FieldExtension (talk | contribs) No edit summary |
mNo edit summary |
||
| (One intermediate revision by the same user not shown) | |||
| Line 19: | Line 19: | ||
|size='''{{IN|Java}}:'''<br> |
|size='''{{IN|Java}}:'''<br> |
||
'''Adult:'''<br>Height: 0.85 Blocks<br>Width: 0.6 Blocks<br> |
'''Adult:'''<br>Height: 0.85 Blocks<br>Width: 0.6 Blocks<br> |
||
| − | ''' |
+ | '''Pup:'''<br>Height: 0.425 Blocks<br>Width: 0.3 Blocks<br> |
'''{{IN|Bedrock}}:'''<br> |
'''{{IN|Bedrock}}:'''<br> |
||
'''Adult:'''<br>Height: 0.8 Blocks<br>Width: 0.6 Blocks<br> |
'''Adult:'''<br>Height: 0.8 Blocks<br>Width: 0.6 Blocks<br> |
||
| − | ''' |
+ | '''Pup:'''<br>Height: 0.4 Blocks<br>Width: 0.3 Blocks |
|spawn= {{BiomeLink|Forest}} <br> {{BiomeLink|Wooded Hills}} <br> {{BiomeLink|Taiga}} and its variants <br> {{BiomeLink|Giant Tree Taiga}} and its variants <br> {{BiomeLink|Snowy Taiga}} and its variants |
|spawn= {{BiomeLink|Forest}} <br> {{BiomeLink|Wooded Hills}} <br> {{BiomeLink|Taiga}} and its variants <br> {{BiomeLink|Giant Tree Taiga}} and its variants <br> {{BiomeLink|Snowy Taiga}} and its variants |
||
|usableitems= |
|usableitems= |
||
| Line 37: | Line 37: | ||
== Spawning == |
== Spawning == |
||
| − | Wolves spawn naturally above [[grass block]]s, [[dirt]] or [[podzol]] in [[forest]]s, [[taiga]]s, [[giant tree taiga]]s and [[snowy taiga]]s, along with all variants of these [[biome]]s (with the exception of [[flower forest]]s), in packs of 4, where 10% spawn as |
+ | Wolves spawn naturally above [[grass block]]s, [[dirt]] or [[podzol]] in [[forest]]s, [[taiga]]s, [[giant tree taiga]]s and [[snowy taiga]]s, along with all variants of these [[biome]]s (with the exception of [[flower forest]]s), in packs of 4, where 10% spawn as pups. |
Naturally-spawned wolves are untamed and become hostile if attacked by the [[player]]. |
Naturally-spawned wolves are untamed and become hostile if attacked by the [[player]]. |
||
| Line 47: | Line 47: | ||
Upon successful [[breeding]], {{xp|1|7}} are dropped. |
Upon successful [[breeding]], {{xp|1|7}} are dropped. |
||
| − | Like other baby animals, killing a |
+ | Like other baby animals, killing a pup yields no experience. |
== Behavior and appearance == |
== Behavior and appearance == |
||
| Line 56: | Line 56: | ||
Wolves exhibit three different states depending on how the user interacts with them: |
Wolves exhibit three different states depending on how the user interacts with them: |
||
| − | * {{EntitySprite|wolf}} '''Untamed'''{{Anchor|Wild Wolf}} wolves have gray fur, a drooping tail, and their eyes consist of a white pixel and a black pixel for the pupil (on each side). They are neutral toward the [[player]] and hostile toward [[sheep]], [[rabbit]]s, [[fox]]es, baby [[ |
+ | * {{EntitySprite|wolf}} '''Untamed'''{{Anchor|Wild Wolf}} wolves have gray fur, a drooping tail, and their eyes consist of a white pixel and a black pixel for the pupil (on each side). They are neutral toward the [[player]] and hostile toward [[sheep]], [[rabbit]]s, [[fox]]es, baby [[turtle]]s, and [[skeleton]]s. They avoid [[llama]]s, although wolves may attack a llama that spits on them. They do not [[Despawning|despawn]], even if they are in an unloaded chunk, or 32 blocks away from the [[player]]. |
* {{EntitySprite|angry-wolf}} '''Angry'''{{Anchor|Hostile Wolf}} wolves are characterized by their constant growling and fearsome appearance. Wild wolves become hostile when they are either attacked by a [[player]] or [[mob]], or when they see a [[mob]] they want to eat. Their tail is held out straight, their eyes become blood red, their mouth is raised in a slight snarl, and they have angry eyebrows. Angry wolves are hostile only to mobs that attack them, or to the mobs they are hunting. They can see attackers even if they are under the invisibility effect, but they cannot track the attacker down, if they get out of their render distance, or the attacker was able to unload the [[chunk]] where the wolves were. Angry wolves cannot be [[lead|leashed]], but a wild wolf may become angry while it is still leashed without dropping the lead. |
* {{EntitySprite|angry-wolf}} '''Angry'''{{Anchor|Hostile Wolf}} wolves are characterized by their constant growling and fearsome appearance. Wild wolves become hostile when they are either attacked by a [[player]] or [[mob]], or when they see a [[mob]] they want to eat. Their tail is held out straight, their eyes become blood red, their mouth is raised in a slight snarl, and they have angry eyebrows. Angry wolves are hostile only to mobs that attack them, or to the mobs they are hunting. They can see attackers even if they are under the invisibility effect, but they cannot track the attacker down, if they get out of their render distance, or the attacker was able to unload the [[chunk]] where the wolves were. Angry wolves cannot be [[lead|leashed]], but a wild wolf may become angry while it is still leashed without dropping the lead. |
||
* {{EntitySprite|tamed-wolf}} '''Tamed''' {{Anchor|Tamed Wolf}} wolves have friendlier looking eyes. They have a default red collar around their neck, which can be dyed using any color of [[dye]] on the wolf. Pressing {{Control|use}} on the wolf makes it sit and remain in place and not follow the player around. Tamed wolves that are not sitting attack players or mobs that their owner attacks, or those that injure their owner unless the target has the same owner or is on the same [[team]]. They do not attack [[creeper]]s, [[ghast]]s, tamed [[horse]]s, or tamed [[cat]]s, regardless of owner. Standing tamed wolves attack skeletons and their variants without provocation, but not sheep, baby turtles, passive rabbits, or foxes. Tamed wolves are always passive to the [[player]], even if the player hits them. |
* {{EntitySprite|tamed-wolf}} '''Tamed''' {{Anchor|Tamed Wolf}} wolves have friendlier looking eyes. They have a default red collar around their neck, which can be dyed using any color of [[dye]] on the wolf. Pressing {{Control|use}} on the wolf makes it sit and remain in place and not follow the player around. Tamed wolves that are not sitting attack players or mobs that their owner attacks, or those that injure their owner unless the target has the same owner or is on the same [[team]]. They do not attack [[creeper]]s, [[ghast]]s, tamed [[horse]]s, or tamed [[cat]]s, regardless of owner. Standing tamed wolves attack skeletons and their variants without provocation, but not sheep, baby turtles, passive rabbits, or foxes. Tamed wolves are always passive to the [[player]], even if the player hits them. |
||
| Line 66: | Line 66: | ||
When the [[player]] holds meat or bones near a wolf, the wolf tilts its head as if to 'beg' for the food. |
When the [[player]] holds meat or bones near a wolf, the wolf tilts its head as if to 'beg' for the food. |
||
| − | The behavior of |
+ | The behavior of pups is the same as tamed wolves. Pups have larger heads, similar to other animal babies. |
| − | Wolves are 0.85{{only|java|short=1}} or 0.8{{only|bedrock|short=1}} blocks tall, and |
+ | Wolves are 0.85{{only|java|short=1}} or 0.8{{only|bedrock|short=1}} blocks tall, and pups are 0.425{{only|java|short=1}} or 0.4{{only|bedrock|short=1}} blocks tall. |
The textures of the wolves are tinted dark gray once submerged in water |
The textures of the wolves are tinted dark gray once submerged in water |
||
| Line 173: | Line 173: | ||
Tamed wolves at full [[health]] can be bred with any type of meat, including rotten flesh and raw chicken without causing the Hunger effect. There is a 5-minute cooldown for breeding, during which the wolf does not accept meat. |
Tamed wolves at full [[health]] can be bred with any type of meat, including rotten flesh and raw chicken without causing the Hunger effect. There is a 5-minute cooldown for breeding, during which the wolf does not accept meat. |
||
| − | The growth of |
+ | The growth of pups can be slowly accelerated using any type of meat. Each use takes 10% off the remaining time to grow up. Unlike healing, breeding and speed growth cannot use rabbit stew or any type of fish. |
Breeding two wolves that recognize someone else as an owner causes the pup to also be owned by the owner of the original two wolves. If two tamed wolves with different owners are bred, the owner of the pup is the owner of the older parent wolf. |
Breeding two wolves that recognize someone else as an owner causes the pup to also be owned by the owner of the original two wolves. If two tamed wolves with different owners are bred, the owner of the pup is the owner of the older parent wolf. |
||
| Line 303: | Line 303: | ||
{{Needs render|type=old| |
{{Needs render|type=old| |
||
* 12w34a tame wolf (all collars) textures. |
* 12w34a tame wolf (all collars) textures. |
||
| − | * 18w43a tamed |
+ | * 18w43a tamed pups. |
* 19w45a sitting wolf legs changes.}} |
* 19w45a sitting wolf legs changes.}} |
||
{{History|java beta}} |
{{History|java beta}} |
||
| − | {{History||March 2, 2011|link=wordofnotch:3597265965|[[Notch]] confirmed the addition of wolves after having breakfast with an idol of his (likely |
+ | {{History||March 2, 2011|link=wordofnotch:3597265965|[[Notch]] confirmed the addition of wolves after having breakfast with an idol of his (likely {{w|Peter Molyneux}}).}} |
{{History||March 15, 2011|link={{tweet|jeb_|47650984125665280}}|[[File:Wolf (pre-release).png|42px]] [[Jeb]] posted a first image of wolves.}} |
{{History||March 15, 2011|link={{tweet|jeb_|47650984125665280}}|[[File:Wolf (pre-release).png|42px]] [[Jeb]] posted a first image of wolves.}} |
||
{{History||March 16, 2011|link={{tweet|jeb_|48037113270251520}}|[[File:Wolf (pre-release 2).png|42px]] [[File:Sitting Wolf (pre-release 2).png|42px]] Jeb posted a second image of wolves, with updated texture and model, showing one of them in a sitting pose.}} |
{{History||March 16, 2011|link={{tweet|jeb_|48037113270251520}}|[[File:Wolf (pre-release 2).png|42px]] [[File:Sitting Wolf (pre-release 2).png|42px]] Jeb posted a second image of wolves, with updated texture and model, showing one of them in a sitting pose.}} |
||
| Line 323: | Line 323: | ||
|Wolves can now be [[breeding|bred]] through the use of any type of meat such as chicken ([[raw chicken|raw]] or [[cooked chicken|cooked]]), pork ([[raw porkchop|raw]] or [[cooked porkchop|cooked]]), beef ([[raw beef|raw]] or [[steak|cooked]]), and [[rotten flesh]] if tamed and at full [[health]].}} |
|Wolves can now be [[breeding|bred]] through the use of any type of meat such as chicken ([[raw chicken|raw]] or [[cooked chicken|cooked]]), pork ([[raw porkchop|raw]] or [[cooked porkchop|cooked]]), beef ([[raw beef|raw]] or [[steak|cooked]]), and [[rotten flesh]] if tamed and at full [[health]].}} |
||
{{History||1.4.2|snap=12w34a|Tamed wolves can now have dye-able collars.<ref>{{tweet|dinner|236530180737335296|Nope, but they have dyable collars instead!|August 17, 2012}}</ref>}} |
{{History||1.4.2|snap=12w34a|Tamed wolves can now have dye-able collars.<ref>{{tweet|dinner|236530180737335296|Nope, but they have dyable collars instead!|August 17, 2012}}</ref>}} |
||
| − | {{History||1.4.4|snap=pre|Added |
+ | {{History||1.4.4|snap=pre|Added untamed pups, which can be spawned only in [[creative]] using a [[spawn egg]].}} |
{{History||1.6.1|snap=?|Passive untamed wolves now despawn, but only after at least two minutes.}} |
{{History||1.6.1|snap=?|Passive untamed wolves now despawn, but only after at least two minutes.}} |
||
{{History||1.6.2|snap=release|Wolves, along with [[zombie]]s, [[creeper]]s and [[skeleton]]s, no longer turn hostile to the [[player]] when attacked in [[creative mode]].{{check version|Was this a 1.6.2 change?}}}} |
{{History||1.6.2|snap=release|Wolves, along with [[zombie]]s, [[creeper]]s and [[skeleton]]s, no longer turn hostile to the [[player]] when attacked in [[creative mode]].{{check version|Was this a 1.6.2 change?}}}} |
||
| − | {{History||1.8|snap=14w02a| |
+ | {{History||1.8|snap=14w02a|Pups growth can now be accelerated using [[raw chicken|raw]] or [[cooked chicken]], [[raw porkchop|raw]] or [[cooked porkchop]], [[raw beef|raw]] or [[Steak|cooked beef]] and [[rotten flesh]].}} |
{{History|||snap=14w05b|Tamed wolf collars are no longer visible when they have the [[Invisibility]] effect.}} |
{{History|||snap=14w05b|Tamed wolf collars are no longer visible when they have the [[Invisibility]] effect.}} |
||
{{History|||snap=14w10a|Wolves (both wild and tamed) now chase and attack both regular [[skeleton]]s and [[wither skeleton]]s. |
{{History|||snap=14w10a|Wolves (both wild and tamed) now chase and attack both regular [[skeleton]]s and [[wither skeleton]]s. |
||
| Line 338: | Line 338: | ||
{{History||1.11|snap=16w32a|The entity ID of wolves has been changed from <code>Wolf</code> to <code>wolf</code>.}} |
{{History||1.11|snap=16w32a|The entity ID of wolves has been changed from <code>Wolf</code> to <code>wolf</code>.}} |
||
{{History||1.13|snap=18w07a|Wild wolves now attack baby [[turtle]]s.}} |
{{History||1.13|snap=18w07a|Wild wolves now attack baby [[turtle]]s.}} |
||
| − | {{History||1.14|snap=18w43a|[[File:Wolf.png|42px]] [[File:Baby Wolf.png|32px]] The textures of wolves and |
+ | {{History||1.14|snap=18w43a|[[File:Wolf.png|42px]] [[File:Baby Wolf.png|32px]] The textures of wolves and pups has been changed. |
|[[File:Tamed Wolf with Red Collar.png|42px]] [[File:Tamed Wolf with White Collar.png|42px]] [[File:Tamed Wolf with Orange Collar.png|42px]] [[File:Tamed Wolf with Magenta Collar.png|42px]] [[File:Tamed Wolf with Light Blue Collar.png|42px]] [[File:Tamed Wolf with Yellow Collar.png|42px]] [[File:Tamed Wolf with Lime Collar.png|42px]] [[File:Tamed Wolf with Pink Collar.png|42px]] [[File:Tamed Wolf with Gray Collar.png|42px]] [[File:Tamed Wolf with Light Gray Collar.png|42px]] [[File:Tamed Wolf with Cyan Collar.png|42px]] [[File:Tamed Wolf with Purple Collar.png|42px]] [[File:Tamed Wolf with Blue Collar.png|42px]] [[File:Tamed Wolf with Green Collar.png|42px]] [[File:Tamed Wolf with Brown Collar.png|42px]] [[File:Tamed Wolf with Red Collar.png|42px]] [[File:Tamed Wolf with Black Collar.png|42px]] The textures of tamed wolves have been changed. |
|[[File:Tamed Wolf with Red Collar.png|42px]] [[File:Tamed Wolf with White Collar.png|42px]] [[File:Tamed Wolf with Orange Collar.png|42px]] [[File:Tamed Wolf with Magenta Collar.png|42px]] [[File:Tamed Wolf with Light Blue Collar.png|42px]] [[File:Tamed Wolf with Yellow Collar.png|42px]] [[File:Tamed Wolf with Lime Collar.png|42px]] [[File:Tamed Wolf with Pink Collar.png|42px]] [[File:Tamed Wolf with Gray Collar.png|42px]] [[File:Tamed Wolf with Light Gray Collar.png|42px]] [[File:Tamed Wolf with Cyan Collar.png|42px]] [[File:Tamed Wolf with Purple Collar.png|42px]] [[File:Tamed Wolf with Blue Collar.png|42px]] [[File:Tamed Wolf with Green Collar.png|42px]] [[File:Tamed Wolf with Brown Collar.png|42px]] [[File:Tamed Wolf with Red Collar.png|42px]] [[File:Tamed Wolf with Black Collar.png|42px]] The textures of tamed wolves have been changed. |
||
| − | |The texture of tamed |
+ | |The texture of tamed pups has been changed. |
| − | |[[File:Angry Wolf.png|42px]] [[File:Baby Angry Wolf.png|32px]] The textures of angry wolves and |
+ | |[[File:Angry Wolf.png|42px]] [[File:Baby Angry Wolf.png|32px]] The textures of angry wolves and pups have been changed.}} |
{{History|||snap=19w07a|Wild wolves now attack [[fox]]es.}} |
{{History|||snap=19w07a|Wild wolves now attack [[fox]]es.}} |
||
{{History||1.15|snap=19w37a|Now have a 5% chance to spawn as babies.}} |
{{History||1.15|snap=19w37a|Now have a 5% chance to spawn as babies.}} |
||
| Line 347: | Line 347: | ||
{{History|pocket alpha}} |
{{History|pocket alpha}} |
||
| − | {{History||v0.9.0|snap=build 1|[[File:Wolf Revision 1.png|42px]] [[File:Baby Wolf Revision 1.png|32px]] Added wolves and |
+ | {{History||v0.9.0|snap=build 1|[[File:Wolf Revision 1.png|42px]] [[File:Baby Wolf Revision 1.png|32px]] Added wolves and pups. |
| − | |[[File:Tamed Wolf with Red Collar Revision 1.png|42px]] [[File:Baby Tamed Wolf Revision 1.png|32px]] Wolves can be tamed and tamed wolves can be [[breeding|bred]] to make baby tamed |
+ | |[[File:Tamed Wolf with Red Collar Revision 1.png|42px]] [[File:Baby Tamed Wolf Revision 1.png|32px]] Wolves can be tamed and tamed wolves can be [[breeding|bred]] to make baby tamed pups. |
| − | |[[File:Angry Wolf Revision 1.png|42px]] [[File:Baby Angry Wolf Revision 1.png|32px]] When wolves and |
+ | |[[File:Angry Wolf Revision 1.png|42px]] [[File:Baby Angry Wolf Revision 1.png|32px]] When wolves and pups are hit by the [[player]] or the player's tamed wolves, they become angry.}} |
{{History|||snap=build 2|Wolves now have [[sound]]s.}} |
{{History|||snap=build 2|Wolves now have [[sound]]s.}} |
||
{{History|||snap=build 9|Wolves now have interact buttons at the bottom of the screen to tame and sit them.}} |
{{History|||snap=build 9|Wolves now have interact buttons at the bottom of the screen to tame and sit them.}} |
||
| Line 363: | Line 363: | ||
{{History|bedrock}} |
{{History|bedrock}} |
||
{{History||1.5.0|snap=beta 1.5.0.4|Wild wolves now attack baby [[turtle]]s.}} |
{{History||1.5.0|snap=beta 1.5.0.4|Wild wolves now attack baby [[turtle]]s.}} |
||
| − | {{History||1.10.0|snap=beta 1.10.0.3|[[File:Wolf.png|42px]] [[File:Baby Wolf.png|32px]] The textures of wolves and |
+ | {{History||1.10.0|snap=beta 1.10.0.3|[[File:Wolf.png|42px]] [[File:Baby Wolf.png|32px]] The textures of wolves and pups has been changed. |
|[[File:Tamed Wolf with Red Collar.png|42px]] [[File:Tamed Wolf with White Collar.png|42px]] [[File:Tamed Wolf with Orange Collar.png|42px]] [[File:Tamed Wolf with Magenta Collar.png|42px]] [[File:Tamed Wolf with Light Blue Collar.png|42px]] [[File:Tamed Wolf with Yellow Collar.png|42px]] [[File:Tamed Wolf with Lime Collar.png|42px]] [[File:Tamed Wolf with Pink Collar.png|42px]] [[File:Tamed Wolf with Gray Collar.png|42px]] [[File:Tamed Wolf with Light Gray Collar.png|42px]] [[File:Tamed Wolf with Cyan Collar.png|42px]] [[File:Tamed Wolf with Purple Collar.png|42px]] [[File:Tamed Wolf with Blue Collar.png|42px]] [[File:Tamed Wolf with Green Collar.png|42px]] [[File:Tamed Wolf with Brown Collar.png|42px]] [[File:Tamed Wolf with Red Collar.png|42px]] [[File:Tamed Wolf with Black Collar.png|42px]] The textures of tamed wolves have been changed. |
|[[File:Tamed Wolf with Red Collar.png|42px]] [[File:Tamed Wolf with White Collar.png|42px]] [[File:Tamed Wolf with Orange Collar.png|42px]] [[File:Tamed Wolf with Magenta Collar.png|42px]] [[File:Tamed Wolf with Light Blue Collar.png|42px]] [[File:Tamed Wolf with Yellow Collar.png|42px]] [[File:Tamed Wolf with Lime Collar.png|42px]] [[File:Tamed Wolf with Pink Collar.png|42px]] [[File:Tamed Wolf with Gray Collar.png|42px]] [[File:Tamed Wolf with Light Gray Collar.png|42px]] [[File:Tamed Wolf with Cyan Collar.png|42px]] [[File:Tamed Wolf with Purple Collar.png|42px]] [[File:Tamed Wolf with Blue Collar.png|42px]] [[File:Tamed Wolf with Green Collar.png|42px]] [[File:Tamed Wolf with Brown Collar.png|42px]] [[File:Tamed Wolf with Red Collar.png|42px]] [[File:Tamed Wolf with Black Collar.png|42px]] The textures of tamed wolves have been changed. |
||
| − | |The texture of tamed |
+ | |The texture of tamed pups has been changed. |
| − | |[[File:Angry Wolf.png|42px]] [[File:Baby Angry Wolf.png|32px]] The textures of angry wolves and |
+ | |[[File:Angry Wolf.png|42px]] [[File:Baby Angry Wolf.png|32px]] The textures of angry wolves and pups have been changed.}} |
{{History||1.13.0|snap=beta 1.13.0.1|Wild wolves now attack [[fox]]es.}} |
{{History||1.13.0|snap=beta 1.13.0.1|Wild wolves now attack [[fox]]es.}} |
||
{{History||1.16.0|snap=beta 1.15.0.51|Wolves now spawn in [[forest]]s, wooded hills and [[giant tree taiga]]s.}} |
{{History||1.16.0|snap=beta 1.15.0.51|Wolves now spawn in [[forest]]s, wooded hills and [[giant tree taiga]]s.}} |
||
{{History|console}} |
{{History|console}} |
||
| − | {{History||xbox=TU1|xbone=CU1|ps=1.0|wiiu=Patch 1|[[File:Wolf Revision 1.png|42px]] [[File:Baby Wolf Revision 1.png|32px]] Added wolves and |
+ | {{History||xbox=TU1|xbone=CU1|ps=1.0|wiiu=Patch 1|[[File:Wolf Revision 1.png|42px]] [[File:Baby Wolf Revision 1.png|32px]] Added wolves and pups. |
| − | |[[File:Tamed Wolf with Red Collar Revision 1.png|42px]] [[File:Baby Tamed Wolf Revision 1.png|32px]] Wolves can be tamed and tamed wolves can be [[breeding|bred]] to make |
+ | |[[File:Tamed Wolf with Red Collar Revision 1.png|42px]] [[File:Baby Tamed Wolf Revision 1.png|32px]] Wolves can be tamed and tamed wolves can be [[breeding|bred]] to make tamed pups. |
| − | |[[File:Angry Wolf Revision 1.png|42px]] [[File:Baby Angry Wolf Revision 1.png|32px]] When wolves and |
+ | |[[File:Angry Wolf Revision 1.png|42px]] [[File:Baby Angry Wolf Revision 1.png|32px]] When wolves and pups are hit by the [[player]] or the player's tamed wolves, they become angry.}} |
{{History||xbox=TU14|ps=1.04|Tamed wolves can now have [[dye]]able collars.}} |
{{History||xbox=TU14|ps=1.04|Tamed wolves can now have [[dye]]able collars.}} |
||
{{History||xbox=TU31|xbone=CU19|ps=1.22|wiiu=Patch 3|A tamed wolf's collar color now defaults to orange rather than red. |
{{History||xbox=TU31|xbone=CU19|ps=1.22|wiiu=Patch 3|A tamed wolf's collar color now defaults to orange rather than red. |
||
| − | |The growth of |
+ | |The growth of pups can now be accelerated using [[raw chicken|raw]] or [[cooked chicken]], [[raw porkchop|raw]] or [[cooked porkchop]], [[raw beef|raw]] or [[steak|cooked beef]] and [[rotten flesh]].}} |
{{History|new 3ds}} |
{{History|new 3ds}} |
||
| − | {{History||0.1.0|[[File:Wolf Revision 1.png|42px]] [[File:Baby Wolf Revision 1.png|32px]] Added wolves and |
+ | {{History||0.1.0|[[File:Wolf Revision 1.png|42px]] [[File:Baby Wolf Revision 1.png|32px]] Added wolves and pups. |
| − | |[[File:Tamed Wolf with Red Collar Revision 1.png|42px]] [[File:Baby Tamed Wolf Revision 1.png|32px]] Wolves can be tamed and tamed wolves can be [[breeding|bred]] to make |
+ | |[[File:Tamed Wolf with Red Collar Revision 1.png|42px]] [[File:Baby Tamed Wolf Revision 1.png|32px]] Wolves can be tamed and tamed wolves can be [[breeding|bred]] to make tamed pups. |
| − | |[[File:Angry Wolf Revision 1.png|42px]] [[File:Baby Angry Wolf Revision 1.png|32px]] When wolves and |
+ | |[[File:Angry Wolf Revision 1.png|42px]] [[File:Baby Angry Wolf Revision 1.png|32px]] When wolves and pups are hit by the [[player]] or the player's tamed wolves, they become angry.}} |
{{History|foot}} |
{{History|foot}} |
||
| Line 401: | Line 401: | ||
* Untamed wolves use their hostile appearance when they are attacking [[sheep]], [[skeleton]]s, [[fox]]es, [[turtle|baby turtles]] or [[rabbit]]s. They change back once the targeted mob dies or gets out of their range. |
* Untamed wolves use their hostile appearance when they are attacking [[sheep]], [[skeleton]]s, [[fox]]es, [[turtle|baby turtles]] or [[rabbit]]s. They change back once the targeted mob dies or gets out of their range. |
||
* Attacking a wild wolf in Peaceful Mode aggravates the wolf and its group, but they do no damage. |
* Attacking a wild wolf in Peaceful Mode aggravates the wolf and its group, but they do no damage. |
||
| − | * A wild |
+ | * A wild pup's head grows significantly when attacked. |
* If the player attacks a wolf, but then moves a large distance away (e.g. 70 blocks), the wolf still appears hostile, but exhibits neutral behavior.{{only|java}} |
* If the player attacks a wolf, but then moves a large distance away (e.g. 70 blocks), the wolf still appears hostile, but exhibits neutral behavior.{{only|java}} |
||
* Wolves chase bats despite being unable to reach them.<ref>{{bug|MC-9925}}</ref> |
* Wolves chase bats despite being unable to reach them.<ref>{{bug|MC-9925}}</ref> |
||
| − | * {{IN|BE}}, a glitched adult "red wolf" can be spawned using the command {{cmd|/summon wolf ~ ~ ~ minecraft:on_tame}}, and a |
+ | * {{IN|BE}}, a glitched adult "red wolf" can be spawned using the command {{cmd|/summon wolf ~ ~ ~ minecraft:on_tame}}, and a "red pup" can be spawned with {{cmd|/summon wolf ~ ~ ~ minecraft:entity_born}}. The wolf cannot be tamed, bred or fed, though it's model color can be altered by using various dyes. A tamed version of this "red wolf" can be obtained by taming it as soon as it becomes hostile toward a mob such as a [[skeleton]]. |
* A tamed wolf tilts its head toward the player when the player is holding [[bones]], despite it no longer being able to accept bones. |
* A tamed wolf tilts its head toward the player when the player is holding [[bones]], despite it no longer being able to accept bones. |
||
* If a player feeds a sitting wolf and a standing wolf, the sitting one slides toward the standing one to breed. The sitting one remains in its new spot until moved. |
* If a player feeds a sitting wolf and a standing wolf, the sitting one slides toward the standing one to breed. The sitting one remains in its new spot until moved. |
||
| Line 415: | Line 415: | ||
File:Darkwolves.png|Wolves having a darker texture when they are [[swimming]] or when it's [[Rain|raining]]. |
File:Darkwolves.png|Wolves having a darker texture when they are [[swimming]] or when it's [[Rain|raining]]. |
||
File:CollaredWolves.png|Tamed wolves with [[Dye|dyed]] collars. |
File:CollaredWolves.png|Tamed wolves with [[Dye|dyed]] collars. |
||
| − | File:12w03a Baby Wolf.png|A tamed |
+ | File:12w03a Baby Wolf.png|A tamed pup. |
| − | File:Baby Wild Wolf.png|A wild |
+ | File:Baby Wild Wolf.png|A wild pup. |
| − | File:Fightingwolves.png|An adult wolf fighting a |
+ | File:Fightingwolves.png|An adult wolf fighting a pup. |
File:Wolf Attacking Sheep.png|A wolf killing a [[sheep]]. |
File:Wolf Attacking Sheep.png|A wolf killing a [[sheep]]. |
||
File:Angry wolf.png|A hostile wolf looking and running at the [[player]]. |
File:Angry wolf.png|A hostile wolf looking and running at the [[player]]. |
||
Revision as of 10:18, 9 June 2021
Wolves are neutral mobs that can be tamed.
Spawning
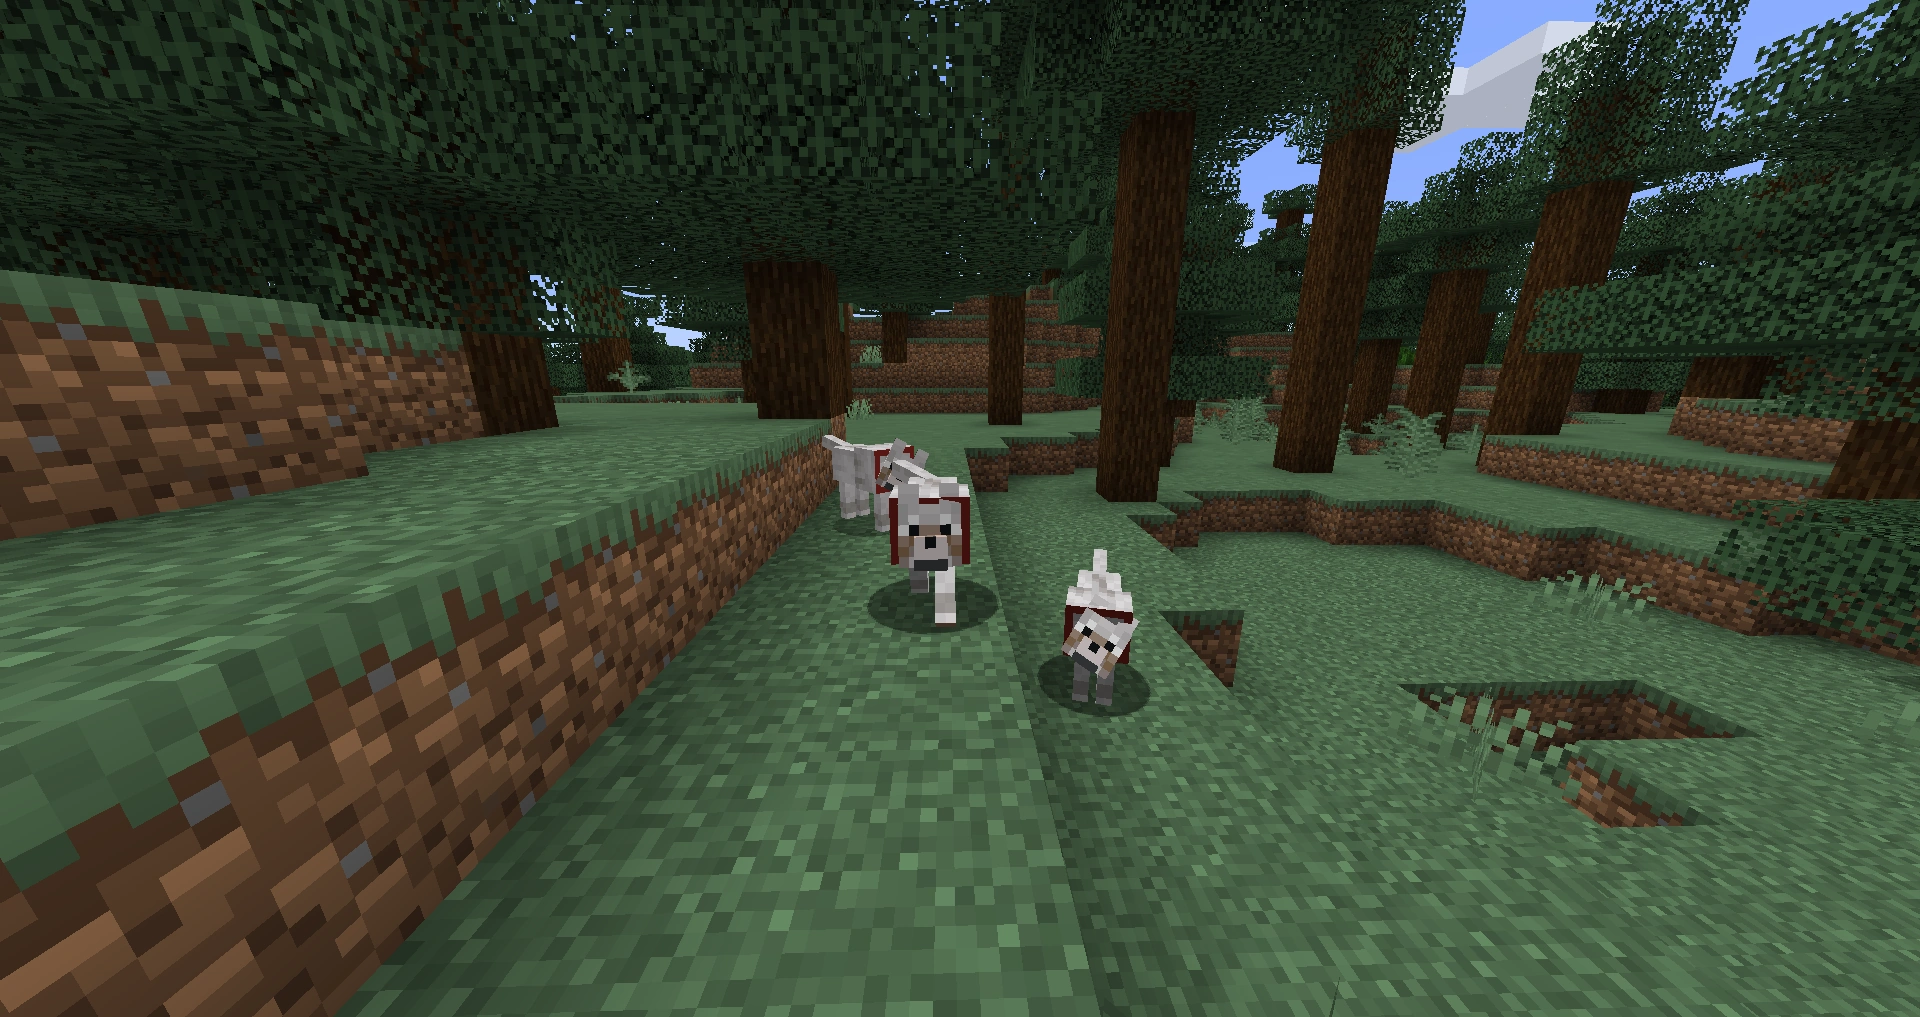
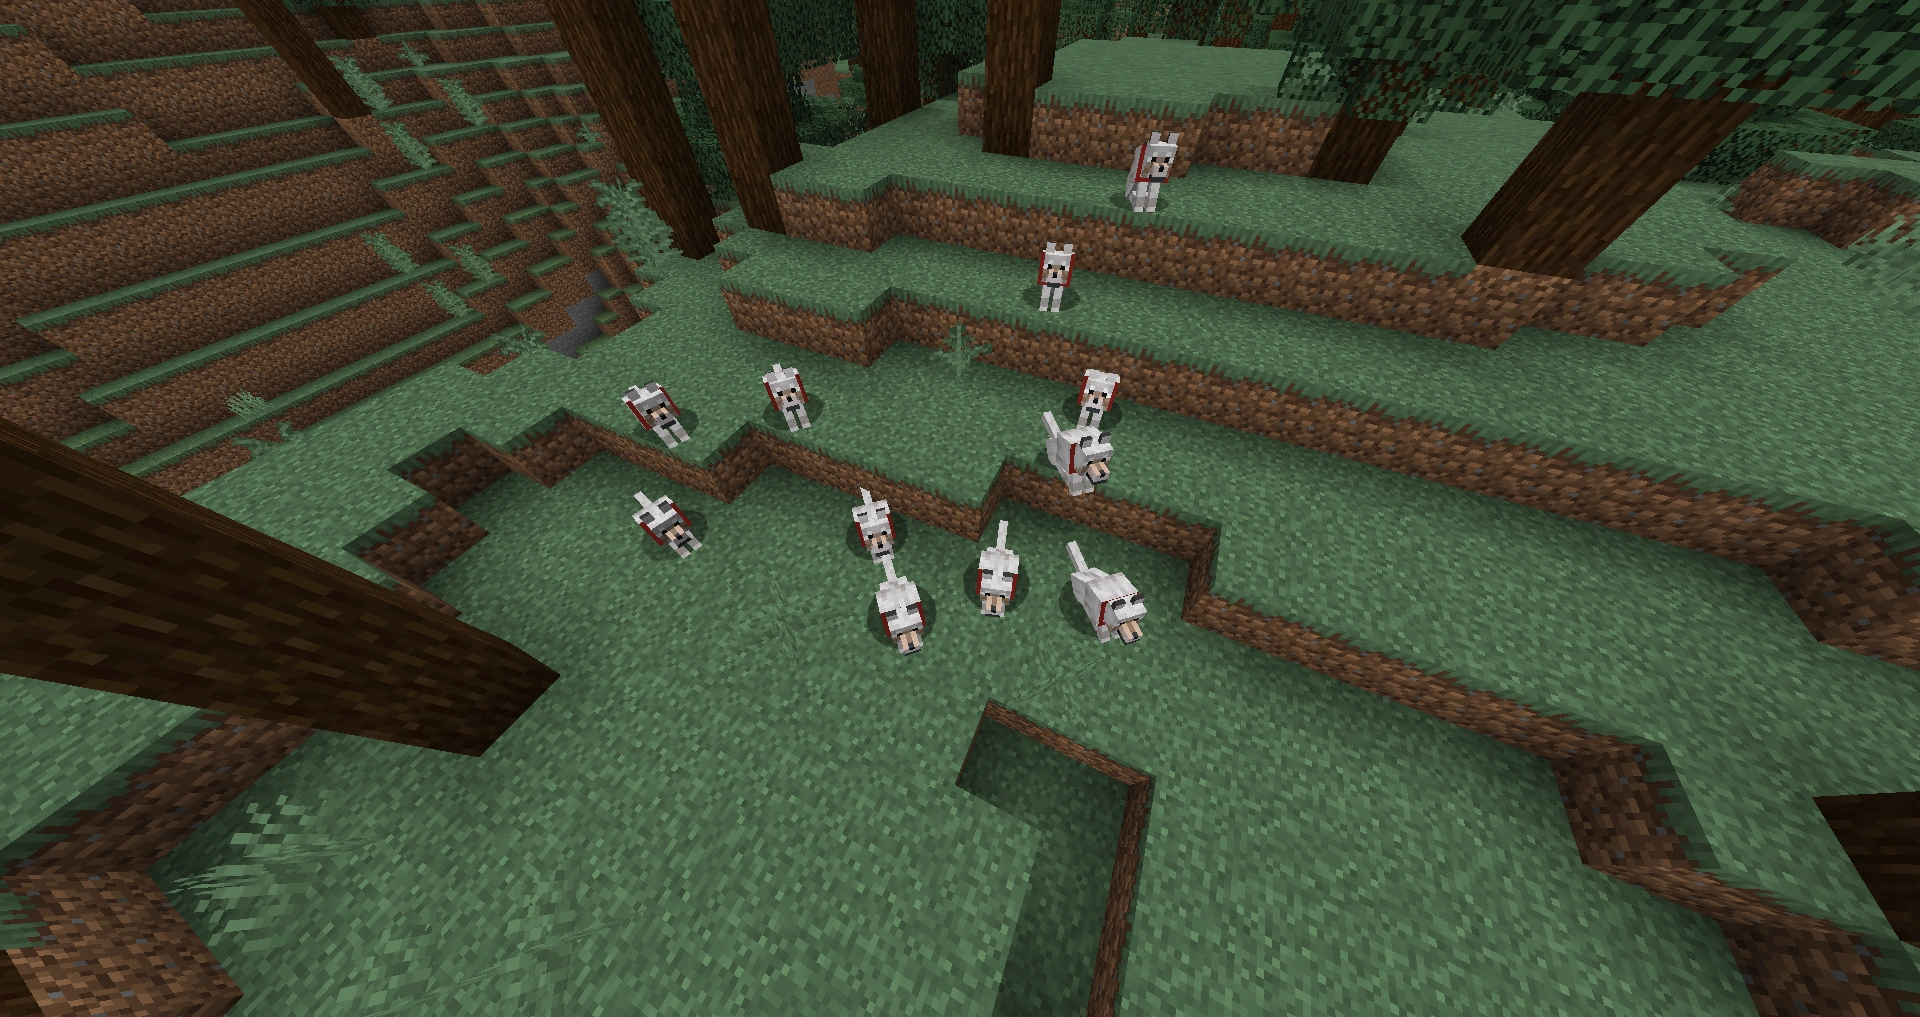
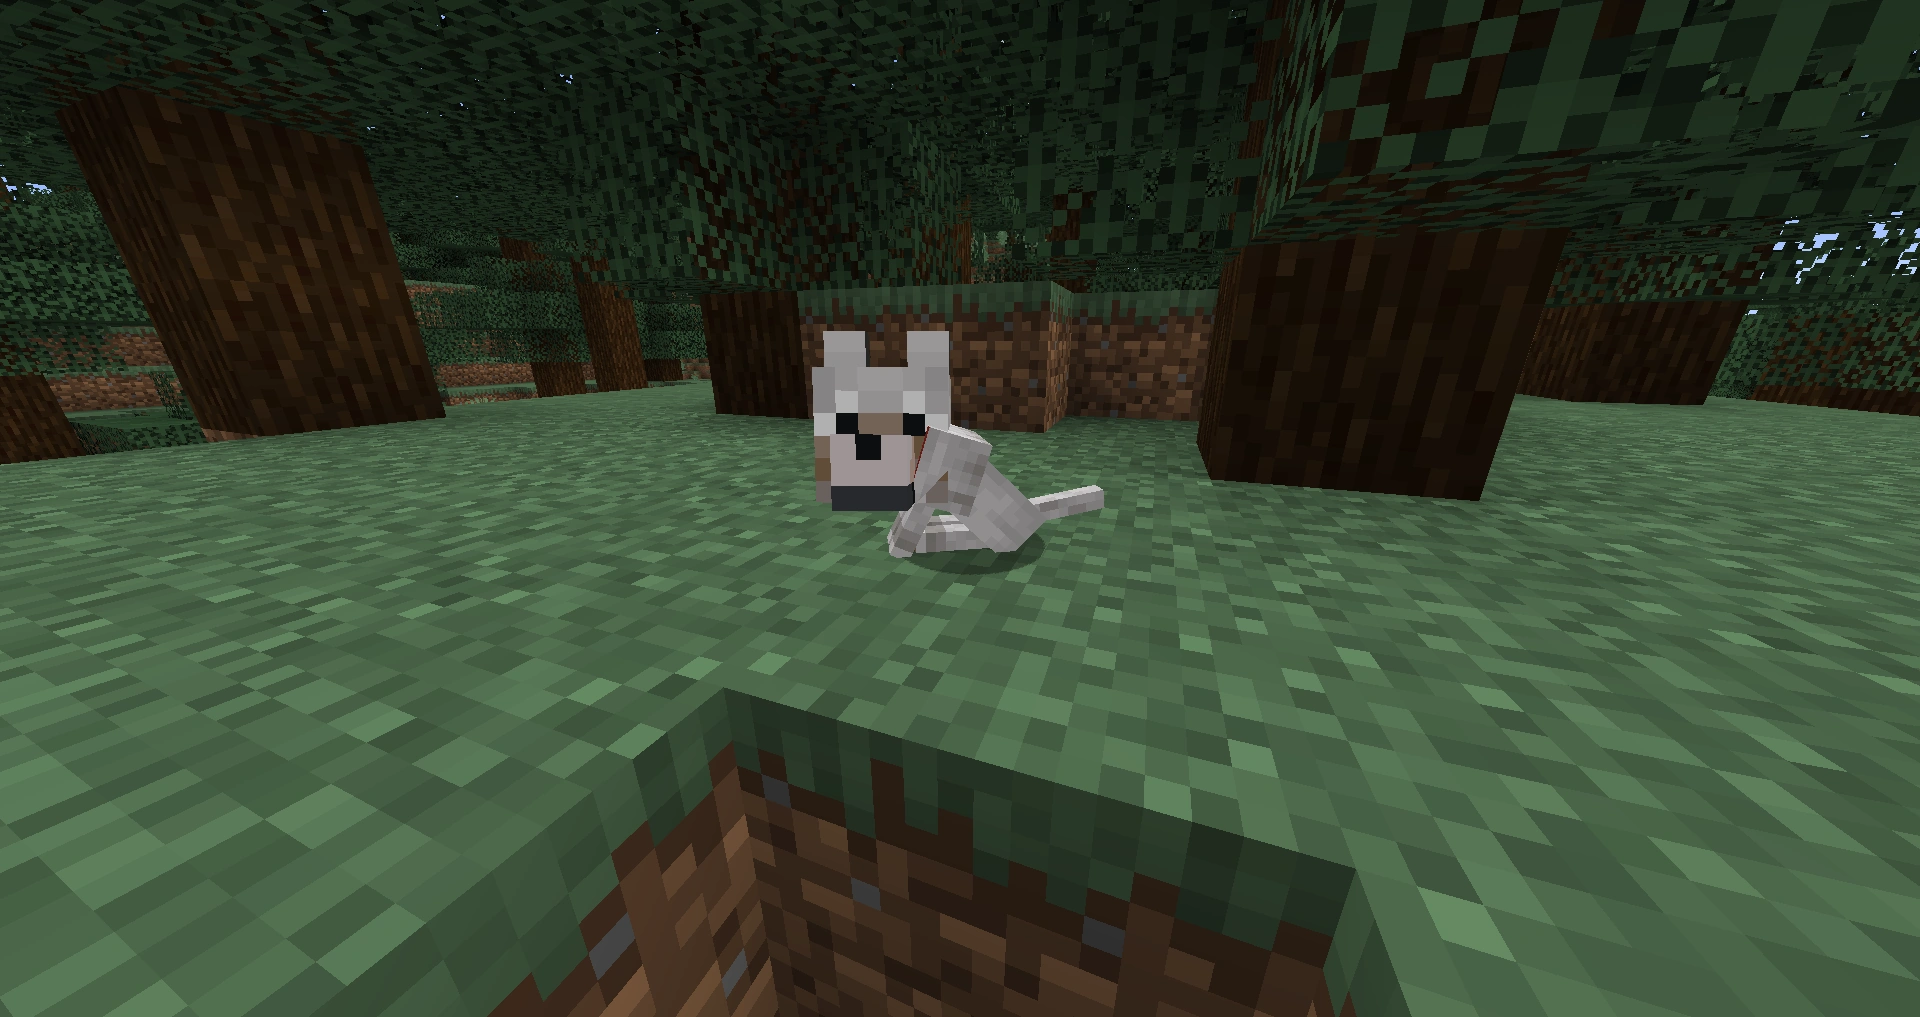
Wolves spawn naturally above grass blocks, dirt or podzol in forests, taigas, giant tree taigas and snowy taigas, along with all variants of these biomes (with the exception of flower forests), in packs of 4, where 10% spawn as pups.
Naturally-spawned wolves are untamed and become hostile if attacked by the player.
Drops
Adult wolves drop 1–3 when killed by a player or tamed wolf. A tamed wolf that is killed by its owner still drops experience.
Upon successful breeding, 1–7 are dropped.
Like other baby animals, killing a pup yields no experience.
Behavior and appearance

A tamed wolf "begging" the player for food.

Three tamed wolves following the player around.
Wolves exhibit three different states depending on how the user interacts with them:
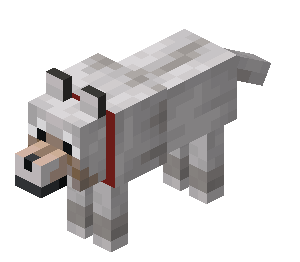
- Untamed wolves have gray fur, a drooping tail, and their eyes consist of a white pixel and a black pixel for the pupil (on each side). They are neutral toward the player and hostile toward sheep, rabbits, foxes, baby turtles, and skeletons. They avoid llamas, although wolves may attack a llama that spits on them. They do not despawn, even if they are in an unloaded chunk, or 32 blocks away from the player.
- Angry wolves are characterized by their constant growling and fearsome appearance. Wild wolves become hostile when they are either attacked by a player or mob, or when they see a mob they want to eat. Their tail is held out straight, their eyes become blood red, their mouth is raised in a slight snarl, and they have angry eyebrows. Angry wolves are hostile only to mobs that attack them, or to the mobs they are hunting. They can see attackers even if they are under the invisibility effect, but they cannot track the attacker down, if they get out of their render distance, or the attacker was able to unload the chunk where the wolves were. Angry wolves cannot be leashed, but a wild wolf may become angry while it is still leashed without dropping the lead.
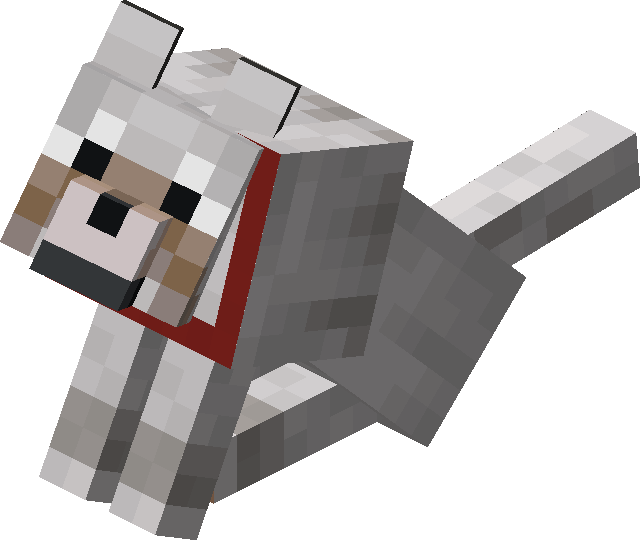
- Tamed wolves have friendlier looking eyes. They have a default red collar around their neck, which can be dyed using any color of dye on the wolf. Pressing use on the wolf makes it sit and remain in place and not follow the player around. Tamed wolves that are not sitting attack players or mobs that their owner attacks, or those that injure their owner unless the target has the same owner or is on the same team. They do not attack creepers, ghasts, tamed horses, or tamed cats, regardless of owner. Standing tamed wolves attack skeletons and their variants without provocation, but not sheep, baby turtles, passive rabbits, or foxes. Tamed wolves are always passive to the player, even if the player hits them.
A wolf becomes hostile to a player or other mob that attacks it unless the attacker is the wolf's owner or is otherwise on the same team. It also causes wild wolves and standing tamed wolves in a 33×33×21 cuboid centered on the attacked wolf to become hostile to the attacker, allowing coordination for attacks, and team hunts (only in Wild Wolves).
Skeletons and their variants, foxes, baby turtles, and passive rabbits actively avoid both tamed and wild wolves. Killer rabbits[JE only] attack wolves actively. Sheep ignore wolves, but flee when attacked by one.
When the player holds meat or bones near a wolf, the wolf tilts its head as if to 'beg' for the food.
The behavior of pups is the same as tamed wolves. Pups have larger heads, similar to other animal babies.
Wolves are 0.85[JE only] or 0.8[BE only] blocks tall, and pups are 0.425[JE only] or 0.4[BE only] blocks tall. The textures of the wolves are tinted dark gray once submerged in water
In peaceful difficulty, hostile wolves deal no damage to the player.
Movement
A wolf shaking off water.
Standing tamed wolves wander randomly when near their owner, but follow if more than 10 blocks away, and teleport to a nearby free block (if any) if more than 12 blocks away. Besides making travel easier, teleportation can be used to rescue them from lava, water or pits, as they immediately teleport to a safe area.
- Wolves can be told to "sit" by pressing use on them and made to stand again with another press of use.
- A wolf automatically sits when first tamed.
- While sitting, they do not follow the player. However, if their owner fights a mob near them, they are still likely to join the fight. When the fight is over, they go back to sitting (if in water, they do not sit until they are on dry land). They sit at their new location instead of returning to wherever they were previously.
- Wolves stand up and follow the player if it is pushed into water or injured while sitting.
- Wolves find paths to their targets if attacking, even in difficult terrain. They also navigate along the edges of cliffs, and occasionally fall far enough to take damage.
- Wolves attack their targets running at player's walking speed and by leaping at them in exactly the same manner as spiders, but cause no damage while in midair. Tamed wolves attack any animal the player starts to attack. They also can navigate and turn around in 1 × 1 horizontal tunnels.
- After emerging from water, a wolf shakes the water off their fur. This is represented by an animation and water particles.
Teleportation
Tamed wolves teleport to their owner, if they are more than 12 blocks away, with a few caveats.
- Teleporting resets the focus of a tamed wolf, so if a wolf is attacking a mob and teleports beside a player, it resumes following the player, as its tracking has been reset.
- It is possible for tamed wolves to teleport to an inaccessible location (e.g. under ice) and be injured or die of suffocation as a result. This happens when the wolf considers transparent blocks, like glass, or half-blocks, to be open.
A wolf does not teleport:
- If the wolf has been ordered to sit.[1]
- Exception: The wolf is likely to teleport if it is injured while sitting (it no longer sits after teleporting). An example is if a wolf that is sitting is hit by another player, it teleports to their owner.
- Exception: If the wolf is in a loaded chunk, and the player gets damaged by a mob, there's a chance for the wolf to stop sitting, causing them to teleport if the player is far away, then attacking the player's attacker and sitting down afterward.
- If the wolf is chasing after a skeleton. This can lead to wolves standing and jumping in one place, such as over a cavern if a skeleton is near. The wolf teleports once the skeleton is killed.
- If the wolf is in a minecart or a boat.
- If the wolf has been attached to a fence post with a lead.
- If the wolf is in an unloaded chunk.
- If none of the blocks on the edge of a 5×1×5 region centered on the player are transparent blocks with a solid block below and another transparent block above.
- If the player is in another dimension; a wolf remains in its current dimension until the player returns. However, wolves can be transported to another dimension by pushing them into the portal first.
- If the owner is not directly touching the ground (e.g. using elytra, swimming, flying, in a boat).
- If the wolf is in any body of water, it may not teleport to the owner.[Bedrock Edition only]
Wolf teleportation is completely silent; this is not an oversight.[2]
Taming, health and feeding
Many tamed wolves sitting.
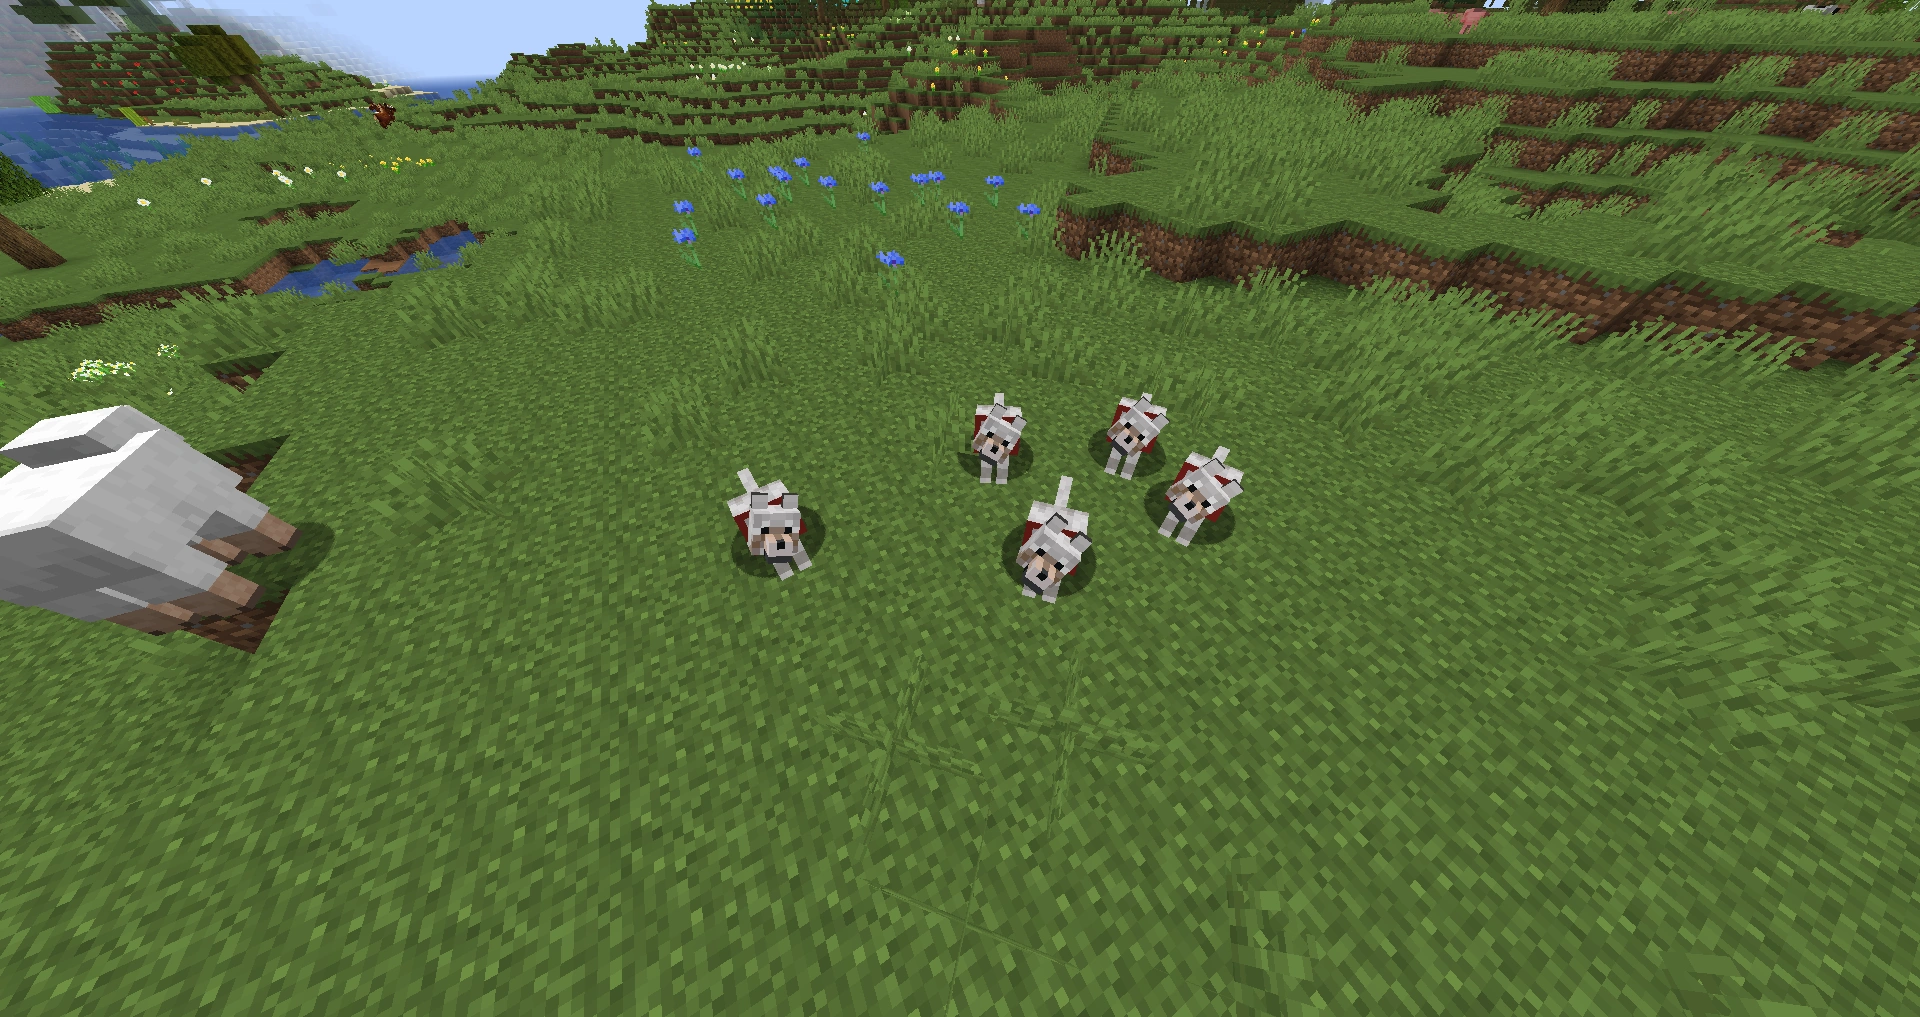
A group of begging wolves.
A wolf can be tamed by feeding it bones. Once tamed, a wolf does not accept any more bones. Note that the number of bones required is random – each bone has a 1⁄3 chance of taming the wolf.[3] If the wolf is tamed, it receives a red collar and, in Java Edition, sits if not swimming. There is no limit[4] to the number of wolves the player can tame.
A wolf's tail rises and lowers depending on its health. The exact health of an individual wolf can be determined by measuring the angle between its hind legs and tail. The angle indicates the percentage of health that the wolf has. Tamed wolves whine when they have low health (below 10![]()
![]()
![]()
![]()
![]() ). Wild wolves have a maximum health of 8
). Wild wolves have a maximum health of 8![]()
![]()
![]()
![]() , so their tails always remain significantly lower than those of tamed wolves. Tamed wolves can be healed by feeding them any sort of meat other than fish;[Bedrock Edition only] listed below, this restores as much of the wolf's health as the same food would restore hunger points when eaten by the player.[Bedrock Edition only].
, so their tails always remain significantly lower than those of tamed wolves. Tamed wolves can be healed by feeding them any sort of meat other than fish;[Bedrock Edition only] listed below, this restores as much of the wolf's health as the same food would restore hunger points when eaten by the player.[Bedrock Edition only].
The wolf cannot be tamed if it is hostile or already tamed.
Wolves that are tamed by the same player can accidentally attack each other while attacking another mob, leading to a fight.
| Food | Heals (Java Edition) | Heals (Bedrock Edition) | Notes |
|---|---|---|---|
| Raw Cod Raw Salmon |
N/A | 2 |
[Bedrock Edition only] |
| Pufferfish Tropical Fish |
N/A | 1 |
Pufferfish can be fed to wolves without making them get the Hunger, Poison and Nausea status effects.[Bedrock Edition only] |
| Cooked Cod | N/A | 5 |
[Bedrock Edition only] |
| Raw Chicken | 1 |
2 |
Raw chicken can be fed to wolves without making them get the Hunger status effect. |
| Cooked Chicken | 1 |
6 |
|
| Raw Porkchop Raw Beef Raw Rabbit |
2 |
3 |
|
| Cooked Porkchop Steak |
2 |
8 |
|
| Rotten Flesh | 2 |
4 |
Rotten flesh can be fed to wolves without making them get the Hunger status effect. |
| Raw Mutton | 2 |
2 |
|
| Cooked Mutton | 2 |
6 |
|
| Cooked Rabbit | 2 |
5 |
|
| Cooked Salmon | N/A | 6 |
[Bedrock Edition only] |
| Rabbit Stew | N/A | 10 |
[Bedrock Edition only] |
Wolves do not get food poisoning, so they can freely eat rotten flesh, pufferfish or raw chicken. Feeding a tamed wolf that is already at full health usually starts the "love mode" animation.
A tamed wolf's collar color can be changed by using a dye on the wolf.
Breeding
A pup sitting.
Tamed wolves at full health can be bred with any type of meat, including rotten flesh and raw chicken without causing the Hunger effect. There is a 5-minute cooldown for breeding, during which the wolf does not accept meat.
The growth of pups can be slowly accelerated using any type of meat. Each use takes 10% off the remaining time to grow up. Unlike healing, breeding and speed growth cannot use rabbit stew or any type of fish.
Breeding two wolves that recognize someone else as an owner causes the pup to also be owned by the owner of the original two wolves. If two tamed wolves with different owners are bred, the owner of the pup is the owner of the older parent wolf.
If the player attacks an untamed wolf and then feeds it, hearts appear as when entering breeding mode, although the wolf does not breed and remains aggressive toward the player.
Sounds
| Sound | Subtitles | Source | Description | Resource location | Translation key | Volume | Pitch | Attenuation distance |
|---|---|---|---|---|---|---|---|---|
| Wolf pants[sound 1] | ? | Wolf barks. | entity | subtitles | ? | ? | 16 | |
| Wolf dies | ? | Dying | entity | subtitles | ? | ? | 16 | |
| Wolf growls | ? | Randomly when angry | entity | subtitles | ? | ? | 16 | |
| None[sound 2] | ? | Unused sound event | entity | None[sound 2] | None | None | None | |
| Wolf hurts | ? | Getting hit | entity | subtitles | ? | ? | 16 | |
| Wolf pants | ? | Randomly when tamed | entity | subtitles | ? | ? | 16 | |
| Wolf shakes | ? | Shaking off water | entity | subtitles | ? | ? | 16 | |
| Footsteps | ? | Walking | entity | subtitles | ? | ? | 16 | |
| Wolf pants[sound 1] | ? | Randomly when on low health | entity | subtitles | ? | ? | 16 |
Data values
ID
| Name | Identifier | Translation key |
|---|---|---|
| Wolf | wolf | entity.minecraft.wolf |
| Name | Identifier | Numeric ID | Translation key |
|---|---|---|---|
| Wolf | wolf | 14 | entity.wolf.name |
Entity data
Wolves have entity data associated with them that contain various properties.
- Entity data
- Additional fields for mobs that can become angry
- Additional fields for mobs that can be tamed by players
- Additional fields for mobs that can breed
- Tags common to all entities
- Tags common to all mobs
- CollarColor: The color of the wolf's collar. Present even for wild wolves (but does not render); default value is 14.
Achievements
| Icon | Achievement | In-game description | Actual requirements (if different) | Gamerscore earned | Trophy type (PS4) | |
|---|---|---|---|---|---|---|
| PS4 | Other | |||||
| Leader of the Pack | Befriend five wolves. | This does not have to be in a single game, so multiple games or reloading old saves does count toward this achievement. | 20G | Bronze | ||
Advancements
| Icon | Advancement | In-game description | Parent | Actual requirements (if different) | Resource location |
|---|---|---|---|---|---|
 | The Parrots and the Bats | Breed two animals together | Husbandry | Breed a pair of any of these 25 mobs:
| husbandry/breed_an_animal
|
| Best Friends Forever | Tame an animal | Husbandry | Tame one of these 8 tameable mobs: | husbandry/tame_an_animal
|
 | Two by Two | Breed all the animals! | The Parrots and the Bats | Breed a pair of each of these 24 mobs:
| husbandry/bred_all_animals
|
Videos
- Wolves when they were in development uploaded by Jeb as shown below.
History
The specific instructions are:
- 12w34a tame wolf (all collars) textures.
- 18w43a tamed pups.
- 19w45a sitting wolf legs changes.
| Java Edition Beta | |||||
|---|---|---|---|---|---|
| March 2, 2011 | Notch confirmed the addition of wolves after having breakfast with an idol of his (likely Peter Molyneux). | ||||
| March 15, 2011 | |||||
| March 16, 2011 | |||||
| March 18, 2011 | File:Wolf Revision 1.png File:Tamed Wolf with Red Collar Revision 1.png Jeb posted a video of the wolves in action. Normal texture has been changed and tamed version of wolves now has special texture. | ||||
1.4{{Extension DPL}}<ul><li>[[Cyan Dye|Cyan Dye]]<br/>{{Item
| image = Cyan Dye.png
| renewable = Yes
| stackable = Yes (64)
}}
'''Cyan dye''' is a [[Dyeing#Secondary|secondary dye color]].
== Obtaining ==
=== Crafting ===
{{Crafting
|head=1
|showdescription=1
|showname=0
|Blue Dye
|Green Dye
|Output=Cyan Dye,2
|type=Material
}}
{{Crafting
|Lapis Lazuli
|Green Dye
|Output=Cyan Dye,2
|description={{only|bedrock|education}}
|type=Material
}}
{{Crafting
|Pitcher Plant
|Output=Cyan Dye,2
|description=
|type=Material
|foot=1
}}
=== Trading ===
[[Wandering trader]]s sell 3 cyan dye for an [[emerald]].
== Usage ==
{{dye usage}}
=== Crafting ingredient ===
{{crafting usage|ignore=Banner|continue=1}}
{{banner crafting usage}}
=== Loom ingredient ===
{{Banner loom usage|Cyan Dye}}
=== Trading ===
{{IN|bedrock}}, journeyman-level shepherd villagers have 20% chance to buy 12 cyan dye for an emerald.
{{More info|java=1|Java UI does not use a specific trade slot, which results in a different chance to offer this trade.}}
== Data values ==
=== ID ===
{{edition|java}}:
{{ID table
|edition=java
|showforms=y
|generatetranslationkeys=y
|displayname=Cyan Dye
|spritetype=item
|nameid=cyan_dye
|form=item
|foot=1}}
{{edition|bedrock}}:
{{ID table
|edition=bedrock
|showaliasids=y
|shownumericids=y
|showforms=y
|notshowbeitemforms=y
|generatetranslationkeys=y
|displayname=Cyan Dye
|spritetype=item
|nameid=cyan_dye
|aliasid=dye / 6
|id=401
|form=item
|translationkey=item.dye.cyan.name
|foot=1}}
== History ==
{{History|java beta}}
{{History||1.2|[[File:Cyan Dye JE1 BE1.png|32px]] Added cyan dye.}}
{{History|java}}
{{History||1.4.2|snap=12w34a|Added the ability to [[Armor#Dyeing|dye]] leather [[armor]] and [[wolf]] collars.}}
{{History||1.4.6|snap=12w49a|Cyan dye can now be [[crafting|crafted]] with [[gunpowder]] to create a [[firework star]].}}
{{History||1.6.1|snap=13w19a|[[Stained clay]] can now be crafted.}}
{{history||1.7.2|snap=13w36a|With the addition of new [[flower]]s, many secondary and tertiary dyes are now primary [[dye]]s.}}
{{History|||snap=13w41a|[[Stained glass]] can now be crafted.}}
{{History||1.8|snap=14w02a|Due to [[lapis lazuli]] being [[renewable resource|renewable]], cyan dye is also renewable.}}
{{History|||snap=14w30a|Added [[banner]]s, which can be dyed.}}
{{History||1.13|snap=17w47a|The different data values for the <code>dye</code> ID have now been split up into their own IDs.
|Prior to [[1.13/Flattening|''The Flattening'']], this [[item]]'s numeral ID was 351.}}
{{History||1.14|snap=18w43a|Cyan dye is now [[crafting|crafted]] using [[blue dye]], instead of [[lapis lazuli]].
|[[File:Cyan Dye.png|32px]] The texture of cyan dye has now been changed.}}
{{History|||snap=18w44a|Cyan dye can now change the text color on [[sign]]s to cyan.}}
{{History|||snap=19w05a|Added the [[wandering trader]], which sell cyan dyes.}}
{{History|||snap=19w11a|Cyan dye can now be [[trading|bought]] by shepherd villagers.}}
{{History||1.17|snap=20w45a|Cyan dye can now be used to craft [[cyan candle]]s.}}
{{History|||snap=21w19a|Cyan dye can no longer be used to craft cyan candles.}}
{{History|||snap=Pre-release 1|Cyan dye can once again be used to craft cyan candles.}}
{{History||1.20<br>(Experimental)|link=1.19.3|snap=22w42a|Cyan dye can now change the text color on [[hanging sign]]s to cyan.}}
{{History||1.20|snap=23w12a|Added [[pitcher plant]]s, which can be crafted into cyan dye.}}
{{History|||snap=23w14a|[[Pitcher plant]]s now craft into 2 cyan dye instead of 1.}}
{{History|pocket alpha}}
{{History||v0.3.0|[[File:Cyan Dye JE1 BE1.png|32px]] Added cyan dye. It is currently unobtainable and serves no purpose.}}
{{History||v0.4.0|Cyan dye is now craftable with [[lapis lazuli]] and [[cactus green]].
|Cyan dye can now be used to craft cyan wool.}}
{{History||v0.6.0|Cyan dye can now be used to dye [[sheep]].}}
{{History||v0.9.0|snap=build 11|Cyan dye can now be used to craft colored [[terracotta]].}}
{{History||v0.11.0|snap=build 1|Cyan dye can now be used to dye tamed [[wolf]] collars.}}
{{History||v0.14.0|snap=build 1|Cyan dye can now be used to dye water in [[cauldron]]s.}}
{{History|pocket}}
{{History||1.0.0|snap=alpha 0.17.0.1|Cyan dye can now be used to dye [[shulker]]s.}}
{{History||1.1.0|snap=alpha 1.1.0.0|Cyan dye can now be used to craft [[concrete powder]], colored [[bed]]s and dyed [[shulker box]]es.}}
{{History|bedrock}}
{{History||1.2.0|snap=beta 1.2.0.2|Cyan dye can now be used to craft [[firework star]]s, [[stained glass]] and patterns on [[banner]]s.}}
{{History||1.4.0|snap=beta 1.2.20.1|Cyan dye can now be used to craft [[balloon|ballons]] and [[glow stick|glow sticks]].}}
{{History||1.8.0|snap=beta 1.8.0.8|Cyan dye can now be used to dye tamed [[cat]] collars.}}
{{History||1.10.0|snap=beta 1.10.0.3|Cyan dye are now [[trading|sold]] by [[wandering trader]]s.
|Cyan dye can now be used to dye white [[carpet|carpets]] and undyed [[glass pane]]s.
|[[File:Cyan Dye.png|32px]] The texture of cyan dye has now been changed.}}
{{History||1.11.0|snap=beta 1.11.0.4|Cyan dye can be [[trading|sold]] to shepherd [[villager]]s.}}
{{History||1.16.100|snap=beta 1.16.100.56|The ID of cyan dye has been changed from <code>dye/6</code> to <code>cyan_dye</code>.}}
{{History|console}}
{{History||xbox=TU1|xbone=CU1|ps=1.00|switch=1.0.1|wiiu=Patch 1|[[File:Cyan Dye JE1 BE1.png|32px]] Added cyan dye.}}
{{History|PS4}}
{{History||1.90|[[File:Cyan Dye.png|32px]] The texture of cyan dye has now been changed.}}
{{History|new 3ds}}
{{History||0.1.0|[[File:Cyan Dye JE1 BE1.png|32px]] Added cyan dye.}}
{{History|foot}}
== Issues ==
{{issue list}}
{{Items}}
[[Category:Items]]
[[Category:Dyes]]
[[Category:Renewable resources]]
[[cs:Azurové barvivo]]
[[de:Türkiser Farbstoff]]
[[es:Tinte cian]]
[[fr:Teinture cyan]]
[[hu:Ciánkék festék]]
[[ja:青緑色の染料]]
[[ko:청록색 염료]]
[[nl:Turquoise kleurstof]]
[[pl:Błękitny barwnik]]
[[pt:Corante ciano]]
[[ru:Бирюзовый краситель]]
[[zh:青色染料]]</li><li>[[Raw Porkchop|Raw Porkchop]]<br/>{{Item
| title = Raw Porkchop
| image = Raw Porkchop.png
| renewable = Yes
| heals = {{hunger|3}}
| stackable = Yes (64)
}}
A '''raw porkchop''' is a [[food]] item that can be eaten by the [[player]] or cooked to make a [[cooked porkchop]].
== Obtaining ==
=== Mob loot ===
==== Pigs ====
Adult [[pig]]s drop 1–3 raw porkchop when killed. The maximum amount is increased by 1 per level of [[Looting]], for a maximum of 1-6 with Looting III. If killed while on fire, they drop [[cooked porkchop]] instead.
==== Hoglins ====
Adult [[hoglin]]s drop 2–4 raw porkchop when killed. The maximum amount is increased by 1 per level of [[Looting]], for a maximum of 7 with Looting III. If killed while on fire, they drop [[cooked porkchop]] instead.
=== Chest loot ===
{{LootChestItem|raw-porkchop}}
== Usage ==
=== Food ===
To eat raw porkchop, press and hold {{control|use}} while it is selected in the hotbar. Eating one restores {{hunger|3}} [[hunger]] and 0.6 [[Hunger#Mechanics|saturation]].
=== Smelting ingredient ===
{{Smelting
|showname=1
|Raw Porkchop
|Cooked Porkchop
|0.35
}}
=== Trading ===
{{IN|bedrock}}, novice-level butcher [[villager]]s have a {{frac|1|3}} chance to [[trading|buy]] 7 raw porkchop for an [[emerald]] as part of their [[trading|trades]].
{{IN|java}}, novice-level butcher villagers have a 40% chance to buy 7 raw porkchop for an emerald.
=== Wolves ===
Raw porkchops can be used to [[breed]] and heal tamed [[wolves]], lead them around, and make baby tamed wolves grow up faster by 10% of the remaining time.
=== Piglins ===
[[Piglin|Piglins]] instantly pick up raw or [[Cooked Porkchop|cooked porkchops]] that are within 1 block of them, unless they have already picked up one within the last 10 seconds. Porkchops picked up are not dropped upon the piglin's death.
==Sounds==
{{Sound table/Entity/Food}}
== Data values ==
=== ID ===
{{edition|java}}:
{{ID table
|edition=java
|showitemtags=y
|showforms=y
|generatetranslationkeys=y
|displayname=Raw Porkchop
|spritetype=item
|nameid=porkchop
|itemtags=piglin_food
|form=item
|foot=1}}
{{edition|bedrock}}:
{{ID table
|edition=bedrock
|shownumericids=y
|showforms=y
|notshowbeitemforms=y
|generatetranslationkeys=y
|displayname=Raw Porkchop
|spritetype=item
|nameid=porkchop
|id=262
|form=item
|foot=1}}
== Achievements ==
{{load achievements|Pork Chop}}
== Advancements ==
{{load advancements|Husbandry;A Balanced Diet}}
== History ==
{{History|java indev}}
{{History||20100219|[[File:Raw Porkchop JE1 BE1.png|32px]] Added raw porkchops.
|Raw porkchops restore {{hp|3}} and do not stack in the [[inventory]].
|Raw porkchops are [[drops|dropped]] by [[pig]]s.}}
{{History|java beta}}
{{History||1.4|Raw porkchops can now be given to [[wolf|wolves]].}}
{{History||1.8|snap=Pre-release|Raw porkchops can now be stacked to 64.<ref>{{Tweet|jeb|103408168356421632|Some Minecraft food changes...}}</ref>
|Raw porkchops now restore {{hunger|3}} to the [[Hunger|food bar]].}}
{{History|java}}
{{History||1.2.1|snap=12w03a|Raw porkchops can now be used to breed wolves.}}
{{History||1.3.1|snap=12w21a|Raw porkchops can now be [[trading|sold]] to butcher [[villager]]s, at 14–17 pork chops for 1 [[emerald]].}}
{{History|||snap=12w25a|[[Pig]]s now [[drops|drop]] 1–3 porkchops instead of 0–2.}}
{{History||1.4.2|snap=12w37a|[[File:Raw Porkchop JE2 BE2.png|32px]] The texture of raw porkchops has been changed, so that it no longer has a dark outline.}}
{{History||1.8|snap=14w02a|[[Trading]] has been changed; butcher villagers now [[trading|buy]] 14–18 porkchops for 1 emerald.}}
{{History||1.13|snap=17w47a|Prior to [[1.13/Flattening|''The Flattening'']], this [[item]]'s numeral ID was 319.}}
{{History||1.14|snap=18w43a|[[File:Raw Porkchop.png|32px]] The texture of raw porkchops has been changed.}}
{{History|||snap=18w49a|Raw porkchops can now be found in [[chest]]s in [[village]] butcher shops.}}
{{History||1.16|snap=20w07a|Raw porkchops are dropped by the new [[hoglin]]s.
|Raw porkchops have a {{frac|5|109}} (~4.59%) chance of being given by the new [[piglin]]s when [[bartering]], in a stack size of 2–5.}}
{{History|||snap=20w09a|Raw porkchops can no longer be obtained by bartering with piglins.}}
{{History|||snap=20w16a|Raw porkchops now generate in [[bastion remnants]] chests.}}
{{History|pocket alpha}}
{{History||v0.4.0|[[File:Raw Porkchop JE1 BE1.png|32px]] Added raw porkchops.}}
{{History||v0.5.0|Raw porkchops now restore {{hp|3}} instead of {{hp|1}}.}}
{{History||v0.8.0|snap=build 1|[[File:Raw Porkchop JE2 BE2.png|32px]] The texture of raw porkchops has been changed, so that it no longer has that dark outline.}}
{{History||v0.12.1|snap=build 1|Raw porkchops now restore [[hunger]] instead of [[health]].}}
{{History||v0.16.2|[[Pig]]s now [[drops|drop]] 1–3 raw porkchops rather than 0–2.}}
{{History|pocket}}
{{History||1.0.4|snap=alpha 1.0.4.0|14–18 raw porkchops can now be [[trading|sold]] to butcher [[villager]]s for an [[emerald]].}}
{{History|bedrock}}
{{History||1.10.0|snap=beta 1.10.0.3|[[File:Raw Porkchop.png|32px]] The texture of raw porkchops has been changed.}}
{{History||1.11.0|snap=beta 1.11.0.3|Raw porkchops can now be found in [[village]] butcher [[chest]]s.}}
{{History|||snap=beta 1.11.0.4|Butcher [[villager]]s now have {{frac|1|3}} chance to [[trading|buy]] 7 raw porkchops.}}
{{History|console}}
{{History||xbox=TU1|xbone=CU1|ps=1.0|wiiu=Patch 1|switch=1.0.1|[[File:Raw Porkchop JE1 BE1.png|32px]] Added raw porkchops.}}
{{History||xbox=TU5|Raw porkchops are now stackable to 64 and fills [[hunger]] instead of [[health]].}}
{{History||xbox=TU12|[[File:Raw Porkchop JE2 BE2.png|32px]] The texture of raw porkchops has been changed, so that it no longer has a dark outline.}}
{{History||xbox=none|xbone=none|ps=1.90|wiiu=none|switch=none|[[File:Raw Porkchop.png|32px]] The texture of raw porkchops has been changed.}}
{{History|new3DS}}
{{History||0.1.0|[[File:Raw Porkchop JE2 BE2.png|32px]] Added raw porkchops.}}
{{History|foot}}
== Issues ==
{{issue list}}
== Gallery ==
<gallery>
I Porkchop Minecraft JINX.jpg|Official T-shirt artwork "I Porkchop Minecraft" sold by [https://www.jinx.com JINX].
I Brake for Porkchop Bumper Sticker JINX.jpg|An official bumper sticker featuring a raw porkchop sold by JINX.
</gallery>
== References ==
{{reflist}}
== External Links ==
*[https://www.minecraft.net/en-us/article/taking-inventory--porkchop Taking Inventory: Porkchop] – Minecraft.net on February 13, 2020
{{Items}}
[[Category:Food]]
[[cs:Syrová kotleta]]
[[de:Rohes Schweinefleisch]]
[[es:Chuleta de cerdo cruda]]
[[fr:Côtelette de porc crue]]
[[hu:Nyers disznóhús]]
[[ja:生の豚肉]]
[[nl:Rauw varkensvlees]]
[[pl:Surowy schab]]
[[pt:Costeleta de porco crua]]
[[ru:Сырая свинина]]
[[uk:Сира свинина]]
[[zh:生猪排]]
[[Category:Renewable resources]]</li></ul> | File:Wolf Revision 1.png File:Tamed Wolf with Red Collar Revision 1.png File:Angry Wolf Revision 1.png Added wolves. | ||||
| Wolves can be tamed. When wolves are hit by the player or the player's tamed wolves, they become angry. A glitch is currently encountered where if the player's wolf isn't sitting when the player logs off, it becomes wild and the player must tame it again. This problem was fixed a couple of updates after wolves were first introduced. | |||||
1.5{{Extension DPL}}<ul><li>[[Poisonous Potato|Poisonous Potato]]<br/>{{Item
| title = Poisonous Potato
| image = Poisonous Potato.png
| heals = {{hunger|2}}
|effects={{EffectLink|Poison}} (0:05) (60% chance)
| stackable = Yes (64)
| renewable = Yes
}}
A '''poisonous potato''' is a type of [[potato]] that can [[poison]] the [[player]].
== Obtaining ==
The poisonous potato is a rare [[drop]] when harvesting (destroying) [[potato|potato crops]]; a fully grown plant has a 2% chance of dropping one in addition to the 2-5 regular potatoes.
=== Chest loot ===
{{LootChestItem|poisonous-potato}}
== Usage ==
Poisonous potatoes cannot be planted on [[farmland]] or [[Baked Potato|baked]]. They also have no use with the [[composter]].<ref>{{bug|MC-142373|resolution=WAI}}</ref>
=== Food ===
{{see also|Tutorials/Hunger management|title1=Hunger management}}
To eat a poisonous potato, press and hold {{control|use}} while it is selected in the hotbar. Eating one restores {{hunger|2}} [[hunger]] and 1.2 hunger [[Hunger#Mechanics|saturation]] and has a 60% chance of applying 5 seconds of [[Poison]] II, draining {{hp|4|poisoned=1}} points of [[health]].
Interestingly, a poisonous potato actually restores double the hunger and saturation than a normal, unpoisoned potato. (A normal potato gives {{hunger|1}} hunger and 0.6 saturation points.)
==Sounds==
{{Sound table/Entity/Food}}
== Advancements ==
{{load advancements|Husbandry;A Balanced Diet}}
== Data values ==
=== ID ===
{{edition|java}}:
{{ID table
|edition=java
|showforms=y
|generatetranslationkeys=y
|displayname=Poisonous Potato
|spritetype=item
|nameid=poisonous_potato
|form=item
|foot=1}}
{{edition|bedrock}}:
{{ID table
|edition=bedrock
|shownumericids=y
|showforms=y
|notshowbeitemforms=y
|generatetranslationkeys=y
|displayname=Poisonous Potato
|spritetype=item
|nameid=poisonous_potato
|id=282
|form=item
|foot=1}}
== History ==
{{History|java}}
{{History||1.4.2|snap=12w34a|[[File:Poisonous Potato JE1 BE1.png|32px]] Added poisonous potatoes.}}
{{History||1.13|snap=17w47a|Prior to [[Java_Edition_1.13/Flattening|''The Flattening'']], this [[item]]'s numeral ID was 394.}}
{{History|||snap=18w11a|Poisonous potatoes now generate in the [[chest]]s of [[shipwreck]]s.}}
{{History||1.14|snap=18w43a|[[File:Poisonous Potato JE2.png|32px]] The texture of poisonous potatoes has been changed.}}
{{History|||snap=18w50a|[[File:Poisonous Potato JE3 BE2.png|32px]] The texture of poisonous potatoes has been changed, once again.}}
{{History|pocket alpha}}
{{History||v0.12.1|snap=build 1|[[File:Poisonous Potato JE1 BE1.png|32px]] Added poisonous potatoes.}}
{{History|bedrock}}
{{History||1.4.0|snap=beta 1.2.14.2|Poisonous potatoes can now be found inside of [[shipwreck]] [[chest]]s.}}
{{History||1.10.0|snap=beta 1.10.0.3|[[File:Poisonous Potato JE3 BE2.png|32px]] The texture of poisonous potatoes has been changed.}}
{{History|console}}
{{History||xbox=TU14|xbone=CU1|ps=1.04|wiiu=Patch 1|switch=1.0.1|[[File:Poisonous Potato JE1 BE1.png|32px]] Added poisonous potatoes.}}
{{History||xbox=none|xbone=none|ps=1.90|wiiu=none|switch=none|[[File:Poisonous Potato JE3 BE2.png|32px]] The texture of poisonous potatoes has been changed.}}
{{History|New 3DS}}
{{History||0.1.0|[[File:Poisonous Potato JE1 BE1.png|32px]] Added poisonous potatoes.}}
{{History|foot}}
== Issues ==
{{issue list}}
== References ==
{{reflist}}
{{Items}}
[[Category:Plants]]
[[cs:Jedovatá brambora]]
[[de:Giftige Kartoffel]]
[[es:Patata envenenada]]
[[fr:Pomme de terre empoisonnée]]
[[hu:Mérgező burgonya]]
[[it:Patata velenosa]]
[[ja:青くなったジャガイモ]]
[[ko:독이 있는 감자]]
[[nl:Giftige aardappel]]
[[pl:Trujący ziemniak]]
[[pt:Batata venenosa]]
[[ru:Ядовитый картофель]]
[[th:มันฝรั่งพิษ]]
[[uk:Отруйна картопля]]
[[zh:毒马铃薯]]
[[Category:Food]]
[[Category:Renewable resources]]</li><li>[[Emerald|Emerald]]<br/>{{About|the item|the currency in ''Minecraft Dungeons''|MCD:Emerald|the skin|MCD:Emerald (skin)|the ore|Emerald Ore|the mineral block|Block of Emerald}}
{{Item
| image = Emerald.png
| renewable = Yes
| stackable = Yes (64)
| rarity = Common}}
'''Emeralds''' are rare minerals that are used primarily as the currency for [[trading]] with [[villager]]s and [[wandering trader]]s. Naturally-occurring emeralds are rarer than [[diamond]]s.
== Obtaining ==
=== Trading (how emerald is renewable) ===
{{main|Trading}}
Emeralds can be obtained by trading with [[villager]]s, since they are the currency that villagers use for trading. Villagers either buy or sell specific goods for emeralds. Some villagers trade stuff that is renewable with emerald.
=== Mining ===
[[Emerald ore]] drops one emerald when mined using an iron or better [[pickaxe]]. If the pickaxe is enchanted with [[Fortune]], it may drop an extra emerald per level of Fortune, up to a maximum of 4 emeralds with Fortune III. If the ore is mined using a pickaxe enchanted with [[Silk Touch]], it drops itself in ore form instead of an emerald.
=== Crafting ===
{{Crafting
|Block of Emerald
|Output= Emerald,9
|type= Material
}}
=== Smelting ===
{{Smelting
|Emerald Ore; Deepslate Emerald Ore
|Emerald
|1
}}
=== Natural generation ===
{{see also|Emerald Ore#Natural generation}}
Emeralds can generate in [[chest]]s in some [[village]] houses or other generated [[Generated structures|structures]].
{{needs update|inaccurate=1|section=1}}
{{LootChestItem|emerald}}
=== Drops ===
[[Vindicator]]s and [[evoker]]s drop 0–1 emeralds upon death. [[Looting]] increases the maximum emerald drop by one per level, for a maximum of 4 emeralds with Looting III.
[[Fox]]es that are holding emeralds also have a chance of 100% to drop the emerald they are holding upon death. Alternatively, the player can drop a food item to entice the fox to drop the emerald without killing it.
{{IN|bedrock}}, vindicators and [[pillager]]s spawned from [[raids]] can drop 0–1 emeralds. Depending on difficulty, vindicators and pillagers spawned from raids also have a chance of dropping additional emeralds. There is a 65% chance of dropping on easy and normal, and an 80% chance of dropping on hard. If this additional drop condition is met, different emerald counts can drop with different chances. There is a {{frac|10|39}} chance to drop an additional 0–1 emeralds, a {{frac|5|39}} chance to drop an additional 2–3, and a {{frac|2|39}} chance to drop an additional 4–5.
{{IN|bedrock}}, with Looting III, it is possible for a vindicator in a raid to drop up to 16 emeralds upon death (vindicator drops + raid drops + an additional drop<!-- emerald from 2/39 chance-->).
== Usage ==
=== Trading ===
{{main|Trading}}
Emeralds are primarily used as currency for [[trading]] with villagers and wandering traders. Trading is typically a faster way to obtain emeralds than by mining, as an emerald ore is rarer than a diamond ore.
=== Crafting ingredient ===
{{crafting usage}}
===Beacons===
Emeralds can be used to select powers from a [[beacon]]. The player must select one of the available powers and then insert an emerald into the item slot.
An emerald can be substituted for an [[iron ingot]], a [[gold ingot]], a [[diamond]] or a [[netherite ingot]] in a beacon.
=== Smithing ingredient ===
{{Smithing
|head=1
|ingredients=Any Armor Trim +<br/>Any Armor Piece + <br/>Emerald
|Any Armor Trim Smithing Template
|Netherite Chestplate
|Emerald
|Emerald Trim Netherite Chestplate
|showdescription=1
|description = All armor types can be used in this recipe,<br/>a netherite chestplate is shown as an example.
|tail=1
}}
;Trim color palette
The following color palette is shown on the designs on trimmed armor:
*{{TrimPalette|emerald}}
== Achievements ==
{{load achievements|The Haggler;Buy Low;Master Trader}}
== Advancements ==
{{load advancements|What a Deal!}}
== Data values ==
=== ID ===
{{edition|java}}:
{{ID table
|edition=java
|showitemtags=y
|showforms=y
|generatetranslationkeys=y
|displayname=Emerald
|spritetype=item
|nameid=emerald
|itemtags=beacon_payment_items
|form=item
|foot=1}}
{{edition|bedrock}}:
{{ID table
|edition=bedrock
|shownumericids=y
|showforms=y
|notshowbeitemforms=y
|generatetranslationkeys=y
|displayname=Emerald
|spritetype=item
|nameid=emerald
|id=512
|form=item
|foot=1}}
== History ==
{{History|java indev}}
{{History||0.31|snap=20100129|Added [[diamond]]s, referred to as emeralds in the code.}}
{{History|java}}
{{History||May 21, 2012|link={{tweet|jeb_|204619936616808451}}|[[File:Ruby pJE20120521.png|32px]] [[Jens Bergensten|Jeb]] released a screenshot of himself testing the [[trading]] system. At this time, what would become emeralds were [[History_of_textures/Unused_textures#Ruby|rubies]].<ref>http://www.minecraftforum.net/topic/1621716-15-new-blocksitems/#entry19977082</ref>}}
{{History||1.3.1|snap=12w21a|[[File:Emerald JE1 BE1.png|32px]] Added emeralds and [[emerald ore]].
|Emeralds can be [[trading|traded]] with [[villager]]s in exchange for different [[item]]s.
|Added [[desert temple]]s, with a hidden [[chest]] room and loot containing emeralds.
|[[File:Ruby JE1 BE1.png|32px]] The texture of [[History_of_textures/Unused_textures#Ruby|rubies]] can be found in the (at this time unused) file {{cd|items.png}}.<ref name="en_US 12w21">Snapshot 12w21a/b ''lang/en_US.lang'': '''item.ruby.name=Ruby'''</ref>}}
{{History|||snap=12w22a|[[Block of emerald]] has now been added, which is [[crafting|crafted]] from nine emeralds and can be placed as a decorative [[block]].
|Added [[jungle temple]]s, which contain loot [[chest]]s with emeralds.}}
{{History||1.4.2|snap=12w32a|As [[zombie villager]]s can now spawn and be cured, emeralds can now still be obtained in [[trading|trades]] even if [[generated structures]] are disabled.}}
{{history||1.9|snap=15w31a|Emeralds now generate in [[end city]] ship [[chest]]s.}}
{{history|||snap=15w43a|Emeralds now generate in [[igloo]] basement chests.}}
{{history|||snap=15w44a|The average yield of emeralds in [[desert temple]] chests has now been increased.}}
{{History||1.11|snap=16w39a|Added [[vindicator]]s and [[evoker]]s, which drop emeralds if killed by a player.}}
{{History||1.13|snap=17w47a|Prior to [[1.13/Flattening|''The Flattening'']], this [[item]]'s numeral ID was 388.}}
{{History|||snap=18w09a|Emeralds can now generate in the loot [[chest]]s of [[underwater ruins]].}}
{{History|||snap=18w10a|Emeralds can now generate in [[buried treasure]] chests.}}
{{History|||snap=18w11a|Emeralds can now generate in the chests of [[shipwreck]]s.}}
{{History||1.14|snap=18w43a|[[File:Emerald JE2 BE2.png|32px]] The texture of emeralds has now been changed.
|Added [[pillager]]s, which can [[drops|drop]] emeralds.}}
{{History|||snap=18w46a|Pillagers no longer drop emeralds.}}
{{History|||snap=18w48a|Emeralds now generate in chests in [[village]] tanneries, fisher cottages and plains village houses.}}
{{History|||snap=18w49a|Emeralds now generate in chests in [[village]] shepherd houses, mason houses, butcher shops, and savanna and snowy village houses.}}
{{History|||snap=18w50a|Emeralds now generate in chests in [[village]] fletcher houses, temples, and desert and taiga village houses.}}
{{History|||snap=19w07a|Added [[fox]]es, which sometimes spawn with emeralds in their mouths.}}
{{History|||snap=19w08a|[[File:Emerald JE3 BE3.png|32px]] The texture of emeralds has now been changed, once again and it looks smaller.}}
{{History||1.17|snap=21w13a|The unused [[History_of_textures/Unused_textures#Ruby|rubies]] texture was removed.}}
{{History||1.20<br>(Experimental)|link=1.19.4|snap=23w04a|Emeralds can now be used as an armor trim material.}}
{{History|||snap=23w07a|Emeralds now drop when brushing [[suspicious sand]] in [[desert pyramid]]s or [[desert well]]s.}}
{{History||1.20|snap=23w12a|The probability for the emerald to generate in the [[suspicious sand]] in [[desert temple]] and in [[desert well]] has been changed from 1/7 to 1/8.|Emerald can now be found in [[suspicious gravel]] and [[suspicious sand]] in cold and warm [[ocean ruins]] and in [[trail ruins]].}}
{{History|||snap=23w16a|Emerald no longer generates in [[suspicious sand]] in [[trail ruins]].|Due to the split of the archaeological loot tables for the suspicious gravel within the [[trail ruins]]; emerald now is in the common loot.}}
{{History|pocket alpha}}
{{History||v0.9.0|snap=build 1|[[File:Emerald JE1 BE1.png|32px]] Added emeralds.}}
{{History|||snap=build 5|Emeralds can now be used to craft [[blocks of emerald]].}}
{{History||v0.13.0|snap=build 1|Emeralds can now be found inside [[desert temple]] [[chest]]s.}}
{{History||v0.15.0|snap=build 1|Added [[jungle temple]]s, which contain loot chests with emeralds.}}
{{History||v0.16.0|snap=build 1|Emeralds can now be used to power [[beacon]]s.}}
{{History|pocket}}
{{History||1.0.0|snap=alpha 0.17.0.1|Emeralds can now be found in [[end city]] ship [[chest]]s.
|Emeralds can now be found in [[igloo]] basement chests.}}
{{History||1.0.4|snap=alpha 1.0.4.0|Emeralds are now used as "currency" for [[villager]] [[trading]].}}
{{History||1.1.0|snap=alpha 1.1.0.0|Added [[evoker]]s and [[vindicator]]s, which [[drops|drop]] emeralds when killed.}}
{{History|bedrock}}
{{History||1.4.0|snap=beta 1.2.14.2|Emeralds can now be found in some [[shipwreck]] [[chest]]s.}}
{{History|||snap=beta 1.2.20.1|Emeralds can now be found inside [[underwater ruins]] chests.}}
{{History||1.10.0|snap=beta 1.10.0.3|Emeralds can now be used to [[trading|buy]] items from [[wandering trader]]s.
|Emeralds can now be found in [[plains]] [[village]] house and tannery [[chest]]s.
|[[File:Emerald JE2 BE2.png|32px]] The texture of emeralds has now been changed.}}
{{History||1.11.0|snap=beta 1.11.0.1|Emeralds can now be found in [[village]] [[chest]]s other than [[plains]].}}
{{History|||snap=beta 1.11.0.4|[[Vindicator]]s and [[pillager]]s that spawn from [[raid]]s can now [[drops|drop]] bonus emeralds.}}
{{History|||snap=beta 1.11.0.5|[[File:Emerald JE3 BE3.png|32px]] The texture of emeralds has now been changed, once again.}}
{{History||1.13.0|snap=beta 1.13.0.1|Added [[fox]]es, which can [[drops|drop]] emeralds.}}
{{History||Next Major Update<br>(Experimental)|link=Bedrock Edition 1.19.70|snap=beta 1.19.70.23|Emeralds now drop when brushing [[suspicious sand]] in [[desert pyramid]]s or [[desert well]]s.}}
{{History|||snap=beta 1.19.80.21|Emeralds can now be used as an armor trim material.}}
{{History|console}}
{{History||xbox=TU14|xbone=CU1|ps=1.04|wiiu=Patch 1|switch=1.0.1|[[File:Emerald JE1 BE1.png|32px]] Added emeralds.}}
{{History|Ps4}}
{{History||1.90|[[File:Emerald JE2 BE2.png|32px]] The texture of emeralds has now been changed.}}
{{History|new3DS}}
{{History||0.1.0|[[File:Emerald JE1 BE1.png|32px]] Added emeralds.}}
{{History|foot}}
== Issues ==
{{issue list}}
== Gallery ==
<gallery>
Villager trading preview.png|The first image of the trading system released by [[Jeb]]. What would become emeralds can be seen in the [[inventory]] space.
Emerald Ore 12w21a.png|A wall of [[emerald ore]] utilizing a previous texture in snapshot [[12w21a]].
Room of Emeralds.png|All forms of emeralds in one photo: emerald (in the form of [[emerald block|block]], [[emerald ore|ore]] and the emerald itself).
</gallery>
==Trivia==
*The [[History_of_textures/Unused_textures#Ruby|ruby]] was going to be the [[villager]] currency but was changed to emeralds before the update's release.
== References ==
{{Reflist}}
{{Items}}
[[Category:Renewable resources]]
[[cs:Smaragd]]
[[de:Smaragd]]
[[es:Esmeralda]]
[[fr:Émeraude]]
[[hu:Smaragd]]
[[it:Smeraldo]]
[[ja:エメラルド]]
[[ko:에메랄드]]
[[nl:Smaragd]]
[[pl:Szmaragd]]
[[pt:Esmeralda]]
[[ru:Изумруд]]
[[th:มรกต]]
[[tr:Zümrüt]]
[[uk:Смарагд]]
[[zh:绿宝石]]</li></ul> | Prior to this update, wolves would continuously made whimpering noises, even when they were at full health in multiplayer because Jeb accidentally used client-side health instead of synced health.[5] Wolves no longer do this. | ||||
1.6{{Extension DPL}}<ul><li>[[Clay Ball|Clay Ball]]<br/>{{Item
| image = Clay Ball.png
| stackable = Yes (64)
| renewable = Yes
}}
{{about|the item|the block|Clay|other uses|Clay (disambiguation)}}
A '''clay ball''' is the item obtained from [[clay]] used for [[crafting]] or making [[brick]]s.
== Obtaining ==
=== Block loot ===
Clay balls are obtained when a [[clay]] block is broken with a non-[[Silk Touch]] tool. Each block yields four clay balls regardless of [[Fortune]].
=== Chest loot ===
{{LootChestItem|clay-ball}}
=== Villager gifts ===
If a [[player]] has the [[Hero of the Village]] status effect, a Mason [[villager]] might throw that player a [[clay block]] as a gift. {{Only|java}} This can be placed and [[breaking|broken]] to harvest clay balls.
== Usage ==
Clay balls can be [[crafting|crafted]] back together to form [[clay]] blocks or baked in a [[furnace]] to create [[brick]]s.
=== Crafting ingredient ===
{{crafting usage}}
=== Smelting ingredient ===
{{Smelting
|showname=1
|Clay Ball
|Brick
|0.3
}}
=== Trading ===
Novice-level [[Villager|mason villagers]] buy 10 clay balls for 1 [[emerald]] as part of their [[trades]].
== Data values ==
=== ID ===
{{edition|java}}:
{{ID table
|edition=java
|showforms=y
|generatetranslationkeys=y
|displayname=Clay Ball
|spritetype=item
|nameid=clay_ball
|form=item
|foot=1}}
{{edition|bedrock}}:
{{ID table
|edition=bedrock
|shownumericids=y
|showforms=y
|notshowbeitemforms=y
|generatetranslationkeys=y
|displayname=Clay
|spritetype=item
|nameid=clay_ball
|id=384
|form=item
|foot=1}}
== History ==
{{History|java alpha}}
{{History||v1.0.11|[[File:Clay Ball JE1 BE1.png|32px]] Added clay.}}
{{History|java}}
{{History||1.13|snap=17w47a|Prior to [[1.13/Flattening|''The Flattening'']], this [[item]]'s numeral ID was 337.}}
{{History||1.14|snap=18w43a|[[File:Clay Ball JE2 BE2.png|32px]] The texture of clay has been changed.}}
{{History|||snap=18w49a|Clay can now be found in [[chest]]s in [[village]] mason houses.}}
{{History|||snap=18w50a|Clay can now be found in [[chest]]s in [[desert]] [[village]] houses.}}
{{History|||snap=19w11a|Clay is now [[trading|bought]] by [[villager]]s of the new mason profession.}}
{{History||1.16|snap=20w06a|"Clay" has been renamed to "Clay Ball."}}
{{History|pocket alpha}}
{{History||v0.2.0|[[File:Clay Ball JE1 BE1.png|32px]] Added clay. It is currently unobtainable and serves no purpose.}}
{{History||v0.3.2|4 clay items are now dropped from clay blocks when broken.
|Clay can now be crafted into clay blocks.
|Clay can now be smelted into bricks.}}
{{History|bedrock}}
{{History||1.10.0|snap=beta 1.10.0.3|[[File:Clay Ball JE2 BE2.png|32px]] The texture of clay has been changed.|10–13 clay can now be [[trading|sold]] to stone mason [[villager]]s for an [[emerald]].}}
{{History||1.11.0|snap=beta 1.11.0.1|Clay can now be found in [[village]] mason [[chest]]s and [[desert]] village house chests.}}
{{History|||snap=beta 1.11.0.4|[[Trading]] has been changed, stone mason villagers now [[trading|buy]] 10 clay for an emerald<!-- previously 10-13 -->.}}
{{History||1.19.0|snap=beta 1.19.0.24|Clay ball now [[renewable]] by placing [[mud]] above a block which has [[pointed dripstone]] underneath.}}
{{History|console}}
{{History||xbox=TU1|xbone=CU1|ps=1.0|wiiu=Patch 1|[[File:Clay Ball JE1 BE1.png|32px]] Added clay.}}
{{History||xbox=none|xbone=none|ps=1.90|wiiu=none|switch=none|[[File:Clay Ball JE2 BE2.png|32px]] The texture of clay has been changed.}}
{{History|3ds}}
{{History||0.1.0|[[File:Clay Ball JE1 BE1.png|32px]] Added clay.}}
{{History|foot}}
== Issues ==
{{issue list}}
== Gallery ==
<gallery>
File:ClayInNumerousForms.png
</gallery>
== Notes ==
{{fnlist}}
{{Items}}
[[cs:Jíl]]
[[de:Tonklumpen]]
[[es:Bola de arcilla]]
[[fr:Motte d'argile]]
[[hu:Agyag (Tárgy)]]
[[it:Zolla di argilla]]
[[ja:粘土玉]]
[[ko:점토 덩이]]
[[nl:Klei (voorwerp)]]
[[pl:Glina]]
[[pt:Bola de argila]]
[[ru:Глина]]
[[uk:Глиняна кулька]]
[[zh:黏土球]]</li><li>[[Lapis Lazuli|Lapis Lazuli]]<br/>{{Item
| image = Lapis Lazuli.png
|type=
| renewable = Yes
| stackable = Yes (64)
}}
{{About|the item|the ore|Lapis Lazuli Ore|the mineral block|Lapis Lazuli Block}}
'''Lapis lazuli''' is a mineral required to [[Enchanting|enchant]] items in an [[Enchanting Table|enchanting table]].
== Obtaining ==
=== Mining ===
When mined with a stone [[pickaxe]] or better, [[lapis lazuli ore]] drops 4–9 lapis lazuli. With the [[Fortune]] III enchantment, a single block has a chance of dropping up to 36 items.
=== Crafting ===
{{Crafting
|Block of Lapis Lazuli
|Output=Lapis Lazuli,9
|type=Material
}}
=== Smelting ===
{{Smelting
|showname=1
|Lapis Lazuli Ore; Deepslate Lapis Lazuli Ore
|Lapis Lazuli
|0.2
}}
=== Villager gifts ===
{{IN|java}}, cleric [[villager]]s give [[player]]s lapis lazuli if they have the [[Hero of the Village]] effect.
=== Trading ===
Apprentice-level cleric villagers sell one lapis lazuli for an [[emerald]] as part of their trades.
{{IN|bedrock}}, [[wandering trader]]s may sell 3 lapis lazuli for an emerald.
=== Chest loot ===
{{see also|Lapis Lazuli Ore#Natural generation}}
{{LootChestItem|lapis-lazuli}}
== Usage ==
=== Enchanting ===
1–3 pieces of lapis lazuli are required to use an [[Enchanting Table|enchanting table]] to enchant an [[items|item]]. More specifically, the enchanting table UI shows 3 options (see [[Enchanting mechanics]] for details): the first, second, and third options cost 1, 2, and 3 lapis lazuli, respectively.
=== Crafting ingredient ===
Lapis lazuli can be used to make [[blocks of lapis lazuli]] and [[blue dye]]. {{IN|bedrock}}, it can also be used directly as a substitute for blue dye.
{{crafting usage}}
{{IN|bedrock}}, lapis lazuli can be also used in banner patterns:
{{banner crafting usage}}
=== Loom ingredient ===
{{Banner loom usage|Lapis Lazuli}}
=== Dye ===
{{Dye usage}}
=== Smithing ingredient ===
{{Smithing
|head=1
|ingredients=Any Armor Trim +<br/>Any Armor Piece + <br/>Lapis Lazuli
|Any Armor Trim Smithing Template
|Netherite Chestplate
|Lapis Lazuli
|Lapis Trim Netherite Chestplate
|showdescription=1
|description = All armor types can be used in this recipe,<br/>a netherite chestplate is shown as an example.<br/>
|tail=1
}}
;Trim color palette
The following color palette is shown on the designs on trimmed armor:
*{{TrimPalette|lapis lazuli}}
== Data values ==
=== ID ===
{{edition|java}}:
{{ID table
|edition=java
|showforms=y
|generatetranslationkeys=y
|displayname=Lapis Lazuli
|spritetype=item
|nameid=lapis_lazuli
|form=item
|foot=1}}
{{edition|bedrock}}:
{{ID table
|edition=bedrock
|showaliasids=y
|shownumericids=y
|showforms=y
|notshowbeitemforms=y
|generatetranslationkeys=y
|displayname=Lapis Lazuli
|spritetype=item
|nameid=lapis_lazuli
|aliasid=dye / 4
|id=414
|form=item
|translationkey=item.dye.blue.name
|foot=1}}
== Advancements ==
{{load advancements|Enchanter}}
== History ==
{{History|java beta}}
{{History||1.2|[[File:Lapis Lazuli JE1 BE1.png|32px]] Added lapis lazuli.}}
{{History||1.2_02|[[Lapis lazuli ore]] can now be found at [[bedrock]] level and now drops 4–8 lapis lazuli per block mined (increased from 1) on [[singleplayer]] only. However, servers have not been affected yet.}}
{{History||1.8|snap=Pre-release|Lapis lazuli can now be found in [[mineshaft]] [[chest]]s.}}
{{History|java}}
{{History||1.4.2|snap=12w34a|Lapis lazuli can now be used to [[Armor#Dyeing|dye]] leather [[armor]] and [[wolf]] collars.}}
{{History||1.4.6|snap=12w49a|Lapis lazuli can now be [[crafting|crafted]] with [[gunpowder]] to create a [[firework star]].}}
{{History||1.6.1|snap=13w19a|Lapis lazuli can now be used to craft blue [[stained clay]].}}
{{History||1.7.2|snap=13w41a|Lapis lazuli can now be used to craft blue [[stained glass]].}}
{{History||1.8|snap=14w02a|[[Enchanting]] now requires lapis lazuli. Different enchantments require different amounts of levels and different amounts of levels now require different amounts of lapis lazuli (between 1-3).
|Cleric [[villager]]s now [[trading|sell]] 1–2 lapis lazuli for 1 [[emerald]], making it a [[renewable resource]].}}
{{History|||snap=14w30a|Lapis lazuli can now be used to dye [[banner]]s.}}
{{History||1.9|snap=15w44a|The average yield of lapis lazuli in [[mineshaft]] [[chest]]s has been decreased.}}{{History||1.11|snap=16w39a|Added the ability to dye [[shulker box]]es.}}
{{History||1.12|snap=17w06a|Can now be used to craft blue [[concrete powder]].}}
{{History|||snap=17w15a|Added the ability to dye [[bed]]s.}}
{{History||1.13|snap=17w47a|The different data values for the <code>dye</code> ID have been split up into their own IDs.
|Prior to [[1.13/Flattening|''The Flattening'']], this [[item]]'s numeral ID was 351.}}
{{History|||snap=18w11a|Lapis lazuli now generates in [[shipwreck]] [[chest]]s.}}
{{History||1.14|snap=18w43a|Lapis lazuli can now be used to craft [[blue dye]].
|Lapis lazuli can no longer be used as a [[dye]].
|All of the dye-related functions and crafting recipes of lapis lazuli (except lapis lazuli blocks) have been transferred to blue dye.
|[[File:Lapis Lazuli JE2 BE2.png|32px]] The texture of lapis lazuli has been changed.}}
{{History|||snap=18w50a|Lapis lazuli can now be found in chests in [[village]] temples.}}
{{History|||snap=19w13a|Cleric villagers now give lapis lazuli to players under the [[Hero of the Village]] effect.}}
{{History||1.17|snap=21w08a|Lapis lazuli can now drop and be smelted from [[deepslate lapis lazuli ore]].}}
{{History||1.20<br>(Experimental)|link=1.19.4|snap=23w04a|Lapis lazuli can now be used as an armor trim material.}}
{{History|pocket alpha}}
{{History||v0.3.0|[[File:Lapis Lazuli JE1 BE1.png|32px]] Added lapis lazuli.}}
{{History||v0.3.2|Lapis lazuli can now be crafted into lapis lazuli blocks, and vice versa.}}
{{History||v0.12.1|snap=build 1|Lapis lazuli is now required for [[enchanting]].}}
{{History||v0.14.0|snap=build 1|Lapis lazuli can now be found inside [[minecart with chest]]s in [[mineshaft]]s.
|Lapis lazuli can now be used to dye [[water]] in [[cauldron]]s.}}
{{History|pocket}}
{{History||1.0.4|snap=alpha 1.0.4.0|Cleric [[villager]]s now [[trading|sell]] 1–2 lapis lazuli for 1 [[emerald]].
|Lapis lazuli can now be used to [[dyeing|dye]] [[shulker shell]]s.}}
{{History||1.1.0|snap=alpha 1.1.0.0|Lapis lazuli can now be used to dye [[shulker box]]es and [[bed]]s.
|Lapis lazuli can now be used to [[crafting|craft]] blue [[concrete powder]].}}
{{History|bedrock}}
{{History||1.2.0|snap=beta 1.2.0.2|Lapis lazuli can now be used to dye [[banner]]s, [[firework star]]s and [[glass]].}}
{{History||1.4.0|snap=beta 1.2.14.2|Lapis lazuli can now be found in [[shipwreck]] treasure chests.}}
{{History|||snap=beta 1.2.20.1|Lapis lazuli can now be used to craft [[balloon]]s and [[glow stick]]s.}}
{{History||1.8.0|snap=beta 1.8.0.10|Lapis lazuli can now be used to craft [[blue dye]]s.}}
{{History||1.10.0|snap=beta 1.10.0.3|Lapis lazuli are now [[trading|sold]] by [[wandering trader]]s.
|[[File:Lapis Lazuli JE2 BE2.png|32px]] The texture of lapis lazuli has been changed.}}
{{History||1.11.0|snap=beta 1.11.0.1|Lapis lazuli can now be found in [[desert]] [[village]] temple [[chest]]s.}}
{{History|||snap=beta 1.11.0.4|Cleric [[villager]]s now [[trading|sell]] one lapis lazuli for one [[emerald]].}}
{{History||1.16.100|snap=beta 1.16.100.56|The ID of lapis lazuli has been changed from <code>dye/4</code> to <code>lapis_lazuli</code>.}}
{{History||1.17.0|snap=beta 1.16.230.52|Lapis lazuli can now drop and be smelted from [[deepslate lapis lazuli ore]].}}
{{History||1.19.80|snap=beta 1.19.80.21|Lapis lazuli can now be used as an armor trim material.}}
{{History|console}}
{{History||xbox=TU1|xbone=CU1|ps=1.0|wiiu=Patch 1|switch=1.0.1|[[File:Lapis Lazuli JE1 BE1.png|32px]] Added lapis lazuli.}}
{{History||xbox=TU31|xbone=CU19|ps=1.22|wiiu=Patch 3|switch=1.0.1|Lapis lazuli can now be used in [[enchanting]].}}
{{History|Ps4}}
{{History||1.90|[[File:Lapis Lazuli JE2 BE2.png|32px]] The texture of lapis lazuli has been changed.}}
{{History|foot}}
== Issues ==
{{issue list}}
== Trivia ==
* In real life, lapis lazuli is a blue gem that can be ground and processed into ultramarine pigment. Lapis lazuli pigment has been famously used in the production of illuminated manuscripts, stained glass, and cave paintings. [[Wikipedia:Lapis lazuli|See the Wikipedia article for more information]].
* Lapis lazuli is the only [[ore]] that can be used as a [[dye]]{{only|BE|short=1}} or making a dye.
* It is the only item that can be put in the second slot of an [[enchantment table]].
== References ==
{{reflist}}
{{Items}}
[[Category:Dyes]]
[[cs:Lazurit]]
[[de:Lapislazuli]]
[[es:Lapislázuli]]
[[fr:Lapis-lazuli]]
[[hu:Lazurit]]
[[ja:ラピスラズリ]]
[[ko:청금석]]
[[nl:Lapis lazuli]]
[[pl:Lazuryt]]
[[pt:Lápis-lazúli]]
[[ru:Лазурит]]
[[th:แร่แลพิสแลซูลี]]
[[uk:Лазурит]]
[[zh:青金石]]
[[Category:Renewable resources]]</li></ul> | Test Build 3 | Players hurting themselves with arrows no longer causes all of their tamed wolves to attack them. | |||
1.8{{Extension DPL}}<ul><li>[[Le Tricolore|Le Tricolore]]<br/>{{Exclusive|Java}}
{{Joke feature}}
{{Item
| image =
| renewable = Yes
| stackable = Yes (64)
}}
'''Le Tricolore''' (French for ''The Tricolour'') is a joke item from [[Java Edition 23w13a_or_b]].
== Obtaining ==
One le tricolore and one [[la baguette]] is given to all players when [[French mode]] gets activated. Deactivating the mode will remove le tricolore from the player's inventory (but not la baguette; [[container]]s such as [[chest]]s are not affected).
Le Tricolore is not available in the creative inventory, but can be obtained by using the {{cmd|give}} command.
== Data values ==
=== ID ===
{{ID table
|showforms=y
|generatetranslationkeys=java
|displayname=Le Tricolore
|spritetype=item
|nameid=le_tricolore
|form=item
|foot=1}}
== History ==
{{History|java}}
{{History||23w13a or b|[[File:Le Tricolore.png|32px]] Added Le Tricolore.}}
{{History|foot}}
{{Items}}
{{Jokes}}
[[Category:Joke items]]
[[ja:Le Tricolore]]
[[pt:Le Tricolore]]</li><li>[[Painting|Painting]]<br/>{{ItemEntity
|title=Painting
|image=Painting JE2 BE2.png
|extratext=View [[#Renders|all renders]]
|renewable=Yes
|stackable=Yes (64)
|drops=1 {{ItemLink|Painting}}
}}
'''Paintings''' are decorative [[entity|entities]] that hang on walls.
== Obtaining ==
=== Crafting ===
{{Crafting
|A1= Stick |B1= Stick |C1= Stick
|A2= Stick |B2= Any Wool |C2= Stick
|A3= Stick |B3= Stick |C3= Stick
|Output= Painting
|type= Decoration block
}}
Paintings can be crafted with any color of [[wool]]. The color of the wool used does not influence the picture chosen when the painting is placed.
Once placed, it displays a random painting.
=== Breaking ===
To remove a painting from a wall, the player can {{control|attack}} it, break one of its supporting blocks, cover one square of it with a block, hit it with an arrow, egg, ender pearl, snowball, or fire charge, or subject it to an explosion. The painting then drops as an item. Arrows that hit paintings disappear.
=== Trading ===
Master-level shepherd [[villager]]s sell 3 paintings for 2 [[emerald]]s.
== Usage ==
=== Placement ===
Paintings can be placed on the sides of [[solid block]]s, [[sign]]s, [[banner]]s, or [[sculk vein]]s. A small gap is visible between the painting and attachment surface. There are several different sizes of paintings (see below). When placed, a painting checks for the largest amount of space it has. It then chooses a random painting of that size. The player can add blocks around the painting to ensure it is the size wanted. When the supporting blocks are removed, the painting breaks after 20 game [[tick]]s (1 second) if no supporting blocks are replaced during that interval.
=== Properties ===
Being an entity, paintings can simultaneously exist in the same space as blocks such as water or torches. Specifically, they can share the space with any block whose collision box does not intersect its hitbox.
Players and mobs are able to walk through paintings, as long as the blocks supporting the painting allow it. Secret doorways can be created this way. [[Light]] propagates through paintings as well.
If a player is concealed behind a painting, the player's name is also concealed from other players.{{verify|Is this true in Bedrock?}}
Paintings are non-flammable.
== Canvases ==
{{Stub|Needing the new painting renders}}
There are 31 paintings in the game. These are mostly based on paintings by [[Kristoffer Zetterstrand]], who also created the ''Minecraft'' versions.
{| class="wikitable stikitable" style="text-align: center" data-description="Paintings"
! style="min-width:150px" |Canvas
! style="min-width:3em;max-width:4em" |Size
! style="min-width:3em" |Original
! style="min-width:3em" |Name
! style="min-width:3em;max-width:4.5em" |[[Resource location]]
! style="min-width:10em" |Description
! Java Edition version added
|-
! [[File:Alban (texture).png|64px]]
| rowspan="7" | 1×1 blocks<br>16×16 pixels || [https://zetterstrand.com/work/pictures/archive/alban.jpeg "Albanian"] || Albanian || <code>alban</code> || A man wearing a fez next to a house and a bush. As the name of the painting suggests, it may be a landscape in [[Wikipedia:Albania|Albania]]. || rowspan="9" | [[Indev 20100223]]
|-
! [[File:Aztec (texture).png|64px]]
|[https://zetterstrand.com/eventz/wp-content/uploads/2aztbig.jpg "de_aztec"]|| de_aztec || <code>aztec</code> || [[Wikipedia:Noclip mode|Free-look]] perspective of the map [[w:c:counterstrike:Aztec|de_aztec]] from the video game ''[[Wikipedia:Counter-Strike (video game)|Counter-Strike]]''.
|-
! [[File:Aztec2 (texture).png|64px]]
|[https://zetterstrand.com/eventz/wp-content/uploads/11aztec_for_print.jpg "de_aztec"]|| de_aztec || <code>aztec2</code> || [[Wikipedia:Noclip mode|Free-look]] perspective of the map [[w:c:counterstrike:Aztec|de_aztec]] from the video game ''[[Wikipedia:Counter-Strike (video game)|Counter-Strike]]''.
|-
! [[File:Bomb (texture).png|64px]]
|[https://zetterstrand.com/eventz/wp-content/uploads/12bomb.jpg "Target successfully bombed"]|| Target Successfully Bombed || <code>bomb</code> || The map [[w:c:counterstrike:Dust II|de_dust2]] from the video game ''[[Wikipedia:Counter-Strike (video game)|Counter-Strike]]'', named “target successfully bombed" in reference to the game.
|-
! [[File:Kebab (texture).png|64px]]
|[https://zetterstrand.com/work/pictures/archive/kebab2.jpg "Kebab med tre pepperoni"] || Kebab med tre pepperoni || <code>kebab</code> || A kebab with three green chili peppers.
|-
! [[File:Plant (texture).png|64px]]
|[https://zetterstrand.com/work/pictures/archive/paradistrad.jpeg "Paradisträd"] || Paradisträd || <code>plant</code> || Still life of two plants in pots. "Paradisträd" is Swedish for "[[Wikipedia:Crassula ovata|money tree]]", which is a common name for the depicted species in Scandinavia.
|-
! [[File:Wasteland (texture).png|64px]]
|[https://zetterstrand.com/eventz/wp-content/uploads/Wasteland_1920.jpg "Wasteland"]|| Wasteland || <code>wasteland</code> || A view of some wastelands; a small animal (presumably a rabbit) is sitting on the window ledge.
|-
! [[File:Courbet (texture).png|128px]]
| rowspan="5" | 2×1 blocks<br>32×16 pixels ||[https://zetterstrand.com/eventz/wp-content/uploads/bonjourmonsieurcourbet_BIG.jpg "Bonjour monsieur Courbet"]|| Bonjour Monsieur Courbet || <code>courbet</code> || Two hikers with pointy beards seemingly greeting each other. Based on Gustave Courbet's painting ''[[Wikipedia:La rencontre|The Meeting or "Bonjour, Monsieur Courbet"]]''.
|-
! [[File:Pool (texture).png|128px]]
|[https://zetterstrand.com/eventz/wp-content/uploads/thepool_1920.jpg "The pool"]|| The Pool || <code>pool</code> || Some men and women skinny-dipping in a pool over a cube of sorts. Also there is an old man resting in the lower-right edge.
|-
! [[File:Sea (texture).png|128px]]
| rowspan=2 |[https://zetterstrand.com/eventz/wp-content/uploads/SeaSide_1920.jpg "Seaside"]
| Seaside
| <code>sea</code>
| Mountains and a lake, with a small photo of a mountain and a bright-colored plant on the window ledge. || [[Indev 20100223]] / [[Alpha v1.1.1]]
|-
! [[File:Creebet (texture).png|128px]]
| Creebet || <code>creebet</code> || Mountains and a lake, with a small photo of a mountain and a creeper looking at the viewer through a window. || [[Alpha v1.1.1]]
|-
! [[File:Sunset (texture).png|128px]]
|[https://zetterstrand.com/eventz/wp-content/uploads/sunset_dense.jpg "sunset_dense"]|| sunset_dense || <code>sunset</code> || A view of mountains at sunset. || [[Indev 20100223]]
|-
! [[File:Graham (texture).png|64px]]
| rowspan="2" | 1×2 blocks<br>16×32 pixels ||[https://zetterstrand.com/eventz/wp-content/uploads/graham.jpg "Graham"]|| Graham || <code>graham</code> || King Graham, the player character in the video game series ''[[Wikipedia:King's Quest|King's Quest]]''. The original is based on ''[[Wikipedia:File:Sánchez_Cotán_(Bodegón_con_membrillo,_repollo,_melón_y_pepino).jpg|Still Life with Quince, Cabbage, Melon, and Cucumber]]'' by Juan Sánchez Cotán.|| [[Alpha v1.1.1]]
|-
! [[File:Wanderer (texture).png|64px]]
|[https://zetterstrand.com/eventz/wp-content/uploads/wanderer_1920.jpg "Wanderer"]|| Wanderer || <code>wanderer</code> || A version of Caspar David Friedrich's famous painting ''[[Wikipedia:Wanderer above the Sea of Fog|Wanderer above the Sea of Fog]]''. || rowspan="4" | [[Indev 20100223]]
|-
! [[File:Bust (texture).png|128px]]
| rowspan="6" | 2×2 blocks<br>32×32 pixels ||[https://zetterstrand.com/eventz/wp-content/uploads/bust_1915.jpg "Bust"]|| Bust || <code>bust</code> || A bust of [[Wikipedia:Marcus Aurelius|Marcus Aurelius]] surrounded by fire.
|-
! [[File:Match (texture).png|128px]]
|[https://zetterstrand.com/eventz/wp-content/uploads/Match_rgb_1918.jpg "Match"]|| Match || <code>match</code> || A hand holding a match, causing fire on a white cubic gas fireplace.
|-
! [[File:Skull and Roses (texture).png|128px]]
|[https://zetterstrand.com/eventz/wp-content/uploads/moonlight-installation_1920.jpg "Moonlight Installation"]|| Skull and Roses || <code>skull_and_roses</code> || A skeleton at night with red flowers in the foreground. The original painting was different, depicting a woman sitting in a couch, while the skull is in the middle of a body of glacial water of sorts.
|-
! [[File:Stage (texture).png|128px]]
|[https://zetterstrand.com/eventz/wp-content/uploads/The-stage-is-set-1.jpg "The stage is set"]
| The Stage Is Set
| <code>stage</code>
| Scenery from ''[[Wikipedia:Space Quest I|Space Quest I]]'', with the character Graham from the video game series ''[[Wikipedia:King's Quest|King's Quest]]'' appearing twice. || [[Indev 20100223]] / [[Alpha v1.1.1]]
|-
! [[File:Void (texture).png|128px]]
|[https://zetterstrand.com/eventz/wp-content/uploads/the-void_1920.jpg "The Void"]|| The void || <code>void</code> || An angel praying into a void with fire below. || [[Indev 20100223]]
|-
! [[File:Wither (painting texture).png|128px]]
| – || Wither || <code>wither</code> || The creation of a [[wither]].
This is the only painting not based on a real painting. Made by Jens Bergensten.<ref>{{Citation|url=https://www.youtube.com/watch?v=kK5Y4k-vVXc|title=Who Made Minecraft’s LAST Painting?!|author=AntVenom|website=YouTube|date=29 October 2022}}</ref><ref>https://www.reddit.com/r/Minecraft/comments/1tzav2/comment/cedagcy/</ref>
|| [[Java Edition 1.4.2]] ([[12w36a]])
|-
! [[File:Fighters (texture).png|128px]]
| 4×2 blocks<br>64×32 pixels ||[https://zetterstrand.com/eventz/wp-content/uploads/fighters.jpg "Fighters"]|| Fighters || <code>fighters</code> || Two men poised to fight. Paper versions of fighters from the game ''[[Wikipedia:International Karate +|International Karate +]]''. || [[Indev 20100223]]
|-
! [[File:Donkey Kong (texture).png|128px]]
| rowspan="2" | 4×3 blocks<br>64×48 pixels ||[https://zetterstrand.com/eventz/wp-content/uploads/kong.jpg "Kong"]|| Kong || <code>donkey_kong</code> || A paper-looking screenshot of the level [https://www.mariowiki.com/100m 100m] from the arcade game ''[[Wikipedia:Donkey Kong (arcade game)|Donkey Kong]]''. || rowspan="2" | [[Alpha v1.1.1]]
|-
! [[File:Skeleton (painting texture).png|128px]]
|[https://zetterstrand.com/eventz/wp-content/uploads/mortal_coil.jpg "Mortal Coil"]|| Mortal Coil || <code>skeleton</code> || [[w:c:grim-fandango:Bruno Martinez|Bruno Martinez]] from the adventure game ''[[Wikipedia:Grim Fandango|Grim Fandango]]''.
|-
! [[File:Burning Skull (texture).png|128px]]
| rowspan="3" | 4×4 blocks<br>64×64 pixels ||[https://zetterstrand.com/eventz/wp-content/uploads/skull_on_fire_framed_c_1910.jpg "Skull on Fire"]|| Skull On Fire || <code>burning_skull</code> || A Skull on fire; in the background there is a moon in a clear night sky.<br>This painting is based on a Minecraft screenshot,<ref>{{Citation|url=https://web.archive.org/web/20220928041338/https://imgur.com/HVhrbnH|website=Imgur|date=22 August 2020|title=https://web.archive.org/web/20220928041338/https://imgur.com/HVhrbnH}}</ref> with the grass block and a 3D skull added on top.<ref>{{Citation|url=https://web.archive.org/web/20200906184721/https://imgur.com/AwqQFS6|title=https://web.archive.org/web/20200906184721/https://imgur.com/AwqQFS6|website=Imgur|date=23 August 2020}}</ref>
(See the [[:en:Painting#Trivia|trivia]] section for more info.)
| [[Java Edition Beta 1.2 01|Beta 1.2_01]] / [[Java Edition Beta 1.3|Beta 1.3]]
|-
! [[File:Pigscene (texture).png|128px]]
|[https://zetterstrand.com/eventz/wp-content/uploads/rgb_1914.jpg "RGB"]|| Pigscene || <code>pigscene</code> <!-- yes, without an underscore --> || A girl pointing to a pig on a canvas. In the original version, the canvas showed red, green and blue blocks, representing the three colors of the [[Wikipedia:RGB color model|RGB color model]] that is typically used by computer displays. It is based on the painting ''[[Wikipedia:File:Jacob van Oost (I) - The Artist's Studio - WGA16654.jpg|The Artist's Studio]]'' by Jacob van Oost.|| [[Alpha v1.1.1]]
|-
! [[File:Pointer (texture).png|128px]]
|[https://zetterstrand.com/eventz/wp-content/uploads/pointer_1920.jpg "Pointer"]|| Pointer || <code>pointer</code> || The main character of the game ''[[Wikipedia:International Karate +|International Karate +]]'' in a fighting stance touching a large hand. It could also be interpreted as a play on Michelangelo's famous painting ''[[Wikipedia:The Creation of Adam|The Creation of Adam]]''. || [[Indev 20100223]]
|-
! TBA ||
Pack || <code>pack</code> || Reference to the pack.png fi || [[Java Edition 1.21]]le
|}
=== Unused paintings ===
In [[Pocket Edition v0.5.0 alpha|v0.5.0 alpha]], with the addition of paintings to Pocket Edition, four unused 32×32 paintings were present in <samp>[[kz.png]]</samp> which remained unused. See {{slink|Bedrock Edition unused features|Paintings}} for more information. They were also added to Java Edition in snapshot [[Java Edition 22w16a|22w16a]]. They cannot be placed by default, but can be summoned by [[commands]] (such as {{cmd|/summon painting ~ ~ ~ {variant:"water"} }}) or through a [[datapack]].
According to [[Helen Zbihlyj]],<ref>https://old.reddit.com/r/Minecraft/comments/u8hpnx/thoughts_on_the_new_paintings/i5olue6/?context=3 ([https://web.archive.org/web/20220422115723/https://old.reddit.com/r/Minecraft/comments/u8hpnx/thoughts_on_the_new_paintings/i5olue6/?context=3 archived])</ref> these paintings were originally added "as part of a Pocket Edition promo map" (no footage found) which was planned to be a part of [[Pocket Edition]] promotion at [[MINECON 2012]] [[MINECON 2013|or 2013]] and have never been used in game. The artist of these paintings remains unknown.
{| class="wikitable stikitable" style="text-align: center" data-description="Paintings"
! style="min-width:100px" |Canvas
! style="min-width:3em;max-width:4em" |Size
! style="min-width:6em" |Name
! style="min-width:10em" |[[Resource location]]
! style="min-width:10em" |Description
! style="min-width:5em;max-width:10em" |Bedrock Edition version added
! style="min-width:5em;max-width:8em" |Java Edition version added
|-
! [[File:Earth (texture) BE2.png|128px]]
| rowspan="4" | 2×2 blocks<br>32×32 pixels || Earth || <code>earth</code> || One of the four {{Wikipedia|Classical element|classical elements}}: Earth. || rowspan="4" | [[Pocket Edition v0.5.0 alpha|v0.5.0 alpha]] || rowspan="4" | [[Java Edition 22w16a|22w16a]]
|-
! [[File:Fire (texture) BE2.png|128px]]
| Fire || <code>fire</code> || One of the four classical elements: Fire.
|-
! [[File:Water (texture) BE2.png|128px]]
| Water || <code>water</code> || One of the four classical elements: Water.
|-
! [[File:Wind (texture) BE2.png|128px]]
| Wind || <code>wind</code> || One of the four classical elements: Air.
|}
==Sounds==
{{Edition|Java}}:
{{Sound table
|sound=Painting break1.ogg
|sound2=Painting break2.ogg
|sound3=Painting break3.ogg
|subtitle=Painting breaks<ref>{{Cite bug|MC|194948|Painting, item frame and lead breaking subtitles inconsistent with block breaking subtitle|date=July 14, 2020}}</ref>
|source=neutral
|description=When a painting is broken or pops off
|id=entity.painting.break
|translationkey=subtitles.entity.painting.break
|volume=1.0
|pitch=1.0
|distance=16}}
{{Sound table
|sound=Painting place1.ogg
|sound2=Painting place2.ogg
|sound3=Painting place3.ogg
|sound4=Painting place4.ogg
|subtitle=Painting placed
|source=neutral
|description=When a painting is placed
|id=entity.painting.place
|translationkey=subtitles.entity.painting.place
|volume=1.0
|pitch=1.0
|distance=16
|foot=1}}
{{Edition|Bedrock}}:
{{Sound table
|type=bedrock
|sound=Item Frame break1.ogg
|sound2=Item Frame break2.ogg
|sound3=Item Frame break3.ogg
|source=block
|description=When a painting is broken or pops off
|id=block.itemframe.break
|volume=1.0
|pitch=1.0}}
{{Sound table
|sound=Item Frame add item1.ogg
|sound2=Item Frame add item2.ogg
|soumd3=Item Frame add item3.ogg
|sound4=Item Frame add item4.ogg
|source=block
|description=When a painting is placed
|id=block.itemframe.add_item
|volume=1.0
|pitch=1.0
|foot=1}}
== Data values ==
=== ID ===
{{edition|java}}:
{{ID table
|edition=java
|firstcolumnname=Item
|showforms=y
|generatetranslationkeys=y
|displayname=Painting
|spritetype=item
|nameid=painting
|form=item
|foot=1}}
{{ID table
|edition=java
|firstcolumnname=Entity
|generatetranslationkeys=y
|displayname=Painting
|spritetype=entity
|nameid=painting
|foot=1}}
{{edition|bedrock}}:
{{ID table
|edition=bedrock
|firstcolumnname=Item
|shownumericids=y
|showforms=y
|notshowbeitemforms=y
|generatetranslationkeys=y
|displayname=Painting
|spritetype=item
|nameid=painting
|id=357
|form=item
|foot=1}}
{{ID table
|edition=bedrock
|firstcolumnname=Entity
|shownumericids=y
|generatetranslationkeys=y
|displayname=Painting
|spritetype=entity
|nameid=painting
|id=83
|foot=1}}
=== Entity data ===
Paintings have entity data that defines various properties of the entity.
{{el|java}}:
{{main|Entity format}}
{{/ED}}
{{el|bedrock}}:
: See [[Bedrock Edition level format/Entity format]].
== Video ==
<div style="text-align:center">{{yt|M3vWDirTMek}}</div>
== History ==
{{History|java indev}}
{{History||20100223|[[File:Painting JE1 BE1.png|32px]] Added paintings.
|There are currently 19 canvases, which can be viewed at [[Java Edition history of textures/Paintings]].
|The [[crafting]] recipe of paintings uses eight [[planks]].
{{{!}} class{{=}}"collapsible collapsed"
! Recipe
{{!}}-
{{!}}
{{Crafting Table
|A1=Oak Planks
|B1=Oak Planks
|C1=Oak Planks
|A2=Oak Planks
|B2=Light Gray Wool
|C2=Oak Planks
|A3=Oak Planks
|B3=Oak Planks
|C3=Oak Planks
|Output=Painting
}}
{{!}}}
|Painting textures are currently stored on a [[texture atlas]] called <samp>[[kz.png]]</samp>.}}
{{History|java infdev}}
{{History||20100227-1|The [[crafting]] recipe has of paintings has been changed, so that it now uses [[stick]]s, rather than [[planks]].
{{{!}} class{{=}}"collapsible collapsed"
! Recipe
{{!}}-
{{!}}
{{Crafting Table
|A1=Stick
|B1=Stick
|C1=Stick
|A2=Stick
|B2=Light Gray Wool
|C2=Stick
|A3=Stick
|B3=Stick
|C3=Stick
|Output=Painting
}}
{{!}}}
}}
{{History|java alpha}}
{{History||v1.1.1|Added five more painting canvases, for a total of 24.
|The textures of two paintings have been changed.}}
{{History|java beta}}
{{History||1.2_01|Added a new painting, although it uses an untextured part of <samp>kz.png</samp> due to the painting texture not yet being implemented.}}
{{History||1.3|The texture of the new painting, has been added to the part of <samp>kz.png</samp> displayed by the new painting.}}
{{History||April 27, 2011|link=https://web.archive.org/web/20201111211000/https://notch.tumblr.com/post/4988431144/the-maps|Custom paintings are mentioned by [[Notch]].}}
{{History||1.7.3|Paintings pushed by [[piston]]s now pop off.}}
{{History|java}}
{{History||1.4.2|snap=12w36a|Added new painting canvas 'Wither'.
|Paintings can now be placed overlapping one another.}}
{{History||1.8|snap=14w10a|Paintings can no longer be placed directly inside of each other.}}
{{History||1.9|snap=15w49a|Paintings can no longer be destroyed by [[lightning]].}}
{{History|||snap=15w50a|Added [[sound]]s for placing and breaking paintings: <code>entity.painting.place</code> and <code>entity.painting.break</code>.}}
{{History||1.11|snap=16w32a|The [[entity]] ID for paintings has been changed from <code>Painting</code> to <code>painting</code>.}}
{{History||1.12|snap=17w06a|Paintings now have a more intuitive placement system. When placed, a painting always uses the maximum possible amount of available space.}}
{{History||1.13|snap=17w47a|Prior to [[1.13/Flattening|''The Flattening'']], this [[item]]'s numeral ID was 321.}}
{{History|||snap=18w02a|Paintings now use a [[resource location]] for their motive.}}
{{History||1.14|snap=18w43a|[[File:Painting JE2 BE2.png|32px]] The [[item]] texture of paintings has been changed.}}
{{History|||snap=19w07a|Paintings are now stored as individual image files instead of parts of a single large image file, and now support animations.}}
{{History|||snap=19w11a|Shepherd [[villager]]s now [[trading|sell]] paintings.}}
{{History||1.17|snap=21w11a|The painting back texture has been updated to be in line with the texture update.}}
{{History||1.19|snap=22w16a|Added the four unused paintings from Bedrock Edition: "Earth", "Wind", "Fire", and "Water".|These paintings can only be added through a [[data pack]], or with the {{cmd|summon}} command.}}
{{History||1.19.4|snap=23w06a|Added [[painting]] variants to "Functional Blocks" tab.|Paintings with pre-defined variant will now display author, title and size in description when hovered over.|The "Operator Utilities" tab now contains the four paintings that are not available in Survival mode.}}
{{History||1.21|snap=TBA|Added 5 new paintings, one 1x1, one 2x1, one 2x2, one 3x2 and one 4x4}}
}
{{History|pocket alpha}}
{{History||v0.5.0|[[File:Painting JE1 BE1.png|32px]] Added paintings.
|There are currently 25 canvases, which can be viewed at [[Bedrock Edition history of textures/Paintings]].}}
{{History||v0.8.0|snap=build 3|A new painting rendering has been added.{{info needed|What exactly changed?}}}}
{{History||v0.12.1|snap=build 1|Paintings are no longer available from the [[nether reactor]].}}
{{History||v0.15.0|snap=build 1|Paintings now have [[sound]]s when placed and broken.}}
{{History|pocket}}
{{History||1.0.7|Added new painting canvas 'Wither'.}}
{{History|bedrock}}
{{History||1.10.0|snap=beta 1.10.0.3|[[File:Painting JE2 BE2.png|32px]] The [[item]] texture of paintings has been changed.}}
{{History||1.11.0|snap=beta 1.11.0.4|Paintings can now be [[trading|bought]] from shepherd [[villager]]s.}}
{{History||1.17.0|snap=beta 1.17.0.50|The painting back texture has been updated to be in line with the texture update.}}
{{History|console}}
{{History||xbox=TU1|xbone=CU1|ps=1.0|wiiu=Patch 1|switch=1.0.1|[[File:Painting JE1 BE1.png|32px]] Added paintings.
|There are currently 25 canvases, which can be viewed at [[Legacy Console Edition history of textures/Paintings]].}}
{{History||xbox=TU11|The limit for paintings in a world has been increased.
|A message is now displayed when the maximum paintings are reached.}}
{{History||xbox=TU14|ps=1.04|Added new painting canvas 'Wither'.}}
{{History||xbox=TU43|xbone=CU33|ps=1.36|wiiu=Patch 13|Added [[sound]]s for paintings.}}
{{History||xbox=none|xbone=none|ps=1.90|wiiu=none|switch=none|[[File:Painting JE2 BE2.png|32px]] The [[item]] texture of paintings has been changed.}}
{{History|3ds}}
{{History||0.1.0|[[File:Painting JE1 BE1.png|32px]] Added paintings.
|There are currently 25 canvases, which can be viewed at [[New Nintendo 3DS Edition history of textures/Paintings]].}}
{{History|foot}}
== Issues ==
{{issue list}}
== Trivia ==
* On April 26, 2011, Notch stated that the automapping code can be used to share custom paintings and books in the future.<ref>{{tweet|notch|62970142207913984|The auto mapping code can be used to share custom paintings and books in the future. There's a hard cap on 65536 of each/world, though|April 26, 2011}}</ref>
* The texture on the back of a painting is the same as the wooden planks texture, but with a yellowish color similar to that of [[chests]] (but slightly darker).
* The "Skull on Fire" painting contains a Minecraft world in the background, which is based on a screenshot taken by the artist in [[Java Edition Alpha v1.1.2 01|Alpha 1.1.2_01]] (or earlier) on October 12, 2010, at 13:22:49 (UTC+2).<ref>{{cite|url=https://web.archive.org/web/20220928041338/https://imgur.com/HVhrbnH|title=The original (never publicly shared before) screenshot that Kristoffer Zetterstrand took and based his painting on.|website=Imgur}}</ref>
**The seeds for this world are -1044887956651363087 and -6984854390176336655 (both are the same), standing at X=-249.65, Y=91, Z=-29.04.<ref>https://pastebin.com/fzAY9ES4</ref><ref>https://www.reddit.com/r/Minecraft/comments/iqg3ey/the_original_screenshot_seed_of_the_minecraft/</ref>
* The "Skull on Fire" painting's texture was added in [[Java Edition Beta 1.3|Beta 1.3]]. However, the code for paintings to randomly display the part of the [[Kz.png]] texture that was to be occupied by the Burning Skull painting was added earlier, in [[Java Edition Beta 1.2_01|Beta 1.2_01]]. As there was nothing on this part of the texture except for a purple background grid, this is what would be displayed if the painting was randomly chosen, until the Burning Skull painting texture was actually added.
* The original "Skull on Fire" painting was given to the winner of an official texture pack competition by Mojang.<ref>https://web.archive.org/web/20110110003612/http://www.webhallen.com:80/minecraft/</ref>
== Gallery ==
<gallery>
File:Notch Painting Screenshot.png|The first image of paintings released by [[Notch]].
File:Skull on Fire world.jpg|The original screenshot behind the "Skull on Fire" painting.
File:Burning Skull Render.jpg|A render of the "Skull on Fire" painting that [[Kristoffer Zetterstrand]] used as a reference image.
File:Skull on Fire IRL.jpg|The original "Skull on Fire" painting being painted.
File:Burning Skull JE1.png|The "Skull on Fire" painting as it appeared between versions [[Java Edition Beta 1.2_01|Beta 1.2_01]] and [[Java Edition Beta 1.2_02|Beta 1.2_02]], prior to its texture being added in [[Java Edition Beta 1.3|Beta 1.3]].
</gallery>
=== Renders ===
<gallery>
Alban.png | Albanian
Aztec.png | de_aztec
Aztec2.png | de_aztec
Bomb.png | Target Successfully Bombed
Kebab.png | Kebab med tre pepperoni
Plant.png | Paradisträd
Wasteland.png | Wasteland
Courbet.png | Bonjour Monsieur Courbet
Creebet.png | Creebet
Pool.png | The Pool
Sea.png | Seaside
Sunset.png | sunset_dense
Graham.png | Graham
Wanderer.png | Wanderer
Bust.png | Bust
Match.png | Match
Skull and Roses.png | Skull and Roses
Stage.png | The Stage Is Set
Void.png | The void
Wither (painting).png | Wither
Fighters.png | Fighters
Donkey Kong.png | Kong
Skeleton (painting).png | Mortal Coil
Burning Skull.png | Skull On Fire
Pigscene.png | Pigscene
Pointer.png | Pointer
Earth BE2.png | Earth
Fire BE2.png | Fire
Water BE2.png | Water
Wind BE2.png | Wind
</gallery>
== See also ==
* [[Item Frame]]
* [[Bedrock Edition unused features#Paintings|Unused paintings]]
* [[Kz.png]]
* [[Kristoffer Zetterstrand]]
== References ==
{{reflist}}
== External links ==
*[https://www.minecraft.net/en-us/article/taking-inventory-painting Taking Inventory: Painting] – Minecraft.net on January 18, 2019
{{items}}
{{entities}}
[[cs:Obraz]]
[[de:Gemälde]]
[[es:Cuadro]]
[[fr:Tableau]]
[[hu:Festmény]]
[[it:Quadro]]
[[ja:絵画]]
[[ko:그림]]
[[nl:Schilderij]]
[[pl:Obraz]]
[[pt:Quadro]]
[[ru:Картина]]
[[th:ภาพวาด]]
[[uk:Картина]]
[[zh:画]]</li></ul> | Pre-release | Just like farm animals, wolves no longer despawn, and they now spawn rarely. | |||
| Most wolves now generate with the world. | |||||
| Unknown | |||||
| ? | Wolves now appear angry when attacking sheep. | ||||
| Java Edition | |||||
1.1{{Extension DPL}}<ul><li>[[Lava Bucket|Lava Bucket]]<br/>{{Item
| title = Lava Bucket
| image = Lava Bucket.png
| renewable = Yes
| stackable = No
}}
A '''lava bucket''' is a [[bucket]] filled with [[lava]].
== Obtaining ==
=== Interacting ===
To fill an empty [[bucket]] with lava, {{control|use}} it on a [[lava]] source block or lava in a [[cauldron]]. The block is consumed in the process. Flowing lava does not fill a bucket.
If there is a lava source above the [[pointed dripstone]] stalactite, there is a {{frac|15|256}} (~5.9%) chance for it to completely fill an empty cauldron within 10 blocks under the tip with lava after a [[random tick]]. This lava can then be scooped with a bucket, making it a renewable resource.
==Usage==
A lava bucket can be used to place down lava sources with the {{key|Use Item}} button. Doing so gives the player the bucket back. Lava buckets can be used to replace some transparent, non-full blocks such as [[tall grass]] and [[water]], both flowing and sources.
{{IN|java}}, lava buckets can be used to break [[Nether Portal (block)|Nether portal blocks]] by placing the lava on the side of a block next to the portal block.
=== Smelting ===
A lava bucket can be used as an efficient [[fuel]]. It has the longest burning value of 1000 seconds, compared to 800 seconds for a [[coal block]] (a lava bucket smelts 100 items, and a coal block smelts 80). After smelting starts, the lava bucket turns into an empty bucket.
=== Trading ===
{{IN|bedrock}}, journeyman-level armorer villagers buy a lava bucket for one [[emerald]] as part of their trades.
{{IN|java}}, journeyman-level armorer villagers have a 40% chance of offering to buy a lava bucket for one emerald.
=== Cauldrons ===
A lava bucket can be used to fill a [[cauldron]] with lava. The lava damages any entity standing inside the cauldron, unless the entity is immune to fire damage.<!-- ex: nether mobs--> Flowing water or waterlogging does not affect the lava in the cauldron.
== Sounds ==
{{el|je}}:
{{Sound table
|sound=Fill lava bucket1.ogg
|sound2=Fill lava bucket2.ogg
|sound3=Fill lava bucket3.ogg
|subtitle=Bucket fills
|source=player
|description=When a bucket is filled with lava
|id=item.bucket.fill_lava
|translationkey=subtitles.item.bucket.fill
|volume=1.0
|pitch=1.0
|distance=16}}
{{Sound table
|sound=Empty lava bucket1.ogg
|sound2=Empty lava bucket2.ogg
|sound3=Empty lava bucket3.ogg
|subtitle=Bucket empties
|source=block
|description=When a lava bucket is emptied
|id=item.bucket.empty_lava
|translationkey=subtitles.item.bucket.empty
|volume=1.0
|pitch=1.0
|distance=16
|foot=1}}
{{el|be}}:
{{Sound table
|type=bedrock
|sound=Fill lava bucket1.ogg
|sound2=Fill lava bucket2.ogg
|sound3=Fill lava bucket3.ogg
|source=block
|description=When a bucket is filled with lava
|id=bucket.fill_lava
|volume=1.0
|pitch=1.0}}
{{Sound table
|sound=Empty lava bucket1.ogg
|sound2=Empty lava bucket2.ogg
|sound3=Empty lava bucket3.ogg
|source=block
|description=When a lava bucket is emptied
|id=bucket.empty_lava
|volume=1.0
|pitch=1.0
|foot=1}}
==Data values==
=== ID ===
{{edition|java}}:
{{ID table
|edition=java
|showforms=y
|generatetranslationkeys=y
|displayname=Lava Bucket
|spritetype=item
|nameid=lava_bucket
|form=item
|foot=1}}
{{edition|bedrock}}:
{{ID table
|edition=bedrock
|showaliasids=y
|shownumericids=y
|showforms=y
|notshowbeitemforms=y
|generatetranslationkeys=y
|displayname=Lava Bucket
|spritetype=item
|nameid=lava_bucket
|aliasid=bucket / 10
|id=363
|form=item
|translationkey=item.bucketLava.name
|foot=1}}
== Achievements ==
{{load achievements|Super Fuel}}
== Advancements ==
{{Load advancements|Hot Stuff}}
==History==
{{History|java infdev}}
{{History||20100615|[[File:Lava Bucket JE1 BE1.png|32px]] Added lava buckets.}}
{{History|java alpha}}
{{History||v1.1.0|Buckets of lava can now be used to fuel a [[furnace]] for 100 [[smelting|smelts]], consuming the [[lava]] and the [[bucket]]. This is the highest number of smelts of any single [[item]] in the game.}}
{{History||v1.2.6|{{control|use|text=Using}} a lava bucket on [[block]]s with GUIs ([[chest]]s, furnaces, etc.) no longer places the lava.}}
{{History|java}}
{{History||1.2.1|snap=1.2|Changed name from "Lava bucket" to "Lava Bucket".}}
{{History||1.3|snap=12w22a|[[Smelting]] in a [[furnace]] with a lava bucket now leaves an empty [[bucket]] for the [[player]] to retrieve.}}
{{History||1.8|snap=14w25a|A lava bucket is now shown as the icon when [[lava]] is used as a layer in [[Superflat]].}}
{{History||1.9|snap=15w50a|Added sounds for filling and pouring lava buckets.}}
{{History||1.13|snap=17w47a|Prior to the ''[[Flattening]]'' this item's numerical ID was 327.}}
{{History||1.14|snap=18w43a|[[File:Lava Bucket JE2 BE2.png|32px]] The texture of lava buckets has been changed.}}
{{History|||snap=19w11a|Armorer villagers can now [[trading|buy]] lava buckets.}}
{{History||1.17|snap=20w45a|Lava buckets can now be used to fill a [[cauldron]] with lava.}}
{{History|||snap=21w13a|The lava bucket is now fully renewable, as [[pointed dripstone]] can now be obtained in Survival mode without custom generation.}}
{{History|pocket alpha}}
{{History||v0.7.0|[[File:Lava Bucket JE1 BE1.png|32px]] Added lava buckets.}}
{{History||v0.7.4|Lava buckets can now be used as [[fuel]] in a [[furnace]].
|Lava buckets no longer stack to 64.}}
{{History|bedrock}}
{{History||1.4.0|snap=beta 1.2.14.2|Moved all bucket items, including lava buckets, from the Equipment tab to the Items tab in the [[Creative inventory]].{{verify|type=update}}{{info needed}}<!---please check snapshots, only 1 major release version was checked each--->}}
{{History||1.9.0|snap=beta 1.9.0.2|Lava bucket can now be used to fill a [[cauldron]].}}
{{History||1.10.0|snap=beta 1.10.0.3|[[File:Lava Bucket JE2 BE2.png|32px]] The texture of lava buckets has been changed.}}
{{History||1.11.0|snap=beta 1.11.0.4|Lava buckets can now be [[trading|sold]] to armorer [[villager]]s.}}
{{History||1.16.100|snap=beta 1.16.100.56|The ID of lava buckets has been changed from <code>bucket/10</code> to <code>lava_bucket</code>.}}
{{History||1.17.0|snap=beta 1.16.230.54|The lava bucket is now fully renewable, as [[pointed dripstone]] can now be obtained in Survival mode without custom generation.}}
{{History|console}}
{{History||xbox=TU1|xbone=CU1|ps=1.0|wiiu=Patch 1|switch=1.0.1|[[File:Lava Bucket JE1 BE1.png|32px]] Added lava buckets.}}
{{History||xbox=TU9|[[Dispenser]]s have now been given the ability to shoot out the [[liquids]] inside lava buckets. They can also suck up the liquids if activated again, but do not fill up the [[bucket]]s with the liquid dropped due to a bug.}}
{{History||xbox=none|xbone=none|ps=1.90|wiiu=none|switch=none|[[File:Lava Bucket JE2 BE2.png|32px]] The texture of lava buckets has been changed.}}
{{History|New Nintendo 3DS Edition}}
{{History||0.1.0|[[File:Lava Bucket JE1 BE1.png|32px]] Added lava buckets.}}
{{History|foot}}
== Issues ==
{{Issue list}}
==Trivia==
* One lava bucket has the highest number of [[smelting|smelts]] in the game at 100 items per bucket.
** This makes it 12.5 times more efficient than [[coal]] and [[charcoal]].
* A lava bucket is used as Steve's Down-Smash attack in the crossover fighting game Super Smash Bros. Ultimate.
{{Items}}
[[Category:Renewable resources]]
[[Category:Tools]]
[[de:Lavaeimer]]
[[ja:溶岩入りバケツ]]
[[pt:Balde de lava]]
[[th:ถังลาวา]]
[[uk:Відро лави]]
[[zh:熔岩桶]]</li><li>[[Pumpkin Pie|Pumpkin Pie]]<br/>{{redirect|Pie|the other craftable dessert|Cake|the terrain features|Pile}}
{{Item
| title = Pumpkin Pie
| image = Pumpkin Pie.png
| renewable = Yes
| heals = {{hunger|8}}
| stackable = Yes (64)
}}
'''Pumpkin pie''' is a [[food]] item that can be eaten by the [[player]].
== Obtaining ==
{{see also
| Tutorials/Pumpkin and melon farming |title1= Pumpkin and melon farming
| Tutorials/Sugar Cane farming |title2= Sugar cane farming
| Tutorials/Egg farming |title3= Egg farming
}}
=== Crafting ===
{{Crafting
|Pumpkin
|Sugar
|Egg
|Output= Pumpkin Pie
|type=Foodstuff
}}
=== Trading ===
Apprentice-level farmer [[villager]]s have a 50%{{only|bedrock}} or {{frac|2|3}}{{only|java}} chance to sell 4 pumpkin pies for an emerald as part of their trades.
{{in|java}}, farmer villagers throw pumpkin pies at players under the [[Hero of the Village]] effect.
=== Natural generation ===
{{LootChestItem|pumpkin-pie}}
== Usage ==
=== Food ===
{{see also|Tutorials/Hunger management|title1=Hunger management}}
To eat pumpkin pie, press and hold {{control|use}} while it is selected in the hotbar. Eating one restores {{hunger|8}} [[hunger]] and 4.8 [[:en:Hunger#Mechanics|saturation]].
=== Composting ===
Placing pumpkin pie into a [[composter]] raises the compost level by 1.
==Sounds==
{{Sound table/Entity/Food}}
== Advancements ==
{{load advancements|Husbandry;A Balanced Diet}}
== Data values ==
=== ID ===
{{edition|java}}:
{{ID table
|edition=java
|showforms=y
|generatetranslationkeys=y
|displayname=Pumpkin Pie
|spritetype=item
|nameid=pumpkin_pie
|form=item
|foot=1}}
{{edition|bedrock}}:
{{ID table
|edition=bedrock
|shownumericids=y
|showforms=y
|notshowbeitemforms=y
|generatetranslationkeys=y
|displayname=Pumpkin Pie
|spritetype=item
|nameid=pumpkin_pie
|id=284
|form=item
|foot=1}}
== Video ==
<div style="text-align:center">{{yt|IjeeTE117HM}}</div>
== History ==
{{History|java}}
{{History||September 11, 2012|link=http://twitter.com/jeb_/status/245503714167750656|The first screenshot of pumpkin pie was posted on [[Jens Bergensten|Jeb's]] Twitter.<ref>{{Tweet|jeb|245503714167750656}}</ref><ref>{{Tweet|jeb|245506498099298305}}</ref>}}
{{History||1.4.2|snap=12w37a|[[File:Pumpkin Pie JE1 BE1.png|32px]] Added pumpkin pies.}}
{{History||1.8|snap=14w02a|Pumpkin pie can now be [[trading|bought]] from farmer [[villager]]s, at 2–3 pumpkin pies for 1 [[emerald]].}}
{{History||1.13|snap=17w47a|Prior to [[1.13/Flattening|''The Flattening'']], this [[item]]'s numeral ID was 400.}}
{{History||1.14|snap=18w43a|[[File:Pumpkin Pie JE2 BE2.png|32px]] The texture of pumpkin pie has been changed.}}
{{History|||snap=18w50a|Pumpkin pies now generate in chests in taiga [[village]] houses.}}
{{History|||snap=19w03a|Placing pumpkin pie into the new [[composter]] raises the compost level by 1.}}
{{History|||snap=19w13a|Farmer villagers now give pumpkin pies to players under the [[Hero of the Village]] effect.}}
{{History|pocket alpha}}
{{History||v0.8.0|snap=build 1|[[File:Pumpkin Pie JE1 BE1.png|32px]] Added pumpkin pie.}}
{{History||v0.12.1|snap=build 1|Pumpkin pie now restores [[hunger]] instead of [[health]].}}
{{History|bedrock}}
{{History||1.10.0|snap=beta 1.10.0.3|[[File:Pumpkin Pie JE2 BE2.png|32px]] The texture of pumpkin pie has been changed.}}
{{History||1.11.0|snap=beta 1.11.0.1|Pumpkin pie can now be found in [[taiga]] and [[snowy taiga]] [[village]] house [[chest]]s.
|Pumpkin pie can now be used to fill up [[composter]]s.}}
{{History|||snap=beta 1.11.0.4|Farmer [[villager]]s now have a 50% chance to [[trading|sell]] 4 pumpkin pies for an [[emerald]].}}
{{History|console}}
{{History||xbox=TU14|xbone=CU1|ps=1.04|wiiu=Patch 1|switch=1.0.1|[[File:Pumpkin Pie JE1 BE1.png|32px]] Added pumpkin pie.}}
{{History||xbox=none|xbone=none|ps=1.90|wiiu=none|switch=none|[[File:Pumpkin Pie JE2 BE2.png|32px]] The texture of pumpkin pie has been changed.}}
{{History|New 3DS}}
{{History||0.1.0|[[File:Pumpkin Pie JE1 BE1.png|32px]] Added pumpkin pie.}}
{{History|foot}}
== Issues ==
{{issue list}}
== Gallery ==
<gallery>
File:Twitter Pumpkin Pie.png|The first screenshot of pumpkin pies, posted on Jeb's twitter.
</gallery>
== References ==
{{reflist}}
{{Items}}
[[cs:Dýňový koláč]]
[[de:Kürbiskuchen]]
[[es:Tarta de calabaza]]
[[fr:Tarte à la citrouille]]
[[it:Torta di zucca]]
[[ja:パンプキンパイ]]
[[ko:호박 파이]]
[[lzh:南瓜餅]]
[[nl:Pompoentaart]]
[[pl:Placek dyniowy]]
[[pt:Torta de abóbora]]
[[ru:Тыквенный пирог]]
[[zh:南瓜派]]
[[Category:Food]]
[[Category:Renewable resources]]</li></ul> | ? | Wolves now despawn only when hostile; passive and tamed wolves do not. | |||
1.2.1{{Extension DPL}}<ul><li>[[Tool|Tool]]<br/>{{About|the in-game items|program enhancing software|Programs and Editors}}
A '''tool''' is an [[item]] used by the [[player]] while held to perform actions faster and more efficiently, to gather materials not obtainable by hand, to gain information, or to perform completely new actions. With the exception of the [[clock]], [[compass]], empty [[bucket]], and [[lead]], tools do not stack in the inventory. Tools can be repaired; see [[Item repair]].
== Obtaining ==
=== Mob loot ===
{{main|Drops#Mob drops|title1=Drops}}
Some tools can be obtained by killing mobs that carry the equipment.
=== Crafting ===
Most tools can be obtained through crafting.
{{:Crafting/Tools}}
=== Upgrading ===
[[Netherite]] tools can be obtained only through upgrading.
{{Smithing
|head=1
|Netherite Upgrade
|Diamond Pickaxe; Diamond Axe; Diamond Shovel; Diamond Hoe
|Netherite Ingot
|Netherite Pickaxe; Netherite Axe; Netherite Shovel; Netherite Hoe
}}
== Usage ==
=== Best tools ===
{{main|Breaking#Best tools|title1=Breaking}}
Many blocks have a preferred tool to break them. Some blocks can be broken only with certain tools. The tool's material also affects how fast a block is mined. Materials from worst to best in terms of mining speed are wooden, stone, iron, diamond, netherite, gold.
=== Item durability ===
{{main|Durability}}
Different tools have different amounts of durability. Some uses require more durability to be used than others. A tool's durability is also affected by its material. Materials from worst to best in terms of durability are gold, wooden, stone, iron, diamond, netherite.
Some tools are not block-breaking tools: This includes bows, fishing rods, carrots on sticks, flint & steel, and buckets. Such tools are no better than bare fists at breaking blocks, but they do not take damage from doing so—they take damage from being used in their own intended manners.
=== Item enchantability ===
Materials from worst to best in terms of [[enchantability]] are stone, diamond, iron, wooden/netherite, gold.
=== Smelting ===
{{main|Smelting}}
Iron or golden tools can be smelted into [[nugget]]s.
{{Smelting|showname=1|head=1|Any iron tools|Iron Nugget|0,1}}
{{Smelting|showname=1|foot=1|Any golden tools|Gold Nugget|0,1}}
; Fuel
* Wooden tools can be used as a fuel in [[furnace]]s, smelting 1 item per tool.
* A [[fishing rod]] can be used as fuel in [[furnace]]s, smelting 1.5{{only|java|short=1}}/1{{only|bedrock|short=1}} items per fishing rod.
== History ==
{{info needed section|earlier Java Edition history between Indev and 1.3.1|section=10}}
{{History|java indev}}
{{History||0.31|snap=20091231-2|Added iron shovels.}}
{{History|||snap=20100110|Added iron axes and pickaxes.}}
{{History|||snap=20100128|Added wooden, stone, and diamond tools.}}
{{History|||snap=20100129|Added crafting recipes for wooden, stone, iron, and diamond tools.}}
{{History|||snap=20100130|Added golden tools.}}
{{History|||snap=20100131|A [[Tiers|tier system]] for wooden, stone, iron, diamond, and gold tools is added. Each tier has a different mining speed multiplier and durability.}}
{{History|||snap=20100201-2|Tools are now required to break blocks and ores.}}
{{history|java}}
{{History||1.0.0|snap=RC1|Tools now make a breaking sound and have a breaking animation.
|All tools now also have breaking animation.}}
{{History|||snap=RC2|Tools no longer break quickly after loading a world that was saved in RC1.}}
{{History||1.3.1|snap=12w17a|Tools now have infinite [[durability]] in [[Creative]] mode.}}
{{history|||snap=12w18a|Wooden tools became able to be used as [[fuel]] for [[furnace]]s in case players didn't want to repair them or finish using them.}}
{{History|||snap=12w24a|Breaking a block that can be [[instant mining|instantly mined]] by hand ([[tall grass]], [[torch]], etc.) while holding a block-breaking tool no longer reduces the tool's [[durability]].}}
{{history||1.6.1|snap=13w21a|Instead of replacing the barehanded damage ({{hp|1}}), pickaxes, shovels, axes and swords now add their damage onto the barehanded damage.}}
{{History||1.11.1|snap=16w50a|Golden and iron tools now smelt down into one of their respective nuggets.}}
{{History||1.14|snap=18w48a|Tools cannot be repaired by crafting.}}
{{History||1.14.3|snap=Pre-Release 3|Tools can be once again be repaired by crafting.}}
{{History||1.16.2|snap=20w29a|Tools have a new arrange in the Creative inventory.}}
{{History||1.20<br>(Experimental)|link=1.19.4|snap=23w04a|Upgrading diamond tools to netherite tools now requires the netherite upgrade [[smithing template]].}}
{{History|||snap=23w07a|Added brushes.}}
{{History|pocket alpha}}
{{History||v0.2.0|Added stone tools and shears.}}
{{History||v0.3.0|Added wooden tools.}}
{{History||v0.3.2|Added iron, diamond, and golden tools.}}
{{History||v0.3.3|Added bows.}}
{{History||v0.4.0|Added flint and steel and all hoe types.}}
{{History||v0.7.0|Added buckets.}}
{{History||v0.7.4|Flint and steel now ignite creepers.}}
{{History||v0.8.0|snap=build 1|Added flint and steel to the Creative inventory.}}
{{History|||snap=build 3|Added shears to the Creative inventory.}}
{{History||v0.11.0|snap=build 1|Added fishing rod.}}
{{History||v0.15.0|snap=build 1|Added carrot on a stick and leads.}}
{{History|pocket}}
{{History||1.1.0|snap=alpha 1.1.0.0|Golden and iron tools now smelt down into one of their respective nuggets.}}
{{History|console}}
{{History||xbox=TU53|xbone=CU43|ps=1.49|wiiu=Patch 23|switch=1.0.3|Golden and iron tools now smelt down into one of their respective nuggets.}}
{{History|foot}}
== Issues ==
{{issue list}}
== Trivia ==
* Gold tools are actually ranked as superior to diamond tools on the [[Legacy Console Edition]]'s crafting screen.
* Wooden tools can be burned in a furnace regardless of its durability; this means the player can burn a wooden tool that has only 1 use left.
== See also ==
* [[Item Repair]]
* [[Breaking]]
* [[Weapon]]
{{Items}}
[[Category:Tools|*]]
[[cs:Nástroje]]
[[de:Werkzeug]]
[[es:Herramientas]]
[[fr:Outils]]
[[hu:Eszközök]]
[[it:Attrezzi]]
[[ja:道具]]
[[ko:도구]]
[[nl:Gereedschap]]
[[pl:Narzędzia]]
[[pt:Ferramentas]]
[[ru:Инструменты]]
[[tr:Alet]]
[[zh:工具]]</li><li>[[Melon Seeds|Melon Seeds]]<br/>{{Block
|image = <gallery>
Melon Stem Age 0.png | Age 0
Melon Stem Age 1.png | Age 1
Melon Stem Age 2.png | Age 2
Melon Stem Age 3.png | Age 3
Melon Stem Age 4.png | Age 4
Melon Stem Age 5.png | Age 5
Melon Stem Age 6.png | Age 6
Melon Stem Age 7.png | Age 7
</gallery>
| image2 = <gallery>
Attached Melon Stem (N).png | North
Attached Melon Stem (E).png | East
Attached Melon Stem (S).png | South
Attached Melon Stem (W).png | West
</gallery>
| transparent = Yes
| light = No
| tool = none
| renewable = Yes
| stackable = Yes (64)
| flammable = No
| lavasusceptible = No
}}'''Melon seeds''' are items obtained from [[Melon Slice|melon slices]] that can be used to grow melon stems.
'''Melon stems''' are plants grown on [[farmland]] that, over time, grow [[melon]]s on dirt, mud and moss blocks adjacent to them.
== Obtaining ==
=== Breaking ===
When broken, a melon stem drops 0–3 melon seeds. The chance for melon seeds to drop increases with the stem's age.
{| class="wikitable"
! rowspan="3" |[[Resource location]]
! rowspan="3" | Source
! colspan="4" | Default
|-
| colspan="1" rowspan="2" style="text-align:center" | Nothing || colspan="3" style="text-align:center" |{{ItemLink|Melon Seeds|Melon seeds}}
|-
| style="text-align:center" | 1 || style="text-align:center" | 2 || style="text-align:center" | 3
|-
| rowspan="8" |<code>blocks/melon_stem</code>
|{{BlockLink|Melon Stem|Melon stem}} <code>age = 0</code>
| style="text-align:center" |81.3%|| style="text-align:center" |17.42%|| style="text-align:center" |1.24%|| style="text-align:center" |0.03%
|-
|{{BlockLink|Melon Stem|Melon stem}} <code>age = 1</code>
| style="text-align:center" |65.1%|| style="text-align:center" |30.04%|| style="text-align:center" |4.62%|| style="text-align:center" |0.24%
|-
|{{BlockLink|Melon Stem|Melon stem}} <code>age = 2</code>
| style="text-align:center" |51.2%|| style="text-align:center" |38.4%|| style="text-align:center" |9.6%|| style="text-align:center" |0.8%
|-
|{{BlockLink|Melon Stem|Melon stem}} <code>age = 3</code>
| style="text-align:center" |39.44%|| style="text-align:center" |43.02%|| style="text-align:center" |15.64%|| style="text-align:center" |1.9%
|-
|{{BlockLink|Melon Stem|Melon stem}} <code>age = 4</code>
| style="text-align:center" |29.13%|| style="text-align:center" |44.44%|| style="text-align:center" |22.22%|| style="text-align:center" |3.7%
|-
|{{BlockLink|Melon Stem|Melon stem}} <code>age = 5</code>
| style="text-align:center" |21.6%|| style="text-align:center" |43.2%|| style="text-align:center" |28.8%|| style="text-align:center" |6.4%
|-
|{{BlockLink|Melon Stem|Melon stem}} <code>age = 6</code>
| style="text-align:center" |15.17%|| style="text-align:center" |39.82%|| style="text-align:center" |34.84%|| style="text-align:center" |10.16%
|-
|{{BlockLink|Melon Stem|Melon stem}} <code>age = 7</code>
| style="text-align:center" |10.16%|| style="text-align:center" |34.84%|| style="text-align:center" |39.82%|| style="text-align:center" |15.17%
|-
| rowspan="1" |<code>blocks/attached_melon_stem</code>
|{{BlockLink|Attached Melon Stem|Attached Melon stem}}
| style="text-align:center" |10.16%|| style="text-align:center" |34.84%|| style="text-align:center" |39.82%|| style="text-align:center" |15.17%
|}
=== Natural generation ===
Melon stems generate naturally in stem farm inside [[woodland mansion]]s.
Melon stems generate in 20% of the farm plots in [[savanna]] [[village]]s, and 10% of the farm plots in [[desert]] villages.
=== Chest loot ===
{{LootChestItem|melon-seeds}}
=== Crafting ===
{{Crafting
|Melon Slice
|Output= Melon Seeds
|type= Material
}}
=== Trading ===
[[Wandering trader]]s sell melon seeds for 1 [[emerald]].
== Usage ==
=== Farming ===
{{see also|Tutorials/Pumpkin and melon farming}}
Melon seeds can be planted only on [[farmland]], as stems. Over time, a stem grows through several stages<sup>[''[[Talk:Pumpkin Seeds|needs testing]]'']</sup> and, at its final growth stage, will produce [[melon]]s on any adjacent [[dirt]], [[Coarse Dirt|coarse dirt]], [[Rooted Dirt|rooted dirt]], [[Grass Block|grass block]], [[farmland]], [[podzol]], [[mycelium]], [[Moss Block|moss block]], [[mud]] or [[Muddy Mangrove Roots|muddy mangrove roots]]. If a melon is already occupying a spot adjacent to a stem it does not grow more melons until the melons is removed. A single stem can grow an unlimited number of melons. Melon stems need a minimum light level of 10 in the block above the stem to grow and give melons. Melon seeds are affected by [[bone meal]] only with respect to stem growth; bone meal does not help produce the actual melons.
=== Breeding ===
Like other seeds, melon seeds can be used to [[breed]] [[chicken]]s, lead chickens around, and make baby chickens grow up faster by 10% of the remaining time.
=== Taming ===
Like other seeds, melon seeds can be used to tame [[parrot]]s.
=== Composting ===
Placing melon seeds into a [[composter]] has a 30% chance of raising the compost level by 1.
== Melon Stem ==
A '''melon stem''' is the block that is planted on [[farmland]] when melon seeds are used on it. It starts underground, and rises up as the plant grows. The stem is colored green when young, and then yellow once fully grown.
The stem curves once a melon has grown from it. A fully-grown single stem connects to any [[melon]] in an adjacent square, thus there are 5 possible appearances to a stem. If there are multiple melons it can connect to, it favors the east, then west, north, and south. When the melon is removed, the stem returns to its straight shape.
== Sounds ==
{{Sound table/Block/Hard crop}}
== Data values ==
=== ID ===
{{edition|java}}:
{{ID table
|edition=java
|showblocktags=y
|showforms=y
|generatetranslationkeys=y
|displayname=Melon Stem
|spritetype=block
|nameid=melon_stem
|blocktags=bee_growables, crops
|form=block}}
{{ID table
|displayname=Attached Melon Stem
|spritetype=block
|nameid=attached_melon_stem
|form=block}}
{{ID table
|displayname=Melon Seeds
|spritetype=item
|nameid=melon_seeds
|form=item
|foot=1}}
{{edition|bedrock}}:
{{ID table
|edition=bedrock
|shownumericids=y
|showforms=y
|generatetranslationkeys=y
|displayname=Melon Stem
|spritetype=block
|nameid=melon_stem
|id=105
|form=block
|translationkey=-}}
{{ID table
|displayname=Melon Seeds
|spritetype=item
|nameid=melon_seeds
|id=293
|form=item
|foot=1}}
=== Block states ===
{{see also|Block states}}
{{/BS}}
== Advancements ==
{{load advancements|A Seedy Place}}
== History ==
{{info needed section|check if stems floated above farmland upon initial implementation}}
{{History|java beta}}
{{History||1.8|snap=Pre-release|[[File:Melon Seeds JE1 BE1.png|32px]] Added melon seeds.
|[[File:Melon Stem Age 0 JE1.png|32px]] [[File:Stem Age 1 JE1.png|32px]] [[File:Melon Stem Age 2 JE1.png|32px]] [[File:Melon Stem Age 3 JE1.png|32px]] [[File:Melon Stem Age 4 JE1.png|32px]] [[File:Melon Stem Age 5 JE1.png|32px]] [[File:Melon Stem Age 6 JE1.png|32px]] [[File:Melon Stem Age 7 JE1.png|32px]] Added the melon stem, with seven stages of growth.
|Melon seeds can found in the new [[mineshaft]] [[chest]]s.
|[[File:Attached Melon Stem (N) JE1.png|32px]] [[File:Attached Melon Stem (E) JE1.png|32px]] [[File:Attached Melon Stem (S) JE1.png|32px]] [[File:Attached Melon Stem (W) JE1.png|32px]] Melon stems have four slightly visually distinct appearances for each facing direction - the bent part of the stem rotates, but the other two planes do not.
|[[File:Melon Stem Age 8 JE1.png|32px]] [[File:Melon Stem Age 9 JE1.png|32px]] [[File:Melon Stem Age 10 JE1.png|32px]] [[File:Melon Stem Age 11 JE1.png|32px]] [[File:Melon Stem Age 12 JE1.png|32px]] [[File:Melon Stem Age 13 JE1.png|32px]] [[File:Melon Stem Age 14 JE1.png|32px]] [[File:Melon Stem Age 15 JE1.png|32px]] Melon stem data values 8–15 now show a glitched formation, with a floating stem with an attached stem cross eventually emerging below.
|[[File:Attached Stem Age 8 JE1.png|32px]] [[File:Attached Stem Age 9 JE1.png|32px]] [[File:Attached Stem Age 10 JE1.png|32px]] [[File:Attached Stem Age 11 JE1.png|32px]] [[File:Attached Stem Age 12 JE1.png|32px]] [[File:Attached Stem Age 13 JE1.png|32px]] [[File:Attached Stem Age 14 JE1.png|32px]] [[File:Attached Stem Age 15 JE1.png|32px]] Melon stem blocks with data values higher than 7 can now attach to adjacent fruits, which results in buggy stem textures with [[vines]] in the mix due to vines being below attached stems in [[terrain.png]].}}
{{History|||snap=Pre-release 2 ;)|Melon stems can now be grown faster using [[bone meal]].}}
{{History|java}}
{{History||1.3.1|snap=1.3|The texture of melon stems has been moved one pixel to the left in [[terrain.png]].
|[[File:Melon Stem Age 0 JE2.png|32px]] [[File:Melon Stem Age 1 JE2.png|32px]] [[File:Melon Stem Age 2 JE2.png|32px]] [[File:Melon Stem Age 3 JE2.png|32px]] [[File:Melon Stem Age 4 JE2.png|32px]] [[File:Melon Stem Age 5 JE2.png|32px]] [[File:Melon Stem Age 6 JE2.png|32px]] [[File:Melon Stem Age 7 JE2.png|32px]] Stems now appear slightly different.
|[[File:Melon Stem Age 8 JE2.png|32px]] [[File:Melon Stem Age 9 JE2.png|32px]] [[File:Melon Stem Age 10 JE2.png|32px]] [[File:Melon Stem Age 11 JE2.png|32px]] [[File:Melon Stem Age 12 JE2.png|32px]] [[File:Melon Stem Age 13 JE2.png|32px]] [[File:Melon Stem Age 14 JE2.png|32px]] [[File:Melon Stem Age 15 JE2.png|32px]] Overgrown stems now appear slightly different.
|[[File:Attached Melon Stem (N) JE2.png|32px]] [[File:Attached Melon Stem (E) JE2.png|32px]] [[File:Attached Melon Stem (S) JE2.png|32px]] [[File:Attached Melon Stem (W) JE2.png|32px]] Attached melon stems now appear slightly different.
|[[File:Attached Stem Age 8 JE2.png|32px]] [[File:Attached Stem Age 9 JE2.png|32px]] [[File:Attached Stem Age 10 JE2.png|32px]] [[File:Attached Stem Age 11 JE2.png|32px]] [[File:Attached Stem Age 12 JE2.png|32px]] [[File:Attached Stem Age 13 JE2.png|32px]] [[File:Attached Stem Age 14 JE2.png|32px]] [[File:Attached Stem Age 15 JE2.png|32px]] Overgrown attached melon stems now appear slightly different.}}
{{History||1.4.2|snap=12w36a|[[Chicken]]s now use [[wheat seeds]], melon seeds, and [[pumpkin seeds]], instead of [[wheat]] to breed.}}
{{History||1.5|snap=13w02a|[[File:Melon Stem Age 0 JE3.png|32px]] [[File:Melon Stem Age 1 JE3.png|32px]] [[File:Melon Stem Age 2 JE3.png|32px]] [[File:Melon Stem Age 3 JE3.png|32px]] [[File:Melon Stem Age 4 JE3.png|32px]] [[File:Melon Stem Age 5 JE3.png|32px]] [[File:Melon Stem Age 6 JE3.png|32px]] Melon stems now use a squished version of their texture for immature stems, depending on age.
|[[File:Melon Stem Age 8 JE3.png|32px]] [[File:Melon Stem Age 9 JE3.png|32px]] [[File:Melon Stem Age 10 JE3.png|32px]] [[File:Melon Stem Age 11 JE3.png|32px]] [[File:Melon Stem Age 12 JE3.png|32px]] [[File:Melon Stem Age 13 JE3.png|32px]] [[File:Melon Stem Age 14 JE3.png|32px]] [[File:Melon Stem Age 15 JE3.png|32px]] This also affects melon stems of ages 8–15, which are likewise stretched to accommodate its predicted size.
|[[File:Attached Stem Age 8 JE3.png|32px]] [[File:Attached Stem Age 9 JE3.png|32px]] [[File:Attached Stem Age 10 JE3.png|32px]] [[File:Attached Stem Age 11 JE3.png|32px]] [[File:Attached Stem Age 12 JE3.png|32px]] [[File:Attached Stem Age 13 JE3.png|32px]] [[File:Attached Stem Age 14 JE3.png|32px]] [[File:Attached Stem Age 15 JE3.png|32px]] Melon stems of extreme ages, which are attached to adjacent fruits, now show a stretched and tinted stem appearance.}}
{{History|||snap=13w03a|[[File:Melon Stem Age 0 JE4.png|32px]] [[File:Melon Stem Age 1 JE4.png|32px]] [[File:Melon Stem Age 2 JE4.png|32px]] [[File:Melon Stem Age 3 JE4.png|32px]] [[File:Melon Stem Age 4 JE4.png|32px]] [[File:Melon Stem Age 5 JE4.png|32px]] [[File:Melon Stem Age 6 JE4.png|32px]] [[File:Melon Stem Age 7 JE4.png|32px]] Melon stems are no longer squished or stretched to account for age.<ref>{{bug|MC-7111}}</ref>
|[[File:Melon Stem Age 8 JE4.png|32px]] [[File:Melon Stem Age 9 JE4.png|32px]] [[File:Melon Stem Age 10 JE4.png|32px]] [[File:Melon Stem Age 11 JE4.png|32px]] [[File:Melon Stem Age 12 JE4.png|32px]] [[File:Melon Stem Age 13 JE4.png|32px]] [[File:Melon Stem Age 14 JE4.png|32px]] [[File:Melon Stem Age 15 JE4.png|32px]] Melon stems with age values 8 through 15 now show a tinted [[trapdoor]] texture.
|From this version up until 14w08a, overgrown melon stems start to draw from the texture below them on the [[texture atlas]], in much the same way they previously did with terrain.png. However, as texture atlases are unstable and textures tend to change positions as new blocks and textures are added, overgrown stems change the texture they draw from every time new textures are added, which includes when textures added by [[mods]].}}
{{History|||snap=13w09a|[[File:Melon Stem Age 8 JE5.png|32px]] [[File:Melon Stem Age 9 JE5.png|32px]] [[File:Melon Stem Age 10 JE5.png|32px]] [[File:Melon Stem Age 11 JE5.png|32px]] [[File:Melon Stem Age 12 JE5.png|32px]] [[File:Melon Stem Age 13 JE5.png|32px]] [[File:Melon Stem Age 14 JE5.png|32px]] [[File:Melon Stem Age 15 JE5.png|32px]] Melon stems with age values 8–15 now show a tinted [[birch wood]] texture.}}
{{History||1.6.1|snap=13w24a|Melon and pumpkin stems have now been assigned separate textures.
|[[File:Melon Stem Age 8 JE6.png|32px]] [[File:Melon Stem Age 9 JE6.png|32px]] [[File:Melon Stem Age 10 JE6.png|32px]] [[File:Melon Stem Age 11 JE6.png|32px]] [[File:Melon Stem Age 12 JE6.png|32px]] [[File:Melon Stem Age 13 JE6.png|32px]] [[File:Melon Stem Age 14 JE6.png|32px]] [[File:Melon Stem Age 15 JE6.png|32px]] Melon stems with age values 8–15 now show a tinted [[note block]] texture.}}
{{History||1.7.2|snap=13w37a|Added the {{cmd|setblock}} [[commands|command]], allowing for invalid stem ages to be placed in the world without using external editors. This also allows them to be obtained in earlier versions via backdating.}}
{{History|||snap=13w41a|[[File:Melon Stem Age 8 JE7.png|32px]] [[File:Melon Stem Age 9 JE7.png|32px]] [[File:Melon Stem Age 10 JE7.png|32px]] [[File:Melon Stem Age 11 JE7.png|32px]] [[File:Melon Stem Age 12 JE7.png|32px]] [[File:Melon Stem Age 13 JE7.png|32px]] [[File:Melon Stem Age 14 JE7.png|32px]] [[File:Melon Stem Age 15 JE7.png|32px]] Melon stems with age values 8–15 now show a tinted [[netherrack]] texture.}}
{{History||1.8|snap=14w10a|[[File:Melon Stem Age 8 JE8.png|32px]] [[File:Melon Stem Age 9 JE8.png|32px]] [[File:Melon Stem Age 10 JE8.png|32px]] [[File:Melon Stem Age 11 JE8.png|32px]] Melon stems with data values 8–11 now display a tinted attached stem, with 8 facing west, 9 facing east, 10 facing north and 11 facing south.
|Invalid melon stems with data values 12-15 now crash the game.}}
{{History|||snap=14w25a|[[File:Melon Stem Age 0 JE5.png|32px]] [[File:Melon Stem Age 1 JE5.png|32px]] [[File:Melon Stem Age 2 JE5.png|32px]] [[File:Melon Stem Age 3 JE5.png|32px]] [[File:Melon Stem Age 4 JE5.png|32px]] [[File:Melon Stem Age 5 JE5.png|32px]] [[File:Melon Stem Age 6 JE5.png|32px]] [[File:Melon Stem Age 7 JE5.png|32px]] Melon stems now render as a single diagonal plane, or, in the case of attached stems, a diagonal and orthogonal plane.
|[[File:Attached Melon Stem (N) JE3.png|32px]] [[File:Attached Melon Stem (E) JE3.png|32px]] [[File:Attached Melon Stem (S) JE3.png|32px]] [[File:Attached Melon Stem (W) JE3.png|32px]] The attached melon stem [[model]] now fully rotates to the direction the stem points. Prior to this update, the base of the melon stem would stay the same while the long attaching section would differ, resulting in four possible attached stem appearances.
|Invalid overgrown melon stems have effectively been removed from the game, as attempting to place an out of range stem via {{cmd|setblock}} creates a stem of age 0 and loading a world with such stems existing causes a game crash.}}
{{History|||snap=14w26a|[[File:Melon Stem Age 0 JE6.png|32px]] [[File:Melon Stem Age 1 JE6.png|32px]] [[File:Melon Stem Age 2 JE6.png|32px]] [[File:Melon Stem Age 3 JE6.png|32px]] [[File:Melon Stem Age 4 JE6.png|32px]] [[File:Melon Stem Age 5 JE6.png|32px]] [[File:Melon Stem Age 6 JE6.png|32px]] [[File:Melon Stem Age 7 JE6.png|32px]] [[File:Attached Melon Stem (N) JE4.png|32px]] [[File:Attached Melon Stem (E) JE4.png|32px]] [[File:Attached Melon Stem (S) JE4.png|32px]] [[File:Attached Melon Stem (W) JE4.png|32px]] Melon stems now correctly render as crosses again.<ref>{{bug|MC-58136}}</ref>}}
{{History|||snap=14w27a|[[File:Attached Stem Age 0 14w27a.png|32px]] [[File:Attached Stem Age 1 14w27a.png|32px]] [[File:Attached Stem Age 2 14w27a.png|32px]] [[File:Attached Stem Age 3 14w27a.png|32px]] [[File:Attached Stem Age 4 14w27a.png|32px]] [[File:Attached Stem Age 5 14w27a.png|32px]] [[File:Attached Stem Age 6 14w27a.png|32px]] Due to a bug, all melon stems appear attached regardless of age or any actual attachment.<ref>{{bug|MC-60208}}</ref>}}
{{History|||snap=14w28a|All melon stems appearing attached regardless of age or any actual attachment has been fixed. However, melon stems still appear attached to adjacent fruits regardless of age due to a similar bug.<ref>{{bug|MC-61716}}</ref>}}
{{History|||snap=14w34d|Melon seeds can no longer be used for [[breeding]] [[chicken]]s.}}
{{History||1.9|snap=15w31a|Chickens can now use melon seeds to breed again.}}
{{History|||snap=15w44a|Melon seeds have been added to [[dungeon]] [[chest]]s.
|The average yield of melon seeds from [[mineshaft]] chests has been decreased.}}
{{History|||snap=15w45a|Melon stems must now be fully grown again to attach.}}
{{History||1.11|snap=16w39a|Melon seeds can now be found inside chests in the new [[woodland mansion]]s.
|Melon crops now generate inside woodland mansions.}}
{{History||1.12|snap=17w18b|Placing a melon seeds in farmland now gives the player the "A Seedy Place" [[advancement]].{{verify}}}}
{{History||1.13|snap=17w47a|The different block states for the <code>melon_stem</code> ID have been split up into their own IDs.
|Prior to [[1.13/Flattening|''The Flattening'']], this [[block]]'s numeral ID was 105, and the [[item]]'s 362.}}
{{History|||snap=17w48a|Attached melon stems no longer [[drops|drop]] seeds.}}
{{History||1.14|snap=18w43a|[[File:Attached Melon Stem (N) JE5.png|32px]] [[File:Attached Melon Stem (E) JE5.png|32px]] [[File:Attached Melon Stem (S) JE5.png|32px]] [[File:Attached Melon Stem (W) JE5.png|32px]] The texture of attached melon stems has been changed.}}
{{History|||snap=18w49a|Melon stems now generate in the updated [[savanna]] [[village]]s.}}
{{History|||snap=18w50a|Melon stems now generate in the updated [[desert]] [[village]]s.}}
{{History|||snap=19w03a|Placing melon seeds into the new [[composter]] has a 10% chance of raising the compost level by 1.}}
{{History|||snap=19w05a|Melon seeds now have a 30% chance of increasing the compost level in a composter by 1.
|Added [[Wandering Trader|wandering trader]]s, which sell melon seeds.}}
{{History||1.15|snap=19w34a|[[Bee]]s can now pollinate melon stems.}}
{{History|||snap=19w39a|Attached melon stems now [[drops|drop]] seeds again.<ref>{{bug|MC-136360}}</ref>}}
{{History||1.18|snap=Pre-release 5|[[File:Melon Seeds JE2.png|32px]] The texture of melon seeds has been changed.}}
{{History|pocket alpha}}
{{History||v0.5.0|Added melon seeds.
|[[File:Melon Stem Age 0 JE1.png|32px]] [[File:Stem Age 1 JE1.png|32px]] [[File:Melon Stem Age 2 JE1.png|32px]] [[File:Melon Stem Age 3 JE1.png|32px]] [[File:Melon Stem Age 4 JE1.png|32px]] [[File:Melon Stem Age 5 JE1.png|32px]] [[File:Melon Stem Age 6 JE1.png|32px]] [[File:Melon Stem Age 7 JE1.png|32px]] [[File:Attached Melon Stem (N) JE1.png|32px]] [[File:Attached Melon Stem (E) JE1.png|32px]] [[File:Attached Melon Stem (S) JE1.png|32px]] [[File:Attached Melon Stem (W) JE1.png|32px]]{{verify|Are these models correct?}} Added melon stems.}}
{{History||v0.6.0|[[File:Melon Seeds JE1 BE1.png|32px]] Melon seeds no longer use the pumpkin seeds texture.}}
{{History||v0.9.0|snap=?|Melon seeds can now be found in [[mineshaft]] chests.}}
{{History||v0.12.1|snap=build 1|Melon seeds are no longer available from the [[Nether reactor]].}}
{{History||v0.14.0|snap=build 1|Melon seeds can now be found in [[minecart with chest|minecarts with chests]] in [[mineshaft]]s.}}
{{History|pocket}}
{{History||1.0.0|snap=alpha 0.17.0.1|Melon seeds now generate inside [[dungeon]] [[chest]]s.}}
{{History||1.1.0|snap=alpha 1.1.0.0|Melon crops now generate inside [[woodland mansion]]s.
|Melon seeds can now be found in woodland mansion chests.}}
{{History|bedrock}}
{{History||1.2.0|snap=beta 1.2.0.2|Melon seeds can now be found inside [[bonus chest]]s.
|Melon seeds are now used to tame [[parrot]]s.}}
{{History||1.10.0|snap=beta 1.10.0.3|[[File:Attached Melon Stem (W) JE5.png|32px]]{{info needed|More accurate image}} The texture of attached melon stems has been changed.
|Melon stems now generate in [[savanna]] and [[desert]] [[village]] farms.
|Added [[wandering trader]]s, who [[trading|sell]] melon seeds.}}
{{History||1.11.0|snap=beta 1.11.0.1|Melon seeds can now be used to fill up [[composter]]s.}}
{{History||1.14.0|snap=beta 1.14.0.1|[[Bee]]s can now pollinate melon stems.}}
{{History|console}}
{{History||xbox=TU5|xbone=CU1|ps=1.0|wiiu=Patch 1|[[File:Melon Seeds JE1 BE1.png|32px]] Added melon seeds.
|[[File:Melon Stem Age 0 JE1.png|32px]] [[File:Stem Age 1 JE1.png|32px]] [[File:Melon Stem Age 2 JE1.png|32px]] [[File:Melon Stem Age 3 JE1.png|32px]] [[File:Melon Stem Age 4 JE1.png|32px]] [[File:Melon Stem Age 5 JE1.png|32px]] [[File:Melon Stem Age 6 JE1.png|32px]] [[File:Melon Stem Age 7 JE1.png|32px]] [[File:Attached Melon Stem (N) JE1.png|32px]] [[File:Attached Melon Stem (E) JE1.png|32px]] [[File:Attached Melon Stem (S) JE1.png|32px]] [[File:Attached Melon Stem (W) JE1.png|32px]]{{verify|Are these models correct?}} Added melon stems.}}
{{History||xbox=none|xbone=none|ps=1.90|wiiu=none|switch=none|[[File:Attached Melon Stem (W) JE5.png|32px]]{{info needed|More accurate image}} The texture of attached melon stems has been changed.}}
{{History|New 3DS}}
{{History||0.1.0|[[File:Melon Stem Age 0 JE1.png|32px]] [[File:Stem Age 1 JE1.png|32px]] [[File:Melon Stem Age 2 JE1.png|32px]] [[File:Melon Stem Age 3 JE1.png|32px]] [[File:Melon Stem Age 4 JE1.png|32px]] [[File:Melon Stem Age 5 JE1.png|32px]] [[File:Melon Stem Age 6 JE1.png|32px]] [[File:Melon Stem Age 7 JE1.png|32px]] [[File:Attached Melon Stem (N) JE1.png|32px]] [[File:Attached Melon Stem (E) JE1.png|32px]] [[File:Attached Melon Stem (S) JE1.png|32px]] [[File:Attached Melon Stem (W) JE1.png|32px]]{{verify|Are these models correct?}} Added melon stems.}}
{{History|foot}}
<gallery>
Melon Stem with data value 15.png|The final version of the melon stem with age 15, as seen in-game.
Melonstems.png|Melon stems of ages 1–15 on a modded version of 1.7.2, hence the melon stems using the melon top texture.
Stems of 13w02a.png|All 16 stem sizes in 13w02a, with accompanying data values.
</gallery>
=== Melon stem "item" ===
{{:Technical blocks/Melon Stem}}
== Issues ==
{{issue list}}
== Gallery ==
<gallery>
Stem All Ages.png|All stages of growth.
AllSeeds.png|All the [[seeds]] that exist in the game.
</gallery>
== See also ==
* [[Melon]]
* [[Pumpkin Seeds]]
==References==
{{Reflist}}
{{Blocks|vegetation}}
{{Items}}
[[Category:Plants]]
[[Category:Food]]
[[Category:Non-solid blocks]]
[[Category:Generated structure blocks]]
[[cs:Semínka melounu]]
[[de:Melone]]
[[es:Semillas de sandía]]
[[fr:Graines de pastèque]]
[[hu:Dinnyemagok]]
[[it:Anguria]]
[[ja:スイカの種]]
[[ko:수박씨]]
[[nl:Meloenzaden]]
[[pl:Nasiona arbuza]]
[[pt:Sementes de melancia]]
[[ru:Семена арбуза]]
[[th:เมล็ดแตงโม]]
[[zh:西瓜种子]]</li></ul> | 12w03a | Prior to this update, breeding wolves with wheat caused a bug that made them sit forever. This has been fixed. | |||
| Wolves can now be bred through the use of any type of meat such as chicken (raw or cooked), pork (raw or cooked), beef (raw or cooked), and rotten flesh if tamed and at full health. | |||||
1.4.2{{Extension DPL}}<ul><li>[[Ice Bomb|Ice Bomb]]<br/>{{education feature}}
{{exclusive|bedrock|education}}
{{ItemEntity
|image=Ice Bomb.png
|renewable=No (unless [[Material Reducer]] is available)<!-- Well, CHO are everywhere in sugar and charcoal, and sodium is in cobblestone... -->
|stackable=Yes (16)
|size=Height: 0.25 Blocks<br>Width: 0.25 Blocks
}}
The '''ice bomb''' is an [[item]] that is used to freeze [[water]] into [[ice]].
== Obtaining ==
=== Lab Table ===
{| class="wikitable"
! Result
! Materials Needed
|-
!rowspan=2|{{slot|Ice Bomb}}<br>[[Ice Bomb]]
|{{slot|Sodium Acetate|link=Compound#List_of_compounds}}{{slot|Sodium Acetate|link=Compound#List_of_compounds}}{{slot|Sodium Acetate|link=Compound#List_of_compounds}}{{slot|Sodium Acetate|link=Compound#List_of_compounds}}
|-
|<center>[[Compound#List_of_compounds|Sodium Acetate]] x4</center>
|}
== Usage ==
Ice bombs can be thrown by {{control|using}} them. They are affected by gravity.
Like with [[ender pearl]]s, there is a short cooldown before the player can throw another ice bomb. The cooldown is shown in the [[hotbar]] by a white overlay that shrinks before the player is able to use it again.
Ice bombs explode upon hitting most [[blocks]], including non-solid blocks, but not [[air]]. They also explode upon hitting other entities, but do not deal [[damage]], and unlike [[egg]]s and [[snowball]]s, their impact is not considered an attack and does no damage or knockback. When exploding, any [[water]] (including flowing water, but not [[waterlogged]] blocks) in a 3×3×3 cube around the ice bomb freezes into [[ice]]. Ice bombs can be used to contain and displace [[mobs]] in ice under water.
While [[endermen]] teleport away from arrows shot at them, they can be hit by ice bombs.
Throwing an ice bomb while underwater encloses the player in ice.
{| class="wikitable"
|+Ice bomb arrangement table
!y\x
!-2
!-1
!0
!1
!2
|-
!64
|Air
|Air
|Air
|Air
|Air
|-
!63
|Air
|Air
|Ice bomb
|Air
|Air
|-
!62
!Water
!Ice
!Ice
!Ice
!Water
|-
!61
!Water
!Ice
!Ice
!Ice
!Water
|-
!60
!Water
!Water
!Water
!Water
!Water
|}
== Sounds ==
{{Sound table
|type=bedrock
|sound=Zombie breaks door.ogg
|source=hostile
|description=When an ice bomb is created by a [[lab table]]
|id=mob.wither.break_block
|volume=0.5
|pitch=1.1/1.3}}
{{Sound table
|sound=Glass dig1.ogg
|sound2=Glass dig2.ogg
|sound3=Glass dig3.ogg
|source=block
|description=When an ice bomb impacts something
|id=random.glass
|volume=1.0
|pitch=1.4/1.6
|foot=1}}
== Data values ==
=== ID ===
{{ID table
|edition=bedrock
|firstcolumnname=Ice Bomb
|shownumericids=y
|showforms=y
|notshowbeitemforms=y
|generatetranslationkeys=y
|displayname=Item
|spritename=ice-bomb
|spritetype=item
|nameid=ice_bomb
|id=595
|form=item
|foot=1}}
{{ID table
|edition=bedrock
|firstcolumnname=Ice Bomb
|shownumericids=y
|generatetranslationkeys=y
|displayname=Entity
|spritename=ice-bomb
|spritetype=entity
|nameid=ice_bomb
|id=106
|foot=1}}
== History ==
{{History|bedrock}}
{{History||1.4.0|snap=beta 1.2.20.1|[[File:Ice Bomb BE1.png|32px]] Added ice bombs.}}
{{History|education}}
{{History||1.0.27|[[File:Ice Bomb BE1.png|32px]] Added ice bombs.}}
{{History|foot}}
== Trivia ==
* In real life, mixing a sufficient amount of sodium acetate in water does solidify it, but creates [[wikipedia:Sodium acetate#Heating pad|hot ice]] (sodium acetate trihydrate) instead of normal ice.
{{items}}
{{entities}}
{{Education Edition}}
[[Category:Non-renewable resources]]
[[Category:Education Edition items]]
[[Category:Education Edition entities]]
[[pl:Lodowa bomba]]
[[de:Eisbombe]]
[[ja:氷の爆弾]]
[[ko:얼음 폭탄]]
[[lzh:冰丸]]
[[pt:Bomba de gelo]]
[[zh:冰弹]]</li><li>[[Bone Meal|Bone Meal]]<br/>{{Item
| image = Bone Meal.png
| renewable = Yes
| stackable = Yes (64)
}}
'''Bone meal''' is a material that can be used as a fertilizer for most plants and fungi, as well as a crafting ingredient for [[dye]]s.
== Obtaining ==
=== Crafting ===
{{Crafting
|Bone
|Output=Bone Meal,3
|type=Material
|showname=0
|head=1
}}
{{Crafting
|Bone Block
|Output= Bone Meal,9
|type=Material
|foot=1
}}
=== Mob loot ===
==== Fish ====
All fish mob variants ([[cod]], [[salmon]], [[tropical fish]], and [[pufferfish]]) have a 5% chance to drop 1 bone meal upon death.{{only|java}} In [[Bedrock Edition]], they drop [[bones]] instead.
=== Composters ===
When a [[composter]] is completely filled, a single bone meal drops the next time the composter is {{ctrl|used}}.
=== Trading ===
[[Wandering trader]]s sell 3 bone meal for an [[emerald]].{{only|bedrock}}
== Usage ==
=== Crafting ingredient ===
{{crafting usage}}
{{IN|bedrock}}, bone meal can be also used in [[banner pattern]]s:
{{banner crafting usage}}
=== Loom ingredient ===
{{Banner loom usage|Bone Meal}}
=== Dye ===
{{Dye usage}}
=== Fertilizer ===
Bone meal can also be used on the following [[plants]] to have a chance to increase their growth stage:
{| class="wikitable"
|+
!Plant
!Action
|-
|{{BlockLink|Wheat}}<br>{{BlockLink|Carrots}}<br>{{BlockLink|Potatoes}}
|The plant matures 2–5 growth stages.
|-
|{{BlockLink|Beetroots}}
|The plant has a 75% chance of growing to the next growth stage.
|-
|{{BlockLink|Bamboo}}
|Grows the [[bamboo]] by 1-2 stems.
|-
|{{BlockLink|Melon Stem|link=Melon seeds|text=Melon Seeds}}<br>{{BlockLink|Pumpkin Stem|link=Pumpkin seeds|text=Pumpkin Seeds}}
|The planted stem matures 2–5 growth stages. Bone meal affects only the stem's growth; it does not cause [[melon]]s or [[pumpkin]]s to sprout from a mature stem.
|-
|{{BlockLink|Saplings}}<br>{{BlockLink|Azalea}}<br>{{BlockLink|Flowering Azalea}}<br>{{BlockLink|Mangrove Propagule}} (not hanging)
|The [[sapling]] has a 45% chance of growing to the next growth stage, if possible. Saplings have two growth stages (with no visible difference between them) before growing into trees as the third stage. A tree cannot grow unless the sapling is planted in proper ground and sufficient space is available. Using bone meal on such an obstructed sapling with no chance of growing wastes the bone meal.
|-
|{{BlockLink|Sunflower}}s<br>{{BlockLink|Lilac}}s<br>{{BlockLink|Rose Bush}}es<br>{{BlockLink|Peony|Peonies}}
|The corresponding item form drops, without destroying the original plant.
|-
|{{BlockLink|Grass}}<br>{{BlockLink|Fern}}s<br>{{BlockLink|Seagrass}}
|A one-block-high tall [[grass]], [[fern]], or [[seagrass]] (that is on [[grass block]], [[dirt]], [[coarse dirt]], [[rooted dirt]], [[farmland]], [[podzol]], [[mycelium]], [[moss block]], [[mud]], or [[muddy mangrove roots]] (only exception is seagrass, will need to on a full surface)) grows into a two-block-high tall grass, fern or seagrass.
|-
|{{BlockLink|Mushrooms}}
|Has a 40% chance of growing into a {{EnvLink|huge mushroom}} if on [[grass block]], [[dirt]], [[coarse dirt]], [[rooted dirt]], [[farmland]], [[podzol]], [[mycelium]], [[moss block]], [[mud]], or [[muddy mangrove roots]].
|-
|{{BlockLink|Cocoa}}
|The cocoa plant matures 1 growth stage.
|-
|{{BlockLink|Sweet Berry Bush}}
|Grows every stage.
|-
|{{BlockLink|Sea Pickle}}
|If the [[sea pickle]] is on a [[coral block]] and in [[water]] at least 2 blocks deep, the sea pickle colony grows, and additional sea pickles generate nearby.
|-
|{{BlockLink|Sugar Cane}}{{only|bedrock|short=1}}
|The sugar cane grows to maximum height (three blocks tall).
|-
|{{BlockLink|Kelp}}
|The kelp plant grows by 1 block per bone meal used, up to its maximum height.
|-
|{{BlockLink|Flower|id=poppy}} (excluding wither roses){{only|bedrock|short=1}}
|One-block-high flowers make more flowers of the same type grow in the surrounding area.
|-
|{{BlockLink|Fungus|id=fungi}}
|Grows into [[huge fungi]], but only if on the respective [[nylium]].
|-
|{{BlockLink|Weeping Vines}}
|Grows the [[weeping vine]]s a few blocks downward.
|-
|{{BlockLink|Twisting Vines}}
|Grows the [[twisting vine]]s a few blocks upward.
|-
|{{BlockLink|Cave Vines}}
|Produces [[glow berries]] if the vine did not have any [[glow berries]] on it already.
|-
|{{BlockLink|Glow Lichen}}
|The [[glow lichen]] spreads to a random adjacent block.
|-
|{{BlockLink|Moss Block}}
|The [[moss block]] causes nearby [[stone]], [[cave vine]]s, and [[dirt]] to become moss blocks.
|-
|{{BlockLink|Big Dripleaf}}<br>{{BlockLink|Small Dripleaf}}
|A [[big dripleaf]] grows one block higher, and a [[small dripleaf]] becomes a big dripleaf.
|-
|{{BlockLink|Rooted Dirt}}
|Causes [[hanging roots]] to grow underneath the [[rooted dirt]] if there is space.
|-
|{{BlockLink|Mangrove Leaves}}
|Creates a hanging [[mangrove propagule]] under the [[mangrove leaves]].
|-
|{{BlockLink|Mangrove Propagule}} (hanging)
|The [[mangrove propagule]] matures 1 growth age.
|-
|{{BlockLink|Pink Petals}}
|Produces another pink petal in the block. If there are already four pink petals in the block, it will drop a pink petal as an item.
|-
|{{BlockLink|Torchflower Crop}}<br>{{BlockLink|Pitcher Crop}}
|Grows every stage.
|}
Bone meal does not affect:
* [[Cactus]]
* [[Vines]]
* [[Nether wart]]
* [[Sugar cane]]{{only|JE}}
* [[Chorus plant]]s, or other plants not listed above.
==== Wasting bone meal ====
Bone meal can be used on the following objects in the following situations, consuming it without any real effect:
* On [[grass]], [[fern]]s, and [[seagrass]] that do not have enough space to grow.<ref>{{bug|MC-125642}}</ref>
* On [[seagrass]] that doesn't have [[water]] above.
* On a [[dark oak sapling]] that is not in a group of four.<ref>{{bug|MC-168446}}</ref>
* On a [[mushroom]] that is not on a block that allows it to grow into a huge mushroom.<ref>{{bug|MC-173213}}</ref>
* On a [[sea pickle]] that is already in a group of four and has no valid locations to expand to.<ref>{{bug|MC-127995}}</ref>
* On a [[bamboo]] (not [[bamboo shoot]]) that is blocked in the way.
* On a [[sea pickle]] that is not on a [[coral block]].
* On a [[fungus]] that is not on its respective [[nylium]].
* Any plants that can't grow due to being block by the [[build limit]].
=== Creating new plants ===
If bone meal is {{ctrl|used}} on a [[grass block]]; [[tall grass]], [[grass]], [[flower]]s, and [[pink petals]] form on the targeted block and on random adjacent grass blocks in an 15×5×15{{only|java|short=1}}/7×5×7{{only|bedrock|short=1}} area centered on the targeted block. The flowers/pink petals that appear depend on the biome, meaning that in order to obtain specific flowers, the player must travel to biomes where the flowers are found naturally. See {{slink|Flower|Flower biomes}} for more information.
Using bone meal on a 2-block flower (rose bushes, sunflowers, lilacs or peonies) will cause one of the same type of flower to drop, without breaking the original. This is the only way to reproduce these flowers, since they cannot generate from using bone meal on grass blocks.
Using bone meal on a non-transparent block that is underwater generates [[seagrass]] on that block and surrounding blocks. Sometimes, if in a [[warm ocean]] biome, [[coral]] and [[coral fan]]s may have a chance to generate as well, and in Bedrock Edition, coral (not coral fan) can be generated in any biome. In order for this to work, there must be 2 water blocks above the block the bone meal is being used on, and the lower one must be non-flowing water.
Using bone meal on a [[sea pickle]] on a [[coral block]] creates sea pickles. This generates sea pickles up to 3 [[block]]s (of coral) away, so a 7+ × 7+ block (49+ blocks) of coral may be necessary, to return the most sea pickles per given bone meal attempt (more attempts grows them more numerously, exactly - including the range of it growing, like grass with heights on grass blocks - as coral and coral fans, though those others being non-solid blocks).
Using bone meal on [[netherrack]] adjacent to [[nylium]] converts the netherrack into nylium of the same type. If both crimson and warped nylium are adjacent to the netherrack that was applied with bone meal, there is a 50% chance that either type of nylium is created.
Using bone meal on [[nylium]] causes the corresponding [[roots]] and both types of [[fungi]] to appear on the nylium block and other nylium nearby, with the type of fungi matching the type of nylium being more common. In addition, using bone meal on the side of warped nylium creates [[nether sprouts]] and [[twisting vines]].
=== Farmer villagers ===
[[Villager]]s with the farmer profession can collect bone meal from a full [[composter]], with which they can make their crops grow faster.
== Sounds ==
{{edition|java}}:
{{Sound table
|sound=Bonemeal1.ogg
|sound2=Bonemeal2.ogg
|sound3=Bonemeal3.ogg
|sound4=Bonemeal4.ogg
|sound5=Bonemeal5.ogg
|subtitle=Bone Meal crinkles
|description=When bone meal is successfully used
|source=block
|id=item.bone_meal.use
|translationkey=subtitles.item.bone_meal.use
|volume=1.0
|pitch=1.0
|distance=16
|foot=1}}
{{edition|be}}:
{{Sound table
|type=bedrock
|sound=Bonemeal1.ogg
|sound2=Bonemeal2.ogg
|sound3=Bonemeal3.ogg
|sound4=Bonemeal4.ogg
|sound5=Bonemeal5.ogg
|description=When bone meal is successfully used
|source=block
|id=item.bone_meal.use
|volume=1.0
|pitch=0.9-1.1
|foot=1}}
== Data values ==
=== ID ===
{{edition|java}}:
{{ID table
|edition=java
|showforms=y
|generatetranslationkeys=y
|displayname=Bone Meal
|spritetype=item
|nameid=bone_meal
|form=item
|foot=1}}
{{edition|bedrock}}:
{{ID table
|edition=bedrock
|showaliasids=y
|shownumericids=y
|showforms=y
|notshowbeitemforms=y
|generatetranslationkeys=y
|displayname=Bone Meal
|spritetype=item
|nameid=bone_meal
|aliasid=dye / 15
|id=411
|form=item
|translationkey=item.dye.white.name
|foot=1}}
== History ==
{{History|java beta}}
{{History||1.2|[[File:Bone Meal JE1 BE1.png|32px]] Added bone meal.
|Bone meal can now only be applied to [[sapling]]s and [[wheat]].}}
{{History||1.6.6|Bone meal can now be applied on [[grass block]]s.}}
{{History||1.8|snap=Pre-release|Bone meal can now be used on [[mushroom]]s to make [[huge mushroom]]s, and the block the mushroom is on changes to [[dirt]].}}
{{History|||snap=Pre-release 2 ;)|Bone meal can now be applied on [[pumpkin seeds|pumpkin]] and [[melon seed]]s.}}
{{History|java}}
{{History||1.3.1|snap=12w19a|Bone meal can now be applied on [[cocoa bean]]s.}}
{{History|||snap=1.3|[[File:Bone Meal JE2 BE2.png|32px]] The texture of bone meal has been changed.}}
{{History||1.4.2|snap=12w34a|Bone meal can now be used to dye [[leather armor]] and [[tamed wolf]]'s collar.}}
{{History||1.4.6|snap=12w49a|Bone meal can now be [[crafted]] with [[gunpowder]] to create a [[firework star]].}}
{{History||1.5|snap=13w04a|Bone meal has been significantly nerfed.<br>
[[Wheat]], [[melon seeds|melon]] and [[pumpkin seed]]s, [[potato]]es and [[carrot]]s: one bone meal is now consumed for all seven stages of growth (melon and pumpkin seeds do not spawn right away).<br>
[[Sapling]]s: one bone meal is now consumed for each of the two growth stages, then it grows into a tree.<br>
[[Cocoa]]s: one bone meal is now consumed for each of the three stages of growth.
|Green [[particle]]s are now displayed when bone meal is used.
|Bone meal can now be used from [[dispenser]]s.}}
{{History|||snap=13w05a|The balancing of bone meal has been adjusted. Growing a plant to its last state now takes on average 2-5 uses of bone meal (results vary from plant to plant).<ref>https://web.archive.org/web/20220921040940/https://imgur.com/a/gOngk</ref>}}
{{History||1.6.1|snap=13w19a|Bone meal can now be used to craft white [[stained clay]].}}
{{History||1.7.2|snap=13w36a|The [[flower]]s generated when using bone meal on grass blocks is now biome dependent.}}
{{History|||snap=13w41a|Bone meal can now be used to craft white [[stained glass]].}}
{{History||1.8|snap=14w30a|Added [[banner]]s, which can be dyed with [[bone meal]].}}
{{History||1.10|snap=16w20a|Bone meal can now be used to craft [[bone block]]s.}}
{{History||1.11|snap=16w39b|Bone meal can now be used to dye [[shulker box]]es.}}
{{History||1.12|snap=17w06a|Bone meal can now be used to craft white [[concrete powder]].}}
{{History||1.13|snap=17w47a|The different data values for the <code>dye</code> ID have been split up into their own IDs.
|Prior to [[1.13/Flattening|''The Flattening'']], this [[item]]'s numeral ID was 351.}}
{{History|||snap=18w07a|Bone meal can now be used underwater to create [[seagrass]].}}
{{History|||snap=18w14b|Bone meal can now be used for spreading [[sea pickle]]s.}}
{{History||1.13.1|snap=18w31a|Bone meal used in [[water]] of warm ocean biomes now has a chance of growing [[coral]].
|[[Cod]], [[salmon]], [[tropical fish]], and [[pufferfish]] now have a chance of dropping bone meal upon death.}}
{{History|||snap=18w32a|Bone meal used in [[water]] of warm ocean biomes now has a chance of growing [[coral fan]]s.}}
{{History||1.14|snap=18w43a|Bone meal can now used to craft [[white dye]].
|Bone meal can no longer be used as a [[dye]].
|All of the dye-related functions and crafting recipes of bone meal (except bone blocks) have been transferred to white dye.
|[[File:Bone Meal JE3 BE3.png|32px]] The texture of bone meal has been changed.
|Bone meal can now be used on [[bamboo]] and [[bamboo shoot]].}}
{{History|||snap=19w03a|Bone meal can now be obtained from [[composter]]s.}}
{{History||1.16|snap=20w06a|Bone meal can now be used to grow [[fungi]] into [[huge fungi]].
|Bone meal can now be used to spread [[nylium]] onto netherrack.}}
{{History|||snap=20w09a|Using bone meal to grow fungi now works only on the respective [[nylium]].}}
{{History|||snap=20w11a|Bone meal can now grow [[kelp]], [[weeping vines]], and [[twisting vines]].}}
{{History|||snap=20w12a|Bone meal can now be used to grow [[roots]], [[fungi]], and [[nether sprouts]] on nylium.}}
{{History|||snap=20w13a|Farmers can now use bone meal to grow crops.}}
{{History||1.17|snap=21w03a|Bone meal can now be used to spread [[glow lichen]]s.}}
{{History|||snap=21w05a|Bone meal can now be used on [[moss block]]s, [[small dripleaf]], [[big dripleaf]], and [[cave vines]].}}
{{History|||snap=21w11a|Bone meal can now be used on [[rooted dirt]].}}
{{History|||snap=21w15a|Bone meal now makes a sound when used.}}
{{History|||snap=21w16a|Moss patches obtained from fertilizing moss blocks contain less vegetation and are now smaller and more irregular in shape.
|Bone meal can now be used on [[azalea]] and [[flowering azalea]].}}
{{History||1.19|snap=22w11a|Bone meal can now be used on [[mangrove propagule]]s and [[mangrove leaves]].}}
{{History||1.20<br>(Experimental)|link=1.19.4|snap=23w07a|Bone meal can now be used on [[pink petals]] and [[torchflower crop]]s.|Using bone meal on [[cherry grove]]s now have a chance to generate [[pink petal]]s.}}
{{History||1.20|snap=23w12a|Bone meal can now be used on [[pitcher crop]]s.}}
{{History|pocket alpha}}
{{History||v0.3.0|[[File:Bone Meal JE1 BE1.png|32px]] Added bone meal. It is currently unobtainable and serves no purpose.}}
{{History||v0.3.3|Bone meal can now be crafted from bones.
|Bone meal can now be applied to grass blocks and saplings.}}
{{History||v0.4.0|Added the first [[crop]]s, which bone meal can be applied to.}}
{{History||v0.8.0|snap=build 1|[[File:Bone Meal JE2 BE2.png|32px]] The texture of bone meal has been changed.
|Bone meal no longer instantly grows [[crop]]s to full size.
|Bone meal can now be used to craft white [[wool]].}}
{{History|||snap=build 5|[[Pumpkin]] and [[melon]] stems now grow by only one stage when bone meal is used.
|Some [[flower]]s now spawn certain other flowers when bone meal is used on them.
|Bone meal can now grow [[fern]]s and [[tall grass]] in [[survival]] and [[creative]].
|Bone meal can now grow [[sugar cane]]s to maximum height.}}
{{History||v0.9.0|snap=build 11|Bone meal can now be used to dye tamed [[wolf]] collars.}}
{{History||v0.14.0|snap=build 1|Bone meal can now be used from [[dispenser]]s.
|Bone meal can now be used to dye [[water]] in [[cauldron]]s.}}
{{History|pocket}}
{{History||1.0.0|snap=alpha 0.17.0.1|Bone meal can now be used to dye [[shulker]]s.}}
{{History||1.1.0|snap=alpha 1.1.0.0|Bone meal can now be used to craft white [[concrete powder]], white [[bed]]s and white [[shulker box]]es.}}
{{History||1.1.3|snap=alpha 1.1.3.0|Bone meal can now be used to craft [[bone block]]s.}}
{{History|bedrock}}
{{History||1.2.0|snap=beta 1.2.0.2|Bone meal can now be used to craft white [[stained glass]].
|Bone meal can now be used to craft [[firework star]]s.
|Bone meal can now be used to create [[banner]] patterns.}}
{{History||1.4.0|snap=beta 1.2.14.2|Bone meal can now be used underwater for growing [[seagrass]] and [[coral]].}}
{{History|||snap=beta 1.2.20.1|Bone meal can now be used for spreading [[sea pickle]]s.
|Bone meal can now be used to craft white [[balloon]]s and white [[glow stick]]s.}}
{{History||1.8.0|snap=beta 1.8.0.8|Bone meal can now be used to grow [[bamboo]].}}
{{History|||snap=beta 1.8.0.10|Bone meal can now be used to craft [[white dye]].}}
{{History||1.10.0|snap=beta 1.10.0.3|Bone meal are now sold by [[wandering trader]]s.
|[[File:Bone Meal JE3 BE3.png|32px]] The texture of bone meal has been changed.}}
{{History||1.11.0|snap=beta 1.11.0.1|Bone meal can now be obtained from [[composter]]s.}}
{{History||1.16.0|snap=beta 1.16.0.51|Bone meal can now grow [[fungus|fungi]] into [[huge fungi]].
|Bone meal can now be used to turn [[netherrack]] into [[nylium]].
|Bone meal can now be used to grow [[roots]], [[fungi]], and [[nether sprouts]] on nylium.}}
{{History||1.16.100|snap=beta 1.16.100.56|The ID of bone meal has been changed from <code>dye/15</code> to <code>bone_meal</code>.}}
{{History||1.16.210|snap=beta 1.16.210.51|Bone meal used in [[water]] now has a chance of growing [[coral fan]]s.}}
{{History||1.16.220|snap=beta 1.16.220.52|Bone meal can now be used on [[moss block]]s, [[small dripleaf]], [[big dripleaf]], [[cave vines]] and [[rooted dirt]].}}
{{History||1.17.0|snap=beta 1.16.230.50|Bone meal can now be used to spread [[glow lichen]]s.}}
{{History|||snap=beta 1.16.230.54|Bone meal can be used to grow [[azalea]]s into azalea trees.}}
{{History|||snap=beta 1.17.0.50|Bone meal now makes a sound when used.}}
{{History|console}}
{{History||xbox=TU1|xbone=CU1|ps=1.00|wiiu=Patch 1|switch=1.0.1|[[File:Bone Meal JE1 BE1.png|32px]] Added bone meal.}}
{{History||xbox=TU19|xbone=CU7|ps=1.12|Bone meal no longer instantly grows [[crop]]s to full size.}}
{{History||xbox=none|xbone=none|ps=1.90|wiiu=none|switch=none|[[File:Bone Meal JE3 BE3.png|32px]] The texture of bone meal has been changed.}}
{{History|new 3ds}}
{{History||0.1.0|[[File:Bone Meal JE2 BE2.png|32px]] Added bone meal.}}
{{History|foot}}
== Issues ==
{{issue list}}
== Trivia ==
* Bone meal can be used on the sides or bottom of a [[grass block]], as well as on a grass block with [[plant]]s already on top of it.
* Regardless of if it succeeds in fertilizing, bone meal makes green sparkles. However, like smoke from a [[torch]], the sparkles appear only if the [[player]] has [[particles]] set All or Decreased.
* In real life, [[Wikipedia:bone meal|bone meal]] is used as a fertilizer to provide nitrogen and phosphorus to plants.
==Gallery==
<gallery>
File:Bone Meal On Grass.png|Bone meal used on [[grass block]]s.
</gallery>
== See also ==
* [[Farming]]
== References ==
{{reflist}}
{{Items}}
[[Category:Dyes]]
[[Category:Plants]]
[[Category:Renewable resources]]
[[cs:Kostní moučka]]
[[de:Knochenmehl]]
[[es:Polvo de hueso]]
[[fr:Poudre d'os]]
[[hu:Csontliszt]]
[[ja:骨粉]]
[[ko:뼛가루]]
[[nl:Beendermeel]]
[[pl:Mączka kostna]]
[[pt:Farinha de osso]]
[[ru:Костная мука]]
[[th:ผงกระดูก]]
[[zh:骨粉]]</li></ul> | 12w34a | Tamed wolves can now have dye-able collars.[6] | |||
1.4.4{{Extension DPL}}<ul><li>[[Ghast Tear|Ghast Tear]]<br/>{{Item
| image = Ghast Tear.png
| renewable = Yes
| stackable = Yes (64)
}}
'''Ghast tears''' are items [[Drops|dropped]] by [[ghast]]s. They can be used to make potions of [[Regeneration]] and [[end crystal]]s.
== Obtaining ==
=== Mob loot ===
[[Ghast]]s drop 0–1 ghast tears. [[Looting]] increases the maximum ghast tears dropped by one per level, for a maximum of 4 ghast tears with Looting III. Looting also works when knocking back a [[fireball]] with an enchanted item.
== Usage ==
=== Brewing ingredient ===
{{brewing
|showname=1
|head=1
|Ghast Tear
|Mundane Potion
|base=Water Bottle
}}
{{brewing
|foot=1
|Ghast Tear
|Potion of Regeneration
}}
=== Crafting ingredient ===
{{crafting usage}}
== Data values ==
=== ID ===
{{edition|java}}:
{{ID table
|edition=java
|showforms=y
|generatetranslationkeys=y
|displayname=Ghast Tear
|spritetype=item
|nameid=ghast_tear
|form=item
|foot=1}}
{{edition|bedrock}}:
{{ID table
|edition=bedrock
|shownumericids=y
|showforms=y
|notshowbeitemforms=y
|generatetranslationkeys=y
|displayname=Ghast Tear
|spritetype=item
|nameid=ghast_tear
|id=424
|form=item
|foot=1}}
== History ==
{{History|java}}
{{History||1.0.0|snap=Beta 1.9 Prerelease|[[File:Ghast Tear JE1 BE1.png|32px]] Added ghast tears.}}
{{History|||snap=Beta 1.9 Prerelease 3|Ghast tears can now be brewed in a [[water bottle]] to create a [[mundane potion]], or in an [[awkward potion]] to create a [[potion of Healing]].}}
{{History|||snap=Beta 1.9 Prerelease 4|Ghast tears now create [[potion of regeneration|potions of Regeneration]]. This was due to the sheer difficulty in obtaining them.<ref>{{tweet|jeb|123671273904680960|Since Ghast Tears are so hard to get, I've decided to replace the "Instant Health" with "Regeneration" for them|October 11, 2011}}</ref> [[Glistering melon]]s have been added to create potions of Healing, instead.}}
{{History||1.9|snap=15w44b|A ghast tear is now used to [[crafting|craft]] an [[end crystal]].}}
{{History||1.13|snap=17w47a|Prior to [[1.13/Flattening|''The Flattening'']], this [[item]]'s numeral ID was 370.}}
{{History||1.14|snap=18w43a|[[File:Ghast Tear JE2 BE2.png|32px]] The texture of ghast tears has been changed.}}
{{History|pocket alpha}}
{{History||v0.12.1|snap=build 1|[[File:Ghast Tear JE1 BE1.png|32px]] Added ghast tears.|Ghast tears are currently unobtainable as [[ghast]]s don’t [[drops|drop]] them.}}
{{History|||snap=build 7|Ghasts now drop ghast tears.<ref>{{bug|MCPE-9338}}</ref>}}
{{History|pocket}}
{{History||1.0.0|snap=alpha 0.17.0.1|A ghast tear is now used to [[crafting|craft]] an [[end crystal]].}}
{{History|bedrock}}
{{History||1.10.0|snap=beta 1.10.0.3|[[File:Ghast Tear JE2 BE2.png|32px]] The texture of ghast tears has been changed.}}
{{History|console}}
{{History||xbox=TU7|xbone=CU1|ps=1.0|wiiu=Patch 1|switch=1.0.1|[[File:Ghast Tear JE1 BE1.png|32px]] Added ghast tears.}}
{{History||xbox=none|xbone=none|ps=1.90|wiiu=none|switch=none|[[File:Ghast Tear JE2 BE2.png|32px]] The texture of ghast tears has been changed.}}
{{History|New 3DS}}
{{History||0.1.0|[[File:Ghast Tear JE1 BE1.png|32px]] Added ghast tears.}}
{{History|foot}}
== Issues ==
{{issue list}}
== References ==
{{reflist}}
{{items}}
[[Category:Renewable resources]]
[[Category:Brewing recipe]]
[[cs:Ďasova slza]]
[[de:Ghast-Träne]]
[[es:Lágrima de ghast]]
[[fr:Larme de Ghast]]
[[hu:Kísértetkönny]]
[[it:Lacrima di ghast]]
[[ja:ガストの涙]]
[[ko:가스트 눈물]]
[[nl:Ghasttraan]]
[[pl:Łza ghasta]]
[[pt:Lágrima de ghast]]
[[ru:Слеза гаста]]
[[uk:Сльоза ґаста]]
[[zh:恶魂之泪]]</li><li>[[Glow Stick|Glow Stick]]<br/>{{stub}}
{{education feature}}
{{Exclusive|Bedrock|Education}}
{{Item
| image = White Glow Stick.png
| extratext = View [[#Gallery|all renders]]
| renewable = No
| durability = 95
| stackable = No
}}
'''Glow sticks''' are [[Chemistry Update|chemistry]]-related [[item]]s, which can be lit up in the player's hand for a limited time.
== Obtaining ==
{{iN|be}}, glow sticks cannot be obtained by the {{cmd|give}} command. They also cannot be obtained in [[Survival]]. Cheats must be enabled to obtain glow sticks in Survival mode, or in [[Minecraft Education]].
=== Crafting ===
{{Crafting
|showdescription=1
|ingredients=[[Polyethylene]] +<br>[[Hydrogen Peroxide]] +<br>Matching [[Dye]] +<br>[[Luminol]]
|A1= Polyethylene
|B1= Hydrogen Peroxide
|C1= Polyethylene
|A2= Polyethylene
|B2= White Dye; Orange Dye; Magenta Dye; Light Blue Dye; Yellow Dye; Lime Dye; Pink Dye; Gray Dye; Cyan Dye; Purple Dye; Blue Dye; Brown Dye; Green Dye; Red Dye
|C2= Polyethylene
|A3= Polyethylene
|B3= Luminol
|C3= Polyethylene
|Output= Matching Glow Stick
|description={{only|bedrock|education}}
|type= Miscellaneous
}}
<div style="display:none">
<!--
This is so the pre-Village & Pillage dyes can have dye-related crafting recipes show on their respective pages.
They don't need to be displayed on this page because they already intuitively list "Any Matching Dye".
-->
{{Crafting
|showdescription=1
|ingredients=[[Polyethylene]] +<br>[[Hydrogen Peroxide]] +<br>Matching [[Dye]] +<br>[[Luminol]]
|A1= Polyethylene
|B1= Hydrogen Peroxide
|C1= Polyethylene
|A2= Polyethylene
|B2= Bone Meal; Lapis Lazuli; Cocoa Beans
|C2= Polyethylene
|A3= Polyethylene
|B3= Luminol
|C3= Polyethylene
|Output= White Glow Stick; Blue Glow Stick; Brown Glow Stick
|description={{only|bedrock|Education}}
|type= Miscellaneous
}}
</div>
== Usage ==
While equipped, [[player]]s can {{control|use}} glow sticks to shake them, causing them to appear bright regardless of the [[light]] level. This is only an aesthetic change, as no light is emitted to the surrounding area. A [[particle]] effect is visible until the [[durability]] runs out. The glow stick's durability depletes while lit{{Info needed}}, in both Survival and Creative modes.
== Sounds ==
{{Sound table
|type=bedrock
|sound=Flint and steel click.ogg
|source=block
|description=While a glowstick is being activated
|id=fire.ignite
|volume=1.0
|pitch=0.5/0.7
|foot=1}}
== Data values ==
=== ID ===
{{ID table
|edition=bedrock
|shownumericids=y
|showforms=y
|notshowbeitemforms=y
|generatetranslationkeys=y
|displayname=Glow Stick
|spritename=glow-sticks
|spritetype=item
|nameid=glow_stick
|id=601
|form=item
|translationkey=item.glow_stick.black.name,item.glow_stick.red.name,item.glow_stick.green.name,item.glow_stick.brown.name,item.glow_stick.blue.name,item.glow_stick.purple.name,item.glow_stick.cyan.name,item.glow_stick.silver.name,item.glow_stick.gray.name,item.glow_stick.pink.name,item.glow_stick.lime.name,item.glow_stick.yellow.name,item.glow_stick.lightBlue.name,item.glow_stick.magenta.name,item.glow_stick.orange.name,item.glow_stick.white.name
|foot=1}}
===Metadata===
{{/DV}}
===Item data===
See [[Bedrock Edition level format/Item format]].
== History ==
{{History|bedrock}}
{{History||1.4.0|snap=beta 1.2.20.1|[[File:White Glow Stick.png|32px]] [[File:Orange Glow Stick.png|32px]] [[File:Magenta Glow Stick.png|32px]] [[File:Light Blue Glow Stick.png|32px]] [[File:Yellow Glow Stick.png|32px]] [[File:Lime Glow Stick.png|32px]] [[File:Pink Glow Stick.png|32px]] [[File:Gray Glow Stick.png|32px]] [[File:Cyan Glow Stick.png|32px]] [[File:Purple Glow Stick.png|32px]] [[File:Blue Glow Stick.png|32px]] [[File:Brown Glow Stick.png|32px]] [[File:Green Glow Stick.png|32px]] [[File:Red Glow Stick.png|32px]] Added glow sticks.}}
{{History||1.14.60|snap=?|Making a glow stick results in an edible item called {{code|item.glow_stick.black.name}}.}}
{{History||?|Making a glow stick results in correct items again.
|Making a glow stick with dye has been made an upgrade{{info needed|what is this supposed to mean?}}
|Putting 2 glow sticks in a Crafting Table now outputs a correct glow stick.}}
{{History||1.17.0|snap=?|[[File:Missing Glow Stick.png|32px]] Two black glow sticks, using the [[missing texture]] if Education Edition is disabled, now generate in fake end portal rooms in [[mansion]]s instead of [[ender pearl]]s.}}
{{h||1.18.0|snap=beta 1.18.0.21|Glow sticks no longer generate in [[woodland mansion]]s.}}
{{History|education}}
{{History||1.0.27|[[File:White Glow Stick.png|32px]] [[File:Orange Glow Stick.png|32px]] [[File:Magenta Glow Stick.png|32px]] [[File:Light Blue Glow Stick.png|32px]] [[File:Yellow Glow Stick.png|32px]] [[File:Lime Glow Stick.png|32px]] [[File:Pink Glow Stick.png|32px]] [[File:Gray Glow Stick.png|32px]] [[File:Cyan Glow Stick.png|32px]] [[File:Purple Glow Stick.png|32px]] [[File:Blue Glow Stick.png|32px]] [[File:Brown Glow Stick.png|32px]] [[File:Green Glow Stick.png|32px]] [[File:Red Glow Stick.png|32px]] Added glow sticks.}}
{{History|foot}}
== Gallery ==
<gallery>
White Glow Stick.png|
Orange Glow Stick.png|
Magenta Glow Stick.png|
Light Blue Glow Stick.png|
Yellow Glow Stick.png|
Lime Glow Stick.png|
Pink Glow Stick.png|
Gray Glow Stick.png|
Cyan Glow Stick.png|
Purple Glow Stick.png|
Blue Glow Stick.png|
Brown Glow Stick.png|
Green Glow Stick.png|
Red Glow Stick.png|
</gallery>
== Trivia ==
* The glowing reaction of [[Wikipedia:Luminol|Luminol]] during oxidation exists in real life. It is used for detecting blood in crime scenes.
* Players cannot enchant glow sticks with Unbreaking or Mending, despite the items having [[durability]].
* The black and light gray glow sticks use the same texture as the red glow stick.{{verify|It seems they use the missing texture instead. Was this the case beforehand, and they only started using the missing texture later?}}
== Issues ==
{{issue list}}
{{items}}
{{Education Edition}}
[[Category:Non-renewable resources]]
[[Category:Education Edition items]]
[[de:Knicklicht]]
[[ja:ケミカルライト]]
[[ko:발광봉]]
[[pt:Graveto Brilhante]]
[[ru:Химический источник света]]
[[zh:荧光棒]]</li></ul> | pre | Added untamed pups, which can be spawned only in creative using a spawn egg. | |||
1.6.1{{Extension DPL}}<ul><li>[[Cyan Dye|Cyan Dye]]<br/>{{Item
| image = Cyan Dye.png
| renewable = Yes
| stackable = Yes (64)
}}
'''Cyan dye''' is a [[Dyeing#Secondary|secondary dye color]].
== Obtaining ==
=== Crafting ===
{{Crafting
|head=1
|showdescription=1
|showname=0
|Blue Dye
|Green Dye
|Output=Cyan Dye,2
|type=Material
}}
{{Crafting
|Lapis Lazuli
|Green Dye
|Output=Cyan Dye,2
|description={{only|bedrock|education}}
|type=Material
}}
{{Crafting
|Pitcher Plant
|Output=Cyan Dye,2
|description=
|type=Material
|foot=1
}}
=== Trading ===
[[Wandering trader]]s sell 3 cyan dye for an [[emerald]].
== Usage ==
{{dye usage}}
=== Crafting ingredient ===
{{crafting usage|ignore=Banner|continue=1}}
{{banner crafting usage}}
=== Loom ingredient ===
{{Banner loom usage|Cyan Dye}}
=== Trading ===
{{IN|bedrock}}, journeyman-level shepherd villagers have 20% chance to buy 12 cyan dye for an emerald.
{{More info|java=1|Java UI does not use a specific trade slot, which results in a different chance to offer this trade.}}
== Data values ==
=== ID ===
{{edition|java}}:
{{ID table
|edition=java
|showforms=y
|generatetranslationkeys=y
|displayname=Cyan Dye
|spritetype=item
|nameid=cyan_dye
|form=item
|foot=1}}
{{edition|bedrock}}:
{{ID table
|edition=bedrock
|showaliasids=y
|shownumericids=y
|showforms=y
|notshowbeitemforms=y
|generatetranslationkeys=y
|displayname=Cyan Dye
|spritetype=item
|nameid=cyan_dye
|aliasid=dye / 6
|id=401
|form=item
|translationkey=item.dye.cyan.name
|foot=1}}
== History ==
{{History|java beta}}
{{History||1.2|[[File:Cyan Dye JE1 BE1.png|32px]] Added cyan dye.}}
{{History|java}}
{{History||1.4.2|snap=12w34a|Added the ability to [[Armor#Dyeing|dye]] leather [[armor]] and [[wolf]] collars.}}
{{History||1.4.6|snap=12w49a|Cyan dye can now be [[crafting|crafted]] with [[gunpowder]] to create a [[firework star]].}}
{{History||1.6.1|snap=13w19a|[[Stained clay]] can now be crafted.}}
{{history||1.7.2|snap=13w36a|With the addition of new [[flower]]s, many secondary and tertiary dyes are now primary [[dye]]s.}}
{{History|||snap=13w41a|[[Stained glass]] can now be crafted.}}
{{History||1.8|snap=14w02a|Due to [[lapis lazuli]] being [[renewable resource|renewable]], cyan dye is also renewable.}}
{{History|||snap=14w30a|Added [[banner]]s, which can be dyed.}}
{{History||1.13|snap=17w47a|The different data values for the <code>dye</code> ID have now been split up into their own IDs.
|Prior to [[1.13/Flattening|''The Flattening'']], this [[item]]'s numeral ID was 351.}}
{{History||1.14|snap=18w43a|Cyan dye is now [[crafting|crafted]] using [[blue dye]], instead of [[lapis lazuli]].
|[[File:Cyan Dye.png|32px]] The texture of cyan dye has now been changed.}}
{{History|||snap=18w44a|Cyan dye can now change the text color on [[sign]]s to cyan.}}
{{History|||snap=19w05a|Added the [[wandering trader]], which sell cyan dyes.}}
{{History|||snap=19w11a|Cyan dye can now be [[trading|bought]] by shepherd villagers.}}
{{History||1.17|snap=20w45a|Cyan dye can now be used to craft [[cyan candle]]s.}}
{{History|||snap=21w19a|Cyan dye can no longer be used to craft cyan candles.}}
{{History|||snap=Pre-release 1|Cyan dye can once again be used to craft cyan candles.}}
{{History||1.20<br>(Experimental)|link=1.19.3|snap=22w42a|Cyan dye can now change the text color on [[hanging sign]]s to cyan.}}
{{History||1.20|snap=23w12a|Added [[pitcher plant]]s, which can be crafted into cyan dye.}}
{{History|||snap=23w14a|[[Pitcher plant]]s now craft into 2 cyan dye instead of 1.}}
{{History|pocket alpha}}
{{History||v0.3.0|[[File:Cyan Dye JE1 BE1.png|32px]] Added cyan dye. It is currently unobtainable and serves no purpose.}}
{{History||v0.4.0|Cyan dye is now craftable with [[lapis lazuli]] and [[cactus green]].
|Cyan dye can now be used to craft cyan wool.}}
{{History||v0.6.0|Cyan dye can now be used to dye [[sheep]].}}
{{History||v0.9.0|snap=build 11|Cyan dye can now be used to craft colored [[terracotta]].}}
{{History||v0.11.0|snap=build 1|Cyan dye can now be used to dye tamed [[wolf]] collars.}}
{{History||v0.14.0|snap=build 1|Cyan dye can now be used to dye water in [[cauldron]]s.}}
{{History|pocket}}
{{History||1.0.0|snap=alpha 0.17.0.1|Cyan dye can now be used to dye [[shulker]]s.}}
{{History||1.1.0|snap=alpha 1.1.0.0|Cyan dye can now be used to craft [[concrete powder]], colored [[bed]]s and dyed [[shulker box]]es.}}
{{History|bedrock}}
{{History||1.2.0|snap=beta 1.2.0.2|Cyan dye can now be used to craft [[firework star]]s, [[stained glass]] and patterns on [[banner]]s.}}
{{History||1.4.0|snap=beta 1.2.20.1|Cyan dye can now be used to craft [[balloon|ballons]] and [[glow stick|glow sticks]].}}
{{History||1.8.0|snap=beta 1.8.0.8|Cyan dye can now be used to dye tamed [[cat]] collars.}}
{{History||1.10.0|snap=beta 1.10.0.3|Cyan dye are now [[trading|sold]] by [[wandering trader]]s.
|Cyan dye can now be used to dye white [[carpet|carpets]] and undyed [[glass pane]]s.
|[[File:Cyan Dye.png|32px]] The texture of cyan dye has now been changed.}}
{{History||1.11.0|snap=beta 1.11.0.4|Cyan dye can be [[trading|sold]] to shepherd [[villager]]s.}}
{{History||1.16.100|snap=beta 1.16.100.56|The ID of cyan dye has been changed from <code>dye/6</code> to <code>cyan_dye</code>.}}
{{History|console}}
{{History||xbox=TU1|xbone=CU1|ps=1.00|switch=1.0.1|wiiu=Patch 1|[[File:Cyan Dye JE1 BE1.png|32px]] Added cyan dye.}}
{{History|PS4}}
{{History||1.90|[[File:Cyan Dye.png|32px]] The texture of cyan dye has now been changed.}}
{{History|new 3ds}}
{{History||0.1.0|[[File:Cyan Dye JE1 BE1.png|32px]] Added cyan dye.}}
{{History|foot}}
== Issues ==
{{issue list}}
{{Items}}
[[Category:Items]]
[[Category:Dyes]]
[[Category:Renewable resources]]
[[cs:Azurové barvivo]]
[[de:Türkiser Farbstoff]]
[[es:Tinte cian]]
[[fr:Teinture cyan]]
[[hu:Ciánkék festék]]
[[ja:青緑色の染料]]
[[ko:청록색 염료]]
[[nl:Turquoise kleurstof]]
[[pl:Błękitny barwnik]]
[[pt:Corante ciano]]
[[ru:Бирюзовый краситель]]
[[zh:青色染料]]</li><li>[[Cocoa Beans|Cocoa Beans]]<br/>{{Block
|image=<gallery>
Cocoa Age 0.png|Age 0 JE
Cocoa Age 1.png|Age 1 JE
Cocoa Age 2.png|Age 2 JE
</gallery>
|image2=<gallery>
Cocoa Age 0 BE.png|Age 0 BE
Cocoa Age 1 BE.png|Age 1 BE
Cocoa Age 2 BE.png|Age 2 BE
</gallery>
|transparent=Yes
|light=No
|tool=axe
|renewable=Yes
|stackable=Yes (64)
|flammable=No
|lavasusceptible=No
}} '''Cocoa beans''' are items obtained from cocoa pods and are used to plant them, as well as to craft [[dye|brown dye]] and [[cookie|cookies]].
'''Cocoa pods''' are [[Bone Meal|bonemealable]] [[plant]]s placed on [[Log|jungle log]] sides that grow cocoa beans, and can be found naturally in [[Jungle|jungles]].
==Obtaining==
In ''Java Edition'', cocoa beans are only obtained through the natural generation of cocoa pods, while in ''Bedrock Edition'', they can also be gotten in bonus chests, from [[fishing]] inside the jungle, bamboo jungle and sparse jungle biomes and during a [[trading]] with a wandering trader.
Cocoa beans come from cocoa pods, which are found on the trunks of normal-sized naturally-generated [[jungle tree]]s in [[jungle]], [[bamboo jungle]]s and [[sparse jungle]] temperate [[biome]]s.
Cocoa pods can be mined with any item, but [[axe]]s are the quickest. Fully grown cocoa pods drop 3 cocoa beans. Using a tool enchanted with Fortune does not increase the amount of cocoa beans dropped.
{{breaking row|horizontal=1|Cocoa|Axe|sword=1|link=none}}
The block itself can be obtained by inventory editing or [[add-on]]s {{in|bedrock}}.
From one to two cocoa beans can be found in 40% of bonus [[chest]]s {{in|bedrock}}.
{{LootChestItem|cocoa-beans}}
Cocoa beans can be obtained from [[fishing]] in a jungle {{in|bedrock}}.
[[Wandering trader]]s may sell 3 cocoa beans for an [[emerald]] during a [[trading]] {{in|bedrock}}.
==Usage==
===Farming===
{{main|Tutorials/Cocoa bean farming}}
Placing cocoa beans on the side of a jungle [[log]] plants a new cocoa pod. The log does not need to be attached to a tree. A cocoa pod can be placed on jungle logs, jungle [[wood]], stripped jungle logs and stripped jungle wood.
[[File:Cocoaplant farm.png|thumb|left|A somewhat efficient cocoa pod farm, minimizing space and wood use.]]
Cocoa has three stages of growth. During its first stage, the pod is small and green. In the second stage, the plant is bigger and colored tan. In its last stage, the pod is even larger and orange. The cocoa block has a 20% chance to grow a stage when receiving a [[Tick#Random tick|random tick]], giving it an average time of 5 minutes and 41 seconds per stage. When destroyed in the first two stages, the pod yields only one cocoa bean. When destroyed in the third stage, it gives 3 cocoa beans. [[Bone meal]] can be used to force the cocoa pod forward by one growth stage. Cocoa pods burst and drop their beans when struck by flowing water, pushed by a piston or if their [[log]] or wood are removed by any means.
===Composting===
Placing cocoa beans into a [[composter]] has a 65% chance of raising the compost level by 1. {{IN|bedrock}}, cocoa beans are accepted as a direct substitute of brown dye in many recipes.
===Crafting ingredient===
{{crafting usage}}
{{Dye usage}}
{{IN|bedrock}}, cocoa beans can be also used in banner patterns:
{{banner crafting usage}}
{{Banner loom usage|Cocoa Beans}}
==Sounds==
{{Sound table/Block/Wood}}
==Data values==
===ID===
{{edition|java}}:
{{ID table
|edition=java
|showforms=y
|generatetranslationkeys=y
|displayname=Cocoa
|spritetype=block
|nameid=cocoa
|form=block}}
{{ID table
|displayname=Cocoa Beans
|spritetype=item
|nameid=cocoa_beans
|form=item
|foot=1}}
{{edition|bedrock}}:
{{ID table
|edition=bedrock
|showforms=y
|showaliasids=y
|shownumericids=y
|generatetranslationkeys=y
|displayname=Cocoa
|spritetype=block
|nameid=cocoa
|id=127
|form=block}}
{{ID table
|displayname=Cocoa Beans
|spritetype=item
|nameid=cocoa_beans
|aliasid=dye / 3
|id=412
|form=item
|translationkey=item.dye.brown.name
|foot=1}}
===Block states===
{{see also|Block states}}
{{/BS}}
==History==
''For a more in-depth breakdown of changes to textures and models, including a set of renders for each state combination, see [[/Asset history]]''
{{History|java beta}}
{{History||1.2|[[File:Cocoa Beans JE1 BE1.png|32px]] Added cocoa beans.
|Cocoa beans are currently obtainable only through an inventory editor.}}
{{History||1.2_02|Prior to this, Cocoa Beans were misspelled as 'Coco Beans'.}}
{{History||1.4|Cocoa beans have been formally brought into the game as a reward found in [[dungeon]] chests.<ref>{{tweet|notch|53161729990987776}}</ref> (53% chance) Also, brown [[sheep]] now naturally spawn, making brown [[wool]] obtainable without hacking the game.
|Cocoa beans can now be used to craft [[cookie]]s.}}
{{History|java}}
{{History||May 8, 2012|link={{tweet|jeb|199867730927697920}}|[[Jeb]] revealed cocoa with a screenshot.}}
{{History||1.3.1|snap=12w18a|For only this snapshot, cocoa beans have been given a small (0.5%) chance of dropping from destroyed [[jungle tree]] [[leaves]] in a similar fashion to [[apple]]s from oak leaves, which makes cocoa beans [[renewable resource|renewable]] for the first time.}}
{{History|||snap=12w19a|[[File:Cocoa Age 0 (S) JE1.png|32px]] [[File:Cocoa Age 1 (S) JE1.png|32px]] [[File:Cocoa Age 2 (S) JE1.png|32px]] Added cocoa. The top textures of cocoa always keep a completely constant rotation, regardless of what direction they face. They also not shaded.
|[[File:Cocoa Beans JE2.png|32px]] The texture of cocoa beans has been changed.
|Cocoa has replaced jungle [[leaves]] as the main method of finding cocoa beans.
|[[File:Cocoa Age 3 (S) JE1.png|32px]] Cocoa with values 12–15 is inaccessible normally, and use the texture of the [[dragon egg]]. This is due to the dragon egg texture being to the left of the ripe cocoa texture in <samp>[[terrain.png]]</samp>, as cocoa textures are arranged with the oldest on the left and the youngest on the right, resulting in the unusually ripe cocoa reading the dragon egg texture.}}
{{History|||snap=1.3|[[File:Cocoa Beans JE3 BE2.png|32px]] The texture of cocoa beans has been changed.}}
{{History||1.4.2|snap=12w34a|Cocoa beans have been given the ability to [[Armor#Dyeing|dye]] leather [[armor]] and [[wolf]] collars.}}
{{History||1.4.6|snap=12w49a|Cocoa beans can now be [[crafting|crafted]] with [[gunpowder]] to create a [[firework star]].}}
{{History||1.5|snap=13w02a|Due to textures being stored in individual files, cocoa beans with data 12–15 no longer have a texture to use, and now crash the game if a [[chunk]] containing one is loaded.}}
{{History|||snap=13w03a|Cocoa with data values 12–15 now only crash the game if one is directly in the field of view.}}
{{History|||snap=13w04a|[[Bone meal]] now grows cocoa by only one stage.}}
{{History|||snap=13w10a|[[File:Cocoa Age 3 (S) JE2.png|32px]] Cocoa with data 12–15 now use the age 2 texture, resulting in a broken appearance, preventing previously mentioned crashes.}}
{{History||1.6.1|snap=13w18a|Cocoa beans have been removed from [[dungeon]] [[chest]]s.}}
{{History|||snap=13w19a|Brown [[Terracotta|stained clay]] can now be [[crafting|crafted]] using cocoa beans.}}
{{History||1.7.2|snap=13w41a|Brown [[stained glass]] can now be crafted using cocoa beans.}}
{{History||1.8|snap=14w07a|[[File:Cocoa Age 0 (S) JE2.png|32px]] [[File:Cocoa Age 1 (S) JE2.png|32px]] [[File:Cocoa Age 2 (S) JE2.png|32px]] [[File:Missing Model JE1.png|32px]] The top textures of cocoa now rotate with the blocks themselves (cocoa facing north remaining visually unaffected), and cocoa of age 3 has [[Missing model|no model]].}}
{{History|||snap=14w10a|[[File:Cocoa Age 0 (S) JE3.png|32px]] [[File:Cocoa Age 1 (S) JE3.png|32px]] [[File:Cocoa Age 2 (S) JE3.png|32px]] [[File:Missing Model JE2.png|32px]] The large section of cocoa is shaded, and the missing model (which age 3 cocoa uses) has changed.}}
{{History|||snap=14w25a|[[File:Cocoa Age 0 (S) JE4.png|32px]] [[File:Cocoa Age 1 (S) JE4.png|32px]] [[File:Cocoa Age 2 (S) JE4.png|32px]] The connecting region of cocoa is now shaded.}}
{{History|||snap=14w26a|Cocoa with data 12–15 has been effectively removed from the game, as such blocks now convert to a proper value with {{cmd|setblock}}. Loading worlds with existing out of range cocoa crash the game.}}
{{History|||snap=14w30a|Cocoa beans can now be used to dye [[banner]]s.}}
{{History||1.13|snap=17w47a|The different data values for the <code>dye</code> ID have been split up into their own IDs.
|Prior to [[1.13/Flattening|''The Flattening'']], this block's and item's numeral ID were respectively 127 and 351.}}
{{History||1.14|snap=18w43a|Cocoa beans can now be used to craft [[brown dye]].
|Cocoa beans can no longer be used as a [[dye]].
|All of the dye-related functions and crafting recipes of cocoa beans (except cookies) have been transferred to brown dye.
|"Cocoa Beans" item has been renamed to "Cocoa".
|[[File:Cocoa Beans JE4 BE3.png|32px]] The texture of cocoa has been changed.
|[[File:Cocoa Age 0 (S) JE5.png|32px]] [[File:Cocoa Age 1 (S) JE5.png|32px]] [[File:Cocoa Age 2 (S) JE5.png|32px]] The textures of cocoa have been changed.
|[[File:Cocoa Age 0 (texture) JE2 BE2.png|32px]] [[File:Cocoa Age 1 (texture) JE2 BE2.png|32px]] Textures for cocoa age 0 and 1 has palette left, visible only on particles.
|Cocoa now has a placement [[sound]].}}
{{History|||snap=19w03a|Placing cocoa into the new [[composter]] has a 50% chance of raising the compost level by 1.}}
{{History|||snap=19w05a|Cocoa now has a 65% chance of increasing the compost level in a composter by 1.}}
{{History|||snap=19w11b|"Cocoa" item has been renamed back to "Cocoa Beans".{{verify|was this not just one bug that affected other crops as well? if so cite the ticket and add to all other affected pages}}}}
{{History||1.18|snap=Pre-release 5|[[File:Cocoa Age 0 (texture) JE3 BE3.png|32px]] [[File:Cocoa Age 1 (texture) JE3 BE3.png|32px]] Textures for cocoa age 0 and 1 were changed. This visually changes only particles.}}
{{History||1.19|snap=22w11a|[[File:Cocoa Age 2 (S) JE6.png|32px]] The texture and model of cocoa age 2 have been changed.}}
{{History|pocket alpha}}
{{History||v0.3.0|[[File:Cocoa Beans JE1 BE1.png|32px]] Added cocoa beans. They are currently unobtainable and serve no purpose.}}
{{History||v0.8.0|snap=build 1|[[File:Cocoa Beans JE3 BE2.png|32px]] The texture of cocoa beans has been changed.
|Cocoa beans can be [[crafted]] from an [[orange dye]] and an [[ink sac]], or from [[dandelion yellow]], [[rose red]], and an ink sac, despite there being no way of obtaining ink sacs at the time.}}
{{History|||snap=build 3|Cocoa beans are now available in [[creative]].}}
{{History||v0.9.0|snap=build 1|[[File:Cocoa Age 0 (S) JE1.png|32px]] [[File:Cocoa Age 1 (S) JE1.png|32px]] [[File:Cocoa Age 2 (S) JE1.png|32px]] {{info needed|How did 12-16 appear?}} Added cocoa.
|Cocoa provides an additional way of obtaining cocoa beans.
|Cocoa beans are now used to craft [[cookie]]s.}}
{{History||v0.11.0|snap=build 14|Cocoa now grows over time.<ref>{{bug|MCPE-7887}}</ref>}}
{{History||?|[[File:Cocoa Age 0 (S) BE4.png|32px]] [[File:Cocoa Age 1 (S) BE4.png|32px]] [[File:Cocoa Age 2 (S) BE2.png|32px]] Cocoa no longer has a stem connecting it to the log.}}
{{History||v0.15.0|snap=Realms build 4|[[File:Cocoa Age 0 (S) JE1.png|32px]] [[File:Cocoa Age 1 (S) JE1.png|32px]] [[File:Cocoa Age 2 (S) JE1.png|32px]] Cocoa stems now render again.<ref>{{bug|MCPE-13579}}</ref>}}
{{History||v0.16.0|snap=build 1|Cocoa beans can no longer be crafted from [[orange dye]] and an ink sac.
|Cocoa beans can no longer be crafted from rose red, dandelion yellow and ink sacs.}}
{{History|pocket}}
{{History||1.0.0|snap=alpha 0.17.0.1|Cocoa beans can now be used to dye [[shulker]]s.}}
{{History||1.1.0|snap=alpha 1.1.0.0|Cocoa beans can now be used to dye [[shulker box]]es and [[bed]]s.
|Cocoa beans can now be used to craft [[concrete powder]].}}
{{History|bedrock}}
{{History||1.2.0|snap=beta 1.2.0.2|Cocoa beans can now be used to dye [[banner]]s, [[firework star]]s, and [[glass]].
|Cocoa beans can now be found in [[bonus chest]]s.}}
{{History||1.4.0|snap=beta 1.2.20.1|Cocoa beans can now be used to craft brown [[balloon]]s and [[glow stick]]s.}}
{{History||1.8.0|snap=beta 1.8.0.10|Cocoa beans can now be used to craft [[brown dye]].}}
{{History||1.10.0|snap=beta 1.10.0.3|Cocoa beans are now [[trading|sold]] by [[wandering trader]]s.
|[[File:Cocoa Beans JE4 BE3.png|32px]] The texture of cocoa beans has been changed.
|[[File:Cocoa Age 0 (S) BE4.png|32px]] [[File:Cocoa Age 1 (S) BE4.png|32px]] [[File:Cocoa Age 2 (S) BE4.png|32px]] The textures of cocoa have been changed.}}
{{History||1.11.0|snap=beta 1.11.0.1|Cocoa beans can now be used to fill up [[composter]]s.}}
{{History||1.16.100|snap=beta 1.16.100.56|The ID of cocoa beans has been changed from <code>dye/3</code> to <code>cocoa_beans</code>.}}
{{History||1.18.10|snap=beta 1.18.10.22|[[File:Cocoa Age 0 (texture) JE3 BE3.png|32px]] [[File:Cocoa Age 1 (texture) JE3 BE3.png|32px]] Textures for cocoa age 0 and 1 were changed. This visually changes only particles.}}
{{History|console}}
{{History||xbox=TU1|xbone=CU1|ps=1.0|wiiu=Patch 1|switch=1.0.1|[[File:Cocoa Beans JE1 BE1.png|32px]] Added cocoa beans.}}
{{History||xbox=TU9|[[File:Cocoa Beans JE3 BE2.png|32px]] The texture of cocoa beans has been changed.}}
{{History||xbox=TU12|[[File:Cocoa Age 0 (S) JE3.png|32px]] [[File:Cocoa Age 1 (S) JE3.png|32px]] [[File:Cocoa Age 2 (S) JE3.png|32px]]{{verify|Were these the models used?}} Added cocoa.}}
{{History||xbox=none|xbone=none|ps=1.90|wiiu=none|switch=none|[[File:Cocoa Beans JE4 BE3.png|32px]] The texture of cocoa beans has been changed once again.
|[[File:Cocoa Age 0 (S) JE5.png|32px]] [[File:Cocoa Age 1 (S) JE5.png|32px]] [[File:Cocoa Age 2 (S) JE5.png|32px]]{{verify|Were these the models used?}} The textures of cocoa have been changed.}}
{{History|new 3ds}}
{{History||0.1.0|[[File:Cocoa Beans JE3 BE2.png|32px]] Added cocoa beans.
|[[File:Cocoa Age 0 (S) JE3.png|32px]] [[File:Cocoa Age 1 (S) JE3.png|32px]] [[File:Cocoa Age 2 (S) JE3.png|32px]]{{verify|Were these the models used?}} Added cocoa.}}
{{History|foot}}
=== Cocoa "item" ===
{{:Technical blocks/Cocoa}}
== Issues ==
{{issue list|Cocoa Beans|Cocoa Pod}}
== Trivia ==
*Cocoa pods have a different hitbox for each size; however, the top is always 0.25 blocks below the top of the [[log]] it is on.
*If a cocoa pod grows while the player is standing next to it, the player is forced into the appropriate form of [[suffocation prevention]] depending on available space.
*{{IN|be}}, the pixels on top of the fully grown pod are 8/7 the size of those on the side.<ref>{{bug|MC-109055||Fixed}}</ref><ref>{{bug|MCPE-152862}}</ref>
== Gallery ==
<gallery>
CocoaReveal.png|The first screenshot of cocoa pods tweeted by [[Jens Bergensten]], which revealed the plants.
CocoaPlant.png|A screenshot tweeted by Jens Bergensten, showing the pod.
Cocoa Plants in a Jungle Biome (12w19a).png|Naturally generated cocoa pods.
CPlantsJWood.png|A cocoa pod farm.
Cocoa2.jpg|A cocoa farm.
Cocoa beans phases.png|Three growing phases of the cocoa pod.
AreaOptimizedBeanPods.gif|A log and pod layout for optimizing an example area of 14×14 (including walls).
File:CocoaBean15.png|Cocoa beans with values greater than 12 appeared this way
</gallery>
==Literature==
===References===
{{reflist}}
===External Links===
*[https://www.minecraft.net/en-us/article/taking-inventory--cocoa-beans Taking Inventory: Cocoa Beans] – Minecraft.net on December 5, 2019
{{Items}}
{{Blocks|vegetation}}
[[Category:Dyes]]
[[Category:Food]]
[[Category:Plants]]
[[Category:Renewable resources]]
[[Category:Non-solid blocks]]
[[Category:Natural blocks]]
[[cs:Kakaové boby]]
[[de:Kakaobohnen]]
[[es:Semillas de cacao]]
[[fr:Fèves de cacao]]
[[hu:Kakaóbab]]
[[ja:カカオ豆]]
[[ko:코코아 콩]]
[[nl:Cacaobonen]]
[[pl:Ziarna kakaowe]]
[[pt:Sementes de cacau]]
[[ru:Какао-бобы]]
[[uk:Какао-боби]]
[[zh:可可豆]]</li></ul> | ? | Passive untamed wolves now despawn, but only after at least two minutes. | |||
1.6.2{{Extension DPL}}<ul><li>[[Kelp|Kelp]]<br/>{{About|the plant|the dried variant|Dried Kelp}}
{{For}}
{{Block
|image=Kelp.gif
|invimage=Kelp
|transparent=Yes
|tool=Any
|renewable=Yes
|stackable=Yes (64)
|flammable=No
|lavasusceptible=No
|light=No
|hardness=0}}
'''Kelp''' is an underwater plant that generates in most [[ocean]]s.
== Obtaining ==
=== Natural generation ===
Kelp naturally generates in any [[ocean]] [[biome]]s (except in [[Frozen Ocean|frozen]], [[Deep Frozen Ocean|deep frozen]] and [[Warm Ocean|warm]]), near and around [[seagrass]]. Each chunk has {{frac|1|18}} chance to generate a [[vegetation]] of kelp.
=== Breaking ===
Kelp can be mined instantly with any [[tool]] or with the player's fist. Removing water from the kelp block destroys the kelp. Breaking one part of a kelp stalk destroys all kelp [[block]]s above it. Each block drops a kelp [[item (entity)|item]].
=== Trading ===
Kelp can be bought from [[wandering trader]]s for 3 emeralds.
== Usage ==
Kelp can be placed underwater by hand, or anywhere by the use of [[commands]] such as {{cmd|setblock}}. Placing it by hand gives it a random {{code|age}} value between 0 and 24. Kelp can be placed only in [[water]] source blocks or downward-flowing water, not horizontally flowing water.
When placed in downward-flowing water, the flowing water transforms into a water source block,<ref>{{bug|MC-134229}}</ref> which is useful for faster [[bubble column]] elevator creation.
Any building block can be placed on top of a kelp plant, which is useful for building structures over a deep ocean without needing to build from the ocean floor (see also [[lily pad]]).
=== Cooking ingredient ===
{{smelting
| showname = 1
| Kelp
| Dried Kelp
| 0.1
}}
=== Composting ===
Placing kelp into a [[composter]] has a 30% chance of raising the compost level by 1.
=== Growth mechanics ===
Kelp can be planted on a broad variety of blocks. It grows underwater if it has either a source block of water or, {{in|Java}}, flowing water above it.<ref>{{bug|MC-133354}}</ref> Neither [[player]]s nor [[dispenser]]s can remove the water source block that kelp grows in without breaking the kelp first.
Kelp does not require any [[light]] level to grow. Kelp also grows without having [[sky]] access. [[Bone meal]] can be used to grow kelp by 1 block on each use.
Kelp, when planted, is generated with a randomly chosen age value, which can be checked when pressing [[Debug screen|<kbd>F3</kbd>]]{{only|java}}. The age value of a newly planted kelp plant varies randomly from 0 to 24. Each time the kelp grows in height by one block, the newly generated top of the kelp plant increases its age by 1. When the top block of the kelp plant reaches an age of 25, it stops growing. This means that kelp can naturally grow to a height between 2 (if the first kelp plant had an age of 24) and 26 blocks (if the first kelp plant had an age of 0).
When a kelp plant block is broken, the age of the kelp plant block underneath is randomized to a value from 0 to 24 and the kelp continues growing until it reaches age 25. It is possible to use this mechanic to cultivate a kelp plant to increase its growth height beyond its natural maximum height of 26 blocks. This can be done by breaking the top-most block of the kelp plant each time it reaches age 25. A kelp plant cultivated by a player in this way repeatedly grows until it reaches the water surface.
Each time it receives a [[random tick]], kelp has a 14% chance of growing.
If [[shears]] are used on the topmost block of kelp, that block automatically sets its {{cd|age}} value to {{cd|25}} and stop growing.{{only|JE}}
=== Farming ===
{{Main|Tutorials/Kelp farming}}
Kelp farming is similar to farming [[sugar cane]], although kelp must be placed underwater. Automation of harvest is easier because items float up in water.
== Sounds ==
=== Generic ===
{{Sound table/Block/Wet grass}}
=== Unique ===
{{edition|java}}:
{{Sound table
|sound=Shear.ogg
|subtitle=Plant cropped
|source=block
|description=When the tip of kelp is cropped with [[Shears#Cropping growing plants|shears]]
|id=block.growing_plant.crop
|translationkey=subtitles.block.growing_plant.crop
|volume=1.0
|pitch=1.0
|distance=16
|foot=1}}
{{edition|bedrock}}: ''None''
== Data values ==
=== ID ===
{{edition|java}}:
{{ID table
|edition=java
|showforms=y
|generatetranslationkeys=y
|displayname=Kelp
|spritetype=block
|nameid=kelp}}
{{ID table
|displayname=Kelp Plant
|spritetype=block
|nameid=kelp_plant
|form=block
|foot=1}}
{{edition|bedrock}}:
{{ID table
|edition=bedrock
|firstcolumnname=Kelp
|shownumericids=y
|showforms=y
|generatetranslationkeys=y
|displayname=Item
|spritename=kelp
|spritetype=item
|nameid=kelp
|id=382
|form=item}}
{{ID table
|displayname=Block
|spritename=kelp
|spritetype=block
|nameid=kelp
|id=393
|form=block
|itemform=item.kelp
|translationkey=-
|foot=1}}
=== Block states ===
{{see also|Block states}}
{{/BS}}
== History ==
{{History|java classic}}
{{History||May 21, 2009|link=https://web.archive.org/web/0/http://notch.tumblr.com/post/110762705/my-list-on-tile-types-so-far|[[Notch]] shows interest in adding a "[[seaweed]]" [[block]].}}
{{History|java}}
{{History||November 18, 2017|link={{YouTubeLink|mAapz_nIC_Y}}|Kelp plants were shown in a clip of [[MineCon Earth]].}}
{{History||1.13|snap=18w07a|[[File:Kelp JE1 BE1.gif|32px]] [[File:Kelp (item) JE1 BE2.png|32px]] Added kelp.}}
{{History|||snap=18w07b|Kelp now behaves more like [[water]], meaning [[mob]]s can no longer spawn within the plant under water nor can they replenish their breath by [[swimming]] through it.}}
{{History|||snap=18w10a|[[File:Kelp JE2.gif|32px]] The texture for kelp has been overhauled.}}
{{History|||snap=18w14a|[[File:Kelp.gif|32px]] Top of the kelp textures have been shifted slightly downward.
|The generation rules for kelp have been changed, it now mainly generates in [[cold ocean]] [[biome]]s and can no longer generate in [[warm ocean]]s.}}
{{History|||snap=18w20a|The {{cd|kelp_top}} has been changed ID to {{cd|kelp}} and {{cd|kelp}} has been changed to {{cd|kelp_plant}}, for both the [[block]] and [[item]] forms.}}
{{History|||snap=pre2|Kelp is now destroyed by [[sponge]]s.<ref>{{bug|MC-127111}}</ref>}}
{{History|||snap=pre6|Added 5 new [[sound]] events that apply to kelp: <code>block.wet_grass.break</code>, <code>block.wet_grass.fall</code>, <code>block.wet_grass.hit</code>, <code>block.wet_grass.place</code>, and <code>block.wet_grass.step</code>.}}
{{History||1.14|snap=19w03a|Placing kelp into the new [[composter]] has a 10% chance of raising the compost level by 1.}}
{{History|||snap=19w05a|Kelp now has a 30% chance of increasing the compost level in a composter by 1.
|Added [[Wandering Trader|wandering trader]]s, which sell kelp.}}
{{History||1.16|snap=20w11a|Kelp can now be grown with [[bone meal]].}}
{{History|||snap=20w13a|Kelp has been moved from the Miscellaneous tab to the Decoration Blocks tab in the [[Creative inventory]].<ref name="misc decoration">https://bugs.mojang.com/browse/MC-174434</ref>}}
{{History||1.17|snap=20w46a|Kelp no longer generates on magma blocks.<ref>{{Bug|MC-185605|resolution=Fixed}}</ref>}}
{{History||1.18|snap=21w37a|Kelp now stops growing if [[shears]] are used on the tip.}}
{{History|bedrock}}
{{History||1.4.0|snap=beta 1.2.14.2|[[File:Kelp JE1 BE1.gif|32px]] [[File:Kelp (item) BE1.png|32px]] Added kelp.}}
{{History|||snap=beta 1.2.20.1|[[File:Kelp (item) JE1 BE2.png|32px]] The kelp [[item]] texture has been updated to the {{el|je}}'s.}}
{{History||1.5.0|snap=beta 1.5.0.4|[[File:Kelp.gif|32px]] The texture of the kelp plant has been updated.}}
{{History||1.10.0|snap=beta 1.10.0.3|Kelp can now be bought from [[wandering trader]]s for 3 [[emerald]]s.}}
{{History||1.11.0|snap=beta 1.11.0.1|Kelp can now be used to fill [[composter]]s.}}
{{History|console}}
{{History||xbox=TU69|ps=1.76|wiiu=Patch 38|[[File:Kelp.gif|32px]] [[File:Kelp (item) JE1 BE2.png|32px]] Added kelp.}}
{{History|foot}}
== Issues ==
{{issue list}}
== Trivia ==
* In real life, [[wikipedia:kelp|kelp]] is not considered a [[wikipedia:plant|plant]]. It is classified by scientists as a [[wikipedia:Brown algae|brown algae]].
** Kelp in real life absorbs nutrients directly from the water, instead of through its root-like structure, [[wikipedia:Holdfast (biology)|holdfast]], which merely attaches it to the seabed. This is in accordance with kelp being able to grow on almost any solid block in ''Minecraft''.
== Gallery ==
<gallery heights="60">
SeaPlantsMineConEarth2017.jpg|Kelp shown in a clip from MINECON Earth 2017.
Kelp in ocean with Jappa textures.jpg|Naturally generated kelp in an [[ocean]] biome.
Kelp on shoreline.png|Naturally generated kelp near the shore.
Ocean life.png|An ocean with kelp visible in the far distance.
Kelp on Land.png|Kelp placed outside of [[water]] using the {{cmd|setblock}} command before 18w07b.
Waterless kelp.png|What kelp looks like without water (water removed using a [[resource pack]]).
Coral reef at night.png|Kelp within a [[coral reef]].
Floating Kelp.png|Kelp that generated in mid-air due to an [[ocean monument]]'s water cutting through it.
Kelp in ocean.jpg|Multiple kelps.
Kelp 255 blocks tall.png|Without obstacles, kelp can grow all the way to building limit.
ArgoMajor Kelp.jpg|First image of kelp in ''Bedrock Edition''.
</gallery>
== References ==
{{reflist}}
{{Blocks|vegetation}}
{{Items}}
[[Category:Plants]]
[[Category:Natural blocks]]
[[Category:Non-solid blocks]]
[[de:Seetang]]
[[es:Alga]]
[[fr:Algue]]
[[ja:コンブ]]
[[ko:켈프]]
[[pl:Wodorosty]]
[[pt:Alga]]
[[ru:Ламинария]]
[[th:สาหร่ายทะเล]]
[[zh:海带]]</li><li>[[Bowl|Bowl]]<br/>{{Item
| image = Bowl.png
| renewable = Yes
| stackable = Yes (64)
}}
'''Bowls''' are containers that can hold certain [[food]]s.
== Obtaining ==
=== Crafting ===
{{Crafting
|A2= Any Planks
|C2= Any Planks
|B3= Any Planks
|Output= Bowl,4
|type= Material
}}
=== Fishing ===
Bowls can be obtained as a "junk" item while [[fishing]].
=== Eating ===
A bowl containing food becomes an empty bowl when the food is eaten.
=== Mob loot ===
When a [[turtle]] is killed by a [[Thunderstorm#Lightning|lightning bolt]], it drops 1 bowl.<ref name=BowlReport>{{Cite bug|MC|125562|Turtles drop bowls when killed by lightning|date=February 16, 2018}}</ref><ref>{{Cite bug|MCPE|57038| Turtles killed by lightning drop Bowls.|date=November 17, 2019}}</ref>
== Usage ==
=== Crafting ingredient ===
{{crafting usage}}
=== Mooshrooms ===
{{control|use|text=Using}} a bowl on a [[mooshroom]] turns the bowl into [[mushroom stew]] or [[suspicious stew]]. The stew can then be consumed immediately and the process repeated, making this an excellent way to quickly restore depleted [[hunger]] and [[saturation]] with almost no cost or effort.
=== Fuel ===
Bowls can be used as a fuel in [[furnace]]s, smelting 0.5 items per bowl {{in|je}}, and 1 item per bowl {{in|be}}.
== Data values ==
=== ID ===
{{edition|java}}:
{{ID table
|edition=java
|showforms=y
|generatetranslationkeys=y
|displayname=Bowl
|spritetype=item
|nameid=bowl
|form=item
|foot=1}}
{{edition|bedrock}}:
{{ID table
|edition=bedrock
|shownumericids=y
|showforms=y
|notshowbeitemforms=y
|generatetranslationkeys=y
|displayname=Bowl
|spritetype=item
|nameid=bowl
|id=321
|form=item
|foot=1}}
== History ==
{{History|java indev}}
{{History||0.31|snap=20100130|[[File:Bowl JE1 BE1.png|32px]] Added bowls.
|Bowls are used to craft [[mushroom soup]].}}
{{History|java}}
{{History||1.0.0|snap=Beta 1.9 Prerelease|Added [[mooshroom]]s, which can be {{control|use|text=milked}} with a bowl.}}
{{History||1.2.4|snap=release|[[Spruce planks]], [[birch planks]], and [[jungle planks]] can now be used to craft bowls.}}
{{History||1.7.2|snap=13w36a|Bowls can now be obtained as one of the "junk" [[item]]s by [[fishing]].}}
{{History|||snap=1.7.1|[[Acacia planks]] and [[dark oak planks]] can now be used to craft bowls.}}
{{History||1.8|snap=14w27a|Bowls are now used to craft [[rabbit stew]].}}
{{History||1.9|snap=15w31a|Bowls are now used to craft [[beetroot soup]].}}
{{History||1.11|snap=16w33a|Bowls can now be used to fuel [[furnace]]s.}}
{{History||1.13|snap=17w47a|Prior to [[1.13/Flattening|''The Flattening'']], this [[item]]'s numeral ID was 281.}}
{{History|||snap=18w07a|[[Turtles]] drop 0 to 1 bowls if killed by [[lightning]].<ref name=BowlReport/>}}
{{History||1.14|snap=18w43a|[[File:Bowl JE2 BE2.png|32px]] The texture of bowls has now been changed.
|Bowls are now used to craft [[suspicious stew]].}}
{{History||1.16|snap=20w06a|[[Crimson planks]] and [[warped planks]] can now be used to craft bowls.}}
{{History||1.19|snap=22w11a|[[Mangrove planks]] can now be used to craft bowls.}}
{{History|pocket alpha}}
{{History||v0.2.0|[[File:Bowl JE1 BE1.png|32px]] Added bowls. They are currently unobtainable and serve no purpose.}}
{{History||v0.3.0|Bowls are now [[craft]]able. They still serve no purpose.}}
{{History||v0.4.0|Bowls are now used to craft [[mushroom stew]].}}
{{History||v0.5.0|Bowls now appear in the [[nether reactor]].}}
{{History||v0.8.0|snap=build 2|Bowls are now used to craft [[beetroot soup]].}}
{{History|||snap=build 7|Bowls can now be used as fuel in a [[furnace]].}}
{{History||v0.9.0|snap=build 1|Added bowls to [[creative]] mode.
|[[Mooshroom]]s can now be "milked" to obtain [[mushroom stew]].}}
{{History||v0.12.1|snap=build 1|Bowls are no longer available from the [[nether reactor]].}}
{{History||v0.13.0|snap=build 1|Bowls are now used to craft [[rabbit stew]].}}
{{History|bedrock}}
{{History||1.10.0|snap=beta 1.10.0.3|[[File:Bowl JE2 BE2.png|32px]] The texture of bowls has now been changed.}}
{{History||1.13.0|snap=beta 1.13.0.9|Bowls can now be used to craft [[suspicious stew]].}}
{{History|console}}
{{History||xbox=TU1|xbone=CU1|ps=1.0|wiiu=Patch 1|switch=1.0.1|[[File:Bowl JE1 BE1.png|32px]] Added bowls.}}
{{History||xbox=TU9|Bowls now stack to 64.}}
{{History||xbox=none|xbone=none|ps=1.90|wiiu=none|switch=none|[[File:Bowl JE2 BE2.png|32px]] The texture of bowls has now been changed.}}
{{History|new 3ds}}
{{History||0.1.0|[[File:Bowl JE1 BE1.png|32px]] Added bowls.}}
{{History|foot}}
== Issues ==
{{issue list}}
== Trivia ==
* {{in|be}}, bowls are actually more fuel efficient than [[stick]]s. If 6 wood planks are crafted into 8 bowls, 8 items can be [[smelt]]ed; but if those are crafted into 12 sticks, only 6 items can be smelted. This can be useful when the player only has access to Nether wood types, which cannot be used as fuel.
== See also ==
* [[Mushrooms]]
== References ==
{{reflist}}
== External Links ==
* {{Mcnet|taking-inventory--bowl|Taking Inventory: Bowl|April 25, 2019}}
{{Items}}
[[Category:Renewable resources]]
[[cs:Miska]]
[[de:Schüssel]]
[[es:Cuenco]]
[[fr:Bol]]
[[hu:Tál]]
[[it:Ciotola]]
[[ja:ボウル]]
[[ko:그릇]]
[[nl:Kom]]
[[pl:Miska]]
[[pt:Tigela]]
[[ru:Миска]]
[[th:ชาม]]
[[uk:Миска]]
[[zh:碗]]</li></ul> | release | Wolves, along with zombies, creepers and skeletons, no longer turn hostile to the player when attacked in creative mode.[is this the correct version?] | |||
1.8{{Extension DPL}}<ul><li>[[Purple Dye|Purple Dye]]<br/>{{Item
| image = Purple_Dye_JE2_BE2.png
| renewable = Yes
| stackable = Yes (64)
}}
'''Purple dye''' is a [[Dyeing#Secondary colors|secondary dye color]] created by combining [[red dye]] and [[blue dye]] in a crafting grid.
== Obtaining ==
=== Crafting ===
{{Crafting
|head=1
|showname=0
|Blue Dye
|Red Dye
|Output=Purple Dye,2
|type=Material
}}
{{Crafting
|foot=1
|Lapis Lazuli
|Red Dye
|Output=Purple Dye,2
|description={{only|bedrock|education}}
|type=Material
}}
=== Trading ===
[[Wandering trader]]s sometimes sell 3 purple dye for an [[emerald]].
== Usage ==
{{dye usage}}
=== Crafting ingredient ===
{{crafting usage|ignore=Banner|continue=1}}
{{banner crafting usage}}
=== Loom ingredient ===
{{Banner loom usage|Purple Dye}}
=== Trading ===
Apprentice-level Shepherd villagers have a 20% chance to buy 12 purple dye for an emerald as part of their trades.{{only|bedrock}}
Expert-level Shepherd villagers have a {{frac|2|7}} chance to buy 12 purple dye for an emerald.{{only|java}}
== Data values ==
=== ID ===
{{edition|java}}:
{{ID table
|edition=java
|showforms=y
|generatetranslationkeys=y
|displayname=Purple Dye
|spritetype=item
|nameid=purple_dye
|form=item
|foot=1}}
{{edition|bedrock}}:
{{ID table
|edition=bedrock
|showaliasids=y
|shownumericids=y
|showforms=y
|notshowbeitemforms=y
|generatetranslationkeys=y
|displayname=Purple Dye
|spritetype=item
|nameid=purple_dye
|aliasid=dye / 5
|id=400
|form=item
|translationkey=item.dye.purple.name
|foot=1}}
== Video ==
<div style="text-align:center">{{yt|Cx52CGo5QnI}}</div>
== History ==
{{History|java beta}}
{{History||1.2|[[File:Purple Dye JE1 BE1.png|32px]] Added purple dye.}}
{{History|java}}
{{History||1.4.2|snap=12w34a|Added the ability to [[Armor#Dyeing|dye]] leather [[armor]] and [[wolf]] collars.}}
{{History||1.4.6|snap=12w49a|Purple dye can now be [[crafting|crafted]] with [[gunpowder]] to create a [[firework star]].}}
{{History||1.6.1|snap=13w19a|[[Stained clay]] can now be crafted.}}
{{history||1.7.2|snap=13w36a|With the addition of new [[flower]]s, many secondary and tertiary dyes are now primary [[dye]]s.}}
{{History|||snap=13w41a|[[Stained glass]] can now be crafted.}}
{{History||1.8|snap=14w02a|Due to [[lapis lazuli]] being [[renewable resource|renewable]] now, purple dye is also now renewable.}}
{{History|||snap=14w30a|Added [[banner]]s which can be dyed.}}
{{History||1.13|snap=17w47a|The different data values for the <code>dye</code> ID have now been split up into their own IDs.
|Prior to [[1.13/Flattening|''The Flattening'']], this [[item]]'s numeral ID was 351.}}
{{History||1.14|snap=18w43a|Purple dye is now [[crafting|crafted]] using [[blue dye]], instead of [[lapis lazuli]].
|[[File:Purple_Dye_JE2_BE2.png|32px]] The texture of purple dye has now been changed.}}
{{History|||snap=18w44a|Purple dye can now change the text color on [[sign]]s to purple.}}
{{History|||snap=19w05a|Added the [[wandering trader]], which sells purple dye.}}
{{History|||snap=19w11a|Purple dye can now be [[trading|bought]] by shepherd villagers.}}
{{History||1.17|snap=20w45a|Purple dye can now be used to craft [[purple candle]]s.}}
{{History|||snap=21w19a|Purple dye can no longer be used to craft purple candles.}}
{{History|||snap=Pre-release 1|Purple dye can once again be used to craft purple candles.}}
{{History||1.20<br>(Experimental)|link=1.19.3|snap=22w42a|Purple dye can now change the text color on [[hanging sign]]s to purple.}}
{{History|pocket alpha}}
{{History||v0.3.0|[[File:Purple Dye JE1 BE1.png|32px]] Added purple dye. It is currently unobtainable and serves no purpose.}}
{{History||v0.4.0|Purple dye is now [[craft]]able with rose red and lapis lazuli.
|Purple dye can now be used to craft purple [[wool]].}}
{{History||v0.6.0|Purple dye can now be used to dye [[sheep]].}}
{{History||v0.8.0|snap=build 1|Purple dye can now be used to craft [[magenta dye]].}}
{{History||v0.9.0|snap=build 11|Purple dye can now be used to craft colored [[terracotta]].}}
{{History||v0.11.0|snap=build 1|Purple dye can now be used to dye tamed [[wolf]] collars.}}
{{History||v0.14.0|snap=build 1|Purple dye can now be used to dye [[water]] in [[cauldron]]s.}}
{{History|pocket}}
{{History||1.0.0|snap=alpha 0.17.0.1|Purple dye can now be used to dye [[shulker]]s.}}
{{History||1.1.0|snap=alpha 1.1.0.0|Purple dye can now be used to craft [[concrete powder]], colored [[bed]]s and dyed [[shulker box]]es.}}
{{History|bedrock}}
{{History||1.2.0|snap=beta 1.2.0.2|Purple dye can now be used to craft [[firework star]]s, [[stained glass]] and patterns on [[banner]]s.}}
{{History||1.4.0|snap=beta 1.2.20.1|Purple dye can now be used to craft [[balloon]]s and [[glow stick]]s.}}
{{History||1.8.0|snap=beta 1.8.0.8|Purple dye can now be used to dye tamed [[cat]] collars.}}
{{History||1.10.0|snap=beta 1.10.0.3|Purple dye is now [[trading|sold]] by [[wandering trader]]s.
|Purple dye can now be used to dye white [[carpet]]s and undyed [[glass pane]]s.
|[[File:Purple_Dye_JE2_BE2.png|32px]] The texture of purple dye has now been changed.}}
{{History||1.11.0|snap=beta 1.11.0.4|Purple dye can now be [[trading|sold]] to shepherd [[villager]]s.}}
{{History||1.16.100|snap=beta 1.16.100.56|The ID of purple dye has been changed from <code>dye/5</code> to <code>purple_dye</code>.}}
{{History|console}}
{{History||xbox=TU1|xbone=CU1|ps=1.00|switch=1.0.1|wiiu=Patch 1|[[File:Purple Dye JE1 BE1.png|32px]] Added purple dye.}}
{{History|PS4}}
{{History||1.90|[[File:Purple_Dye_JE2_BE2.png|32px]] The texture of purple dye has now been changed.}}
{{History|new 3ds}}
{{History||0.1.0|[[File:Purple Dye JE1 BE1.png|32px]] Added purple dye.}}
{{History|foot}}
== Issues ==
{{issue list}}
{{Items}}
[[Category:Items]]
[[Category:Dyes]]
[[Category:Renewable resources]]
[[cs:Fialové barvivo]]
[[de:Violetter Farbstoff]]
[[es:Tinte morado]]
[[fr:Teinture violette]]
[[hu:Lila festék]]
[[ja:紫色の染料]]
[[ko:보라색 염료]]
[[nl:Paarse kleurstof]]
[[pl:Fioletowy barwnik]]
[[pt:Corante roxo]]
[[ru:Фиолетовый краситель]]
[[zh:紫色染料]]</li><li>[[Fire Charge|Fire Charge]]<br/>{{ItemEntity
|image=Fire Charge.png
|invimage=Fire Charge
|durability=
|renewable=Yes
|stackable=Yes (64)
|networkid='''[[JE]]''': 64
}}
'''Fire charges''' are items that can be {{control|used}} as a single-use version of a [[flint and steel]] or shot as a [[small fireball]] from a [[dispenser]].
== Obtaining ==
=== Chest loot ===
{{LootChestItem|fire-charge}}
=== Crafting ===
{{Crafting
|Blaze Powder
|Coal; Charcoal
|Gunpowder
|Output= Fire Charge, 3
|type= Miscellaneous
}}
=== Bartering ===
[[Piglin]]s may [[barter]] 1 fire charge when given a [[gold ingot]].
== Usage ==
[[File:Natural Fire Charge.png|200px|thumb|Dispensing Fire Charge]]
Fire charges can be used as ammunition for [[dispenser]]s, or as a substitute for [[flint and steel]].
When used, it instantly places a [[fire]], similar to flint and steel. The fire charge is consumed in the process. It can prime [[TNT]], light [[Nether portal|nether portals]], [[Campfire|campfires]], [[Candle|candles]], [[Cake|cakes with candles]] and [[creeper]]s{{only|JE}} like flint and steel.
When a fire charge is fired from a dispenser, it shoots a [[small fireball]].
=== Crafting ingredient ===
{{crafting usage}}
== Sounds ==
{{edition|java}}:
{{Sound table
|rowspan=4
|sound=Ghast fireball4.ogg
|subtitle=Ghast shoots
|source=hostile
|description=When a fireball is shot by a ghast
|id=entity.ghast.shoot
|translationkey=subtitles.entity.ghast.shoot
|volume=10.0
|pitch=0.8-1.2
|distance=16 {{verify}}}}
{{Sound table
|subtitle=Blaze shoots <ref group=sound name=LousyEvents>{{Bug|MC-98316||Wrong subtitles caused by missing distinction}}</ref>
|source=hostile
|description=When a fire charge is fired from a dispenser or a blaze
|id=entity.blaze.shoot|idnote=<ref group=sound name=LousyEvents/>
|translationkey=subtitles.entity.blaze.shoot|translationkeynote=<ref group=sound name=LousyEvents/>
|volume=2.0
|pitch=0.8–1.2
|distance=32}}
{{Sound table
|subtitle=Fireball whooshes
|source=block
|description=When a fire charge is used by hand
|id=item.firecharge.use|idnote=<ref group=sound name=nounderscore>{{bug|MC-177457}}</ref>
|translationkey=subtitles.item.firecharge.use|translationkeynote=<ref group=sound name=nounderscore/>
|volume=1.0
|pitch=0.8-1.2
|distance=16}}
{{Sound table
|subtitle=Fireball whooshes
|source=hostile
|description=When a fire charge is used to light a creeper
|id=item.firecharge.use|idnote=<ref group=sound name=nounderscore/>
|translationkey=subtitles.item.firecharge.use|translationkeynote=<ref group=sound name=nounderscore/>
|volume=1.0
|pitch=0.8-1.2
|distance=16
|foot=1}}
{{edition|bedrock}}:
{{Sound table
|type=bedrock
|sound=Ghast fireball4.ogg
|source=hostile
|description=When something shoots or uses a fire charge
|id=mob.ghast.fireball
|volume=1.0
|pitch=1.0
|foot=1}}
== Data values ==
=== ID ===
{{edition|java}}:
{{ID table
|edition=java
|showforms=y
|generatetranslationkeys=y
|displayname=Fire Charge
|spritetype=item
|nameid=fire_charge
|form=item
|foot=1}}
{{edition|bedrock}}:
{{ID table
|edition=bedrock
|showaliasids=y
|shownumericids=y
|showforms=y
|notshowbeitemforms=y
|generatetranslationkeys=y
|displayname=Fire Charge
|spritetype=item
|nameid=fire_charge
|aliasid=fireball
|id=509
|form=item
|translationkey=item.fireball.name
|foot=1}}
=== Entity data ===
{{main|Small Fireball#Entity data}}
== Achievements ==
{{Load achievements|Into the Nether}}
== Advancements ==
{{load advancements|We Need to Go Deeper}}
== Video ==
<div style="text-align:center">{{yt|IiCTxsHg6SQ}}</div>
== History ==
{{for|information pertaining to smallmfireballs (which fire charges produce when shot from a dispenser)|Small Fireball#History}}
{{History|java}}
{{History||1.0.0|snap=Beta 1.9 Prerelease|[[File:Fire Charge JE1 BE1.png|32px]] Added the fire charge texture. It is currently only used by [[fireball]]s and [[small fireball]]s, both of which are entities, and is not used by any items.}}
{{History||1.2.1|snap=12w04a|Added fire charges, which use the above texture. They can be crafted only with [[coal]].}}
{{History|||snap=12w05a|Fire charges can now be crafted with charcoal.}}
{{History||1.4.2|snap=12w38b|The [[sound]] when using the fire charge has now been changed; it now uses the same sound as [[flint and steel]].}}
{{History||1.4.6|snap=12w49a|Fire charges can now be used to craft [[Firework Rocket|fireworks]].}}
{{History||1.8|snap=14w31a|The sound when using fire charges to set fire has now been changed; it now uses the same sound as when fired from [[dispenser]]s.}}
{{History||1.9|snap=15w33c|Fire charges now appear purple and explode with [[dragon's breath]] when fired from dispensers. Whether a true dragon fireball entity is created or if this effect is purely visual is unknown.}}
{{History|||snap=15w44b|Fire charges once again appear as [[small fireball]]s when fired from dispensers.}}
{{History||1.11|snap=16w40a|The <code>life</code> tag is no longer used for anything, but still saved/read.{{info needed|Is this even relevant to the fire charge, or is it a remnant from the blaze page or something?}}}}
{{History||1.13|snap=17w47a|Prior to [[1.13/Flattening|''The Flattening'']], this [[item]]'s numeral ID was 385.}}
{{History||1.14|snap=18w43a|[[File:Fire Charge JE2 BE2.png|32px]] The texture of fire charges has now been changed.}}
{{History||1.15|snap=19w42a|Dispensed fire charges{{info needed|as in the fireball, or a dispenser facing straight into a campfire?}} can now light campfires.}}
{{History||1.16|snap=20w07a|Fire charges have a {{frac|5|109}} (~4.59%) chance of being given by the new [[piglin]]s when [[bartering]], in a stack size of 1.}}
{{History|||snap=20w09a|Fire charges now have a {{frac|20|226}} (~8.85%) chance of being given by piglins when bartering, in a stack size of 1–5.}}
{{History|||snap=20w10a|Fire charges now have a {{frac|40|411}} (~9.73%) chance of being given by piglins when bartering, in a stack size of 1–5.}}
{{History|||snap=20w11a|Fire charges now have a {{frac|40|417}} (~9.59%) chance of being given by piglins when bartering, in a stack size of 1–5.}}
{{History|||snap=20w13a|Fire charges now have a {{frac|40|424}} (~9.43%) chance of being given by piglins when bartering, in a stack size of 1–5.}}
{{History|||snap=20w16a|Fire charges now generate in [[ruined portal]] chests.}}
{{History|||snap=20w20a|Fire charges now have a {{frac|40|423}} (~9.46%) chance of being given by piglins when bartering, in a stack size of 1–5.}}
{{History||1.16.2|snap=20w28a|Fire charges now have a {{frac|40|459}} (~8.71%) chance of being given by piglins when bartering, in a stack size of 1.}}
{{History||1.19.3|snap=Pre-release 2|Fire charges can now be {{control|use|text=used}} to forcibly detonate [[creeper]]s.<ref>{{bug|MC-185618|||Fixed}}</ref>}}
{{History||1.19.4|snap=23w06a|Added the [[fire charge]] to the "Ingredients" tab in the creative inventory.}}
{{History|pocket alpha}}
{{History||v0.15.0|snap=build 1|[[File:Fire Charge JE1 BE1.png|32px]] Added fire charges.}}
{{History|bedrock}}
{{History||1.2.0|snap=beta 1.2.0.2|Fire charges can now be used to craft [[firework star]]s.}}
{{History||1.10.0|snap=beta 1.10.0.3|[[File:Fire Charge JE2 BE2.png|32px]] The texture of fire charges has now been changed.}}
{{History||1.16.0|snap=beta 1.16.0.57|Fire charges can now be obtained from bartering with piglin.
|Fire charges can now be found in [[ruined portal]] chests.}}
{{History||1.16.100|snap=beta 1.16.100.56|The ID of fire charges has been changed from <code>fireball</code> to <code>fire_charge</code>.}}
{{History|console}}
{{History||xbox=TU9|xbone=CU1|ps=1.0|wiiu=Patch 1|switch=1.0.1|[[File:Fire Charge JE1 BE1.png|32px]] Added fire charges.}}
{{History||xbox=TU31|xbone=CU19|ps=1.22|wiiu=Patch 3|Fire charges now make [[sound]]s when igniting [[block]]s.}}
{{History||xbox=none|xbone=none|ps=1.90|wiiu=none|switch=none|[[File:Fire Charge JE2 BE2.png|32px]] The texture of fire charges has now been changed.}}
{{History|3ds}}
{{History||0.1.0|[[File:Fire Charge JE1 BE1.png|32px]] Added fire charges.}}
{{History|foot}}
== Issues ==
{{issue list}}
== Gallery ==
<gallery>
GodPortal.png|A fire charge found in a [[ruined portal]] chest, together with an [[enchanted golden apple]].
</gallery>
== See also ==
* [[Flint and Steel]]
* [[Dragon Fireball]]
* [[Ghast]]
== References ==
{{reflist}}
== External Links ==
*[https://www.minecraft.net/en-us/article/taking-inventory-fire-charge Taking Inventory: Fire Charge] – Minecraft.net on January 11, 2019
{{Items}}
[[Category:Recipe using Charcoal]]
[[cs:Ohnivá koule]]
[[de:Feuerkugel]]
[[es:Carga ígnea]]
[[fr:Boule de feu]]
[[hu:Tűzgolyó]]
[[ja:ファイヤーチャージ]]
[[ko:화염구]]
[[nl:Vuurbal]]
[[pl:Ognista kula]]
[[pt:Bola de fogo]]
[[ru:Огненный шар]]
[[th:ลูกไฟ]]
[[zh:火焰弹]]</li></ul> | 14w02a | Pups growth can now be accelerated using raw or cooked chicken, raw or cooked porkchop, raw or cooked beef and rotten flesh. | |||
| 14w05b | Tamed wolf collars are no longer visible when they have the Invisibility effect. | ||||
| 14w10a | Wolves (both wild and tamed) now chase and attack both regular skeletons and wither skeletons. | ||||
| Tamed wolves named using a name tag now display death messages to the owner. | |||||
| 14w18a | A tamed wolf's collar color now defaults to orange rather than red.[7] | ||||
1.9{{Extension DPL}}<ul><li>[[Glow Ink Sac|Glow Ink Sac]]<br/>{{For|the regular sac dropped by squids|Ink Sac}}
{{Item
|Image=Glow Ink Sac.png
| renewable = Yes
| stackable = Yes (64)
|}}
A '''glow ink sac''' is an item dropped by a [[glow squid]] upon death. Unlike regular ink sacs, it can be added to [[sign]]s to make glowing text, and can be used to craft glow item frames.
== Obtaining ==
=== Mob loot ===
[[Glow squid]]s drop 1–3 glow ink sacs upon death. The maximum amount is increased by 1 per level of [[Looting]], for a maximum of 1–6 with Looting III.
=== Compound creation ===
A glow ink sac can be created from its base [[element]]s, using the [[compound creator]].{{only|bedrock|education}}
{| class="wikitable"
!Name
!Elements
!Example recipe
|- <!-- Temporarily using crafting grid as substitute for compound creator (template not yet available), since the layout is the same, even if the appearance is different -->
!Glow Ink Sac
|1 Iron<br>1 Sulfur<br>4 Oxygen
|{{Crafting Table
|shapeless= 1
|A2=Iron |B2=Sulfur |C2=Oxygen,4
|Output=Glow Ink Sac}}
|}
== Usage ==
=== Crafting ingredient ===
{{Crafting usage}}
=== Signs ===
[[File:Glow Ink Sign with Orange Dye JE2.png|thumb|150px|An oak sign with a glow ink sac used on it.]]
Glow ink sacs can be used on [[sign]]s or [[hanging sign]]s to make their text brighter in low light levels. This also adds an outline around the text on the sign, the color of which is based on the color of the sign's text. The text does not emit any light, it is only more visible in darkness, similarly to the eyes of spiders and endermen. Normal [[ink sacs]] can be applied to revert glowing text back to default.
== Sounds ==
{{edition|java}}:
{{Sound table
|sound=Ink sac1.ogg
|sound2=Ink sac2.ogg
|sound3=Ink sac3.ogg
|subtitle=Glow Ink Sac splotches
|source=block
|description=When a glow ink sac is used on a [[sign]]
|id=item.glow_ink_sac.use
|translationkey=subtitles.item.glow_ink_sac.use
|volume=1.0
|pitch=''varies'' <ref group=sound>Can be 1.0, 0.95, or 1.05</ref>
|distance=16
|foot=1}}
{{edition|bedrock}}:
{{Sound table
|type=bedrock
|sound=Ink sac1.ogg
|sound2=Ink sac2.ogg
|sound3=Ink sac3.ogg
|source=sound
|description=When a glow ink sac is used on a sign
|id=sign.ink_sac.use
|volume=1.0
|pitch=1.0
|foot=1}}
== Data values ==
=== ID ===
{{edition|java}}:
{{ID table
|edition=java
|showforms=y
|generatetranslationkeys=y
|displayname=Glow Ink Sac
|spritetype=item
|nameid=glow_ink_sac
|form=item
|foot=1}}
{{edition|bedrock}}:
{{ID table
|edition=bedrock
|shownumericids=y
|showforms=y
|notshowbeitemforms=y
|generatetranslationkeys=y
|displayname=Glow Ink Sac
|spritetype=item
|nameid=glow_ink_sac
|form=item
|id=503
|foot=1}}
== Advancements ==
{{load advancements|Glow and Behold}}
== History ==
{{History|java}}
{{History||1.17|snap=21w03a|[[File:Glow Ink Sac JE1 BE1.png|32px]] Added glow ink sacs.}}
{{History||1.17.1|snap=Pre-release 1|[[Zombie]]s, [[husk]]s, [[zombie villager]]s, and [[drowned]] no longer pick up [[glow ink sac]]s.}}
{{History||1.20<br>(Experimental)|link=1.19.3|snap=22w42a|Glow ink sacs can now be used to make the text glow on a [[hanging sign]].}}
{{History|bedrock}}
{{History||Caves & Cliffs (experimental)|link=Bedrock Edition 1.17.0|snap=beta 1.16.210.59|[[File:Glow Ink Sac JE1 BE1.png|32px]] Added glow ink sacs.}}
{{History|||snap=beta 1.16.210.60|Glow ink sacs have been removed temporarily.}}
{{History|||snap=beta 1.16.220.50|[[File:Glow Ink Sac JE1 BE1.png|32px]] Re-added glow ink sacs.}}
{{History||1.17.0|snap=beta 1.17.0.52|Glow ink sacs are now available without enabling [[experimental gameplay]].}}
{{History||1.17.30|snap=beta 1.17.30.20|[[Zombie]]s, [[husk]]s, [[zombie villager]]s, and [[drowned]] no longer pick up [[glow ink sac]]s.}}
{{History|foot}}
== Issues ==
{{Issue list}}
== External Links ==
*[https://www.minecraft.net/en-us/article/taking-inventory--glow-ink-sac Taking Inventory: Glow Ink Sac] – Minecraft.net on October 14, 2021
{{Items}}
[[Category:Items]]
[[Category:Dyes]]
[[Category:Renewable resources]]
[[de:Leuchttintenbeutel]]
[[es:Saco de tinta luminosa]]
[[it:Sacca d'inchiostro luminescente]]
[[ja:輝くイカスミ]]
[[pl:Torbiel ze świecącym atramentem]]
[[pt:Bolsa de tinta brilhante]]
[[ru:Светящийся чернильный мешок]]
[[uk:Сяйний чорнильний мішок]]
[[zh:荧光墨囊]]</li><li>[[Disc Fragment|Disc Fragment]]<br/>{{Item
| image = Disc Fragment.png
| renewable = No
| stackable = Yes (64)
}}
A '''disc fragment''' is a [[music disc]] fragment obtained from [[ancient city]] loot chests. Nine fragments can be combined in a [[Crafting Table|crafting table]] to make a music disc named "5".
== Obtaining ==
=== Chest loot ===
{{LootChestItem|disc-fragment-5}}
== Usage ==
=== Crafting ingredient ===
{{crafting usage|Disc Fragment 5}}
== Data values ==
=== ID ===
{{ID table
|edition=java<!--
|showitemtags=y-->
|showforms=y
|firstcolumnname=Track
|generatetranslationkeys=y
|displayname=Samuel Åberg - 5
|spritename=disc-fragment-5
|spritetype=item
|nameid=disc_fragment_5<!--
|itemtags=-->
|form=item
|foot=y}}
== History ==
{{History|java}}
{{History||1.19|snap=22w16a|[[File:Disc Fragment.png|32px]] Added disc fragments.}}
{{History|bedrock}}
{{History||1.19.0|snap=beta 1.19.0.28|[[File:Disc Fragment.png|32px]] Added disc fragments.}}
{{History|foot}}
== Issues ==
{{Issue list}}
==Gallery==
<gallery>
9 to 5.jpg|9 fragments of the 5 music disc.
</gallery>
==See also==
* {{EnvLink|Music}}
* {{ItemLink|Music Disc}}
{{Items}}
[[de:Plattenbruchstück]]
[[es:Fragmento de disco]]
[[fr:Fragment de disque]]
[[ja:レコードの破片]]
[[pl:Fragment płyty]]
[[pt:Fragmento de disco]]
[[ru:Фрагмент пластинки 5]]
[[uk:Фрагмент платівки]]
[[zh:唱片残片]]
[[Category:Non-renewable resources]]</li></ul> | 15w31a | Untamed wolves no longer beg when a player holds bones nearby, while tamed wolves now do. | |||
| 15w38a | All tamed wolves – even unnamed ones – now display death messages to their owner. | ||||
| 15w39a | Wolves are now slightly taller (0.85 blocks tall rather than 0.8, with babies 0.425 blocks tall rather than 0.4). | ||||
| 15w46a | A tamed wolf's collar color now once again defaults to red. | ||||
1.10{{Extension DPL}}<ul><li>[[Red Dye|Red Dye]]<br/>{{Item
| title = Red Dye
| renewable = Yes
| stackable = Yes (64)
}}
'''Red dye''' is a [[Dye#Primary|primary color dye]] created primarily from flowers.
== Obtaining ==
=== Crafting ===
{{Crafting
|head=1
|showname=0
|Poppy; Red Tulip; Beetroot
|Output=Red Dye
|type=Material
}}
{{Crafting
|Rose Bush
|Output=Red Dye,2
|type=Material
|foot=1
}}
=== Trading ===
[[Wandering trader]]s sell 3 red dye for an [[emerald]].
== Usage ==
{{dye usage}}
=== Crafting ingredient ===
{{crafting usage|ignore=Banner|continue=1}}
{{banner crafting usage}}
=== Loom ingredient ===
{{Banner loom usage|Red Dye}}
=== Trading ===
Journeyman-level shepherd villagers have a {{frac|1|6}} chance to buy 12 red dye for an emerald.
== Data values ==
=== ID ===
{{edition|java}}:
{{ID table
|edition=java
|showforms=y
|generatetranslationkeys=y
|displayname=Red Dye
|spritetype=item
|nameid=red_dye
|form=item
|foot=1}}
{{edition|bedrock}}:
{{ID table
|edition=bedrock
|showaliasids=y
|shownumericids=y
|showforms=y
|notshowbeitemforms=y
|generatetranslationkeys=y
|displayname=Red Dye
|spritetype=item
|nameid=red_dye
|aliasid=dye / 1
|id=396
|form=item
|translationkey=item.dye.red.name
|foot=1}}
== Video ==
<div style="text-align:center">{{yt|tqTbsbt2irk}}</div>
== History ==
{{History|java beta}}
{{History||January 10, 2011<ref group="n">Supposed time when fragment was filmed. Based on modified date of client.jar/gui/trap.png in [[Beta 1.2]].</ref>|link=https://www.youtube.com/watch?v=cBF2ugTzXqQ&t=181s|[[File:Red Dye (pre-release).png|32px]] Shown rose red in development as part of [[Minecraft: The Story of Mojang]].}}
{{History||1.2|[[File:Red Dye JE1 BE1.png|32px]] Added rose red.}}
{{History||1.6.6|Roses can now be generated using [[Bone Meal|bone meal]], making rose red [[renewable resource|renewable]].}}
{{History|java}}
{{History||1.3.1|snap=1.3|[[File:Red Dye JE2 BE2.png|32px]] The texture of rose red has now been changed.}}
{{History||1.4.2|snap=12w34a|Added the ability to [[Armor#Dyeing|dye]] leather [[armor]] and [[wolf]] collars.}}
{{History||1.4.6|snap=12w49a|Rose red can now be crafted with [[gunpowder]] to create a [[firework star]].}}
{{History||1.6.1|snap=13w19a|Rose red can now be used to craft stained clay.}}
{{History||1.7.2|snap=13w36a|Rose red is now crafted using a poppy instead of a rose, as the latter is removed.
|Rose red can now be crafted using red tulips and rose bushes.}}
{{History|||snap=13w37a|Each poppy now yields only 1 rose red, instead of 2.}}
{{History|||snap=13w41a|Rose red can now be used to craft stained glass.}}
{{History||1.8|snap=14w30a|Added [[banner]]s, which can be dyed.}}
{{History||1.9|snap=15w31a|Rose red can now be crafted using [[beetroot]].}}
{{History||1.11|snap=16w39a|Added the ability to dye [[shulker box]]es.}}
{{History||1.12|snap=17w06a|Rose red can now be used to craft red [[concrete powder]].}}
{{History|||snap=17w15a|Added the ability to dye [[bed]]s.}}
{{History||1.13|snap=17w47a|The different data values for the <code>dye</code> ID have now been split up into their own IDs.
|Prior to [[1.13/Flattening|''The Flattening'']], this [[item]]'s numeral ID was 351.}}
{{History||1.14|snap=18w43a|"Rose Red" has now been renamed to "Red Dye".
|[[File:Red Dye JE3 BE3.png|32px]] The texture of red dye has now been changed.}}
{{History|||snap=18w44a|Red dye can now change the text color on [[sign]]s to red.}}
{{History|||snap=19w05a|Added the [[wandering trader]], which sells red dye.}}
{{History|||snap=19w11a|Red dye can now be [[trading|bought]] by shepherd villagers.}}
{{History||1.17|snap=20w45a|Red dye can now be used to craft [[red candle]]s.}}
{{History|||snap=21w19a|Red dye can no longer be used to craft red candles.}}
{{History|||snap=Pre-release 1|Red dye can once again be used to craft red candles.}}
{{History||1.20<br>(Experimental)|link=1.19.3|snap=22w42a|Red dye can now change the text color on [[hanging sign]]s to red.}}
{{History|pocket alpha}}
{{History||v0.3.0|[[File:Red Dye JE1 BE1.png|32px]] Added rose red. It is currently unobtainable and serves no purpose.}}
{{History||v0.4.0|Rose red is now obtainable by smelting red [[mushroom]]s.
|Rose red can now be used to craft other dyes and red wool.}}
{{History||v0.8.0|snap=build 1|[[File:Red Dye JE2 BE2.png|32px]] The texture of red dye has been changed.
|Rose red is now used to craft [[cocoa beans]].}}
{{History||v0.9.0|snap=build 3|Rose red can now be obtained by putting a poppy, red tulip or rose bush [[flower]]s in the crafting grid.}}
{{History||v0.15.0|snap=build 1|Red mushrooms can no longer be smelted to obtain rose red.}}
{{History||v0.16.0|snap=build 1|Rose red is no longer used to craft cocoa beans.}}
{{History|bedrock}}
{{History||1.8.0|snap=beta 1.8.0.10|"Rose Red" has now been renamed to "Red Dye".}}
{{History||1.10.0|snap=beta 1.10.0.3|Red dye can now be [[trading|bought]] from [[wandering trader]]s.
|[[File:Red Dye JE3 BE3.png|32px]] The texture of red dye has now been changed.}}
{{History||1.11.0|snap=beta 1.11.0.4|Red dye can now be [[trading|sold]] to shepherd [[villager]]s.}}
{{History||1.16.100|snap=beta 1.16.100.56|The ID of red dye has been changed from <code>dye/1</code> to <code>red_dye</code>.}}
{{History|console}}
{{History||xbox=TU1|xbone=CU1|ps=1.00|switch=1.0.1|wiiu=Patch 1|[[File:Red Dye JE1 BE1.png|32px]] Added rose red.}}
{{History||xbox=none|xbone=none|ps=1.83|switch=none|wiiu=none|"Rose Red" has now been renamed to "Red Dye".}}
{{History||ps=1.90|[[File:Red Dye JE3 BE3.png|32px]] The texture of red dye has now been changed.}}
{{History|new 3ds}}
{{History||0.1.0|[[File:Red Dye JE1 BE1.png|32px]] Added rose red.}}
{{History|foot}}
;Notes
{{reflist|group=n}}
== Issues ==
{{issue list}}
{{Items}}
[[cs:Šípková červeň]]
[[de:Roter Farbstoff]]
[[es:Tinte rojo]]
[[fr:Teinture rouge]]
[[hu:Rózsavörös]]
[[ja:赤色の染料]]
[[ko:장밋빛 빨강 염료]]
[[nl:Rozenrood]]
[[pl:Czerwony barwnik]]
[[pt:Corante vermelho]]
[[ru:Красный краситель]]
[[zh:红色染料]]
[[Category:Items]]
[[Category:Dyes]]
[[Category:Renewable resources]]</li><li>[[Saddle|Saddle]]<br/>{{about|normal saddles|the removed horse saddle|Horse Saddle}}
{{item
| image = <gallery>
Saddle (Pig).png | Pig
Saddle (Horse).png | Horse
Saddle (Strider).png | Strider
</gallery>
| invimage = Saddle
| renewable = Yes
| stackable = No
}}
A '''saddle''' is an [[item]] required to ride [[Pig|pigs]] and [[Strider|striders]] or control ridden [[camel]]s, [[Horse|horses]], [[Donkey|donkeys]] and [[Mule|mules]].
== Obtaining ==
=== Chest loot ===
{{LootChestItem|saddle}}
=== Fishing ===
Saddles can be obtained as a "treasure" item from [[fishing]] with a base chance (without fishing rod enchantments) of 0.8%.
=== Trading ===
Master-level [[Trading#Leatherworker|leatherworker]] [[villager]]s have a 50% chance to sell a saddle for 6 [[Emerald|emeralds]] as their trade.{{only|bedrock}} This trade is always offered in ''Java Edition''.
=== Mob loot ===
Any mob that the player equips with a saddle drops the saddle upon death.
A [[strider]] may spawn being ridden by a [[zombified piglin]], which causes it to spawn wearing a saddle. This saddle always drops when the strider is killed.
A [[ravager]] always spawns with a saddle and always drops the saddle upon death. Looting does not affect the drop.
== Usage ==
[[File:SaddledHorse.png|thumb|right|A [[horse]] equipped with a saddle.]]
While [[camel]]s, [[horse]]s, [[donkey]]s, [[mule]]s and [[Skeleton Horse|skeleton horse]]s{{Only|Java}} can always be ridden, a saddle is required to control them. These mobs (only after being tamed, in the case of equine mobs) can be equipped with a saddle by placing it in their inventory, which can be opened by pressing {{control|use}} while holding a saddle or {{control|sneaking}}. The saddle can be unequipped by removing it from {{SlotSprite|Saddle}} the specific inventory slot.
Saddles are required to ride [[Pig|pigs]] and [[Strider|striders]], but even with a saddle their movement cannot be controlled like other mobs. A [[Carrot on a Stick|carrot on a stick]] (for pigs) or a [[Warped Fungus on a Stick|warped fungus on a stick]] (for striders) is required to direct these mobs. {{control|Using}} a saddle on one of these mobs equips them with the saddle, and, since they have no inventory, there is no way to retrieve the saddle without killing the mob.
Animals can also be equipped with saddles by a [[dispenser]].
Although [[ravager]]s are equipped with saddles and sometimes ridden by other mobs, the [[player]] is unable to ride ravagers.
== Sounds ==
{{edition|java}}:
{{Sound table
|rowspan=4
|sound=Saddle equip.ogg
|source=neutral
|subtitle=Saddle equips
|description=When a saddle is equipped to a camel
|id=entity.camel.saddle
|translationkey=subtitles.entity.horse.saddle
|volume=0.5
|pitch=0.8
|distance=16}}
{{Sound table
|subtitle=MC-184399
|source=neutral
|description=When a saddle is equipped to a strider
|id=entity.strider.saddle
|translationkey=-
|volume=0.5
|pitch=1.0
|distance=16}}
{{Sound table
|subtitle=Saddle equips
|source=neutral
|description=When a saddle is equipped to a horse, donkey, mule, skeleton horse, or zombie horse
|id=entity.horse.saddle
|translationkey=subtitles.entity.horse.saddle
|volume=0.5
|pitch=1.0
|distance=16}}
{{Sound table
|subtitle=Saddle equips
|source=neutral
|description=When a saddle is equipped to a pig
|id=entity.pig.saddle
|translationkey=subtitles.entity.pig.saddle
|volume=0.5
|pitch=1.0
|distance=16
|foot=1}}
{{edition|bedrock}}:
{{Sound table
|type=bedrock
|rowspan=3
|sound=Saddle equip.ogg
|source=neutral
|description=When a saddle is equipped to a camel
|id=mob.horse.leather
|volume=1.0
|pitch=1.0}}
{{Sound table
|source=neutral
|description=When a saddle is equipped to a horse, mule, skeleton horse, or zombie horse
|id=mob.horse.leather
|volume=0.6
|pitch=1.0}}
{{Sound table
|source=neutral
|description=When a saddle is equipped to a donkey
|id=mob.horse.leather
|volume=0.5
|pitch=1.0
|foot=1}}
== Data values ==
=== ID ===
{{edition|java}}:
{{ID table
|edition=java
|showforms=y
|generatetranslationkeys=y
|displayname=Saddle
|spritetype=item
|nameid=saddle
|form=item
|foot=1}}
{{edition|bedrock}}:
{{ID table
|edition=bedrock
|shownumericids=y
|showforms=y
|notshowbeitemforms=y
|generatetranslationkeys=y
|displayname=Saddle
|spritetype=item
|nameid=saddle
|id=371
|form=item
|foot=1}}
== Achievements ==
{{load achievements|When Pigs Fly}}
== Advancements ==
{{load advancements|This Boat Has Legs}}
== History ==
{{needs render|type=old|isolated saddles in 1.13 dev|section=11}}
{{History|java infdev}}
{{History||20100625-2|[[File:Saddle (Pig) JE1 BE1.png|32px]] [[File:Saddle JE1 BE1.png|32px]] Added saddles.
|Saddles do not [[drops|drop]] from saddled [[pig]]s.
|Saddles can be found in the new [[dungeon]] [[chest]]s.}}
{{History|java}}
{{History||1.2.4|snap=release|When baby animals were introduced, baby [[pig]]s could be ridden just like adult pigs. After this version, baby pigs can no longer be saddled.}}
{{History||1.3.1|snap=12w21a|Saddles can now be [[trading|bought]] from butcher [[villager]]s for 6–7 [[emerald]]s each, and thus have become [[renewable resource|renewable]].}}
{{History||1.4.2|snap=12w36a|Saddles now [[drops|drop]] from killing saddled [[pig]]s.
|Added [[Carrot on a Stick|carrot on a stick]] to direct saddled pigs, effectively controlling them.}}
{{History|||snap=12w37a|Pigs can now jump when being ridden.}}
{{History||1.6.1|snap=13w18a|Regular saddles can now be used to ride [[horse]]s, while previously they required [[Horse Saddle|horse saddle]]s.
|Added saddles to the loot tables of [[mineshaft]] minecarts, [[stronghold]] altar chests, [[village]] blacksmith chests, as well as [[Desert pyramid|desert]] and [[jungle pyramid]]s.
|Added chests to [[Nether Fortress|nether fortresses]], where saddles can be found.}}
{{History||1.7.2|snap=13w36a|Saddles can now be [[fishing|fished]] with [[Fishing Rod|fishing rod]]s and are described as treasure.}}
{{History||1.8|snap=14w02a|[[Trading]] has been changed: leatherworker [[villager]]s now [[trading|sell]] saddles for 8–10 [[emerald]]s each, and butchers no longer [[trading|trade]] saddles.}}
{{History||1.9|snap=15w31a|Saddles can now be found in [[End City|end city]] [[chest]]s.}}
{{History|||snap=15w43a|The average yield of saddles in [[Nether Fortress|nether fortress]] chests has been slightly decreased.}}
{{History|||snap=15w44a|Saddles have been removed from [[mineshaft]] chests.
|The average yield of saddles in [[dungeon]] chests has been decreased.
|The average yield of saddles in [[desert pyramid|desert temple]] chests has been increased.}}
{{History||1.13|snap=17w45a|[[File:White Horse (Saddle) 17w45a.png|50px]] The models of the horse's saddle has been changed.}}
{{History|||snap=17w46a|[[File:White Horse (Saddle) 17w46a.png|50px]] The models of the horse's saddle has been changed once again.}}
{{History|||snap=17w47a|Prior to [[Java Edition 1.13/Flattening|''The Flattening'']], this [[item]]'s numeral ID was 329.}}
{{History|||snap=18w03a|[[File:White Horse (Saddle) 18w03a.png|50px]] The models of the horse's saddle has been changed once again.}}
{{History|||snap=pre2|[[File:White Horse (Saddle) 1.13pre2.png|50px]] The models of the horse's saddle has been changed once again. The reins bit has now been rendered. Also, the lines of the reins are no longer rendered except when riding.}}
{{History||1.14|snap=18w43a|Added [[ravager|illager beast]]s, which [[drops|drop]] saddles.
|[[File:Saddle (Pig) JE2 BE2.png|32px]] [[File:Saddle (Horse) JE2 BE2.png|32px]] <br>[[File:Saddle JE2 BE2.png|32px]] The textures of saddles have been changed.}}
{{History|||snap=18w48a|Saddles can now be found in [[chest]]s in [[village]] tanneries.}}
{{History|||snap=18w49a|Saddles can now be found in chests in [[savanna]] village houses.}}
{{History||1.16|snap=20w13a|[[File:Saddle (Strider) JE1 BE1.png|32px]] Added [[strider]]s, which can be ridden with saddles.}}
{{History|||snap=20w15a|Saddles placed in a [[dispenser]] can now saddle pigs, striders, and tamed horses, donkeys and mules.}}
{{History|||snap=20w16a|Saddles now generate in [[Bastion Remnant|bastion remnant]] chests.}}
{{History|||snap=20w17a|[[File:Saddle (Strider) JE2.png|32px]] The texture of the strider saddles has been changed. The front and back orientation of the saddle has been corrected.<ref>{{bug|MC-176116}}</ref>}}
{{History||1.19|snap=22w13a|Saddles may now be found in [[ancient city]] [[chest]]s.}}
{{History||1.20<br>(Experimental)|link=1.19.3|snap=22w42a|Saddles can be used to ride [[camel]]s with the use of a built-in experimental data pack.}}
{{History|pocket alpha}}
{{History||v0.7.0|[[File:Saddle JE1 BE1.png|32px]] Added saddles. They are currently unobtainable and have no practical usage since they cannot be equipped on any mobs.}}
{{History||v0.9.0|snap=build 1|Saddles can now be obtained from [[village]] blacksmith [[chest]]s.}}
{{History||v0.11.0|snap=build 1|Saddles can now be [[fishing|fished]] with [[fishing rod]]s and are described as treasure.}}
{{History||v0.12.1|snap=build 1|Saddles can now be found in [[nether fortress]]es.}}
{{History||v0.13.0|snap=build 1|Saddles can now be found in [[desert temple]]s.}}
{{History||v0.15.0|snap=build 1|[[File:Saddle (Pig) JE1 BE1.png|32px]] [[File:Saddle (Horse) JE1 BE1.png|32px]] Saddles can now be used for riding [[horse]]s and [[pig]]s.|Saddles can now be found inside [[jungle temple]]s.}}
{{History||snap=?||Added saddles to the [[Creative inventory]].{{info needed}}}}
{{History|pocket}}
{{History||1.0.0|snap=alpha 0.17.0.1|Saddles can now be found in [[end cities]].}}
{{History||1.0.4|snap=alpha 1.0.4.0|Saddles are now [[trading|sold]] by leatherworker [[villager]]s for 8-10 [[emerald]]s as their only third tiers [[trading|trades]].}}
{{History|bedrock}}
{{History||1.10.0|snap=beta 1.10.0.3|Saddles can now be found in [[plains]] [[village]] tannery and weaponsmith [[chest]]s.
|Added [[ravager]]s, which [[drops|drop]] a saddle upon death.
|[[File:Saddle (Pig) JE2 BE2.png|32px]] [[File:Saddle (Horse) JE2 BE2.png|32px]] <br>[[File:Saddle JE2 BE2.png|32px]] The textures of saddles have been changed.}}
{{History||1.11.0|snap=beta 1.11.0.1|Saddles can now be found in [[savanna]], [[snowy taiga]], [[taiga]] and [[snowy tundra]] village tannery [[chest]]s.
|Saddles can now be found in savanna, taiga, snowy taiga, and [[desert]] village weaponsmith chests.
|Saddles can now be found in savanna [[village]] house chests.}}
{{History|||snap=beta 1.11.0.4|[[Trading]] has been changed. Leatherworker [[villager]]s now have 50% chance to [[trading|sell]] saddles for 10 [[emerald]]s as part of their last tier [[trading|trade]].}}
{{History||1.12.0|snap=beta 1.12.0.3|The trading price of saddles has been lowered to 6 emeralds.}}
{{History||1.16.0|snap=beta 1.16.0.57|[[File:Saddle (Strider) JE1 BE1.png|32px]] Added [[strider]]s, which can be ridden with saddles.|Saddles now generate in [[Bastion Remnant|bastion remnant]] chests.}}
{{History||1.20.0<br>(Experimental)|link=Bedrock Edition 1.19.50|snap=beta 1.19.50.21|Saddles can now be used to ride [[camel]]s with the use of the "[[Bedrock Edition 1.20|Next Major Update]]" [[experimental]] toggle.}}
{{History|console}}
{{History||xbox=TU1|xbone=CU1|ps=1.0|wiiu=Patch 1|switch=1.0.1|[[File:Saddle (Pig) JE1 BE1.png|32px]] <br>[[File:Saddle JE1 BE1.png|32px]] Added saddles.}}
{{History||xbox=none|xbone=none|ps=1.90|wiiu=none|switch=none|[[File:Saddle (Pig) JE2 BE2.png|32px]] [[File:Saddle (Horse) JE2 BE2.png|32px]] <br>[[File:Saddle JE2 BE2.png|32px]] The textures of saddles have been changed.}}
{{History|3ds}}
{{History||0.1.0|[[File:Saddle (Pig) JE1 BE1.png|32px]] <br>[[File:Saddle JE1 BE1.png|32px]] Added saddles.}}
{{History|foot}}
== Issues ==
{{issue list}}
== Trivia ==
* A saddle is considered "armor" by the game, but the value of protection to the animal is zero.
* A saddle on a pig can still be seen if the pig is afflicted with [[Invisibility]].
* When riding a saddled mob, the hunger bar is replaced by hearts (representing the mounted mob's health) resembling the look of the saddle.
== Gallery ==
<gallery>
File:Pig saddle.png|A [[player]] riding a [[pig]] (before [[Java Edition Beta 1.8|Beta 1.8]]).
File:Horse saddle.png|A player riding a [[horse]].
File:13w21a-new-HorseUI-inventory.png|The horse interface implemented in [[Java Edition 13w21a|13w21a]] that allows for the removal of saddles, but only on horses, [[donkey]]s or [[mule]]s.
File:Saddled Mule (picture).png|Mule equipped with both a saddle and a [[chest]].
File:GodSpawner.png|A saddle found in a monster room chest, which coincidentally contains an [[enchanted golden apple]].
</gallery>
== See also ==
* [[Transportation]]
== References ==
{{reflist}}
{{items}}
[[cs:Sedlo]]
[[de:Sattel]]
[[es:Montura]]
[[fr:Selle]]
[[hu:Nyereg]]
[[it:Sella]]
[[ja:鞍]]
[[ko:안장]]
[[nl:Zadel]]
[[pl:Siodło]]
[[pt:Sela]]
[[ru:Седло]]
[[zh:鞍]]
[[Category:Renewable resources]]
[[uk:Сідло]]</li></ul> | 16w21a | Wild wolves no longer despawn. | |||
1.11{{Extension DPL}}<ul><li>[[Cooked Salmon|Cooked Salmon]]<br/>{{Dungeons hatnote|type=consumable}}
{{Item
| title = Cooked Salmon
| image = Cooked Salmon.png
| renewable = Yes
| heals = {{hunger|6}}
| stackable = Yes (64)
}}
'''Cooked salmon''' is a [[food]] item obtained by cooking [[raw salmon]].
== Obtaining ==
=== Mob loot ===
====Salmon====
[[Salmon]] always drops 1 raw salmon when killed, unaffected by Looting.<ref>{{bug|MC-212795||Salmon & Fish mobs are not affected by Looting}}</ref> If it is killed while on [[fire]], it drops 1 [[Cooked Salmon|cooked salmon]] instead.
====Guardians and elder guardians====
[[Guardian|Guardians]] and [[Elder Guardian|elder guardians]] have a 2.5% chance to drop a random fish, with 25% of them being raw salmon, which drops as cooked if the guardian was on fire. The chance of getting the fish drop is increased by 1% per level with [[Looting]] (for a maximum of 5.5% with Looting III), but the type of fish is not affected.
====Polar bears ====
[[Polar bear]]s have a 25% chance of dropping 0–2 raw salmon when killed. The maximum amount can be increased by 1 per level of Looting, for a maximum of 0-5 with Looting III. If killed while on fire, they drop cooked salmon instead.
=== Cooking ===
Cooked salmon can be obtained by cooking raw salmon in a [[furnace]], [[smoker]], or on a [[campfire]]. Each piece of cooked salmon removed from a furnace output slot gives 0.35 [[experience]] (22.4 experience per stack).
{{smelting|Raw Salmon|Cooked Salmon|0,35}}
=== Chest loot ===
{{LootChestItem|cooked-salmon}}
=== Trading ===
Apprentice-level fishermen villagers have a 50%{{only|bedrock}} or {{frac|2|3}}{{only|java}} chance to sell 6 cooked salmon for 6 raw salmon and an [[emerald]].
== Usage ==
=== Food ===
To eat cooked salmon, press and hold {{control|use}} while it is selected in the hotbar. Eating one restores {{hunger|6}} and 9.6 [[Hunger#Mechanics|saturation]], the same as [[cooked mutton]].
=== Wolves ===
{{IN|Bedrock}}, cooked salmon can be fed to [[wolves]] only if they are not at full health, healing them by {{hp|6|mob=1}}. Cooked salmon does not accelerate the growth of baby wolves and cannot be used to [[breed]] them.
==Sounds==
{{Sound table/Entity/Food}}
== Data values ==
=== ID ===
{{edition|java}}:
{{ID table
|edition=java
|showitemtags=y
|showforms=y
|generatetranslationkeys=y
|displayname=Cooked Salmon
|spritetype=item
|nameid=cooked_salmon
|itemtags=fishes
|form=item
|foot=1}}
{{edition|bedrock}}:
{{ID table
|edition=bedrock
|shownumericids=y
|showforms=y
|notshowbeitemforms=y
|generatetranslationkeys=y
|displayname=Cooked Salmon
|spritetype=item
|nameid=cooked_salmon
|id=269
|form=item
|foot=1}}
== Achievements ==
{{load achievements|Lion Hunter}}
== Advancements ==
{{load advancements|Husbandry;A Balanced Diet;Fishy Business}}
== Video ==
<div style="text-align:center">{{yt|s_GcAFeoREk}}</div>
== History ==
{{History|java}}
{{History||1.7.2|snap=13w36a|[[File:Cooked Salmon JE1 BE1.png|32px]] Added cooked salmon.}}
{{History||1.8|snap=14w02a|Cooked salmon can no longer be [[trading|traded]] by [[villager]]s.}}
{{History||1.13|snap=17w47a|The different data values for the <code>cooked_fish</code> IDs have been split up into their own IDs.
|Prior to [[1.13/Flattening|''The Flattening'']], these [[item]]s' numeral IDs were 349 and 250.}}
{{History|||snap=18w08b|Salmon has been added as a [[mob]], which drops raw salmon when killed (cooked while on [[fire]]).
|[[File:Cooked Salmon JE2 BE2.png|32px]] The texture of cooked salmon has been changed.}}
{{History|||snap=18w10a|Cooked salmon now generates in [[buried treasure]] [[chest]]s.}}
{{History|||snap=19w11a|Fisherman [[villager]]s can now convert raw salmon to cooked salmon, if [[trading|paid]] with emeralds.}}
{{History|pocket alpha}}
{{History||v0.11.0|snap=build 1|[[File:Cooked Salmon JE1 BE1.png|32px]] Added cooked salmon.}}
{{History||v0.12.1|snap=build 1|Salmon now restores [[hunger]] instead of [[health]].}}
{{History||v0.16.0|snap=build 1|Salmon is now dropped by [[guardian]]s and [[elder guardian]]s.}}
{{History|bedrock}}
{{History||1.4.0|snap=beta 1.2.14.2|Salmon has been added as a [[mob]], which drops raw salmon when killed (cooked while on [[fire]]).
|[[File:Cooked Salmon JE2 BE2.png|32px]] The texture of cooked salmon has been changed.}}
{{History||1.11.0|snap=beta 1.11.0.4|Cooked salmon can now be obtained from [[trading]] with fishermen [[villager]]s.}}
{{History||1.16.100|snap=beta 1.16.100.52|Salmon now drops cooked salmon when killed on [[fire]].}}
{{History|console}}
{{History||xbox=TU31|xbone=CU19|ps=1.22|wiiu=Patch 3|[[File:Cooked Salmon JE1 BE1.png|32px]] Added cooked salmon.}}
{{History||xbox=TU69|ps=1.76|wiiu=Patch 38|[[File:Cooked Salmon JE2 BE2.png|32px]] The texture of cooked salmon has been changed.}}
{{History|new 3ds}}
{{History||0.1.0|[[File:Cooked Salmon JE1 BE1.png|32px]] Added cooked salmon.}}
{{History|foot}}
== Issues ==
{{issue list}}
== See also ==
* [[Fishing]]
* [[Cooked Cod]]
{{items}}
[[Category:Food]]
[[Category:Renewable resources]]
[[de:Gebratener Lachs]]
[[es:Salmón ahumado]]
[[pt:Salmão assado]]
[[ko:익힌 연어]]
[[zh:熟鲑鱼]]
[[ru:Жареный лосось]]</li><li>[[Crossbow|Crossbow]]<br/>{{For}}
{{Item
| title = Crossbow
| image = <gallery>
Crossbow.png | Crossbow
Crossbow Pull 0.png | Pull (state 0)
Crossbow Pull 1.png | Pull (state 1)
Crossbow Pull 2.png | Pull (state 2)
Arrow Loaded Crossbow.png | Arrow loaded
Firework Loaded Crossbow.png | Firework loaded
</gallery>
| rarity = Common
| renewable = Yes
| durability = 465{{only|JE|short=yes}}<br>464{{only|BE|short=1}}
| stackable = No
}}
A '''crossbow''' is a ranged [[weapon]] similar to a [[bow]] that uses [[arrow]]s or [[firework rocket|fireworks]] as ammunition.
== Obtaining ==
=== Crafting ===
{{Crafting
|A1=Stick|B1=Iron Ingot |C1=Stick
|A2=String|B2= Tripwire Hook|C2=String
|B3= Stick
|Output= Crossbow
|type= Combat
}}
=== Repairing ===
{{Grinding
|showdescription=1
|ingredients=2× Damaged [[Crossbow]] or<br>2× Damaged [[Arrow Loaded Crossbow]] or<br>2× Damaged [[Firework Loaded Crossbow]]
|Damaged Crossbow; Damaged Arrow Loaded Crossbow; Damaged Firework Loaded Crossbow
|Damaged Crossbow; Damaged Arrow Loaded Crossbow; Damaged Firework Loaded Crossbow
|Crossbow; Arrow Loaded Crossbow; Firework Loaded Crossbow
|description=The [[item durability|durability]] of the two crossbows is added together, plus an extra 5% durability.
}}
{{Crafting
|Damaged Crossbow;Damaged Arrow Loaded Crossbow;Damaged Firework Loaded Crossbow
|Damaged Crossbow;Damaged Arrow Loaded Crossbow;Damaged Firework Loaded Crossbow
|Output=Crossbow
|type=Combat
|ignoreusage=1
|showdescription=1
|description=The durability of the two crossbows is added together, plus an extra 5% durability. Any loaded ammunition is lost.
}}
=== Mob loot ===
==== Pillagers ====
When killed, a [[pillager]] has a small chance (8.5%) of dropping a loaded or unloaded crossbow with random [[durability]]; the [[drop]] rate increases by 1% per [[level]] of [[Looting]]: 9.5% with Looting I, 10.5% with Looting II and 11.5% with Looting III. The [[drop]]ped crossbow can rarely (10% chance) be [[enchanted]] at level 5–19 regardless of being [[enchanted]] when it [[spawn]]ed.
Crossbows dropped by pillagers may have multiple enchantments, including duplicate enchantments on the same weapon.
==== Piglins ====
[[Piglin]]s have a chance of wielding a crossbow upon spawning, and they also have a small chance (8.5%) of dropping a loaded or unloaded crossbow of random durability when killed; this rate increases by 1% per level of [[Looting]]: 9.5% with Looting I, 10.5% with Looting II and 11.5% with Looting III. It can rarely (10% chance) be enchanted at level 5–19 regardless of being enchanted when spawned.
=== Chest loot ===
{{LootChestItem|crossbow,damaged-level-enchanted-crossbow,damaged-random-enchanted-crossbow,damaged-random-enchanted-crossbow-2}}
=== Trading ===
Journeyman-level Fletcher [[villager]]s offer to [[trading|sell]] an unenchanted crossbow for 3 [[emerald]]s.
Master-level Fletcher villagers have a {{frac|1|16}} (6.25%) chance of selling an [[enchanting|enchanted]] crossbow for 8 emeralds.{{only|bedrock}}
Master-level Fletcher villagers have {{frac|2|3}} chance of selling an enchanted crossbow for 7-22 emeralds.{{only|java}}
== Usage ==
<gallery>
Steve aiming with Crossbow.png|
Alex aiming with Crossbow.png|
Pillager Aiming with Crossbow BE.png|
Piglin with Crossbow targeting JE.png|
</gallery>
Despite using [[iron ingot]]s in their crafting recipe, crossbows cannot be smelted into [[iron nugget]]s.<ref>{{bug|MC-111738}}</ref>
=== Weapon ===
[[File:Crossbowcooldown.gif|thumb|right|Charging and shooting the crossbow {{in|bedrock}}.]]
Crossbows are similar to [[bow]]s, but take longer to load and are slightly more powerful, shooting farther with slightly higher accuracy. Alternatively, they can be loaded with a firework rocket, which flies in a straight line.
Load them by {{control|using}} them, which makes the player move at sneak speed. Unlike bows, the [[arrow]] or [[firework rocket]] can be fired only if the player releases the use button after the crossbow is loaded{{Only|je}} or if the crossbow finishes its loading animation {{Only|be}}. At this point, it ''must be used a second time'' to fire its bolt.
Once it has reached full charge, the [[player]]'s speed returns to normal. After that, shooting a charged crossbow does not delay any of the [[player]]'s current action like [[sprinting]] or [[swimming]].
The crossbow can even be placed in another [[inventory]] slot or into an [[item frame]] without the [[arrow]] or [[firework rocket]] being unloaded or fired. A charged crossbow also remains charged after enchanting it with an enchantment table or with an anvil.
In order to use the crossbow, at least one arrow or firework rocket must be present in the inventory. The player can choose the type of arrow to fire based on its location in their [[inventory]]:
* [[File:Java Crossbow 1stP Loading.mp4|thumb|177x177px|Java Edition first-person loading animation for crossbows.]]Arrows in the off-hand, or the selected [[hotbar]] slot if the crossbow is in the off-hand, are prioritized first.
* If there are no arrows in the off-hand or selected hotbar slot, the arrow closest to slot 0 is selected.
Crossbows take 1.25 seconds (25 ticks) to load.
The player can load either an arrow, spectral arrow, tipped arrow (of any effect) or a firework (of any color/type).
[[File:Bedrock Crossbow 1stP Loading.mp4|thumb|177x177px|Bedrock Edition first-person loading animation for crossbows.]]
[[Endermen]] teleport away from projectile paths, so they cannot be hit with crossbow [[arrow]]s. However, they can still get harmed by [[firework rocket]] explosions, if they can't detect the firework rocket.
;Attack strength
''Java Edition'':
{| class="wikitable" style="text-align:center" data-description="Crossbow Damage Statistic"
|-
! Damage || Arrow || Max firework
|-
| {{ItemSprite|Crossbow|text= '''Minimum'''}}
| {{hp|7}}
| {{hp|11}}
|-
| {{ItemSprite|Crossbow|text= '''Average'''}}
| {{hp|9}}
| {{hp|14.5}}
|-
| {{ItemSprite|Crossbow|text= '''Maximum'''}}
| {{hp|11}}
| {{hp|18}}
|}
''Bedrock Edition''
* Always {{hp|9}}
=== Fireworks ===
[[Firework rocket]]s can be fired by loading the crossbow only while holding the rockets in the off-hand. They fly at 32 m/s. Firework rockets with higher flight duration have a longer time before they explode and therefore travel farther. Firing a firework rocket uses 3 [[durability]] points per shot.
{| class="wikitable" style="text-align:center"
! colspan="4" |Firework rocket range
|-
|Minimum
|Average
|Maximum
|Gunpowder
|-
|32m (20 ticks)
|40.8m (25.5 ticks)
|49.6m (31 ticks)
|1 ([[File:Gunpowder JE2 BE2.png|12x12px]])
|-
|48m (30 ticks)
|56.8m (35.5 ticks)
|65.6m (41 ticks)
| 2 ([[File:Gunpowder JE2 BE2.png|12x12px]][[File:Gunpowder JE2 BE2.png|12x12px]])
|-
|64m (40 ticks)
|72.8m (45.5 ticks)
|81.6m (51 ticks)
|3 ([[File:Gunpowder JE2 BE2.png|12x12px]][[File:Gunpowder JE2 BE2.png|12x12px]][[File:Gunpowder JE2 BE2.png|12x12px]])
|}
Firework rockets also work with the [[Multishot]] enchantment, enabling the [[player]] to shoot 3 firework rockets at a time. The increased durability usage stacks, resulting in 9 durability being consumed with each shot.
A shot firework rocket explodes instantly when it hits a [[mob]] or [[block]].{{only|java}} If the firework rocket has no explosion effect, it deals no [[damage]]. The explosion of a firework rocket deals {{hp|5}} to {{hp|6}} points of damage, with one [[firework star]]. The explosion has a radius of roughly 4 blocks, which is unaffected by the firework star's [[Firework Star#Effects|effect]]. Each additional firework star on the rocket deals an additional {{hp|1}} to {{hp|2}} points of damage, for a maximum of {{hp|11}} to {{hp|18}} with 7 firework stars. The flight duration of the firework increases the maximum range the firework can travel before exploding, but does not affect the damage output. Likewise, the damage remains the same regardless of any dyes used. The [[Piercing]] enchantment causes the firework rocket to pierce a number of entities based on its respective level before exploding.{{only|java}} Unlike an arrow shot from a bow, the firework does not slow down under water.
=== Repair ===
Crossbows can be repaired in an [[anvil]] or [[grindstone]] by combining two crossbows. Any loaded ammunition is retained from the crossbow in the first slot but sacrificed from the crossbow in the second slot.
===Enchantments===
{| class="wikitable"
|+
!Name
!Description
!Max Level
|-
|[[Quick Charge]]
|Decreases the reloading time of the crossbow by {{code|level * 0.25}} seconds. Crossbows with [[Quick Charge]] III fire slightly faster than [[bow]]s. If [[commands]] are used to enchant a crossbow with Quick Charge V, the crossbow charges instantaneously. A crossbow enchanted with Quick Charge VI is effectively impossible to charge, which renders it useless. This can be done only {{in|je}}.
|III
|-
|[[Multishot]]
| Makes the crossbow fire a spread of 3 projectiles at once instead of a single projectile, which is useful for targeting mobs spread out in a small area. This works for both [[arrow]]s and [[firework rocket]]s. Firing with this enchantment still uses only one projectile, and because of that, it is possible to recover only one of the three arrows shot from a Multishot crossbow. Multishot crossbows use 3 [[item durability|durability]] points per shot, unless using fireworks for ammunition, in which case 9 durability is consumed. Mutually exclusive with Piercing.
|I
|-
|[[Piercing]]
|Makes [[arrow]]s shot from the crossbow pierce [[entity|entities]] they hit and continue their flight, which allows each arrow to hit up to {{code|level + 1}} entities. This is useful for targeting [[mob]]s closely packed together, and for conserving arrows, as they can be picked up after piercing entities. Arrows fired in this manner also ignore [[Shield|shields]]. Mutually exclusive with Multishot.
|IV
|-
|[[Unbreaking]]
|Causes a <code>(Level /(Level+1)) * 100%</code> chance a shot fired does not reduce the [[item durability|durability]] of the crossbow.
|III
|-
|[[Mending]]
|Allows a certain proportion of [[experience]] orbs collected to contribute toward repairing the crossbow, rather than raising the [[player]]'s experience.
|I
|-
|[[Curse of Vanishing]]
| Causes the crossbow to disappear instead of dropping on the ground when the player dies. The {{cmd|gamerule keepInventory}} overrides this.
|I
|}
[[Multishot]] and [[Piercing]] are mutually exclusive. Normal methods of [[enchanting]] allow only one of them to be applied to a crossbow.
Crossbows can receive 3 unique [[enchanting|enchantment]]s, and have a base enchantability of 1. Enchantments specific to crossbows include [[Quick Charge]], Multishot and Piercing.
===Fuel===
Crossbows can be used as [[fuel]] in [[furnace]]s, [[smelting]] 1.5 [[item]]s per crossbow.
== Sounds ==
{{el|je}}:
{{Sound table
|sound=Crossbow loading start.ogg
|subtitle=Crossbow charges up
|source=player
|description=When a crossbow starts to load
|id=item.crossbow.loading_start
|translationkey=subtitles.item.crossbow.charge
|volume=0.15
|pitch=1.0
|distance=16}}
{{Sound table
|sound=Crossbow quick charge one1.ogg
|sound2=Crossbow quick charge one2.ogg
|sound3=Crossbow quick charge one3.ogg
|subtitle=Crossbow charges up
|source=player
|description=When a Quick Charge I crossbow starts to load <ref group=sound><code>quick1_3</code> occurs at half the frequency as the other sounds</ref>
|id=item.crossbow.quick_charge_1
|translationkey=subtitles.item.crossbow.charge
|volume=''varies'' <ref group=sound>0.325 for all except <code>quick1_1</code> (pitch=0.9), which is 0.25</ref>
|pitch=''varies'' <ref group=sound><code>quick1_1</code> can be 1.0 or 0.9; <code>quick1_2</code> can be 1.0 or 0.95; <code>quick1_3</code> can be 1.0</ref>
|distance=16}}
{{Sound table
|sound=Crossbow quick charge two1.ogg
|sound2=Crossbow quick charge two2.ogg
|sound3=Crossbow quick charge two3.ogg
|subtitle=Crossbow charges up
|source=player
|description=When a Quick Charge II crossbow starts to load <ref group=sound name=quickchargefrequency><code>_1</code> occurs at {{frac|2|3}} the frequency as the other sounds</ref>
|id=item.crossbow.quick_charge_2
|translationkey=subtitles.item.crossbow.charge
|pitch=''varies'' <ref group=sound name=quickchargevolume />
|volume=''varies'' <ref group=sound name=quickchargepitch />
|distance=16}}
{{Sound table
|sound=Crossbow quick charge three1.ogg
|sound2=Crossbow quick charge three2.ogg
|sound3=Crossbow quick charge three3.ogg
|subtitle=Crossbow charges up
|source=player
|description=When a Quick Charge III crossbow starts to load <ref group=sound name=quickchargefrequency />
|id=item.crossbow.quick_charge_3
|translationkey=subtitles.item.crossbow.charge
|volume=''varies'' <ref group=sound name=quickchargevolume>0.325 for all except <code>_1</code> (pitch=0.95), which is 0.25</ref>
|pitch=''varies'' <ref group=sound name=quickchargepitch><code>_1</code> can be 1.0 or 0.95; <code>_2</code> can be 1.0, 0.95, or 1.05; <code>_3</code> can be 1.0, 0.9, or 1.05</ref>
|distance=16}}
{{Sound table
|sound=Crossbow loading middle1.ogg
|sound2=Crossbow loading middle2.ogg
|sound3=Crossbow loading middle3.ogg
|sound4=Crossbow loading middle4.ogg
|subtitle=MC-203146
|source=player
|description=While a crossbow is loading <ref group=sound><code>loading_middle4</code> occurs at {{frac|1|4}} the frequency as the other sounds</ref>
|id=item.crossbow.loading_middle
|translationkey=-
|volume=0.325
|pitch=''varies'' <ref group=sound><code>loading_middle1</code> can be 1.0, 0.95, or 1.2; <code>loading_middle2</code> and <code>loading_middle3</code> can be 1.0, 0.9, or 1.05; <code>loading_middle4</code> can be 1.0</ref>
|distance=16}}
{{Sound table
|sound=Crossbow loading end.ogg
|subtitle=Crossbow loads
|source=dependent
|description=When a crossbow stops loading
|id=item.crossbow.loading_end
|translationkey=subtitles.item.crossbow.load
|volume=1.0
|pitch={{frac|13|15}}-1.2
|distance=16}}
{{Sound table
|sound=Crossbow shoot1.ogg
|sound2=Crossbow shoot2.ogg
|sound3=Crossbow shoot3.ogg
|subtitle=Crossbow fires
|source=dependent
|description=When a crossbow fires
|id=item.crossbow.shoot
|translationkey=subtitles.item.crossbow.shoot
|volume=0.8/0.9/0.9
|pitch=1.0/1.0/0.9 <ref group=sound>Multiplied by the loading percentage of the crossbow</ref>
|distance=16}}
{{Sound table
|sound=Arrow hit1.ogg
|sound2=Arrow hit2.ogg
|sound3=Arrow hit3.ogg
|sound4=Arrow hit4.ogg
|subtitle=Arrow hits
|source=neutral
|description=When an arrow hits a block or entity
|id=item.crossbow.hit
|translationkey=subtitles.item.crossbow.hit
|volume=1.0
|pitch={{frac|12|11}}-{{frac|4|3}}
|distance=16}}
{{Sound table
|sound=Succesfull Hit.ogg
|subtitle=Player hit
|source=player
|description=When an arrow shot by a player hits another player
|id=entity.arrow.hit_player
|translationkey=subtitles.entity.arrow.hit_player
|volume=0.18
|pitch=0.45
|distance=16}}
{{Sound table
|sound=Firework launch.ogg
|subtitle=Firework launches
|source=ambient
|description=When a crossbow fires a firework rocket
|id=entity.firework_rocket.launch
|translationkey=subtitles.entity.firework_rocket.launch
|volume=3.0
|pitch=1.0
|distance=16}}
{{Sound table
|sound=Random break.ogg
|subtitle=Item breaks
|source=dependent
|description=When a crossbow's durability is exhausted
|id=entity.item.break
|translationkey=subtitles.entity.item.break
|volume=0.8
|pitch=0.8-1.2
|distance=16
|foot=1}}
{{el|be}}:
{{Sound table
|type=bedrock
|sound=Crossbow loading start.ogg
|source=player
|description=When a crossbow starts to load
|id=crossbow.loading.start
|volume=1.0
|pitch=1.0}}
{{Sound table
|sound=Crossbow loading middle1.ogg
|sound2=Crossbow loading middle2.ogg
|sound3=Crossbow loading middle3.ogg
|sound4=Crossbow loading middle4.ogg
|source=player
|description=While a crossbow is loading and when a crossbow stops loading
|id=crossbow.loading.middle
|volume=1.0
|pitch=1.0}}
{{Sound table
|sound=Crossbow loading end.ogg
|source=player
|description=''Unused sound event''
|id=crossbow.loading.end
|volume=1.0
|pitch=1.0}}
{{Sound table
|sound=Crossbow quick charge one1.ogg
|sound2=Crossbow quick charge two1.ogg
|sound3=Crossbow quick charge three1.ogg
|source=player
|description=When a crossbow with Quick Charge starts to load
|id=crossbow.quick_charge.start
|volume=1.0
|pitch=1.0}}
{{Sound table
|sound=Crossbow quick charge one2.ogg
|sound2=Crossbow quick charge two2.ogg
|sound3=Crossbow quick charge three2.ogg
|source=player
|description=While a crossbow with Quick Charge is loading
|id=crossbow.quick_charge.middle
|volume=1.0
|pitch=1.0}}
{{Sound table
|sound=Crossbow quick charge one3.ogg
|sound2=Crossbow quick charge two3.ogg
|sound3=Crossbow quick charge three3.ogg
|source=player
|description=When a crossbow with Quick Charge stops loading
|id=crossbow.quick_charge.end
|volume=1.0
|pitch=1.0}}
{{Sound table
|sound=Crossbow shoot1.ogg
|sound2=Crossbow shoot2.ogg
|sound3=Crossbow shoot3.ogg
|source=player
|description=When a crossbow fires
|id=crossbow.shoot
|volume=1.0
|pitch=1.0}}
{{Sound table
|sound=Arrow hit1.ogg
|sound2=Arrow hit2.ogg
|sound3=Arrow hit3.ogg
|sound4=Arrow hit4.ogg
|source=player
|description=When an arrow hits a block or entity
|id=random.bowhit
|volume=1.0
|pitch=1.09-1.3}}
{{Sound table
|sound=Firework launch.ogg
|source=ambient
|description=When a crossbow fires a firework rocket
|id=firework.launch
|volume=1.0
|pitch=1.0}}
{{Sound table
|sound=Random break.ogg
|source=player
|description=When a crossbow's durability is exhausted
|id=random.break
|volume=1.0
|pitch=0.9
|foot=1}}
==Data values==
=== ID===
{{edition|java}}:
{{ID table
|edition=java
|showforms=y
|generatetranslationkeys=y
|displayname=Crossbow
|spritetype=item
|nameid=crossbow
|form=item
|foot=1}}
{{edition|bedrock}}:
{{ID table
|edition=bedrock
|shownumericids=y
|showforms=y
|notshowbeitemforms=y
|generatetranslationkeys=y
|displayname=Crossbow
|spritetype=item
|nameid=crossbow
|id=575
|form=item
|foot=1}}
===Item data===
{{el|java}}:
{{main|Player.dat format}}
<div class="treeview" style="margin-top: 0;">
*{{nbt|compound|tag}}: The '''tag''' tag.
{{:Player.dat_format/Crossbow}}
</div>
{{el|bedrock}}:
: See [[Bedrock Edition level format/Item format]].
==Achievements==
{{load achievements|Sniper Duel;Archer;Bullseye}}
==Advancements==
{{load advancements|Take Aim;Bullseye;Sniper Duel;Ol' Betsy;Who's the Pillager Now;Two Birds;Arbalistic}}
==History==
{{History||September 29, 2018|link={{tweet|Minecraft|1046094916902965249}}|Crossbows are announced at [[MINECON Earth 2018]].}}
{{History|java}}
{{History||1.14|snap=18w43a|[[File:Crossbow.png|32px]] [[File:Crossbow Pull 0.png|32px]] [[File:Crossbow Pull 1.png|32px]] [[File:Crossbow Pull 2.png|32px]] [[File:Arrow Loaded Crossbow.png|32px]] [[File:Crossbow.png|32px]] [[File:Crossbow Pull 0.png|32px]] [[File:Crossbow Pull 1.png|32px]] [[File:Crossbow Pull 2.png|32px]] [[File:Firework Loaded Crossbow.png|32px]] [[File:Crossbow.png|32px]] Added crossbows.
|Crossbows can be enchanted with either the [[Quick Charge]] (Highest Level III), [[Piercing]] (Highest Level IV) or [[Multishot]] (Highest Level I).}}
{{History|||snap=18w47a|Crossbows can now be found inside loot [[chest]]s at the top of [[pillager outpost]]s.}}
{{History|||snap=19w11a|Fletcher [[villager]]s now [[trading|sell]] crossbows and enchanted crossbows.}}
{{History||1.16|snap=20w07a|[[File:Piglin with Crossbow.png|32px]] [[File:Piglin left handed with Crossbow.png|35px]] [[File:Piglin using one hand to hold a loaded crossbow JE1.png|35px]] Added [[piglin]]s, which can spawn with and [[drops|drop]] crossbows.}}
{{History|||snap=20w16a|Crossbows now generate randomly enchanted in [[bastion remnants]] chests.}}
{{History||1.18|snap=21w37a|Crossbow durability is increased to 465 to match {{edition|BE}}.}}
{{History||1.19.4|snap=23w07a|The crossbow recipes are no longer unlocked by [[stick]]s.}}
{{History|upcoming java}}
{{History||Villager Trade Rebalance<br>(Experimental)|link=Java Edition 1.20.2|snap=23w31a|Enchantments exclusive to crossbows are no longer obtainable from villager [[trading]].}}
{{History|bedrock}}
{{History||1.8.0|snap=beta 1.8.0.10|[[File:Crossbow.png|32px]] [[File: Crossbow Pull 0.png|32px]] [[File: Crossbow Pull 1.png|32px]] [[File: Crossbow Pull 2.png|32px]] [[File:Arrow Loaded Crossbow.png|32px]] [[File:Crossbow.png|32px]] [[File:Crossbow Pull 0.png|32px]] [[File:Crossbow Pull 1.png|32px]] [[File:Crossbow Pull 2.png|32px]] [[File:Firework Loaded Crossbow.png|32px]] [[File:Crossbow.png|32px]] Added crossbows.
|Crossbows are currently apart of [[Experimental Gameplay]].}}
{{History||1.9.0|snap=beta 1.9.0.0|Added [[pillager]]s, which use and [[drops|drop]] crossbows.}}
{{History|||snap=beta 1.9.0.3|Crossbows now appear bigger in a pillager's hand.}}
{{History||1.10.0|snap=beta 1.10.0.3|Crossbows are now fully implemented and separate from [[Experimental Gameplay]].
|Crossbows can now be found in [[pillager outpost]] [[chest]]s.}}
{{History||1.11.0|snap=beta 1.11.0.4|Unenchanted and [[enchanting|enchanted]] crossbows can now be [[trading|bought]] from fletcher [[villager]]s.}}
{{History||1.12.0|snap=beta 1.12.0.3|Journeyman-level fletcher villagers now have 100% chance to [[trading|sell]] unenchanted crossbow, rather than 50% chance.}}
{{History||1.16.0|snap=beta 1.16.0.51|[[File:Piglin with Crossbow BE.png|32px]] Added [[piglin]]s, which can spawn with and [[drops|drop]] crossbows.}}
{{History|||snap=beta 1.16.0.57|Crossbows now generate randomly enchanted in [[bastion remnants]] chests.}}
{{History|PS4}}
{{History||1.90|[[File:Crossbow.png|32px]] [[File: Crossbow Pull 0.png|32px]] [[File: Crossbow Pull 1.png|32px]] [[File: Crossbow Pull 2.png|32px]] [[File:Arrow Loaded Crossbow.png|32px]] [[File:Crossbow.png|32px]] [[File:Crossbow Pull 0.png|32px]] [[File:Crossbow Pull 1.png|32px]] [[File:Crossbow Pull 2.png|32px]] [[File:Firework Loaded Crossbow.png|32px]] [[File:Crossbow.png|32px]] Added crossbows.}}
{{History|foot}}
==Issues==
{{issue list}}
==Trivia==
*Alongside [[pillager]]s, crossbows were inspired by ''[[Minecraft Dungeons]]'', even though they were added in the base game first.<ref>{{cite|url=https://discord.com/channels/579770991056519194/818903542139453480/819631528593588244| title = March 2021 developper Q&A|website=discord.com|date=March 11, 2021}}</ref>
*Crossbows [[enchanting|enchanted]] with [[Quick Charge]] VI and above get stuck on the first frame on the recharging animation because the resulting charge time is negative, and the game never reaches the time markers that tell it to advance the animation or the reloading procedure itself. It is technically possible to charge such crossbows, but this would require overflowing the value that determines how long the crossbow has been charged. This takes such an amount of time that this is practically impossible: for example, charging a crossbow with Quick Charge VI would take 69.4 years to complete.
*Although Piercing allows arrows to bypass [[shield]]s, they can't get through the wither armor.
*The crossbow's first-person loading animation in [[Bedrock Edition]] is different from [[Java Edition]].
*Even if a crossbow is already wound with a projectile, when it drops on the ground, it always looks uncharged.<ref>{{bug|MC-137552}}</ref>
*In real life, crossbows don't shoot the same arrows as bows, rather they shoot shorter, thicker, and oftentimes fletchless arrows (usually called "bolts") made to withstand the crossbow's increased power, which can shatter conventional arrows.
==Gallery==
<gallery>
File:CrossbowMinecon.png|A crossbow shown at [[MINECON Earth 2018]].
File:PillagerMinecon.png|A [[pillager]] armed with a crossbow, shown at MINECON Earth 2018.
File:EquippingCrossbow.png|How the crossbow is equipped.
File:Enchanted_Crossbow.gif|An enchanted crossbow.
File:Steve_Charging_Crossbow.gif|Steve charging crossbow {{in|java}}.
File:Alex_Charging_Crossbow.gif|Alex charging crossbow {{in|java}}.
File:Pillager_Charging_Crossbow.gif|Pillager charging crossbow.
File:Piglin_Charging_Crossbow.gif|Piglin charging crossbow.
File:Crossbow_(MCD).png|The ''Minecraft Dungeons'' variant of the crossbow
</gallery>
== References ==
{{reflist}}
== External Links ==
*[https://www.minecraft.net/en-us/article/taking-inventory--crossbow Taking Inventory: Crossbow] – Minecraft.net on October 20, 2022
{{Items}}
[[Category:Combat]]
[[Category:Renewable resources]]
[[de:Armbrust]]
[[es:Ballesta]]
[[fr:Arbalète]]
[[it:Balestra]]
[[ja:クロスボウ]]
[[ko:쇠뇌]]
[[pl:Kusza]]
[[pt:Besta]]
[[ru:Арбалет]]
[[th:หน้าไม้]]
[[zh:弩]]</li></ul> | 16w32a | The entity ID of wolves has been changed from Wolf to wolf. | |||
1.13{{Extension DPL}}<ul><li>[[Tool|Tool]]<br/>{{About|the in-game items|program enhancing software|Programs and Editors}}
A '''tool''' is an [[item]] used by the [[player]] while held to perform actions faster and more efficiently, to gather materials not obtainable by hand, to gain information, or to perform completely new actions. With the exception of the [[clock]], [[compass]], empty [[bucket]], and [[lead]], tools do not stack in the inventory. Tools can be repaired; see [[Item repair]].
== Obtaining ==
=== Mob loot ===
{{main|Drops#Mob drops|title1=Drops}}
Some tools can be obtained by killing mobs that carry the equipment.
=== Crafting ===
Most tools can be obtained through crafting.
{{:Crafting/Tools}}
=== Upgrading ===
[[Netherite]] tools can be obtained only through upgrading.
{{Smithing
|head=1
|Netherite Upgrade
|Diamond Pickaxe; Diamond Axe; Diamond Shovel; Diamond Hoe
|Netherite Ingot
|Netherite Pickaxe; Netherite Axe; Netherite Shovel; Netherite Hoe
}}
== Usage ==
=== Best tools ===
{{main|Breaking#Best tools|title1=Breaking}}
Many blocks have a preferred tool to break them. Some blocks can be broken only with certain tools. The tool's material also affects how fast a block is mined. Materials from worst to best in terms of mining speed are wooden, stone, iron, diamond, netherite, gold.
=== Item durability ===
{{main|Durability}}
Different tools have different amounts of durability. Some uses require more durability to be used than others. A tool's durability is also affected by its material. Materials from worst to best in terms of durability are gold, wooden, stone, iron, diamond, netherite.
Some tools are not block-breaking tools: This includes bows, fishing rods, carrots on sticks, flint & steel, and buckets. Such tools are no better than bare fists at breaking blocks, but they do not take damage from doing so—they take damage from being used in their own intended manners.
=== Item enchantability ===
Materials from worst to best in terms of [[enchantability]] are stone, diamond, iron, wooden/netherite, gold.
=== Smelting ===
{{main|Smelting}}
Iron or golden tools can be smelted into [[nugget]]s.
{{Smelting|showname=1|head=1|Any iron tools|Iron Nugget|0,1}}
{{Smelting|showname=1|foot=1|Any golden tools|Gold Nugget|0,1}}
; Fuel
* Wooden tools can be used as a fuel in [[furnace]]s, smelting 1 item per tool.
* A [[fishing rod]] can be used as fuel in [[furnace]]s, smelting 1.5{{only|java|short=1}}/1{{only|bedrock|short=1}} items per fishing rod.
== History ==
{{info needed section|earlier Java Edition history between Indev and 1.3.1|section=10}}
{{History|java indev}}
{{History||0.31|snap=20091231-2|Added iron shovels.}}
{{History|||snap=20100110|Added iron axes and pickaxes.}}
{{History|||snap=20100128|Added wooden, stone, and diamond tools.}}
{{History|||snap=20100129|Added crafting recipes for wooden, stone, iron, and diamond tools.}}
{{History|||snap=20100130|Added golden tools.}}
{{History|||snap=20100131|A [[Tiers|tier system]] for wooden, stone, iron, diamond, and gold tools is added. Each tier has a different mining speed multiplier and durability.}}
{{History|||snap=20100201-2|Tools are now required to break blocks and ores.}}
{{history|java}}
{{History||1.0.0|snap=RC1|Tools now make a breaking sound and have a breaking animation.
|All tools now also have breaking animation.}}
{{History|||snap=RC2|Tools no longer break quickly after loading a world that was saved in RC1.}}
{{History||1.3.1|snap=12w17a|Tools now have infinite [[durability]] in [[Creative]] mode.}}
{{history|||snap=12w18a|Wooden tools became able to be used as [[fuel]] for [[furnace]]s in case players didn't want to repair them or finish using them.}}
{{History|||snap=12w24a|Breaking a block that can be [[instant mining|instantly mined]] by hand ([[tall grass]], [[torch]], etc.) while holding a block-breaking tool no longer reduces the tool's [[durability]].}}
{{history||1.6.1|snap=13w21a|Instead of replacing the barehanded damage ({{hp|1}}), pickaxes, shovels, axes and swords now add their damage onto the barehanded damage.}}
{{History||1.11.1|snap=16w50a|Golden and iron tools now smelt down into one of their respective nuggets.}}
{{History||1.14|snap=18w48a|Tools cannot be repaired by crafting.}}
{{History||1.14.3|snap=Pre-Release 3|Tools can be once again be repaired by crafting.}}
{{History||1.16.2|snap=20w29a|Tools have a new arrange in the Creative inventory.}}
{{History||1.20<br>(Experimental)|link=1.19.4|snap=23w04a|Upgrading diamond tools to netherite tools now requires the netherite upgrade [[smithing template]].}}
{{History|||snap=23w07a|Added brushes.}}
{{History|pocket alpha}}
{{History||v0.2.0|Added stone tools and shears.}}
{{History||v0.3.0|Added wooden tools.}}
{{History||v0.3.2|Added iron, diamond, and golden tools.}}
{{History||v0.3.3|Added bows.}}
{{History||v0.4.0|Added flint and steel and all hoe types.}}
{{History||v0.7.0|Added buckets.}}
{{History||v0.7.4|Flint and steel now ignite creepers.}}
{{History||v0.8.0|snap=build 1|Added flint and steel to the Creative inventory.}}
{{History|||snap=build 3|Added shears to the Creative inventory.}}
{{History||v0.11.0|snap=build 1|Added fishing rod.}}
{{History||v0.15.0|snap=build 1|Added carrot on a stick and leads.}}
{{History|pocket}}
{{History||1.1.0|snap=alpha 1.1.0.0|Golden and iron tools now smelt down into one of their respective nuggets.}}
{{History|console}}
{{History||xbox=TU53|xbone=CU43|ps=1.49|wiiu=Patch 23|switch=1.0.3|Golden and iron tools now smelt down into one of their respective nuggets.}}
{{History|foot}}
== Issues ==
{{issue list}}
== Trivia ==
* Gold tools are actually ranked as superior to diamond tools on the [[Legacy Console Edition]]'s crafting screen.
* Wooden tools can be burned in a furnace regardless of its durability; this means the player can burn a wooden tool that has only 1 use left.
== See also ==
* [[Item Repair]]
* [[Breaking]]
* [[Weapon]]
{{Items}}
[[Category:Tools|*]]
[[cs:Nástroje]]
[[de:Werkzeug]]
[[es:Herramientas]]
[[fr:Outils]]
[[hu:Eszközök]]
[[it:Attrezzi]]
[[ja:道具]]
[[ko:도구]]
[[nl:Gereedschap]]
[[pl:Narzędzia]]
[[pt:Ferramentas]]
[[ru:Инструменты]]
[[tr:Alet]]
[[zh:工具]]</li><li>[[:Category:Food|Category:Food]]<br/>
[[Category:Items]]
[[cs:Kategorie:Potraviny]]
[[fr:Catégorie:Nourriture]]
[[hu:Kategória:Ételek]]
[[zh:Category:食物]]</li></ul> | 18w07a | Wild wolves now attack baby turtles. | |||
1.14{{Extension DPL}}<ul><li>[[Spider Eye|Spider Eye]]<br/>{{Item
| title = Spider Eye
| image = Spider Eye.png
| renewable = Yes
| heals = {{Hunger|2}}
|effects={{EffectLink|Poison}} (0:05)
| stackable = Yes (64)
}}
A '''spider eye''' is a poisonous [[food]] and [[brewing]] item.
== Obtaining ==
=== Mob loot ===
==== Spiders ====
[[Spider]]s and [[cave spider]]s have a {{frac|1|3}} chance of dropping a [[spider eye]] when killed by a player or tamed wolf, but not when killed by environmental damage (such as falling). The maximum amount of spider eyes is increased by 1 per level of [[Looting]]. The chance of a spider '''not''' dropping any spider eyes can be found using the formula <code>2 / (Looting Level + 3)</code>. For example, Looting III gives a {{frac|1|3}} chance of not dropping any spider eyes. All other amounts have an equal chance of occurring.
==== Witches ====
[[Witch]]es have a chance of dropping 0–6 spider eyes upon death. This is increased by 3 per level of [[Looting]], for a maximum of 0-15 spider eyes.
=== Chest loot ===
{{LootChestItem|spider-eye}}
== Usage ==
=== Food ===
When [[Food|eaten]], a spider eye restores {{hunger|2}} [[Hunger|hunger points]] and 3.2 [[Hunger#Mechanics|saturation points]], giving a nourishment value of 1.6. It also applies a [[Poison]] [[effect]] lasting 5 seconds to the player, causing {{hp|4|poisoned=1}} damage, which reduces hunger/saturation by 6 points.
=== Crafting ingredient ===
{{crafting usage}}
=== Brewing ingredient ===
{{brewing
|showname=1
|head=1
|Spider Eye
|Mundane Potion
|base=Water Bottle
}}
{{brewing
|foot=1
|Spider Eye
|Potion of Poison
}}
==Sounds==
{{Sound table/Entity/Food}}
== Data values ==
=== ID ===
{{edition|java}}:
{{ID table
|edition=java
|showforms=y
|generatetranslationkeys=y
|displayname=Spider Eye
|spritetype=item
|nameid=spider_eye
|form=item
|foot=1}}
{{edition|bedrock}}:
{{ID table
|edition=bedrock
|shownumericids=y
|showforms=y
|notshowbeitemforms=y
|generatetranslationkeys=y
|displayname=Spider Eye
|spritetype=item
|nameid=spider_eye
|id=278
|form=item
|foot=1}}
== Advancements ==
{{load advancements|Husbandry;A Balanced Diet}}
== Video ==
<div style="text-align:center">{{yt|-PD-wX07TCg}}</div>
== History ==
{{History|java}}
{{History||1.0.0|snap=Beta 1.9 Prerelease 2|[[File:Spider Eye JE1 BE1.png|32px]] Added spider eyes.
|Spider eyes can be used to craft [[fermented spider eye]]s.}}
{{History|||snap=Beta 1.9 Prerelease 3|Spider eyes can now be [[brewing|brewed]] in a [[water bottle]] to create a [[Mundane Potion]], or in an [[Awkward Potion]] to create a [[Potion of Poison]].}}
{{History||1.4.2|snap=12w38b|Spider eyes can now be dropped by [[witch]]es.}}
{{History||1.9|snap=15w44a|Spider eyes can now be found in [[desert pyramid|desert temple]] [[chest]]s.}}
{{History||1.13|snap=17w47a|Prior to [[1.13/Flattening|''The Flattening'']], this [[item]]'s numeral ID was 375.}}
{{History||1.14|snap=18w43a|[[File:Spider Eye JE2 BE2.png|32px]] The texture of spider eyes has been changed.}}
{{History|pocket alpha}}
{{History||v0.12.1|snap=build 1|[[File:Spider Eye JE1 BE1.png|32px]] Added spider eyes.|Spider eyes can be used to craft [[fermented spider eye]]s and for [[brewing]].}}
{{History||v0.13.0|snap=build 1|Spider eyes can now be found in [[desert pyramid|desert temple]] [[chest]]s.}}
{{History||v0.14.0|snap=build 1|Spider eyes can now dropped by [[witch]]es.}}
{{History|bedrock}}
{{History||1.10.0|snap=beta 1.10.0.3|[[File:Spider Eye JE2 BE2.png|32px]] The texture of spider eyes has been changed.}}
{{History|console}}
{{History||xbox=TU7|xbone=CU1|ps=1.0|wiiu=Patch 1|[[File:Spider Eye JE1 BE1.png|32px]] Added spider eyes.}}
{{History||xbox=none|xbone=none|ps=1.90|wiiu=none|[[File:Spider Eye JE2 BE2.png|32px]] The texture of spider eyes has been changed.}}
{{History|New 3DS}}
{{History||0.1.0|[[File:Spider Eye JE1 BE1.png|32px]] Added spider eyes.}}
{{History|foot}}
== Issues ==
{{issue list}}
== References ==
{{reflist}}
{{items}}
[[cs:Pavoučí oko]]
[[de:Spinnenauge]]
[[es:Ojo de araña]]
[[fr:Œil d'araignée]]
[[hu:Pókszem]]
[[it:Occhio di ragno]]
[[ja:クモの目]]
[[ko:거미 눈]]
[[nl:Spinnenoog]]
[[pl:Oko pająka]]
[[pt:Olho de aranha]]
[[ru:Паучий глаз]]
[[zh:蜘蛛眼]]
[[Category:Food]]
[[Category:Renewable resources]]
[[Category:Brewing recipe]]</li><li>[[Gray Dye|Gray Dye]]<br/>{{Item
| image = Gray Dye.png
| renewable = Yes
| stackable = Yes (64)
}}
'''Gray dye'''{{fn|Known as '''Grey Dye''' in British, Canadian, Australian, and New Zealand English variants.}} is a [[Dyeing#Secondary colors|secondary color]] dye.
== Obtaining ==
=== Crafting ===
{{Crafting
|Black Dye
|White Dye
|Output=Gray Dye,2
|type=Material
|head=1
|showdescription=1
|showname=0
}}
{{Crafting
|Ink Sac;Black Dye;Ink Sac
|Bone Meal;Bone Meal;White Dye
|Output=Gray Dye,2
|type=Material
|description={{only|bedrock|education}}
|foot=1
}}
=== Trading ===
[[Wandering trader]]s sell 3 gray dye for an [[emerald]].{{only|bedrock}}
== Usage ==
{{dye usage}}
=== Crafting ingredient ===
{{crafting usage|ignore=Banner|continue=1}}
{{banner crafting usage}}
=== Loom ingredient ===
{{Banner loom usage|Gray Dye}}
=== Trading ===
Journeyman-level villagers have a 20% chance to buy 12 gray dye for an emerald.
== Data values ==
=== ID ===
{{edition|java}}:
{{ID table
|edition=java
|showforms=y
|generatetranslationkeys=y
|displayname=Gray Dye
|spritetype=item
|nameid=gray_dye
|form=item
|foot=1}}
{{edition|bedrock}}:
{{ID table
|edition=bedrock
|showaliasids=y
|shownumericids=y
|showforms=y
|notshowbeitemforms=y
|generatetranslationkeys=y
|displayname=Gray Dye
|spritetype=item
|nameid=gray_dye
|aliasid=dye / 8
|id=403
|form=item
|translationkey=item.dye.gray.name
|foot=1}}
== Video ==
{{yt|wGalHy0_fj0}}
== History ==
{{History|java beta}}
{{History||1.2|[[File:Gray Dye JE1 BE1.png|32px]] Added gray dye.}}
{{History|java}}
{{History||1.4.2|snap=12w34a|Added the ability to [[Armor#Dyeing|dye]] leather [[armor]] and [[wolf]] collars.}}
{{History||1.4.6|snap=12w49a|Gray dye can be now [[crafting|crafted]] with [[gunpowder]] to create a [[firework star]].}}
{{History||1.6.1|snap=13w19a|[[Stained clay]] can now be crafted.}}
{{history||1.7.2|snap=13w36a|With the addition of new [[flower]]s, many secondary and tertiary dyes are now primary [[dye]]s.}}
{{History|||snap=13w41a|[[Stained glass]] can now be crafted.}}
{{History||1.8|snap=14w30a|Added [[banner]]s, which can be dyed.}}
{{History||1.11|snap=16w39a|Added the ability to dye [[shulker box]]es.}}
{{History||1.12|snap=17w15a|Added the ability to dye [[bed]]s.}}
{{History||1.13|snap=17w47a|The different data values for the <code>dye</code> ID have now been split up into their own IDs.
|Prior to [[1.13/Flattening|''The Flattening'']], this [[item]]'s numeral ID was 351.}}
{{History||1.14|snap=18w43a|Gray dye is now [[crafting|crafted]] using [[black dye|black]] and [[white dye]]s, instead of [[ink sac]] and [[bone meal]].
|[[File:Gray Dye JE2 BE2.png|32px]] The texture of gray dye has now been changed.}}
{{History|||snap=18w44a|Gray dye can now change the text color on the [[sign]]s to gray.}}
{{History|||snap=19w05a|Added the [[wandering trader]], which sell gray dyes.}}
{{History|||snap=19w11a|Gray dye can now be [[trading|bought]] by shepherd villagers.}}
{{History||1.17|snap=20w45a|Gray dye can now used to craft [[gray candle]]s.}}
{{History|||snap=21w19a|Gray dye can no longer be used to craft gray candles.}}
{{History|||snap=Pre-release 1|Gray dye can once again be used to craft gray candles.}}
{{History||1.20<br>(Experimental)|link=1.19.3|snap=22w42a|Gray dye can now change the text color on [[hanging sign]]s to gray.}}
{{History|pocket alpha}}
{{History||v0.3.0|[[File:Gray Dye JE1 BE1.png|32px]] Added gray dye. It is currently unobtainable and serves no purpose.}}
{{History||v0.8.0|snap=build 1|Gray dye can be [[craft]]ed with [[bone meal]] and an [[ink sac]], despite there being no way of obtaining ink sacs at the time.}}
{{History|||snap=build 3|Gray dye is now available in [[creative]] mode.}}
{{History||v0.9.0|snap=build 3|Gray dye can now be obtained in [[survival]] mode.}}
{{History|||snap=build 11|Gray dye can now be used to craft colored [[terracotta]].}}
{{History||v0.11.0|snap=build 1|Gray dye can now be used to dye tamed [[wolf]] collars.}}
{{History||v0.14.0|snap=build 1|Gray dye can now be used to dye [[water]] in [[cauldron]]s.}}
{{History|pocket}}
{{History||1.0.0|snap=alpha 0.17.0.1|Gray dye can now be used to dye [[shulker]]s.}}
{{History||1.1.0|snap=alpha 1.1.0.0|Gray dye can now be used to craft [[concrete powder]], colored [[bed]]s and dyed [[shulker box]]es.}}
{{History|bedrock}}
{{History||1.2.0|snap=beta 1.2.0.2|Gray dye can now be used to craft [[firework star]]s, [[stained glass]] and patterns on [[banner]]s.}}
{{History||1.4.0|snap=beta 1.2.20.1|Gray dye can now be used to craft [[balloon]]s and [[glow stick]]s.}}
{{History||1.8.0|snap=beta 1.8.0.8|Gray dye can now be used to dye tamed [[cat]] collars.}}
{{History||1.10.0|snap=beta 1.10.0.3|Gray dye is now [[trading|sold]] by [[wandering trader]]s.
|Gray dye can now be used to dye white [[carpet]]s and undyed [[glass pane]]s.
|[[File:Gray Dye JE2 BE2.png|32px]] The texture of gray dye has now been changed.}}
{{History||1.11.0|snap=beta 1.11.0.1|Gray dye can now be [[trading|sold]] to shepherd [[villager]]s.}}
{{History||1.16.100|snap=beta 1.16.100.56|The ID of gray dye has been changed from <code>dye/8</code> to <code>gray_dye</code>.}}
{{History|console}}
{{History||xbox=TU1|xbone=CU1|ps=1.00|switch=1.0.1|wiiu=Patch 1|[[File:Gray Dye JE1 BE1.png|32px]] Added gray dye.}}
{{History|PS4}}
{{History||1.90|[[File:Gray Dye JE2 BE2.png|32px]] The texture of gray dye has now been changed.}}
{{History|new 3ds}}
{{History||0.1.0|[[File:Gray Dye JE1 BE1.png|32px]] Added gray dye.}}
{{History|foot}}
== Issues ==
{{Issue list}}
== Notes ==
{{fnlist}}
== References ==
{{Reflist}}
{{Items}}
[[Category:Dyes]]
[[Category:Renewable resources]]
[[cs:Šedé barvivo]]
[[de:Grauer Farbstoff]]
[[es:Tinte gris]]
[[fr:Teinture grise]]
[[hu:Szürke festék]]
[[ja:灰色の染料]]
[[ko:회색 염료]]
[[nl:Grijze kleurstof]]
[[pl:Szary barwnik]]
[[pt:Corante cinza]]
[[ru:Серый краситель]]
[[zh:灰色染料]]</li></ul> | 18w43a | ||||
| The texture of tamed pups has been changed. | |||||
| 19w07a | Wild wolves now attack foxes. | ||||
1.15{{Extension DPL}}<ul><li>[[Green Dye|Green Dye]]<br/>{{redirect|Cactus Green|the plant|Cactus}}{{Item
| title = Green Dye
| renewable = Yes
| stackable = Yes (64)
}}
'''Green dye''' is a [[primary color dye]].
== Obtaining ==
=== Chest loot ===
{{LootChestItem|green-dye}}
=== Smelting ===
{{Smelting
|head=1
|showdescription=1
|Cactus
|Green Dye
|1
|description={{only|Java}}<ref>{{bug|MC-210211||Smelting cactus gives too much experience since 1.13}}</ref>
}}
{{Smelting
|head=0
|showdescription=1
|Cactus
|Green Dye
|0,2
|description={{only|Bedrock}}
|foot=1
}}
=== Trading ===
[[Wandering trader]]s sell 3 green dye for an [[emerald]].
== Usage ==
{{dye usage}}
=== Crafting ingredient ===
{{crafting usage|ignore=Banner|continue=1}}
{{banner crafting usage}}
=== Loom ingredient ===
{{Banner loom usage|Green Dye}}
=== Trading ===
Expert level shepherd villagers have {{frac|1|6}} chance to buy 12 green dye for an emerald.{{only|bedrock}} Expert level shepherds have a {{frac|2|7}} chance to buy 12 green dye for 1 emerald.{{only|java}}
== Data values ==
=== ID ===
{{edition|java}}:
{{ID table
|edition=java
|showforms=y
|generatetranslationkeys=y
|displayname=Green Dye
|spritetype=item
|nameid=green_dye
|form=item
|foot=1}}
{{edition|bedrock}}:
{{ID table
|edition=bedrock
|showaliasids=y
|shownumericids=y
|showforms=y
|notshowbeitemforms=y
|generatetranslationkeys=y
|displayname=Green Dye
|spritetype=item
|nameid=green_dye
|aliasid=dye / 2
|id=397
|form=item
|translationkey=item.dye.green.name
|foot=1}}
== Video ==
<div style="text-align:center">{{yt|O4KVTPI4qIc}}</div>
== History ==
{{History|java beta}}
{{History||1.2|[[File:Green Dye JE1 BE1.png|32px]] Added cactus green, together with all other dyes.}}
{{History|java}}
{{History||1.3.1|snap=1.3|[[File:Green Dye JE2 BE2.png|32px]] The texture of cactus green has been changed.}}
{{History||1.4.2|snap=12w34a|Added the ability to [[Armor#Dyeing|dye]] leather [[armor]] and [[wolf]] collars.}}
{{History||1.4.6|snap=12w49a|Cactus green can be crafted with [[gunpowder]] to create a [[firework star]].}}
{{History||1.6.1|snap=13w19a|[[Stained clay]] can now be [[crafting|crafted]].}}
{{History||1.7.2|snap=13w41a|[[Stained glass]] can now be crafted.}}
{{History||1.8|snap=14w30a|Added [[banner]]s, which can be dyed.}}
{{History||1.11|snap=16w39a|Added the ability to dye [[shulker box]]es.}}
{{History||1.12|snap=17w06a|Cactus green can now be used to craft green [[concrete powder]].}}
{{History||1.12|snap=17w15a|Added the ability to dye [[bed]]s.}}
{{History||1.13|snap=17w47a|The different data values for the <code>dye</code> ID have now been split up into their own IDs.
|Prior to [[1.13/Flattening|''The Flattening'']], this [[item]]'s numeral ID was 351.}}
{{History||1.14|snap=18w43a|"Cactus Green" has been renamed to "Green Dye".
|[[File:Green Dye JE3 BE3.png|32px]] The texture of green dye has been changed.}}
{{History|||snap=18w44a|Green dye can now change the text color on [[sign]]s to green.}}
{{History|||snap=18w50a|Green dye can now be found in [[chest]]s in [[desert]] [[village]] houses.}}
{{History|||snap=19w05a|Added the [[wandering trader]], which sells green dye.}}
{{History|||snap=19w11a|Green dye can now be [[trading|bought]] by shepherd villagers.}}
{{History||1.17|snap=20w45a|Green dye can now be used to craft [[green candle]]s.}}
{{History|||snap=21w19a|Green dye can no longer be used to craft green candles.}}
{{History|||snap=Pre-release 1|Green dye can once again be used to craft green candles.}}
{{History||1.20<br>(Experimental)|link=1.19.3|snap=22w42a|Green dye can now change the text color on [[hanging sign]]s to green.}}
{{History|pocket alpha}}
{{History||v0.3.0|[[File:Green Dye JE1 BE1.png|32px]] Added cactus green. It is currently unobtainable and has no usage.}}
{{History||v0.3.2|Cactus green is now obtainable by [[smelting]] cacti in a [[furnace]]. It still has no usage.}}
{{History||v0.4.0|Cactus green can now be used to craft [[cyan dye]], [[lime dye]], and [[green wool]].}}
{{History||v0.8.0|snap=build 1|[[File:Green Dye JE2 BE2.png|32px]] The texture of cactus green has been changed.}}
{{History||v0.14.0|snap=build 1|Cactus green can now be used to dye [[water]] in [[cauldron]]s.}}
{{History|pocket}}
{{History||1.0.0|snap=alpha 0.17.0.1|Cactus green can now be used to dye [[shulker]]s.}}
{{History||1.1.0|snap=alpha 1.1.0.0|Cactus green can now be used to dye [[bed]]s, [[shulker box]]es, and craft [[concrete powder]].}}
{{History|bedrock}}
{{History||1.2.0|snap=beta 1.2.0.2|Cactus green can now be used to craft [[stained glass]], patterns on [[banner]]s, and [[firework star]]s.}}
{{History||1.4.0|snap=beta 1.2.20.1|Cactus green can now be used to craft [[balloon]]s and [[glow stick]]s.}}
{{History||1.8.0|snap=beta 1.8.0.10|"Cactus Green" has been renamed to "Green Dye".}}
{{History||1.10.0|snap=beta 1.10.0.3|Green dye is now sold by [[wandering trader]]s.
|[[File:Green Dye JE3 BE3.png|32px]] The texture of green dye has been changed.}}
{{History||1.11.0|snap=beta 1.11.0.1|Green dye can now be found in [[desert]] [[village]] house [[chest]]s.}}
{{History|||snap=beta 1.11.0.4|Green dye can now be [[trading|sold]] to shepherd [[villager]]s.}}
{{History||1.16.100|snap=beta 1.16.100.56|The ID of green dye has been changed from <code>dye/2</code> to <code>green_dye</code>.}}
{{History|console}}
{{History||xbox=TU1|xbone=CU1|ps=1.00|wiiu=Patch 1|[[File:Green Dye JE1 BE1.png|32px]] Added cactus green.}}
{{History|PS4}}
{{History||1.83|"Cactus Green" has been renamed to "Green Dye".}}
{{History||1.90|[[File:Green Dye JE3 BE3.png|32px]] The texture of green dye has been changed.}}
{{History|new 3ds}}
{{History||0.1.0|[[File:Green Dye JE1 BE1.png|32px]] Added cactus green.}}
{{History|foot}}
== Issues ==
{{issue list}}
{{Items}}
[[cs:Kaktusová zeleň]]
[[de:Grüner Farbstoff]]
[[es:Tinte verde]]
[[fr:Teinture verte]]
[[hu:Kaktuszzöld]]
[[ja:緑色の染料]]
[[ko:초록색 염료]]
[[nl:Cactusgroen]]
[[pl:Zielony barwnik]]
[[pt:Corante verde]]
[[ru:Зелёный краситель]]
[[Category:Items]]
[[Category:Dyes]]
[[Category:Renewable resources]]</li><li>[[Hopper|Hopper]]<br/>{{About|the block|the crash utility|Hopper (crash utility)}}
{{Block
|image=<gallery>
Hopper (D).png|Java
Hopper (D) BE.png|Bedrock
</gallery>
|extratext = View [[#Gallery|all renders]]
|transparent=Yes
|light=No
|tool=wooden pickaxe
|renewable=Yes
|stackable=Yes (64)
|flammable=No
|lavasusceptible=No
}}
A '''hopper''' is a low-capacity storage [[block]] that can be used to collect [[item (entity)|item entities]] directly above it, as well as to transfer [[item]]s into and out of other containers. A hopper can be locked with [[Redstone Dust|redstone power]] to stop it from moving items into or out of itself.
== Obtaining ==
=== Breaking ===
To obtain a hopper, {{control|mine}} it with a [[pickaxe]]. Using any other item to mine a hopper drops only its contents.
{{breaking row|horizontal=1|Hopper|Pickaxe|Wood|foot=1}}
===Crafting===
A hopper can be crafted from 5 iron ingots and a chest.
{{Crafting
|A1= Iron Ingot
|C1= Iron Ingot
|A2= Iron Ingot
|B2= Chest
|C2= Iron Ingot
|B3= Iron Ingot
|Output= Hopper
|type= Redstone
}}
==Usage==
{{see also|Tutorials/Hopper}}
[[File:Hopper aligment.png|Hoppers can face down or sideways.|thumb]]
A hopper can be used as a container, as a crafting ingredient, and as a redstone component.
A hopper has an "output" tube at its bottom that can face down or sideways and provides a visual indication of which block the hopper is set up to drop its items into, if that block has an inventory. To place a hopper, use the {{control|Place Block}} control while aiming at the surface to which its output should face (Hoppers ''do not'' orient themselves automatically). To place a hopper directly on the face of an already interactable block, the player can {{control|sneak}} while placing the hopper. Attempting to place a hopper aimed on the bottom face of a block instead faces downward. With some blocks, such as the [[furnace]] and [[brewing stand]], the hopper has multiple uses. A hopper does not change direction after placement, and it is not attached to the container it faces; the container can be removed or replaced, and the hopper remains unchanged.
Hoppers cannot be moved by [[piston]]s.{{only|java}} Despite not being a solid block, attached blocks such as [[rail]]s, [[lever]]s, [[tripwire]] and [[redstone]] dust can be placed on top of hoppers, but not on their sides.
===Container===
[[File:Hopper GUI.png|thumb|176px|Hopper GUI showing the hopper's five slots of inventory at the top and the player's inventory below.]]
A hopper can be used as a container and has 5 slots of inventory space.
To open the hopper GUI, use the {{control|use item|text=Use Item/Place Block}} [[control]]. To move items between the hopper inventory and the player inventory or hotbar while the hopper GUI is open, drag or shift-click the items. To exit the hopper GUI, use the {{key|Esc}} key, B button or circle button, depending on the device.
By default, the GUI of a hopper is labeled "Item Hopper". A hopper's GUI label can be changed by naming the hopper in an [[anvil]] before placing it, or, {{in|java}}, by using the [[Commands#data|data]] command (for example, to label a hopper at (0,64,0) "Steve's Hopper", use <code>/data merge block 0 64 0 {CustomName:'"Steve's Hopper"'}</code>).
{{IN|java}}, a hopper's GUI can be "locked" (or subsequently unlocked) by setting the hopper's <code>Lock</code> tag with the [[Commands#data|data]] command. If a hopper's <code>Lock</code> tag is not blank, the hopper cannot be accessed except by players holding an item with the same name as the <code>Lock</code> tag's text. For example, to lock a hopper at (0,64,0) so that only players holding an item named "Steve's Key" can access the hopper, use <code>/data merge block 0 64 0 {Lock:"Steve's Key"}</code>.
===Crafting ingredient===
A hopper can be used to craft a [[minecart with hopper]].
{{crafting usage}}
===Redstone component===
{{see also|Redstone circuit|Redstone components#Hopper}}
[[File:Hopper logic flowchart.png|thumb|Flowchart of hopper logic]]
While a hopper is ''not'' powered by redstone signals, it operates with three functions:
*'''Collect''' [[Item (entity)|item entities]] (free-floating items in the world) into its inventory from the space above it
*'''Pull''' a single item into its inventory from a container above it
*'''Push''' a single item from its own inventory into a container it faces
A hopper first attempts to push any items inside it. Afterward, it checks if the block above it is a type of container. If so, it attempts to pull from it. Otherwise, the hopper attempts to collect item entities. Notably, hoppers can push to and pull from other hoppers, forming '''hopper pipes''' or '''hopper chains''', which allow transporting items across several blocks and are further discussed below.
====Redstone signals====
When a hopper receives a redstone signal (and is considered to be "activated"), all three functions stop. To avoid confusion over the terms "activated" and "deactivated", powered hoppers are often described as being '''locked''' and unpowered hoppers described as being '''unlocked'''. Hoppers can be powered by [[Redstone_mechanics#Power|soft powered]] blocks, meaning a [[redstone dust]] trail pointing into a block touching the hopper locks it just as effectively as a [[redstone block]] or any other [[Redstone components#Power components|power component]] touching the hopper. When the hopper is unlocked during a redstone tick, it does not push or pull/collect during the same tick, but has a delay of 1 redstone tick instead.
While a locked hopper does not push or pull/collect items, it may still receive items from [[dispenser]]s, [[dropper]]s and other hoppers, and may have its items pulled out by another hopper beneath it. Hence, the item flow in a horizontal hopper pipe may be stopped by locking just one of the hoppers, but stopping a vertical hopper pipe requires locking two adjacent hoppers at the same time, such that both the pushing of the top one and the pulling of the bottom one are stopped.
A hopper does not output any redstone signals by itself, but its fullness can be read using a [[Redstone Comparator|redstone comparator]], which needs to be placed next to it and facing away from it. An empty hopper outputs a signal strength of 0 and a completely full hopper outputs a signal strength of 15. Notably, a single stackable item (16 or 64) outputs a signal strength of 1 and a single non-stackable item outputs a signal strength of 3.
{{IN|Java}}, if the hopper being read is part of a horizontal hopper pipe, the comparator can individually read each item passing through the chain, because items are pushed through the hoppers one by one at a speed that is manageable by the comparator. If there is an uninterrupted stream of items, the comparator does not switch off in between items. On the other hand, in a vertical hopper pipe, some of the hoppers may never produce a reading above 0, even with a continuous stream of items, because pushes and pulls both occur in the same game tick: The hoppers' items get pulled out a single game tick after they're pushed in and this isn't measurable by a comparator, because comparators need measurements lasting at least 1.5 redstone ticks to produce a reading.
====Collecting items====
A hopper collects items dropped on top of it if the space above the hopper not occupied by a storage block. Items are gathered from the entire 1 block space above the hopper, meaning that items sitting on partial blocks such as [[soul sand]] directly above a hopper can be collected.<ref>https://bugs.mojang.com/browse/MCPE-55824</ref> It is also possible for a hopper to collect items from inside a full, solid block, a situation that might come from items rising up through solid blocks or being [[commands/summon|summoned]]. Item entities are not collected when they are outside of the collection area however; for example, items on top of a stone block directly above a hopper are not collected. Collected items are placed in the leftmost empty slot of a hopper's inventory.
{{IN|java}}, if there is no container above the hopper, then the hopper collects dropped items in the order in which they landed on the hopper. This order is remembered even while a hopper is locked. For instance, if a hopper is locked under a carpet while a fully equipped [[armor stand]] is broken above it, then it always collects items in this order when it is unlocked: [[armor stand]], [[boots]], [[leggings]], [[chestplates]], [[helmets]]. This is due to the order in which these items land.{{Verify|Wouldn't this be due to the order in which the game creates the item entities that drop drop from the armor stand?}} {{IN|Bedrock}}, hoppers do not remember the order in which items land on the hopper. Instead, hoppers with multiple dropped items above them collect the items in the order in which they entered the chunk in which the hopper is located. Items that drop from a broken armor stand are collected in a random order.<ref>https://bugs.mojang.com/browse/MCPE-120586</ref>
Hoppers usually check for dropped items every [[game tick]] and they can collect items even before they are picked up by a [[player]]{{Verify|Does this happen always, or sometimes, and in Java only or also in Bedrock?}} or destroyed by [[lava]]. However, {{In|Bedrock}} hoppers have a "collection cooldown" time. After collecting an item (or stack of items), a hopper waits {{tooltip|4 redstone ticks|8 game ticks}} (0.4 seconds, barring lag) before attempting to collect again.
Hoppers collect groups of items all at once rather than collecting them as single items one at a time. As a result, hoppers can collect item entities much faster than they can pull items from a container. Pulling from a moving [[minecart with chest]] or [[minecart with hopper]] is even slower, since the minecart is not always above the hopper.
====Pushing and pulling items====
A hopper with a storage container above it (such as a [[furnace]], [[chest]], [[dropper]], [[composter]], or another hopper) attempts to pull from the container instead of checking for floating items above it, and hence can not collect items. A hopper always tries to push or pull items using the leftmost available slot. When a hopper is removing items from a chest, the items disappear from left to right. Similarly, when filling up a chest, the chest fills up from left to right. Hoppers prioritize pulling from the first slot of a container over pulling into the first hopper slot. If a hopper has stone in its first slot and nothing in its second while the container it is pulling from has chicken in its first slot but stone in the second, the hopper pulls the chicken from the first slot of the container into its empty second slot. However, if the hopper is unable to pull the chicken, such as if all slots are filled with stone, the hopper pulls the stone from the second slot of the container instead. Similarly, hoppers prioritize pushing from their first slot over pushing into the first slot of a container. If a hopper has stone in its first slot and chicken in its second while the container it is pushing to has chicken it its first slot but stone in the second, the hopper pushes stone from its first slot into the second slot of the container.
In [[Java Edition]] the checks done by a hopper while pulling generally require less processing than the checks done by a hopper attempting collection. Therefore, a chain of hoppers topped with storage containers rather than air/solid blocks has better performance (measured as milliseconds of processing per tick) and lower potential for processing lag. <ref name=":0">https://www.youtube.com/watch?v=LC3ZOOI1Rf0</ref> The performance improvement achieved is correlated with the number of storage slots the container has. Placing composters (with no storage slots but still with custom output logic) on top of hoppers provide the greatest efficiency, while double chests actually degrade performance, even when sharing each double chest across two hoppers.<ref name=":0" /> In [[Bedrock Edition]] a chain of hoppers with air or non-container blocks on top has better performance than a chain of hoppers topped by container blocks.<ref>https://cdn.discordapp.com/attachments/715523208530362389/890030941282631741/Redstone_MSPT_measure.xlsx</ref> This may be because, even though hoppers with containers on top do not check for items, they do check for hopper-minecarts and chest-minecarts to pull from, and that involves scanning the chunk entity list.<ref>{{bug|MCPE-109449}}</ref>
{{Schematic|caption='''Push then Pull'''
Chest A is full of items while the hopper and Chest B are empty.
|ch-$+A||-
|ho-$e|ch-$+B
}}
Item pushes and pulls are processed in the same game tick, but pushes are processed before pulls. In the schematic, the empty hopper first pulls an item from chest A as it cannot push anything into chest B. After the cooldown, the hopper first pushes its item into chest B before pulling another item from chest A, both pushing and pulling in the same tick, and the process repeats. The hopper stops pulling when A is empty, and stops pushing when B becomes full.
Hoppers also have a "transfer cooldown" time. After pulling and/or pushing items, a hopper waits {{tooltip|4 redstone ticks|8 game ticks}} (0.4 seconds, barring lag) before pulling or pushing again (a transfer rate of 2.5 items per second, barring lag). A hopper that has an item pushed into it from another hopper also starts a 4 tick cooldown period, regardless of whether it pushed or pulled items itself. Item entities can be collected at any time without affecting the transfer cooldown time. The transfer cooldown and the Bedrock Edition collection cooldown are independent of each other.
====Container interactions====
Some [[container]]s interact with hoppers in specific ways:
:;{{BlockLink|Composter}}
::Hoppers above composters can push compostable items into the composter's top face with a chance of increasing the level of the composter as if the player used the item on the composter. Items that are not compostable cannot be pushed into the composter. Hoppers below the composter can pull [[bone meal]] when the composter is in stage 8, emptying the composter and resetting it to stage 0. Hoppers to the side of a composter do not interact with it.
:;{{BlockLink|Brewing Stand}}
::A working hopper on the top face of a brewing stand deposits only into the ingredient slot and it can push only valid [[brewing]] ingredients. A hopper on side face of a brewing stand can deposit only [[blaze powder]] or filled bottles into the three brew slots. A hopper underneath a brewing stand always extracts from the three brew slots, whether brewing is finished or not—The hopper must be locked to allow potions to finish brewing.
:;{{BlockLink|Chest}}
:;{{BlockLink|Trapped Chest}}
::Large chests and large trapped chests are treated as a single container: A hopper depositing into a large chest fills up the entire chest and a hopper underneath a large chest empties the entire chest. Trapped chests being accessed by a player lock any adjacent hoppers, per the standard behavior of a hopper next to an active power source.
:;{{BlockLink|Furnace}}
:;{{BlockLink|Blast Furnace}}
:;{{BlockLink|Smoker}}
::A working hopper pointing into top of a furnace deposits only into the ingredient slot. It can push any item, including items that can't be smelted by the furnace. A hopper pointing into the side of a furnace deposits into the fuel slot, and only items that are usable as fuel. A hopper below a furnace pulls everything from the output slot and empty [[bucket]]s from the fuel slot left over from using [[lava bucket]]s as fuel. When a hopper removes items from a furnace, the experience points are 'stored' in the furnace until a player removes at least one smelted item, or the furnace block is broken.
:;{{BlockSprite|Hopper}} Hopper
::A sequence of three or more hoppers, each pushing items into the next, is called a '''hopper pipe'''. Working horizontal hopper pipes simply push items into each other at the expected rate of 2.5 items per second, but vertical hopper pipes are more complicated, as the hoppers are trying both to pull and to push. When a vertical pipe pulls from a single container, it simply transfers items at 2.5 items per second because the transfer rate is limited by the first hopper pulling items from the container. If a ''stack of items'' is in a vertical pipe, the items can be transferred twice as fast, because the hopper with the item stack is pushing items down while the hopper below it is also pulling items down.
:;{{EntityLink|Minecart with Chest}}
:;{{EntityLink|Minecart with Hopper}}
::Unlocked hoppers fill chest minecarts and hopper minecarts if any part of the entity's hitbox is within the hopper's target block-space. Hopper minecarts try to pull items from the hopper at high speed. Hoppers can pull items from minecarts above them so rails can be placed directly on the top faces of a hoppers. If a [[detector rail]] is in the right position, it could lock the hopper per standard redstone-hopper behavior.
:;{{BlockLink|Jukebox}}
::Hoppers can insert [[music disc]]s into jukeboxes, and extract the music discs after they finish playing.
:;{{BlockLink|Shulker Box}}
::Hoppers cannot put shulker boxes into other shulker boxes. This allows for the creation of certain [[Tutorials/Hopper#Potions and shulker boxes|item filters]].
::Otherwise, hoppers interact with shulker boxes normally.
:;{{BlockLink|Lectern}}
::Hoppers cannot remove or place books on lecterns. The redstone pulse emitted from a lectern when a page is turned can temporarily lock hoppers.
:;{{BlockLink|Ender Chest}}
::Hoppers cannot interact with ender chests in any way.
:;{{BlockLink|Barrel}}
:;{{BlockLink|Dispenser}}
:;{{BlockLink|Dropper}}
:;{{EntityLink|Boat with Chest}}
::Hoppers interact normally with barrels, dispensers, droppers, and boats with chests.
:;{{BlockLink|Chiseled Bookshelf}}
::Hoppers and minecart with hoppers can insert and remove books from the bookshelf. As with any other container, items are taken from the first slot that has an item that can fit in the hopper and are inserted into the first empty slot.
==Sounds==
===Generic===
{{Sound table/Block/Metal}}
===Unique===
{{Edition|Java}}:
{{Sound table
|sound=Door close.ogg
|sound2=Door open.ogg
|subtitle=Chest locked<ref group=sound name=lock>{{Bug|MC-98316||Wrong subtitles caused by missing distinction}}</ref>
|source=block
|description=When a player attempts to open a hopper locked using the {{nbt|string|Lock}} tag
|id=block.chest.locked|idnote=<ref group=sound name=lock/>
|translationkey=subtitles.block.chest.locked|translationkeynote=<ref group=sound name=lock/>
|volume=1.0
|pitch=1.0
|distance=16
|foot=1}}
{{Edition|Bedrock}}: ''None''
==Data values==
===ID===
{{edition|java}}:
{{ID table
|edition=java
|showforms=y
|generatetranslationkeys=y
|displayname=Hopper
|spritetype=block
|nameid=hopper
|foot=1}}
{{ID table
|displayname=Block entity
|spritename=hopper
|spritetype=block
|nameid=hopper
|foot=1}}
{{edition|bedrock}}:
{{ID table
|edition=bedrock
|firstcolumnname=Hopper
|shownumericids=y
|showforms=y
|generatetranslationkeys=y
|displayname=Block
|spritename=hopper
|spritetype=block
|nameid=hopper
|id=154
|form=block
|itemform=item.hopper}}
{{ID table
|displayname=Item
|spritename=hopper
|spritetype=item
|nameid=hopper
|id=527
|form=item
|translationkey=tile.hopper.name
|foot=1}}
{{ID table
|notnamespaced=y
|displayname=Block entity
|spritename=hopper
|spritetype=block
|nameid=Hopper
|foot=1}}
===Block states===
{{see also|Block states}}
{{/BS}}
===Block data===
A hopper has a block entity associated with it that holds additional data about the block.
{{el|java}}:
{{see also|Block entity format}}
{{/BE}}
{{el|bedrock}}:
:See [[Bedrock Edition level format/Block entity format]].
==Achievements==
{{load achievements|Freight Station;Smelt Everything}}
==Video==
<div style="text-align:center">{{yt|XO0IKUsGiG8}}</div>
==History==
{{History|java}}
{{History||1.5|snap=13w01a|[[File:Hopper (D) JE1.png|32px]] [[File:Hopper (N) JE1.png|32px]] [[File:Hopper (E) JE1.png|32px]] [[File:Hopper (S) JE1.png|32px]] [[File:Hopper (W) JE1.png|32px]] [[File:Hopper (U) JE1.png|32px]] Added hoppers.
|Hoppers with the [[damage]] value of 1, which are obtainable only through world editing, visually point in no direction. They functionally push items upward, however the behavior is inconsistent.
|[[File:Hopper (item) JE1.png|32px]] There is currently a temporary "work in progress" sprite for hoppers in the [[inventory]].
|Hoppers can be [[crafting|crafted]] from a [[chest]] and [[stone]] blocks with the following recipe:
{{{!}} class{{=}}"collapsible collapsed"
! Recipe
{{!}}-
{{!}}
{{Crafting Table
|A1= Stone
|C1= Stone
|A2= Stone
|B2= Chest
|C2= Stone
|B3= Stone
|Output= Hopper
}}
{{!}}}
}}
{{History|||snap=13w01b|[[Rail]]s can now be placed on top of hoppers.
|Hoppers no longer load [[item]]s into [[minecart]]s without [[chest]]s.}}
{{History|||snap=13w02a|[[File:Hopper (item) JE2 BE1.png|32px]] The [[inventory]] sprite of hoppers has been changed.
|[[File:Hopper (item) 13w02a.png|32px]] However, the [[item]] of hoppers appears bugged if [[drops|dropped]] or placed in an [[item frame]].<ref>{{bug|MC-6737}}</ref> This may be due to the game attempting to pull the item sprite from the hopper's equivalent spot in <samp>[[stitched_terrain.png]]</samp> (compare files: [[:File:13w02a stitched terrain.png|terrain]], [[:File:13w02a stitched items.png|items]]), a region which contains parts of the oak planks, end stone and iron bars textures.
|Applying a [[redstone]] signal to a hopper now deactivates the hopper until the signal is removed.
|Hoppers can no longer be used as [[fuel]] in a [[furnace]].
|Hoppers are now [[crafting|crafted]] using 5 [[iron ingot]]s rather than 5 [[stone]] blocks.
{{{!}} class{{=}}"collapsible collapsed"
! Recipe
{{!}}-
{{!}}
{{Crafting
|A1= Iron Ingot
|C1= Iron Ingot
|A2= Iron Ingot
|B2= Chest
|C2= Iron Ingot
|B3= Iron Ingot
|Output= Hopper
}}
{{!}}}
|Hoppers now pull only from the output slot of [[furnace]]s.
|Hoppers now output 1 signal strengh per 1/3 of a stack (21 [[item]]s) when interacting with a [[redstone comparator]].
|[[File:Hopper (D) JE2.png|32px]] [[File:Hopper (N) JE2.png|32px]] [[File:Hopper (E) JE2.png|32px]] [[File:Hopper (S) JE2.png|32px]] [[File:Hopper (W) JE2.png|32px]] [[File:Hopper (U) JE2.png|32px]] The texture of hoppers has been given a unique texture. Hoppers no longer use the [[cauldron]] texture. Note that the top texture does not rotate with facing direction.
|The preferred tool is now a pickaxe, rather than the axe.}}
{{History|||snap=13w02b|Hoppers now treat large [[chest]]s properly, no longer needing two hoppers connected to them to fill up the entire [[inventory]].
|Hoppers no longer take [[item]]s from containers when powered via a [[redstone]] current.
|Hoppers now display correctly as a [[drops|dropped]] or [[item frame|frame]] [[item]].}}
{{History|||snap=13w03a|Hoppers are now used to [[crafting|craft]] a [[minecart with hopper]].
|Hoppers can now empty a [[minecart with hopper]].}}
{{History|||snap=13w04a|The transfer rate of hoppers has been changed from 7 to 8 [[game tick]]s per [[item]] (2.5 items per second).}}
{{History||1.5.1|snap=pre|Hoppers now take empty [[bucket]]s out of furnace fuel slots.}}
{{History||1.7.2|snap=release|[[File:Hopper (D) JE3.png|32px]] [[File:Hopper (N) JE3.png|32px]] [[File:Hopper (E) JE3.png|32px]] [[File:Hopper (S) JE3.png|32px]] [[File:Hopper (W) JE3.png|32px]] [[File:Hopper (U) JE3.png|32px]] The UV of all blocks is broken on certain sides as a result of {{bug|MC-37106}} (few cases are listed on the wiki so far - this is a future project). This includes hoppers.}}
{{History||1.7.4|snap=13w47a|[[File:Hopper (D) JE4.png|32px]] [[File:Hopper (N) JE4.png|32px]] [[File:Hopper (E) JE4.png|32px]] [[File:Hopper (S) JE4.png|32px]] [[File:Hopper (W) JE4.png|32px]] [[File:Hopper (U) JE4.png|32px]] MC-37106 has been fixed, reverting hoppers to their pre-1.7.2 appearences.}}
{{History|||snap=13w48a|This version fixed {{bug|MC-190}}, which hoppers were allegedly subject to since their introduction. However, a comparison of hopper UV in 13w02a and 14w08a failed to reveal any visible differences, even accounting for the example images on the ticket. More research is needed on this matter.}}
{{History||1.8|snap=?|Hoppers no longer generate [[multiplayer]] lag when idle.}}
{{History|||snap=14w10a|[[File:Hopper (D) JE5.png|32px]] [[File:Hopper (N) JE5.png|32px]] [[File:Hopper (E) JE5.png|32px]] [[File:Hopper (S) JE5.png|32px]] [[File:Hopper (W) JE5.png|32px]] [[File:Missing Model JE2.png|32px]] Hoppers now use block models rather than having a hardcoded shape. This brings multiple changes: the inside texture now rotates with the hopper rather than being constant, the inside planes of hoppers are now shaded/have ambient occlusion, and some minor UV changes have occurred, notably on the smallest cuboid. The directionless hopper also [[Missing model|no longer has a model]].}}
{{History|||snap=14w26a|The directionless hopper has been removed.}}
{{History|||snap=14w31a|Hoppers now no longer use wood [[sound]]s.<ref>{{bug|MC-5991}}</ref>}}
{{History||1.9|snap=15w33c|A hopper now generates as a part of the [[end ship]] in the [[end city|end cities]].}}
{{History|||snap=15w41a|End ships no longer contain a hopper.}}
{{History|||snap=15w43a|[[Loot table]]s have been added; hoppers can now use loot tables.}}
{{History|||snap=15w43c|[[File:Hopper (D) JE6.png|32px]] [[File:Hopper (N) JE6.png|32px]] [[File:Hopper (E) JE6.png|32px]] [[File:Hopper (S) JE6.png|32px]] [[File:Hopper (W) JE6.png|32px]] The UV on the hopper model has changed, resulting in minor differences, particularly to the smallest cuboid. This is likely due to the fix for {{bug|MC-73401}}.}}
{{History|||snap=15w44a|[[File:Hopper (D) JE7.png|32px]] [[File:Hopper (N) JE7.png|32px]] [[File:Hopper (E) JE7.png|32px]] [[File:Hopper (S) JE7.png|32px]] [[File:Hopper (W) JE7.png|32px]] A mapping issue introduced in the previous snapshot for the sides of the large funnel region has been fixed. This may be due to the fix for {{bug|MC-50344}}.}}
{{History||1.9.1|snap=pre1|A hopper can now push into and pull [[item]]s from a blocked [[chest]].}}
{{History||1.13|snap=17w47a|Prior to [[1.13/Flattening|''The Flattening'']], this [[block]]'s numeral ID was 154.}}
{{History||1.14|snap=18w43a|[[File:Hopper (D) JE8.png|32px]] [[File:Hopper (N) JE8.png|32px]] [[File:Hopper (E) JE8.png|32px]] [[File:Hopper (S) JE8.png|32px]] [[File:Hopper (W) JE8.png|32px]]<br>[[File:Hopper (item) JE3 BE2.png|32px]] The textures of hoppers have been changed.}}
{{History|||snap=19w03c|Hoppers now use correct cullface arguments, and some redundant faces have also been deleted.}}
{{History||1.19|snap=22w13a|Hoppers no longer drop when breaking a [[minecart with hopper]].}}
{{History||1.19.4|snap=23w07a|Hoppers can now interact with jukeboxes.}}
{{History|pocket alpha}}
{{History||v0.14.0|snap=build 1|[[File:Hopper (D) JE2.png|32px]]{{verify|Is this model correct?}}<br>[[File:Hopper (item) JE2 BE1.png|32px]] Added hoppers. Upward hoppers also exist.}}
{{History||v0.15.0|snap=build 1|Hoppers can now be moved by [[piston]]s.}}
{{History|bedrock}}
{{History||1.10.0|snap=beta 1.10.0.3|[[File:Hopper (D) BE.png|32px]] [[File:Hopper (N) BE.png|32px]] [[File:Hopper (E) BE.png|32px]] [[File:Hopper (S) BE.png|32px]] [[File:Hopper (W) BE.png|32px]] [[File:Hopper (U) BE.png|32px]]<br>[[File:Hopper (item) JE3 BE2.png|32px]] The textures of hoppers have been changed.}}
{{History||1.19.70|snap=beta 1.19.70.20|Hoppers can now collect items through all blocks that have a lower height than a full block.}}
{{History|console}}
{{History||xbox=TU19|xbone=CU7|ps=1.12|wiiu=Patch 1|switch=1.0.1|[[File:Hopper (D) JE2.png|32px]]{{verify|Is this model correct?}}<br>[[File:Hopper (item) JE2 BE1.png|32px]] Added hoppers.}}
{{History||xbox=none|xbone=none|ps=1.90|wiiu=none|switch=none|[[File:Hopper (D) JE8.png|32px]]{{verify|Is this model correct?}}<br>[[File:Hopper (item) JE3 BE2.png|32px]] The textures of hoppers have been changed.}}
{{History||ps=1.91|Hoppers can now fill [[composter]]s.}}
{{History|new 3ds}}
{{History||0.1.0|[[File:Hopper (D) JE2.png|32px]]{{verify|Is this model correct?}}<br>[[File:Hopper (item) JE2 BE1.png|32px]] Added hoppers.}}
{{History|foot}}
==Issues==
{{Issue list}}
==Trivia==
* A [[wikipedia:Hopper (particulate collection container)|real-world hopper]] is a large, pyramidal or cone-shaped container used in industrial processes to hold particulate matter, like dust, gravel, nuts, seeds, etc., and can then dispense them from the bottom.
* A hopper can transfer 9000 items per hour, or 150 items per minute.
==Gallery==
=== Renders ===
<gallery>
Hopper (N).png
Hopper (E).png
Hopper (S).png
Hopper (W).png
</gallery>
<gallery>
Hopper (N) BE.png
Hopper (E) BE.png
Hopper (S) BE.png
Hopper (W) BE.png
</gallery>
=== Screenshots ===
<gallery>
File:Hopper screenshot 1.png|In snapshot 13w01a, the hopper item uses a 'WIP' sprite, though the item still read "Hopper".
File:13w02a Banner.png|The 13w02a Banner includes a [[minecart with TNT]] and a hopper.
</gallery>
==References==
{{Reflist}}
{{Redstone}}
{{Blocks|Utility}}
{{Items}}
[[Category:Mechanisms]]
[[Category:Redstone mechanics]]
[[Category:Mechanics]]
[[Category:Storage]]
[[Category:Utility blocks]]
[[Category:Manufactured blocks]]
[[Category:Block entities]]
[[cs:Násypka]]
[[de:Trichter]]
[[el:Hopper]]
[[es:Tolva]]
[[fr:Entonnoir]]
[[it:tramoggia]]
[[ja:ホッパー]]
[[ko:호퍼]]
[[nl:Trechter]]
[[pl:Lej]]
[[pt:Funil]]
[[ru:Загрузочная воронка]]
[[uk:Лійка]]
[[zh:漏斗]]</li></ul> | 19w37a | Now have a 5% chance to spawn as babies. | |||
1.16.2{{Extension DPL}}<ul><li>[[Explorer Map|Explorer Map]]<br/>{{about|the map used to find rare structures|the craftable map|Map|others|Map (disambiguation)}}{{Needs updating|Add info on the new jungle, swamp, and village maps in Java 1.20.2 Pre-Release 1}}{{Item
| image = <gallery>
Ocean Explorer Map.png | Ocean
Woodland Explorer Map.png | Woodland
Buried Treasure Map.png | Buried Treasure
</gallery>
|image2 = <gallery>
Ocean Explorer Map BE.png | Ocean (BE)
Woodland Explorer Map BE.png | Woodland (BE)
Buried Treasure Map BE.png | Buried in Treasure (BE)
</gallery>
| renewable =
* '''Buried Treasure''': No
* '''Woodland and Ocean''': Yes
| stackable = Yes (64)
}}
An '''explorer map''' is a special [[map]] used to aid in finding rare [[generated structures]], including [[woodland mansion]]s, [[ocean monument]]s, and [[buried treasure]]s.
== Obtaining ==
=== Trading ===
Apprentice-level [[cartographer]] villagers sell ocean explorer maps for 13 emeralds and a compass. Journeyman-level cartographer villagers sell woodland explorer maps for 14 emeralds and a compass.
{{IN|java}}, if the cartographer is in [[the Nether]] or [[the End]], either spawned or transported, the trades for the map do not unlock. However, {{in|bedrock}}, the cartographer trades for the map are unlocked, but the purchased map shows the same layout as in the corresponding dimension and shows no destination structure, but if cartographer trades are unlocked in an old world type (prior-1.11.0), the game stops ticking.
In ''Java Edition'', each cartographer sells its own unique explorer map that points to a different location than other cartographers. Purchasing another explorer map from the same cartographer results in the same explorer map. In Bedrock Edition, a cartographer sells an explorer map that points to the nearest location, regardless of whether it is explored or previously mapped by another cartographer.<!-- start to glitched out-->
=== Chest loot ===
Treasure maps, in contrast to explorer maps, generate in underwater ruins or in shipwrecks.
{{LootChestItem|buried-treasure-map}}
== Usage ==
[[File:Explorer Map Comparison.gif|thumb|217px|Unexplored and partially explored maps.]]
{{See also|Map#Mapping|Map#Map content}}
=== Locating structures ===
There are three types of explorer maps: woodland, [[ocean]], and buried treasure. The maps differ from a normal map, in that it shows the area's land-water outline, with an orange striated (striped) texture for water<ref>Specifically, biomes in the "water_on_map_outlines" [[Tag#Biomes|biome tag]].</ref>, and the blank map texture for land. The maps show a section of land that contains a [[woodland mansion]], [[monument]] or [[buried treasure]] respectively. This may not be the nearest such [[structure]] to the [[player]]. The structures are displayed as a small icon. If the player icon is smaller than it would be on a normal map, that means the player is a great distance away. When the player is less than 1027 blocks away from the map border, the icon returns to the proper size. When the player reaches the map's area of land (512×512), the [[map]] fills in like a normal map.
The basic functions of a buried treasure explorer map are similar to that of the other two. However, instead of showing the structure icon on the map, it shows a red X instead. The [[buried treasure]] structure is located on the same X and Z coordinates as the middle of the X (the player marker may need to be aligned with the bottom of the middle 2×2 pixel square of the X). To locate the [[chest]] spot, hold the treasure map with both hands, not in the offhand slot.
=== Cloning ===
{{Crafting
|showdescription=1
|shapeless=1
|name=[[Explorer Map]]<br>(cloned)
|;;;Empty Map;Empty Map;Empty Map;Empty Map;Empty Map
|;;;;Empty Map;Empty Map;Empty Map;Empty Map
|;;;;;Empty Map;Empty Map;Empty Map
|Ocean Explorer Map; Woodland Explorer Map; Buried Treasure Map; Ocean Explorer Map; Woodland Explorer Map; Buried Treasure Map; Ocean Explorer Map; Woodland Explorer Map
|Empty Map
|;;;;;;Empty Map;Empty Map
|;Empty Map;Empty Map;Empty Map;Empty Map;Empty Map;Empty Map;Empty Map
|;;Empty Map;Empty Map;Empty Map;Empty Map;Empty Map;Empty Map
|;;;;;;;Empty Map
|Output= Ocean Explorer Map,2; Woodland Explorer Map,3; Buried Treasure Map,4; Ocean Explorer Map,5; Woodland Explorer Map,6; Buried Treasure Map,7; Ocean Explorer Map,8; Woodland Explorer Map,9
|type= Miscellaneous
|description=The output has the same map center as the input map, and the same [[monument]], [[woodland mansion]] or [[buried treasure]] marker. Cloned maps are stackable.
}}
The parts of the world that have already been explored and mapped are copied, and newly explored areas appear on both instances. In Creative mode, cloned explorer maps can be obtained by pick blocking on the explorer map displayed on [[item frames]] (the map needs to be out of the [[player]]'s inventory when using pick block, or else that map moves into the active hotbar slot).
== Sounds ==
{{edition|java}}:
{{Sound table
|sound=Drawmap1.ogg
|sound2=Drawmap2.ogg
|sound3=Drawmap3.ogg
|subtitle=Map drawn
|source=block
|description=When an explorer map is edited using a cartography table
|id=ui.cartography_table.take_result
|translationkey=subtitles.ui.cartography_table.take_result
|volume=1.0
|pitch=1.0
|distance=16
|foot=1}}
{{edition|bedrock}}: ''None''
== Data values ==
=== ID ===
{{edition|java}}:
{{ID table
|edition=java
|showforms=y
|generatetranslationkeys=y
|displayname=Map
|spritetype=item
|nameid=filled_map
|form=item
|translationkey=filled_map.mansion,filled_map.ocean,filled_map.buried_treasure
|foot=1}}
{{edition|bedrock}}:
{{ID table
|edition=bedrock
|showaliasids=y
|shownumericids=y
|showforms=y
|notshowbeitemforms=y
|generatetranslationkeys=y
|displayname=Map
|spritetype=item
|nameid=filled_map
|aliasid=map
|id=358
|form=item
|translationkey=item.map.exploration.monument.name,item.map.exploration.mansion.name,item.map.exploration.treasure.name
|foot=1}}
=== Metadata ===
{{see also|Bedrock Edition data values}}
{{IN|bedrock}}, the item [[Data value]] distinguishes explorer maps from one another:
{{:Map/DV}}
=== Item data ===
An explorer map differs from a map in that its <code>display</code> tag is set, which includes a <code>Mapcolor</code> and a <code>LocName</code>; also its <code>Decorations</code> list includes an entry for its target monument, mansion or buried treasure. Its [[Map item format#map_<#>.dat format|map item entry]] is identical to that of a normal map, except that by the time the player sees it, its <code>colors</code> byte array is pre-filled with explorer maps' characteristic land-water boundary lines and water shading.
<div class="treeview">
It should be noted that this additional data is stored in the Cartographer's NBT data and in the inventory item's NBT data, and not in the map file (e.g. <samp>map_0.dat</samp>). If the [[player]] were to use the {{cmd|give}} command to give themselves a map with the same map ID as an existing explorer map, it would still have the Ocean Monument or the Woodland Mansion icon on the map, but it would simply be named "Map" instead of, for example, "Ocean Explorer Map".
* {{nbt|compound}} Item data
** {{nbt|compound|tag}}:
*** {{nbt|compound|display}}: How the map looks in an item slot. See also [[Player.dat_format#Display Properties]].
**** {{nbt|string|Name}}: The name the map is given. In this case, they are localized strings: either <code>{"translate":"filled_map.monument"}</code>,<code>{"translate":"filled_map.mansion"}</code> or <code>{"translate":"filled_map.buried_treasure"}</code>.
**** {{nbt|int|MapColor}}: Color codes are calculated from the Red, Green and Blue components using this formula:<br>'''<span style="color:red">Red</span>[[wikipedia:Logical shift|<<]]16 + <span style="color:green">Green</span><<8 + <span style="color:blue">Blue</span>'''.<ref group=note>For positive values larger than 0x00FFFFFF, the top byte is ignored. All negative values produce white.</ref> Monument maps use 3830373, which is {{color swatch|58|114|101}}. Mansion maps use 5393476, which is {{color swatch|82|76|68}}. Buried treasure explorer maps do not use a color code.
*** {{nbt|list|Decorations}}:
**** {{nbt|compound}}: One of these for each icon on the map. Explorer maps always have at least one representing their target.
***** {{nbt|string|id}}: An arbitrary unique string identifying the decoration. For explorer map target structures, this is "+".
***** {{nbt|double|rot}}: The rotation of the icon. For explorer map target structures, this is always 180.
***** {{nbt|byte|type}}: The ID of the [[Map#Map icons|map icon]]: 8 for a mansion map, 9 for a monument map, 26 for a treasure map.
***** {{nbt|double|x}}: The world x-coordinate of the target structure icon.
***** {{nbt|double|z}}: The world z-coordinate of the target structure icon.
</div>
; Notes
{{notelist}}
== Achievements ==
{{load achievements|Treasure Hunter}}
== History ==
{{History|java}}
{{History||1.11|snap=16w39a|[[File:Woodland Explorer Map JE1 BE1.png|32px]] [[File:Ocean Explorer Map JE1 BE1.png|32px]] Added woodland and ocean explorer maps.}}
{{History|||snap=16w41a|Explorer maps can now no longer be zoomed out.}}
{{History||1.13|snap=18w10a|[[File:Map (item) JE1 BE1.png|32px]] Added buried treasure explorer maps.}}
{{History|||snap=18w11a|Buried treasure explorer maps now generate in the [[chest]]s of [[shipwreck]]s.}}
{{History||1.14|snap=18w43a|[[File:Woodland Explorer Map JE2 BE2.png|32px]] [[File:Ocean Explorer Map JE2 BE2.png|32px]] [[File:Map (item) JE2 BE2.png|32px]] The textures for explorer maps have now been changed.}}
{{History||1.20.2|snap=1.20.2 Pre-release 1|Updated structure icons on explorer maps sold by cartographers.}}
{{History||Villager Trade Rebalance<br>(Experimental)|link=Java Edition 1.20.2|snap=1.20.2 Pre-release 1|Added seven new maps which cartographers can sell.}}
{{History|pocket}}
{{History||1.1.0|snap=alpha 1.1.0.0|[[File:Woodland Explorer Map JE1 BE1.png|32px]] [[File:Ocean Explorer Map JE1 BE1.png|32px]] Added explorer maps.<ref>{{Mcnet|discovery-update-pocket-and-win-10-soon|The Discovery Update: on Pocket and Win 10 soon|March 29, 2017}}</ref>
|Explorer maps are not yet obtainable in [[survival]] mode.}}
{{History|||snap=alpha 1.1.0.3|Explorer maps are now obtainable as [[trading|trades]] from [[cartographer]] [[villager]]s.}}
{{History|bedrock}}
{{History||1.4.0|snap=beta 1.2.14.2|[[File:Map (item) JE1 BE1.png|32px]] Added buried treasure explorer maps.}}
{{History|||snap=beta 1.2.20.1|Treasure maps now generate in [[underwater ruins]] [[chest]]s.}}
{{History||1.10.0|snap=beta 1.10.0.3|[[File:Woodland Explorer Map JE2 BE2.png|32px]] [[File:Ocean Explorer Map JE2 BE2.png|32px]] [[File:Map (item) JE2 BE2.png|32px]] The textures for explorer maps have now been changed.}}
{{History||1.11.0|snap=beta 1.11.0.4|[[Trading]] has now been changed, woodland and ocean explorer maps now cost a [[compass]] and 12 [[emerald]]s.
|Journeyman-level [[cartographer]] [[villager]]s no longer [[trading|sell]] 2 type of explorer map as they now have {{frac|1|3}} chance to sell woodland explorer maps, {{frac|1|3}} chance to sell ocean explorer maps, or {{frac|1|3}} chance to sell other [[item]]s<!-- empty locator map--> as part of their [[trading|trades]].
|Woodland explorer maps can now be [[trading|bought]] from fletcher [[villager]]s.}}
{{History||1.12.0|snap=beta 1.12.0.3|Journeyman-level fletcher villagers no longer [[trading|sell]] woodland explorer maps.}}
{{History||1.13.0|snap=beta 1.13.0.1|[[File:Woodland Explorer Map BE3.png|32px]] [[File:Ocean Explorer Map BE3.png|32px]] [[File:Buried Treasure Map BE3.png|32px]] The textures of explorer maps have now been changed.}}
{{History||1.16.100|snap=beta 1.16.100.56|The ID of maps has been changed from <code>map</code> to <code>filled_map</code>.}}
{{History|console}}
{{History||xbox=TU54|xbone=CU44|ps=1.52|wiiu=Patch 24|switch=1.0.4|[[File:Woodland Explorer Map JE1 BE1.png|32px]] [[File:Ocean Explorer Map JE1 BE1.png|32px]] Added explorer maps.}}
{{History|PS4}}
{{History||1.90|[[File:Woodland Explorer Map JE2 BE2.png|32px]] [[File:Ocean Explorer Map JE2 BE2.png|32px]] The textures for explorer maps have now been changed.}}
{{History|new3ds}}
{{History||1.9.19|[[File:Woodland Explorer Map JE1 BE1.png|32px]] [[File:Ocean Explorer Map JE1 BE1.png|32px]] Added explorer maps.}}
{{History|foot}}
== Issues ==
{{Issue list}}
== Trivia ==
* When a [[cartographer]] generates the trade offers for the explorer maps, it chooses the location of one of the nearest structures of the respective type ([[monument]] or [[woodland mansion]]).
* For the reason above, explorer maps obtained from one cartographer are always the same. Also, if two cartographers unlock the explorer map trades approximately at the same place and at the same time, the map locations are usually identical. This sometimes also happens when finding multiple treasure maps from [[ocean ruins]].
* Explorer maps fill as the [[chunk]]s are generated, rather than when the [[player]] holds them while in the area; leaving an explorer map while exploring the area still fills the map.
* Buried treasure explorer maps are named ''Buried Treasure Map'' {{in|java}} while {{in|bedrock}}, they are named ''Treasure Map''.
* It is possible for a cartographer to give a monument or woodland mansion explorer map for areas where the [[generated structures|structures]] would have spawned in the world, but were unable to as a result of terrain generation. As a result, explorer maps, unfortunately, don't always guarantee that a structure exists at the purported location. This is most common with woodland mansion explorer maps, due to its generation algorithm.
* On [[Bedrock Edition]], inventory editors and add-ons can be used to create Explorer Maps that lead to any structure.
== Gallery ==
<gallery>
File:Explorer Maps.png|An ocean explorer map in the [[off-hand]], a woodland explorer map in the main hand, and a [[cartographer]] [[villager]] in between them.
File:Partial Explorer Map.png|A partially-explored explorer map.
File:ExplorerToNormal Map Comparison.png|Two fully-explored maps of the same place, one of which is a woodland explorer map.
File:Buried Treasure Explorer Map.png|An [[item frame]] holding a buried treasure explorer map. The player can see the red X on the left side of the map.
File:Purchase.png|Purchasing explorer maps from a cartographer.
</gallery>
== See also ==
* [[Map]]
* [[Woodland Mansion]]
* [[Ocean Monument]]
* [[Shipwreck]]
* [[Buried treasure]]
== References ==
{{reflist}}
== External Links ==
*[https://www.minecraft.net/en-us/article/taking-inventory--explorer-map Taking Inventory: Explorer Map] – Minecraft.net on November 13, 2019
{{Items}}
[[de:Schatzkarte]]
[[es:Mapa (localización de estructura)]]
[[fr:Carte d'exploration]]
[[ja:探検家の地図]]
[[ko:탐험 지도]]
[[pl:Mapa eksploracyjna]]
[[pt:Mapa de exploração]]
[[ru:Карта сокровищ]]
[[zh:探险家地图]]</li><li>[[Boat|Boat]]<br/>{{ItemEntity
|image=Oak Boat.png
|image2=Oak Boat (item) JE6.png
|extratext = [[#Gallery|View all renders]]
|stackable=No
|renewable=Yes
|flammable=Yes
|size='''{{IN|Java}}:'''<br>
Height: 0.5625 Blocks<br>Width: 1.375 Blocks<br>
'''{{IN|Bedrock}}:'''<br>
Height: 0.455 Blocks<br>Width: 1.4 Blocks
|networkid='''[[JE]]''': 1
}}
{{for|other kinds of boats|Boat (disambiguation)}}
A '''boat''' is a drivable vehicle [[entity]] used primarily for fast transport of players and passenger mobs over bodies of water. '''Bamboo rafts''' look different, but function almost identically to other boats.
== Obtaining ==
Boats can be crafted with any Overworld planks; crimson and warped planks cannot be used to make boats.<ref>{{bug|MC-170868|||Invalid}}</ref>
Boats can be retrieved by repeatedly hitting them until they drop as an item.
[[Tool]]s and [[weapon]]s that deal more than {{Health|4}} damage will instantly destroy a boat in one hit.{{only|Java}}
=== Crafting ===
{{Crafting
|head=1
|showname=0
|A2= Matching Overworld Planks
|C2= Matching Overworld Planks
|A3= Matching Overworld Planks
|B3= Matching Overworld Planks
|C3= Matching Overworld Planks
|Output= Matching Boat
|type= Transportation
|foot=1
}}
== Usage ==
Boats can be used for the transportation of [[player]]s and [[mob]]s, sold for emeralds, or [[Smelting|burnt]] as fuel.
=== Crafting ===
{{Crafting usage|match=end|Boat, Bamboo Raft}}
=== Trading ===
Master-level fisherman [[villager]]s always offer to buy a boat for an [[emerald]]. The type of boat depends on the biome outfit type of the villager; [[plains]] villagers offer to buy oak boats, [[taiga]] and [[Snowy Tundra|snowy]] villagers offer to buy spruce boats, [[savanna]] villagers offer to buy acacia boats, [[desert]] and [[jungle]] villagers offer to buy jungle boats, and [[swamp]] villagers offer to buy dark oak boats.
=== Fuel ===
A boat used as fuel in a [[furnace]] lasts 60 seconds, smelting up to 6 items.
=== Transportation ===
{{see also|Transportation|Riding}}
==== Entering ====
A player enters a boat by {{control|using}} it, if the boat is not fully occupied (boats can hold two entities). Unlike [[bed]]s, there is no message above the hotbar for attempting to enter a fully occupied boat.<ref>{{bug|MC-161251}} - resolved as “Works as Intended”</ref>
==== Exiting ====
A boat can be exited by {{control|sneaking}} or, {{in|BE}}, pressing down the right analog stick on a controller, tapping the "Leave Boat" button when using touch controls, or {{control|jumping}}. When exiting a boat, the player is placed in the direction the player is facing, or, if facing directly up or down, the player is placed in front of the boat. The exiting player is placed on land if possible from the dismounting position.
==== Motion ====
Boats do not turn with mouse-look.
With a keyboard or gamepad, boats are controlled using the {{control|forward}}, {{control|left}} (turns left), {{control|right}} (turns right), and {{control|backward}} keys. Using the {{control|sprint}} key increases the field of vision, but does not increase speed as if [[sprinting]].
With touchscreen controls, two buttons for steering appear. The right button or key steers to the left, and the left button or key steers to the right. Pressing both buttons or keys moves the boat forward.
{{IN|Java}}, boats can be ridden against a current, but cannot be ridden upstream to a higher elevation. A boat lift, usually made from tripwire, pistons, and optionally a slime block, can be used to move a boat up. Bubble columns created with soul sand can also be used to push boats upward. These mechanisms can also be used {{in|bedrock}} but are usually unnecessary because boats can be ridden upward in descending water, as well as [[Tutorials/Water-powered boat transportation|follow upward stair-step currents]].
== Behavior ==
=== Speed ===
Boats move according to the player's control or water currents, with speed affected by the surface traversed. Boats move extremely quickly on ice,<ref name="MC-97803">{{bug|MC-97803||Boats going faster on ice than in water|WAI}}</ref> allowing for the construction of fast transportation systems in any dimension.
{| class="wikitable"
|+
!Substance
!Speed
|-
|[[Water]]
|8.0 blocks/s
|-
|[[Ice]], [[Frosted Ice]], [[Packed Ice]]
|40 blocks/s
|-
|[[Blue Ice]]
|72.7 blocks/s
|-
|Land
|2.0 blocks/s
|}
=== Floatation ===
[[File:Oak Boat shake.gif|thumb|right|The animation of an oak boat when atop a [[Bubble Column|bubble column]].]]
A boat floats atop still or flowing water. {{IN|java}}, a boat sinks if it enters a waterfall.<ref>{{bug|MC-91206|||WAI}}</ref> {{IN|bedrock}}, a boat does not sink when submerged but floats up. This feature lets a player contrive stepped uphill water flows to [[Tutorials/Water-powered boat transportation#Floating uphill|propel a boat uphill]] using only flowing water.
When a boat moves over a bubble column, it begins to shake. If the bubbles are caused by a [[Magma Block|magma block]], all passengers are expelled and the boat sinks.
{{IN|java}}, a sunken boat cannot be re-floated until a bubble column pushes it up or it is broken by the player. {{IN|bedrock}}, a boat resumes floating when it emerges from the currents keeping it down, or when the bubble column is blocked or removed.
[[Dolphin]]s chase players riding a boat in motion, occasionally bumping the boat, causing it to shake briefly.
=== Destruction ===
As boats are [[Entity|entities]], they have [[health]]. Boats effectively have just over {{hp|4}} (exactly 4 damage is not quite enough to destroy a boat), and regenerate {{frac|1|10}} per game tick.
Boats can be destroyed by explosions, fire and lava (but not magma blocks), cactus, and by being punched by mobs, such as [[Drowned]]. Boats made invulnerable with commands cannot be broken by any of these, but they still cannot be used to travel on lava because they sink.
When a boat is destroyed under normal conditions, it drops itself in item form. In certain conditions, such as when falling for exactly 12, 13, 49, 51, 111, 114, 198, 202, 310, or 315 blocks,<ref name="MC-119369">{{bug|MC-119369}}</ref> it drops two [[stick]]s and three [[planks]] upon being destroyed.
=== Passengers ===
[[File:Multiple mobs in 2 boats.png|alt=|thumb|Multiple mobs in 2 types of boats.]]
Boats can support two riders, including [[mob]]s. Except for [[Enderman|endermen]] {{in|bedrock}}, a mob cannot exit a boat and is trapped until the boat gets destroyed, or until the player uses a [[Fishing Rod|fishing rod]] or [[lead]] to remove the mob. This can be used to transport mobs, although hostile mobs still attack while in boats. Mobs riding a boat don't despawn{{only|java}} and don't count toward the mob cap.<ref>{{bug|MC-182897|resolution=WAI}}</ref>
A player cannot both move (row) and use items at the same time. It is still possible to initialize item use (e.g. start eating) and row the boat while the item is still in the middle of the use animation. Although the rowing animation overrides the item use animation, the item can still be successfully consumed. This does not work with items that are triggered by the ''release'' of the use button (such as [[Bow|bows]] and [[Trident|tridents]]).{{only|Java}}
Being in a boat limits the player's mouse-look to the forward 210° arc {{in|java}} and 180° {{in|bedrock}}.
Underwater boat cannot be ridden. When the boat is underwater, all passengers in it are expelled.
=== Damage prevention ===
Riding a boat does not deplete [[hunger]], making it an efficient way to travel.
Boats can completely nullify [[fall damage]] for themselves and any players/mobs inside, making them useful for travel through mountains or through the Nether.<ref>{{bug|MC-105103|resolution=WAI}}</ref><ref>{{bug|MCPE-149490|resolution=WAI}}</ref> However {{in|java}}, due to a bug, boats can break when falling from certain heights, and the riders take fall damage.<ref name="MC-119369"></ref>
=== Collision ===
A boat has a solid collision box, which means players and other entities can't go through it even with high speed. Falling blocks are also blocked by boats.
{{IN|java}}, a boat falling on top of an entity stops on top of the entity. {{In|bedrock}}, a falling boat can go through other entities.
Riding a boat over a [[Lily Pad|lily pad]] causes the lily pad to drop, although the boat's speed stutters a bit.
=== Mobs ===
Most mobs can ride boats. Mobs cannot exit the boat unless the boat is destroyed, sinks, or moves over a bubble column. However, {{in|bedrock}}, [[endermen]] are able to teleport out of boats.
Mobs can be picked up into the boat when they collide with the side of the boat. A mob cannot control the boat. {{IN|java}}, a boat being ridden by a player cannot pick up a mob. {{IN|bedrock}}, mobs can be picked up by a boat being ridden by a player.
Mobs wider than the width of a boat cannot be picked up by a boat. [[Warden]]s, and [[wither]]s cannot be picked up by a boat. {{IN|java}}, baby [[sniffer]]s cannot be picked up either.
=== Lead ===
{{IN|java}}, leads cannot be attached to boats. {{IN|bedrock}}, leads can be attached to boats, though the lead can break when stretched too far due to boats moving much slower on land.
== Sounds ==
{{Edition|Java}}:<br>
Boats use the Friendly Creatures sound category for entity-dependent sound events.
{{Sound table
|sound=Boat paddle land1.ogg
|sound2=Boat paddle land2.ogg
|sound3=Boat paddle land3.ogg
|sound4=Boat paddle land4.ogg
|sound5=Boat paddle land5.ogg
|sound6=Boat paddle land6.ogg
|subtitle=Rowing
|source=neutral
|description=While a boat is rowed on land
|id=entity.boat.paddle_land
|translationkey=subtitles.entity.boat.paddle_land
|volume=1.0
|pitch=0.8-1.2
|distance=16}}
{{Sound table
|sound=Boat paddle water1.ogg
|sound2=Boat paddle water2.ogg
|sound3=Boat paddle water3.ogg
|sound4=Boat paddle water4.ogg
|sound5=Boat paddle water5.ogg
|sound6=Boat paddle water6.ogg
|sound7=Boat paddle water7.ogg
|sound8=Boat paddle water8.ogg
|subtitle=Rowing
|source=neutral
|description=While a boat is rowed in water
|id=entity.boat.paddle_water
|translationkey=subtitles.entity.boat.paddle_water
|volume=0.8
|pitch=0.8-1.2
|distance=16
|foot=1}}
{{Edition|Bedrock}}:
{{Sound table
|type=bedrock
|sound=Swim1.ogg
|sound2=Swim2.ogg
|sound3=Swim3.ogg
|sound4=Swim4.ogg
|source=player
|description=While a boat is rowed in water
|id=random.swim
|pitch=0.6-1.4
|foot=1}}
==Data values==
===ID===
{{edition|java}}:
{{ID table
|edition=java
|showitemtags=y
|showforms=y
|generatetranslationkeys=y
|displayname=Oak Boat
|spritetype=item
|spritename=oak-boat
|nameid=oak_boat
|itemtags=boats
|form=item}}
{{ID table
|displayname=Spruce Boat
|spritetype=item
|spritename=spruce-boat
|nameid=spruce_boat
|itemtags=boats
|form=item}}
{{ID table
|displayname=Birch Boat
|spritetype=item
|spritename=birch-boat
|nameid=birch_boat
|itemtags=boats
|form=item}}
{{ID table
|displayname=Jungle Boat
|spritetype=item
|spritename=jungle-boat
|nameid=jungle_boat
|itemtags=boats
|form=item}}
{{ID table
|displayname=Acacia Boat
|spritetype=item
|spritename=acacia-boat
|nameid=acacia_boat
|itemtags=boats
|form=item}}
{{ID table
|displayname=Dark Oak Boat
|spritetype=item
|spritename=dark-oak-boat
|nameid=dark_oak_boat
|itemtags=boats
|form=item}}
{{ID table
|displayname=Mangrove Boat
|spritetype=item
|spritename=mangrove-boat
|nameid=mangrove_boat
|itemtags=boats
|form=item}}
{{ID table
|displayname=Cherry Boat
|spritetype=item
|spritename=cherry-boat
|nameid=cherry_boat
|itemtags=boats
|form=item}}
{{ID table
|displayname=Bamboo Raft
|spritetype=item
|spritename=bamboo-raft
|nameid=bamboo_raft
|itemtags=boats
|form=item
|foot=1}}
{{ID table
|edition=java
|firstcolumnname=Boat
|generatetranslationkeys=y
|displayname=Entity
|spritetype=entity
|spritename=boats
|nameid=boat
|foot=1}}
{{edition|bedrock}}:
{{ID table
|edition=bedrock
|showitemtags=y
|showaliasids=y
|shownumericids=y
|showforms=y
|notshowbeitemforms=y
|generatetranslationkeys=y
|displayname=Oak Boat
|spritetype=item
|nameid=oak_boat
|aliasid=boat / 0
|id=375
|form=item
|itemtags=minecraft:boats
|translationkey=item.boat.oak.name}}
{{ID table
|displayname=Spruce Boat
|spritetype=item
|nameid=spruce_boat
|aliasid=boat / 1
|id=378
|form=item
|itemtags=minecraft:boats
|translationkey=item.boat.spruce.name}}
{{ID table
|displayname=Birch Boat
|spritetype=item
|nameid=birch_boat
|aliasid=boat / 2
|id=376
|form=item
|itemtags=minecraft:boats
|translationkey=item.boat.birch.name}}
{{ID table
|displayname=Jungle Boat
|spritetype=item
|nameid=jungle_boat
|aliasid=boat / 3
|id=377
|form=item
|itemtags=minecraft:boats
|translationkey=item.boat.jungle.name}}
{{ID table
|displayname=Acacia Boat
|spritetype=item
|nameid=acacia_boat
|aliasid=boat / 4
|id=379
|form=item
|itemtags=minecraft:boats
|translationkey=item.boat.acacia.name}}
{{ID table
|displayname=Dark Oak Boat
|spritetype=item
|nameid=dark_oak_boat
|aliasid=boat / 5
|id=380
|form=item
|itemtags=minecraft:boats
|translationkey=item.boat.big_oak.name}}
{{ID table
|displayname=Mangrove Boat
|spritetype=item
|nameid=mangrove_boat
|aliasid=boat / 6
|id=643
|form=item
|itemtags=minecraft:boats
|translationkey=item.boat.mangrove.name}}
{{ID table
|displayname=Cherry Boat
|spritetype=item
|nameid=cherry_boat
|aliasid=boat / 8
|id=657
|form=item
|itemtags=minecraft:boats
|translationkey=item.boat.cherry.name}}
{{ID table
|displayname=Bamboo Raft
|spritetype=item
|nameid=bamboo_raft
|aliasid=boat / 7
|id=661
|form=item
|itemtags=minecraft:boats
|translationkey=item.boat.bamboo.name
|foot=1}}
{{ID table
|edition=bedrock
|firstcolumnname=Form
|shownumericids=y
|generatetranslationkeys=y
|displayname=Entity
|spritetype=entity
|spritename=boats
|nameid=boat
|id=90
|foot=1}}
===Entity data===
Boats have entity data associated with them that contain various properties of the entity.
{{el|java}}:
{{main|Entity format}}
{{/ED}}
{{el|bedrock}}:
:See [[Bedrock Edition level format/Entity format]].
==Achievements==
{{load achievements|Whatever Floats Your Goat}}
==Advancements==
{{load advancements|Whatever Floats Your Goat!}}
==History==
{{History|java alpha}}
{{History||v1.0.6|[[File:Oak Boat JE1.png|32px]] [[File:Oak Boat (item) JE1.png|32px]] Added boats.
|Initially, boats broke upon being placed outside water, and on impact with land.}}
{{History||v1.0.6_01|Boats now only break on impact with land at high speeds.
|Boats no longer break upon being placed outside water.
|Boat turning has been made smoother.}}
{{History|java beta}}
{{History||1.8|snap=Pre-release|It is now possible to score a [[Damage#Critical hit|critical hit]] against a boat.}}
{{History|java}}
{{History||1.3.1|snap=12w15a|Boats can now be shot out from [[dispenser]]s.}}
{{History|||snap=1.3|[[File:Oak Boat (item) JE2 BE1.png|32px]] The texture of the oak boat [[item]] has been changed.}}
{{History|||snap=12w21a|Boats no longer take [[damage]] when colliding with [[lily pad]]s. Instead, the lily pads themselves break.}}
{{History|||snap=12w23a|Boats can now accelerate to faster than previous speeds, and are now easier to control.}}
{{History|||snap=12w27a|Boats now drop their [[item]] instead of 3 [[planks|oak wood planks]] and 2 [[stick]]s if broken by a [[player]].|Instead, it needs to fall certain heights to drop 3 oak wood planks and 2 sticks.}}
{{History||1.6.1|snap=13w16b|New boat physics with lower inertia, but {{control|left}}, {{control|back}} and {{control|right}} controls have been removed.
|Boats now take [[damage]] and break when colliding with many lily pads in a short time.}}
{{History||1.7.2|snap=13w36a|[[Player]]s can now {{cmd|summon}} [[mob]]s riding boats, though mobs cannot control boats.}}
{{History|||snap=13w43a|Boats no longer inflict fall [[damage]] when running aground.
|Boats being broken by lily pads has been slightly improved.
|{{control|Left}}, {{control|back}} and {{control|right}} controls added again.}}
{{History||1.8|snap=14w06a|[[Mob]]s riding boats can now control them, so that they can chase or flee enemies, move toward food, move about randomly, or whatever they would do on land. The exceptions are the [[ghast]] and [[bat]], both of which cannot control boats.}}
{{History||1.8.2|snap=pre2|Boats can now survive crashes at higher speeds.<!-- They have to be going 0.2975 now, rather than only 0.2. -->}}
{{History||1.9|snap=15w41a|[[File:Oak Boat JE2 BE1.png|32px]] [[File:Spruce Boat JE1 BE1.png|32px]] [[File:Birch Boat JE1 BE1.png|32px]] [[File:Jungle Boat JE1 BE1.png|32px]] [[File:Acacia Boat JE1 BE1.png|32px]] [[File:Dark Oak Boat JE1 BE1.png|32px]]<br>
[[File:Oak Boat (item) JE3 BE2.png|32px]] [[File:Spruce Boat (item) JE1 BE2.png|32px]] [[File:Birch Boat (item) JE1 BE2.png|32px]] [[File:Jungle Boat (item) JE1 BE2.png|32px]] [[File:Acacia Boat (item) JE1 BE2.png|32px]] [[File:Dark Oak Boat (item) JE1 BE2.png|32px]] Boats have been overhauled to match the boats from [[Pocket Edition v0.11.0 alpha|Pocket Edition Alpha 0.11.0]]. They now have oars for paddling and are more durable and now allows passengers to board.
|[[Mob]]s can now board boats, though they can no longer control them.
|A new set of controls have been introduced: it includes holding down the {{control|right}} and {{control|left}} keys to move forward, and using the {{control|right}} key to move the right oar, turning the boat to the left (and vice-versa). Mouse movement no longer turns boats, and the {{control|forward}} and {{control|back}} keys no longer have any effect.
|[[Player]]s can no longer {{control|use}} [[item]]s or {{control|attack}} from boats unless they were at a complete stop.
|The [[crafting]] recipe for boats has been changed to require a wooden [[shovel]] as shown below.
{{{!}} class{{=}}"collapsible collapsed" data-description{{=}}"Recipe"
! Recipe
{{!}}-
{{!}}
{{Crafting
|A2= Oak Planks |B2= Wooden Shovel |C2= Oak Planks
|A3= Oak Planks |B3= Oak Planks |C3= Oak Planks
|Output= Oak Boat
|ignoreusage=1
}}
{{!}}}
|The NBT [[tag]] {{code|Type}} (string) have now added for the boat [[entity]], taking values {{code|oak}}, {{code|spruce}}, {{code|birch}}, {{code|jungle}}, {{code|acacia}} and {{code|dark_oak}}.
|Boats no longer break [[snow|snow layers]] they run into.}}
{{History|||snap=15w42a|The new boats are now comparable in speed to the old boats (slightly faster than sprinting), though with less momentum.
|Players can now {{control|use}} items and {{control|attack}} immediately after they stop rowing.}}
{{History|||snap=15w43c|The texture of boats has been remapped, so that they now have a separate texture per oar and per side of the boat.}}
{{History|||snap=15w51a|Boats now [[drops|drop]] their corresponding [[planks]] when broken.}}
{{History|||snap=16w04a|Boats are now faster and now move forward and backward using the {{control|forward}} and {{control|backward}} keys respectively, and steer left and right using the {{control|left}} and {{control|right}} keys respectively. The rowing mechanism introduced in [[Java Edition 15w41a|15w41a]], holding the {{control|right}} and {{control|left}} keys, is removed and no longer moves the boat forward. The controls are now more similar to boats before the overhaul.
|Boats now sink when underwater, or within flowing water of any depth.
|The crafting recipe of boats has been restored to the original recipe, no longer requiring a wooden [[shovel]] as it has since 15w41a (though matching wood [[planks]] is still required).
|Riding a boat no longer subjects [[water]]-sensitive [[mob]]s to being damaged by water, and no longer protects sunlight-sensitive mobs from being damaged by sunlight.
|Dismounting in a boat now attempts to place the [[player]] on land.}}
{{History|||snap=16w05a|Boats now travel extremely fast on [[ice]], [[Packed Ice|packed ice]] and [[Frosted Ice|frosted ice]].<ref name="MC-97803"/>}}
{{History|||snap=16w06a|Riding [[entity|entities]] such as boats are now run by the client rather than by the server.}}
{{History||1.11|snap=16w32a|The entity ID has been changed from {{code|Boat}} to {{code|boat}}.
|The player's [[hunger]] bar is now visible when riding in a boat.}}
{{History|||snap=16w33a|Boats can now be used to fuel [[furnace]]s.}}
{{History|||snap=16w39c|Boats placed by dispensers now face the same way as the dispenser, instead of toward the dispenser.<ref>{{bug|MC-90074|||Fixed}}</ref>}}
{{History||1.12|snap=17w17a|A boat paddles [[sound]] has been added.}}
{{History||1.13|snap=17w47a|The oak boat ID has been changed from {{code|boat}} to {{code|oak_boat}}.
|Prior to [[Java Edition 1.13/Flattening|''The Flattening'']], these [[item]]s' numeral IDs were 333, 444, 445, 446, 447 and 448.}}
{{History|||snap=18w15a|Added [[Blue Ice|blue ice]], which allows boats to travel even faster on it.}}
{{History||1.14|snap=18w43a|[[File:Oak Boat JE3.png|32px]] [[File:Spruce Boat JE2.png|32px]] [[File:Birch Boat JE2.png|32px]] [[File:Jungle Boat JE2.png|32px]] [[File:Acacia Boat JE2.png|32px]] [[File:Dark Oak Boat JE2.png|32px]]<br>
[[File:Oak Boat (item) JE4 BE3.png|32px]] [[File:Spruce Boat (item) JE2 BE3.png|32px]] [[File:Birch Boat (item) JE2 BE3.png|32px]] [[File:Jungle Boat (item) JE2 BE3.png|32px]] [[File:Acacia Boat (item) JE2 BE3.png|32px]] [[File:Dark Oak Boat (item) JE2 BE3.png|32px]] The textures of all boats have been changed.}}
{{History||1.14|snap=18w50a|[[File:Oak Boat JE4 BE2.png|32px]] [[File:Spruce Boat JE3 BE2.png|32px]] [[File:Birch Boat JE3 BE2.png|32px]] [[File:Jungle Boat JE3 BE2.png|32px]] [[File:Acacia Boat JE3 BE2.png|32px]] [[File:Dark Oak Boat JE3 BE2.png|32px]] The textures of all boats have been changed to match the new [[planks]].}}
{{History|||snap=19w11a|Fisherman [[villager]]s now [[trading|buy]] boats.}}
{{History||1.15|snap=19w37a|Boats as fuel now [[smelting|smelt]] 6 [[item]]s in a [[furnace]] instead of 1.}}
{{History||1.16|snap=20w18a|Mobs in boats no longer [[Spawn#Despawning|despawn]].}}
{{History||1.19|snap=22w11a|[[File:Mangrove Boat JE1 BE1.png|32px]] [[File:Mangrove Boat (item) JE1 BE1.png|32px]] Added mangrove boats.}}
{{History|||snap=22w12a|Boats can now be used to craft boats with chests.
|[[File:Oak Boat (item) JE5.png|32px]] [[File:Spruce Boat (item) JE3 BE5.png|32px]] [[File:Birch Boat (item) JE3 BE4.png|32px]] [[File:Jungle Boat (item) JE3 BE4.png|32px]] [[File:Acacia Boat (item) JE3 BE4.png|32px]] [[File:Dark Oak Boat (item) JE3 BE4.png|32px]] The textures of all boat items (except mangrove) have been changed.<ref>{{bug|MC-94161|||Fixed}}</ref>}}
{{History|||snap=22w14a|Due to the addition of the [[mangrove tree]] and [[mangrove swamp]], mangrove boats are now obtainable and renewable.}}
{{History|||snap=22w15a|[[File:Oak Boat (item) JE6.png|32px]] [[File:Spruce Boat (item) JE4.png|32px]] [[File:Birch Boat (item) JE4.png|32px]] [[File:Jungle Boat (item) JE4.png|32px]] [[File:Acacia Boat (item) JE4.png|32px]] [[File:Dark Oak Boat (item) JE4.png|32px]] [[File:Mangrove Boat (item) JE2.png|32px]] The textures of all boat item textures have been changed.}}
{{History||October 15, 2022|link={{ytl|yZRXmHiEh7U&t}}|[[File:Bamboo Raft JE1 BE1.png|32px]] Bamboo rafts were announced at [[Minecraft Live 2022]].}}
{{History||1.20<br>(Experimental)|link=1.19.3|snap=22w42a|[[File:Bamboo Raft JE1 BE1.png|32px]] [[File:Bamboo Raft (item) JE1.png|32px]] Added bamboo rafts behind the [[Java Edition 1.20|Update 1.20 experimental datapack]].}}
{{History|||snap=22w45a|[[File:Bamboo Raft (item) JE2 BE2.png|32px]] The item texture of the bamboo raft has been changed.}}
{{History||1.20<br>(Experimental)|link=1.19.4|snap=23w07a|[[File:Cherry Boat JE1.png|32px]] [[File:Cherry Boat (item) JE1.png|32px]] Added cherry boats behind the [[Java Edition 1.20|Update 1.20 experimental datapack]].}}
{{History||1.20|snap=23w12a|Bamboo rafts and cherry boats are now available without using the "Update 1.20" experimental datapack.}}
{{History||1.20.2|snap=?|Riding height for mobs without a sitting position have been adjusted so their feet are at the bottom of the boat.}}
{{History|pocket alpha}}
{{History||September 19, 2014|link={{tweet|_tomcc|512935629026770944}}|[[Tommaso Checchi]] tweeted a picture of a [[player]] riding a boat, stating that the most important thing is to "get the paddling right."
|[[File:Minecart JE2 BE1.png|32px]] The model used by boats is currently a [[minecart]].}}
{{History||January 26, 2015|link={{tweet|_tomcc|559697958728654848}}|Tommaso Checchi tweets a screenshot of multiple riders in a single boat.
|[[File:Boat (pre-release).png|32px]] The model used by boats is now a minecart which has been squished vertically, and tinted brown.}}
{{History||February 20, 2015|link={{tweet|_tomcc|568844305491730432}}|Tommaso Checchi tweets a screenshot of multiple boats with only mobs in them.
|Boats now have a proper model with paddles.}}
{{History||v0.11.0|snap=build 1|[[File:Oak Boat JE2 BE1.png|32px]] [[File:Spruce Boat JE1 BE1.png|32px]] [[File:Birch Boat JE1 BE1.png|32px]] [[File:Jungle Boat JE1 BE1.png|32px]] [[File:Acacia Boat JE1 BE1.png|32px]] [[File:Dark Oak Boat JE1 BE1.png|32px]]<br>
[[File:Oak Boat (item) JE2 BE1.png|32px]] [[File:Oak Boat (item) JE2 BE1.png|32px]] [[File:Oak Boat (item) JE2 BE1.png|32px]] [[File:Oak Boat (item) JE2 BE1.png|32px]] [[File:Oak Boat (item) JE2 BE1.png|32px]] [[File:Oak Boat (item) JE2 BE1.png|32px]] Added boats. Each wood type has its own respective variant, though they share the same sprite as [[item]]s.
|Boats can support two riders, including [[mob]]s.
|Boats are larger in size than {{in|java}}.
|Boats are more resistant to crashing against land than {{in|java}}.}}
{{History|||snap=build 12|Projectiles can now be shot from boats.}}
{{History||v0.12.1|snap=build 1|Added all boat variants to the [[Creative]] [[inventory]].
|[[File:Oak Boat (item) JE3 BE2.png|32px]] [[File:Spruce Boat (item) JE1 BE2.png|32px]] [[File:Birch Boat (item) JE1 BE2.png|32px]] [[File:Jungle Boat (item) JE1 BE2.png|32px]] [[File:Acacia Boat (item) JE1 BE2.png|32px]] [[File:Dark Oak Boat (item) JE1 BE2.png|32px]] New [[inventory]] icons for boats have been added. The sprite now includes paddles and represents their respective wood color.}}
{{History||v0.13.0|snap=build 1|Boats are now slightly faster than sprinting, and no longer deplete [[hunger]].
|[[Player]]s can now {{control|use}} [[item]]s and {{control|attack}} immediately after they stop rowing.}}
{{History|||snap=build 3|Boats now stack on top of each other.}}
{{History|bedrock}}
{{History||1.2.0|snap=beta 1.2.0.22|Boats now move faster on [[ice]].}}
{{History||1.5.0|snap=beta 1.5.0.0|The steering of boats has been changed when using keyboard and mouse - W now moves the boat forward and S reverses it.}}
{{History|||snap=beta 1.5.0.4|Boats can now sink or float on [[Bubble Column|bubble column]]s.}}
{{History||1.10.0|snap=beta 1.10.0.3|[[File:Oak Boat JE4 BE2.png|32px]] [[File:Spruce Boat JE3 BE2.png|32px]] [[File:Birch Boat JE3 BE2.png|32px]] [[File:Jungle Boat JE3 BE2.png|32px]] [[File:Acacia Boat JE3 BE2.png|32px]] [[File:Dark Oak Boat JE3 BE2.png|32px]]<br>
[[File:Oak Boat (item) JE4 BE3.png|32px]] [[File:Spruce Boat (item) JE2 BE3.png|32px]] [[File:Birch Boat (item) JE2 BE3.png|32px]] [[File:Jungle Boat (item) JE2 BE3.png|32px]] [[File:Acacia Boat (item) JE2 BE3.png|32px]] [[File:Dark Oak Boat (item) JE2 BE3.png|32px]] The textures of all boats have been changed.}}
{{History||1.11.0|snap=beta 1.11.0.4|Boats can now be [[trading|bought]] from fisherman [[villager]]s.}}
{{History||1.16.0|snap=beta 1.16.0.57|[[Trading]] has been changed, master-level fisherman villagers now offer to [[trading|buy]] boats based on their villager [[biome]] outfit.
|Due to trading changes, birch boats can no longer be [[trading|sold]] to fisherman villagers.}}
{{History||1.16.100|snap=beta 1.16.100.51|Custom named boats now save their name after placing and breaking.}}
{{History|||snap=beta 1.16.100.56|The item ID {{code|boat}} has been split up into {{code|<type>_boat}}.}}
{{History||1.18.10|snap=beta 1.18.10.27|[[File:Oak Boat (item) BE4.png|32px]] [[File:Spruce Boat (item) BE4.png|32px]] [[File:Birch Boat (item) JE3 BE4.png|32px]] [[File:Jungle Boat (item) JE3 BE4.png|32px]] [[File:Acacia Boat (item) JE3 BE4.png|32px]] The item sprites of all boats have been changed. The paddles now represent their respective wood color (except spruce) and the inside rims of the boats are darker.
|[[File:Dark Oak Boat (item) JE3 BE4.png|32px]] An updated item sprite for dark oak boat has been added to the game files, but it's currently unused.<ref>{{bug|MCPE-151667}}</ref>}}
{{History||1.18.30|snap=beta 1.18.20.25|[[File:Spruce Boat (item) JE3 BE5.png|32px]] An updated item sprite for spruce boat has been added to the game files, but it's currently unused.<ref>{{bug|MCPE-152262}}</ref>}}
{{History|||snap=beta 1.18.20.27|Spruce and dark oak boats now correctly use their updated item sprites.}}
{{History||1.19.0|snap=beta 1.19.0.20|[[File:Mangrove Boat JE1 BE1.png|32px]] [[File:Mangrove Boat (item) JE1 BE1.png|32px]] Added mangrove boats.}}
{{History|||snap=beta 1.19.0.26|[[File:Oak Boat (item) JE6.png|32px]] [[File:Spruce Boat (item) JE4.png|32px]] [[File:Birch Boat (item) JE4.png|32px]] [[File:Jungle Boat (item) JE4.png|32px]] [[File:Acacia Boat (item) JE4.png|32px]] [[File:Dark Oak Boat (item) JE4.png|32px]] [[File:Mangrove Boat (item) JE2.png|32px]] Changed all boat item textures.}}
{{History||Next Major Update<br>(Experimental)|link=Bedrock Edition 1.19.50|snap=beta 1.19.50.21|[[File:Bamboo Raft JE1 BE1.png|32px]] [[File:Bamboo Raft (item) BE1.png|32px]] Added bamboo rafts behind the "[[Bedrock Edition 1.20|Next Major Update]]" [[experimental]] toggle.}}
{{History||Next Major Update<br>(Experimental)|link=Bedrock Edition 1.19.50|snap=beta 1.19.60.20|[[File:Bamboo Raft (item) JE2 BE2.png|32px]] The item texture of the bamboo raft has been changed to match ''[[Java Edition]]''.}}
{{History||Next Major Update<br>(Experimental)|link=Bedrock Edition 1.19.80|snap=beta 1.19.80.20|[[File:Cherry Boat JE1.png|32px]] [[File:Cherry Boat (item) JE1.png|32px]] Added cherry boats behind the "[[Bedrock Edition 1.20|Next Major Update]]" [[experimental]] toggle.}}
{{History||1.20.0|snap=beta 1.20.0.21|Bamboo rafts and cherry boats are now available without using the "Next Major Update" experimental toggle.}}
{{History||1.20.10|snap=beta 1.20.10.20|The [[wooden shovel]] in the crafting recipe has been removed for all boat types except the bamboo raft.}}
{{History|||snap=beta 1.20.10.21|The bamboo raft recipe no longer needs a wooden shovel.}}
{{History|console}}
{{History||xbox=TU1|xbone=CU1|ps=1.0|wiiu=Patch 1|switch=1.0.1|[[File:Oak Boat JE1.png|32px]] [[File:Oak Boat (item) JE2 BE1.png|32px]] Added boats.}}
{{History||xbox=TU12|The maximum number of boats in a world has been increased to 40.
|Boats now break when they hit land hard.}}
{{History||xbox=TU14|ps=1.04|Boats are no longer broken by [[Lily Pad|lily pad]]s anymore, instead they run straight through the lily pad now, breaking and sometimes dropping it.
|When boats crash, they can now sometimes [[drops|drop]] themselves as [[item]]s.
|Boats are now less glitchy and more responsive now.
|The maximum speed of boats has been increased.
|When exiting, [[player]]s now move from the boat.
|When broken by a player, they [[drops|drop]] a boat now.}}
{{History||xbox=TU46|xbone=CU36|ps=1.38|wiiu=Patch 15|[[File:Oak Boat JE2 BE1.png|32px]] [[File:Spruce Boat JE1 BE1.png|32px]] [[File:Birch Boat JE1 BE1.png|32px]] [[File:Jungle Boat JE1 BE1.png|32px]] [[File:Acacia Boat JE1 BE1.png|32px]] [[File:Dark Oak Boat JE1 BE1.png|32px]]<br>
[[File:Oak Boat (item) JE3 BE2.png|32px]] [[File:Spruce Boat (item) JE1 BE2.png|32px]] [[File:Birch Boat (item) JE1 BE2.png|32px]] [[File:Jungle Boat (item) JE1 BE2.png|32px]] [[File:Acacia Boat (item) JE1 BE2.png|32px]] [[File:Dark Oak Boat (item) JE1 BE2.png|32px]] Boats have been overhauled to match [[Pocket Edition v0.11.0 alpha|Pocket Edition Alpha 0.11.0]] boats.}}
{{History||xbox=TU57|xbone=CU49|ps=1.56|wiiu=Patch 27|switch=1.0.7|The [[crafting]] recipe of boats has been changed to require a wooden [[shovel]].}}
{{History||xbox=none|xbone=none|ps=1.90|wiiu=none|switch=none|[[File:Oak Boat JE4 BE2.png|32px]] [[File:Spruce Boat JE3 BE2.png|32px]] [[File:Birch Boat JE3 BE2.png|32px]] [[File:Jungle Boat JE3 BE2.png|32px]] [[File:Acacia Boat JE3 BE2.png|32px]] [[File:Dark Oak Boat JE3 BE2.png|32px]]<br>
[[File:Oak Boat (item) JE4 BE3.png|32px]] [[File:Spruce Boat (item) JE2 BE3.png|32px]] [[File:Birch Boat (item) JE2 BE3.png|32px]] [[File:Jungle Boat (item) JE2 BE3.png|32px]] [[File:Acacia Boat (item) JE2 BE3.png|32px]] [[File:Dark Oak Boat (item) JE2 BE3.png|32px]] The textures of all boats have been changed.}}
{{History|new 3ds}}
{{History||0.1.0|[[File:Oak Boat JE2 BE1.png|32px]] [[File:Spruce Boat JE1 BE1.png|32px]] [[File:Birch Boat JE1 BE1.png|32px]] [[File:Jungle Boat JE1 BE1.png|32px]] [[File:Acacia Boat JE1 BE1.png|32px]] [[File:Dark Oak Boat JE1 BE1.png|32px]]<br>
[[File:Oak Boat (item) JE3 BE2.png|32px]] [[File:Spruce Boat (item) JE1 BE2.png|32px]] [[File:Birch Boat (item) JE1 BE2.png|32px]] [[File:Jungle Boat (item) JE1 BE2.png|32px]] [[File:Acacia Boat (item) JE1 BE2.png|32px]] [[File:Dark Oak Boat (item) JE1 BE2.png|32px]] Added boats.}}
{{History|foot}}
==Issues ==
{{issue list}}
==Trivia==
*[[Sand]], [[Sand|red sand]], [[Concrete Powder|concrete powder]], [[gravel]], [[anvil]]s, and [[Dragon Egg|dragon egg]]s drop as [[Item (entity)|items]] when they fall onto a boat that is in water.
*A [[chest]] is short enough that a boat falls onto it rather than crashes into it.
*{{IN|console}}, holding the movement stick to the side in a boat on [[Blue Ice|blue ice]] causes the player to spin quickly. If a passenger is in the boat while this occurs, when the player exits the boat after it reaches maximum velocity (attained after about three seconds), for most mobs, the mob's head may spin uncontrollably. For some mobs, however, nothing happens (such as [[slime]]s and [[ghast]]s). The mob may also get its head stuck at an angle. Thorough testing was done on Minecraft: Wii U Edition, although the glitch was originally discovered on the Xbox 360 Edition.
==Gallery==
<gallery>
Oak Boat.png|Oak
Spruce Boat.png|Spruce
Birch Boat.png|Birch
Jungle Boat.png|Jungle
Acacia Boat.png|Acacia
Dark Oak Boat.png|Dark oak
Mangrove Boat.png|Mangrove
Cherry Boat.png|Cherry
Bamboo Raft.png|Bamboo raft
Oak Boat (item).png|Oak
Spruce Boat (item).png|Spruce
Birch Boat (item).png|Birch
Jungle Boat (item).png|Jungle
Acacia Boat (item).png|Acacia
Dark Oak Boat (item).png|Dark oak
Mangrove Boat (item).png|Mangrove
Cherry Boat (item).png|Cherry
Bamboo Raft (item).png|Bamboo raft
</gallery>
=== Screenshots ===
<gallery>
AllBoats.png|All types of boats next to each other.
Screenboat.png|The old boat floating.
BoatStackingFun.png|A bunch of pre-1.9 boats stacked up.
Boats boats boats boats!!.jpg|First image of boats in BE development.
I guess it's getting there.png|Second image of boats in BE development.
All aboard the hype boat!.png|Image of the completed Bedrock Edition boats.
Boatglitche.png|A trail of boats after a game crash while riding a boat.
BoatDock.png|A dock with many boats.
Minescape.png|A third-person perspective of a boat in [[Java Edition Alpha v1.0.6]].
</gallery>
=== Development Images ===
<gallery>
Jappa Boat.jpg|Jappa texturing a boat.
Nekofresa Making Bamboo Raft in Blockbench.png|Nekofresa making the bamboo raft in Blockbench.
Chiwi Boats 1.png|Boat item textures.
Chiwi Boats 2.png|Boat item textures.
Chiwi Boats 3.png|Boat item textures.
Chiwi Boats 4.png|Boat item textures.
</gallery>
=== Concept Art ===
<gallery>
Bamboo Raft Concept Art.png|Bamboo raft concept art.
Bamboo Raft and Raft with Chest Concept Art.png|Ditto.
</gallery>
=== Artwork ===
<gallery>
Sunny-boat.gif|Official artwork of [[Sunny]] riding a mangrove boat.
Mobile Adventure 640x960.png|Official artwork of [[Alex]] in a boat at sea with an [[Allay]].
File:Zuri Raft.jpg
Zuri on Bamboo Raft Pixel Art.png|Pixel art of [[Zuri]] on a bamboo raft with a baby [[panda]].
File:Cutout Blossom (Trails & Tales Event).png|Cutout of Zuri and [[Efe]] on bamboo rafts, featured in the [[Trails & Tales Event]].
File:This or That.jpg
File:Croc Ad 1.jpg|An oak boat as it appears in an advertisement for ''Crocs''.<ref> https://www.youtube.com/shorts/e1AJo7jU5MI</ref>
</gallery>
==See also==
*[[Transportation]]
==References==
{{reflist}}
== External Links ==
*[https://www.minecraft.net/en-us/article/taking-inventory--boat Taking Inventory: Boat] – Minecraft.net on October 4, 2019
{{Items}}
{{Entities}}
[[cs:Člun]]
[[de:Boot]]
[[es:Barca]]
[[fr:Bateau]]
[[hu:Csónak]]
[[it:Barca]]
[[ja:ボート]]
[[ko:보트]]
[[nl:Boot]]
[[pl:Łódka]]
[[pt:Bote]]
[[ru:Лодка]]
[[th:เรือ]]
[[uk:Човен]]
[[zh:船]]</li></ul> | Pre-release 3 | Wolves are now properly rendered in dark places. | |||
| Pocket Edition Alpha | |||||
v0.9.0{{Extension DPL}}<ul><li>[[Prismarine Shard|Prismarine Shard]]<br/>{{Item
| renewable = Yes
| stackable = Yes (64)
| type =
}}
A '''prismarine shard''' is an item obtained by defeating [[guardian]]s or [[elder guardian]]s. It can be used to craft various [[prismarine]] blocks as well as [[sea lantern]]s.
== Obtaining ==
Prismarine shards are dropped upon the death of [[guardian]]s and [[elder guardian]]s. From these mobs, 0–2 shards are dropped each time. This can be increased to a maximum of 5 with the [[Looting]] enchantment.
== Usage ==
=== Crafting ingredient ===
{{crafting usage}}
== Data values ==
=== ID ===
{{edition|java}}:
{{ID table
|edition=java
|showforms=y
|generatetranslationkeys=y
|displayname=Prismarine Shard
|spritetype=item
|nameid=prismarine_shard
|form=item
|foot=1}}
{{edition|bedrock}}:
{{ID table
|edition=bedrock
|showaliasids=y
|shownumericids=y
|showforms=y
|notshowbeitemforms=y
|generatetranslationkeys=y
|displayname=Prismarine Shard
|spritetype=item
|nameid=prismarine_shard
|aliasid=prismarineshard
|id=565
|form=item
|foot=1}}
== History ==
{{History|java}}
{{history||1.8|snap=14w25a|[[File:Prismarine Shard JE1 BE1.png|32px]] Added prismarine shards.}}
{{History||1.13|snap=17w47a|Prior to [[1.13/Flattening|''The Flattening'']], this [[item]]'s numeral ID was 409.}}
{{History||1.14|snap=18w43a|[[File:Prismarine Shard JE2 BE2.png|32px]] The texture of prismarine shards has now been changed.}}
{{History|pocket alpha}}
{{History||v0.16.0|snap=build 1|[[File:Prismarine Shard JE1 BE1.png|32px]] Added prismarine shards.}}
{{History|bedrock}}
{{History||1.10.0|snap=beta 1.10.0.3|[[File:Prismarine Shard JE2 BE2.png|32px]] The texture of prismarine shards has now been changed.}}
{{History|console}}
{{History||xbox=TU31|xbone=CU19|ps=1.22|wiiu=Patch 3|[[File:Prismarine Shard JE1 BE1.png|32px]] Added prismarine shards.}}
{{History||xbox=none|xbone=none|ps=1.90|wiiu=none|switch=none|[[File:Prismarine Shard JE2 BE2.png|32px]] The texture of prismarine shards has now been changed.}}
{{History|New 3DS}}
{{History||1.3.12|[[File:Prismarine Shard JE1 BE1.png|32px]] Added prismarine shards.}}
{{History|foot}}
== Issues ==
{{issue list}}
{{items}}
[[de:Prismarinscherbe]]
[[es:Fragmento de prismarina]]
[[fr:Éclat de prismarine]]
[[ja:プリズマリンの欠片]]
[[ko:프리즈머린 조각]]
[[nl:Prismarienscherf]]
[[pl:Odłamek pryzmarynu]]
[[pt:Pedaço de prismarinho]]
[[ru:Призмариновый осколок]]
[[uk:Призмариновий уламок]]
[[zh:海晶碎片]]
[[Category:Renewable resources]]</li><li>[[Recovery Compass|Recovery Compass]]<br/>{{About|the item used to point to the location of the player's last death|the item used to point to the world spawn or to a lodestone|Compass}}
{{Item
| image = Recovery Compass.gif
| renewable = No
| stackable = Yes (64)
}}
A '''recovery compass''' is an item used to point to the location of the [[Player|player's]] last death.
== Obtaining ==
=== Crafting ===
{{Crafting
|A1= Echo Shard |B1= Echo Shard |C1= Echo Shard
|A2= Echo Shard |B2= Compass |C2= Echo Shard
|A3= Echo Shard |B3= Echo Shard |C3= Echo Shard
|Output= Recovery Compass
|type= Tool
}}
== Usage ==
When held by a player, the recovery compass will point towards the spot where they previously died.
The recovery compass will only work when it is held by a player who has previously died and is in the same dimension as their last death. Otherwise, it will spin around randomly.
Like other items, the recovery compass itself will still drop when a player dies and the <code>keepInventory</code> [[game rule]] is not enabled.
This item is useless on Hardcore mode, as once the player dies, the player cannot respawn.
=== Enchantments ===
A recovery compass can receive the following [[enchantment]]s:
{| class="wikitable col-2-center col-3-right"
|+
!Name
!Max Level
![[Enchanting|Method]]
|-
|[[Curse of Vanishing]]{{only|bedrock|short=1}}
|I
|{{Inventory slot|Anvil}}
|-
|}
== Data values ==
{{Missing information|section|data values for Bedrock Edition|type=data}}
=== ID ===
[[Java Edition|''Java Edition'']]:
{{ID table|edition=java|displayname=Recovery Compass|nameid=recovery_compass|translationkey=item.minecraft.recovery_compass|generatetranslationkeys=y|showforms=y|spritetype=item|form=item|foot=1}}
==History==
{{History|java}}
{{History||1.19|snap=22w14a|[[File:Recovery Compass JE1 BE1.gif|32px]] Added recovery compasses.}}
{{History|||snap=22w15a|Recovery compasses can no longer be used on [[lodestone]]s and can no longer be enchanted with [[Curse of Vanishing]].}}
{{History|bedrock}}
{{History||1.19.0|snap=beta 1.19.0.24|[[File:Recovery Compass JE1 BE1.gif|32px]] Added recovery compasses.}}
{{History|foot}}
==Issues==
{{issue list}}
==Gallery==
<gallery>
File:Recovery Compass In An Item Frame.jpg|Recovery Compass.<ref>{{tweet|kingbdogz|1511751971673419782|Tell us what you think of the new Recovery Compass! We're hoping it improves how rewarding it feels to obtain Ancient City loot. Despite that, how do you feel about it? Will you use it? If so, how? What situations would you use it instead of just trying to remember?|April 6, 2022}}</ref>
</gallery>
==References==
{{reflist}}
== External Links ==
*[https://www.minecraft.net/en-us/article/taking-inventory--recovery-compass Taking Inventory:Recovery Compass] – Minecraft.net on January 19, 2023
{{Items}}
[[Category:Tools]]
[[Category:Non-renewable resources]]
[[de:Bergungskompass]]
[[es:Brújula de recuperación]]
[[fr:Boussole de récupération]]
[[ja:リカバリーコンパス]]
[[pl:Kompas powrotny]]
[[pt:Bússola de retomada]]
[[ru:Компас восстановления]]
[[th:เข็มทิศกู้คืน]]
[[uk:Компас відновлення]]
[[zh:追溯指针]]</li></ul> | build 1 | File:Wolf Revision 1.png File:Baby Wolf Revision 1.png Added wolves and pups. | |||
| File:Tamed Wolf with Red Collar Revision 1.png File:Baby Tamed Wolf Revision 1.png Wolves can be tamed and tamed wolves can be bred to make baby tamed pups. | |||||
| File:Angry Wolf Revision 1.png File:Baby Angry Wolf Revision 1.png When wolves and pups are hit by the player or the player's tamed wolves, they become angry. | |||||
| build 2 | Wolves now have sounds. | ||||
| build 9 | Wolves now have interact buttons at the bottom of the screen to tame and sit them. | ||||
v0.11.0{{Extension DPL}}<ul><li>[[Glass Bottle|Glass Bottle]]<br/>{{about|the empty bottle||Bottle}}
{{Item
| image = Glass Bottle.png
| renewable = Yes
| stackable = Yes (64)
}}
A '''glass bottle''' is an [[item]] that can hold [[water]], [[potion]]s, [[Honey Bottle|honey]], or [[dragon's breath]].
== Obtaining ==
Glass bottles can be obtained by crafting, drinking from bottles, [[fishing]], or from [[witch]] drops.
=== Crafting ===
{{Crafting
|A2= Glass
|C2= Glass
|B3= Glass
|Output= Glass Bottle,3
|type= Brewing
}}
=== Drinking ===
Drinking a [[potion]] or [[Honey Bottle|honey bottle]] returns the empty glass bottle. Throwing a splash potion or a lingering potion does not return a glass bottle, but brewing a lingering potion gives back a glass bottle.
=== Mob loot ===
[[Witch]]es have a chance of dropping 0–6 glass bottles upon death. This is increased by 3 per level of [[Looting]], for a maximum of 0–15 glass bottles.
=== Mud ===
{{control|Using}} a [[water bottle]], [[splash water bottle]] or [[lingering water bottle]] on [[dirt]], [[coarse dirt]] or [[rooted dirt]] will transforming it into a [[mud]] block, at the same time leaving the player with an empty glass bottle.
=== Cauldrons ===
{{control|Using}} a water bottle (or, {{in|bedrock}}, a potion, splash potion, or lingering potion) on a [[cauldron]] that is not yet full adds that liquid to the cauldron, leaving the player with an empty glass bottle.
== Usage ==
Glass bottles can be filled to make [[water bottle]]s, which can then be used to [[brew]] items with a [[brewing stand]]. Glass bottles are also used to hold the resulting [[potion]].
=== Collecting liquids ===
==== Water ====
A bottle may be filled with water by holding it in the hand and {{control|using}} it on a [[water]] source block or a [[cauldron]] that has water in it. It can also be filled using a waterlogged block.{{only|java}}<ref>{{bug|MCPE-83420}}</ref>
Also, a bottle may be filled by powering a [[dispenser]] containing a bottle and pointed at a water source block. This does not work with cauldrons.<ref>{{bug|MC-165196|||Invalid}}</ref>
If filled via a water source, the water is unaffected. If filled via a cauldron, {{frac|1|3}} of the water in the cauldron is removed. Therefore, using a cauldron to fill water bottles is inefficient, except in [[the Nether]] where it is normally the only way to fill bottles.
==== Potion ====
{{IN|bedrock}}, a bottle may be filled with potion by {{control|using}} it on a [[cauldron]] containing potion. When the bottle is filled, {{frac|1|3}} of the cauldron's potion is removed.
==== Honey ====
If a [[beehive|bee nest]] or [[beehive]] is full, the player can {{control|use}} a glass bottle on the block, or may power a [[dispenser]] that contains a bottle and is pointed at the block, which empties the block and creates a [[honey bottle]]. Honey bottles can also be emptied by using them in crafting recipes (such as [[sugar]] or [[honey block]]). However, a lingering potion use on tipped arrow recipe does not give the bottle back.
==== Dragon's breath ====
{{control|Using}} a glass bottle in clouds emitted when the [[ender dragon]] breathes or shoots a [[dragon fireball]] fills the bottle with [[dragon's breath]].
When put 2 or more dragon's breath in the brewing stand, after the brewing process, a glass bottle will drop as an [[Item (entity)|entity]]. However, if put only 1 dragon's breath in the brewing stand, after the brewing process, the glass bottle is consumed and cannot be retrieved.<ref>{{bug|MC-259583}}</ref>
=== Trading ===
Expert-level cleric [[villager]]s have a 50% chance to buy 9 glass bottles for one [[emerald]] as part of their trade.{{only|bedrock}}
Expert-level cleric villagers have a {{frac|2|3}} chance to buy 9 glass bottles for one emerald.{{only|java}}
=== Crafting ingredients ===
{{Crafting usage|Glass Bottle}}
== Sounds ==
{{edition|java}}:
{{Sound table
|rowspan=2
|sound=Bottle fill water1.ogg
|sound2=Bottle fill water2.ogg
|sound3=Bottle fill water3.ogg
|sound4=Bottle fill water4.ogg
|subtitle=Bottle fills
|source=block
|description=When a bottle is filled with a liquid from a cauldron, or honey from a bee nest or beehive
|id=item.bottle.fill
|translationkey=subtitles.item.bottle.fill
|volume=1.0
|pitch=1.0
|distance=16}}
{{Sound table
|subtitle=Bottle fills
|source=neutral
|description=When a bottle is filled with water from a water source
|id=item.bottle.fill
|translationkey=subtitles.item.bottle.fill
|volume=1.0
|pitch=1.0
|distance=16}}
{{Sound table
|sound=Bottle empty1.ogg
|sound2=Bottle empty2.ogg
|subtitle=Bottle empties
|source=block
|description=When a water bottle is emptied
|id=item.bottle.empty
|translationkey=subtitles.item.bottle.empty
|volume=1.0
|pitch=1.0
|distance=16}}
{{Sound table
|sound=Bottle fill dragon breath1.ogg
|sound2=Bottle fill dragon breath2.ogg
|subtitle=Bottle fills
|source=neutral
|description=When a bottle is filled with dragon's breath
|id=item.bottle.fill_dragonbreath
|translationkey=subtitles.item.bottle.fill
|volume=1.0
|pitch=1.0
|distance=16
|foot=1}}
{{edition|java}}:
{{Sound table
|type=bedrock
|rowspan=4
|sound=Water Splash Old.ogg
|source=block
|description=When water from a bottle is placed in a cauldron<wbr><ref group=sound name=potionsplash>{{Bug|MCPE-174867}}</ref>
|id=cauldron.fillwater
|volume=0.1
|pitch=1.0}}
{{Sound table
|source=block
|description=When water from a bottle is taken from a cauldron<wbr><ref group=sound name=potionsplash/>
|id=cauldron.takewater
|volume=0.1
|pitch=1.0}}
{{Sound table
|source=block
|description=When a bottle is filled with a potion from a cauldron<wbr><ref group=sound name=potionsplash/>
|id=cauldron.fillpotion
|volume=0.1
|pitch=1.0}}
{{Sound table
|source=block
|description=When a potion bottle is emptied into a cauldron<wbr><ref group=sound name=potionsplash/>
|id=cauldron.takepotion
|volume=0.1
|pitch=1.0}}
{{Sound table
|sound=Bottle empty1.ogg
|sound2=Bottle empty2.ogg
|source=sound<!--bottle-->
|description=When a bottle is emptied<wbr>{{Upcoming|BE 1.20.40}}
|id=bottle.empty
|volume=1.0
|pitch=1.0}}
{{Sound table
|sound=Bottle fill water1.ogg
|sound2=Bottle fill water2.ogg
|sound3=Bottle fill water3.ogg
|sound4=Bottle fill water4.ogg
|source=sound<!--bottle-->
|description=When a bottle is filled<wbr>{{Upcoming|BE 1.20.40}}
|id=bottle.fill
|volume=1.0
|pitch=1.0}}
{{Sound table
|sound=Fill water bucket1.ogg
|sound2=Fill water bucket2.ogg
|sound3=Fill water bucket3.ogg
|source=block
|description=When a bottle is filled with honey from a bee nest or beehive<wbr><ref group=sound>{{Bug|MCPE-53881}}</ref>
|id=bucket.fill_water
|volume=1.0
|pitch=1.0}}
{{Sound table
|sound=Bottle fill dragon breath1.ogg
|sound2=Bottle fill dragon breath2.ogg
|source=sound
|description=When a bottle is filled with dragon's breath
|id=bottle.dragonbreath
|volume=0.7<wbr>{{Until|BE 1.20.40}}<br>1.0<wbr>{{Upcoming|BE 1.20.40}}
|pitch=1.0
|foot=1}}
== Data values ==
=== ID ===
{{edition|java}}:
{{ID table
|edition=java
|showforms=y
|generatetranslationkeys=y
|displayname=Glass Bottle
|spritetype=item
|nameid=glass_bottle
|form=item
|foot=1}}
{{edition|bedrock}}:
{{ID table
|edition=bedrock
|shownumericids=y
|showforms=y
|notshowbeitemforms=y
|generatetranslationkeys=y
|displayname=Glass Bottle
|spritetype=item
|id=427
|nameid=glass_bottle
|form=item
|foot=1}}
== Achievements ==
{{Load achievements|You Need a Mint;Local Brewery;Bee Our guest}}
== Advancements ==
{{load advancements|Local Brewery;You Need a Mint;Bee Our Guest}}
== History ==
{{History|java}}
{{History||1.0.0|snap=Beta 1.9 Prerelease 2|[[File:Glass Bottle JE1 BE1.png|32px]] Added glass bottles.}}
{{History|||snap=Beta 1.9 Prerelease 3|[[File:Water Bottle JE1 BE1.png|32px]] Glass bottles have been given their sole function of picking up [[water]] for the [[brewing]] of [[potion]]s.}}
{{History||1.4.2|snap=12w38b|[[Witch]]es now have a chance of [[drops|dropping]] glass bottles upon [[death]].}}
{{history||1.9|snap=15w33a|[[File:Dragon's Breath JE1 BE1.png|32px]] Glass bottles can now be used to obtain [[dragon's breath]].}}
{{history|||snap=15w43a|A glass bottle can be found in the [[brewing stand]] in an [[igloo]] basement.}}
{{history|||snap=15w43c|The glass bottle has been removed from igloo basements.}}
{{History|||snap=15w50a|Added [[sound]]s: <code>item.bottle.fill</code> and <code>item.bottle.fill_dragonbreath</code>.}}
{{History||1.13|snap=17w47a|Prior to [[1.13/Flattening|''The Flattening'']], this [[item]]'s numeral ID was 374.}}
{{History||1.14|snap=18w43a|[[File:Glass Bottle JE2 BE2.png|32px]] [[File:Water Bottle JE2 BE2.png|32px]] [[File:Dragon's Breath JE2 BE2.png|32px]] The textures of glass bottles, [[water bottle]]s and [[dragon's breath]] have been changed.}}
{{History|||snap=19w11a|Cleric [[villager]]s now [[trading|buy]] glass bottles.}}
{{History||1.15|snap=19w34a|[[File:Honey Bottle JE1.png|32px]] Glass bottles can now be used to collect [[Honey Bottle|honey]].
|[[Dispenser]]s may now use glass bottles to collect [[water]] and honey.}}
{{History|||snap=19w46a|Using glass bottles to collect honey now unlocks the [[Bee Our Guest]] advancement.}}
{{History||1.19|snap=22w11a|Converting [[dirt]], [[coarse dirt]] or [[rooted dirt]] into [[mud]] using a [[water bottle]], [[splash water bottle]] or [[lingering water bottle]] now leaves the player with an empty glass bottle.}}
{{History|pocket alpha}}
{{History||v0.12.1|snap=build 1|[[File:Glass Bottle JE1 BE1.png|32px]] Added glass bottles.}}
{{History||v0.14.0|snap=build 1|Glass bottles can now be used to empty [[cauldron]]s filled with [[water]] or [[potion]]s.
|Glass bottles can now be dropped by [[witch]]es.
|Potions and [[splash potion]]s can now be used to fill cauldrons, which turns them into glass bottles.}}
{{History|pocket}}
{{History||1.0.0|snap=alpha 0.17.0.1|[[File:Dragon's Breath JE1 BE1.png|32px]] Glass bottles can now be used to obtain [[dragon's breath]].
|[[Lingering potion]]s can now be used to fill [[cauldron]]s, which turns them into glass bottles.}}
{{History|bedrock}}
{{History||1.10.0|snap=beta 1.10.0.3|[[File:Glass Bottle JE2 BE2.png|32px]] The texture of glass bottles has been changed.}}
{{History||1.11.0|snap=beta 1.11.0.4|Glass bottles can now be [[trading|sold]] to cleric [[villager]]s.}}
{{History||1.14.0|snap=beta 1.14.0.1|[[File:Honey Bottle BE1.png|32px]] Glass bottles can now be used to collect [[Honey Bottle|honey]].
|[[Dispenser]]s may now use glass bottles to collect [[water]] and honey.}}
{{History|console}}
{{History||xbox=TU7|xbone=CU1|ps=1.0|wiiu=Patch 1|[[File:Glass Bottle JE1 BE1.png|32px]] Added glass bottles.}}
{{History|PS4}}
{{History||1.90|[[File:Glass Bottle JE2 BE2.png|32px]] The texture of glass bottles has been changed.}}
{{History|new 3ds}}
{{History||0.1.0|[[File:Glass Bottle JE1 BE1.png|32px]] Added glass bottles.}}
{{History||1.7.10|[[File:Dragon's Breath JE1 BE1.png|32px]] Glass bottles can now be used to obtain [[dragon's breath]].}}
{{history|foot}}
== Issues ==
{{issue list}}
==References==
{{Reflist}}
{{Items}}
[[cs:Lahvička]]
[[de:Glasflasche]]
[[es:Frasco de cristal]]
[[fr:Fiole]]
[[hu:Üvegpalack]]
[[it:Ampolla]]
[[ja:ガラス瓶]]
[[ko:유리병]]
[[nl:Glazen fles]]
[[pl:Szklana butelka]]
[[pt:Frasco]]
[[ru:Колба]]
[[zh:玻璃瓶]]
[[Category:Renewable resources]]</li><li>[[Cocoa Beans|Cocoa Beans]]<br/>{{Block
|image=<gallery>
Cocoa Age 0.png|Age 0 JE
Cocoa Age 1.png|Age 1 JE
Cocoa Age 2.png|Age 2 JE
</gallery>
|image2=<gallery>
Cocoa Age 0 BE.png|Age 0 BE
Cocoa Age 1 BE.png|Age 1 BE
Cocoa Age 2 BE.png|Age 2 BE
</gallery>
|transparent=Yes
|light=No
|tool=axe
|renewable=Yes
|stackable=Yes (64)
|flammable=No
|lavasusceptible=No
}} '''Cocoa beans''' are items obtained from cocoa pods and are used to plant them, as well as to craft [[dye|brown dye]] and [[cookie|cookies]].
'''Cocoa pods''' are [[Bone Meal|bonemealable]] [[plant]]s placed on [[Log|jungle log]] sides that grow cocoa beans, and can be found naturally in [[Jungle|jungles]].
==Obtaining==
In ''Java Edition'', cocoa beans are only obtained through the natural generation of cocoa pods, while in ''Bedrock Edition'', they can also be gotten in bonus chests, from [[fishing]] inside the jungle, bamboo jungle and sparse jungle biomes and during a [[trading]] with a wandering trader.
Cocoa beans come from cocoa pods, which are found on the trunks of normal-sized naturally-generated [[jungle tree]]s in [[jungle]], [[bamboo jungle]]s and [[sparse jungle]] temperate [[biome]]s.
Cocoa pods can be mined with any item, but [[axe]]s are the quickest. Fully grown cocoa pods drop 3 cocoa beans. Using a tool enchanted with Fortune does not increase the amount of cocoa beans dropped.
{{breaking row|horizontal=1|Cocoa|Axe|sword=1|link=none}}
The block itself can be obtained by inventory editing or [[add-on]]s {{in|bedrock}}.
From one to two cocoa beans can be found in 40% of bonus [[chest]]s {{in|bedrock}}.
{{LootChestItem|cocoa-beans}}
Cocoa beans can be obtained from [[fishing]] in a jungle {{in|bedrock}}.
[[Wandering trader]]s may sell 3 cocoa beans for an [[emerald]] during a [[trading]] {{in|bedrock}}.
==Usage==
===Farming===
{{main|Tutorials/Cocoa bean farming}}
Placing cocoa beans on the side of a jungle [[log]] plants a new cocoa pod. The log does not need to be attached to a tree. A cocoa pod can be placed on jungle logs, jungle [[wood]], stripped jungle logs and stripped jungle wood.
[[File:Cocoaplant farm.png|thumb|left|A somewhat efficient cocoa pod farm, minimizing space and wood use.]]
Cocoa has three stages of growth. During its first stage, the pod is small and green. In the second stage, the plant is bigger and colored tan. In its last stage, the pod is even larger and orange. The cocoa block has a 20% chance to grow a stage when receiving a [[Tick#Random tick|random tick]], giving it an average time of 5 minutes and 41 seconds per stage. When destroyed in the first two stages, the pod yields only one cocoa bean. When destroyed in the third stage, it gives 3 cocoa beans. [[Bone meal]] can be used to force the cocoa pod forward by one growth stage. Cocoa pods burst and drop their beans when struck by flowing water, pushed by a piston or if their [[log]] or wood are removed by any means.
===Composting===
Placing cocoa beans into a [[composter]] has a 65% chance of raising the compost level by 1. {{IN|bedrock}}, cocoa beans are accepted as a direct substitute of brown dye in many recipes.
===Crafting ingredient===
{{crafting usage}}
{{Dye usage}}
{{IN|bedrock}}, cocoa beans can be also used in banner patterns:
{{banner crafting usage}}
{{Banner loom usage|Cocoa Beans}}
==Sounds==
{{Sound table/Block/Wood}}
==Data values==
===ID===
{{edition|java}}:
{{ID table
|edition=java
|showforms=y
|generatetranslationkeys=y
|displayname=Cocoa
|spritetype=block
|nameid=cocoa
|form=block}}
{{ID table
|displayname=Cocoa Beans
|spritetype=item
|nameid=cocoa_beans
|form=item
|foot=1}}
{{edition|bedrock}}:
{{ID table
|edition=bedrock
|showforms=y
|showaliasids=y
|shownumericids=y
|generatetranslationkeys=y
|displayname=Cocoa
|spritetype=block
|nameid=cocoa
|id=127
|form=block}}
{{ID table
|displayname=Cocoa Beans
|spritetype=item
|nameid=cocoa_beans
|aliasid=dye / 3
|id=412
|form=item
|translationkey=item.dye.brown.name
|foot=1}}
===Block states===
{{see also|Block states}}
{{/BS}}
==History==
''For a more in-depth breakdown of changes to textures and models, including a set of renders for each state combination, see [[/Asset history]]''
{{History|java beta}}
{{History||1.2|[[File:Cocoa Beans JE1 BE1.png|32px]] Added cocoa beans.
|Cocoa beans are currently obtainable only through an inventory editor.}}
{{History||1.2_02|Prior to this, Cocoa Beans were misspelled as 'Coco Beans'.}}
{{History||1.4|Cocoa beans have been formally brought into the game as a reward found in [[dungeon]] chests.<ref>{{tweet|notch|53161729990987776}}</ref> (53% chance) Also, brown [[sheep]] now naturally spawn, making brown [[wool]] obtainable without hacking the game.
|Cocoa beans can now be used to craft [[cookie]]s.}}
{{History|java}}
{{History||May 8, 2012|link={{tweet|jeb|199867730927697920}}|[[Jeb]] revealed cocoa with a screenshot.}}
{{History||1.3.1|snap=12w18a|For only this snapshot, cocoa beans have been given a small (0.5%) chance of dropping from destroyed [[jungle tree]] [[leaves]] in a similar fashion to [[apple]]s from oak leaves, which makes cocoa beans [[renewable resource|renewable]] for the first time.}}
{{History|||snap=12w19a|[[File:Cocoa Age 0 (S) JE1.png|32px]] [[File:Cocoa Age 1 (S) JE1.png|32px]] [[File:Cocoa Age 2 (S) JE1.png|32px]] Added cocoa. The top textures of cocoa always keep a completely constant rotation, regardless of what direction they face. They also not shaded.
|[[File:Cocoa Beans JE2.png|32px]] The texture of cocoa beans has been changed.
|Cocoa has replaced jungle [[leaves]] as the main method of finding cocoa beans.
|[[File:Cocoa Age 3 (S) JE1.png|32px]] Cocoa with values 12–15 is inaccessible normally, and use the texture of the [[dragon egg]]. This is due to the dragon egg texture being to the left of the ripe cocoa texture in <samp>[[terrain.png]]</samp>, as cocoa textures are arranged with the oldest on the left and the youngest on the right, resulting in the unusually ripe cocoa reading the dragon egg texture.}}
{{History|||snap=1.3|[[File:Cocoa Beans JE3 BE2.png|32px]] The texture of cocoa beans has been changed.}}
{{History||1.4.2|snap=12w34a|Cocoa beans have been given the ability to [[Armor#Dyeing|dye]] leather [[armor]] and [[wolf]] collars.}}
{{History||1.4.6|snap=12w49a|Cocoa beans can now be [[crafting|crafted]] with [[gunpowder]] to create a [[firework star]].}}
{{History||1.5|snap=13w02a|Due to textures being stored in individual files, cocoa beans with data 12–15 no longer have a texture to use, and now crash the game if a [[chunk]] containing one is loaded.}}
{{History|||snap=13w03a|Cocoa with data values 12–15 now only crash the game if one is directly in the field of view.}}
{{History|||snap=13w04a|[[Bone meal]] now grows cocoa by only one stage.}}
{{History|||snap=13w10a|[[File:Cocoa Age 3 (S) JE2.png|32px]] Cocoa with data 12–15 now use the age 2 texture, resulting in a broken appearance, preventing previously mentioned crashes.}}
{{History||1.6.1|snap=13w18a|Cocoa beans have been removed from [[dungeon]] [[chest]]s.}}
{{History|||snap=13w19a|Brown [[Terracotta|stained clay]] can now be [[crafting|crafted]] using cocoa beans.}}
{{History||1.7.2|snap=13w41a|Brown [[stained glass]] can now be crafted using cocoa beans.}}
{{History||1.8|snap=14w07a|[[File:Cocoa Age 0 (S) JE2.png|32px]] [[File:Cocoa Age 1 (S) JE2.png|32px]] [[File:Cocoa Age 2 (S) JE2.png|32px]] [[File:Missing Model JE1.png|32px]] The top textures of cocoa now rotate with the blocks themselves (cocoa facing north remaining visually unaffected), and cocoa of age 3 has [[Missing model|no model]].}}
{{History|||snap=14w10a|[[File:Cocoa Age 0 (S) JE3.png|32px]] [[File:Cocoa Age 1 (S) JE3.png|32px]] [[File:Cocoa Age 2 (S) JE3.png|32px]] [[File:Missing Model JE2.png|32px]] The large section of cocoa is shaded, and the missing model (which age 3 cocoa uses) has changed.}}
{{History|||snap=14w25a|[[File:Cocoa Age 0 (S) JE4.png|32px]] [[File:Cocoa Age 1 (S) JE4.png|32px]] [[File:Cocoa Age 2 (S) JE4.png|32px]] The connecting region of cocoa is now shaded.}}
{{History|||snap=14w26a|Cocoa with data 12–15 has been effectively removed from the game, as such blocks now convert to a proper value with {{cmd|setblock}}. Loading worlds with existing out of range cocoa crash the game.}}
{{History|||snap=14w30a|Cocoa beans can now be used to dye [[banner]]s.}}
{{History||1.13|snap=17w47a|The different data values for the <code>dye</code> ID have been split up into their own IDs.
|Prior to [[1.13/Flattening|''The Flattening'']], this block's and item's numeral ID were respectively 127 and 351.}}
{{History||1.14|snap=18w43a|Cocoa beans can now be used to craft [[brown dye]].
|Cocoa beans can no longer be used as a [[dye]].
|All of the dye-related functions and crafting recipes of cocoa beans (except cookies) have been transferred to brown dye.
|"Cocoa Beans" item has been renamed to "Cocoa".
|[[File:Cocoa Beans JE4 BE3.png|32px]] The texture of cocoa has been changed.
|[[File:Cocoa Age 0 (S) JE5.png|32px]] [[File:Cocoa Age 1 (S) JE5.png|32px]] [[File:Cocoa Age 2 (S) JE5.png|32px]] The textures of cocoa have been changed.
|[[File:Cocoa Age 0 (texture) JE2 BE2.png|32px]] [[File:Cocoa Age 1 (texture) JE2 BE2.png|32px]] Textures for cocoa age 0 and 1 has palette left, visible only on particles.
|Cocoa now has a placement [[sound]].}}
{{History|||snap=19w03a|Placing cocoa into the new [[composter]] has a 50% chance of raising the compost level by 1.}}
{{History|||snap=19w05a|Cocoa now has a 65% chance of increasing the compost level in a composter by 1.}}
{{History|||snap=19w11b|"Cocoa" item has been renamed back to "Cocoa Beans".{{verify|was this not just one bug that affected other crops as well? if so cite the ticket and add to all other affected pages}}}}
{{History||1.18|snap=Pre-release 5|[[File:Cocoa Age 0 (texture) JE3 BE3.png|32px]] [[File:Cocoa Age 1 (texture) JE3 BE3.png|32px]] Textures for cocoa age 0 and 1 were changed. This visually changes only particles.}}
{{History||1.19|snap=22w11a|[[File:Cocoa Age 2 (S) JE6.png|32px]] The texture and model of cocoa age 2 have been changed.}}
{{History|pocket alpha}}
{{History||v0.3.0|[[File:Cocoa Beans JE1 BE1.png|32px]] Added cocoa beans. They are currently unobtainable and serve no purpose.}}
{{History||v0.8.0|snap=build 1|[[File:Cocoa Beans JE3 BE2.png|32px]] The texture of cocoa beans has been changed.
|Cocoa beans can be [[crafted]] from an [[orange dye]] and an [[ink sac]], or from [[dandelion yellow]], [[rose red]], and an ink sac, despite there being no way of obtaining ink sacs at the time.}}
{{History|||snap=build 3|Cocoa beans are now available in [[creative]].}}
{{History||v0.9.0|snap=build 1|[[File:Cocoa Age 0 (S) JE1.png|32px]] [[File:Cocoa Age 1 (S) JE1.png|32px]] [[File:Cocoa Age 2 (S) JE1.png|32px]] {{info needed|How did 12-16 appear?}} Added cocoa.
|Cocoa provides an additional way of obtaining cocoa beans.
|Cocoa beans are now used to craft [[cookie]]s.}}
{{History||v0.11.0|snap=build 14|Cocoa now grows over time.<ref>{{bug|MCPE-7887}}</ref>}}
{{History||?|[[File:Cocoa Age 0 (S) BE4.png|32px]] [[File:Cocoa Age 1 (S) BE4.png|32px]] [[File:Cocoa Age 2 (S) BE2.png|32px]] Cocoa no longer has a stem connecting it to the log.}}
{{History||v0.15.0|snap=Realms build 4|[[File:Cocoa Age 0 (S) JE1.png|32px]] [[File:Cocoa Age 1 (S) JE1.png|32px]] [[File:Cocoa Age 2 (S) JE1.png|32px]] Cocoa stems now render again.<ref>{{bug|MCPE-13579}}</ref>}}
{{History||v0.16.0|snap=build 1|Cocoa beans can no longer be crafted from [[orange dye]] and an ink sac.
|Cocoa beans can no longer be crafted from rose red, dandelion yellow and ink sacs.}}
{{History|pocket}}
{{History||1.0.0|snap=alpha 0.17.0.1|Cocoa beans can now be used to dye [[shulker]]s.}}
{{History||1.1.0|snap=alpha 1.1.0.0|Cocoa beans can now be used to dye [[shulker box]]es and [[bed]]s.
|Cocoa beans can now be used to craft [[concrete powder]].}}
{{History|bedrock}}
{{History||1.2.0|snap=beta 1.2.0.2|Cocoa beans can now be used to dye [[banner]]s, [[firework star]]s, and [[glass]].
|Cocoa beans can now be found in [[bonus chest]]s.}}
{{History||1.4.0|snap=beta 1.2.20.1|Cocoa beans can now be used to craft brown [[balloon]]s and [[glow stick]]s.}}
{{History||1.8.0|snap=beta 1.8.0.10|Cocoa beans can now be used to craft [[brown dye]].}}
{{History||1.10.0|snap=beta 1.10.0.3|Cocoa beans are now [[trading|sold]] by [[wandering trader]]s.
|[[File:Cocoa Beans JE4 BE3.png|32px]] The texture of cocoa beans has been changed.
|[[File:Cocoa Age 0 (S) BE4.png|32px]] [[File:Cocoa Age 1 (S) BE4.png|32px]] [[File:Cocoa Age 2 (S) BE4.png|32px]] The textures of cocoa have been changed.}}
{{History||1.11.0|snap=beta 1.11.0.1|Cocoa beans can now be used to fill up [[composter]]s.}}
{{History||1.16.100|snap=beta 1.16.100.56|The ID of cocoa beans has been changed from <code>dye/3</code> to <code>cocoa_beans</code>.}}
{{History||1.18.10|snap=beta 1.18.10.22|[[File:Cocoa Age 0 (texture) JE3 BE3.png|32px]] [[File:Cocoa Age 1 (texture) JE3 BE3.png|32px]] Textures for cocoa age 0 and 1 were changed. This visually changes only particles.}}
{{History|console}}
{{History||xbox=TU1|xbone=CU1|ps=1.0|wiiu=Patch 1|switch=1.0.1|[[File:Cocoa Beans JE1 BE1.png|32px]] Added cocoa beans.}}
{{History||xbox=TU9|[[File:Cocoa Beans JE3 BE2.png|32px]] The texture of cocoa beans has been changed.}}
{{History||xbox=TU12|[[File:Cocoa Age 0 (S) JE3.png|32px]] [[File:Cocoa Age 1 (S) JE3.png|32px]] [[File:Cocoa Age 2 (S) JE3.png|32px]]{{verify|Were these the models used?}} Added cocoa.}}
{{History||xbox=none|xbone=none|ps=1.90|wiiu=none|switch=none|[[File:Cocoa Beans JE4 BE3.png|32px]] The texture of cocoa beans has been changed once again.
|[[File:Cocoa Age 0 (S) JE5.png|32px]] [[File:Cocoa Age 1 (S) JE5.png|32px]] [[File:Cocoa Age 2 (S) JE5.png|32px]]{{verify|Were these the models used?}} The textures of cocoa have been changed.}}
{{History|new 3ds}}
{{History||0.1.0|[[File:Cocoa Beans JE3 BE2.png|32px]] Added cocoa beans.
|[[File:Cocoa Age 0 (S) JE3.png|32px]] [[File:Cocoa Age 1 (S) JE3.png|32px]] [[File:Cocoa Age 2 (S) JE3.png|32px]]{{verify|Were these the models used?}} Added cocoa.}}
{{History|foot}}
=== Cocoa "item" ===
{{:Technical blocks/Cocoa}}
== Issues ==
{{issue list|Cocoa Beans|Cocoa Pod}}
== Trivia ==
*Cocoa pods have a different hitbox for each size; however, the top is always 0.25 blocks below the top of the [[log]] it is on.
*If a cocoa pod grows while the player is standing next to it, the player is forced into the appropriate form of [[suffocation prevention]] depending on available space.
*{{IN|be}}, the pixels on top of the fully grown pod are 8/7 the size of those on the side.<ref>{{bug|MC-109055||Fixed}}</ref><ref>{{bug|MCPE-152862}}</ref>
== Gallery ==
<gallery>
CocoaReveal.png|The first screenshot of cocoa pods tweeted by [[Jens Bergensten]], which revealed the plants.
CocoaPlant.png|A screenshot tweeted by Jens Bergensten, showing the pod.
Cocoa Plants in a Jungle Biome (12w19a).png|Naturally generated cocoa pods.
CPlantsJWood.png|A cocoa pod farm.
Cocoa2.jpg|A cocoa farm.
Cocoa beans phases.png|Three growing phases of the cocoa pod.
AreaOptimizedBeanPods.gif|A log and pod layout for optimizing an example area of 14×14 (including walls).
File:CocoaBean15.png|Cocoa beans with values greater than 12 appeared this way
</gallery>
==Literature==
===References===
{{reflist}}
===External Links===
*[https://www.minecraft.net/en-us/article/taking-inventory--cocoa-beans Taking Inventory: Cocoa Beans] – Minecraft.net on December 5, 2019
{{Items}}
{{Blocks|vegetation}}
[[Category:Dyes]]
[[Category:Food]]
[[Category:Plants]]
[[Category:Renewable resources]]
[[Category:Non-solid blocks]]
[[Category:Natural blocks]]
[[cs:Kakaové boby]]
[[de:Kakaobohnen]]
[[es:Semillas de cacao]]
[[fr:Fèves de cacao]]
[[hu:Kakaóbab]]
[[ja:カカオ豆]]
[[ko:코코아 콩]]
[[nl:Cacaobonen]]
[[pl:Ziarna kakaowe]]
[[pt:Sementes de cacau]]
[[ru:Какао-бобы]]
[[uk:Какао-боби]]
[[zh:可可豆]]</li></ul> | build 1 | Wolves' collars are now dyeable. | |||
v0.12.1{{Extension DPL}}<ul><li>[[:Category:Minecraft Legends resources|Category:Minecraft Legends resources]]<br/>[[Category:Minecraft Legends]]
[[Category:Items]]
[[pt:Categoria:Recursos do Minecraft Legends]]</li><li>[[Wheat Seeds|Wheat Seeds]]<br/>{{Block
| group = Age 0
| 1-1 = Wheat Age 0.png
| 1-2 = Wheat Age 0 BE.png
| group2 = Age 7
| 2-1 = Wheat Age 7.png
| 2-2 = Wheat Age 7 BE.png
| image = Wheat Seeds.png
| extratext = [[#Renders|View all renders]]
| invimage = Wheat Seeds
| transparent = Yes
| light = No
| tool = N/A
| renewable = Yes
| stackable = Yes (64)
| flammable = No
| lavasusceptible = No
}}
'''Wheat seeds''' ({{in|java}}) or '''seeds''' ({{in|bedrock}}) are [[item]]s obtained by breaking [[grass]], or more abundantly harvested from wheat crops, and are used to plant them.
'''Wheat crops''' are planted in [[farmland]] and used to grow [[wheat]] and wheat seeds.
== Obtaining ==
=== Breaking ===
Harvesting fully-grown [[wheat]] [[crops]] yields from 1 to 4 seeds per crop harvested (about {{frac|2|5|7}} seeds/crop harvested on average).
In '''Bedrock edition''' yields are 0-3.[https://bugs.mojang.com/browse/MCPE-169402]<sup><nowiki>https://bugs.mojang.com/browse/MCPE-169402</sup>
Wheat seeds can be obtained from breaking all variants of [[grass]], which yields 0 to 1 seed. If harvested with a [[Fortune]] enchanted tool the drop rate from grass is increased.
The looting is calculated by a binomial distribution: a drop is attempted three times with a success rate of around 57% to yield the 0–3 drops. Each level of Fortune enchantment increases the number of attempts by one.
{| class="wikitable"
! rowspan="3" |[[Resource location]]
! rowspan="3" | Source
! colspan="5" | Drops
|- style="text-align:center"
! rowspan="2" |{{ItemLink|Wheat}}
! colspan="4" |{{ItemText|Wheat Seeds}}
|- style="text-align:center"
! Default tool
! With [[Fortune]] I
! With Fortune II
! With Fortune III
|- style="text-align:center"
| rowspan="2" |<code>blocks/wheat</code>
|{{BlockLink|Wheat}} (age 0–6)
| 0 {{ItemSprite|Wheat}}
| 1 {{ItemSprite|Wheat Seeds}}|| 1 {{ItemSprite|Wheat Seeds}}|| 1 {{ItemSprite|Wheat Seeds}}|| 1 {{ItemSprite|Wheat Seeds}}
|- style="text-align:center"
|{{BlockLink|Wheat}} (age 7)
| 1 {{ItemSprite|Wheat}}
| 1 {{ItemSprite|Wheat Seeds}} (~7.87%) ''or''<br>2 {{ItemSprite|Wheat Seeds}} (~31.49%) ''or''<br>3 {{ItemSprite|Wheat Seeds}} (~41.98%) ''or''<br>4 {{ItemSprite|Wheat Seeds}} (~18.66%)
| 1 {{ItemSprite|Wheat Seeds}} (~3.37%) ''or''<br>2 {{ItemSprite|Wheat Seeds}} (~17.99%) ''or''<br>3 {{ItemSprite|Wheat Seeds}} (~35.98%) ''or''<br>4 {{ItemSprite|Wheat Seeds}} (~31.99%) ''or''<br>5 {{ItemSprite|Wheat Seeds}} (~10.66%)
| 1 {{ItemSprite|Wheat Seeds}} (~1.44%) ''or''<br>2 {{ItemSprite|Wheat Seeds}} (~9.64%) ''or''<br>3 {{ItemSprite|Wheat Seeds}} (~25.70%) ''or''<br>4 {{ItemSprite|Wheat Seeds}} (~34.27%) ''or''<br>5 {{ItemSprite|Wheat Seeds}} (~22.85%) ''or''<br>6 {{ItemSprite|Wheat Seeds}} (~6.09%)
| 1 {{ItemSprite|Wheat Seeds}} (~0.62%) ''or''<br>2 {{ItemSprite|Wheat Seeds}} (~4.96%) ''or''<br>3 {{ItemSprite|Wheat Seeds}} (~16.52%) ''or''<br>4 {{ItemSprite|Wheat Seeds}} (~29.38%) ''or''<br>5 {{ItemSprite|Wheat Seeds}} (~29.38%) ''or''<br>6 {{ItemSprite|Wheat Seeds}} (~15.67%) ''or''<br>7 {{ItemSprite|Wheat Seeds}} (~3.48%)
|}
=== Natural generation ===
[[Village]] farm plots have a chance of being wheat crops. The exact chance depends on the style of the village:
{| class="wikitable"
! Village style !! Chance
|-
| {{EnvSprite|savanna-village}} Savanna || 80%
|-
| {{EnvSprite|desert-village}} Desert || 70%
|-
| {{EnvSprite|taiga-village}} Taiga || 60%
|-
| {{EnvSprite|plains-village}} Plains || 50%
|-
| {{EnvSprite|snowy-village}} Snowy || 20%
|}
=== Chest loot ===
{{LootChestItem|wheat-seeds}}
=== Trading ===
[[Wandering trader]]s sell wheat seeds for an [[emerald]].
=== Villager gifts ===
{{exclusive|java|section=1}}
Nitwit and unemployed [[villager]]s throw wheat seeds at players under the [[Hero of the Village]] effect.
== Usage ==
=== Crop ===
{{main|Tutorials/Crop farming|title1=Crop Farming}}
[[File:Crop states.png|thumb|Different stages of crop growth.]]
Wheat seeds can be placed on [[farmland]] by right-clicking, where they grow through eight stages. When left alone, wheat seeds planted on farmland grow to become wheat crops, which can be harvested by the player. Planted seeds require a light level of 9 or greater to continue growing. If the light level is 7 or below, the crops instantly un-plant themselves ("pop off"). It is not possible to plant seeds if the light level is too low.
Crops grow faster if the farmland they are planted in is [[Farmland#Hydration|hydrated]]. Using [[bone meal]] on crops also increases the speed of growth by randomly increasing their growth stage by 2 to 5.
Breaking the final stage produces 1 to 4 wheat seeds (or more with Fortune) and 1 [[wheat]]. If they are harvested early, they drop 1 seed without any wheat. Crops break if pushed by a [[piston]] or if their supporting farmland breaks or turns to dirt (i.e. by being trampled), dropping their usual drops.
=== Breeding ===
Like other seeds, wheat seeds can be used to breed [[chicken]]s and reduce the remaining growth duration of baby chickens by 10%. Chickens also follow a player holding wheat seeds.
=== Taming ===
Like other seeds, wheat seeds can be used to tame [[parrot]]s.
=== Composting ===
Placing wheat seeds into a [[composter]] has a 30% chance of raising the compost level by 1. A stack of wheat seeds yields an average of 2.74 [[bonemeal]].
== Sounds ==
{{Sound table/Block/Crop}}
== Data values ==
=== ID ===
{{edition|java}}:
{{ID table
|edition=java
|showblocktags=y
|showforms=y
|generatetranslationkeys=y
|displayname=Wheat Crops
|spritetype=block
|nameid=wheat
|blocktags=bee_growables, crops
|form=block}}
{{ID table
|displayname=Wheat Seeds
|spritetype=item
|nameid=wheat_seeds
|form=item
|foot=1}}
{{edition|bedrock}}:
{{ID table
|edition=bedrock
|shownumericids=y
|showforms=y
|generatetranslationkeys=y
|displayname=Wheat
|spritetype=block
|nameid=wheat
|id=59
|form=block
|itemform=item.wheat}}
{{ID table
|displayname=Seeds
|spritetype=item
|nameid=wheat_seeds
|id=291
|form=item
|foot=1}}
=== Block states ===
{{see also|Block states}}
{{/BS}}
== Advancements ==
{{load advancements|A Seedy Place}}
== History ==
''For a more in-depth breakdown of changes to wheat textures and models, including a set of renders for each state, see [[/Asset history]]''
{{History|java classic}}
{{History||May 21, 2009|link=wordofnotch:110762705|[[Notch]] shows interest in adding [[crops]] on [[farmland]].}}
{{History|java indev}}
{{History||Minecraft Indev|snap=20100206|link=Minecraft Indev|slink=Java Edition Indev 20100206|[[File:Wheat Seeds JE1 BE1.png|32px]] Added seeds.
|[[File:Wheat Age 0 JE1.png|32px]] [[File:Wheat Age 1 JE1.png|32px]] [[File:Wheat Age 2 JE1.png|32px]] [[File:Wheat Age 3 JE1.png|32px]] [[File:Wheat Age 4 JE1.png|32px]] [[File:Wheat Age 5 JE1.png|32px]] [[File:Wheat Age 6 JE1.png|32px]] [[File:Wheat Age 7 JE1.png|32px]] Added crops.
|Seeds can be planted on farmland.
|Seeds have a chance of [[drop]]ping while using a [[hoe]] on a [[grass block]].}}
{{History|java beta}}
{{History||1.5|Crops destroyed by [[water]] now drop both seeds and wheat. Prior to this update, they dropped only wheat when destroyed by water.}}
{{History||1.6|snap=Test Build 3|Seeds can no longer be tilled from a grass block.
|Seeds are now found by destroying [[tall grass]] or by harvesting fully-grown crops.}}
{{History||1.8|snap=Pre-release|Crops can now be found in [[village]] farms.}}
{{History|java}}
{{History||1.4.2|snap=12w36a|[[Chicken]]s now use seeds instead of wheat to [[breeding|breed]].}}
{{History||1.8|snap=14w02a|[[Villager]]s can now harvest and plant seeds to grow crops.}}
{{History|||snap=14w06a|[[File:Wheat Age 0 JE2.png|32px]] [[File:Wheat Age 1 JE2.png|32px]] [[File:Wheat Age 2 JE2.png|32px]] [[File:Wheat Age 3 JE2.png|32px]] [[File:Wheat Age 4 JE2.png|32px]] [[File:Wheat Age 5 JE2.png|32px]] [[File:Wheat Age 6 JE2.png|32px]] [[File:Wheat Age 7 JE2.png|32px]] Crops are now a pixel higher - previously they were offset one pixel down as to match farmland. This is likely an accidental result of model conversion.}}
{{History|||snap=14w10a|[[File:Missing Model JE2.png|32px]] [[File:Missing Model JE2.png|32px]] [[File:Missing Model JE2.png|32px]] [[File:Missing Model JE2.png|32px]] [[File:Missing Model JE2.png|32px]] [[File:Missing Model JE2.png|32px]] [[File:Missing Model JE2.png|32px]] [[File:Missing Model JE2.png|32px]] Crops of all stages [[Missing model|no longer have a model]].}}
{{History|||snap=14w10b|[[File:Wheat Age 0 JE4.png|32px]] [[File:Wheat Age 1 JE4.png|32px]] [[File:Wheat Age 2 JE4.png|32px]] [[File:Wheat Age 3 JE4.png|32px]] [[File:Wheat Age 4 JE4.png|32px]] [[File:Wheat Age 5 JE4.png|32px]] [[File:Wheat Age 6 JE4.png|32px]] [[File:Wheat Age 7 JE4.png|32px]] Crops now have models again.<ref>{{bug|MC-50232|||Fixed}}</ref> In addition, they are now offset downwards by one pixel once more.<ref>{{bug|MC-50155|||Fixed}}</ref>}}
{{History|||snap=14w25a|[[File:Wheat Age 0 JE5.png|32px]] [[File:Wheat Age 1 JE5.png|32px]] [[File:Wheat Age 2 JE5.png|32px]] [[File:Wheat Age 3 JE5.png|32px]] [[File:Wheat Age 4 JE5.png|32px]] [[File:Wheat Age 5 JE5.png|32px]] [[File:Wheat Age 6 JE5.png|32px]] [[File:Wheat Age 7 JE5.png|32px]] Crops model are now shaded.}}
{{History|||snap=14w27a|[[File:Wheat Age 0 JE6.png|32px]] [[File:Wheat Age 1 JE6.png|32px]] [[File:Wheat Age 2 JE6.png|32px]] [[File:Wheat Age 3 JE6.png|32px]] [[File:Wheat Age 4 JE6.png|32px]] [[File:Wheat Age 5 JE6.png|32px]] [[File:Wheat Age 6 JE6.png|32px]] [[File:Wheat Age 7 JE6.png|32px]] Crops are no longer shaded.}}
{{History||1.9|snap=15w38a|The drop chances of crops has been slightly improved from an average of {{frac|1|3|5}} per [[crop]] harvested to {{frac|1|5|7}}.}}
{{History||1.11|snap=16w39a|Crops now generate inside [[woodland mansion]]s.}}
{{History||1.12|snap=17w18b|Placing a wheat seeds in farmland now gives the player the "A Seedy Place" [[advancement]].}}
{{History|||snap=pre3|Seeds are now used to tame [[parrot]]s.}}
{{History||1.13|snap=17w47a|Prior to [[1.13/Flattening|''The Flattening'']], this block's numeral ID was 59, and the item's was 295.}}
{{History|||snap=18w14a|Seeds no longer become destroyed when an [[entity]] jumps on them if they have the [[Slow Falling]] status effect.}}
{{History|||snap=18w20a|"Seeds" have been renamed to "Wheat Seeds".
|"Crops" have been renamed to "Wheat Crops".}}
{{History||1.14|snap=18w43a|[[File:Wheat Age 0 JE7.png|32px]] [[File:Wheat Age 1 JE7.png|32px]] [[File:Wheat Age 2 JE7.png|32px]] [[File:Wheat Age 3 JE7.png|32px]] [[File:Wheat Age 4 JE7.png|32px]] [[File:Wheat Age 5 JE7.png|32px]] [[File:Wheat Age 6 JE7.png|32px]] [[File:Wheat Age 7 JE7.png|32px]] The textures of wheat crops have been changed.
|The drop rate of fully grown wheat seeds has been changed from 0-3 to 1-4.}}
{{History|||snap=18w44a|[[File:Wheat Age 6 JE8.png|32px]] [[File:Wheat Age 7 JE8.png|32px]] The textures of wheat crops of age 6 and 7 have been changed again.}}
{{History|||snap=18w47a|[[File:Wheat Age 0 JE8.png|32px]] [[File:Wheat Age 1 JE8.png|32px]] [[File:Wheat Age 2 JE8.png|32px]] [[File:Wheat Age 3 JE8.png|32px]] [[File:Wheat Age 4 JE8.png|32px]] [[File:Wheat Age 5 JE8.png|32px]] [[File:Wheat Age 6 JE9.png|32px]] [[File:Wheat Age 7 JE9.png|32px]] The textures of wheat crops have been changed, once again.}}
{{History|||snap=18w48a|Wheat seeds can now be found in [[chest]]s in [[village]] fisher cottages.}}
{{History|||snap=18w49a|Wheat seeds can now be found in chests in [[savanna]] village houses.}}
{{History|||snap=19w03a|Placement and breaking [[sound]]s have been added to wheat crops.
|Placing wheat seeds into the new [[composter]] has a 10% chance of raising the compost level by 1.}}
{{History|||snap=19w05a|Wheat seeds now have a 30% chance of increasing the compost level in a composter by 1.
|Added [[Wandering Trader|wandering trader]]s, which sell wheat seeds.}}
{{History|||snap=19w13a|Nitwit and unemployed villagers now give wheat seeds to players under the [[Hero of the Village]] effect.}}
{{History||1.15|snap=19w34a|[[Bee]]s can now pollinate wheat crops.}}
{{History||1.17|snap=21w13a|[[File:Wheat Age 0.png|32px]] [[File:Wheat Age 1.png|32px]] [[File:Wheat Age 2.png|32px]] [[File:Wheat Age 3.png|32px]] [[File:Wheat Age 4.png|32px]] [[File:Wheat Age 5.png|32px]] [[File:Wheat Age 6.png|32px]] [[File:Wheat Age 7.png|32px]] The "crop" template model has changed such that pixels appear in the same physical positions on opposite sides of texture planes.<ref>{{bug|MC-199242|||Fixed}}</ref>}}
{{History||1.20|snap=23w12a|Wheat seeds can now be found in [[suspicious gravel]] and [[suspicious sand]] in [[trail ruins]].}}
{{History|||snap=23w16a|Wheat seeds no longer generates in [[suspicious sand]] in [[trail ruins]].|Due to the split of the archaeological loot tables for suspicious gravel within [[trail ruins]], wheat seeds are now common loot.}}
{{History|pocket alpha}}
{{History||v0.4.0|[[File:Wheat Seeds JE1 BE1.png|32px]] Added seeds.
|[[File:Wheat Age 0 JE6 BE1.png|32px]] [[File:Wheat Age 1 JE6 BE1.png|32px]] [[File:Wheat Age 2 JE6 BE1.png|32px]] [[File:Wheat Age 3 JE6 BE1.png|32px]] [[File:Wheat Age 4 JE6 BE1.png|32px]] [[File:Wheat Age 5 JE6 BE1.png|32px]] [[File:Wheat Age 6 JE6 BE1.png|32px]] [[File:Wheat Age 7 JE6 BE1.png|32px]] Added crops.
|Seeds can be obtained by tilling [[grass block]]s.}}
{{History||v0.9.0|snap=build 1|[[File:Wheat Age 0 BE2.png|32px]] [[File:Wheat Age 1 BE2.png|32px]] [[File:Wheat Age 2 BE2.png|32px]] [[File:Wheat Age 3 BE2.png|32px]] [[File:Wheat Age 4 BE2.png|32px]] [[File:Wheat Age 5 BE2.png|32px]] [[File:Wheat Age 6 BE2.png|32px]] [[File:Wheat Age 7 BE2.png|32px]] Faces now renders from both sides, resulting in z-fighting.
|Seeds can now be used to [[breeding|breed]] [[chicken]].
|Crops can now be found in [[village]] farms.}}
{{History|||snap=build 2|[[File:Wheat Age 0 BE3.png|32px]] [[File:Wheat Age 1 BE3.png|32px]] [[File:Wheat Age 2 BE3.png|32px]] [[File:Wheat Age 3 BE3.png|32px]] [[File:Wheat Age 4 BE3.png|32px]] [[File:Wheat Age 5 BE3.png|32px]] [[File:Wheat Age 6 BE3.png|32px]] [[File:Wheat Age 7 BE3.png|32px]] Removed some faces to fix z-fighting.}}
{{History||v0.12.1|snap=build 1|Farmer [[villager]]s can now pick up, harvest and plant seeds to grow [[wheat]].}}
{{History|||snap=build 2|Crops now always drop seeds when mined, regardless of growth stage.}}
{{History|||snap=build 8|Seeds can no longer be obtained by tilling [[grass block]]s.}}
{{History||v0.16.2|Seeds can now be found in [[chest]]s inside the large house of [[snowy tundra]] and [[snowy taiga]] [[village]]s.}}
{{History|pocket}}
{{History||1.1.0|snap=alpha 1.1.0.0|Crops now generate inside [[woodland mansion]]s.}}
{{History|bedrock}}
{{History||1.2.0|snap=beta 1.2.0.2|Seeds are now used to tame [[parrot]]s.}}
{{History||1.6.0|snap=beta 1.6.0.1|Seeds no longer become destroyed when an [[entity]] jumps on them if they have the [[Slow Falling]] status effect.}}
{{History||1.10.0|snap=beta 1.10.0.3|Seeds can now be bought from [[wandering trader]]s.
|Placement and breaking [[sound]]s have been added to crops.
|[[File:Wheat Age 0 BE.png|32px]] [[File:Wheat Age 1 BE.png|32px]] [[File:Wheat Age 2 BE.png|32px]] [[File:Wheat Age 3 BE.png|32px]] [[File:Wheat Age 4 BE.png|32px]] [[File:Wheat Age 5 BE.png|32px]] [[File:Wheat Age 6 BE.png|32px]] [[File:Wheat Age 7 BE.png|32px]] The textures of crops have been changed.}}
{{History||1.11.0|snap=beta 1.11.0.1|Seeds can now be found in [[savanna]] [[village]] house [[chest]]s.
|Seeds can now be used to fill up [[composter]]s.}}
{{History||1.14.0|snap=beta 1.14.0.1|[[Bee]]s can now pollinate crops.}}
{{History|console}}
{{History||xbox=TU1|xbone=CU1|ps=1.0|wiiu=Patch 1|switch=1.0.1|[[File:Wheat Seeds JE1 BE1.png|32px]] Added seeds.
|[[File:Wheat Age 0 JE6 BE1.png|32px]] [[File:Wheat Age 1 JE6 BE1.png|32px]] [[File:Wheat Age 2 JE6 BE1.png|32px]] [[File:Wheat Age 3 JE6 BE1.png|32px]] [[File:Wheat Age 4 JE6 BE1.png|32px]] [[File:Wheat Age 5 JE6 BE1.png|32px]] [[File:Wheat Age 6 JE6 BE1.png|32px]] [[File:Wheat Age 7 JE6 BE1.png|32px]] Added crops.}}
{{History||xbox=none|xbone=none|ps=1.90|wiiu=none|switch=none|[[File:Wheat Age 0 JE8.png|32px]] [[File:Wheat Age 1 JE8.png|32px]] [[File:Wheat Age 2 JE8.png|32px]] [[File:Wheat Age 3 JE8.png|32px]] [[File:Wheat Age 4 JE8.png|32px]] [[File:Wheat Age 5 JE8.png|32px]] [[File:Wheat Age 6 JE9.png|32px]] [[File:Wheat Age 7 JE9.png|32px]] The textures of crops have been changed.}}
{{History|New 3DS}}
{{History||0.1.0|[[File:Wheat Seeds JE1 BE1.png|32px]] Added seeds.
|[[File:Wheat Age 0 JE6 BE1.png|32px]] [[File:Wheat Age 1 JE6 BE1.png|32px]] [[File:Wheat Age 2 JE6 BE1.png|32px]] [[File:Wheat Age 3 JE6 BE1.png|32px]] [[File:Wheat Age 4 JE6 BE1.png|32px]] [[File:Wheat Age 5 JE6 BE1.png|32px]] [[File:Wheat Age 6 JE6 BE1.png|32px]] [[File:Wheat Age 7 JE6 BE1.png|32px]] Added crops.}}
{{History|foot}}
=== Wheat "item" ===
{{:Technical blocks/Crops}}
== Issues ==
{{issue list}}
== Gallery ==
===Renders===
;Java Edition
<gallery>
Wheat Age 0.png|
Wheat Age 1.png|
Wheat Age 2.png|
Wheat Age 3.png|
Wheat Age 4.png|
Wheat Age 5.png|
Wheat Age 6.png|
Wheat Age 7.png|
</gallery>
;Bedrock Edition
<gallery>
Wheat Age 0 BE.png|
Wheat Age 1 BE.png|
Wheat Age 2 BE.png|
Wheat Age 3 BE.png|
Wheat Age 4 BE.png|
Wheat Age 5 BE.png|
Wheat Age 6 BE.png|
Wheat Age 7 BE.png|
</gallery>
===Screenshots===
<gallery>
AllSeeds.png|All the seeds that exist.
Wheat.jpg|Wheat crops in Pocket Edition.
Village Wheat Beetroot Farm.png| Wheat generated in a village.
</gallery>
== References ==
{{reflist}}
{{Blocks|vegetation}}
{{Items}}
[[Category:Plants]]
[[Category:Food]]
[[Category:Non-solid blocks]]
[[Category:Generated structure blocks]]
[[de:Weizensamen]]
[[es:Semillas de trigo]]
[[fr:Graines de blé]]
[[hu:Búzamagok]]
[[it:Semi di grano]]
[[ja:小麦の種]]
[[ko:밀 씨앗]]
[[nl:Zaden]]
[[pl:Nasiona zboża]]
[[pt:Sementes de trigo]]
[[ru:Семена пшеницы]]
[[zh:小麦种子]]</li></ul></nowiki> | build 11 | Tamed wolves now attack targets when hit with a bow. | |||
v0.13.0{{Extension DPL}}<ul><li>[[Raw Gold|Raw Gold]]<br/>{{Item
| image = Raw Gold.png
| renewable = No
| stackable = Yes (64)
}}
'''Raw gold''' is a raw metal resource obtained from mining [[gold ore]].
== Obtaining ==
=== Mining ===
[[Gold ore]] and [[deepslate gold ore]] mined with an [[iron pickaxe]] or higher drops 1 unit of raw gold. If the pickaxe is enchanted with [[Fortune]], it can drop an extra unit per level of Fortune, allowing for a maximum of 4 with Fortune III. If the ore is mined using a pickaxe enchanted with [[Silk Touch]], it drops the ore block instead.
=== Crafting ===
{{Crafting
|showname=1
|Block of Raw Gold
|Output=Raw Gold,9
|type=Material
|foot=1
}}
== Usage ==
The primary usage of raw gold is smelting it into [[gold ingot]]s.
=== Crafting ===
{{crafting usage|Raw Gold}}
=== Smelting ingredient ===
{{Smelting
|showname=2
|Raw Gold
|Gold Ingot
|1.0
}}
=== Piglins ===
{{EntityLink|Piglin|Piglins}} are attracted to raw gold. They run toward any raw gold on the ground, and inspect it for 6 to 8 seconds before putting it in their inventory.
== Advancements ==
{{load advancements|Oh Shiny}}
== Data values ==
=== ID ===
{{edition|java}}:
{{ID table
|edition=java
|showitemtags=y
|showforms=y
|generatetranslationkeys=y
|displayname=Raw Gold
|spritetype=item
|nameid=raw_gold
|itemtags=piglin_loved
|form=item
|foot=1}}
{{edition|bedrock}}:
{{ID table
|edition=bedrock
|shownumericids=y
|showforms=y
|notshowbeitemforms=y
|generatetranslationkeys=y
|displayname=Raw Gold
|spritetype=item
|nameid=raw_gold
|form=item
|id=506
|foot=1}}
== History ==
{{History|java}}
{{History||1.17|snap=21w14a|[[File:Raw Gold JE1.png|32px]] Added raw gold.}}
{{History|||snap=April 13, 2021|slink={{Tweet|JasperBoerstra|1381991999952277513}}|[[File:Raw Gold JE2.png|32px]] [[JAPPA]] shows a new raw gold texture.}}
{{History|||snap=21w15a|[[File:Raw Gold JE2.png|32px]] The texture of raw gold has been changed.
|Raw gold can now be used to craft [[block of raw gold]].}}
{{History|||snap=April 16, 2021|slink={{Tweet|JasperBoerstra|1383047666037325829}}|[[File:Raw Gold (pre-release).png|32px]] [[JAPPA]] shows a new raw gold texture again.}}
{{History|||snap=21w16a|[[File:Raw Gold JE3.png|32px]] The texture of raw gold has been changed.}}
{{History|Bedrock}}
{{History||1.17.0|snap=beta 1.17.0.50|[[File:Raw Gold JE2.png|32px]] Added raw gold.}}
{{History|||snap=beta 1.17.0.52|Raw gold are now available without enabling [[experimental gameplay]].}}
{{History|||snap=beta 1.17.0.54|[[File:Raw Gold JE3.png|32px]] The texture of raw gold has been changed.}}
{{History|foot}}
== Issues ==
{{Issue list}}
==Gallery==
<gallery>
JE 1.17 Dev Raw Metals.jpg|Jappa shows raw ore textures.
Jappa Raw Ores 1.jpg|Jappa shows raw ore textures.
Jappa Raw Ores 2.png|Jappa shows raw ore textures.
Jappa Raw Ores 3.jpg|Jappa shows raw ore textures.
Jappa Raw Ores 4.jpg|Jappa shows raw ore textures.
Jappa Raw Ores 5.jpg|Jappa shows raw ore textures.
</gallery>
{{Items}}
[[Category:Non-renewable resources]]
[[de:Rohgold]]
[[es:Oro en bruto]]
[[fr:Or brut]]
[[ja:金の原石]]
[[pl:Surowe złoto]]
[[pt:Ouro bruto]]
[[ru:Необработанное золото]]
[[uk:Необроблене золото]]
[[zh:粗金]]</li><li>[[Bundle|Bundle]]<br/>{{Experimental feature|bundle}}
{{planned|BE}}
{{Item
| image = Bundle.png
| image2 = Bundle Filled.png
| rarity = Common
| renewable = No
| stackable = No
}}
A '''bundle''' is an [[item]] that can store up to a stack's worth of mixed [[item]] types within itself in a single [[inventory]] slot. Items that stack to 16 occupy more space within the bundle, and items that do not stack occupy the entire bundle without allowing space for any other items.
== Obtaining ==
=== Crafting ===
{{Crafting
|showdescription=1
|A1=String |B1=Rabbit Hide |C1=String
|A2=Rabbit Hide |C2=Rabbit Hide
|A3=Rabbit Hide |B3=Rabbit Hide |C3=Rabbit Hide
|Output=Bundle
|type=Tool
|description={{OnlyExperimental|bundle}}
}}
== Usage ==
<!--The tooltip does not reflect the current bundle "tooltip"-->
{{FakeImage|style=max-width:250px;
|1={{Slot|Stick,64}}{{Slot|Ender Pearl,16}}{{Slot|Iron Sword}}<br>{{Slot|Stick,1}}{{Slot|Ender Pearl,4}}{{Slot|Iron Sword,64}}<br>{{Slot|Filled Bundle[Stick x32/Ender Pearl x8]| title = Bundle|link=none}}
|2=Item stack sizes (top row) and the number of bundle slots they take up (middle row). Sticks stack to 64, so they take up one bundle slot; ender pearls stack to 16, so they take up four; and swords do not stack, so they take up the whole bundle. So, for instance, a bundle may have 32 sticks and 8 ender pearls inside (bottom), which take up a total of {{Tooltip|(32×1)|32 Sticks}}+{{Tooltip|(8×4)|8 Ender Pearls}}=64 bundle slots.
}}
Bundles are used to store different [[item|item type]]s in the same [[inventory]] slot. This does not, however, increase the total capacity of the slot: each bundle has 64 "bundle slots" and each item placed in the bundle takes up these slots similar to how they take up space in a normal inventory slot: items that stack to 64 take up 1 bundle slot, items that stack to 16 (for example, [[egg]]s) take up 4, and items that do not stack (such as tools/weapons/armor) take up the whole bundle, all 64 slots.
Although bundles themselves cannot be stacked, a bundle can be placed inside another (nested): the inner bundle itself uses 4 slots plus the number of slots already occupied by the items in that bundle.<ref>{{bug|MC-203567||Bundles can be placed inside of bundles|WAI}}</ref>
To place items inside a bundle, either (1) pick up the bundle in the inventory and right-click on the item(s) to be placed inside or (2) pick up the item(s) and right-click on the bundle. When placing bundles inside another bundle, the interface uses the first method: picking up Bundle A and right clicking on Bundle B attempts to store Bundle B inside A.
Bundles can be {{ctrl|used}} inside the inventory to take out the last item put in. In this way, items are accessible LIFO (last in, first out). When {{ctrl|used}} outside the inventory, it dumps all the items out into the world.
Hovering over the bundle shows its contained items in its inventory slots. The number of bundle slots used is displayed as ''<fullness>''/64 in the tooltip. If the bundle is full, then the empty slots are greyed out with an <span class="invslot">{{SlotSprite|Bundle full}}</span>.
[[Shulker box]]es cannot be placed inside of bundles.
[[File:MinecraftBundle.jpg|thumb|Hovering the mouse over a bundle filled with mob loot, nearly full, with 61 items.]]
== Sounds ==
{{Sound table
|sound=Bundle drop contents1.ogg
|sound2=Bundle drop contents2.ogg
|sound3=Bundle drop contents3.ogg
|subtitle=Bundle empties
|source=player
|description=When a bundle's items are thrown onto the ground
|id=item.bundle.drop_contents
|translationkey=subtitles.item.bundle.drop_contents
|volume=0.8
|pitch=''varies'' <ref group=sound>Can be 0.8-1.2 or 0.76-1.14 for each sound</ref>
|distance=16}}
{{Sound table
|sound=Bundle insert1.ogg
|sound2=Bundle insert2.ogg
|sound3=Bundle insert3.ogg
|subtitle=Item packed
|source=player
|description=When items are placed into a bundle
|id=item.bundle.insert
|translationkey=subtitles.item.bundle.insert
|volume=0.8
|pitch=''varies'' <ref group=sound>Can be 0.8-1.2, 0.76-1.14, or 0.84-1.26 for each sound</ref>
|distance=16}}
{{Sound table
|sound=Bundle remove one1.ogg
|sound2=Bundle remove one2.ogg
|sound3=Bundle remove one3.ogg
|subtitle=Item unpacked
|source=player
|description=When items are removed from a bundle
|id=item.bundle.remove_one
|translationkey=subtitles.item.bundle.remove_one
|volume=0.8
|pitch=''varies' <ref group=sound>Can be 0.8-1.2, 0.84-1.26, or 0.88-1.32 for each sound</ref>
|distance=16
|foot=1}}
== Data values ==
=== ID ===
{{JE}}:
{{ID table
|edition=java
|showforms=y
|generatetranslationkeys=y
|displayname=Bundle
|spritetype=item
|nameid=bundle
|form=item
|foot=1}}
=== Item data ===
<div class="treeview" style="margin-top: 0;">
* {{nbt|compound|tag}}: The '''tag''' tag.
{{:Player.dat_format/Bundle}}
</div>
== History ==
{{History||October 3, 2020|link={{ytl|DBvZ2Iqmm3M|t=1846s}}|[[File:Bundle JE1.png|32px]][[File:Bundle Filled JE1.png|32px]] Bundles are revealed at [[Minecraft Live 2020]]. Hovering over them shows all items inside scattered around a large area, and incomplete bundles have the empty texture.}}
{{History||October 16, 2021|link=https://clips.twitch.tv/AffluentEncouragingOryxPeteZaroll-cd8pIapkfD4PRHxO|Ulraf, a game developer on ''Minecraft'', states that bundles will not be included in [[Caves & Cliffs]].}}
{{History||November 17, 2021|link=https://www.minecraft.net/en-us/article/caves---cliffs-update-part-ii-coming|Bundles are announced to be added after [[The Wild Update]].}}
{{History|java}}
{{History||1.17|snap=20w45a|[[File:Bundle JE1.png|32px]][[File:Bundle Filled JE1.png|32px]] Added bundles. Hovering over them shows some of the items contained and their quantities, much like the tooltip of a [[shulker box]]. Incomplete bundles have the full texture.}}
{{History|||snap=20w46a|[[File:Bundle JE2.png|32px]][[File:Bundle Filled JE2.png|32px]] The textures of bundles have been changed.
|Hovering over bundles now shows its contained items in special slots, similar to slots in the [[inventory]]. If the bundle is not full, it also has an empty slot with a plus on it.}}
{{History|||snap=20w48a|Bundles now show fullness as a number when [[advanced tooltips]] are enabled.
|{{ctrl|Using}} a bundle in the inventory now empties one item from the bundle instead of emptying all the contents out to the [[inventory]].
|{{ctrl|Using}} a bundle now throws out its entire content into the world.}}
{{History|||snap=20w49a|Bundle fullness is now always shown.
|Full bundles now show the blue bar instead of hiding it, to distinguish from empty bundles.}}
{{History|||snap=20w51a|Bundles now drop its contents when destroyed as an [[Item (entity)|item entity]].
|Bundle fullness has been changed from <code>Fullness: ''<fullness>'' / 64</code> to <code>''<fullness>''/64</code>
|The slots in the tooltip when hovering over bundles have changed to have a border, and rows of slot have a thicker edge between them.
|When the bundle is not full, it instead shows empty slots instead of one slot with a plus. When it is full, those empty slots become greyed out with an X.}}
{{History|||snap=21w05a|The player now receives a tutorial when first having a bundle in the inventory.}}
{{History|||snap=21w19a|Bundles are now accessible only through commands.}}
{{History||1.18|snap=Experimental Snapshot 1|Bundles are now available in the creative inventory and can be crafted once again.}}
{{History|||snap=21w37a|Bundles are once again accessible only through commands.}}
{{History||1.19.3|snap=22w42a|Bundles have been made available once again, and have been moved behind their own datapack.}}
{{h|bedrock}}
{{h||1.19.50|snap=beta 1.19.50.21|Added bundle GUI textures in the Vanilla Packs.}}
{{History|foot}}
== Issues ==
{{Issue list}}
== Gallery ==
<gallery>
JE 1.17 Development Bundle.png|The original bundle UI
Bundle in Inventory.jpg|A bundle inventory in the inventory
</gallery>
== References ==
{{Reflist}}
{{Items}}
[[Category:Storage]]
[[Category:Tools]]
[[Category:Renewable resources]]
[[de:Bündel]]
[[es:Saco]]
[[fr:Sac]]
[[ja:バンドル]]
[[pl:Sakwa]]
[[pt:Trouxa]]
[[ru:Мешок]]
[[zh:收纳袋]]</li></ul> | build 1 | Wolves now naturally attack skeletons and rabbits. | |||
v0.14.0{{Extension DPL}}<ul><li>[[Chorus Fruit|Chorus Fruit]]<br/>{{about|the fruit that drops from [[chorus tree]]s|the building material|Popped Chorus Fruit|other uses|Chorus}}
{{Item
| title = Chorus Fruit
| image = Chorus Fruit.png
| renewable = Yes
| heals = {{hunger|4}}
| stackable = Yes (64)
}}
'''Chorus fruit''' is a [[food]] [[item]] native to [[the End]] that can be eaten, or [[smelting|smelted]] into [[Popped Chorus Fruit|popped chorus fruit]]. It can be eaten even when the hunger bar is full, and eating it may teleport the [[player]] up to 8 blocks in any direction.
== Obtaining ==
{{see also|Tutorials/Chorus fruit farming}}
Chorus fruit can be obtained by breaking [[Chorus Plant (block)|chorus plant blocks]]. Each block of chorus plant has a 50% chance to drop a chorus fruit. This is not affected by [[Fortune]].<ref>{{bug|MC-198924||Chorus Fruit doesn't have a higher chance with Fortune|Invalid}}</ref>
== Usage ==
To eat chorus fruit, press and hold {{control|use}} while it is selected in the hotbar. Eating one restores {{hunger|4}} [[hunger]] and 2.4 hunger [[Hunger#Mechanics|saturation]].
Unlike most foods, chorus fruits can be eaten even when the player has a full hunger bar.
The player may also be [[teleportation|teleported]]: up to 16 attempts are made to choose a random destination within ±8 on all three axes in the same manner as [[Enderman#Teleportation|enderman teleportation]], with the exception that the player may teleport into an area only 2 blocks high, or one block tall if the player is crawling. The player does not land in the average centroid of the block, but rather to any position within an 8-block range. The player will be teleported directly down to the ground regardless of the height it was used at if the player is too far from a valid destination.
The chorus fruit, unlike an [[Ender Pearl|ender pearl]], can teleport the player through [[solid block]]s. The algorithm tries to avoid [[fluid]]s; the player cannot teleport into a space occupied by [[water]] or [[lava]]. However, the player can be teleported onto dangerous blocks such as fire, cacti and magma blocks.<ref>{{bug|MC-102836||Enderman and chorus fruit can teleport to some dangerous places}}</ref>
If a teleport succeeds, a sound similar to an enderman teleporting plays originating from the teleportation origin location. Chorus fruit has a cooldown of 1 second before being able to be used again. The cooldown is represented by a white overlay on the chorus fruit in the hotbar. The cooldown is applied to all chorus fruits items, including those in the player's inventory and containers.<ref>{{bug|MC-88236|||WAI}}</ref>
Eating chorus fruit may teleport the player into areas protected by [[bedrock]], [[barrier|barrier blocks]], or other blocks that are otherwise unbreakable in [[Survival]] mode. However, it cannot teleport the player onto [[the Nether]] roof.<ref>{{bug|MC-84198|||Fixed}}</ref>
Chorus fruit is completely non-functional above the nether roof.
[[Fox]]es can also eat chorus fruit and the teleportation effect works the same as with players.
=== Smelting ingredient ===
{{smelting
|Chorus Fruit
|Popped Chorus Fruit
|0.1}}
== Sounds ==
===Generic===
{{Sound table/Entity/Food}}
===Unique===
{{edition|java}}:
{{Sound table
|rowspan=2
|sound=Teleport1.ogg
|sound2=Teleport2.ogg
|subtitle=Player teleports
|source=player
|description=When a player teleports by eating a chorus fruit
|id=item.chorus_fruit.teleport
|translationkey=subtitles.item.chorus_fruit.teleport
|volume=1.0
|pitch=1.0
|distance=16}}
{{Sound table
|subtitle=Fox teleports
|source=Players & Friendly Creatures<wbr><ref group=sound>{{Bug|MC-257516||"Fox teleports" sound plays for both Players and Friendly Creatures sound categories}}</ref>|overridesource=1
|description=When a fox teleports by eating a chorus fruit
|id=entity.fox.teleport
|translationkey=subtitles.entity.fox.teleport
|volume=1.0
|pitch=1.0
|distance=16
|foot=1}}
{{edition|bedrock}}:
{{Sound table
|type=bedrock
|sound=Teleport1.ogg
|sound2=Teleport2.ogg
|source=hostile
|description=When something teleports by eating a chorus fruit
|id=mob.shulker.teleport
|volume=1.0
|pitch=1.0
|foot=1}}
==Data values ==
===ID===
{{edition|java}}:
{{ID table
|edition=java
|showforms=y
|generatetranslationkeys=y
|displayname=Chorus Fruit
|spritetype=item
|nameid=chorus_fruit
|form=item
|foot=1}}
{{edition|bedrock}}:
{{ID table
|edition=bedrock
|shownumericids=y
|showforms=y
|notshowbeitemforms=y
|generatetranslationkeys=y
|displayname=Chorus Fruit
|spritetype=item
|nameid=chorus_fruit
|id=558
|form=item
|foot=1}}
==Advancements==
{{load advancements|Husbandry;A Balanced Diet}}
==History==
{{History|java}}
{{History||1.9|snap=15w31a|[[File:Chorus Fruit JE1 BE1.png|32px]] Added chorus fruit.}}
{{History|||snap=15w34c|A cooldown for using chorus fruit has now been added.}}
{{History|||snap=15w37a|The chorus fruit's teleportation range has now been reduced from ±32 to ±8.}}
{{History|||snap=15w50a|Added a [[sound]] for chorus fruit: <code>item.chorus_fruit.teleport</code>.}}
{{History||1.10|snap=16w21a|Chorus fruit can now teleport riders off their mounts.}}
{{History||1.13|snap=17w47a|Prior to [[1.13/Flattening|''The Flattening'']], this [[item]]'s numeral ID was 432.}}
{{History||1.14|snap=18w43a|[[File:Chorus Fruit JE2 BE2.png|32px]] The texture of chorus fruit has now been changed.}}
{{History||1.20.2|snap=23w33a|Eating chorus fruit now resets fall distance.<ref>{{bug|MC-112133||Eating chorus fruit does not reset fall distance|Fixed}}</ref>}}
{{History|pocket}}
{{History||1.0.0|snap=alpha 0.17.0.1|[[File:Chorus Fruit JE1 BE1.png|32px]] Added chorus fruit.}}
{{History|||snap=alpha 1.0.0.1|The cooldown of chorus fruit now has an animation.}}
{{History|bedrock}}
{{History||1.7.0|snap=beta 1.7.0.2|The category that chorus fruit are apart of in the [[Creative inventory]] has been changed from "Nature" to "Items".}}
{{History||1.10.0|snap=beta 1.10.0.3|[[File:Chorus Fruit JE2 BE2.png|32px]] The texture of chorus fruit has now been changed.}}
{{History||1.13.0|snap=beta 1.13.0.15|Chorus fruit has been moved back to the "Nature" section in the Creative inventory.}}
{{History|console}}
{{History||xbox=TU46|xbone=CU36|switch=1.0.1|ps=1.38|wiiu=Patch 15|[[File:Chorus Fruit JE1 BE1.png|32px]] Added chorus fruit.}}
{{History||xbox=none|xbone=none|ps=1.90|wiiu=none|switch=none|[[File:Chorus Fruit JE2 BE2.png|32px]] The texture of chorus fruit has now been changed.}}
{{History|new 3ds}}
{{History||1.7.10|[[File:Chorus Fruit JE1 BE1.png|32px]] Added chorus fruit.}}
{{History|foot}}
==Issues==
{{issue list}}
==References==
{{reflist}}
==External Links==
*[https://www.minecraft.net/en-us/article/taking-inventory--chorus-fruit Taking Inventory: Chorus Fruit] – Minecraft.net on November 5, 2020
{{Items}}
[[Category:Plants]]
[[Category:Food]]
[[Category:Renewable resources]]
[[de:Chorusfrucht]]
[[es:Fruta chorus]]
[[fr:Chorus]]
[[ja:コーラスフルーツ]]
[[ko:후렴과]]
[[nl:Chorusfruit]]
[[pl:Owoc refrenusu]]
[[pt:Fruta do coro]]
[[ru:Плод коруса]]
[[uk:Фрукт хорусу]]
[[zh:紫颂果]]</li><li>[[Footprint|Footprint]]<br/>{{about|the joke item|the unused particle|Java Edition unused features#Footprint particle}}
{{Joke feature}}
{{Item
| image = Footprint (item).png
| renewable = No
| stackable = Yes (64)
}}
The '''Footprint''' was a joke item from [[Java Edition 20w14∞]], found only in the {{code|missing}} dimension.
== Appearance ==
This item is semi-transparent with a grey colour scheme.
== Obtaining ==
=== Dimension ===
Footprints were obtained only from a chest in the {{Code|missing}} dimension. Only existing in 2020 April fools snapshot 20w14∞, it cannot exist in any non-April Fool's joke versions and April Fool's joke versions before or after 20w14∞. There is a maximum of 2 footprints that can be obtained legitimately in any given world.
=== Cheats/Creative Mode ===
Despite these footprints not being available in the creative inventory, it is still possible to acquire them via the command {{Code|code=give <target> minecraft:footprint <amount>}} or duplicating them by holding down middle-click whilst in creative mode.
== Usage ==
As of snapshot 20w14∞, this item cannot be placed or used in any way other than a trophy. This item can be inserted and/or rotated inside of an item frame, and it has a stack limit of 64.
== Data values ==
=== ID ===
{{ID table
|showforms=y
|generatetranslationkeys=java
|displayname=Footprint
|spritetype=item
|nameid=footprint
|form=item
|foot=1}}
== History ==
{{History|java}}
{{History||20w14∞|[[File:Footprint (item).png|32px]] Added the footprint item.}}
{{History|foot}}
== Gallery ==
<gallery>
File:Missing biome.png|The Easter Egg dimension that the item spawns in.
</gallery>
== Trivia ==
* This is a reference to the removed "Footstep" particle, hence in the "missing" dimension.
** This item is intended as a joke directed towards the commands' community where the "Footstep" particle is commonly requested.<ref>https://gist.github.com/boq/8e65cb85badc75765eeb8956af78aaa5</ref>
== References ==
{{reflist}}
{{Items}}
{{Jokes}}
[[Category:Non-renewable resources]]
[[Category:Joke items]]
[[es:Footprint]]
[[pt:Pegada]]</li></ul> | build 1 | Baby zombie jockeys now check for nearby adult wolves to mount prior to attacking the player, villager, or golem. | |||
v0.15.0{{Extension DPL}}<ul><li>[[Brown Dye|Brown Dye]]<br/>{{Item
| image = Brown Dye.png
| renewable = Yes
| stackable = Yes (64)
}}
'''Brown dye''' is a [[Dye#Primary|primary color dye]] derived from [[cocoa beans]].
== Obtaining ==
=== Crafting ===
{{Crafting
|Cocoa Beans
|Output=Brown Dye
|type=Material
|head=
}}
== Usage ==
{{dye usage}}
=== Crafting ingredient ===
{{crafting usage|ignore=Banner|continue=1}}
{{banner crafting usage}}
=== Loom ingredient ===
{{Banner loom usage|Brown Dye}}
=== Trading ===
Apprentice-level Shepherd villagers have a 20% chance to buy 12 brown dye for an emerald.{{only|bedrock}}
Expert-level Shepherd villagers have a {{frac|2|7}} chance to buy 12 brown dye for an emerald.{{only|java}}
== Data values ==
=== ID ===
{{edition|java}}:
{{ID table
|edition=java
|showforms=y
|generatetranslationkeys=y
|displayname=Brown Dye
|spritetype=item
|nameid=brown_dye
|form=item
|foot=1}}
{{edition|bedrock}}:
{{ID table
|edition=bedrock
|showaliasids=y
|shownumericids=y
|showforms=y
|notshowbeitemforms=y
|generatetranslationkeys=y
|displayname=Brown Dye
|spritetype=item
|nameid=brown_dye
|aliasid=dye / 17
|id=398
|form=item
|translationkey=item.dye.brown_new.name
|foot=1}}
== History ==
{{expand section|Item textures and more from a development video on twitter by bartek.}}
{{History|java}}
{{History||1.14|snap=18w43a|[[File:Brown Dye JE1 BE1.png|32px]] Added brown dye.}}
{{History|||snap=18w44a|Brown dye now can change the text color on [[sign]]s to brown.}}
{{History|||snap=19w05a|Added the [[wandering trader]], which sell brown dyes.}}
{{History|||snap=19w11a|Brown dye can now be [[trading|bought]] by shepherd villagers.}}
{{History||1.17|snap=20w45a|Brown dye can now used to craft newly added [[brown candle]]s.}}
{{History|||snap=21w19a|Brown dye can no longer used to craft brown candles.}}
{{History|||snap=Pre-release 1|Brown dye can once again used to craft brown candles.}}
{{History||1.20<br>(Experimental)|link=1.19.3|snap=22w42a|Brown dye now can change the text color on [[hanging sign]]s to brown.}}
{{History|bedrock}}
{{History||1.8.0|snap=beta 1.8.0.10|[[File:Brown Dye JE1 BE1.png|32px]] Added brown dye.}}
{{History||1.11.0|snap=beta 1.11.0.4|Brown dye can now be [[trading|sold]] to shepherd [[villager]]s.}}
{{History||1.16.100|snap=beta 1.16.100.56|The ID of brown dye has been changed from <code>dye/17</code> to <code>brown_dye</code>.}}
{{History|ps4}}
{{History||1.83|[[File:Brown Dye JE1 BE1.png|32px]] Added brown dye.}}
{{History|foot}}
== Issues ==
{{issue list}}
{{Items}}
[[Category:Dyes]]
[[Category:Renewable resources]]
[[de:Brauner Farbstoff]]
[[es:Tinte marrón]]
[[fr:Teinture marron]]
[[ja:茶色の染料]]
[[ko:갈색 염료]]
[[pl:Brązowy barwnik]]
[[pt:Corante marrom]]
[[th:สีย้อมสีน้ำตาล]]
[[zh:棕色染料]]</li><li>[[Slimeball|Slimeball]]<br/>{{about|the item|the mob|Slime|the block constructed with slimeballs|Slime Block|other uses|Slime (disambiguation)}}
{{Item
| image = Slimeball.png
| renewable = Yes
| stackable = Yes (64)
}}
A '''slimeball''' is a [[crafting]] ingredient commonly dropped by [[slime]]s, and can be sneezed out by [[panda]]s.
== Obtaining ==
=== Mob loot ===
==== Slimes ====
{{see also|Tutorials/Slime farming}}
If a [[slime]]'s size is 1, it drops 0–2 slimeballs when killed. The maximum number of slimeballs is increased by 1 per level of [[Looting]], for a maximum of 5 slimeballs with Looting III.
==== Pandas ====
Baby [[panda]]s have a {{frac|1|700}} chance of [[drop]]ping one slimeball when sneezing.
=== Crafting ===
{{Crafting
|Slime Block
|Output= Slimeball,9
|type= Miscellaneous
}}
=== Trading ===
[[Wandering trader]]s sometimes offer to sell a slimeball for 4 [[emerald]]s.
== Usage ==
=== Crafting ingredient ===
{{crafting usage}}
=== Breeding ===
Slimeballs can be used to breed [[frog]]s and reduce the remaining growth duration of [[tadpole]]s by 10%. Both also follow a player holding a slimeball.
==Video==
{{Video note|This video is outdated, as slimeballs can now also be used to craft [[lead]]s and [[slime block]]s, breed [[frog]]s, and can now be obtained from baby [[panda]]s and [[wandering trader]]s.}}
{{yt|J6oR3fdbbjY}}
== Data values ==
===ID===
{{edition|java}}:
{{ID table
|edition=java
|showforms=y
|generatetranslationkeys=y
|displayname=Slimeball
|spritetype=item
|nameid=slime_ball
|form=item
|foot=1}}
{{edition|bedrock}}:
{{ID table
|edition=bedrock
|shownumericids=y
|showforms=y
|notshowbeitemforms=y
|generatetranslationkeys=y
|displayname=Slimeball
|spritetype=item
|nameid=slime_ball
|id=388
|form=item
|foot=1}}
==History==
{{History|java alpha}}
{{History||v1.0.11|[[File:Slimeball JE1 BE1.png|32px]] Added slimeballs, which are dropped from [[slime]]s. At the moment, they serve no purpose.}}
{{History|java beta}}
{{History||1.7|Slimeballs are now used to craft [[sticky piston]]s.}}
{{History|java}}
{{History||1.0.0|snap=Beta 1.9 Prerelease 2|Slimeballs are used to craft [[magma cream]].}}
{{History||1.6.1|snap=13w18a|[[Lead]]s, which were originally implemented in the [[13w16a]] snapshot, now have a [[crafting]] recipe that includes slimeballs.}}
{{History||1.8|snap=14w02a|Nine slimeballs are now used to [[crafting|craft]] a [[slime block]]. Slime blocks also act as storage [[block]]s, being able to craft back into 9 slimeballs.}}
{{History||1.13|snap=17w47a|Prior to [[1.13/Flattening|''The Flattening'']], this [[item]]'s numeral ID was 341.}}
{{History||1.14|snap=18w43a|[[File:Slimeball JE2 BE2.png|32px]] The texture of slimeballs has been changed.
|Slimeballs can now be obtained when a [[panda|baby panda]] sneezes.}}
{{History|||snap=19w05a|Slimeballs can now be bought from [[wandering trader]]s.}}
{{History||1.19|snap=22w11a|Slimeballs can now be used to breed [[frog]]s.}}
{{History|pocket alpha}}
{{History||v0.9.0|snap=build 1|[[File:Slimeball JE1 BE1.png|32px]] Added slimeballs. They are currently unobtainable and serve no purpose.}}
{{History||v0.12.1|snap=build 1|Added slimeballs to the [[creative]] [[inventory]].
|Slimeballs can now be obtained by killing [[slime]]s.
|Slimeballs are now used to craft [[magma cream]].}}
{{History||v0.14.0|snap=build 1|Slimeballs are now used to craft [[slime block]]s.}}
{{History||v0.15.0|snap=build 1|Slimeballs are now used to craft [[sticky piston]]s and [[lead]]s.}}
{{History|bedrock}}
{{History||1.8.0|snap=beta 1.8.0.8|Slimeballs can now be obtained when a [[panda|baby panda]] sneezes.}}
{{History||1.10.0|snap=beta 1.10.0.3|[[File:Slimeball JE2 BE2.png|32px]] The texture of slimeballs has been changed.
|Slimeballs can now be obtained via [[trading]] with [[wandering trader]]s.}}
{{History|console}}
{{History||xbox=TU1|xbone=CU1|ps=1.0|wiiu=Patch 1|switch=1.0.1|[[File:Slimeball JE1 BE1.png|32px]] Added slimeballs.}}
{{History||xbox=TU3|Slimeballs are now used to craft [[sticky piston]]s.}}
{{History||xbox=TU5|Slimeballs are found in the Miscellaneous tab in the [[Creative inventory]].}}
{{History||xbox=TU9|Moved slimeballs to the Materials tab in the Creative inventory.}}
{{History||xbox=none|xbone=none|ps=1.83|wiiu=none|switch=none|Slimeballs can now be obtained when a [[panda|baby panda]] sneezes.}}
{{History||xbox=none|xbone=none|ps=1.90|wiiu=none|switch=none|[[File:Slimeball JE2 BE2.png|32px]] The texture of slimeballs has been changed.}}
{{History|New 3DS}}
{{History||0.1.0|[[File:Slimeball JE1 BE1.png|32px]] Added slimeballs.}}
{{History|foot}}
==Issues ==
{{issue list}}
== External Links ==
*[https://www.minecraft.net/en-us/article/taking-inventory--slimeball Taking Inventory: Slimeball] – Minecraft.net on June 24, 2021
{{Items}}
[[Category:Renewable resources]]
[[cs:Sliz]]
[[de:Schleimball]]
[[es:Bola de slime]]
[[fr:Boule de Slime]]
[[hu:Nyálkagolyó]]
[[it:Palla di slime]]
[[ja:スライムボール]]
[[ko:슬라임볼]]
[[nl:Slijmbal]]
[[pl:Kula szlamu]]
[[pt:Bola de slime]]
[[ru:Слизь]]
[[th:ลูกเมือก]]
[[uk:Слизова кулька]]
[[zh:黏液球]]</li></ul> | build 1 | Baby husks can now mount wolves. | |||
| Wolves now attack strays. | |||||
v0.16.0{{Extension DPL}}<ul><li>[[Rabbit Stew|Rabbit Stew]]<br/>{{Item
| title = Rabbit Stew
| heals = {{hunger|10}}
| renewable = Yes
| stackable = No
}}
'''Rabbit stew''' is a [[food]] [[item]] that can be eaten by the [[player]].
== Obtaining ==
=== Crafting ===
{{Crafting
|shapeless=true
|B1=Cooked Rabbit
|A2=Carrot
|B2=Baked Potato
|C2=Any Mushroom
|B3=Bowl
|Output=Rabbit Stew
|type=Foodstuff
}}
=== Trading ===
{{IN|bedrock}}, novice-level Butcher villagers always offer to sell rabbit stew for one emerald as their second trade.
{{IN|java}}, novice-level Butcher villagers have a 50% chance of offering rabbit stew for one emerald.
== Usage ==
=== Food ===
To eat rabbit stew, press and hold {{control|use}} while it is selected in the hotbar. Eating one restores {{hunger|10}} [[hunger]] and 12 hunger [[Hunger#Mechanics|saturation]]. This restores more hunger than any other food type in the game except [[cake]], but has less saturation than a [[golden carrot]], a [[cooked porkchop]], or a [[steak]].
Eating rabbit stew leaves the player with an empty bowl, similar to [[mushroom stew]], [[suspicious stew]], and [[beetroot soup]].
=== Wolves ===
{{IN|bedrock}}, rabbit stew can be used to feed [[wolves]], healing them by {{hp|10|mob=1}}. However, unlike other wolf food, rabbit stew does not speed up the growth of baby wolves, and it cannot be used to breed them. It is usable only on a wolf that has less than full health.
== Sounds ==
{{Sound table/Entity/Food}}
== Data values ==
=== ID ===
{{edition|java}}:
{{ID table
|edition=java
|showforms=y
|generatetranslationkeys=y
|displayname=Rabbit Stew
|spritetype=item
|nameid=rabbit_stew
|form=item
|foot=1}}
{{edition|bedrock}}:
{{ID table
|edition=bedrock
|shownumericids=y
|showforms=y
|notshowbeitemforms=y
|generatetranslationkeys=y
|displayname=Rabbit Stew
|spritetype=item
|nameid=rabbit_stew
|id=290
|form=item
|foot=1}}
== Advancements ==
{{load advancements|Husbandry;A Balanced Diet}}
== Video ==
<div style="text-align:center">{{yt|GwCqwtydRBc}}</div>
== History ==
{{History|java}}
{{History||1.8|snap=June 30, 2014|slink={{tweet|TheMogMiner|483725253018157057}}|[[Ryan Holtz]] tweets the recipe of rabbit stew, and that it can restore hunger better than any other item other than [[golden apple]]s (which was incorrect, as golden apples restore less hunger, but a whole [[cake]] restores more).}}
{{History|||snap=14w27a|[[File:Rabbit Stew JE1 BE1.png|32px]] Added rabbit stew.}}
{{History||1.13|snap=17w47a|Prior to [[1.13/Flattening|''The Flattening'']], this [[item]]'s numeral ID was 413.}}
{{History||1.14|snap=18w43a|[[File:Rabbit Stew JE2.png|32px]] The texture of rabbit stew has been changed.
|The rabbit stew's [[recipe]] is now shapeless.}}
{{History|||snap=18w50a|[[File:Rabbit Stew JE3 BE2.png|32px]] The texture of rabbit stew has been changed.}}
{{History|||snap=19w11a|Butcher [[villager]]s now [[trading|sell]] rabbit stew.}}
{{History|pocket alpha}}
{{History||v0.13.0|snap=build 1|[[File:Rabbit Stew JE1 BE1.png|32px]] Added rabbit stew.}}
{{History|bedrock}}
{{History||1.10.0|snap=beta 1.10.0.3|[[File:Rabbit Stew JE3 BE2.png|32px]] The texture of rabbit stew has been changed.
|The recipe for rabbit stew is now shapeless.}}
{{History||1.11.0|snap=beta 1.11.0.4|Butcher [[villager]]s now [[trading|sell]] rabbit stew.}}
{{History|console}}
{{History||xbox=TU31|xbone=CU19|ps=1.22|wiiu=Patch 3|switch=1.0.1|[[File:Rabbit Stew JE1 BE1.png|32px]] Added rabbit stew.}}
{{History||xbox=none|xbone=none|ps=1.90|wiiu=none|switch=none|[[File:Rabbit Stew JE3 BE2.png|32px]] The texture of rabbit stew has been changed.
|The recipe for rabbit stew is now shapeless.}}
{{History|new 3ds}}
{{History||0.1.0|[[File:Rabbit Stew JE1 BE1.png|32px]] Added rabbit stew.}}
{{History|foot}}
== Issues ==
{{issue list}}
== Trivia ==
* If the ingredients of rabbit stew were eaten separately and the [[mushroom]] had become half of a [[mushroom stew]], they would restore a total of {{Hunger|16}} and 19.2 saturation points. Without counting the mushroom, the separate ingredients would restore {{Hunger|13}} and 15.6 saturation points. Therefore, crafting rabbit stew results in a net loss of restorative points, though it is quicker than eating all the ingredients separately.
* Rabbit stew restores more hunger and total food points (hunger + saturation) than nearly any other single item (the exception is a suspicious stew with Saturation). This is balanced by the point that the stew does not stack, and with its complex recipe it's not so easy to make "on the road". The suspicious stew shares the unstackability, but with only four ingredients it can at least be crafted in the inventory.
==Gallery==
<gallery>
Rabbit Stew Crafting.jpg|Crafting rabbit stew.
</gallery>
== References ==
{{Reflist}}
{{items}}
[[de:Kaninchenragout]]
[[es:Estofado de conejo]]
[[it:Stufato di coniglio]]
[[fr:Ragoût de lapin]]
[[ja:ウサギシチュー]]
[[ko:토끼 스튜]]
[[nl:Konijnenstoofpot]]
[[pl:Gulasz z królika]]
[[pt:Ensopado de coelho]]
[[ru:Тушёный кролик]]
[[uk:Тушкований кролик]]
[[zh:兔肉煲]]
[[Category:Food]]
[[Category:Renewable resources]]</li><li>[[Gold Nugget|Gold Nugget]]<br/>{{About|the nugget|the block that can drop nuggets|Gilded Blackstone|the ore|Gold Ore|the ingot form|Gold Ingot|the mineral block|Block of Gold}}
{{Item
| image = Gold Nugget.png
| renewable = Yes
| stackable = Yes (64)
}}
'''Gold nuggets''' are items used to make [[gold ingot]]s and other various golden items. One gold nugget is effectively worth one-ninth of a gold ingot.
== Obtaining ==
=== Mob loot ===
[[Zombified Piglin|Zombified piglin]]s, when killed, may drop 0-1 gold nuggets. When killed using a weapon enchanted with [[Looting]], they may drop an additional gold nugget per level of Looting used, up to a maximum of 4.
=== Crafting ===
{{Crafting
|Gold Ingot
|Output= Gold Nugget, 9
|type= Material
}}
=== Smelting ===
{{Smelting
|Golden Sword; {Any golden tools}; {Any golden armor}; Golden Horse Armor
|Gold Nugget
|0,25
}}
=== Chest loot ===
{{LootChestItem|gold-nugget}}
=== Mining ===
[[Nether gold ore]] mined using a [[pickaxe]] drops 2-6 gold nuggets. If the pickaxe is enchanted with [[Fortune]], it has a 33.3% chance to multiply the drops by 2, Fortune II has a 25% chance to multiply the drops by 2 or 3 and Fortune III has a 20% chance each to multiply the drops by 2, 3, or 4 for a maximum possible drop of 24 golden nuggets. The average drop rate for a Fortune III pickaxe is 8.8, while the drop rate for a [[Silk Touch]] pickaxe is a single ingot, or a flat rate of 9. It is slightly more efficient to mine with a Silk Touch pickaxe.
[[Gilded Blackstone|Gilded blackstone]] mined using a pickaxe has a 10% chance to drop 2-5 gold nuggets. If the pickaxe is enchanted with Fortune I, the chance gold nuggets drop is increased 14.29%, Fortune II increases the drop chance to 25%, and Fortune III guarantees the drop.
== Usage ==
Gold nuggets can be used to craft a [[golden carrot]] or [[glistering melon]] for brewing. Also, gold nuggets can be combined with gunpowder and dye to create a [[firework star]] that bursts in a star-shaped explosion.
[[Piglin]]s instantly pick up any gold nuggets that are within 1 [[block]] of them. Unlike other gold-related items, they do not intentionally seek out gold nuggets to pick up and only pick them up if they walk near it. Unlike gold ingots, gold nuggets picked up are dropped upon the piglin's death.
=== Crafting ingredient ===
{{crafting usage}}
== Data values ==
=== ID ===
{{edition|java}}:
{{ID table
|edition=java
|showforms=y
|generatetranslationkeys=y
|displayname=Gold Nugget
|spritetype=item
|nameid=gold_nugget
|form=item
|foot=1}}
{{edition|bedrock}}:
{{ID table
|edition=bedrock
|shownumericids=y
|showforms=y
|notshowbeitemforms=y
|generatetranslationkeys=y
|displayname=Gold Nugget
|spritetype=item
|nameid=gold_nugget
|id=425
|form=item
|foot=1}}
== History ==
{{History|Java}}
{{History||1.0.0|snap=Beta 1.9 Prerelease|[[File:Gold Nugget JE1.png|32px]] Added gold nuggets.
|Gold nuggets are [[drops|dropped]] by [[zombie pigmen]].
|Gold nuggets can be used to craft [[gold ingot]]s.
|Gold nuggets currently do not have a mouseover name.}}
{{History|||snap=Beta 1.9 Prerelease 2|Gold nuggets now have a mouseover name.}}
{{History|||snap=Beta 1.9 Prerelease 4|Gold nuggets are now used to craft [[glistering melon]]s.
|Gold nuggets can now be [[crafting|crafted]] from a single [[gold ingot]].}}
{{History||1.1|snap=release|Normal [[golden apple]]s are now crafted with gold nuggets.}}
{{History||1.3.1|snap=1.3|[[File:Gold Nugget JE2 BE1.png|32px]] The texture of gold nuggets has been changed.}}
{{History||1.4.2|snap=12w34a|Gold nuggets are now used to craft [[golden carrot]]s.}}
{{History||1.4.6|snap=12w49a|Gold nuggets can now be used to craft a [[firework star]] for a star shaped effect on a [[firework rocket|firework]].}}
{{History||1.6.1|snap=13w23a|Gold nuggets can no longer be used to [[crafting|craft]] a [[golden apple]].}}
{{History||1.9|snap=15w43a|Gold nuggets may now be found among the loot in [[igloo]] basement [[chest]]s.}}
{{History||1.11.1|snap=16w50a|Gold nuggets can now be [[smelting|smelted]] from golden [[tool]]s and [[armor]].}}
{{History||1.13|snap=17w47a|Prior to [[1.13/Flattening|''The Flattening'']], this [[item]]'s numeral ID was 371.}}
{{History|||snap=18w09a|Gold nuggets can now be found in [[underwater ruins]] loot [[chest]]s.}}
{{History|||snap=18w11a|Gold nuggets now generate in the chests of [[shipwreck]]s.}}
{{History||1.14|snap=18w43a|[[File:Gold Nugget JE3 BE2.png|32px]] The texture of gold nuggets has been changed.}}
{{History|||snap=18w48a|Gold nuggets can now be found in chests in [[plains]] [[village]] houses.}}
{{History|||snap=18w49a|Gold nuggets can now be found in chests in [[savanna]] village houses.}}
{{History||1.16|snap=20w12a|[[Nether gold ore]] now [[drops]] 2-6 gold nuggets, affected by [[Fortune]].}}
{{History|||snap=20w15a|[[Gilded blackstone]] now has 10% chance to drop 2-5 gold nuggets. Only the drop chance is affected by [[Fortune]].}}
{{History|||snap=20w16a|Gold nuggets now generate in [[bastion remnant]]s and [[ruined portal]] chests.}}
{{History|||snap=Pre-release 1|Gold nuggets can now be used to distract [[piglin]]s.}}
{{History|||snap=Pre-release 3|Gold nuggets can no longer be used to distract [[piglin]]s.}}
{{History||1.20|snap=23w12a|Gold nuggets can now be found in [[suspicious gravel]] and [[suspicious sand]] in cold and warm [[ocean ruins]] and in [[trail ruins]].}}
{{History|||snap=23w16a|Gold nuggets no longer generate in [[suspicious sand]] in [[trail ruins]].|Due to the split of the archaeological loot tables for suspicious gravel within [[trail ruins]], gold nuggets are now common loot.}}
{{History|pocket alpha}}
{{History||v0.12.1|snap=build 1|[[File:Gold Nugget JE2 BE1.png|32px]] Added gold nuggets. |Gold nuggets can be used to craft [[glistering melon]]s, [[gold ingot]]s and [[golden carrot]]s.|[[Gold ingot]]s can now be [[crafting|crafted]] into 9 gold nuggets.|[[Zombie pigmen]] now [[drops|drop]] gold nuggets upon being killed.}}
{{History|pocket}}
{{History||1.0.0|snap=alpha 0.17.0.1|Gold nuggets can now be found inside [[igloo]] basement [[chest]]s.}}
{{History||1.1.0|snap=alpha 1.1.0.0|Gold nuggets can now be [[smelting|smelted]] from golden [[tool]]s and [[armor]].}}
{{History|bedrock}}
{{History||1.2.0|snap=beta 1.2.0.2|Gold nuggets can now be used to craft [[firework star]]s.}}
{{History||1.4.0|snap=beta 1.2.14.2|Gold nuggets can now be found in some [[shipwreck]] [[chest]]s.}}
{{History|||snap=beta 1.2.20.1|Gold nuggets can now be found in [[underwater ruins]] chests.}}
{{History||1.10.0|snap=beta 1.10.0.3|The gold nugget can now be found in [[plains]] [[village]] house chests.|[[File:Gold Nugget JE3 BE2.png|32px]] The texture of gold nuggets has been changed.}}
{{History||1.11.0|snap=beta 1.11.0.1|The gold nugget can now be found in [[savanna]] village house [[chest]]s.}}
{{History||1.16.0|snap=beta 1.16.0.57|[[Nether gold ore]] now [[drops]] 2-6 gold nuggets.|[[Gilded blackstone]] now has 10% chance to drop 2-5 gold nuggets.}}
{{History||1.16.100|snap=beta 1.16.100.50|Gold nuggets can now be used as fuel for a [[furnace]].<ref>{{bug|MCPE-114216}}</ref>}}
{{History||1.18.30|snap=beta 1.18.30.26|Gold nuggets can no longer be used as fuel for a furnace.}}
{{History|Legacy Console}}
{{History||xbox=TU7|xbone=CU1|ps=1.0|wiiu=Patch 1|switch=1.0.1|[[File:Gold Nugget JE2 BE1.png|32px]] Added gold nuggets.}}
{{History||xbox=TU53|xbone=CU43|ps=1.49|wiiu=Patch 23|switch=1.0.3|Gold nuggets can now be [[smelting|smelted]] from golden [[tool]]s and [[armor]].}}
{{History||xbox=none|xbone=none|ps=1.90|wiiu=none|switch=none|[[File:Gold Nugget JE3 BE2.png|32px]] The texture of gold nuggets has been changed.}}
{{History|3DS}}
{{History||0.1.0|[[File:Gold Nugget JE2 BE1.png|32px]] Added gold nuggets.}}
{{History||1.9.19|Gold nuggets can now be [[smelting|smelted]] from golden [[tool]]s and [[armor]].}}
{{History|foot}}
== Issues ==
{{issue list}}
== See also ==
* [[Iron Nugget]]
* [[Gold]]
{{Items}}
[[cs:Zlatý nuget]]
[[de:Goldklumpen]]
[[es:Pepita de oro]]
[[fr:Pépite d'or]]
[[hu:Aranyrög]]
[[it:Pepita d'oro]]
[[ja:金塊]]
[[ko:황금 조각]]
[[nl:Goudklompje]]
[[pl:Bryłka złota]]
[[pt:Pepita de ouro]]
[[ru:Кусочек золота]]
[[uk:Золотий самородок]]
[[zh:金粒]]
[[Category:Renewable resources]]</li></ul> | build 4 | Wolves now damage the player in peaceful difficulty.[verify] | |||
| Pocket Edition | |||||
1.1.0{{Extension DPL}}<ul><li>[[Ankle Monitor|Ankle Monitor]]<br/>{{Joke feature}}
{{Item
| title = Ankle Monitor
| image = Ankle Monitor.png
| renewable = No
| stackable = Yes (64)
}}
The '''Ankle monitor''' was a joke foot item.
== Usage ==
Ankle monitors were equipped in the boots slot. In survival mode, when equipped, it could not be taken off. However, players in Creative mode are unaffected.
When equipped, the player would be afflicted with {{EffectLink|Slowness}} I.
During the night, being a certain number of blocks from the world spawn, above a certain minimum,{{checkthecode|how much?}} would prompt the following message in chat: "CURFEW WARNING! You are violating your house arrest! Get back by [distance] meters!"
If in [[the Nether]] or [[the End]], a different set of messages would be cycled through which can be seen in the section below.
=== Nether and End messages ===
* CURFEW WARNING! You are violating your house arrest! Uuuh... where are you anyway?
* CURFEW WARNING! Hello, are you there?
* CURFEW WARNING! I'm sure you have important things to do, but you need to go back!
* CURFEW WARNING! We're lonely back home!
* CURFEW WARNING! By "we" I mean I. I'm lonely.
* CURFEW WARNING! Ok enough games... GET BACK RIGHT NOW!
* CURFEW WARNING! LAST WARNING!
* CURFEW WARNING! LASTEST WARNING (really now)
* CURFEW WARNING! ...
* CURFEW WARNING! So... Where are you?
* CURFEW WARNING! Having a good day?
* CURFEW WARNING! Did you see that monster over there?
* CURFEW WARNING! Give it a whack, if you would be so kind.
* CURFEW WARNING! Teheee...
* CURFEW WARNING! Ok, enough of this!
* CURFEW WARNING! Last straw!
* CURFEW WARNING! Now you die.
* CURFEW WARNING! Boom!
* CURFEW WARNING! Hehe, fun right?
* CURFEW WARNING! Ok, you will not hear anything more from me now!
* CURFEW WARNING! You'll be as lonely as I am.
* CURFEW WARNING! How does that feel?
* CURFEW WARNING! Stop. Please. Stupid.
* CURFEW WARNING! I know, I'll wipe my memory. That way, I can start over!
* CURFEW WARNING! *bzzzzttt*
== Sounds ==
{{Sound table
|sound=Robot1arm1.ogg
|sound2=Robot1arm2.ogg
|sound3=Robot1arm3.ogg
|sound4=Robot1arm4.ogg
|source=dependent
|subtitle=''None''
|description=When a notification is displayed
|id=item.ankle_monitor.warning
|translationkey=''None''
|volume=1.0
|pitch=1.0
|distance=16
|foot=1}}
== Data values ==
=== ID ===
{{ID table
|shownumericids=y
|showforms=y
|generatetranslationkeys=java
|displayname=Ankle Monitor
|spritetype=item
|nameid=ankle_monitor
|id=501
|form=item
|translationkey=item.ankleMonitor.name
|foot=1}}
== History ==
{{History|java}}
{{History||1.RV-Pre1|[[File:Ankle_Monitor_(item).png|32px]] [[File:Ankle Monitor.png|32px]] Added ankle monitors.}}
{{History||1.11|snap=16w39a|The inability to remove ankle monitors was somewhat implemented into the canonical game through the addition of [[Curse of Binding]].<ref>{{ytl|Vm6oplvyyh0|t=3m31s}}</ref>}}
{{History|foot}}
== Issues ==
Ankle monitors are an unsupported [[item]] due to being an [[Wikipedia:April Fools' Day|April Fools']] joke, and therefore such issues relating to them will not be fixed.
== Gallery ==
<gallery>
TechGear.png|A [[player]] wearing the gear featured in this [[wikipedia:April Fools' Day|April Fools']] joke version.
</gallery>
==References==
{{Reflist}}
{{Items}}
{{Jokes}}
[[Category:Non-renewable resources]]
[[Category:Joke items]]
[[es:Ankle monitor]]</li><li>[[:Category:Joke items|Category:Joke items]]<br/>[[Category:Joke features|Items]]
[[Category:Items]]</li></ul> | alpha 1.1.0.0 | Wolves now run away from llamas. | |||
| Bedrock Edition | |||||
1.5.0{{Extension DPL}}<ul><li>[[Ink Sac|Ink Sac]]<br/>{{For|the variant dropped by Glow squids|Glow Ink Sac}}
{{Item
| image = Ink Sac.png
| renewable = Yes
| stackable = Yes (64)
}}
An '''ink sac''' is an [[item]] dropped by a [[squid]] upon death used to create [[black dye]], [[dark prismarine]]{{only|BE|short=1}}, and [[Book and Quill|books and quills]].
== Obtaining ==
=== Mob loot ===
==== Squid ====
{{see also|Tutorials/Squid farming|title1=Squid farming}}
A [[squid]] drops one to three ink sacs upon death. The maximum amount is increased by 1 per level of [[Looting]], for a maximum of 1 to 6 with Looting III.
=== Fishing ===
Ink sacs can be obtained as a "junk" item from [[fishing]]. The [[Luck of the Sea]] [[enchantment]] decreases the chance.
=== Trading ===
[[Wandering trader]]s sometimes sell 3 ink sacs for an [[emerald]] {{in|bedrock}}. Apprentice level [[Trading#Librarian|librarians]] also buy 5 ink sacs for one [[emerald]].
=== Natural generation ===
{{LootChestItem|ink-sac}}
== Usage ==
=== Crafting ingredient ===
{{crafting usage}}
{{IN|bedrock}}, ink sacs can be also used in banner patterns:
{{banner crafting usage}}
=== Loom ingredient ===
{{Banner loom usage|Ink Sac}}
=== Dye ===
{{Dye usage}}
* Each type of [[Prismarine#Dark Prismarine|dark prismarine]] can be crafted using varying amounts of 8 [[Prismarine Shard#prismarine shards|prismarine shards]].
=== Trading ===
Journeyman-level librarian [[villager]]s have a {{frac|2|3}} chance to buy five ink sacs for an [[emerald]]. They always offer the trade {{in|bedrock|lc=}}.
=== Signs ===
Ink sacs can be applied to [[sign]]s or [[hanging sign]]s to revert glowing text back to default.
== Sounds ==
{{edition|java}}:
{{Sound table
|sound=Ink sac1.ogg
|sound2=Ink sac2.ogg
|sound3=Ink sac3.ogg
|subtitle=Ink Sac splotches
|source=block
|description=When an ink sac is used on a sign
|id=item.ink_sac.use
|translationkey=subtitles.item.ink_sac.use
|volume=1.0
|pitch=''varies'' <ref group=sound>Each sound can be 0.85, 0.88, or 0.9</ref>
|distance=16
|foot=1}}
{{edition|bedrock}}:
{{Sound table
|type=bedrock
|sound=Ink sac1.ogg
|sound2=Ink sac2.ogg
|sound3=Ink sac3.ogg
|source=sound
|description=When an ink sac is used on a sign
|id=sign.ink_sac.use
|volume=1.0
|pitch=1.0
|foot=1}}
== Data values ==
=== ID ===
{{edition|java}}:
{{ID table
|edition=java
|showforms=y
|generatetranslationkeys=y
|displayname=Ink Sac
|spritetype=item
|nameid=ink_sac
|form=item
|foot=1}}
{{edition|bedrock}}:
{{ID table
|edition=bedrock
|showaliasids=y
|shownumericids=y
|showforms=y
|notshowbeitemforms=y
|generatetranslationkeys=y
|displayname=Ink Sac
|spritetype=item
|nameid=ink_sac
|aliasid=dye / 0
|id=413
|form=item
|translationkey=item.dye.black.name
|foot=1}}
== Video ==
{{video note|Ink sacs can no longer be used as a dye in Java Edition.}}
<div style="text-align:center">{{yt|ABYCZfawO60}}</div>
== History ==
{{History|java beta}}
{{History||1.2|[[File:Ink Sac JE1 BE1.png|32px]] Added ink sacks, together with all other dyes.}}
{{History||1.2_02|"Ink Sack" has been renamed to "Ink Sac".}}
{{History|java}}
{{History||1.3.1|snap=12w17a|Ink sacs are now used to craft [[book and quill]]s.}}
{{History||1.4.2|snap=12w34a|Added the ability to [[Armor#Dyeing|dye]] leather [[armor]] and [[wolf]] collars.}}
{{History||1.4.6|snap=12w49a|Ink sacs can now be crafted with [[gunpowder]] to create a [[firework star]].}}
{{History||1.6.1|snap=13w19a|[[Stained clay]] can now be [[crafting|crafted]].}}
{{History||1.7.2|snap=13w41a|[[Stained glass]] can now be crafted.}}
{{History||1.8|snap=14w25a|Ink sacs are now used to craft [[dark prismarine]].}}
{{History|||snap=14w30a|Added [[banner]]s, which can be [[dye]]d with ink sacs.}}
{{History||1.11|snap=16w39a|Ink sacs can now be used to dye [[shulker box]]es.}}
{{History||1.12|snap=17w06a|Ink sacs are now used to craft black [[concrete powder]].}}
{{History|||snap=17w15a|Ink sacs can now be used to dye [[bed]]s.}}
{{History||1.13|snap=17w47a|The different data values for the <code>dye</code> ID have been split up into their own IDs.
|Prior to [[1.13/Flattening|''The Flattening'']], this [[item]]'s numeral ID was 351.}}
{{History||1.14|snap=18w43a|Ink sacs can now be used to craft [[black dye]].
|Ink sacs can no longer be used as a [[dye]].
|All of the dye-related functions and crafting recipes of ink sac (except books and quills and dark prismarine) have been transferred to black dye.
|[[File:Ink Sac JE2 BE2.png|32px]] The texture of ink sacs has been changed.}}
{{History|||snap=19w11a|Librarian [[villager]]s now [[trading|buy]] ink sacs.}}
{{History||1.15|snap=Pre-release 1|Ink sacs are no longer used to craft [[dark prismarine]].}}
{{History||1.17|snap=21w03a|Ink sacs can now be used to remove the text's glowing effect of a [[sign]].}}
{{History||1.20<br>(Experimental)|link=1.19.3|snap=22w42a|Ink sacs can now be used to remove the text's glowing effect of a [[hanging sign]].}}
{{History|pocket alpha}}
{{History||v0.3.0|[[File:Ink Sac JE1 BE1.png|32px]] Added ink sacs. They are currently unobtainable and serve no purpose.}}
{{History||v0.8.0|snap=build 1|Ink sacs can now be used to craft [[cocoa beans]].}}
{{History|||snap=build 3|Ink sacs are now available in [[creative]].}}
{{History||v0.9.0|snap=build 1|Ink sacs now generate in [[village]] and [[stronghold]] [[chest]]s.}}
{{History||v0.11.0|snap=build 1|Ink sacs can now be obtained from [[squid]].
|Ink sacs can now be obtained as a junk [[item]] from [[fishing]].}}
{{History||v0.14.0|snap=build 1|Ink sacs now can now be used to dye water in [[cauldron]]s.}}
{{History||v0.16.0|snap=build 1|Ink sacs are no longer used to craft [[cocoa beans]].
|Ink sacs can now be used to craft [[dark prismarine]].}}
{{History|pocket}}
{{History||1.0.0|snap=alpha 0.17.0.1|Ink sacs can now be used to dye [[shulker]]s.}}
{{History||1.1.0|snap=alpha 1.1.0.0|Ink sacs are now used to re-dye [[bed]]s.
|Ink sacs can now be used to dye [[shulker box]]es.}}
{{History|bedrock}}
{{History||1.2.0|snap=beta 1.2.0.2|Ink sacs can now be used to craft [[book and quill]]s.
|Added [[banner]]s, which can be [[dye]]d with ink sacs.
|Ink sacs can now be crafted with [[gunpowder]] to create [[firework star]]s.
|Ink sacs can now be used to craft black [[concrete powder]].
|[[Stained glass]] can now be [[crafting|crafted]].}}
{{History||1.4.0|snap=beta 1.2.20.1|Ink sacs can now be crafted from iron, sulfur, and 4 oxygen in the [[compound creator]]s.
|Ink sacs can now be used to craft [[balloon]]s and [[glow stick]]s.}}
{{History||1.8.0|snap=beta 1.8.0.10|Ink sacs can now be used to craft [[black dye]].}}
{{History||1.10.0|snap=beta 1.10.0.3|Ink sacs can now be bought from [[wandering trader]]s.
|[[File:Ink Sac JE2 BE2.png|32px]] The texture of ink sacs has been changed.}}
{{History||1.11.0|snap=beta 1.11.0.4|Ink sacs can now be [[trading|sold]] to librarian [[villager]]s.}}
{{History||1.16.100|snap=beta 1.16.100.56|The ID of ink sacs has been changed from {{cd|dye/0}} to {{cd|ink_sac}}.}}
{{History||1.16.210|snap=beta 1.16.210.59|Ink sacs can now be used to revert glowing text on signs to normal.}}
{{History|console}}
{{History||xbox=TU1|xbone=CU1|ps=1.00|switch=1.0.1|wiiu=Patch 1|[[File:Ink Sac JE1 BE1.png|32px]] Added ink sacs.}}
{{History||xbox=none|xbone=none|ps=1.90|wiiu=none|switch=none|[[File:Ink Sac JE2 BE2.png|32px]] The texture of ink sacs has been changed.}}
{{History|New 3DS}}
{{History||0.1.0|[[File:Ink Sac JE1 BE1.png|32px]] Added ink sacs.}}
{{History|foot}}
== Issues ==
{{issue list}}
== References ==
{{reflist}}
{{Items}}
[[Category:Bedrock Edition specific information]]
[[Category:Items]]
[[Category:Dyes]]
[[Category:Renewable resources]]
[[cs:Váček inkoustu]]
[[de:Tintenbeutel]]
[[es:Saco de tinta]]
[[fr:Poche d'encre]]
[[hu:Tintazsák]]
[[ja:イカスミ]]
[[ko:먹물 주머니]]
[[nl:Inktzak]]
[[pl:Torbiel z atramentem]]
[[pt:Bolsa de tinta]]
[[ru:Чернильный мешок]]
[[uk:Чорнильний мішок]]
[[zh:墨囊]]</li><li>[[Drinks|Drinks]]<br/>[[File:Drinking Steve.png|150px|right]] [[File:Drinking Alex.png|150px|right]]
'''Drinks''' are a narrow class of consumable [[item]]s that can be ingested by the [[player]] in an extremely similar manner to [[food]]. However, drinks are not encountered quite as commonly as food is, and they are not nearly as integral to Survival gameplay. Drinks can generally be distinguished from food by the sounds they make upon consumption, the lack of [[particles]] they emit, and the fact that they leave an empty container item in the [[inventory]] after consumption. Drinks do not affect [[hunger]] or saturation values upon use (with the exception of [[honey bottle]]s), and do not need those values to be depleted in order to be consumed.
Drinks are drunk by holding {{control|use item}} while having the drink item selected in the hotbar or in the off hand.
== Drinks ==
{{/table}}
== History ==
{{main|Milk#History|Potion#History|Honey Bottle#History}}
{{History|java alpha}}
{{History||v1.0.11|[[File:Milk Bucket JE1 BE1.png|32px]] Added milk.}}
{{History|java}}
{{History||1.0.0|snap=Beta 1.9 Prerelease 3|Added water bottles and potions.}}
{{History||1.15|snap=19w34a|[[File:Honey Bottle JE1.png|32px]] Added honey bottles.}}
{{History|pocket alpha}}
{{History||v0.7.0|[[File:Milk Bucket JE1 BE1.png|32px]] Added milk buckets.}}
{{History||v0.12.1|snap=build 1|Added water bottles and potions.}}
{{History|bedrock}}
{{History||1.14.0|snap=beta 1.14.0.1|[[File:Honey Bottle BE1.png|32px]] Added honey bottles.}}
{{History|foot}}
{{Items}}
[[ja:飲み物]]
[[pt:Bebidas]]
[[Category:Food]]</li></ul> | beta 1.5.0.4 | Wild wolves now attack baby turtles. | |||
1.10.0{{Extension DPL}}<ul><li>[[Heart of the Sea|Heart of the Sea]]<br/>{{Item
| image = Heart of the Sea.png
| stackable = Yes (64)
| rarity = Uncommon
| renewable = No
}}
A '''heart of the sea''' is a rare [[item]] that can be crafted into a [[conduit]].
== Obtaining ==
The heart of the sea must be found. It cannot be crafted or obtained by trading, making it a [[non-renewable resource]].
A heart of the sea is obtained from a [[buried treasure]]. The location is marked with a noticeable red X on a [[Explorer Map|buried treasure map]], which is found in [[Ocean_Ruins|ocean ruins]] and [[Shipwreck|shipwrecks]]. Feeding [[raw cod]] or [[raw salmon]] to a [[dolphin]] causes the dolphin to swim toward the nearest [[buried treasure]], [[shipwreck]], or [[ocean ruins]].
=== Chest loot ===
{{LootChestItem|heart-of-the-sea}}
== Usage ==
=== Crafting===
{{crafting usage}}
== Data values ==
=== ID ===
{{edition|java}}:
{{ID table
|edition=java
|showforms=y
|generatetranslationkeys=y
|displayname=Heart of the Sea
|spritetype=item
|nameid=heart_of_the_sea
|form=item
|foot=1}}
{{edition|bedrock}}:
{{ID table
|edition=bedrock
|shownumericids=y
|showforms=y
|notshowbeitemforms=y
|generatetranslationkeys=y
|displayname=Heart of the Sea
|spritetype=item
|nameid=heart_of_the_sea
|id=571
|form=item
|foot=1}}
== History ==
{{History|java}}
{{History||1.13|snap=18w15a|[[File:Heart of the Sea JE1 BE2.png|32px]] Added heart of the sea.}}
{{History|||snap=18w19a|Heart of the sea now generates in all [[buried treasure]] [[chest]]s in a stack of 1.}}
{{History|bedrock}}
{{History||1.4.0|snap=beta 1.2.14.2|An entry in the [[buried treasure]] loot table has been added named <code>nautilus_core</code>. It is unobtainable though since the <code>nautilus_core</code> has not been added into the game yet.}}
{{History|||snap=beta 1.2.20.1|[[File:Heart of the Sea BE1.png|32px]] Added heart of the sea as an [[item]] obtainable in buried treasure [[chest]]s. It cannot be used to craft [[conduit]]s yet.}}
{{History|||snap=beta 1.2.20.2|[[File:Heart of the Sea JE1 BE2.png|32px]] The texture of heart of the sea has been changed.}}
{{History||1.5.0|snap=beta 1.5.0.1|Heart of the sea can now be used to craft [[conduit]]s.}}
{{History|console}}
{{History||xbox=TU69|ps=1.76|wiiu=Patch 38|[[File:Heart of the Sea JE1 BE2.png|32px]] Added heart of the sea.}}
{{History|education}}
{{History||1.4.0|[[File:Heart of the Sea JE1 BE2.png|32px]] Added heart of the sea. It generates in all [[buried treasure]] [[chest]]s in a stack of 1.}}
{{History|foot}}
== Issues ==
{{issue list}}
== Trivia ==
* Before the heart of the sea was added to {{el|be}}, there was an entry found in the buried treasure chest loot table named <code>nautilus_core</code>, which was later revealed to be the heart of the sea. Despite the name change, the heart of the sea continues to be referred to as the <code>nautilus_core</code> in most game files.
== External Links ==
*[https://www.minecraft.net/en-us/article/heart-sea Taking Inventory: Heart of the Sea] – Minecraft.net on August 31, 2023
{{items}}
[[Category:Non-renewable resources]]
[[de:Herz des Meeres]]
[[fr:Cœur de la mer]]
[[es:Corazón del mar]]
[[it:Cuore del mare]]
[[ja:海洋の心]]
[[ko:바다의 심장]]
[[nl:Hart van de zee]]
[[pl:Serce oceanu]]
[[pt:Coração do mar]]
[[ru:Сердце моря]]
[[uk:Серце моря]]
[[zh:海洋之心]]</li><li>[[:Category:Food|Category:Food]]<br/>
[[Category:Items]]
[[cs:Kategorie:Potraviny]]
[[fr:Catégorie:Nourriture]]
[[hu:Kategória:Ételek]]
[[zh:Category:食物]]</li></ul> | beta 1.10.0.3 | ||||
| The texture of tamed pups has been changed. | |||||
1.13.0{{Extension DPL}}<ul><li>[[Camera|Camera]]<br/>{{about|the entity|the command|commands/camera}}
{{exclusive|edu}}
{{unobtainable|edition=be}}
{{ItemEntity
|imagesize=80px
|renewable=No
|stackable=Yes (64)
|health={{hp|4}}
|image=Camera.png}}
{{Block
| title = Camera Block
| image = Camera (block).png
| invimage = none
| transparent = No
| light = 0
| tool = any
| stackable = Yes (64)
| flammable = No
| lavasusceptible = No
| renewable = No
}}
The '''camera''' is an [[entity]] that is capable of capturing and storing images. {{IN|edu}}, it works together with the [[portfolio]] item to create collections of [[photo]]s.<ref>https://education.minecraft.net/support/knowledge-base/using-cameras-portfolios/</ref>
== Obtaining ==
The camera can be obtained in the [[Creative inventory]] in ''Minecraft Education''. It can be obtained either by NBT editors, inventory editors, or glitches in Bedrock Edition.
To get the block form of the camera in Bedrock Edition using an NBT editor, you need to set the item name of the block in the inventory slot (<code>name:</code> ) to <code>item.camera</code>, then you need to add a compound tag called <code>Block</code> and inside of that put the int tag <code>version: 18040335</code> and the text tag <code>name: minecraft:camera</code> into the block compound tag. For the usable "[[spawn egg]]" form of the camera, you only need to set the item name of the block in the inventory slot (<code>name:</code> ) to <code>camera</code>; you do not need to add the block compound for this form of the camera.
== Usage ==
Using a camera from the [[inventory]] captures a first-person screenshot. It can also be placed, creating a camera [[entity]] that can track the user, and take pictures from the camera's perspective. Photos that are taken using the camera appear in the [[portfolio]].
Close-up snapshots of an [[item]] on the ground can be taken by holding the Shift key while right-clicking.
Photos that are taken with the camera block are stored in <code>%localappdata%\Packages\MinecraftUWP_8wekyb3d8bbwe\LocalState\screenshots</code>.
== Sounds ==
=== Generic ===
{{Sound table/Block/Normal/BE}}
=== Unique ===
{{Sound table
|sound=Camera1.ogg
|sound2=Camera2.ogg
|sound3=Camera3.ogg
|type=bedrock
|description=When a picture is taken with a camera
|source=Players
|id=camera.take_picture
|volume=1.0
|pitch=1.0
|foot=1}}
== Data values ==
=== ID ===
{{ID table
|edition=bedrock
|firstcolumnname=Camera
|shownumericids=y
|showforms=y
|generatetranslationkeys=y
|displayname=Block
|spritename=camera
|spritetype=block
|nameid=camera
|id=242
|form=block
|itemform=item.camera}}
{{ID table
|displayname=Item
|spritename=camera
|spritetype=item
|translationtype=item
|nameid=camera
|id=593
|form=item
|foot=1}}
{{ID table
|edition=bedrock
|firstcolumnname=Camera
|shownumericids=y
|generatetranslationkeys=y
|displayname=Entity
|spritename=camera
|spritetype=entity
|nameid=tripod_camera
|id=62
|foot=1}}
=== Entity data ===
See [[Bedrock Edition level format/Entity format]].
== Video ==
{{yt|1XLRGFibFNQ}}
== History ==
{{History|pocket alpha}}
{{History||v0.1.0|[[File:Camera BE1.png|50px]] [[File:Camera (item texture) BE1.png|32px]] The textures and model of the camera can be found in the game apk file.<ref name="found">[{{Reddit|jkkmr/found_image_file_for_camera_in_minecraft_portable}} Reddit - Found image file for camera in Minecraft Portable Edition Demo APK file.]</ref><ref>https://web.archive.org/web/20160604161800/https://twitter.com/Kappische/status/103548954368679936</ref>}}
{{History||v0.2.0|[[File:Camera BE2.png|50px]] [[File:Music Disc Blocks JE1 BE1.png|32px]] Added cameras
|Changed item and tripod textures.
|To use a camera, equip it in the [[player]]'s hand, then look in the direction the player wants the picture to be taken. Long-press the screen, and a camera [[drops]] to the ground where the player are standing. Step back, then press on the camera until it starts emitting smoke [[particles]]. The smoke means a picture has been taken, and the camera may disappear immediately afterward.
|Cameras have infinite uses.
|Entity id 62 and item id 456.<ref>https://www.minecraftforum.net/topic/1233138-i-found-the-camera-id/</ref>}}
{{History||v0.5.0|The camera is now invisible and makes the standard player [[damage]] [[sound]].}}
{{History||v0.7.0|Added the "F1" feature (Hide GUI), which has now made the camera obsolete.}}
{{History||v0.8.0|snap=build 2|[[File:Egg JE1 BE1.png|32px]] Item form now uses [[egg]] texture.}}
{{History||v0.9.0|snap=build 1|The camera [[entity]] has been removed. [[Tommaso]] also stated: ''"It doesn't mean that it's dead forever, in fact I have a lot of ideas for it! I think it will be back when have [[shader]]s, sharing and [[redstone]]."''<ref>{{Reddit|sub=MCPE|281sep/camera|ci6znr8}}</ref>}}
{{History||v0.14.0|snap=build 1|[[File:Camera BE3.png|32px]] [[File:Camera (item) BE2.png|32px]] Re-added the camera. It is accessible only with [[inventory]] editors.
|In this version, if the player spawns a camera, leaves the [[world]] and joins back, it summons [[lightning]].}}
{{History||v0.14.2|The camera [[item]] ID has been changed to 498, but it cannot be used at the moment. The [[entity]] can now be spawned with a [[spawn egg]] with a [[damage]] value of 62.
|According to the language files of the game, the empty label that shows up whenever hovering a finger to a camera would now say "Take Picture". However, the button doesn't do anything.}}
{{History||v0.15.0|snap=build 1|The previous empty label on the camera mentioned above now displays the words "Take Picture".
|The [[health]] of the camera [[entity]] is now {{hp|2}} instead {{hp|4}}.
|The camera no longer summons [[lightning]].}}
{{History||v0.16.0|snap=build 1|The camera now has a [[block]] form in [[inventory]], but still spawns the entity. However, the block can be placed only with [[commands]] and editing.
|"Take picture" button on the camera works now, but no image files are created.
|The oldest ID for camera (456) now refers to [[portfolio]].}}
{{History|||snap=build 2|[[File:Camera Block.png|32px]] The camera now has an [[item]] form and the [[block]] has been removed. However, it is still obtainable in servers.
|[[Portfolio]], which works together with the camera to create collections of pictures, has been removed.}}
{{History|||snap=build 4|Camera item form has been removed, and the camera can no longer be obtained or placed using any [[commands|command]].}}
{{History|bedrock}}
{{History||1.8.0|snap=beta 1.8.0.8|[[File:Camera BE3.png|32px]] [[File:Camera Block.png|32px]] The camera has been reimplemented.
|The camera [[entity]] can now be spawned with a [[spawn egg]] with [[damage]] value 258.}}
{{History||1.12.0|snap=beta 1.12.0.2|The camera can now be obtained with the {{cmd|give}} [[commands|command]].}}
{{History||1.13.0|snap=beta 1.13.0.1|The camera can no longer be obtained with the {{cmd|give}} command.
|Functionality has been added to the camera. Screenshots that are taken by the camera can now be saved into the {{cd|screenshots}} folder.
|Cameras are now a part of the {{el|ee}} toggle as a hidden feature.
|Cameras no longer have a [[death]] animation when killed by the [[player]] and instead, instantly emit smoke [[particles]].}}
{{History||1.16.100|snap=beta 1.16.100.50|The camera can now be obtained with the {{cmd|give}} [[commands|command]] once again.}}
{{History|||snap=beta 1.16.100.55|The camera can no longer be obtained with the {{cmd|give}} command.}}
{{History|education}}
{{History||1.0|[[File:Camera BE3.png|32px]] [[File:Camera Block.png|32px]] Added cameras.}}
{{History||1.4.0|Cameras no longer have a [[death]] animation when killed by the [[player]] and instead instantly emit smoke [[particles]].}}
{{History|foot}}
=== Future ===
At the Minecraft [[Pocket Edition]] panel at [[MineCon 2012]], as well as one of [[Johan Bernhardsson|Jbernhardsson]]'s livestreams, it was stated that future plans include trying to have a proper use for cameras, perhaps an easier way to take screenshots and share them with others.<ref>{{ytl|YMhyX_lKWV4}}</ref> In the BlockTalk Q&A, the camera was briefly mentioned as part of a broader "sharing" theme planned for {{el|be}} in the future.<ref>{{ytl|Ruf6tvqsD84}}</ref>
It later got implemented into {{el|ee}}, using the camera to make screenshots and share them in a special book.
== Issues ==
{{Issue list}}
== Trivia ==
* A camera prevents a [[Book and Quill]] from working. Attempting to craft it or obtain it by commands gives a regular book instead, due to non-implementation of photo attaching to written books.
* The camera can take a screenshot, which appears a bit smaller with a thick paper outline having cuts on its edges, making it look like an old photograph.
* This feature is hidden from the Creative inventory and from the /give command item menu.
== Gallery ==
<gallery>
PEcameras030.jpg|A row of cameras, as seen in [[Pocket Edition v0.3.0 alpha|v0.3.0]].
PEcameraphoto.jpg|Example image taken by the camera [[entity]].
CameraUse-1.png|The first method of using cameras.
CameraUse-2.png|The second method of using cameras.
Dinnerbone Camera.png|A camera spawned using a [[spawn egg]] named "[[Dinnerbone]]" in the v0.15.0 beta.
Cam2.png|A camera falling from a [[tree]]. This shows that cameras are entities.
Education Edition Exclusive Features.png|The camera and camera block placed in a world along with other Education Edition features.
Screenshot by camera.jpg|An example of the screenshot taken by a camera in [[Bedrock Edition beta 1.13.0.1|beta 1.13.0.1]].
File:Say Cheese.jpeg|[[Steve]], [[Alex]], [[Jesse]], and an [[Agent]] getting their picture taken.
</gallery>
== See also ==
* [[Portfolio]]
* [[Screenshot]]
== References ==
{{Reflist}}
{{Items}}
{{Entities}}
{{Education Edition}}
[[Category:Education Edition entities]]
[[Category:Education Edition items]]
[[Category:Tools]]
[[cs:Kamera]]
[[de:Kamera]]
[[el:Camera]]
[[es:Cámara]]
[[fr:Appareil photo]]
[[hu:Kamera]]
[[ja:カメラ]]
[[ko:카메라]]
[[nl:Camera]]
[[pl:Kamera]]
[[pt:Câmera]]
[[ru:Камера]]
[[uk:Камера]]
[[zh:相机]]</li><li>[[Carrot|Carrot]]<br/>{{about|the natural food item|the golden food|Golden Carrot|the item for controlling saddled pigs|Carrot on a Stick}}
{{Item
| group = Age 0-1
| 1-1 = Carrots Age 0-1.png
| 1-2 = Carrots Age 0-1 BE.png
| group2 = Age 2-3
| 2-1 = Carrots Age 2-3.png
| 2-2 = Carrots Age 2-3 BE.png
| group3 = Age 4-6
| 3-1 = Carrots Age 4-6.png
| 3-2 = Carrots Age 4-6 BE.png
| group4 = Age 7
| 4-1 = Carrots Age 7.png
| 4-2 = Carrots Age 7 BE.png
| image2 = Carrot JE3 BE2.png
| renewable = Yes
| heals = {{hunger|3}}
| stackable = Yes (64)
}}
A '''carrot''' is a [[food]] [[item]] obtained from carrot crops that can be used to plant them, eaten or used as a crafting ingredient.
'''Carrot crops''' are planted in [[farmland]] and used to grow carrots.
== Obtaining ==
=== Breaking ===
{{See also|Fortune#Seeds}}
Fully grown carrot crops drop 2 to 5 carrots ({{frac|3|5|7}} per crop harvested on average). Yield can be increased using a tool enchanted with [[Fortune]], with Fortune III harvesting an average of {{frac|5|3|7}} carrots.
The yield is calculated by a binomial distribution: 2 drops are fixed, then a drop is attempted three times with a success rate of 57.14286% to yield the extra 0–3 drops. Each level of Fortune enchantment increases the number of attempts by one.
=== Natural generation ===
[[Village]] farm plots have a chance of having carrots. The exact chance depends on the style of the village:
{| class="wikitable"
! Village style !! Chance
|-
| {{EnvSprite|plains-village}} Plains || 30%
|-
| {{EnvSprite|snowy-village}} Snowy || 10%
|}
=== Mob loot ===
[[Zombie]]s, [[husk]]s, and [[zombie villager]]s have a 2.5% ({{frac|1|40}}) chance of dropping either an [[iron ingot]], carrot, or [[potato]] when killed by a player or tamed wolf. This is increased by 1% ({{frac|1|100}}) per level of looting. This gives carrots the following chances of dropping:
* {{frac|1|120}} (about 0.83%)
* {{frac|7|600}} (about 1.17%) with Looting I
* {{frac|9|600}} (about 1.50%) with Looting II
* {{frac|11|600}} (about 1.83%) with Looting III
=== Chest loot ===
{{LootChestItem|carrot}}
== Usage ==
{{see also|Tutorials/Hunger management|title1=Hunger management}}
To eat a carrot, press and hold {{control|use}} while the carrot is selected in the [[hotbar]]. Eating a carrot restores {{hunger|3}} [[hunger]] and 3.6 hunger [[Hunger#Mechanics|saturation]].
=== Farming ===
{{see also|Tutorials/Crop farming|title1 = Crop farming }}
Carrots can be [[farming|farmed]] and harvested on [[farmland]]. Planted carrots take 8 [[Block tick|stages]] to grow, and go through 4 visually distinct stages. Planted carrots require a light level of 9 or greater to continue growing. If the light level is 7 or below, the crops instantly un-plant themselves ("pop off"). It is not possible to plant carrots if the light level is too low.
Crops grow faster if the farmland they are planted in is [[Farmland#Hydration|hydrated]]. Using [[bone meal]] on crops also increases the speed of growth by randomly increasing their growth stage by 2 to 5.
Crops break if pushed by a [[piston]] or if their supporting farmland breaks or turns to dirt (i.e. by being trampled), dropping their usual drops.
If {{cmd|gamerule mobGriefing}} is <code>true</code>, rabbits will find mature carrot [[crops]]{{only|je}} / carrot crops with growth stage greater than 1{{only|be}}. This reduces the growth stages by one, removing the crop completely when the growth stage reaches 0.
=== Breeding ===
Carrots can also be used to [[breed]] and attract [[pig]]s and [[rabbit]]s.
Villagers can pick up carrot items to become willing, which allow them to breed. Villagers require 12 carrots to become willing.
=== Trading ===
Novice-level Farmer villagers have a 25% ({{frac|1|4}}){{only|bedrock}} or 40% ({{frac|2|5}}){{only|java}} chance to buy 22 carrots for an emerald.
=== Crafting ingredient ===
{{crafting usage}}
=== Composting ===
Placing a carrot into a [[composter]] has a 65% chance of raising the compost level by 1.
== Sounds ==
=== Block ===
{{Sound table/Block/Crop}}
=== Item ===
{{Sound table/Entity/Food}}
== Data values ==
=== ID ===
{{edition|java}}:
{{ID table
|edition=java
|showblocktags=y
|showforms=y
|generatetranslationkeys=y
|displayname=Carrots
|spritetype=block
|nameid=carrots
|blocktags=bee_growables, crops
|form=block}}
{{ID table
|displayname=Carrot
|spritetype=item
|nameid=carrot
|form=item
|foot=1}}
{{edition|bedrock}}:
{{ID table
|edition=bedrock
|showforms=y
|shownumericids=y
|generatetranslationkeys=y
|displayname=Carrots
|spritetype=block
|nameid=carrots
|id=141
|form=block
|translationkey=-}}
{{ID table
|displayname=Carrot
|spritetype=item
|nameid=carrot
|id=279
|form=item
|foot=1}}
=== Block states ===
{{see also|Block states}}
{{/BS}}
== Advancements ==
{{load advancements|Husbandry;A Balanced Diet}}
== History ==
{{History|java}}
{{History||1.4.2|snap=12w34a|[[File:Carrot JE1.png|32px]] Added carrots.
|[[File:Carrots Age 0-1 JE1.png|32px]] [[File:Carrots Age 2-3 JE1.png|32px]] [[File:Carrots Age 4-6 JE1.png|32px]] [[File:Carrots Age 7 JE1.png|32px]] Added carrot crops.
|Carrots can be obtained only as a rare [[drop]] from [[zombie]]s.}}
{{History|||snap=August 28, 2012|slink={{tweet|Dinnerbone|240428477856231424}}|[[Dinnerbone]] released an image of a [[saddle]]d [[pig]] being controlled with a [[carrot on a stick]]. [[Wheat]] was considered as a "fuel" along with carrots,<ref>{{Tweet|Dinnerbone|240188453789257728}}</ref> but Dinnerbone eventually decided on carrots.<ref>{{Tweet|Dinnerbone|240355810650247168}}</ref>}}
{{History|||snap=12w34a|Carrots can now be used to craft [[golden carrot]]s.}}
{{History|||snap=12w36a|Carrots can now be found in [[village]]s.
|Carrots are now used to breed [[pig]]s.
|Carrots are now used to craft [[carrot on a stick]].}}
{{History|||snap=12w37a|[[File:Carrot JE2 BE1.png|32px]] The texture of carrots has now been changed. The texture has been changed to singular carrot, with the tooltip changed to reflect this.}}
{{History||1.5|snap=13w04a|[[Bone meal]] now grows carrots by 1 stage instead of fully growing it. The [[player]] might not see it grow, because some stages look the same.}}
{{History||1.8|snap=14w02a|Carrots now restore {{hunger|3}} points and 3.6 hunger [[saturation]], instead of {{hunger|4}} and 4.8 hunger saturation.
|Farmer [[villager]]s now [[trading|buy]] 15–19 carrots for 1 [[emerald]].}}
{{History|||snap=14w04a|[[Farmer]] (profession) [[villager]]s now harvest fully grown carrots.
|Villagers can now be made willing using 12 carrots.}}
{{History|||snap=14w06a|[[File:Carrots Age 0-1 JE2.png|32px]] [[File:Carrots Age 2-3 JE2.png|32px]] [[File:Carrots Age 4-6 JE2.png|32px]] [[File:Carrots Age 7 JE2.png|32px]] Carrot crops are now a pixel higher - previously they were offset one pixel down as to match farmland's sunken model. This is likely an accidental result of model conversion.}}
{{History|||snap=14w10a|[[File:Missing Model JE2.png|32px]] [[File:Missing Model JE2.png|32px]] [[File:Missing Model JE2.png|32px]] [[File:Missing Model JE2.png|32px]]<br>[[File:Missing Model (anisotropic filtering) JE2.png|32px]] [[File:Missing Model (anisotropic filtering) JE2.png|32px]] [[File:Missing Model (anisotropic filtering) JE2.png|32px]] [[File:Missing Model (anisotropic filtering) JE2.png|32px]]<br>Carrot crops of all stages [[Missing model|no longer have a model]].}}
{{History|||snap=14w10b|[[File:Carrots Age 0-1 JE4.png|32px]] [[File:Carrots Age 2-3 JE4.png|32px]] [[File:Carrots Age 4-6 JE4.png|32px]] [[File:Carrots Age 7 JE4.png|32px]] Carrot crops now have models again.<ref>{{bug|MC-50232}}</ref> In addition, they are now offset downwards by one pixel once more.<ref>{{bug|MC-50155}}</ref>}}
{{History|||snap=14w25a|[[File:Carrots Age 0-1 JE5.png|32px]] [[File:Carrots Age 2-3 JE5.png|32px]] [[File:Carrots Age 4-6 JE5.png|32px]] [[File:Carrots Age 7 JE5.png|32px]] Carrot crops are now darker and subject to directional shading.}}
{{History|||snap=14w27a|[[File:Carrots Age 0-1 JE6.png|32px]] [[File:Carrots Age 2-3 JE6.png|32px]] [[File:Carrots Age 4-6 JE6.png|32px]] [[File:Carrots Age 7 JE6.png|32px]] Carrot crops are no longer subject to directional shading.
|Added [[rabbit]]s, which can be [[breeding|bred]] and/or tamed using carrots. Rabbits also grief carrot crops.
|Carrots are now used to craft [[rabbit stew]].}}
{{History|||snap=14w34a|Rabbits can no longer be tamed.}}
{{History||1.9|snap=15w38a|The [[drops|drop]] chances have now been slightly improved from an average of {{frac|2|3|5}} per [[crops|crop]] harvested to {{frac|2|5|7}}.}}
{{History||1.13|snap=17w47a|Prior to [[1.13/Flattening|''The Flattening'']], this block's numeral ID was 141, and the item's 391.}}
{{History|||snap=18w11a|Carrots can now generate in the chests of [[shipwreck]]s.}}
{{History||1.14|snap=18w43a|[[File:Carrot JE3 BE2.png|32px]] The texture of carrots has now been changed.
|[[File:Carrots Age 0-1 JE7.png|32px]] [[File:Carrots Age 2-3 JE7.png|32px]] [[File:Carrots Age 4-6 JE7.png|32px]] [[File:Carrots Age 7 JE7.png|32px]] The textures of carrot crops have now been changed.}}
{{History|||snap=18w47a|Carrots can now generate in the [[chest]]s of [[pillager outpost]]s.}}
{{History|||snap=19w03a|Placement and breaking [[sound]]s have now been added to carrots.
|Placing a carrot into the new [[composter]] has a 50% chance of raising the compost level by 1.}}
{{History|||snap=19w05a|Carrots now have a 65% chance of increasing the compost level in a composter by 1.}}
{{History||1.15|snap=19w34a|[[Bee]]s can now pollinate carrot crops.}}
{{History||1.17|snap=21w13a|[[File:Carrots Age 0-1 JE8.png|32px]] [[File:Carrots Age 2-3 JE8.png|32px]] [[File:Carrots Age 4-6 JE8.png|32px]] [[File:Carrots Age 7 JE8.png|32px]] The "crop" template model has changed such that pixels appear in the same physical positions on opposite sides of texture planes, changing the carrot crop's appearance in the process.<ref>{{bug|MC-199242}}</ref>}}
{{History||1.18|snap=Pre-release 5|[[File:Carrots Age 7 JE9.png|32px]] A stray dark pixel has been removed from the texture of fully-grown carrots.<ref>{{bug|MC-226711}}</ref>}}
{{History|pocket alpha}}
{{History||v0.8.0|snap=build 1|[[File:Carrot JE2 BE1.png|32px]] Added carrots.
|[[File:Carrots Age 0-1 JE6 BE1.png|32px]] [[File:Carrots Age 2-3 JE6 BE1.png|32px]] [[File:Carrots Age 4-6 JE6 BE1.png|32px]] [[File:Carrots Age 7 JE6 BE1.png|32px]]{{verify|Correct models?}} Added carrot crops.
|Carrots can be obtained by killing [[zombie]]s.}}
{{History|||snap=build 3|Carrots now have a chance to [[drops|drop]] when tilling [[grass block]]s.}}
{{History|||snap=build 4|Carrots are no longer dropped by tilling [[grass block]]s.}}
{{History||v0.9.0|snap=build 1|Carrot crops now naturally spawn in [[village]]s.
|Carrot now used to breed [[pig]]s.}}
{{History||v0.12.1|snap=build 1|Carrots now restore [[hunger]] instead of [[health]].
|Brown robed [[villager]]s can now harvest fully grown carrot crops.
|Carrots can now be used to craft [[golden carrot]]s.}}
{{History||v0.13.0|snap=build 1|Carrots can now be used to breed [[rabbit]]s.
|Carrots can now be used to craft [[rabbit stew]].}}
{{History||v0.15.0|snap=build 1|Carrots are now used to craft [[carrot on a stick]].}}
{{History||v0.16.2|Carrots can now be found in a [[chest]] inside the large house in [[snowy tundra]] and [[snowy taiga]] [[village]]s.}}
{{History|pocket}}
{{History||1.0.4|snap=alpha 1.0.4.0|Farmer [[villager]]s now [[trading|buy]] 15–19 carrots for 1 [[emerald]].
|Carrots can now be picked up by villagers and become willing.}}
{{History|bedrock}}
{{History||1.2.0|snap=beta 1.2.0.2|Carrots can now be found inside of [[bonus chest]]s.}}
{{History||1.4.0|snap=beta 1.2.14.2|Carrots can now be found inside [[shipwreck]] chests.}}
{{History||1.10.0|snap=beta 1.10.0.3|Carrots can be found in the new [[pillager outpost]]s.
|[[File:Carrot JE3 BE2.png|32px]] The texture of carrots has now been changed.
|[[File:Carrots Age 0-1 JE7.png|32px]] [[File:Carrots Age 2-3 JE7.png|32px]] [[File:Carrots Age 4-6 JE7.png|32px]] [[File:Carrots Age 7 JE7.png|32px]]{{verify|Correct models?}} The textures of carrot crops have now been changed.}}
{{History||1.11.0|snap=beta 1.11.0.1|Carrots can now be used to fill up [[composter]]s.}}
{{History|||snap=beta 1.11.0.4|[[Trading]] has now been changed, farmer [[villager]]s now have a 25% chance to [[trading|buy]] 22 carrots for an [[emerald]].}}
{{History||1.14.0|snap=beta 1.14.0.1|[[Bee]]s can now pollinate carrot crops.}}
{{History||?|[[File:Carrots Age 0-1 BE.png|32px]] [[File:Carrots Age 2-3 BE.png|32px]] [[File:Carrots Age 4-6 BE.png|32px]] [[File:Carrots Age 7 BE.png|32px]] Carrot crop planes use a mapping that results in very unnatural mirroring when viewed from certain angles, such as northwest.<ref>{{bug|MCPE-146936}}</ref>}}
{{History|console}}
{{History||xbox=TU14|xbone=CU1|ps=1.04|wiiu=Patch 1|switch=1.0.1|[[File:Carrot JE2 BE1.png|32px]] Added carrots.
|[[File:Carrots Age 0-1 JE6 BE1.png|32px]] [[File:Carrots Age 2-3 JE6 BE1.png|32px]] [[File:Carrots Age 4-6 JE6 BE1.png|32px]] [[File:Carrots Age 7 JE6 BE1.png|32px]]{{verify|Correct models?}} Added carrot crops.}}
{{History||xbox=none|xbone=none|ps=1.90|wiiu=none|switch=none|[[File:Carrot JE3 BE2.png|32px]] The texture of carrots has now been changed.
|[[File:Carrots Age 0-1 JE7.png|32px]] [[File:Carrots Age 2-3 JE7.png|32px]] [[File:Carrots Age 4-6 JE7.png|32px]] [[File:Carrots Age 7 JE7.png|32px]]{{verify|Correct models?}} The textures of carrot crops have now been changed.}}
{{History||xbox=none|xbone=none|ps=1.91|wiiu=none|switch=none|Carrots can now be used to fill up [[composter]]s.}}
{{History|New 3DS}}
{{History||0.1.0|[[File:Carrot JE2 BE1.png|32px]] Added carrots.
|[[File:Carrots Age 0-1 JE6 BE1.png|32px]] [[File:Carrots Age 2-3 JE6 BE1.png|32px]] [[File:Carrots Age 4-6 JE6 BE1.png|32px]] [[File:Carrots Age 7 JE6 BE1.png|32px]]{{verify|Correct models?}} Added carrot crops.}}
{{History|foot}}
=== Carrots "item" ===
{{:Technical blocks/Carrots}}
== Issues ==
{{issue list}}
== Gallery ==
<gallery>
AllSeeds.png|All the seeds that exist in the game (except [[nether wart]] and [[cocoa beans]]).
VillageGrowingCarrotsAndPotatoes.png|Carrots and [[potato]]es found growing naturally in a [[village]].
Carrots Growing.png|Carrots in multiple stages of growth.
Carrot Dungeon.jpg|A carrot that dropped from a zombie, just to the right of the [[spawner]].
Carrot SDGP.png|Carrot in the [[Super Duper Graphics Pack]].
</gallery>
== References ==
{{reflist}}
{{Items}}
{{blocks|vegetation}}
[[Category:Plants]]
[[Category:Food]]
[[Category:Renewable resources]]
[[Category:Non-solid blocks]]
[[Category:Generated structure blocks]]
[[cs:Mrkev]]
[[de:Karotte]]
[[es:Zanahoria]]
[[fr:Carotte]]
[[hu:Sárgarépa]]
[[ja:ニンジン]]
[[ko:당근]]
[[lzh:胡蘿蔔]]
[[nl:Wortel]]
[[pl:Marchewka]]
[[pt:Cenoura]]
[[ru:Морковь]]
[[th:แคร์รอต]]
[[uk:Морква]]
[[zh:胡萝卜]]</li></ul> | beta 1.13.0.1 | Wild wolves now attack foxes. | |||
1.16.0{{Extension DPL}}<ul><li>[[Scute|Scute]]<br/>{{about|the item used to craft turtle shell helmets|the helmet|Turtle Shell}}
{{Item
| image = Scute.png
| renewable = Yes
| stackable = Yes (64)
|title=Turtle scute}}
'''Turtle Scutes''' are [[item]]s that baby [[turtle]]s drop when they grow into adults. They can be used to craft [[turtle shell]]s which can be used to brew the [[potion of the Turtle Master]].
== Obtaining ==
=== Mob loot ===
Baby [[turtle]]s drop a single scute when they grow up into adults, which is the only way possible to obtain the [[item]].
== Usage ==
Scutes can be crafted into [[turtle shell]]s.
=== Crafting ingredient ===
{{crafting usage}}
=== Repairing ===
Scutes are the [[repair]] items for the turtle [[armor material]], and thus can be used to repair [[turtle shell]]s in an [[anvil]].
=== Trading ===
Expert-level cleric [[villager]]s have a {{frac|2|3}} chance to buy 4 scutes for an [[emerald]] as part of their [[trading|trades]].{{only|java}}
Expert-level cleric villagers have a 50% chance to buy 4 scutes for an emerald as part of their seventh trades.{{only|bedrock}}
Expert-level leatherworker villagers buy 4 scutes for an emerald as part of their trades.
== Data values ==
=== ID ===
{{edition|java}}:
{{ID table
|edition=java
|showforms=y
|generatetranslationkeys=y
|displayname=Scute
|spritetype=item
|nameid=scute
|form=item
|foot=1}}
{{edition|bedrock}}:
{{ID table
|edition=bedrock
|showaliasids=y
|shownumericids=y
|showforms=y
|notshowbeitemforms=y
|generatetranslationkeys=y
|displayname=Scute
|spritetype=item
|nameid=scute
|aliasid=turtle_shell_piece
|id=572
|form=item
|translationkey=item.turtle_shell_piece.name
|foot=1}}
== History ==
{{History|java}}
{{History||1.13|snap=18w07a|[[File:Scute JE1 BE1.png|32px]] Added turtle shell pieces.}}
{{History|||snap=18w07b|"Turtle Shell Pieces" have now been renamed to "Scutes."}}
{{History||1.14|snap=19w11a|Cleric and leatherworker [[villager]]s now [[trading|buy]] scutes.}}
{{History|bedrock}}
{{History||1.5.0|snap=beta 1.5.0.4|[[File:Scute JE1 BE1.png|32px]] Added scutes.}}
{{History||1.11.0|snap=beta 1.11.0.4|Scutes can be [[trading|sold]] to cleric and leatherworker [[villager]]s.}}
{{History|console}}
{{History||xbox=TU69|ps=1.76|wiiu=Patch 38|[[File:Scute JE1 BE1.png|32px]] Added scutes.}}
{{history|foot}}
== Issues ==
{{issue list}}
== Trivia ==
* Scutes used to be called "Turtle Shell Pieces", they were renamed after it was pointed out that "Scute" was a more technical term.<ref>https://www.reddit.com/r/minecraftsuggestions/comments/7xnp2o/rename_turtle_shell_pieces_to_scutes/</ref>
== References ==
{{reflist}}
{{Items}}
[[Category:Renewable resources]]
[[de:Hornschild]]
[[es:Escama de tortuga]]
[[fr:Écaille de tortue]]
[[ja:カメのウロコ]]
[[ko:인갑]]
[[lzh:鱗]]
[[pl:Tarczka]]
[[pt:Escama de tartaruga]]
[[ru:Щиток]]
[[th:เกล็ดเต่า]]
[[uk:Черепок]]
[[zh:鳞甲]]</li><li>[[Hopper|Hopper]]<br/>{{About|the block|the crash utility|Hopper (crash utility)}}
{{Block
|image=<gallery>
Hopper (D).png|Java
Hopper (D) BE.png|Bedrock
</gallery>
|extratext = View [[#Gallery|all renders]]
|transparent=Yes
|light=No
|tool=wooden pickaxe
|renewable=Yes
|stackable=Yes (64)
|flammable=No
|lavasusceptible=No
}}
A '''hopper''' is a low-capacity storage [[block]] that can be used to collect [[item (entity)|item entities]] directly above it, as well as to transfer [[item]]s into and out of other containers. A hopper can be locked with [[Redstone Dust|redstone power]] to stop it from moving items into or out of itself.
== Obtaining ==
=== Breaking ===
To obtain a hopper, {{control|mine}} it with a [[pickaxe]]. Using any other item to mine a hopper drops only its contents.
{{breaking row|horizontal=1|Hopper|Pickaxe|Wood|foot=1}}
===Crafting===
A hopper can be crafted from 5 iron ingots and a chest.
{{Crafting
|A1= Iron Ingot
|C1= Iron Ingot
|A2= Iron Ingot
|B2= Chest
|C2= Iron Ingot
|B3= Iron Ingot
|Output= Hopper
|type= Redstone
}}
==Usage==
{{see also|Tutorials/Hopper}}
[[File:Hopper aligment.png|Hoppers can face down or sideways.|thumb]]
A hopper can be used as a container, as a crafting ingredient, and as a redstone component.
A hopper has an "output" tube at its bottom that can face down or sideways and provides a visual indication of which block the hopper is set up to drop its items into, if that block has an inventory. To place a hopper, use the {{control|Place Block}} control while aiming at the surface to which its output should face (Hoppers ''do not'' orient themselves automatically). To place a hopper directly on the face of an already interactable block, the player can {{control|sneak}} while placing the hopper. Attempting to place a hopper aimed on the bottom face of a block instead faces downward. With some blocks, such as the [[furnace]] and [[brewing stand]], the hopper has multiple uses. A hopper does not change direction after placement, and it is not attached to the container it faces; the container can be removed or replaced, and the hopper remains unchanged.
Hoppers cannot be moved by [[piston]]s.{{only|java}} Despite not being a solid block, attached blocks such as [[rail]]s, [[lever]]s, [[tripwire]] and [[redstone]] dust can be placed on top of hoppers, but not on their sides.
===Container===
[[File:Hopper GUI.png|thumb|176px|Hopper GUI showing the hopper's five slots of inventory at the top and the player's inventory below.]]
A hopper can be used as a container and has 5 slots of inventory space.
To open the hopper GUI, use the {{control|use item|text=Use Item/Place Block}} [[control]]. To move items between the hopper inventory and the player inventory or hotbar while the hopper GUI is open, drag or shift-click the items. To exit the hopper GUI, use the {{key|Esc}} key, B button or circle button, depending on the device.
By default, the GUI of a hopper is labeled "Item Hopper". A hopper's GUI label can be changed by naming the hopper in an [[anvil]] before placing it, or, {{in|java}}, by using the [[Commands#data|data]] command (for example, to label a hopper at (0,64,0) "Steve's Hopper", use <code>/data merge block 0 64 0 {CustomName:'"Steve's Hopper"'}</code>).
{{IN|java}}, a hopper's GUI can be "locked" (or subsequently unlocked) by setting the hopper's <code>Lock</code> tag with the [[Commands#data|data]] command. If a hopper's <code>Lock</code> tag is not blank, the hopper cannot be accessed except by players holding an item with the same name as the <code>Lock</code> tag's text. For example, to lock a hopper at (0,64,0) so that only players holding an item named "Steve's Key" can access the hopper, use <code>/data merge block 0 64 0 {Lock:"Steve's Key"}</code>.
===Crafting ingredient===
A hopper can be used to craft a [[minecart with hopper]].
{{crafting usage}}
===Redstone component===
{{see also|Redstone circuit|Redstone components#Hopper}}
[[File:Hopper logic flowchart.png|thumb|Flowchart of hopper logic]]
While a hopper is ''not'' powered by redstone signals, it operates with three functions:
*'''Collect''' [[Item (entity)|item entities]] (free-floating items in the world) into its inventory from the space above it
*'''Pull''' a single item into its inventory from a container above it
*'''Push''' a single item from its own inventory into a container it faces
A hopper first attempts to push any items inside it. Afterward, it checks if the block above it is a type of container. If so, it attempts to pull from it. Otherwise, the hopper attempts to collect item entities. Notably, hoppers can push to and pull from other hoppers, forming '''hopper pipes''' or '''hopper chains''', which allow transporting items across several blocks and are further discussed below.
====Redstone signals====
When a hopper receives a redstone signal (and is considered to be "activated"), all three functions stop. To avoid confusion over the terms "activated" and "deactivated", powered hoppers are often described as being '''locked''' and unpowered hoppers described as being '''unlocked'''. Hoppers can be powered by [[Redstone_mechanics#Power|soft powered]] blocks, meaning a [[redstone dust]] trail pointing into a block touching the hopper locks it just as effectively as a [[redstone block]] or any other [[Redstone components#Power components|power component]] touching the hopper. When the hopper is unlocked during a redstone tick, it does not push or pull/collect during the same tick, but has a delay of 1 redstone tick instead.
While a locked hopper does not push or pull/collect items, it may still receive items from [[dispenser]]s, [[dropper]]s and other hoppers, and may have its items pulled out by another hopper beneath it. Hence, the item flow in a horizontal hopper pipe may be stopped by locking just one of the hoppers, but stopping a vertical hopper pipe requires locking two adjacent hoppers at the same time, such that both the pushing of the top one and the pulling of the bottom one are stopped.
A hopper does not output any redstone signals by itself, but its fullness can be read using a [[Redstone Comparator|redstone comparator]], which needs to be placed next to it and facing away from it. An empty hopper outputs a signal strength of 0 and a completely full hopper outputs a signal strength of 15. Notably, a single stackable item (16 or 64) outputs a signal strength of 1 and a single non-stackable item outputs a signal strength of 3.
{{IN|Java}}, if the hopper being read is part of a horizontal hopper pipe, the comparator can individually read each item passing through the chain, because items are pushed through the hoppers one by one at a speed that is manageable by the comparator. If there is an uninterrupted stream of items, the comparator does not switch off in between items. On the other hand, in a vertical hopper pipe, some of the hoppers may never produce a reading above 0, even with a continuous stream of items, because pushes and pulls both occur in the same game tick: The hoppers' items get pulled out a single game tick after they're pushed in and this isn't measurable by a comparator, because comparators need measurements lasting at least 1.5 redstone ticks to produce a reading.
====Collecting items====
A hopper collects items dropped on top of it if the space above the hopper not occupied by a storage block. Items are gathered from the entire 1 block space above the hopper, meaning that items sitting on partial blocks such as [[soul sand]] directly above a hopper can be collected.<ref>https://bugs.mojang.com/browse/MCPE-55824</ref> It is also possible for a hopper to collect items from inside a full, solid block, a situation that might come from items rising up through solid blocks or being [[commands/summon|summoned]]. Item entities are not collected when they are outside of the collection area however; for example, items on top of a stone block directly above a hopper are not collected. Collected items are placed in the leftmost empty slot of a hopper's inventory.
{{IN|java}}, if there is no container above the hopper, then the hopper collects dropped items in the order in which they landed on the hopper. This order is remembered even while a hopper is locked. For instance, if a hopper is locked under a carpet while a fully equipped [[armor stand]] is broken above it, then it always collects items in this order when it is unlocked: [[armor stand]], [[boots]], [[leggings]], [[chestplates]], [[helmets]]. This is due to the order in which these items land.{{Verify|Wouldn't this be due to the order in which the game creates the item entities that drop drop from the armor stand?}} {{IN|Bedrock}}, hoppers do not remember the order in which items land on the hopper. Instead, hoppers with multiple dropped items above them collect the items in the order in which they entered the chunk in which the hopper is located. Items that drop from a broken armor stand are collected in a random order.<ref>https://bugs.mojang.com/browse/MCPE-120586</ref>
Hoppers usually check for dropped items every [[game tick]] and they can collect items even before they are picked up by a [[player]]{{Verify|Does this happen always, or sometimes, and in Java only or also in Bedrock?}} or destroyed by [[lava]]. However, {{In|Bedrock}} hoppers have a "collection cooldown" time. After collecting an item (or stack of items), a hopper waits {{tooltip|4 redstone ticks|8 game ticks}} (0.4 seconds, barring lag) before attempting to collect again.
Hoppers collect groups of items all at once rather than collecting them as single items one at a time. As a result, hoppers can collect item entities much faster than they can pull items from a container. Pulling from a moving [[minecart with chest]] or [[minecart with hopper]] is even slower, since the minecart is not always above the hopper.
====Pushing and pulling items====
A hopper with a storage container above it (such as a [[furnace]], [[chest]], [[dropper]], [[composter]], or another hopper) attempts to pull from the container instead of checking for floating items above it, and hence can not collect items. A hopper always tries to push or pull items using the leftmost available slot. When a hopper is removing items from a chest, the items disappear from left to right. Similarly, when filling up a chest, the chest fills up from left to right. Hoppers prioritize pulling from the first slot of a container over pulling into the first hopper slot. If a hopper has stone in its first slot and nothing in its second while the container it is pulling from has chicken in its first slot but stone in the second, the hopper pulls the chicken from the first slot of the container into its empty second slot. However, if the hopper is unable to pull the chicken, such as if all slots are filled with stone, the hopper pulls the stone from the second slot of the container instead. Similarly, hoppers prioritize pushing from their first slot over pushing into the first slot of a container. If a hopper has stone in its first slot and chicken in its second while the container it is pushing to has chicken it its first slot but stone in the second, the hopper pushes stone from its first slot into the second slot of the container.
In [[Java Edition]] the checks done by a hopper while pulling generally require less processing than the checks done by a hopper attempting collection. Therefore, a chain of hoppers topped with storage containers rather than air/solid blocks has better performance (measured as milliseconds of processing per tick) and lower potential for processing lag. <ref name=":0">https://www.youtube.com/watch?v=LC3ZOOI1Rf0</ref> The performance improvement achieved is correlated with the number of storage slots the container has. Placing composters (with no storage slots but still with custom output logic) on top of hoppers provide the greatest efficiency, while double chests actually degrade performance, even when sharing each double chest across two hoppers.<ref name=":0" /> In [[Bedrock Edition]] a chain of hoppers with air or non-container blocks on top has better performance than a chain of hoppers topped by container blocks.<ref>https://cdn.discordapp.com/attachments/715523208530362389/890030941282631741/Redstone_MSPT_measure.xlsx</ref> This may be because, even though hoppers with containers on top do not check for items, they do check for hopper-minecarts and chest-minecarts to pull from, and that involves scanning the chunk entity list.<ref>{{bug|MCPE-109449}}</ref>
{{Schematic|caption='''Push then Pull'''
Chest A is full of items while the hopper and Chest B are empty.
|ch-$+A||-
|ho-$e|ch-$+B
}}
Item pushes and pulls are processed in the same game tick, but pushes are processed before pulls. In the schematic, the empty hopper first pulls an item from chest A as it cannot push anything into chest B. After the cooldown, the hopper first pushes its item into chest B before pulling another item from chest A, both pushing and pulling in the same tick, and the process repeats. The hopper stops pulling when A is empty, and stops pushing when B becomes full.
Hoppers also have a "transfer cooldown" time. After pulling and/or pushing items, a hopper waits {{tooltip|4 redstone ticks|8 game ticks}} (0.4 seconds, barring lag) before pulling or pushing again (a transfer rate of 2.5 items per second, barring lag). A hopper that has an item pushed into it from another hopper also starts a 4 tick cooldown period, regardless of whether it pushed or pulled items itself. Item entities can be collected at any time without affecting the transfer cooldown time. The transfer cooldown and the Bedrock Edition collection cooldown are independent of each other.
====Container interactions====
Some [[container]]s interact with hoppers in specific ways:
:;{{BlockLink|Composter}}
::Hoppers above composters can push compostable items into the composter's top face with a chance of increasing the level of the composter as if the player used the item on the composter. Items that are not compostable cannot be pushed into the composter. Hoppers below the composter can pull [[bone meal]] when the composter is in stage 8, emptying the composter and resetting it to stage 0. Hoppers to the side of a composter do not interact with it.
:;{{BlockLink|Brewing Stand}}
::A working hopper on the top face of a brewing stand deposits only into the ingredient slot and it can push only valid [[brewing]] ingredients. A hopper on side face of a brewing stand can deposit only [[blaze powder]] or filled bottles into the three brew slots. A hopper underneath a brewing stand always extracts from the three brew slots, whether brewing is finished or not—The hopper must be locked to allow potions to finish brewing.
:;{{BlockLink|Chest}}
:;{{BlockLink|Trapped Chest}}
::Large chests and large trapped chests are treated as a single container: A hopper depositing into a large chest fills up the entire chest and a hopper underneath a large chest empties the entire chest. Trapped chests being accessed by a player lock any adjacent hoppers, per the standard behavior of a hopper next to an active power source.
:;{{BlockLink|Furnace}}
:;{{BlockLink|Blast Furnace}}
:;{{BlockLink|Smoker}}
::A working hopper pointing into top of a furnace deposits only into the ingredient slot. It can push any item, including items that can't be smelted by the furnace. A hopper pointing into the side of a furnace deposits into the fuel slot, and only items that are usable as fuel. A hopper below a furnace pulls everything from the output slot and empty [[bucket]]s from the fuel slot left over from using [[lava bucket]]s as fuel. When a hopper removes items from a furnace, the experience points are 'stored' in the furnace until a player removes at least one smelted item, or the furnace block is broken.
:;{{BlockSprite|Hopper}} Hopper
::A sequence of three or more hoppers, each pushing items into the next, is called a '''hopper pipe'''. Working horizontal hopper pipes simply push items into each other at the expected rate of 2.5 items per second, but vertical hopper pipes are more complicated, as the hoppers are trying both to pull and to push. When a vertical pipe pulls from a single container, it simply transfers items at 2.5 items per second because the transfer rate is limited by the first hopper pulling items from the container. If a ''stack of items'' is in a vertical pipe, the items can be transferred twice as fast, because the hopper with the item stack is pushing items down while the hopper below it is also pulling items down.
:;{{EntityLink|Minecart with Chest}}
:;{{EntityLink|Minecart with Hopper}}
::Unlocked hoppers fill chest minecarts and hopper minecarts if any part of the entity's hitbox is within the hopper's target block-space. Hopper minecarts try to pull items from the hopper at high speed. Hoppers can pull items from minecarts above them so rails can be placed directly on the top faces of a hoppers. If a [[detector rail]] is in the right position, it could lock the hopper per standard redstone-hopper behavior.
:;{{BlockLink|Jukebox}}
::Hoppers can insert [[music disc]]s into jukeboxes, and extract the music discs after they finish playing.
:;{{BlockLink|Shulker Box}}
::Hoppers cannot put shulker boxes into other shulker boxes. This allows for the creation of certain [[Tutorials/Hopper#Potions and shulker boxes|item filters]].
::Otherwise, hoppers interact with shulker boxes normally.
:;{{BlockLink|Lectern}}
::Hoppers cannot remove or place books on lecterns. The redstone pulse emitted from a lectern when a page is turned can temporarily lock hoppers.
:;{{BlockLink|Ender Chest}}
::Hoppers cannot interact with ender chests in any way.
:;{{BlockLink|Barrel}}
:;{{BlockLink|Dispenser}}
:;{{BlockLink|Dropper}}
:;{{EntityLink|Boat with Chest}}
::Hoppers interact normally with barrels, dispensers, droppers, and boats with chests.
:;{{BlockLink|Chiseled Bookshelf}}
::Hoppers and minecart with hoppers can insert and remove books from the bookshelf. As with any other container, items are taken from the first slot that has an item that can fit in the hopper and are inserted into the first empty slot.
==Sounds==
===Generic===
{{Sound table/Block/Metal}}
===Unique===
{{Edition|Java}}:
{{Sound table
|sound=Door close.ogg
|sound2=Door open.ogg
|subtitle=Chest locked<ref group=sound name=lock>{{Bug|MC-98316||Wrong subtitles caused by missing distinction}}</ref>
|source=block
|description=When a player attempts to open a hopper locked using the {{nbt|string|Lock}} tag
|id=block.chest.locked|idnote=<ref group=sound name=lock/>
|translationkey=subtitles.block.chest.locked|translationkeynote=<ref group=sound name=lock/>
|volume=1.0
|pitch=1.0
|distance=16
|foot=1}}
{{Edition|Bedrock}}: ''None''
==Data values==
===ID===
{{edition|java}}:
{{ID table
|edition=java
|showforms=y
|generatetranslationkeys=y
|displayname=Hopper
|spritetype=block
|nameid=hopper
|foot=1}}
{{ID table
|displayname=Block entity
|spritename=hopper
|spritetype=block
|nameid=hopper
|foot=1}}
{{edition|bedrock}}:
{{ID table
|edition=bedrock
|firstcolumnname=Hopper
|shownumericids=y
|showforms=y
|generatetranslationkeys=y
|displayname=Block
|spritename=hopper
|spritetype=block
|nameid=hopper
|id=154
|form=block
|itemform=item.hopper}}
{{ID table
|displayname=Item
|spritename=hopper
|spritetype=item
|nameid=hopper
|id=527
|form=item
|translationkey=tile.hopper.name
|foot=1}}
{{ID table
|notnamespaced=y
|displayname=Block entity
|spritename=hopper
|spritetype=block
|nameid=Hopper
|foot=1}}
===Block states===
{{see also|Block states}}
{{/BS}}
===Block data===
A hopper has a block entity associated with it that holds additional data about the block.
{{el|java}}:
{{see also|Block entity format}}
{{/BE}}
{{el|bedrock}}:
:See [[Bedrock Edition level format/Block entity format]].
==Achievements==
{{load achievements|Freight Station;Smelt Everything}}
==Video==
<div style="text-align:center">{{yt|XO0IKUsGiG8}}</div>
==History==
{{History|java}}
{{History||1.5|snap=13w01a|[[File:Hopper (D) JE1.png|32px]] [[File:Hopper (N) JE1.png|32px]] [[File:Hopper (E) JE1.png|32px]] [[File:Hopper (S) JE1.png|32px]] [[File:Hopper (W) JE1.png|32px]] [[File:Hopper (U) JE1.png|32px]] Added hoppers.
|Hoppers with the [[damage]] value of 1, which are obtainable only through world editing, visually point in no direction. They functionally push items upward, however the behavior is inconsistent.
|[[File:Hopper (item) JE1.png|32px]] There is currently a temporary "work in progress" sprite for hoppers in the [[inventory]].
|Hoppers can be [[crafting|crafted]] from a [[chest]] and [[stone]] blocks with the following recipe:
{{{!}} class{{=}}"collapsible collapsed"
! Recipe
{{!}}-
{{!}}
{{Crafting Table
|A1= Stone
|C1= Stone
|A2= Stone
|B2= Chest
|C2= Stone
|B3= Stone
|Output= Hopper
}}
{{!}}}
}}
{{History|||snap=13w01b|[[Rail]]s can now be placed on top of hoppers.
|Hoppers no longer load [[item]]s into [[minecart]]s without [[chest]]s.}}
{{History|||snap=13w02a|[[File:Hopper (item) JE2 BE1.png|32px]] The [[inventory]] sprite of hoppers has been changed.
|[[File:Hopper (item) 13w02a.png|32px]] However, the [[item]] of hoppers appears bugged if [[drops|dropped]] or placed in an [[item frame]].<ref>{{bug|MC-6737}}</ref> This may be due to the game attempting to pull the item sprite from the hopper's equivalent spot in <samp>[[stitched_terrain.png]]</samp> (compare files: [[:File:13w02a stitched terrain.png|terrain]], [[:File:13w02a stitched items.png|items]]), a region which contains parts of the oak planks, end stone and iron bars textures.
|Applying a [[redstone]] signal to a hopper now deactivates the hopper until the signal is removed.
|Hoppers can no longer be used as [[fuel]] in a [[furnace]].
|Hoppers are now [[crafting|crafted]] using 5 [[iron ingot]]s rather than 5 [[stone]] blocks.
{{{!}} class{{=}}"collapsible collapsed"
! Recipe
{{!}}-
{{!}}
{{Crafting
|A1= Iron Ingot
|C1= Iron Ingot
|A2= Iron Ingot
|B2= Chest
|C2= Iron Ingot
|B3= Iron Ingot
|Output= Hopper
}}
{{!}}}
|Hoppers now pull only from the output slot of [[furnace]]s.
|Hoppers now output 1 signal strengh per 1/3 of a stack (21 [[item]]s) when interacting with a [[redstone comparator]].
|[[File:Hopper (D) JE2.png|32px]] [[File:Hopper (N) JE2.png|32px]] [[File:Hopper (E) JE2.png|32px]] [[File:Hopper (S) JE2.png|32px]] [[File:Hopper (W) JE2.png|32px]] [[File:Hopper (U) JE2.png|32px]] The texture of hoppers has been given a unique texture. Hoppers no longer use the [[cauldron]] texture. Note that the top texture does not rotate with facing direction.
|The preferred tool is now a pickaxe, rather than the axe.}}
{{History|||snap=13w02b|Hoppers now treat large [[chest]]s properly, no longer needing two hoppers connected to them to fill up the entire [[inventory]].
|Hoppers no longer take [[item]]s from containers when powered via a [[redstone]] current.
|Hoppers now display correctly as a [[drops|dropped]] or [[item frame|frame]] [[item]].}}
{{History|||snap=13w03a|Hoppers are now used to [[crafting|craft]] a [[minecart with hopper]].
|Hoppers can now empty a [[minecart with hopper]].}}
{{History|||snap=13w04a|The transfer rate of hoppers has been changed from 7 to 8 [[game tick]]s per [[item]] (2.5 items per second).}}
{{History||1.5.1|snap=pre|Hoppers now take empty [[bucket]]s out of furnace fuel slots.}}
{{History||1.7.2|snap=release|[[File:Hopper (D) JE3.png|32px]] [[File:Hopper (N) JE3.png|32px]] [[File:Hopper (E) JE3.png|32px]] [[File:Hopper (S) JE3.png|32px]] [[File:Hopper (W) JE3.png|32px]] [[File:Hopper (U) JE3.png|32px]] The UV of all blocks is broken on certain sides as a result of {{bug|MC-37106}} (few cases are listed on the wiki so far - this is a future project). This includes hoppers.}}
{{History||1.7.4|snap=13w47a|[[File:Hopper (D) JE4.png|32px]] [[File:Hopper (N) JE4.png|32px]] [[File:Hopper (E) JE4.png|32px]] [[File:Hopper (S) JE4.png|32px]] [[File:Hopper (W) JE4.png|32px]] [[File:Hopper (U) JE4.png|32px]] MC-37106 has been fixed, reverting hoppers to their pre-1.7.2 appearences.}}
{{History|||snap=13w48a|This version fixed {{bug|MC-190}}, which hoppers were allegedly subject to since their introduction. However, a comparison of hopper UV in 13w02a and 14w08a failed to reveal any visible differences, even accounting for the example images on the ticket. More research is needed on this matter.}}
{{History||1.8|snap=?|Hoppers no longer generate [[multiplayer]] lag when idle.}}
{{History|||snap=14w10a|[[File:Hopper (D) JE5.png|32px]] [[File:Hopper (N) JE5.png|32px]] [[File:Hopper (E) JE5.png|32px]] [[File:Hopper (S) JE5.png|32px]] [[File:Hopper (W) JE5.png|32px]] [[File:Missing Model JE2.png|32px]] Hoppers now use block models rather than having a hardcoded shape. This brings multiple changes: the inside texture now rotates with the hopper rather than being constant, the inside planes of hoppers are now shaded/have ambient occlusion, and some minor UV changes have occurred, notably on the smallest cuboid. The directionless hopper also [[Missing model|no longer has a model]].}}
{{History|||snap=14w26a|The directionless hopper has been removed.}}
{{History|||snap=14w31a|Hoppers now no longer use wood [[sound]]s.<ref>{{bug|MC-5991}}</ref>}}
{{History||1.9|snap=15w33c|A hopper now generates as a part of the [[end ship]] in the [[end city|end cities]].}}
{{History|||snap=15w41a|End ships no longer contain a hopper.}}
{{History|||snap=15w43a|[[Loot table]]s have been added; hoppers can now use loot tables.}}
{{History|||snap=15w43c|[[File:Hopper (D) JE6.png|32px]] [[File:Hopper (N) JE6.png|32px]] [[File:Hopper (E) JE6.png|32px]] [[File:Hopper (S) JE6.png|32px]] [[File:Hopper (W) JE6.png|32px]] The UV on the hopper model has changed, resulting in minor differences, particularly to the smallest cuboid. This is likely due to the fix for {{bug|MC-73401}}.}}
{{History|||snap=15w44a|[[File:Hopper (D) JE7.png|32px]] [[File:Hopper (N) JE7.png|32px]] [[File:Hopper (E) JE7.png|32px]] [[File:Hopper (S) JE7.png|32px]] [[File:Hopper (W) JE7.png|32px]] A mapping issue introduced in the previous snapshot for the sides of the large funnel region has been fixed. This may be due to the fix for {{bug|MC-50344}}.}}
{{History||1.9.1|snap=pre1|A hopper can now push into and pull [[item]]s from a blocked [[chest]].}}
{{History||1.13|snap=17w47a|Prior to [[1.13/Flattening|''The Flattening'']], this [[block]]'s numeral ID was 154.}}
{{History||1.14|snap=18w43a|[[File:Hopper (D) JE8.png|32px]] [[File:Hopper (N) JE8.png|32px]] [[File:Hopper (E) JE8.png|32px]] [[File:Hopper (S) JE8.png|32px]] [[File:Hopper (W) JE8.png|32px]]<br>[[File:Hopper (item) JE3 BE2.png|32px]] The textures of hoppers have been changed.}}
{{History|||snap=19w03c|Hoppers now use correct cullface arguments, and some redundant faces have also been deleted.}}
{{History||1.19|snap=22w13a|Hoppers no longer drop when breaking a [[minecart with hopper]].}}
{{History||1.19.4|snap=23w07a|Hoppers can now interact with jukeboxes.}}
{{History|pocket alpha}}
{{History||v0.14.0|snap=build 1|[[File:Hopper (D) JE2.png|32px]]{{verify|Is this model correct?}}<br>[[File:Hopper (item) JE2 BE1.png|32px]] Added hoppers. Upward hoppers also exist.}}
{{History||v0.15.0|snap=build 1|Hoppers can now be moved by [[piston]]s.}}
{{History|bedrock}}
{{History||1.10.0|snap=beta 1.10.0.3|[[File:Hopper (D) BE.png|32px]] [[File:Hopper (N) BE.png|32px]] [[File:Hopper (E) BE.png|32px]] [[File:Hopper (S) BE.png|32px]] [[File:Hopper (W) BE.png|32px]] [[File:Hopper (U) BE.png|32px]]<br>[[File:Hopper (item) JE3 BE2.png|32px]] The textures of hoppers have been changed.}}
{{History||1.19.70|snap=beta 1.19.70.20|Hoppers can now collect items through all blocks that have a lower height than a full block.}}
{{History|console}}
{{History||xbox=TU19|xbone=CU7|ps=1.12|wiiu=Patch 1|switch=1.0.1|[[File:Hopper (D) JE2.png|32px]]{{verify|Is this model correct?}}<br>[[File:Hopper (item) JE2 BE1.png|32px]] Added hoppers.}}
{{History||xbox=none|xbone=none|ps=1.90|wiiu=none|switch=none|[[File:Hopper (D) JE8.png|32px]]{{verify|Is this model correct?}}<br>[[File:Hopper (item) JE3 BE2.png|32px]] The textures of hoppers have been changed.}}
{{History||ps=1.91|Hoppers can now fill [[composter]]s.}}
{{History|new 3ds}}
{{History||0.1.0|[[File:Hopper (D) JE2.png|32px]]{{verify|Is this model correct?}}<br>[[File:Hopper (item) JE2 BE1.png|32px]] Added hoppers.}}
{{History|foot}}
==Issues==
{{Issue list}}
==Trivia==
* A [[wikipedia:Hopper (particulate collection container)|real-world hopper]] is a large, pyramidal or cone-shaped container used in industrial processes to hold particulate matter, like dust, gravel, nuts, seeds, etc., and can then dispense them from the bottom.
* A hopper can transfer 9000 items per hour, or 150 items per minute.
==Gallery==
=== Renders ===
<gallery>
Hopper (N).png
Hopper (E).png
Hopper (S).png
Hopper (W).png
</gallery>
<gallery>
Hopper (N) BE.png
Hopper (E) BE.png
Hopper (S) BE.png
Hopper (W) BE.png
</gallery>
=== Screenshots ===
<gallery>
File:Hopper screenshot 1.png|In snapshot 13w01a, the hopper item uses a 'WIP' sprite, though the item still read "Hopper".
File:13w02a Banner.png|The 13w02a Banner includes a [[minecart with TNT]] and a hopper.
</gallery>
==References==
{{Reflist}}
{{Redstone}}
{{Blocks|Utility}}
{{Items}}
[[Category:Mechanisms]]
[[Category:Redstone mechanics]]
[[Category:Mechanics]]
[[Category:Storage]]
[[Category:Utility blocks]]
[[Category:Manufactured blocks]]
[[Category:Block entities]]
[[cs:Násypka]]
[[de:Trichter]]
[[el:Hopper]]
[[es:Tolva]]
[[fr:Entonnoir]]
[[it:tramoggia]]
[[ja:ホッパー]]
[[ko:호퍼]]
[[nl:Trechter]]
[[pl:Lej]]
[[pt:Funil]]
[[ru:Загрузочная воронка]]
[[uk:Лійка]]
[[zh:漏斗]]</li></ul> | beta 1.15.0.51 | Wolves now spawn in forests, wooded hills and giant tree taigas. | |||
| Legacy Console Edition | |||||
| TU1 | CU1 | 1.0 | Patch 1 | File:Wolf Revision 1.png File:Baby Wolf Revision 1.png Added wolves and pups. | |
| File:Tamed Wolf with Red Collar Revision 1.png File:Baby Tamed Wolf Revision 1.png Wolves can be tamed and tamed wolves can be bred to make tamed pups. | |||||
| File:Angry Wolf Revision 1.png File:Baby Angry Wolf Revision 1.png When wolves and pups are hit by the player or the player's tamed wolves, they become angry. | |||||
| TU14 | 1.04 | Tamed wolves can now have dyeable collars. | |||
| TU31 | CU19 | 1.22 | Patch 3 | A tamed wolf's collar color now defaults to orange rather than red. | |
| The growth of pups can now be accelerated using raw or cooked chicken, raw or cooked porkchop, raw or cooked beef and rotten flesh. | |||||
| New Nintendo 3DS Edition | |||||
0.1.0{{Extension DPL}}<ul><li>[[Firework Rocket|Firework Rocket]]<br/>{{redirect|Firework}}
{{ItemEntity
|image=Firework Rocket.png
|renewable='''Trail Effect''':No<br>'''All Others''':Yes
|stackable=Yes (64)
|size=Height: 0.25 Blocks<br>Width: 0.25 Blocks
|networkid=76
}}
A '''firework rocket''' is an [[item]] (and [[entity]]) used for creating decorative explosions, boosting when flying with [[elytra]], and loading into a [[crossbow]] as ammunition.
== Obtaining ==
Fireworks can be obtained by crafting. {{IN|java}}, a firework with no explosion effect is available on the [[Creative]] inventory and can be crafted as shown below. {{IN|bedrock}}, fireworks with the different base colors or no explosion are available in the Creative inventory.
=== Crafting ===
{{Crafting
|head=1
|showname=0
|showdescription=1
|Paper
|; ; Gunpowder
|; Gunpowder; Gunpowder
|Gunpowder
|Output=Firework Rocket,3
|description=When crafted this way (without a firework star), the rocket does not have explosion effects. The value of gunpowder affects the [[Firework Rocket#Duration and direction|flight duration]].
|type=Miscellaneous
}}
{{Crafting
|Any Firework Star
|Paper
|; ; Gunpowder
|; Gunpowder; Gunpowder
|Gunpowder
|Output= Firework Rocket,3
|description=Adding more gunpowder increases the duration of the rocket. Up to three gunpowder can be used. Up to five firework stars can also be used with three gunpowder. Up to seven firework stars can be used by using firework stars instead of additional gunpowder. All firework stars explode almost simultaneously when the rocket detonates.
|type=Miscellaneous
|foot=1
}}
== Usage ==
=== Launching fireworks ===
To launch a firework rocket, {{control|use}} its item on a block. They can also be launched from [[dispenser]]s and [[crossbow]]s. If shot from a [[Multishot]] [[crossbow]], then 3 rockets fire with the same effects.
=== Elytra ===
{{control|Using}} a firework rocket while flying with [[elytra]] propels the player in the direction they are facing. The duration of the speed boost depends on the flight duration of the rocket. If the rocket is equipped with a firework star of any kind, the player takes damage when it explodes.
=== Crossbow ===
A firework rocket can be used as ammunition for [[crossbow]]s, although it deals [[damage]] only if it has an [[explosion]] effect. A higher flight duration gives the firework rocket a longer range, and more damage is added per firework star. The [[Piercing]] enchantment has no effect on firework rockets shot from a crossbow.
{{IN|java}}, if a firework rocket shot from a [[crossbow]] hits an [[entity]], the rocket instantly [[explosion|explodes]], no matter the flight duration. Attempting to do this {{in|bedrock}}, however, results in the firework passing through the entity,<ref>[[bugtracker:MCPE-52675|MCPE-52675]]</ref> so the [[player]] must plan where to aim.
== Behavior ==
{{see also|Firework Star#Effects}}
Once launched, fireworks fly out vertically, with random horizontal offset up to 5 blocks. {{IN|bedrock|java}}, fireworks can fly in any of the 6 directions a dispenser can point. After [[#Duration and direction|some time]], the firework explodes into a colorful explosion based on the effects of the [[firework star]]s added upon crafting, or no explosion if no firework star was used. If multiple firework stars were added to the rocket upon crafting, they all explode simultaneously.
The explosion of a firework rocket deals damage to mobs and players that are within 5 blocks and not obstructed by [[solid block]]s. The maximum damage of a rocket with one firework star is {{hp|7}}, with the damage decreasing with distance. Each additional firework star on the rocket adds {{hp|2}} points of damage, for a maximum damage of {{hp|19}} with 7 stars. Using commands to add additional firework stars results in more damage. The damage dealt is unaffected by any other ingredients used. The explosion does not destroy end crystals nor damage the Ender dragon, but does destroy armor stands.
There is a delay between the detonation and the player hearing the sound, emulating real fireworks, but this sound travels much more slowly than in the real world.<ref>{{Tweet|jeb|277075644804907009|However, no sound effects for fireworks yet... but everything's implemented, so they can be added without doing a new snapshot|December 7, 2012}}</ref><ref>{{Tweet|jeb|277075517226762242|Haha, @igblan , the speed of sound is 40 m/s, because the realistic speed of ~340 m/s didn't work well in Minecraft scale|December 7, 2012}}</ref> {{IN|java}}, the explosion of a firework can be seen 64 blocks away, regardless of its height. {{IN|bedrock}}, the explosion can be seen from your render distance.
If the explosion exceeds the (unmodded) [[particle]] limit of 16,384, the oldest particles are removed before displaying new ones, resulting in severely diminished firework quality / duration. At most a firework should have 3 trail stars, more than that could waste diamonds, firework stars, and other fireworks. Particle counts per star are:
{| class="wikitable" data-description="Particle counts per firework star"
|-
! Ball Type !! Plain !! Trail
|-
| Small || 98 || ~1300
|-
| Large || 387 || 4000+
|-
| Star || 122 || ~1600
|-
| Creeper || 266 || ~3500
|-
| Burst || 72 || ~930
|}
Twinkle effect adds 2 particles to the count.
Like most other entities, they can be moved by [[water]] and [[explosion]]s, and teleported via [[portal]]s. They also cannot move through solid surfaced blocks, upon hitting one, they either move to a side or explode based on the duration. If a firework explodes under a block, its explosion is flattened.
=== Duration and direction ===
Fireworks travel different heights based on the amount of gunpowder added. The number is displayed as a tag on the item's tooltip with the description of "Flight Duration".
The height it rises is between 8 and 20 blocks with 1 gunpowder, 18 to 34 blocks with 2 gunpowder, and 32 to 52 blocks with 3 gunpowder.
(Note: Using command blocks, firework rockets with higher durations go higher and keep accelerating with virtually no terminal velocity. If the duration is long enough, the firework rocket could reach heights of over 1,000,000 blocks and speeds of over 10,000 m/s in a matter of minutes. Such fireworks with significant X and Z motions speed up sideways exponentially and reach outside the world boundary in a matter of seconds.{{only|java}})
When spawned, <!-- server-side --> fireworks have a vertical speed of .05 and a random small X and Z speed (random value near zero with a standard deviation of .001). Each firework also determines its lifetime in ticks by 10 × (number of gunpowder + 1) + random value from 0 to 5 + random value from 0 to 6, after which it explodes. Each tick, the firework accelerates horizontally by multiplying its X and Z velocities by 1.15, and vertically by adding a constant factor of .04.
Fireworks can be made to travel different directions by being dispensed or launched under flowing water. The firework's direction combines with the flow of the water to go diagonally.
Firework rockets without firework stars shot from a crossbow upon hitting terrain elements will traverse along until stopped by a ledge or into unobstructed terrains again continuing its original flight path. Ledges as tall as one pixel high (e.g. from [[Dirt Path|Dirt Paths]] to [[Grass Block|Grass Blocks]]) will also block the firework. They will still vanish if they hit entities early amidst their flight.
==Village Raids==
After successfully defending a village from a [[Raid]] the villagers may celebrate by setting off firework rockets.
==Boosting elytra==
Fireworks can be used to boost [[elytra]] when in flight. Normally, elytra can glide for a short distance, but with the use of fireworks, the player can fly a long distance, gain speed, and take off from the ground.
Simply using the firework rocket with elytra spread boosts the player in the direction the player faces. It can leave behind a trail sometimes.
Although fireworks with firework stars can be used, the player takes blast damage if they use it in flight.
There are four types of rockets, with three types of flight duration. Higher flight durations mean longer boosts. {{IN|bedrock}}, the fireworks obtained from the Creative menu have a flight duration of 1, while {{in|java}}, the fireworks obtained in the Creative menu have a flight duration of 1, 2, or 3.
==Sounds ==
{{Edition|Java}}:<br>
Firework rockets use the Friendly Creatures sound category for entity-dependent sound events.
{{Sound table
|sound=Firework blast.ogg
|subtitle=Firework blasts
|source=ambient
|description=When a non-large firework rocket explodes within a 16-block radius of the player
|id=entity.firework_rocket.blast
|translationkey=subtitles.entity.firework_rocket.blast
|volume=20.0
|pitch=0.95-1.05
|distance=16}}
{{Sound table
|sound=Firework blast far.ogg
|subtitle=Firework blasts
|source=ambient
|description=When a non-large firework rocket explodes greater than 16 blocks away from the player
|id=entity.firework_rocket.blast_far
|translationkey=subtitles.entity.firework_rocket.blast
|volume=20.0
|pitch=0.95-1.05
|distance=16}}
{{Sound table
|sound=Firework large blast.ogg
|subtitle=Firework blasts
|source=ambient
|description=When a large firework rocket explodes within a 16-block radius of the player
|id=entity.firework_rocket.large_blast
|translationkey=subtitles.entity.firework_rocket.blast
|volume=20.0
|pitch=0.95-1.05
|distance=16}}
{{Sound table
|sound=Firework large blast far.ogg
|subtitle=Firework blasts
|source=ambient
|description=When a large firework rocket explodes greater than 16 blocks away from the player
|id=entity.firework_rocket.large_blast_far
|translationkey=subtitles.entity.firework_rocket.blast
|volume=20.0
|pitch=0.95-1.05
|distance=16}}
{{Sound table
|sound=Firework twinkle.ogg
|subtitle=Firework twinkles
|source=ambient
|description=When a twinkle firework rocket explodes within a 16-block radius of the player
|id=entity.firework_rocket.twinkle
|translationkey=subtitles.entity.firework_rocket.twinkle
|volume=20.0
|pitch=0.9-1.05
|distance=16}}
{{Sound table
|sound=Firework twinkle far.ogg
|subtitle=Firework twinkles
|source=ambient
|description=When a twinkle firework rocket explodes greater than 16 blocks away from the player
|id=entity.firework_rocket.twinkle_far
|translationkey=subtitles.entity.firework_rocket.twinkle
|volume=20.0
|pitch=0.9-1.05
|distance=16}}
{{Sound table
|sound=Firework launch.ogg
|subtitle=Firework launches
|source=ambient
|description=When a dispenser shoots, a player uses, or a crossbow fires a firework rocket
|id=entity.firework_rocket.launch
|translationkey=subtitles.entity.firework_rocket.launch
|volume=3.0
|pitch=1.0
|distance=16}}
{{Sound table
|sound=Bow shoot.ogg
|subtitle=Firework launches
|source=neutral
|description=When a dispenser fires a firework rocket
|id=entity.firework_rocket.shoot
|translationkey=subtitles.entity.firework_rocket.launch
|volume=1.0
|pitch=1.2
|distance=16
|foot=1}}
{{Edition|Bedrock}}:
{{Sound table
|type=bedrock
|sound=Firework blast.ogg
|source=ambient
|description=When a non-large firework rocket explodes
|id=firework.blast
|volume=1.0
|pitch=1.0}}
{{Sound table
|sound=Firework large blast.ogg
|source=ambient
|description=When a large firework rocket explodes
|id=firework.large_blast
|volume=1.0
|pitch=1.0}}
{{Sound table
|sound=Firework twinkle.ogg
|source=ambient
|description=When a twinkle firework rocket explodes
|id=firework.twinkle
|volume=1.0
|pitch=1.0}}
{{Sound table
|sound=Firework launch.ogg
|source=ambient
|description=When a dispenser shoots, a player uses, or a crossbow fires a firework rocket
|id=firework.launch
|volume=1.0
|pitch=1.0}}
{{Sound table
|sound=Bow shoot.ogg
|source=ambient
|description=''Unused sound event''
|id=firework.shoot
|volume=1.0
|pitch=1.0
|foot=1}}
==Data values==
===ID===
{{edition|java}}:
{{ID table
|edition=java
|firstcolumnname=Item
|showforms=y
|generatetranslationkeys=y
|displayname=Firework Rocket
|spritetype=item
|nameid=firework_rocket
|form=item
|foot=1}}
{{ID table
|edition=java
|firstcolumnname=Entity
|generatetranslationkeys=y
|displayname=Firework Rocket
|spritetype=entity
|nameid=firework_rocket
|foot=1}}
{{edition|bedrock}}:
{{ID table
|edition=bedrock
|firstcolumnname=Item
|showaliasids=y
|shownumericids=y
|showforms=y
|notshowbeitemforms=y
|generatetranslationkeys=y
|displayname=Firework Rocket
|spritetype=item
|nameid=firework_rocket
|aliasid=fireworks
|id=519
|form=item
|translationkey=item.fireworks.name
|foot=1}}
{{ID table
|edition=bedrock
|firstcolumnname=Entity
|shownumericids=y
|generatetranslationkeys=y
|displayname=Firework Rocket
|spritetype=entity
|nameid=fireworks_rocket
|id=72
|foot=1}}
===Item data===
{{el|java}}:
{{main|Player.dat format}}
<div class="treeview">
* {{nbt|compound|tag}}: The item's '''tag''' tag.
{{:Player.dat_format/Firework Rockets}}
</div>
{{el|bedrock}}:
: See [[Bedrock Edition level format/Item format]].
===Entity data===
{{el|java}}:
{{main|Entity format}}
{{/ED}}
{{el|bedrock}}:
:See [[Bedrock Edition level format/Entity format]].
==Advancements ==
{{load advancements|Bullseye;Ol' Betsy}}
==History==
{{History|java}}
{{History||November 24, 2012|link=none|[[Jeb]] stated that there may be fireworks in ''Minecraft'' at the ''Future Updates with the Minecraft PC Team'' panel at [[MINECON 2012]].}}
{{History||December 5, 2012|link={{tweet|jeb|276367442362630144}}|Jeb released the first image of fireworks, along with the information that colors, fade, height, effects and shapes are [[crafting|craftable]].}}
{{History||December 7, 2012|link=https://twitter.com/jeb_/status/277075087503536128|Jeb mentions that fireworks should probably scare [[wolves]] and potentially have other effects on mobs.}}
{{History||1.4.6|snap=12w49a|[[File:Firework Rocket JE1 BE1.png|32px]] Added firework rockets.
|Firework rockets cannot be obtained within the [[Creative inventory]].}}
{{History|||snap=12w50a|Added [[sound]] and more effects to firework rockets.}}
{{History||1.10|snap=16w20a|The firework rocket [[crafting]] recipe now produces 3 rockets, rather than 1.}}
{{History||1.11|snap=16w32a|The entity ID has been changed from <code>FireworksRocketEntity</code> to <code>fireworks_rocket</code>.}}
{{History||1.11.1|snap=16w50a|Firework rockets can now cause [[damage]] to [[entity|entities]] that are within their [[explosion]] radius.
|Firework rockets can now boost [[player]]s while flying with [[elytra]].}}
{{History||1.13|snap=17w47a|The ID has been changed from <code>fireworks</code> to <code>firework_rocket</code>.
|The fade effects on fireworks can now be added by combining the firework star with [[dye]]s.
|Prior to [[1.13/Flattening|''The Flattening'']], this [[item]]'s numeral ID was 401.}}
{{History||1.13|snap=?|Firework rockets are now available in the [[Creative]] [[Inventory]]. However, it does not show a flight duration}}
{{History|||snap=pre5|The [[entity]] ID of firework rockets has been changed to <code>firework_rocket</code>.}}
{{History||1.14|snap=18w43a|Fireworks can now be shot from [[crossbow]]s.
|[[File:Firework Rocket JE2 BE2.png|32px]] The texture of firework rockets has been changed.}}
{{History||1.15|snap=19w36a|Firework rockets dispensed from a [[dispenser]] now travel in the direction they were fired.}}
{{History||1.17|snap=20w45a|Simple firework rockets with one gunpowder can now be crafted using the [[recipe book]].}}
{{History||1.19.3|snap=22w45a|All three flight durations of firework rockets are now available in the Creative inventory.<ref>{{bug
|MC-194390||A firework rocket from the creative inventory doesn't show a flight duration|Fixed}}</ref>}}
{{History|bedrock}}
{{History||1.2.0|snap=beta 1.2.0.2|[[File:Firework Rocket JE1 BE1.png|32px]] Added firework rockets.
|Firework rockets are available in the Creative inventory in 17 variants, sixteen colors in small ball duration 1, plus one additional preset with only duration 1.{{verify|type=update|Is this the right snapshot?}}{{info needed}}}}
{{History||1.8.0|snap=beta 1.8.0.10|Firework rockets can now be held in the off-hand and be shot from [[crossbow]]s.}}
{{History||1.10.0|snap=beta 1.10.0.3|[[File:Firework Rocket JE2 BE2.png|32px]] The texture of firework rockets has been changed.}}
{{History||1.16.100|snap=beta 1.16.100.56|The ID of firework rockets has been changed from <code>fireworks</code> to <code>firework_rocket</code>.}}
{{History|console}}
{{History||xbox=TU19|xbone=CU7|ps=1.12|wiiu=Patch 1|switch=1.0.1|[[File:Firework Rocket JE1 BE1.png|32px]] Added firework rockets.
|Firework rockets are available in five types in the Creative inventory. The presets are as follows:
* Duration 1, small ball, light blue, twinkle
* Duration 2, creeper shaped, green
* Duration 2, burst, red, fade to orange
* Duration 3, burst, magenta, fade to blue, twinkle
* Duration 2, star shaped, yellow, fade to orange, trail}}
{{History||xbox=TU46|xbone=CU36|ps=1.38|wiiu=Patch 15|The crafting interface has been updated to allow crafting [[firework star]]s and fireworks.}}
{{History||xbox=TU53|xbone=CU43|ps=1.49|wiiu=Patch 23|switch=1.0.3|Firework rockets can now boost [[player]]s while flying with [[elytra]].}}
{{History||xbox=TU53|xbone=CU43|ps=1.49|wiiu=Patch 23|switch=1.0.3|Firework rockets now [[damage]] players if there is a [[firework star]] applicated to the firework rocket.}}
{{History||xbox=TU56|xbone=CU47|ps=1.55|wiiu=Patch 26|switch=1.0.6|Firework rockets now produce 3 rockets upon [[crafting]] them instead of 1.}}
{{History||xbox=TU60|xbone=CU51|ps=1.64|wiiu=Patch 30|switch=1.0.11|Added new firework rocket models.}}
{{History|PS4}}
{{History||1.90|[[File:Firework Rocket JE2 BE2.png|32px]] The texture of firework rockets has been changed.}}
{{History|foot}}
==Issues==
{{issue list}}
== Trivia==
* Launching a rocket by hand on a wooden [[pressure plate]] activates it. The same doesn't hold for stone pressure plates, or for a [[dispenser]] placing a rocket onto a wooden pressure plate.
* New Year's Eve is what inspired [[Jeb]] to add fireworks.<ref>{{tweet|jeb|277080498814189568|@SPvs_TheWorld New Year's Eve|December 7, 2012}}</ref>
*If the player shoots a firework into a [[Nether portal]], it explodes in [[the Nether]].
*There are around 2×10{{^|136}} distinct fireworks.
==Gallery==
<gallery>
File:Firework jeb twitter.jpg|[[Jeb]]'s first image of Fireworks, also showing that they can be shot from dispensers.
File:1.4.6 release image.png|1.4.6 Release image.
File:Flatexplosion.png|An example of a flattened firework explosion.
File:Creeper firework.png|Creeper face shaped firework.
</gallery>
==References==
{{Reflist}}
{{Items}}
{{Entities}}
[[cs:Rachejtle]]
[[de:Feuerwerksrakete]]
[[es:Cohete de fuegos artificiales]]
[[fr:Feu d'artifice]]
[[hu:Tűzijáték rakéta]]
[[ja:ロケット花火]]
[[ko:폭죽 로켓]]
[[nl:Vuurpijl]]
[[pl:Fajerwerk]]
[[pt:Fogo de artifício]]
[[ru:Пиротехническая ракета]]
[[th:ดอกไม้ไฟ]]
[[zh:烟花火箭]]
[[Category:Renewable resources]]</li><li>[[Gray Dye|Gray Dye]]<br/>{{Item
| image = Gray Dye.png
| renewable = Yes
| stackable = Yes (64)
}}
'''Gray dye'''{{fn|Known as '''Grey Dye''' in British, Canadian, Australian, and New Zealand English variants.}} is a [[Dyeing#Secondary colors|secondary color]] dye.
== Obtaining ==
=== Crafting ===
{{Crafting
|Black Dye
|White Dye
|Output=Gray Dye,2
|type=Material
|head=1
|showdescription=1
|showname=0
}}
{{Crafting
|Ink Sac;Black Dye;Ink Sac
|Bone Meal;Bone Meal;White Dye
|Output=Gray Dye,2
|type=Material
|description={{only|bedrock|education}}
|foot=1
}}
=== Trading ===
[[Wandering trader]]s sell 3 gray dye for an [[emerald]].{{only|bedrock}}
== Usage ==
{{dye usage}}
=== Crafting ingredient ===
{{crafting usage|ignore=Banner|continue=1}}
{{banner crafting usage}}
=== Loom ingredient ===
{{Banner loom usage|Gray Dye}}
=== Trading ===
Journeyman-level villagers have a 20% chance to buy 12 gray dye for an emerald.
== Data values ==
=== ID ===
{{edition|java}}:
{{ID table
|edition=java
|showforms=y
|generatetranslationkeys=y
|displayname=Gray Dye
|spritetype=item
|nameid=gray_dye
|form=item
|foot=1}}
{{edition|bedrock}}:
{{ID table
|edition=bedrock
|showaliasids=y
|shownumericids=y
|showforms=y
|notshowbeitemforms=y
|generatetranslationkeys=y
|displayname=Gray Dye
|spritetype=item
|nameid=gray_dye
|aliasid=dye / 8
|id=403
|form=item
|translationkey=item.dye.gray.name
|foot=1}}
== Video ==
{{yt|wGalHy0_fj0}}
== History ==
{{History|java beta}}
{{History||1.2|[[File:Gray Dye JE1 BE1.png|32px]] Added gray dye.}}
{{History|java}}
{{History||1.4.2|snap=12w34a|Added the ability to [[Armor#Dyeing|dye]] leather [[armor]] and [[wolf]] collars.}}
{{History||1.4.6|snap=12w49a|Gray dye can be now [[crafting|crafted]] with [[gunpowder]] to create a [[firework star]].}}
{{History||1.6.1|snap=13w19a|[[Stained clay]] can now be crafted.}}
{{history||1.7.2|snap=13w36a|With the addition of new [[flower]]s, many secondary and tertiary dyes are now primary [[dye]]s.}}
{{History|||snap=13w41a|[[Stained glass]] can now be crafted.}}
{{History||1.8|snap=14w30a|Added [[banner]]s, which can be dyed.}}
{{History||1.11|snap=16w39a|Added the ability to dye [[shulker box]]es.}}
{{History||1.12|snap=17w15a|Added the ability to dye [[bed]]s.}}
{{History||1.13|snap=17w47a|The different data values for the <code>dye</code> ID have now been split up into their own IDs.
|Prior to [[1.13/Flattening|''The Flattening'']], this [[item]]'s numeral ID was 351.}}
{{History||1.14|snap=18w43a|Gray dye is now [[crafting|crafted]] using [[black dye|black]] and [[white dye]]s, instead of [[ink sac]] and [[bone meal]].
|[[File:Gray Dye JE2 BE2.png|32px]] The texture of gray dye has now been changed.}}
{{History|||snap=18w44a|Gray dye can now change the text color on the [[sign]]s to gray.}}
{{History|||snap=19w05a|Added the [[wandering trader]], which sell gray dyes.}}
{{History|||snap=19w11a|Gray dye can now be [[trading|bought]] by shepherd villagers.}}
{{History||1.17|snap=20w45a|Gray dye can now used to craft [[gray candle]]s.}}
{{History|||snap=21w19a|Gray dye can no longer be used to craft gray candles.}}
{{History|||snap=Pre-release 1|Gray dye can once again be used to craft gray candles.}}
{{History||1.20<br>(Experimental)|link=1.19.3|snap=22w42a|Gray dye can now change the text color on [[hanging sign]]s to gray.}}
{{History|pocket alpha}}
{{History||v0.3.0|[[File:Gray Dye JE1 BE1.png|32px]] Added gray dye. It is currently unobtainable and serves no purpose.}}
{{History||v0.8.0|snap=build 1|Gray dye can be [[craft]]ed with [[bone meal]] and an [[ink sac]], despite there being no way of obtaining ink sacs at the time.}}
{{History|||snap=build 3|Gray dye is now available in [[creative]] mode.}}
{{History||v0.9.0|snap=build 3|Gray dye can now be obtained in [[survival]] mode.}}
{{History|||snap=build 11|Gray dye can now be used to craft colored [[terracotta]].}}
{{History||v0.11.0|snap=build 1|Gray dye can now be used to dye tamed [[wolf]] collars.}}
{{History||v0.14.0|snap=build 1|Gray dye can now be used to dye [[water]] in [[cauldron]]s.}}
{{History|pocket}}
{{History||1.0.0|snap=alpha 0.17.0.1|Gray dye can now be used to dye [[shulker]]s.}}
{{History||1.1.0|snap=alpha 1.1.0.0|Gray dye can now be used to craft [[concrete powder]], colored [[bed]]s and dyed [[shulker box]]es.}}
{{History|bedrock}}
{{History||1.2.0|snap=beta 1.2.0.2|Gray dye can now be used to craft [[firework star]]s, [[stained glass]] and patterns on [[banner]]s.}}
{{History||1.4.0|snap=beta 1.2.20.1|Gray dye can now be used to craft [[balloon]]s and [[glow stick]]s.}}
{{History||1.8.0|snap=beta 1.8.0.8|Gray dye can now be used to dye tamed [[cat]] collars.}}
{{History||1.10.0|snap=beta 1.10.0.3|Gray dye is now [[trading|sold]] by [[wandering trader]]s.
|Gray dye can now be used to dye white [[carpet]]s and undyed [[glass pane]]s.
|[[File:Gray Dye JE2 BE2.png|32px]] The texture of gray dye has now been changed.}}
{{History||1.11.0|snap=beta 1.11.0.1|Gray dye can now be [[trading|sold]] to shepherd [[villager]]s.}}
{{History||1.16.100|snap=beta 1.16.100.56|The ID of gray dye has been changed from <code>dye/8</code> to <code>gray_dye</code>.}}
{{History|console}}
{{History||xbox=TU1|xbone=CU1|ps=1.00|switch=1.0.1|wiiu=Patch 1|[[File:Gray Dye JE1 BE1.png|32px]] Added gray dye.}}
{{History|PS4}}
{{History||1.90|[[File:Gray Dye JE2 BE2.png|32px]] The texture of gray dye has now been changed.}}
{{History|new 3ds}}
{{History||0.1.0|[[File:Gray Dye JE1 BE1.png|32px]] Added gray dye.}}
{{History|foot}}
== Issues ==
{{Issue list}}
== Notes ==
{{fnlist}}
== References ==
{{Reflist}}
{{Items}}
[[Category:Dyes]]
[[Category:Renewable resources]]
[[cs:Šedé barvivo]]
[[de:Grauer Farbstoff]]
[[es:Tinte gris]]
[[fr:Teinture grise]]
[[hu:Szürke festék]]
[[ja:灰色の染料]]
[[ko:회색 염료]]
[[nl:Grijze kleurstof]]
[[pl:Szary barwnik]]
[[pt:Corante cinza]]
[[ru:Серый краситель]]
[[zh:灰色染料]]</li></ul> | File:Wolf Revision 1.png File:Baby Wolf Revision 1.png Added wolves and pups. | ||||
| File:Tamed Wolf with Red Collar Revision 1.png File:Baby Tamed Wolf Revision 1.png Wolves can be tamed and tamed wolves can be bred to make tamed pups. | |||||
| File:Angry Wolf Revision 1.png File:Baby Angry Wolf Revision 1.png When wolves and pups are hit by the player or the player's tamed wolves, they become angry. | |||||
![The first screenshot of wolves.[8]](https://static.wikia.nocookie.net/minecraft_gamepedia/images/a/aa/Wolves_in_working.png/revision/latest/scale-to-width-down/120?cb=20110315135735)
The first screenshot of wolves.[8]
![The first screenshot of wolves.[8]](https://static.wikia.nocookie.net/minecraft_gamepedia/images/a/aa/Wolves_in_working.png/revision/latest?cb=20110315135735)
![The second screenshot of wolves. Here, Jeb implemented sitting and has a new texture.[9]](https://static.wikia.nocookie.net/minecraft_gamepedia/images/c/c6/Wolf_sitting.png/revision/latest?cb=20110316150652)
Issues
Issues relating to "Wolf", "Wolves", or "Dog" are maintained on the bug tracker. Report issues there.
Trivia
- If a tamed wolf is named with a name tag, its name is shown in the chat when killed.
- Wolves can teleport into transparent blocks.
- In singleplayer, if the player punches a wild wolf and leaves its field of vision, it stares at the player and does not move at all. Going back into its range causes it to continue pursuing the player.
- A hostile wolf can path-find like most mobs, but may sometimes try to jump across a 1–2 block gap to get to a player. A wolf cannot scale a two-block gap, so it falls, but may still manage to damage the player.
- Untamed wolves use their hostile appearance when they are attacking sheep, skeletons, foxes, baby turtles or rabbits. They change back once the targeted mob dies or gets out of their range.
- Attacking a wild wolf in Peaceful Mode aggravates the wolf and its group, but they do no damage.
- A wild pup's head grows significantly when attacked.
- If the player attacks a wolf, but then moves a large distance away (e.g. 70 blocks), the wolf still appears hostile, but exhibits neutral behavior.[Java Edition only]
- Wolves chase bats despite being unable to reach them.[10]
- In Bedrock Edition, a glitched adult "red wolf" can be spawned using the command
/summon wolf ~ ~ ~ minecraft:on_tame, and a "red pup" can be spawned with/summon wolf ~ ~ ~ minecraft:entity_born. The wolf cannot be tamed, bred or fed, though it's model color can be altered by using various dyes. A tamed version of this "red wolf" can be obtained by taming it as soon as it becomes hostile toward a mob such as a skeleton. - A tamed wolf tilts its head toward the player when the player is holding bones, despite it no longer being able to accept bones.
- If a player feeds a sitting wolf and a standing wolf, the sitting one slides toward the standing one to breed. The sitting one remains in its new spot until moved.
- If a player uses the
/effectcommand to give a tamed wolf with max health health boost 255, absorption 255 and Regeneration 255, the tamed wolf’s tail may begin spinning all the way around constantly, or it just points directly up.
Gallery

A hostile wolf shaking off water droplets after a swim.
Tamed wolves with dyed collars.
A tamed pup.
A wild pup.
An adult wolf fighting a pup.
A wolf killing a sheep.
A hostile wolf looking and running at the player.
Secret skin with level 0 transparency found on the wolf collar.
Two tamed adult wolves and a pup.
Two wolves sitting in a boat.
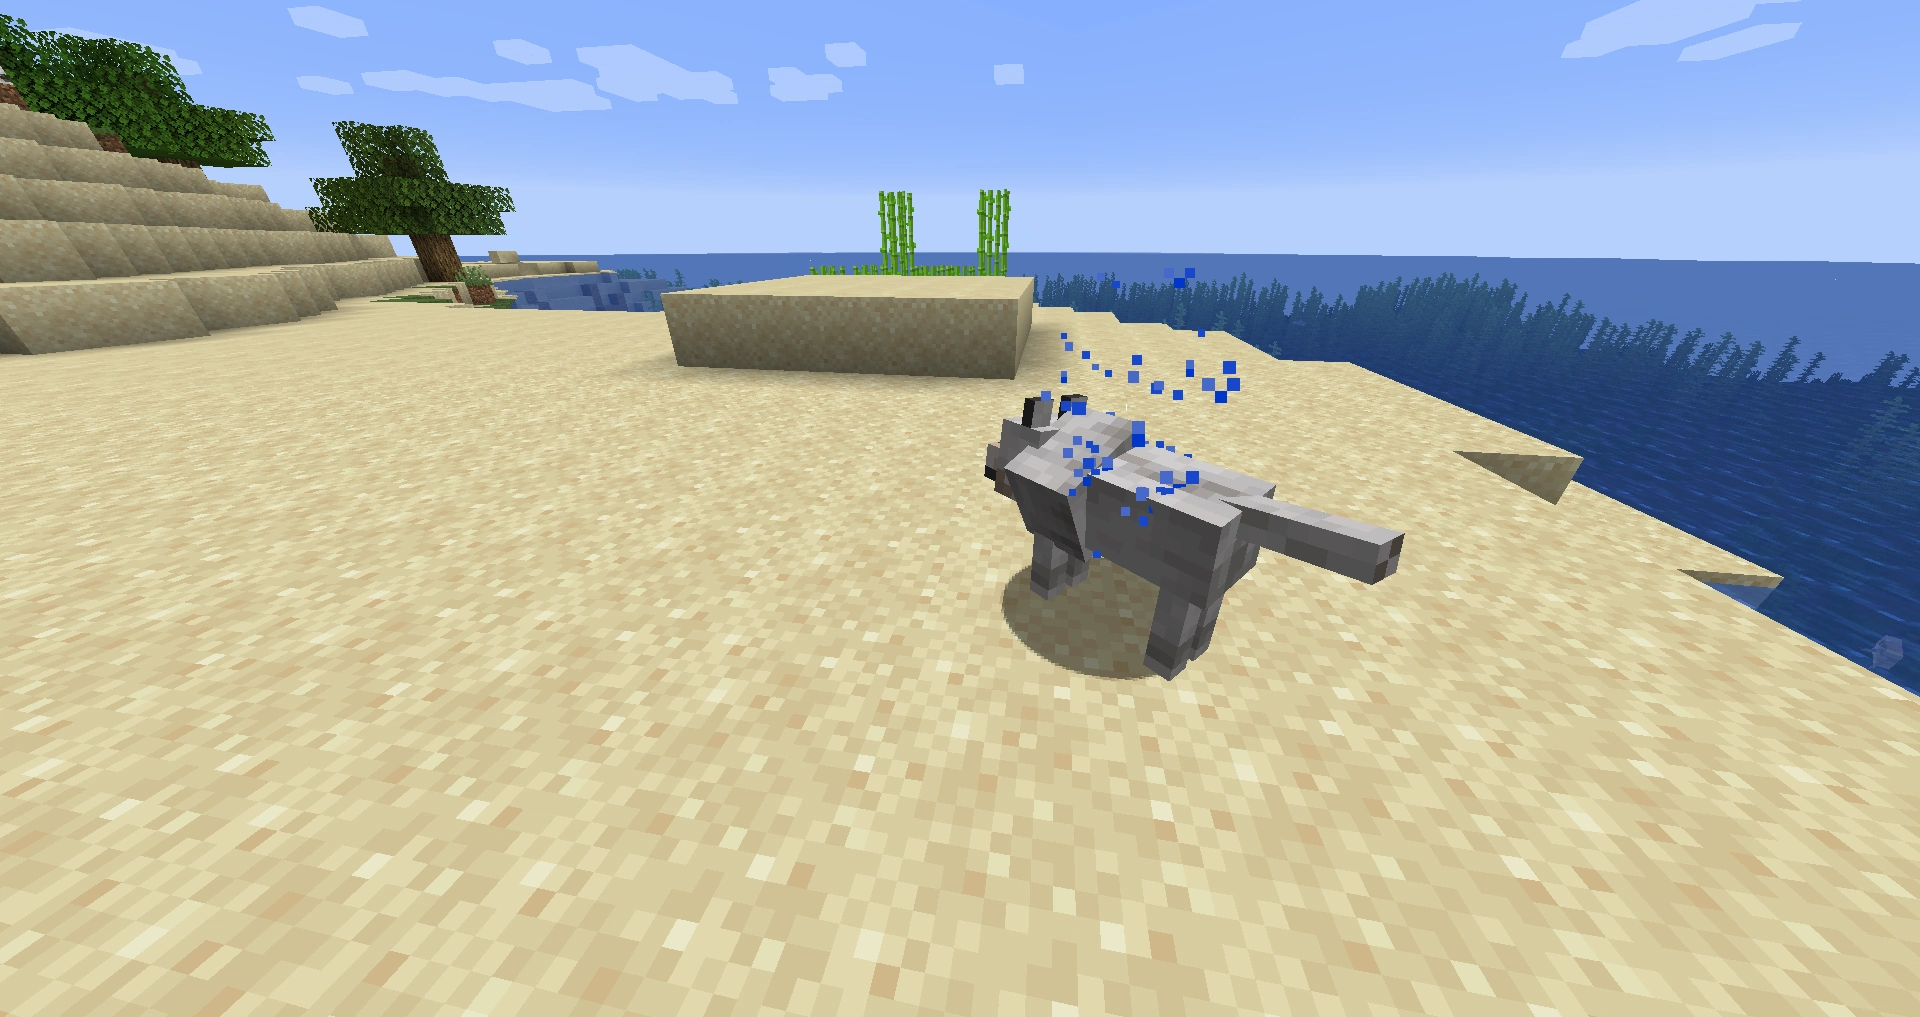
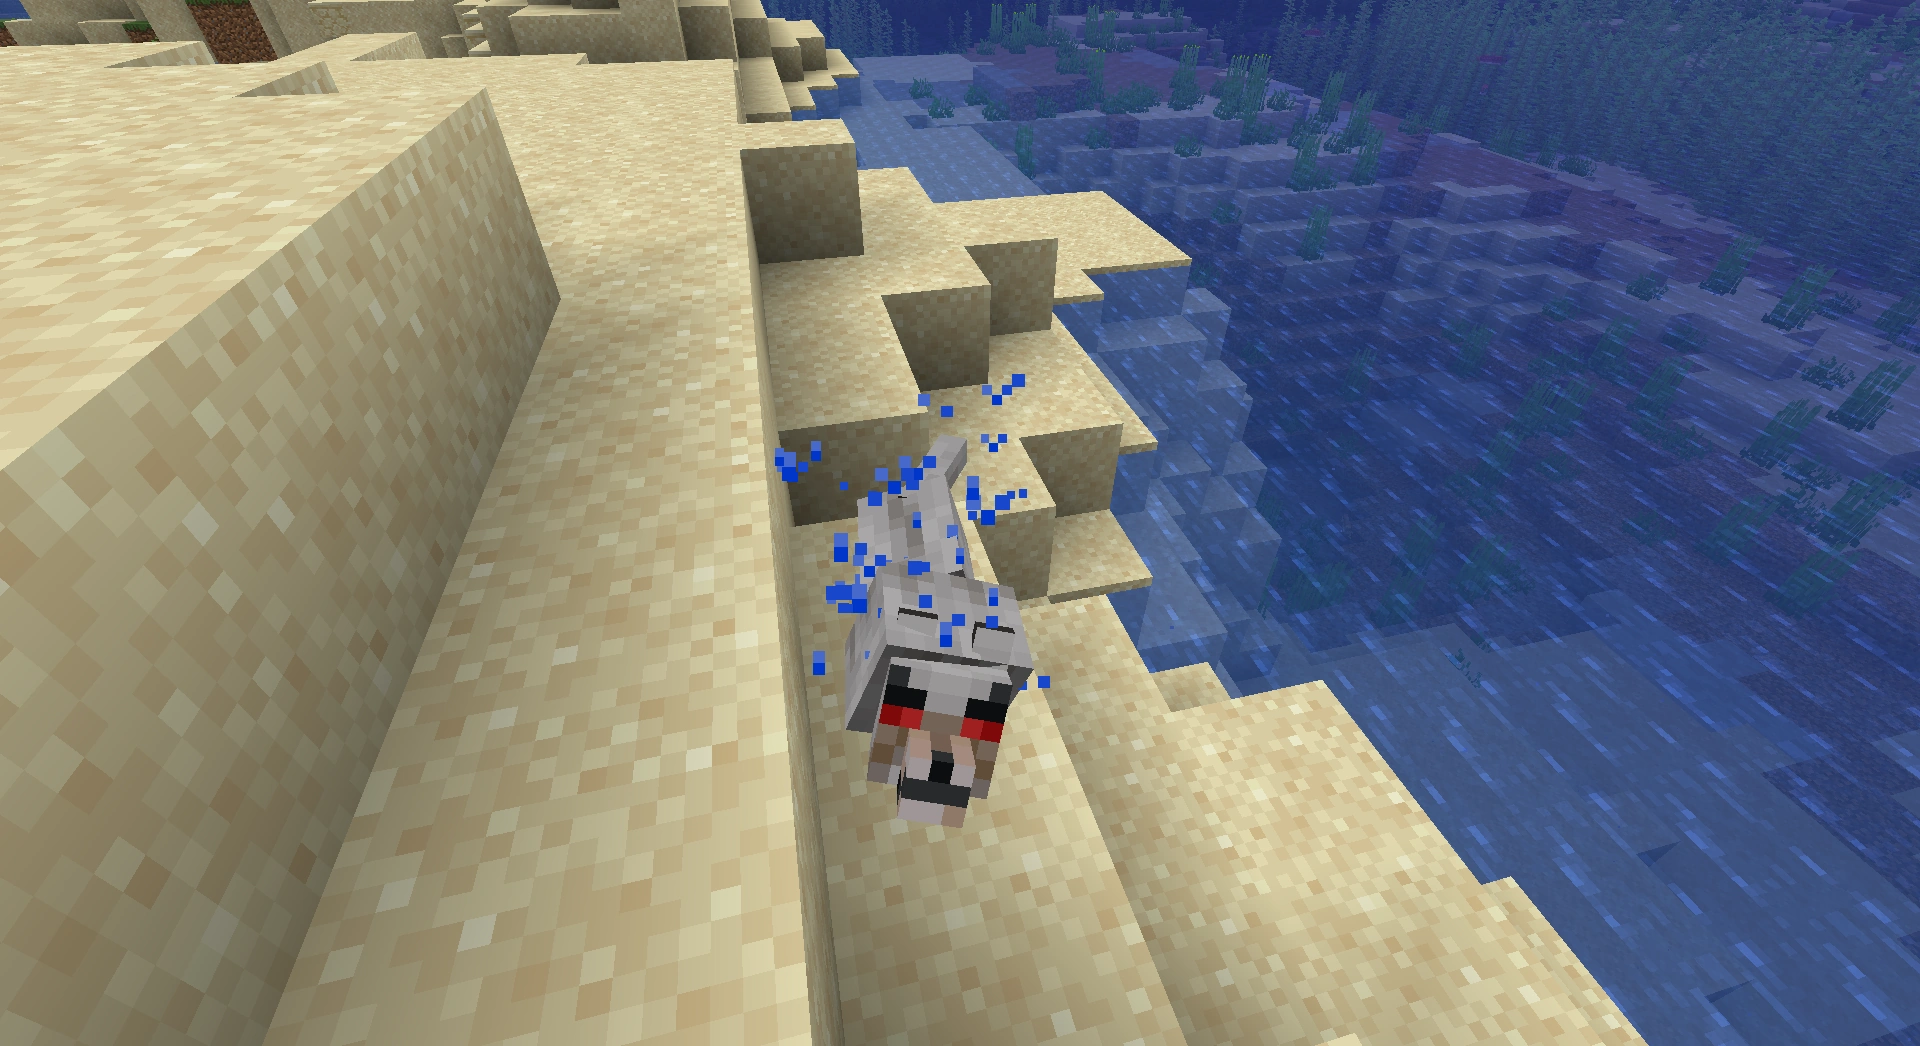
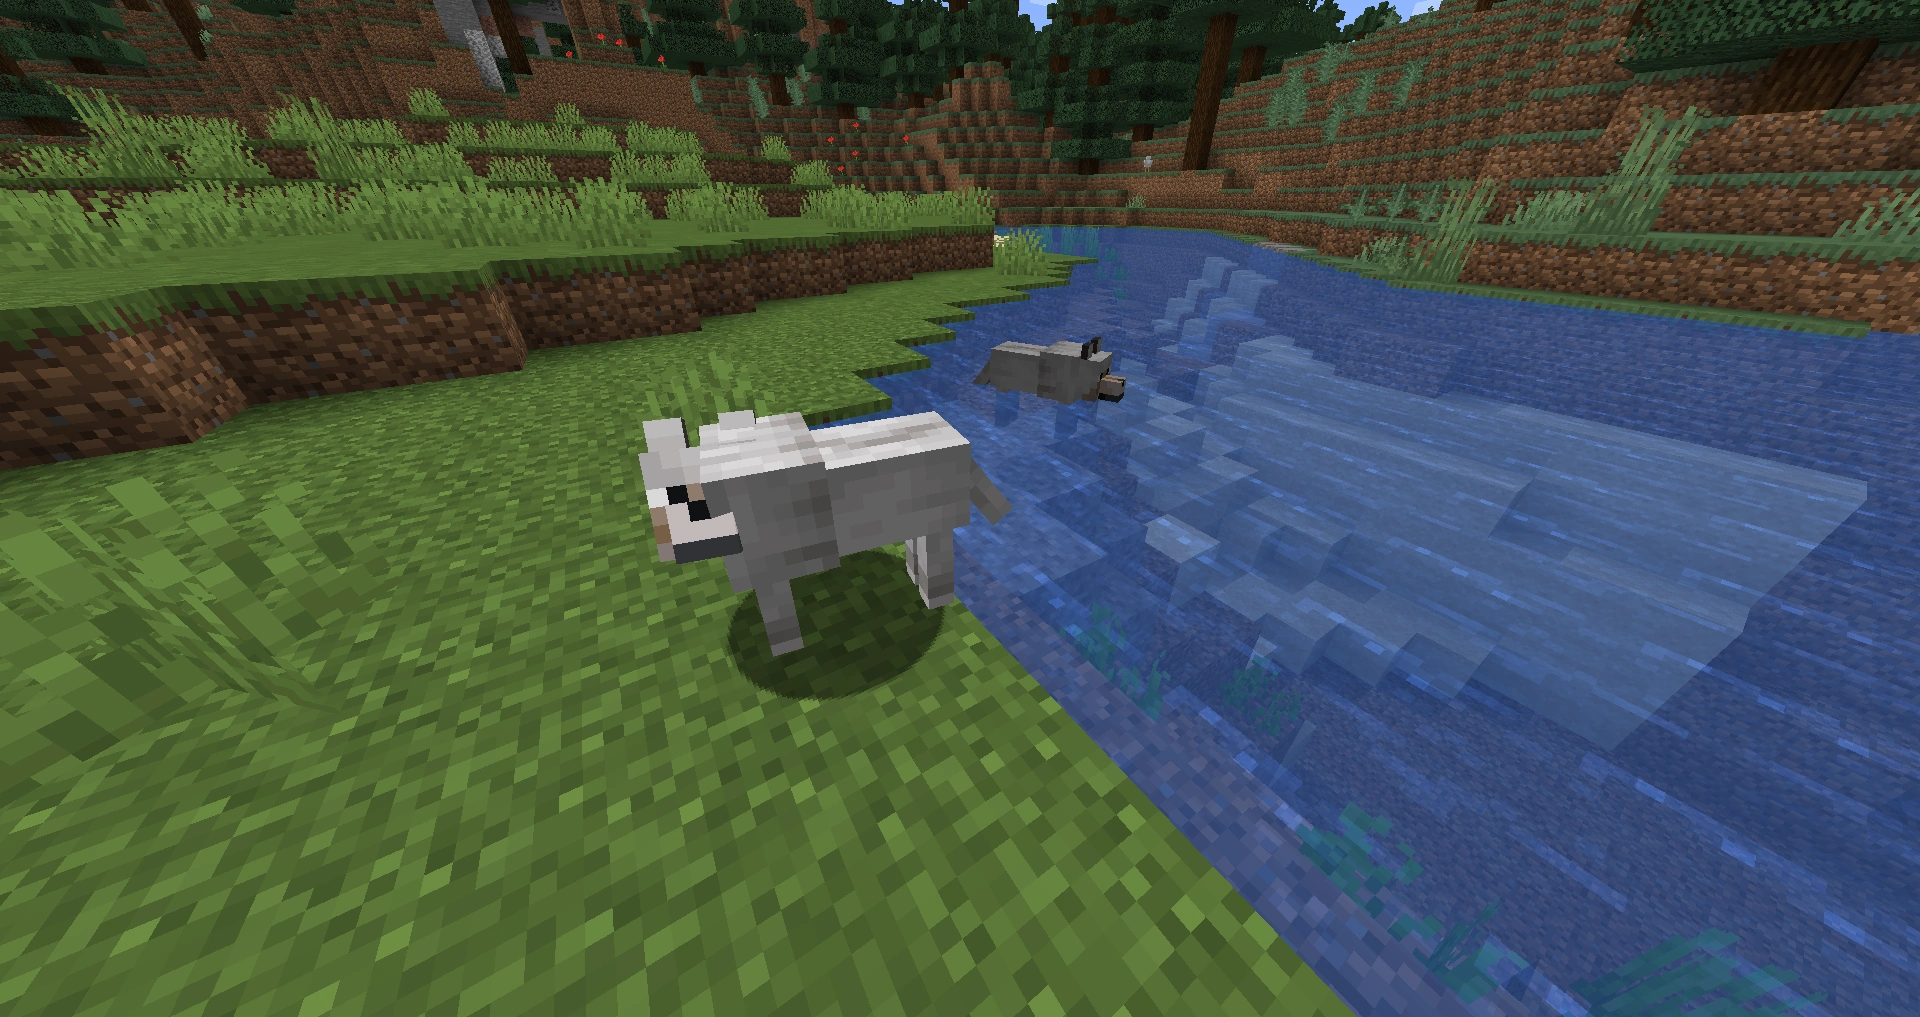
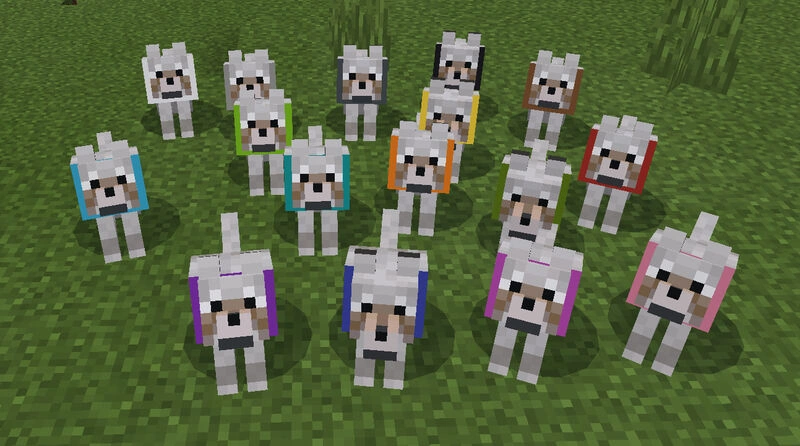
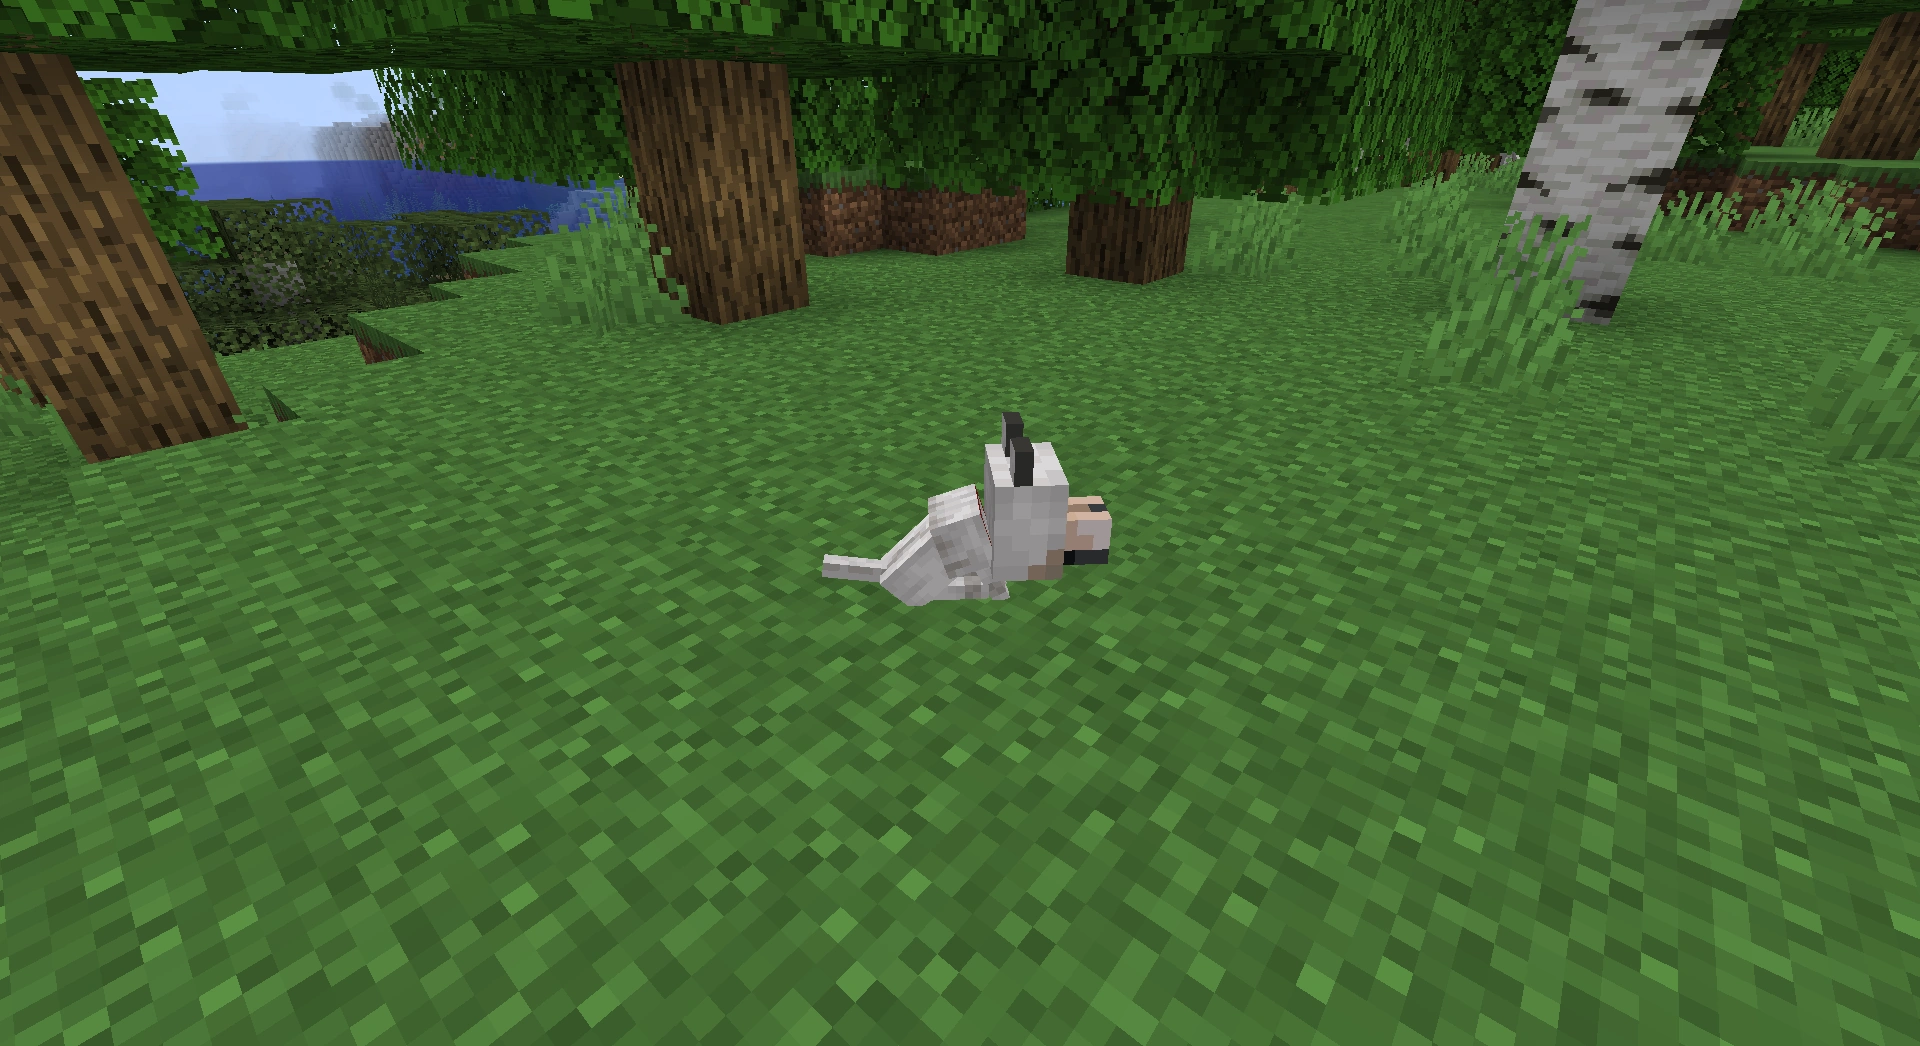
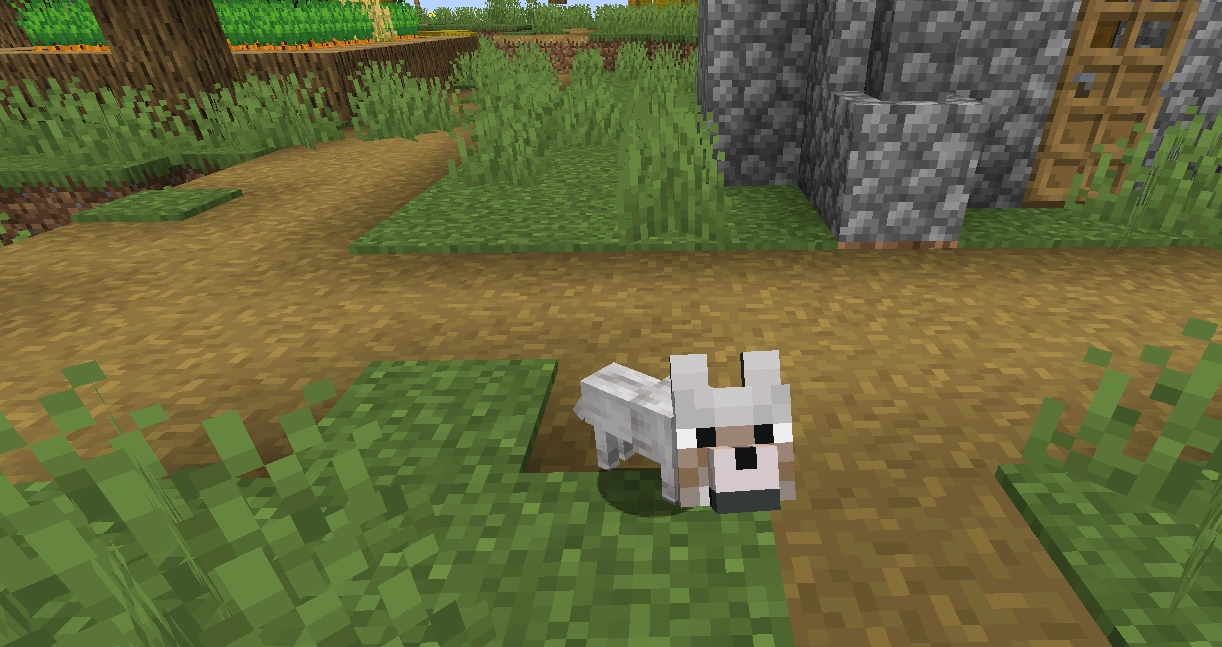
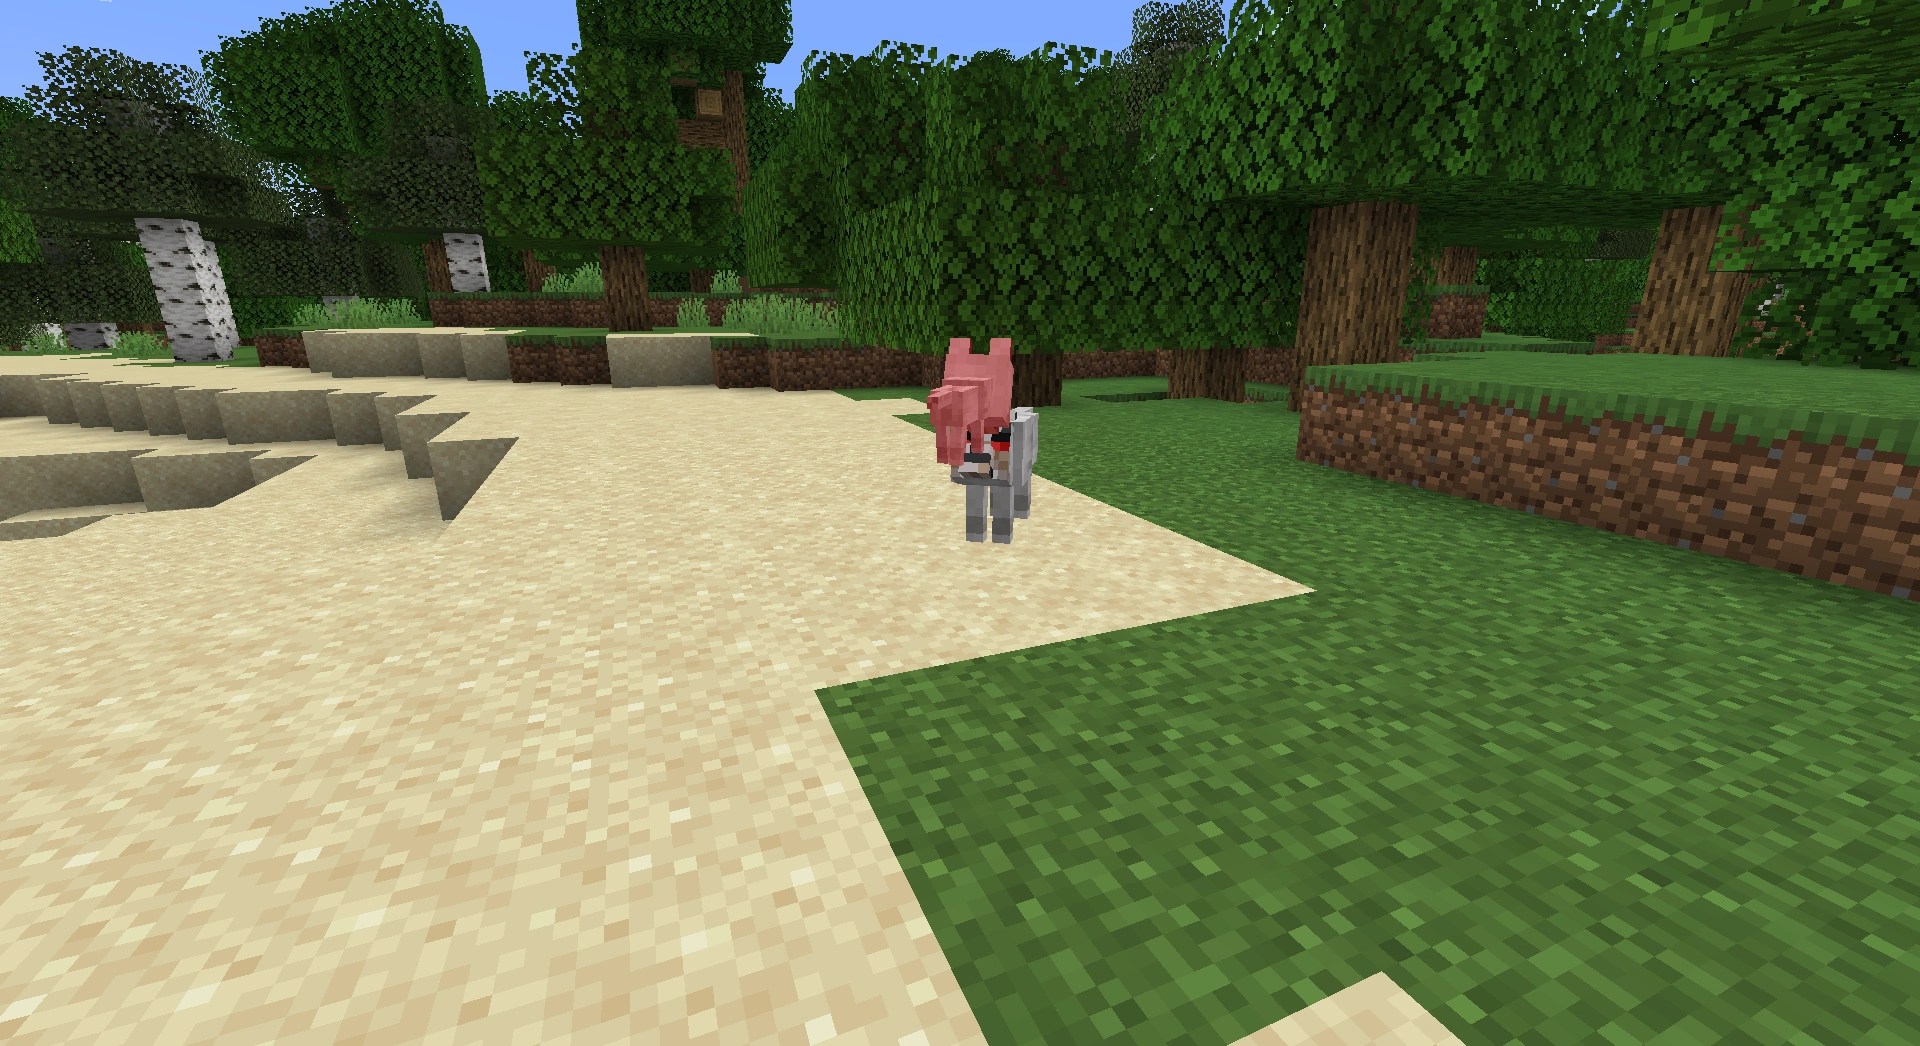
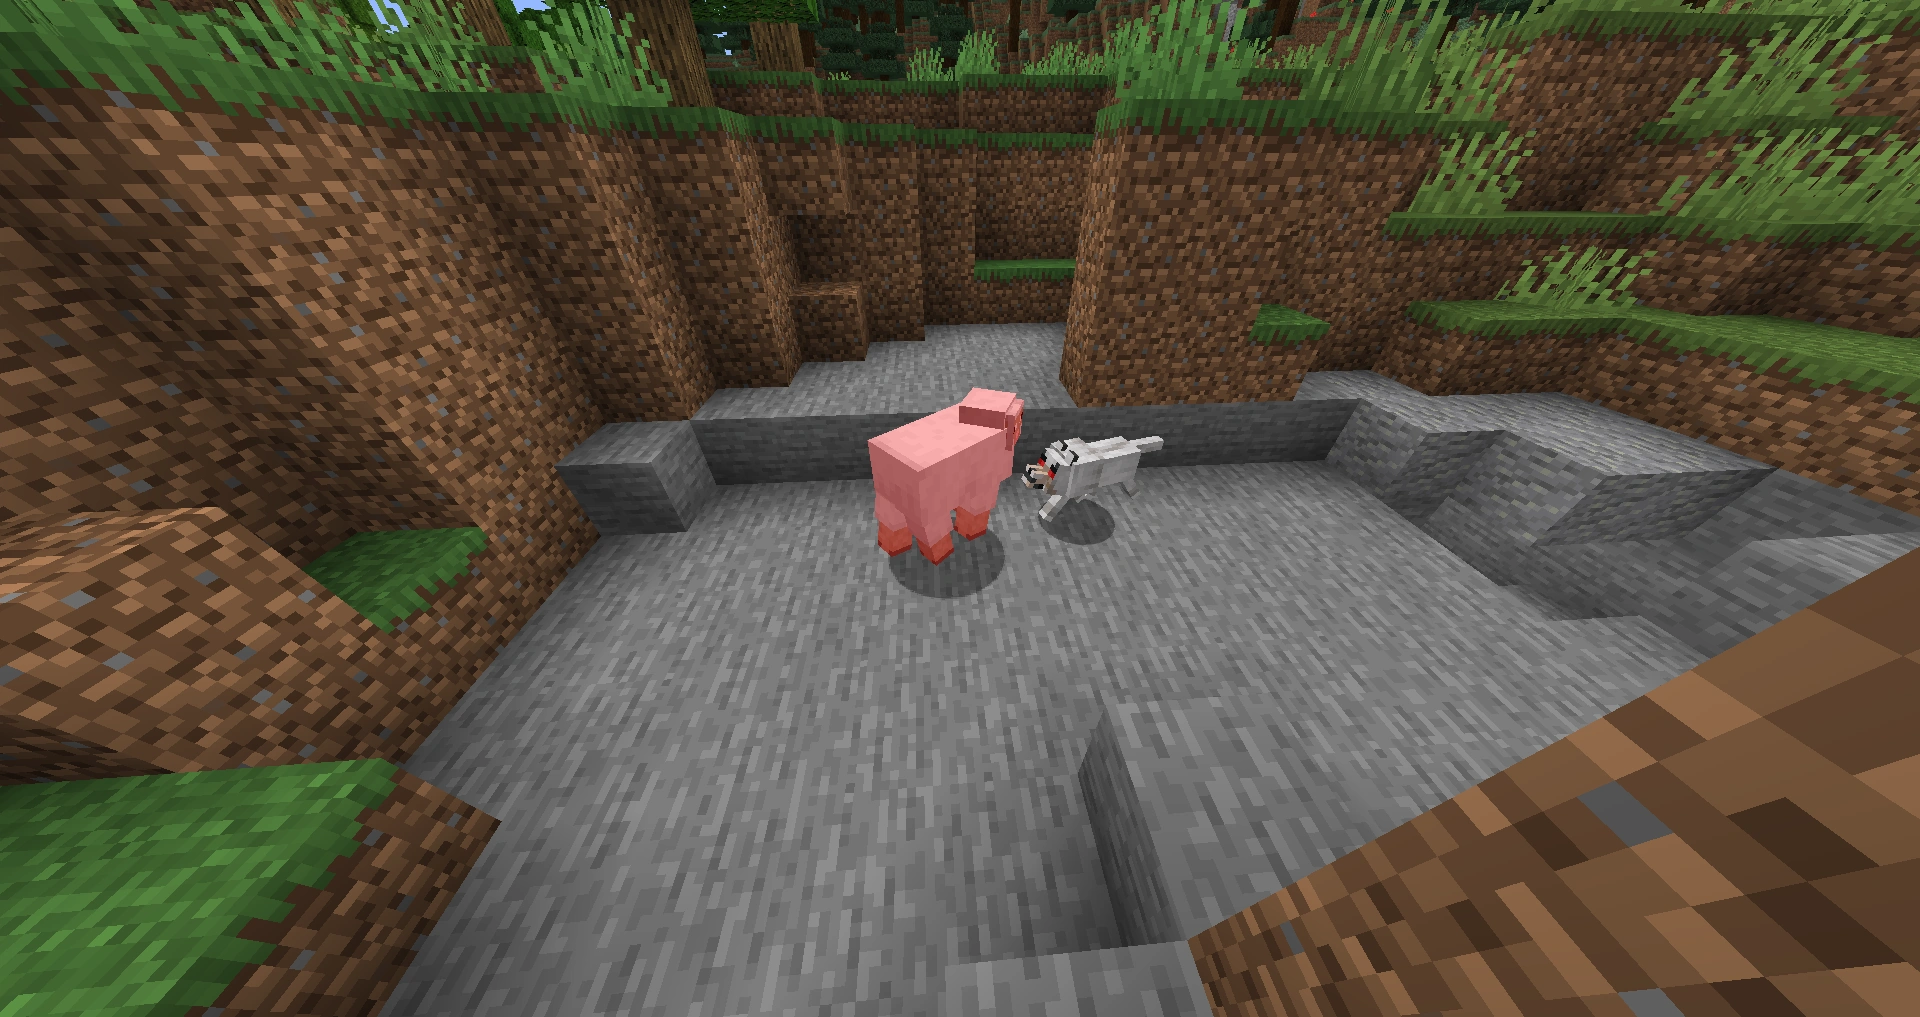

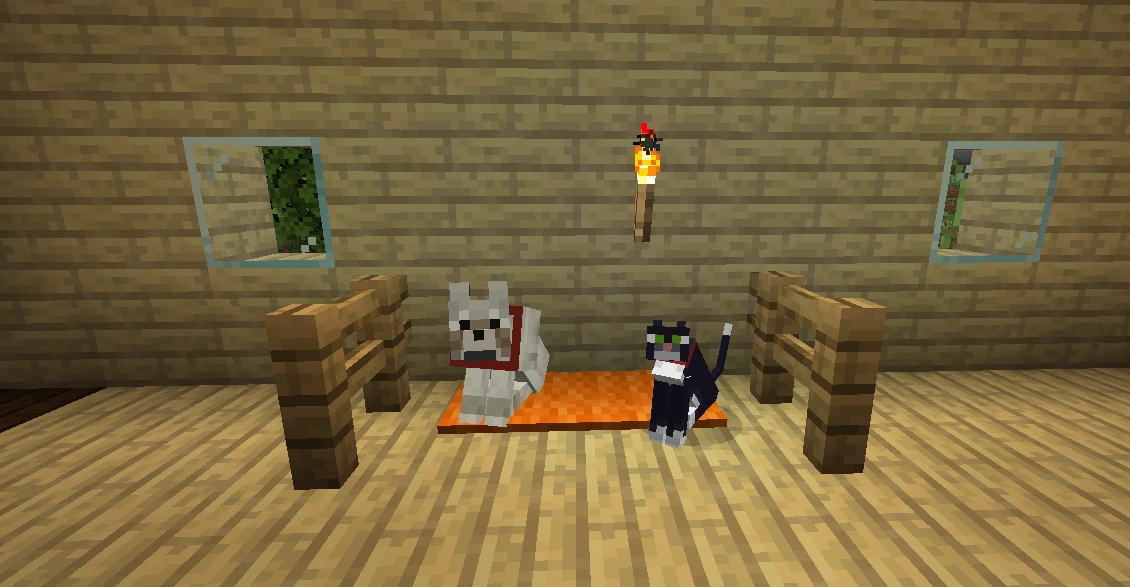

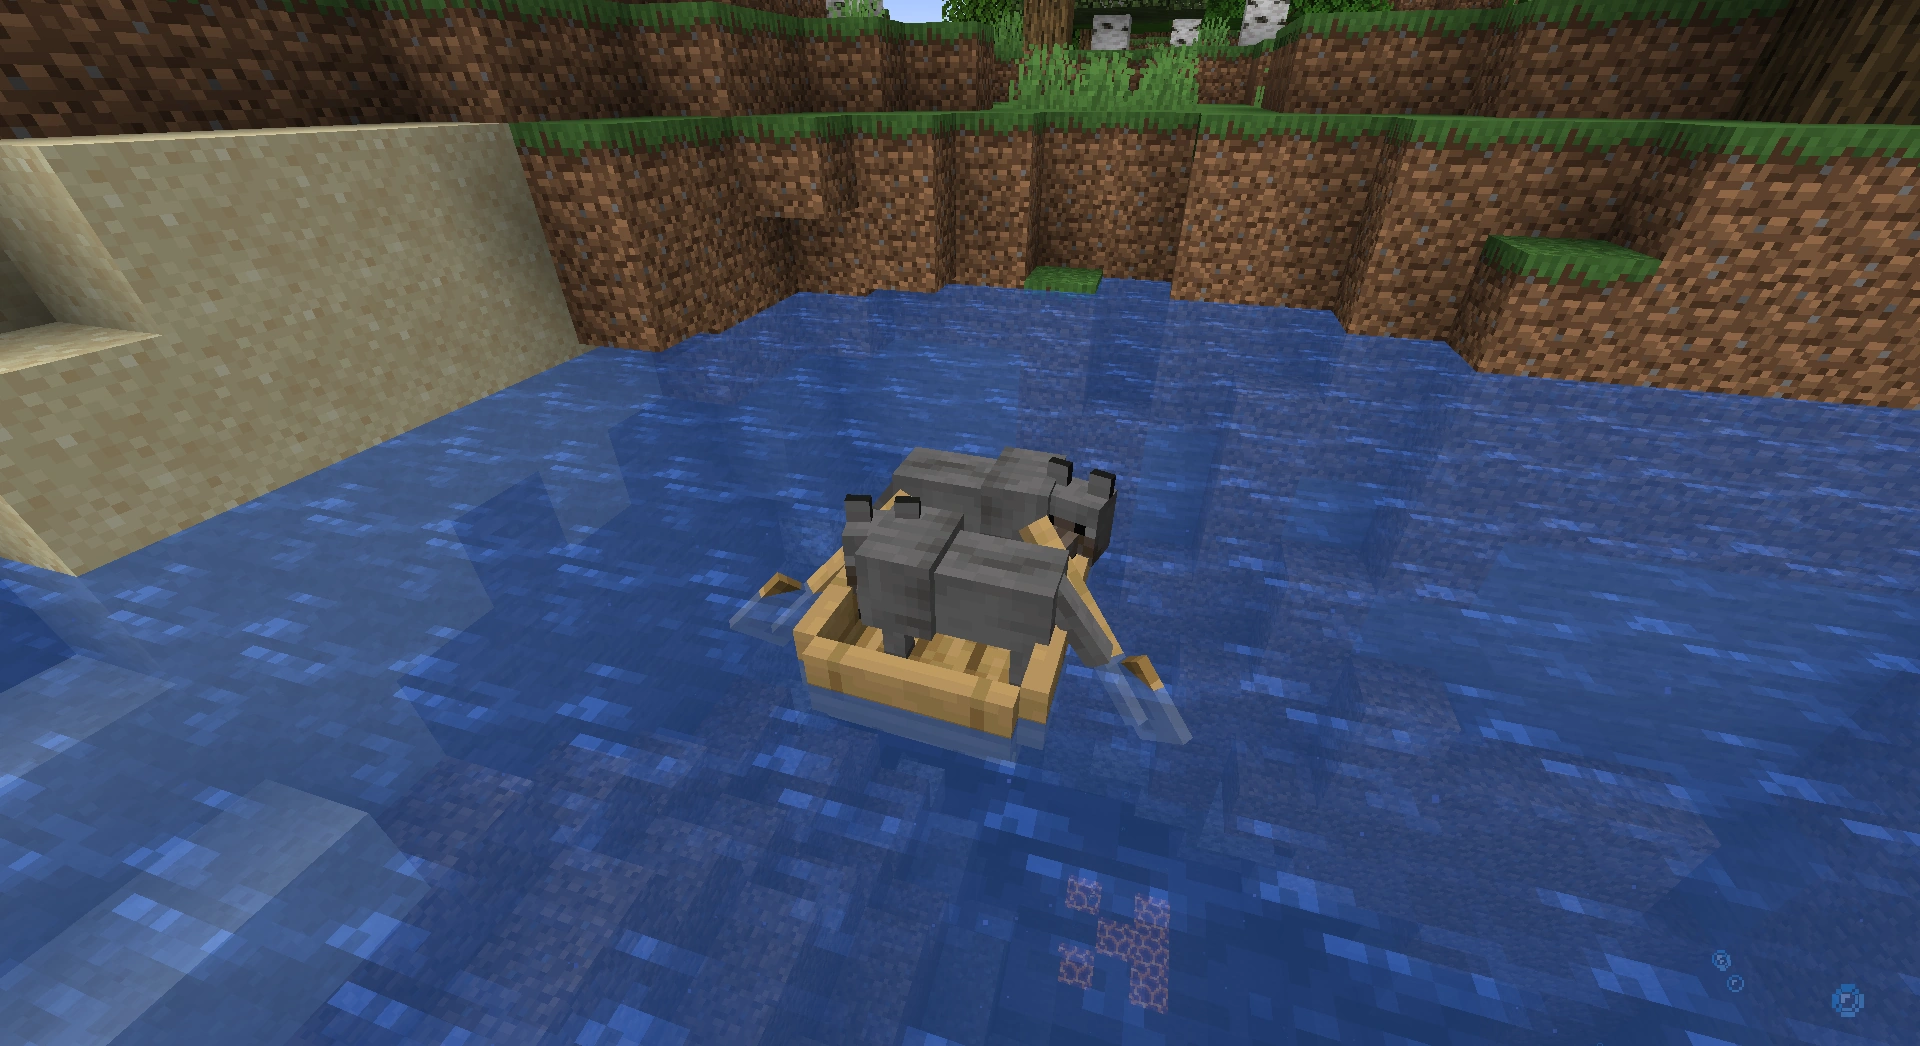
In other media
Official wolf artwork.
Lego Minecraft Wolf.
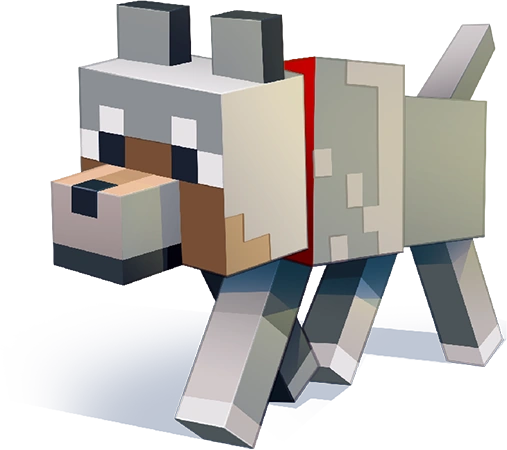

References
- ↑ " No, but they can teleport =)" – @jeb_ (Jens Bergensten) on X, March 30, 2011
- ↑ MC-166291
- ↑ "No it's random" – @jeb_ (Jens Bergensten) on X, March 18, 2011
- ↑ "We haven't decided how to limit the amount of wolves yet, currently it's unlimited" – @jeb_ (Jens Bergensten) on X, March 18, 2011
- ↑ "Wolves whimper in SMP because I accidentally used the client-side health value instead of the synched one" – @jeb_ (Jens Bergensten) on X, April 1, 2011
- ↑ "Nope, but they have dyable collars instead!" – @Dinnerbone (Nathan Adams) on X, August 17, 2012
- ↑ 54109
- ↑ "Ok don't laugh, I just tried to make it white to non-bear'ify it, didn't turn out well =)" – @jeb_ (Jens Bergensten) on X, March 15, 2011
- ↑ "Wolf progress (yes it knows "SIT!")" – @jeb_ (Jens Bergensten) on X, March 16, 2011
- ↑ MC-9925