Villagers are passive mobs that inhabit villages, work at their professions, breed, and interact. Their outfit varies according to their occupation and biome. A player can trade with villagers using emeralds as currency.
Spawning
Natural generation
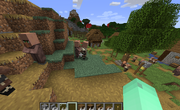
Villagers can be found in villages, which spawn in several biomes such as plains, snowy plains, savannas, deserts, taigas, and snowy taigas and can cut into other biomes such as swamps and jungles. When the village is generated, unemployed villagers spawn in them, the number of which depends on the buildings in that village, as some buildings generate with villagers inside and some do not.
A cleric villager and cleric zombie villager spawn locked up in the basements of igloos (if the basement generates) under the carpet of the floor. In Bedrock Edition, the villager and zombie villager inside igloo basements have random professions instead of always being clerics. The cleric villager can also turn into a leatherworker villager since the cauldron in the basement is closer to the villager.
Curing
When a zombie villager is cured, it transforms into a villager, displaying purple Nausea status effect particles for 10 seconds after being cured. The villager retains the profession it had as a zombie, if it had one before turning into a zombie villager. If the zombie villager is player spawned, it adopts a randomly chosen profession.[Bedrock Edition only] The villager can also be a nitwit, as the game counts it as a "profession" but the nitwit villager still can't work. If employed the cured villager offers discounts on most of its trades.
Drops
A villager, either adult or baby, does not ordinarily drop any items or experience when killed. However, when a player holds an emerald or other item a villager is willing to trade for, the item it offers in trade appears in its hands, alternating between items if there are multiple items the villager wants to trade.
Upon successful trading, a villager drops 3–6.
Upon successful trading, while willing to breed, 8–11 is dropped.
Behavior


Movement patterns
Nitwit and unemployed villagers leave their homes at day and begin to explore the village. Generally, they wander inside the village during the day. They may go indoors or outdoors, periodically making mumbling sounds. Occasionally, two villagers may stop and turn to look at each other, in a behavior called socializing, during which they stare at another villager for 4–5 seconds at a time. They continuously stare at a nearby player unless the villager is trying to get into a house at night, farm food, work, or flee from a zombie or illager. Baby villagers may jump on beds and play tag with each other, similarly to how baby piglins and baby hoglins play tag.
In Bedrock Edition, baby villagers do not stop continuously in front of players, though they still do stare as they move.
Villagers tend to not travel far from their beds in a large village unless the job site or the nearest gossip site (bell) is far from their beds.
Villagers, like other mobs, can find paths around obstructions, avoid walking off cliffs of heights greater than 3 blocks, and avoid some blocks that cause harm. However, in crowded situations, one villager can push another off a cliff or into harm's way.
Villagers emit green particles if they join a village, set a bed or acquire a job site/profession.
Villagers run inside at night or during rain, closing doors behind them. They attempt to sleep at night, but if they cannot claim a bed, they stay indoors near a bed until morning. In the morning, they head outside and resume normal behavior. However, some villagers, such as nitwits, stay outside later than others unless being chased by an illager or zombie.
If a villager finds itself outside the village boundary, or a villager without a village detects a village boundary within 32 blocks, it moves quickly back within the boundary. A villager taken more than 32 blocks away from its village boundary forgets the village within about 6 seconds. Whether in a village or not, a villager is never prone to despawning.
Villagers can open all wooden doors and find paths or blocks of interest behind the doors. However, they cannot open any trapdoors, fence gates, or iron doors. Villagers can climb ladders, but do not recognize them as paths and do not deliberately use them. Any climbing of ladders seems to be a side effect of them being pushed into the block by another mob, (likely, and most often, other villagers). Unfortunately, this behavior can leave them stranded on the second floors and roofs of some village structures, as they lack the necessary AI to intentionally descend ladders.[verify] A simple fix for these situations is for the player to manually push the villager back toward the ladder hole and then install a wooden trap door at the top, after the villager is returned to the ground level. One way to prevent a villager from climbing ladders is to break the first ladder touching the ground thus requiring a player to jump to the ladder to climb.
Getting attacked
Villagers flee from zombies, zombie villagers, husks, drowned, zombified piglins [Bedrock Edition only], zoglins, vindicators, pillagers (even if their crossbow has been broken), ravagers, and vexes within 8 blocks, and evokers and illusioners within 12 blocks. Like other passive mobs, villagers sprint away when attacked. Villagers do not run away from skeletons (and their variants), spiders, or cave spiders since these hostile mobs are passive towards villagers, although a skeleton arrow might hit a villager by accident.
Preferred path
Villagers favor pathways to reach a selected destination and try to stay in low cost blocks, like the dirt path or cobblestone blocks. They also avoid jumping.
| Preferred path blocks | Block cost | |
|---|---|---|
| Adult Villager | Baby Villager | |
| Dirt Path | 0 | 0 |
| Cobblestone Stone |
1 | 1 |
| Beds Lectern |
50 | 50 |
| Other | 3 | 1.5 |
| Jump cost | 20 | 5 |
Job site blocks
Villagers who have already claimed beds[Bedrock Edition only] (other than babies and nitwits) seek employment by searching a 48-block horizontal radius[verify] for a job site block. An unemployed villager acquires a profession and a job by claiming the first unclaimed job site block it can detect in that area. A job site block can be detected as long as it is in range, not already claimed, and the villager can pathfind to the block to claim it. This means if they cannot see or get to the block, they cannot claim it.[Java Edition only]
When the block is claimed, its owner emits green particles and no other villager can claim it unless the owner relinquishes it.
If a job site block is broken or destroyed, its owner (if any) emits anger particles[Bedrock Edition only] and becomes jobless, but retains its profession after trading. A villager who already has a profession but no job site attempts to find one:
- A villager who has not yet traded can claim any job site block and changes its profession along with acquiring a new job.
- Villagers who have made their first trade can claim a job site block only if the block is associated with their profession.
- For a villager to claim a job site block in Java Edition, the block must be on the ground to allow the villager to pathfind to the job block. A job site block placed decoratively on scaffolding or a fence post, for example, cannot be found by a villager and no job assignment results.
In Java Edition, villagers can change professions only while awake. Villagers also tend to walk to the job site block before claiming it. They also stare at the block while walking towards it.
In Bedrock Edition, villagers can still claim job site blocks when asleep, while green particles still appear around the block and the villager. Villagers change their profession before walking to their job site block. They stare at the block while walking just like Java Edition.

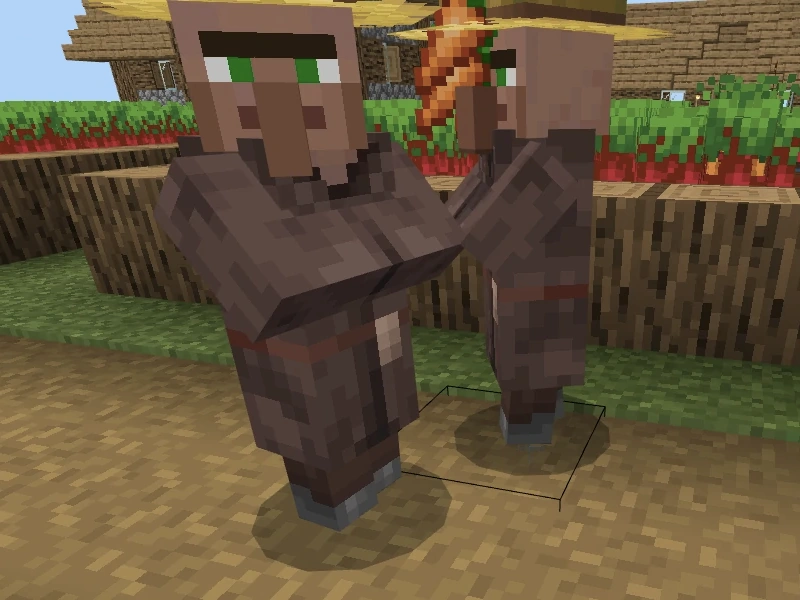
A taiga villager and a plains villager gossiping.
Gossiping
Villagers can store certain memories about players in the form of gossip. These get spread to other villagers whenever they talk with each other. Each piece of gossip is one of five types, and it stores a value as well as a target. Gossips generate and increase in value as a result of various player actions. The target is the player who caused the gossip. Together the gossip values determine a player's reputation with the villager, which influence trading prices and the hostility of naturally spawned iron golems.
| Type | Caused by | Amount
gained |
Decay | Share
penalty |
Max
value |
Reputation
multiplier |
|---|---|---|---|---|---|---|
| Major positive | Curing | 20 | 0 | 100 | 100 | 5 |
| Minor positive | Curing | 25 | 1 | 5 | 200 | 1 |
| Minor negative | Attacking | 25 | 20 | 20 | 200 | -1 |
| Major negative | Killing | 25 | 10 | 10 | 100 | -5 |
| Trade | Trading | 2 | 2 | 20 | 25 | 1 |
Trading with or curing a villager increase the value of the corresponding gossips for the targeted villager only. When a villager is attacked or killed, however, it instead generates the major negative gossip in every other villager it could see (eye-to-eye line of sight) inside a box extending 16 blocks from the villager in all coordinate directions.
When a piece of gossip is shared it is received at a lower value than the sharer has it. Gossips also decay a certain amount every 20 minutes. Since major positive gossip have a decay of 0 and a share penalty equal to its max value, it cannot be shared and never decays.
A player's total reputation with a villager is determined by multiplying each gossip's value by their respective multiplier and adding the results together. For example, if a player has recently cured a villager for the first time but also attacked the villager twice, their reputation with that villager would be 5×20 + 25 - 50 = 75. After 40 minutes the gossips have decayed twice, making the player's reputation 5×20 + 23 - 10 = 113.
The prices of a villager's trades all get reduced by reputation times the price multiplier rounded down, meaning that a positive reputation lowers prices but a negative reputation increase them. The price multiplier is either 0.05 or 0.2 depending on the item, see trading. Prices can not get lower than 1 or higher than the item's stack size. The exact function to calculate the price affected by the gossips is y = x - floor((5a + b + c - d - 5e) × p), Where y is the final price, x is the base price, a is the value of major_positive, b is the value of minor_positive, c is the value of trading, d is the value of minor_negative, e is the value of major_negative, and p is the value of PriceMultiplier.
Iron golems that were not built by a player become hostile towards players whose reputation with any nearby villager is -100 or lower. The golem checks all villagers inside a box centered on the golem and extending 10 blocks in every horizontal direction and 8 blocks in both vertical directions.
Players can set villagers on fire using flint and steel or lava without affecting gossips. The same is true for TNT activated by redstone or a dispenser. However, TNT ignited directly by a player (using flint and steel, fire charges or flaming arrows) does generate gossip for damaged or killed villagers, because the TNT's damage is attributed to the player.
Picking up items
Villagers have eight hidden inventory slots, which start empty whenever the villager is spawned. Villagers do not intentionally seek out items to pick up, but they do collect any bread, carrots, potatoes, wheat, wheat seeds, beetroot, beetroot seeds, and bone meal within range (bone meal can be picked up only by farmer villagers). These are the only items they can pick up, although the player may use the /item replace command to put an arbitrary item into a villager's inventory. If a player and a villager are in the pickup range of an item at the same time, the player always picks it up first. If several villagers are next to an item, the same one picks up the item every time. Consequently, in constrained space, the same villager picks up any item dropped. This behavior prevents villagers from sharing food in a one-block space.
As of 1.16.1 villagers can fill all 8 inventory slots with the same item.
When killed or converted to a zombie villager, any inventory item of the villager is lost, even when /gamerule keepInventory is set to true.
If /gamerule mobGriefing is false, Villagers cannot pick up items, and farmer villagers cannot plant or harvest crops.
Like other mobs, villagers have four slots for worn armor, separate from their inventory. An adjacent dispenser can equip armor, elytra, mob heads or carved pumpkins to a villager, but the armor is not rendered (except for carved pumpkins and mob heads). The equipment functions as normal; for example, a villager wearing an armor piece enchanted with Thorns can inflict Thorns damage to attackers, and a villager wearing Frost Walker boots is able to create frosted ice. If a villager is converted into a zombie villager, the armor it was wearing is dropped, though it may be able to pick it up and equip it again.
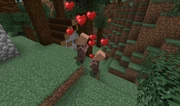
Sharing food

Villagers sharing carrots.
If a villager has enough food in one inventory stack (6 bread or 24 carrots, potatoes, beetroots, or 18 wheat for farmers only) and sees a villager without enough food in one inventory stack (3 bread, 12 carrots, 12 potatoes, or 12 beetroots for non-farmers; 15 bread, 60 carrots, potatoes, or beetroot, or 45 wheat for farmers), the villager may decide to share food with that villager.
To share, a villager finds its first inventory stack with at least 4 bread, carrots, potatoes, or beetroot or with at least 6 wheat, and then throws half the stack (rounded down) in the direction of the target villager. When wheat is shared, it is first crafted to bread, which may result in 1 or 2 less than half the stack being shared.
Farming
Farmer villagers tend crops within the village boundary. Villagers far enough outside the boundary of any village also tend nearby crops.
Farmland to be tended is found by seeking for certain blocks up to 9 blocks away from the villager in the X and Z coordinates and up to 1 away in the Y coordinate (a 19×19×3 volume total).
- If a farmer villager does not have enough food in one stack in its inventory (15 bread, 60 carrots, 60 potatoes, 60 beetroots, or 45 wheat) and finds fully-grown wheat, carrots, potatoes, or beetroot, the villager moves to the crop block and harvests it.
- If a farmer villager has any seeds, carrots, potatoes, or beetroot seeds in his inventory and finds an air block above farmland, the villager moves to it and plants a crop. They always plant from the first eligible slot in their inventory.
- Farmer villagers use and pick up bone meal. They also fill their composter with seeds.
- If
/gamerule mobGriefingisfalse[Java Edition only], villagers cannot farm. - Farmer villagers cannot turn dirt, grass blocks, or dirt paths into farmland. Nor they pick up any hoes to till the blocks.
- If a hoe is placed into a farmer villager's mainhand or offhand via commands, they still cannot till any blocks.
- Farmer villagers often share their crops and food with other villagers if they have any extras.
Breeding
Adult villagers breed depending on the time of the day and need to be willing to spawn § Baby villagers, who also require beds with at least 2 empty blocks above them. Job sites are not required for villagers to breed.
The breeding depends on the number of valid beds. If a villager is "willing" (see § Willingness below), villagers breed as long as there are unclaimed beds available within the limits of the village. All baby villagers are initially unemployed.
A census is periodically taken to determine the current population of the village. All villagers within the horizontal boundary of the village and 5 vertical blocks[Java Edition only] of the center are counted as part of the population to determine if continued villager mating is allowed. However, any villager within the horizontal boundary of the village and the spherical boundary of the village attempts to enter mating mode as long as there is at least one villager within the boundary. If two villagers simultaneously enter mating mode while they are close to one another, they breed and produce a child. The appearance is determined by the biome where the breeding occurs in Bedrock Edition.[1] In Java Edition, the appearance is randomly determined by either the biome type of the parents or by the biome where the breeding occurred.

Two villagers breeding.
Willingness
Villagers must be willing to breed. Willingness is determined by the amount of food items a villager has. Becoming willing consumes the villager's food stock, therefore, after mating, villagers cease to be willing until they gather a sufficient stock of food items and breed again.
Villagers must have enough beds within village bounds for baby villagers to spawn. The beds must have 2 blocks of clearance above them because there needs to be room for the baby villager to jump on them. This means that the baby villager needs to be able to path-find the bed; it can't be in an unreachable spot. (Note that mobs view slabs as full blocks for pathfinding, so putting upper half slabs above a bed invalidates the bed.)
Villagers can become willing by having either 3 bread, 12 carrots, 12 potatoes, or 12 beetroots in one slot in their inventory. Any villager with an excess of food (usually farmers) throws food to other villagers, allowing them to pick it up and obtain enough food to become willing. The player can also throw bread, carrots, beetroots, or potatoes at the villagers themselves to encourage breeding. Villagers consume the required food upon becoming willing. If /gamerule mobGriefing is false, villagers don't pick up food or break crops.
Some baby villagers in Java Edition, their heads are not as big as Bedrock Edition or Education Edition baby villagers.
Baby villagers
Baby villagers sprint around, entering and leaving houses at will. They sometimes stop sprinting to stare at an iron golem. If the iron golem is holding out a poppy, the children may cautiously take the flower from its hands. This is a reference to the 1986 Japanese animated movie, Laputa: Castle In The Sky, where a giant robot covered in vines (inspiration for the iron golem) gives the main characters flowers to put on a memorial.[2] Baby villagers tend to group and chase one another around the village as if playing tag. They also jump on beds.
In Bedrock Edition and Java Edition 1.18, illagers ignore baby villagers until they reach adulthood.
Baby villagers give gifts of poppies or wheat seeds to players who have the Hero of the Village effect in Java Edition.
Baby villagers in Bedrock Edition and Minecraft Education have a slightly bigger head than in Java Edition; this also can be seen in other baby mobs in the game as well. Java Edition baby villagers don't have too big of a head, so they look like a tiny normal villager.
Baby villagers can fit through 1x1 block gaps.
A baby villager becomes an adult 20 minutes after birth, even when in a boat or a minecart. Baby villagers with no AI do not grow up.
Lightning


A villager gets struck by lightning.
When lightning strikes within 3–4 blocks of a villager, the villager is replaced by a witch that can't despawn. Even a baby villager that is struck by lightning is turned into a two-block-tall witch.
Iron golems also attack any villagers that turned into witches.
Iron golem summoning
Villagers can summon iron golems.
In Java Edition, a villager desires a golem if the villager has gone to bed in the past 20 minutes and has not detected a golem in the past 30 seconds.[3] A villager scans for golems once every 10 seconds, and detects one if the golem's collision box is inside a 32×32×32 block box centred on the villager (obstructions do not matter). A villager that desires an iron golem and has 4 more desirous villagers "in range" attempts to summon one after it successfully spreads gossip (villagers spread gossip at most once every 60 seconds). Alternatively, a villager attempts to summon a golem every 5 seconds on a global timer if they are panicking (see below), desires one, and has 2 more desirous villagers "in range"; that is, within a 20×20×20 block cube centered on the villager. If golem summoning is successful, the villager and all villagers within a 32×32×32 block cube reset their 30-second "seen golem timer". Villagers can summon iron golems regardless of their profession (including nitwits) or latest working time.
In Bedrock Edition, a golem can spawn if there are at least 20 beds and 10 villagers. All villagers in the village must have a bed, and a profession with access to the profession block. It spawns in a 16×6×16 area around the village center and attempts to spawn once every 700 game ticks, or about every 35 seconds. One golem spawns per 10 villagers. The golem must be killed near the village as villagers have a long cooldown time for golems that wander away.

A villager panicking.
Panicking
Villagers sometimes panic during a raid or a zombie siege by emitting water particles and shaking.
In Java Edition, villagers panic if they see a mob that is hostile toward villagers, like a zombie, zombie villager, husk, drowned, zoglin, illager, vex, wither, or ravager and flee frantically from them, sometimes hiding in houses. In Bedrock Edition, villagers panic by running around in circles around a bed in a village house, such as when a raid happens or when the player rings the village bell. Java Edition villagers in panic are more likely to summon iron golems. To see these mobs, the villager must have an unobstructed line of sight to it (eye-level to eye-level), and be within a certain range[3] (spherical distance between feet center bottom-most point of the villager and hostile mob): [verify]
| Mob | Panic radius |
|---|---|
| Zombie, Husk, Drowned, Zombie Villager, Vex | 8 |
| Vindicator, Zoglin | 10 |
| Evoker, Illusioner, Ravager | 12 |
| Pillager | 15 |
Zombies
Zombies, zombie villagers, husks, and drowned seek out and attack villagers within a 42-block radius[Java Edition only] or a 16-block radius[Bedrock Edition only] (even when the villager is invisible). Zombies attempt to break down doors, but only a fraction of zombies can do so and can succeed only when difficulty is set to hard. Zombies who cannot break doors tend to crowd around a door that separates them from a villager. If a zombie or a drowned comes across a set of doors with one open, it usually tries to go through the closed door.
Both zombies and drowned either kill villagers or convert them to zombie villagers. The chance of the villager becoming a zombie villager upon death is 0% on Easy, 50% on Normal, and 100% on Hard. Baby villagers can be infected by zombies as well. Drowned are able to convert villagers to zombie villagers, even when attacking with a trident from a distance.
Raids
During a raid, villagers flee from illagers and run to the nearest house, similar to a zombie siege. For a villager to hide, the house must have a door and at least one bed.
Before the first raid wave in Java Edition, at least one villager rushes to ring the bell in the center of the village (if they are close enough) to warn the other villagers of an incoming raid before going into their house. In Bedrock Edition, the bell rings automatically regardless of whether a villager is nearby. In Java Edition, when a bell is rung, all illagers within 48 blocks get the glowing effect for 3 seconds.
A villager often stays in the house it first entered, but may exit the house occasionally. The player can still trade with villagers during a raid.
On random occasions, the villager displays water particles as if sweating.
In Java Edition, once the player gains the Hero of the Village status after defeating a raid, villagers give them a discount for their trades and throw them gifts related to their profession. For a list of items that they can gift, see Hero of the Village § Gifts.
Staring
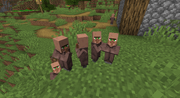
A lot of villagers staring at the player.
Villagers stare at any player that stares at them, or goes near them. This also applies for some mobs, especially wolves. A villager first turns its head towards the player, then the body. Villagers can keep staring at the player unless a raid happens or a zombie comes and chases them off.
A villager staring at the player.
Schedules
Villagers have set schedules depending on their age and employment status. Schedules define the villager's goals, which mostly determine how they behave throughout the day. However, their goals can be interrupted by higher priority behaviors most villagers have, such as fleeing from an attack, trading, and getting out of the rain.
| Image | Ticks (time) | Employed | Unemployed | Child | Nitwit |
|---|---|---|---|---|---|
| 00000 (06:00:00) | Work | Wander | Play | Sleep | |
| 02000 (08:00:00) | Wander | ||||
| 08000 (14:00:00) | Gather | ||||
| 10000 (16:00:00) | Work | Wander | |||
| 11000 (17:00:00) | Home | ||||
| 12000 (18:00:00) | Sleep | ||||
| 13000 (19:00:00) | Home | ||||
| 14000 (20:00:00) | Sleep | ||||
| Image | Ticks (time) | Employed | Unemployed | Child | Nitwit |
|---|---|---|---|---|---|
| 00010 (06:00:36) | Wander | Wander | Sleep | ||
| 02000 (08:00:00) | Work | Wander | |||
| 03000 (09:00:00) | Play | ||||
| 05000 (11:00:00) | Wander | ||||
| 06000 (12:00:00) | Wander | ||||
| 09000 (15:00:00) | Gather | ||||
| 10000 (16:00:00) | Play | ||||
| 11000 (17:00:00) | Wander | Sleep | |||
| 12000 (18:00:00) | Sleep | ||||
Working
Employed villagers spend most of their day standing next to their job site blocks. From time to time they "gather supplies" by wandering a short distance away, then returning.
Some professions have additional job-specific goals that are part of their work schedule:
- Farmers harvest and sow crops.
- Librarians inspect bookshelves.[Bedrock Edition only]
When a villager reaches its job site block, it commences "work". Two times a day, this action of working resupplies any locked trades. Villagers can resupply twice per day, even without having a bed or while sitting in a minecart. A villager can "reach" its job site block if the block is in any of the 8 directly adjacent or diagonal block spaces horizontally around it at the height of their feet, or at the 9 blocks below that. Villagers can still "reach" them diagonally, even if they can't see or touch the face of the block.
Employed villagers do not breed with each other during their work schedule. Nitwits and the unemployed do not follow this rule as they would breed with each other and the employed villagers.
Leatherworker villagers work at any cauldron; the cauldron does not have to be filled with water in order for the villager to work at it.
Wandering
All villagers wander from time to time, but for the unemployed, wandering is their main goal because it maximizes their ability to find a job site block they can claim (thereby becoming employed). Nitwit villagers wander for their whole day before returning home, and sometimes they even hang out with other employed villagers. A wandering villager chooses a random block and walks toward it, then stands there for a variable amount of time before wandering again. If at any time it detects a job site block it can claim, it does so, assumes the skin for the associated profession, and immediately begins following the appropriate schedule.
A villager attempts to claim a job site block by finding a path to a block next to one, showing angry particles when unable to reach it. After a villager fails to reach the job site block several times, it becomes unclaimed, indicated by showing angry particles on it. The villager loses its job site block and eventually becomes unemployed if the villager is at novice-level and no nearby job site block is available. Any other nearby unemployed villager has a chance to become the block's new owner. If there are no unemployed villagers nearby, then the villager who lost the job site block seeks for another unclaimed one or tries to reclaim the same unreachable one in an endless loop (this also happens for claiming beds).
The wander schedule includes a job-specific goal called "exploring the outskirts" that causes villagers to wander near the edges of the village. This enables them to detect new beds, job site blocks, bells, and houses that players have used to extend the village.
During this time of the day, they may also share items.
Gathering
Late in the day, adult villagers (other than nitwits) gather at a meeting place (the area around a bell). When two villagers encounter one another, they mingle (look at each other and "converse" by humming at other villagers). They may also share food, or breed if both are willing.
If a villager isn't close enough to detect a bell, it wanders randomly, searching for one.
Playing
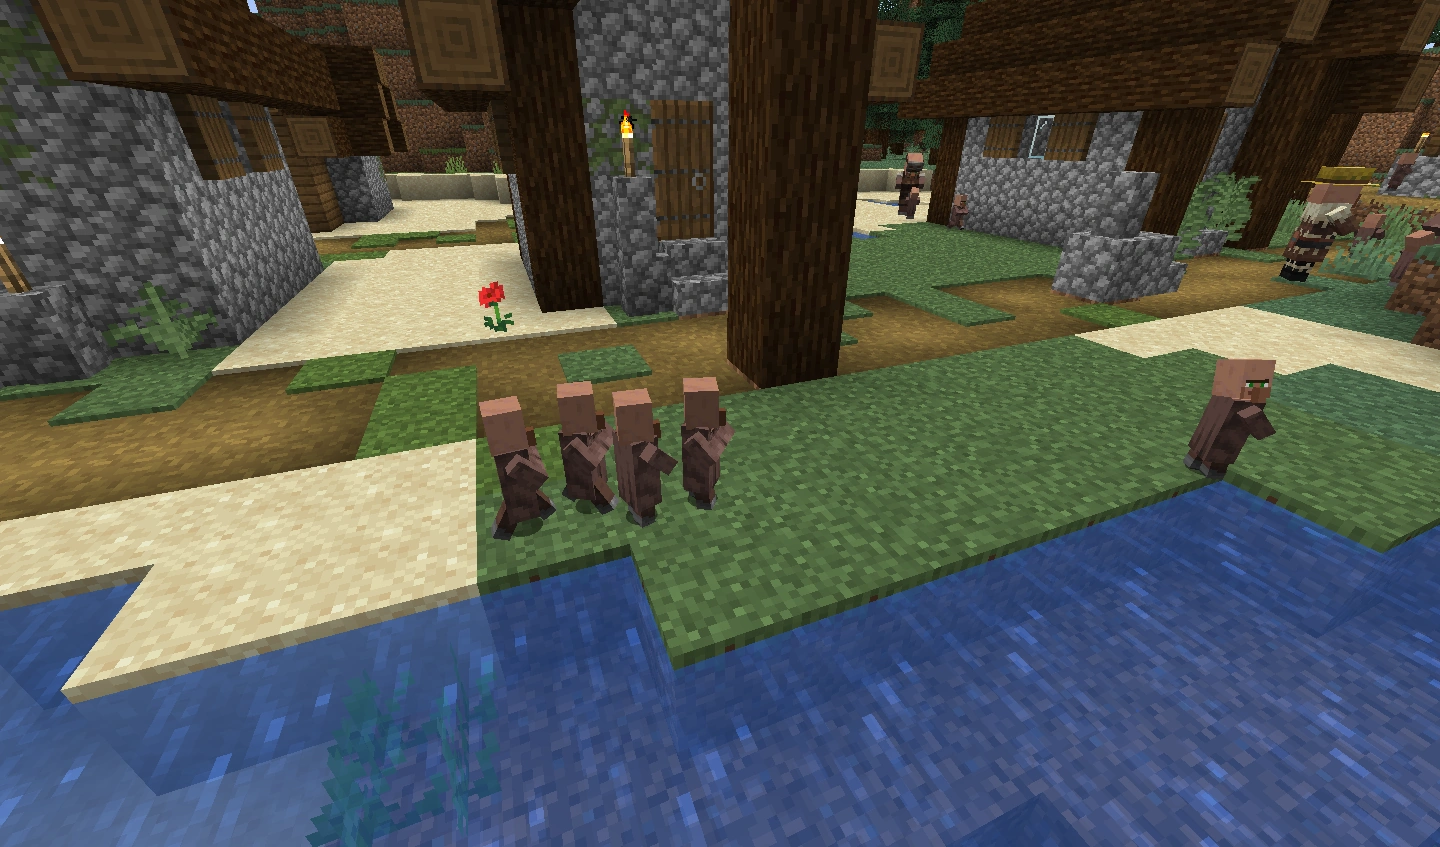
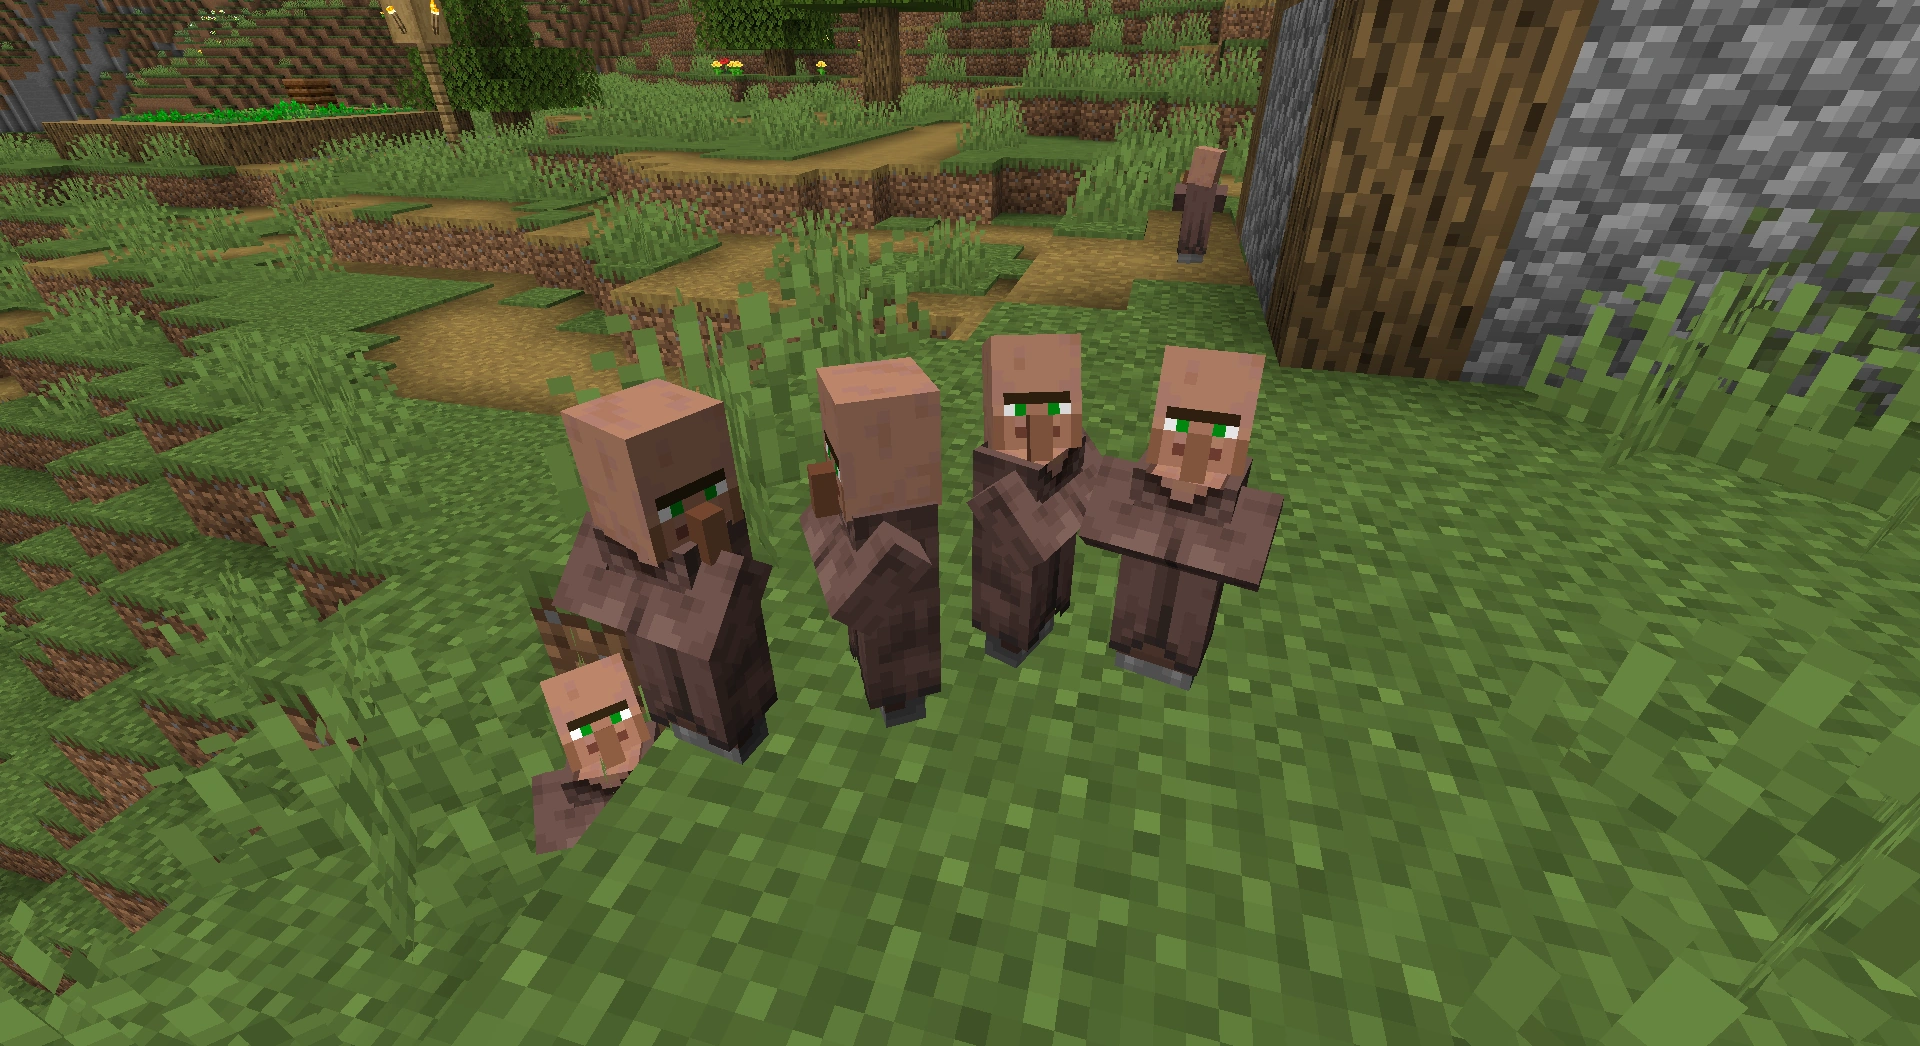
4 villager children chasing one another.
Baby villagers wander randomly searching for others to play with. When they find one, the two of them follow each other for a while and sometimes run as if racing or chasing each other.
Baby villagers wander randomly searching for beds to jump on.
They sometimes stop to stare at an iron golem. If the iron golem holds out a poppy, the baby villager cautiously accepts it [Java Edition only].
In Bedrock Edition, iron golems ignore all villagers and walk as though the villager is not there, kind of like pushing the villager, not looking at them and not showing manners.
Returning home
All villagers except nitwits head home a short time before sunset and nitwits go home after sunset. They roam around until they get near their beds, then target a block beside the bed. Once they reach their beds, they do not go through a door again before sleeping.
A villager who has no bed simply waits inside a house until morning. This includes players stealing a villager's bed to sleep in, mostly the villager stays in the house and doesn't move until sunrise. But sometimes, if they detect a unclaimed bed nearby they walk out of the house and towards the bed.

A villager pushed on a bed in Java Edition. The villager falls off the bed if it is pushed again.

Dropping an anvil on a villager that is sleeping in Java Edition does not hurt the villager nor causes the villager to wake up.
Sleeping

A villager sleeping in a bed at night (from the top view).
At sunset, most villagers lie down in their beds and remain there until morning (Nitwits stay up later at night and get up later in the morning). Villagers wake early if food is thrown at them [Java Edition only], they are pushed out of bed, or if their bed is destroyed. They also wake up when their bed is used, if they are attacked, or when a bell is rung. If possible, they return to sleeping in a bed after the interruption.
Jumping on a bed with a villager sleeping in it doesn't cause the villager to get up.
In Java Edition, villagers can be pushed on beds and sometimes turn their heads. A villager can be pushed off a bed, but most likely to go back to sleeping after staring at the player who pushed the villager for a few seconds.
When sleeping in Bedrock Edition, a villager's hitbox reduces to a cube restricted to the pillow part of the bed. If an anvil is dropped on the hitbox, the villager takes damage and wakes up.
In Java Edition, dropping any anvil on a villager that is sleeping causes the anvil to bounce and drop as an item, and the villager remains sleeping and does not take damage.
A villager who has no bed continues wandering in search of a bed to claim.
Villagers follow their Overworld schedules regardless of which dimension they are in. They can sleep in the Nether or the End, without causing the usual consequences of the bed exploding (See Bed), if the Overworld's time is correct.[4] This is because the daylight cycle continues in these dimensions, even though it is not normally apparent to the player.
Sometimes when a villager gets in a bed from another direction they turn their body until their head is on the pillow of the bed. Villagers also sleep with their eyes open, just like players.
Healing
Villagers get a brief regeneration effect once leveling up in their profession. Pink regeneration particles appear when the villager is healing.
In Bedrock Edition, when villagers successfully sleep, they immediately heal themselves when waking up at dawn if they are damaged.
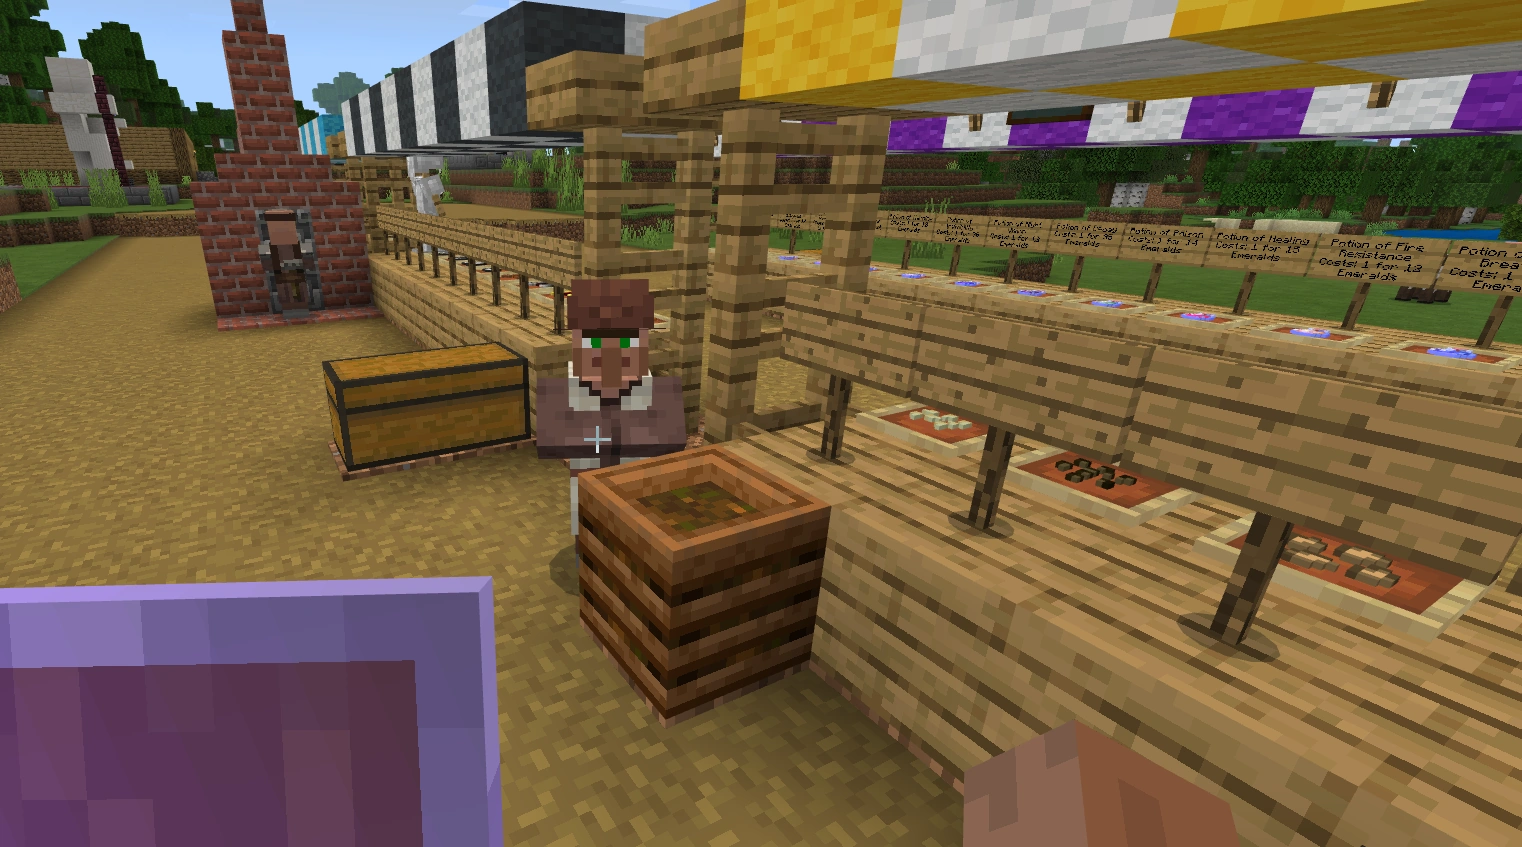
Professions
The specific instructions are: Updated librarian in 21w11a
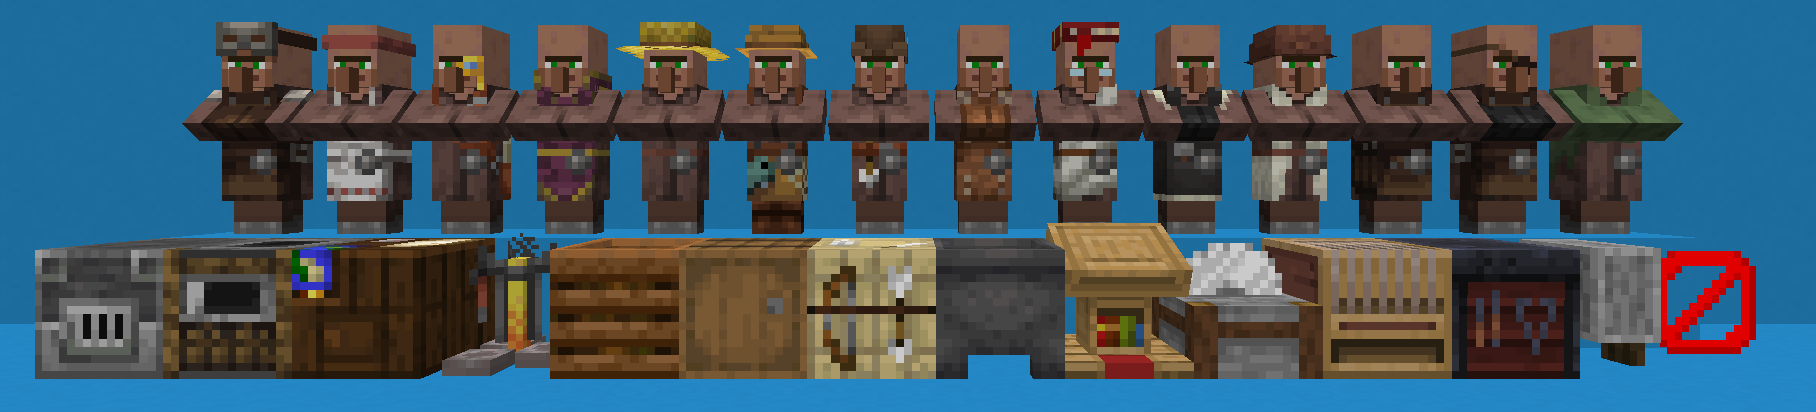
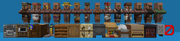
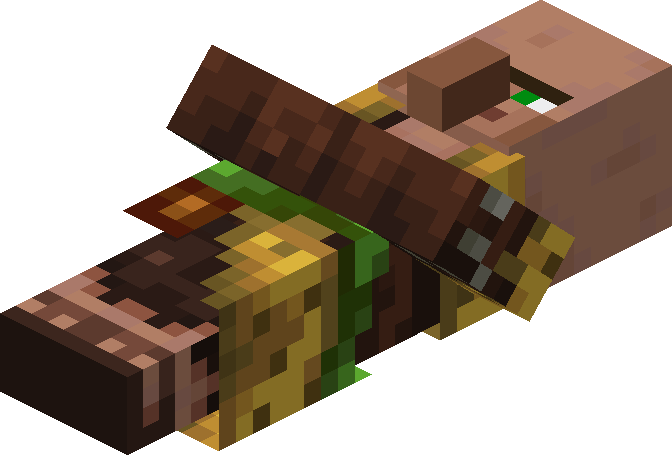
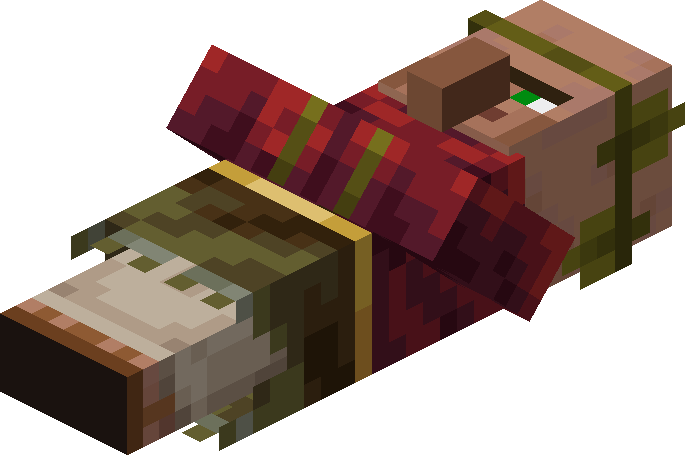
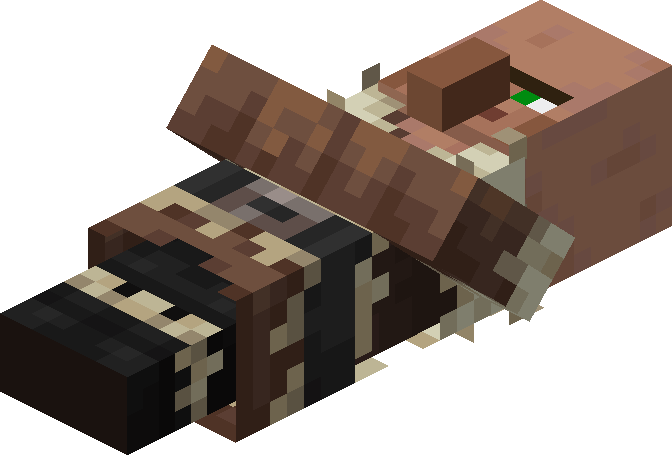
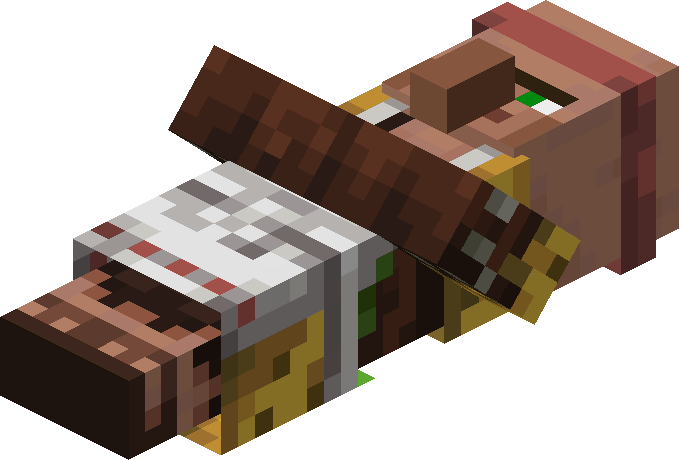
All plains biome variant professions (except unemployed) corresponding to their different job site blocks.
Each villager can have a profession, indicated by their clothing as well as by the title at the top of the trading interface. A villager can choose their profession by claiming a job site block. When they go to work, they use their daily schedule to get to their claimed job site block. Some professions, like farmers and librarians, do other things. Farmers plant crops, and librarians can inspect bookshelves.
A job site block can be claimed only if it is unclaimed and within a village boundary with at least 1 bed. Removal of a claimed job site block causes the owner to switch to another profession or become unemployed, provided that the villager has no prior trades with the player. If the villager has prior trades, it keeps its profession and claims a new job site block that matches its profession if one is available. So, once a player trades with a villager, the villager keeps its profession forever.
Nitwits and baby villagers cannot change their profession.
In Java Edition, villagers summoned by a spawn egg or via command /summon are always unemployed until they have claimed a job site block. In Bedrock Edition, however, villagers summoned in similar ways have a random profession[5]; their profession can be changed by a job site block, though.
Novice-level villagers who have not yet traded can lose their profession and change into unemployed villagers.
Unemployed adults actively seek for an unclaimed job site block and change into the corresponding profession.
Below is a table listing the various professions, along with the specific job site block that each profession requires:
Profession |
Job site block |
Biome | ||||||
|---|---|---|---|---|---|---|---|---|
| Desert | Jungle [6] |
Plains | Savanna | Snow | Swamp[6] | Taiga | ||
| Unemployed | None | |||||||
| Nitwit | None | |||||||
| Armorer | Blast Furnace | |||||||
| Butcher | Smoker | |||||||
| Cartographer | Cartography Table | |||||||
| Cleric | Brewing Stand | |||||||
| Farmer | Composter | 
|

|

|
|

|
|

|
| Fisherman | Barrel | |||||||
| Fletcher | Fletching Table | |||||||
| Leatherworker | Cauldron | |||||||
| Librarian | Lectern | |||||||
| Stone Mason[BE only] | Stonecutter | |||||||
| Shepherd | Loom | |||||||
| Toolsmith | Smithing Table | |||||||
| Weaponsmith | Grindstone | |||||||
Nitwit
A nitwit shaking its head
Nitwit villagers wear robes that are green on top. They cannot acquire a profession, trade, or gather around bells, but are still able to breed. They are not equipped with a level stone since they cannot trade. Pressing use on a nitwit in Java Edition causes it to grunt and shake its head at the player. They wander around the village for about 2000 ticks after other villagers go to sleep, before seeking a bed. If they can claim a bed, they arise in the morning 2000 ticks (1 minute 40 seconds) after the rest of the village wakes up. A nitwit must be born or spawned; no villagers change to nitwit from unemployed or a profession, and vice versa. Nitwits can be found naturally or by curing naturally spawned zombie villagers. Zombie villagers can also be spawned as babies, so this is the only way to encounter baby nitwits in survival mode. In Bedrock Edition, every baby villager has a 10% chance to become a nitwit when they become an adult.
Appearance
Villagers and zombie villagers have seven skin types corresponding to the biome they spawn in. Their appearance also varies based on their profession and their five tiers. They show which trade tier they have unlocked by a badge of a varying material on their belt. A new tier is obtained every time a player trades with a villager and the badge appears as stone, iron, gold, emerald, and finally diamond.
Villagers have different outfits depending on their biome. Naturally generated villagers take on the outfit from the biome they were spawned in. When breeding occurs, the outfit of the child is determined by the biome where the breeding occurs, but in Java Edition, it is sometimes randomly inherited from the biome type of the parents. The outfits available are:
- Desert outfit: desert and badlands biome and variants
- Savanna outfit: savanna biome and variants
- Taiga outfit: taiga, old growth taiga, windswept hills biome and variants
- Snowy outfit: any snowy biomes (including snowy taiga, frozen river, frozen ocean (and its deep variant), snowy beach and any snowy mountain biome)
- Swamp outfit: swamp biome and variants
- Jungle outfit: jungle biome variants (including bamboo jungle)
- Plains outfit: plains, meadow and all other biomes not listed above, including mushroom fields, beaches, ocean and cave biomes. Villagers spawned in the Nether or the End also have the plains biome outfit.
Villagers have 13 professions with 2 non professions for a total of 15 professions:
- Farmer (straw hat)
- Trades crops and natural foods, such as bread and cookies.
- Fisherman (fisher hat)
- Trades campfires and fishing items.
- Shepherd (brown hat with white apron)
- Trades shears, wool, dyes, paintings and beds.
- Fletcher (hat with feather and quiver on the back)
- Trades bows, crossbows, all types of arrows (except luck) and archery ingredients.
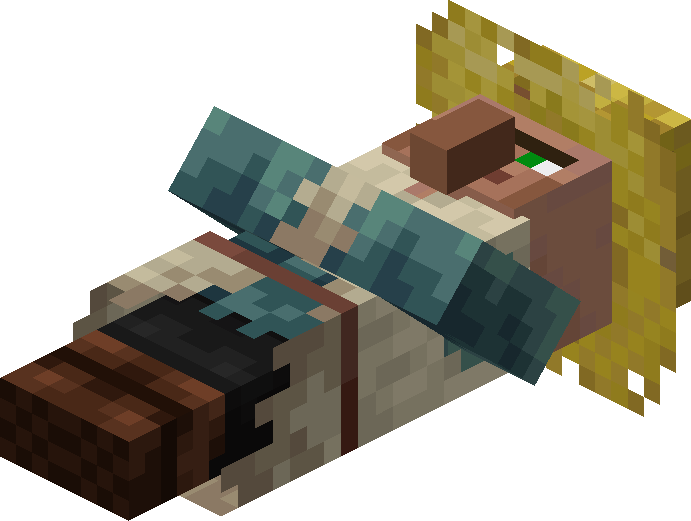
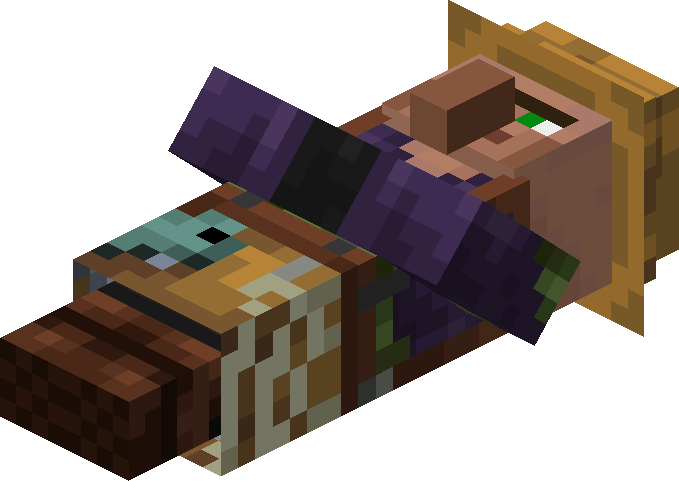
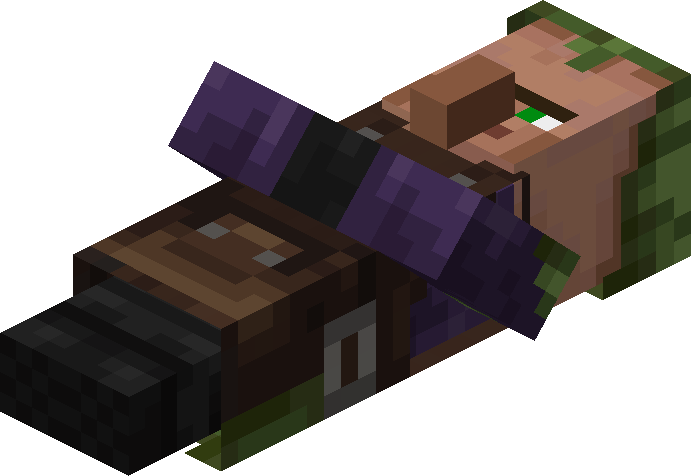
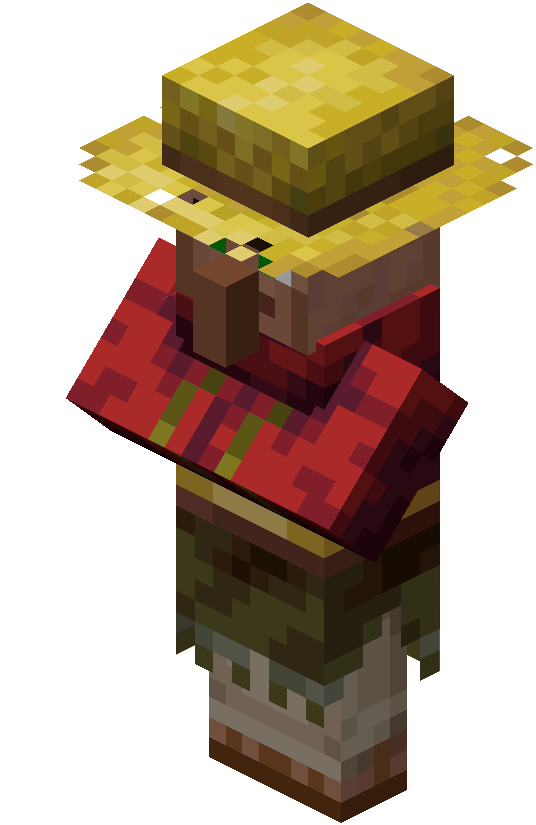
- Cleric (purple apron and creeper cloak)
- Trades magic items like ender pearls, redstone dust, glowstone dust, and other enchanting or potion ingredients.
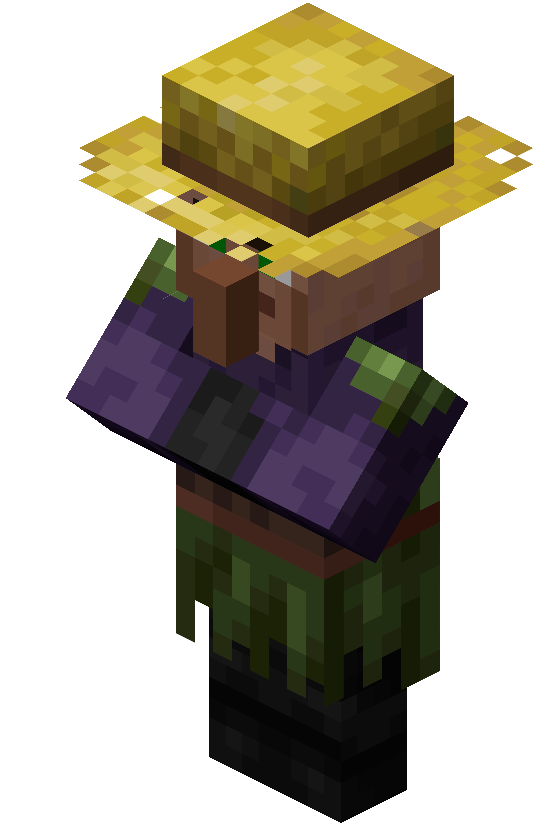
- Weaponsmith (eyepatch and black apron)
- Armorer (welding mask)
- Trades foundry items and sells chain, iron and enchanted diamond armor tiers.
- Toolsmith (black apron)
- Trades minerals, bells and harvest tools. The axe enchantments are tool related.
- Librarian (eyeglasses and a book as a hat)
- Trades enchanted books, clocks, compasses, name tags, glass, ink sacs, lanterns, and book and quills.
- Cartographer (golden monocle)
- Trades banners, compasses, banner patterns, papers and various maps, including explorer maps.
- Leatherworker (brown apron and brown gloves)
- Trades scutes, rabbit hide, and leather-related items.
- Butcher (red headband and white apron)
- Trades meats, sweet berries, rabbit stew, and dried kelp blocks.
- Mason[JE only]/Stone Mason[BE only] (black apron and black gloves)
- Trades polished stones, terracotta, clay, glazed terracotta and quartz.
- Nitwit (green coated, no badge)
- No trades, No badge
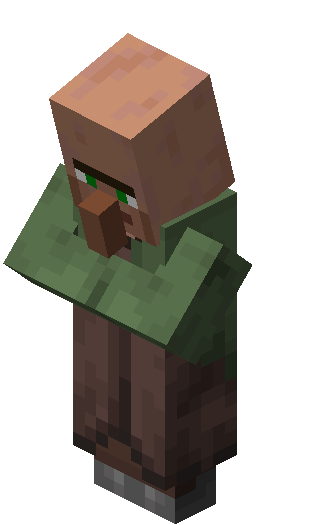
- Unemployed (no overlay, base clothing of biome without any extra features)
- No trades until employed. No badge until employed.
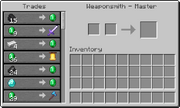
Trading
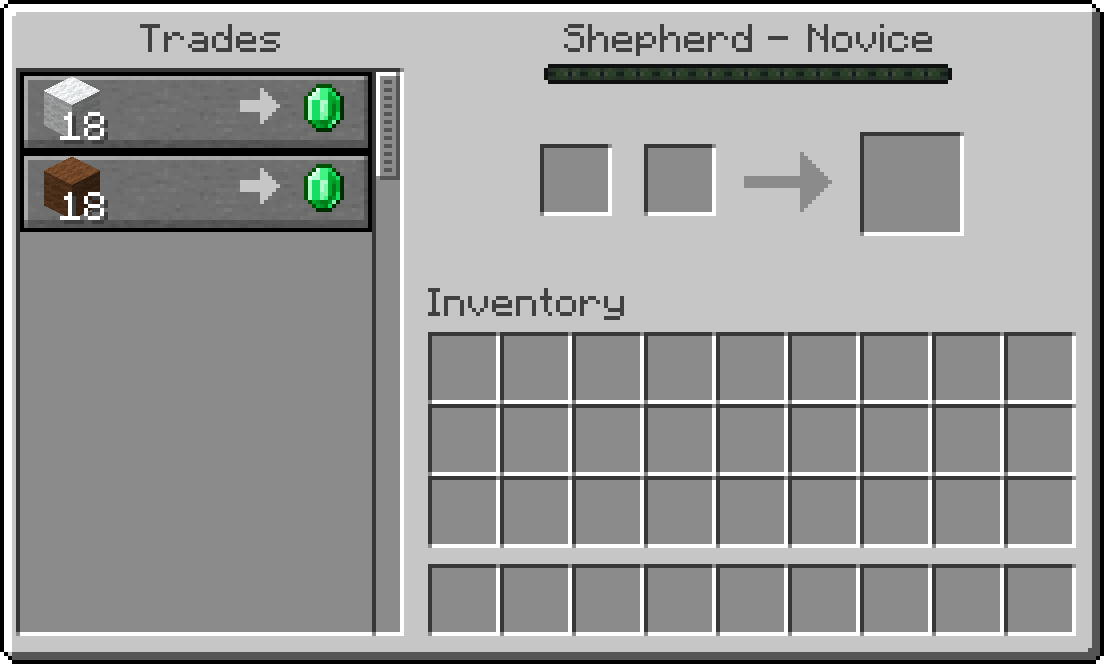
The Java Edition trading interface, displaying basic novice-level trading options.
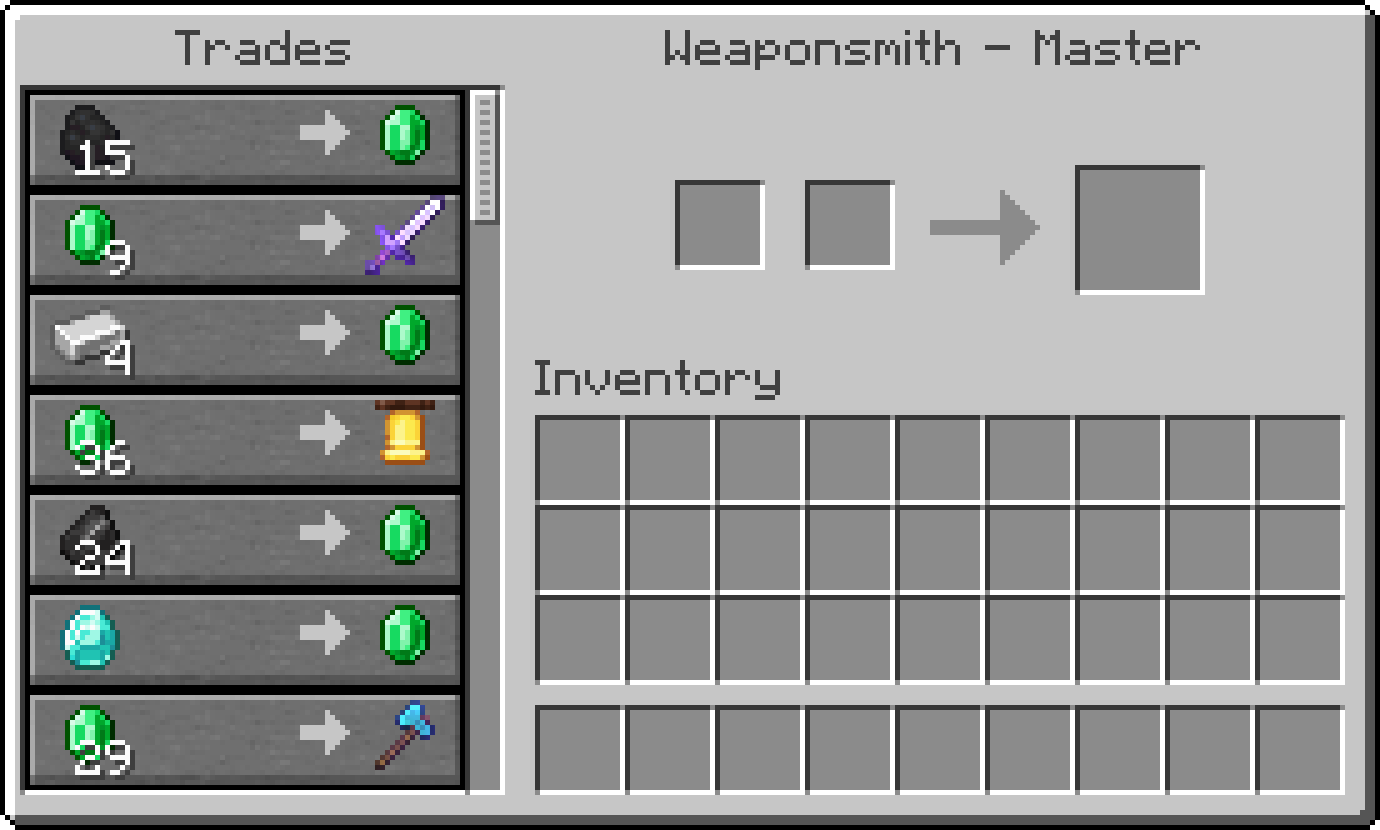
Trading options of a max-level weaponsmith.
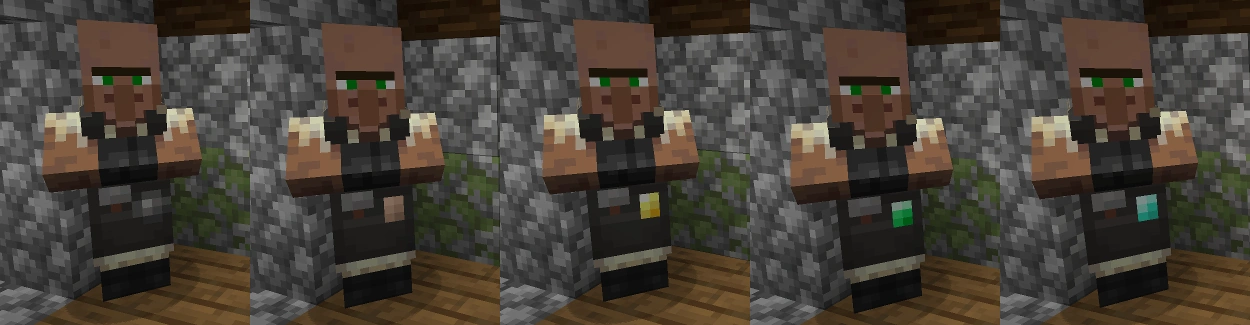

Villager badge changes color depending on the level of the villager.
From left to right: stone (novice), iron (apprentice), gold (journeyman), emerald (expert), and diamond (master).
The trading system is a gameplay mechanic that allows players to buy and sell various items to and from villagers, using emeralds as a currency. Their trades can be valuable or somewhat meaningless, depending on the cost, the items the player might get, and how the player treats the villagers. Only adult villagers with professions can trade; the player cannot trade with nitwits, unemployed villagers, or baby villagers. Attempting to do so causes the villager to display a head-shaking animation and play the villager's declined trade sound[Java Edition only].
Using an employed villager allows a player to trade, making offers based on the villager's profession and profession level. All offers involve emeralds as a currency, and items related to the villager's profession. Trading can allow the acquisition of items that would otherwise be difficult or impossible to obtain, such as enchanted books with "treasure" enchantments (e.g. Mending), bottles o' enchanting, or chainmail armor. When a villager gets a new trade, they receive 10 seconds of Regeneration I (totaling to 4![]()
![]() of restoration), which emits pink particles. The villager also emits green particles suggesting contentment.
of restoration), which emits pink particles. The villager also emits green particles suggesting contentment.
Completing a trade with a villager increases its professional-level slightly. Some trades grant higher levels to the villager, while others do not. As it advances through its profession, the villager offers additional trades. When a villager unlocks a new trade at a higher level, it almost always grants more experience than every lower-level trade.
Villagers have a maximum supply of items and after the player has traded for an item that many times, the villager's supply of the item is exhausted. This results in the trade being temporarily locked. A player can continue to trade for the villager's other available items if any. Exhausted items are restocked when the villager works at a job site, up to twice per day.
Clicking use on a unemployed villager or a nitwit villager causes it to grunt and shake their head. [Java Edition only] In Bedrock Edition, clicking use on a unemployed villager or a nitwit villager does nothing.
Using a name tag on a villager always names the villager instead of opening the trading interface.
Supply and demand
The price of an item can rise and fall with changes in demand. The price of a traded item can rise when next resupplied, or fall from a risen price if not traded. Demand is stored per item, not per villager.
Trade offering
Several villagers offering trade items to a player.
When a player holds an item near a villager who wants that item, the villager holds up an item it offers in exchange. For example, a farmer villager who buys 20 wheat for one emerald holds up an emerald, offering it to a player holding wheat. Villagers do not offer trades that are currently out of stock. If the villager has more than one trade for an item, it cycles through the trades, offering a different item every few seconds. This kind of trading interaction makes it easier to find villagers who offer a particular trade, but the player must still open the trading interface to complete the trade. Note that villagers do not hold items to offer trades during their gather or sleep phases, even though it is still possible to trade with them.
Economic trade
Villagers have levels and require experience to unlock the next tiers of trade; level 1 is a novice, level 2 is apprentice, level 3 is journeyman, level 4 is expert, and level 5 is master. Villagers can resupply trades by themselves by working more at their job site block.
Popularity
In Java Edition, villagers increase their prices of trades if a player's popularity is low, (e.g. from damaging villagers), and decrease it if their popularity is high (e.g. from trading with multiple villagers). Curing a zombie villager in Bedrock Edition or defeating a raid in Java Edition also increases the player's popularity by 10.
Hero of the Village
When a player receives Hero of the Village, players receive discounted prices on all the items traded by villagers in both editions. The Hero of the Village also gets gifts.[Java Edition only] Each villager throws gifts related to its profession, and nitwits and unemployed villagers throw wheat seeds instead. These gifts range in value from common (like seeds) to rare items (like chainmail armor). A player's popularity increases by 10 in Java Edition and doesn't increase in Bedrock Edition. Villagers also shoot off fireworks, with different colored fireworks with no pattern.[Java Edition only][upcoming: BE 1.18.10]
Variants
Zombie villagers
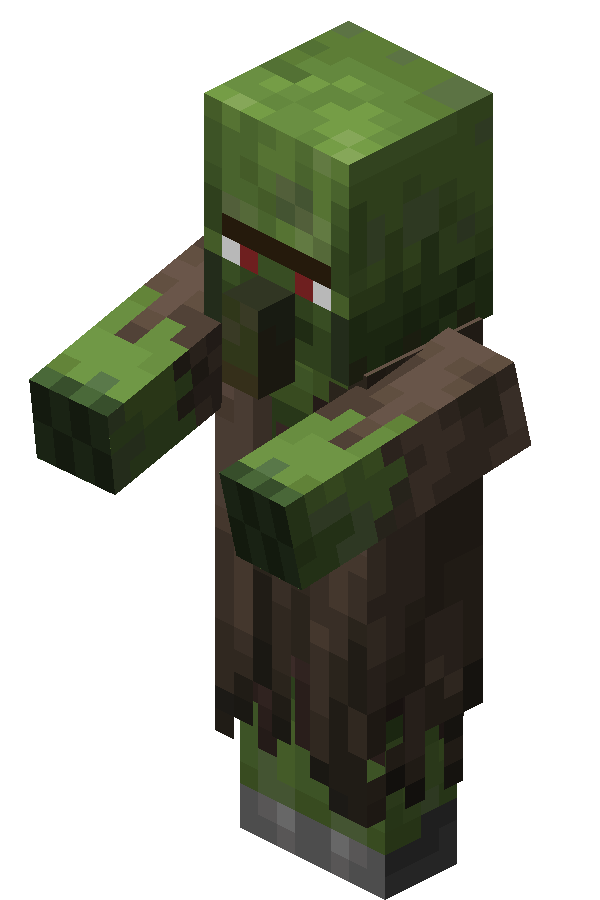
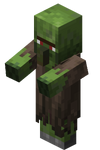
An example of a zombie villager.
When a zombie kills a villager, it can turn the villager into a zombie villager, depending on the difficulty: 0% chance on easy, 50% chance on normal and 100% chance on hard. Zombie villagers also spawn naturally in the Overworld in the same conditions as a normal zombie, although much less commonly, with a 5% chance. Zombie villagers also spawn in abandoned villages (zombie villages) and igloos, in place of villagers in zombie villages.
Witches


A witch.
Witches are hostile villager-like mobs that spawn anywhere in the Overworld in light levels of 7 or less, in swamp huts, as part of raids, or when a villager gets struck by lightning. Once a villager becomes a witch it cannot be turned back to a villager. Witches attack by throwing splash potions of harming, slowness, weakness and poison. They also use beneficial potions on themselves, especially healing potions when damaged, fire resistance potions if on fire, and water breathing potions if submerged in water.
Witches in raids heal and buff illagers and other raider mobs by throwing beneficial potions and healing potions on them in Java Edition. Despite being allies with and looking similar in appearance to illagers, witches themselves are not considered illagers, are passive toward villagers and wandering traders, and are neutral toward iron golems in Java Edition, attacking only if attacked or another witch in that area is attacked. If a witch's negative splash potion hits an illager, the illager retaliates, leading to a fight in Bedrock Edition.
Witches attack villagers only if in a pillager patrol or through other commands.
NPC


An example of an NPC.
NPCs are villager-like mobs in Minecraft Education and in Bedrock Edition if "educational features" are turned on. NPCs can behave almost like players. They can also chat to players, turn their heads, and even rotate their body 360 degrees. They are the only companions to chat with in a single player game. but can't move, even when hit. NPCs cannot be pushed, but are affected by gravity. Breaking a block under an NPC causes it to fall like an armor stand. Using a bubble column on a NPC makes it go up.
NPCs are also affected by any effects but cannot die from the wither effect or fatal poison. They also don't take any fall damage, fire damage, drowning damage, suffocation damage, or any external damage from another mob/player, but they can die in the void.
The only way to kill an NPC is to go into world builder (/worldbuilder) and hit it once or use the /kill @e[type=npc] command.
Illagers


An example of an illager, the evoker.
Illagers are hostile villager-like mobs that spawn in woodland mansions as well as pillager outposts, illager patrols, or raids. The varieties of illagers are vindicators, evokers, pillagers, and illusioners[Java Edition only] (which can be summoned only by using commands), along with two associated mobs: vexes and ravagers. The ravager is considered an illager in Bedrock Edition, but not in Java Edition, which means that vindicators named "Johnny" attack ravagers in Java Edition. Illagers are considered to be outcasts from villages, meaning they were once villagers, but turned evil, so the villagers kicked them out forever, leaving them the hatred of villagers[7]. In addition to attacking players, they also attack villagers, wandering traders, and iron golems. They do not go seeking for villagers, and never naturally come to villages, except during raids and patrols. In Bedrock Edition, sometimes a pillager outpost can generate on the border of a village, leading to altercations if any villager or iron golem goes near the outpost.
In Bedrock Edition, illagers attack snow golems but do not attack baby villagers, although baby villagers still flee from them. "Johnny" vindicators still attack baby villagers in Bedrock Edition.
As of Java Edition 1.18, illagers and ravagers no longer attack baby villagers.
Wandering trader


A wandering trader.
Wandering traders are a type of villager that spawn randomly close to the player in both editions, or periodically in village gathering sites in Bedrock Edition. Wandering traders also spawn near bells. Two trader llamas spawn leashed to the wandering trader when a wandering trader is either naturally spawned, summoned or spawned using a spawn egg in Bedrock Edition.
Players may use emeralds to buy items from wandering traders without the need of unlocking the previous trade, but cannot trade items for emeralds, although wandering trader trades can be customized using commands in Java Edition. They also lock trades like villagers, but never unlock the trade, nor they can work at any job site blocks. Like villagers, wandering traders are attacked by most zombie variants (though they do not have a zombified form, they die if a zombie kills it, even on hard difficulty), illagers, ravagers[Java Edition only], and vexes.
Wandering traders also drink a Potion of Invisibility at night (or when they see a hostile mob such as an illager or zombie). In Java Edition, they drink a milk bucket in the morning to remove the Invisibility. They despawn after 40-60 minutes (even with a name tag or in a minecart or boat) with their llamas, and sooner if all the trades are locked.
Sounds
| Sound | Subtitles | Source | Description | Resource location | Translation key | Volume | Pitch | Attenuation distance |
|---|---|---|---|---|---|---|---|---|
| Villager mumbles | ? | Villager is talking | entity | subtitles | ? | ? | 16 | |
| Villager cheers | ? | Villager is happy, such as after defeating a raid | entity | subtitles | ? | ? | 16 | |
| Villager dies | ? | Villager dies/becomes zombified | entity | subtitles | ? | ? | 16 | |
| Villager hurts | ? | Villager gets hurt | entity | subtitles | ? | ? | 16 | |
| Villager disagrees | ? | Player trades with either an unemployed villager, a nitwit, or fails to trade with an employed villager due to lack of resources. | entity | subtitles | ? | ? | 16 | |
| Villager trades | ? | Player opens the trade UI on a villager | entity | subtitles | ? | ? | 16 | |
| Villager agrees | ? | Player successfully trades with the villager. | entity | subtitles | ? | ? | 16 | |
| Fletcher works | ? | ? | entity | ? | ? | ? | 16 | |
| Cleric works | ? | brewing stand finishes brewing a potion | entity | ? | ? | ? | 16 | |
| Farmer works | ? | Adding to a composter | entity | ? | 0.3 | 0.8 | 16 | |
| Armorer works | ? | ? | entity | ? | 1.0 | ? | 16 | |
| Toolsmith works | Blocks | ? | entity | ? | 1.0 | 1.0 | 16 | |
| Butcher works | ? | ? | entity | ? | ? | ? | 16 | |
| Fisherman works | Blocks | ? | entity | ? | 1.0 | 1.0 | 16 | |
| Shepherd works | ? | ? | entity | ? | ? | ? | 16 | |
| Weaponsmith works | ? | ? | entity | ? | ? | ? | 16 | |
| Leatherworker works | ? | ? | entity | ? | 1 = 0.9; 1, 2, 3 = ? | ? | 16 |
Data values
ID
| Name | Identifier | Translation key |
|---|---|---|
| Villager | villager | entity.minecraft.villager |
| Name | Identifier | Numeric ID | Translation key |
|---|---|---|---|
| Villager (old) | villager | 15 | entity.villager.name |
| Villager (new) | villager_v2 | 115 | entity.villager_v2.name |
Entity data
Villagers have entity data associated with them that contains various properties.
- Entity data
- Additional fields for mobs that can breed
- Tags common to all entities
- Tags common to all mobs
- Tags common to all villagers
- Inventory: Each compound tag in this list is an item in the villager's inventory, up to a maximum of 8 slots. Items in two or more slots that can be stacked together are automatically condensed into one slot. If there are more than 8 slots, the last slot is removed until the total is 8. If there are 9 slots but two previous slots can be condensed, the last slot returns after the two other slots are combined.
- An item in the inventory, excluding the Slot tag.
- Tags common to all items
- An item in the inventory, excluding the Slot tag.
- LastRestock: The last tick the villager went to their job site block to resupply their trades.
- LastGossipDecay: The last tick all gossip of the villager has decreased strength naturally.
- RestocksToday: The number of restocks a villager has done in 10 minutes from the last restock, or
0if the villager has not restocked in the last 10 minutes. When a villager has restocked twice in less than 10 minutes, it waits at least 10 minutes for another restock. - Willing: 1 or 0 (true/false) – true if the villager is willing to mate. Becomes true after certain trades (those that would cause offers to be refreshed), and false after mating.
Villager type
Villager profession
Achievements
| Icon | Achievement | In-game description | Actual requirements (if different) | Gamerscore earned | Trophy type (PS4) | |
|---|---|---|---|---|---|---|
| PS4 | Other | |||||
| The Haggler | Acquire or spend 30 Emeralds by trading with villagers or with wandering trader. [sic] | — | 30G | Silver | ||
| Treasure Hunter | Acquire a map from a cartographer villager, then enter the revealed structure | Visit the structure indicated while the purchased map is in your main hand (hotbar). | 40G | Silver | ||
| Buy Low, Sell High | Trade for the best possible price. | Buy something for 1 emerald, or when the Hero of the Village effect is applied. | 50G | Gold | ||
| Master Trader | Trade for 1,000 emeralds. | Obtain 1,000 emeralds from trading with villagers. | 30G | Silver | ||
Advancements
| Icon | Advancement | In-game description | Parent | Actual requirements (if different) | Resource location |
|---|---|---|---|---|---|
 | Zombie Doctor | Weaken and then cure a Zombie Villager | We Need to Go Deeper | Use a golden apple on a zombie villager under the Weakness effect; the advancement is granted when the zombie villager converts into a villager. In multiplayer, only the player that feeds the golden apple gets the advancement. | story/cure_zombie_villager
|
 | Adventure | Adventure, exploration and combat | — | Kill any entity, or be killed by any entity. | adventure/root
|
| What a Deal! | Successfully trade with a Villager | Adventure | Take an item from a villager or wandering trader's trading output slot, and put it in your inventory. | adventure/trade
|
| Surge Protector | Protect a Villager from an undesired shock without starting a fire | Adventure | Be within 30 blocks of a lightning strike that doesn't set any blocks on fire, while an unharmed villager is within or up to six blocks above a 30×30×30 volume centered on the lightning strike. | adventure/lightning_rod_with_villager_no_fire
|
| Very Very Frightening | Strike a Villager with lightning | A Throwaway Joke | Hit a villager with lightning created by a trident with the Channeling enchantment. | adventure/very_very_frightening
|
History
| Java Edition | |||||
|---|---|---|---|---|---|
| September 29, 2018 | The Village and Pillage update, which improves villagers and villages, was announced at MINECON Earth 2018. | ||||
1.14{{Extension DPL}}<ul><li>[[Blue Dye|Blue Dye]]<br/>{{Item
|image = Blue_Dye_JE1_BE1.png
|renewable = Yes
|stackable = Yes (64)
}}
'''Blue dye''' is a [[Dye#Primary|primary dye color]].
== Obtaining ==
=== Crafting ===
{{Crafting
|Lapis Lazuli
|Output=Blue Dye
|type=Material
|head=1
}}
{{Crafting
|Cornflower
|Output=Blue Dye
|type=Material
|foot=1
}}
=== Chest loot ===
{{#invoke:LootChest|base3|blue-dye}}
== Usage ==
{{dye usage}}
=== Crafting ingredient ===
{{crafting usage|ignore=Banner|continue=1}}
{{banner crafting usage}}
=== Loom ingredient ===
{{Banner loom usage|Blue Dye}}
=== Trading ===
Expert-level shepherd villagers have a {{frac|1|6}} chance to buy 12 blue dye for an emerald.
== Data values ==
=== ID ===
{{edition|java}}:
{{ID table
|edition=java
|showforms=y
|generatetranslationkeys=y
|displayname=Blue Dye
|spritetype=item
|nameid=blue_dye
|form=item
|foot=1}}
{{edition|bedrock}}:
{{ID table
|edition=bedrock
|showaliasids=y
|shownumericids=y
|showforms=y
|notshowbeitemforms=y
|generatetranslationkeys=y
|displayname=Blue Dye
|spritetype=item
|nameid=blue_dye
|aliasid=dye / 18
|id=399
|form=item
|translationkey=item.dye.blue_new.name
|foot=1}}
== History ==
{{History|java}}
{{History||1.14|snap=18w43a|[[File:Blue_Dye_JE1_BE1.png|32px]] Added blue dye.}}
{{History|||snap=18w44a|Blue dyes now can changed the text color on the [[sign]]s to blue.}}
{{History|||snap=19w05a|Added the [[wandering trader]], which sell blue dyes.}}
{{History|||snap=19w11a|Blue dyes can now be [[trading|bought]] by shepherd villagers.}}
{{History||1.17|snap=20w45a|Blue dyes can now used to craft newly added [[blue candle]]s.}}
{{History|||snap=21w19a|Blue dyes can no longer used to craft blue candles.}}
{{History|||snap=Pre-release 1|Blue dyes can once again used to craft blue candles.}}
{{History||1.20<br>(Experimental)|link=1.19.3|snap=22w42a|Blue dyes can now change the text color on [[hanging sign]]s to blue.}}
{{History||1.20|snap=23w12a|Blue dye can now be found in [[suspicious gravel]] and [[suspicious sand]] in [[trail ruins]].}}
{{History|||snap=23w16a|Blue dye no longer generates in [[suspicious sand]] in [[trail ruins]].|Due to the split of the archaeological loot tables for the suspicious gravel within the [[trail ruins]]; blue dye now is in the common loot.}}
{{History|bedrock}}
{{History||1.8.0|snap=beta 1.8.0.10|[[File:Blue_Dye_JE1_BE1.png|32px]] Added blue dye.}}
{{History||1.9.0|snap=beta 1.9.0.0|Added [[flower|cornflowers]], which can be used to [[crafting|craft]] blue dye.}}
{{History||1.10.0|snap=beta 1.10.0.3|Blue dye can now be used to [[dye]] white [[carpet]]s and uncolored [[glass pane]]s.}}
{{History||1.11.0|snap=beta 1.11.0.4|Blue dye can now be [[trading|sold]] to shepherd [[villager]]s.}}
{{History||1.16.100|snap=beta 1.16.100.56|The ID of blue dye has been changed from <code>dye/18</code> to <code>blue_dye</code>.}}
{{History|ps4}}
{{History||1.83|[[File:Blue_Dye_JE1_BE1.png|32px]] Added blue dye.}}
{{History|foot}}
== Issues ==
{{issue list}}
== References ==
{{Reflist}}
{{Items}}
[[Category:Items]]
[[Category:Dyes]]
[[Category:Renewable resources]]
[[de:Blauer Farbstoff]]
[[es:Tinte azul]]
[[fr:Teinture bleue]]
[[ja:青色の染料]]
[[ko:파란색 염료]]
[[pl: Niebieski barwnik]]
[[pt:Corante azul]]
[[zh:蓝色染料]]</li><li>[[Raw Copper|Raw Copper]]<br/>{{Item
| image = Raw Copper.png
| renewable = No
| stackable = Yes (64)
}}
'''Raw copper''' is a raw metal resource obtained from mining [[copper ore]].
== Obtaining ==
=== Mining ===
Copper ore and deepslate copper ore mined with a [[stone pickaxe]] or better drops 2–5 units of raw copper. If the pickaxe is enchanted with [[Fortune]], it can drop extra raw copper, allowing for a maximum of 20 units per ore block with Fortune III, or an average of 7.7 units of raw copper per ore block. If the ore is mined using a pickaxe enchanted with [[Silk Touch]], it drops the ore block instead.
=== Crafting ===
{{Crafting
|showname=1
|Block of Raw Copper
|Output=Raw Copper,9
|type=Material
|foot=1
}}
== Usage ==
The primary usage of raw copper is [[smelting]] it into [[copper ingot]]s.
=== Crafting ===
{{crafting usage}}
=== Smelting ingredient ===
{{Smelting
|showname=2
|Raw Copper
|Copper Ingot
|0.7
}}
== Data values ==
=== ID ===
{{edition|java}}:
{{ID table
|edition=java
|showitemtags=y
|showforms=y
|generatetranslationkeys=y
|displayname=Raw Copper
|spritetype=item
|nameid=raw_copper
|form=item
|foot=1}}
{{edition|bedrock}}:
{{ID table
|edition=bedrock
|shownumericids=y
|showforms=y
|notshowbeitemforms=y
|generatetranslationkeys=y
|displayname=Raw Copper
|spritetype=item
|nameid=raw_copper
|form=item
|id=507
|foot=1}}
== History ==
{{History|java}}
{{History||1.17|snap=21w14a|[[File:Raw Copper JE1.png|32px]] Added raw copper.}}
{{History|||snap=April 13, 2021|slink={{Tweet|JasperBoerstra|1381991999952277513}}|[[File:Raw Copper JE2.png|32px]] [[JAPPA]] shows a new raw copper texture.}}
{{History|||snap=21w15a|[[File:Raw Copper JE2.png|32px]] The texture of raw copper has been changed.
|Raw copper can now be used to craft [[block of raw copper]].}}
{{History|||snap=April 16, 2021|slink={{Tweet|JasperBoerstra|1383047666037325829}}|[[File:Raw Copper (pre-release).png|32px]] [[JAPPA]] shows a new raw copper texture again.}}
{{History|||snap=21w16a|[[File:Raw Copper JE3.png|32px]] The texture of raw copper has been changed.}}
{{History|||snap=21w17a|[[Copper ore]] now drops 2-3 raw copper when mined instead of a single unit.}}
{{History||1.18|snap=21w40a|[[Copper ore]] now drops 2-5 raw copper when mined.}}
{{History|bedrock}}
{{History||1.17.0|snap=beta 1.17.0.50|[[File:Raw Copper JE2.png|32px]] Added raw copper.}}
{{History|||snap=beta 1.17.0.52|Raw copper are now available without enabling [[experimental gameplay]].}}
{{History|||snap=beta 1.17.0.54|[[File:Raw Copper JE3.png|32px]] The texture of raw copper has been changed.}}
{{History|foot}}
== Issues ==
{{Issue list}}
==Gallery==
<gallery>
JE 1.17 Dev Raw Metals.jpg|Jappa shows raw ore textures.
Jappa Raw Ores 1.jpg|Jappa shows raw ore textures.
Jappa Raw Ores 2.png|Jappa shows raw ore textures.
Jappa Raw Ores 3.jpg|Jappa shows raw ore textures.
Jappa Raw Ores 4.jpg|Jappa shows raw ore textures.
Jappa Raw Ores 5.jpg|Jappa shows raw ore textures.
</gallery>
{{Items}}
[[Category:Non-renewable resources]]
[[de:Rohkupfer]]
[[es:Cobre en bruto]]
[[fr:Cuivre brut]]
[[it:Rame grezzo]]
[[ja:銅の原石]]
[[pl:Surowa miedź]]
[[pt:Cobre bruto]]
[[ru:Необработанная медь]]
[[tr:Ham Bakır]]
[[uk:Необроблена мідь]]
[[zh:粗铜]]</li></ul> | 18w47a | Villagers now hide in houses during raids. | |||
| 18w50a | Added new mason profession. | ||||
| Villagers now have different skins based on biome (including swamps and jungles, which do not contain villages), as well as profession. | |||||
| Villagers now have five tiers and show which trade tier they've unlocked, by a badge of a varying material on their suit. The first trade tier appears as a stone badge, the next iron, then gold, emerald and finally diamond. | |||||
| Villagers now run away from and get infected by giants. | |||||
| 19w03a | Villagers no longer run away from nor get infected by giants. | ||||
| 19w11a | Added many new villager trades, for each villager profession. | ||||
| Villager trading prices now also depend on the player's popularity in the village. | |||||
| Villagers now resupply their trades up to two times a day, if they get to work at a job site block. | |||||
| The villager trading UI has been updated. | |||||
| Villagers now level up in a new way. | |||||
| Villagers now have a daily schedule. They go to work and meet up at the village bell. Each villager tries to find its own bed and job site block. Each profession has a specific block that works as a job site block for them (e.g. lectern for the librarian and cauldron for the leatherworker). | |||||
| Villagers now sleep in beds at night. | |||||
| Iron golems now spawn when enough villagers meet. | |||||
| 19w13a | Villagers can now trade during raids. | ||||
| Villagers now sweat during raids. | |||||
| Villagers now hide in houses when a bell is rung by the player. | |||||
| Villagers now throw gifts to players with the different Hero of the Village status effects, with the gift item depending on their profession. Baby villagers throw poppies. | |||||
| 19w13b | The trading UI of villagers has been revamped. | ||||
| Available trades are now listed in a left sidebar, similar to Bedrock Edition. | |||||
| When players have the required materials, clicking on one of the trades now put the items into the slots automatically. | |||||
| 19w14a | |||||
| Pre-Release 1 | Fletcher villagers no longer sell luck arrows. | ||||
| 100% of villager trades are now discounted when the player has the Hero of the Village effect. | |||||
1.14.3{{Extension DPL}}<ul><li>[[Amethyst Shard|Amethyst Shard]]<br/>{{Item
| title = Amethyst Shard
| image = Amethyst Shard.png
| renewable = Yes
| stackable = Yes (64)
}}
An '''amethyst shard''' is a crystal ore obtained from mining a fully grown [[amethyst cluster]] or can be obtained from chests in [[Ancient City|ancient cities]].
== Obtaining ==
=== Mining ===
An [[amethyst cluster]] mined using a non-[[Silk Touch]], non-[[Fortune]] [[pickaxe]] drops 4 amethyst shards. When mined using any other tool, [[item]] or mechanism (such as [[explosion]]s or [[piston]]s) it drops 2 shards. The maximum amount of amethyst shards dropped can be increased with Fortune. Fortune I gives a {{frac|1|3}} chance for eight shards, averaging 5.33 shards; Fortune II gives a 25% chance (each) to give eight or 12 shards, averaging 7 shards, and Fortune III gives a 20% chance (each) to give 8, 12, or 16 shards, averaging 8.8 shards.
If the amethyst cluster in any of its growth stages is mined using a pickaxe enchanted with [[Silk Touch]], it drops itself rather than amethyst shards.
=== Chest loot ===
{{LootChestItem|amethyst-shard}}
== Usage ==
=== Crafting ingredient ===
{{Crafting usage}}
=== Smithing ingredient ===
{{Smithing
|head=1
|ingredients=Any Armor Trim +<br/>Any Armor Piece + <br/>Amethyst Shard
|Any Armor Trim Smithing Template
|Netherite Chestplate
|Amethyst Shard
|Amethyst Trim Netherite Chestplate
|showdescription=1
|description = All armor types can be used in this recipe;<br/>a netherite chestplate is shown as an example.<br/>
|tail=1
}}
;Trim color palette
The following color palette is shown on the designs on trimmed armor:
*{{TrimPalette|amethyst shard}}
=== Allay duplication ===
If an amethyst shard is given to an [[allay]] that is currently dancing to an active [[jukebox]], the allay emits heart particles, consumes the amethyst shard and duplicates into another allay. After this, there is a 5 minute cool down until both allays can be duplicated like this again.
== Sounds ==
{{Edition|Java}}:
{{Sound table
|sound=Amethyst shimmer.ogg
|subtitle=Amethyst chimes
|source=neutral
|description=When an amethyst shard duplicates an allay
|id=block.amethyst_block.chime
|translationkey=subtitles.block.amethyst_block.chime
|volume=0.4
|pitch=1.0
|distance=16
|foot=1}}
{{Edition|Bedrock}}:
{{Sound table
|type=bedrock
|sound=Amethyst shimmer.ogg
|source=block
|description=When an amethyst shard duplicates an allay
|id=chime.amethyst_block
|volume=1.0
|pitch=0.5-1.7
|foot=1}}
== Data values ==
=== ID ===
{{edition|java}}:
{{ID table
|edition=java
|showforms=y
|generatetranslationkeys=y
|displayname=Amethyst Shard
|spritetype=item
|nameid=amethyst_shard
|form=item
|foot=1}}
{{edition|bedrock}}:
{{ID table
|edition=bedrock
|shownumericids=y
|showforms=y
|notshowbeitemforms=y
|generatetranslationkeys=y
|displayname=Amethyst Shard
|spritetype=item
|nameid=amethyst_shard
|form=item
|id=625
|foot=1}}
==History==
{{History||October 3, 2020|link={{ytl|DBvZ2Iqmm3M|t=23m14s}}|Amethyst shards are mentioned, but not shown at [[Minecraft Live 2020]].}}
{{History|java}}
{{History||1.17|snap=20w45a|[[File:Amethyst Shard JE1.png|32px]] Added amethyst shards.}}
{{History|||snap=20w46a|[[File:Amethyst Shard JE2 BE1.png|32px]] The texture for amethyst shards has changed.}}
{{History||1.19|snap=22w13a|Amethyst shards can now be found in [[ancient city]] [[chest]]s.}}
{{History||1.19.1|snap=22w24a|Amethyst shards can now be used to duplicate [[allay]]s.}}
{{History||1.20<br>(Experimental)|link=1.19.4|snap=23w04a|Amethyst shards can now be used as an armor trim material.}}
{{History||1.20|snap=23w12a|Amethyst shards can now be used to craft [[calibrated sculk sensor]]s.}}
{{History|bedrock}}
{{History||1.17.0|snap=beta 1.17.0.50|[[File:Amethyst Shard JE2 BE1.png|32px]] Added amethyst shards.}}
{{History|||snap=beta 1.17.0.52|Amethyst shards are now available without enabling [[Experimental Gameplay]].}}
{{History||1.19.0|snap=beta 1.19.0.26|Amethyst shards can now be found in [[ancient city]] [[chest]]s.}}
{{History||1.19.10|snap=beta 1.19.10.22|Amethyst shards can now be used to duplicate allays.}}
{{History||1.20.0<br>(Experimental)|link=Bedrock Edition 1.19.80|snap=beta 1.19.80.21|Amethyst shards can now be used as an armor trim material.}}
{{History|||snap=beta 1.19.80.22|Amethyst shards can now be used to craft calibrated sculk sensors.}}
{{History|foot}}
==Issues==
{{issue list}}
==Trivia==
* Although in real life {{w|amethyst}} is a variety of {{w|quartz}} like [[Nether Quartz|nether quartz]], the two resources are not interchangeable.
* besides netherite, amethyst is the only or to be attempted not from an ore in caves
== External Links ==
*[https://www.minecraft.net/en-us/article/taking-inventory--amethyst-shard Taking Inventory: Amethyst Shard] – Minecraft.net on May 20, 2021
{{Items}}
[[Category:Renewable resources]]
[[de:Amethystscherbe]]
[[es:Fragmento de amatista]]
[[fr:Éclat d'améthyste]]
[[it:Scheggia di ametista]]
[[ja:アメジストの欠片]]
[[lzh:紫水玉片]]
[[pl:Odłamek ametystu]]
[[pt:Fragmento de ametista]]
[[ru:Осколок аметиста]]
[[uk:Уламок аметисту]]
[[zh:紫水晶碎片]]
[[Category:Ore]]</li><li>[[Shield|Shield]]<br/>{{Item
| image = Shield.png
| image2 = White Shield.png
| extratext = View [[#Gallery|all renders]]
| durability = 336
| renewable = Yes
| stackable = No
}}
A '''shield''' is a tool used for protecting the [[player]] against attacks.
== Obtaining ==
=== Crafting ===
{{Crafting
|head=1
|showname=0
|A1=Any Planks <!-- the recipe changed in 15w37a, do not change it to the old recipe without reason -->
|B1=Iron Ingot
|C1=Any Planks
|A2=Any Planks
|B2=Any Planks
|C2=Any Planks
|B3=Any Planks
|Output=Shield
|type=Combat
}}
{{Crafting
|ignoreusage=1
|Shield
|Matching Banner
|A2=Shield
|B2=Banner
|Output=Matching Shield
|type=combat
|foot=1
}}
=== Repairing ===
{{Crafting
|ignoreusage=1
|showdescription=1
|Damaged Shield
|Damaged Shield
|Output=Shield
|description= The durability of the two shields is added together, plus an extra 5% durability. The repaired shield has no pattern.
|type= Combat
}}
Shields may also be repaired on an [[anvil]] by using [[planks]] or another shield. Shields repaired on anvils retain their pattern.
=== Trading ===
Journeyman-level armorer [[villager]]s have {{frac|1|3}}{{only|Bedrock|short=1}}/{{frac|2|5}}{{only|Java|short=1}} chance of selling a shield for 5 [[emerald]]s as their sixth trade.
== Usage ==
Despite using iron in its crafting recipe, it cannot be smelted into [[iron nugget]]s.<ref>{{bug|MC-111738}}</ref>
=== Defense ===
Shields are used for [[blocking]] incoming attacks. {{control|Using}}{{Only|Java|short=1}} or {{Control|sneaking}}{{Only|Bedrock|short=1}} causes a player to slow to a [[sneaking]] pace, and after {{convert|5|ticks|seconds}}<ref>{{bug|MC-100949||Shield blocking is delayed}}</ref>, attacks coming from in front of the player are blocked, dealing no damage. When the shield blocks an attack of {{hp|3}} or stronger, it takes durability damage equal to the strength of the attack rounded up.
Most blocked projectiles that carry status effects (such as [[Shulker#Shulker bullet|shulker bullets]]{{only|java|short=1}}, flaming [[arrow]]s, or tipped arrows) do not affect the blocker. [[Trident]]s & arrows can be deflected into other targets. Knockback from melee attacks and projectiles is prevented, while knockback from [[explosion]]s, [[hoglin]], and [[ravager]] attacks are significantly reduced.
The shield directionally blocks all attacks coming from within the FOV of the direction the wielder is facing, providing a full hemisphere of coverage to them. If the wielder faces straight up, they are likely to miss their blocks.<ref>{{bug|MC-109101||Shields do not block damage while the player faces straight up}}</ref><!--straight down fix: MC-92019-->
Mobs that deal continuous contact damage such as the slime, magma cube, and blaze rapidly drain the shield's durability for as long as the shielded player remains within the mob's hitbox.<ref>{{bug|MC-169167}}</ref><ref>{{bug|MCPE-119451}}</ref>
Blockable attacks include:
*Melee attacks, except by a warden, axe-wielding mobs or by a sprinting player wielding an axe, however even without sprinting an axe still greatly decreases the durability
** Status effects do not carry through to the blocker{{only|java|short=1}}.
*Normal, tipped, and spectral [[arrow]]s
** Arrows other than [[Piercing]] are totally deflected and can hit other targets.
** Status effects do not carry through to the blocker{{only|java|short=1}}.
***This can be used to damage the attacker or another mob down there.
*[[Flame|Flaming arrows]]
** Burning does not carry through to the blocker{{only|java|short=1}}.
*[[Trident]]s
*[[Snowball]]s and [[egg]]s
*Spines from [[pufferfish]]
*Bullets from [[shulker]]s
** The levitation effect does not carry through to the blocker{{only|java|short=1}}.
*Spit from [[llama]]s
*[[Fireball]]s, such as from [[blaze]]s and [[fire charge]]s
** Burning does not carry through to the blocker.
*Direct hits from [[ghast]] [[fireball]]s
** These still cause environmental damage.
*All explosions{{only|JE|short=1}}
*Explosion damage from [[creeper]]s
*[[TNT]] that another player lit
*[[Ravager]] headbutts
** These still knock the blocker back by about 3 blocks.
** Blocking these strikes can stun the ravager for a moment, and it roars afterward.
*Ravager roars are blocked but still knock back the blocker.
*[[Bee]] stings are blocked, but bees continuously attack until the player stops blocking and the player is stung.
*Beam attacks from [[guardian]]s or [[elder guardian]]s (only reduces damage by 50%).
*Damage reflected from [[Thorns]] enchantment / [[Guardian|guardians]].
They cannot block:
*Arrows from a [[crossbow]] enchanted with [[Piercing]]
** This does not reduce the shield's durability.
*[[Status effect]]s from tipped arrows or shulker bullets {{only|bedrock|short=1}} <ref>{{bug|MCPE-52904}}</ref>
** Direct projectile damage is blocked, but the effect still carries through.
*Status effects from splash/lingering [[potion]]s, [[evoker]]s' fangs, or breath from the [[ender dragon]]
*Beam attacks from [[guardian]]s or [[elder guardian]]s, or the [[warden]]'s sonic boom attack
*TNT that the blocking player lit themselves{{only|BE|short=1}}
*TNT that a [[Redstone (disambiguation)|redstone mechanism]] lit{{only|BE|short=1}}
*[[Fall damage]], including that from [[ender pearl]]s
** This also includes when the player rides an [[entity]] that died due to fall damage.
*Strikes from a warden or any [[axe]]-wielding mob (e.g., [[vindicator]]s, [[piglin brute]]s, [[zombie]]s after disabling players shield they attack another time immediately)
** Such strikes disable being able to use shields for 5 seconds.
=== Applying patterns ===
[[File:Cyan Shield Screenshot.png|250px|thumb|A custom shield.]]
Shields can be decorated by applying a [[banner]].
{{Crafting
|showdescription=1
|Shield
|Matching Banner
|Output=Matching Shield; Ominous Shield
|B2link=Banner
|Olink=Shield
|type=Combat
|description=Applies the banner pattern to the shield. The banner is consumed.<br>The shield must have no preexisting patterns.<br>Does not change existing durability or enchantments on the shield.
}}
Unlike with [[banner]]s, shields cannot be repainted or washed in a [[cauldron]]. Shields have only half the resolution of banners, making patterns look slightly different. In the game files, the pattern textures can be found in a separate directory called entity/shield.
{{IN|java}}, shields with patterns can also be obtained using the same commands as banners, except <code>banner</code> has to be replaced with <code>shield</code>.
=== Enchantments ===
A shield can receive the following [[enchantments]], but only through an [[anvil]]:
{| class="wikitable col-2-center"
|+
!Name
!Max Level
![[Enchanting|Method]]
|-
|[[Unbreaking]]
|III
|{{Inventory slot|Anvil}}
|-
|[[Mending]]
|I
|{{Inventory slot|Anvil}}
|-
|[[Curse of Vanishing]]
|I
|{{Inventory slot|Anvil}}
|-
|}
== Sounds ==
{{edition|java}}:
{{Sound table
|sound=Shield block1.ogg
|sound2=Shield block2.ogg
|sound3=Shield block3.ogg
|sound4=Shield block4.ogg
|sound5=Shield block5.ogg
|subtitle=Shield blocks
|source=player
|description=When an attack is blocked using a shield
|id=item.shield.block
|translationkey=subtitles.item.shield.block
|volume=1.0
|pitch=0.8-1.2
|distance=16}}
{{Sound table
|sound=Equip generic1.ogg
|sound2=Equip generic2.ogg
|sound3=Equip generic3.ogg
|sound4=Equip generic4.ogg
|sound5=Equip generic5.ogg
|sound6=Equip generic6.ogg
|subtitle=Gear equips
|source=player
|description=When a shield is placed in the offhand slot
|id=item.armor.equip_generic
|translationkey=subtitles.item.armor.equip
|volume=1.0
|pitch=1.0
|distance=16}}
{{Sound table
|sound=Random break.ogg
|subtitle=Item breaks
|source=player
|description=When a shield's durability is exhausted
|id=item.shield.break
|translationkey=subtitles.entity.item.break
|volume=0.8
|pitch=0.8-1.2
|distance=16
|foot=1}}
{{edition|bedrock}}:
{{Sound table
|type=bedrock
|sound=Shield block1.ogg
|sound2=Shield block2.ogg
|sound3=Shield block3.ogg
|sound4=Shield block4.ogg
|sound5=Shield block5.ogg
|source=player
|description=When an attack is blocked using a shield
|id=item.shield.block
|volume=0.7
|pitch=1.0}}
{{Sound table
|sound=Equip generic1.ogg
|sound2=Equip generic2.ogg
|sound3=Equip generic3.ogg
|sound4=Equip generic4.ogg
|sound5=Equip generic5.ogg
|sound6=Equip generic6.ogg
|source=player
|description=When a shield is placed in the offhand slot<wbr>{{Upcoming|BE 1.20.30}}<wbr><ref group=sound>{{Bug|MCPE-168039}}</ref>
|id=armor.equip_generic
|volume=1.0
|pitch=1.0}}
{{Sound table
|sound=Random break.ogg
|source=player
|description=When a shield's durability is exhausted
|id=random.break
|volume=1.0
|pitch=0.9
|foot=1}}
== Data values ==
=== ID ===
{{edition|java}}:
{{ID table
|edition=java
|showforms=y
|generatetranslationkeys=y
|displayname=Shield
|spritetype=item
|nameid=shield
|form=item
|translationkey=item.minecraft.shield, item.minecraft.shield.white, item.minecraft.shield.orange, item.minecraft.shield.magenta, item.minecraft.shield.light_blue, item.minecraft.shield.yellow, item.minecraft.shield.lime, item.minecraft.shield.pink, item.minecraft.shield.gray, item.minecraft.shield.light_gray, item.minecraft.shield.cyan, item.minecraft.shield.purple, item.minecraft.shield.blue, item.minecraft.shield.brown, item.minecraft.shield.green, item.minecraft.shield.red, item.minecraft.shield.black
|foot=1}}
{{edition|bedrock}}:
{{ID table
|edition=bedrock
|shownumericids=y
|showforms=y
|notshowbeitemforms=y
|generatetranslationkeys=y
|displayname=Shield
|spritetype=item
|nameid=shield
|id=355
|form=item
|translationkey=item.shield.name, item.shield.white.name, item.shield.orange.name, item.shield.magenta.name, item.shield.lightBlue.name, item.shield.yellow.name, item.shield.lime.name, item.shield.pink.name, item.shield.gray.name, item.shield.silver.name, item.shield.cyan.name, item.shield.purple.name, item.shield.blue.name, item.shield.brown.name, item.shield.green.name, item.shield.red.name, item.shield.black.name
|foot=1}}
== Advancements ==
{{load advancements|Not Today}}
== History ==
{{History||July 10, 2011|link=http://minetimes.wordpress.com/2011/07/10/interview-mit-jeb-ihr-konntet-die-fragen-stellen/|During an interview, [[Jeb]] says that "shields for the left arm" might be added.}}
{{History|java}}
{{History||1.9|snap=15w33c|[[File:White Shield.png|22px]] [[File:Light Gray Shield.png|22px]] [[File:Gray Shield.png|22px]] [[File:Black Shield.png|22px]] [[File:Brown Shield.png|22px]] [[File:Red Shield.png|22px]] [[File:Orange Shield.png|22px]] [[File:Yellow Shield.png|22px]] [[File:Lime Shield.png|22px]] [[File:Green Shield.png|22px]] [[File:Cyan Shield.png|22px]] [[File:Light Blue Shield.png|22px]] [[File:Blue Shield.png|22px]] [[File:Purple Shield.png|22px]] [[File:Magenta Shield.png|22px]] [[File:Pink Shield.png|22px]] Added shields.
|Shields replace the [[blocking]] functionality of [[sword]]s, although blocking more [[damage]].
|The current [[crafting]] recipe of shields includes [[wool]], producing 16 possible colored shields. There currently isn't a blank, uncolored shield.
{{{!}} class{{=}}"collapsible collapsed" data-description{{=}}"Recipe"
! Recipe
{{!}}-
{{!}}
{{Crafting
|A1=Matching Wool |B1=Any Planks
|A2=Matching Wool |B2=Any Planks |C2=Iron Ingot
|A3=Matching Wool |B3=Any Planks
|Output=Matching Shield
|ignoreusage=1
}}
{{!}}}
|Any of the colored base shields can be [[crafting|crafted]] with a [[banner]] of the same base color, to produce a patterned shield.
}}
{{History|||snap=15w34c|When an attack is blocked by a shield, the attacker now may be knocked back.
|Being attacked with an [[axe]] now may disable shield use for 5 seconds.}}
{{History|||snap=15w37a|The [[crafting]] recipe of shields has been changed to 6 [[planks]] and 1 [[iron ingot]].
{{{!}} class{{=}}"collapsible collapsed" data-description{{=}}"Recipe"
! Recipe
{{!}}-
{{!}}
{{Crafting
|A1=Any Planks |B1=Iron Ingot |C1=Any Planks
|A2=Any Planks |B2=Any Planks |C2=Any Planks
|B3=Any Planks
|Output=Shield
|ignoreusage=1
}}
{{!}}}
|[[File:Shield JE1.png|22px]] Crafting a shield now produces a base wooden shield that can be crafted together with any [[banner]].
|The cooldown of shields has been reduced from 0.5s to 0.25s.
|Blocking with shields now prevents some side effects.{{verify}}
|[[Arrow]]s now ricochet off shields.}}
{{History|||snap=15w44a|Shields can now be repaired by combining with other shields. This removes any [[banner]] that had been applied.}}
{{History|||snap=15w45a|Crafting a banner onto a shield now consumes the banner.}}
{{History|||snap=15w47b|Added shield blocking [[sound]]s.}}
{{History|||snap=16w07a|Added more variation of shield blocking sounds.}}
{{History|||snap=pre1|The [[durability]] of shields has been increased from 181 to 337.}}
{{History||1.10|snap=16w21a|Shields can now be equipped by [[dispenser]]s.}}
{{History||1.11|snap=16w33a|[[Crafting]] a shield with a banner no longer changes the durability, nor does it remove [[enchanting|enchantments]] from it.}}
{{History|||snap=16w35a|Shields now block 100% of [[damage]]/[[knockback]]/debuffs dealt in melee combat.}}
{{History||1.13|snap=17w47a|Prior to [[1.13/Flattening|''The Flattening'']], this [[item]]'s numeral ID was 442.}}
{{History||1.13.2|snap=release|Shields now properly block attacks when the player is facing down.<ref>{{bug|MC-92019|||Fixed}}</ref>}}
{{History||1.14|snap=18w43a|[[File:Shield JE2 BE1.png|22px]] The texture of shields has been changed.
|Shields no longer knockback attackers when they block due to a bug with rework of the blocking mechanic with the introduction of the ravager.<ref>{{bug|MC-147694}}</ref>}}
{{History|||snap=19w11a|Shields can now be [[trading|bought]] from armorer [[villager]]s.}}
{{History||1.14.3|snap=Pre-Release 3|Shields blocking flaming [[arrow]]s no longer put the [[player]] on [[fire]].}}
{{History||1.16|snap=20w06a|[[Crimson planks]] and [[warped planks]] can now be used to craft shields.}}
{{History||1.19|snap=22w11a|[[Mangrove planks]] can now be used to craft shields.}}
{{History||1.19.3|snap=22w43a|Shields can now properly block all explosions.}}
{{History||1.19.4|snap=23w06a|A sound is now played when a shield is placed into the offhand slot.}}
{{History|upcoming java}}
{{History||Combat Tests|snap=1.14.3 - Combat Test|Critical hits now bypass shields.
|The warm-up delay has been removed from shields.
|When in the off-hand, shields now activate when [[sneaking]].}}
{{History|||snap=Combat Test 2|Shields now protect against critical attacks again.
|Shields can only be activated when the weapon is charged to 200%.}}
{{History|||snap=Combat Test 3|A "Shield Indicator" option that displays when the shield is active, similar to the attack indicator, has been added.
|An option to hide shields when active has been added.
|The arc of available protection of shields has been decreased to 100 degrees instead of 180 degrees.}}
{{History|||snap=Combat Test 4|An option to disable shields being activated by pressing {{ctrl|crouch}} has been added.
|The option to hide the shield has been removed.}}
{{History|||snap=Combat Test 6|Shields now protect up to 5 [[damage]] for melee attacks (still 100% against projectiles).
|Shields activate instantly regardless if the weapon is charged, similar to Combat test 1.
|Shields now recover faster after an attack.}}
{{History|||snap=Combat Test 7c|Shields now add a 50% knockback resistance when active.
|Shields now protect against 100% [[explosions|explosion]] damage.}}
{{History|||snap=Combat Test 8c|The knockback calculations for shields have been fixed.{{Info needed}}
|Crouch-shielding while jumping has been disabled.
|Shields with [[banner]]s are now temporarily stronger than normal shields (10 absorption instead of 5, and better knockback resistance) to test different shield types.}}
{{History|bedrock}}
{{History||1.10.0|snap=beta 1.10.0.3|[[File:Shield JE2 BE1.png|22px]] Added shields.
|Shields cannot be customized with [[banner]]s.
|Shields are activated by [[sneaking|crouching]] or mounting [[mob]]s.}}
{{History||1.11.0|snap=beta 1.11.0.4|Shields can now be [[trading|bought]] from armorer [[villager]]s.}}
{{History||1.16.210|snap=beta 1.16.210.51|Now grants partial knockback protection from the [[goat]] ram attack.}}
{{History||1.16.220|snap=beta 1.16.220.50|[[Mob]]s that pick up shields now place them to their off-hand.}}
{{History||1.18.30|snap=beta 1.18.30.26|Being attacked with an [[axe]] now may disable shield use. This was not mentioned in the official changelog.<ref>{{tweet|kingbdogz|1504505321884196872|We missed a change in recent changelogs for the Bedrock beta that you may like - we have now made a parity fix that makes shields get disabled for 5 seconds when attacked by an Axe-wielding mob or player. We will make sure to list this properly in the next beta :)|March 17, 2022}}</ref>}}
{{History||1.20.0|snap=beta 1.20.0.20|[[File:White Shield.png|22px]] [[File:Light Gray Shield.png|22px]] [[File:Gray Shield.png|22px]] [[File:Black Shield.png|22px]] [[File:Brown Shield.png|22px]] [[File:Red Shield.png|22px]] [[File:Orange Shield.png|22px]] [[File:Yellow Shield.png|22px]] [[File:Lime Shield.png|22px]] [[File:Green Shield.png|22px]] [[File:Cyan Shield.png|22px]] [[File:Light Blue Shield.png|22px]] [[File:Blue Shield.png|22px]] [[File:Purple Shield.png|22px]] [[File:Magenta Shield.png|22px]] [[File:Pink Shield.png|22px]] Shields can now be customized using a banner.}}
{{History|PS4}}
{{History||1.90|[[File:Shield JE1.png|22px]] Added shields.
|Shields do not have [[banner]] application features.}}
{{History|foot}}
== Issues ==
{{issue list|-wither}}
== Gallery ==
<gallery>
Shield.png|Shield
White Shield.png|White Shield
Light Gray Shield.png|Light Gray Shield
Gray Shield.png|Gray Shield
Black Shield.png|Black Shield
Brown Shield.png|Brown Shield
Red Shield.png|Red Shield
Orange Shield.png|Orange Shield
Yellow Shield.png|Yellow Shield
Lime Shield.png|Lime Shield
Green Shield.png|Green Shield
Cyan Shield.png|Cyan Shield
Light Blue Shield.png|Light Blue Shield
Blue Shield.png|Blue Shield
Purple Shield.png|Purple Shield
Magenta Shield.png|Magenta Shield
Pink Shield.png|Pink Shield
</gallery>
=== Screenshots ===
<gallery>
JebShield.png|One of the first images of shields. [[Jeb]] wearing diamond armor while holding a creeper-emblazoned shield during [[MineCon]] 2015.
Jeb Crafting Shield.png|Jeb crafting a shield.
Player with Shield.png|Player holding the default shield.
Shield Block.png|A player blocking with a shield.
ShieldFirstPerson.png|Blocking with a shield as seen in first person.
Enchanted Shield (item).gif|An enchanted shield as seen in the [[inventory]].
-ominous- shield.png|A shield with the [[ominous banner]] on it as seen in the inventory.
Kai-Shield.jpg|An image of [[Kai]] wielding a banner with a shield, used to announce the feature on [[Bedrock Edition]].
Bedrock-Shields.jpg
</gallery>
== References ==
{{reflist}}
== External Links ==
* [https://www.minecraft.net/en-us/article/taking-inventory--shield Taking Inventory: Shield] – Minecraft.net on July 25, 2019
{{Items}}
[[Category:Combat]]
[[Category:Renewable resources]]
[[de:Schild (Kampf)]]
[[fr:Bouclier]]
[[it:Scudo]]
[[ja:盾]]
[[ko:방패]]
[[nl:Schild]]
[[pl:Tarcza]]
[[pt:Escudo]]
[[ru:Щит]]
[[th:โล่]]
[[zh:盾牌]]</li></ul> | pre1 | Panicking villagers now have a higher chance of spawning iron golems. | |||
| Farmer villagers now spend more time farming when they are working. | |||||
| Farmer villagers now always give away food even if other villagers do not need it. | |||||
| pre2 | Panicked villagers now have to work and sleep, so they cannot be in a state of panic all the time. | ||||
| The "last slept" and "last worked" properties for villagers are now saved properly. | |||||
1.14.4{{Extension DPL}}<ul><li>[[Cookie|Cookie]]<br/>{{Item
| title = Cookie
| image = Cookie.png
| heals = {{hunger|2}}
| renewable = Yes
| stackable = Yes (64)
}}
'''Cookies''' are [[food]] items that can be obtained in large quantities, but do not restore hunger or saturation significantly.
== Obtaining ==
=== Trading ===
Journeyman-level farmer [[villager]]s sell 18 cookies for 3 [[emerald]]s as part of their trades.
=== Crafting ===
{{Crafting
|A2= Wheat
|B2= Cocoa Beans
|C2= Wheat
|Output= Cookie,8
|type= Foodstuff
}}
=== Villager gifts ===
{{in|java}}, if the [[player]] has the [[Hero of the Village]] effect, a farmer villager may gift them a cookie.
== Usage ==
=== Food ===
To eat a cookie, press and hold {{control|use}} while it is selected in the hotbar. Eating one restores {{hunger|2}} [[hunger]] and 0.4 hunger
[[Hunger#Mechanics|saturation]].
=== Parrots ===
Feeding a cookie to a [[parrot]] kills the parrot instantly, and causes it to give off [[Poison]] [[particles]] as it dies due to chocolate being toxic to parrots.
{{IN|Bedrock}}, feeding a cookie to a parrot inflicts the parrot with [[Fatal Poison]] for 1,000 seconds.
=== Composting ===
Placing a cookie into a [[composter]] has an 85% chance of raising the compost level by 1.
Considering the high yield of cookies (8 cookies from 1 cocoa bean and 2 wheats) and the higher chance to successfully compost a cookie (85%), it is more efficient to craft cookies to compost rather than using separate ingredients. For example, 100 wheats and 50 cocoa beans, which in total could yield only 13.92 bone meal on average, could be crafted into 400 cookies to yield 48.57 bone meal on average.
== Sounds ==
{{Sound table/Entity/Food}}
== Advancements ==
{{load advancements|Husbandry;A Balanced Diet}}
== Data values ==
=== ID ===
{{edition|java}}:
{{ID table
|edition=java
|showforms=y
|generatetranslationkeys=y
|displayname=Cookie
|spritetype=item
|nameid=cookie
|form=item
|foot=1}}
{{edition|bedrock}}:
{{ID table
|edition=bedrock
|shownumericids=y
|showforms=y
|notshowbeitemforms=y
|generatetranslationkeys=y
|displayname=Cookie
|spritetype=item
|nameid=cookie
|id=271
|form=item
|foot=1}}
== History ==
{{History|java beta}}
{{History||1.4|[[File:Cookie JE1 BE1.png|32px]] Added cookies.
|Cookies restore {{hp|1}} and are currently the only stackable [[food]], up to 8 cookies per stack.}}
{{History||1.8|snap=Pre-release|Cookies can now be stacked to 64.
|Cookies now restore {{hunger|1}}.}}
{{History|java}}
{{History||1.3.1|snap=12w18a|Cocoa beans have become farmable, making cookies [[renewable resource|renewable]] and ''much'' cheaper.}}
{{History|||snap=12w19a|Cookies now restore {{hunger|2}} instead of {{hunger|1}}.}}
{{History|||snap=12w21a|Farmer [[villager]]s now [[trading|sell]] 8–10 cookies for 1 [[emerald]].}}
{{History||1.8|snap=14w02a|Farmer villagers now sell 6 cookies for 1 emerald.}}
{{History||1.11|snap=16w33a|Farmer villagers now sell 6–10 cookies for 1 emerald.}}
{{History||1.12|snap=17w13a|Cookies can now be used to tame [[parrot]]s.}}
{{History|||snap=pre3|Cookies are no longer used to tame [[parrot]]s. Instead, a cookie now instantly kills a parrot.}}
{{History||1.13|snap=17w47a|Prior to [[1.13/Flattening|''The Flattening'']], this [[item]]'s numeral ID was 357.}}
{{History||1.14|snap=18w43a|[[File:Cookie JE2 BE2.png|32px]] The texture of cookies has been changed.}}
{{History|||snap=19w03a|Placing a cookie into the new [[composter]] has a 80% chance of raising the compost level by 1.}}
{{History|||snap=19w05a|Cookies now have an 85% chance of increasing the compost level in a composter by 1.}}
{{History|||snap=19w13a|Farmer villagers now give cookies to players under the [[Hero of the Village]] effect.}}
{{History|pocket alpha}}
{{History||v0.9.0|snap=build 1|[[File:Cookie JE1 BE1.png|32px]] Added cookies.}}
{{History||v0.12.1|snap=build 1|Cookies now restore [[hunger]] instead of [[health]].}}
{{History|pocket}}
{{History||1.0.4|snap=alpha 1.0.4.0|Farmer [[villager]]s now [[trading|sell]] 6-10 cookies for 1 [[emerald]].}}
{{History|bedrock}}
{{History||1.2.0|snap=beta 1.2.0.2|Cookies can now be used to inflict a fatal [[Poison]] [[status effect]] to [[parrot]]s.}}
{{History||1.10.0|snap=beta 1.10.0.3|[[File:Cookie JE2 BE2.png|32px]] The texture of cookies has been changed.}}
{{History||1.11.0|snap=beta 1.11.0.1|Cookies can now be used to fill up [[composter]]s.}}
{{History|||snap=beta 1.11.0.4|Farmer [[villager]]s now [[trading|sell]] 18 cookies for 3 [[emerald]]s as part of their third tier [[trading|trades]].}}
{{History|console}}
{{History||xbox=TU1|xbone=CU1|ps=1.0|wiiu=Patch 1|[[File:Cookie JE1 BE1.png|32px]] Added cookies.}}
{{History||xbox=none|xbone=none|ps=1.90|wiiu=none|switch=none|[[File:Cookie JE2 BE2.png|32px]] The texture of cookies has been changed.}}
{{History|new 3ds}}
{{History||0.1.0|[[File:Cookie JE1 BE1.png|32px]] Added cookies.}}
{{History|foot}}
== Issues ==
{{issue list}}
== Gallery ==
<gallery>
File:12w21a CookiePurchase.png|Cookies being obtained by [[trading]] with a farmer [[villager]].
File:Eating Steve.png|[[Steve]] eating a cookie.
File:Eating Alex.png|Alex eating a cookie.
</gallery>
== References ==
{{reflist}}
== External Links ==
*[https://www.minecraft.net/en-us/article/taking-inventory--cookie Taking Inventory: Cookie] – Minecraft.net on August 22, 2019
{{Items}}
[[Category:Food]]
[[Category:Renewable resources]]
[[cs:Sušenka]]
[[de:Keks]]
[[es:Galleta]]
[[fr:Cookie]]
[[hu:Csokis süti]]
[[ja:クッキー]]
[[ko:쿠키]]
[[nl:Koekje]]
[[pl:Ciastko]]
[[pt:Biscoito]]
[[ru:Печенье]]
[[uk:Печиво]]
[[zh:曲奇]]</li><li>[[Phantom Membrane|Phantom Membrane]]<br/>{{Item
| title = Phantom Membrane
| image = Phantom Membrane.png
| renewable = Yes
| stackable = Yes (64)
}}
'''Phantom membranes''' are items obtained from killing [[phantom]]s. They are used to repair [[elytra]] and brew [[Potion of Slow Falling|potions of Slow Falling]].
== Obtaining ==
=== Mob loot ===
[[Phantom]]s drop 0–1 phantom membrane when killed by a [[player]] or tamed [[wolf]]. [[Looting]] increases the maximum drops by 1 per level, for a maximum of 4 with Looting III.
=== Cat gifts ===
{{main|Cat#Gifts}}
Tamed [[cat]]s have a 70% chance to bring the player a gift when they wake up from a [[bed]], and the gift has a 3.22% chance to be a phantom membrane.
== Usage ==
=== Repairing ===
Phantom membranes can be used in an [[anvil]] to repair [[elytra]], restoring 108 durability points (25% of the pair's total durability) per membrane while preserving their [[enchantments]].
{| class="wikitable" data-description="Repairing elytra"
! scope="col" style="width:64px;" | Name
! Ingredients
! [[Anvil]] usage
|-
! scope="row" style="text-align: center;" | '''Elytra'''
| [[Elytra]] +<br>[[Phantom Membrane]]
| style="width: 260px; padding: 1px;" | {{Anvil| title = Elytra|Input1=Damaged Elytra|Input2=Phantom Membrane, 2|Output=Elytra}}
|-
|}
=== Brewing ingredient ===
Phantom membranes are used to [[brewing|brew]] [[Potion of Slow Falling|slow falling potions]] from an [[awkward potion]].
{{Brewing
|Phantom Membrane
|Potion of Slow Falling
|showname=3
}}
== Data values ==
=== ID ===
{{edition|java}}:
{{ID table
|edition=java
|showforms=y
|generatetranslationkeys=y
|displayname=Phantom Membrane
|spritetype=item
|nameid=phantom_membrane
|form=item
|foot=1}}
{{edition|bedrock}}:
{{ID table
|edition=bedrock
|shownumericids=y
|showforms=y
|notshowbeitemforms=y
|generatetranslationkeys=y
|displayname=Phantom Membrane
|spritetype=item
|nameid=phantom_membrane
|id=574
|form=item
|foot=1}}
== History ==
{{History|java}}
{{History||1.13|snap=18w14a|[[File:Phantom Membrane JE1 BE1.png|32px]] Added phantom membranes.}}
{{History||1.14|snap=18w44a|Tamed [[cat]]s now have a chance to give the [[player]] phantom membranes as [[Cat#Gifts|gifts]].}}
{{History|||snap=19w08a|[[File:Phantom Membrane JE2 BE2.png|32px]] The texture of phantom membranes has now been changed.}}
{{History|bedrock}}
{{History||1.6.0|snap=beta 1.6.0.5|[[File:Phantom Membrane JE1 BE1.png|32px]] Added phantom membranes.}}
{{History||1.8.0|snap=beta 1.8.0.8|Tamed [[cat]]s now have a chance to give the [[player]] phantom membranes as gifts.}}
{{History||1.10.0|snap=beta 1.10.0.3|[[File:Phantom Membrane JE2 BE2.png|32px]] The texture of phantom membranes has now been changed.}}
{{History|console}}
{{History||xbox=TU69|ps=1.76|wiiu=Patch 38|[[File:Phantom Membrane JE1 BE1.png|32px]] Added phantom membranes.}}
{{History||xbox=none|xbone=none|ps=1.90|wiiu=none|switch=none|[[File:Phantom Membrane JE2 BE2.png|32px]] The texture of phantom membranes has now been changed.}}
{{History|foot}}
== Issues ==
{{issue list}}
== References ==
{{reflist}}
== External Links ==
*[https://www.minecraft.net/en-us/article/taking-inventory--phantom-membrane Taking Inventory: Phantom Membrane] – Minecraft.net on August 2, 2019
{{items}}
[[de:Phantomhaut]]
[[fr:Membrane de Phantom]]
[[ja:ファントムの皮膜]]
[[ko:팬텀 막]]
[[pl:Błona fantoma]]
[[pt:Membrana de phantom]]
[[ru:Мембрана фантома]]
[[th:เนื้อเยื่อแฟนท่อม]]
[[uk:Перетинка фантома]]
[[zh:幻翼膜]]
[[Category:Renewable resources]]
[[Category:Brewing recipe]]</li></ul> | pre1 | Villagers now voluntarily pick up items. | |||
| pre2 | Villagers now stock more items, so they now can trade more items before they lock their trades. | ||||
| Villagers now remember their gossip after becoming a zombie villager. | |||||
| Gossip about players who converted a zombie villager now last longer. | |||||
| Villagers can now work without also restocking at the same time. | |||||
| The performance of villager pathfinding has been improved. | |||||
1.15{{Extension DPL}}<ul><li>[[Purple Dye|Purple Dye]]<br/>{{Item
| image = Purple_Dye_JE2_BE2.png
| renewable = Yes
| stackable = Yes (64)
}}
'''Purple dye''' is a [[Dyeing#Secondary colors|secondary dye color]] created by combining [[red dye]] and [[blue dye]] in a crafting grid.
== Obtaining ==
=== Crafting ===
{{Crafting
|head=1
|showname=0
|Blue Dye
|Red Dye
|Output=Purple Dye,2
|type=Material
}}
{{Crafting
|foot=1
|Lapis Lazuli
|Red Dye
|Output=Purple Dye,2
|description={{only|bedrock|education}}
|type=Material
}}
=== Trading ===
[[Wandering trader]]s sometimes sell 3 purple dye for an [[emerald]].
== Usage ==
{{dye usage}}
=== Crafting ingredient ===
{{crafting usage|ignore=Banner|continue=1}}
{{banner crafting usage}}
=== Loom ingredient ===
{{Banner loom usage|Purple Dye}}
=== Trading ===
Apprentice-level Shepherd villagers have a 20% chance to buy 12 purple dye for an emerald as part of their trades.{{only|bedrock}}
Expert-level Shepherd villagers have a {{frac|2|7}} chance to buy 12 purple dye for an emerald.{{only|java}}
== Data values ==
=== ID ===
{{edition|java}}:
{{ID table
|edition=java
|showforms=y
|generatetranslationkeys=y
|displayname=Purple Dye
|spritetype=item
|nameid=purple_dye
|form=item
|foot=1}}
{{edition|bedrock}}:
{{ID table
|edition=bedrock
|showaliasids=y
|shownumericids=y
|showforms=y
|notshowbeitemforms=y
|generatetranslationkeys=y
|displayname=Purple Dye
|spritetype=item
|nameid=purple_dye
|aliasid=dye / 5
|id=400
|form=item
|translationkey=item.dye.purple.name
|foot=1}}
== Video ==
<div style="text-align:center">{{yt|Cx52CGo5QnI}}</div>
== History ==
{{History|java beta}}
{{History||1.2|[[File:Purple Dye JE1 BE1.png|32px]] Added purple dye.}}
{{History|java}}
{{History||1.4.2|snap=12w34a|Added the ability to [[Armor#Dyeing|dye]] leather [[armor]] and [[wolf]] collars.}}
{{History||1.4.6|snap=12w49a|Purple dye can now be [[crafting|crafted]] with [[gunpowder]] to create a [[firework star]].}}
{{History||1.6.1|snap=13w19a|[[Stained clay]] can now be crafted.}}
{{history||1.7.2|snap=13w36a|With the addition of new [[flower]]s, many secondary and tertiary dyes are now primary [[dye]]s.}}
{{History|||snap=13w41a|[[Stained glass]] can now be crafted.}}
{{History||1.8|snap=14w02a|Due to [[lapis lazuli]] being [[renewable resource|renewable]] now, purple dye is also now renewable.}}
{{History|||snap=14w30a|Added [[banner]]s which can be dyed.}}
{{History||1.13|snap=17w47a|The different data values for the <code>dye</code> ID have now been split up into their own IDs.
|Prior to [[1.13/Flattening|''The Flattening'']], this [[item]]'s numeral ID was 351.}}
{{History||1.14|snap=18w43a|Purple dye is now [[crafting|crafted]] using [[blue dye]], instead of [[lapis lazuli]].
|[[File:Purple_Dye_JE2_BE2.png|32px]] The texture of purple dye has now been changed.}}
{{History|||snap=18w44a|Purple dye can now change the text color on [[sign]]s to purple.}}
{{History|||snap=19w05a|Added the [[wandering trader]], which sells purple dye.}}
{{History|||snap=19w11a|Purple dye can now be [[trading|bought]] by shepherd villagers.}}
{{History||1.17|snap=20w45a|Purple dye can now be used to craft [[purple candle]]s.}}
{{History|||snap=21w19a|Purple dye can no longer be used to craft purple candles.}}
{{History|||snap=Pre-release 1|Purple dye can once again be used to craft purple candles.}}
{{History||1.20<br>(Experimental)|link=1.19.3|snap=22w42a|Purple dye can now change the text color on [[hanging sign]]s to purple.}}
{{History|pocket alpha}}
{{History||v0.3.0|[[File:Purple Dye JE1 BE1.png|32px]] Added purple dye. It is currently unobtainable and serves no purpose.}}
{{History||v0.4.0|Purple dye is now [[craft]]able with rose red and lapis lazuli.
|Purple dye can now be used to craft purple [[wool]].}}
{{History||v0.6.0|Purple dye can now be used to dye [[sheep]].}}
{{History||v0.8.0|snap=build 1|Purple dye can now be used to craft [[magenta dye]].}}
{{History||v0.9.0|snap=build 11|Purple dye can now be used to craft colored [[terracotta]].}}
{{History||v0.11.0|snap=build 1|Purple dye can now be used to dye tamed [[wolf]] collars.}}
{{History||v0.14.0|snap=build 1|Purple dye can now be used to dye [[water]] in [[cauldron]]s.}}
{{History|pocket}}
{{History||1.0.0|snap=alpha 0.17.0.1|Purple dye can now be used to dye [[shulker]]s.}}
{{History||1.1.0|snap=alpha 1.1.0.0|Purple dye can now be used to craft [[concrete powder]], colored [[bed]]s and dyed [[shulker box]]es.}}
{{History|bedrock}}
{{History||1.2.0|snap=beta 1.2.0.2|Purple dye can now be used to craft [[firework star]]s, [[stained glass]] and patterns on [[banner]]s.}}
{{History||1.4.0|snap=beta 1.2.20.1|Purple dye can now be used to craft [[balloon]]s and [[glow stick]]s.}}
{{History||1.8.0|snap=beta 1.8.0.8|Purple dye can now be used to dye tamed [[cat]] collars.}}
{{History||1.10.0|snap=beta 1.10.0.3|Purple dye is now [[trading|sold]] by [[wandering trader]]s.
|Purple dye can now be used to dye white [[carpet]]s and undyed [[glass pane]]s.
|[[File:Purple_Dye_JE2_BE2.png|32px]] The texture of purple dye has now been changed.}}
{{History||1.11.0|snap=beta 1.11.0.4|Purple dye can now be [[trading|sold]] to shepherd [[villager]]s.}}
{{History||1.16.100|snap=beta 1.16.100.56|The ID of purple dye has been changed from <code>dye/5</code> to <code>purple_dye</code>.}}
{{History|console}}
{{History||xbox=TU1|xbone=CU1|ps=1.00|switch=1.0.1|wiiu=Patch 1|[[File:Purple Dye JE1 BE1.png|32px]] Added purple dye.}}
{{History|PS4}}
{{History||1.90|[[File:Purple_Dye_JE2_BE2.png|32px]] The texture of purple dye has now been changed.}}
{{History|new 3ds}}
{{History||0.1.0|[[File:Purple Dye JE1 BE1.png|32px]] Added purple dye.}}
{{History|foot}}
== Issues ==
{{issue list}}
{{Items}}
[[Category:Items]]
[[Category:Dyes]]
[[Category:Renewable resources]]
[[cs:Fialové barvivo]]
[[de:Violetter Farbstoff]]
[[es:Tinte morado]]
[[fr:Teinture violette]]
[[hu:Lila festék]]
[[ja:紫色の染料]]
[[ko:보라색 염료]]
[[nl:Paarse kleurstof]]
[[pl:Fioletowy barwnik]]
[[pt:Corante roxo]]
[[ru:Фиолетовый краситель]]
[[zh:紫色染料]]</li><li>[[Spyglass|Spyglass]]<br/>{{Item
| title = Spyglass
| image = Spyglass.png
| durability =
| rarity = Common
| renewable = Yes
| stackable = No
}}
A '''spyglass''' is a [[tool]] used to zoom in on distant objects.
== Obtaining ==
=== Crafting ===
{{Crafting
|B1=Amethyst Shard
|B2=Copper Ingot
|B3=Copper Ingot
|Output=Spyglass
|type=Tool
}}
== Usage ==
[[File:Steve scoping Spyglass.png|right|100px]] [[File:Alex scoping Spyglass.png|right|100px]]
To use a spyglass, the player selects it from the hotbar and clicks {{control|use}} while looking in the desired direction.
Spyglasses are used to zoom in on a specific location in the player's field of view (FOV). The spyglass changes the FOV to {{frac|1|10}} of the FOV set in [[options]]. By default, the FOV is set to 70° in ''Java Edition'' and 60° in Bedrock Edition, resulting in an FOV of 7° in ''Java Edition'' and 6° in Bedrock Edition through the spyglass. The player's FOV can be set from 30° to 110°, so the spyglass FOV can range from 3° to 11°. Regardless of the situation, or status effects the player has, using the Spyglass always shows a FOV {{frac|1|10}} of the FOV set in [[options]].
A square vignette is applied when in use, similar to the effect when wearing a [[carved pumpkin]]. Pressing {{key|F1}} removes the vignette,{{only|java}}<ref>{{bug|MC-203575||The spyglass overlay goes away when pressing F1|WAI}}</ref><ref>{{bug|MCPE-125869||Spyglass's overlay don't go away even if the player toggles Hide GUI on/ Pressing F1|}}</ref> similar to a carved pumpkin.
Hazy distant objects remain hazy when viewed in the spyglass. Mobs too distant to render also do not render in the spyglass. The spyglass shows a magnified view of what the player already sees.
The player is slowed down while watching through the spyglass. When the player uses the spyglass continuously for {{convert|1|minute|game tick}}, the interface is automatically closed.
If the player has a certain effect on their screen like [[fire]], the spyglass does not remove that effect on the player's screen.
[[File:Spyglass Zooming.gif|thumb|center|A spyglass being used to zoom in on a [[block of gold]] starting from normal FOV (70°).]]
== Sounds ==
{{edition|java}}:
{{Sound table
|sound=Spyglass use.ogg
|subtitle=Spyglass expands
|source=player
|description=When a player uses a spyglass
|id=item.spyglass.use
|translationkey=subtitles.item.spyglass.use
|volume=0.5
|pitch=''varies'' <ref group=sound>Can be 1.15, 1.33, 1.4, or 1.55</ref>
|distance=16}}
{{Sound table
|sound=Spyglass stop.ogg
|subtitle=Spyglass retracts
|source=player
|description=When a player stops using a spyglass
|id=item.spyglass.stop_using
|translationkey=subtitles.item.spyglass.stop_using
|volume=0.5
|pitch=''varies'' <ref group=sound>Can be 1.0, 0.8, or 0.9</ref>
|distance=16
|foot=1}}
{{edition|bedrock}}:
{{Sound table
|type=bedrock
|sound=Spyglass use.ogg
|source=player
|description=When a player uses a spyglass
|id=item.spyglass.use
|volume=0.5
|pitch=1.15-1.55}}
{{Sound table
|sound=Spyglass stop.ogg
|source=player
|description=When a player stops using a spyglass
|id=item.spyglass.stop_using
|volume=0.5
|pitch=0.8-1.0
|foot=1}}
== Data values ==
=== ID ===
{{edition|java}}:
{{ID table
|edition=java
|showforms=y
|generatetranslationkeys=y
|displayname=Spyglass
|spritetype=item
|nameid=spyglass
|form=item
|foot=1}}
{{edition|bedrock}}:
{{ID table
|edition=bedrock
|shownumericids=y
|showforms=y
|notshowbeitemforms=y
|generatetranslationkeys=y
|displayname=Spyglass
|spritetype=item
|nameid=spyglass
|form=item
|foot=1|id=626}}
== Advancements ==
{{load advancements|Is it a Bird?;Is it a Balloon?;Is it a Plane?}}
== History ==
{{History||October 3, 2020|link={{ytl|DBvZ2Iqmm3M|t=25m21s}}|[[File:Spyglass JE1.png|32px]]<!-- [[File:Spyglass scope (pre-release).png|32px]]--> Spyglasses are revealed at [[Minecraft Live 2020]]. They were originally named "telescopes" and had an oval vignette.}}
{{History|java}}
{{History||1.17|snap=20w45a|[[File:Spyglass JE1.png|32px]] Added spyglasses.
|[[File:Spyglass scope JE1.png|32px]] The scope texture is currently a circle with glare spots.}}
{{History|||snap=20w46a|[[File:Spyglass scope JE2.png|32px]] The scope texture is now a [[glass]] square with a [[copper]] border.}}
{{History|||snap=20w48a|[[File:Spyglass JE2 BE1.png|32px]] The spyglass is now a 3D model instead of a flat sprite.
|[[File:Spyglass (texture) JE2.png|32px]] The texture of the spyglass has changed.
|A spyglass in use is anchored better to the player's "eye" when viewed in 3rd person.}}
{{History|||snap=21w05a|Copper ingots are now renewable via [[drowned]], making spyglasses renewable.}}
{{History|||snap=21w10a|[[File:Spyglass (item) JE3 BE1.png|32px]] Spyglasses have a new texture in the inventory. The 3D model is still used in the hand, similar to [[tridents]].}}
{{History||1.17.1|snap=Pre-release 1|[[File:Spyglass (texture) JE3.png|32px]] The texture of the spyglass model has changed.}}
{{History|bedrock}}
{{History||1.17.0|snap=beta 1.17.0.50|[[File:Spyglass JE2 BE1.png|32px]] [[File:Spyglass (item) JE3 BE1.png|32px]] Added spyglasses.}}
{{History|||snap=beta 1.17.0.52|Spyglasses are now available without enabling [[experimental gameplay]].}}
{{History|foot}}
== Issues ==
{{Issue list}}
== Trivia ==
*If {{command|item replace}} is used to place a spyglass on a player's head, the item appears stuck to the center of the player's face.
== Gallery ==
<gallery>
Villager Spyglass.png|Spying on [[villager]]s through a spyglass.
After using the spyglass at FOV 30 F1.png|Hiding the HUD removes the spyglass overlay.
Panda eating a spyglass.png|When eaten by a [[panda]], spyglasses cause [[missing texture]] particles to be produced.<ref>{{bug|MC-206684}}</ref>
JE 1.17 Development Telescope.jpg|The spyglass was originally called the telescope.
JE 1.17 Development Telescope 2.jpg|The telescope's overlay was originally round instead of square.
File:Ari Spyglass.jpg|How the spyglass looks in the third person.
Steve scoping Spyglass JE1.png|Steve using a spyglass before its 3D model was added.
Alex scoping Spyglass JE1.png|Alex using a spyglass before its 3D model was added.
File:Mangrove Portal.jpg|An [[allay]] peeking into view of [[Noor]]’s spyglass.
</gallery>
== References ==
{{Reflist}}
== External Links ==
*[https://www.minecraft.net/en-us/article/taking-inventory--spyglass Taking Inventory: Spyglass] – Minecraft.net on February 17, 2022
{{Items}}
[[Category:Renewable resources]]
[[de:Fernrohr]]
[[es:Catalejo]]
[[fr:Longue-vue]]
[[it:Cannocchiale]]
[[ja:望遠鏡]]
[[pl:Luneta]]
[[pt:Luneta]]
[[ru:Подзорная труба]]
[[zh:望远镜]]</li></ul> | 19w35a | Nitwit villagers no longer have a leveling gemstone in their belt. | |||
| If a player tries to sleep in a bed that is occupied by a villager, that villager is now kicked out of the bed. | |||||
1.16{{Extension DPL}}<ul><li>[[End Crystal|End Crystal]]<br/>{{ItemEntity
|image=End Crystal.gif
|imagesize=150px
|invimage=End Crystal
|renewable=Yes
|stackable=Yes (64)
|rarity=Rare
|drops=None
|size=
Height: 2 Blocks<br>Width: 2 Blocks
}}
An '''end crystal''' is an [[entity]] that can be [[Crafting|crafted]] or found on [[the End]]'s main island, where it heals the [[Ender Dragon|ender dragon]]. It can only be placed on [[obsidian]] or [[bedrock]] and [[Explosion|explodes]] instantly when attacked or damaged in most ways.
== Spawning ==
=== Natural generation ===
An end crystal is found atop each [[obsidian pillar]] on the central island of the End, each on top of a piece of [[bedrock]]. There are 10 end crystals in total, of which two are protected in "cages" of [[iron bars]]. All end crystals respawn one after another as the respawning process of the [[ender dragon]] starts.
== Obtaining ==
=== Crafting ===
{{Crafting
|A1=Glass
|B1=Glass
|C1=Glass
|A2=Glass
|B2=Eye of Ender
|C2=Glass
|A3=Glass
|B3=Ghast Tear
|C3=Glass
|Output= End Crystal
|type= Decoration block
}}
== Usage ==
=== Healing the ender dragon ===
Their primary purpose is to recharge the health of the ender dragon, who gains a charge from the nearest crystal within a cuboid extending 32 blocks from the dragon in all directions. The dragon is healed {{hp|1}} each half-second. If multiple ender dragons are spawned, an end crystal can affect multiple dragons at the same time. The healing beam is neither obstructed nor is its power diminished by entities or blocks.
=== Respawning the ender dragon ===
[[File:End Crystals on the Exit portal.png|right|thumb|How to arrange end crystals on the exit portal to respawn the ender dragon.]]
As items, end crystals may be placed on bedrock and [[obsidian]], if the two blocks above the bedrock or obsidian block are air or replaceable blocks and no other entities intersect the area. When an end crystal is placed in [[the End]], a [[fire]] block is created at the end crystal location. If four are placed on the end [[exit portal]], one on each of the flat sides, the crystals respawn the original end crystals on the obsidian pillars, as well as resurrect the dragon itself, before exploding. The top of each pillar also explodes, destroying any player-placed blocks. This happens even if TNT explosions are turned off in settings.
If the exit portal is ever broken for any reason, end crystals can still be placed on obsidian blocks with the same location as the exit portal.
=== Explosions ===
End crystals explode when attacked or damaged in most ways, even by attacks that normally do zero damage. They are not affected by exploding fireworks, and if damaged by an explosion, they disappear instead of exploding.{{Only|Java}}<ref>{{bug|MC-118429||End crystals don't explode when destroyed by nearby explosions}}</ref> The end crystal's [[explosion]] has an [[Explosion#Explosion strength|explosion strength]] of 6, the same as a [[charged creeper]]. The end crystal's fire often remains after the crystal explodes. Any ender dragon charging from the crystal when it is destroyed takes {{hp|10}} damage.
{{IN|java}}, an end crystal's explosion can be [[blocking|blocked]] by a [[shield]].
Although an ender dragon damages most blocks and entities in its path, it cannot destroy end crystals simply by going near them.
Placing [[water]] on the end crystal will neutralize the blast effect, but not the [[damage]] or knockback.
End crystals with obsidian or bedrock below them will not damage blocks below them when they explode.
{{IN|bedrock}}, having the game rule {{cd|mobGriefing}} to {{cd|false}} will prevent the End Crystal from destroying any blocks. While {{in|java}} the same game rule will not prevent the End Crystal from destroying any blocks.
=== Beams ===
The end crystal naturally shoots a beam at the ender dragon and heals it when the dragon is within range. This beam can be manually created using the command {{cmd|data merge entity @e[type{{=}}end_crystal,limit{{=}}1] {BeamTarget:{X:0, Y:0, Z:0<nowiki>}}}}. The beam can be pointed in any direction, allowing it to mark locations or objects.
=== Properties ===
[[File:End Crystal (Slateless).gif|thumb|A base-less end crystal.]]
End crystals are of two kinds: the ones with a base beneath them are created either by game mechanism or by the {{cmd|summon}} command; while the base-less ones are created by players by manually placing the crystal items on top of [[obsidian]] or [[bedrock]].
The base appears to be made of bedrock, with a crystal hovering over it. While in the End, a crystal continually generates fire at its current position, one block above the base (directly on top of the block the base is embedded in), replacing any other block at that location. This fire is capable of spreading.
The end crystal entity is not solid and can be walked through freely. End crystals can be pushed by [[piston]]s, but they explode if moved while on fire. Because fire is checked only when an entity moves, end crystals do not normally take damage from their own fire unless moved.
== Sounds ==
{{edition|java}}:
{{Sound table
|sound=Explosion1.ogg
|sound2=Explosion2.ogg
|sound3=Explosion3.ogg
|sound4=Explosion4.ogg
|subtitle=Explosion
|source=block
|description=When an end crystal explodes
|id=entity.generic.explode
|translationkey=subtitles.entity.generic.explode
|volume=4.0
|pitch=0.56-0.84
|distance=16
|foot=1}}
{{edition|bedrock}}:
{{Sound table
|type=bedrock
|sound=Explosion1.ogg
|sound2=Explosion2.ogg
|sound3=Explosion3.ogg
|sound4=Explosion4.ogg
|source=block
|description=When an end crystal explodes
|id=random.explode
|volume=4.0
|pitch=1.0
|foot=1}}
== Data values ==
=== ID ===
{{edition|java}}:
{{ID table
|edition=java
|firstcolumnname=Item
|showforms=y
|generatetranslationkeys=y
|displayname=End Crystal
|spritetype=item
|nameid=end_crystal
|form=item
|foot=1}}
{{ID table
|edition=java
|firstcolumnname=Entity
|generatetranslationkeys=y
|displayname=End Crystal
|spritetype=entity
|nameid=end_crystal
|foot=1}}
{{edition|bedrock}}:
{{ID table
|edition=bedrock
|firstcolumnname=Item
|shownumericids=y
|showforms=y
|notshowbeitemforms=y
|generatetranslationkeys=y
|displayname=End Crystal
|spritetype=item
|nameid=end_crystal
|id=637
|form=item
|foot=1}}
{{ID table
|edition=bedrock
|firstcolumnname=Entity
|shownumericids=y
|generatetranslationkeys=y
|displayname=End Crystal
|spritetype=entity
|nameid=ender_crystal
|id=71
|foot=1}}
=== Entity data ===
End crystals have entity data that define various properties of the entity.
{{el|java}}:
{{main|Entity format}}
{{/ED}}
{{el|bedrock}}:
: See [[Bedrock Edition level format/Entity format]].
== Achievements ==
{{load achievements|The End... Again...}}
== Advancements ==
{{load advancements|The End... Again...}}
== History ==
[[File:End Crystal 19w38a.gif|thumb|Java Edition 19w38a]]
{{History|java}}
{{History||1.0.0|snap=Beta 1.9 Prerelease 6|[[File:End Crystal JE1 BE1.png|32px]] Added ender crystals.}}
{{History||1.2.1|snap=12w04a|Previously, ender crystals could be spawned using [[spawn egg]]s with ID 200 (in a [[server]], these were created using {{cmd|give 383 1 200}}). The spawned crystal would be positioned where a natural crystal would be if there was a bedrock block at the location. It was still possible until 1.9 to obtain an end crystal spawn egg, but it would not spawn anything.}}
{{History||1.7.2|snap=13w36a|Ender crystals can now be spawned with the {{cmd|summon}} command.}}
{{History||1.8|snap=14w06a|Ender crystals now generate one [[block]] lower. The fire they generate destroys the [[bedrock]] block that is supposed to be underneath (see {{bug|MC-47526}}).}}
{{History||1.9|snap=15w31a|Ender crystals generate at the correct Y-level again.}}
{{History|||snap=15w33c|Respawning the ender dragon now also respawns the ender crystals on the obsidian pillars.
|Ender crystals now have a compound BeamTarget tag that hold the X, Y, Z block location the beam points to.}}
{{History|||snap=15w44a|"Ender crystals" have been renamed to "end crystals".
|[[File:End Crystal (item) JE1 BE1.png|32px]] End crystals can now be obtained as an item.
|End crystals now drop from [[skeleton trap]] horses and can be placed only on [[obsidian]] or bedrock. Placing several of them atop the end exit portal respawns the ender dragon.}}
{{History|||snap=15w44b|End crystals are no longer dropped by [[skeleton horse]]s.
|Added crafting recipe for end crystals, making end crystals [[renewable]].}}
{{History|||snap=15w49a|End crystals now require [[air]]/replaceable [[block]]s and lack of [[entity|entities]] for placement.}}
{{History|||snap=15w51a|End crystals can no longer be placed in [[Adventure mode]].}}
{{History||1.11|snap=16w32a|The entity ID has been changed from <code>EnderCrystal</code> to <code>ender_crystal</code>.}}
{{History||1.13|snap=17w47a|Prior to [[1.13/Flattening|''The Flattening'']], this [[item]]'s numeral ID was 426.}}
{{History|||snap=18w20b|Renamed to "End Crystal".}}
{{History|||snap=pre5|Entity ID has been changed to <code>end_crystal</code>.}}
{{History||1.14|snap=18w43a|[[File:End Crystal JE2.png|32px]][[File:End Crystal (item) JE2 BE2.png|32px]] The textures of end crystals and the end crystal [[item]] have been changed.}}
{{History||1.19.3|snap=22w43a|End crystal explosions can now be [[blocking|blocked]] by [[shield]]s.<ref>{{bug|MC-188247|||Fixed}}</ref>}}
{{History|pocket}}
{{History||1.0.0|snap=alpha 0.17.0.1|[[File:End Crystal JE1 BE1.png|32px]][[File:End Crystal (item) JE1 BE1.png|32px]] Added end crystals.}}
{{History|bedrock}}
{{History||1.6.0|snap=?|[[File:End Crystal BE2.png|32px]] [[File:End Crystal BE2.gif|32px]] The model of the end crystals has been changed. It has now two cubes instead of three.}}
{{History||1.10.0|snap=beta 1.10.0.3|[[File:End Crystal BE3.png|32px]][[File:End Crystal (item) JE2 BE2.png|32px]] The textures of end crystals and the end crystal item have been changed.}}
{{History||1.17.10|snap=beta 1.17.10.20|[[File:End Crystal JE2.png|32px]] The model of the end crystals has been changed to have three cubes again, and to match ''Java Edition''.}}
{{History||1.19.70|snap=beta 1.19.70.20|Increased end crystal collision box size to match ''Java Edition''.|End crystals with obsidian or bedrock below them now will not damage blocks below them when they explode.}}
{{History|console}}
{{History||xbox=TU9|xbone=CU1|ps=1.0|wiiu=Patch 1|[[File:End Crystal JE1 BE1.png|32px]] Added ender crystals.}}
{{History||xbox=TU31|xbone=CU19|ps=1.22|wiiu=Patch 3|Ender crystals now generate one block lower. The fire they generate destroys the [[bedrock]] block that is supposed to be underneath.}}
{{History||xbox=TU46|xbone=CU36|ps=1.38|wiiu=Patch 15|"Ender crystals" have been renamed to "end crystals".
|[[File:End Crystal (item) JE1 BE1.png|32px]] End crystals can now be obtained as an [[item]].
|End crystals now drop from [[skeleton trap]] horses and can be placed only on [[obsidian]] or bedrock. Placing several of them atop the [[end portal|end exit portal]] respawns the ender dragon.
|Added a crafting recipe for end crystals.}}
{{History||xbox=none|xbone=none|ps=1.90|wiiu=none|switch=none|[[File:End Crystal JE2.png|32px]][[File:End Crystal (item) JE2 BE2.png|32px]] The textures of end crystals and the end crystal item have been changed.}}
{{History|new 3ds}}
{{History||1.7.10|[[File:End Crystal JE1 BE1.png|32px]][[File:End Crystal (item) JE1 BE1.png|32px]] Added end crystals.}}
{{History|foot}}
== Issues ==
{{issue list}}
== Trivia ==
* According to [[Jens Bergensten|Jeb]], the reason behind the current crafting recipe using glass as opposed to [[Chorus Fruit|chorus fruit]] or any materials introduced in [[Java Edition 1.9|1.9]] is as a means for players to craft end crystals in older worlds that the dragon has already been killed in.<ref>{{tweet|jeb_|667000226524372992|The problem is that you need to be able to craft the crystals on worlds in which the dragon has been destroyed already|November 18, 2015}}</ref>
* A historical rendition of the [[beacon]] block featured an animated entity within it, which resembled a yellow miniaturized end crystal. The bedrock platform of the end crystal entity would also render below the beacon, though this would normally be hidden within the block below.
* Using a [[piston]] to push an end crystal's fire into an end portal block deletes the end portal block. However, natural portal blocks regenerate if the end crystal is moved.
== Gallery ==
<gallery>
End Crystal Usage.png|Using end crystals to respawn the ender dragon.
Crystal Link.png|An ender dragon being hit with the "healing beam" of an end crystal.
Ender Crystal.png|An end crystal.
EnderCrystalOverworld.png|An end crystal in the Overworld spawned using {{cmd|summon}} {{code|end_crystal}}.
Ender Dragon Revival.png|End crystals respawning the ender dragon.
CagedEnderCrystal.png|A caged end crystal.
Respawn ender dragon.png|A [[player]] trying to respawn the ender dragon.
End Crystal (item).gif|An animation of the item of the end crystal.
</gallery>
== References ==
{{reflist}}
{{Entities}}
{{Items}}
[[de:Enderkristall]]
[[el:Κρύσταλλος του Ender]]
[[es:Cristal del End]]
[[fr:Cristal de l'End]]
[[ja:エンドクリスタル]]
[[ko:엔드 수정]]
[[nl:Endkristal]]
[[pl:Kryształ Endu]]
[[pt:Cristal do End]]
[[ru:Кристалл Края]]
[[th:คริสตัลเอนด์]]
[[uk:Кристал Енду]]
[[zh:末影水晶]]</li><li>[[Gold Nugget|Gold Nugget]]<br/>{{About|the nugget|the block that can drop nuggets|Gilded Blackstone|the ore|Gold Ore|the ingot form|Gold Ingot|the mineral block|Block of Gold}}
{{Item
| image = Gold Nugget.png
| renewable = Yes
| stackable = Yes (64)
}}
'''Gold nuggets''' are items used to make [[gold ingot]]s and other various golden items. One gold nugget is effectively worth one-ninth of a gold ingot.
== Obtaining ==
=== Mob loot ===
[[Zombified Piglin|Zombified piglin]]s, when killed, may drop 0-1 gold nuggets. When killed using a weapon enchanted with [[Looting]], they may drop an additional gold nugget per level of Looting used, up to a maximum of 4.
=== Crafting ===
{{Crafting
|Gold Ingot
|Output= Gold Nugget, 9
|type= Material
}}
=== Smelting ===
{{Smelting
|Golden Sword; {Any golden tools}; {Any golden armor}; Golden Horse Armor
|Gold Nugget
|0,25
}}
=== Chest loot ===
{{LootChestItem|gold-nugget}}
=== Mining ===
[[Nether gold ore]] mined using a [[pickaxe]] drops 2-6 gold nuggets. If the pickaxe is enchanted with [[Fortune]], it has a 33.3% chance to multiply the drops by 2, Fortune II has a 25% chance to multiply the drops by 2 or 3 and Fortune III has a 20% chance each to multiply the drops by 2, 3, or 4 for a maximum possible drop of 24 golden nuggets. The average drop rate for a Fortune III pickaxe is 8.8, while the drop rate for a [[Silk Touch]] pickaxe is a single ingot, or a flat rate of 9. It is slightly more efficient to mine with a Silk Touch pickaxe.
[[Gilded Blackstone|Gilded blackstone]] mined using a pickaxe has a 10% chance to drop 2-5 gold nuggets. If the pickaxe is enchanted with Fortune I, the chance gold nuggets drop is increased 14.29%, Fortune II increases the drop chance to 25%, and Fortune III guarantees the drop.
== Usage ==
Gold nuggets can be used to craft a [[golden carrot]] or [[glistering melon]] for brewing. Also, gold nuggets can be combined with gunpowder and dye to create a [[firework star]] that bursts in a star-shaped explosion.
[[Piglin]]s instantly pick up any gold nuggets that are within 1 [[block]] of them. Unlike other gold-related items, they do not intentionally seek out gold nuggets to pick up and only pick them up if they walk near it. Unlike gold ingots, gold nuggets picked up are dropped upon the piglin's death.
=== Crafting ingredient ===
{{crafting usage}}
== Data values ==
=== ID ===
{{edition|java}}:
{{ID table
|edition=java
|showforms=y
|generatetranslationkeys=y
|displayname=Gold Nugget
|spritetype=item
|nameid=gold_nugget
|form=item
|foot=1}}
{{edition|bedrock}}:
{{ID table
|edition=bedrock
|shownumericids=y
|showforms=y
|notshowbeitemforms=y
|generatetranslationkeys=y
|displayname=Gold Nugget
|spritetype=item
|nameid=gold_nugget
|id=425
|form=item
|foot=1}}
== History ==
{{History|Java}}
{{History||1.0.0|snap=Beta 1.9 Prerelease|[[File:Gold Nugget JE1.png|32px]] Added gold nuggets.
|Gold nuggets are [[drops|dropped]] by [[zombie pigmen]].
|Gold nuggets can be used to craft [[gold ingot]]s.
|Gold nuggets currently do not have a mouseover name.}}
{{History|||snap=Beta 1.9 Prerelease 2|Gold nuggets now have a mouseover name.}}
{{History|||snap=Beta 1.9 Prerelease 4|Gold nuggets are now used to craft [[glistering melon]]s.
|Gold nuggets can now be [[crafting|crafted]] from a single [[gold ingot]].}}
{{History||1.1|snap=release|Normal [[golden apple]]s are now crafted with gold nuggets.}}
{{History||1.3.1|snap=1.3|[[File:Gold Nugget JE2 BE1.png|32px]] The texture of gold nuggets has been changed.}}
{{History||1.4.2|snap=12w34a|Gold nuggets are now used to craft [[golden carrot]]s.}}
{{History||1.4.6|snap=12w49a|Gold nuggets can now be used to craft a [[firework star]] for a star shaped effect on a [[firework rocket|firework]].}}
{{History||1.6.1|snap=13w23a|Gold nuggets can no longer be used to [[crafting|craft]] a [[golden apple]].}}
{{History||1.9|snap=15w43a|Gold nuggets may now be found among the loot in [[igloo]] basement [[chest]]s.}}
{{History||1.11.1|snap=16w50a|Gold nuggets can now be [[smelting|smelted]] from golden [[tool]]s and [[armor]].}}
{{History||1.13|snap=17w47a|Prior to [[1.13/Flattening|''The Flattening'']], this [[item]]'s numeral ID was 371.}}
{{History|||snap=18w09a|Gold nuggets can now be found in [[underwater ruins]] loot [[chest]]s.}}
{{History|||snap=18w11a|Gold nuggets now generate in the chests of [[shipwreck]]s.}}
{{History||1.14|snap=18w43a|[[File:Gold Nugget JE3 BE2.png|32px]] The texture of gold nuggets has been changed.}}
{{History|||snap=18w48a|Gold nuggets can now be found in chests in [[plains]] [[village]] houses.}}
{{History|||snap=18w49a|Gold nuggets can now be found in chests in [[savanna]] village houses.}}
{{History||1.16|snap=20w12a|[[Nether gold ore]] now [[drops]] 2-6 gold nuggets, affected by [[Fortune]].}}
{{History|||snap=20w15a|[[Gilded blackstone]] now has 10% chance to drop 2-5 gold nuggets. Only the drop chance is affected by [[Fortune]].}}
{{History|||snap=20w16a|Gold nuggets now generate in [[bastion remnant]]s and [[ruined portal]] chests.}}
{{History|||snap=Pre-release 1|Gold nuggets can now be used to distract [[piglin]]s.}}
{{History|||snap=Pre-release 3|Gold nuggets can no longer be used to distract [[piglin]]s.}}
{{History||1.20|snap=23w12a|Gold nuggets can now be found in [[suspicious gravel]] and [[suspicious sand]] in cold and warm [[ocean ruins]] and in [[trail ruins]].}}
{{History|||snap=23w16a|Gold nuggets no longer generate in [[suspicious sand]] in [[trail ruins]].|Due to the split of the archaeological loot tables for suspicious gravel within [[trail ruins]], gold nuggets are now common loot.}}
{{History|pocket alpha}}
{{History||v0.12.1|snap=build 1|[[File:Gold Nugget JE2 BE1.png|32px]] Added gold nuggets. |Gold nuggets can be used to craft [[glistering melon]]s, [[gold ingot]]s and [[golden carrot]]s.|[[Gold ingot]]s can now be [[crafting|crafted]] into 9 gold nuggets.|[[Zombie pigmen]] now [[drops|drop]] gold nuggets upon being killed.}}
{{History|pocket}}
{{History||1.0.0|snap=alpha 0.17.0.1|Gold nuggets can now be found inside [[igloo]] basement [[chest]]s.}}
{{History||1.1.0|snap=alpha 1.1.0.0|Gold nuggets can now be [[smelting|smelted]] from golden [[tool]]s and [[armor]].}}
{{History|bedrock}}
{{History||1.2.0|snap=beta 1.2.0.2|Gold nuggets can now be used to craft [[firework star]]s.}}
{{History||1.4.0|snap=beta 1.2.14.2|Gold nuggets can now be found in some [[shipwreck]] [[chest]]s.}}
{{History|||snap=beta 1.2.20.1|Gold nuggets can now be found in [[underwater ruins]] chests.}}
{{History||1.10.0|snap=beta 1.10.0.3|The gold nugget can now be found in [[plains]] [[village]] house chests.|[[File:Gold Nugget JE3 BE2.png|32px]] The texture of gold nuggets has been changed.}}
{{History||1.11.0|snap=beta 1.11.0.1|The gold nugget can now be found in [[savanna]] village house [[chest]]s.}}
{{History||1.16.0|snap=beta 1.16.0.57|[[Nether gold ore]] now [[drops]] 2-6 gold nuggets.|[[Gilded blackstone]] now has 10% chance to drop 2-5 gold nuggets.}}
{{History||1.16.100|snap=beta 1.16.100.50|Gold nuggets can now be used as fuel for a [[furnace]].<ref>{{bug|MCPE-114216}}</ref>}}
{{History||1.18.30|snap=beta 1.18.30.26|Gold nuggets can no longer be used as fuel for a furnace.}}
{{History|Legacy Console}}
{{History||xbox=TU7|xbone=CU1|ps=1.0|wiiu=Patch 1|switch=1.0.1|[[File:Gold Nugget JE2 BE1.png|32px]] Added gold nuggets.}}
{{History||xbox=TU53|xbone=CU43|ps=1.49|wiiu=Patch 23|switch=1.0.3|Gold nuggets can now be [[smelting|smelted]] from golden [[tool]]s and [[armor]].}}
{{History||xbox=none|xbone=none|ps=1.90|wiiu=none|switch=none|[[File:Gold Nugget JE3 BE2.png|32px]] The texture of gold nuggets has been changed.}}
{{History|3DS}}
{{History||0.1.0|[[File:Gold Nugget JE2 BE1.png|32px]] Added gold nuggets.}}
{{History||1.9.19|Gold nuggets can now be [[smelting|smelted]] from golden [[tool]]s and [[armor]].}}
{{History|foot}}
== Issues ==
{{issue list}}
== See also ==
* [[Iron Nugget]]
* [[Gold]]
{{Items}}
[[cs:Zlatý nuget]]
[[de:Goldklumpen]]
[[es:Pepita de oro]]
[[fr:Pépite d'or]]
[[hu:Aranyrög]]
[[it:Pepita d'oro]]
[[ja:金塊]]
[[ko:황금 조각]]
[[nl:Goudklompje]]
[[pl:Bryłka złota]]
[[pt:Pepita de ouro]]
[[ru:Кусочек золота]]
[[uk:Золотий самородок]]
[[zh:金粒]]
[[Category:Renewable resources]]</li></ul></nowiki> | 20w19a | Villagers can now spawn iron golems regardless of their profession status or latest working time. | |||
| 20w22a | Villagers no longer try to work at the same workstation. | ||||
| When a workstation is placed, the most experienced nearby villager for that corresponding profession claims the workstation. | |||||
| Villagers now have to walk to and reach the workstation before they can acquire the profession/work there. | |||||
| Villagers can no longer claim workstations/professions during raids or night time. | |||||
| Villagers now check that their workstation is valid at all times of day as long as they are within 16 blocks of their workstation. | |||||
1.16.2{{Extension DPL}}<ul><li>[[Suspicious Stew|Suspicious Stew]]<br/>{{For|the block|Suspicious Sand}}
{{Item
| title = Suspicious Stew
| heals = {{hunger|6}}
| renewable = Yes
| stackable = No
|effects=See {{slink||Food}}
}}
'''Suspicious stew''' is a [[food]] item that can give the [[player]] a [[effect|status effect]] that depends on the [[flower]] used to craft it.
== Obtaining ==
{{IN|Bedrock}}, suspicious stew is the only food item in the game that can be obtained from the [[Creative]] inventory only by searching. However, it can be crafted and can also be found in [[shipwreck]] chests. Suspicious stew can be given with [[commands]] like {{cmd|give}}, but {{in|java}}, unless NBT data like that listed in the data values section is included, consuming it has no effect and still restores the same hunger points as a normal suspicious stew. In [[Bedrock Edition]], giving the player a suspicious stew through commands causes the stew to choose an allowable status effect at random.
=== Harvesting ===
Suspicious stew can be obtained by "milking" a brown [[mooshroom]] with a [[bowl]] after using a small flower on it. When a small flower is used on a brown mooshroom, the brown mooshrom produces a suspicious stew related to that small flower the next time it is milked with a bowl. Red mooshrooms do not produce suspicious stew. The brown mooshroom returns to producing [[mushroom stew]] until fed another small flower.
=== Crafting ===
{{Crafting
|Red Mushroom
|Brown Mushroom
|Bowl
|Any Flower
|Output=Suspicious Stew
|shapeless=true
|type=Foodstuff
}}
Suspicious stew is not listed in the recipe book. However, it can be quickly assembled by clicking the [[Mushroom Stew|mushroom stew]] recipe and adding one small flower to it.
=== Chest loot ===
{{LootChestItem|suspicious-stew}}
=== Mob loot ===
After being given a flower, a brown [[mooshroom]] can be "milked" for suspicious stew by {{control|using}} a [[bowl]] on it. The flower type determines the stew's effect using the same rule as a crafted stew. Milking a red mooshroom after feeding it a flower does not yield a suspicious stew specific to that flower.
=== Trading ===
{{IN|java}}, expert-level farmer [[villager]]s can offer either 1 or 2 suspicious stew trades, each stew for one [[emerald]].
{{IN|bedrock}}, expert-level farmer villager offers to sell suspicious stew for one emerald as well.
The [[trading]] interface does not indicate the type of suspicious stew being sold, but each trade entry consistently yields the same type of stew, so the player can remember or make a note of the types offered by a given villager, such as "this villager's first stew gives [[blindness]], and their second entry gives saturation".
== Usage ==
=== Food ===
{{see also|Tutorials/Hunger management}}
To eat suspicious stew, press and hold {{control|use}} while it is selected in the hotbar. Eating one restores {{hunger|6}} hunger and 7.2 hunger [[Hunger#Mechanics|saturation]] and gives a few seconds of a [[effect|status effect]] that varies depending on which flower was used to craft it. The effect is not displayed in the tooltip, texture, etc., meaning that the player cannot know in advance what the effect is without knowing which flower was used.
{{/Effects}}
The [[bowl]] is emptied and returned to the player after the suspicious stew has been eaten, and can be re-used to craft more stews. Unlike most foods, suspicious stew can be eaten even if the player's hunger bar is full.
The Saturation effect effectively makes those two stews a superfood: In those 6 or 7 ticks it can restore up to 6(7) hunger and 12(14) saturation points ''on top of'' their food value, for a total of at least {{hunger|12}} hunger, and effectively maximizing saturation. This is the largest amount of hunger and saturation the player can get from a single food item. Regeneration can restore up to {{Health|3}} health, and Poison or Wither can inflict up to {{Health|4}} damage.
Consuming suspicious stew is the only way to obtain the Saturation and Blindness effects in vanilla ''Minecraft'' without the use of commands.
== Sounds ==
=== Generic ===
{{Sound table/Entity/Food}}
=== Unique ===
{{edition|java}}:
{{Sound table
|sound=Mooshroom eat1.ogg
|sound2=Mooshroom eat2.ogg
|sound3=Mooshroom eat3.ogg
|sound4=Mooshroom eat4.ogg
|subtitle=Mooshroom eats
|source=neutral
|description=Plays when a brown mooshroom is fed a flower.
|id=entity.mooshroom.eat
|translationkey=subtitles.entity.mooshroom.eat
|volume=2.0
|pitch=''varies'' <ref group=sound>Can be 1.0, 0.95, or 1.05 for each sound</ref>
|distance=16}}
{{Sound table
|sound=Mooshroom milk1.ogg
|sound2=Mooshroom milk2.ogg
|sound3=Mooshroom milk3.ogg
|subtitle=Mooshroom gets milked suspiciously
|source=neutral
|description=Plays when a brown mooshroom is milked with a bowl after being fed a flower.
|id=entity.mooshroom.suspicious_milk
|translationkey=subtitles.entity.mooshroom.suspicious_milk
|volume=1.0
|pitch=''varies'' <ref group=sound>Can be 1.0, 0.9, or 1.1 for each sound</ref>
|distance=16
|foot=1}}
{{edition|bedrock}}:
{{Sound table
|type=bedrock
|sound=Mooshroom eat1.ogg
|sound2=Mooshroom eat2.ogg
|sound3=Mooshroom eat3.ogg
|sound4=Mooshroom eat4.ogg
|subtitle=Mooshroom eats
|source=Friendly Creatures
|description=When a brown mooshroom is fed a flower
|id=mob.mooshroom.eat
|volume=1.0/0.95/1.05
|pitch=0.8-1.2}}
{{Sound table
|sound=Mooshroom milk1.ogg
|sound2=Mooshroom milk2.ogg
|sound3=Mooshroom milk3.ogg
|subtitle=Mooshroom gets milked
|source=Friendly Creatures
|description=When a mooshroom is milked with a bowl
|id=mob.mooshroom.suspicious_milk
|volume=1.0/0.9/1.1
|pitch=1.0
|foot=1}}
== Data values ==
=== ID ===
{{edition|java}}:
{{ID table
|edition=java
|showforms=y
|generatetranslationkeys=y
|displayname=Suspicious Stew
|spritetype=item
|nameid=suspicious_stew
|form=item
|foot=1}}
{{edition|bedrock}}:
{{ID table
|edition=bedrock
|shownumericids=y
|showforms=y
|notshowbeitemforms=y
|generatetranslationkeys=y
|displayname=Suspicious Stew
|spritetype=item
|nameid=suspicious_stew
|id=590
|form=item
|foot=1}}
=== Item data ===
{{IN|je}}, suspicious stew uses the following NBT data:
<div class="treeview">
* {{nbt|compound|tag}}: The item's '''tag''' tag.
{{:Player.dat format/Suspicious Stew}}
</div>
=== Metadata ===
{{IN|be}}, suspicious stew uses the following data values:
{{dvt|spritetype=item|sprite=suspicious-stew|{{EffectLink|Night Vision}} from {{BlockLink|Poppy}}}}
{{dvt|sprite=suspicious-stew|{{EffectLink|Jump Boost}}}}
{{dvt|sprite=suspicious-stew|{{EffectLink|Weakness}}}}
{{dvt|sprite=suspicious-stew|{{EffectLink|Blindness}}}}
{{dvt|sprite=suspicious-stew|{{EffectLink|Poison}}}}
{{dvt|sprite=suspicious-stew|{{EffectLink|Saturation}} from {{BlockLink|Dandelion}}}}
{{dvt|sprite=suspicious-stew|{{EffectLink|Saturation}} from {{BlockLink|Blue Orchid}}}}
{{dvt|spritetype=item|sprite=suspicious-stew|{{EffectLink|Fire Resistance}}}}
{{dvt|sprite=suspicious-stew|{{EffectLink|Regeneration}}}}
{{dvt|sprite=suspicious-stew|{{EffectLink|Wither}}}}
{{dvt|sprite=suspicious-stew|{{EffectLink|Night Vision}} from {{BlockLink|Torchflower}}|foot=1}}
== Achievements ==
{{load achievements|Time for Stew}}
== Advancements ==
{{load advancements|A Furious Cocktail;How Did We Get Here;Husbandry;A Balanced Diet}}
== History ==
{{History|java}}
{{History||1.14|snap=18w43a|[[File:Suspicious Stew JE1 BE1.png|32px]] Added suspicious stew.
|Suspicious stew is not obtainable in the [[Creative inventory]].}}
{{History|||snap=19w08a|Suspicious stew can be obtained by milking brown [[mooshroom]]s.}}
{{History|||snap=19w11a|[[Trading]] has been changed, expert-level farmer villagers now sell suspicious stew for an [[emerald]].}}
{{History||1.14.4|snap=Pre-Release 1|Suspicious stew made from [[poppies]] now gives [[Night Vision]] to the [[player]] instead of [[Speed]].}}
{{History||1.16|snap=Pre-release 1|Mooshrooms can now be milked for suspicious stew in Creative mode.<ref>{{bug|MC-90969}}</ref>}}
{{History||1.17|snap=21w13a|Suspicious stew can now be eaten even if the player is at full [[hunger]].}}
{{History||1.19|snap=22w13a|Suspicious stew may now be found in [[ancient city]] [[chest]]s.}}
{{History||1.19.3|snap=22w45a|Suspicious stew is now available in the [[Creative]] [[inventory]].}}
{{History||1.20<br>(Experimental)|link=1.19.4|snap=23w07a|Suspicious stew now drops when brushing [[suspicious sand]] in [[desert well]]s.}}
{{History|||snap=1.19.4-pre1|[[Torchflower]]s can now be used to make suspicious stew.}}
{{History||1.20|snap=23w12a|The probability for the suspicious stew to generate in the [[suspicious sand]] in [[desert well]] has been changed from 1/7 to 1/8.}}
{{History|bedrock}}
{{History||1.13.0|snap=beta 1.13.0.9|[[File:Suspicious Stew JE1 BE1.png|32px]] Added suspicious stew.
|Suspicious stew is not obtainable in the Creative inventory.}}
{{History|||snap=beta 1.13.0.15|Master-level farmer [[villager]]s can now [[trading|sell]] suspicious stew.}}
{{History||1.16.0|snap=beta 1.16.0.57|[[Trading]] has been changed, expert-level farmer villagers now sell suspicious stew for an [[emerald]].}}
{{History||1.20.0<br>(Experimental)|link=Bedrock Edition 1.19.70|snap=beta 1.19.70.23|Suspicious stew now drops when brushing [[suspicious sand]] in [[desert well]]s.}}
{{History||1.20.10|Added one type of suspicious stew to the Items tab in the Creative inventory.}}
{{History||1.20.30|snap=beta 1.20.20.20|Suspicious stew can no longer be found in the Creative inventory.}}
{{History|foot}}
== Issues ==
{{Issue list}}
== Trivia ==
* Suspicious stew was introduced because developers wanted a way of communicating that [[wikipedia:Lily_of_the_valley|lilies of the valley]] are poisonous.<ref>{{ytl|YUM7XiEX1DI|Items: Ten Things You Probably Didn't Know About Minecraft @ 3:32|Minecraft|November 29, 2019|t=212s}}</ref>
== References ==
{{Reflist}}
<references group="loot"/>
{{Items}}
[[Category:Food]]
[[de:Seltsame Suppe]]
[[es:Estofado sospechoso]]
[[fr:Soupe suspecte]]
[[ja:怪しげなシチュー]]
[[ko:수상한 스튜]]
[[nl:Geheimzinnige stoofpot]]
[[pl:Podejrzana potrawka]]
[[pt:Ensopado suspeito]]
[[ru:Подозрительный суп]]
[[th:สตูว์พิศวง]]
[[zh:迷之炖菜]]
[[Category:Renewable resources]]</li><li>[[Chestplate|Chestplate]]<br/>{{Update|Include information about armor trims and updated netherite upgrade information.}}
{{Item
| image = <gallery>
Leather Tunic.png | Leather
Chainmail Chestplate.png | Chainmail
Iron Chestplate.png | Iron
Diamond Chestplate.png | Diamond
Golden Chestplate.png | Golden
Netherite Chestplate.png | Netherite
</gallery>
| durability =
* Leather: 80
* Chainmail: 240
* Iron: 240
* Golden: 112
* Diamond: 528
* Netherite: 592
| renewable =
* '''Netherite''': No
* '''All Other''': Yes
| stackable = No
}}
'''Chestplates''' are a type of [[armor]] that covers the upper body of the player. There are six types of chestplates: '''leather''', '''chainmail''', '''iron''', '''diamond''', '''gold''' and '''netherite'''.
== Obtaining ==
=== Crafting ===
{{crafting
|head=1
|showname=0
|showdescription=1
|name=[[Chestplate]]
|A1= Leather;Gold Ingot;Iron Ingot;Diamond
|C1= Leather;Gold Ingot;Iron Ingot;Diamond
|A2= Leather;Gold Ingot;Iron Ingot;Diamond
|B2= Leather;Gold Ingot;Iron Ingot;Diamond
|C2= Leather;Gold Ingot;Iron Ingot;Diamond
|A3= Leather;Gold Ingot;Iron Ingot;Diamond
|B3= Leather;Gold Ingot;Iron Ingot;Diamond
|C3= Leather;Gold Ingot;Iron Ingot;Diamond
|Output= Leather Tunic;Golden Chestplate;Iron Chestplate;Diamond Chestplate
|type= Combat
}}
{{crafting
|foot=1
|ignoreusage=1
|name=[[Chestplate]]
|ingredients=Damaged Matching [[Chestplate]]
|Damaged Leather Tunic; Damaged Golden Chestplate; Damaged Chainmail Chestplate; Damaged Iron Chestplate; Damaged Diamond Chestplate; Damaged Netherite Chestplate
|Damaged Leather Tunic; Damaged Golden Chestplate; Damaged Chainmail Chestplate; Damaged Iron Chestplate; Damaged Diamond Chestplate; Damaged Netherite Chestplate
|Output= Leather Tunic; Golden Chestplate; Chainmail Chestplate; Iron Chestplate; Diamond Chestplate; Netherite Chestplate
|description= The durability of the two chestplates is added together, making a fully healed chestplate. You can get 5% more durability while using a grindstone to fix.
|type= Combat
}}
=== Upgrading ===
{{Smithing
|Netherite Upgrade
|Diamond Chestplate
|Netherite Ingot
|Netherite Chestplate
|description=
|tail=1
}}
=== Repairing ===
==== Grinding ====
{{Grinding
|showdescription=1
|ingredients=Damaged Matching Chestplates
|Damaged Leather Tunic; Damaged Chainmail Chestplate; Damaged Iron Chestplate; Damaged Golden Chestplate; Damaged Diamond Chestplate; Damaged Netherite Chestplate
|Damaged Leather Tunic; Damaged Chainmail Chestplate; Damaged Iron Chestplate; Damaged Golden Chestplate; Damaged Diamond Chestplate; Damaged Netherite Chestplate
|Leather Tunic; Chainmail Chestplate; Iron Chestplate; Golden Chestplate; Diamond Chestplate; Netherite Chestplate
|description=The durability of the two chestplates are added together, plus an extra 5% durability.
}}
==== [[Anvil mechanics#Unit repair|Unit repair]] ====
Chestplates can be repaired in an [[anvil]] by adding units of the [[armor material]]'s repair material, with each repair material restoring 25% of the chestplate's maximum durability, rounded down.
=== Mob loot ===
[[Zombie]]s and [[skeleton]]s have a small chance to spawn wearing any armor. There is an 8.5% chance (9.5% with [[Looting]] I, 10.5% with Looting II and 11.5% with Looting III) for the mob to drop a chestplate upon death. The chestplate the mob drops is usually badly damaged, and rarely enchanted.
[[Vindicator]]s and [[Pillager]]s spawning in [[raid]]s have a 4.1% chance (5.12% on hard difficulty) to drop iron chestplate, which is almost always badly damaged and rarely enchanted.
=== Natural generation ===
Two [[armor stand]]s are found in each taiga [[village]] outdoor armory, one of them equipped with an [[iron chestplate]].
=== Chest loot ===
{{IN|BE}}, a sealed room in [[woodland mansion]]s can appear that has a chest sometimes containing an [[Efficiency]] I leather tunic.<ref>{{bug|MCPE-109048}}</ref>
{{LootChestItem|leather-tunic,random-enchanted-leather-tunic,chainmail-chestplate,iron-chestplate,level-enchanted-iron-chestplate,golden-chestplate,random-enchanted-golden-chestplate,diamond-chestplate,damaged-diamond-chestplate,level-enchanted-diamond-chestplate,damaged-random-enchanted-diamond-chestplate,damaged-random-enchanted-diamond-chestplate-2}}
=== Trading ===
{{IN|java}}, novice-level armorer villagers have a 40% chance to sell an iron chestplate for 9 emeralds. Journeyman-level armorers have a 40% chance to sell a chainmail chestplate for 4 emeralds. Master-level armorers always sell an enchanted<ref group="note" name="enchantment" /> diamond chestplate for 18-35 emeralds. Novice-level leatherworker villagers have a {{frac|2|3}} chance to sell a leather tunic<ref group="note" name="dye note">The leather armor has a random color created by two dyes (possibly the same dye twice).</ref> for 7 emeralds. Journeyman-level Leatherworker villagers always offer the same trade.
Armorer villagers may give the players with the [[Hero of the Village]] effect a chainmail chestplate.
{{IN|bedrock}}, novice-level armorer villagers have a 25% chance to sell an iron chestplate for 9 emeralds. Journeyman-level armorers have a {{frac|1|3}} chance to sell a chainmail chestplate for 4 emeralds. Master-level armorers have a 50% chance to sell an enchanted<ref group="note" name="enchantment">When creating an enchantment offer, the game uses a random enchantment level from 5 – 19. The enchantments are never treasure enchantments.</ref> diamond chestplate for 16 emeralds. Novice-level leatherworker villagers have a 50% chance to sell leather tunic for 7 emeralds. Master-level leatherworkers always sell an enchanted<ref group="note" name="enchantment" /> leather tunic for 7 emeralds.
{{notelist|columns=1}}
== Usage ==
Chestplates can be placed in the 2nd armor slot of a player's [[inventory]] for activation.
=== Defense points ===
Defense points are each signified by chestplates in the armor bar above the [[health]] bar. 1 defense point is half of a chestplate in the armor bar. Each defense point reduces any damage dealt to the player, which is absorbed by armor by 4%, increasing additively with the number of defense points. Different materials and combinations of armor provide different levels of defense.
The following table shows the amount of defense points added by chestplates.
{| class="wikitable" data-description="Chestplate defense points"
|-
!scope="col" | Material
!scope="col" | Defense points
|-
!scope="row" | Leather
| {{armor|3}}
|-
!scope="row" | Golden
| rowspan="2" | {{armor|5}}
|-
!scope="row" | Chainmail
|-
!scope="row" | Iron
| {{armor|6}}
|-
!scope="row" | Diamond
| rowspan="2" | {{armor|8}}
|-
!scope="row" | Netherite
|}
===Knockback Resistance ===
A netherite chestplate provides 10% knockback resistance.
=== Durability ===
The following table shows the amount of damage each piece of armor can absorb before being destroyed.
Any "hit" from a damage source that can be blocked by armor removes one point of durability from each piece of armor worn for every {{hp|4}} of incoming damage (rounded down, but never below 1). Damage taken that unenchanted armor does not protect against (such as [[Damage#Fall damage|falling]] or [[Damage#Drowning|drowning]]) does not damage the armor, even if it is enchanted to protect against that type of damage. The following chart displays how many hits chest plates can endure.
Netherite armor is not damaged by [[lava]] or [[fire]] when worn.
{| class="wikitable" data-description="Chestplate durability"
|-
! Material
! Durability
|-
!scope="row" | Leather
| 80
|-
!scope="row" | Golden
| 112
|-
!scope="row" | Chainmail
| rowspan="2" | 240
|-
!Iron
|-
!scope="row" | Diamond
| 528
|-
!scope="row" | Netherite
| 592
|}
==== Repair ====
Chestplates may be [[item repair|repaired]] by using them along with some of their crafting material ([[leather]], [[gold ingot]]s, [[iron ingot]]s, [[diamond]]s, or [[netherite ingot]]s) in an [[anvil]]. Chainmail chestplates may be repaired in this way with iron ingots. They may also be repaired by crafting them together with another chestplate of the same material.
=== Enchantments ===
A chestplate can receive the following [[enchantment]]s:
{| class="wikitable"
|-
! Enchantment !! Max Level !! Notes
|-
| [[Fire Protection]] || IV || <ref group=note name=exclusive>Fire Protection, Blast Protection, Projectile Protection and Protection are mutually exclusive</ref>
|-
| [[Projectile Protection]] || IV || <ref group=note name="exclusive"/>
|-
| [[Blast Protection]] || IV || <ref group=note name="exclusive"/>
|-
| [[Protection]] || IV || <ref group=note name="exclusive"/>
|-
| [[Unbreaking]] || III ||
|-
| [[Thorns]] || III || <ref group="note" name="maxlvl">The max level obtainable in the enchanting table is 2</ref>
|-
| [[Mending]] || I || <ref group=note name="anvil2">Only from chest loot, fishing, or an anvil and enchanted books.</ref>
|-
| [[Curse of Binding]] || I || <ref group="note" name="anvil2"/>
|-
| [[Curse of Vanishing]] || I || <ref group="note" name="anvil2"/>
|}
{{notelist}}
=== Smelting usage ===
{{Smelting|showname=1|Iron Chestplate;Chainmail Chestplate;Golden Chestplate|Iron Nugget;Iron Nugget;Gold Nugget|0,1}}
=== Piglins ===
{{EntityLink|Piglin|Piglins}} are attracted to ''golden'' chestplates and pick them up, examining them for 6 to 8 seconds. Piglins can wear other chestplates but are not attracted to them. They prefer stronger chestplates over weaker chestplates, with one exception: They always prefer golden chestplates over all other chestplates, throwing out stronger chestplates to equip them. Enchanted chestplates are preferred over unenchanted chestplates.
== Sounds ==
{{el|je}}:
{{Sound table
|sound=Equip leather1.ogg
|sound2=Equip leather2.ogg
|sound3=Equip leather3.ogg
|sound4=Equip leather4.ogg
|sound5=Equip leather5.ogg
|sound6=Equip leather6.ogg
|subtitle=Leather armor rustles
|source=player
|description=When a leather chestplate is equipped
|id=item.armor.equip_leather
|translationkey=subtitles.item.armor.equip_leather
|volume=1.0
|pitch=1.0
|distance=16}}
{{Sound table
|sound=Equip chain1.ogg
|sound2=Equip chain2.ogg
|sound3=Equip chain3.ogg
|sound4=Equip chain4.ogg
|sound5=Equip chain5.ogg
|sound6=Equip chain6.ogg
|subtitle=Chain armor jingles
|source=player
|description=When a chainmail chestplate is equipped
|id=item.armor.equip_chain
|translationkey=subtitles.item.armor.equip_chain
|volume=1.0
|pitch=1.0
|distance=16}}
{{Sound table
|sound=Equip iron1.ogg
|sound2=Equip iron2.ogg
|sound3=Equip iron3.ogg
|sound4=Equip iron4.ogg
|sound5=Equip iron5.ogg
|sound6=Equip iron6.ogg
|subtitle=Iron armor clanks
|source=player
|description=When an iron chestplate is equipped
|id=item.armor.equip_iron
|translationkey=subtitles.item.armor.equip_iron
|volume=1.0
|pitch=1.0
|distance=16}}
{{Sound table
|sound=Equip gold1.ogg
|sound2=Equip gold2.ogg
|sound3=Equip gold3.ogg
|sound4=Equip gold4.ogg
|sound5=Equip gold5.ogg
|sound6=Equip gold6.ogg
|subtitle=Gold armor clinks
|source=player
|description=When a gold chestplate is equipped
|id=item.armor.equip_gold
|translationkey=subtitles.item.armor.equip_gold
|volume=1.0
|pitch=1.0
|distance=16}}
{{Sound table
|sound=Equip diamond1.ogg
|sound2=Equip diamond2.ogg
|sound3=Equip diamond3.ogg
|sound4=Equip diamond4.ogg
|sound5=Equip diamond5.ogg
|sound6=Equip diamond6.ogg
|subtitle=Diamond armor clangs
|source=player
|description=When a diamond chestplate is equipped
|id=item.armor.equip_diamond
|translationkey=subtitles.item.armor.equip_diamond
|volume=1.0
|pitch=1.0
|distance=16}}
{{Sound table
|sound=Equip netherite1.ogg
|sound2=Equip netherite2.ogg
|sound3=Equip netherite3.ogg
|sound4=Equip netherite4.ogg
|subtitle=Netherite armor clanks
|source=player
|description=When a netherite chestplate is equipped
|id=item.armor.equip_netherite
|translationkey=subtitles.item.armor.equip_netherite
|volume=0.8
|pitch=1.0/0.9
|distance=16}}
{{Sound table
|sound=Random break.ogg
|subtitle=Item breaks
|source=dependent
|description=When a chestplate's durability is exhausted
|id=entity.item.break
|translationkey=subtitles.entity.item.break
|volume=0.8
|pitch=0.8-1.2
|distance=16
|foot=1}}
{{el|be}}:
{{Sound table
|type=bedrock
|sound=Equip leather1.ogg
|sound2=Equip leather2.ogg
|sound3=Equip leather3.ogg
|sound4=Equip leather4.ogg
|sound5=Equip leather5.ogg
|sound6=Equip leather6.ogg
|source=player
|description=When a leather chestplate is equipped
|id=armor.equip_leather
|volume=1.0
|pitch=1.0}}
{{Sound table
|sound=Equip chain1.ogg
|sound2=Equip chain2.ogg
|sound3=Equip chain3.ogg
|sound4=Equip chain4.ogg
|sound5=Equip chain5.ogg
|sound6=Equip chain6.ogg
|source=player
|description=When a chain chestplate is equipped
|id=armor.equip_chain
|volume=1.0
|pitch=1.0}}
{{Sound table
|sound=Equip iron1.ogg
|sound2=Equip iron2.ogg
|sound3=Equip iron3.ogg
|sound4=Equip iron4.ogg
|sound5=Equip iron5.ogg
|sound6=Equip iron6.ogg
|source=player
|description=When an iron chestplate is equipped
|id=armor.equip_iron
|volume=1.0
|pitch=1.0}}
{{Sound table
|sound=Equip gold1.ogg
|sound2=Equip gold2.ogg
|sound3=Equip gold3.ogg
|sound4=Equip gold4.ogg
|sound5=Equip gold5.ogg
|sound6=Equip gold6.ogg
|source=player
|description=When a gold chestplate is equipped
|id=armor.equip_gold
|volume=1.0
|pitch=1.0}}
{{Sound table
|sound=Equip diamond1.ogg
|sound2=Equip diamond2.ogg
|sound3=Equip diamond3.ogg
|sound4=Equip diamond4.ogg
|sound5=Equip diamond5.ogg
|sound6=Equip diamond6.ogg
|source=player
|description=When a diamond chestplate is equipped
|id=armor.equip_diamond
|volume=1.0
|pitch=1.0}}
{{Sound table
|sound=Equip netherite1.ogg
|sound2=Equip netherite2.ogg
|sound3=Equip netherite3.ogg
|sound4=Equip netherite4.ogg
|source=player
|description=When a netherite chestplate is equipped.
|id=armor.equip_netherite
|volume=1.0
|pitch=1.0}}
{{Sound table
|rowspan=2
|sound=Water Splash Old.ogg
|source=block
|description=When a leather chestplate is dyed using a cauldron
|id=cauldron.dyearmor
|volume=0.1
|pitch=1.0}}
{{Sound table
|source=block
|description=When a leather chestplate's dye is removed using a cauldron
|id=cauldron.cleanarmor
|volume=0.1
|pitch=1.0}}
{{Sound table
|sound=Random break.ogg
|source=player
|description=When a chestplate's durability is exhausted
|id=random.break
|volume=1.0
|pitch=0.9
|foot=1}}
== Data values ==
=== ID ===
{{edition|java}}:
{{ID table
|edition=java
|showitemtags=y
|showforms=y
|generatetranslationkeys=y
|displayname=Leather Tunic
|spritetype=item
|nameid=leather_chestplate
|itemtags=freeze_immune_wearables
|form=item}}
{{ID table
|displayname=Chainmail Chestplate
|spritetype=item
|nameid=chainmail_chestplate
|form=item}}
{{ID table
|displayname=Iron Chestplate
|spritetype=item
|nameid=iron_chestplate
|form=item}}
{{ID table
|displayname=Diamond Chestplate
|spritetype=item
|nameid=diamond_chestplate
|form=item}}
{{ID table
|displayname=Golden Chestplate
|spritetype=item
|nameid=golden_chestplate
|form=item}}
{{ID table
|displayname=Netherite Chestplate
|spritetype=item
|nameid=netherite_chestplate
|form=item
|foot=1}}
{{edition|bedrock}}:
{{ID table
|edition=bedrock
|shownumericids=y
|showforms=y
|notshowbeitemforms=y
|generatetranslationkeys=y
|displayname=Leather Tunic
|spritetype=item
|nameid=leather_chestplate
|id=336
|form=item}}
{{ID table
|displayname=Chainmail Chestplate
|spritetype=item
|nameid=chainmail_chestplate
|id=340
|form=item}}
{{ID table
|displayname=Iron Chestplate
|spritetype=item
|nameid=iron_chestplate
|id=344
|form=item}}
{{ID table
|displayname=Diamond Chestplate
|spritetype=item
|nameid=diamond_chestplate
|id=348
|form=item}}
{{ID table
|displayname=Golden Chestplate
|spritetype=item
|nameid=golden_chestplate
|id=352
|form=item}}
{{ID table
|displayname=Netherite Chestplate
|spritetype=item
|nameid=netherite_chestplate
|id=610
|form=item
|foot=1}}
=== Item data ===
When leather tunics are dyed, it has the following NBT:
<div class="treeview">
* {{nbt|compound|tag}}: Parent tag.
** {{nbt|compound|display}}: Display properties.
*** {{nbt|int|color}}: The color of the leather armor. The tooltip displays "Dyed" if advanced tooltips are disabled, otherwise it displays the hexadecimal color value. Color codes are calculated from the Red, Green and Blue components using this formula:<br>'''<span style="color:red">Red</span>[[wikipedia:Logical shift|<<]]16 + <span style="color:green">Green</span><<8 + <span style="color:blue">Blue</span>'''<ref>For positive values larger than 0x00FFFFFF, the top byte is ignored. All negative values produce white.</ref>
</div>
== Achievements ==
{{load achievements|Iron Man;Tie Dye Outfit;Cover me in debris;Oooh, shiny!}}
== Advancements ==
{{load advancements|Suit Up;Cover me With Diamonds;Oh Shiny;Cover Me in Debris}}
== History ==
{{History|java classic}}
{{History||June 14, 2009|link=wordofnotch:123343045|[[Notch]] discussed how armor would work in [[Survival]] mode: "Two types of swords, two types of armor, two types of helmets. The basic versions require iron. The advanced versions require steel, which you make by combining iron and coal. Carrying swords, armor or helmets take up inventory slots, but otherwise have no penalty and work pretty much as you expect (prevent some damage, or cause more damage)".}}
{{History||August 13, 2009|link=wordofnotch:162091556|Notch tested chestplates on the [[human]]. They were merely aesthetic at the time and had no effect on gameplay.}}
{{History||0.24_SURVIVAL_TEST|[[File:Plate Chestplate.png|32px]] Added the [[Java_Edition_removed_features#Armor_in_Survival_Test|plate chestplate]].
|[[File:Chainmail Chestplate JE1.png|32px]] Added the model and the texture for the unused [[Java_Edition_removed_features#Armor_in_Survival Test|chain chestplate]].
|[[File:Zombie full set.png|32px]] [[File:Skeleton helmet.png|26px]] The plate chestplate has been tested on [[zombie]]s and [[skeleton]]s. It had no effect on gameplay.}}
{{History|java indev}}
{{History||0.31|snap=20091223-1|Plate and chain armor chestplates are no longer used.}}
{{History|||snap=20091231-2|[[File:Leather Tunic (item) JE1 BE1.png|32px]] [[File:Studded Chestplate (item) JE1.png|32px]] [[File:Chainmail Chestplate (item) JE1 BE1.png|32px]] [[File:Iron Chestplate (item) JE1 BE1.png|32px]] Added the single item form of relation to leather, [[History of textures/Unused textures#Studded armor|studded]], chainmail, and plate (iron) chestplates.
|The textures of the cloth chestplate are taken from one of [[Notch]]'s previous games, ''[[Legend of the Chambered]]''. The rest are from ''[[Legend of the Chambered 2]]''.}}
{{History||20100206|[[File:Golden Chestplate (item) JE1 BE1.png|32px]] [[File:Diamond Chestplate (item) JE1 BE1.png|32px]] Added the item form of golden and diamond chestplates.
|Removed the leather-chain chestplate.}}
{{History||February 9, 2010|link=wordofnotch:380486636|[[File:Notch revealed armor.png|32px]] [[Notch]] revealed new models for armor - including chestplates.}}
{{History||20100212-1|Added armor models.
|[[File:Indev 20100212 armor.png|50px]] Armor models are now displayed on the [[player]] in the [[inventory]].}}
{{History||20100218|[[File:Leather Tunic JE1 BE1.png|32px]] [[File:Chainmail Chestplate JE2 BE1.png|32px]] [[File:Iron Chestplate JE1 BE1.png|32px]] [[File:Golden Chestplate JE1 BE1.png|32px]] [[File:Diamond Chestplate JE1 BE1.png|32px]] Added models of cloth, chainmail, iron, gold, and diamond chestplates.
|Chestplates can now be [[crafting|crafted]] and worn.
|Chestplates now functions. All chestplates give {{Armor|8}}. Chestplates have limited [[item durability|durability]], with lower tier chestplates less durable than higher tier chestplates.}}
{{History|java alpha}}
{{History||v1.0.8|With the introduction of [[leather]], "Cloth Chestplate" has been renamed to "Leather Tunic".
|Leather tunics is now [[crafting|crafted]] with leather instead of [[wool|cloth]].}}
{{History|java}}
{{History||1.0.0|snap=Beta 1.9 Prerelease|The armor protection behavior has been changed. Previous to this update, the total armor protection is based in this equation: ((''total equipped armor damage reduction'' − 1) × (''all equipped armor max damage'' − ''total equipped armor damage'')) ÷ (''total equipped armor max damage'' + 1)). Armor no longer reduces certain damage types to be covered by enchantments.}}
{{History|||snap=October 3, 2011|slink={{tweet|notch|120859830339637249}}|The first images of a [[player]] wearing enchanted chestplates are revealed.}}
{{History|||snap=Beta 1.9 Prerelease 3|Iron chestplates can now be found in the new [[stronghold]] altar [[chest]]s.}}
{{History|||snap=Beta 1.9 Prerelease 4|Chestplates can now be [[enchanting|enchanted]].}}
{{History||1.1|snap=12w01a|Iron chestplates can now be found in the new blacksmith [[chest]]s in [[village]]s.}}
{{History||1.3.1|snap=12w15a|{{key|Shift}}+clicking can now be used to wear chestplates.}}
{{History|||snap=12w21a|Chainmail chestplates can now be obtained legitimately in [[survival]] mode through [[trading]].
|Blacksmith [[villager]]s now [[trading|sell]] chainmail chestplates for 11–14 emeralds.
|Blacksmith villagers now sell diamond chestplates for 16–18 emeralds.
|Blacksmith villagers now sell iron chestplates for 10–13 emeralds.
|Butchers now sell leather tunics for 4 emeralds.}}
{{History||1.4.2|snap=12w32a|[[Mob]] armor has been reintroduced. A partial or full set of any armor is now sometimes worn by [[zombie]]s, [[skeleton]]s and [[zombified piglins|zombie pigmen]], with the likelihood increasing with difficulty.}}
{{History|||snap=August 17, 2012|slink={{tweet|Dinnerbone|236445090929844225}}|[[Jeb]] and [[Dinnerbone]] tweeted pictures of [[dye]]able leather chestplates.}}
{{History|||snap=12w34a|Leather tunics can now be dyed by [[crafting]] a leather tunic piece with [[dye]]s. Dyes can be removed by {{control|use|text=using}} dyed leather tunics on a [[cauldron]] with [[water]].
|[[File:Leather Tunic JE2.png|32px]] [[File:Leather Tunic (item) JE2.png|32px]] Default leather tunic textures are now slightly darker and have buttons.}}
{{History|||snap=12w34b|[[File:Leather Tunic JE3 BE2.png|32px]] [[File:Leather Tunic (item) JE3 BE2.png|32px]] [[File:Diamond Chestplate JE2.png|32px]] The texture of leather and diamond chestplates has been changed. Leather tunics now have longer sleeves. Diamond chestplates now have notches under the shoulders.}}
{{History|||snap=12w36a|[[Dye]]d leather tunics are now more saturated and have a slight tint of tan in respect to the default armor color.}}
{{History|||snap=12w37a|[[File:Leather Cap JE3 BE2.png|32px]] [[File:Leather Boots JE2 BE2.png|32px]] [[File:Leather Cap (item) JE3 BE2.png|32px]] [[File:Leather Boots (item) JE3 BE2.png|32px]] Leather armor now have non-dyed parts on cap, pants and boots. This has been implemented so that [[player]]s can distinguish between other types of armor and similarly colored leather armor.}}
{{History||1.4.6|snap=12w50a|The [[Thorns]] enchantment can now be [[enchanting|enchanted]] on chestplates.}}
{{History||1.5|snap=13w04a|Armor in the [[player]]'s hand can now be equipped by right-clicking.
|[[Dispenser]]s can now equip nearby players with armor.}}
{{History||1.6.1|snap=13w18a|Golden chestplates are now found in the new [[chest]]s in [[nether fortress]]es.}}
{{History||1.7.2|snap=13w36a|Leather [[boots]] can now be obtained as one of the "junk" items by [[fishing]].}}
{{History||1.8|snap=14w02a|[[Trading|Trades]] changed: armorer [[villager]]s now [[trading|sell]] chain boots for 5–7 [[emerald]]s, chain [[leggings]] for 9–11 emeralds, chain chestplates for 11–15 emeralds and chain helmets for 5–7 emeralds.
|Armorer villagers now sell enchanted diamond chestplates for 16–19 emeralds, and no longer sell other diamond armor.
|Armorer villagers now sell iron chestplates for 10–14 emeralds and iron helmets for 4–6 emeralds, and no longer sell other iron armor.
|Leatherworkers now sell enchanted leather tunics for 7–12 emeralds, and no longer sell other leather armor.}}
{{History|||snap=14w05a|Armor no longer turns red when [[mob]]s and [[player]]s are hurt.}}
{{History|||snap=14w06a|Armor is now visible on [[giant]]s.}}
{{History|||snap=14w25a|Chain armor [[Java Edition removed features#Chainmail armor|cannot be crafted anymore]] due to the [[item]] form of [[fire]] being [[Java Edition removed features#Obtainable until 1.8|removed]].}}
{{History||1.9|snap=15w31a|Enchanted iron and diamond armor can now be found in [[end city]] ship [[chest]]s.
|[[Mob]]s now wear armor from the bottom to the top, rather than from the top to the bottom. This means that a mob with three armor pieces, for example, spawn with all armor except a helmet.}}
{{History|||snap=15w34b|Armor [[item durability|durability]] now affects armor value.}}
{{History|||snap=15w36a|Armor and armor [[enchanting|enchantment]] calculations have been changed. For the original values, see [[Armor/Before 1.9|here]].}}
{{History|||snap=15w36d|Armor durability affecting value has been removed.
|Armor now has an attribute controlling the defense points.}}
{{History|||snap=15w43a|The average yield of gold chestplates in [[nether fortress]] [[chest]]s has been decreased.}}
{{History|||snap=15w50a|Added <code>equip</code> [[sound]]s for all types of armor.}}
{{History|||snap=16w02a|Armor and armor enchantment calculations have been changed again.}}
{{History|||snap=16w05a|Armor calculations have been changed, once again.}}
{{History||1.11|snap=16w39a|Diamond and chainmail chestplates are now found in the new [[woodland mansion]] chests.}}
{{History||1.11.1|snap=16w50a|Golden, chain and iron armor can now be [[smelting|smelted]] down into one of their respective [[nugget]]s.}}
{{History||1.13|snap=17w47a|Prior to [[1.13/Flattening|''The Flattening'']], these [[item]]s' numeral IDs were 298 through 317.}}
{{History|||snap=18w09a|Leather tunics now have a chance of generating in [[underwater ruins]].}}
{{History|||snap=18w10a|Leather tunics can now generate in [[buried treasure]] [[chest]]s.}}
{{History|||snap=18w11a|Enchanted leather tunics can now generate in the chests of [[shipwreck]]s.}}
{{History|||snap=18w20a|Chain armor pieces have been renamed to "chainmail".}}
{{History||1.14|snap=18w43a|[[File:Leather Tunic JE4 BE2.png|32px]] [[File:Chainmail Chestplate JE3 BE2.png|32px]] [[File:Iron Chestplate JE2 BE2.png|32px]] [[File:Golden Chestplate JE2 BE2.png|32px]] [[File:Diamond Chestplate JE3 BE2.png|32px]] [[File:Leather Tunic (item) JE4 BE3.png|32px]] [[File:Chainmail Chestplate (item) JE2 BE2.png|32px]] [[File:Iron Chestplate (item) JE2 BE2.png|32px]] [[File:Golden Chestplate (item) JE2 BE2.png|32px]] [[File:Diamond Chestplate (item) JE2 BE2.png|32px]] The textures of all types of armor have been changed.}}
{{History|||snap=18w48a|Leather tunics can now be found in [[chest]]s in [[village]] tanneries.}}
{{History|||snap=18w50a|Iron chestplates can now be found on [[armor stand]]s in [[taiga]] villages.}}
{{History|||snap=19w08a|[[File:Golden Chestplate (item) JE3 BE3.png|32px]] The textures of gold chestplate [[item]] have been changed.}}
{{History|||snap=19w11a|Leatherworker villagers now sell randomly [[dye]]d leather tunics, instead of enchanted leather tunics.}}
{{History|||snap=19w13a|Armorer villagers now give chainmail chestplates to players under the [[Hero of the Village]] effect.}}
{{History||1.16|snap=20w06a|[[File:Netherite Chestplate JE1.png|32px]] [[File:Netherite Chestplate (item) JE1.png|32px]] Added netherite chestplate.}}
{{History|||snap=20w10a|[[File:Netherite Chestplate JE2 BE1.png|32px]] [[File:Netherite Chestplate (item) JE2 BE1.png|32px]] The texture of netherite chestplate have been changed.
|Netherite chestplate can no longer be [[crafting|crafted]].
|Netherite chestplate is now obtained by combining one diamond armor piece and one netherite ingot in a [[smithing table]].}}
{{History|||snap=20w16a|All parts of golden and netherite chestplates now generate randomly [[enchanting|enchanted]], and sometimes [[damage]]d, in [[bastion remnant]] and [[ruined portal]] chests.}}
{{History|||snap=20w17a|Diamonds chestplates now generates in place of netherite armor in bastion remnant [[chest]]s.}}
{{History||1.17|snap=20w48a|Wearing any piece of leather armor now prevents [[Powder Snow#Freezing|freezing]] entirely.}}
{{History||1.18.2|snap=22w03a|Netherite chestplate knockback resistance is no longer random.}}
{{History||1.20<br>(Experimental)|link=1.19.4|snap=23w04a|Non-leather chestplates can now be trimmed using a [[smithing table]].
|There are 10 types of material that determine the color of the trim:
*Iron
*Copper
*Gold
*Lapis
*Emerald
*Diamond
*Netherite
*Redstone
*Amethyst
*Quartz
|Upgrading diamond chestplate to netherite chestplate now requires the netherite upgrade [[smithing template]].}}
{{History|||snap=23w05a|Leather tunics can now be trimmed using a smithing table.|Chestplates can now have trims of the same material it is made out of.|The texture of the dune armor trim has been tweaked, so that the symbol on the chestplate is moved up a few pixels.}}
{{History|||snap=23w06a|Swapped {{cd|iron}} and {{cd|iron_darker}} palette, then made {{cd|iron_darker}} darker overall.|Added a darkest pixel to {{cd|chestplate_trim}} trim item texture.}}
{{History||1.19.4|snap=23w05a|Chestplates can now be swapped by {{ctrl|using}} them/elytra in the hotbar.<ref>{{bug|MC-216270|||Fixed}}</ref>}}
{{History||?|Chestplates can now be swapped in [[armor stand]]s by {{ctrl|using}} them/elytra in the armor stand's slot.}}
{{History||1.20|snap=23w12a|The pattern textures of dune and sentry armor trims are changed.|
Those previous patterns were left with different names: dune was renamed sentry and sentry was renamed shaper.}}
{{History|pocket alpha}}
{{History||v0.6.0|[[File:Leather Tunic JE1 BE1.png|32px]] [[File:Chainmail Chestplate JE2 BE1.png|32px]] [[File:Iron Chestplate JE1 BE1.png|32px]] [[File:Golden Chestplate JE1 BE1.png|32px]] [[File:Diamond Chestplate JE1 BE1.png|32px]] [[File:Leather Tunic (item) JE1 BE1.png|32px]] [[File:Chainmail Chestplate (item) JE1 BE1.png|32px]] [[File:Iron Chestplate (item) JE1 BE1.png|32px]] [[File:Golden Chestplate (item) JE1 BE1.png|32px]] [[File:Diamond Chestplate (item) JE1 BE1.png|32px]] Added chestplates.}}
{{History||v0.8.0|snap=build 2|[[File:Leather Tunic (item) JE3 BE2.png|32px]] The leather armor sprites have been changed to that of {{el|je}}, but its armor [[model]] remains that of older versions.}}
{{History||v0.9.0|snap=build 1|Iron armor now naturally generates in [[village]] [[chest]]s and a [[stronghold]] altar chest.}}
{{History||v0.11.0|snap=build 11|Armor now protects against [[damage]] from [[mob]]s only.}}
{{History||v0.12.1|snap=build 1|Armor can now be worn by mobs.
|Golden chestplates can now be found in [[nether fortress]] [[chest]]s.
|Chainmail armor can now be obtained in [[survival]] mode from a mob wearing it.}}
{{History||?|Armor no longer turns red when [[mob]]s and [[player]]s are hurt.}}
{{History||v0.14.0|snap=build 1|[[File:Leather Tunic JE3 BE2.png|32px]] The textures of leather chestplate have been changed.
|Leather armor can now be dyed.}}
{{History||v0.15.0|snap=build 1|Armor can now be obtained from [[stray]]s and [[husk]]s that naturally spawn with armor.}}
{{History||v0.15.10|[[Cape]]s no longer clip through armor.}}
{{History|pocket}}
{{History||1.0.0|snap=alpha 0.17.0.1|[[Enchanting|Enchanted]] iron armor and enchanted diamond armor can now be found inside [[chest]]s within [[end city]].}}
{{History||1.0.4|snap=alpha 1.0.4.0|Iron [[helmet]]s, iron chestplates, enchanted diamond chestplates and chainmail armor are now [[trading|sold]] by armorer smith [[villager]]s via [[trading]].}}
{{History||1.1.0|snap=alpha 1.1.0.0|Golden, chain and iron armor can now be [[smelting|smelted]] down into one of their respective [[nugget]]s.
|Diamond chestplates and chainmail chestplates can now be found inside [[woodland mansion]] chests.}}
{{History|bedrock}}
{{History||1.4.0|snap=beta 1.2.14.2|Chainmail chestplates now generate in [[buried treasure]] chests.
|Enchanted leather armor can now be found inside [[shipwreck]] supply room [[chest]]s.}}
{{History|||snap=beta 1.2.20.1|Leather chestplates can now be found inside [[underwater ruins]] chests.}}
{{History||1.10.0|snap=beta 1.10.0.3|[[File:Leather Tunic JE4 BE2.png|32px]] [[File:Chainmail Chestplate JE3 BE2.png|32px]] [[File:Iron Chestplate JE2 BE2.png|32px]] [[File:Golden Chestplate JE2 BE2.png|32px]] [[File:Diamond Chestplate JE3 BE2.png|32px]] [[File:Leather Tunic (item) JE4 BE3.png|32px]] [[File:Chainmail Chestplate (item) JE2 BE2.png|32px]] [[File:Iron Chestplate (item) JE2 BE2.png|32px]] [[File:Golden Chestplate (item) JE2 BE2.png|32px]] [[File:Diamond Chestplate (item) JE2 BE2.png|32px]] The textures of all types of chestplates have been changed.
|Iron armor now can be found in plains [[village]] weaponsmith [[chest]]s.
|Leather armor can now be found inside plains village tannery chests.}}
{{History||1.11.0|snap=beta 1.11.0.1|Iron armor now can be found in [[savanna]], [[taiga]], [[desert]], [[snowy taiga]] and [[snowy tundra]] [[village]] weaponsmith [[chest]]s.
|Leather armor can now be found inside savanna, taiga, desert, snowy taiga and snowy tundra village tannery chests.}}
{{History|||snap=beta 1.11.0.4|[[Pillager]]s and [[vindicator]]s that spawn in [[raid]]s can now drop iron armor.}}
{{History||1.11.0|snap=beta 1.11.0.5|[[File:Golden Chestplate (item) JE3 BE3.png|32px]] The textures of gold chestplate [[item]] have been changed.}}
{{History||1.12.0|snap=beta 1.12.0.2|[[File:Armor Stand with Leather Armor MCPE-44669.png|32px]] Leather armor no longer show as being [[dye]]d properly when worn by [[armor stand]]s.}}
{{History||1.13.0|snap=beta 1.13.0.1|Leather armor now appears dyed properly when worn by armor stands.}}
{{History||1.16.0|snap=beta 1.16.0.51|[[File:Netherite Chestplate JE2 BE1.png|32px]] [[File:Netherite Chestplate (item) JE2 BE1.png|32px]] Added netherite chestplate.
|Armor can now be obtained from [[piglin]]s that naturally spawn with golden armor.}}
{{History|||snap=beta 1.16.0.57|All parts of golden and netherite armor now generate randomly [[enchanting|enchanted]], and sometimes [[damage]]d, in [[bastion remnant]] chests.
|Netherite armor can no longer be [[crafting|crafted]].
|Netherite armor is now obtained by combining one diamond armor piece and one netherite ingot in a [[smithing table]].}}
{{History|||snap=beta 1.16.0.63|Diamonds armor now generates in place of netherite armor in bastion remnant [[chest]]s.}}
{{History|||snap=beta 1.16.200.53|Netherite Armor now gives a 90% reduction in Knockback.}}
{{History||1.16.210|snap=beta 1.16.210.53|Wearing any piece of leather armor now prevents [[Powder Snow#Freezing|freezing]] entirely.}}
{{History|console}}
{{History||xbox=TU1|xbone=CU1|ps=1.0|wiiu=Patch 1|switch=1.0.1|[[File:Leather Tunic JE1 BE1.png|32px]] [[File:Chainmail Chestplate JE2 BE1.png|32px]] [[File:Iron Chestplate JE1 BE1.png|32px]] [[File:Golden Chestplate JE1 BE1.png|32px]] [[File:Diamond Chestplate JE1 BE1.png|32px]] [[File:Leather Tunic (item) JE1 BE1.png|32px]] [[File:Chainmail Chestplate (item) JE1 BE1.png|32px]] [[File:Iron Chestplate (item) JE1 BE1.png|32px]] [[File:Golden Chestplate (item) JE1 BE1.png|32px]] [[File:Diamond Chestplate (item) JE1 BE1.png|32px]] Added chestplates.
|Added a quick equip for armor to the [[inventory]] interface.}}
{{History||xbox=TU12|ps=1.03|[[File:Leather Tunic JE3 BE2.png|32px]] [[File:Leather Tunic (item) JE3 BE2.png|32px]] The textures for leather chestplate have been changed.}}
{{History||xbox=TU14|ps=1.05|Leather armor can now be [[dye]]d.
|[[Item repair]] can now repair armor.}}
{{History||xbox=TU25|xbone=CU13|ps=1.16|Armor now have the quick equip functionality.}}
{{History||xbox=TU53|xbone=CU43|ps=1.49|wiiu=Patch 23|switch=1.0.3|Golden, chain and iron armor can now be [[smelting|smelted]] down into one of their respective [[nugget]]s.}}
{{History|PS4}}
{{History||1.90|[[File:Chainmail Chestplate (item) JE2 BE2.png|32px]] [[File:Iron Chestplate (item) JE2 BE2.png|32px]] [[File:Golden Chestplate (item) JE2 BE2.png|32px]] [[File:Diamond Chestplate (item) JE2 BE2.png|32px]] The textures of all types of chestplate items have been changed (except for the leather one).}}
{{History|new 3ds}}
{{History||0.1.0|[[File:Leather Tunic JE1 BE1.png|32px]] [[File:Chainmail Chestplate JE2 BE1.png|32px]] [[File:Iron Chestplate JE1 BE1.png|32px]] [[File:Golden Chestplate JE1 BE1.png|32px]] [[File:Diamond Chestplate JE1 BE1.png|32px]] [[File:Leather Tunic (item) JE3 BE2.png|32px]] [[File:Chainmail Chestplate (item) JE1 BE1.png|32px]] [[File:Iron Chestplate (item) JE1 BE1.png|32px]] [[File:Golden Chestplate (item) JE1 BE1.png|32px]] [[File:Diamond Chestplate (item) JE1 BE1.png|32px]] Added chestplates.}}
{{History|foot}}
; Armor durability from Indev until late Beta
{| class="wikitable" data-description="Armor Durability during Indev until late Beta" style="text-align:center;"
|-
!scope="col" | Material
!scope="col" | Helmet
!scope="col" | Chestplate
!scope="col" | Leggings
!scope="col" | Boots
|-
|scope="row" | '''Leather'''
| 33
| 48
| 45
| 39
|-
|scope="row" | '''Golden'''
| 66
| 96
| 90
| 78
|-
|scope="row" | '''Chainmail'''
| 66
| 96
| 90
| 78
|-
|scope="row" | '''Iron'''
| 132
| 192
| 180
| 156
|-
|scope="row" | '''Diamond'''
| 264
| 384
| 360
| 312
|}
== Issues ==
{{issue list}}
== Trivia ==
* Chestplates do not render on the player's arm in first person view.<ref>{{bug|MC-25512}}</ref><ref>{{bug|MCPE-30000}}</ref>
== Gallery ==
=== Enchanted Chestplates ===
<gallery>
File:Enchanted Leather Tunic (item).gif
File:Enchanted Chainmail Chestplate (item).gif
File:Enchanted Iron Chestplate (item).gif
File:Enchanted Golden Chestplate (item).gif
File:Enchanted Diamond Chestplate (item).gif
File:Enchanted Netherite Chestplate (item).gif
</gallery>
<gallery>
File:Enchanted Leather Chestplate.gif
File:Enchanted Chainmail Chestplate.gif
File:Enchanted Iron Chestplate.gif
File:Enchanted Golden Chestplate.gif
File:Enchanted Diamond Chestplate.gif
File:Enchanted Netherite Chestplate.gif
</gallery>
== References ==
{{reflist}}
== External Links ==
*[https://www.minecraft.net/en-us/article/taking-inventory--chestplate Taking Inventory: Chestplate] – Minecraft.net on August 4, 2021
{{Items}}
[[Category:Armor]]
[[ja:チェストプレート]]
[[ko:흉갑]]
[[pt:Peitoral]]
[[pl:Napierśnik]]
[[th:เสื้อเกราะ]]
[[zh:胸甲]]</li></ul> | 20w28a | Villagers now emit green particles when joining a village, setting a home bed, or acquiring a job site/profession to match Bedrock Edition. | |||
| Pre-release 1 | Villagers now lose their job sites when changing dimension. | ||||
1.17{{Extension DPL}}<ul><li>[[Water Bucket|Water Bucket]]<br/>{{Item
| title = Water Bucket
| renewable = Yes
| image = Water Bucket.png
| stackable = No
}}
A '''water bucket''' is a [[bucket]] filled with [[water]].
== Obtaining ==
=== Interacting ===
To fill an empty [[bucket]] with water, {{control|use}} it on a [[water]] source block. The water is consumed in the process. Flowing water does not fill a bucket.
{{control|Using}} an empty bucket on a [[cauldron]] filled with water (water level 3) empties the cauldron and fills the bucket.
Water buckets can also be filled by placing an empty one in the fuel slot of a [[furnace]], and a wet [[sponge]] into the oven slot. The bucket is filled when the [[smelting]] process completes, which also leaves the sponge dry and ready to be reused.
=== Chest Loot ===
{{LootChestItem|water-bucket}}
== Usage ==
{{Control|Using}} a water bucket on a solid block places a water source block against that block, emptying the bucket; using a water bucket on a [[waterlogging|waterloggable]] block waterlogs the block. In [[the Nether]], however, the water evaporates, making a fire extinguishing sound and displays smoke particles while nothing gets placed.
=== Dispensers ===
A [[dispenser]] can be loaded with a water bucket, and when activated it places a water block directly before it, emptying the bucket. A dispenser loaded with an empty bucket and a water source right in front of it draws the source into the bucket when activated.
=== Cauldrons ===
A single water bucket can fill a [[cauldron]], and using an empty bucket on a water-filled cauldron fills the bucket. Empty buckets cannot be filled from partly-filled cauldrons.
=== Filling bucket with mobs ===
Water buckets can be used on a [[fish]], [[axolotl]] or [[tadpole]] to create a [[bucket of aquatic mob]].
=== Transportation ===
{{main|Tutorials/Elevators#Water elevators}}
Water buckets can be used as a means of quickly descending great heights in the [[Overworld]] and [[the End]], either by creating a waterfall or using the water bucket while falling to create a safe water landing.
Water buckets can also be used to climb vertical surfaces anywhere but [[the Nether]] by repeatedly creating higher waterfalls from the bottom and swimming up them.
== Sounds ==
{{el|je}}:
{{Sound table
|sound=Fill water bucket1.ogg
|sound2=Fill water bucket2.ogg
|sound3=Fill water bucket3.ogg
|subtitle=Bucket fills
|source=player
|description=When a bucket is filled with water
|id=item.bucket.fill
|translationkey=subtitles.item.bucket.fill
|volume=1.0
|pitch=1.0
|distance=16}}
{{Sound table
|sound=Empty water bucket1.ogg
|sound2=Empty water bucket2.ogg
|sound3=Empty water bucket3.ogg
|subtitle=Bucket empties
|source=block
|description=When the bucket is placed
|id=item.bucket.empty
|translationkey=subtitles.item.bucket.empty
|volume=1.0 <ref group=sound>Except for the second copy of {{cd|empty1}}, which is 0.9</ref>
|pitch=1.0
|distance=16
|foot=1}}
{{el|je}}:
{{Sound table
|type=bedrock
|sound=Fill water bucket1.ogg
|sound2=Fill water bucket2.ogg
|sound3=Fill water bucket3.ogg
|source=block
|description=When a bucket is filled with water
|id=bucket.fill_water
|volume=1.0
|pitch=1.0}}
{{Sound table
|sound=Empty water bucket1.ogg
|sound2=Empty water bucket2.ogg
|sound3=Empty water bucket3.ogg
|source=block
|description=When a water bucket is emptied
|id=bucket.empty_water
|volume=1.0
|pitch=1.0}}
{{Sound table
|rowspan=2
|sound=Water Splash Old.ogg
|source=block
|description=When a water bucket is placed in a cauldron<wbr><ref group=sound name=bucketsplash>{{Bug|MCPE-135919}}</ref>
|id=cauldron.fillwater
|volume=0.1
|pitch=1.0}}
{{Sound table
|source=block
|description=When a water bucket is removed from a cauldron<wbr><ref group=sound name=bucketsplash/>
|id=cauldron.takewater
|volume=0.1
|pitch=1.0
|foot=1}}
==Data values==
=== ID ===
{{edition|java}}:
{{ID table
|edition=java
|showforms=y
|generatetranslationkeys=y
|displayname=Water Bucket
|spritetype=item
|nameid=water_bucket
|form=item
|foot=1}}
{{edition|bedrock}}:
{{ID table
|edition=bedrock
|showaliasids=y
|shownumericids=y
|showforms=y
|notshowbeitemforms=y
|generatetranslationkeys=y
|displayname=Water Bucket
|spritetype=item
|nameid=water_bucket
|aliasid=bucket / 8
|id=362
|form=item
|translationkey=item.bucketWater.name
|foot=1}}
== Advancements ==
{{load advancements|Tactical fishing;The Cutest Predator;Bukkit bukkit}}
==History==
{{History|java infdev}}
{{History||20100615|[[File:Water Bucket JE1 BE1.png|32px]] Added water buckets.}}
{{History|java alpha}}
{{History||v1.2.6|{{control|use|text=Using}} a water bucket on [[block]]s with GUIs ([[chest]]s, [[furnace]]s, etc.) no longer places the water.}}
{{History|java}}
{{History||1.0.0|snap=Beta 1.9 Prerelease 2|Water buckets can now be used to fill [[cauldron]]s.}}
{{History||1.3.1|snap=12w15a|[[Dispenser]]s have now been given the ability to dispense water buckets. They can also collect if activated again.}}
{{History||1.8|snap=14w25a|A water bucket is now shown as the icon when [[water]] is used as a layer in [[Superflat]].}}
{{History|||snap=14w25b|[[Smelting]] a wet [[sponge]] while an empty bucket is in the fuel slot fills the bucket with water.}}
{{History||1.9|snap=15w44a|A full [[cauldron]] can now be emptied with a bucket, yielding a water bucket.}}
{{History|||snap=15w50a|Added sounds for collecting and pouring water using a bucket.}}
{{History||1.13|snap=17w47a|Prior to the ''[[Flattening]]'' this item's numerical ID was 326.}}
{{History|||snap=18w08b|Water buckets can now be used to pick up [[fish]] mobs.}}
{{History||1.14|snap=18w43a|[[File:Water Bucket JE2 BE2.png|32px]] The texture of water buckets has now been changed.
|Water buckets can now suck up liquids directly adjacent to the side they are facing. How this works is unknown, given the water bucket clearly already contains a liquid.}}
{{History|||snap=18w48a|Water buckets can now be found in [[chest]]s in [[village]] fishing cottages.}}
{{History|||snap=19w02a|Water buckets can now be used to put out [[campfire]]s.}}
{{History||1.17|snap=20w51a|Water buckets can now be used to collect [[axolotl]]s.}}
{{History||1.19|snap=22w11a|Water buckets can now be used to collect [[tadpole]]s.}}
{{History||1.19.3|snap=22w45a|Water buckets can now be emptied into [[waterlogging|waterlogged]] blocks, instead of placing water against them.<ref>{{bug|MC-127110|||Fixed}}</ref>}}
{{History|upcoming java}}
{{History||Villager Trade Rebalance<br>(Experimental)|link=Java Edition 1.20.2|snap=23w31a|[[Wandering trader]]s now have a chance to [[trading|buy]] a water bucket from the player.}}
{{History|pocket alpha}}
{{History||v0.7.0|[[File:Water Bucket JE1 BE1.png|32px]] Added water buckets.
|Water buckets were simply called "Bucket".}}
{{History||v0.7.4|Water buckets no longer stack to 64.}}
{{History||v0.14.0|snap=build 1|Dispensers can now shoot out water from water buckets.}}
{{History|bedrock}}
{{History||1.4.0|snap=beta 1.2.14.2|Water buckets can now be used to pick up [[fish mob]]s.
|Moved all bucket items, including water buckets, from the Equipment tab to the Items tab in the [[Creative inventory]].{{verify|type=update}}{{info needed}}<!---please check snapshots, only 1 major release version was checked each--->}}
{{History||1.10.0|snap=beta 1.10.0.3|[[File:Water Bucket JE2 BE2.png|32px]] The texture of water buckets has now been changed.}}
{{History||1.16.100|snap=beta 1.16.100.56|The ID of water buckets has been changed from <code>bucket/8</code> to <code>water_bucket</code>.}}
{{History||1.17.0|snap=beta 1.16.230.52|Water buckets can now be used to collect [[axolotl]]s.}}
{{History||1.18.10|snap=beta 1.18.10.24|Water buckets can now be used to collect [[tadpole]]s behind the "Wild Update" experimental toggle.}}
{{History|console}}
{{History||xbox=TU1|xbone=CU1|ps=1.0|wiiu=Patch 1|switch=1.0.1|[[File:Water Bucket JE1 BE1.png|32px]] Added water buckets.}}
{{History||xbox=TU9|[[Dispenser]]s have now been given the ability to shoot out the [[liquids]] inside water buckets. They can also suck up the liquids if activated again, but a bug prevents the empty [[bucket]] from being filled. Whether this was ever fixed is unknown.}}
{{History||xbox=none|xbone=none|ps=1.90|wiiu=none|switch=none|[[File:Water Bucket JE2 BE2.png|32px]] The texture of water buckets has now been changed.}}
{{History|New Nintendo 3DS Edition}}
{{History||0.1.0|[[File:Water Bucket JE1 BE1.png|32px]] Added water buckets.}}
{{History|foot}}
==Issues==
{{issue list}}
==Gallery==
<gallery>
Water Bucket SDGP.png|Water bucket in the [[Super Duper Graphics Pack]].
</gallery>
==References==
{{Reflist}}
{{Items}}
[[Category:Renewable resources]]
[[Category:Tools]]
[[de:Wassereimer]]
[[ja:水入りバケツ]]
[[pt:Balde de água]]
[[th:ถังน้ำ]]
[[uk:Відро води]]
[[zh:水桶]]</li><li>[[Cauldron|Cauldron]]<br/>{{For|the boss in ''Minecraft Dungeons''|MCD:Corrupted Cauldron}}
{{Block
| extratext = View [[#Renders|all renders]]
| transparent = Yes
| light = Depends on contained liquid
| tool = wooden pickaxe
| renewable = Yes
| stackable = Yes (64)
| flammable = No
| lavasusceptible = No
}}
A '''cauldron''' is a [[block]] that can contain [[water]], [[lava]] or [[powder snow]] and, in certain situations, collect it from the environment. {{IN|bedrock}}, it can also hold [[potion]]s or dyed water. It also serves as a [[leatherworker]]'s [[job site block]].
== Obtaining ==
=== Breaking ===
A cauldron can be obtained using any [[pickaxe]]. If mined without a pickaxe, it drops nothing. Regardless of the tool, when a cauldron is destroyed, its contents are lost.
{{breaking row|horizontal=1|Cauldron|Pickaxe|Wood}}
=== Natural generation ===
[[File:Natural Cauldron Table.png|A naturally occurring cauldron inside of a [[witch hut]].|thumb]]
A single empty cauldron is generated in each [[swamp hut]]. {{IN|be}}, the cauldrons generated there are {{frac|1|3}} to {{frac|2|3}} full of a random [[potion]].
A cauldron {{frac|2|3}} full of water is generated in each [[igloo]] basement.
[[File:MansionJailInner.png|thumb|Cauldron in [[woodland mansion]] jail.]]
Cauldrons can be found in a few rooms inside of [[woodland mansion]]s.
Two filled cauldrons can be found inside savanna, taiga, snowy taiga, and snowy tundra [[village]] tannery houses.
A single filled cauldron can be found in plains village and desert village tannery houses.
{{IN|java}}, three filled cauldrons can be found in plains village tannery houses.
Cauldrons can also spawn in [[trail ruins]].
=== Crafting ===
A cauldron can be crafted from [[iron ingot]]s.
{{Crafting
|A1= Iron Ingot
|C1= Iron Ingot
|A2= Iron Ingot
|C2= Iron Ingot
|A3= Iron Ingot
|B3= Iron Ingot
|C3= Iron Ingot
|Output= Cauldron
|type= Brewing
}}
== Usage ==
=== Storage for substances ===
Cauldrons can hold a variety of substances. Fluids they cannot hold include [[milk]], [[Honey Bottle|honey]] and any food items that exist in [[bowl]]s; namely [[mushroom stew]], [[beetroot soup]], [[rabbit stew]] and [[suspicious stew]]. {{IN|java}}, cauldrons containing fluids are considered by the game to be separate blocks from each other and from empty cauldrons, which does not affect gameplay but does affect the commands needed to place them.
==== Holding water ====
A cauldron can be filled with [[water]] by {{control|using}} a [[water bucket]] on the cauldron. Once completely filled, a cauldron can be used to fill a water bucket by {{control|using}} an empty [[bucket]] on the cauldron; this empties the cauldron. Despite containing water, using a [[fish bucket]] on a cauldron does not fill it with water, but places water against it, meaning it does nothing to the cauldron.<ref>{{bug|MC-129109|||WAI}}</ref>
A cauldron can also be filled by dumping a water bucket on the block above the cauldron. Once the water block is removed, the cauldron is filled to the full level with water.{{only|be}}
It can contain three levels of water. One level of water can be added to a cauldron by {{control|using}} a [[water bottle]] on it. One level of water can be removed from a cauldron, filling a water bottle, by {{control|using}} a [[glass bottle]] on it.
A cauldron slowly fills with [[water]] when [[rain]]ed upon, if starting empty or with some water. This happens randomly, at 5% of the rate in which snow accumulates on the ground during [[snowfall]].
Water can be stored in a cauldron even in [[the Nether]]. Water in a cauldron does not freeze in cold biomes.
Water in a cauldron does ''not'' absorb [[explosion]] damage; make [[sound]]s and [[particle]]s; absorb fall damage;<ref>{{bug|MC-176867|||WF}}</ref><ref>{{bug|MCPE-104572|||WF}}</ref> allow [[Riptide]] [[trident]]s to activate;<ref>{{bug|MC-145311|||WF}}</ref><ref>{{bug|MCPE-93111}}</ref> or damage [[endermen]], [[strider]]s, or [[blaze]]s.<ref>{{bug|MC-106813|||WF}}</ref> Cauldrons do ''not'' deal drowning damage to mobs inside of them<ref>{{bug|MC-152680}}</ref> and [[fish]] act as if there is no water inside it.<ref>{{bug|MC-126819|||WF}}</ref> The player ''cannot'' float or [[swim]] in it, as the water is about level with the player's waist. Jumping in a cauldron does ''not'' produce any bubble or water particles.
A cauldron placed below a down-facing [[pointed dripstone]] that has water placed a block above it slowly fills with water. The same works with [[lava]], allowing for infinite lava generation.
Attempting to add lava or potion to water empties the cauldron.{{only|be}}
The water in a cauldron cannot be sucked up by a [[sponge]], whether the sponge is touching the cauldron or not.
===== Applying dye to cauldron water =====
{{exclusive|bedrock|section=yes}}
{{IN|bedrock}}, leather armor is dyed through a cauldron, so a cauldron can hold dyed [[water]]. {{control|Using}} a dye on a cauldron filled with water colors the water, consuming the dye. Different dyes may be added to produce mixed colors. {{control|Using}} [[leather armor]] or [[leather horse armor]] on the cauldron dyes that item the color of the water, reducing the water in the cauldron by one level for each item dyed.
Attempting to add water, lava or potion to dyed water empties the cauldron.
==== Holding lava ====
[[File:Lava Cauldron.png|150px|thumb|Cauldron filled with lava]]
Cauldrons can be used to hold lava. {{IN|be|ee}}, when a cauldron is already filled with water, it empties the cauldron and makes an extinguishing sound. A cauldron filled with lava emits a light level of 15, similar to lava, and burns any [[entity]] inside of it; {{in|be|ee|short=1}}, this includes mobs that do not take damage from lava like [[zombified piglin]]s.
Lava inside a cauldron does not interact with water outside of the cauldron. The lava disappears upon putting water in the cauldron.
A [[redstone comparator]] with a lava cauldron behind it outputs redstone signal strength of 3.<ref name=JavaLava>{{bug|MC-204393}}</ref><ref>{{bug|MCPE-104824}}</ref>
A cauldron placed below a down-facing [[pointed dripstone]] that has lava placed a block above it slowly fills with lava.
If a cauldron is filled by lava, using glass bottles on the cauldron does nothing.
==== Holding powder snow ====
[[Powder snow]] is currently the only solid material that can be stored in a cauldron. A cauldron slowly fills with powder snow during [[snowfall]], if starting empty or with any layer of powder snow already inside. Up to three layers can be filled. When the cauldron is full, {{ctrl|interacting}} using a [[bucket]], creates a [[powder snow bucket]] and empties the cauldron. Entities standing in the cauldron do not take freeze damage, and entities wearing [[leather boots]] still fall through the powder snow.
A [[redstone comparator]] with a powder snow cauldron behind it outputs a redstone signal strength proportional to the fill level, up to 3.
Contrary to a cauldron filled with water, a powder snow cauldron that is not full cannot be filled up with a powder snow bucket, as {{control|using}} the bucket on the cauldron instead places powder snow against it.
==== Filling cauldrons with potions ====
{{exclusive|bedrock|education|section=yes}}
{{IN|bedrock}}, a cauldron can hold normal [[potion]]s, [[splash potion]]s and [[lingering potion]]s. {{control|Using}} a potion on a cauldron empties the potion and increases the level of the potion in the cauldron by one level. A glass bottle can then be {{control|used}} on a cauldron with a potion in it, filling the bottle with that potion. This reduces the potion in the cauldron by one level.
{{control|Using}} an [[arrow]] on a cauldron that contains a potion transforms the arrow into a [[tipped arrow]] with that potion [[effect]], and reduce the potion in the cauldron by one level. Tipping multiple arrows at once can be more efficient, and it may use more than one level at once. 1 level of potion tips up to 16 arrows, 2 levels up to 32, and a full cauldron can tip a full stack of arrows, resulting in 21.33 tipped arrows per potion.
Attempting to put [[water]], [[lava]] or a different potion into a cauldron with a potion causes an explosion sound, and the cauldron is emptied.
An entity that stands in a cauldron filled to any level with any potion does not receive the effect of the potion.
Using an empty bucket on a cauldron filled with any potion does nothing, as the bucket remains empty and the potion in the cauldron does not empty.
=== Removing dye from items ===
A cauldron with [[water]] can wash the dye off of leather [[armor]] and [[shulker box]]es, and can remove the top-most pattern layer of a [[banner]], by pressing {{control|use}} on the cauldron with the leather armor, shulker box, or banner in hand. Each wash reduces the water in the cauldron by one level. The water does not become dyed while removing dye from objects.
=== Changing profession ===
If a [[village]] has a cauldron that has not been claimed by a [[villager]], any villager that does not already have a profession or [[job site]] block may change their profession to [[leatherworker]].
=== Extinguishing fire ===
A cauldron with [[water]] or [[powder snow]] extinguishes [[entities]] on [[fire]] that fall into it and the entity emits black particles. This includes [[mob]]s, [[player]]s, [[item]]s (if they land in the cauldron before burning up), and flaming [[arrow]]s{{only|je|short=1}}. Flaming arrows stuck into the side are also extinguished. Entities must reach the water or powder snow in it. Each entity extinguished causes the substance in the cauldron to decrease by one level. If the cauldron is filled with powder snow, it then becomes a water cauldron.
=== Redstone component ===
[[File:Cauldron transmission over piston.png|An example of a cauldron used in a [[redstone]] circuit.|thumb]]
{{see also|Redstone circuit}}
A cauldron can act as a power source for a [[redstone comparator]]. With a cauldron behind it (either directly, or separated by an unpowered solid block), a comparator outputs a signal strength proportional to how full the cauldron is: 0 for empty, 1 for one-third full, 2 for two-thirds full, and 3 for completely full or filled with lava. However, if there is a block between the cauldron and the comparator, the comparator does not immediately update.
== Sounds ==
=== Generic ===
{{Sound table/Block/Normal}}
=== Unique ===
{{edition|java}}:
{{Sound table
|sound=Pointed Dripstone drip water cauldron1.ogg
|sound2=Pointed Dripstone drip water cauldron2.ogg
|sound3=Pointed Dripstone drip water cauldron3.ogg
|sound4=Pointed Dripstone drip water cauldron4.ogg
|sound5=Pointed Dripstone drip water cauldron5.ogg
|sound6=Pointed Dripstone drip water cauldron6.ogg
|sound7=Pointed Dripstone drip water cauldron7.ogg
|sound8=Pointed Dripstone drip water cauldron8.ogg
|subtitle=Water drips
|source=block
|description=When dripping water from a pointed dripstone falls into a cauldron
|id=block.pointed_dripstone.drip_water_into_cauldron
|translationkey=subtitles.block.pointed_dripstone.drip_water_into_cauldron
|volume=2.0
|pitch=0.9-1.0
|distance=16}}
{{Sound table
|sound=Pointed Dripstone drip lava cauldron1.ogg
|sound2=Pointed Dripstone drip lava cauldron2.ogg
|sound3=Pointed Dripstone drip lava cauldron3.ogg
|sound4=Pointed Dripstone drip lava cauldron4.ogg
|subtitle=Lava drips
|source=block
|description=When dripping lava from a pointed dripstone falls into a cauldron
|id=block.pointed_dripstone.drip_lava_into_cauldron
|translationkey=subtitles.block.pointed_dripstone.drip_lava_into_cauldron
|volume=2.0
|pitch=0.9-1.0
|distance=16}}
{{Sound table
|sound=Empty water bucket1.ogg
|sound2=Empty water bucket1.ogg
|sound3=Empty water bucket2.ogg
|sound4=Empty water bucket3.ogg
|subtitle=Bucket empties
|source=block
|description=When water from a bucket is placed in a cauldron <ref group=sound><code>empty1</code> plays twice as often as the other sounds</ref>
|id=item.bucket.empty
|translationkey=subtitles.item.bucket.empty
|volume=1.0
|pitch=1.0 <ref group=sound>Except for the second copy of <code>empty1</code>, which is 0.9</ref>
|distance=16}}
{{Sound table
|sound=Fill water bucket1.ogg
|sound2=Fill water bucket2.ogg
|sound3=Fill water bucket3.ogg
|subtitle=Bucket fills
|source=block
|description=When water from a bucket is removed from a cauldron
|id=item.bucket.fill
|translationkey=subtitles.item.bucket.fill
|volume=1.0
|pitch=1.0
|distance=16}}
{{Sound table
|sound=Empty lava bucket1.ogg
|sound2=Empty lava bucket2.ogg
|sound3=Empty lava bucket3.ogg
|subtitle=Bucket empties
|source=block
|description=When lava is placed in a cauldron
|id=item.bucket.empty_lava
|translationkey=subtitles.item.bucket.empty
|volume=1.0
|pitch=1.0
|distance=16}}
{{Sound table
|sound=Fill lava bucket1.ogg
|sound2=Fill lava bucket2.ogg
|sound3=Fill lava bucket3.ogg
|subtitle=Bucket fills
|source=block
|description=When lava is removed from a cauldron
|id=item.bucket.fill_lava
|translationkey=subtitles.item.bucket.fill
|volume=1.0
|pitch=1.0
|distance=16}}
{{Sound table
|sound=Empty powder snow bucket1.ogg
|sound2=Empty powder snow bucket2.ogg
|subtitle=Bucket empties
|source=block
|description=When powder snow is placed in a cauldron
|id=item.bucket.empty_powder_snow
|translationkey=subtitles.item.bucket.empty
|volume=1.0
|pitch=''varies'' <ref group=sound>Can be 1.0, 0.95, or 1.1 for each sound</ref>
|distance=16}}
{{Sound table
|sound=Fill powder snow bucket1.ogg
|sound2=Fill powder snow bucket2.ogg
|subtitle=Bucket fills
|source=block
|description=When powder snow is removed from a cauldron
|id=item.bucket.fill_powder_snow
|translationkey=subtitles.item.bucket.fill
|volume=1.0
|pitch=''varies'' <ref group=sound>Can be 1.0, 0.9, or 1.1 for each sound</ref>
|distance=16}}
{{Sound table
|sound=Bottle empty1.ogg
|sound2=Bottle empty2.ogg
|subtitle=Bottle empties
|source=block
|description=When water from a bottle is placed in a cauldron
|id=item.bottle.empty
|translationkey=subtitles.item.bottle.empty
|volume=1.0
|pitch=1.0
|distance=16}}
{{Sound table
|sound=Bottle fill_water1.ogg
|sound2=Bottle fill_water2.ogg
|sound3=Bottle fill_water3.ogg
|sound4=Bottle fill_water4.ogg
|subtitle=Bottle fills
|source=block
|description=When water from a bottle is removed from a cauldron
|id=item.bottle.fill
|translationkey=subtitles.item.bottle.fill
|volume=1.0
|pitch=1.0
|distance=16}}
{{Sound table
|sound=Empty water bucket1.ogg
|sound2=Empty water bucket2.ogg
|sound3=Empty water bucket3.ogg
|subtitle=Leatherworker works
|source=neutral
|description=Randomly while a leatherworker is working
|id=entity.villager.work_leatherworker
|translationkey=subtitles.entity.villager.work_leatherworker
|volume=0.9
|pitch=0.8-1.2
|distance=16
|foot=1}}
{{edition|bedrock}}:
{{Sound table
|type=bedrock
|sound=Pointed Dripstone drip water cauldron1.ogg
|sound2=Pointed Dripstone drip water cauldron2.ogg
|sound3=Pointed Dripstone drip water cauldron3.ogg
|sound4=Pointed Dripstone drip water cauldron4.ogg
|sound5=Pointed Dripstone drip water cauldron5.ogg
|sound6=Pointed Dripstone drip water cauldron6.ogg
|sound7=Pointed Dripstone drip water cauldron7.ogg
|sound8=Pointed Dripstone drip water cauldron8.ogg
|source=block
|description=When dripping water from a pointed dripstone falls into a cauldron
|id=cauldron_drip.water<br>.pointed_dripstone
|volume=2.0
|pitch=0.9-1.0}}
{{Sound table
|sound=Pointed Dripstone drip lava cauldron1.ogg
|sound2=Pointed Dripstone drip lava cauldron2.ogg
|sound3=Pointed Dripstone drip lava cauldron3.ogg
|sound4=Pointed Dripstone drip lava cauldron4.ogg
|source=block
|description=When dripping lava from a pointed dripstone falls into a cauldron
|id=cauldron_drip.lava<br>.pointed_dripstone
|volume=2.0
|pitch=0.9-1.0}}
{{Sound table
|sound=Fizz.ogg
|source=block
|description=When a different liquid is put in a cauldron with a potion
|id=random.fizz
|volume=1.0
|pitch=0.6-0.8<wbr>{{Checkthecode}}[[Category:Pages with inaccurate sound pitch value]]}}
{{Sound table
|rowspan=8
|sound=Water Splash Old.ogg
|source=block
|description=When dye is added to a cauldron
|id=cauldron.adddye
|volume=0.1
|pitch=1.0}}
{{Sound table
|source=block
|description=When armor is dyed using a cauldron
|id=cauldron.dyearmor
|volume=0.1
|pitch=1.0}}
{{Sound table
|source=block
|description=When dye is removed from armor using a cauldron
|id=cauldron.cleanarmor
|volume=0.1
|pitch=1.0}}
{{Sound table
|source=block
|description=When all patterns are removed from a banner using a cauldron
|id=cauldron.cleanbanner
|volume=0.1
|pitch=1.0}}
{{Sound table
|source=block
|description=When a potion is placed in a cauldron<wbr><ref group=sound name=potionsplash>{{Bug|MCPE-174867}}</ref>
|id=cauldron.fillpotion
|volume=0.1
|pitch=1.0}}
{{Sound table
|source=block
|description=When a potion is taken from a cauldron<wbr><ref group=sound name=potionsplash/>
|id=cauldron.takepotion
|volume=0.1
|pitch=1.0}}
{{Sound table
|source=block
|description=When water from a bucket or bottle is placed in a cauldron<wbr><ref group=sound name=bucketsplash>{{Bug|MCPE-135919}}</ref>
|id=cauldron.fillwater
|volume=0.1
|pitch=1.0}}
{{Sound table
|source=block
|description=When water from a bucket or bottle is removed from a cauldron <ref group=sound name=bucketsplash/>
|id=cauldron.takewater
|volume=0.1
|pitch=1.0}}
{{Sound table
|sound=Empty lava bucket1.ogg
|sound2=Empty lava bucket2.ogg
|sound3=Empty lava bucket3.ogg
|source=block
|description=When lava is placed in a cauldron
|id=bucket.empty_lava
|volume=1.0
|pitch=1.0}}
{{Sound table
|sound=Fill lava bucket1.ogg
|sound2=Fill lava bucket2.ogg
|sound3=Fill lava bucket3.ogg
|source=block
|description=When lava is removed from a cauldron
|id=bucket.fill_lava
|volume=1.0
|pitch=1.0}}
{{Sound table
|sound=Empty powder snow bucket1.ogg
|sound2=Empty powder snow bucket2.ogg
|source=block
|description=When powder snow is placed in a cauldron
|id=bucket.empty_powder_snow
|volume=1.0
|pitch=1.0}}
{{Sound table
|sound=Fill powder snow bucket1.ogg
|sound2=Fill powder snow bucket2.ogg
|source=player
|description=When powder snow is removed from a cauldron
|id=bucket.fill_powder_snow
|volume=1.0
|pitch=1.0}}
{{Sound table
|sound=Empty water bucket1.ogg
|sound2=Empty water bucket2.ogg
|sound3=Empty water bucket3.ogg
|source=block
|description=Randomly while a leatherworker is working
|id=bucket.fill_water
|volume=1.0
|pitch=1.0
|foot=1}}
== Data values ==
=== ID ===
{{edition|java}}:
{{ID table
|edition=java
|showblocktags=y
|showforms=y
|generatetranslationkeys=y
|displayname=Cauldron
|spritetype=block
|nameid=cauldron
|blocktags=cauldrons
|translationkey=block.minecraft.cauldron,item.minecraft.cauldron}}
{{ID table
|displayname=Lava Cauldron
|spritename=cauldron
|spritetype=block
|nameid=lava_cauldron
|blocktags=cauldrons
|form=block}}
{{ID table
|displayname=Powder Snow Cauldron
|spritename=cauldron
|spritetype=block
|nameid=powder_snow_cauldron
|blocktags=cauldrons
|form=block}}
{{ID table
|displayname=Water Cauldron
|spritename=cauldron
|spritetype=block
|nameid=water_cauldron
|blocktags=cauldrons
|form=block
|foot=1}}
{{edition|bedrock}}:
{{ID table
|edition=bedrock
|firstcolumnname=Type
|shownumericids=y
|showforms=y
|generatetranslationkeys=y
|displayname=Normal block
|spritename=cauldron
|spritetype=block
|nameid=cauldron
|id=118
|form=block
|itemform=item.cauldron}}
{{ID table
|displayname=Brighting block
|spritename=cauldron
|spritetype=block
|nameid=lava_cauldron
|id=465
|form=block
|translationkey=-}}
{{ID table
|displayname=Item
|spritename=cauldron
|spritetype=item
|nameid=cauldron
|id=432
|form=item
|foot=1}}
{{ID table
|notnamespaced=y
|displayname=Block entity
|spritename=cauldron
|spritetype=block
|nameid=Cauldron
|foot=1}}
=== Block states ===
{{see also|Block states}}
{{/BS}}
=== Block data ===
{{IN|be}}, a cauldron has a block entity associated with it that holds additional data about the block.
See [[Bedrock Edition level format/Block entity format]].
== Achievements ==
{{load achievements|Tie Dye Outfit}}
== History ==
{{History|java}}
{{History||1.0.0|snap=Beta 1.9 Prerelease 2|[[File:Cauldron JE1.png|32px]] Cauldrons are present in the code, but are not assigned to a [[block]] ID (and thus are unobtainable without [http://www.minecraftforum.net/topic/673742-19-pre2-cauldron-block/ mods] (archived link: [https://web.archive.org/web/20141222205821/https://dl.dropboxusercontent.com/u/19728555/cauldron.zip])).}}
{{History|||snap=Beta 1.9 Prerelease 3|[[File:Cauldron (item) JE1 BE1.png|32px]] Cauldrons have been given a [[block]] ID, an [[item]] ID, and a [[crafting]] recipe.}}
{{History||1.2.1|snap=12w06a|Cauldrons have now become [[renewable]], due to [[zombie]]s sometimes dropping iron ingots.}}
{{History||1.4.2|snap=12w40a|Empty cauldrons can now be found in [[witch hut]]s.}}
{{History||1.5|snap=13w02a|[[File:Cauldron JE2.png|32px]] The walls inside of the cauldron now use the bottom texture, and the cauldron now has no bottom.<ref name="whatdoyouputinacauldrontomakeitlighter">{{bug|MC-6772}}</ref>}}
{{History|||snap=13w02b|[[File:Cauldron JE1.png|32px]] Fixed the model error from 13w02a.}}
{{History||1.8|snap=14w03a|[[File:Cauldron JE4.png|32px]] Cauldrons now appear completely opaque.<ref>{{bug|MC-44990}}</ref>}}
{{History|||snap=14w03b|[[File:Cauldron JE1.png|32px]] Cauldrons now render as normal again.}}
{{History|||snap=14w06a|Cauldrons now have extra planes inside the feet. These planes are now rendered solid, so the [[player]] cannot see through the [[water]].{{info needed|what exactly does this mean?}}}}
{{History|||snap=14w10a|[[File:Cauldron JE6.png|32px]] The cauldron's feet now have planes on all sides.}}
{{History||1.11|snap=16w39a|Cauldrons now generate naturally in jail cells in [[woodland mansion]]s.}}
{{History||July 19, 2017|link=https://twitter.com/jeb_/status/887599625045250048|[[Jeb]] tweets image of a new jungle [[planks]], cauldron and [[dandelion]] textures.}}
{{History||1.13|snap=17w47a|Prior to [[1.13/Flattening|''The Flattening'']], this [[block]]'s numeral ID was 118, and the [[item]]'s was 380.}}
{{History||1.14|snap=18w43a|[[File:Cauldron JE7.png|32px]]<br/>[[File:Cauldron (item) JE2 BE2.png|32px]] The textures of cauldrons have been changed.}}
{{History|||snap=18w48a|Cauldrons now generate in the updated [[plains]] [[village]]s.}}
{{History|||snap=18w49a|Cauldrons now generate in the updated [[savanna]] villages and the new [[snowy tundra]] villages.}}
{{History|||snap=18w50a|Cauldrons now generate in the updated [[desert]] and [[taiga]] villages.}}
{{History|||snap=19w03a|The numerous missing cullface arguments for the cauldron have been fixed.}}
{{History|||snap=19w11a|Cauldrons now serve as leatherworker [[villager]]s' job site block.}}
{{History|||snap=19w13a|The cauldron's hitbox has been fixed.<ref>{{bug|MC-129205}}</ref>}}
{{History||1.17|snap=20w45a|Normal and water cauldrons have been split into different blocks, making filled cauldrons no longer work as a workstation for villagers.<ref name="technicalunemployment">{{bug|MC-204430}}</ref>
|This also means that any [[structure]]s before this snapshot that have cauldron(s) fill with water now no longer generate(s) cauldron. Instead, water cauldron(s) will generate.}}
{{History|||snap=20w48a|Cauldrons can now collect water and lava dripped by [[pointed dripstone]].}}
{{History|||snap=21w11a|[[Lava bucket]]s and [[powder snow bucket]]s can now be emptied into any filled cauldron.}}
{{History|||snap=21w13a|Filled cauldrons work again as a workstation for villagers.}}
{{History||1.20|snap=23w12a|Cauldrons now generate in [[trail ruins]].}}
{{History|pocket alpha}}
{{History||v0.14.0|snap=build 1|[[File:Cauldron BE1.png|32px]]<br/>[[File:Cauldron (item) JE1 BE1.png|32px]] Added cauldrons.
|Cauldrons are generated naturally in [[witch hut]]s.}}
{{History||v0.15.0|snap=build 1|Cauldrons can now be moved by [[piston]]s.}}
{{History|pocket}}
{{History||1.1.0|snap=alpha 1.1.0.0|Cauldrons now generate naturally in [[woodland mansion]]s, their fullness status is unknown.}}
{{History|bedrock}}
{{History||1.10.0|snap=beta 1.10.0.3|[[File:Cauldron BE2.png|32px]] The textures of cauldrons have been changed.
|Cauldrons now generate in tannery houses in [[village]]s.}}
{{History||?|[[File:Cauldron JE7.png|32px]] The textures of cauldrons have been changed.}}
{{History|console}}
{{History||xbox=TU7|xbone=CU1|ps=1.0|wiiu=Patch 1|switch=1.0.1|[[File:Cauldron JE1.png|32px]]{{verify|Was this the actually used model?}}[[File:Cauldron (item) JE1 BE1.png|32px]] Added cauldrons.}}
{{History||xbox=TU60|xbone=CU51|ps=1.64|wiiu=Patch 30|switch=1.0.11|[[Water]] in a cauldron can now be [[dye]]d.
|[[Armor]] can be dyed in a cauldron filled with dyed water.
|Cauldrons can no longer be pushed by [[piston]]s.}}
{{History||xbox=none|xbone=none|ps=1.90|wiiu=none|switch=none|[[File:Cauldron JE7.png|32px]]{{verify|Was this the actually used model?}}<br/>[[File:Cauldron (item) JE2 BE2.png|32px]] The textures of cauldrons have been changed.}}
{{History|new 3ds}}
{{History||0.1.0|[[File:Cauldron BE1.png|32px]]<br/>[[File:Cauldron (item) JE1 BE1.png|32px]] Added cauldrons.}}
{{History|foot}}
=== Water cauldron ===
{{History|java}}
{{History||1.0.0|snap=Beta 1.9 Prerelease 2|[[File:Water Cauldron (level 1) JE1.png|32px]] [[File:Water Cauldron (level 2) JE1.png|32px]] [[File:Water Cauldron JE1.png|32px]] If made to work with a mod, cauldrons can be filled with a [[water bucket]].
|Cauldron water transparency appears inconsistent depending on hardware.}}
{{History||1.3.1|snap=12w22a|Cauldrons can now be filled with [[water]], if placed outside during [[rain]] or a [[thunderstorm]].}}
{{History||1.4.2|snap=12w34a|Holding a piece of [[Dyeing|dyed]] leather [[armor]] and right-clicking a [[water]]-filled cauldron now washes away all [[dye]]s applied to the leather armor.}}
{{History||1.5|snap=13w02a|[[File:Water Cauldron (level 1) JE2.png|32px]] [[File:Water Cauldron (level 2) JE2.png|32px]] [[File:Water Cauldron JE2.png|32px]] The walls inside of the cauldron now use the bottom texture, and the cauldron now has no bottom.<ref name="whatdoyouputinacauldrontomakeitlighter"/>}}
{{History|||snap=13w02b|[[File:Water Cauldron (level 1) JE1.png|32px]] [[File:Water Cauldron (level 2) JE1.png|32px]] [[File:Water Cauldron JE1.png|32px]] Fixed the model error from 13w02a.}}
{{History||1.6.1|snap=13w18a|When used with a [[redstone comparator]], cauldrons now output a signal varying in strength according to the amount of water inside.}}
{{History||1.7.2|snap=13w43a|Cauldrons now extinguish burning [[entity|entities]].}}
{{History||1.8|snap=14w10a|[[File:Water Cauldron (level 1) JE4.png|32px]] [[File:Water Cauldron (level 2) JE4.png|32px]] [[File:Water Cauldron JE4.png|32px]] The cauldron's feet now have planes on all sides.}}
{{History|||snap=14w30a|Right-clicking a non-empty cauldron with a [[banner]] now removes the top-most pattern layer.}}
{{History||1.9|snap=15w43a|A cauldron now generates within [[igloo]] basements, {{frac|2|3}} full.}}
{{History|||snap=15w44a|A full cauldron can now be emptied with a [[bucket]], filling the bucket with [[water]].}}
{{History||1.11|snap=16w32a|When a cauldron washes a dyed item (leather [[armor]] or [[banner]]), it reduces its water level by 1.}}
{{History|||snap=16w33a|A [[water bottle]] is now able to add 1 [[water]] level to a cauldron.}}
{{History||1.13|snap=18w10d|[[Shulker box]]es can now be undyed in a cauldron.}}
{{History|||snap=18w15a|[[File:Water Cauldron (level 1) JE5.png|32px]] [[File:Water Cauldron (level 2) JE5.png|32px]] [[File:Water Cauldron JE5.png|32px]] [[Water]] in cauldrons is now white colored.<ref>{{bug|MC-128253}}</ref>}}
{{History|||snap=18w20b|[[File:Water Cauldron (level 1) JE6.png|32px]] [[File:Water Cauldron (level 2) JE6.png|32px]] [[File:Water Cauldron JE6.png|32px]] Cauldron water is now colored again, depending on the biome.
|[[File:Swamp Water Cauldron JE1.png|32px]] [[File:Warm Ocean Water Cauldron JE1.png|32px]] [[File:Lukewarm Ocean Water Cauldron JE1.png|32px]] [[File:Cold Ocean Water Cauldron JE1.png|32px]] [[File:Frozen Ocean Water Cauldron JE1.png|32px]] This currently affects ocean temperature variants and swamps.
|[[File:Swamp Hills Water Cauldron JE1.png|32px]] Swampland M water has a yellowish color while in a cauldron.<ref>{{bug|MC-128558}}</ref>}}
{{History|||snap=pre3|[[File:Swamp Water Cauldron JE1.png|32px]] Swampland M water now has the same [[water]] color in cauldrons as regular [[swamp]]s.}}
{{History||1.14|snap=18w43a|[[File:Water Cauldron (level 1) JE7.png|32px]] [[File:Water Cauldron (level 2) JE7.png|32px]] [[File:Water Cauldron JE7.png|32px]]<br>[[File:Swamp Water Cauldron JE2.png|32px]] [[File:Warm Ocean Water Cauldron JE2.png|32px]] [[File:Lukewarm Ocean Water Cauldron JE2.png|32px]] [[File:Cold Ocean Water Cauldron JE2.png|32px]] [[File:Frozen Ocean Water Cauldron JE2.png|32px]] The textures of cauldrons have been changed.}}
{{History|||snap=19w03a|The numerous missing cullface arguments for the water cauldron have been fixed.}}
{{History||1.17|snap=20w45a|Normal and water cauldrons have been split into different blocks, making filled cauldrons no longer work as a workstation for villagers.<ref name="technicalunemployment"/>
|This also means that any [[structure]]s before this snapshot that have cauldron(s) fill with water now no longer generate(s) cauldron. Instead, water cauldron(s) will generate.}}
{{History|||snap=21w13a|Filled cauldrons work again as a workstation for villagers.}}
{{History|pocket alpha}}
{{History||v0.14.0|snap=build 1|[[File:Water Cauldron (level 1) BE1.png|32px]] [[File:Water Cauldron (level 2) BE1.png|32px]] [[File:Water Cauldron BE1.png|32px]] Added water cauldrons.
|[[Water]] color in cauldrons can be changed by adding [[dye]]s. [[Item]]s dipped in the water are dyed that color.}}
{{History||v0.15.0|snap=build 1|Cauldrons are now used to dye leather [[horse armor]].
|Water cauldrons can now be moved by [[piston]]s.}}
{{History|pocket}}
{{History||1.0.0|snap=alpha 0.17.0.1|Cauldrons now generate naturally in [[igloo]] basements.
|Cauldrons now extinguish burning [[entity|entities]].}}
{{History|bedrock}}
{{History||1.10.0|snap=beta 1.10.0.3|[[File:Water Cauldron (level 1) BE2.png|32px]] [[File:Water Cauldron (level 2) BE2.png|32px]] [[File:Water Cauldron BE2.png|32px]] The textures of cauldrons have been changed.}}
{{History||1.20.0|snap=beta 1.20.0.20|[[File:Water Cauldron (level 1) MCPE-170427.png|32px]] [[File:Water Cauldron (level 2) MCPE-170427.png|32px]] [[File:Water Cauldron MCPE-170427.png|32px]] [[Water]] in cauldrons now looks like lava.<ref>{{bug|MCPE-170427}}</ref>}}
{{History||1.20.10|snap=beta 1.20.10.20|[[File:Water Cauldron (level 1) BE2.png|32px]] [[File:Water Cauldron (level 2) BE2.png|32px]] [[File:Water Cauldron BE2.png|32px]] Cauldron water now uses the correct texture.}}
{{History|console}}
{{History||xbox=TU7|xbone=CU1|ps=1.0|wiiu=Patch 1|switch=1.0.1|[[File:Water Cauldron (level 1) JE1.png|32px]] [[File:Water Cauldron (level 2) JE1.png|32px]] [[File:Water Cauldron JE1.png|32px]]{{verify|Were these the models used?}} Added water cauldrons.}}
{{History||xbox=TU12|[[Water]] is no longer removed from a [[water bucket]] when filling a cauldron in [[creative]] mode.}}
{{History||xbox=TU14|ps=1.04|Cauldrons fill with water if placed outside during [[rain]] or a [[thunderstorm]].}}
{{History||xbox=TU31|xbone=CU19|ps=1.22|wiiu=Patch 3|Cauldrons with [[water]] in them extinguish burning [[entity|entities]], taking away one water level each time.}}
{{History|new 3ds}}
{{History||0.1.0|[[File:Water Cauldron (level 1) BE1.png|32px]] [[File:Water Cauldron (level 2) BE1.png|32px]] [[File:Water Cauldron BE1.png|32px]]{{verify|Were these the models used?}} Added cauldrons.
|Water color in cauldrons can be changed by adding [[dye]]s.
|Cauldrons can be used to [[dye]] leather [[armor]].}}
{{History|foot}}
=== Lava cauldron ===
{{History|Java}}
{{History||1.17|snap=20w45a|[[File:Lava Cauldron JE1.png|32px]] Cauldrons can now be filled with [[lava]].}}
{{History|||snap=21w20a|Lava cauldrons now emits redstone signal strength of 3.<ref name=JavaLava/>}}
{{History|bedrock}}
{{History||1.9.0|snap=beta 1.9.0.2|[[File:Lava Cauldron BE1.png|32px]] Cauldrons can now be filled with lava.}}
{{History||1.10.0|snap=beta 1.10.0.3|[[File:Lava Cauldron BE2.png|32px]] The texture of cauldrons filled with lava has been changed.}}
{{History|console}}
{{History||xbox=none|xbone=none|ps=1.88|wiiu=none|switch=none|[[File:Lava Cauldron LCE1.png|32px]] Cauldrons can now be filled with lava.}}
{{History||xbox=none|xbone=none|ps=1.90|wiiu=none|switch=none|[[File:Lava Cauldron LCE2.png|32px]] The texture of cauldrons filled with lava has been changed.}}
{{History|foot}}
=== Powder Snow Cauldron ===
{{History|java}}
{{History||1.17|snap=20w46a|[[File:Powder Snow Cauldron (level 1) JE1.png|32px]] [[File:Powder Snow Cauldron (level 2) JE1.png|32px]] [[File:Powder Snow Cauldron JE1.png|32px]] Cauldrons can now be filled with powder snow.}}
{{History||1.17.1|snap=Pre-release 1|Powder snow now fills twice as fast in a cauldron.}}
{{History|bedrock}}
{{History||1.17.0|snap=beta 1.17.0.52|[[File:Powder Snow Cauldron (level 1) JE1.png|32px]] [[File:Powder Snow Cauldron (level 2) JE1.png|32px]] [[File:Powder Snow Cauldron JE1.png|32px]] Cauldrons can now be filled with powder snow.}}
{{History|foot}}
=== Potion cauldron ===
{{cleanup|Many potion cauldrons here are listed as being added in versions where said potion did not exist yet - please rearrange and add new history entries accordingly}}
{{History|java}}
{{History||1.0.0|snap=Beta 1.9 Prerelease 2|[[File:Arrran Cauldron 1.png|32px]] [[File:Arrran Cauldron 2.png|32px]] [[File:Arrran Cauldron 3.png|32px]] [[File:Arrran Cauldron 4.png|32px]] <br/>[[File:Cauldron (item) JE1 BE1.png|32px]] Cauldrons are intended to be used for the creation of [[potion]]s.
|Cauldrons can be made to work with a mod, through which the following has been revealed:
* Applying a [[potion]] ingredient to a water cauldron cause it to change to a differently-colored [[lava]] texture, and adding any further potion ingredients to the filled cauldron cause the [[liquid]] to change color.
* Scooping out a potion with ingredients applied cause the potion to have an effect related to the ingredient, e.g. a potion brewed with a [[magma cream]] have [[Fire Resistance]] as an effect.}}
{{History|||snap=Beta 1.9 Prerelease 3|The system was deemed too complex and not user-friendly,<ref>{{Tweet|jeb|119466949708222465|Potions are delayed because *add to cauldron, pick up, look at tooltip, pour back into cauldron, repeat* was extremely tedious|September 29, 2011}}</ref> so the cauldron's ability to brew potions has been replaced with the [[brewing stand]].<ref>{{Tweet|jeb|119710836469149697|A quick discussion with @notch led me in on a new way of doing the potion brewing. Cauldron is out...|September 30, 2011}}</ref><ref>{{Tweet|jeb|119762786619359232|Look back at me! Your Cauldron is now a Brewing Stand. Anything's possible when working with interaction design.|September 30, 2011}}</ref> That brewing system is finalized and doesn't change in the rest of the pre-releases.}}
{{History|pocket alpha}}
{{History||v0.14.0|snap=build 1|[[File:Invisibility Potion Cauldron BE1.png|32px]] [[File:Jump Boost Potion Cauldron BE1.png|32px]] [[File:Fire Resistance Potion Cauldron BE1.png|32px]] [[File:Speed Potion Cauldron BE1.png|32px]] [[File:Slowness Potion Cauldron BE1.png|32px]] [[File:Water Breathing Potion Cauldron BE1.png|32px]] [[File:Instant Health Potion Cauldron BE1.png|32px]] [[File:Instant Damage Potion Cauldron BE1.png|32px]] [[File:Poison Potion Cauldron BE1.png|32px]] [[File:Regeneration Potion Cauldron BE1.png|32px]] [[File:Strength Potion Cauldron BE1.png|32px]] [[File:Weakness Potion Cauldron BE1.png|32px]] [[File:Wither Potion Cauldron BE1.png|32px]] [[File:Turtle Master Potion Cauldron BE1.png|32px]] [[File:Slow Falling Potion Cauldron BE1.png|32px]] Cauldrons can store [[potion]]s, and [[explosion|explode]] if potions are mixed.}}
{{History||v0.15.0|snap=build 1|Cauldrons are now used to make [[tipped arrow]]s.}}
{{History|bedrock}}
{{History||1.10.0|snap=beta 1.10.0.3|[[File:Invisibility Potion Cauldron BE2.png|32px]] [[File:Jump Boost Potion Cauldron BE2.png|32px]] [[File:Fire Resistance Potion Cauldron BE2.png|32px]] [[File:Speed Potion Cauldron BE2.png|32px]] [[File:Slowness Potion Cauldron BE2.png|32px]] [[File:Water Breathing Potion Cauldron BE2.png|32px]] [[File:Instant Health Potion Cauldron BE2.png|32px]] [[File:Instant Damage Potion Cauldron BE2.png|32px]] [[File:Poison Potion Cauldron BE2.png|32px]] [[File:Regeneration Potion Cauldron BE2.png|32px]] [[File:Strength Potion Cauldron BE2.png|32px]] [[File:Weakness Potion Cauldron BE2.png|32px]] [[File:Wither Potion Cauldron BE2.png|32px]] [[File:Turtle Master Potion Cauldron BE2.png|32px]] [[File:Slow Falling Potion Cauldron BE2.png|32px]] The textures of cauldrons filled with [[potion]]s have been changed.}}
{{History|console}}
{{History||xbox=TU60|xbone=CU51|ps=1.64|wiiu=Patch 30|switch=1.0.11|[[File:Invisibility Potion Cauldron BE1.png|32px]] [[File:Jump Boost Potion Cauldron BE1.png|32px]] [[File:Fire Resistance Potion Cauldron BE1.png|32px]] [[File:Speed Potion Cauldron BE1.png|32px]] [[File:Slowness Potion Cauldron BE1.png|32px]] [[File:Water Breathing Potion Cauldron BE1.png|32px]] [[File:Instant Health Potion Cauldron BE1.png|32px]] [[File:Instant Damage Potion Cauldron BE1.png|32px]] [[File:Poison Potion Cauldron BE1.png|32px]] [[File:Regeneration Potion Cauldron BE1.png|32px]] [[File:Strength Potion Cauldron BE1.png|32px]] [[File:Weakness Potion Cauldron BE1.png|32px]] [[File:Wither Potion Cauldron BE1.png|32px]] [[File:Turtle Master Potion Cauldron BE1.png|32px]] [[File:Slow Falling Potion Cauldron BE1.png|32px]]{{verify|Were these the models used?}} Cauldrons can now be filled with [[potion]]s and make an explosion [[sound]] if they are mixed.
|[[Effect]]s can now be applied to [[arrow]]s by using them on a potion-filled cauldron.}}
{{History||xbox=none|xbone=none|ps=1.90|wiiu=none|switch=none|[[File:Invisibility Potion Cauldron BE2.png|32px]] [[File:Jump Boost Potion Cauldron BE2.png|32px]] [[File:Fire Resistance Potion Cauldron BE2.png|32px]] [[File:Speed Potion Cauldron BE2.png|32px]] [[File:Slowness Potion Cauldron BE2.png|32px]] [[File:Water Breathing Potion Cauldron BE2.png|32px]] [[File:Instant Health Potion Cauldron BE2.png|32px]] [[File:Instant Damage Potion Cauldron BE2.png|32px]] [[File:Poison Potion Cauldron BE2.png|32px]] [[File:Regeneration Potion Cauldron BE2.png|32px]] [[File:Strength Potion Cauldron BE2.png|32px]] [[File:Weakness Potion Cauldron BE2.png|32px]] [[File:Wither Potion Cauldron BE2.png|32px]] [[File:Turtle Master Potion Cauldron BE2.png|32px]] [[File:Slow Falling Potion Cauldron BE2.png|32px]]{{verify|Were these the models used?}} The textures of cauldrons filled with [[potion]]s have been changed.}}
{{History|new 3ds}}
{{History||0.1.0|[[File:Invisibility Potion Cauldron BE1.png|32px]] [[File:Jump Boost Potion Cauldron BE1.png|32px]] [[File:Fire Resistance Potion Cauldron BE1.png|32px]] [[File:Speed Potion Cauldron BE1.png|32px]] [[File:Slowness Potion Cauldron BE1.png|32px]] [[File:Water Breathing Potion Cauldron BE1.png|32px]] [[File:Instant Health Potion Cauldron BE1.png|32px]] [[File:Instant Damage Potion Cauldron BE1.png|32px]] [[File:Poison Potion Cauldron BE1.png|32px]] [[File:Regeneration Potion Cauldron BE1.png|32px]] [[File:Strength Potion Cauldron BE1.png|32px]] [[File:Weakness Potion Cauldron BE1.png|32px]] [[File:Wither Potion Cauldron BE1.png|32px]] [[File:Turtle Master Potion Cauldron BE1.png|32px]] [[File:Slow Falling Potion Cauldron BE1.png|32px]]{{verify|Were these the models used?}} Cauldrons can store [[potion]]s.
|Cauldrons make an explosion [[sound]] if potions are mixed, and the potions disappear.
|Potions inside cauldrons have a bubbling effect.}}
{{History|foot}}
===Cauldron "item"===
{{:Technical blocks/Cauldron}}
==Issues==
{{issue list}}
==Trivia==
*[[Arrow]]s "stick" to the [[water]] in a cauldron.
*The inside of a cauldron is 0.25 ({{frac|1|4}}) blocks tall.
*A cauldron holding water is the only way to have water in [[the Nether]] without the use of [[commands]].
==Renders==
; Normal water
<gallery>
Water Cauldron (level 1).png | Level 1
Water Cauldron (level 2).png | Level 2
Water Cauldron.png | Level 3 - full
Water Cauldron (level 1) BE.png | Level 1 (Bedrock Edition)
Water Cauldron (level 2) BE.png | Level 2 (Bedrock Edition)
Water Cauldron BE.png | Level 3 - full (Bedrock Edition)
</gallery>
;Dyed water {{Only|BE}}
<gallery>
Cauldron (filled with white water).png|White Water Cauldron
Cauldron (filled with light gray water).png|Light Gray Water Cauldron
Cauldron (filled with gray water).png|Gray Water Cauldron
Cauldron (filled with black water).png|Black Water Cauldron
Cauldron (filled with brown water).png|Brown Water Cauldron
Cauldron (filled with red water).png|Red Water Cauldron
Cauldron (filled with orange water).png|Orange Water Cauldron
Cauldron (filled with yellow water).png|Yellow Water Cauldron
Cauldron (filled with lime water).png|Lime Water Cauldron
Cauldron (filled with green water).png|Green Water Cauldron
Cauldron (filled with cyan water).png|Cyan Water Cauldron
Cauldron (filled with light blue water).png|Light Blue Water Cauldron
Cauldron (filled with blue water).png|Blue Water Cauldron
Cauldron (filled with purple water).png|Purple Water Cauldron
Cauldron (filled with magenta water).png|Magenta Water Cauldron
Cauldron (filled with pink water).png|Pink Water Cauldron
</gallery>
;Cauldrons filled with potions {{Only|BE}}
<gallery>
Night Vision Potion Cauldron.png|Night Vision Potion Cauldron
Invisibility Potion Cauldron.png|Invisibility Potion Cauldron
Jump Boost Potion Cauldron.png|Leaping Potion Cauldron
Fire Resistance Potion Cauldron.png|Fire Resistance Potion Cauldron
Speed Potion Cauldron.png|Swiftness Potion Cauldron
Slowness Potion Cauldron.png|Slowness Potion Cauldro
Turtle Master Potion Cauldron.png|Turtle Master Potion Cauldron
Water Breathing Potion Cauldron.png|Water Breathing Potion Cauldron
Instant Health Potion Cauldron.png|Healing Potion Cauldron
Instant Damage Potion Cauldron.png|Harming Potion Cauldron
Poison Potion Cauldron.png|Poison Potion Cauldron
Regeneration Potion Cauldron.png|Regeneration Potion Cauldron
Strength Potion Cauldron.png|Strength Potion Cauldron
Weakness Potion Cauldron.png|Weakness Potion Cauldron
Slow Falling Potion Cauldron.png|Slow Falling Potion Cauldron
Wither Potion Cauldron.png|Decay Potion Cauldron
</gallery>
;Powder Snow
<gallery>
Powder Snow Cauldron (level 1).png | Level 1
Powder Snow Cauldron (level 2).png | Level 2
Powder Snow Cauldron.png | Level 3 - full
</gallery>
== Gallery==
<gallery>
The three stages of water height in cauldrons.png| All cauldron states in [[Java Edition]].
Cauldrons potion.png|All [[potion]]s in cauldrons.{{only|be|short=1}}
Cauldrons DyeWater.png|All cauldron [[water]] colors possible with one dye.{{only|be|short=1}}
Brewing Potions.png|How potions were brewed in [[Java Edition Beta 1.9 Prerelease 2|Beta 1.9 Pre-Release 2]] if enabled through a mod.
Dyed Water Cauldrons.jpg|Cauldrons filled with dyed water.
Potion Cauldron.jpg|A cauldron filled with potions.
Arrow Tipping 1.jpg|Using a cauldron to make [[tipped arrow]]s.
Arrow Tipping 2.jpg|Using a cauldron to make [[tipped arrow]]s.
Arrow Tipping 3.jpg|Using a cauldron to make [[tipped arrow]]s.
Snow Cauldron.jpg|A cauldron full of snow.
</gallery>
==References==
{{reflist|2}}
{{Blocks|Utility}}
{{items}}
[[Category:Natural blocks]]
[[Category:Job blocks]]
[[Category:Utility blocks]]
[[Category:Storage]]
[[Category:Manufactured blocks]]
[[Category:Generated structure blocks]]
[[Category:Light sources]]
[[cs:Kotel]]
[[de:Kessel]]
[[es:Caldero]]
[[fr:Chaudron]]
[[hu:Üst]]
[[it:Calderone]]
[[ja:大釜]]
[[ko:가마솥]]
[[nl:Ketel]]
[[pl:Kocioł]]
[[pt:Caldeirão]]
[[ru:Котёл]]
[[th:หม้อปรุงยา]]
[[uk:Казан]]
[[zh:炼药锅]]</li></ul> | 21w11a | ||||
| 21w13a | Can now accept a filled cauldron as a valid workstation. | ||||
| Mason villagers can now sell 4 dripstone blocks for an emerald. | |||||
1.18{{Extension DPL}}<ul><li>[[Raw Iron|Raw Iron]]<br/>{{Item
| image = Raw Iron.png
| renewable = No
| stackable = Yes (64)
}}
'''Raw iron''' is a raw metal resource obtained from mining [[iron ore]].
== Obtaining ==
=== Mining ===
[[Iron ore]] and [[deepslate iron ore]] mined with a [[stone pickaxe]] or higher drops 1 unit of raw iron. If the pickaxe is enchanted with [[Fortune]], it can drop an extra unit per level of Fortune, allowing for a maximum of 4 with Fortune III. If the ore is mined using a pickaxe enchanted with [[Silk Touch]], it drops the ore block instead.
=== Crafting ===
{{Crafting
|showname=1
|Block of Raw Iron
|Output=Raw Iron,9
|type=Material
|foot=1
}}
== Usage ==
The primary usage of raw iron is smelting it into [[iron ingot]]s.
=== Crafting ===
{{crafting usage}}
=== Smelting ingredient ===
{{Smelting
|showname=2
|Raw Iron
|Iron Ingot
|0.7
}}
== Data values ==
=== ID ===
{{edition|java}}:
{{ID table
|edition=java
|showitemtags=y
|showforms=y
|generatetranslationkeys=y
|displayname=Raw Iron
|spritetype=item
|nameid=raw_iron
|form=item
|foot=1}}
{{edition|bedrock}}:
{{ID table
|edition=bedrock
|shownumericids=y
|showforms=y
|notshowbeitemforms=y
|generatetranslationkeys=y
|displayname=Raw Iron
|spritetype=item
|nameid=raw_iron
|form=item
|id=505
|foot=1}}
== History ==
{{History|java}}
{{History||1.17|snap=21w14a|[[File:Raw Iron JE1.png|32px]] Added raw iron.}}
{{History|||snap=April 13, 2021|slink={{Tweet|JasperBoerstra|1381991999952277513}}|[[File:Raw Iron JE2.png|32px]] [[JAPPA]] shows a new raw iron texture.}}
{{History|||snap=21w15a|[[File:Raw Iron JE2.png|32px]] The texture of raw iron has been changed.
|Raw iron can now be used to craft [[block of raw iron]].}}
{{History|||snap=April 16, 2021|slink={{Tweet|JasperBoerstra|1383047666037325829}}|[[File:Raw Iron (pre-release).png|32px]] [[JAPPA]] shows a new raw iron texture again.}}
{{History|||snap=21w16a|[[File:Raw Iron JE3.png|32px]] The texture of raw iron has been changed.}}
{{History|Bedrock}}
{{History||1.17.0|snap=beta 1.17.0.50|[[File:Raw Iron JE2.png|32px]] Added raw iron.}}
{{History|||snap=beta 1.17.0.52|Raw iron are now available without enabling [[experimental gameplay]].}}
{{History|||snap=beta 1.17.0.54|[[File:Raw Iron JE3.png|32px]] The texture of raw iron has been changed.}}
{{History|foot}}
== Issues ==
{{Issue list}}
==Gallery==
<gallery>
JE 1.17 Dev Raw Metals.jpg|Jappa shows raw ore textures.
Jappa Raw Ores 1.jpg|Jappa shows raw ore textures.
Jappa Raw Ores 2.png|Jappa shows raw ore textures.
Jappa Raw Ores 3.jpg|Jappa shows raw ore textures.
Jappa Raw Ores 4.jpg|Jappa shows raw ore textures.
Jappa Raw Ores 5.jpg|Jappa shows raw ore textures.
</gallery>
{{Items}}
[[Category:Non-renewable resources]]
[[de:Roheisen]]
[[es:Hierro en bruto]]
[[fr:Fer brut]]
[[it:Ferro grezzo]]
[[ja:鉄の原石]]
[[lzh:砂鐵]]
[[pl:Surowe żelazo]]
[[pt:Ferro bruto]]
[[ru:Необработанное железо]]
[[uk:Необроблене залізо]]
[[zh:粗铁]]</li><li>[[Dye|Dye]]<br/>{{Item
| title = Dyes
| image = White Dye.png
| extratext = View [[#Gallery|all renders]]
| renewable = Yes
| stackable = Yes (64)
}}
'''Dyes''' are a set of sixteen items used to change the color of [[wool]], [[carpet]]s, [[terracotta]], [[concrete powder]], [[glass]], [[shulker box]]es, [[bed]]s, [[candle]]s, the patterns on [[banner]]s, [[firework star]]s, certain mobs, and text on [[sign]]s and [[hanging sign]]s. {{IN|bedrock}} they can also be used to dye water in a [[cauldron]] (which is thereafter used to dye leather [[armor]]); {{in|java}} leather armor can be dyed directly. {{IN|education}} dyes can also be used to dye [[balloon]]s and [[glow stick]]s.
{{IN|bedrock|education}}, [[bone meal]], [[ink sac]]s, [[lapis lazuli]], and [[cocoa bean]]s can generally substitute for [[white dye]], [[black dye]], [[blue dye]], and [[brown dye]], respectively, in crafting recipes and for use in dyeing items or mobs. However, they have other important uses that aren't related to color, and are therefore not considered true dyes. They are mentioned in this article only in regard to their use as dyeing agents; see their individual articles for complete information about them.
[[File:Dye Recipes.png|400px|thumb|A guide for creating all the dyes]]
== Obtaining ==
<!--[[File:Dye Chart.png|350px|thumb|A guide to crafting all the dyes.{{until|java 1.14}}]]-->
Dyes can be produced by crafting them from plants (mainly flowers), by crafting dyes of different colors together, by smelting plants, or by trading with a [[wandering trader]].
{{loadPage|Crafting/Dye|Crafting|h3}}
=== Smelting ===
{{smelting|head=1|Sea Pickle|Lime Dye|0,2}}
{{smelting|foot=1|Cactus|Green Dye|1||b=Lapis Lazuli|c=Any fuel|d=1}}
=== Trading ===
[[Wandering trader]]s can sell 3 dyes for an [[emerald]]. {{IN|bedrock}}, they can also sell 3 lapis lazuli, bone meal, cocoa beans, or ink sacs for one emerald.
Apprentice-level cleric [[villager]]s sell one lapis lazuli per emerald.
=== Chest loot ===
{{#invoke:LootChest|base3|blue-dye,green-dye,orange-dye,light-blue-dye,yellow-dye,white-dye}}
=== Other ===
Ink sacs can also be created using 1 iron, 1 sulfur, and 4 oxygen in the [[compound creator]]. {{only|bedrock|education}}
== Usage ==
Similar to their use in crafting, [[bone meal]], [[ink sac]]s, [[lapis lazuli]], and [[cocoa beans]] can be substituted for the corresponding dye in any of the following usages unless otherwise specified.{{only|bedrock}} <!--- sections are ordered by craftable dyeable blocks, dyeable items, version exclusive sections, and non-crafting miscellaneous uses--->
=== Dyeing wool and mobs ===
Players can dye wool by placing [[wool]] and any dye in a crafting grid.
{{Crafting
|nocat=1
|Any Wool
|Matching Dye
|Output=Any Wool
}}
Dyes can be {{control|use|text=used}} on sheep to change the color of the wool. Shearing a colored sheep drops the corresponding color of the wool, and the sheep retains the color when the wool regenerates. [[Breeding]] colored sheep produces a lamb colored as one of the parent sheep, or a color resulting from the combination of both parents' color. The color combining follows the same rules that dyes use – red and yellow sheep produce an orange lamb, but a blue and yellow sheep cannot create a green lamb. The unlimited reproduction of colored sheep makes dyeing and shearing sheep infinitely more efficient than just dyeing wool directly.
Dye can also be used on a tamed [[wolf]] or [[cat]] to change the color of its collar from the default red to the color of the dye.
=== Dyeing carpets ===
Carpets can be dyed.
{{Crafting
|Any Carpet
|Matching Dye
|Output= Matching Carpet
|type= Building block
}}
=== Dyeing terracotta ===
[[Terracotta]] can be dyed by placing 8 blocks around a dye on a crafting table.
{{Crafting
|nocat=1
|A1=Terracotta |B1=Terracotta |C1=Terracotta
|A2=Terracotta |B2=Matching Dye |C2=Terracotta
|A3=Terracotta |B3=Terracotta |C3=Terracotta
|Output=Matching Dyed Terracotta,8
}}
=== Creating concrete powder ===
Dyes can also be used to craft [[concrete powder]], which can then be set into their respective [[concrete]] blocks (they cannot be dyed directly).
{{Crafting
|nocat=1
|Sand |Gravel |Sand
|Gravel |Matching Dye |Gravel
|Sand |Gravel |Sand
|Output=Matching Concrete Powder,8
}}
=== Staining glass ===
[[Stained glass]] can be stained by placing 8 blocks of glass around a dye on a [[crafting table]]. Just like regular glass, stained glass can be crafted into stained glass panes. The recipe for this is the same as with regular glass.
{{Crafting
|nocat=1
|A1=Glass |B1=Glass |C1=Glass
|A2=Glass |B2=Matching Dye |C2=Glass
|A3=Glass |B3=Glass |C3=Glass
|Output=Matching Stained Glass,8
|head=1
}}
{{Crafting
|nocat=1
|A1= Glass Pane
|B1= Glass Pane
|C1= Glass Pane
|A2= Glass Pane
|B2= Matching Dye
|C2= Glass Pane
|A3= Glass Pane
|B3= Glass Pane
|C3= Glass Pane
|Output= Matching Stained Glass Pane,8
|type= Decoration block
|foot=1
}}
=== Dyeing shulker boxes ===
[[Shulker box]]es are generated in a light shade of purple (like the [[purpur block]]), but can be dyed any color. They can also be re-dyed as often as desired.
{{Crafting
|ignoreusage=1
|showname=1
|Any Shulker Box
|Matching Dye
|Output=Matching Shulker Box
}}
=== Dyeing beds ===
Players can dye beds by placing a [[bed]] and any color dye in a crafting grid.
{{Crafting
|nocat=1
|Any Bed
|Matching Dye
|Output=Matching Bed
}}
=== Dyeing candles ===
Players can dye [[candles]] by placing an undyed candle and any color dye in a crafting grid.
{{Crafting
|ignoreusage=1
|Candle
|Matching Dye
|Output=Matching Dyed Candle
}}
=== Banner patterns ===
{{main|Banner#Patterns}}
Dyes are used in most banner patterns to determine the pattern and color displayed.
=== Dyeing armor ===
[[File:DyeGraph2.png|200px|thumb|A graph showing all combinations of two dyes on a [[tunic]].]]
Leather [[armor]] can be dyed by:
* Crafting dyes with a piece of leather armor or leather [[horse armor]].{{Only|java}}
* Dousing the leather armor or leather [[horse armor]] in a [[cauldron]] to which dyes have been added.{{Only|bedrock}}
There are 5,713,438<ref>https://anrar4.github.io/DyeLeatherArmor/</ref> (34.1% of sRGB) colors leather armor can be, as it is possible to put more than one dye on the crafting bench alongside the leather armor. Armor can be dyed multiple times with previous colors affecting the final outcome. Colored armor can be reverted to their original color using a [[cauldron]] with undyed water.
The game has a specific formula for calculating the color of dyed armor: each color, in the RGB color model, has a red value, green value, and blue value. For each dye in the crafting grid, and the armor itself (if it is already dyed), the red, green, and blue values are added to running totals. In addition, a running total of the highest value (be it red, green, or blue) is also kept. After this, each total is divided by the number of colors used. This effectively produces the average red, green, blue, and maximum values. The maximum value of the average RGB values is also calculated. Finally, each average RGB value is multiplied by the average maximum value and divided by the maximum of the average RGB values. The modified average RGB values are then used as the final color. This procedure can be summed up with the following equations:
for each color (all "total" variables start at 0 before counting):
totalRed = totalRed + redValue
totalGreen = totalGreen + greenValue
totalBlue = totalBlue + blueValue
totalMaximum = totalMaximum + max(redValue, greenValue, blueValue)
numberOfColors = numberOfColors + 1
averageRed = totalRed / numberOfColors
averageGreen = totalGreen / numberOfColors
averageBlue = totalBlue / numberOfColors
averageMaximum = totalMaximum / numberOfColors
maximumOfAverage = max(averageRed, averageGreen, averageBlue)
gainFactor = averageMaximum / maximumOfAverage
resultRed = averageRed * gainFactor
resultGreen = averageGreen * gainFactor
resultBlue = averageBlue * gainFactor
Due to the way this formula works, the resulting color can never be darker than the average of the input colors and is often lighter and more saturated. Of course, the resulting color can never be lighter or more saturated than the lightest or most saturated input color. In addition, this formula never creates an RGB value higher than 255 (which would be invalid in the 8-bit RGB color model).
If leather armor is renamed on an [[anvil]], it retains its name when dyed or undyed.
;Mixing Samples
: {{ItemSprite|Yellow Dye}} + {{ItemSprite|Yellow Dye}} = {{Tint|leather-chestplate| #{{CalcDye| yellow=2 }} | code=1}}
: {{ItemSprite|Red Dye}} + {{ItemSprite|Blue Dye}} + {{ItemSprite|White Dye}} = {{Tint|leather-chestplate| #{{CalcDye| red=1 | blue=1 | white=1}} | code=1}}
: {{ItemSprite|Green Dye}} + {{ItemSprite|Red Dye}} + {{ItemSprite|Pink Dye}} = {{Tint|leather-chestplate| #{{CalcDye| green=1 | red=1 | pink=1}} | code=1}}
=== Dyeing firework stars ===
A [[firework star]] can have a single color or a combination of up to eight colors when crafted with dyes. Adding one or more dyes to a crafted firework star adds a "fade to color" effect to it, overwriting any existing fade colors.
{{Crafting
|head=1
|ignoreusage=1
|ingredients=[[Gunpowder]] +<br>Any Dye (1–8) +<br>Extra ingredient (optional)
|Gunpowder
|Matching Dye
|Diamond;Glowstone Dust;Head;Gold Nugget;Feather;Fire Charge;
|Output=Matching Firework Star
}}
{{Crafting
|ignoreusage=1
|Matching Firework Star
|Any Dye
|Output=Matching Firework Star
|foot=1
}}
=== Creating balloons ===
Dye can be used to craft balloons.{{only|education}}
{{Crafting
|nocat=1
|A1= Latex
|B1= Matching Dye
|C1= Latex
|A2= Latex
|B2= Helium
|C2= Latex
|A3= Latex
|B3= Lead
|C3= Latex
|Output= Matching Balloon
}}
=== Creating glow sticks ===
Dye can also be used to craft glow sticks.{{only|education}}
{{Crafting
|nocat=1
|A1= Polyethylene
|B1= Hydrogen Peroxide
|C1= Polyethylene
|A2= Polyethylene
|B2= Matching Dye
|C2= Polyethylene
|A3= Polyethylene
|B3= Luminol
|C3= Polyethylene
|Output= Matching Glow Stick
}}
=== Dyeing water inside cauldrons ===
Water can be dyed in a cauldron by holding any dye in the hand and pressing {{Ctrl|use}} on a cauldron filled with water.{{only|bedrock}}
=== Signs ===
Dye can be {{control|used}} on a [[sign]] or a [[hanging sign]] to change the text color. {{IN|bedrock}}, [[ink sac]]s cannot be used for this purpose; black dye must be used to change the text to black.
=== Trading ===
Apprentice, journeyman and expert-level shepherd [[villager]]s buy any of the 12 dyes for an [[emerald]].
== Color values ==
The "color codes" are used to determine the color imparted on sheep, wolf and cat collars, firework stars, [[beacon]] beams, and dyed leather armor. The hex value is shown in the extended tooltips of dyed leather armor; however, to set the color using an NBT data tag in a [[command]], the decimal value must be used instead. The color values for firework stars are slightly different from the ones listed below, and use [[Item colors#Firework stars|these values]] instead.
{| class="wikitable" style="margin:2px; border: 1px solid silver; text-align: left;" data-description="Data values"
! rowspan=2 | Description
! colspan=2 style="text-align:center" | Color Code
|-
! Dec
! <abbr title="Hexadecimal color code">Hex</abbr>
|-
| style="text-align:center" | White || 16383998 || {{color|#F9FFFE}}
|-
| style="text-align:center" | Light gray || 10329495 || {{color|#9D9D97}}
|-
| style="text-align:center" | Gray || 4673362 || {{color|#474F52}}
|-
| style="text-align:center" | Black || 1908001|| {{color|#1D1D21}}
|-
| style="text-align:center" | Brown || 8606770 || {{color|#835432}}
|-
| style="text-align:center" | Red || 11546150 || {{color|#B02E26}}
|-
| style="text-align:center" | Orange || 16351261 || {{color|#F9801D}}
|-
| style="text-align:center" | Yellow || 16701501 || {{color|#FED83D}}
|-
| style="text-align:center" | Lime || 8439583 || {{color|#80C71F}}
|-
| style="text-align:center" | Green || 6192150 || {{color|#5E7C16}}
|-
| style="text-align:center" | Cyan || 1481884|| {{color|#169C9C}}
|-
| style="text-align:center" | Light blue || 3847130 || {{color|#3AB3DA}}
|-
| style="text-align:center" | Blue || 3949738 || {{color|#3C44AA}}
|-
| style="text-align:center" | Purple || 8991416 || {{color|#8932B8}}
|-
| style="text-align:center" | Magenta || 13061821 || {{color|#C74EBD}}
|-
| style="text-align:center" | Pink || 15961002 || {{color|#F38BAA}}
|}
== Sounds ==
{{edition|java}}:
{{Sound table
|rowspan=2
|sound=Dye.ogg
|subtitle=Dye stains
|source=block
|description=When dye is used on a [[sign]]
|id=item.dye.use
|translationkey=subtitles.item.dye.use
|volume=1.0
|pitch=1.0/0.9/0.95/1.1
|distance=16}}
{{Sound table
|subtitle=Dye stains
|source=player
|description=When dye is used on a [[sheep]]
|id=item.dye.use
|translationkey=subtitles.item.dye.use
|volume=1.0
|pitch=1.0/0.9/0.95/1.1
|distance=16
|foot=1}}
{{edition|bedrock}}:
{{Sound table
|type=bedrock
|sound=Dye.ogg
|source=sound
|description=When dye is used on a sign
|id=sign.dye.use
|volume=1.0
|pitch=1.0}}
{{Sound table
|rowspan=3
|sound=Water Splash Old.ogg
|source=block
|description=When dye is added to a cauldron
|id=cauldron.adddye
|volume=0.1
|pitch=1.0}}
{{Sound table
|source=block
|description=When armor is dyed using a cauldron
|id=cauldron.dyearmor
|volume=0.1
|pitch=1.0}}
{{Sound table
|source=block
|description=When dye is removed from armor using a cauldron
|id=cauldron.cleanarmor
|volume=0.1
|pitch=1.0
|foot=1}}
== Achievements ==
{{load achievements|Rainbow Collection;Tie dye outfit}}
== Video ==
{{Video note|These videos are outdated, as it does not include details of the [[Java Edition 1.7.2|1.7.2]] update's changes to the dyeing system/production chain.}}
<div style="text-align:center">
<span style="display:inline-block">{{yt|8YD7oauNZHE}}</span>
<span style="display:inline-block">{{yt|7tETaRt7STM}}</span>
</div>
== History ==
{{History|java beta}}
{{History||January 3, 2011|link=https://web.archive.org/web/0/http://notch.tumblr.com/post/2582321901/2011-here-we-go|Notch mentions adding a "paint" feature if he can figure out how.}}
{{History||January 10, 2011<ref group="n">Supposed time when fragment was filmed. Based on modified date of client.jar/gui/trap.png in [[Beta 1.2]].</ref>|link=https://www.youtube.com/watch?v=cBF2ugTzXqQ&t=181s|[[File:Red Dye (pre-release).png|32px]] Shown rose red in development as part of [[Minecraft: The Story of Mojang]].}}
{{History||1.2|[[File:Ink Sac JE1 BE1.png|32px]] [[File:Red Dye JE1 BE1.png|32px]] [[File:Green Dye JE1 BE1.png|32px]] [[File:Cocoa Beans JE1 BE1.png|32px]] [[File:Lapis Lazuli JE1 BE1.png|32px]] [[File:Purple Dye JE1 BE1.png|32px]] [[File:Cyan Dye JE1 BE1.png|32px]] [[File:Light Gray Dye JE1 BE1.png|32px]] [[File:Gray Dye JE1 BE1.png|32px]] [[File:Pink Dye JE1 BE1.png|32px]] [[File:Lime Dye JE1 BE1.png|32px]] [[File:Yellow Dye JE1 BE1.png|32px]] [[File:Light Blue Dye JE1 BE1.png|32px]] [[File:Magenta Dye JE1 BE1.png|32px]] [[File:Orange Dye JE1 BE1.png|32px]] [[File:Bone Meal JE1 BE1.png|32px]] Added dyes.
|[[File:Black Dye (Recreated).png|32px]] [[File:Red Dye (pre-release).png|32px]] [[File:Green Dye (Recreated).png|32px]] [[File:Brown Dye (Recreated).png|32px]] [[File:Blue Dye (Recreated).png|32px]] [[File:Purple Dye (Recreated).png|32px]] [[File:Cyan Dye (Recreated).png|32px]] [[File:Light Gray Dye (Recreated).png|32px]] [[File:Gray Dye (Recreated).png|32px]] [[File:Pink Dye (Recreated).png|32px]] [[File:Lime Dye (Recreated).png|32px]] [[File:Yellow Dye (Recreated).png|32px]] [[File:Light Blue Dye (Recreated).png|32px]] [[File:Magenta Dye (Recreated).png|32px]] [[File:Orange Dye (Recreated).png|32px]] [[File:White Dye (Recreated).png|32px]] Leftovers of old textures can be seen in [[items.png]] with 100% opacity. The white dye texture was reused for [[Sugar]].
| The colors were as follows:{{verify|Did the color codes remain the same between Beta 1.2 and Java 1.11.2?}}
{{:Color/Java Edition dye colors before 17w06a}}
}}
{{History|java}}
{{History||1.1|snap=11w49a|[[Sheep]] can now regrow their [[wool]] by eating [[grass block|grass]]. Dyed sheep regrow wool in their new color.}}
{{History||1.3.1|snap=12w19a|[[File:Cocoa Beans JE2.png|32px]] The texture of [[cocoa beans]] has been changed.}}
{{History|||snap=1.3|[[File:bone meal changes.gif|32px]] The textures of [[bone meal]], [[cactus green]], cocoa beans and [[rose red]] have been changed. The textures have been lowered one pixel.}}
{{History||1.4.2|snap=12w34a|Added the ability to dye leather [[armor]] and [[wolf]] collars.}}
{{History||1.4.4|snap=1.4.3|Color codes have been changed. The colors of red, brown, blue, purple, cyan, pink, light blue, magenta and orange were adjusted a little vividly.}}
{{History||1.6.1|snap=13w19a|[[Stained clay]] can now be crafted using dyes.}}
{{history||1.7.2|snap=13w36a|With the addition of new [[flower]]s, many secondary and tertiary dyes are now primary dyes.}}
{{History|||snap=13w41a|[[Stained glass]] can now be crafted using dyes.}}
{{History||1.8|snap=14w02a|As cleric [[villager]]s now sell lapis lazuli, all dyes have become fully renewable.}}
{{History|||snap=14w30a|Added [[banner]]s, which can be dyed.}}
{{History||1.9|snap=15w34a|Added [[shield]]s, which can be dyed indirectly by applying a matching [[banner]].}}
{{History||1.11|snap=16w39b|Dyes are now used to change the color of [[shulker box]]es.}}
{{History||1.12|snap=17w06a|Dyes are now used to craft [[concrete powder]].
|Color codes have been changed. All colors are adjusted more vividly. The changes were as follows:
{{:Color/Java Edition dye color changes in 17w06a}}
|Light blue dye, stained glass, and stained glass panes, did not change colors in this update. This means that they still use old colors.<ref name="unchanged dyes">{{Bug|MC-214643}}<br>{{Bug|MC-214641}}</ref>
}}
{{History|||snap=17w15a|Dyes can now apply color to white [[bed]]s.}}
{{History||1.13|snap=17w47a|The different data values for the <code>dye</code> ID have been split up into their own IDs.}}
{{History||1.14|snap=18w43a|[[Bone meal]], [[ink sac]]s, [[cocoa beans]] and [[lapis lazuli]] are no longer considered dyes.
|[[File:White Dye JE1 BE1.png|32px]] [[File:Black Dye JE1 BE1.png|32px]] [[File:Brown Dye JE1 BE1.png|32px]] [[File:Blue Dye JE1 BE1.png|32px]] Added [[white dye|white]], [[black dye|black]], [[brown dye|brown]] and [[blue dye]]s.
|"Rose Red", "Dandelion Yellow" and "Cactus Green" have been renamed to "Red Dye", "Yellow Dye" and "Green Dye", respectively.
|[[Glass pane]]s and [[carpet]]s can now be dyed.
|[[File:Light Gray Dye JE2 BE2.png|32px]] [[File:Gray Dye JE2 BE2.png|32px]] [[File:Red Dye JE2 BE2.png|32px]] [[File:Orange Dye JE2 BE2.png|32px]] [[File:Yellow Dye JE2 BE2.png|32px]] [[File:Lime Dye JE2 BE2.png|32px]] [[File:Green Dye JE2 BE2.png|32px]] [[File:Cyan Dye.png|32px]] [[File:Light Blue Dye JE2 BE2.png|32px]] [[File:Purple Dye JE2 BE2.png|32px]] [[File:Magenta Dye JE2 BE2.png|32px]] [[File:Pink Dye JE2 BE2.png|32px]] The textures of light gray, gray, red, orange, yellow, lime, green, cyan, light blue, purple, magenta, and pink dyes, have been changed. The color texture for light blue dye was not changed to reflect the updated colors from 1.12.<ref name="unchanged dyes"></ref>}}
{{History|||snap=18w44a|The color of the text on [[sign]]s can now be changed with dye.}}
{{History|||snap=18w49a|Yellow dyes can now be found in [[chest]]s in [[village]] mason houses.}}
{{History|||snap=18w50a|Green dyes can now be found in [[chest]]s in [[desert]] [[village]] houses.}}
{{History|||snap=19w05a|Added the [[wandering trader]], which can sell any type of dye.}}
{{History|||snap=19w11a|All 16 types of dyes can now be [[trading|bought]] by shepherd villagers.}}
{{History||1.16.2|snap=Pre-release 2|Reversed the order of dyes to match other colored items in the [[Creative inventory]].<ref name="reverse dye">{{Bug|MC-136553}}</ref>
|Regrouped dyes in the Creative inventory such that white, blue, brown, and black dyes are within and not [[cocoa beans]], [[ink sacs]], [[lapis lazuli]], and [[bone meal]].<ref name="regroup dye">{{Bug|MC-177684}}</ref>}}
{{History||1.17|snap=20w45a|Added [[candle]]s, which can be dyed.}}
{{History|||snap=21w03a|Added a sound for applying dyes.}}
{{History|||snap=21w19a|Candles can no longer be dyed.}}
{{History|||snap=Pre-release 1|Candles can now once again be dyed.}}
{{History||1.20<br>(Experimental)|link=1.19.3|snap=22w42a|The color of the text on [[hanging sign]]s can now be changed with dye.}}
{{History||1.20<br>(Experimental)|link=1.19.4|snap=23w07a|[[Torchflower]]s can now be crafted into orange dye.|[[Pink petals]] can now be crafted into pink dye.}}
{{History||1.20|snap=23w12a|[[Pitcher plant]]s can now be crafted into cyan dye.|Blue, light blue, orange, white, and yellow dye can now be found in [[suspicious gravel]] and [[suspicious sand]] in [[trail ruins]].}}
{{History|||snap=23w14a|Pitcher plants can now craft two [[cyan dye]] instead of one.}}
{{History|||snap=23w16a|Blue, light blue, orange, white, and yellow dye no longer generates in [[suspicious sand]] in [[trail ruins]].|Due to the split of the archaeological loot tables for the suspicious gravel within the [[trail ruins]]; blue, light blue, orange, white, and yellow dye now are in the common loot.}}
{{History|pocket alpha}}
{{History||v0.3.0|[[File:Bone Meal JE1 BE1.png|32px]] [[File:Light Gray Dye JE1 BE1.png|32px]] [[File:Gray Dye JE1 BE1.png|32px]] [[File:Ink Sac JE1 BE1.png|32px]] [[File:Cocoa Beans JE1 BE1.png|32px]] [[File:Red Dye JE1 BE1.png|32px]] [[File:Orange Dye JE1 BE1.png|32px]] [[File:Yellow Dye JE1 BE1.png|32px]] [[File:Lime Dye JE1 BE1.png|32px]] [[File:Green Dye JE1 BE1.png|32px]] [[File:Cyan Dye JE1 BE1.png|32px]] [[File:Light Blue Dye JE1 BE1.png|32px]] [[File:Lapis Lazuli JE1 BE1.png|32px]] [[File:Purple Dye JE1 BE1.png|32px]] [[File:Magenta Dye JE1 BE1.png|32px]] [[File:Pink Dye JE1 BE1.png|32px]] Added dyes. Only [[dandelion yellow]] and [[lapis lazuli]] are currently obtainable and have functionality.}}
{{History||v0.3.2|[[Cactus green]] is now obtainable by smelting [[cacti]].}}
{{History||v0.3.3|[[Bone meal]] is now obtainable via [[crafting]].}}
{{History||v0.4.0|[[Cyan dye]], [[light blue dye]], [[lime dye]], [[magenta dye]], [[orange dye]], [[pink dye]], and [[purple dye]] are now obtainable via crafting.
|[[Rose red]] is now obtainable by smelting red [[mushroom]]s.
|All available dyes, excluding bone meal, can now be used to craft their respective [[wool]] color.}}
{{History||v0.8.0|snap=build 1|[[File:Cocoa Beans JE3 BE2.png|32px]] The texture of cocoa beans has been changed.}}
{{History|||snap=build 3|[[Ink sac]]s, [[cocoa bean]]s, [[gray dye]], and [[light gray dye]] are now available in the [[creative]] [[inventory]].
|Rose red can now be obtained from [[beetroot]]s.}}
{{History||v0.9.0|snap=build 1|Cocoa beans can now be obtained from [[cocoa pod]]s.
|The [[rose]] has been removed and replaced with a new poppy [[flower]] that can be crafted into rose red.}}
{{History|||snap=build 3|All new [[flower]]s can now be [[crafting|crafted]] into dyes. Because of this, many secondary and tertiary dyes are now primary dyes.
|[[Gray dye]] and [[light gray dye]] can now be obtained in [[survival]].}}
{{History|||snap=build 11|[[Terracotta|Stained clay]] can now be crafted using dyes.}}
{{History||v0.11.0|snap=build 1|[[Ink sac]]s can now be obtained from [[squid]].
|Added the ability to dye [[wolf]] collars.}}
{{History||v0.12.1|snap=build 1|Red [[mushroom]]s can no longer be smelted to obtain [[rose red]].}}
{{History||v0.14.0|snap=build 1|[[Cauldron]]s now used for leather dyeing, by applying a dye to a [[water]]-filled cauldron.}}
{{History||v0.16.0|snap=build 1|[[Cocoa bean]]s can no longer be crafted.}}
{{History|pocket}}
{{History||1.0.0|snap=alpha 0.17.0.1|Added a ''Dye'' button for [[sheep]].
|Added [[shulker]]s, which can be dyed.
|Added [[stained glass]]. Stain glass cannot be [[crafting|crafted]], but purple glass generates in [[end city|end cities]].}}
{{History||1.1.0|snap=alpha 1.1.0.0|Dyes can now apply color to a white [[bed]]s.
|Dyes are now used to craft [[concrete powder]].
|The color palette has been changed.}}
{{History|bedrock}}
{{History||1.2.0|snap=beta 1.2.0.2|Dyes can now be used for [[banner]] crafting.
|Dyes can now be used to craft [[firework star]]s.
|[[Stained glass]] is now [[crafting|craftable]], using dyes.}}
{{History||1.4.0|snap=beta 1.2.20.1|[[Lime dye]] can now be obtained from smelting [[sea pickle]]s.
|Dyes can now used to craft [[glow stick]]s and [[balloon]]s.}}
{{History||1.8.0|snap=beta 1.8.0.8|Dyes can now be used to dye [[cat]] collars.}}
{{History|||snap=beta 1.8.0.10|[[File:White Dye JE1 BE1.png|32px]] [[File:Black Dye JE1 BE1.png|32px]] [[File:Brown Dye JE1 BE1.png|32px]] [[File:Blue Dye JE1 BE1.png|32px]] Added [[white dye|white]], [[brown dye|brown]], [[black dye|black]] and [[blue dye]]s, which can be crafted from [[lapis lazuli]], [[bone meal]], [[cocoa beans]] and [[ink sac]]s. This, however, the later four still use as dyes.<ref>{{Bug|MCPE-42473}}</ref>
|"Rose Red", "Dandelion Yellow" and "Cactus Green" have been renamed to "Red Dye", "Yellow Dye" and "Green Dye", respectively.}}
{{History||1.9.0|snap=beta 1.9.0.0|Blue and white dye can now be obtained from [[cornflower]]s and [[lily of the valley]]s.}}
{{History||1.10.0|snap=beta 1.10.0.3|[[Glass pane]]s and [[carpet]]s can now be dyed.
|Only a single dye is now required to apply a banner pattern in a [[loom]].
|Various dyes except black dye, white dye, brown dye and blue dye are now [[trading|sold]] by [[wandering trader]]s.
|[[File:Bone Meal JE2 BE2.png|32px]] [[File:Light Gray Dye JE2 BE2.png|32px]] [[File:Gray Dye JE2 BE2.png|32px]] [[File:Ink Sac JE2 BE2.png|32px]] [[File:Cocoa Beans JE4 BE3.png|32px]] [[File:Red Dye JE3 BE3.png|32px]] [[File:Orange Dye JE2 BE2.png|32px]] [[File:Yellow Dye JE2 BE2.png|32px]] [[File:Lime Dye JE2 BE2.png|32px]] [[File:Green Dye JE2 BE2.png|32px]] [[File:Cyan Dye.png|32px]] [[File:Light Blue Dye JE2 BE2.png|32px]] [[File:Lapis Lazuli JE2 BE2.png|32px]] [[File:Purple Dye JE2 BE2.png|32px]] [[File:Magenta Dye JE2 BE2.png|32px]] [[File:Pink Dye JE2 BE2.png|32px]] The textures of bone meal, light gray, gray, ink sac, cocoa beans, red, orange, yellow, lime, green, cyan, light blue, lapis lazuli, purple, magenta, and pink dyes have been changed.}}
{{History||1.11.0|snap=beta 1.11.0.4|Dye can now be [[trading|sold]] to shepherd [[villager]]s.}}
{{History||1.16.210|snap=beta 1.16.210.59|The color of the text on [[sign]]s can now be changed with dye.}}
{{History|||snap=beta 1.16.210.60|The ability to dye the color of the text on [[sign]]s was temporarily removed.}}
{{History||1.16.220|snap=beta 1.16.220.50|The color of the text on [[sign]]s can now be changed with dye again.}}
{{History||1.17.10|snap=beta 1.17.10.22|Added [[candles]], which can be dyed.}}
{{History|console}}
{{History||xbox=TU1|xbone=CU1|ps=1.0|wiiu=Patch 1|switch=1.0.1|[[File:Bone Meal JE1 BE1.png|32px]] [[File:Light Gray Dye JE1 BE1.png|32px]] [[File:Gray Dye JE1 BE1.png|32px]] [[File:Ink Sac JE1 BE1.png|32px]] [[File:Cocoa Beans JE1 BE1.png|32px]] [[File:Red Dye JE1 BE1.png|32px]] [[File:Orange Dye JE1 BE1.png|32px]] [[File:Yellow Dye JE1 BE1.png|32px]] [[File:Lime Dye JE1 BE1.png|32px]] [[File:Green Dye JE1 BE1.png|32px]] [[File:Cyan Dye JE1 BE1.png|32px]] [[File:Light Blue Dye JE1 BE1.png|32px]] [[File:Lapis Lazuli JE1 BE1.png|32px]] [[File:Purple Dye JE1 BE1.png|32px]] [[File:Magenta Dye JE1 BE1.png|32px]] [[File:Pink Dye JE1 BE1.png|32px]] Added dyes.}}
{{History||xbox=TU9|[[File:Cocoa Beans JE3 BE2.png|32px]] The texture of cocoa beans has been changed.}}
{{History||xbox=none|xbone=none|ps=1.83|wiiu=none|switch=none|[[File:White Dye JE1 BE1.png|32px]] [[File:Black Dye JE1 BE1.png|32px]] [[File:Brown Dye JE1 BE1.png|32px]] [[File:Blue Dye JE1 BE1.png|32px]] Added [[white dye|white]], [[black dye|black]], [[brown dye|brown]], and [[blue dye|blue]] dyes, which can crafted from [[bone meal]], [[ink sac]], [[cocoa beans]], and [[lapis lazuli]].
|"Rose Red", "Dandelion Yellow" and "Cactus Green" have been renamed to "Red Dye", "Yellow Dye" and "Green Dye", respectively.}}
{{History||ps=1.90|[[File:Bone Meal JE2 BE2.png|32px]] [[File:Light Gray Dye JE2 BE2.png|32px]] [[File:Gray Dye JE2 BE2.png|32px]] [[File:Ink Sac JE2 BE2.png|32px]] [[File:Cocoa Beans JE4 BE3.png|32px]] [[File:Red Dye JE2 BE2.png|32px]] [[File:Orange Dye JE2 BE2.png|32px]] [[File:Yellow Dye JE2 BE2.png|32px]] [[File:Lime Dye JE2 BE2.png|32px]] [[File:Green Dye JE2 BE2.png|32px]] [[File:Cyan Dye.png|32px]] [[File:Light Blue Dye JE2 BE2.png|32px]] [[File:Lapis Lazuli JE2 BE2.png|32px]] [[File:Purple Dye JE2 BE2.png|32px]] [[File:Magenta Dye JE2 BE2.png|32px]] [[File:Pink Dye JE2 BE2.png|32px]] The textures of bone meal, light gray, gray, ink sac, cocoa beans, red, orange, yellow, lime, green, cyan, light blue, lapis lazuli, purple, magenta, and pink dyes have been changed.}}
{{History|3ds}}
{{History||0.1.0|[[File:Bone Meal JE1 BE1.png|32px]] [[File:Light Gray Dye JE1 BE1.png|32px]] [[File:Gray Dye JE1 BE1.png|32px]] [[File:Ink Sac JE1 BE1.png|32px]] [[File:Cocoa Beans JE3 BE2.png|32px]] [[File:Red Dye JE1 BE1.png|32px]] [[File:Orange Dye JE1 BE1.png|32px]] [[File:Yellow Dye JE1 BE1.png|32px]] [[File:Lime Dye JE1 BE1.png|32px]] [[File:Green Dye JE1 BE1.png|32px]] [[File:Cyan Dye JE1 BE1.png|32px]] [[File:Light Blue Dye JE1 BE1.png|32px]] [[File:Lapis Lazuli JE1 BE1.png|32px]] [[File:Purple Dye JE1 BE1.png|32px]] [[File:Magenta Dye JE1 BE1.png|32px]] [[File:Pink Dye JE1 BE1.png|32px]] Added dyes from [[Pocket Edition v0.15.4 alpha]].}}
{{History|foot}}
<gallery>
Pre-release dyes.png|Pre-release dye textures hidden within [[Items.png]].
</gallery>
;Notes
{{reflist|group=n}}
== Gallery ==
<gallery>
White Dye.png|White Dye
Light Gray Dye.png|Light Gray Dye
Gray Dye.png|Gray Dye
Black Dye.png|Black Dye
Brown Dye.png|Brown Dye
Red Dye.png|Red Dye
Orange Dye.png|Orange Dye
Yellow Dye.png|Yellow Dye
Lime Dye.png|Lime Dye
Green Dye.png|Green Dye
Cyan Dye.png|Cyan Dye
Light Blue Dye.png|Light Blue Dye
Blue Dye.png|Blue Dye
Purple Dye.png|Purple Dye
Magenta Dye.png|Magenta Dye
Pink Dye.png|Pink Dye
</gallery>
==Issues==
{{issue list}}
== Trivia ==
* Players can obtain each one of every color with 1 cocoa bean, 2 yellow dye, 2 ink sac, 3 green dye, 4 lapis lazuli, 4 red dye, and 6 bone meal (2 bones).
* The dyed sheep breeding behavior mirrors [[wikipedia:Lamarckism|Lamarck's theory]], in which the organisms evolve inheriting the external changes and adaptations of the previous generation, transmitting them to their offspring.
* In ''Bedrock Edition'', tertiary colors, along with their regular crafting recipes, can be crafted with primary colors. E.g.: Magenta can be crafted with one rose red and two bone meals.
* The colors of the dyes match the chat colors in [[color codes]] except for brown (dye only), light aqua, and gold (color codes only).
* The texture for light blue dye still uses the color from prior to the 1.12 World of Color update.<ref name="unchanged dyes"></ref>
== References ==
{{reflist}}
== External Links ==
* Tools for calculating leather dye combination: [https://minecraft.tools/en/armor.php minecraft.tools] (webapp); [https://github.com/pudquick/pyMCdyes/ pyMCDyes] (open-source Python script, outdated); [https://anrar4.github.io/DyeLeatherArmor/ DyeLeatherArmor]: a tool for calculating an exact crafting recipe for any sRGB color
{{Items}}
[[Category:Dyes]]
[[Category:Renewable resources]]
[[cs:Barvivo]]
[[de:Farbstoff]]
[[es:Tinte]]
[[fr:Teinture]]
[[hu:Színezés]]
[[it:Colorante]]
[[ja:染料]]
[[ko:염료]]
[[nl:Kleurstof]]
[[pl:Barwniki]]
[[pt:Corante]]
[[ru:Красители]]
[[th:สีย้อม]]
[[uk:Барвники]]
[[zh:染料]]</li></ul> | 21w37a | Baby villagers are no longer attacked by illagers. | |||
| 21w41a | Tweaked the armorer zombie villager's and weaponsmith zombie villager's textures to remove stray villager pixels. | ||||
| Bedrock Edition | |||||
1.9.0{{Extension DPL}}<ul><li>[[Melon Seeds|Melon Seeds]]<br/>{{Block
|image = <gallery>
Melon Stem Age 0.png | Age 0
Melon Stem Age 1.png | Age 1
Melon Stem Age 2.png | Age 2
Melon Stem Age 3.png | Age 3
Melon Stem Age 4.png | Age 4
Melon Stem Age 5.png | Age 5
Melon Stem Age 6.png | Age 6
Melon Stem Age 7.png | Age 7
</gallery>
| image2 = <gallery>
Attached Melon Stem (N).png | North
Attached Melon Stem (E).png | East
Attached Melon Stem (S).png | South
Attached Melon Stem (W).png | West
</gallery>
| transparent = Yes
| light = No
| tool = none
| renewable = Yes
| stackable = Yes (64)
| flammable = No
| lavasusceptible = No
}}'''Melon seeds''' are items obtained from [[Melon Slice|melon slices]] that can be used to grow melon stems.
'''Melon stems''' are plants grown on [[farmland]] that, over time, grow [[melon]]s on dirt, mud and moss blocks adjacent to them.
== Obtaining ==
=== Breaking ===
When broken, a melon stem drops 0–3 melon seeds. The chance for melon seeds to drop increases with the stem's age.
{| class="wikitable"
! rowspan="3" |[[Resource location]]
! rowspan="3" | Source
! colspan="4" | Default
|-
| colspan="1" rowspan="2" style="text-align:center" | Nothing || colspan="3" style="text-align:center" |{{ItemLink|Melon Seeds|Melon seeds}}
|-
| style="text-align:center" | 1 || style="text-align:center" | 2 || style="text-align:center" | 3
|-
| rowspan="8" |<code>blocks/melon_stem</code>
|{{BlockLink|Melon Stem|Melon stem}} <code>age = 0</code>
| style="text-align:center" |81.3%|| style="text-align:center" |17.42%|| style="text-align:center" |1.24%|| style="text-align:center" |0.03%
|-
|{{BlockLink|Melon Stem|Melon stem}} <code>age = 1</code>
| style="text-align:center" |65.1%|| style="text-align:center" |30.04%|| style="text-align:center" |4.62%|| style="text-align:center" |0.24%
|-
|{{BlockLink|Melon Stem|Melon stem}} <code>age = 2</code>
| style="text-align:center" |51.2%|| style="text-align:center" |38.4%|| style="text-align:center" |9.6%|| style="text-align:center" |0.8%
|-
|{{BlockLink|Melon Stem|Melon stem}} <code>age = 3</code>
| style="text-align:center" |39.44%|| style="text-align:center" |43.02%|| style="text-align:center" |15.64%|| style="text-align:center" |1.9%
|-
|{{BlockLink|Melon Stem|Melon stem}} <code>age = 4</code>
| style="text-align:center" |29.13%|| style="text-align:center" |44.44%|| style="text-align:center" |22.22%|| style="text-align:center" |3.7%
|-
|{{BlockLink|Melon Stem|Melon stem}} <code>age = 5</code>
| style="text-align:center" |21.6%|| style="text-align:center" |43.2%|| style="text-align:center" |28.8%|| style="text-align:center" |6.4%
|-
|{{BlockLink|Melon Stem|Melon stem}} <code>age = 6</code>
| style="text-align:center" |15.17%|| style="text-align:center" |39.82%|| style="text-align:center" |34.84%|| style="text-align:center" |10.16%
|-
|{{BlockLink|Melon Stem|Melon stem}} <code>age = 7</code>
| style="text-align:center" |10.16%|| style="text-align:center" |34.84%|| style="text-align:center" |39.82%|| style="text-align:center" |15.17%
|-
| rowspan="1" |<code>blocks/attached_melon_stem</code>
|{{BlockLink|Attached Melon Stem|Attached Melon stem}}
| style="text-align:center" |10.16%|| style="text-align:center" |34.84%|| style="text-align:center" |39.82%|| style="text-align:center" |15.17%
|}
=== Natural generation ===
Melon stems generate naturally in stem farm inside [[woodland mansion]]s.
Melon stems generate in 20% of the farm plots in [[savanna]] [[village]]s, and 10% of the farm plots in [[desert]] villages.
=== Chest loot ===
{{LootChestItem|melon-seeds}}
=== Crafting ===
{{Crafting
|Melon Slice
|Output= Melon Seeds
|type= Material
}}
=== Trading ===
[[Wandering trader]]s sell melon seeds for 1 [[emerald]].
== Usage ==
=== Farming ===
{{see also|Tutorials/Pumpkin and melon farming}}
Melon seeds can be planted only on [[farmland]], as stems. Over time, a stem grows through several stages<sup>[''[[Talk:Pumpkin Seeds|needs testing]]'']</sup> and, at its final growth stage, will produce [[melon]]s on any adjacent [[dirt]], [[Coarse Dirt|coarse dirt]], [[Rooted Dirt|rooted dirt]], [[Grass Block|grass block]], [[farmland]], [[podzol]], [[mycelium]], [[Moss Block|moss block]], [[mud]] or [[Muddy Mangrove Roots|muddy mangrove roots]]. If a melon is already occupying a spot adjacent to a stem it does not grow more melons until the melons is removed. A single stem can grow an unlimited number of melons. Melon stems need a minimum light level of 10 in the block above the stem to grow and give melons. Melon seeds are affected by [[bone meal]] only with respect to stem growth; bone meal does not help produce the actual melons.
=== Breeding ===
Like other seeds, melon seeds can be used to [[breed]] [[chicken]]s, lead chickens around, and make baby chickens grow up faster by 10% of the remaining time.
=== Taming ===
Like other seeds, melon seeds can be used to tame [[parrot]]s.
=== Composting ===
Placing melon seeds into a [[composter]] has a 30% chance of raising the compost level by 1.
== Melon Stem ==
A '''melon stem''' is the block that is planted on [[farmland]] when melon seeds are used on it. It starts underground, and rises up as the plant grows. The stem is colored green when young, and then yellow once fully grown.
The stem curves once a melon has grown from it. A fully-grown single stem connects to any [[melon]] in an adjacent square, thus there are 5 possible appearances to a stem. If there are multiple melons it can connect to, it favors the east, then west, north, and south. When the melon is removed, the stem returns to its straight shape.
== Sounds ==
{{Sound table/Block/Hard crop}}
== Data values ==
=== ID ===
{{edition|java}}:
{{ID table
|edition=java
|showblocktags=y
|showforms=y
|generatetranslationkeys=y
|displayname=Melon Stem
|spritetype=block
|nameid=melon_stem
|blocktags=bee_growables, crops
|form=block}}
{{ID table
|displayname=Attached Melon Stem
|spritetype=block
|nameid=attached_melon_stem
|form=block}}
{{ID table
|displayname=Melon Seeds
|spritetype=item
|nameid=melon_seeds
|form=item
|foot=1}}
{{edition|bedrock}}:
{{ID table
|edition=bedrock
|shownumericids=y
|showforms=y
|generatetranslationkeys=y
|displayname=Melon Stem
|spritetype=block
|nameid=melon_stem
|id=105
|form=block
|translationkey=-}}
{{ID table
|displayname=Melon Seeds
|spritetype=item
|nameid=melon_seeds
|id=293
|form=item
|foot=1}}
=== Block states ===
{{see also|Block states}}
{{/BS}}
== Advancements ==
{{load advancements|A Seedy Place}}
== History ==
{{info needed section|check if stems floated above farmland upon initial implementation}}
{{History|java beta}}
{{History||1.8|snap=Pre-release|[[File:Melon Seeds JE1 BE1.png|32px]] Added melon seeds.
|[[File:Melon Stem Age 0 JE1.png|32px]] [[File:Stem Age 1 JE1.png|32px]] [[File:Melon Stem Age 2 JE1.png|32px]] [[File:Melon Stem Age 3 JE1.png|32px]] [[File:Melon Stem Age 4 JE1.png|32px]] [[File:Melon Stem Age 5 JE1.png|32px]] [[File:Melon Stem Age 6 JE1.png|32px]] [[File:Melon Stem Age 7 JE1.png|32px]] Added the melon stem, with seven stages of growth.
|Melon seeds can found in the new [[mineshaft]] [[chest]]s.
|[[File:Attached Melon Stem (N) JE1.png|32px]] [[File:Attached Melon Stem (E) JE1.png|32px]] [[File:Attached Melon Stem (S) JE1.png|32px]] [[File:Attached Melon Stem (W) JE1.png|32px]] Melon stems have four slightly visually distinct appearances for each facing direction - the bent part of the stem rotates, but the other two planes do not.
|[[File:Melon Stem Age 8 JE1.png|32px]] [[File:Melon Stem Age 9 JE1.png|32px]] [[File:Melon Stem Age 10 JE1.png|32px]] [[File:Melon Stem Age 11 JE1.png|32px]] [[File:Melon Stem Age 12 JE1.png|32px]] [[File:Melon Stem Age 13 JE1.png|32px]] [[File:Melon Stem Age 14 JE1.png|32px]] [[File:Melon Stem Age 15 JE1.png|32px]] Melon stem data values 8–15 now show a glitched formation, with a floating stem with an attached stem cross eventually emerging below.
|[[File:Attached Stem Age 8 JE1.png|32px]] [[File:Attached Stem Age 9 JE1.png|32px]] [[File:Attached Stem Age 10 JE1.png|32px]] [[File:Attached Stem Age 11 JE1.png|32px]] [[File:Attached Stem Age 12 JE1.png|32px]] [[File:Attached Stem Age 13 JE1.png|32px]] [[File:Attached Stem Age 14 JE1.png|32px]] [[File:Attached Stem Age 15 JE1.png|32px]] Melon stem blocks with data values higher than 7 can now attach to adjacent fruits, which results in buggy stem textures with [[vines]] in the mix due to vines being below attached stems in [[terrain.png]].}}
{{History|||snap=Pre-release 2 ;)|Melon stems can now be grown faster using [[bone meal]].}}
{{History|java}}
{{History||1.3.1|snap=1.3|The texture of melon stems has been moved one pixel to the left in [[terrain.png]].
|[[File:Melon Stem Age 0 JE2.png|32px]] [[File:Melon Stem Age 1 JE2.png|32px]] [[File:Melon Stem Age 2 JE2.png|32px]] [[File:Melon Stem Age 3 JE2.png|32px]] [[File:Melon Stem Age 4 JE2.png|32px]] [[File:Melon Stem Age 5 JE2.png|32px]] [[File:Melon Stem Age 6 JE2.png|32px]] [[File:Melon Stem Age 7 JE2.png|32px]] Stems now appear slightly different.
|[[File:Melon Stem Age 8 JE2.png|32px]] [[File:Melon Stem Age 9 JE2.png|32px]] [[File:Melon Stem Age 10 JE2.png|32px]] [[File:Melon Stem Age 11 JE2.png|32px]] [[File:Melon Stem Age 12 JE2.png|32px]] [[File:Melon Stem Age 13 JE2.png|32px]] [[File:Melon Stem Age 14 JE2.png|32px]] [[File:Melon Stem Age 15 JE2.png|32px]] Overgrown stems now appear slightly different.
|[[File:Attached Melon Stem (N) JE2.png|32px]] [[File:Attached Melon Stem (E) JE2.png|32px]] [[File:Attached Melon Stem (S) JE2.png|32px]] [[File:Attached Melon Stem (W) JE2.png|32px]] Attached melon stems now appear slightly different.
|[[File:Attached Stem Age 8 JE2.png|32px]] [[File:Attached Stem Age 9 JE2.png|32px]] [[File:Attached Stem Age 10 JE2.png|32px]] [[File:Attached Stem Age 11 JE2.png|32px]] [[File:Attached Stem Age 12 JE2.png|32px]] [[File:Attached Stem Age 13 JE2.png|32px]] [[File:Attached Stem Age 14 JE2.png|32px]] [[File:Attached Stem Age 15 JE2.png|32px]] Overgrown attached melon stems now appear slightly different.}}
{{History||1.4.2|snap=12w36a|[[Chicken]]s now use [[wheat seeds]], melon seeds, and [[pumpkin seeds]], instead of [[wheat]] to breed.}}
{{History||1.5|snap=13w02a|[[File:Melon Stem Age 0 JE3.png|32px]] [[File:Melon Stem Age 1 JE3.png|32px]] [[File:Melon Stem Age 2 JE3.png|32px]] [[File:Melon Stem Age 3 JE3.png|32px]] [[File:Melon Stem Age 4 JE3.png|32px]] [[File:Melon Stem Age 5 JE3.png|32px]] [[File:Melon Stem Age 6 JE3.png|32px]] Melon stems now use a squished version of their texture for immature stems, depending on age.
|[[File:Melon Stem Age 8 JE3.png|32px]] [[File:Melon Stem Age 9 JE3.png|32px]] [[File:Melon Stem Age 10 JE3.png|32px]] [[File:Melon Stem Age 11 JE3.png|32px]] [[File:Melon Stem Age 12 JE3.png|32px]] [[File:Melon Stem Age 13 JE3.png|32px]] [[File:Melon Stem Age 14 JE3.png|32px]] [[File:Melon Stem Age 15 JE3.png|32px]] This also affects melon stems of ages 8–15, which are likewise stretched to accommodate its predicted size.
|[[File:Attached Stem Age 8 JE3.png|32px]] [[File:Attached Stem Age 9 JE3.png|32px]] [[File:Attached Stem Age 10 JE3.png|32px]] [[File:Attached Stem Age 11 JE3.png|32px]] [[File:Attached Stem Age 12 JE3.png|32px]] [[File:Attached Stem Age 13 JE3.png|32px]] [[File:Attached Stem Age 14 JE3.png|32px]] [[File:Attached Stem Age 15 JE3.png|32px]] Melon stems of extreme ages, which are attached to adjacent fruits, now show a stretched and tinted stem appearance.}}
{{History|||snap=13w03a|[[File:Melon Stem Age 0 JE4.png|32px]] [[File:Melon Stem Age 1 JE4.png|32px]] [[File:Melon Stem Age 2 JE4.png|32px]] [[File:Melon Stem Age 3 JE4.png|32px]] [[File:Melon Stem Age 4 JE4.png|32px]] [[File:Melon Stem Age 5 JE4.png|32px]] [[File:Melon Stem Age 6 JE4.png|32px]] [[File:Melon Stem Age 7 JE4.png|32px]] Melon stems are no longer squished or stretched to account for age.<ref>{{bug|MC-7111}}</ref>
|[[File:Melon Stem Age 8 JE4.png|32px]] [[File:Melon Stem Age 9 JE4.png|32px]] [[File:Melon Stem Age 10 JE4.png|32px]] [[File:Melon Stem Age 11 JE4.png|32px]] [[File:Melon Stem Age 12 JE4.png|32px]] [[File:Melon Stem Age 13 JE4.png|32px]] [[File:Melon Stem Age 14 JE4.png|32px]] [[File:Melon Stem Age 15 JE4.png|32px]] Melon stems with age values 8 through 15 now show a tinted [[trapdoor]] texture.
|From this version up until 14w08a, overgrown melon stems start to draw from the texture below them on the [[texture atlas]], in much the same way they previously did with terrain.png. However, as texture atlases are unstable and textures tend to change positions as new blocks and textures are added, overgrown stems change the texture they draw from every time new textures are added, which includes when textures added by [[mods]].}}
{{History|||snap=13w09a|[[File:Melon Stem Age 8 JE5.png|32px]] [[File:Melon Stem Age 9 JE5.png|32px]] [[File:Melon Stem Age 10 JE5.png|32px]] [[File:Melon Stem Age 11 JE5.png|32px]] [[File:Melon Stem Age 12 JE5.png|32px]] [[File:Melon Stem Age 13 JE5.png|32px]] [[File:Melon Stem Age 14 JE5.png|32px]] [[File:Melon Stem Age 15 JE5.png|32px]] Melon stems with age values 8–15 now show a tinted [[birch wood]] texture.}}
{{History||1.6.1|snap=13w24a|Melon and pumpkin stems have now been assigned separate textures.
|[[File:Melon Stem Age 8 JE6.png|32px]] [[File:Melon Stem Age 9 JE6.png|32px]] [[File:Melon Stem Age 10 JE6.png|32px]] [[File:Melon Stem Age 11 JE6.png|32px]] [[File:Melon Stem Age 12 JE6.png|32px]] [[File:Melon Stem Age 13 JE6.png|32px]] [[File:Melon Stem Age 14 JE6.png|32px]] [[File:Melon Stem Age 15 JE6.png|32px]] Melon stems with age values 8–15 now show a tinted [[note block]] texture.}}
{{History||1.7.2|snap=13w37a|Added the {{cmd|setblock}} [[commands|command]], allowing for invalid stem ages to be placed in the world without using external editors. This also allows them to be obtained in earlier versions via backdating.}}
{{History|||snap=13w41a|[[File:Melon Stem Age 8 JE7.png|32px]] [[File:Melon Stem Age 9 JE7.png|32px]] [[File:Melon Stem Age 10 JE7.png|32px]] [[File:Melon Stem Age 11 JE7.png|32px]] [[File:Melon Stem Age 12 JE7.png|32px]] [[File:Melon Stem Age 13 JE7.png|32px]] [[File:Melon Stem Age 14 JE7.png|32px]] [[File:Melon Stem Age 15 JE7.png|32px]] Melon stems with age values 8–15 now show a tinted [[netherrack]] texture.}}
{{History||1.8|snap=14w10a|[[File:Melon Stem Age 8 JE8.png|32px]] [[File:Melon Stem Age 9 JE8.png|32px]] [[File:Melon Stem Age 10 JE8.png|32px]] [[File:Melon Stem Age 11 JE8.png|32px]] Melon stems with data values 8–11 now display a tinted attached stem, with 8 facing west, 9 facing east, 10 facing north and 11 facing south.
|Invalid melon stems with data values 12-15 now crash the game.}}
{{History|||snap=14w25a|[[File:Melon Stem Age 0 JE5.png|32px]] [[File:Melon Stem Age 1 JE5.png|32px]] [[File:Melon Stem Age 2 JE5.png|32px]] [[File:Melon Stem Age 3 JE5.png|32px]] [[File:Melon Stem Age 4 JE5.png|32px]] [[File:Melon Stem Age 5 JE5.png|32px]] [[File:Melon Stem Age 6 JE5.png|32px]] [[File:Melon Stem Age 7 JE5.png|32px]] Melon stems now render as a single diagonal plane, or, in the case of attached stems, a diagonal and orthogonal plane.
|[[File:Attached Melon Stem (N) JE3.png|32px]] [[File:Attached Melon Stem (E) JE3.png|32px]] [[File:Attached Melon Stem (S) JE3.png|32px]] [[File:Attached Melon Stem (W) JE3.png|32px]] The attached melon stem [[model]] now fully rotates to the direction the stem points. Prior to this update, the base of the melon stem would stay the same while the long attaching section would differ, resulting in four possible attached stem appearances.
|Invalid overgrown melon stems have effectively been removed from the game, as attempting to place an out of range stem via {{cmd|setblock}} creates a stem of age 0 and loading a world with such stems existing causes a game crash.}}
{{History|||snap=14w26a|[[File:Melon Stem Age 0 JE6.png|32px]] [[File:Melon Stem Age 1 JE6.png|32px]] [[File:Melon Stem Age 2 JE6.png|32px]] [[File:Melon Stem Age 3 JE6.png|32px]] [[File:Melon Stem Age 4 JE6.png|32px]] [[File:Melon Stem Age 5 JE6.png|32px]] [[File:Melon Stem Age 6 JE6.png|32px]] [[File:Melon Stem Age 7 JE6.png|32px]] [[File:Attached Melon Stem (N) JE4.png|32px]] [[File:Attached Melon Stem (E) JE4.png|32px]] [[File:Attached Melon Stem (S) JE4.png|32px]] [[File:Attached Melon Stem (W) JE4.png|32px]] Melon stems now correctly render as crosses again.<ref>{{bug|MC-58136}}</ref>}}
{{History|||snap=14w27a|[[File:Attached Stem Age 0 14w27a.png|32px]] [[File:Attached Stem Age 1 14w27a.png|32px]] [[File:Attached Stem Age 2 14w27a.png|32px]] [[File:Attached Stem Age 3 14w27a.png|32px]] [[File:Attached Stem Age 4 14w27a.png|32px]] [[File:Attached Stem Age 5 14w27a.png|32px]] [[File:Attached Stem Age 6 14w27a.png|32px]] Due to a bug, all melon stems appear attached regardless of age or any actual attachment.<ref>{{bug|MC-60208}}</ref>}}
{{History|||snap=14w28a|All melon stems appearing attached regardless of age or any actual attachment has been fixed. However, melon stems still appear attached to adjacent fruits regardless of age due to a similar bug.<ref>{{bug|MC-61716}}</ref>}}
{{History|||snap=14w34d|Melon seeds can no longer be used for [[breeding]] [[chicken]]s.}}
{{History||1.9|snap=15w31a|Chickens can now use melon seeds to breed again.}}
{{History|||snap=15w44a|Melon seeds have been added to [[dungeon]] [[chest]]s.
|The average yield of melon seeds from [[mineshaft]] chests has been decreased.}}
{{History|||snap=15w45a|Melon stems must now be fully grown again to attach.}}
{{History||1.11|snap=16w39a|Melon seeds can now be found inside chests in the new [[woodland mansion]]s.
|Melon crops now generate inside woodland mansions.}}
{{History||1.12|snap=17w18b|Placing a melon seeds in farmland now gives the player the "A Seedy Place" [[advancement]].{{verify}}}}
{{History||1.13|snap=17w47a|The different block states for the <code>melon_stem</code> ID have been split up into their own IDs.
|Prior to [[1.13/Flattening|''The Flattening'']], this [[block]]'s numeral ID was 105, and the [[item]]'s 362.}}
{{History|||snap=17w48a|Attached melon stems no longer [[drops|drop]] seeds.}}
{{History||1.14|snap=18w43a|[[File:Attached Melon Stem (N) JE5.png|32px]] [[File:Attached Melon Stem (E) JE5.png|32px]] [[File:Attached Melon Stem (S) JE5.png|32px]] [[File:Attached Melon Stem (W) JE5.png|32px]] The texture of attached melon stems has been changed.}}
{{History|||snap=18w49a|Melon stems now generate in the updated [[savanna]] [[village]]s.}}
{{History|||snap=18w50a|Melon stems now generate in the updated [[desert]] [[village]]s.}}
{{History|||snap=19w03a|Placing melon seeds into the new [[composter]] has a 10% chance of raising the compost level by 1.}}
{{History|||snap=19w05a|Melon seeds now have a 30% chance of increasing the compost level in a composter by 1.
|Added [[Wandering Trader|wandering trader]]s, which sell melon seeds.}}
{{History||1.15|snap=19w34a|[[Bee]]s can now pollinate melon stems.}}
{{History|||snap=19w39a|Attached melon stems now [[drops|drop]] seeds again.<ref>{{bug|MC-136360}}</ref>}}
{{History||1.18|snap=Pre-release 5|[[File:Melon Seeds JE2.png|32px]] The texture of melon seeds has been changed.}}
{{History|pocket alpha}}
{{History||v0.5.0|Added melon seeds.
|[[File:Melon Stem Age 0 JE1.png|32px]] [[File:Stem Age 1 JE1.png|32px]] [[File:Melon Stem Age 2 JE1.png|32px]] [[File:Melon Stem Age 3 JE1.png|32px]] [[File:Melon Stem Age 4 JE1.png|32px]] [[File:Melon Stem Age 5 JE1.png|32px]] [[File:Melon Stem Age 6 JE1.png|32px]] [[File:Melon Stem Age 7 JE1.png|32px]] [[File:Attached Melon Stem (N) JE1.png|32px]] [[File:Attached Melon Stem (E) JE1.png|32px]] [[File:Attached Melon Stem (S) JE1.png|32px]] [[File:Attached Melon Stem (W) JE1.png|32px]]{{verify|Are these models correct?}} Added melon stems.}}
{{History||v0.6.0|[[File:Melon Seeds JE1 BE1.png|32px]] Melon seeds no longer use the pumpkin seeds texture.}}
{{History||v0.9.0|snap=?|Melon seeds can now be found in [[mineshaft]] chests.}}
{{History||v0.12.1|snap=build 1|Melon seeds are no longer available from the [[Nether reactor]].}}
{{History||v0.14.0|snap=build 1|Melon seeds can now be found in [[minecart with chest|minecarts with chests]] in [[mineshaft]]s.}}
{{History|pocket}}
{{History||1.0.0|snap=alpha 0.17.0.1|Melon seeds now generate inside [[dungeon]] [[chest]]s.}}
{{History||1.1.0|snap=alpha 1.1.0.0|Melon crops now generate inside [[woodland mansion]]s.
|Melon seeds can now be found in woodland mansion chests.}}
{{History|bedrock}}
{{History||1.2.0|snap=beta 1.2.0.2|Melon seeds can now be found inside [[bonus chest]]s.
|Melon seeds are now used to tame [[parrot]]s.}}
{{History||1.10.0|snap=beta 1.10.0.3|[[File:Attached Melon Stem (W) JE5.png|32px]]{{info needed|More accurate image}} The texture of attached melon stems has been changed.
|Melon stems now generate in [[savanna]] and [[desert]] [[village]] farms.
|Added [[wandering trader]]s, who [[trading|sell]] melon seeds.}}
{{History||1.11.0|snap=beta 1.11.0.1|Melon seeds can now be used to fill up [[composter]]s.}}
{{History||1.14.0|snap=beta 1.14.0.1|[[Bee]]s can now pollinate melon stems.}}
{{History|console}}
{{History||xbox=TU5|xbone=CU1|ps=1.0|wiiu=Patch 1|[[File:Melon Seeds JE1 BE1.png|32px]] Added melon seeds.
|[[File:Melon Stem Age 0 JE1.png|32px]] [[File:Stem Age 1 JE1.png|32px]] [[File:Melon Stem Age 2 JE1.png|32px]] [[File:Melon Stem Age 3 JE1.png|32px]] [[File:Melon Stem Age 4 JE1.png|32px]] [[File:Melon Stem Age 5 JE1.png|32px]] [[File:Melon Stem Age 6 JE1.png|32px]] [[File:Melon Stem Age 7 JE1.png|32px]] [[File:Attached Melon Stem (N) JE1.png|32px]] [[File:Attached Melon Stem (E) JE1.png|32px]] [[File:Attached Melon Stem (S) JE1.png|32px]] [[File:Attached Melon Stem (W) JE1.png|32px]]{{verify|Are these models correct?}} Added melon stems.}}
{{History||xbox=none|xbone=none|ps=1.90|wiiu=none|switch=none|[[File:Attached Melon Stem (W) JE5.png|32px]]{{info needed|More accurate image}} The texture of attached melon stems has been changed.}}
{{History|New 3DS}}
{{History||0.1.0|[[File:Melon Stem Age 0 JE1.png|32px]] [[File:Stem Age 1 JE1.png|32px]] [[File:Melon Stem Age 2 JE1.png|32px]] [[File:Melon Stem Age 3 JE1.png|32px]] [[File:Melon Stem Age 4 JE1.png|32px]] [[File:Melon Stem Age 5 JE1.png|32px]] [[File:Melon Stem Age 6 JE1.png|32px]] [[File:Melon Stem Age 7 JE1.png|32px]] [[File:Attached Melon Stem (N) JE1.png|32px]] [[File:Attached Melon Stem (E) JE1.png|32px]] [[File:Attached Melon Stem (S) JE1.png|32px]] [[File:Attached Melon Stem (W) JE1.png|32px]]{{verify|Are these models correct?}} Added melon stems.}}
{{History|foot}}
<gallery>
Melon Stem with data value 15.png|The final version of the melon stem with age 15, as seen in-game.
Melonstems.png|Melon stems of ages 1–15 on a modded version of 1.7.2, hence the melon stems using the melon top texture.
Stems of 13w02a.png|All 16 stem sizes in 13w02a, with accompanying data values.
</gallery>
=== Melon stem "item" ===
{{:Technical blocks/Melon Stem}}
== Issues ==
{{issue list}}
== Gallery ==
<gallery>
Stem All Ages.png|All stages of growth.
AllSeeds.png|All the [[seeds]] that exist in the game.
</gallery>
== See also ==
* [[Melon]]
* [[Pumpkin Seeds]]
==References==
{{Reflist}}
{{Blocks|vegetation}}
{{Items}}
[[Category:Plants]]
[[Category:Food]]
[[Category:Non-solid blocks]]
[[Category:Generated structure blocks]]
[[cs:Semínka melounu]]
[[de:Melone]]
[[es:Semillas de sandía]]
[[fr:Graines de pastèque]]
[[hu:Dinnyemagok]]
[[it:Anguria]]
[[ja:スイカの種]]
[[ko:수박씨]]
[[nl:Meloenzaden]]
[[pl:Nasiona arbuza]]
[[pt:Sementes de melancia]]
[[ru:Семена арбуза]]
[[th:เมล็ดแตงโม]]
[[zh:西瓜种子]]</li><li>[[Compound|Compound]]<br/>{{About|a feature in the Education Edition|the NBT tag|NBT}}
{{education feature}}
{{exclusive|bedrock|education}}
{{Item
| image = Water (compound).png
| image2 = Garbage.png
| renewable = No
| stackable = Yes (64)
}}
'''Compounds''' are a type of [[item]] from [[Education Edition]] used in chemistry, which are created from combinations of various [[element]]s.
== Obtaining ==
Compounds cannot be obtained in the [[Creative inventory]]. They are only obtained from creating them in the [[compound creator]]. This is done by inserting a certain number of [[element]]s corresponding to the compound's chemical formula.
== List of compounds ==
{| class="wikitable" data-description="Compounds"
!Icon
!Compound Name
!Compound Recipe
!Description
!Uses
|-
|{{slot|Aluminum Oxide|link=none}}
|{{text anchor|Aluminium Oxide}}
|{{slot|Aluminum,2}}{{slot|Oxygen,3}}
|Is only brown when dug up from the Earth and contaminated; actually white when pure. Can be electrolyzed to make aluminum metal. Also the main chemical in rubies and sapphires.
|Used to craft [[hardened glass]].
|-
|{{slot|Ammonia|link=none}}
|{{text anchor|Ammonia}}
|{{slot|Nitrogen}}{{slot|Hydrogen,3}}
|
|Used to create [[super fertilizer]].
|-
|{{slot|Barium Sulfate|link=none}}
|{{text anchor|Barium Sulfate}}
|{{slot|Barium}}{{slot|Sulfur}}{{slot|Oxygen,4}}
|
|
|-
|{{slot|Benzene|link=none}}
|{{text anchor|Benzene}}
|{{slot|Carbon,6}}{{slot|Hydrogen,6}}
|
|
|-
|{{slot|Boron Trioxide|link=none}}
|{{text anchor|Boron Trioxide}}
|{{slot|Boron,2}}{{slot|Oxygen,3}}
|
|Used to craft [[hardened glass]].
|-
|{{slot|Calcium Bromide|link=none}}
|{{text anchor|Calcium Bromide}}
|{{slot|Calcium}}{{slot|Bromine,2}}
|
|
|-
|{{slot|Crude Oil|link=none}}
|{{text anchor|Crude Oil}}
|{{slot|Carbon,9}}{{slot|Hydrogen,20}}
|C<sub>9</sub>H<sub>20</sub> is the chemical formula for nonane.
|
|-
|{{slot|Glue|link=none}}
|{{text anchor|Glue}} (Cyanoacrylate)
|{{slot|Carbon,5}}{{slot|Hydrogen,5}}{{slot|Nitrogen}}{{slot|Oxygen,2}}
|C<sub>5</sub>H<sub>5</sub>NO<sub>2</sub> is the chemical formula for methyl cyanoacrylate, one of the cyanoacrylate glues ("superglue"); its condensed formula is CH<sub>2</sub>=C(CN)COOCH<sub>3</sub>.
|
|-
|{{slot|Hydrogen Peroxide|link=none}}
|{{text anchor|Hydrogen Peroxide}}
|{{slot|Hydrogen,2}}{{slot|Oxygen,2}}
|
|Used to craft [[glow stick]].
|-
|{{slot|Iron Sulfide|link=none}}
|{{text anchor|Iron Sulfide}}
|{{slot|Iron}}{{slot|Sulfur}}
|
|
|-
|{{slot|Latex|link=none}}
|{{text anchor|Latex}}
|{{slot|Carbon,5}}{{slot|Hydrogen,8}}
|C<sub>5</sub>H<sub>8</sub> is the chemical formula for isoprene, which polymers are the main components of natural rubber; its condensed formula is CH<sub>2</sub>=C(CH<sub>3</sub>)−CH=CH<sub>2</sub>.
|Used to craft [[balloon]]s.
|-
|{{slot|Lithium Hydride|link=none}}
|{{text anchor|Lithium Hydride}}
|{{slot|Lithium}}{{slot|Hydrogen}}
|
|
|-
|{{slot|Luminol|link=none}}
|{{text anchor|Luminol}}
| class="nowrap" |{{slot|Carbon,8}}{{slot|Hydrogen,7}}{{slot|Nitrogen,3}}{{slot|Oxygen,2}}
|Luminol is a chemical that glows blue when oxidized. It can detect blood.
|Used to craft [[glow stick]].
|-
|{{slot|Lye|link=none}}
|{{text anchor|Lye}}
|{{slot|Sodium}}{{slot|Oxygen}}{{slot|Hydrogen}}
|
|
|-
|{{slot|Magnesium Nitrate|link=none}}
|{{text anchor|Magnesium Nitrate}}
|{{slot|Magnesium}}{{slot|Nitrogen,2}}{{slot|Oxygen,6}}
|Condensed formula: Mg(NO<sub>3</sub>)<sub>2</sub>
|
|-
|{{slot|Magnesium Oxide|link=none}}
|{{text anchor|Magnesium Oxide}}
|{{slot|Magnesium}}{{slot|Oxygen}}
|
|
|-
|{{slot|Polyethylene|link=none}}
|{{text anchor|Polyethylene}}
|{{slot|Carbon,10}}{{slot|Hydrogen,20}}
|Polyethlene (PE), (CH<sub>2</sub>)<sub>''n''</sub>, is ''the'' most commonly produced plastic.
|Used to craft [[glow stick]].
|-
|{{slot|Potassium Iodide|link=none}}
|{{text anchor|Potassium Iodide}}
|{{slot|Potassium}}{{slot|Iodine}}
|Used for making iodized salt and other things.
|
|-
|{{slot|Soap|link=none}}
|{{text anchor|Soap}}
|{{slot|Carbon,18}}{{slot|Hydrogen,35}}{{slot|Sodium}}{{slot|Oxygen,2}}
|C<sub>18</sub>H<sub>35</sub>NaO<sub>2</sub> is the chemical formula of sodium stearate, the most common soap.
|
|-
|{{slot|Sodium Acetate|link=none}}
|{{text anchor|Sodium Acetate}}
|{{slot|Carbon,2}}{{slot|Hydrogen,3}}{{slot|Sodium}}{{slot|Oxygen,2}}
|Used to make hand warmers because it heats up when it "freezes".
|Used to create [[Ice Bomb]].
|-
|{{slot|Sodium Fluoride|link=none}}
|{{text anchor|Sodium Fluoride}}
|{{slot|Sodium}}{{slot|Fluorine}}
|Commonly used in toothpaste to prevent cavity, among other uses.
|
|-
|{{slot|Sodium Hydride|link=none}}
|{{text anchor|Sodium Hydride}}
|{{slot|Sodium}}{{slot|Hydrogen}}
|
|
|-
|{{slot|Sodium Hypochlorite|link=none}}
|{{text anchor|Sodium Hypochlorite}}
|{{slot|Sodium}}{{slot|Chlorine}}{{slot|Oxygen}}
|Main ingredient of real-life bleach.
|Used to create [[Bleach]].
|-
|{{slot|Sodium Oxide|link=none}}
|{{text anchor|Sodium Oxide}}
|{{slot|Sodium,2}}{{slot|Oxygen}}
|
|
|-
|{{slot|Sulfate|link=none}}
|{{text anchor|Sulfate}}
|{{slot|Sulfur}}{{slot|Oxygen,4}}
|Cannot actually exist on its own, as it should have a <sup>2-</sup> charge.
|
|}
=== Chlorides ===
{| class="wikitable" data-description="Chlorides"
!Icon
!Compound
!Recipe
!Uses
|-
|{{slot|Salt|link=none}}
|{{text anchor|Salt}}
|{{slot|Sodium}}{{slot|Chlorine}}
|Used to create [[heat block]].
|-
|{{slot|Calcium Chloride|link=none}}
|{{text anchor|Calcium Chloride}}
|{{slot|Calcium}}{{slot|Chlorine,2}}
|Used to craft [[sparkler|orange sparkler]].
|-
|{{slot|Cerium Chloride|link=none}}
|{{text anchor|Cerium Chloride}}
|{{slot|Cerium}}{{slot|Chlorine,3}}
|Used to craft [[colored torch|blue torch]] and [[sparkler|blue sparkler]].
|-
|{{slot|Mercuric Chloride|link=none}}
|{{text anchor|Mercuric Chloride}}
|{{slot|Mercury}}{{slot|Chlorine,2}}
|Used to craft [[colored torch|red torch]] and [[sparkler|red sparkler]].
|-
|{{slot|Potassium Chloride|link=none}}
|{{text anchor|Potassium Chloride}}
|{{slot|Potassium}}{{slot|Chlorine}}
|Used to craft [[colored torch|purple torch]] and [[sparkler|purple sparkler]].
|-
|{{slot|Tungsten Chloride|link=none}}
|{{text anchor|Tungsten Chloride}}
|{{slot|Tungsten}}{{slot|Chlorine,6}}
|Used to craft [[colored torch|green torch]] and [[sparkler|green sparkler]].
|}
=== Natural compounds ===
Natural compounds are compounds which can be obtained naturally in ''Minecraft''.
{| class="wikitable" data-description="Chlorides"
!Icon
!Compound
! class="nowrap" |Chemical formula
!Natural source
!Method
!Notes
|-
|{{slot|Charcoal}}
|[[Charcoal]]
|{{slot|Carbon,7}}{{slot|Hydrogen,4}}{{slot|Oxygen}}
|[[Log]] or [[Wood]]
|[[Smelting]]
|The chemical formula C<sub>7</sub>H<sub>4</sub>O is sometimes used to describe the approximate composition of charcoal.
|-
|{{slot|Glow Ink Sac}} {{slot|Ink Sac}}
|[[Glow Ink Sac]], [[Ink Sac]]
|{{slot|Iron}}{{slot|Sulfur}}{{slot|Oxygen,4}}
|[[Glow Squid]], [[Squid]]
|Killing Glow Squid, Squid
|FeSO<sub>4</sub> is the chemical formula of iron(II) sulfate or ferrous sulfate, normally found complexed with water as a salt with the formula FeSO<sub>4</sub>·''x''H<sub>2</sub>O, and has been used in the manufacture of iron gall ink and other inks for centuries. In contrast, squid ink (and other cephalopod inks) is composed mainly of melanin and mucus, with an assortment of other compounds in a variety of concentrations dependent on the species.
|-
|{{slot|Sugar}}
|[[Sugar]]
|{{slot|Carbon,6}}{{slot|Hydrogen,12}}{{slot|Oxygen,6}}
|[[Sugar Cane]]s or [[Honey Bottle]]s
|Harvesting and [[crafting]]
|C<sub>6</sub>H<sub>12</sub>O<sub>6</sub> is the chemical formula of glucose and fructose, as well as a number of other simple sugars (common table sugar is instead sucrose, a complex sugar made of glucose and fructose with the chemical formula C<sub>12</sub>H<sub>22</sub>O<sub>11</sub>).
|-
|{{slot|Water (compound)|link=water}}
|{{text anchor|Water}}
|{{slot|Hydrogen,2}}{{slot|Oxygen}}
|[[Water]]
|Picking up in a [[bucket]] or [[glass bottle]] from a [[Cauldron]] or a water source block
|One of the easiest to obtain.
|}
=== Garbage ===
Garbage is considered a "compound", but the only way to produce it is to activate the [[Lab Table]] when its inputs are an invalid recipe. It has no uses.
== Usage ==
Certain compounds are used as ingredients in [[crafting]] or [[lab table]] experiments. Natural compounds have uses outside of chemistry, detailed in their respective articles.
=== Crafting ingredient ===
{{Crafting usage|description=0|Latex, Polyethylene, Hydrogen Peroxide, Luminol, Boron Trioxide, Aluminum Oxide}}
==== Chloride coloring ====
{{Crafting usage|Chloride,Cerium Chloride|match=end}}
=== Lab table ingredient ===
{| class="wikitable"
!Result
!Materials needed
|-
! rowspan="2" |{{slot|Bleach}}<br>[[Bleach]]
|{{slot|Water (compound)|link=Compound}}{{slot|Water (compound)|link=Compound}}{{slot|Water (compound)|link=Compound}}{{slot|Sodium Hypochlorite|link=Compound}}{{slot|Sodium Hypochlorite|link=Compound}}{{slot|Sodium Hypochlorite|link=Compound}}
|-
|<center>Water ×3, Sodium Hypochlorite ×3</center>
|-
! rowspan="2" |{{slot|Heat Block.gif}}<br>[[Heat Block]]
|{{slot}}{{slot|Iron|link=Element#Iron}}{{slot|Water (compound)|link=Compound}}{{slot|Charcoal}}{{slot|Salt|link=Compound}}{{slot}}
|-
|<center>[[Iron (element)|Iron]], Water, [[Charcoal]], Salt</center>
|-
! rowspan="2" |{{slot|Ice Bomb}}<br>[[Ice Bomb]]
|{{slot}}{{slot|Sodium Acetate|link=Compound}}{{slot|Sodium Acetate|link=Compound}}{{slot|Sodium Acetate|link=Compound}}{{slot|Sodium Acetate|link=Compound}}{{slot}}
|-
|<center>Sodium Acetate ×4</center>
|-
! rowspan="2" |{{slot|Super Fertilizer}}<br>[[Super Fertilizer]]
|{{slot}}{{slot}}{{slot|Ammonia|link=Compound}}{{slot|Phosphorus|link=Element#Phosphorus}}{{slot}}{{slot}}
|-
|<center>Ammonia, [[Phosphorus]]</center>
|}
== Sounds ==
Sounds are produced when a [[lab table]] creates garbage.
{{Sound table
|type=bedrock
|sound=Fizz.ogg
|source=block
|description=When a lab table creates garbage{{verify}}
|id=random.fizz
|volume=1.0
|pitch=0.5/0.7}}
{{Sound table
|sound=Ghast fireball4.ogg
|source=hostile
|description=When a lab table creates garbage{{verify}}
|id=mob.blaze.shoot
|volume=1.0
|pitch=0.8/1.0}}
{{Sound table
|sound=Explosion1.ogg
|sound2=Explosion2.ogg
|sound3=Explosion3.ogg
|sound4=Explosion4.ogg
|source=block
|description=When a lab table creates garbage
|id=random.explode
|volume=1.0
|pitch=0.4/0.6}}
{{Sound table
|sound=Fire.ogg
|source=sound
|description=When a lab table creates garbage
|id=lt.reaction.fire
|volume=2.0
|pitch=0.4/0.6}}
{{Sound table
|sound=Explosion1.ogg
|sound2=Explosion2.ogg
|sound3=Explosion3.ogg
|sound4=Explosion4.ogg
|source=weather
|description=When a lab table creates garbage
|id=ambient.weather.lightning.impact
|volume=1.0
|pitch=0.6/0.8
|foot=1}}
== Data values ==
=== ID ===
{{ID table
|edition=bedrock
|shownumericids=y
|showforms=y
|notshowbeitemforms=y
|generatetranslationkeys=y
|displayname=Compound
|spritetype=item
|nameid=compound
|id=594
|form=item
|translationkey=item.compound.salt.name,item.compound.sodiumoxide.name,item.compound.sodiumhydroxide.name,item.compound.magnesiumnitrate.name,item.compound.ironsulfide.name,item.compound.lithiumhydride.name,item.compound.sodiumhydride.name,item.compound.calciumbromide.name,item.compound.magnesiumoxide.name,item.compound.sodiumacetate.name,item.compound.luminol.name,item.compound.charcoal.name,item.compound.sugar.name,item.compound.aluminumoxide.name,item.compound.borontrioxide.name,item.compound.soap.name,item.compound.polyethylene.name,item.compound.garbage.name,item.compound.magnesiumsalts.name,item.compound.sulfate.name,item.compound.bariumsulfate.name,item.compound.potassiumchloride.name,item.compound.mercuricchloride.name,item.compound.ceriumchloride.name,item.compound.tungstenchloride.name,item.compound.calciumchloride.name,item.compound.water.name,item.compound.glue.name,item.compound.hypochlorite.name,item.compound.crudeoil.name,item.compound.latex.name,item.compound.potassiumiodide.name,item.compound.sodiumfluoride.name,item.compound.benzene.name,item.compound.ink.name,item.compound.hydrogenperoxide.name,item.compound.ammonia.name,item.compound.sodiumhypochlorite.name
|foot=1}}
===Item data===
{{see also|Data values}}Compounds uses the following data values:{{/DV}}
== History ==
{{History|bedrock}}
{{History||1.4.0|snap=beta 1.2.20.1|[[File:Aluminum Oxide BE1.png|32px]] [[File:Ammonia BE1.png|32px]] [[File:Barium Sulfate BE1.png|32px]] [[File:Benzene BE1.png|32px]] [[File:Boron Trioxide BE1.png|32px]] [[File:Calcium Bromide BE1.png|32px]] [[File:Crude Oil BE1.png|32px]] [[File:Glue BE1.png|32px]] [[File:Hydrogen Peroxide BE1.png|32px]] [[File:Iron Sulfide BE1.png|32px]] [[File:Latex BE1.png|32px]] [[File:Lithium Hydride BE1.png|32px]] [[File:Luminol BE1.png|32px]] [[File:Lye BE1.png|32px]] [[File:Magnesium Nitrate BE1.png|32px]] [[File:Magnesium Oxide BE1.png|32px]] [[File:Polyethylene BE1.png|32px]] [[File:Potassium Iodide BE1.png|32px]] [[File:Salt BE1.png|32px]] [[File:Soap BE1.png|32px]] [[File:Sodium Acetate BE1.png|32px]] [[File:Sodium Fluoride.png|32px]] [[File:Sodium Hydride BE1.png|32px]] [[File:Sodium Hypochlorite BE1.png|32px]] [[File:Sodium Oxide BE1.png|32px]] [[File:Sulfate BE1.png|32px]] [[File:Calcium Chloride BE1.png|32px]] [[File:Cerium Chloride BE1.png|32px]] [[File:Mercuric Chloride BE1.png|32px]] [[File:Potassium Chloride BE1.png|32px]] [[File:Tungsten Chloride BE1.png|32px]] [[File:Charcoal JE3 BE3.png|32px]] [[File:Ink Sac JE1 BE1.png|32px]] [[File:Sugar JE1 BE1.png|32px]] [[File:Water (compound) BE1.png|32px]] [[File:Garbage BE1.png|32px]] Added compounds.}}
{{History||1.10.0|snap=beta 1.10.0.3|[[File:Charcoal JE4 BE4.png|32px]][[File:Ink Sac JE2 BE2.png|32px]][[File:Sugar JE2 BE2.png|32px]] The textures of Charcoal, Ink Sacs and Sugar have been changed.}}
{{History||1.16|All compounds have been made unobtainable. It is unknown whether it is a glitch or intended. {{bug|MCPE-113776}}}}
{{History| |1.17.0|All compounds are obtainable once again.}}{{History|education}}
{{History||1.0.27|[[File:Aluminum Oxide BE1.png|32px]] [[File:Ammonia BE1.png|32px]] [[File:Barium Sulfate BE1.png|32px]] [[File:Benzene BE1.png|32px]] [[File:Boron Trioxide BE1.png|32px]] [[File:Calcium Bromide BE1.png|32px]] [[File:Crude Oil BE1.png|32px]] [[File:Glue BE1.png|32px]] [[File:Hydrogen Peroxide BE1.png|32px]] [[File:Iron Sulfide BE1.png|32px]] [[File:Latex BE1.png|32px]] [[File:Lithium Hydride BE1.png|32px]] [[File:Luminol BE1.png|32px]] [[File:Lye BE1.png|32px]] [[File:Magnesium Nitrate BE1.png|32px]] [[File:Magnesium Oxide BE1.png|32px]] [[File:Polyethylene BE1.png|32px]] [[File:Potassium Iodide BE1.png|32px]] [[File:Salt BE1.png|32px]] [[File:Soap BE1.png|32px]] [[File:Sodium Acetate BE1.png|32px]] [[File:Sodium Fluoride BE1.png|32px]] [[File:Sodium Hydride BE1.png|32px]] [[File:Sodium Hypochlorite BE1.png|32px]] [[File:Sodium Oxide BE1.png|32px]] [[File:Sulfate BE1.png|32px]] [[File:Calcium Chloride BE1.png|32px]] [[File:Cerium Chloride BE1.png|32px]] [[File:Mercuric Chloride BE1.png|32px]] [[File:Potassium Chloride BE1.png|32px]] [[File:Tungsten Chloride BE1.png|32px]] [[File:Charcoal JE3 BE3.png|32px]] [[File:Ink Sac JE1 BE1.png|32px]] [[File:Sugar JE1 BE1.png|32px]] [[File:Water (compound) BE1.png|32px]] [[File:Garbage BE1.png|32px]] Added compounds.}}
{{History||1.12.0|[[File:Charcoal JE4 BE4.png|32px]][[File:Ink Sac JE2 BE2.png|32px]][[File:Sugar JE2 BE2.png|32px]] The textures of Charcoal, Ink Sacs and Sugar have been changed.}}
{{History|foot}}
== Unused compound textures ==
In the chemistry resource pack folder, there are numerous [[History of textures/Unused textures#Unused compounds|compound textures which are not used]] in the game. Note: a <code>compound</code> item with a data value of <code>38</code> will have the <code>Blue Flask</code> texture and will be called <code>item.compound..name</code>. If you use an NBT Editor to get a compound item with no assigned data value (by deleting the data tag) and then transfer that item to another world / realm using structure blocks (by exporting to a <code>.mcstructure</code> file, then importing it on another world or realm) then it will be renamed to <code>Ivory Tusk</code>.
<gallery widths="48" heights="48" perrow="30" class="center">
Flask EE1.png|Flask
Black Flask EE1.png|Black Flask
Blue Flask EE1.png|Blue Flask
Brown Beaker EE1.png|Brown Beaker
Brown Flask EE1.png|Brown Flask
Dark Gray Beaker EE1.png|Dark Gray Beaker
Dark Gray Flask EE1.png|Dark Gray Flask
Dark Gray Jar EE1.png|Dark Gray Jar
Green Beaker EE1.png|Green Beaker
Green Flask EE1.png|Green Flask
Green Jar EE1.png|Green Jar
Indigo Beaker EE1.png|Indigo Beaker
Indigo Flask EE1.png|Indigo Flask
Indigo Jar EE1.png|Indigo Jar
Light Gray Beaker EE1.png|Light Gray Beaker
Light Gray Flask EE1.png|Light Gray Flask
Orange Beaker EE1.png|Orange Beaker
Orange Flask EE1.png|Orange Flask
Orange Jar EE1.png|Orange Jar
Purple Beaker EE1.png|Purple Beaker
Purple Flask EE1.png|Purple Flask
Purple Jar EE1.png|Purple Jar
Red Beaker EE1.png|Red Beaker
Red Flask EE1.png|Red Flask
Red Jar EE1.png|Red Jar
White Flask EE1.png|White Flask
Yellow Flask EE1.png|Yellow Flask
Bleach (compound).png|Bleach
</gallery>
== Gallery ==
<gallery>
Screen Shot 2021-08-19 at 12.22.50 PM.png|A compound creator in using 5 carbon and 8 hydrogen to create latex.
</gallery>
== See also ==
*[[Compound Creator]]
*[[Crafting]]
*[[Element Constructor]]
*[[Lab Table]]
*[[Brewing Stand]]
*[[Brewing]]
*[[Crafting Table]]
== References ==
{{reflist}}
{{Items}}
{{Education Edition}}
[[Category:Non-renewable resources]]
[[Category:Education Edition items]]
[[de:Verbindung]]
[[it:Composto]]
[[ja:化合物]]
[[pl:Związki chemiczne]]
[[pt:Composto]]
[[ru:Соединение]]
[[th:สารประกอบ]]
[[uk:Сполуки]]
[[zh:化合物]]</li></ul> | beta 1.9.0.0 | Villagers now run away from pillagers. | |||
1.10.0{{Extension DPL}}<ul><li>[[White Dye|White Dye]]<br/>{{Item
| image = White Dye.png
| renewable = Yes
| stackable = Yes (64)
}}
'''White dye''' is a [[Dye#Primary|primary color dye]] similar to [[bone meal]].
== Obtaining ==
=== Crafting ===
{{Crafting
|showname=0
|Bone Meal
|Output=White Dye
|type=Material
|head=1
}}
{{Crafting
|Lily of the Valley
|Output=White Dye
|type=Material
|foot=1
}}
=== Loot chest ===
{{#invoke:LootChest|base3|white-dye}}
== Usage ==
{{dye usage}}
=== Crafting ingredient ===
{{crafting usage|ignore=Banner|continue=1}}
{{banner crafting usage}}
=== Loom ingredient ===
{{Banner loom usage|White Dye}}
=== Trading ===
Apprentice-level shepherd villagers have a 20% chance to buy 12 white dye for an emerald.
== Data values ==
=== ID ===
{{edition|java}}:
{{ID table
|edition=java
|showforms=y
|generatetranslationkeys=y
|displayname=White Dye
|spritetype=item
|nameid=white_dye
|form=item
|foot=1}}
{{edition|bedrock}}:
{{ID table
|edition=bedrock
|showaliasids=y
|shownumericids=y
|showforms=y
|notshowbeitemforms=y
|generatetranslationkeys=y
|displayname=White Dye
|spritetype=item
|nameid=white_dye
|aliasid=dye / 19
|id=410
|form=item
|translationkey=item.dye.white_new.name
|foot=1}}
== History ==
{{History|java}}
{{History||1.14|snap=18w43a|[[File:White Dye JE1 BE1.png|32px]] Added white dye.}}
{{History|||snap=18w44a|White dye can now change the text color on [[sign]]s to white.}}
{{History|||snap=19w05a|Added the [[wandering trader]], which sells white dye.}}
{{History|||snap=19w11a|White dye can now be [[trading|bought]] by shepherd villagers.}}
{{History||1.17|snap=20w45a|White dye can now be used to craft [[white candle]]s.}}
{{History|||snap=21w19a|White dyes can no longer be used to craft white candles.}}
{{History|||snap=Pre-release 1|White dye can once again be used to craft white candles.}}
{{History||1.20<br>(Experimental)|link=1.19.3|snap=22w42a|White dye can now change the text color on [[hanging sign]]s to white.}}
{{History||1.20|snap=23w12a|White dye can now be found in [[suspicious gravel]] and [[suspicious sand]] in [[trail ruins]].}}
{{History|||snap=23w16a|White dye no longer generates in [[suspicious sand]] in [[trail ruins]].|Due to the split of the archaeological loot tables for suspicious gravel within the [[trail ruins]]; white dye is now common loot.}}
{{History|bedrock}}
{{History||1.8.0|snap=beta 1.8.0.10|[[File:White Dye JE1 BE1.png|32px]] Added white dye.}}
{{History||1.9.0|snap=beta 1.9.0.0|Added [[flower|lilies of the valley]], which can be used to [[crafting|craft]] white dye.}}
{{History||1.11.0|snap=beta 1.11.0.4|White dye can now be [[trading|sold]] to shepherd [[villager]]s.}}
{{History||1.16.100|snap=beta 1.16.100.56|The ID of white dye has been changed from <code>dye/19</code> to <code>white_dye</code>.}}
{{History|ps4}}
{{History||1.83|[[File:White Dye JE1 BE1.png|32px]] Added white dye.}}
{{History|foot}}
== Issues ==
{{issue list}}
{{Items}}
[[Category:Items]]
[[Category:Dyes]]
[[Category:Renewable resources]]
[[de:Weißer Farbstoff]]
[[es:Tinte blanco]]
[[fr:Teinture blanche]]
[[ja:白色の染料]]
[[ko:하얀색 염료]]
[[pl:Biały barwnik]]
[[pt:Corante branco]]
[[zh:白色染料]]</li><li>[[Black Dye|Black Dye]]<br/>{{Item
| image = Black Dye.png
| renewable = Yes
| stackable = Yes (64)
}}
'''Black dye''' is a [[Dye#Primary|primary color dye]] similar to an [[ink sac]].
== Obtaining ==
=== Trading ===
[[Wandering trader]]s have a chance to [[trading|trade]] 3 black dyes for 1 [[emerald]].{{only|java}}
=== Crafting ===
{{Crafting
|head=1
|showname=0
|Ink Sac
|Output=Black Dye
|type=Material
}}
{{Crafting
|Wither Rose
|Output=Black Dye
|type=Material
|foot=1
}}
== Usage ==
{{dye usage}}
=== Crafting ingredient ===
{{crafting usage|ignore=Banner|continue=1}}
{{banner crafting usage}}
=== Loom ingredient ===
{{Banner loom usage|Black Dye}}
=== Trading ===
Apprentice-level Shepherd villagers have a 20%{{only|bedrock}} or {{frac|2|7}}{{only|java}} chance to buy 12 black dye for an emerald.
== Data values ==
=== ID ===
{{edition|java}}:
{{ID table
|edition=java
|showforms=y
|generatetranslationkeys=y
|displayname=Black Dye
|spritetype=item
|nameid=black_dye
|form=item
|foot=1}}
{{edition|bedrock}}:
{{ID table
|edition=bedrock
|showaliasids=y
|shownumericids=y
|showforms=y
|notshowbeitemforms=y
|generatetranslationkeys=y
|displayname=Black Dye
|spritetype=item
|nameid=black_dye
|aliasid=dye / 16
|id=395
|form=item
|translationkey=item.dye.black_new.name
|foot=1}}
== History ==
{{History|java}}
{{History||1.14|snap=18w43a|[[File:Black Dye JE1 BE1.png|32px]] Added black dye.}}
{{History|||snap=18w44a|Black dyes now can changed the text color on the [[sign]]s to black.}}
{{History|||snap=19w05a|Added the [[wandering trader]], which sell black dyes.}}
{{History|||snap=19w11a|Black dyes can now be [[trading|bought]] by shepherd villagers.}}
{{History||1.15|snap=Pre-release 1|Black dye can now be used to craft [[prismarine|dark prismarine]], just like [[Bedrock Edition]].}}
{{History||1.17|snap=20w45a|Black dyes can now used to craft newly added [[black candle]]s.}}
{{History|||snap=21w19a|Black dyes can no longer used to craft black candles.}}
{{History|||snap=Pre-release 1|Black dyes can once again used to craft black candles.}}
{{History||1.20<br>(Experimental)|link=1.19.3|snap=22w42a|Black dyes now can change the text color on [[hanging sign]]s to black.}}
{{History|bedrock}}
{{History||1.8.0|snap=beta 1.8.0.10|[[File:Black Dye JE1 BE1.png|32px]] Added black dye.}}
{{History||1.11.0|snap=beta 1.11.0.4|Black dye can now be [[trading|sold]] to shepherd [[villager]]s.}}
{{history||1.13.0|snap=beta 1.13.0.9|Black dye can now be [[crafting|crafted]] from [[flower|wither roses]].}}
{{History||1.16.100|snap=beta 1.16.100.56|The ID of black dye has been changed from <code>dye/16</code> to <code>black_dye</code>.}}
{{History|ps4}}
{{History||1.83|[[File:Black Dye JE1 BE1.png|32px]] Added black dye.}}
{{History|foot}}
== Issues ==
{{issue list}}
{{Items}}
[[Category:Dyes]]
[[Category:Renewable resources]]
[[de:Schwarzer Farbstoff]]
[[es:Tinte negro]]
[[fr:Teinture noire]]
[[ja:黒色の染料]]
[[ko:검은색 염료]]
[[pl:Czarny barwnik]]
[[pt:Corante preto]]
[[th:สีย้อมสีดำ]]
[[zh:黑色染料]]</li></ul> | beta 1.10.0.3 | Added nitwit and unemployed villagers. | |||
| Added mason profession, which can be traded with. | |||||
| Villagers now run away from the new ravager. | |||||
| Added a new type of villager. Both the old (pre-Village & Pillage) and new types of villagers are able to be spawned in-game and have different spawn eggs, although they have the same name and same spawn egg texture. | |||||
| Villagers now have different skins based on biome (including swamps and jungles, which do not contain villages) as well as professions. However, villagers spawned in igloo basements still use their old skin. | |||||
| Villagers now have three tiers and show which trade tier they have unlocked, by a badge of a varying material on their suit. The first trade tier appears as an iron badge, then next gold and finally diamond. | |||||
| Librarian villagers now inspect bookshelves. | |||||
| Villagers can now occupy beds to sleep. | |||||
| Villagers now have a schedule. Adult and child villagers have a different schedule and fishermen, farmers and librarians have special work schedules. | |||||
| Villagers now hold the item they want to trade. | |||||
| Villagers now have behavior to wander village outskirts. | |||||
| Villagers can now mingle in gathering sites. | |||||
| Villagers can now work in job sites with the corresponding job site block and can change professions depending on the available job site blocks in villages. | |||||
1.11.0{{Extension DPL}}<ul><li>[[Poisonous Potato|Poisonous Potato]]<br/>{{Item
| title = Poisonous Potato
| image = Poisonous Potato.png
| heals = {{hunger|2}}
|effects={{EffectLink|Poison}} (0:05) (60% chance)
| stackable = Yes (64)
| renewable = Yes
}}
A '''poisonous potato''' is a type of [[potato]] that can [[poison]] the [[player]].
== Obtaining ==
The poisonous potato is a rare [[drop]] when harvesting (destroying) [[potato|potato crops]]; a fully grown plant has a 2% chance of dropping one in addition to the 2-5 regular potatoes.
=== Chest loot ===
{{LootChestItem|poisonous-potato}}
== Usage ==
Poisonous potatoes cannot be planted on [[farmland]] or [[Baked Potato|baked]]. They also have no use with the [[composter]].<ref>{{bug|MC-142373|resolution=WAI}}</ref>
=== Food ===
{{see also|Tutorials/Hunger management|title1=Hunger management}}
To eat a poisonous potato, press and hold {{control|use}} while it is selected in the hotbar. Eating one restores {{hunger|2}} [[hunger]] and 1.2 hunger [[Hunger#Mechanics|saturation]] and has a 60% chance of applying 5 seconds of [[Poison]] II, draining {{hp|4|poisoned=1}} points of [[health]].
Interestingly, a poisonous potato actually restores double the hunger and saturation than a normal, unpoisoned potato. (A normal potato gives {{hunger|1}} hunger and 0.6 saturation points.)
==Sounds==
{{Sound table/Entity/Food}}
== Advancements ==
{{load advancements|Husbandry;A Balanced Diet}}
== Data values ==
=== ID ===
{{edition|java}}:
{{ID table
|edition=java
|showforms=y
|generatetranslationkeys=y
|displayname=Poisonous Potato
|spritetype=item
|nameid=poisonous_potato
|form=item
|foot=1}}
{{edition|bedrock}}:
{{ID table
|edition=bedrock
|shownumericids=y
|showforms=y
|notshowbeitemforms=y
|generatetranslationkeys=y
|displayname=Poisonous Potato
|spritetype=item
|nameid=poisonous_potato
|id=282
|form=item
|foot=1}}
== History ==
{{History|java}}
{{History||1.4.2|snap=12w34a|[[File:Poisonous Potato JE1 BE1.png|32px]] Added poisonous potatoes.}}
{{History||1.13|snap=17w47a|Prior to [[Java_Edition_1.13/Flattening|''The Flattening'']], this [[item]]'s numeral ID was 394.}}
{{History|||snap=18w11a|Poisonous potatoes now generate in the [[chest]]s of [[shipwreck]]s.}}
{{History||1.14|snap=18w43a|[[File:Poisonous Potato JE2.png|32px]] The texture of poisonous potatoes has been changed.}}
{{History|||snap=18w50a|[[File:Poisonous Potato JE3 BE2.png|32px]] The texture of poisonous potatoes has been changed, once again.}}
{{History|pocket alpha}}
{{History||v0.12.1|snap=build 1|[[File:Poisonous Potato JE1 BE1.png|32px]] Added poisonous potatoes.}}
{{History|bedrock}}
{{History||1.4.0|snap=beta 1.2.14.2|Poisonous potatoes can now be found inside of [[shipwreck]] [[chest]]s.}}
{{History||1.10.0|snap=beta 1.10.0.3|[[File:Poisonous Potato JE3 BE2.png|32px]] The texture of poisonous potatoes has been changed.}}
{{History|console}}
{{History||xbox=TU14|xbone=CU1|ps=1.04|wiiu=Patch 1|switch=1.0.1|[[File:Poisonous Potato JE1 BE1.png|32px]] Added poisonous potatoes.}}
{{History||xbox=none|xbone=none|ps=1.90|wiiu=none|switch=none|[[File:Poisonous Potato JE3 BE2.png|32px]] The texture of poisonous potatoes has been changed.}}
{{History|New 3DS}}
{{History||0.1.0|[[File:Poisonous Potato JE1 BE1.png|32px]] Added poisonous potatoes.}}
{{History|foot}}
== Issues ==
{{issue list}}
== References ==
{{reflist}}
{{Items}}
[[Category:Plants]]
[[cs:Jedovatá brambora]]
[[de:Giftige Kartoffel]]
[[es:Patata envenenada]]
[[fr:Pomme de terre empoisonnée]]
[[hu:Mérgező burgonya]]
[[it:Patata velenosa]]
[[ja:青くなったジャガイモ]]
[[ko:독이 있는 감자]]
[[nl:Giftige aardappel]]
[[pl:Trujący ziemniak]]
[[pt:Batata venenosa]]
[[ru:Ядовитый картофель]]
[[th:มันฝรั่งพิษ]]
[[uk:Отруйна картопля]]
[[zh:毒马铃薯]]
[[Category:Food]]
[[Category:Renewable resources]]</li><li>[[Torchflower Seeds|Torchflower Seeds]]<br/>{{wip}}
{{Block
| image = <gallery>
Torchflower Age 0.png| Age 0
Torchflower Age 1.png| Age 1
Torchflower Age 2.png| Age 2
</gallery>
| image2 = Torchflower Seeds JE1.png
| transparent = Yes
| light = No
| tool = N/A
| renewable = Yes
| stackable = Yes (64)
| rarity = Common
|flammable=No
|lavasusceptible=No
}}
'''Torchflower seeds''' are seeds that have a chance to be dropped by [[Sniffer|sniffers]] when they finish digging.
== Obtaining ==
[[Sniffer]]s will occasionally bury their nose in the ground and start digging. Once the sniffer has finished digging, one torchflower seed will have a chance to be dropped on the floor as an item.
Sniffers can only dig for torchflower seeds in the following blocks:
*{{BlockLink|Dirt}}
*{{BlockLink|Grass Block}}
*{{BlockLink|Podzol}}
*{{BlockLink|Coarse Dirt}}
*{{BlockLink|Rooted Dirt}}
*{{BlockLink|Moss Block}}
*{{BlockLink|Mud}}
*{{BlockLink|Muddy Mangrove Roots}}
They cannot dig for torchflower seeds on [[mycelium]], which is intended.<ref>{{bug|MC-260259||Sniffers cannot dig nor find seeds on mycelium|WAI}}</ref>
== Usage ==
=== Crop ===
{{main|Tutorials/Crop farming|title1=Crop farming}}
Torchflower seeds can be {{control|placed}} on [[farmland]], where they grow through three stages. Breaking the torchflower crop before it matures drops the seed, while breaking the final stage produces one [[torchflower]] and does not yield the seed.
Crops break if pushed by a [[piston]] or if their supporting farmland breaks or turns to dirt (i.e. by being trampled), dropping their usual drops.
Farmer [[villager]]s can plant torchflower seeds, but cannot harvest them after they have fully grown.<ref>{{bug|MC-263382|||WAI}}</ref>
=== Feeding ===
Torchflower seeds can be used to breed [[sniffer]]s and [[chicken]]s and reduce the remaining growth duration of snifflets and chicks by 10%. Also, if some torchflower seeds were fed to an injured sniffer, it will heal it by {{hp|2}} health points.
=== Taming ===
Torchflower seeds can be used to tame [[parrot]]s.
=== Composting ===
Placing torchflower seeds into a [[composter]] has a 30% chance of raising the compost level by 1.
== Sounds ==
{{Sound table/Block/Crop}}
== Data values ==
=== ID ===
{{edition|java}}:
{{ID table
|edition=java
|showblocktags=y
|showitemtags=y
|showforms=y
|generatetranslationkeys=y
|displayname=Torchflower Crop
|spritetype=block
|nameid=torchflower_crop
|form=block
|blocktags=bee_growables, crops}}
{{ID table
|displayname=Torchflower Seeds
|spritetype=item
|nameid=torchflower_seeds
|form=item
|itemtags=villager_plantable_seeds
|foot=1}}
{{edition|bedrock}}:
{{ID table
|edition=bedrock
|shownumericids=y
|showforms=y
|generatetranslationkeys=y
|displayname=Torchflower Crop
|spritetype=block
|nameid=torchflower_crop
|id=-567
|form=block
|translationkey=-}}
{{ID table
|displayname=Torchflower Seeds
|spritetype=item
|nameid=torchflower_seeds
|id=296
|form=item
|foot=1}}
=== Block states ===
{{see also|Block states}}
{{/BS}}
== Achievements ==
{{Load achievements|Planting The Past}}
== Advancements ==
{{load advancements|A Seedy Place;Planting The Past;Little Sniffs}}
== History ==
{{History|java}}
{{History||1.20<br>(Experimental)|link=1.19.4|snap=23w07a|[[File:Torchflower Seeds JE1.png|32px]] Added torchflower seeds behind the [[Java Edition 1.20|Update 1.20 experimental datapack]].}}
{{History|||snap=1.19.4 Pre-release 1|Torchflower seeds can now be used to breed [[chicken]]s and tame [[parrot]]s.<ref>{{bug|MC-260035|||Fixed}}</ref>|Torchflower seeds are now next to other seeds in the [[Creative inventory]].|Placing torchflower seeds in farmland now gives the player the "A Seedy Place" [[advancement]].}}
{{History||1.20|snap=23w12a|[[Sniffer]]s can now be obtained in Survival, making torchflower seeds [[renewable]].|Torchflower seeds are now available without using the "Update 1.20" experimental datapack.}}
{{History|||snap=23w14a|Torchflower seeds can now be picked up by farmer [[villager]]s.|[[Sniffer]]s can now be tempted with torchflower seeds.}}
{{History|||snap=23w16a|[[Villager]]s can now plant torchflower seeds.}}
{{History|||snap=23w17a|The player now get the [[advancement]] "Little sniffs" when they feed a [[snifflet]] using torchflower seeds, "Planting the past" when they plant torchflower seeds on [[farmland]].}}
{{History|bedrock}}
{{History||Sniffer<br>(Experimental)|link=Bedrock Edition 1.19.70|snap=beta 1.19.70.23|[[File:Torchflower Seeds JE1.png|32px]] Added torchflower seeds behind the "[[Bedrock Edition 1.20.0|Sniffer]]" [[experimental]] toggle.}}
{{History||1.20.0|snap=beta 1.20.0.20|Torchflower seeds are now available without using the "Sniffer" experimental toggle.}}
{{History|foot}}
== Issues ==
{{issue list}}
== Trivia ==
* The final growth stage of the torchflower crop uses the same ID as the actual torchflower. This causes some side effects, such as the plant becoming offset and randomly jumping to the side.<ref>{{bug|MC-260472|resolution=wai}}</ref>
== Gallery ==
<gallery>
Torchflower Seeds stages.png|All the growth stages of torchflower seeds.
</gallery>
== Notes ==
{{notelist}}
== References ==
{{reflist}}
{{Blocks|upcoming}}
{{Items}}
[[Category:Plants]]
[[Category:Non-solid blocks]]
[[de:Fackelliliensamen]]
[[es:Semillas de plantorcha]]
[[ja:トーチフラワーの種]]
[[pt:Sementes de plantocha]]
[[zh:火把莲种子]]</li></ul> | beta 1.11.0.1 | The farmer job site block has been changed from farmland to composters. | |||
| Added economic trades, which makes villagers level up and require experience to unlock next tiers, which makes it possible to instantly change their tiers from iron to diamond. | |||||
Villager trades are no longer instantly refreshed as it now requires to resupply, which can be activated only by using /resupply. | |||||
Old villagers now convert to villager_v2 . | |||||
| Baby villagers are now ignored by illagers, including ravagers and vexes. | |||||
| beta 1.11.0.3 | Villager now heal themselves upon waking up at dawn. | ||||
| beta 1.11.0.4 | Villagers now hide in houses during raids. | ||||
| The villager economy trades have been changed. | |||||
| The supply and demand feature for villagers now works properly. | |||||
| Villagers now make sounds when they work. | |||||
1.13.0{{Extension DPL}}<ul><li>[[Spider Eye|Spider Eye]]<br/>{{Item
| title = Spider Eye
| image = Spider Eye.png
| renewable = Yes
| heals = {{Hunger|2}}
|effects={{EffectLink|Poison}} (0:05)
| stackable = Yes (64)
}}
A '''spider eye''' is a poisonous [[food]] and [[brewing]] item.
== Obtaining ==
=== Mob loot ===
==== Spiders ====
[[Spider]]s and [[cave spider]]s have a {{frac|1|3}} chance of dropping a [[spider eye]] when killed by a player or tamed wolf, but not when killed by environmental damage (such as falling). The maximum amount of spider eyes is increased by 1 per level of [[Looting]]. The chance of a spider '''not''' dropping any spider eyes can be found using the formula <code>2 / (Looting Level + 3)</code>. For example, Looting III gives a {{frac|1|3}} chance of not dropping any spider eyes. All other amounts have an equal chance of occurring.
==== Witches ====
[[Witch]]es have a chance of dropping 0–6 spider eyes upon death. This is increased by 3 per level of [[Looting]], for a maximum of 0-15 spider eyes.
=== Chest loot ===
{{LootChestItem|spider-eye}}
== Usage ==
=== Food ===
When [[Food|eaten]], a spider eye restores {{hunger|2}} [[Hunger|hunger points]] and 3.2 [[Hunger#Mechanics|saturation points]], giving a nourishment value of 1.6. It also applies a [[Poison]] [[effect]] lasting 5 seconds to the player, causing {{hp|4|poisoned=1}} damage, which reduces hunger/saturation by 6 points.
=== Crafting ingredient ===
{{crafting usage}}
=== Brewing ingredient ===
{{brewing
|showname=1
|head=1
|Spider Eye
|Mundane Potion
|base=Water Bottle
}}
{{brewing
|foot=1
|Spider Eye
|Potion of Poison
}}
==Sounds==
{{Sound table/Entity/Food}}
== Data values ==
=== ID ===
{{edition|java}}:
{{ID table
|edition=java
|showforms=y
|generatetranslationkeys=y
|displayname=Spider Eye
|spritetype=item
|nameid=spider_eye
|form=item
|foot=1}}
{{edition|bedrock}}:
{{ID table
|edition=bedrock
|shownumericids=y
|showforms=y
|notshowbeitemforms=y
|generatetranslationkeys=y
|displayname=Spider Eye
|spritetype=item
|nameid=spider_eye
|id=278
|form=item
|foot=1}}
== Advancements ==
{{load advancements|Husbandry;A Balanced Diet}}
== Video ==
<div style="text-align:center">{{yt|-PD-wX07TCg}}</div>
== History ==
{{History|java}}
{{History||1.0.0|snap=Beta 1.9 Prerelease 2|[[File:Spider Eye JE1 BE1.png|32px]] Added spider eyes.
|Spider eyes can be used to craft [[fermented spider eye]]s.}}
{{History|||snap=Beta 1.9 Prerelease 3|Spider eyes can now be [[brewing|brewed]] in a [[water bottle]] to create a [[Mundane Potion]], or in an [[Awkward Potion]] to create a [[Potion of Poison]].}}
{{History||1.4.2|snap=12w38b|Spider eyes can now be dropped by [[witch]]es.}}
{{History||1.9|snap=15w44a|Spider eyes can now be found in [[desert pyramid|desert temple]] [[chest]]s.}}
{{History||1.13|snap=17w47a|Prior to [[1.13/Flattening|''The Flattening'']], this [[item]]'s numeral ID was 375.}}
{{History||1.14|snap=18w43a|[[File:Spider Eye JE2 BE2.png|32px]] The texture of spider eyes has been changed.}}
{{History|pocket alpha}}
{{History||v0.12.1|snap=build 1|[[File:Spider Eye JE1 BE1.png|32px]] Added spider eyes.|Spider eyes can be used to craft [[fermented spider eye]]s and for [[brewing]].}}
{{History||v0.13.0|snap=build 1|Spider eyes can now be found in [[desert pyramid|desert temple]] [[chest]]s.}}
{{History||v0.14.0|snap=build 1|Spider eyes can now dropped by [[witch]]es.}}
{{History|bedrock}}
{{History||1.10.0|snap=beta 1.10.0.3|[[File:Spider Eye JE2 BE2.png|32px]] The texture of spider eyes has been changed.}}
{{History|console}}
{{History||xbox=TU7|xbone=CU1|ps=1.0|wiiu=Patch 1|[[File:Spider Eye JE1 BE1.png|32px]] Added spider eyes.}}
{{History||xbox=none|xbone=none|ps=1.90|wiiu=none|[[File:Spider Eye JE2 BE2.png|32px]] The texture of spider eyes has been changed.}}
{{History|New 3DS}}
{{History||0.1.0|[[File:Spider Eye JE1 BE1.png|32px]] Added spider eyes.}}
{{History|foot}}
== Issues ==
{{issue list}}
== References ==
{{reflist}}
{{items}}
[[cs:Pavoučí oko]]
[[de:Spinnenauge]]
[[es:Ojo de araña]]
[[fr:Œil d'araignée]]
[[hu:Pókszem]]
[[it:Occhio di ragno]]
[[ja:クモの目]]
[[ko:거미 눈]]
[[nl:Spinnenoog]]
[[pl:Oko pająka]]
[[pt:Olho de aranha]]
[[ru:Паучий глаз]]
[[zh:蜘蛛眼]]
[[Category:Food]]
[[Category:Renewable resources]]
[[Category:Brewing recipe]]</li><li>[[Minecart with Command Block|Minecart with Command Block]]<br/>{{ItemEntity
|renewable=No
|stackable=No
|size=Height: 0.7 Blocks<br>Width: 0.98 Blocks
|image=Minecart with Command Block.gif
|image2=Minecart with Command Block BE.gif
|invimage1=Minecart with Command Block
|networkid=10
|drops={{drop|Item|Minecart|1}}
|health={{hp|6}}
|rarity=Epic
}}
A '''minecart with command block''' is an impulse{{only|java|short=y}} or repeating{{only|bedrock|education|short=y}} [[command block]] inside a [[minecart]].
== Obtaining ==
The minecart with command block is obtainable only using the [[command]] {{cmd|give @s command_block_minecart}}, as it does not appear in the creative inventory{{only|BE}} and has no [[crafting]] recipe. It can also be summoned using the command {{cmd|summon command_block_minecart}}. It can be broken like any other minecart, but only the minecart is retained, while the command block is lost.
== Usage ==
{{main|Command Block}}
The minecart with command block combines the functionalities of both minecarts and command blocks. Although the minecart visually contains an impulse command block, it functions more similarly to a repeating command block, and runs its command once every four game [[tick]]s when on an active [[activator rail]]. When it passes over a [[detector rail]] with a [[comparator]] connected next to it, it outputs the command block's result.
== Sounds ==
{{Edition|Java}}:<br>
Minecarts with command blocks use the Friendly Creatures sound category for entity-dependent sound events.<ref group="sound" name="rollsource">{{bug|MC-42132}}</ref>
{{Sound table
|sound=Minecart rolling.ogg
|subtitle=Minecart rolls
|source=Friendly Creatures <ref group=sound name=rollsource/>
|overridesource=1
|description=While a minecart with command block is moving
|id=entity.minecart.riding
|translationkey=subtitles.entity.minecart.riding
|volume=0.0-0.35 <ref group=sound>Relates linearly with horizontal velocity (max 0.5)</ref>
|pitch=0.0-1.0 <ref group=sound>Will increase by 0.0025 per tick if the minecart's horizontal velocity is more than 0.01</ref>
|distance=16
|foot=1}}
{{Edition|Bedrock}}:
{{Sound table
|type=bedrock
|sound=Minecart rolling.ogg
|source=neutral
|description=While a minecart with command block is moving
|id=minecart.base
|foot=1}}
== Data values ==
=== ID ===
{{edition|java}}:
{{ID table
|edition=java
|firstcolumnname=Item
|showforms=y
|generatetranslationkeys=y
|displayname=Minecart with Command Block
|spritetype=item
|nameid=command_block_minecart
|form=item
|foot=1}}
{{ID table
|edition=java
|firstcolumnname=Entity
|generatetranslationkeys=y
|displayname=Minecart with Command Block
|spritetype=entity
|nameid=command_block_minecart
|foot=1}}
{{edition|bedrock}}:
{{ID table
|edition=bedrock
|firstcolumnname=Item
|shownumericids=y
|showforms=y
|notshowbeitemforms=y
|generatetranslationkeys=y
|displayname=Minecart with Command Block
|spritetype=item
|nameid=command_block_minecart
|id=563
|form=item
|foot=1}}
{{ID table
|edition=bedrock
|firstcolumnname=Entity
|shownumericids=y
|generatetranslationkeys=y
|displayname=Minecart with Command Block
|spritename=minecart-with-repeating-command-block
|spritetype=entity
|nameid=command_block_minecart
|id=100
|foot=1}}
=== Entity data ===
Minecarts with command blocks have entity data associated with them that contain various properties of the entity.
{{el|java}}:
{{main|Entity format}}
{{/ED}}
{{el|bedrock}}:
: See [[Bedrock Edition level format/Entity format]].
== History ==
{{History|java}}
{{History||1.7.2|snap=13w39a|[[File:Minecart with Command Block JE1.png|32px]] [[File:Minecart with Command Block (item) JE1 BE2.png|32px]] Added minecart with command block.}}
{{History||1.9|snap=15w34a|[[File:Minecart with Command Block JE2.png|32px]] The texture of the [[command block]] in the [[minecart]] has been removed due to the new texture and types for the command block.}}
{{History|||snap=15w35a|[[File:Minecart with Command Block JE3.png|32px]] The texture of the command block has been changed.}}
{{History||1.11|snap=16w32a|The [[entity]] ID has been changed from <code>MinecartCommandBlock</code> to <code>commandblock_minecart</code>.}}
{{History||1.13|snap=17w47a|Prior to [[1.13/Flattening|''The Flattening'']], this [[item]]'s numeral ID was 422.}}
{{History|||snap=pre5|The entity ID has been changed to <code>command_block_minecart</code>.}}
{{History||1.14|snap=18w43a|[[File:Minecart with Command Block JE4.png|32px]] [[File:Minecart with Command Block (item) JE2 BE3.png|32px]] The textures of the minecart with command block has been changed.}}
{{History||1.17|snap=21w20a|Minecart with command block [[Rarity|rarity color]] was changed from common to epic.}}
{{History||1.19.3|snap=22w44a|Minecart with command block is now available in the creative inventory, but only if cheats are enabled.}}
{{History|||snap=22w45a|Moved the minecart with command block behind the Operator Utilities tab in the creative inventory. The tab is only available if cheats are enabled and the "Operator Items Tab" option in the controls menu is turned on.}}
{{History|pocket}}
{{History||1.0.5|snap=alpha 1.0.5.0|[[File:Minecart with Command Block BE1.png|32px]] [[File:Minecart with Command Block (item) BE1.png|32px]] Added minecart with command block. The [[minecart]] has a [[repeating command block]] in it, instead of an impulse command block.}}
{{History||1.1.0|snap=alpha 1.1.0.0|The entity ID has been changed from <code>minecartcommandblock</code> to <code>command_block_minecart</code>.}}
{{History|bedrock}}
{{History||1.10.0|snap=beta 1.10.0.3|[[File:Minecart with Command Block BE2.png|32px]] [[File:Minecart with Command Block (item) JE2 BE3.png|32px]] The texture of the minecart with command block has been changed. Also the item texture has been changed to match {{el|je}}'s.<ref>{{bug|MCPE-42990}}</ref>}}
{{History|console}}
{{History||xbox=?|xbone=?|ps=?|wiiu=?|switch=?|Added minecart with command blocks. This only exists as an item, as placing it will result in a normal minecart being placed. The command block in the minecart cannot be modified via NBT editing and it has an unused tooltip stating "Used to execute commands on the move!".}}
{{History|foot}}
== Issues ==
{{issue list}}
== Gallery ==
<gallery>
File:Minecart with command block 13w39b.png|A minecart with command block in [[1.16.4]].
File:A minecart command block testing the block in the red bucket with air.png|A minecart command block testing the block in the red area with [[air]].
</gallery>
==References==
{{Reflist}}
{{Items}}
{{Entities}}
[[de:Befehlsblocklore]]
[[fr:Wagonnet à bloc de commande]]
[[it:Carrello da miniera]]
[[ja:コマンドブロック付きのトロッコ]]
[[nl:Mijnkar met opdrachtblok]]
[[pl:Wagonik z blokiem poleceń]]
[[pt:Carrinho de mina com bloco de comando]]
[[ru:Вагонетка с командным блоком]]
[[uk:Вагонетка з командним блоком]]
[[zh:命令方块矿车]]</li></ul> | beta 1.13.0.9 | Villagers can now heal if they have bread in their inventory. | |||
1.17.0{{Extension DPL}}<ul><li>[[Minecart with Furnace|Minecart with Furnace]]<br/>{{ItemEntity
|image=Minecart with Furnace.png
|renewable=Yes
|stackable=No
|size=Height: 0.7 Blocks<br>Width: 0.98 Blocks
|networkid=10
|drops= 1 {{ItemLink|Minecart with Furnace}}
|health={{Hp|6}}
}}
A '''minecart with furnace''' is a [[furnace]] inside a [[minecart]]. It can be powered with [[coal]] or [[charcoal]] to propel it across a [[rail]] line for a limited time, which can be used to move other minecarts.
==Obtaining==
Minecarts with furnace can be retrieved by attacking them, and by doing so it drops as an [[item]].
===Crafting===
{{Crafting
|Output= Minecart with Furnace
|type= Transportation
|Furnace|Minecart}}
==Usage==
Minecarts with furnaces are placed in the same way as other minecarts. It does not have a graphical user interface, unlike a [[furnace]].
Minecarts with furnaces can be powered, done by feeding fuel ([[coal]] or [[charcoal]]) into the furnace minecart with the {{Control|use}} button. The fuel is consumed immediately and it starts to move in the same direction the player clicked toward. Pressing {{Control|use}} always turns it to that direction, even when not holding coal.
Any piece of fuel, added at any time, increases the total range by an additional 3600 ticks (equal to 180 seconds or 3 minutes). The upper limit is 32767 ticks, approximately 27 minutes.
When powered, minecarts with furnaces cover 240m per minute (about 4 m/s, slightly slower than walking speed) or 720m per piece of coal. They do not accelerate beyond this speed when going downhill or on active [[powered rail]]s, and as long as they remain powered, they do not slow down when going uphill, on inactive powered rails, or when pushing or pulling other minecarts.
If a powered furnace minecart is derailed and then pushed back onto a rail, it starts moving again in the direction it came from, so they are not easily turned around in this state unless a player is nearby to redirect it with {{Control|use}}.
Minecarts with furnaces can climb up steep inclines while pushing other minecarts as long as they have fuel. If a minecart with furnace reaches a slope while pulling another minecart, the pulled minecart is switched to the forward position so that it can be pushed along the slope instead of pulled.
When a minecart with furnace bumps into another minecart or multiple minecarts, the other minecarts are pushed forward with great speed. The furnace minecart continues on with its own speed. Because of this speed difference, some of the minecarts may end up inside unloaded chunks on straight tracks.
===Train mechanics===
{{Schematic
|caption=weakly-shunted 1-cart train, one cart was used only to push the train together and is left behind
|AB|mc-$ew|mc-$ew|mc/Fu-$ew|-
|AB|ra-$wu|ra-$ew|ra-$ew|ra-$ew|ellipsis-ew
}}
{{Schematic
|caption=Creating a strongly-shunted 1-cart train. The sloped rail must be replaced with a horizontal rail before powering.
|AB|mc-$ew||mc/Fu-$ew|-
|AB|ra-$ew|ra-$ew|ra-$eu|ra-$ew|ra-$ew|ellipsis-ew
}}
[[File:FurnaceMinecartTrain.png|thumb|right|A Minecart train powered by furnace [[Minecart|minecarts.]]|alt=]]
A furnace minecart can be made to pull up to four other minecarts. All minecarts in this train move at the constant speed of the furnace minecart. Trains are formed when a minecart is pushed into the back of a powered furnace minecart or a short-enough train. These shunts are fragile at best and easily come undone, but some methods are stronger than others. For example, pushing a minecart into a furnace minecart and then powering the furnace gives a weaker shunt than pushing the furnace minecart into the other minecart against a wall, and then powering the furnace in the other direction.
A high-speed minecart running into the back of a furnace minecart going in the same direction automatically creates a weak shunt with it, pulling it along.
Pulling a minecart with TNT causes it to explode.
{| class="wikitable"
|+Pulled minecart/Shunt behavior
!Condition
!Result
|-
|Furnace loses power/speed||Shunt comes undone
|-
|Entity bumping besides those part of the train||Jettisoned forward
|-
|Upward sloped track||Jettisoned forward
|-
|Downward sloped track||Jettisoned forward (strong shunt) or shunt comes undone (weak shunt)
|-
|90° turn in track||Jettisoned backward
|-
|Turn toward north/south or east/west that is not the direction the train was shunted in||Train derails
|}
When a train comes to a turn, the shunt comes undone with the pulled minecart jettisoned backward. The correct way to make such a turn is having the shunt undone before a turn, and then make the two rejoin on a straight rail later by having the pulled cart catch up with the minecart with furnace.<ref name=mango/>
Since the train runs slower on a fully powered track than a normal minecart (~5 m/s compared to 8m/s), a train pulled by an unpowered furnace minecart is ideal for AFK farms involving breaking or placing blocks like [[nether wart]].<ref name=mango>{{YouTubeLink|1=pRLiAQfhTG8|2=Why The Furnace Minecart Isn't As Useless As You Think|3=ilmango}}</ref>
==Properties==
The coal is not stored as an item in the entity, but in the object data in the fuel property as a time in ticks. ''Fuel'' is a short value, i.e. a maximum of 32767 ticks, which is about 27 minutes. However, {{cmd|/summon furnace_minecart ~ ~ ~ {Fuel:32000} }} alone doesn't make it go since it doesn't have a direction. It can be right-clicked on a track to give it a direction, or it can be summoned with the properties ''PushX'' and ''PushZ'' set, which are responsible for the direction. The <code>Motion</code> property of every entity allows for movement of the minecart, but it does not direct the minecart to move on its own.
==Sounds==
{{Edition|Java}}:<br>
Minecarts with furnaces use the Friendly Creatures sound category for entity-dependent sound events.<ref group=sound name=rollsource>{{bug|MC-42132}}</ref>
{{Sound table
|sound=Minecart rolling.ogg
|subtitle=Minecart rolls
|source=Friendly Creatures <ref group=sound name=rollsource/>
|overridesource=1
|description=While a minecart with furnace is moving
|id=entity.minecart.riding
|translationkey=subtitles.entity.minecart.riding
|volume=0.0-0.35 <ref group=sound>Relates linearly with horizontal velocity (max 0.5)</ref>
|pitch=0.0-1.0 <ref group=sound>Will increase by 0.0025 per tick if the minecart's horizontal velocity is more than 0.01</ref>
|distance=16
|foot=1}}
{{Edition|Bedrock}}:
{{Sound table
|type=bedrock
|sound=Minecart rolling.ogg
|source=neutral
|description=While a minecart with furnace is moving
|id=minecart.base
|foot=1}}
==Data values==
===ID===
{{ID table
|edition=java
|firstcolumnname=Item
|showforms=y
|generatetranslationkeys=y
|displayname=Minecart with Furnace
|spritetype=item
|nameid=furnace_minecart
|form=item
|foot=1}}
{{ID table
|edition=java
|firstcolumnname=Entity
|generatetranslationkeys=y
|displayname=Minecart with Furnace
|spritetype=entity
|nameid=furnace_minecart
|foot=1}}
===Entity data===
Minecarts with furnace have entity data associated with them that contain various properties of the entity.
{{el|java}}:
{{main|Entity format}}
{{/ED}}
{{el|bedrock}}:
: See [[Bedrock Edition level format/Entity format]].
==History==
{{History|java alpha}}
{{History||v1.0.14|[[File:Minecart with Furnace JE1.png|32px]] [[File:Minecart with Furnace (item) JE1.png|32px]] Minecarts with furnace were added.
|Since no in-game name was indicated, they were referred to by names such as "powered minecart" or "furnace minecart".
|No matter how much fuel was added to the minecart, it would never move for more than 3 minutes after the last fuel.}}
{{History|java beta}}
{{History||1.0|When tooltips were added to items in inventory, this was named "Minecart with Furnace".}}
{{History||1.2|[[File:Minecart with Furnace JE2.png|32px]] The texture of the minecart with furnace has been changed.}}
{{History|java}}
{{History||1.0.0|snap=?|Each piece of [[coal]] now powers a [[minecart]] with furnace for {{convert|3|minutes|ticks}}, so that adding another piece of coal at any time increases the total range by another 3 minutes. A full stack of 64 coal now powers it for {{convert|192|minutes|ticks}}.
|Minecarts with furnace on a level track cover 204 meters per minute.}}
{{History||1.8|snap=14w11a|Minecarts with furnace now give a much greater boost to other minecarts.
|When powered, minecarts with furnace now move on non-powered rails without decelerating.}}
{{History|||snap=14w17a|Minecarts with furnace's behavior has been reverted, so that no change was released in [[Java Edition 1.8]].}}
{{History||1.11|snap=16w32a|The entity ID of the minecart with furnace has been changed from <code>MinecartFurnace</code> to <code>furnace_minecart</code>.}}
{{History||1.13|snap=17w47a|Prior to [[1.13/Flattening|''The Flattening'']], this [[item]]'s numeral ID was 343.}}
{{History||1.14|snap=18w43a|[[File:Minecart with Furnace JE3.png|32px]] [[File:Minecart with Furnace (item) JE2.png|32px]] The texture of the minecart with furnace has been changed.}}
{{History||1.15|snap=19w38a|[[File:Minecart with Furnace 19w38a.png|32px]] The furnace now appears dark, like suffocating mobs.}}
{{History|||snap=19w39a|The furnace texture is now colored correctly.}}
{{History||1.15.2|snap=Pre-Release 1|Furnace minecarts can now navigate around any corner.}}
{{History||1.19|snap=22w13a|The crafting recipe for a minecart with furnace is now shapeless.
|Breaking a minecart with furnace will now drop the item instead of the minecart and furnace separately.<ref>{{bug|MC-249493|||Fixed}}</ref>}}
{{History|console}}
{{History||xbox=TU1|xbone=CU1|ps=1.0|wiiu=Patch 1|switch=1.0.1|[[File:Minecart with Furnace JE2.png|32px]] [[File:Minecart with Furnace (item) JE1.png|32px]] Added minecart with furnace.}}
{{History|Ps4}}
{{History||1.90|[[File:Minecart with Furnace JE3.png|32px]] [[File:Minecart with Furnace (item) JE2.png|32px]] The texture of the minecart with furnace has been changed.}}
{{History|foot}}
==Issues==
{{issue list}}
==Trivia==
*The minecart with furnace is excluded from {{els|be|3ds}} on purpose. In a tweet, [[Jeb]] considered removing it from {{el|je}}.<ref>{{tweet|jeb|699241247391772672|I think we will phase out the furnace minecraft ''(sic)''|15 Feb 2016}}</ref>
**When converting a [[Legacy Console Edition]] world to a [[Bedrock Edition]] world, any present minecarts with furnaces are converted into a normal minecart.
**Despite the above-described poor standing of the minecart, it was most recently briefly featured in an animation in the [[Minecraft Live 2022]], where one was depicted as moving a train of about 20 minecarts at a higher than normal speed.
==Gallery==
<gallery>
Running Powered Minecart.png|A powered minecart in action.
</gallery>
==References==
{{reflist}}
{{Items}}
{{Entities}}
[[Category:Mechanics]]
[[cs:Parní vozík]]
[[de:Antriebslore]]
[[es:Vagoneta con horno]]
[[fr:Wagonnet motorisé]]
[[hu:Gőzmeghajtású csille]]
[[ja:かまど付きのトロッコ]]
[[ko:화로가 실린 광산 수레]]
[[nl:Mijnkar met oven]]
[[pl:Wagonik z piecem]]
[[ru:Вагонетка с печью]]
[[uk:Вагонетка з піччю]]
[[zh:动力矿车]]</li><li>[[Brick|Brick]]<br/>{{about|the item|the crafted block|Bricks|other uses}}
{{Item
| image = [[File:Brick JE2 BE2.png|32px]]
| stackable = Yes (64)
| renewable = Yes
}}
A '''brick''' is an item used to craft [[bricks|brick]] blocks, [[flower pot]]s, and [[decorated pot]]s.
== Obtaining ==
=== Smelting ===
A brick can be obtained by smelting a [[clay ball]].
{{Smelting
|Clay Ball
|Brick
|0,3
}}
=== Mining ===
When [[breaking]] a [[decorated pot]] with a tool without [[Silk Touch]] on the main hand, the decorated pot can drops 0-4 brick(s) depend on the material that the decorated pot make of.
=== Loot ===
{{LootChestItem|brick}}
=== Trading ===
Novice-level stone mason [[villager]]s sell 16{{only|bedrock}} or 10{{only|java}} bricks for one [[emerald]].
== Usage ==
Brick can be used to craft [[bricks]], [[flower pot]]s, and [[decorated pot]]s.
=== Crafting ingredient ===
{{crafting usage}}
== Data values ==
=== ID ===
{{edition|java}}:
{{ID table
|edition=java
|showforms=y
|generatetranslationkeys=y
|displayname=Brick
|spritetype=item
|nameid=brick
|form=item
|foot=1}}
{{edition|bedrock}}:
{{ID table
|edition=bedrock
|shownumericids=y
|showforms=y
|notshowbeitemforms=y
|generatetranslationkeys=y
|displayname=Brick
|spritetype=item
|nameid=brick
|id=383
|form=item
|foot=1}}
== History ==
{{History|java alpha}}
{{History||v1.0.11|[[File:Brick JE1 BE1.png|32px]] Added bricks as an item.}}
{{History|java}}
{{History||1.4.2|snap=12w34a|Bricks are now used for [[flower pot]]s.}}
{{History||1.13|snap=17w47a|Prior to [[1.13/Flattening|''The Flattening'']], this item's numeral ID was 336.}}
{{History||1.14|snap=18w43a|[[File:Brick JE2 BE2.png|32px]] The texture of bricks has been changed.}}
{{History|||snap=19w11a|Bricks are now [[trading|sold]] by [[villager]]s of the new mason profession, making them [[renewable resource|renewable]].}}
{{History||1.20<br>(Experimental)|link=1.19.4|snap=23w07a|Bricks can now be used for crafting [[decorated pot]]s.|Bricks now drop when brushing [[suspicious sand]] in [[desert well]]s.|Bricks now drop when mining [[decorated pot]] with a tool on the main hand.}}
{{History||1.20|snap=23w12a|The probability for the brick to generate in the [[suspicious sand]] in [[desert well]] has been changed from 1/7 to 1/8.|Brick can now be found in [[suspicious gravel]] and [[suspicious sand]] in [[trail ruins]].}}
{{History|||snap=23w16a|Brick no longer generates in [[suspicious sand]] in [[trail ruins]].|Due to the split of the archaeological loot tables for the suspicious gravel within the [[trail ruins]]; brick now is in the common loot.}}
{{History|pocket alpha}}
{{History||v0.2.0|[[File:Brick JE1 BE1.png|32px]] Added bricks as an item. They are currently unobtainable and serve no purpose.}}
{{History||v0.3.2|Bricks can now be obtained by smelting clay balls.
|Bricks are now used to craft [[brick block]]s.}}
{{History||v0.12.1|snap=build 1|Bricks are now used to craft [[flower pot]]s.}}
{{History||v0.16.0|snap=build 5|Added bricks to the [[Creative]] [[inventory]].<ref name="missing brick">{{Bug|MCPE-16556}}</ref>}}
{{History|bedrock}}
{{History||1.10.0|snap=beta 1.10.0.3|16 bricks can now be obtained via trading with stone mason [[villager]]s for 1-2 [[emerald]]s.
|[[File:Brick JE2 BE2.png|32px]] The texture of bricks has now been changed.}}
{{History||1.11.0|snap=beta 1.11.0.4|Trading has been changed; bricks sold by stone mason villagers now cost only one emerald.}}
{{History||1.20.0<br>(Experimental)|link=Bedrock Edition 1.19.70|snap=beta 1.19.70.23|Bricks now drop when brushing [[suspicious sand]] in [[desert well]]s and can be used to craft decorated pots.}}
{{History|console}}
{{History||xbox=TU1|xbone=CU1|ps=1.0|wiiu=Patch 1|[[File:Brick JE1 BE1.png|32px]] Added bricks.}}
{{History||xbox=none|xbone=none|ps=1.90|wiiu=none|switch=none|[[File:Brick JE2 BE2.png|32px]] The texture of bricks has been changed.}}
{{History|3ds}}
{{History||0.1.0|[[File:Brick JE1 BE1.png|32px]] Added bricks.}}
{{History|foot}}
== Issues ==
{{issue list}}
== References ==
{{reflist}}
{{Items}}
[[Category:Renewable resources]]
[[cs:Cihla]]
[[de:Ziegel]]
[[es:Ladrillo]]
[[fr:Brique]]
[[hu:Tégla]]
[[it:Mattone]]
[[ja:レンガ]]
[[ko:벽돌 (아이템)]]
[[nl:Baksteen]]
[[pl:Cegła]]
[[pt:Tijolo]]
[[ru:Кирпич]]
[[th:อิฐ]]
[[uk:Цеглина]]
[[zh:红砖]]</li></ul> | beta 1.16.230.54 | Mason villagers can now sell 4 dripstone blocks for an emerald. | |||
| Legacy Console Edition | |||||
| TU7 | CU1 | 1.0 | Patch 1 | 1.0.1 | |
| Villagers have the same level of AI as PC version 1.0.0, as they cannot trade, harvest crops, breed or open doors. | |||||
| TU11 | The limit for villagers has been increased in a world. | ||||
| TU12 | Villagers can now open and close doors. | ||||
| Villagers now go inside at night and detect houses. | |||||
| Villagers can now socialize with each other and passive mobs. | |||||
| Villagers are now attacked by and run away from zombies. | |||||
| Villagers now repopulate villages by the number of houses there are. | |||||
| Baby villagers now sprint. | |||||
| TU13 | A limit to the number of villagers spawned by breeding has been added. | ||||
| Added the hearts display when villagers enter 'love mode'. | |||||
| TU14 | 1.04 | Trading with villagers has been added. | |||
| Villagers are now assigned random professions. | |||||
| Villagers that are spawned from a spawn egg now have a random profession. | |||||
| Villagers now make sounds from being hurt, trading and wandering. | |||||
| Baby villagers can now be spawned by using | |||||
| TU31 | CU19 | 1.22 | Patch 3 | Villagers now have additional professions and trading schemes. | |
| Villagers now harvest crops. | |||||
| Villagers now breed only when willing (and can be made willing by giving them 3 bread, 12 carrots or 12 potatoes). | |||||
| Villagers turn into witches when struck by lightning. | |||||
| TU54 | CU44 | 1.52 | Patch 24 | 1.0.4 | Added a new career for the librarian villager: "Cartographer". |
| 1.91 | Added nitwit, unemployed villagers. | ||||
| Added mason villagers, which can be traded with. | |||||
| Villagers have new clothing to indicate their level, profession, and biome. | |||||
| Villagers now have a schedule. Adult and child villagers have a different schedule. | |||||
| Villagers may now wander to the village outskirts. | |||||
| Villagers now attempt to find a door when it rains during the day and navigate to their bed at night. | |||||
| The pathfinding of villagers has been updated and improved. | |||||
| Villagers now have a visual-based trading system, and now hold up the item they wish to trade. | |||||
| Villagers now mingle together around gathering sites in the village. | |||||
| Librarian villagers now inspect bookshelves. | |||||
| Villagers can now switch professions depending on the job site blocks available in the village. | |||||
| Villagers now interact with beds and corresponding job site blocks. | |||||
Issues
Issues relating to "Villager" are maintained on the bug tracker. Report issues there.
Trivia
- The villagers were inspired by the shopkeepers in Dungeon Master 2.[8]
- Originally, the mobs populating villages were to be pigmen.[9]
- When a villager is in love mode, it walks slowly. However, when a villager runs indoors as the night falls, it runs faster than the player's sprinting speed.
- The villager skins added in the Village and Pillage update were inspired by 2018 fashion shows, such as Gucci's.[10]
- Villagers occasionally sleep in odd ways during the night inside their beds, sometimes hanging halfway off the side of the bed or even glitching into walls.
- Although the villages in snowy taiga biomes spawn the snowy villager variant in Bedrock Edition, they use the taiga village variant.
- In Java Edition, when the Programmer Art resource pack is enabled, all villagers wear a green hood on their heads.[11] This is because the Programmer Art nitwit texture (which is directly copied from the pre-1.14 vanilla resource pack and had the hood in the texture since its addition) is called the same as the Village & Pillage base villager texture (
...\entity\villager\villager.png).- In Bedrock Edition, when the Classic Textures pack from Marketplace is enabled, the villagers still use their default texture instead of the old texture.[12] This is because the old textures of villager are located in
...\entity\villager, while the textures for new villagers are in...\entity\villager2.
- In Bedrock Edition, when the Classic Textures pack from Marketplace is enabled, the villagers still use their default texture instead of the old texture.[12] This is because the old textures of villager are located in
- In Java Edition, baby villagers are the only mobs that do not have a disproportionately large head compared to their adult counterparts. Rather, they are smaller versions of the adult villager.
- Giving a villager any item (with commands) causes it to hold the item as if offering it, but it cannot be traded.
- Fisherman villagers have been intentionally textured by Jasper Boerstra to display the long-since-removed raw fish texture.[13]
- Villagers display their held items differently than most creatures do, using the "ground" parameter instead of the usual hand parameter in model display settings.
- Villagers (and baby villagers) on boats that have claimed a bed can still sleep when the bed is near to them resulting in them sleeping in the boat instead.[Bedrock Edition only]
- Although they are usually passive to villagers, when a firework set off by a villager damages an iron golem, it can actually anger it, causing the iron golem to attack the villager.[Java Edition only][14]
April fools
On April 1, 2014, Mojang announced that villagers have taken over the skin servers and content delivery networks (CDN) as an April Fools joke. This caused the player's current skin to turn into villager skins, and caused users to be unable to change their skins unless modifying the launcher .json file. Different career villager skins were used, including the then-unused nitwit villager (green robe).
Many of the sounds were also changed, supposedly by the villagers. They seem to be similar to a villager talking (with words, rather than their normal sounds). The in-game music has also been altered to include villager like noises, and also features a villager version of the "Game of Thrones" theme on the title screen. The sounds originate from the sound resource pack created by Element Animation, titled The Element Animation Villager Sound Resource Pack (T.E.A.V.S.R.P.), which is based on the villagers appearing in their fan videos. The villagers were voiced by Dan Lloyd, Director of Element Animation.
The skins and the sounds were reverted to the way they were before on April 2, 2014. However, this update cannot be activated by setting the computer's date to April 1, 2014.
Gallery
Screenshots
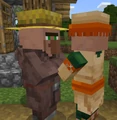
Two villagers from a rare multi-biome village (in this case plains and desert) meeting.

A plains farmer villager holding bread.
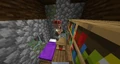
A librarian inspecting a bookshelf.

A group of villager children playing tag.
A villager sweating during a raid.
All plains biome variant professions (except unemployed) corresponding to their different job site blocks.
Every villager skin type per profession and biome.
A villager panicked.
A Creeper face on the robe of a plains biome cleric villager.
The base skin for all villagers. This is never seen in-game.
Villager in Beta 1.9 Prerelease, when villagers had the word "TESTIFICATE" displayed over their heads.
An image released earlier by Jeb showing separated villagers.[15]
Purchasing shears from a villager before the 1.14 update.
Children before the 1.14 update.
Purchasing Feather Falling IV enchanted book from a villager before the 1.14 update.
The new Jungle villager textures shown at MINECON Earth 2018.
New villager textures, shown at MINECON Earth 2018, announced as the Taiga biome variants. They are instead used for the Snowy Plains biome variants.
A vindicator chasing a villager.
An illusioner attacking villagers.

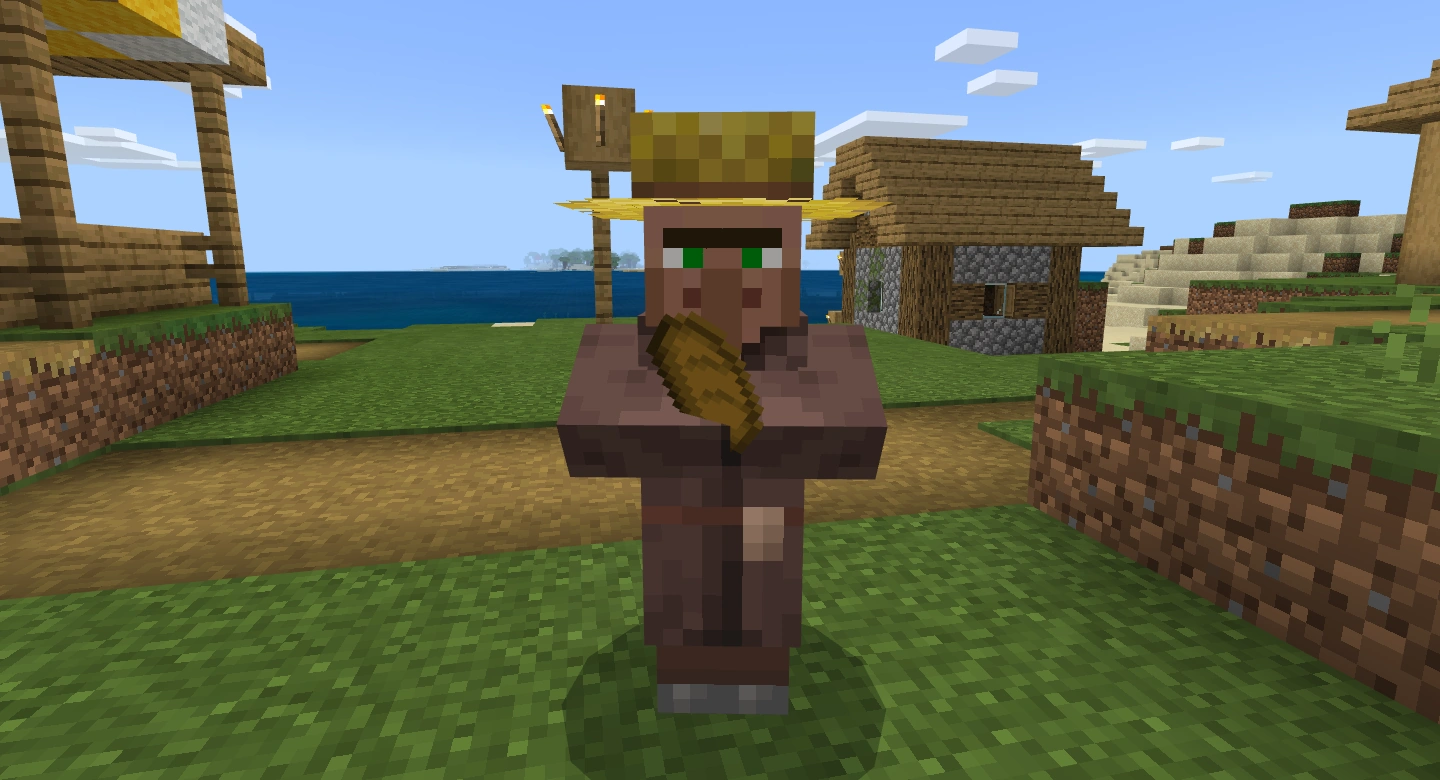
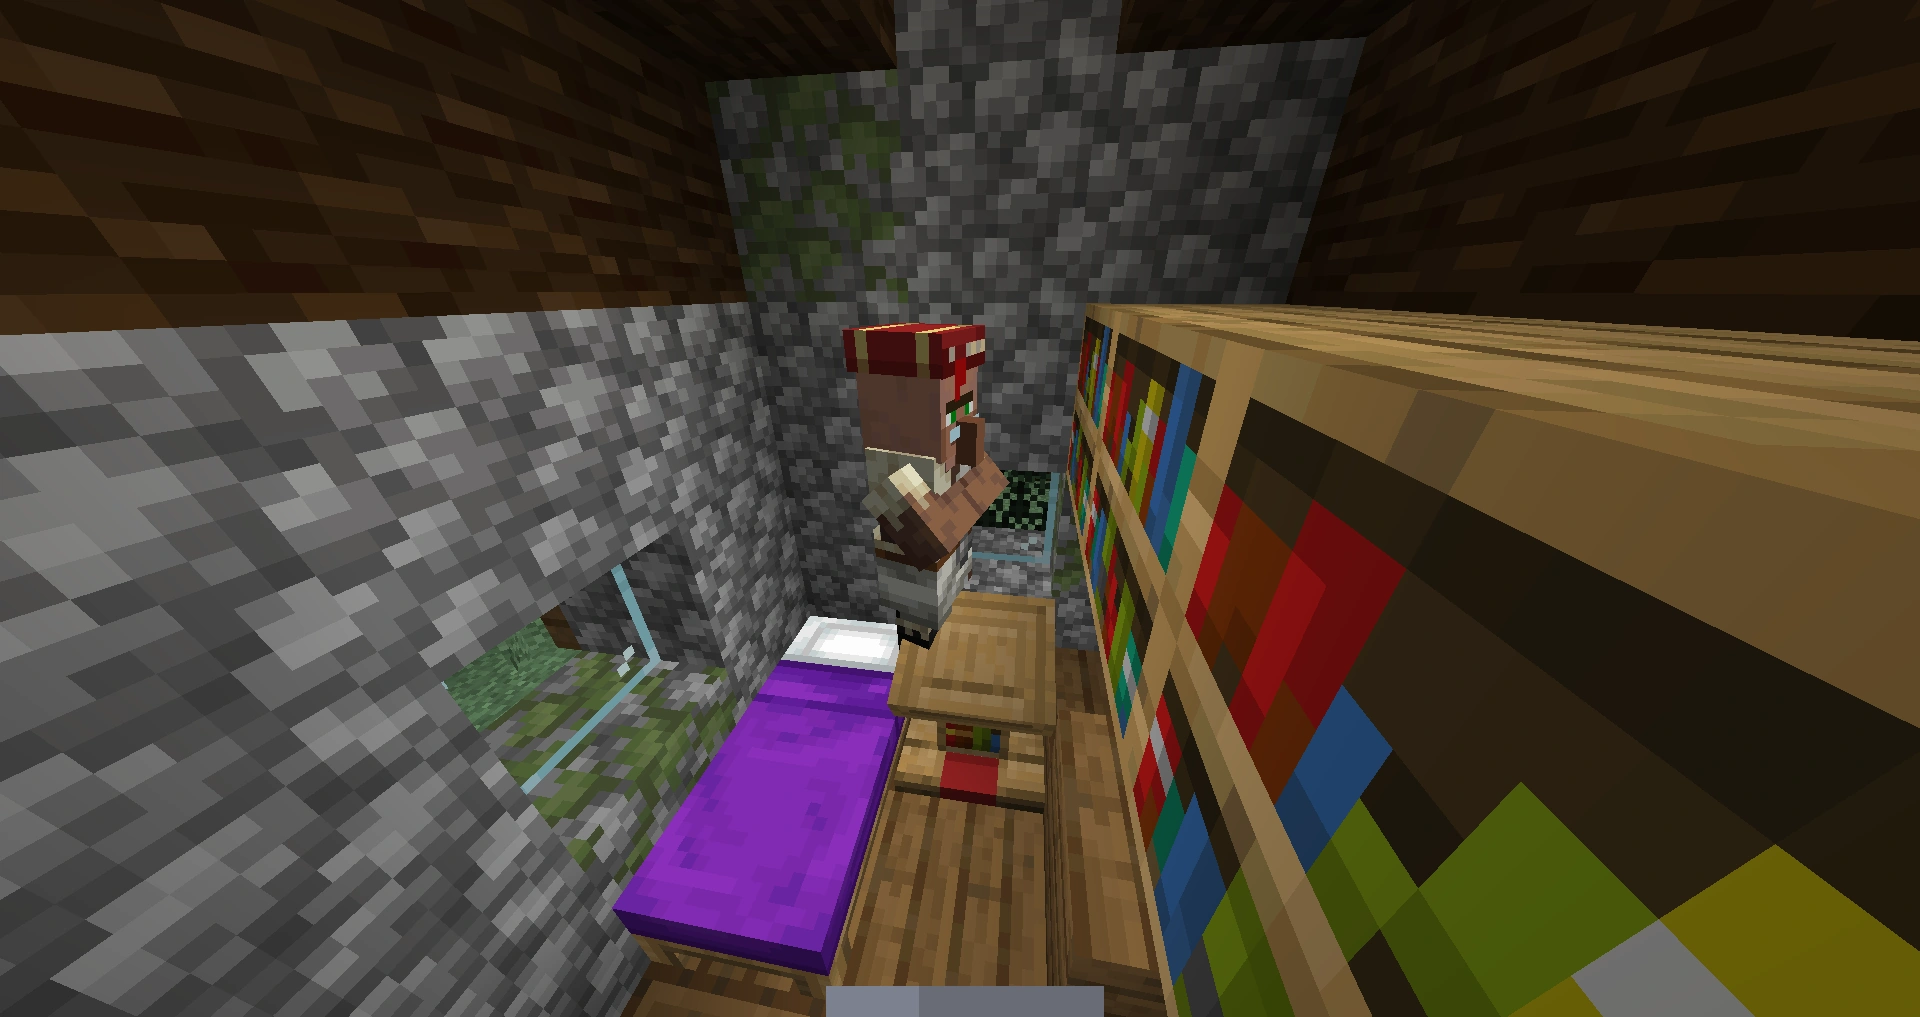
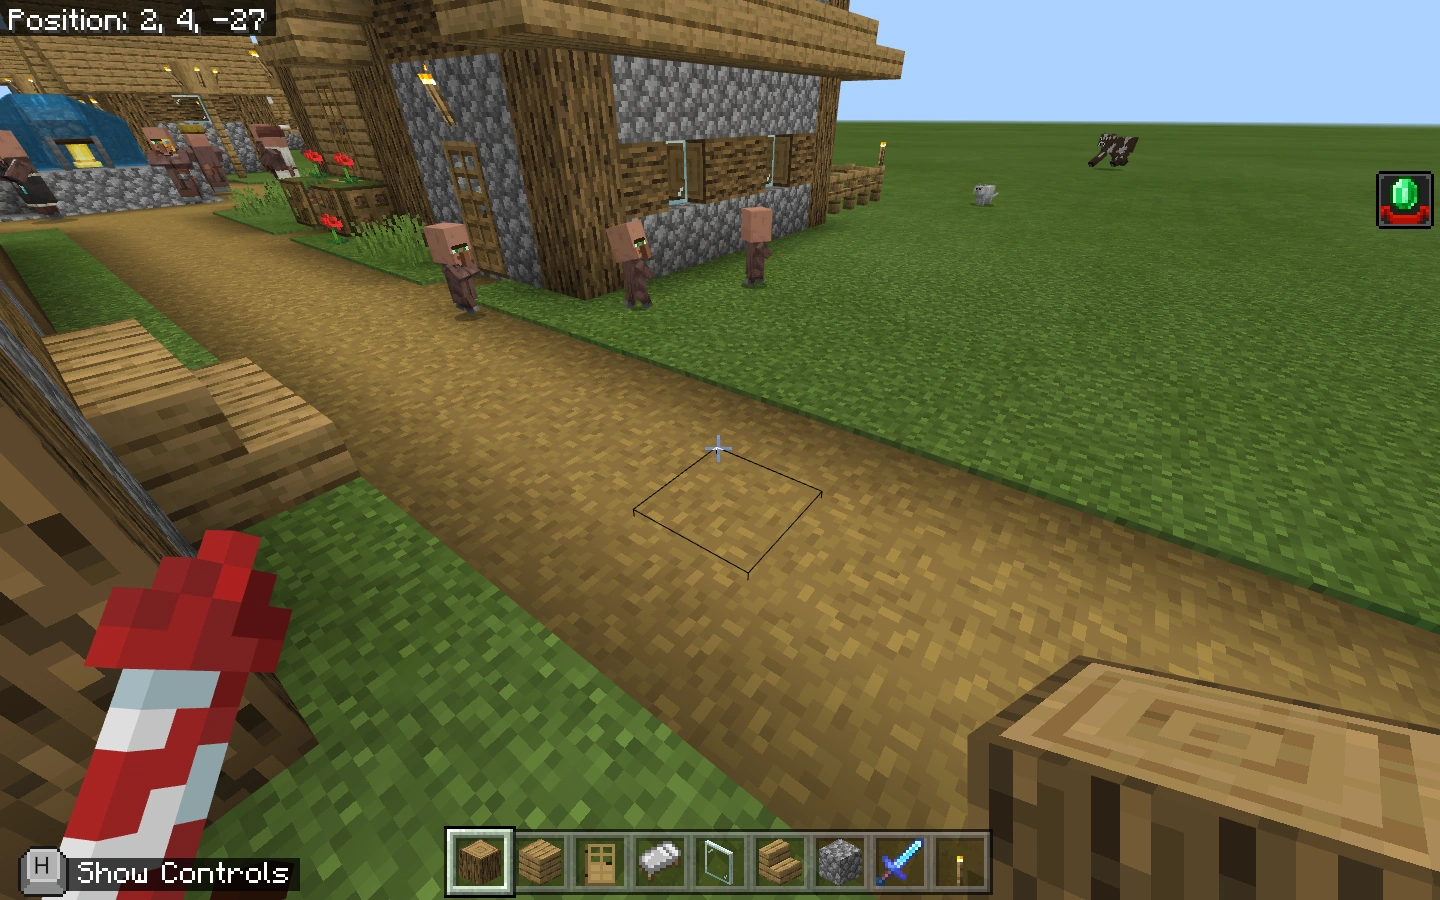

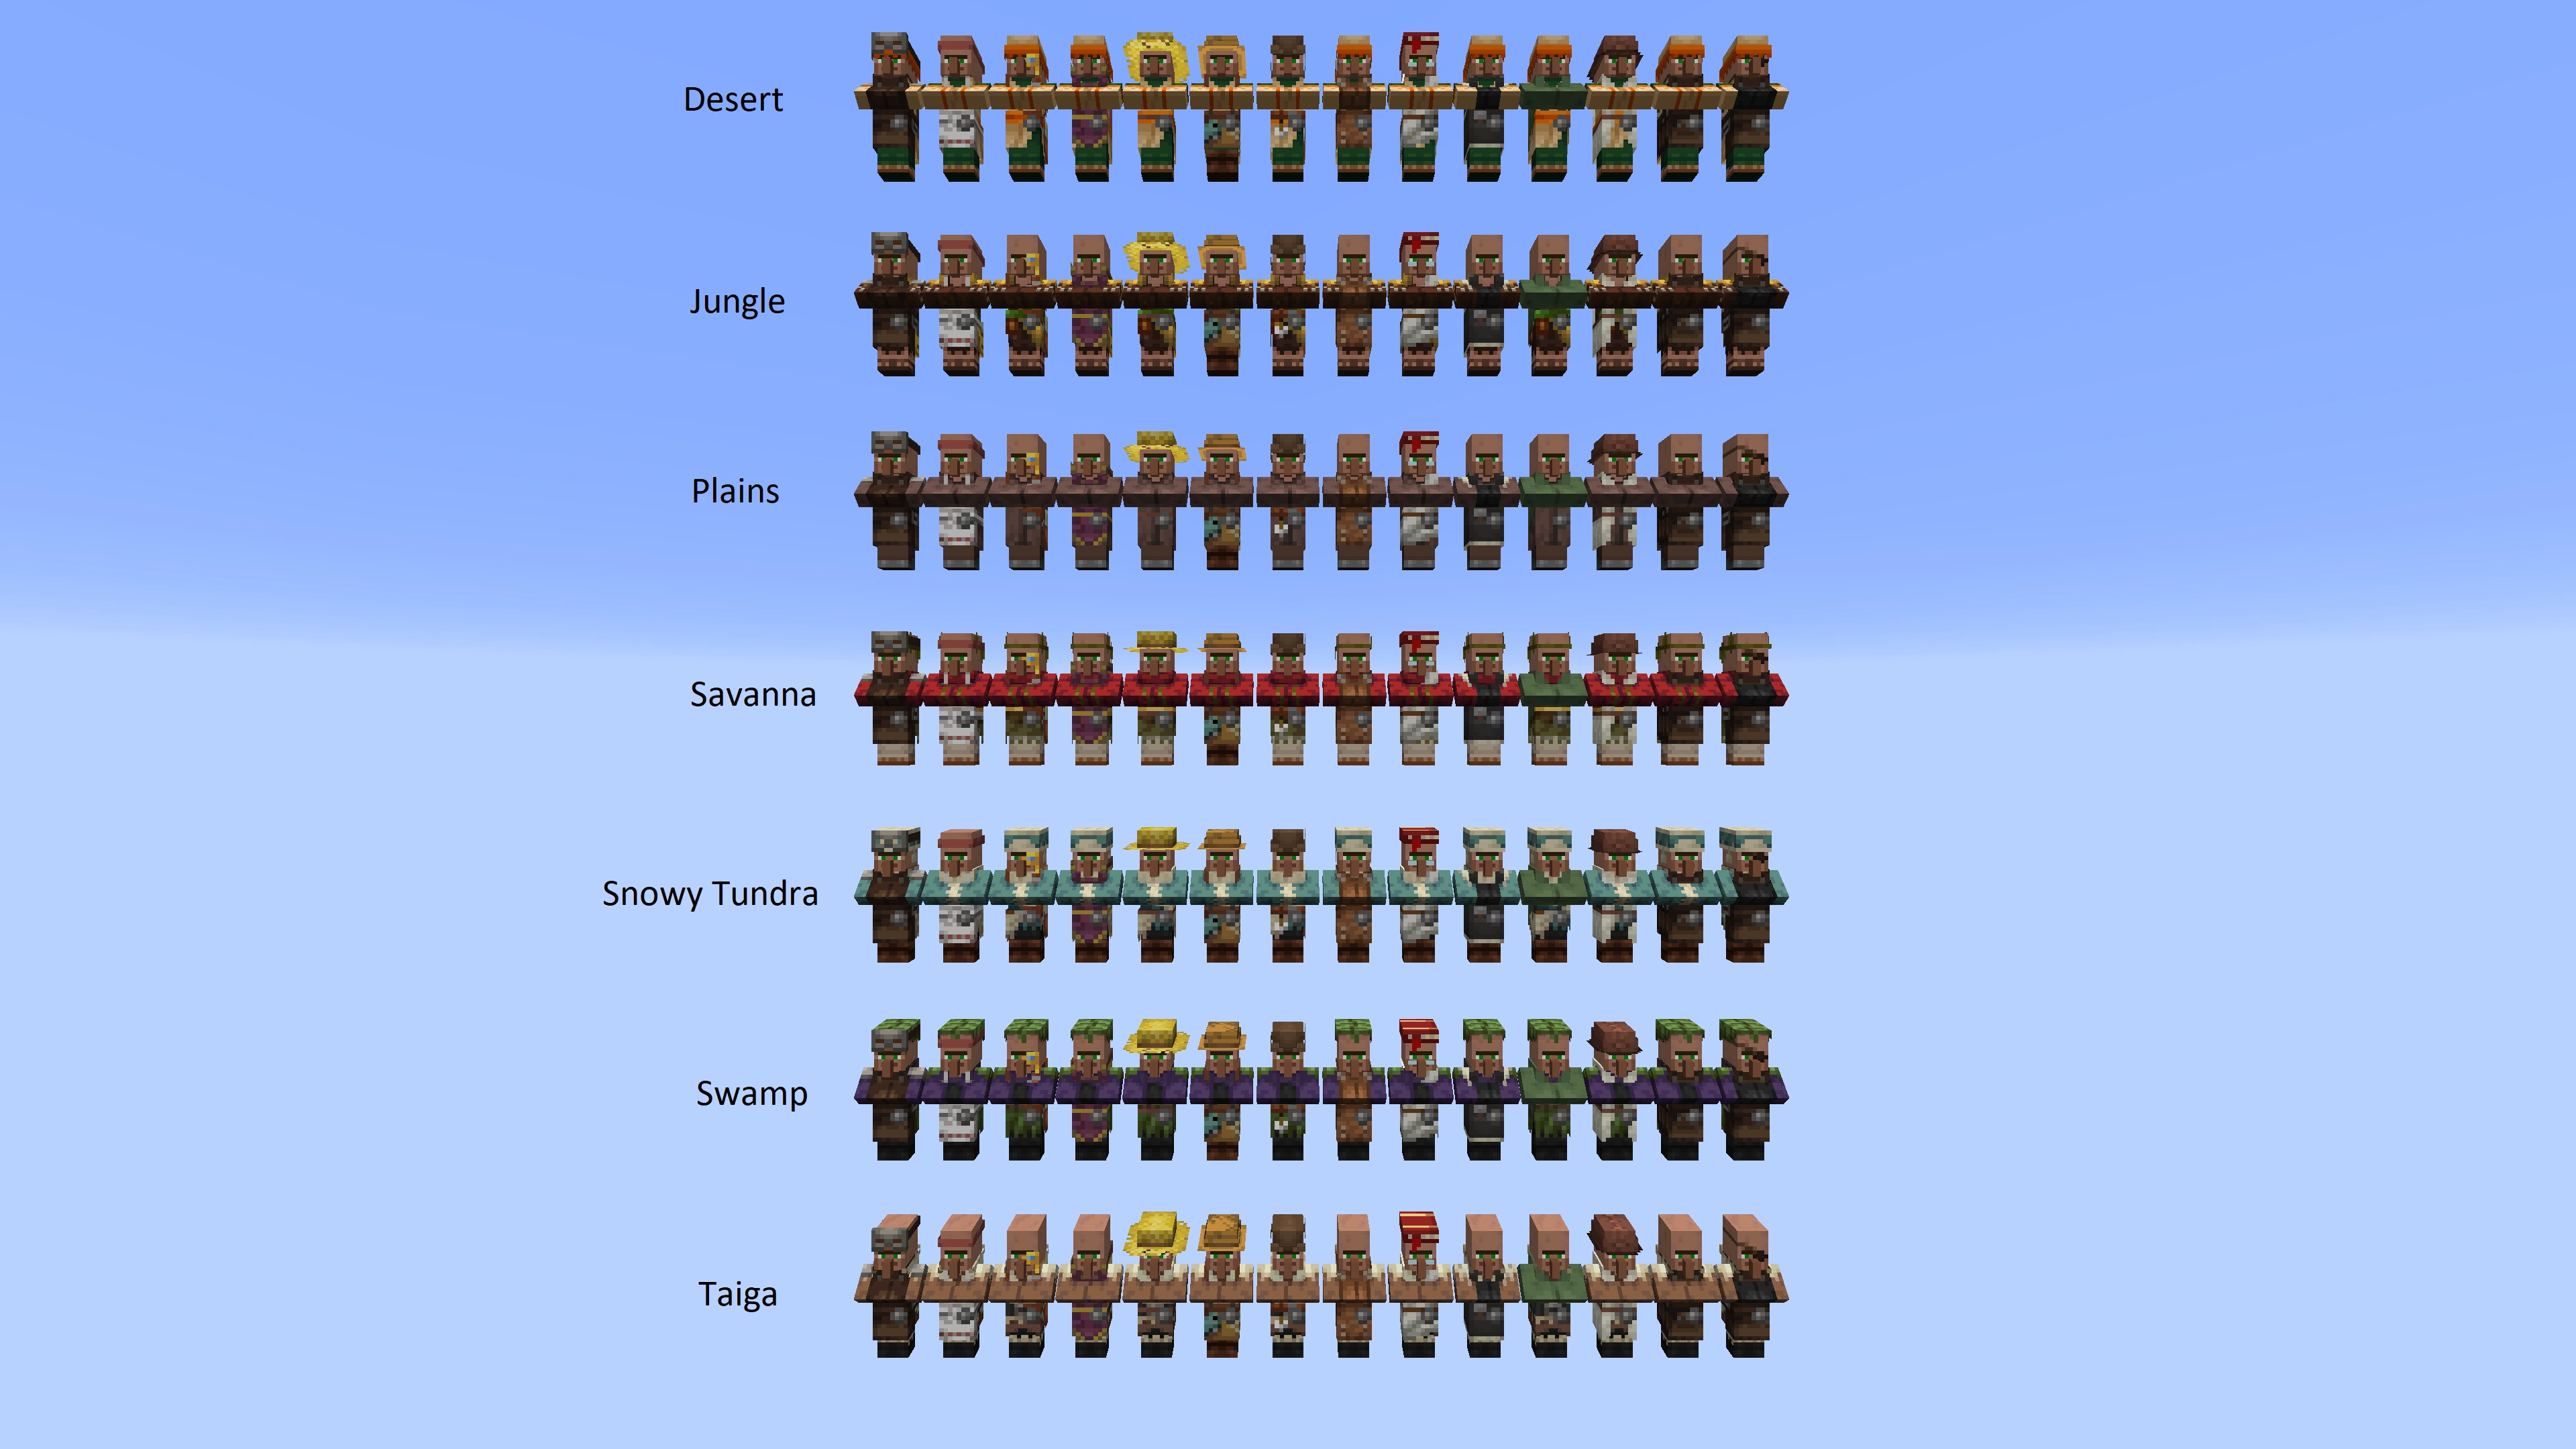


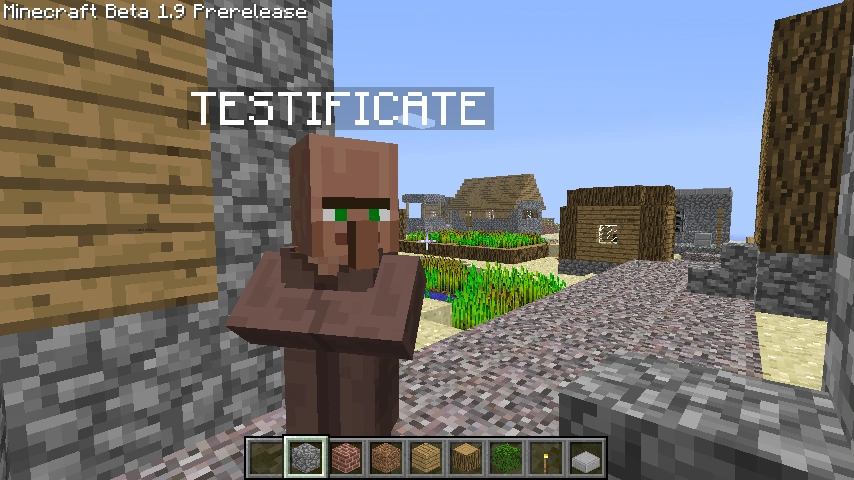
![An image released earlier by Jeb showing separated villagers.[15]](https://static.wikia.nocookie.net/minecraft_gamepedia/images/0/08/Jeb_release_21_May_12.png/revision/latest?cb=20120522054801)
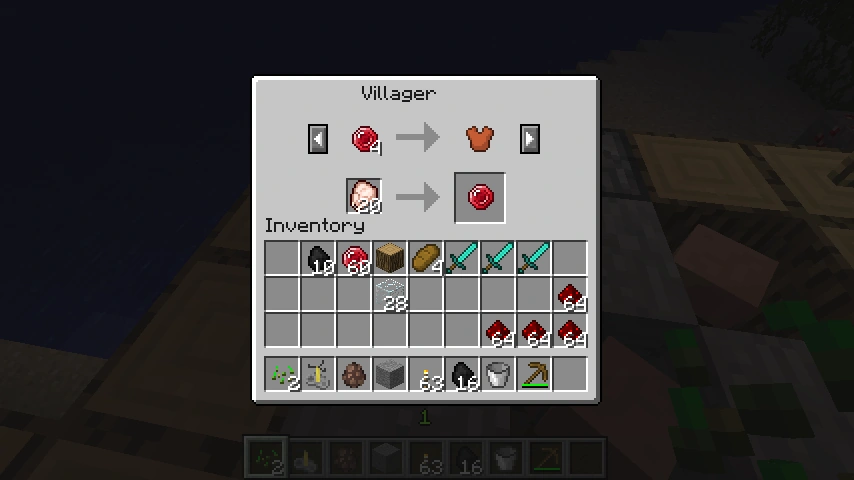
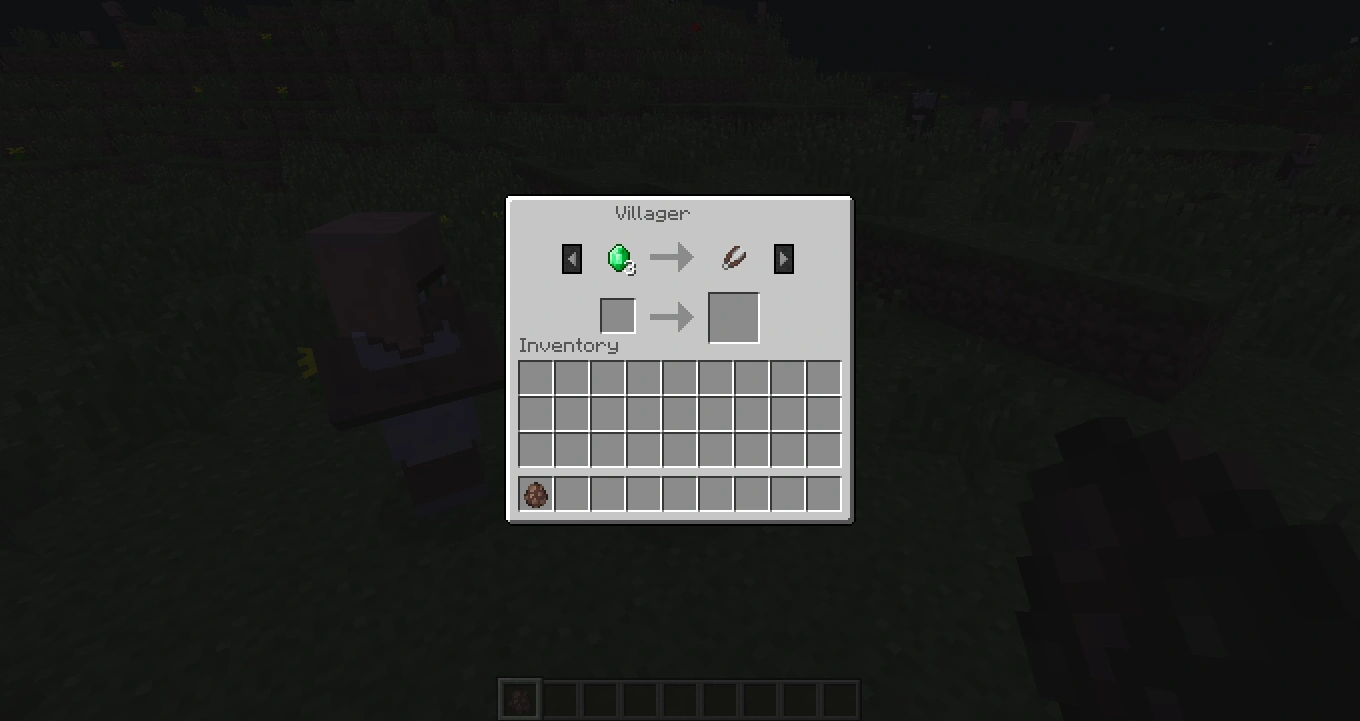
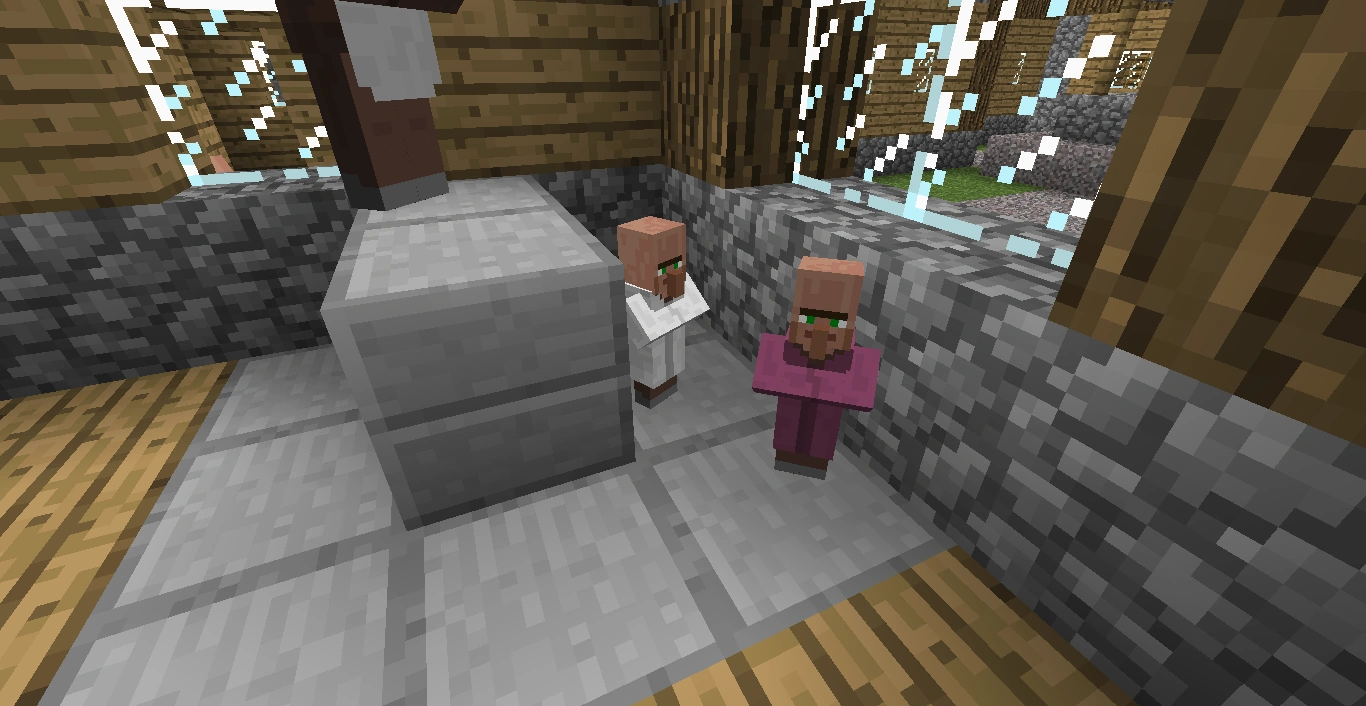
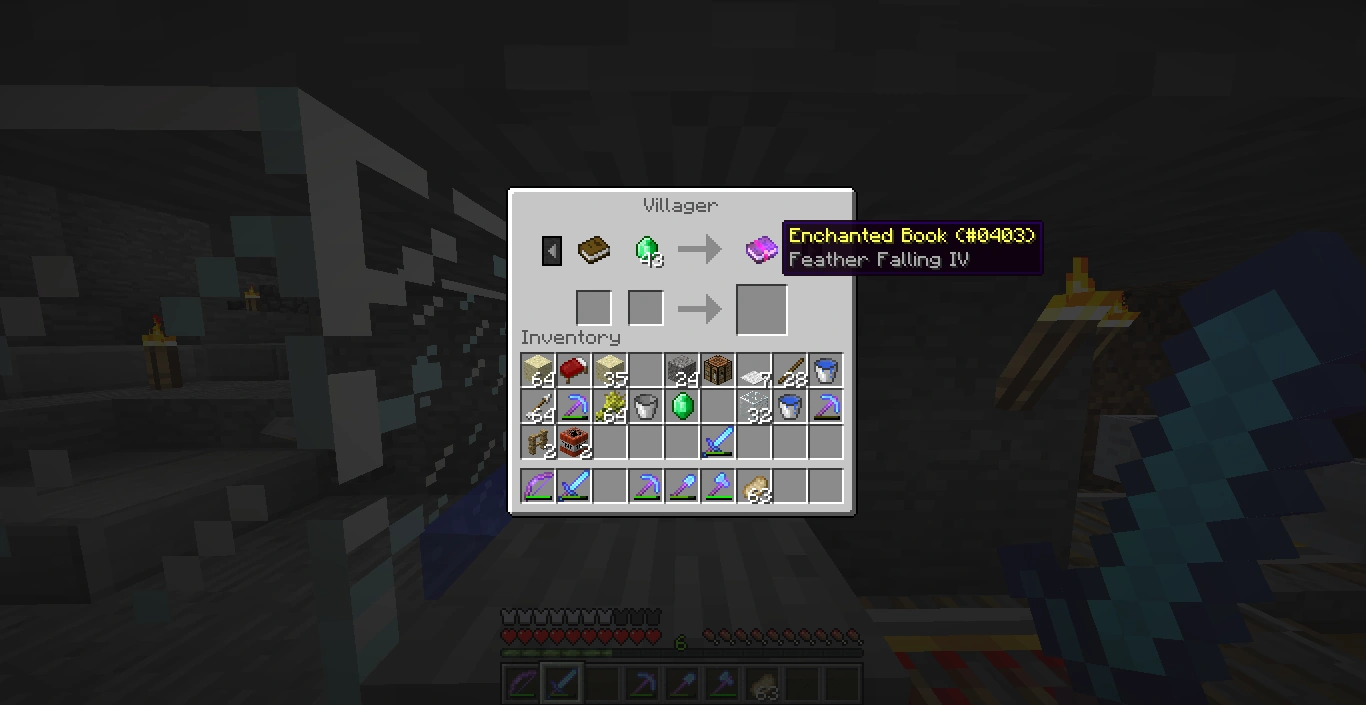
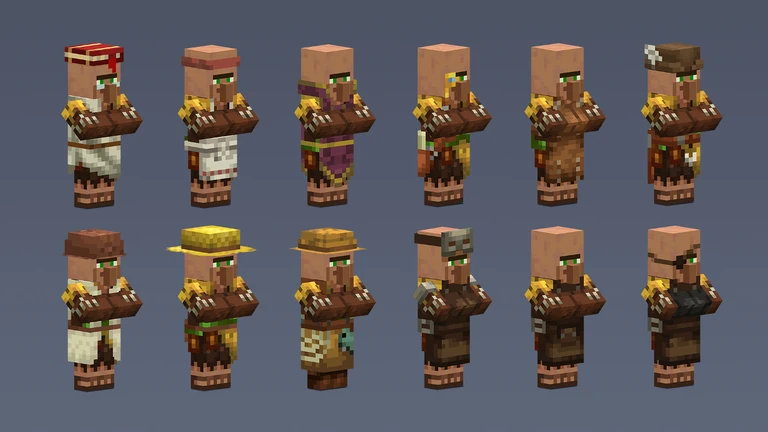
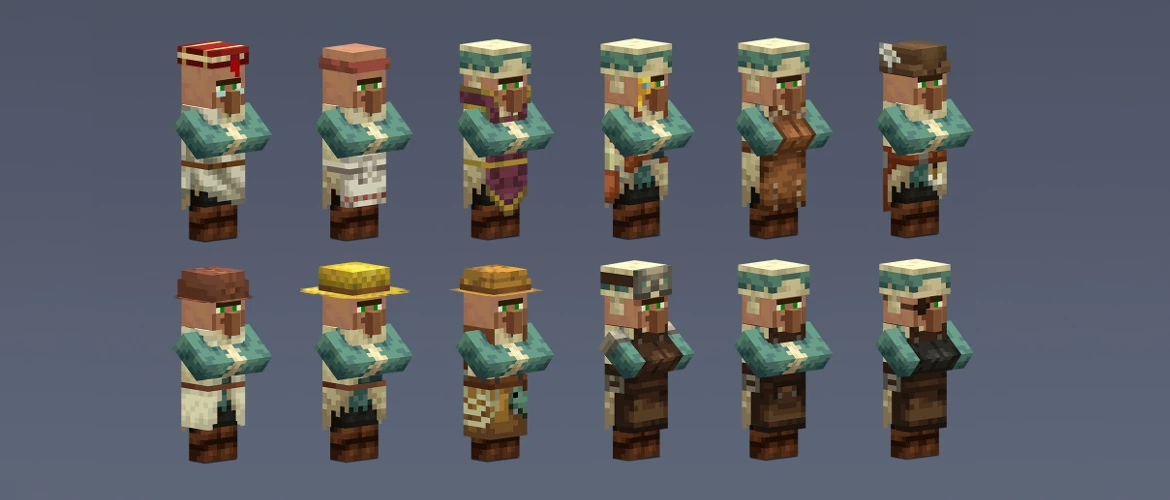
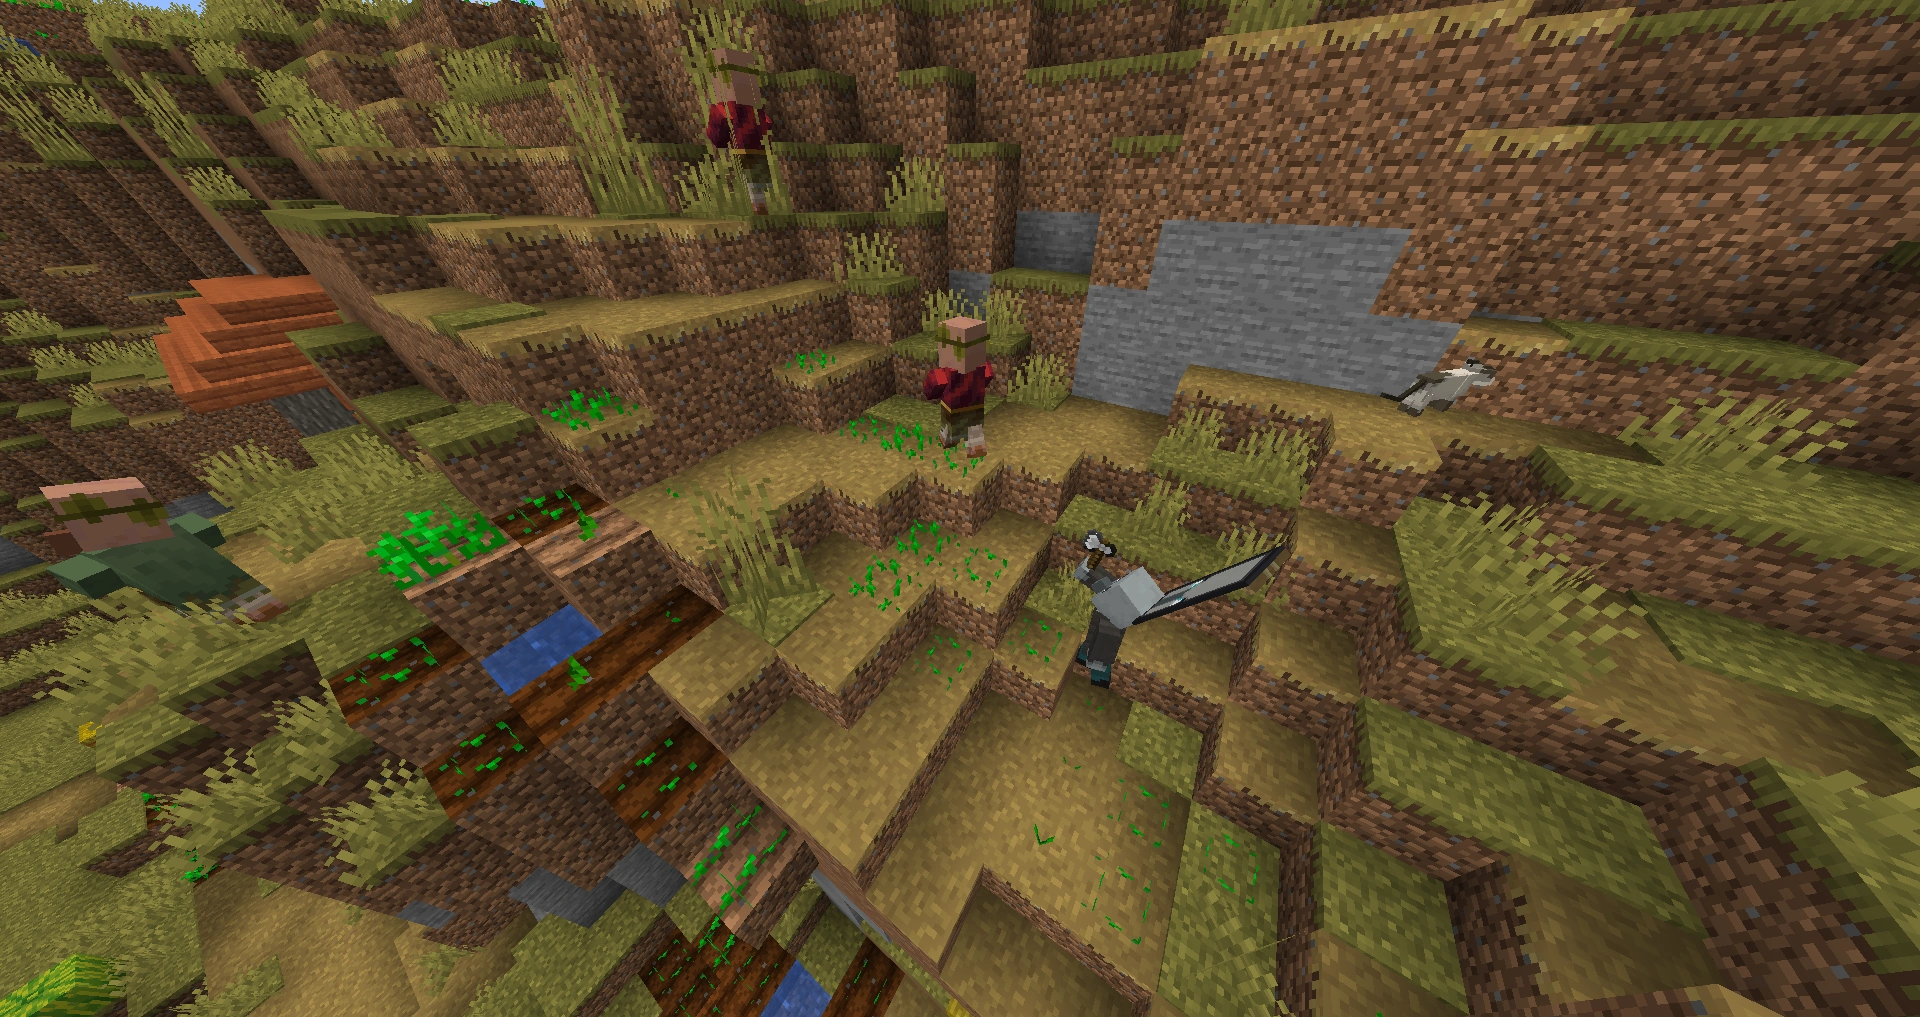

In other media
Old villager artwork.
- Villagers mojang.png
Snowy villager artwork.
Desert villager artwork.
Ditto.
Jungle villager artwork.
Plains villager artwork.
Tundra villager artwork.
Villagers in promotional artwork for the Horse Update.
Villagers in promotional artwork for the World of Color Update.
A group of villagers shown in the Village and Pillage update artwork.
A Villager in promotional artwork for Education Edition 1.14.50.
Villager and Iron Golem Spirit from Super Smash Bros. Ultimate.
Villager micromob (right) from Lego Minecraft.
Lego Minecraft Villager Minifigure.


References
- ↑ https://youtu.be/AnOeYZi4fgc&t=48m33s
- ↑ "@scambot Yes, thanks to @pgeuder who sent me inspirational pictures!" – @jonkagstrom (Jon Kågström) on X, February 23, 2012
- ↑ a b https://youtu.be/vMSiholH_lc
- ↑ MC-146515 — "Villagers can sleep in all dimensions" — resolved as "Works As Intended".
- ↑ MCPE-46034
- ↑ a b Jungle and swamp villagers can spawn only in their corresponding biome if a village intersects these biomes, or by using spawn eggs, breeding or curing a zombie villager, as jungle and swamp villages do not exist.
- ↑ "MINECON 2016 The Minecraft 1.11 Change Log" – Minecraft on YouTube, October 15, 2016
- ↑ http://www.reddit.com/r/Minecraft/comments/xfzdg/i_am_markus_persson_aka_notch_creator_of/c5m0p26
- ↑ "It's very likely the townspeople will be pigmen =)" – @notch (Markus Persson) on X, April 25, 2011
- ↑ "Fun Fact: Most of the villager designs were inspired by 2018 fashion shows like Gucci's." – @JasperBoerstra (Jasper Boerstra) on X, February 28, 2019
- ↑ MC-141075
- ↑ MCPE-119646 — resolved as "Invalid".
- ↑ MC-173917 — resolved as "Works As Intended".
- ↑ MC-201329
- ↑ "This is how I perform experiments on Testificates:" – @jeb_ (Jens Bergensten) on X, May 21, 2012