Bookworm3958 (talk | contribs) m (→Other ores and minerals: added a link and updated terminology) Tag: Visual edit |
Mcpe4the108 (talk | contribs) mNo edit summary |
||
| Line 10: | Line 10: | ||
* At this stage, [[creepers]] are deadly. Run away until they [[Spawn#Despawning|despawn]] or lose track of you. |
* At this stage, [[creepers]] are deadly. Run away until they [[Spawn#Despawning|despawn]] or lose track of you. |
||
| − | *[[Skeletons]] and [[Zombie|zombies]] may survive in shady spots; lead them into the sun and avoid them until they burn to death, then collect their drops. If you're unlucky enough to encounter a [[husk]], armored mob or baby zombie, run away from it until it despawns or loses track of you. Remember that baby |
+ | *[[Skeletons]] and [[Zombie|zombies]] may survive in shady spots; lead them into the sun and avoid them until they burn to death, then collect their drops. If you're unlucky enough to encounter a [[husk]], armored mob or baby zombie, run away from it until it despawns or loses track of you. Remember that baby zombie are faster than regular zombies, though, and skeletons are generally smart enough not to be lured into the sunlight. |
*[[Spiders]] will mostly be neutral in the daytime, so you can avoid them; if one has targeted you, lead it into the sun and run it around until it loses interest. |
*[[Spiders]] will mostly be neutral in the daytime, so you can avoid them; if one has targeted you, lead it into the sun and run it around until it loses interest. |
||
*[[Endermen]] are neutral unless you look directly at their face, so avoid looking at them at all costs. Remember, they could kill you with ease. |
*[[Endermen]] are neutral unless you look directly at their face, so avoid looking at them at all costs. Remember, they could kill you with ease. |
||
| Line 120: | Line 120: | ||
;[[Coal]] |
;[[Coal]] |
||
| − | This is a major resource, with two main uses: it is used to make torches, (your major source of light), and to smelt or cook items in your furnace. Smelting items not only |
+ | This is a major resource, with two main uses: it is used to make torches, (your major source of light), and to smelt or cook items in your furnace. Smelting items not only let you cook your meat for better nutrition, but is also necessary for making use of iron (see below). A stack (64 lumps) of coal is a fairly large amount for the beginning, but over time you will need a lot of it. Fortunately, it is common: You will see it everywhere underground, and even some on the surface. ''Coal is the only ore you can mine with a wooden pickaxe.'' Coal is not ''strictly'' necessary since you can make [[charcoal]] from wood, but it is common, and you have plenty of other things to do with wood. |
;[[Iron]] |
;[[Iron]] |
||
| Line 156: | Line 156: | ||
Optimal iron usage depends on the local environment, but the first things you should make have this approximate order: |
Optimal iron usage depends on the local environment, but the first things you should make have this approximate order: |
||
* A [[shield]]. This requires several wood planks and a single iron ingot. Shields were introduced fairly recently, but have seriously changed the balance of power against mobs: You can use them to block skeleton's arrows and hold off most other mobs' attacks, including creeper explosions. |
* A [[shield]]. This requires several wood planks and a single iron ingot. Shields were introduced fairly recently, but have seriously changed the balance of power against mobs: You can use them to block skeleton's arrows and hold off most other mobs' attacks, including creeper explosions. |
||
| − | * An iron [[pickaxe]], to mine more advanced ores (see below) as you encounter them, which are key to |
+ | * An iron [[pickaxe]], to mine more advanced ores (see below) as you encounter them, which are key to proceed through the game. |
* An iron [[sword]], to attack monsters much more effectively than a stone or wooden sword. |
* An iron [[sword]], to attack monsters much more effectively than a stone or wooden sword. |
||
* A [[bucket]]. This lets you pick up [[water]] source blocks and place them elsewhere. This is a key ability for making a farm, and it lets you generally rearrange water in the landscape. You can remove or place waterfalls, create your own ponds and rivers, (useful for [[fishing]]), defend your base against creepers, and more complex purposes. You can also use it on [[lava]]. |
* A [[bucket]]. This lets you pick up [[water]] source blocks and place them elsewhere. This is a key ability for making a farm, and it lets you generally rearrange water in the landscape. You can remove or place waterfalls, create your own ponds and rivers, (useful for [[fishing]]), defend your base against creepers, and more complex purposes. You can also use it on [[lava]]. |
||
| Line 183: | Line 183: | ||
== Monsters == |
== Monsters == |
||
As you build up your equipment, you'll be able to fight the basic monsters more easily, and start to take on the more dangerous ones as well. A quick (and incomplete) list of the usual Overworld monsters: |
As you build up your equipment, you'll be able to fight the basic monsters more easily, and start to take on the more dangerous ones as well. A quick (and incomplete) list of the usual Overworld monsters: |
||
| − | * [[Zombie]]s you know by now – individually they're slow and easy to defeat. However, if you're fighting them at night or underground, remember that they can summon more zombies when attacked in hard difficulty. [[Zombie villagers]] are a variation that can spawn naturally or when [[villagers]] are killed by zombies. They mostly drop rotten flesh, but can also drop a few bonus items: A carrot or potato for farming, or even an occasional iron ingot. As you continue to play, you will start seeing zombies with weapons and armor. Naturally these are more dangerous, but they also drop more experience, and sometimes they drop the weapons or armor, which may be enchanted. In deserts, you might meet the [[husk]] variant, which inflicts a dangerous status effect called Hunger and does not burn in sunlight. Watch out for the baby zombies, which are much faster. [[Drowned]] are the underwater variant, which can spawn with the deadly [[trident]] but can drop gold. Avoid them until you have good protection, because three hits can kill you with minimal armor. In the |
+ | * [[Zombie]]s you know by now – individually they're slow and easy to defeat. However, if you're fighting them at night or underground, remember that they can summon more zombies when attacked in hard difficulty. [[Zombie villagers]] are a variation that can spawn naturally or when [[villagers]] are killed by zombies. They mostly drop rotten flesh, but can also drop a few bonus items: A carrot or potato for farming, or even an occasional iron ingot. As you continue to play, you will start seeing zombies with weapons and armor. Naturally these are more dangerous, but they also drop more experience, and sometimes they drop the weapons or armor, which may be enchanted. In deserts, you might meet the [[husk]] variant, which inflicts a dangerous status effect called Hunger and does not burn in sunlight. Watch out for the baby zombies, which are much faster. [[Drowned]] are the underwater variant, which can spawn with the deadly [[trident]] but can drop gold. Avoid them until you have good protection, because three hits can kill you with minimal armor. In the very rare case that a thunderstorm occurs and a pig is struck by lightning, you will find a [[zombified piglin]]. These are quick and powerful, but neutral, so leave them alone and they'll ignore you. |
* [[Skeleton]]s are dangerous because of their ranged attack; they mostly drop bones and arrows, but sometimes they drop their bow as well. Later they will also show up with armor (and enchanted bows), which they can also drop. The bones are useful not only for taming wolves, but for making [[bone meal]] which can make crops grow quickly (this is especially handy for multiplying that carrot or potato). During or after storms, be wary if you see a skeletal horse standing around – this is the rare [[Skeleton Horse Trap|skeleton horse trap]], which can confront you with a whole squad of mounted and armored skeletons. In icy areas, you may meet the more dangerous [[stray]] variation, which afflicts you with slowness when you get hit by an arrow. |
* [[Skeleton]]s are dangerous because of their ranged attack; they mostly drop bones and arrows, but sometimes they drop their bow as well. Later they will also show up with armor (and enchanted bows), which they can also drop. The bones are useful not only for taming wolves, but for making [[bone meal]] which can make crops grow quickly (this is especially handy for multiplying that carrot or potato). During or after storms, be wary if you see a skeletal horse standing around – this is the rare [[Skeleton Horse Trap|skeleton horse trap]], which can confront you with a whole squad of mounted and armored skeletons. In icy areas, you may meet the more dangerous [[stray]] variation, which afflicts you with slowness when you get hit by an arrow. |
||
* [[Creeper]]s are the iconic cute-but-deadly suicide bombers of ''Minecraft''. They drop gunpowder, which is mostly used for making [[TNT]]. The safest way to kill them is to shoot them from a distance with arrows, but it is, in fact, possible to sprint up and hit them, sprint away, and repeat until they're dead. Note that water will block the destructive aspect of their explosion, but not the damage -- a creeper that explodes in water will damage you but not the landscape or your base (in Java Edition; in Bedrock Edition you will not be harmed). Once you have iron armor or better, their blasts will be much more survivable. (Point-blank range is still pushing your luck, because being thrown into the air after ending up on one heart often results in death.) Beware: In caves or ravines, they can drop in on you as you pass under them, and explode ''without'' the time delay. |
* [[Creeper]]s are the iconic cute-but-deadly suicide bombers of ''Minecraft''. They drop gunpowder, which is mostly used for making [[TNT]]. The safest way to kill them is to shoot them from a distance with arrows, but it is, in fact, possible to sprint up and hit them, sprint away, and repeat until they're dead. Note that water will block the destructive aspect of their explosion, but not the damage -- a creeper that explodes in water will damage you but not the landscape or your base (in Java Edition; in Bedrock Edition you will not be harmed). Once you have iron armor or better, their blasts will be much more survivable. (Point-blank range is still pushing your luck, because being thrown into the air after ending up on one heart often results in death.) Beware: In caves or ravines, they can drop in on you as you pass under them, and explode ''without'' the time delay. |
||
Revision as of 13:01, 17 February 2021
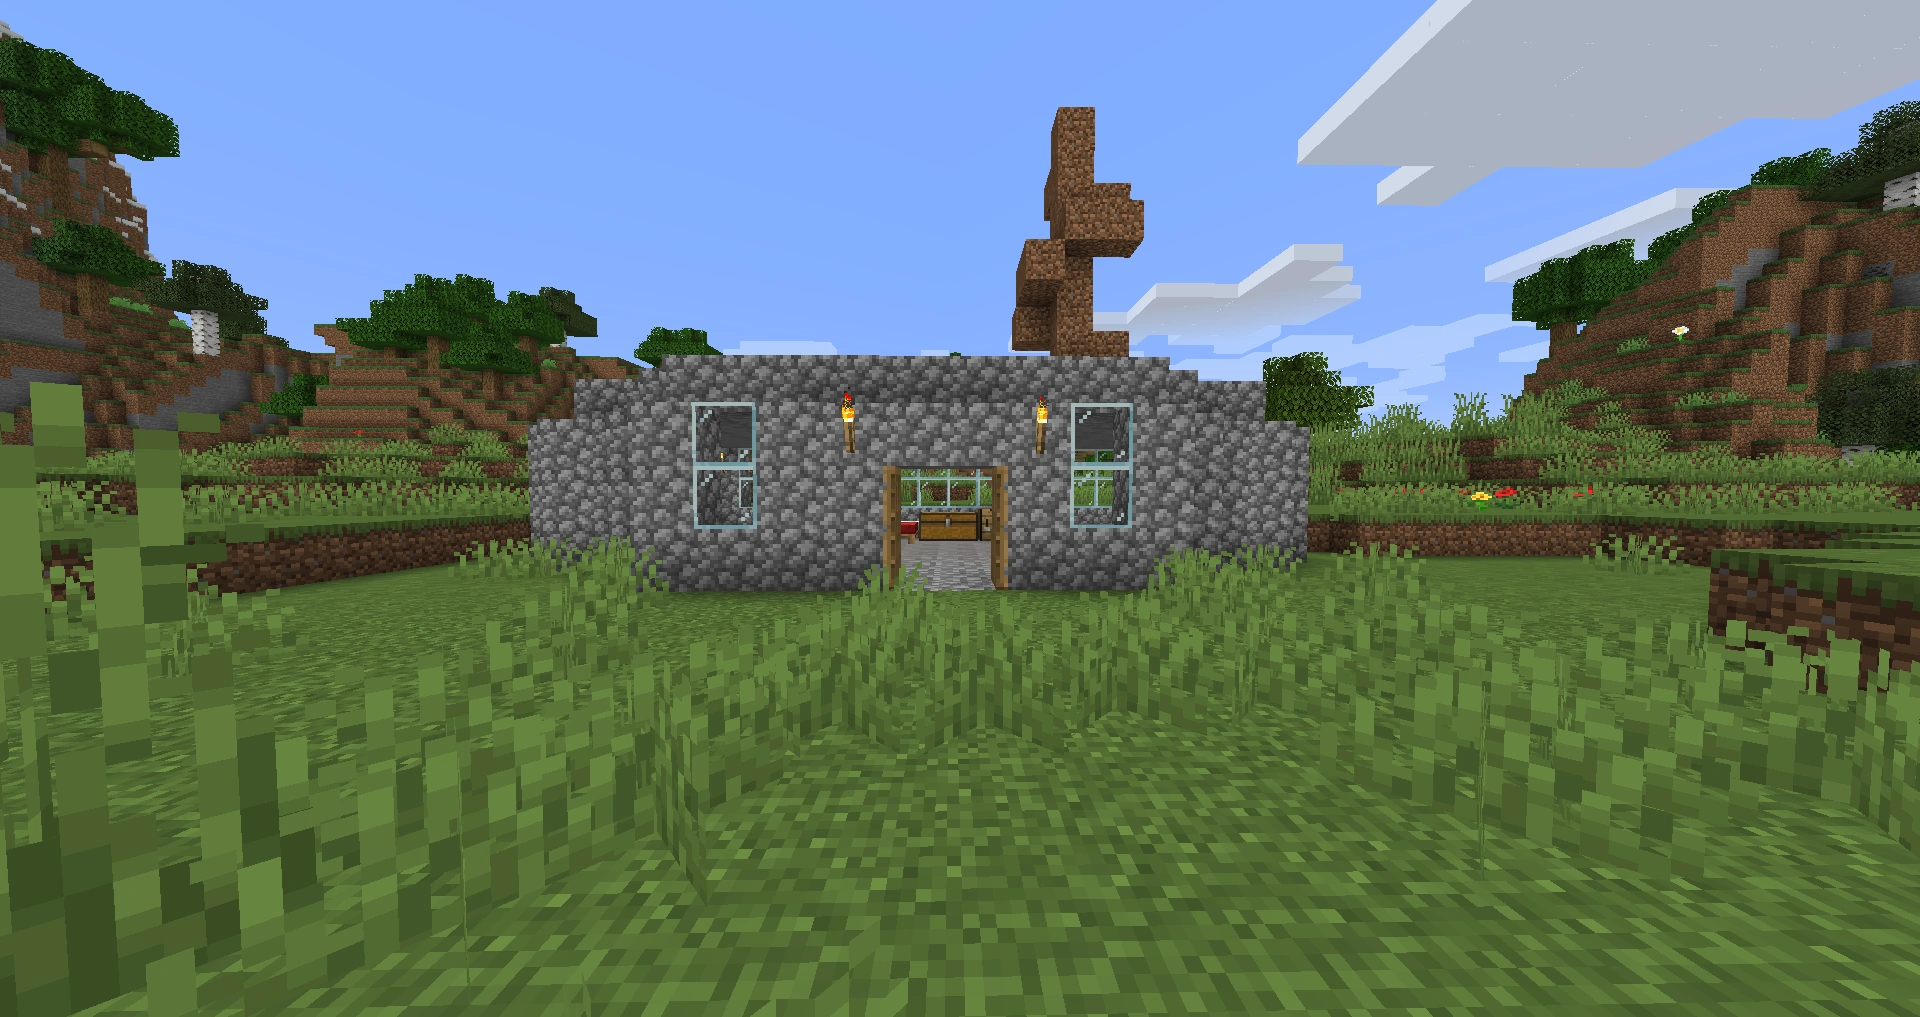
A cobblestone house with a dirt pillar for visibility
This guide is intended for those who have read the beginner's guide first, and survived their first day and night.
A brief picture of a second-day house is shown on the right.
Intro
If you read the beginner's guide and followed it you should have at least a crude shelter, stone tools, and some cooked meat and other food. This day will guide you in building on that and setting up a better base.
When you venture outside after surviving your first night, be on the lookout for hostile mobs from the previous night. Later, you will be hunting them, but that's after you get weapons, some armor, and proper food supply.
- At this stage, creepers are deadly. Run away until they despawn or lose track of you.
- Skeletons and zombies may survive in shady spots; lead them into the sun and avoid them until they burn to death, then collect their drops. If you're unlucky enough to encounter a husk, armored mob or baby zombie, run away from it until it despawns or loses track of you. Remember that baby zombie are faster than regular zombies, though, and skeletons are generally smart enough not to be lured into the sunlight.
- Spiders will mostly be neutral in the daytime, so you can avoid them; if one has targeted you, lead it into the sun and run it around until it loses interest.
- Endermen are neutral unless you look directly at their face, so avoid looking at them at all costs. Remember, they could kill you with ease.
As you move around:
- Keep track of where you are, using the debug screen by pressing F3 if needed.
- If you do get killed at this point, you haven't lost much, and you're presumably still near the spawn point. Just head back to your death location to collect your items.
- Collect any loose items you see, including but not limited to: bones, arrows, rotten flesh, eggs, and wool. Almost everything will be useful later.
- Destroy any tall grass you see and collect the seeds.
- If you see chickens, use seeds to lure some home. If necessary, just stuff them inside your house until you have time to build a proper pen. Save the eggs for later.
- If you find mushrooms, break and grab some of them. If you can get both kinds of mushrooms, you can make mushroom stew. You might also collect flowers for the dyes you can make from them, or decoration. Flowers have another use too, but this isn't useful for now.
- After chopping trees, collect the saplings (and perhaps apples) that drop from the leaves.
- Mine any iron ore you find (with a stone pickaxe, using a wooden one will cause it to mine slower & not drop anything), and at least some of the coal.
- As you're moving around the area, keep an eye on how the ground rises and falls. Over time, you will be fencing off more and more territory to keep monsters out, starting with the area right around your house (or cave entrance). If the terrain is uneven, you'll probably run your fences along ridges, avoiding places where mobs could jump over the fence from a hill or cliff.
Reviewing hunger and food
The "First Day" guide briefly discussed hunger, but by your second day this will become more pressing, and you will surely need food.
Besides the visible hunger bar, you also have an invisible hunger bar, called "Saturation" (both bars were full when you started the game). Like your health bar, this maxes out at 20 points, meaning each "shank" of the visible bar represents two points, although it is never higher than your hunger level. Whenever you do something that would make you hungry, the saturation gets used up first, which provides extra time before you get hungry again. Most foods provide saturation as well as filling the visible bar, and the "better" foods provide more saturation compared to their visible effects. The general rule is that, apart from the golden foods, cooked beef and porkchops are best, followed by other cooked meats (or fish), bread, and vegetables.
The biggest drain on hunger is healing damage, but for quite some time (until you get golden apples and potions), this is the only way to heal damage! You heal faster off saturation than "visible" hunger, and if your hunger bar is below 18 shanks, you will not heal at all. Each point of damage healed costs the equivalent of 1.5 hunger points, or ¾ of a shank.
A few other activities also cause hunger, though at a slower rate:
- Fighting: Both attacking mobs and receiving damage costs hunger, even before you start trying to heal damage. (60 blows either way matches healing
 .) You will need to slaughter a few animals, but pick your fights carefully. Taking damage in other ways counts for this too, but each time you take damage it counts as one "blow" no matter how much damage you took.
 - Sprinting: If you double-tap the forward movement key (W by default), or press the sprint key (Left Ctrl by default), you will sprint. Doing this will move you somewhat faster, but it also uses up food. (60 meters matches healing .)
- Jumping: Obviously, you'll need to jump some just to get around, but don't bounce around randomly or unnecessarily. (120 jumps matches healing
 .) Sprinting jumps are especially costly, 4 times as much as a regular jump, although they are the fastest mode of transportation early in the game. Don't neglect the automatic jumps from Autojump, going uphill can add up!
 - Swimming and mining blocks cost a little hunger, but those are fairly minimal compared to the activities above.
Note that if you are staying at full health, and not fighting, sprinting and/or jumping, or mining blocks, then you will use almost no food. Thus, if your character has a secure place to stay, you can just stay put to conserve food while waiting out the night, a storm, or crop/animal growth. Walking around at normal speed uses no hunger. So if you are injured and/or hungry, it's best to wait out the night quietly in your home (perhaps doing some crafting or smelting) until daylight, when it will be safe to go out and find some food. Sleeping works too, unless you're actually starving, in which case you can't sleep at all since you'll be taking damage.
If your hunger bar is completely empty, you will begin to starve, and take damage until you are down to half health in easy difficulty, or a single hit point in normal difficulty. You shouldn't be on hard difficulty for this first game, but if you are, you can actually starve to death. Well before this point (under 3.5 shanks or 7 hunger), you will be unable to sprint.
Therefore, if you are low on health or very low on food, getting food is a priority:
- You can kill a few animals up front, but they'll run out quickly, and you need to save some for breeding. Again, cooking the meat will make it much more nourishing.
- Wheat takes a day or few to grow, and other vegetables will too when you get them.
- If you have a fishing rod and a safe place to fish, fishing is a great way to get food, because it doesn't involve fighting, mining, or moving around much. If near a river or ocean, you can alternatively slaughter cod and salmon mobs with a sword, as they can abundantly spawn and it's a quick way to gather fish. You can smelt your first few fish while you fish for more.
- Dried kelp and sweet berries are easy to obtain, and can restore your food bar if you have enough. Watch out for those bushes, though, and drowning is bad too.
- If you're desperate, you can try breaking oak or dark oak leaves for apples. Be careful to not take damaging falls or jump around a lot in the process (hint: ladders), much less get attacked by monsters.
- If you are really desperate you can also eat rotten flesh dropped by zombies, but this will usually give you food poisoning, shown as the Hunger effect, which would drain your hunger by almost as much as one piece of rotten flesh fills it. The trick is, if you have a lot of rotten flesh you can quickly fill up on that, then tough out the food poisoning and end up not too hungry.
Writing your to-do list
For the second day, your main objective is to get the lay of the land, locate resources, and plan out further construction. You will be looking for at least the following things. Don't worry if you can't find all of them, right now you're just spotting the resources that are near your home:
- A place to grow wheat:
- Even before you have a bucket, you can till the ground next to a river or lake, and plant whatever seeds you have to get an early start. A handful of bread gives you a lot more options.
- Later, you'll want a basically-flat area at least 12 blocks square, which you can reshape into completely flat. After fencing off a 9×9 square and placing water in the middle (that's what the bucket is for), you can till the square and make a farm that will serve you well for most of the game. (Watch out for nearby rises that could let monsters jump over your fence.)
- A place to build a larger house or lair. There are many options here. The most popular options are to build on (more-or-less) flat ground, a roof over a valley, or wall off and occupy a handy cave. You will need at least a 5x5 space for your enchanting table, plus space for your crafting table, furnace, anvil, and lots of chests, and of course a secure place for your bed.
- Different kinds of trees. Each kind of tree provides logs with a different appearance, and the various trees have different characteristics for farming them (see the "Tree" article for full details). Collect the logs for crafting and building, and the saplings to grow your own.
- Keep an eye out for a pond or riverbank site where you can make a fishing spot. Fishing requires time and (for safety) some preparation, but can get you a lot of resources, some of which are difficult to get otherwise. It's also an early way to get good-quality food.
- One or more cave entrances, to get underground and start collecting iron and stone in quantity. If you spent your night in a cave, this might be easy, but for mining, you'll want a cave that heads deeper into the ground.
- Any of the various crops. You need to find each of these in the world before you can farm them, but then you'll have effectively unlimited supplies. See their respective pages for how to grow each of them, but several of them can share space in your wheat farm.
- Animals, for meat and other resources. You will eventually build pens to breed and slaughter them; as with farming crops, you're looking for large, fairly-flat areas that you can fence off and otherwise defend against mobs. You can kill some of the animals now if you need more meat, but leave some of each type to later catch and breed. Once you do start collecting and breeding them, you will have to go further afield to catch more, as they will not spawn near your farm. (See the Spawn article for more details.) Note that deserts will not spawn any animals except the occasional rabbit.
Crops
- Wheat is the original crop, used to make bread, cake, cookies, and hay bales. The seeds will lure and breed chickens, wheat itself will do the same for cows and sheep. Wheat and hay bales are also used to heal horses and llamas, and to speed their taming.
- Sugar cane is important because it's needed to make paper, and you will need a lot of that (along with leather, see below) for enchanting. Look for it at the edge of any body of water.
- Pumpkins appear wild in several biomes or can be found in taiga and snowy taiga villages. They are mostly used for jack o'lanterns, but you can also make pumpkin pie, and a carved pumpkin can be used to avoid aggravating endermen. The seeds can also be found in treasure chests, and occasionally purchased.
- Carrots, potatoes and beetroot are additional food crops, all of which are grown similarly to wheat (and can share space in your wheat farm). The first two are rarely dropped by slain zombies; only a single item is dropped, but by planting that one, you can multiply it until you have a respectable crop. All three can be found in the farms of a village.
- All three of these can be used to lure and breed pigs.
- Carrots can also be used to lure and breed rabbits.
- Carrots, once combined with gold (as golden carrots) can be used to breed horses (see below).
- Cactus is mildly useful for barriers and traps, and is also the source for green dye. It is only found in deserts, badlands, and in pots in igloo basements.
- Melons are found in jungles, though later you might be able to find the seeds in treasure chests, buy them, or find them in savanna or plains villages.
- Cocoa beans are another jungle specialty. They're the only source of brown dye, and also you can make cookies!
- Bamboo is the newest arrival to the jungle; if you can get hold of some you will be able to craft the remarkably useful scaffolding blocks.
Animals
In order of priority, note the locations of these animals (see their respective pages for full details). If you have plenty of wood and/or stone, you can even throw up some corrals ahead of time for "whatever you bring back first".
- Chickens provide meat, and feathers. (You will need those feathers to make arrows.) These are the first animals you can capture and breed, since you will have seeds long before wheat or carrots. Chickens are especially easy to breed; besides breeding them with seeds, you can hatch them from eggs. With patience, you can start with a single captured chicken, breaking its eggs until you get a second chicken for normal breeding, or you can start with no chickens, but two or three stacks (16 each) of eggs!
- Cows provide both Raw beef and leather. Steak is one of the best foods in the game, and leather will be important when you prepare for enchanting, you will need quite a lot of leather to make a complete enchanting setup. A live cow can also be milked, by right-clicking it with a bucket. Drinking a bucket of milk will not feed you, but it will wipe away any status effects such as poison or food poisoning. (However, being on fire is not a status effect.)
- Sheep provide mutton, a fairly good-quality food, and wool. Wool is necessary for the all-important bed, but it is also useful for decorative uses such as carpets. Once you have shears, you will not need to kill sheep for their wool, but you will want to keep a lot of them around to provide quantities of wool in a variety of colors. A warning: If there are wolves around, they will tend to slaughter any sheep in the area, so you may need to go far afield later to find surviving sheep.
- Wolves, unlike most other animals, are not bred for slaughter. Instead, you will tame them with bones, after which they will become "dogs" which follow and protect you.
- Pigs are the odd child here. Pork is as nourishing as beef, but pigs provide no other resources besides the meat. Worse, luring and breeding them (or riding them) requires crops that you won't get until you start killing zombies (or find a village). That said, if you can find a saddle, you can ride them when you do get carrots.
- Rabbits are even less useful than pigs: Their unreliable drops are second-tier meat and rabbit hide. (Four hides make a piece of leather and six hides and two string can make bundles but those are their only uses.) You can lure and breed rabbits with carrots or dandelions.
- If near a village you may spot cats. If you are near or in a jungle, you may see ocelots, Once you begin fishing (or hunting fish), you will be able to tame the cats or convince ocelots to stop running away from you. This can be helpful against creepers and phantoms, as both monsters will flee from cats and ocelots. Cats can also give you little gifts in the morning, if you let them sleep with you in your bed.
- Horses can be tamed to ride, but to control them you will need a saddle, and breeding them requires gold. (Again, see their page for full details.) Until you start finding underground treasure chests, your best bet to get a saddle is by fishing.
- Donkeys are a horse variant; like horses, they can be ridden but require a saddle to control; however, donkeys can also carry cargo.
- Llamas are tameable like horses and bred with hay (wheat). They can't be ridden (effectively), but they can carry cargo, and if you use a lead on one, the rest of their herd will play follow-the-leader to form a caravan. They do drop leather, and breeding them for strength will give reason to breed and cull a lot of them.
Resources and mining
The foundation of everything is mining (though farming is pretty important too). By now, you should have mined at least enough stone to make your basic stone tools, and you hopefully have some wood left over. You will soon need more of both materials: Wood for various utility items, stone for more durable construction. Over the next few days, you'll be mining a variety of ores as well, but for now, concentrate on the basic materials:
Basic Materials
As you explore your world, you are likely to pick up some dirt blocks. These are not very good for building, but they are quick to place and remove, so you can use them for temporary staircases, pillars, and such. More importantly, you can use them to modify the landscape, making it easier to get around near your home. If you've had a creeper explode nearby, you can also use your collected dirt to fill in the hole (immediately after the explosion, there will be dirt and perhaps stone items left in the crater. Pick those up, but don't expect to get enough to fill in the crater). Note that mining grass blocks (that is, full blocks with a green top, not "tall grass" plants) will drop dirt -- don't worry about the difference for now. If you place the dirt next to grass blocks, the grass will eventually spread to the dirt, cleaning up the "scars" of your work.
You will also encounter sand and gravel. These have special uses: Sand is used for making glass, which is useful for windows and even transparent walls. However, note that glass is very fragile -- a creeper blast will simply destroy any glass in range. Glass also can't be recovered once placed (without the appropriate enchanted tools) -- if mined or blown up, it won't drop anything. Gravel is used to produce flint, which is a key material needed to craft arrows. As a bonus, these can be crafted together with dye to form concrete powder, so any cactus or flowers you've picked up may come in handy.
Both sand and gravel, unlike most blocks, are affected by gravity: If either block is placed without something directly beneath it, or if whatever's beneath it goes away for any reason, it will fall to the ground beneath. If it falls on you such that your head is buried, it will cause suffocation damage until you get free or mine your way out. (They can also suffocate mobs, which can be useful for traps and such.)
You may see shelves of "floating" sand or gravel, which the game generated without support (that is, a player couldn't have placed them like that). Be careful around these, as they are natural traps: Mining them or placing any block next to them, will set off a chain reaction that can bring down the whole shelf. Sand shelves will appear in deserts, while gravel shelves can appear underground. When seen from underneath, sand and gravel shelves will drop "falling dust" particles. Always be careful not to mine or place any blocks touching them.
Beneath sand, you will find sandstone. You can build with this and craft it into various forms, but remember that it is much more fragile than "real" stone.
You can build with wood, and converting the logs to planks will quadruple the number of blocks you have to work with. However, wood has two liabilities: Firstly, it is flammable, and lava or lightning can start a fire that will burn up much of your house. Secondly, it is not very resistant to creeper explosions, so if a creeper goes off near a wooden house, it can demolish a good deal of your work and perhaps damage the inside of the house as well.
If you are in a forest, wood will be plentiful, but if trees are scarce around you, you may want to plant some replacement trees: You may have noticed when you chopped down trees, that as the leaves decay, some of them drop saplings, which you hopefully picked up. You can plant them on any dirt or grass block where there's room for the tree to grow. Once you plant them, don't hang around waiting, just go do other things and come back later when the trees have grown (it can take up to a day or more). Once you have spare torches, you can put one of those a couple or few blocks away from your saplings, as this will help them continue growing overnight.
As you've seen, mining gray ("plain") stone, drops a mottled block called cobblestone. This differs from stone only in appearance and what you can craft with it. Once you start mining in earnest, stone will be plentiful, to the point where you will be making chests just to store your accumulated cobblestone. However, don't throw it away, as stone will be a major building material. Stone is not flammable, and is very sturdy: If a creeper goes off right next to your stone wall, it may break a couple or few blocks, but not much more than that. For your early houses, you should be making most of the walls out of stone.
Once you have coal/charcoal to spare, you might want to use your furnace to smelt some cobblestone back into gray stone. With this, you can fill holes in underground caves without leaving unsightly patches of cobblestone. You can also make various decorative blocks such as stone bricks, which will let you build more attractive houses and other structures. Any variation of stone bricks will be just as strong as gray stone or cobblestone.
You may also find pockets of other "rocks": granite, andesite, and diorite. These are fine building blocks and are as strong as gray stone, but are less flexible: They can also be crafted into various more decorative blocks, but can't always substitute for gray stone in recipes.
This is a major resource, with two main uses: it is used to make torches, (your major source of light), and to smelt or cook items in your furnace. Smelting items not only let you cook your meat for better nutrition, but is also necessary for making use of iron (see below). A stack (64 lumps) of coal is a fairly large amount for the beginning, but over time you will need a lot of it. Fortunately, it is common: You will see it everywhere underground, and even some on the surface. Coal is the only ore you can mine with a wooden pickaxe. Coal is not strictly necessary since you can make charcoal from wood, but it is common, and you have plenty of other things to do with wood.
Iron is probably the most important and versatile resource you can find underground. You can use it to craft good quality tools, armor and a variety of other things. For your second day (or whenever you venture underground), your initial goal is to get at least 33 pieces of iron ore (see below for what to craft with that), and more will be useful. Once you have some of the ore, use a furnace to smelt it into iron ingots, that you can then craft into other items. Remember that to mine the ore, a stone pickaxe is required.
Cave exploration
Cave exploration is pretty straightforward: you light up your way with torches, mine up ores as you see them (check ores and minerals) and kill enemies as you encounter them (see "Tutorials/Combat" for details). There are also some important techniques that might not be obvious to a new player, such as using waterfalls to descend into shafts, and/or swim back up from them. There are also many options for marking your trail and not getting lost. Also, note that sneaking (on PCs, the ⇧ Left Shift key by default) prevents you from falling over the edge of a block, which is useful if you are caving near a long drop, especially a drop into lava. Sometimes such caves end immediately, but often they continue into big cave systems. If they seem to end right away sometimes there will often be a continuation about 2-8 blocks farther back and below the cave's end; mining in these directions (8 blocks back and down, exploring somewhat to the sides) will reveal this if it is the case. Digging away gravel or dirt can also expose cave extensions, but you may go through a few shovels that way. When exploring caves and mining underground, make sure to thoroughly light up the caves and tunnels as you go. If you don't do this, monsters can spawn in the darkness, even in places where you've already been through (meaning, they can come up behind you, or block your exit!).
If there are few nearby caves, or they seem too dangerous, you can explore more advanced mining techniques. Remember, if mining, never ever dig a single-block shaft straight down -- you are likely to fall into a deep monster-infested cave, if not into lava! You can, however, dig a mineshaft in a pattern, such that you always have a safe block to stand on as you mine a different block. Such patterns can range from a simple 2x1 pattern (standing in the middle so one of the blocks always supports you), to a 2x2 or larger staircase into the depths. A simple diagonal staircase works too. Just keep a careful eye out in case you break through into the top of a cave or lava pool. If you do dig a vertical mineshaft, bring a lot of ladders to get back up!
As you explore caves. you may run into dungeons or mineshafts. Don't get near these until you have at least full iron armor, sword, plus bow and arrows. Once you are properly equipped, these will be a challenge, but also contain treasure chests with rare and valuable items.
Other ores and minerals
You probably won't be finding these your second day, but it's worth knowing a little about the more advanced ores. Gold, lapis lazuli, and redstone are more specialized ores, only found in deeper parts of the caves. Diamond is the top-tier crafting material found in the Overworld, while emerald is used to trade with villagers. Lapis can be mined with a stone pickaxe, but the remaining ores all need an iron pickaxe. Some key uses:
- Gold works like iron, in that you mine the ore blocks and smelt them in a furnace to get ingots. You can make tools and armor out of it, but don't: Their durability will be abysmal, so they will wear out very fast. For now, four gold ingots and a bit of redstone (see below), lets you make a clock. This key accessory lets you know the time of day, even when you're deep underground, which is very helpful to avoid coming up to the surface to find a monster-filled night. Later there will be other uses for gold like powered rails, golden apples and netherite.
- Lapis lazuli is used to craft blue dye. It will also later be needed for enchanting. For now, if you happen to find some, mine a vein's worth or so and save it for later, otherwise, don't worry too much about it.
- Redstone is found quite deep, in fact in the same layers as diamond (watch out for lava). It is mostly used for redstone circuits; for now, you only need a few pieces, which a single block of ore can provide. Besides the above-mentioned clock, 4 iron ingots plus redstone lets you make a compass, to help you find your way around. Once you find and start growing sugar cane, you can make more compasses and craft them into maps (paper + compass) to keep track of your explorations and help avoid getting lost.
- Diamond is a very rare mineral, probably the most-sought resource. It can be crafted into very durable and quick tools and vastly superior armor. The ore is found at the very bottom of the world, the bottom 15 layers of the map, and (again) requires an iron pickaxe to mine. Other guides give tips for finding and safely mining diamond, but for now just note that if you're seeing diamond ore, you're very close to the lava "sea", which is dangerous.
- Emeralds are normally gained (and used) by trading with villagers and wandering traders, but scattered blocks of emerald ore can also be found beneath mountain biomes. Emerald ore is found at the same depths as gold ore and likewise requires an iron pickaxe. However, mining for the ore is dangerous and inefficient thanks to the silverfish that spawn at those depths in the mountains, and because you only ever find one.
- All these minerals including coal (but not charcoal) and iron, can be crafted into "storage blocks" at the crafting table, 9 pieces or ingots to a block. You can build with these blocks for show, but that risks losing them to a creeper blast. For now, just use them to save storage space if necessary.
Crafting
Repairing tools
To fix a tool, put two damaged tools of the same type and material in a grindstone or your crafting grid. This will combine the two old items into a new item that is either unused, or has slightly more remaining uses than both the old items together. This applies to any tool that has durability, including swords and bows. Later you'll have enchanted tools and/or weapons, but don't use this method for those, you'll need an anvil to preserve the enchantments.
Iron equipment
Iron is one of the most important resources in Minecraft. Your first half-stack or so will equip you to take on the world, but you'll need ongoing supplies to replace worn-out equipment. Get used to collecting, smelting, and stockpiling it, because you need to replace equipment, and the more you advance in the game, the more uses you'll have for iron.
Optimal iron usage depends on the local environment, but the first things you should make have this approximate order:
- A shield. This requires several wood planks and a single iron ingot. Shields were introduced fairly recently, but have seriously changed the balance of power against mobs: You can use them to block skeleton's arrows and hold off most other mobs' attacks, including creeper explosions.
- An iron pickaxe, to mine more advanced ores (see below) as you encounter them, which are key to proceed through the game.
- An iron sword, to attack monsters much more effectively than a stone or wooden sword.
- A bucket. This lets you pick up water source blocks and place them elsewhere. This is a key ability for making a farm, and it lets you generally rearrange water in the landscape. You can remove or place waterfalls, create your own ponds and rivers, (useful for fishing), defend your base against creepers, and more complex purposes. You can also use it on lava.
- Iron armor, which gives you much more protection against monster attacks and most other damage. The full set requires 24 ingots. If you don't have that much yet, make the various pieces of your armor set as you get more, starting with the chestplate.
- At this point, you have used 33 ingots. If you have iron left, go on to make shears and a second bucket (to hold a second water source, milk a cow, or get a bit of lava out of your way).
- Set aside half a stack or so (that is, 30-odd ingots) for when you need to replace some or all of your equipment.
- As you continue to gather iron, you can start switching over to iron tools for everyday work: An iron pickaxe, shovel or axe works faster and last longer than the stone tools. Extra buckets come in handy too.
- Once you have redstone, make a couple or few compasses (the extras are for maps).
- Eventually you can make an anvil for 31 iron ingots.
Beds again
If you haven't already made a bed, you should get some wool to make one! This lets you set your spawn point someplace safe (and stocked with spare equipment), and also lets you skip past dangerous nights and storms. If you have can craft shears (for just two iron ingots), you don't need to kill sheep, and you might get the wool you need from a single sheep.
Once you get a compass, use it to locate the world spawn point, and build a shelter there (assuming your home isn't already in sight). Once you've done that, you can carry a spare bed with you as you explore, and skip nights and storms by sleeping in it and breaking it in the morning to carry along. This leaves you without a spawn point, but if you do die, you still have a shelter nearby when you respawn. Stock the shelter with spare equipment, and place a bed too, in case you respawn at night or during a storm. Then you can just go to sleep and fetch your items by daylight, if your items are less than 5 minutes away (they despawn after 5 minutes).
If your bed is "missing or obstructed" when you actually try to respawn, you'll lose your spawn point and go back to the default respawning behavior (random within 20 blocks of the world spawn point). This continues until you actually sleep in a bed again. If there is no place to stand (solid block, not glass, fences, slabs, etc.) when you try to respawn, your bed is considered "obstructed".
When trying to sleep, make sure it's either night-time or storming (not just rain), and there are no monsters around you. If there is a problem, you should get a status message explaining what's wrong. You can't sleep if you are currently starving, poisoned or on fire. If trying to sleep at sundown, you may need to wait a few seconds for night to officially begin, and try again.
Slabs and stairs
You can craft most kinds of stone, or any wooden planks, into slabs, stairs or ladders. Slabs are half-height blocks that can be placed in either the top or bottom half of a block space. A floor made of "bottom" slabs can help prevent monster spawns, as mobs can't spawn on bottom slabs, and individual bottom slabs can be used as an easy step up to the next level of blocks. A ceiling made of top slabs can give you a little extra headroom, and double as the floor for a level above.
Stairs, naturally, can let you move up and down an incline without jumping, which is much more convenient, and for an often used path, it can save a lot of food.
Monsters
As you build up your equipment, you'll be able to fight the basic monsters more easily, and start to take on the more dangerous ones as well. A quick (and incomplete) list of the usual Overworld monsters:
- Zombies you know by now – individually they're slow and easy to defeat. However, if you're fighting them at night or underground, remember that they can summon more zombies when attacked in hard difficulty. Zombie villagers are a variation that can spawn naturally or when villagers are killed by zombies. They mostly drop rotten flesh, but can also drop a few bonus items: A carrot or potato for farming, or even an occasional iron ingot. As you continue to play, you will start seeing zombies with weapons and armor. Naturally these are more dangerous, but they also drop more experience, and sometimes they drop the weapons or armor, which may be enchanted. In deserts, you might meet the husk variant, which inflicts a dangerous status effect called Hunger and does not burn in sunlight. Watch out for the baby zombies, which are much faster. Drowned are the underwater variant, which can spawn with the deadly trident but can drop gold. Avoid them until you have good protection, because three hits can kill you with minimal armor. In the very rare case that a thunderstorm occurs and a pig is struck by lightning, you will find a zombified piglin. These are quick and powerful, but neutral, so leave them alone and they'll ignore you.
- Skeletons are dangerous because of their ranged attack; they mostly drop bones and arrows, but sometimes they drop their bow as well. Later they will also show up with armor (and enchanted bows), which they can also drop. The bones are useful not only for taming wolves, but for making bone meal which can make crops grow quickly (this is especially handy for multiplying that carrot or potato). During or after storms, be wary if you see a skeletal horse standing around – this is the rare skeleton horse trap, which can confront you with a whole squad of mounted and armored skeletons. In icy areas, you may meet the more dangerous stray variation, which afflicts you with slowness when you get hit by an arrow.
- Creepers are the iconic cute-but-deadly suicide bombers of Minecraft. They drop gunpowder, which is mostly used for making TNT. The safest way to kill them is to shoot them from a distance with arrows, but it is, in fact, possible to sprint up and hit them, sprint away, and repeat until they're dead. Note that water will block the destructive aspect of their explosion, but not the damage -- a creeper that explodes in water will damage you but not the landscape or your base (in Java Edition; in Bedrock Edition you will not be harmed). Once you have iron armor or better, their blasts will be much more survivable. (Point-blank range is still pushing your luck, because being thrown into the air after ending up on one heart often results in death.) Beware: In caves or ravines, they can drop in on you as you pass under them, and explode without the time delay.
- Spiders usually become peaceful during the day, but can still counterattack after you attack them. They have two special abilities: They can see you through walls, and they can also climb those walls (including fences, but not glass). They drop string, (used for bows, fishing rods, and more advanced crafting), and sometimes spider eyes (not very useful until you start brewing potions). Underground in mineshafts, you will also meet cave spiders, smaller but more dangerous because they can poison you (not to mention slipping through small openings).
- Slimes are found in swamps and occasionally underground. The slimeballs they drop will let you craft a number of useful items, especially leads to capture animals and move them around. From their biggest forms, they will split into smaller versions when killed, so watch out for being mobbed by them - they can be more powerful than most players give them credit for.
- Endermen won't attack unless you meet their eyes or attack them, but once you do fight them, they're much more powerful (and faster) than other monsters. They sometimes drop ender pearls, which you can use to teleport. They can also pick up some blocks and move them elsewhere, which can be... inconvenient. Hint: being 3 blocks tall, they can't follow you under a low ceiling. Even a suspended 3-by-3 platform will let you stay out of reach while you attack them. Fences block them almost as well, though they might teleport to your side of the fence. They are also afraid of (and damaged by) water and rain.
- Witches attack by throwing potions of Poison, Slowness and Harming, and they can also drink potions to heal themselves or protect themselves from fire or drowning. They drop a variety of odd items, occasionally including the potion they were drinking. It is best to kill them with a bow and arrows, but they will latch onto you no matter how far away and start running towards you, healing as they go. Avoid villages during thunderstorms, too: if struck by lightning villagers turn into witches!
Next Day
There's a tutorial of sorts for The third day, but at this point, you're past the very beginning of your game and can choose what to do next. Some ideas:
- Build a bigger house, with room for storage chests and other things. With your new resources, you can make this one nicer looking, with glass windows and various decorative blocks.
- Build more farms for your various crops. Sugar cane especially will need a different sort of farm than the other crops.
- Explore your world, discover new biomes, and find those ores, crops, and animals you haven't already.
- Dig mineshafts and collect more ores, up to and including diamonds.
- Breed up your animals to a decent number for food, leather, and other resources.
- Build a place where you can go fishing overnight or during storms without being pestered by monsters.
- Fight monsters for experience and useful items.
- Collect more resources for building and crafting, and learn about the various things you can craft.
- Find a village and sell your crops and meat for emeralds, then use those to buy more advanced items
- If you come upon an ocean, craft a boat to explore that and find new lands. Make sure you know your way home, though!
- Make a fence or wall around your territory, and light up the whole area, to create a monster-free base where you can wander around at night.
- Explore the possibilities of redstone circuits and mechanisms such as pistons and dispensers.
- Eventually, you'll probably want to move into more advanced activities: enchanting lets you add special abilities to your armor and tools, and a trip to the Nether will let you get the supplies for more advanced items, including brewing potions.
- In time, you may turn your attention to The End, and the special challenges and resources found there.