No edit summary |
m (→=Shelter Name) |
||
| Line 9: | Line 9: | ||
| − | + | ===Shelter Name=== |
|
'''Materials''' |
'''Materials''' |
||
| Line 45: | Line 45: | ||
</gallery> |
</gallery> |
||
--> |
--> |
||
| − | |||
==Navigation Help== |
==Navigation Help== |
||
Revision as of 14:11, 1 May 2011
You don't need a shovel yet. You don't need a pickaxe yet. You need a shelter. Then you'll need a shovel. Then you'll need a pickaxe. Shelter BEFORE tools, okay? Well, you'd need tools to build a shelter, but what do you need to build tools? A shelter!
This page lists types of shelters.
This page is in constant addition. Feel free to add a shelter, under this syntax:
Shelter Name
Materials
- Bulleted list, all materials required. Do not include materials that will be acquired while making the shelter (i.e. cobblestone while mining).
This is a list of many types of shelters. It includes shelters that are used in almost every game to those that have only been used once or twice.
Description
A brief paragraph describing the shelter. List its advantages and disadvantages.
Location
Where the shelter can be built. Be as specific as possible.
Construction
A paragraph giving step-by-step instructions on how to build the shelter.
NOTE: At some point, all construction paragraphs may be changed to numbered lists.
Extras
- Bulleted list of things worth adding to the shelter.
- Don't, however, list things that go in any shelter (i.e. a crafting table).
- IMPORTANT: Only post pictures without the GUI. Hit F1 to hide it.
- This gallery includes pictures of before, during, and after construction. The larger this is, the better.
- Name
Caption
-->
For ease of navigation, it is suggested that you use the "Contents" above to navigate through the shelters. This makes the page much easier to use.
Organization
These shelters are organized by how long it would take to build them. Obviously, these can vary, depending on how detailed you make them.
Note that a day only includes the daytime portion, not the night. Also, material collection time is not included.
Nomadic: The easiest type of shelter to build. Doesn't offer much protection, especially from creeper attacks. These are generally the type you would build while the sun is setting. Time: Almost none.
Easy: These usually work with the map. They offer some protection. Time: 1/2 day.
Medium: These are freestanding structures. They offer a good amount of protection. Time: 1 day.
Hard: These structures can be very time-consuming to make. However, they offer a great amount of protection. Time: 2-10 days.
Innovative: Although these structures are the toughest to build, they do not always offer the most protection. They focus on feats of engineering. Time: variable.
Add-ons: While not structures, they add important features worth mentioning.
Shelters
Nomadic
Emergency shelter
Materials
- None
Description
The simplest shelter can be made by digging 3 blocks straight down and then capping off the hole with some of the blocks of dirt. This requires only a few seconds. While digging down isn't normally recommended, it's extremely rare to run into a cave when digging 3 blocks from the surface. It is safe to expand the shelter from there on. This type of shelter can be done also when your base is already established but you are getting caught by the night while being far away from your base.
Location
On the ground level in a place with dirt.
Extras
- Torches
- Bed
Cliff-side Cave
Materials
- None
Description
A cliff-side cave is probably the most popular shelter for the first night. It takes only a few seconds to make, and once inside, the creator is safe to expand it. It also offers good protection against most mobs (excluding creepers - they can blow up your rock walls). Since it's a structure inside the ground, building material will be gained instead of lost.
Location
The best part of this shelter is that you can build it anywhere there's a cliff. Make sure there's a solid wall (preferably straight up). Mining down does not usually make a good shelter. A cliff by a large body of water is preferred as hostile mobs cannot spawn in the water.
Construction Extremely simple. Mine a 2x2x1 hole in the wall. Then enter the hole and close it off. From there, you want to start mining deeper that way.
Extras
- Torches
- Mine extension
- Link to an above-ground base
- WhereToBuildACave.png
Where to build a cliff-side cave.
- WhereNotToBuildACave.png
Where not to build a cliff-side cave.
- StartedCave.png
A 2x2x1 hole in the wall.
- FinishedCave.png
A finished cliff-side cave.
Pillar
Materials
Lots of dirt. Or lots of anything that is not an entity.
Description
A pillar of blocks, occupying an 1x1 space. Great when you have lots of one type of non-entity block. Remember, DO NOT use a block that is affected by gravity, eg. Sand, Gravel. Remember, not an short pillar. A cloud-level pillar.
Location
Anywhere! But preferably an open space.
Construction
First, equip your NON-ENTITY block. Then, point at the ground, hold your right-mouse button, and jump. Repeat until you are at cloud level, or any other level that Skeleton arrows cannot reach you. After that, it's all up to you on what you want to do with the shelter. For the Nomadic, just stay up there until the sun rises. Mine the blocks below you, until you reach ground level.
Extras REMEMBER!!! If you are planning on building a real shelter up there, do not build above layer 128.
- Shelter (basic house)
- Ladders
Watchtower
Materials
- About 40 blocks of dirt.
- A few torches.
Description
A good shelter should not only protect you from any type of hostile mobs during the night, but also prevent a surprise Creeper ambush in the morning. This shelter type achieves this without the need for sophisticated materials such as glass or doors, and can be set up pretty quickly.
The design is essentially a tower with a rim for nighttime protection, but with some gaps between the tower and rim to see what is going on below in the morning, and have a slash at any assembled hostiles before leaving the shelter.
Location
This shelter is best suited for wide open terrain or hilltops.
Construction
- Build a simple 3x3x2 solid tower.
- Add a single block atop each edge of the tower, then attach yet another one to the outside of each; remove the former blocks again, leaving the latter semi-free-floating. Atop these, build a 5x5 rim.
- Add torches.
- Dig a 2x2x1 shaft in the center of the tower. Wait for dawn down there.
- At dawn, work your way back up out of your foxhole; have a thorough peek though the gaps between the tower and the rim, and finish off any assembled mobs before leaving the shelter. (Note that the rim will be just too high above ground to jump off safely.)
Open-Air
Not what you think.
Materials
- Dirt, dirt, dirt!
Description
Sure, it might not stop invading spiders, but at least it works for the first night! The Open-Air is basically walls surrounding you. No roof. Feel free to add a roof, after you build the walls, if you want. But then it's not a Open-Air anymore. It's a house after the roof.
Location
Flat, open ground.
Construction
First, gather your dirt and basic necessities. Place your dirt in a (preferably, size is up to you) 5x5 area. Once you've built a 1-layer 'wall', build until you have a 3-layer wall. 4, if you really want the safety. By this time, it should be sunset. Again, the time will vary, depending on the number of layers on your wall. After you have built your wall, jump down to your 'shelter'. Done! Sure, it might not be 100% Spider-proof, but just build a small rim, while you're building the wall. Enjoy your night. REMEMBER!!! Don't fill the area!
Extras
- Torches
- Roof (which will turn your Open-Air into a house, in which you're free on expanding)
- Improved wall (Stone, anyone?)
- Windows (which is highly recommended to be built only if you want to add a roof)
Easy
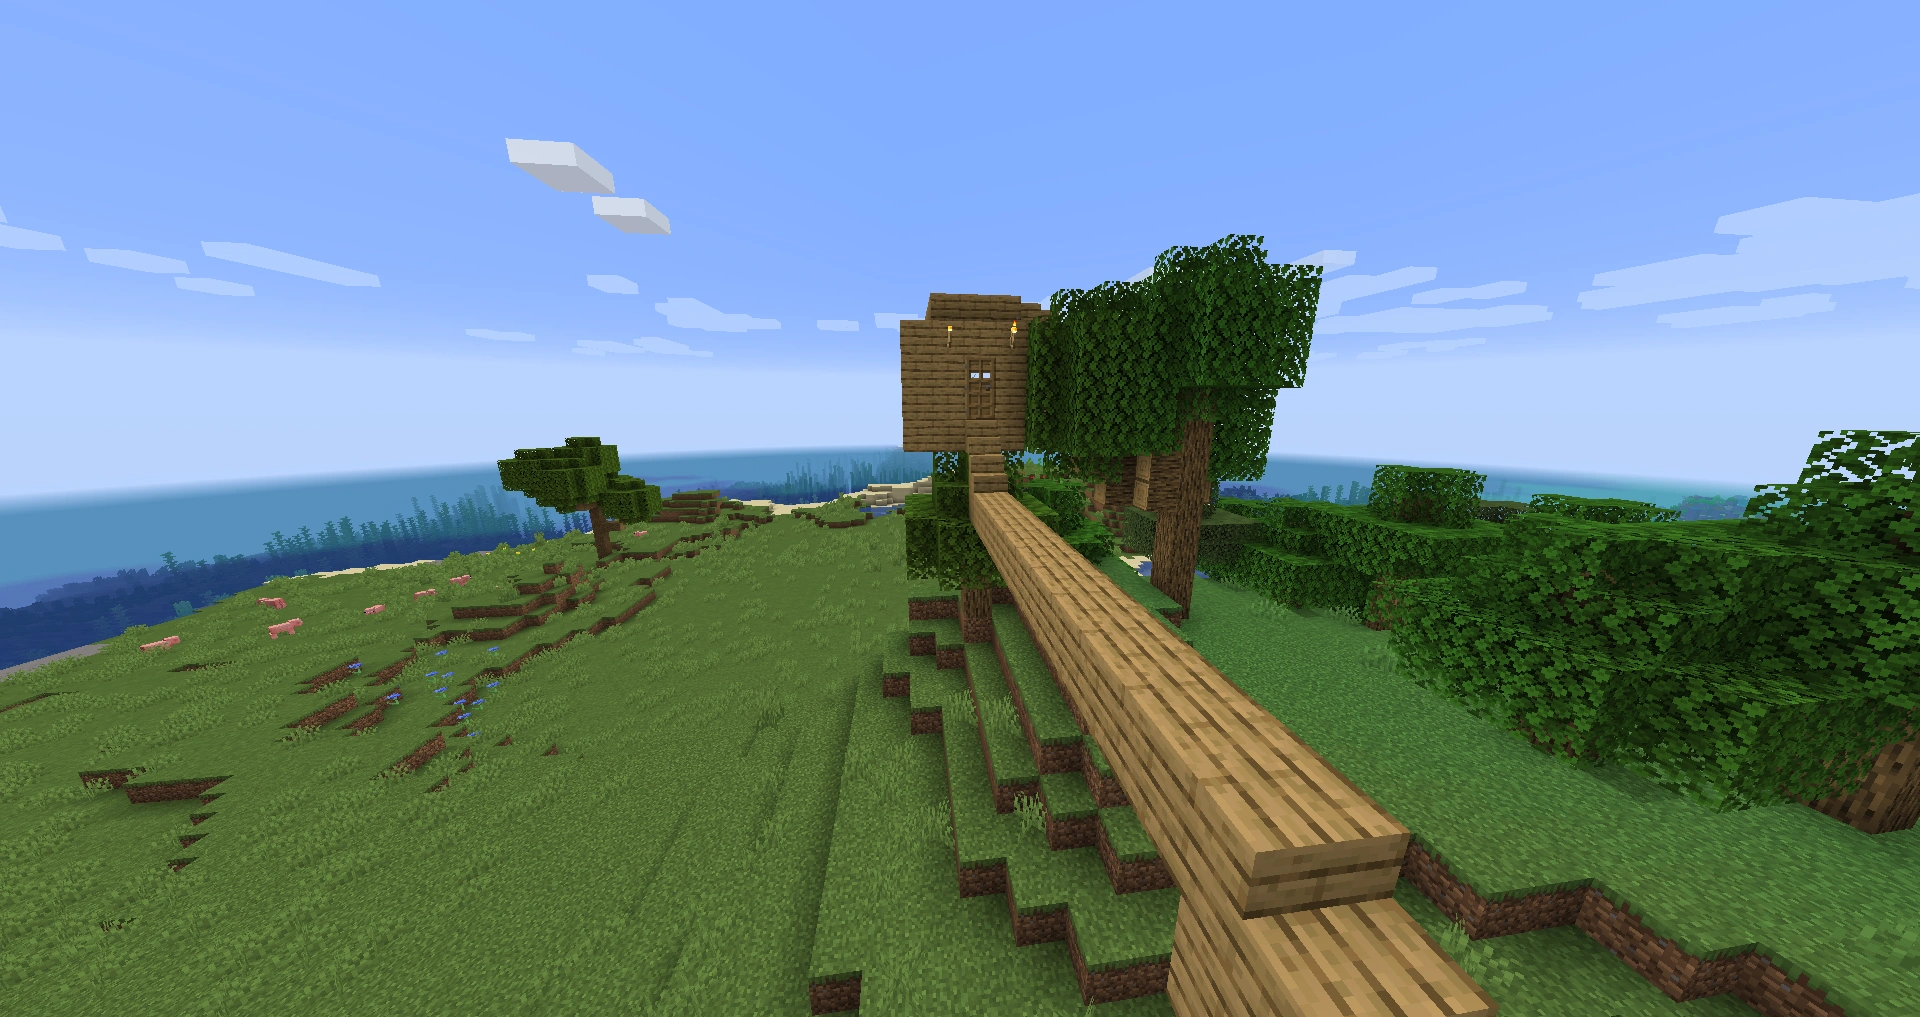
Treehouse
Materials
- ~80 wooden planks
Description
Treehouses provide a high base. They are useful especially against creepers, because most are too high for a creeper's explosion to reach. They are often used with a bow and arrows, because they are excellent sniping spots. Another advantage to treehouses is that they are a great lookout point. They give you a good view of the map, helping you find the place for your next shelter.
Location
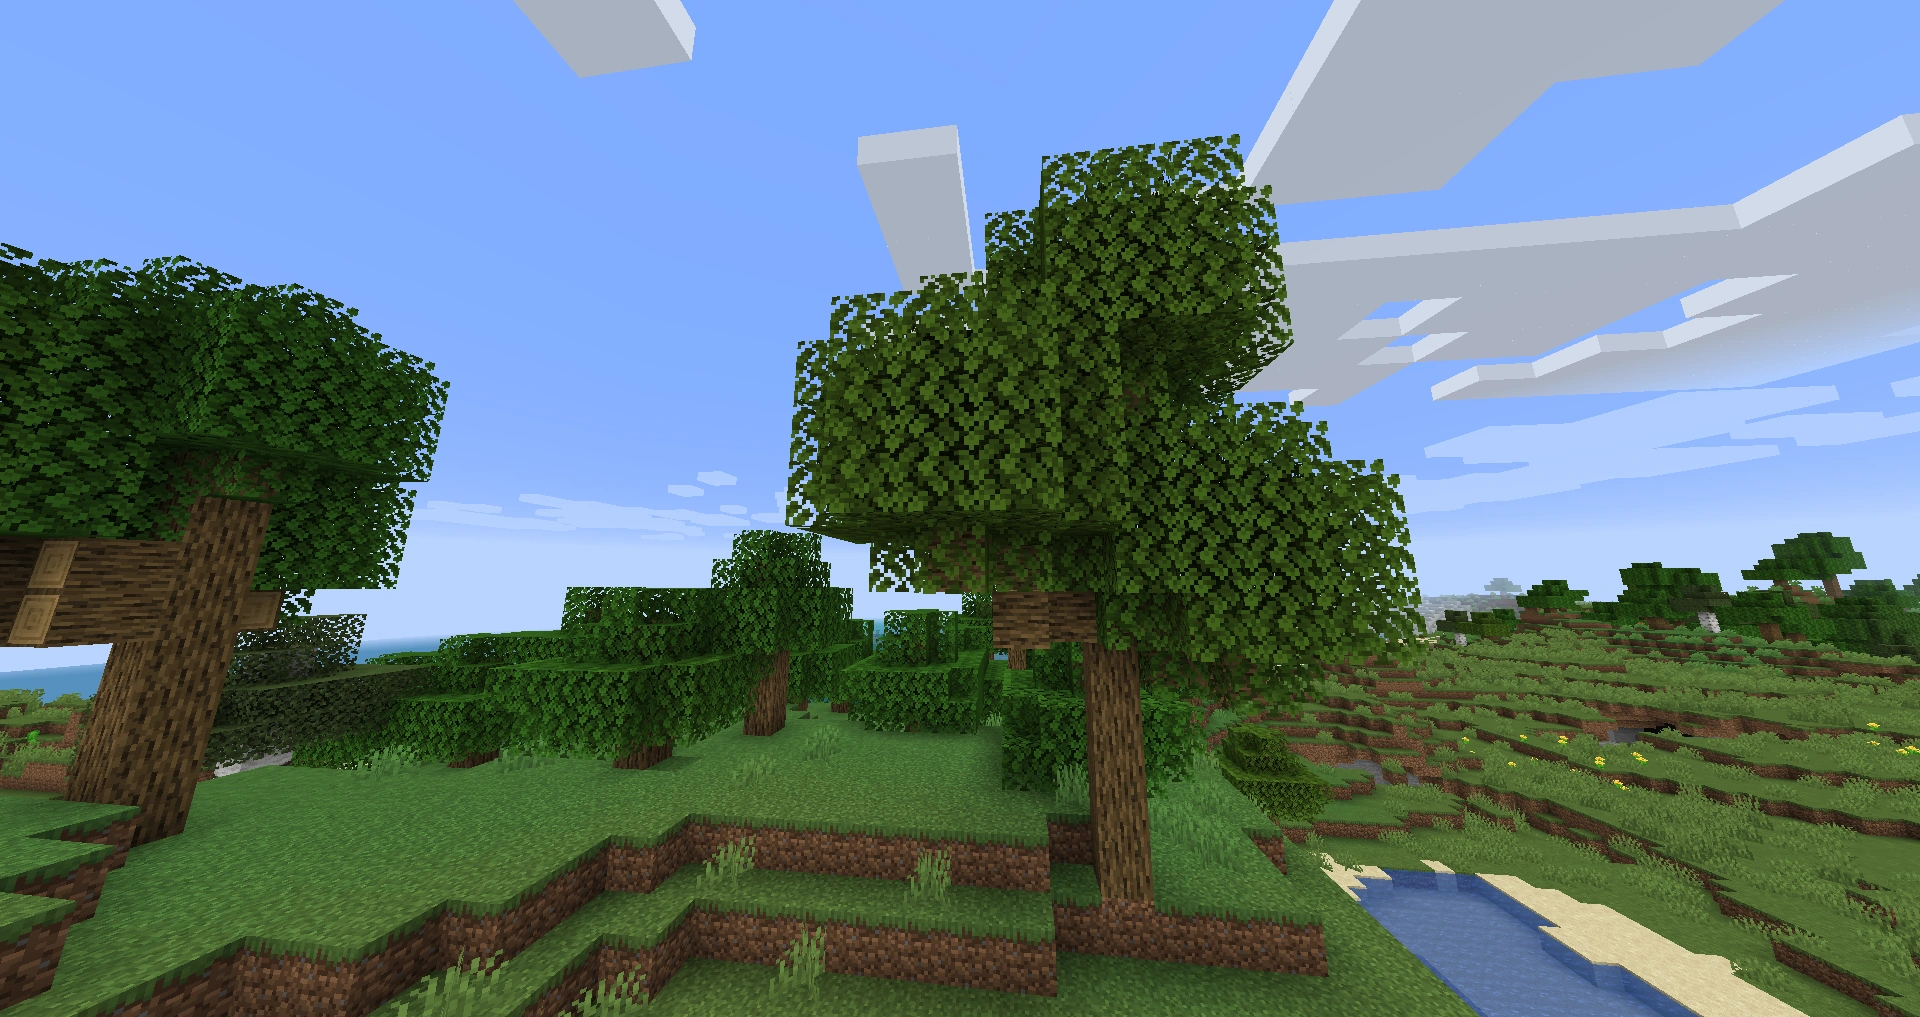
Treehouses are built in trees. The best treehouses are in the tallest trees - but be careful. The taller the tree you pick, the more stairs you will have to build in order to reach your shelter.
Construction
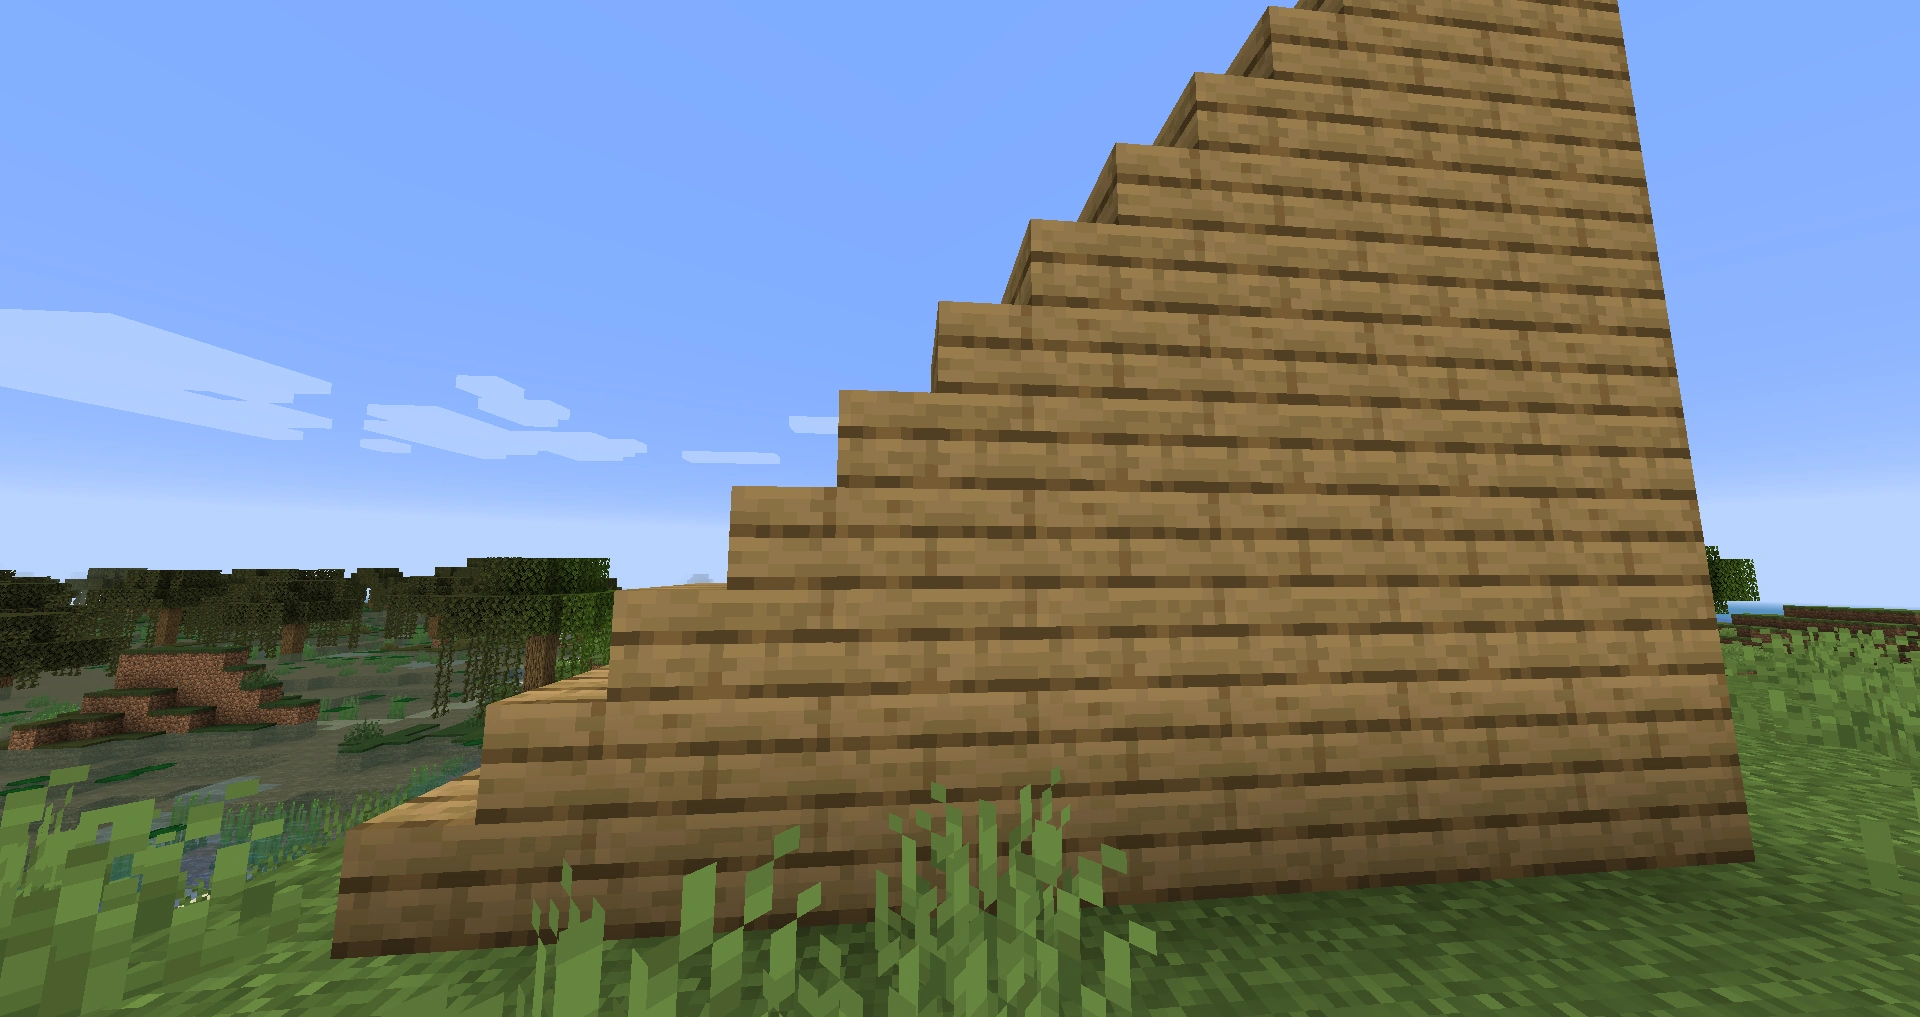
The first thing you will build when constructing a treehouse is the staircase. Without a staircase, you cannot reach the treehouse. The amount of stairs you build will vary depending on the height of the tree you are building in. Make these stairs and place them. Remember to place wooden planks under the stairs to support them. (Not only does this make them easier to build, it also makes the staircase look better.)
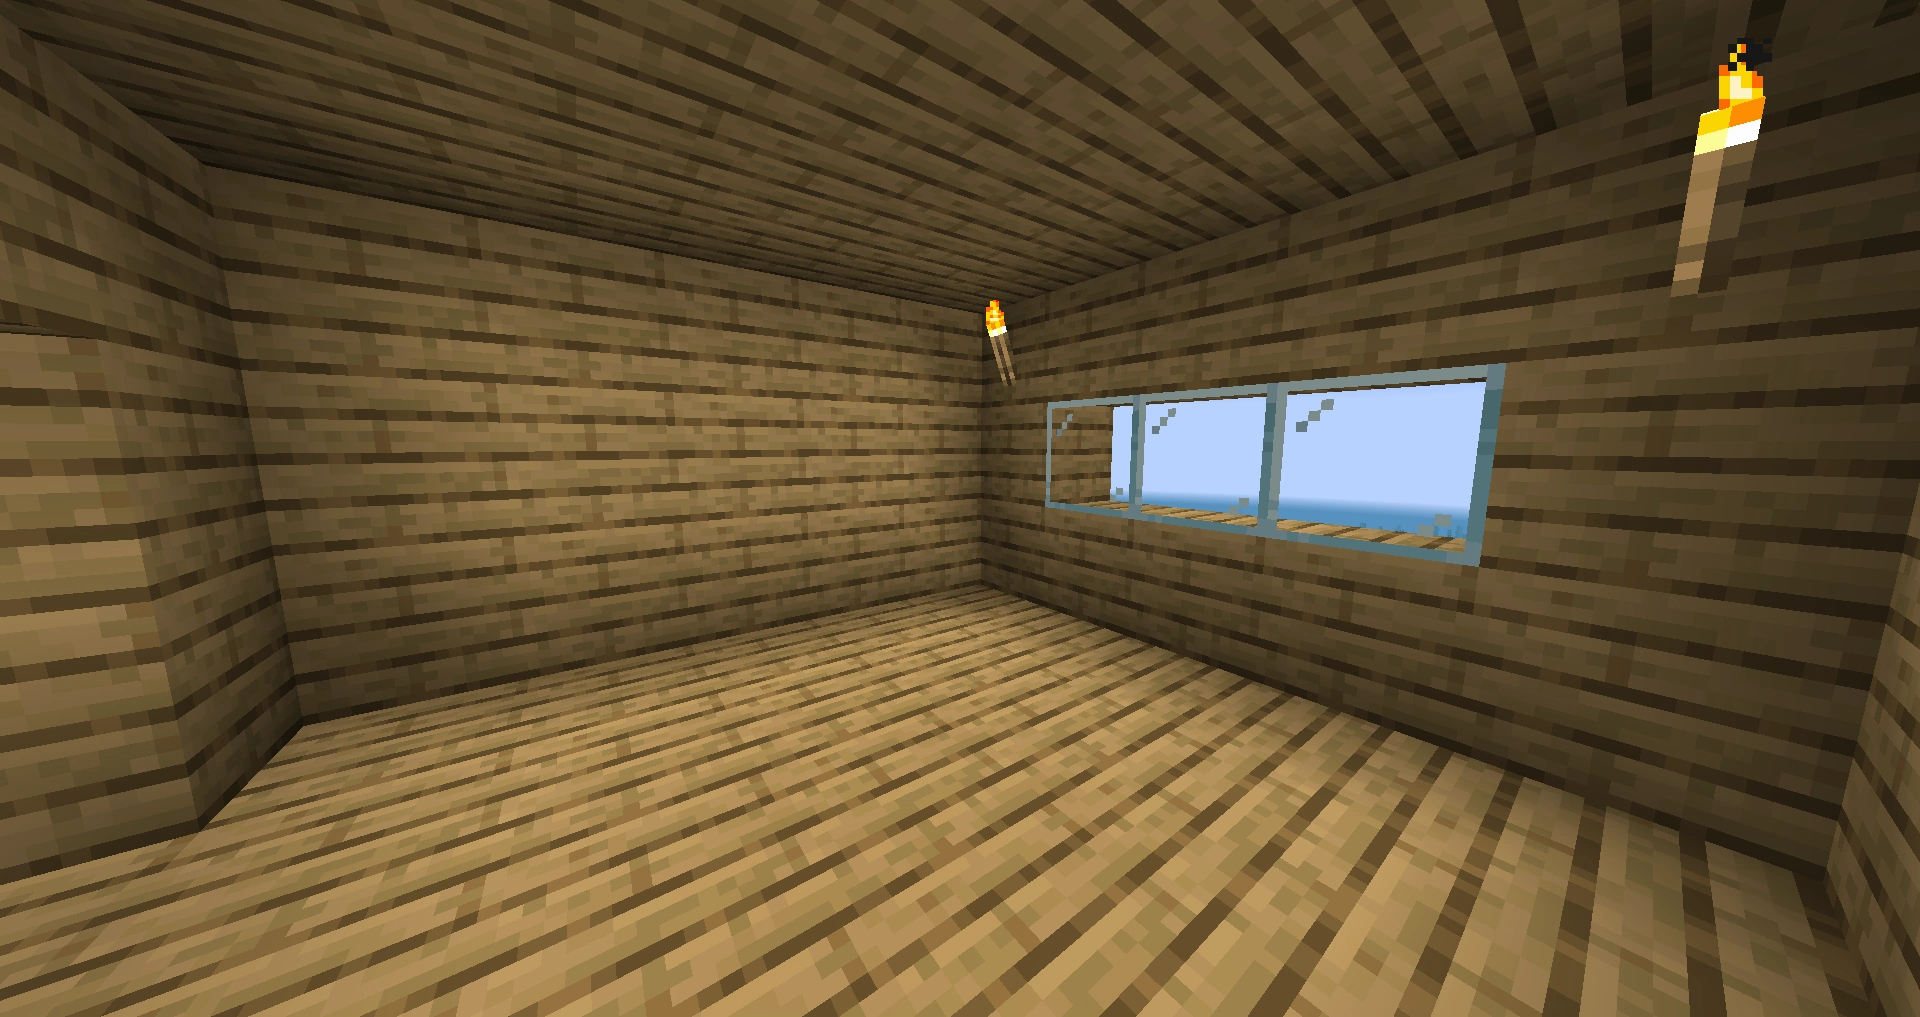
Now you should have a staircase that leads to the top of the tree. Climb this staircase and lay down a 4x5 base of wooden planks. One common practice is to remove a layer of leaves and then build the base. This maintains the same level as you would have had without a base.
Next, build a layer of outer walls. These should only cover the border. To be economical, you could skip the corners, as they are not necessary. Build two more layers on each of these.
Now you will construct a roof. You don't need to add another border level; this was compensated for in the last step. Instead, fill in the top border with wooden planks. This roof should block out most of the light - look in the "Extras" section for ways to counter this.
Extras
- Staircase to top
- Window
- Treehouse link - Multiple treehouses linked together. Best if treehouse is built in a forest.

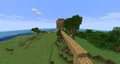
A good place to build a treehouse.
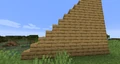
What your finished staircase should look like.
A finished treehouse.

The interior of a treehouse.
House
The expansion to the Open-Air, in detail.
Materials
- See Open-Air, in the Nomadic section, for walls. For the roof, any non-entity.
- Torches
- Sand
Description
You've played the game with the walls, now play it with the roof! A basic house.
Location
Flat, open ground.
Construction
First, build a wall, just like the Nomadic Open-Air. After that, close the roof, add windows (smelt the sand with your furnace), and you're set for expansion!
Extras
- Mine
- Upper Levels
- Lower Levels
- Traps
PS. This is basically the Open-Air WITH a roof.
Medium
Freestanding
Materials
64-128 Wooden planks, Cobblestone, Stone
Description These Freestanding shelters are not usually the first shelter that the player builds, because it usually consumes the time fast. These shelters provide good protections against Mobs.(Creepers).(Watch out for creepers! They can spawn behind or on top of your house. Best way to make sure that creepers don't get on your roof is to put torches on it or make your roof from glass!)
Location You can build these type of shelters anywhere where there is flat ground. You can also clear out a flat area, but this will consume more time and leave you vulnerable in the night if you don't have your house built in time.
Construction The size of the shelter is decided by the player himself. The foundation can be any size you want, but bigger building takes more time. First make the foundation of the building and then you can make it wide as you want. Then you can make a wooden floor, or you can just keep the ground as your floor. Jump and place a block underneath you to make the shelter taller. When your shelter is complete, you can make an access to the rooftop if you like. Making a door is very important, because the aggressive mobs can come inside your house and kill you.
Extras
- Watchtower (used for sniping and looking for resources)
- Windows
- Greenhouse (See Farming)
Floating
Materials:
- Plenty (at least 200) of cobble, planks, or other general building material
- At minimum, 1 door
- Other material needed for house additions
Description: A house that floats in mid-air! Protects greatly, as mobs can't get in and spiders have nothing to climb on. However, it can take a bit longer to start building than freestanding structures, about 1-3 days.
Location: A cliff face, preferably over water, is the best place to build the structure. Any large hill is a good starting point (this option is assumed for the construction section). With more work, however, it can be built anywhere, using a staircase for access.
Construction: 1. Choose an elevation. Recommended height is over 10 blocks. 2. Build a 1-block wide bridge out about 5 blocks from the hill, beginning the count from the furthest horizontal point on the hill within 3 blocks in any direction. 3. If you want a house below the level of your bridge (a basement, perhaps), make a pillar from the ground up to the desired lowest elevation. Build around it to the desired foundation size. Remove the pillar when construction of the foundation is completed. 4. From this base, build as usual, making sure to place a door at the level of the bridge, with an empty space above it so you can jump to and from the door. Don't forget you are still vulnerable to roof spawning if precautions aren't taken! 5. Make a one or two block gap between the bridge and the door. This is the system that so secures the structure. Mobs coming to you will simply fall below if they attempt to reach you when the door is closed. It is unlikely that they would jump the pit, but it is still a possibility. Ex: []=block -=space {}== door
              {}
              {}
  [][][][][]--[][][]
6.Continue building. One great thing about this type of shelter is that you aren't nearly as hemmed in by hills or other terrain! Generaly, you can build in any direction for a great distance. The only concern is that you must build the new foundations, and therefore must use a few more materials.
Notes: You may have some trouble getting into your house. One thing to make sure of is the door. Since the hinge area is solid even when open, you should jump to the door from the side opposite the hinge. Simply widen the bridge at the end to do so more easily. The area under the pit should ideally have some sort of fall-breaker in case misjudgment of the jump occurs. Once you are confident you can jump it consistently, you can build a mob trap for anything that approaches. Make sure that you can escape it if you DO fall, however.
Extras: These will be the same as a normal house- except anything to do with the underground. Just build that sort of structure on the area opposite the bridge/stairs. Even grass can be brought up with a stair of dirt. Do not use a full stair with lower support, as to prevent intrusion while you wait for the spread.
  Do: []          Do not: []
      [][]                [][]
        [][]              [][][]
          [][]            [][][][]
Hard
These homes are very complex and some may combine other shelters with large add-ons, making them different shelters like the ones below.
Underground Shelter
Description
These shelters are built entirely underground, usually at a depth of 15-25 blocks under the surface. They have the advantage of being difficult to detect from the surface and invulnerable to attacks from above-ground mobs. Disadvantages include difficulty of construction - usually involving committing the cardinal Minecraft sin of digging directly down - and the fact that it is difficult to escape if a mob -especially a creeper - managed to enter or spawn.
Necessary Materials
Location
The entrances to this shelter can be anywhere, but in SMP, care should be taken to avoid making your location obvious to griefers or thieves. The top of a mountain, the middle of a desert, or even inside another, well-defended shelter are great locations to place the entrance.
Construction
Dig a 2x1 tunnel downwards, placing ladders on the walls every two blocks block, and Torches in small alcoves to the side. Once a suitable depth has been reached (20 blocks is reccomended, but anything below 10 is acceptable), hollow out a chamber. The size of this room is a matter of preference, but a 5x5x2 space is ideal. Light this area with torches, and your rudimentary shelter is complete. Add-ons can be expansions to the original chamber or separate "rooms" of their own.
Extras
- An escape tunnel - Absolutely necessary, as mobs inside your house will spell doom otherwise.
- Connection to mine
- Subway/railway station
- Farms (Make sure to have plenty of torches)
Underwater Shelter
Description
An underwater base for total protection from creepers and other mobs, along with looking good.
Necessary Materials
Any block (other than TNT; preferably glass).
Some form of light, glowstone , etc. if your house is made of glass, as torches cannot be placed on glass.
Location
In a deep lake or in the ocean.
Construction
Start by filling the space where you are going to build your house, then dig out the inside. Next start removing the wall and replacing it with the block of your choice. Then add your ceiling and replace the water on the top. You now have a "creeperproof" house. (Unless it blows up the water without being in it, although this has only been proved with TNT.)
Extras
- An underground base below this base.
- Glass walls and roofs, as the strength of the blocks doesn't matter.
Innovative Dwellings
These types of dwellings are mostly to impress other players, or are amazingly dangerous to live in.
Description
This type of shelter can vary in location and security. For example, a innovative dwelling could be located within a double dungeon (with the spawners still there), built into the bottom of an overhang, or above a lava lake! Innovative dwellings are usually much more difficult to live in and build; however, they work with the map and are great for impressing other players.
Location
The location of this type of shelter can vary drastically, depending on the map, and on the player's preference.
Types
Dungeons
Dungeon dwellings require very little setup on the part of the player. They are not very big, and there is also the risk of spawned enemies as well as caverns nearby. Many are located deep underground, so they can be relatively difficult to located and navigate to. Leaving the spawner in for decoration can serve as the player's death sentence. However, advantages of this type of home are little setup, free mob drops (if one decides to set up as a mob trap instead), and in SMP, difficulty by other players attempting to located the home.
Overhang Bases
These nifty bases are built into the underside of overhangs of mountains. Unfortunately, suitable overhangs and ones located in scenic or easy-to-defend places can be difficult to find. Building is another problem, as you would either have to pillar upwards to excavate the home or enter from the top and use water to build on the underside of the overhang. Sand or gravel is recommended, as removing pillars made out of these materials is much easier and can be done directly from the ground. As difficult as this setup may be, one can use this type of base as a stealthy reconnaissance outpost, by dropping lava, arrows or even TNT on unsuspecting players and/or mobs, or just for viewing epic scenery.
Lava Forts
These are arguably one of the most difficult bases to build, not only because aboveground lakes tend to burn wooden homes down, as well as the fact that returning home with a stash of diamonds could quite possibly be more risky than hugging a creeper on Hard difficulty. As the player must use nonflammable materials, such as cobblestone, players may not like how the home would look. On the other hand, the lava can protect against ninja creepers, assassin spiders, wall-hacking zombies, and quick-scoping skeletons, allow animal spawns, and is relatively easy to spot from a distance during the nighttime from a high perch.
Add-ons
"Forts"/Walls
These are often just normal on-ground homes with walls around them.
Description
These shelters ofter far higher protection, and if there in no dark places on the walls or inside, then you can roam freely at night without fear of mobs(as long as you are inside the walls), ofter a place to attack from, and allows you to build at night.
Location
A flat area, just like medium-sized houses.
Materials
- A normal freestanding home.
- As many blocks as you need (Cobblestone is suggested)to at least build a 4 block high wall around your home (preferably higher) and a lip on the edge (optional, but recommended).
Construction First pick a perimeter for the wall so you will have space to build in later on, then build a 1 block high wall there. After that keep making it higher and higher until you have the desired height. Then you will build a lip that is at least 1 block over on the top of the wall to prevent spiders and Spider Jockeys from climbing over.
Extras
- Towers can be included on the sides to make it look better and give a better point to attack from.
- A larger lip can be used to give a better point to attack from.
- Windows can be added to allow you to see outside.
- Walls can be made thicker to resist explosions (not needed if the wall is made of Obsidian or Bedrock).
- By building by the sea, part of the wall may not be needed.
- Bigwall.png
1,000,000 pounds reward to a person who finds a creeper that can jump that!