TreeIsLife (talk | contribs) (Undo revision 1935782 by 24.141.184.234 (talk)) Tag: Undo |
|
| (One intermediate revision by one other user not shown) | |
(No difference)
| |
Revision as of 14:26, 12 May 2021
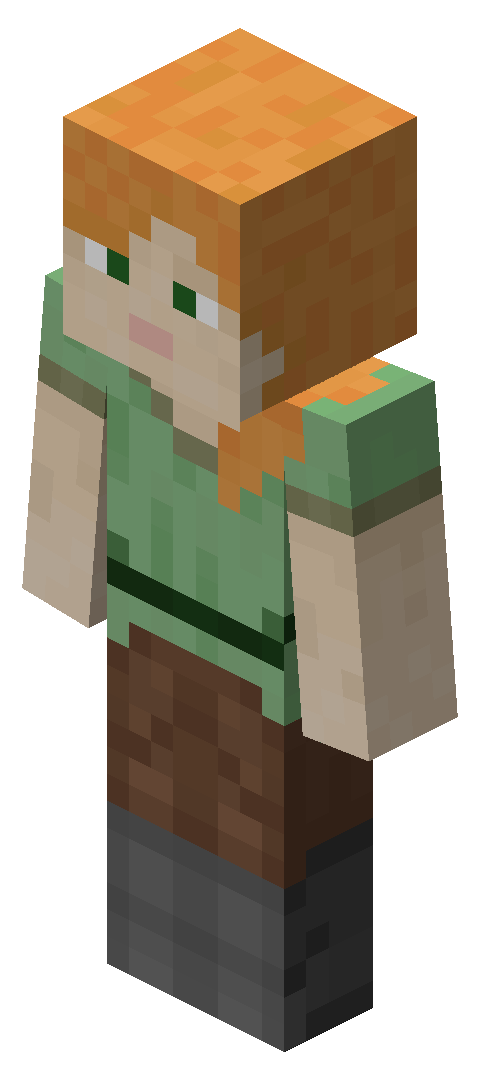
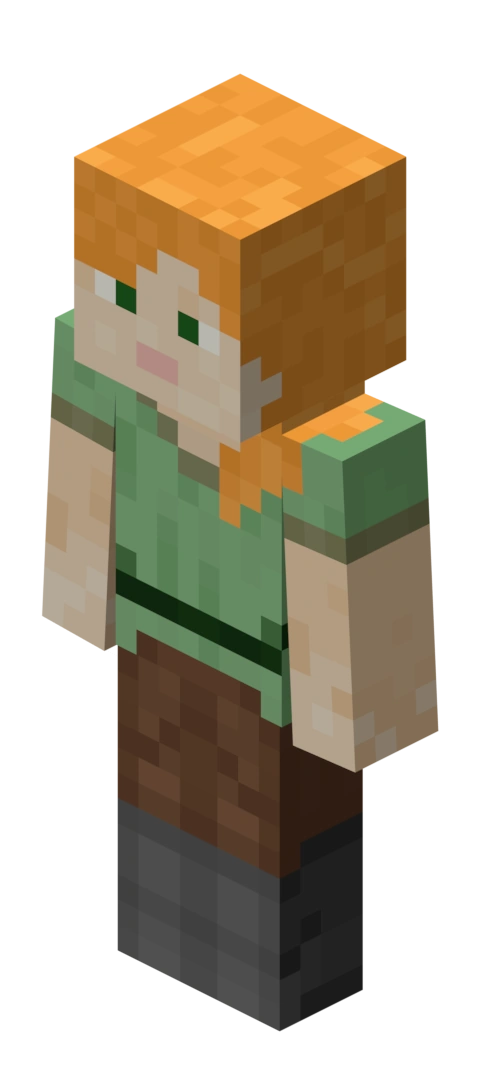
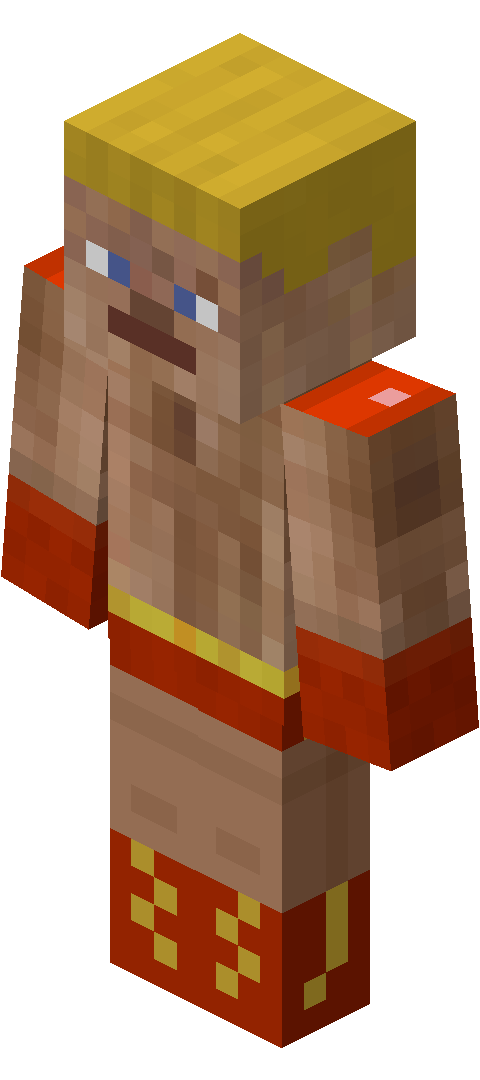
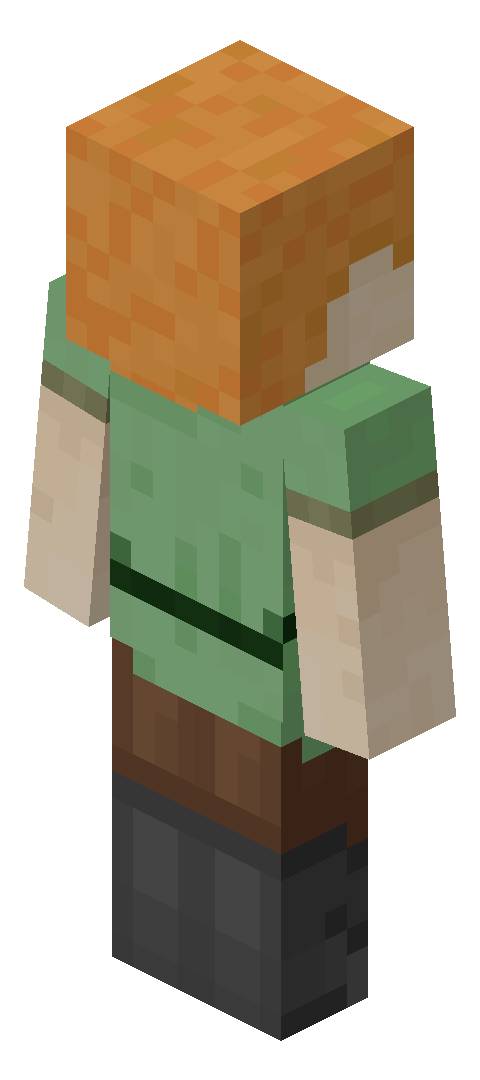
| Steve[JE only] | Steve[BE only] | Alex[JE only] | Alex[BE only] |
|---|---|---|---|

|

|
|
|


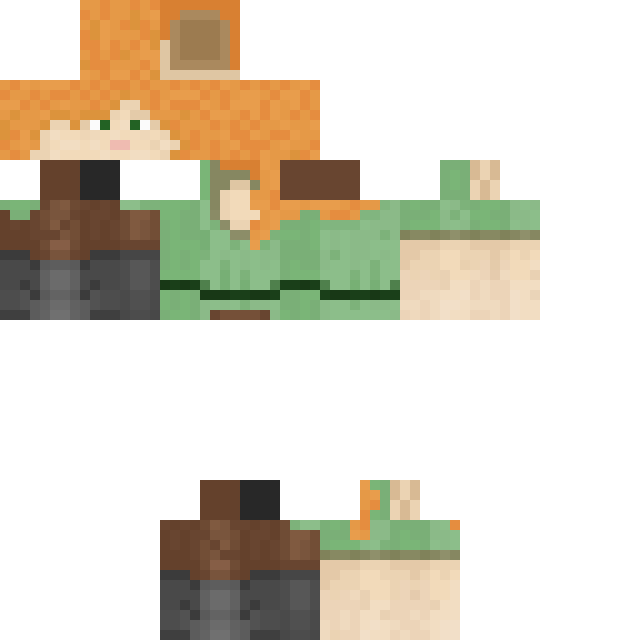
Skins refer to the textures that are placed onto a player or mob model.
Properties
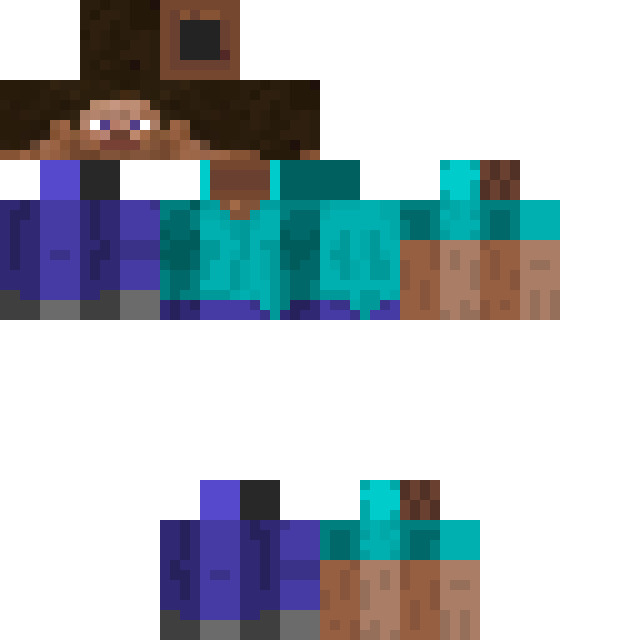
Skins are divided into areas that act as the surface area of the character (for example, the front head area, left leg area, etc.). There are a total of 3,264 pixels that can be customized, with 1,632 on each layer. The second layer can be used to give the character glasses, hats, or other accessories (even a bigger head).
In Java Edition, a skin allows only a solid color; transparency is not allowed on the skin file except on the second layer, which is transparent by default; playing offline, pixels can be left free resulting in "holes" in the skin. If a skin with transparent pixels on the first layer is uploaded, the transparent pixels render as black pixels in-game. There are about 9.571 656 652 × 1031441 possible skins in this edition, with 5.412 073 956 × 1027511 compatible online.
In Bedrock Edition, skins can have double the resolution of a normal skin. This means the skin template can be up to 128×128 instead of just 64×64. The normal templates still apply, but players get 4× the amount of pixels to work with, since both dimensions have been doubled. Transparency can be used, even on the first layer, though there needs to be at least one visible pixel on five body parts, so a fully invisible skin can't be made. The transparency must also be 0% or 100% as translucent colors are not allowed in either layer.
Pixel size of the 2nd layer on body, arms and legs is 0.25 pixel bigger than the skin pixel (inner layer). For head 2nd layer (Hat layer) it is 0.5 pixels bigger than the skin layer (inner layer).
World textures
A skin can also refer to other textures in the game, such as block textures, item sprites, mob skins, etc. A list of these can be found here.
It is worth noting that a zombie and its variants can use typical player skins (and vice-versa). Skeleton mobs can use typical player skins as well, but keep in mind that they have their skinny arms and legs. If a skeleton mob skin is used as a player's skin, their legs and arms do not appear skinny.
In order to use the player skin for zombies, the user must align it to the correct place on the .png to avoid a visual break in the texture.
Changing or installing player skins
Java Edition
Only players who have purchased Minecraft can change their character's skin. This is done on the profile page or in the Minecraft launcher by uploading a valid .png texture that is 64×64 pixels or legacy texture that is 64×32 pixels, which then replaces the default skin.
Skins also have the option of having 3 or 4 pixel wide arms, which can be changed on the profile page as well.[1]
The steve.png and alex.png files in minecraft.jar (Old launcher) or client.jar (New Launcher) can also be changed and replaced via a resource pack, but the effects are visible only to players using the resource pack, and affects all players with the default skin.
Legacy Console Edition
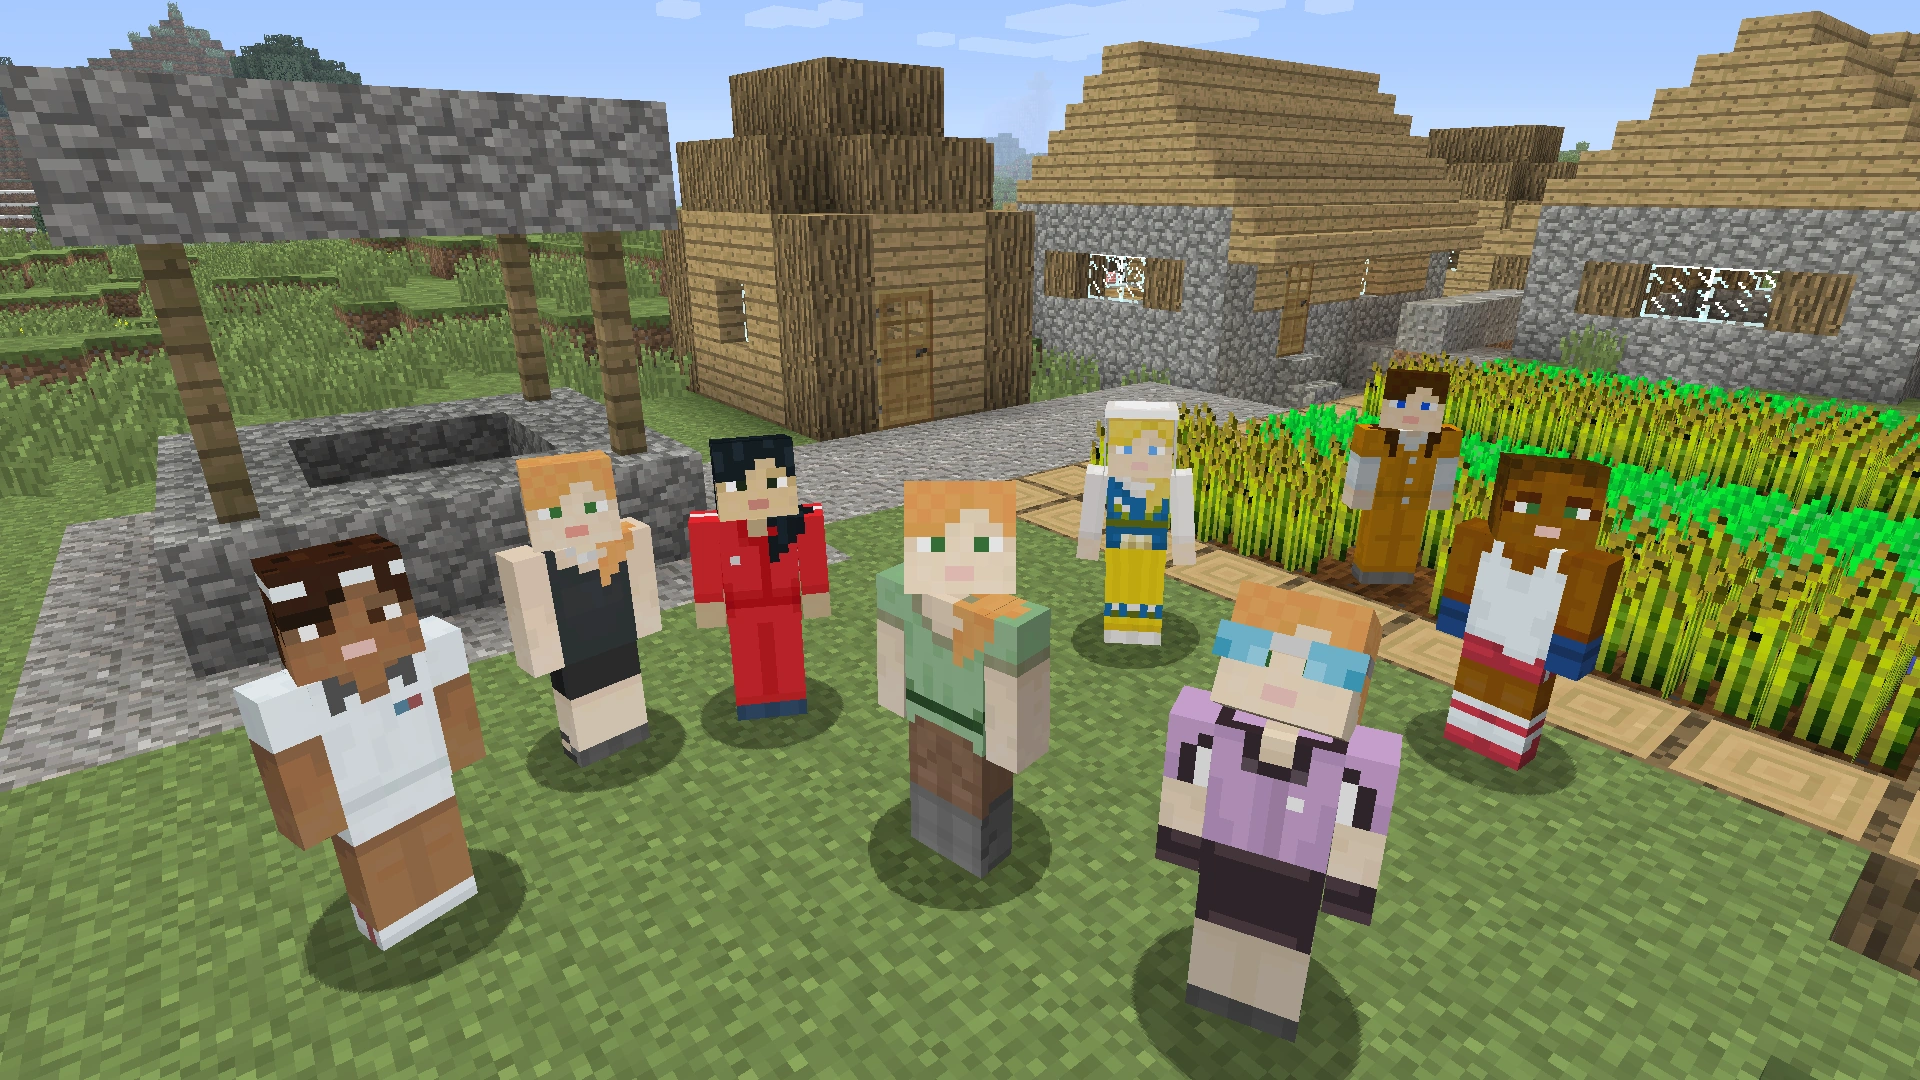

A variety of Alex skins available in the Legacy Console Edition. Left to right: Tennis, Tuxedo, Athlete, Default, Swedish, Cyclist, Prisoner, and Boxer.
There were 18[verify] default skin types (with the exception of the skin packs), 9 of which were based on the Steve model, and the other 9 based on the Alex model, wearing different outfits and skin colors. The skins were available to be chosen in the 'Change Skin' area of Help & Options. There were also a few other skins with the name of Alex or Steve, but they weren't default, such as Developer Alex or Party Steve. The Legacy Console Edition did not allow transparent skins, because the player could not create their own skins. This prevented issues with completely transparent skin users "haunting" other players. The player could add custom skins to the Legacy Console Edition via hacking; however, this voided the warranty of the console, and the player risked a ban from online play for an illicitly modded game or console.
| Skins in Default Skin Pack | ||||||||||||||||||||||||||||||||||||||||||||||||||||||||||||||||||||||||||||||||||||||||||||||||||||||
|---|---|---|---|---|---|---|---|---|---|---|---|---|---|---|---|---|---|---|---|---|---|---|---|---|---|---|---|---|---|---|---|---|---|---|---|---|---|---|---|---|---|---|---|---|---|---|---|---|---|---|---|---|---|---|---|---|---|---|---|---|---|---|---|---|---|---|---|---|---|---|---|---|---|---|---|---|---|---|---|---|---|---|---|---|---|---|---|---|---|---|---|---|---|---|---|---|---|---|---|---|---|---|
|


The specific instructions are: Steve and Alex textures and renders from various birthday packs (such as the fourth one) and the plastic texture pack.
Other versions of Steve and Alex in officially-released skin packs exist:
| Other default skin variations | ||||||||||||||||||||
|---|---|---|---|---|---|---|---|---|---|---|---|---|---|---|---|---|---|---|---|---|
|


Bedrock Edition
Since Pocket Edition v0.11.0 alpha, players can choose one of the two default skins either Steve or Alex, and can apply their own custom skin. (Uses the same format as the Java edition). The player must select a valid skin image from their photo library, and must choose between the two main models. Players can also spend Minecraft Coins to buy skin packs. The Legacy Skin Pack was also implemented in Bedrock Edition, but the player has to sign in to Xbox Live to access all the skins. It also includes five anonymous skins. Players can also make their own skin packs, which must include a manifest.json file, a skins.json file, and all the desired skins. An additional .lang file can be added inside a folder labeled texts to display the skin names, but the game can register the skins without it.
Character creator
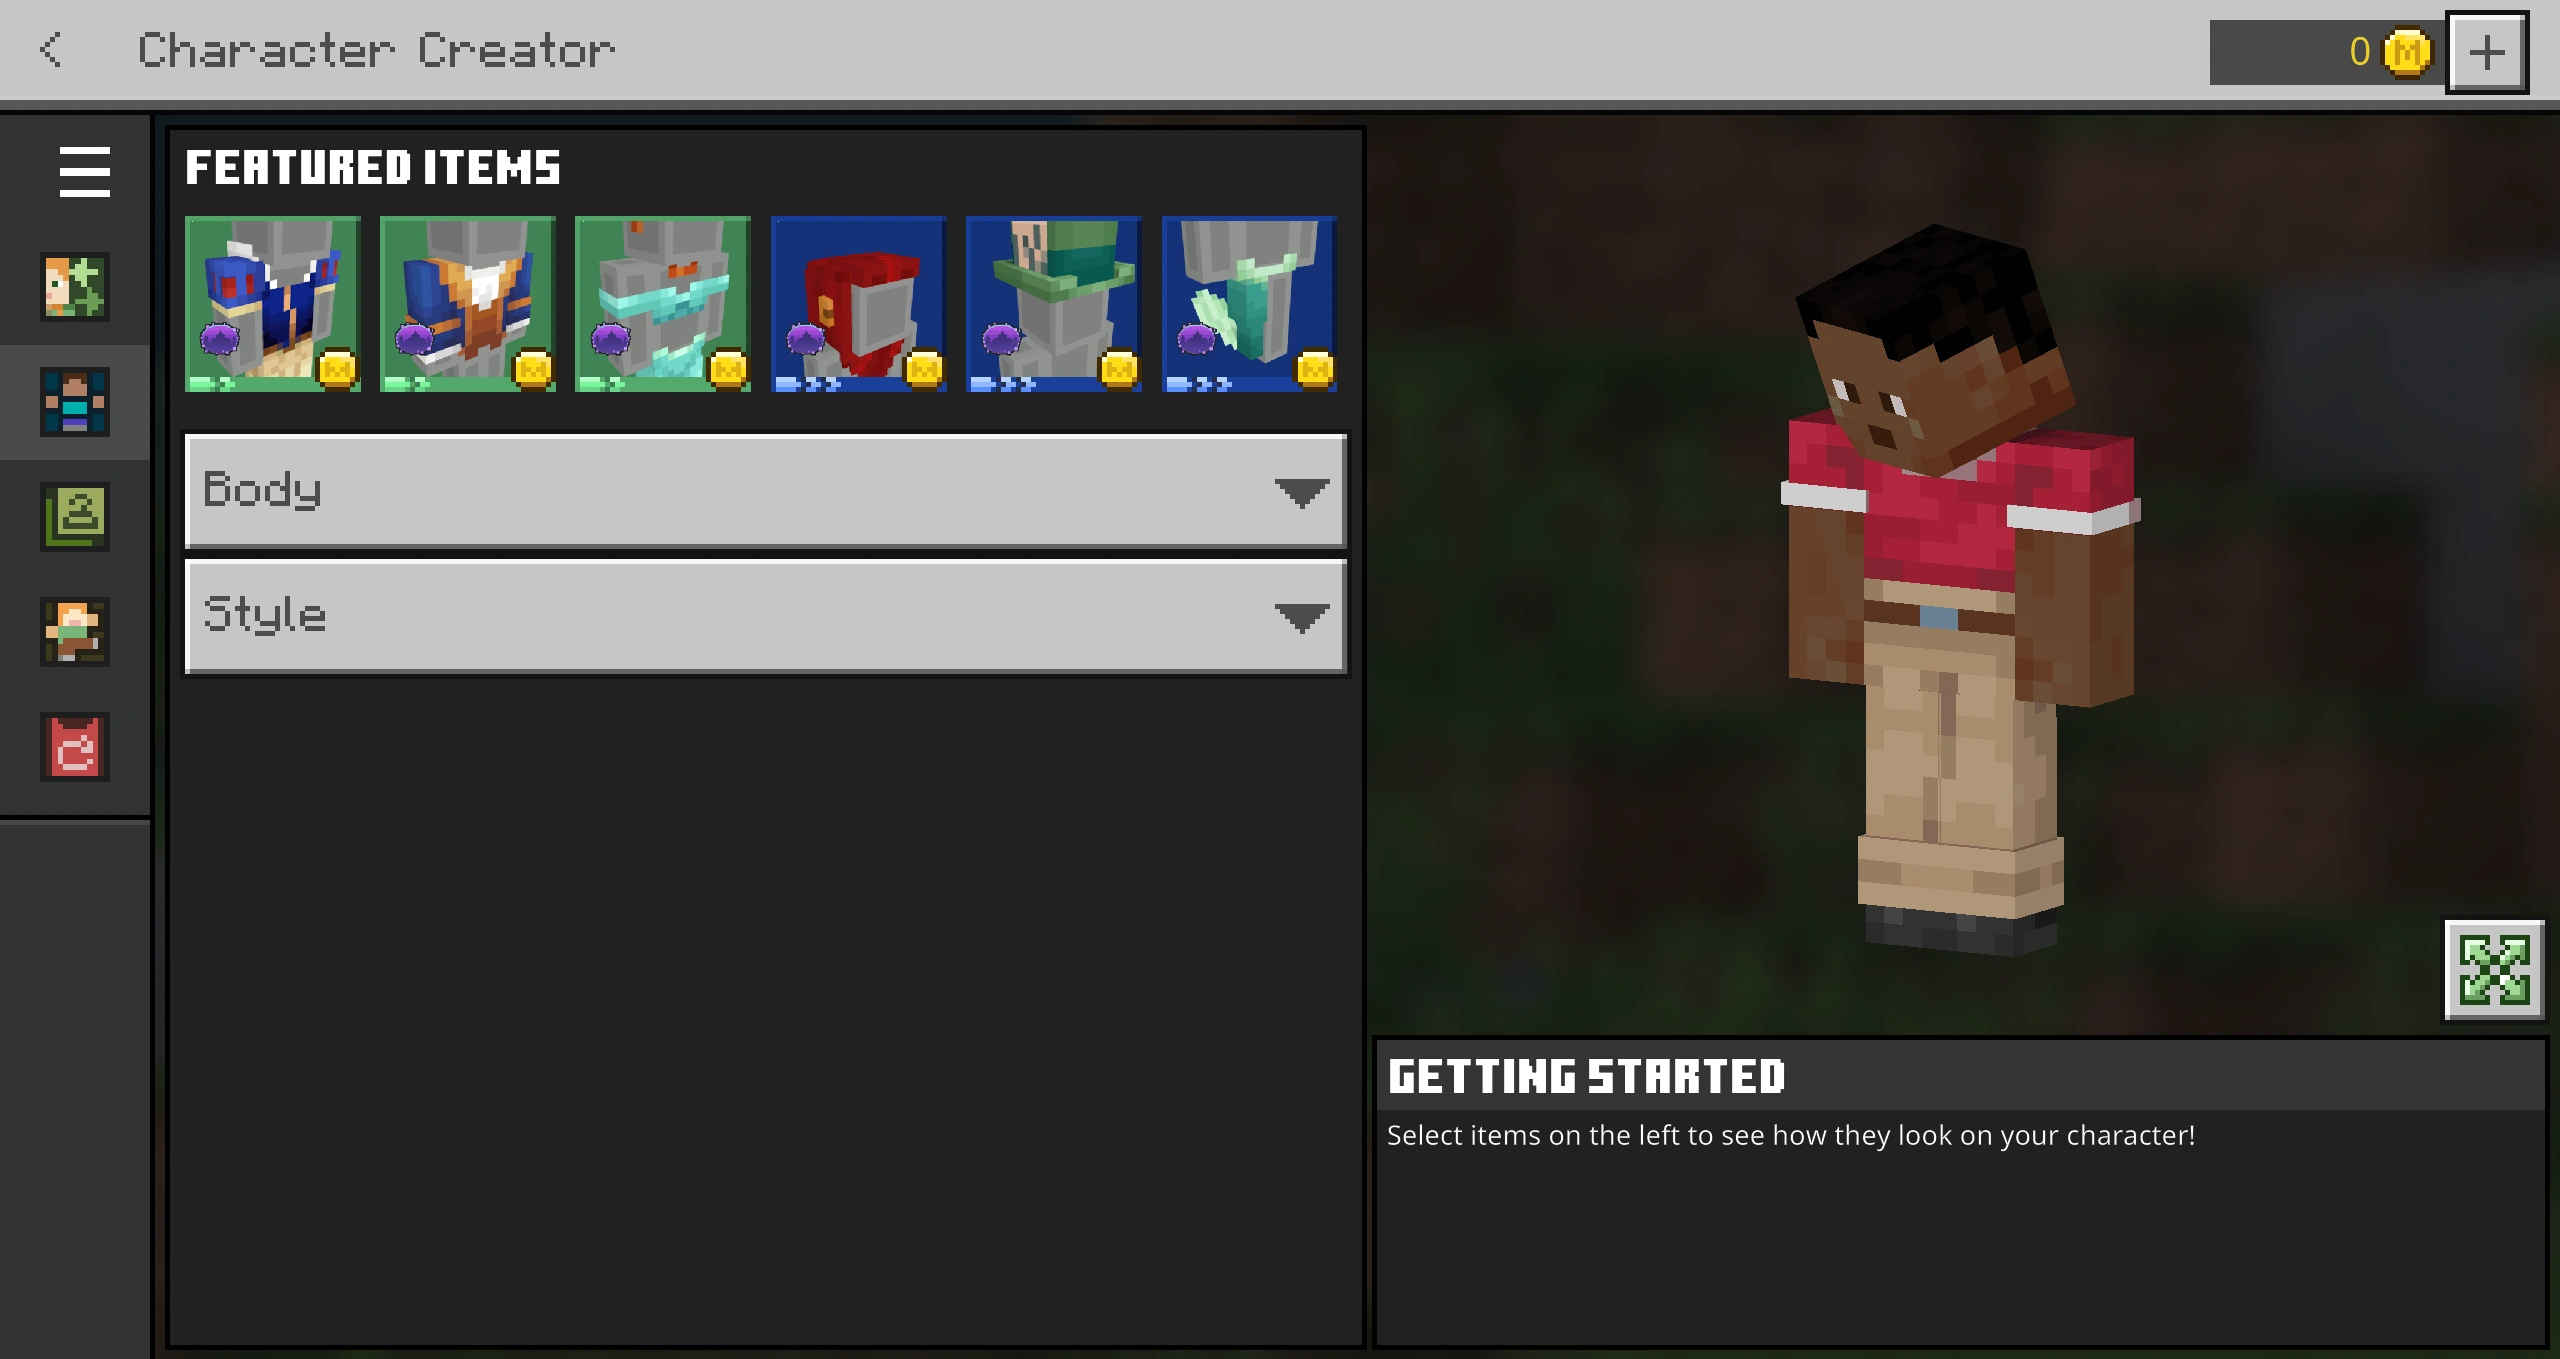

The character creator menu.
The character creator is a feature in Bedrock Edition and Minecraft Earth that lets players customize their skins with free and paid-for cosmetic items. It can be accessed by selecting the character profile button on the main menu. It can also be used to equip capes. Many clothing items cost Minecoins (Tokens on PlayStation 4), or can be earned by completing certain achievements.
Skin packs
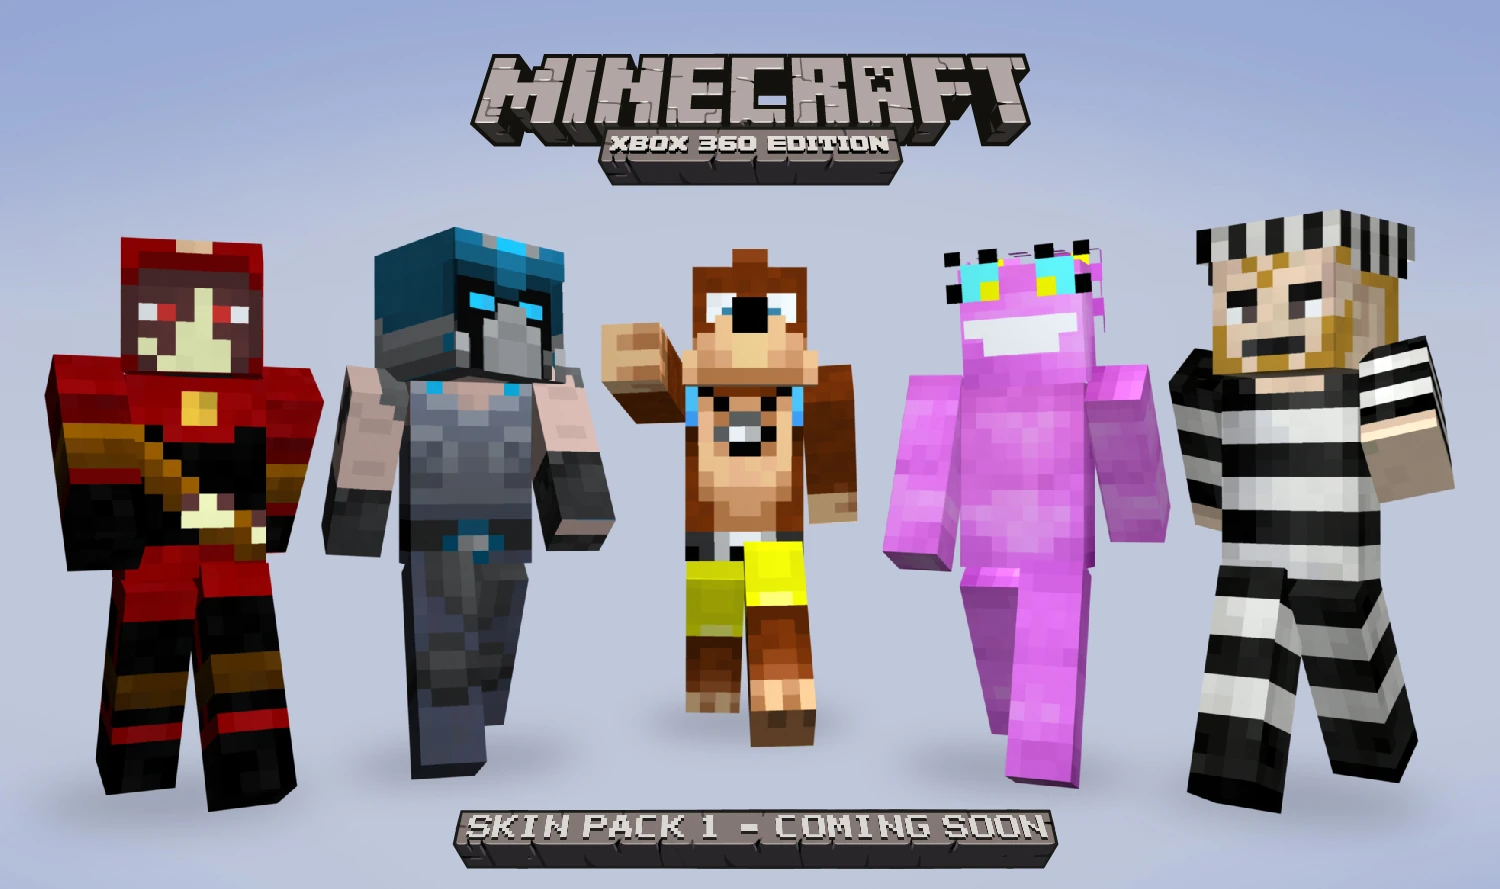

One example of a skin pack available in the Legacy Console Edition.
Skin Packs are available in Bedrock Edition as downloadable content. They can be aquired:
- through the marketplace. Most of them cost minecoins (Tokens on PS4), but some have been released for free.
- through
.mcskinfiles put in theskin_packsordevelopment_skin_packsfolder in the game files (accessible only on Windows 10, Android, iOS, iPadOS and Fire OS).
Java Edition Skin Packs
Those skin packs were released on minecraft.net by Mojang for certain events.
There might be more Java exclusive skin packs released by Mojang not yet listed in this table.
| Name | Download Links | Article | Notes |
|---|---|---|---|
| MINECON Earth 2017 Skin Pack | minecraft.net | Slip on some MINECON Skins! | This Skin Packs is the same as in Bedrock Edition of the game |
| Striding Hero Skin Pack | minecraft.net | Community Celebration: Simburbia and Striding Hero | Includes six player skins from the Striding Hero Minecraft Java Edition map. |
Templates
Many players prefer their own unique skin. While many premade skins can be found online, many players prefer to create their own.
A custom skin is a way to personalize the player model and can be done either by using a variety of community-made skin editors, or by editing the steve.png or alex.png file manually with an image editor like Photoshop, GIMP, Paint.net or similar image editors. The steve.png file can be downloaded here and the alex.png file here. When editing the steve.png or alex.png file manually, be sure to keep the original image dimensions and make the background of the skin (the unused pixels) completely transparent. Otherwise, Minecraft may fail to recognize the skin as intended.
Alternatively, some may find it easier to use a program, either downloadable or in-browser, which provides a live view of their character on a three-dimensional model as they are editing the skin. For example, programs may further assist players by providing them with a wide variety of pre-made selections (such as hats, boots, sweaters, etc.), to give the skin creator exactly what they want, even if the creator has little to no artistic skill.
After making a custom skin, either by using a skin editor or by editing the steve.png file directly, one still needs to upload the .png file at the Skin section of the Profile page on Minecraft.net (found here) before the skin is applied. Other players in multiplayer can also see this skin. Note that players cannot see the custom skin if they are not logged in or when playing offline.
Official skin templates


Other templates

The modern layered skin template; every body part can have a second layer.
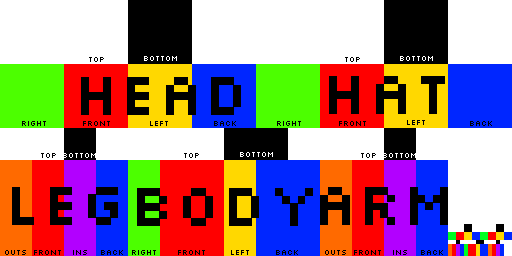
An adaptation of the previous template, color-coded to match the appropriate faces of the skin: front, back, left, right, top and bottom. The checked areas represent the secondary layer.
A template for the slim arms/"Alex" model.
An adaptation of the slimmer arms template, color-coded to match the appropriate faces of the skin: front, back, left, right, top and bottom. The checked areas represent the secondary layer.
Color-coded old skin template with all faces labeled.
Another skin guide, but on a black background. For the arm and leg sections only, "right" indicates those facing outward, and "left" indicates inward.
Deadmau5's skin[2] (not a guide). Notice the ears. See also: Easter eggs#Deadmau5's ears
Template for deadmau5's ears. Use other templates listed here for the skin.


![Deadmau5's skin[2] (not a guide). Notice the ears. See also: Easter eggs#Deadmau5's ears](https://static.wikia.nocookie.net/minecraft_gamepedia/images/e/e4/Deadmau5_skin.png/revision/latest?cb=20200830110328)

The modern templates can be used for old (pre–Java Edition 1.8) skins on the skin server, but only the top half of the image is used. (i.e., not the individual arms and legs on the bottom and no overlay on any layer except the head). If the skin is for Java Edition 1.7, the old system must be used exactly.
To 6 significant figures, there are 3.06013×1023,581 possible unique Minecraft skins.
History
| Java Edition Classic | |||||||||||||||||||||||||||||||||||
|---|---|---|---|---|---|---|---|---|---|---|---|---|---|---|---|---|---|---|---|---|---|---|---|---|---|---|---|---|---|---|---|---|---|---|---|
0.0.17a{{Extension DPL}}<ul><li>[[Lead|Lead]]<br/>{{About|the item used for leashing and leading mobs|the element|Element#Lead}}
{{Item
| image = Lead.png
| stackable = Yes (64)
| renewable = Yes
}}
'''Leads''' are [[tool]]s used to leash and lead passive and neutral [[animal]]s, [[golem]]s and some [[monster]]s.
== Obtaining ==
=== Chest loot ===
{{LootChestItem|lead}}
=== Crafting ===
{{Crafting
|A1= String
|B1= String
|A2= String
|B2= Slimeball
|C3= String
|Output= Lead,2
|type= Tool
}}
=== Mob loot ===
[[Wandering Trader|Wandering trader]]s always spawn with 2 [[llama|trader llama]]s, each held with a lead. When a trader llama is detached, either by killing it or the wandering trader, dragging them far apart, or putting the llama in a [[boat]] or a [[minecart]], the lead drops at the llama's position.
== Usage ==
=== Crafting ingredient ===
{{crafting usage}}
=== Leashing mobs ===
[[File:SuspendedPigs.png|190px|thumb|One block tall mobs, such as pigs, suspend at 7 blocks above the ground.]]
[[File:SuspendedCows.png|190px|thumb|Two block tall mobs, such as cows, also suspend at 7 blocks above the ground.]]
{{control|Using}} a lead on a [[mob]] ties the lead to the mob, allowing it to be moved by the player. Multiple mobs can be held by leads at once, but each mob held requires its own lead.
It is possible to leash the following mobs and other entities:
{{columns-list|colwidth=20em|
* {{EntityLink|Allay}}
* {{EntityLink|Axolotl}}
* {{EntityLink|Bee}}
* {{EntityLink|Boat}}{{only|bedrock}}
* {{EntityLink|Camel}}
* {{EntityLink|Cat}}
* {{EntityLink|Chicken}}
* {{EntityLink|Chicken Jockey}} (only the mount)
* {{EntityLink|Cow}}
* {{EntityLink|Dolphin}}
* {{EntityLink|Donkey}}
* {{EntityLink|Fox}}
* {{EntityLink|Frog}}
* {{EntityLink|Glow Squid}}
* {{EntityLink|Goat}}
* {{EntityLink|Hoglin}}
* {{EntityLink|Horse}}
* {{EntityLink|Iron Golem}}
* {{EntityLink|Llama}}
* {{EntityLink|Mooshroom}}
* {{EntityLink|Mule}}
* {{EntityLink|Ocelot}}
* {{EntityLink|Parrot}}
* {{EntityLink|Pig}}
* {{EntityLink|Polar Bear}}
* {{EntityLink|Rabbit}}
* {{EntityLink|Sheep}}
* {{EntityLink|Skeleton Horse}}
* {{EntityLink|Skeleton Horseman}} (only the mount)
* {{EntityLink|Sniffer}}
* {{EntityLink|Snow Golem}}
* {{EntityLink|Squid}}
* {{EntityLink|Strider}}
* {{EntityLink|Trader Llama}}
* {{EntityLink|Wolf}}
* {{EntityLink|Zoglin}}
* {{EntityLink|Zombie Horse}}}}
Additionally, [[villager]]s, [[wandering trader]]s, and [[monster]]s other than the ones listed above, can be leashed using a map editor or [[NBT]] editor.
With a mob on a lead held by the player, {{control|using}} the lead on any type of [[fence]] (or [[wall]]{{only|bedrock|short=1}}) attaches the lead to it with a visible knot, tying the mob to it. To attach it to a wall on Bedrock Edition, the player must hold a lead in the main hand.<ref>{{bug|MCPE-108078}}</ref> Multiple leads may be attached to one fence post. A mob tied to a fence tends to stay within 5 blocks of the fence post.
A lead is broken by pressing the {{control|use item}} control on the mob again, hitting the knot, or removing the attached fence post. Leads also break when hit by projectiles. Whenever a lead is removed or broken, it drops as an [[item (entity)|item]] at the location of the mob. However, it does not drop when unleashed in Creative mode.{{only|java}}<ref>{{bug|MCPE-79639}}</ref> A lead does not break if the attached animal dies.
A lead can stretch a maximum of 10 blocks. If the mob is able to move towards the player or fence post, it does so. If not, or if the mob is moving very quickly away from the player, the lead breaks.
When the player or the knot is more than 7 blocks above the ground, the mob being leashed becomes suspended.
Most mobs that can be leashed can still be leashed even if attacking the player leashing them, and any attached leads do not break.
[[Wolf|Wolves]] cannot be leashed after becoming angry. Despite this, if they become angry while already leashed, the lead does not break, but it cannot be reattached when broken through other methods while the wolf is still angry.
A lead attached to a hoglin breaks if it becomes a [[zoglin]].
A lead does not prevent mobs from despawning if they normally would despawn.
When moving downwards and accelerating towards the ground, leashed mobs accumulate fall damage and take it if they hit the ground while still accelerating. When moving up or decelerating (such as when the lead is stretched to its limit), the fall distance is set to one block and the mob therefore does not take any fall damage if it touches the ground.
If the player walks into and back out of a [[nether portal]] while holding a lead connected to a mob, the lead remains attached to the mob. However, if a mob attached to a lead walks into a nether portal, the lead breaks and drops as an item in the other dimension.
A lead can be used to remove a mob from a boat without needing to break the boat, if the mob can normally be leashed.
If a chunk unloads while containing a leashed mob (either by the player walking too far away, or traveling to another dimension via a portal), the lead breaks and drops as an item, leaving the mob free to wander around.
== Sounds ==
{{Edition|Java}}:
{{Sound table
|sound=Lead Knot break1.ogg
|sound2=Lead Knot break2.ogg
|sound3=Lead Knot break3.ogg
|subtitle=Leash Knot breaks
|source=neutral
|description=When a leash knot is destroyed
|id=entity.leash_knot.break
|translationkey=subtitles.entity.leashknot.break
|volume=1.0
|pitch=1.0
|distance=16}}
{{Sound table
|sound=Lead Knot place1.ogg
|sound2=Lead Knot place2.ogg
|sound3=Lead Knot place3.ogg
|subtitle=Leash Knot tied
|source=neutral
|description=When a leash knot is placed on a fence
|id=entity.leash_knot.place
|translationkey=subtitles.entity.leashknot.place
|volume=1.0
|pitch=1.0
|distance=16
|foot=1}}
{{Edition|Bedrock}}:
{{Sound table
|type=bedrock
|sound=Lead Knot break1.ogg
|sound2=Lead Knot break2.ogg
|sound3=Lead Knot break3.ogg
|source=neutral
|description=When a leash knot is broken by {{ctrl|interacting}} with it
|id=leashknot.break
|volume=1.0
|pitch=1.0}}
{{Sound table
|sound=Lead Knot place1.ogg
|sound2=Lead Knot place2.ogg
|sound3=Lead Knot place3.ogg
|source=neutral
|description=When a leash knot is placed on a fence or wall
|id=leashknot.place
|volume=1.0
|pitch=1.0
|foot=1}}
== Leash Knot ==
'''Leash knot''' is an entity created when the [[player]] right-clicks the fence while having a mob leashed.
{{Entity| title = Leash Knot| image = Knot.png|imagesize= 100px|networkid='''[[JE]]''': 77}}
=== Data values ===
==== ID ====
{{edition|java}}:
{{ID table
|edition=java
|generatetranslationkeys=y
|displayname=Leash Knot
|spritetype=entity
|nameid=leash_knot
|foot=1}}
{{edition|bedrock}}:
{{ID table
|edition=bedrock
|shownumericids=y
|notshowbeitemforms=y
|generatetranslationkeys=y
|displayname=Leash Knot
|spritetype=entity
|nameid=leash_knot
|id=88
|foot=1}}
==== Entity data ====
Leash knots have entity data that define various properties of the entity.
{{el|java}}:
{{main|Entity format}}
{{/ED}}
{{el|bedrock}}:
: See [[Bedrock Edition level format/Entity format]].
== Data values ==
=== ID ===
{{edition|java}}:
{{ID table
|edition=java
|showforms=y
|generatetranslationkeys=y
|displayname=Lead
|spritetype=item
|nameid=lead
|form=item
|foot=1}}
{{edition|bedrock}}:
{{ID table
|edition=bedrock
|shownumericids=y
|showforms=y
|notshowbeitemforms=y
|generatetranslationkeys=y
|displayname=Lead
|spritetype=item
|nameid=lead
|id=547
|form=item
|foot=1}}
== Achievements ==
{{load achievements|So I Got That Going for Me}}
== Advancements ==
{{load advancements|When the Squad Hops into Town}}
== History ==
{{missing information|The history of a lot of mobs be leashed}}
{{History|java}}
{{History||1.6.1|snap=13w16a|[[File:Lead JE1 BE1.png|32px]] Added leads.
|Leads do not currently have a tooltip and are called “leashes” in [http://www.mojang.com/2013/04/minecraft-snapshot-13w16a-and-new-launcher/ the change notes].}}
{{History|||snap=13w16b|Leads have been given a tooltip.}}
{{History|||snap=13w18a|Leads have been given a [[crafting]] recipe.}}
{{History||1.9|snap=15w50a|Added a [[sound]] for leads: <code>entity.leashknot.place</code>.}}
{{History||1.11|snap=16w32a|The [[entity]] ID of the knot has been changed from <code>LeashKnot</code> to <code>leash_knot</code>.}}
{{History|||snap=16w39a|Leads can now be found in [[woodland mansion]] chests.}}
{{History||1.13|snap=17w47a|Prior to [[1.13/Flattening|''The Flattening'']], this [[item]]'s numeral ID was 420.}}
{{History||1.14|snap=18w43a|[[File:Lead JE2 BE2.png|32px]] The texture of leads has been changed.}}
{{History|||snap=19w05a|Added [[wandering trader]]s, which are naturally equipped with leads.}}
{{History||1.15|snap=?|[[Bee]]s can now be leashed.}}
{{History||1.16|snap=20w09a|[[Skeleton horse]]s and [[zombie horse]]s can now be leashed.<ref>{{bug|MC-166246}}</ref>}}
{{History|||snap=?|[[Hoglin]]s can now be leashed.}}
{{History||1.16.2|snap=20w27a|[[Zoglin]]s can now be leashed.}}
{{History||1.17|snap=21w19a|[[Squid]]s and [[glow squid]]s can now be leashed.<ref>{{bug|MC-136647}}</ref>}}
{{History|||snap=?|[[Axolotl]]s can now be leashed.}}
{{History||1.19|snap=22w13a|Lead may now be found in [[ancient city]] [[chest]]s.}}
{{History|||snap=?|[[Frog]]s can now be leashed.}}
{{History||1.19.3|snap=22w42a|[[Camel]]s can now be leashed.|Mobs no longer accumulate fall damage when dangling on leads.<ref>{{bug|MC-14167||Mobs build up fall damage when dangling on a lead|Fixed}}</ref>}}
{{History||1.20 (Experimental)|link=1.19.4|snap=?|[[Sniffer]]s can now be leashed.}}
{{History||1.20|snap=23w12a|Lead can now be found in [[suspicious gravel]] and [[suspicious sand]] in [[trail ruins]].}}
{{History|||snap=23w16a|Lead no longer generates in [[suspicious sand]] in [[trail ruins]].|Due to the split of the archaeological loot tables for the suspicious gravel within the [[trail ruins]]; lead now is in the common loot.}}
{{History|pocket alpha}}
{{History||v0.15.0|snap=build 1|[[File:Lead JE1 BE1.png|32px]] Added leads.}}
{{History|pocket}}
{{History||1.1.0|snap=alpha 1.1.0.0|Leads now have better "physics".
|The [[entity]] ID of the knot has been changed from <code>leashknot</code> to <code>leash_knot</code>.
|Leads can now be found inside [[woodland mansion]] [[chest]]s.}}
{{History|bedrock}}
{{History||1.4.0|snap=beta 1.2.14.2|Leads can now be found inside [[buried treasure]] [[chest]]s.
|Leads can now be used on [[boat]]s.}}
{{History||1.4.0|snap=beta 1.2.20.1|Leads can now be used to craft [[balloon]]s.}}
{{History||1.10.0|snap=beta 1.10.0.3|[[File:Lead JE2 BE2.png|32px]] The texture of leads has been changed.
|[[Wandering trader]]s now [[drops|drop]] leads after they are detached from trader [[llama]]s.}}
{{History||1.14.0|snap=beta 1.14.0.1|Leads can now be used on [[polar bear]]s, [[ocelot]]s, [[parrot]]s, [[dolphin]]s and old [[villager]]s.}}
{{History||1.19.0|snap=beta 1.19.0.20|Allays can now be leashed.}}
{{History|console}}
{{History||xbox=TU19|xbone=CU7|ps=1.12|wiiu=Patch 1|switch=1.0.1|[[File:Lead JE1 BE1.png|32px]] Added leads.}}
{{History||xbox=TU43|xbone=CU33|ps=1.36|wiiu=Patch 13|[[Sound]]s have been added for leads.}}
{{History|Ps4}}
{{History||1.90|[[File:Lead JE2 BE2.png|32px]] The texture of leads has been changed.}}
{{History|3ds}}
{{History||0.1.0|[[File:Lead JE1 BE1.png|32px]] Added leads.}}
{{History|foot}}
== Issues ==
{{issue list|Lead|Leash}}
== Trivia ==
[[File:Steve wearing Lead.png|100px]] [[File:Alex wearing Lead.png|100px]]
* The lead is named as "leash" in the texture file.
* If a [[player]] goes to sleep while holding a mob on a lead, the lead remains attached.
* {{IN|Java}}, when using the {{cmd|item}} command to put a lead in a player's head slot, the item gets rotated and positioned in such a way that it looks like the player is wearing a monocle.
== Gallery ==
<gallery>
Multiple_Leash.png|Many animals can be tied to one fence post.
HorseLeashedOnAFence.png|A [[horse]] wearing [[golden horse armor]] that is leashed to a fence post.
ThreeTiedSheep.png|Three sheep tied to the same fence.
More accurate lead mobs.png|A shot of all the mobs that could be tied with leads as of 1.6.1, except donkeys and mules.
Yo Yo.png|With the use of the leash, it is possible to suspend animals in the air by tying the leash on high-up fence posts.
YoYo.png|A [[donkey]] with the Grumm/Dinnerbone [[name tag]] [[easter egg]] tied to a fence with a lead to make a yo-yo.
Flying_Sheep.png|Several [[sheep]] hanging in the air in [[Creative]] mode.
Pocket Edition Lead.jpg|First image of a lead in ''Bedrock Edition''.
</gallery>
== References ==
{{Reflist}}
== External Links ==
*[https://www.minecraft.net/en-us/article/taking-inventory-lead Taking Inventory: Lead] – Minecraft.net on April 8, 2022
{{items}}
{{entities}}
[[Category:Tools]]
[[de:Leine]]
[[es:Rienda]]
[[fr:Laisse]]
[[hu:Lasszó]]
[[it:Guinzaglio]]
[[ja:リード]]
[[ko:끈]]
[[nl:Leidtouw]]
[[pl:Smycz]]
[[pt:Laço]]
[[ru:Поводок]]
[[th:เชือกจูง]]
[[zh:拴绳]]
[[Category:Renewable resources]]</li><li>[[Painting|Painting]]<br/>{{ItemEntity
|title=Painting
|image=Painting JE2 BE2.png
|extratext=View [[#Renders|all renders]]
|renewable=Yes
|stackable=Yes (64)
|drops=1 {{ItemLink|Painting}}
}}
'''Paintings''' are decorative [[entity|entities]] that hang on walls.
== Obtaining ==
=== Crafting ===
{{Crafting
|A1= Stick |B1= Stick |C1= Stick
|A2= Stick |B2= Any Wool |C2= Stick
|A3= Stick |B3= Stick |C3= Stick
|Output= Painting
|type= Decoration block
}}
Paintings can be crafted with any color of [[wool]]. The color of the wool used does not influence the picture chosen when the painting is placed.
Once placed, it displays a random painting.
=== Breaking ===
To remove a painting from a wall, the player can {{control|attack}} it, break one of its supporting blocks, cover one square of it with a block, hit it with an arrow, egg, ender pearl, snowball, or fire charge, or subject it to an explosion. The painting then drops as an item. Arrows that hit paintings disappear.
=== Trading ===
Master-level shepherd [[villager]]s sell 3 paintings for 2 [[emerald]]s.
== Usage ==
=== Placement ===
Paintings can be placed on the sides of [[solid block]]s, [[sign]]s, [[banner]]s, or [[sculk vein]]s. A small gap is visible between the painting and attachment surface. There are several different sizes of paintings (see below). When placed, a painting checks for the largest amount of space it has. It then chooses a random painting of that size. The player can add blocks around the painting to ensure it is the size wanted. When the supporting blocks are removed, the painting breaks after 20 game [[tick]]s (1 second) if no supporting blocks are replaced during that interval.
=== Properties ===
Being an entity, paintings can simultaneously exist in the same space as blocks such as water or torches. Specifically, they can share the space with any block whose collision box does not intersect its hitbox.
Players and mobs are able to walk through paintings, as long as the blocks supporting the painting allow it. Secret doorways can be created this way. [[Light]] propagates through paintings as well.
If a player is concealed behind a painting, the player's name is also concealed from other players.{{verify|Is this true in Bedrock?}}
Paintings are non-flammable.
== Canvases ==
{{Stub|Needing the new painting renders}}
There are 31 paintings in the game. These are mostly based on paintings by [[Kristoffer Zetterstrand]], who also created the ''Minecraft'' versions.
{| class="wikitable stikitable" style="text-align: center" data-description="Paintings"
! style="min-width:150px" |Canvas
! style="min-width:3em;max-width:4em" |Size
! style="min-width:3em" |Original
! style="min-width:3em" |Name
! style="min-width:3em;max-width:4.5em" |[[Resource location]]
! style="min-width:10em" |Description
! Java Edition version added
|-
! [[File:Alban (texture).png|64px]]
| rowspan="7" | 1×1 blocks<br>16×16 pixels || [https://zetterstrand.com/work/pictures/archive/alban.jpeg "Albanian"] || Albanian || <code>alban</code> || A man wearing a fez next to a house and a bush. As the name of the painting suggests, it may be a landscape in [[Wikipedia:Albania|Albania]]. || rowspan="9" | [[Indev 20100223]]
|-
! [[File:Aztec (texture).png|64px]]
|[https://zetterstrand.com/eventz/wp-content/uploads/2aztbig.jpg "de_aztec"]|| de_aztec || <code>aztec</code> || [[Wikipedia:Noclip mode|Free-look]] perspective of the map [[w:c:counterstrike:Aztec|de_aztec]] from the video game ''[[Wikipedia:Counter-Strike (video game)|Counter-Strike]]''.
|-
! [[File:Aztec2 (texture).png|64px]]
|[https://zetterstrand.com/eventz/wp-content/uploads/11aztec_for_print.jpg "de_aztec"]|| de_aztec || <code>aztec2</code> || [[Wikipedia:Noclip mode|Free-look]] perspective of the map [[w:c:counterstrike:Aztec|de_aztec]] from the video game ''[[Wikipedia:Counter-Strike (video game)|Counter-Strike]]''.
|-
! [[File:Bomb (texture).png|64px]]
|[https://zetterstrand.com/eventz/wp-content/uploads/12bomb.jpg "Target successfully bombed"]|| Target Successfully Bombed || <code>bomb</code> || The map [[w:c:counterstrike:Dust II|de_dust2]] from the video game ''[[Wikipedia:Counter-Strike (video game)|Counter-Strike]]'', named “target successfully bombed" in reference to the game.
|-
! [[File:Kebab (texture).png|64px]]
|[https://zetterstrand.com/work/pictures/archive/kebab2.jpg "Kebab med tre pepperoni"] || Kebab med tre pepperoni || <code>kebab</code> || A kebab with three green chili peppers.
|-
! [[File:Plant (texture).png|64px]]
|[https://zetterstrand.com/work/pictures/archive/paradistrad.jpeg "Paradisträd"] || Paradisträd || <code>plant</code> || Still life of two plants in pots. "Paradisträd" is Swedish for "[[Wikipedia:Crassula ovata|money tree]]", which is a common name for the depicted species in Scandinavia.
|-
! [[File:Wasteland (texture).png|64px]]
|[https://zetterstrand.com/eventz/wp-content/uploads/Wasteland_1920.jpg "Wasteland"]|| Wasteland || <code>wasteland</code> || A view of some wastelands; a small animal (presumably a rabbit) is sitting on the window ledge.
|-
! [[File:Courbet (texture).png|128px]]
| rowspan="5" | 2×1 blocks<br>32×16 pixels ||[https://zetterstrand.com/eventz/wp-content/uploads/bonjourmonsieurcourbet_BIG.jpg "Bonjour monsieur Courbet"]|| Bonjour Monsieur Courbet || <code>courbet</code> || Two hikers with pointy beards seemingly greeting each other. Based on Gustave Courbet's painting ''[[Wikipedia:La rencontre|The Meeting or "Bonjour, Monsieur Courbet"]]''.
|-
! [[File:Pool (texture).png|128px]]
|[https://zetterstrand.com/eventz/wp-content/uploads/thepool_1920.jpg "The pool"]|| The Pool || <code>pool</code> || Some men and women skinny-dipping in a pool over a cube of sorts. Also there is an old man resting in the lower-right edge.
|-
! [[File:Sea (texture).png|128px]]
| rowspan=2 |[https://zetterstrand.com/eventz/wp-content/uploads/SeaSide_1920.jpg "Seaside"]
| Seaside
| <code>sea</code>
| Mountains and a lake, with a small photo of a mountain and a bright-colored plant on the window ledge. || [[Indev 20100223]] / [[Alpha v1.1.1]]
|-
! [[File:Creebet (texture).png|128px]]
| Creebet || <code>creebet</code> || Mountains and a lake, with a small photo of a mountain and a creeper looking at the viewer through a window. || [[Alpha v1.1.1]]
|-
! [[File:Sunset (texture).png|128px]]
|[https://zetterstrand.com/eventz/wp-content/uploads/sunset_dense.jpg "sunset_dense"]|| sunset_dense || <code>sunset</code> || A view of mountains at sunset. || [[Indev 20100223]]
|-
! [[File:Graham (texture).png|64px]]
| rowspan="2" | 1×2 blocks<br>16×32 pixels ||[https://zetterstrand.com/eventz/wp-content/uploads/graham.jpg "Graham"]|| Graham || <code>graham</code> || King Graham, the player character in the video game series ''[[Wikipedia:King's Quest|King's Quest]]''. The original is based on ''[[Wikipedia:File:Sánchez_Cotán_(Bodegón_con_membrillo,_repollo,_melón_y_pepino).jpg|Still Life with Quince, Cabbage, Melon, and Cucumber]]'' by Juan Sánchez Cotán.|| [[Alpha v1.1.1]]
|-
! [[File:Wanderer (texture).png|64px]]
|[https://zetterstrand.com/eventz/wp-content/uploads/wanderer_1920.jpg "Wanderer"]|| Wanderer || <code>wanderer</code> || A version of Caspar David Friedrich's famous painting ''[[Wikipedia:Wanderer above the Sea of Fog|Wanderer above the Sea of Fog]]''. || rowspan="4" | [[Indev 20100223]]
|-
! [[File:Bust (texture).png|128px]]
| rowspan="6" | 2×2 blocks<br>32×32 pixels ||[https://zetterstrand.com/eventz/wp-content/uploads/bust_1915.jpg "Bust"]|| Bust || <code>bust</code> || A bust of [[Wikipedia:Marcus Aurelius|Marcus Aurelius]] surrounded by fire.
|-
! [[File:Match (texture).png|128px]]
|[https://zetterstrand.com/eventz/wp-content/uploads/Match_rgb_1918.jpg "Match"]|| Match || <code>match</code> || A hand holding a match, causing fire on a white cubic gas fireplace.
|-
! [[File:Skull and Roses (texture).png|128px]]
|[https://zetterstrand.com/eventz/wp-content/uploads/moonlight-installation_1920.jpg "Moonlight Installation"]|| Skull and Roses || <code>skull_and_roses</code> || A skeleton at night with red flowers in the foreground. The original painting was different, depicting a woman sitting in a couch, while the skull is in the middle of a body of glacial water of sorts.
|-
! [[File:Stage (texture).png|128px]]
|[https://zetterstrand.com/eventz/wp-content/uploads/The-stage-is-set-1.jpg "The stage is set"]
| The Stage Is Set
| <code>stage</code>
| Scenery from ''[[Wikipedia:Space Quest I|Space Quest I]]'', with the character Graham from the video game series ''[[Wikipedia:King's Quest|King's Quest]]'' appearing twice. || [[Indev 20100223]] / [[Alpha v1.1.1]]
|-
! [[File:Void (texture).png|128px]]
|[https://zetterstrand.com/eventz/wp-content/uploads/the-void_1920.jpg "The Void"]|| The void || <code>void</code> || An angel praying into a void with fire below. || [[Indev 20100223]]
|-
! [[File:Wither (painting texture).png|128px]]
| – || Wither || <code>wither</code> || The creation of a [[wither]].
This is the only painting not based on a real painting. Made by Jens Bergensten.<ref>{{Citation|url=https://www.youtube.com/watch?v=kK5Y4k-vVXc|title=Who Made Minecraft’s LAST Painting?!|author=AntVenom|website=YouTube|date=29 October 2022}}</ref><ref>https://www.reddit.com/r/Minecraft/comments/1tzav2/comment/cedagcy/</ref>
|| [[Java Edition 1.4.2]] ([[12w36a]])
|-
! [[File:Fighters (texture).png|128px]]
| 4×2 blocks<br>64×32 pixels ||[https://zetterstrand.com/eventz/wp-content/uploads/fighters.jpg "Fighters"]|| Fighters || <code>fighters</code> || Two men poised to fight. Paper versions of fighters from the game ''[[Wikipedia:International Karate +|International Karate +]]''. || [[Indev 20100223]]
|-
! [[File:Donkey Kong (texture).png|128px]]
| rowspan="2" | 4×3 blocks<br>64×48 pixels ||[https://zetterstrand.com/eventz/wp-content/uploads/kong.jpg "Kong"]|| Kong || <code>donkey_kong</code> || A paper-looking screenshot of the level [https://www.mariowiki.com/100m 100m] from the arcade game ''[[Wikipedia:Donkey Kong (arcade game)|Donkey Kong]]''. || rowspan="2" | [[Alpha v1.1.1]]
|-
! [[File:Skeleton (painting texture).png|128px]]
|[https://zetterstrand.com/eventz/wp-content/uploads/mortal_coil.jpg "Mortal Coil"]|| Mortal Coil || <code>skeleton</code> || [[w:c:grim-fandango:Bruno Martinez|Bruno Martinez]] from the adventure game ''[[Wikipedia:Grim Fandango|Grim Fandango]]''.
|-
! [[File:Burning Skull (texture).png|128px]]
| rowspan="3" | 4×4 blocks<br>64×64 pixels ||[https://zetterstrand.com/eventz/wp-content/uploads/skull_on_fire_framed_c_1910.jpg "Skull on Fire"]|| Skull On Fire || <code>burning_skull</code> || A Skull on fire; in the background there is a moon in a clear night sky.<br>This painting is based on a Minecraft screenshot,<ref>{{Citation|url=https://web.archive.org/web/20220928041338/https://imgur.com/HVhrbnH|website=Imgur|date=22 August 2020|title=https://web.archive.org/web/20220928041338/https://imgur.com/HVhrbnH}}</ref> with the grass block and a 3D skull added on top.<ref>{{Citation|url=https://web.archive.org/web/20200906184721/https://imgur.com/AwqQFS6|title=https://web.archive.org/web/20200906184721/https://imgur.com/AwqQFS6|website=Imgur|date=23 August 2020}}</ref>
(See the [[:en:Painting#Trivia|trivia]] section for more info.)
| [[Java Edition Beta 1.2 01|Beta 1.2_01]] / [[Java Edition Beta 1.3|Beta 1.3]]
|-
! [[File:Pigscene (texture).png|128px]]
|[https://zetterstrand.com/eventz/wp-content/uploads/rgb_1914.jpg "RGB"]|| Pigscene || <code>pigscene</code> <!-- yes, without an underscore --> || A girl pointing to a pig on a canvas. In the original version, the canvas showed red, green and blue blocks, representing the three colors of the [[Wikipedia:RGB color model|RGB color model]] that is typically used by computer displays. It is based on the painting ''[[Wikipedia:File:Jacob van Oost (I) - The Artist's Studio - WGA16654.jpg|The Artist's Studio]]'' by Jacob van Oost.|| [[Alpha v1.1.1]]
|-
! [[File:Pointer (texture).png|128px]]
|[https://zetterstrand.com/eventz/wp-content/uploads/pointer_1920.jpg "Pointer"]|| Pointer || <code>pointer</code> || The main character of the game ''[[Wikipedia:International Karate +|International Karate +]]'' in a fighting stance touching a large hand. It could also be interpreted as a play on Michelangelo's famous painting ''[[Wikipedia:The Creation of Adam|The Creation of Adam]]''. || [[Indev 20100223]]
|-
! TBA ||
Pack || <code>pack</code> || Reference to the pack.png fi || [[Java Edition 1.21]]le
|}
=== Unused paintings ===
In [[Pocket Edition v0.5.0 alpha|v0.5.0 alpha]], with the addition of paintings to Pocket Edition, four unused 32×32 paintings were present in <samp>[[kz.png]]</samp> which remained unused. See {{slink|Bedrock Edition unused features|Paintings}} for more information. They were also added to Java Edition in snapshot [[Java Edition 22w16a|22w16a]]. They cannot be placed by default, but can be summoned by [[commands]] (such as {{cmd|/summon painting ~ ~ ~ {variant:"water"} }}) or through a [[datapack]].
According to [[Helen Zbihlyj]],<ref>https://old.reddit.com/r/Minecraft/comments/u8hpnx/thoughts_on_the_new_paintings/i5olue6/?context=3 ([https://web.archive.org/web/20220422115723/https://old.reddit.com/r/Minecraft/comments/u8hpnx/thoughts_on_the_new_paintings/i5olue6/?context=3 archived])</ref> these paintings were originally added "as part of a Pocket Edition promo map" (no footage found) which was planned to be a part of [[Pocket Edition]] promotion at [[MINECON 2012]] [[MINECON 2013|or 2013]] and have never been used in game. The artist of these paintings remains unknown.
{| class="wikitable stikitable" style="text-align: center" data-description="Paintings"
! style="min-width:100px" |Canvas
! style="min-width:3em;max-width:4em" |Size
! style="min-width:6em" |Name
! style="min-width:10em" |[[Resource location]]
! style="min-width:10em" |Description
! style="min-width:5em;max-width:10em" |Bedrock Edition version added
! style="min-width:5em;max-width:8em" |Java Edition version added
|-
! [[File:Earth (texture) BE2.png|128px]]
| rowspan="4" | 2×2 blocks<br>32×32 pixels || Earth || <code>earth</code> || One of the four {{Wikipedia|Classical element|classical elements}}: Earth. || rowspan="4" | [[Pocket Edition v0.5.0 alpha|v0.5.0 alpha]] || rowspan="4" | [[Java Edition 22w16a|22w16a]]
|-
! [[File:Fire (texture) BE2.png|128px]]
| Fire || <code>fire</code> || One of the four classical elements: Fire.
|-
! [[File:Water (texture) BE2.png|128px]]
| Water || <code>water</code> || One of the four classical elements: Water.
|-
! [[File:Wind (texture) BE2.png|128px]]
| Wind || <code>wind</code> || One of the four classical elements: Air.
|}
==Sounds==
{{Edition|Java}}:
{{Sound table
|sound=Painting break1.ogg
|sound2=Painting break2.ogg
|sound3=Painting break3.ogg
|subtitle=Painting breaks<ref>{{Cite bug|MC|194948|Painting, item frame and lead breaking subtitles inconsistent with block breaking subtitle|date=July 14, 2020}}</ref>
|source=neutral
|description=When a painting is broken or pops off
|id=entity.painting.break
|translationkey=subtitles.entity.painting.break
|volume=1.0
|pitch=1.0
|distance=16}}
{{Sound table
|sound=Painting place1.ogg
|sound2=Painting place2.ogg
|sound3=Painting place3.ogg
|sound4=Painting place4.ogg
|subtitle=Painting placed
|source=neutral
|description=When a painting is placed
|id=entity.painting.place
|translationkey=subtitles.entity.painting.place
|volume=1.0
|pitch=1.0
|distance=16
|foot=1}}
{{Edition|Bedrock}}:
{{Sound table
|type=bedrock
|sound=Item Frame break1.ogg
|sound2=Item Frame break2.ogg
|sound3=Item Frame break3.ogg
|source=block
|description=When a painting is broken or pops off
|id=block.itemframe.break
|volume=1.0
|pitch=1.0}}
{{Sound table
|sound=Item Frame add item1.ogg
|sound2=Item Frame add item2.ogg
|soumd3=Item Frame add item3.ogg
|sound4=Item Frame add item4.ogg
|source=block
|description=When a painting is placed
|id=block.itemframe.add_item
|volume=1.0
|pitch=1.0
|foot=1}}
== Data values ==
=== ID ===
{{edition|java}}:
{{ID table
|edition=java
|firstcolumnname=Item
|showforms=y
|generatetranslationkeys=y
|displayname=Painting
|spritetype=item
|nameid=painting
|form=item
|foot=1}}
{{ID table
|edition=java
|firstcolumnname=Entity
|generatetranslationkeys=y
|displayname=Painting
|spritetype=entity
|nameid=painting
|foot=1}}
{{edition|bedrock}}:
{{ID table
|edition=bedrock
|firstcolumnname=Item
|shownumericids=y
|showforms=y
|notshowbeitemforms=y
|generatetranslationkeys=y
|displayname=Painting
|spritetype=item
|nameid=painting
|id=357
|form=item
|foot=1}}
{{ID table
|edition=bedrock
|firstcolumnname=Entity
|shownumericids=y
|generatetranslationkeys=y
|displayname=Painting
|spritetype=entity
|nameid=painting
|id=83
|foot=1}}
=== Entity data ===
Paintings have entity data that defines various properties of the entity.
{{el|java}}:
{{main|Entity format}}
{{/ED}}
{{el|bedrock}}:
: See [[Bedrock Edition level format/Entity format]].
== Video ==
<div style="text-align:center">{{yt|M3vWDirTMek}}</div>
== History ==
{{History|java indev}}
{{History||20100223|[[File:Painting JE1 BE1.png|32px]] Added paintings.
|There are currently 19 canvases, which can be viewed at [[Java Edition history of textures/Paintings]].
|The [[crafting]] recipe of paintings uses eight [[planks]].
{{{!}} class{{=}}"collapsible collapsed"
! Recipe
{{!}}-
{{!}}
{{Crafting Table
|A1=Oak Planks
|B1=Oak Planks
|C1=Oak Planks
|A2=Oak Planks
|B2=Light Gray Wool
|C2=Oak Planks
|A3=Oak Planks
|B3=Oak Planks
|C3=Oak Planks
|Output=Painting
}}
{{!}}}
|Painting textures are currently stored on a [[texture atlas]] called <samp>[[kz.png]]</samp>.}}
{{History|java infdev}}
{{History||20100227-1|The [[crafting]] recipe has of paintings has been changed, so that it now uses [[stick]]s, rather than [[planks]].
{{{!}} class{{=}}"collapsible collapsed"
! Recipe
{{!}}-
{{!}}
{{Crafting Table
|A1=Stick
|B1=Stick
|C1=Stick
|A2=Stick
|B2=Light Gray Wool
|C2=Stick
|A3=Stick
|B3=Stick
|C3=Stick
|Output=Painting
}}
{{!}}}
}}
{{History|java alpha}}
{{History||v1.1.1|Added five more painting canvases, for a total of 24.
|The textures of two paintings have been changed.}}
{{History|java beta}}
{{History||1.2_01|Added a new painting, although it uses an untextured part of <samp>kz.png</samp> due to the painting texture not yet being implemented.}}
{{History||1.3|The texture of the new painting, has been added to the part of <samp>kz.png</samp> displayed by the new painting.}}
{{History||April 27, 2011|link=https://web.archive.org/web/20201111211000/https://notch.tumblr.com/post/4988431144/the-maps|Custom paintings are mentioned by [[Notch]].}}
{{History||1.7.3|Paintings pushed by [[piston]]s now pop off.}}
{{History|java}}
{{History||1.4.2|snap=12w36a|Added new painting canvas 'Wither'.
|Paintings can now be placed overlapping one another.}}
{{History||1.8|snap=14w10a|Paintings can no longer be placed directly inside of each other.}}
{{History||1.9|snap=15w49a|Paintings can no longer be destroyed by [[lightning]].}}
{{History|||snap=15w50a|Added [[sound]]s for placing and breaking paintings: <code>entity.painting.place</code> and <code>entity.painting.break</code>.}}
{{History||1.11|snap=16w32a|The [[entity]] ID for paintings has been changed from <code>Painting</code> to <code>painting</code>.}}
{{History||1.12|snap=17w06a|Paintings now have a more intuitive placement system. When placed, a painting always uses the maximum possible amount of available space.}}
{{History||1.13|snap=17w47a|Prior to [[1.13/Flattening|''The Flattening'']], this [[item]]'s numeral ID was 321.}}
{{History|||snap=18w02a|Paintings now use a [[resource location]] for their motive.}}
{{History||1.14|snap=18w43a|[[File:Painting JE2 BE2.png|32px]] The [[item]] texture of paintings has been changed.}}
{{History|||snap=19w07a|Paintings are now stored as individual image files instead of parts of a single large image file, and now support animations.}}
{{History|||snap=19w11a|Shepherd [[villager]]s now [[trading|sell]] paintings.}}
{{History||1.17|snap=21w11a|The painting back texture has been updated to be in line with the texture update.}}
{{History||1.19|snap=22w16a|Added the four unused paintings from Bedrock Edition: "Earth", "Wind", "Fire", and "Water".|These paintings can only be added through a [[data pack]], or with the {{cmd|summon}} command.}}
{{History||1.19.4|snap=23w06a|Added [[painting]] variants to "Functional Blocks" tab.|Paintings with pre-defined variant will now display author, title and size in description when hovered over.|The "Operator Utilities" tab now contains the four paintings that are not available in Survival mode.}}
{{History||1.21|snap=TBA|Added 5 new paintings, one 1x1, one 2x1, one 2x2, one 3x2 and one 4x4}}
}
{{History|pocket alpha}}
{{History||v0.5.0|[[File:Painting JE1 BE1.png|32px]] Added paintings.
|There are currently 25 canvases, which can be viewed at [[Bedrock Edition history of textures/Paintings]].}}
{{History||v0.8.0|snap=build 3|A new painting rendering has been added.{{info needed|What exactly changed?}}}}
{{History||v0.12.1|snap=build 1|Paintings are no longer available from the [[nether reactor]].}}
{{History||v0.15.0|snap=build 1|Paintings now have [[sound]]s when placed and broken.}}
{{History|pocket}}
{{History||1.0.7|Added new painting canvas 'Wither'.}}
{{History|bedrock}}
{{History||1.10.0|snap=beta 1.10.0.3|[[File:Painting JE2 BE2.png|32px]] The [[item]] texture of paintings has been changed.}}
{{History||1.11.0|snap=beta 1.11.0.4|Paintings can now be [[trading|bought]] from shepherd [[villager]]s.}}
{{History||1.17.0|snap=beta 1.17.0.50|The painting back texture has been updated to be in line with the texture update.}}
{{History|console}}
{{History||xbox=TU1|xbone=CU1|ps=1.0|wiiu=Patch 1|switch=1.0.1|[[File:Painting JE1 BE1.png|32px]] Added paintings.
|There are currently 25 canvases, which can be viewed at [[Legacy Console Edition history of textures/Paintings]].}}
{{History||xbox=TU11|The limit for paintings in a world has been increased.
|A message is now displayed when the maximum paintings are reached.}}
{{History||xbox=TU14|ps=1.04|Added new painting canvas 'Wither'.}}
{{History||xbox=TU43|xbone=CU33|ps=1.36|wiiu=Patch 13|Added [[sound]]s for paintings.}}
{{History||xbox=none|xbone=none|ps=1.90|wiiu=none|switch=none|[[File:Painting JE2 BE2.png|32px]] The [[item]] texture of paintings has been changed.}}
{{History|3ds}}
{{History||0.1.0|[[File:Painting JE1 BE1.png|32px]] Added paintings.
|There are currently 25 canvases, which can be viewed at [[New Nintendo 3DS Edition history of textures/Paintings]].}}
{{History|foot}}
== Issues ==
{{issue list}}
== Trivia ==
* On April 26, 2011, Notch stated that the automapping code can be used to share custom paintings and books in the future.<ref>{{tweet|notch|62970142207913984|The auto mapping code can be used to share custom paintings and books in the future. There's a hard cap on 65536 of each/world, though|April 26, 2011}}</ref>
* The texture on the back of a painting is the same as the wooden planks texture, but with a yellowish color similar to that of [[chests]] (but slightly darker).
* The "Skull on Fire" painting contains a Minecraft world in the background, which is based on a screenshot taken by the artist in [[Java Edition Alpha v1.1.2 01|Alpha 1.1.2_01]] (or earlier) on October 12, 2010, at 13:22:49 (UTC+2).<ref>{{cite|url=https://web.archive.org/web/20220928041338/https://imgur.com/HVhrbnH|title=The original (never publicly shared before) screenshot that Kristoffer Zetterstrand took and based his painting on.|website=Imgur}}</ref>
**The seeds for this world are -1044887956651363087 and -6984854390176336655 (both are the same), standing at X=-249.65, Y=91, Z=-29.04.<ref>https://pastebin.com/fzAY9ES4</ref><ref>https://www.reddit.com/r/Minecraft/comments/iqg3ey/the_original_screenshot_seed_of_the_minecraft/</ref>
* The "Skull on Fire" painting's texture was added in [[Java Edition Beta 1.3|Beta 1.3]]. However, the code for paintings to randomly display the part of the [[Kz.png]] texture that was to be occupied by the Burning Skull painting was added earlier, in [[Java Edition Beta 1.2_01|Beta 1.2_01]]. As there was nothing on this part of the texture except for a purple background grid, this is what would be displayed if the painting was randomly chosen, until the Burning Skull painting texture was actually added.
* The original "Skull on Fire" painting was given to the winner of an official texture pack competition by Mojang.<ref>https://web.archive.org/web/20110110003612/http://www.webhallen.com:80/minecraft/</ref>
== Gallery ==
<gallery>
File:Notch Painting Screenshot.png|The first image of paintings released by [[Notch]].
File:Skull on Fire world.jpg|The original screenshot behind the "Skull on Fire" painting.
File:Burning Skull Render.jpg|A render of the "Skull on Fire" painting that [[Kristoffer Zetterstrand]] used as a reference image.
File:Skull on Fire IRL.jpg|The original "Skull on Fire" painting being painted.
File:Burning Skull JE1.png|The "Skull on Fire" painting as it appeared between versions [[Java Edition Beta 1.2_01|Beta 1.2_01]] and [[Java Edition Beta 1.2_02|Beta 1.2_02]], prior to its texture being added in [[Java Edition Beta 1.3|Beta 1.3]].
</gallery>
=== Renders ===
<gallery>
Alban.png | Albanian
Aztec.png | de_aztec
Aztec2.png | de_aztec
Bomb.png | Target Successfully Bombed
Kebab.png | Kebab med tre pepperoni
Plant.png | Paradisträd
Wasteland.png | Wasteland
Courbet.png | Bonjour Monsieur Courbet
Creebet.png | Creebet
Pool.png | The Pool
Sea.png | Seaside
Sunset.png | sunset_dense
Graham.png | Graham
Wanderer.png | Wanderer
Bust.png | Bust
Match.png | Match
Skull and Roses.png | Skull and Roses
Stage.png | The Stage Is Set
Void.png | The void
Wither (painting).png | Wither
Fighters.png | Fighters
Donkey Kong.png | Kong
Skeleton (painting).png | Mortal Coil
Burning Skull.png | Skull On Fire
Pigscene.png | Pigscene
Pointer.png | Pointer
Earth BE2.png | Earth
Fire BE2.png | Fire
Water BE2.png | Water
Wind BE2.png | Wind
</gallery>
== See also ==
* [[Item Frame]]
* [[Bedrock Edition unused features#Paintings|Unused paintings]]
* [[Kz.png]]
* [[Kristoffer Zetterstrand]]
== References ==
{{reflist}}
== External links ==
*[https://www.minecraft.net/en-us/article/taking-inventory-painting Taking Inventory: Painting] – Minecraft.net on January 18, 2019
{{items}}
{{entities}}
[[cs:Obraz]]
[[de:Gemälde]]
[[es:Cuadro]]
[[fr:Tableau]]
[[hu:Festmény]]
[[it:Quadro]]
[[ja:絵画]]
[[ko:그림]]
[[nl:Schilderij]]
[[pl:Obraz]]
[[pt:Quadro]]
[[ru:Картина]]
[[th:ภาพวาด]]
[[uk:Картина]]
[[zh:画]]</li></ul> | Custom player skin test. | ||||||||||||||||||||||||||||||||||
0.0.18a{{Extension DPL}}<ul><li>[[Baked Potato|Baked Potato]]<br/>{{Item
| title = Baked Potato
| renewable = Yes
| heals = {{hunger|5}}
| stackable = Yes (64)}}
A '''baked potato''' is a [[food]] [[item]] that can be eaten by the [[player]].
== Obtaining ==
Baked potatoes can be obtained by cooking [[potato]]es in a [[furnace]], [[smoker]], or [[campfire]].
{{Smelting
|Potato
|Baked Potato
|0,35
}}
{{IN|JE}}, baked potatoes can also be obtained by killing a zombie or one of its variants while it is on fire. The drop chance is still affected by [[Looting]].
=== Chest loot ===
{{LootChestItem|baked-potato}}
== Usage ==
To eat a baked potato, press and hold {{control|use}} while it is selected in the [[hotbar]]. Eating one restores {{hunger|5}} hunger and 6.0 hunger [[Hunger#Mechanics|saturation]].
=== Crafting ingredient ===
{{crafting usage}}
=== Composting ===
Placing a baked potato into a [[composter]] has an 85% chance of raising the compost level by 1. This is more efficient than composting with raw potatoes.
== Sounds ==
{{Sound table/Entity/Food}}
== Data values ==
=== ID ===
{{edition|java}}:
{{ID table
|edition=java
|showforms=y
|generatetranslationkeys=y
|displayname=Baked Potato
|spritetype=item
|nameid=baked_potato
|form=item
|foot=1}}
{{edition|bedrock}}:
{{ID table
|edition=bedrock
|shownumericids=y
|showforms=y
|notshowbeitemforms=y
|generatetranslationkeys=y
|displayname=Baked Potato
|spritetype=item
|nameid=baked_potato
|id=281
|form=item
|foot=1}}
== Advancements ==
{{load advancements|Husbandry;A Balanced Diet}}
== History ==
{{History|java}}
{{History||1.4.2|snap=12w34a|[[File:Baked Potato JE1.png|32px]] Added baked potatoes.}}
{{History|||snap=12w37a|[[File:Baked Potato JE2 BE1.png|32px]] The texture of baked potatoes has been slightly changed.}}
{{History||1.8|snap=14w02a|Baked potatoes now restore {{Hunger|5}} hunger points instead of 6.}}
{{History|||snap=14w27a|Baked potatoes are now used to craft [[rabbit stew]].}}
{{History||1.13|snap=17w47a|Prior to [[1.13/Flattening|''The Flattening'']], this [[item]]'s numeral ID was 393.}}
{{History||1.14|snap=18w43a|[[File:Baked Potato JE3.png|32px]] The texture of baked potatoes has been changed.}}
{{History|||snap=18w50a|[[File:Baked Potato JE4 BE2.png|32px]] The texture of baked potatoes has been changed, once again.}}
{{History|||snap=19w03a|Placing a baked potato into the new [[composter]] has an 80% chance of raising the compost level by 1.}}
{{History|||snap=19w05a|Baked potatoes now have an 85% chance of increasing the compost level in a composter by 1.}}
{{History||1.17|snap=21w13a|Baked potatoes can now be dropped by flaming [[zombie]]s.<ref>{{bug|MC-199065}}</ref>}}
{{History||1.19|snap=22w13a|Baked potatoes can now be found in [[ancient city]] ice box [[chest]]s.}}
{{History|upcoming java}}
{{History||Villager Trade Rebalance<br>(Experimental)|link=Java Edition 1.20.2|snap=23w31a|[[Wandering trader]]s now have a chance to [[trading|buy]] baked potatoes from the player.}}
{{History|pocket alpha}}
{{History||v0.8.0|snap=build 1|[[File:Baked Potato JE2 BE1.png|32px]] Added baked potatoes.}}
{{History||v0.12.1|snap=build 1|Baked potatoes now restore [[hunger]] instead of [[health]].}}
{{History||v0.13.0|snap=build 1|Baked potatoes are now used to craft [[rabbit stew]].}}
{{History|bedrock}}
{{History||1.10.0|snap=beta 1.10.0.3|[[File:Baked Potato JE4 BE2.png|32px]] The texture of baked potatoes has been changed.}}
{{History||1.11.0|snap=beta 1.11.0.1|Baked potatoes can now be used to fill up [[composter]]s.}}
{{History|console}}
{{History||xbox=TU14|xbone=CU1|ps=1.04|wiiu=Patch 1|switch=1.0.1|[[File:Baked Potato JE2 BE1.png|32px]] Added baked potatoes.}}
{{History||ps=1.00|[[File:Baked Potato JE2 BE1.png|32px]] Added baked potatoes to the [[PlayStation 4 Edition|PS4]] and [[PlayStation Vita Edition|PSVita]].}}
{{History||xbox=none|xbone=none|ps=1.90|wiiu=none|switch=none|[[File:Baked Potato JE4 BE2.png|32px]] The texture of baked potatoes has been changed.}}
{{History|new3DS}}
{{History||0.1.0|[[File:Baked Potato JE2 BE1.png|32px]] Added baked potatoes.}}
{{History|foot}}
== Issues ==
{{issue list}}
== See also ==
* {{ItemLink|Poisonous Potato}}
{{Items}}
[[Category:Food]]
[[Category:Renewable resources]]
[[cs:Pečená brambora]]
[[de:Ofenkartoffel]]
[[es:Patata cocida]]
[[fr:Pomme de terre cuite]]
[[hu:Sült burgonya]]
[[it:Patata al forno]]
[[ja:ベイクドポテト]]
[[ko:구운 감자]]
[[nl:Gebakken aardappel]]
[[pl:Pieczony ziemniak]]
[[pt:Batata assada]]
[[ru:Печёный картофель]]
[[th:มันฝรั่งอบ]]
[[zh:烤马铃薯]]</li><li>[[Sparkler|Sparkler]]<br/>{{About|the Education Edition exclusive item|the new melee weapon available from the ''Minecraft Dungeons'' anniversary event|MCD:Sparkler}}
{{Item
| image = <gallery>
Orange Sparkler.png | Orange
Blue Sparkler.png | Blue
Red Sparkler.png | Red
Purple Sparkler.png | Purple
Green Sparkler.png | Green
</gallery>
| image2 = <gallery>
Active Orange Sparkler.png | Active Orange
Active Blue Sparkler.png | Active Blue
Active Red Sparkler.png | Active Red
Active Purple Sparkler.png | Active Purple
Active Green Sparkler.png | Active Green
</gallery>
| renewable = No
| stackable = No
}}
{{education feature}}
{{exclusive|bedrock|education}}
A '''sparkler''' is a [[Chemistry Update|chemistry]]-related [[item]] that emits particles when lit.
Sparklers are available in orange, blue, red, purple, and green colors.
== Obtaining ==
=== Crafting ===
{{Crafting
|showdescription=1
|B1=Chloride |B2=Magnesium |B3=Stick
|Output=Sparkler
|description= Calcium Chloride: Orange<br>Cerium Chloride: Blue<br>Mercuric Chloride: Red<br>Potassium Chloride: Purple<br>Tungsten Chloride: Green<br>{{only|bedrock|education}}
|type=Miscellaneous
}}
== Usage ==
{{ctrl|Using}} a sparkler ignites it, causing its texture to change. When lit, the sparkler emits colored [[particles]]; the [[durability]] meter depletes while the sparkler is burning. Sparklers are one of the few [[item]]s that can be held in the [[off-hand]] {{in|be}}. Unlit sparklers have normal lighting like most items, while lit sparklers appear to glow when held in the player's hand, similarly to [[glow stick]]s.
When the [[player]] uses another item while a sparkler is lit, or holds the sparkler in the off-hand, the sparkler's durability stops depleting.
If the player has a lit sparkler in their [[inventory]] and goes into the [[water]], the sparkler is destroyed immediately. However, it does not get destroyed if dropped in water. It also cannot float.
Despite having durability, sparklers cannot be enchanted with [[Unbreaking]] or [[Mending]].
== Sounds ==
{{Sound table
|type=bedrock
|sound=Fuse.ogg
|source=sound
|description=While a sparkler is active
|id=sparkler.active
|volume=0.25
|pitch=0.8/1.2}}
{{Sound table
|sound=Fizz.ogg
|source=block
|description=While a sparkler is being lit
|id=random.fizz
|volume=1.0
|pitch=2.4/2.6
|foot=1}}
== Data values ==
=== ID ===
{{ID table
|edition=bedrock
|shownumericids=y
|showforms=y
|notshowbeitemforms=y
|generatetranslationkeys=y
|displayname=Sparkler
|spritename=sparklers
|spritetype=item
|nameid=sparkler
|id=600
|form=item
|translationkey=item.sparkler.orange.name,item.sparkler.blue.name,item.sparkler.red.name,item.sparkler.purple.name,item.sparkler.green.name
|foot=1}}
== History ==
{{History|bedrock}}
{{History||1.4.0|snap=beta 1.2.20.1|[[File:Orange Sparkler BE1.png|32px]] [[File:Blue Sparkler BE1.png|32px]] [[File:Red Sparkler BE1.png|32px]] [[File:Purple Sparkler BE1.png|32px]] [[File:Green Sparkler BE1.png|32px]] <br>[[File:Active Orange Sparkler BE1.png|32px]] [[File:Active Blue Sparkler BE1.png|32px]] [[File:Active Red Sparkler BE1.png|32px]] [[File:Active Purple Sparkler BE1.png|32px]] [[File:Active Green Sparkler BE1.png|32px]] Added sparklers.}}
{{History|education}}
{{History||1.0.27|[[File:Orange Sparkler BE1.png|32px]] [[File:Blue Sparkler BE1.png|32px]] [[File:Red Sparkler BE1.png|32px]] [[File:Purple Sparkler BE1.png|32px]] [[File:Green Sparkler BE1.png|32px]] <br>[[File:Active Orange Sparkler BE1.png|32px]] [[File:Active Blue Sparkler BE1.png|32px]] [[File:Active Red Sparkler BE1.png|32px]] [[File:Active Purple Sparkler BE1.png|32px]] [[File:Active Green Sparkler BE1.png|32px]] Added sparklers.}}
{{History|foot}}
== Issues ==
{{issue list}}
== Trivia ==
* The formula for sparkler roughly works in real life. Magnesium itself burns white in air, while the metal salts add [[wikipedia:flame test|color to the flame]].
{{items}}
{{Education Edition}}
[[Category:Non-renewable resources]]
[[Category:Education Edition items]]
[[de:Wunderkerze]]
[[ja:手持ち花火]]
[[ko:스파클러]]
[[pl:Zimne ognie]]
[[pt:Vela-Faísca]]
[[zh:烟花棒]]</li></ul> | Custom skins released. | ||||||||||||||||||||||||||||||||||
0.24 SURVIVAL TEST{{Extension DPL}}<ul><li>[[Bone Meal|Bone Meal]]<br/>{{Item
| image = Bone Meal.png
| renewable = Yes
| stackable = Yes (64)
}}
'''Bone meal''' is a material that can be used as a fertilizer for most plants and fungi, as well as a crafting ingredient for [[dye]]s.
== Obtaining ==
=== Crafting ===
{{Crafting
|Bone
|Output=Bone Meal,3
|type=Material
|showname=0
|head=1
}}
{{Crafting
|Bone Block
|Output= Bone Meal,9
|type=Material
|foot=1
}}
=== Mob loot ===
==== Fish ====
All fish mob variants ([[cod]], [[salmon]], [[tropical fish]], and [[pufferfish]]) have a 5% chance to drop 1 bone meal upon death.{{only|java}} In [[Bedrock Edition]], they drop [[bones]] instead.
=== Composters ===
When a [[composter]] is completely filled, a single bone meal drops the next time the composter is {{ctrl|used}}.
=== Trading ===
[[Wandering trader]]s sell 3 bone meal for an [[emerald]].{{only|bedrock}}
== Usage ==
=== Crafting ingredient ===
{{crafting usage}}
{{IN|bedrock}}, bone meal can be also used in [[banner pattern]]s:
{{banner crafting usage}}
=== Loom ingredient ===
{{Banner loom usage|Bone Meal}}
=== Dye ===
{{Dye usage}}
=== Fertilizer ===
Bone meal can also be used on the following [[plants]] to have a chance to increase their growth stage:
{| class="wikitable"
|+
!Plant
!Action
|-
|{{BlockLink|Wheat}}<br>{{BlockLink|Carrots}}<br>{{BlockLink|Potatoes}}
|The plant matures 2–5 growth stages.
|-
|{{BlockLink|Beetroots}}
|The plant has a 75% chance of growing to the next growth stage.
|-
|{{BlockLink|Bamboo}}
|Grows the [[bamboo]] by 1-2 stems.
|-
|{{BlockLink|Melon Stem|link=Melon seeds|text=Melon Seeds}}<br>{{BlockLink|Pumpkin Stem|link=Pumpkin seeds|text=Pumpkin Seeds}}
|The planted stem matures 2–5 growth stages. Bone meal affects only the stem's growth; it does not cause [[melon]]s or [[pumpkin]]s to sprout from a mature stem.
|-
|{{BlockLink|Saplings}}<br>{{BlockLink|Azalea}}<br>{{BlockLink|Flowering Azalea}}<br>{{BlockLink|Mangrove Propagule}} (not hanging)
|The [[sapling]] has a 45% chance of growing to the next growth stage, if possible. Saplings have two growth stages (with no visible difference between them) before growing into trees as the third stage. A tree cannot grow unless the sapling is planted in proper ground and sufficient space is available. Using bone meal on such an obstructed sapling with no chance of growing wastes the bone meal.
|-
|{{BlockLink|Sunflower}}s<br>{{BlockLink|Lilac}}s<br>{{BlockLink|Rose Bush}}es<br>{{BlockLink|Peony|Peonies}}
|The corresponding item form drops, without destroying the original plant.
|-
|{{BlockLink|Grass}}<br>{{BlockLink|Fern}}s<br>{{BlockLink|Seagrass}}
|A one-block-high tall [[grass]], [[fern]], or [[seagrass]] (that is on [[grass block]], [[dirt]], [[coarse dirt]], [[rooted dirt]], [[farmland]], [[podzol]], [[mycelium]], [[moss block]], [[mud]], or [[muddy mangrove roots]] (only exception is seagrass, will need to on a full surface)) grows into a two-block-high tall grass, fern or seagrass.
|-
|{{BlockLink|Mushrooms}}
|Has a 40% chance of growing into a {{EnvLink|huge mushroom}} if on [[grass block]], [[dirt]], [[coarse dirt]], [[rooted dirt]], [[farmland]], [[podzol]], [[mycelium]], [[moss block]], [[mud]], or [[muddy mangrove roots]].
|-
|{{BlockLink|Cocoa}}
|The cocoa plant matures 1 growth stage.
|-
|{{BlockLink|Sweet Berry Bush}}
|Grows every stage.
|-
|{{BlockLink|Sea Pickle}}
|If the [[sea pickle]] is on a [[coral block]] and in [[water]] at least 2 blocks deep, the sea pickle colony grows, and additional sea pickles generate nearby.
|-
|{{BlockLink|Sugar Cane}}{{only|bedrock|short=1}}
|The sugar cane grows to maximum height (three blocks tall).
|-
|{{BlockLink|Kelp}}
|The kelp plant grows by 1 block per bone meal used, up to its maximum height.
|-
|{{BlockLink|Flower|id=poppy}} (excluding wither roses){{only|bedrock|short=1}}
|One-block-high flowers make more flowers of the same type grow in the surrounding area.
|-
|{{BlockLink|Fungus|id=fungi}}
|Grows into [[huge fungi]], but only if on the respective [[nylium]].
|-
|{{BlockLink|Weeping Vines}}
|Grows the [[weeping vine]]s a few blocks downward.
|-
|{{BlockLink|Twisting Vines}}
|Grows the [[twisting vine]]s a few blocks upward.
|-
|{{BlockLink|Cave Vines}}
|Produces [[glow berries]] if the vine did not have any [[glow berries]] on it already.
|-
|{{BlockLink|Glow Lichen}}
|The [[glow lichen]] spreads to a random adjacent block.
|-
|{{BlockLink|Moss Block}}
|The [[moss block]] causes nearby [[stone]], [[cave vine]]s, and [[dirt]] to become moss blocks.
|-
|{{BlockLink|Big Dripleaf}}<br>{{BlockLink|Small Dripleaf}}
|A [[big dripleaf]] grows one block higher, and a [[small dripleaf]] becomes a big dripleaf.
|-
|{{BlockLink|Rooted Dirt}}
|Causes [[hanging roots]] to grow underneath the [[rooted dirt]] if there is space.
|-
|{{BlockLink|Mangrove Leaves}}
|Creates a hanging [[mangrove propagule]] under the [[mangrove leaves]].
|-
|{{BlockLink|Mangrove Propagule}} (hanging)
|The [[mangrove propagule]] matures 1 growth age.
|-
|{{BlockLink|Pink Petals}}
|Produces another pink petal in the block. If there are already four pink petals in the block, it will drop a pink petal as an item.
|-
|{{BlockLink|Torchflower Crop}}<br>{{BlockLink|Pitcher Crop}}
|Grows every stage.
|}
Bone meal does not affect:
* [[Cactus]]
* [[Vines]]
* [[Nether wart]]
* [[Sugar cane]]{{only|JE}}
* [[Chorus plant]]s, or other plants not listed above.
==== Wasting bone meal ====
Bone meal can be used on the following objects in the following situations, consuming it without any real effect:
* On [[grass]], [[fern]]s, and [[seagrass]] that do not have enough space to grow.<ref>{{bug|MC-125642}}</ref>
* On [[seagrass]] that doesn't have [[water]] above.
* On a [[dark oak sapling]] that is not in a group of four.<ref>{{bug|MC-168446}}</ref>
* On a [[mushroom]] that is not on a block that allows it to grow into a huge mushroom.<ref>{{bug|MC-173213}}</ref>
* On a [[sea pickle]] that is already in a group of four and has no valid locations to expand to.<ref>{{bug|MC-127995}}</ref>
* On a [[bamboo]] (not [[bamboo shoot]]) that is blocked in the way.
* On a [[sea pickle]] that is not on a [[coral block]].
* On a [[fungus]] that is not on its respective [[nylium]].
* Any plants that can't grow due to being block by the [[build limit]].
=== Creating new plants ===
If bone meal is {{ctrl|used}} on a [[grass block]]; [[tall grass]], [[grass]], [[flower]]s, and [[pink petals]] form on the targeted block and on random adjacent grass blocks in an 15×5×15{{only|java|short=1}}/7×5×7{{only|bedrock|short=1}} area centered on the targeted block. The flowers/pink petals that appear depend on the biome, meaning that in order to obtain specific flowers, the player must travel to biomes where the flowers are found naturally. See {{slink|Flower|Flower biomes}} for more information.
Using bone meal on a 2-block flower (rose bushes, sunflowers, lilacs or peonies) will cause one of the same type of flower to drop, without breaking the original. This is the only way to reproduce these flowers, since they cannot generate from using bone meal on grass blocks.
Using bone meal on a non-transparent block that is underwater generates [[seagrass]] on that block and surrounding blocks. Sometimes, if in a [[warm ocean]] biome, [[coral]] and [[coral fan]]s may have a chance to generate as well, and in Bedrock Edition, coral (not coral fan) can be generated in any biome. In order for this to work, there must be 2 water blocks above the block the bone meal is being used on, and the lower one must be non-flowing water.
Using bone meal on a [[sea pickle]] on a [[coral block]] creates sea pickles. This generates sea pickles up to 3 [[block]]s (of coral) away, so a 7+ × 7+ block (49+ blocks) of coral may be necessary, to return the most sea pickles per given bone meal attempt (more attempts grows them more numerously, exactly - including the range of it growing, like grass with heights on grass blocks - as coral and coral fans, though those others being non-solid blocks).
Using bone meal on [[netherrack]] adjacent to [[nylium]] converts the netherrack into nylium of the same type. If both crimson and warped nylium are adjacent to the netherrack that was applied with bone meal, there is a 50% chance that either type of nylium is created.
Using bone meal on [[nylium]] causes the corresponding [[roots]] and both types of [[fungi]] to appear on the nylium block and other nylium nearby, with the type of fungi matching the type of nylium being more common. In addition, using bone meal on the side of warped nylium creates [[nether sprouts]] and [[twisting vines]].
=== Farmer villagers ===
[[Villager]]s with the farmer profession can collect bone meal from a full [[composter]], with which they can make their crops grow faster.
== Sounds ==
{{edition|java}}:
{{Sound table
|sound=Bonemeal1.ogg
|sound2=Bonemeal2.ogg
|sound3=Bonemeal3.ogg
|sound4=Bonemeal4.ogg
|sound5=Bonemeal5.ogg
|subtitle=Bone Meal crinkles
|description=When bone meal is successfully used
|source=block
|id=item.bone_meal.use
|translationkey=subtitles.item.bone_meal.use
|volume=1.0
|pitch=1.0
|distance=16
|foot=1}}
{{edition|be}}:
{{Sound table
|type=bedrock
|sound=Bonemeal1.ogg
|sound2=Bonemeal2.ogg
|sound3=Bonemeal3.ogg
|sound4=Bonemeal4.ogg
|sound5=Bonemeal5.ogg
|description=When bone meal is successfully used
|source=block
|id=item.bone_meal.use
|volume=1.0
|pitch=0.9-1.1
|foot=1}}
== Data values ==
=== ID ===
{{edition|java}}:
{{ID table
|edition=java
|showforms=y
|generatetranslationkeys=y
|displayname=Bone Meal
|spritetype=item
|nameid=bone_meal
|form=item
|foot=1}}
{{edition|bedrock}}:
{{ID table
|edition=bedrock
|showaliasids=y
|shownumericids=y
|showforms=y
|notshowbeitemforms=y
|generatetranslationkeys=y
|displayname=Bone Meal
|spritetype=item
|nameid=bone_meal
|aliasid=dye / 15
|id=411
|form=item
|translationkey=item.dye.white.name
|foot=1}}
== History ==
{{History|java beta}}
{{History||1.2|[[File:Bone Meal JE1 BE1.png|32px]] Added bone meal.
|Bone meal can now only be applied to [[sapling]]s and [[wheat]].}}
{{History||1.6.6|Bone meal can now be applied on [[grass block]]s.}}
{{History||1.8|snap=Pre-release|Bone meal can now be used on [[mushroom]]s to make [[huge mushroom]]s, and the block the mushroom is on changes to [[dirt]].}}
{{History|||snap=Pre-release 2 ;)|Bone meal can now be applied on [[pumpkin seeds|pumpkin]] and [[melon seed]]s.}}
{{History|java}}
{{History||1.3.1|snap=12w19a|Bone meal can now be applied on [[cocoa bean]]s.}}
{{History|||snap=1.3|[[File:Bone Meal JE2 BE2.png|32px]] The texture of bone meal has been changed.}}
{{History||1.4.2|snap=12w34a|Bone meal can now be used to dye [[leather armor]] and [[tamed wolf]]'s collar.}}
{{History||1.4.6|snap=12w49a|Bone meal can now be [[crafted]] with [[gunpowder]] to create a [[firework star]].}}
{{History||1.5|snap=13w04a|Bone meal has been significantly nerfed.<br>
[[Wheat]], [[melon seeds|melon]] and [[pumpkin seed]]s, [[potato]]es and [[carrot]]s: one bone meal is now consumed for all seven stages of growth (melon and pumpkin seeds do not spawn right away).<br>
[[Sapling]]s: one bone meal is now consumed for each of the two growth stages, then it grows into a tree.<br>
[[Cocoa]]s: one bone meal is now consumed for each of the three stages of growth.
|Green [[particle]]s are now displayed when bone meal is used.
|Bone meal can now be used from [[dispenser]]s.}}
{{History|||snap=13w05a|The balancing of bone meal has been adjusted. Growing a plant to its last state now takes on average 2-5 uses of bone meal (results vary from plant to plant).<ref>https://web.archive.org/web/20220921040940/https://imgur.com/a/gOngk</ref>}}
{{History||1.6.1|snap=13w19a|Bone meal can now be used to craft white [[stained clay]].}}
{{History||1.7.2|snap=13w36a|The [[flower]]s generated when using bone meal on grass blocks is now biome dependent.}}
{{History|||snap=13w41a|Bone meal can now be used to craft white [[stained glass]].}}
{{History||1.8|snap=14w30a|Added [[banner]]s, which can be dyed with [[bone meal]].}}
{{History||1.10|snap=16w20a|Bone meal can now be used to craft [[bone block]]s.}}
{{History||1.11|snap=16w39b|Bone meal can now be used to dye [[shulker box]]es.}}
{{History||1.12|snap=17w06a|Bone meal can now be used to craft white [[concrete powder]].}}
{{History||1.13|snap=17w47a|The different data values for the <code>dye</code> ID have been split up into their own IDs.
|Prior to [[1.13/Flattening|''The Flattening'']], this [[item]]'s numeral ID was 351.}}
{{History|||snap=18w07a|Bone meal can now be used underwater to create [[seagrass]].}}
{{History|||snap=18w14b|Bone meal can now be used for spreading [[sea pickle]]s.}}
{{History||1.13.1|snap=18w31a|Bone meal used in [[water]] of warm ocean biomes now has a chance of growing [[coral]].
|[[Cod]], [[salmon]], [[tropical fish]], and [[pufferfish]] now have a chance of dropping bone meal upon death.}}
{{History|||snap=18w32a|Bone meal used in [[water]] of warm ocean biomes now has a chance of growing [[coral fan]]s.}}
{{History||1.14|snap=18w43a|Bone meal can now used to craft [[white dye]].
|Bone meal can no longer be used as a [[dye]].
|All of the dye-related functions and crafting recipes of bone meal (except bone blocks) have been transferred to white dye.
|[[File:Bone Meal JE3 BE3.png|32px]] The texture of bone meal has been changed.
|Bone meal can now be used on [[bamboo]] and [[bamboo shoot]].}}
{{History|||snap=19w03a|Bone meal can now be obtained from [[composter]]s.}}
{{History||1.16|snap=20w06a|Bone meal can now be used to grow [[fungi]] into [[huge fungi]].
|Bone meal can now be used to spread [[nylium]] onto netherrack.}}
{{History|||snap=20w09a|Using bone meal to grow fungi now works only on the respective [[nylium]].}}
{{History|||snap=20w11a|Bone meal can now grow [[kelp]], [[weeping vines]], and [[twisting vines]].}}
{{History|||snap=20w12a|Bone meal can now be used to grow [[roots]], [[fungi]], and [[nether sprouts]] on nylium.}}
{{History|||snap=20w13a|Farmers can now use bone meal to grow crops.}}
{{History||1.17|snap=21w03a|Bone meal can now be used to spread [[glow lichen]]s.}}
{{History|||snap=21w05a|Bone meal can now be used on [[moss block]]s, [[small dripleaf]], [[big dripleaf]], and [[cave vines]].}}
{{History|||snap=21w11a|Bone meal can now be used on [[rooted dirt]].}}
{{History|||snap=21w15a|Bone meal now makes a sound when used.}}
{{History|||snap=21w16a|Moss patches obtained from fertilizing moss blocks contain less vegetation and are now smaller and more irregular in shape.
|Bone meal can now be used on [[azalea]] and [[flowering azalea]].}}
{{History||1.19|snap=22w11a|Bone meal can now be used on [[mangrove propagule]]s and [[mangrove leaves]].}}
{{History||1.20<br>(Experimental)|link=1.19.4|snap=23w07a|Bone meal can now be used on [[pink petals]] and [[torchflower crop]]s.|Using bone meal on [[cherry grove]]s now have a chance to generate [[pink petal]]s.}}
{{History||1.20|snap=23w12a|Bone meal can now be used on [[pitcher crop]]s.}}
{{History|pocket alpha}}
{{History||v0.3.0|[[File:Bone Meal JE1 BE1.png|32px]] Added bone meal. It is currently unobtainable and serves no purpose.}}
{{History||v0.3.3|Bone meal can now be crafted from bones.
|Bone meal can now be applied to grass blocks and saplings.}}
{{History||v0.4.0|Added the first [[crop]]s, which bone meal can be applied to.}}
{{History||v0.8.0|snap=build 1|[[File:Bone Meal JE2 BE2.png|32px]] The texture of bone meal has been changed.
|Bone meal no longer instantly grows [[crop]]s to full size.
|Bone meal can now be used to craft white [[wool]].}}
{{History|||snap=build 5|[[Pumpkin]] and [[melon]] stems now grow by only one stage when bone meal is used.
|Some [[flower]]s now spawn certain other flowers when bone meal is used on them.
|Bone meal can now grow [[fern]]s and [[tall grass]] in [[survival]] and [[creative]].
|Bone meal can now grow [[sugar cane]]s to maximum height.}}
{{History||v0.9.0|snap=build 11|Bone meal can now be used to dye tamed [[wolf]] collars.}}
{{History||v0.14.0|snap=build 1|Bone meal can now be used from [[dispenser]]s.
|Bone meal can now be used to dye [[water]] in [[cauldron]]s.}}
{{History|pocket}}
{{History||1.0.0|snap=alpha 0.17.0.1|Bone meal can now be used to dye [[shulker]]s.}}
{{History||1.1.0|snap=alpha 1.1.0.0|Bone meal can now be used to craft white [[concrete powder]], white [[bed]]s and white [[shulker box]]es.}}
{{History||1.1.3|snap=alpha 1.1.3.0|Bone meal can now be used to craft [[bone block]]s.}}
{{History|bedrock}}
{{History||1.2.0|snap=beta 1.2.0.2|Bone meal can now be used to craft white [[stained glass]].
|Bone meal can now be used to craft [[firework star]]s.
|Bone meal can now be used to create [[banner]] patterns.}}
{{History||1.4.0|snap=beta 1.2.14.2|Bone meal can now be used underwater for growing [[seagrass]] and [[coral]].}}
{{History|||snap=beta 1.2.20.1|Bone meal can now be used for spreading [[sea pickle]]s.
|Bone meal can now be used to craft white [[balloon]]s and white [[glow stick]]s.}}
{{History||1.8.0|snap=beta 1.8.0.8|Bone meal can now be used to grow [[bamboo]].}}
{{History|||snap=beta 1.8.0.10|Bone meal can now be used to craft [[white dye]].}}
{{History||1.10.0|snap=beta 1.10.0.3|Bone meal are now sold by [[wandering trader]]s.
|[[File:Bone Meal JE3 BE3.png|32px]] The texture of bone meal has been changed.}}
{{History||1.11.0|snap=beta 1.11.0.1|Bone meal can now be obtained from [[composter]]s.}}
{{History||1.16.0|snap=beta 1.16.0.51|Bone meal can now grow [[fungus|fungi]] into [[huge fungi]].
|Bone meal can now be used to turn [[netherrack]] into [[nylium]].
|Bone meal can now be used to grow [[roots]], [[fungi]], and [[nether sprouts]] on nylium.}}
{{History||1.16.100|snap=beta 1.16.100.56|The ID of bone meal has been changed from <code>dye/15</code> to <code>bone_meal</code>.}}
{{History||1.16.210|snap=beta 1.16.210.51|Bone meal used in [[water]] now has a chance of growing [[coral fan]]s.}}
{{History||1.16.220|snap=beta 1.16.220.52|Bone meal can now be used on [[moss block]]s, [[small dripleaf]], [[big dripleaf]], [[cave vines]] and [[rooted dirt]].}}
{{History||1.17.0|snap=beta 1.16.230.50|Bone meal can now be used to spread [[glow lichen]]s.}}
{{History|||snap=beta 1.16.230.54|Bone meal can be used to grow [[azalea]]s into azalea trees.}}
{{History|||snap=beta 1.17.0.50|Bone meal now makes a sound when used.}}
{{History|console}}
{{History||xbox=TU1|xbone=CU1|ps=1.00|wiiu=Patch 1|switch=1.0.1|[[File:Bone Meal JE1 BE1.png|32px]] Added bone meal.}}
{{History||xbox=TU19|xbone=CU7|ps=1.12|Bone meal no longer instantly grows [[crop]]s to full size.}}
{{History||xbox=none|xbone=none|ps=1.90|wiiu=none|switch=none|[[File:Bone Meal JE3 BE3.png|32px]] The texture of bone meal has been changed.}}
{{History|new 3ds}}
{{History||0.1.0|[[File:Bone Meal JE2 BE2.png|32px]] Added bone meal.}}
{{History|foot}}
== Issues ==
{{issue list}}
== Trivia ==
* Bone meal can be used on the sides or bottom of a [[grass block]], as well as on a grass block with [[plant]]s already on top of it.
* Regardless of if it succeeds in fertilizing, bone meal makes green sparkles. However, like smoke from a [[torch]], the sparkles appear only if the [[player]] has [[particles]] set All or Decreased.
* In real life, [[Wikipedia:bone meal|bone meal]] is used as a fertilizer to provide nitrogen and phosphorus to plants.
==Gallery==
<gallery>
File:Bone Meal On Grass.png|Bone meal used on [[grass block]]s.
</gallery>
== See also ==
* [[Farming]]
== References ==
{{reflist}}
{{Items}}
[[Category:Dyes]]
[[Category:Plants]]
[[Category:Renewable resources]]
[[cs:Kostní moučka]]
[[de:Knochenmehl]]
[[es:Polvo de hueso]]
[[fr:Poudre d'os]]
[[hu:Csontliszt]]
[[ja:骨粉]]
[[ko:뼛가루]]
[[nl:Beendermeel]]
[[pl:Mączka kostna]]
[[pt:Farinha de osso]]
[[ru:Костная мука]]
[[th:ผงกระดูก]]
[[zh:骨粉]]</li><li>[[Item Frame|Item Frame]]<br/>{{redirect|Frame}}
{{ItemEntity
| group = Item Frame
| 1-1 = Item Frame.png
| 1-2 = Item Frame (item).png
| group2 = Glow Item Frame
| 2-1 = Glow Item Frame.png
| 2-2 = Glow Item Frame (item).png
| extratext = [[#Renders|View all renders]]
| renewable = Yes
| stackable = Yes (64)
| drops = {{ItemLink|Item Frame}} (1)<br>
or
{{ItemLink|Glow Item Frame}} (1)<br>{{EnvSprite|items}} The item it contains.
}}
An '''item frame''' is an [[entity]]{{only|java|short=y}} or [[block entity]]{{only|bedrock|short=y}} that displays the item or block that is inside it.
A '''glow item frame''' keeps itself and the item inside it illuminated, even in the dark.
== Obtaining ==
=== Breaking ===
{{IN|je}}, an empty item frame can be broken simply by punching it. If the item frame contains an item, punching it drops the item, leaving the frame on the wall.
Because item frames are [[entities]] {{in|java}}, they can be broken in [[Adventure]] mode. They will also be targeted by commands using the @e selector.{{only|java}}
=== Natural generation ===
An item frame containing a pair of [[elytra]] generates in each [[end ship]].
[[File:BoatElytra.png|thumb|An item frame naturally generating in an end ship.]]
=== Crafting ===
{{Crafting
|head=1
|A1= Stick |B1= Stick |C1= Stick
|A2= Stick |B2= Leather |C2= Stick
|A3= Stick |B3= Stick |C3= Stick
|Output= Item Frame
|type= Decoration block
}}
{{Crafting
|foot=1
|Glow Ink Sac
|Item Frame
|Output= Glow Item Frame
|type= Decoration block
}}
=== Trading ===
Expert-level [[Trading#Cartographer|cartographer]] [[villager]]s have a chance to sell an item frame for 7 [[emerald]]s.
== Usage ==
=== Item display ===
[[File:Item Frame (map filled partial).png|thumb|150px|Item frame with partially filled map]]
Item frames can be placed on the sides of [[cactus]] blocks, [[pressure plate]]s, [[fence]]s, [[tree]]s, [[slab]]s, [[cobblestone wall]]s, [[chest]]s, [[door]]s, and all [[solid block]]s. They can also be placed on the top and bottom of these blocks. To place on chests and doors, the player needs to be [[sneaking]]. As item frames are an entity, multiple item frames can occupy the same block, although on different faces. It also allows non-solid blocks to occupy the same space.{{only|java}}
Players can place items in the frame by {{control|using}} the item. If a [[map]] is placed in an item frame, it enlarges to show the map in the size of a full block, with the item frame's location displayed as a green pointer on the map, pointing in the direction the item frame is facing. If this is done in the Nether, the green cursor spins around similar to the white cursor (players). If an item in an item frame has been renamed using an [[anvil]], it displays its custom name when the cursor is over the item frame. If the player places a block inside the frame, it is displayed in miniature half in, half out of the block. This can be most notably seen on stairs or slabs.
{{control|Pick block}} may be used on item frames by players in creative mode only, the control has no effect for players in Survival or Adventure mode. When the item frame is displaying an item, {{control|pick block}} picks the displayed item instead of the item frame.
Item frames can be placed on the lid of a [[shulker box]] that is positioned horizontally, but pop off when the lid is opened.{{only|java}}
=== Rotation ===
The displayed item can then be rotated by right-clicking the frame. Items displayed in the item frame can turn 45° diagonally, with a total of 8 possibilities (90° and 4 possibilities if it is a map), and the frame outputs a [[Mechanics/Redstone/Circuit#Power level|redstone signal]] depending on the rotation phase that can be interpreted by a [[redstone comparator]] (note that this rotation value is separate from the clock or compass rotation). As long as the frame remains placed, it remembers the orientation of the last item it held, and uses it for the next item it holds.{{only|java}}
=== Glow item frames ===
[[File:Item Frames Comparison.png|thumb|260px|Comparison between ordinary item frame and glow item frame in the dark.]]
When an item is placed inside a glow item frame, it appears to glow, even though it does not emit any [[light level]].
== Sounds ==
Item frames and glow item frames share the same sounds.
=== Generic ===
{{Edition|Bedrock}}:<!--Item frames are blocks in BE, so they get the generic section.-->
{{Sound table/Block/Item frame/BE}}
=== Unique ===
{{Edition|Java}}:
{{Sound table
|rowspan=2
|sound=Item Frame add item1.ogg
|sound2=Item Frame add item2.ogg
|soumd3=Item Frame add item3.ogg
|sound4=Item Frame add item4.ogg
|subtitle=Item Frame fills
|source=neutral
|description=When an item is placed in an item frame
|id=entity.item_frame.add_item
|translationkey=subtitles.entity.item_frame.add_item
|volume=1.0
|pitch=1.0
|distance=16}}
{{Sound table
|subtitle=Glow Item Frame fills
|source=neutral
|description=When an item is placed in a glow item frame
|id=entity.glow_item_frame.add_item
|translationkey=subtitles.entity.glow_item_frame.add_item
|volume=1.0
|pitch=1.0
|distance=16}}
{{Sound table
|rowspan=2
|sound=Item Frame break1.ogg
|sound2=Item Frame break2.ogg
|sound3=Item Frame break3.ogg
|subtitle=Item Frame breaks<ref group=sound name=breaks>{{bug|MC-194948}}</ref>
|source=neutral
|description=When an item frame is broken or pops off
|id=entity.item_frame.break
|translationkey=subtitles.entity.item_frame.break
|volume=1.0
|pitch=1.0
|distance=16}}
{{Sound table
|subtitle=Glow Item Frame breaks<ref group=sound name=breaks/>
|source=neutral
|description=When a glow item frame is broken or pops off
|id=entity.glow_item_frame.break
|translationkey=subtitles.entity.glow_item_frame.break
|volume=1.0
|pitch=1.0
|distance=16}}
{{Sound table
|rowspan=2
|sound=Item Frame place1.ogg
|sound2=Item Frame place2.ogg
|sound3=Item Frame place3.ogg
|sound4=Item Frame place4.ogg
|subtitle=Item Frame placed
|source=neutral
|description=When an item frame is placed
|id=entity.item_frame.place
|translationkey=subtitles.entity.item_frame.place
|volume=1.0
|pitch=1.0
|distance=16}}
{{Sound table
|subtitle=Glow Item Frame placed
|source=neutral
|description=When a glow item frame is placed
|id=entity.glow_item_frame.place
|translationkey=subtitles.entity.glow_item_frame.place
|volume=1.0
|pitch=1.0
|distance=16}}
{{Sound table
|rowspan=2
|sound=Item Frame remove item1.ogg
|sound2=Item Frame remove item2.ogg
|sound3=Item Frame remove item3.ogg
|sound4=Item Frame remove item4.ogg
|subtitle=Item Frame empties
|source=neutral
|description=When an item is removed from an item frame
|id=entity.item_frame.remove_item
|translationkey=subtitles.entity.item_frame.remove_item
|volume=1.0
|pitch=1.0
|distance=16}}
{{Sound table
|subtitle=Glow Item Frame empties
|source=neutral
|description=When an item is removed from a glow item frame
|id=entity.glow_item_frame.remove_item
|translationkey=subtitles.entity.glow_item_frame.remove_item
|volume=1.0
|pitch=1.0
|distance=16}}
{{Sound table
|rowspan=2
|sound=Item Frame rotate item1.ogg
|sound2=Item Frame rotate item2.ogg
|sound3=Item Frame rotate item3.ogg
|sound4=Item Frame rotate item4.ogg
|subtitle=Item Frame clicks
|source=neutral
|description=When an item is rotated in an item frame
|id=entity.item_frame.rotate_item
|translationkey=subtitles.entity.item_frame.rotate_item
|volume=1.0
|pitch=1.0
|distance=16}}
{{Sound table
|subtitle=Glow Item Frame clicks
|source=neutral
|description=When an item is rotated in an item frame
|id=entity.glow_item_frame.rotate_item
|translationkey=subtitles.entity.glow_item_frame.rotate_item
|volume=1.0
|pitch=1.0
|distance=16
|foot=1}}
{{Edition|Bedrock}}:
{{Sound table
|type=bedrock
|sound=Item Frame add item1.ogg
|sound2=Item Frame add item2.ogg
|soumd3=Item Frame add item3.ogg
|sound4=Item Frame add item4.ogg
|source=block
|description=When an item is placed in an item frame
|id=block.itemframe.add_item
|volume=1.0
|pitch=1.0}}
{{Sound table
|sound=Item Frame remove item1.ogg
|sound2=Item Frame remove item2.ogg
|sound3=Item Frame remove item3.ogg
|sound4=Item Frame remove item4.ogg
|source=block
|description=When an item is removed from an item frame
|id=block.itemframe.remove_item
|volume=1.0
|pitch=1.0}}
{{Sound table
|sound=Item Frame rotate item1.ogg
|sound2=Item Frame rotate item2.ogg
|sound3=Item Frame rotate item3.ogg
|sound4=Item Frame rotate item4.ogg
|source=block
|description=When an item is rotated in an item frame
|id=block.itemframe.rotate_item
|volume=1.0
|pitch=1.0
|foot=1}}
== Achievements ==
{{load achievements|Map room}}
== Data values ==
=== ID ===
{{edition|java}}:
{{ID table
|edition=java
|firstcolumnname=Item
|showforms=y
|generatetranslationkeys=y
|displayname=Item Frame
|spritetype=item
|nameid=item_frame
|form=item}}
{{ID table
|displayname=Glow Item Frame
|spritetype=item
|nameid=glow_item_frame
|form=item
|foot=1}}
{{ID table
|edition=java
|firstcolumnname=Entity
|generatetranslationkeys=y
|displayname=Item Frame
|spritetype=entity
|nameid=item_frame}}
{{ID table
|displayname=Glow Item Frame
|spritetype=entity
|nameid=glow_item_frame
|foot=1}}
{{edition|bedrock}}:
{{ID table
|edition=bedrock
|firstcolumnname=Item Frame
|shownumericids=y
|showforms=y
|generatetranslationkeys=y
|displayname=Item
|spritename=item-frame
|spritetype=item
|nameid=frame
|id=513
|form=item}}
{{ID table
|displayname=Block
|spritename=item-frame
|spritetype=block
|nameid=frame
|id=199
|form=block
|translationkey=-
|itemform=item.frame}}
{{ID table
|displayname=Item
|spritename=glow-item-frame
|spritetype=item
|nameid=glow_frame
|id=623
|form=item}}
{{ID table
|displayname=Block
|spritename=glow-item-frame
|spritetype=block
|nameid=glow_frame
|form=block
|id=594
|itemform=item.glow_frame
|translationkey=-
|foot=1}}
{{ID table
|notnamespaced=y
|displayname=Block entity
|spritename=item-frame
|spritetype=block
|nameid=ItemFrame}}
{{ID table
|displayname=Block entity
|spritename=glow-item-frame
|spritetype=block
|nameid=GlowItemFrame
|foot=1}}
=== Block states===
{{see also|Block states}}
{{/BS}}<br />
===Item data===
{{el|java}}:{{main|Player.dat format}}<div class="treeview">
*{{nbt|compound|tag}}'''<span data-ve-ignore="true" class="nowrap"> tag</span>''': The item's '''tag''' tag.
{{:Player.dat_format/Entity Spawners}}Unlike spawn eggs, cannot change the type of entity created using the <code>id</code> tag. Data that item frames do not normally use (see below) has no effect.
</div>
===Entity data===
{{main|Entity format}}
{{IN|java}}, item frames have entity data that define various properties of the entity.
{{/ED}}
===Block data===
{{IN|bedrock}}, an item frame has a block entity associated with it that holds additional data about the block.
See [[Bedrock Edition level format/Block entity format]].
== Video==
<div style="text-align:center">{{yt|rJLj95DBb-w}}</div>
==History==
{{History|java}}
{{History||August 15, 2012|link={{tweet|Dinnerbone|235724805196877824}}|[[File:Item Frame (pre-release).png|32px]] [[Dinnerbone]] showed the first image of item frames.}}
{{History||August 15, 2012|link={{tweet|Dinnerbone|235742974271700993}}|[[File:Item Frame (item) (pre-release).png|32px]] Dinnerbone showed item frame in item form.}}
{{History||August 15, 2012|link={{tweet|jeb_|235746335368814592}}|[[File:Item Frame (pre-release 2).png|32px]] [[Jeb]] showed the item frames with new model.}}
{{History||August 16, 2012|link={{tweet|Dinnerbone|236062188555624448}}|[[File:Item Frame (item) JE1 BE1.png|32px]] Dinnerbone showed the item frame in item form with new texture.}}
{{History||1.4.2|snap=12w34a|[[File:Item Frame JE1 BE1.png|32px]] [[File:Item Frame (item) JE1 BE1.png|32px]] Added item frames.
|There is currently a bug where attempting to place an item frame in [[multiplayer]] causes an internal server error, as well as other bugs.}}
{{History|||snap=12w34b|The multiplayer item frame bug has been fixed.}}
{{History|||snap=12w38a|Item frames no longer despawn when the [[player]] moves 20 [[block]]s away.}}
{{History||1.7.2|snap=13w36a|Items renamed using an [[anvil]] now display their name when looked at up close.}}
{{History|||snap=13w38a|[[Map]]s placed in an item frame now cover the whole block face, allowing seamless tiling of adjacent maps. This makes undiscovered areas of maps invisible.}}
{{History|||snap=13w43a|[[File:Item Frame (map) JE1 BE1.png|32px]] Incomplete maps placed in item frames now display the item frame texture underneath.}}
{{History||1.8|snap=14w04a|[[Item]]s and [[block]]s displayed in the item frame now rotate 45 degrees when rotated instead of 90 degrees, and a [[comparator]] outputs a [[redstone]] signal depending on the rotation phase.}}
{{History|||snap=14w10a|Multiple item frames can no longer be placed on the same block face.}}
{{History||1.9|snap=15w41a|An item frame now generates in the treasure room of [[end ship]]s, above the [[shulker]] that guards the treasure. It holds [[elytra]].}}
{{History|||snap=15w49a|Item frames are no longer destroyed by [[lightning]] bolts.}}
{{History|||snap=15w50a|Added [[sound]]s to item frames: <code>entity.itemframe.add_item</code>, <code>entity.itemframe.break</code>, <code>entity.itemframe.place</code>, <code>entity.itemframe.remove_item</code>, and <code>entity.itemframe.rotate_item</code>.}}
{{History||1.11|snap=16w32a|The [[entity]] ID of item frames has been changed from <code>ItemFrame</code> to <code>item_frame</code>.}}
{{History||1.13|snap=17w47a|Prior to [[1.13/Flattening|''The Flattening'']], this [[item]]'s numeral ID was 389.}}
{{History|||snap=17w50a|Item frames can now be put on floors and ceilings.}}
{{History||1.14|snap=18w43a|[[File:Item Frame JE2 BE2.png|32px]] [[File:Item Frame (map) JE2 BE2.png|32px]] [[File:Item Frame (item) JE2 BE2.png|32px]] The textures of item frames have been changed.}}
{{History|||snap=19w11a|Item frames are now [[trading|sold]] by cartographer [[villager]]s.}}
{{History||1.15|snap=19w38a|[[File:Item Frame 19w38a.png|32px]] [[File:Item Frame Map 19w38a.png|32px]] Item frames now appear dark, same as suffocating [[mob]]s.<ref>{{bug|mc-161283|||Fixed}}</ref>}}
{{History|||snap=19w39a|Item frames are now colored correctly.}}
{{History||1.16|snap=20w10a|The NBT <code>Invisible</code> and <code>Fixed</code> have been added to item frames.}}
{{History||1.17|snap=21w03a|[[File:Glow Item Frame JE1 BE3.png|32px]] [[File:Glow Item Frame (map) JE1 BE3.png|32px]] [[File:Glow Item Frame (item) JE1 BE1.png|32px]] Added glow item frames.}}
{{History|||snap=21w10a|Added new [[subtitles]] for glow item frames.}}
{{History||1.18|snap=21w41a|[[File:Item Frame (item) JE3.png|32px]] [[File:Glow Item Frame (item) JE2.png|32px]] The textures of item frames and glow item frames as item have been changed.}}
{{History||1.19|snap=22w15a|Item frames now adjusts its hitbox to account for the larger size of a framed [[map]].}}
{{History|||snap=Pre-release 3|Reverted the change in 22w15a.}}
{{History|pocket alpha}}
{{History||v0.14.0|snap=build 1|[[File:Item Frame JE1 BE1.png|32px]] [[File:Item Frame (map) JE1 BE1.png|32px]] [[File:Item Frame (item) JE1 BE1.png|32px]] Added item frames.
|Item frames are considered as a [[block entity]] instead of an [[entity]].<ref>{{tweet|_tomcc|690127591525728257|Let's create some drama: ItemFrames in MCPE will behave like signs and won't be placeable in blocks, and can't put many in the same block.|21 Jan 2016}}</ref>}}
{{History|pocket}}
{{History||1.0.0|snap=alpha 0.17.0.1|An item frame containing [[elytra]] now generates in [[end city]] ships.}}
{{History|bedrock}}
{{History||1.10.0|snap=beta 1.10.0.3|[[File:Item Frame JE2 BE2.png|32px]] [[File:Item Frame (map) JE2 BE2.png|32px]] [[File:Item Frame (item) JE2 BE2.png|32px]] The textures of item frames have been changed.}}
{{History||1.11.0|snap=beta 1.11.0.4|Item frames can now be [[trading|bought]] from cartographer [[villager]]s.}}
{{History||1.13.0|snap=beta 1.13.0.9|Item frames can now be placed on the top and bottom of [[block]]s.}}
{{History||1.16.0|snap=beta 1.16.0.57|Trading has been changed, item frames are now offered by expert-level cartographer villager.}}
{{History||Caves & Cliffs (experimental)|link=Bedrock Edition 1.17.0|snap=beta 1.16.210.59|[[File:Item Frame.png|32px]] [[File:Item Frame (map) JE2 BE2.png|32px]] [[File:Glow Item Frame (item) JE1 BE1.png|32px]] Added glow item frames.
|Has the default item frame block texture.}}
{{History|||snap=beta 1.16.210.60|Temporarily removed glow item frames due to a crash.}}
{{History|||snap=beta 1.16.220.50|[[File:Item Frame JE2 BE2.png|32px]] [[File:Item Frame (map) JE2 BE2.png|32px]] [[File:Glow Item Frame (item) JE1 BE1.png|32px]] Re-added glow item frames.}}
{{History|||snap=beta 1.16.220.52|[[File:Glow Item Frame BE2.png|32px]] [[File:Glow Item Frame (map) BE2.png|32px]] Glow Item Frame block texture uses update block texture due to a bug.}}
{{History||1.17.0|snap=beta 1.16.230.52|[[File:Item Frame.png|32px]] [[File:Item Frame (map) JE2 BE2.png|32px]] The glow item frame block textures have been reverted back to the previous one.}}
{{History|||snap=beta 1.17.0.50|[[File:Glow Item Frame JE1 BE3.png|32px]] [[File:Glow Item Frame (map) JE1 BE3.png|32px]] The textures of glow item frames have been changed to match Java Edition.
|Now produces [[redstone]] signals.}}
{{History|||snap=beta 1.17.0.52|Maps now glow in glow item frames.
|Glow Item Frames are no longer available only through [[Experimental Gameplay]].}}
{{History||1.18.10|snap=beta 1.18.10.20|[[File:Item Frame (item) JE3.png|32px]] [[File:Glow Item Frame (item) JE2.png|32px]] The textures of item frames and glow item frames as item have been changed.}}
{{History|console}}
{{History||xbox=TU9|xbone=CU1|ps=1.0|wiiu=Patch 1|switch=1.0.1|[[File:Item Frame LCE1.png|32px]] [[File:Item Frame (item) JE1 BE1.png|32px]] Added item frames.}}
{{History||xbox=TU11|The limit for item frames in a world has been increased. A message is now displayed when the maximum number of item frames are reached.}}
{{History||xbox=TU12|[[File:Item Frame JE1 BE1.png|32px]] The entity texture of item frames has been changed.}}
{{History||xbox=TU31|xbone=CU19|ps=1.22|wiiu=Patch 3|[[Item]]s and [[block]]s displayed in the item frame now rotate 45 degrees when rotated instead of 90 degrees, and a [[redstone comparator|comparator]] now outputs a [[redstone]] signal depending on the rotation phase.}}
{{History||xbox=TU43|xbone=CU33|ps=1.36|wiiu=Patch 13|Added [[sound]]s for item frames.}}
{{History||xbox=TU56|xbone=CU47|ps=1.55|wiiu=Patch 26|switch=1.0.6|If the [[item]] in the item frame has a name (from an [[anvil]]) it now shows as if there is a name tag on the item frame.}}
{{History||xbox=none|xbone=none|ps=1.90|wiiu=none|switch=none|[[File:Item Frame JE2 BE2.png|32px]] [[File:Item Frame (map) JE2 BE2.png|32px]] [[File:Item Frame (item) JE2 BE2.png|32px]] The textures of item frames have been changed.}}
{{History|new 3ds}}
{{History||0.1.0|[[File:Item Frame JE1 BE1.png|32px]] [[File:Item Frame (map) JE1 BE1.png|32px]] [[File:Item Frame (item) JE1 BE1.png|32px]] Added item frames.}}
{{History|foot}}
== Issues==
{{issue list}}
== Trivia==
*The item frame is based upon a suggestion on [[wikipedia:Reddit|Reddit]], like the [[ender chest]] and [[flower pot]].<ref>{{Tweet|dinnerbone|235747041286975488}}</ref>
*The item frame is the only entity to reference a block [[model]].{{only|java|short=1}} Because of this, the texture of the frame border is the same as the birch planks texture.
*Item frame is the '''only''' placeable item that can interfere with other non-full block entities.
*Due to the way layer textures are displayed in Minecraft, maps float on item frames, similar to how icons float on the map itself.
== Gallery ==
=== Renders ===
<gallery>
Item Frame.png | Item Frame
Item Frame (map).png | Map Item Frame
Glow Item Frame.png | Glow Item Frame
Glow Item Frame (map).png | Map Glow Item Frame
Item Frame with Item.png | With item
Item Frame with rotated Item.png | With rotated item
Item Frame with Block.png | With block
Item Frame with rotated Block.png | With rotated block
</gallery>
=== Screenshots ===
<gallery>
Slab Frame.png|An item frame on the side of a slab.
ItemFrameBoxed.png|Four item frames in a one-block space.{{only|java}}
Item Frames Woodbase.png|The frame itself uses the texture of birch planks.
Item Frame rotation.gif|The rotation of an item in an item frame.
Front-back-itemframe.png|The front and back of an item frame are the same.
Big skills right there.png|A glow item frame inside a glow item frame.
Frame fireplace.png|An image of a fireplace retweeted by Dinnerbone.
11 Framed.png|[[11]] in an item frame.
</gallery>
=== Development images ===
<gallery>
Suggestion for itemframes.png|Original Reddit image suggesting item frames and flower pots.
Item frame2.png|Dinnerbone's first screenshot showing armor and weapons.
Item frame3.png|Dinnerbone's second screenshot showing a map, a compass, and two diamond swords.
Item frame4.png|Dinnerbone's third screenshot showing a golden sword in all directions, the item frame item itself, and a working clock.
Item frame1.png|Jeb's screenshot of the item frame.
FlowerPot.png|Snapshot showing plant pots and item frames.
Item frame5.png|Snapshot image of an ender pearl in an item frame.
SOATPC.png|An image tweeted by Dinnerbone showing how hovering over an item frame containing a renamed item shows a name tag.
Pocket Edition Item Frames.jpg|First image of item frames in ''Bedrock Edition''.
</gallery>
== See also ==
*{{ItemLink|Painting}}
== References ==
{{Reflist}}
{{Blocks|Utility}}
{{items}}
{{entities}}
[[Category:Block entities]]
[[Category:Utility blocks]]
[[Category:Manufactured blocks]]
[[Category:Generated structure blocks]]
[[Category:Storage]]
[[cs:Rámeček]]
[[de:Rahmen]]
[[es:Marco]]
[[fr:Cadre]]
[[hu:Eszköz keret]]
[[it:Cornice]]
[[ja:額縁]]
[[ko:아이템 액자]]
[[nl:Voorwerplijst]]
[[pl:Ramka na przedmiot]]
[[pt:Moldura]]
[[ru:Рамка]]
[[th:กรอบโชว์สิ่งของ]]
[[zh:物品展示框]]</li></ul> | The player skin originally had a beard, which was removed in this version. | ||||||||||||||||||||||||||||||||||
| Java Edition Alpha | |||||||||||||||||||||||||||||||||||
v1.2.2{{Extension DPL}}<ul><li>[[Hopper|Hopper]]<br/>{{About|the block|the crash utility|Hopper (crash utility)}}
{{Block
|image=<gallery>
Hopper (D).png|Java
Hopper (D) BE.png|Bedrock
</gallery>
|extratext = View [[#Gallery|all renders]]
|transparent=Yes
|light=No
|tool=wooden pickaxe
|renewable=Yes
|stackable=Yes (64)
|flammable=No
|lavasusceptible=No
}}
A '''hopper''' is a low-capacity storage [[block]] that can be used to collect [[item (entity)|item entities]] directly above it, as well as to transfer [[item]]s into and out of other containers. A hopper can be locked with [[Redstone Dust|redstone power]] to stop it from moving items into or out of itself.
== Obtaining ==
=== Breaking ===
To obtain a hopper, {{control|mine}} it with a [[pickaxe]]. Using any other item to mine a hopper drops only its contents.
{{breaking row|horizontal=1|Hopper|Pickaxe|Wood|foot=1}}
===Crafting===
A hopper can be crafted from 5 iron ingots and a chest.
{{Crafting
|A1= Iron Ingot
|C1= Iron Ingot
|A2= Iron Ingot
|B2= Chest
|C2= Iron Ingot
|B3= Iron Ingot
|Output= Hopper
|type= Redstone
}}
==Usage==
{{see also|Tutorials/Hopper}}
[[File:Hopper aligment.png|Hoppers can face down or sideways.|thumb]]
A hopper can be used as a container, as a crafting ingredient, and as a redstone component.
A hopper has an "output" tube at its bottom that can face down or sideways and provides a visual indication of which block the hopper is set up to drop its items into, if that block has an inventory. To place a hopper, use the {{control|Place Block}} control while aiming at the surface to which its output should face (Hoppers ''do not'' orient themselves automatically). To place a hopper directly on the face of an already interactable block, the player can {{control|sneak}} while placing the hopper. Attempting to place a hopper aimed on the bottom face of a block instead faces downward. With some blocks, such as the [[furnace]] and [[brewing stand]], the hopper has multiple uses. A hopper does not change direction after placement, and it is not attached to the container it faces; the container can be removed or replaced, and the hopper remains unchanged.
Hoppers cannot be moved by [[piston]]s.{{only|java}} Despite not being a solid block, attached blocks such as [[rail]]s, [[lever]]s, [[tripwire]] and [[redstone]] dust can be placed on top of hoppers, but not on their sides.
===Container===
[[File:Hopper GUI.png|thumb|176px|Hopper GUI showing the hopper's five slots of inventory at the top and the player's inventory below.]]
A hopper can be used as a container and has 5 slots of inventory space.
To open the hopper GUI, use the {{control|use item|text=Use Item/Place Block}} [[control]]. To move items between the hopper inventory and the player inventory or hotbar while the hopper GUI is open, drag or shift-click the items. To exit the hopper GUI, use the {{key|Esc}} key, B button or circle button, depending on the device.
By default, the GUI of a hopper is labeled "Item Hopper". A hopper's GUI label can be changed by naming the hopper in an [[anvil]] before placing it, or, {{in|java}}, by using the [[Commands#data|data]] command (for example, to label a hopper at (0,64,0) "Steve's Hopper", use <code>/data merge block 0 64 0 {CustomName:'"Steve's Hopper"'}</code>).
{{IN|java}}, a hopper's GUI can be "locked" (or subsequently unlocked) by setting the hopper's <code>Lock</code> tag with the [[Commands#data|data]] command. If a hopper's <code>Lock</code> tag is not blank, the hopper cannot be accessed except by players holding an item with the same name as the <code>Lock</code> tag's text. For example, to lock a hopper at (0,64,0) so that only players holding an item named "Steve's Key" can access the hopper, use <code>/data merge block 0 64 0 {Lock:"Steve's Key"}</code>.
===Crafting ingredient===
A hopper can be used to craft a [[minecart with hopper]].
{{crafting usage}}
===Redstone component===
{{see also|Redstone circuit|Redstone components#Hopper}}
[[File:Hopper logic flowchart.png|thumb|Flowchart of hopper logic]]
While a hopper is ''not'' powered by redstone signals, it operates with three functions:
*'''Collect''' [[Item (entity)|item entities]] (free-floating items in the world) into its inventory from the space above it
*'''Pull''' a single item into its inventory from a container above it
*'''Push''' a single item from its own inventory into a container it faces
A hopper first attempts to push any items inside it. Afterward, it checks if the block above it is a type of container. If so, it attempts to pull from it. Otherwise, the hopper attempts to collect item entities. Notably, hoppers can push to and pull from other hoppers, forming '''hopper pipes''' or '''hopper chains''', which allow transporting items across several blocks and are further discussed below.
====Redstone signals====
When a hopper receives a redstone signal (and is considered to be "activated"), all three functions stop. To avoid confusion over the terms "activated" and "deactivated", powered hoppers are often described as being '''locked''' and unpowered hoppers described as being '''unlocked'''. Hoppers can be powered by [[Redstone_mechanics#Power|soft powered]] blocks, meaning a [[redstone dust]] trail pointing into a block touching the hopper locks it just as effectively as a [[redstone block]] or any other [[Redstone components#Power components|power component]] touching the hopper. When the hopper is unlocked during a redstone tick, it does not push or pull/collect during the same tick, but has a delay of 1 redstone tick instead.
While a locked hopper does not push or pull/collect items, it may still receive items from [[dispenser]]s, [[dropper]]s and other hoppers, and may have its items pulled out by another hopper beneath it. Hence, the item flow in a horizontal hopper pipe may be stopped by locking just one of the hoppers, but stopping a vertical hopper pipe requires locking two adjacent hoppers at the same time, such that both the pushing of the top one and the pulling of the bottom one are stopped.
A hopper does not output any redstone signals by itself, but its fullness can be read using a [[Redstone Comparator|redstone comparator]], which needs to be placed next to it and facing away from it. An empty hopper outputs a signal strength of 0 and a completely full hopper outputs a signal strength of 15. Notably, a single stackable item (16 or 64) outputs a signal strength of 1 and a single non-stackable item outputs a signal strength of 3.
{{IN|Java}}, if the hopper being read is part of a horizontal hopper pipe, the comparator can individually read each item passing through the chain, because items are pushed through the hoppers one by one at a speed that is manageable by the comparator. If there is an uninterrupted stream of items, the comparator does not switch off in between items. On the other hand, in a vertical hopper pipe, some of the hoppers may never produce a reading above 0, even with a continuous stream of items, because pushes and pulls both occur in the same game tick: The hoppers' items get pulled out a single game tick after they're pushed in and this isn't measurable by a comparator, because comparators need measurements lasting at least 1.5 redstone ticks to produce a reading.
====Collecting items====
A hopper collects items dropped on top of it if the space above the hopper not occupied by a storage block. Items are gathered from the entire 1 block space above the hopper, meaning that items sitting on partial blocks such as [[soul sand]] directly above a hopper can be collected.<ref>https://bugs.mojang.com/browse/MCPE-55824</ref> It is also possible for a hopper to collect items from inside a full, solid block, a situation that might come from items rising up through solid blocks or being [[commands/summon|summoned]]. Item entities are not collected when they are outside of the collection area however; for example, items on top of a stone block directly above a hopper are not collected. Collected items are placed in the leftmost empty slot of a hopper's inventory.
{{IN|java}}, if there is no container above the hopper, then the hopper collects dropped items in the order in which they landed on the hopper. This order is remembered even while a hopper is locked. For instance, if a hopper is locked under a carpet while a fully equipped [[armor stand]] is broken above it, then it always collects items in this order when it is unlocked: [[armor stand]], [[boots]], [[leggings]], [[chestplates]], [[helmets]]. This is due to the order in which these items land.{{Verify|Wouldn't this be due to the order in which the game creates the item entities that drop drop from the armor stand?}} {{IN|Bedrock}}, hoppers do not remember the order in which items land on the hopper. Instead, hoppers with multiple dropped items above them collect the items in the order in which they entered the chunk in which the hopper is located. Items that drop from a broken armor stand are collected in a random order.<ref>https://bugs.mojang.com/browse/MCPE-120586</ref>
Hoppers usually check for dropped items every [[game tick]] and they can collect items even before they are picked up by a [[player]]{{Verify|Does this happen always, or sometimes, and in Java only or also in Bedrock?}} or destroyed by [[lava]]. However, {{In|Bedrock}} hoppers have a "collection cooldown" time. After collecting an item (or stack of items), a hopper waits {{tooltip|4 redstone ticks|8 game ticks}} (0.4 seconds, barring lag) before attempting to collect again.
Hoppers collect groups of items all at once rather than collecting them as single items one at a time. As a result, hoppers can collect item entities much faster than they can pull items from a container. Pulling from a moving [[minecart with chest]] or [[minecart with hopper]] is even slower, since the minecart is not always above the hopper.
====Pushing and pulling items====
A hopper with a storage container above it (such as a [[furnace]], [[chest]], [[dropper]], [[composter]], or another hopper) attempts to pull from the container instead of checking for floating items above it, and hence can not collect items. A hopper always tries to push or pull items using the leftmost available slot. When a hopper is removing items from a chest, the items disappear from left to right. Similarly, when filling up a chest, the chest fills up from left to right. Hoppers prioritize pulling from the first slot of a container over pulling into the first hopper slot. If a hopper has stone in its first slot and nothing in its second while the container it is pulling from has chicken in its first slot but stone in the second, the hopper pulls the chicken from the first slot of the container into its empty second slot. However, if the hopper is unable to pull the chicken, such as if all slots are filled with stone, the hopper pulls the stone from the second slot of the container instead. Similarly, hoppers prioritize pushing from their first slot over pushing into the first slot of a container. If a hopper has stone in its first slot and chicken in its second while the container it is pushing to has chicken it its first slot but stone in the second, the hopper pushes stone from its first slot into the second slot of the container.
In [[Java Edition]] the checks done by a hopper while pulling generally require less processing than the checks done by a hopper attempting collection. Therefore, a chain of hoppers topped with storage containers rather than air/solid blocks has better performance (measured as milliseconds of processing per tick) and lower potential for processing lag. <ref name=":0">https://www.youtube.com/watch?v=LC3ZOOI1Rf0</ref> The performance improvement achieved is correlated with the number of storage slots the container has. Placing composters (with no storage slots but still with custom output logic) on top of hoppers provide the greatest efficiency, while double chests actually degrade performance, even when sharing each double chest across two hoppers.<ref name=":0" /> In [[Bedrock Edition]] a chain of hoppers with air or non-container blocks on top has better performance than a chain of hoppers topped by container blocks.<ref>https://cdn.discordapp.com/attachments/715523208530362389/890030941282631741/Redstone_MSPT_measure.xlsx</ref> This may be because, even though hoppers with containers on top do not check for items, they do check for hopper-minecarts and chest-minecarts to pull from, and that involves scanning the chunk entity list.<ref>{{bug|MCPE-109449}}</ref>
{{Schematic|caption='''Push then Pull'''
Chest A is full of items while the hopper and Chest B are empty.
|ch-$+A||-
|ho-$e|ch-$+B
}}
Item pushes and pulls are processed in the same game tick, but pushes are processed before pulls. In the schematic, the empty hopper first pulls an item from chest A as it cannot push anything into chest B. After the cooldown, the hopper first pushes its item into chest B before pulling another item from chest A, both pushing and pulling in the same tick, and the process repeats. The hopper stops pulling when A is empty, and stops pushing when B becomes full.
Hoppers also have a "transfer cooldown" time. After pulling and/or pushing items, a hopper waits {{tooltip|4 redstone ticks|8 game ticks}} (0.4 seconds, barring lag) before pulling or pushing again (a transfer rate of 2.5 items per second, barring lag). A hopper that has an item pushed into it from another hopper also starts a 4 tick cooldown period, regardless of whether it pushed or pulled items itself. Item entities can be collected at any time without affecting the transfer cooldown time. The transfer cooldown and the Bedrock Edition collection cooldown are independent of each other.
====Container interactions====
Some [[container]]s interact with hoppers in specific ways:
:;{{BlockLink|Composter}}
::Hoppers above composters can push compostable items into the composter's top face with a chance of increasing the level of the composter as if the player used the item on the composter. Items that are not compostable cannot be pushed into the composter. Hoppers below the composter can pull [[bone meal]] when the composter is in stage 8, emptying the composter and resetting it to stage 0. Hoppers to the side of a composter do not interact with it.
:;{{BlockLink|Brewing Stand}}
::A working hopper on the top face of a brewing stand deposits only into the ingredient slot and it can push only valid [[brewing]] ingredients. A hopper on side face of a brewing stand can deposit only [[blaze powder]] or filled bottles into the three brew slots. A hopper underneath a brewing stand always extracts from the three brew slots, whether brewing is finished or not—The hopper must be locked to allow potions to finish brewing.
:;{{BlockLink|Chest}}
:;{{BlockLink|Trapped Chest}}
::Large chests and large trapped chests are treated as a single container: A hopper depositing into a large chest fills up the entire chest and a hopper underneath a large chest empties the entire chest. Trapped chests being accessed by a player lock any adjacent hoppers, per the standard behavior of a hopper next to an active power source.
:;{{BlockLink|Furnace}}
:;{{BlockLink|Blast Furnace}}
:;{{BlockLink|Smoker}}
::A working hopper pointing into top of a furnace deposits only into the ingredient slot. It can push any item, including items that can't be smelted by the furnace. A hopper pointing into the side of a furnace deposits into the fuel slot, and only items that are usable as fuel. A hopper below a furnace pulls everything from the output slot and empty [[bucket]]s from the fuel slot left over from using [[lava bucket]]s as fuel. When a hopper removes items from a furnace, the experience points are 'stored' in the furnace until a player removes at least one smelted item, or the furnace block is broken.
:;{{BlockSprite|Hopper}} Hopper
::A sequence of three or more hoppers, each pushing items into the next, is called a '''hopper pipe'''. Working horizontal hopper pipes simply push items into each other at the expected rate of 2.5 items per second, but vertical hopper pipes are more complicated, as the hoppers are trying both to pull and to push. When a vertical pipe pulls from a single container, it simply transfers items at 2.5 items per second because the transfer rate is limited by the first hopper pulling items from the container. If a ''stack of items'' is in a vertical pipe, the items can be transferred twice as fast, because the hopper with the item stack is pushing items down while the hopper below it is also pulling items down.
:;{{EntityLink|Minecart with Chest}}
:;{{EntityLink|Minecart with Hopper}}
::Unlocked hoppers fill chest minecarts and hopper minecarts if any part of the entity's hitbox is within the hopper's target block-space. Hopper minecarts try to pull items from the hopper at high speed. Hoppers can pull items from minecarts above them so rails can be placed directly on the top faces of a hoppers. If a [[detector rail]] is in the right position, it could lock the hopper per standard redstone-hopper behavior.
:;{{BlockLink|Jukebox}}
::Hoppers can insert [[music disc]]s into jukeboxes, and extract the music discs after they finish playing.
:;{{BlockLink|Shulker Box}}
::Hoppers cannot put shulker boxes into other shulker boxes. This allows for the creation of certain [[Tutorials/Hopper#Potions and shulker boxes|item filters]].
::Otherwise, hoppers interact with shulker boxes normally.
:;{{BlockLink|Lectern}}
::Hoppers cannot remove or place books on lecterns. The redstone pulse emitted from a lectern when a page is turned can temporarily lock hoppers.
:;{{BlockLink|Ender Chest}}
::Hoppers cannot interact with ender chests in any way.
:;{{BlockLink|Barrel}}
:;{{BlockLink|Dispenser}}
:;{{BlockLink|Dropper}}
:;{{EntityLink|Boat with Chest}}
::Hoppers interact normally with barrels, dispensers, droppers, and boats with chests.
:;{{BlockLink|Chiseled Bookshelf}}
::Hoppers and minecart with hoppers can insert and remove books from the bookshelf. As with any other container, items are taken from the first slot that has an item that can fit in the hopper and are inserted into the first empty slot.
==Sounds==
===Generic===
{{Sound table/Block/Metal}}
===Unique===
{{Edition|Java}}:
{{Sound table
|sound=Door close.ogg
|sound2=Door open.ogg
|subtitle=Chest locked<ref group=sound name=lock>{{Bug|MC-98316||Wrong subtitles caused by missing distinction}}</ref>
|source=block
|description=When a player attempts to open a hopper locked using the {{nbt|string|Lock}} tag
|id=block.chest.locked|idnote=<ref group=sound name=lock/>
|translationkey=subtitles.block.chest.locked|translationkeynote=<ref group=sound name=lock/>
|volume=1.0
|pitch=1.0
|distance=16
|foot=1}}
{{Edition|Bedrock}}: ''None''
==Data values==
===ID===
{{edition|java}}:
{{ID table
|edition=java
|showforms=y
|generatetranslationkeys=y
|displayname=Hopper
|spritetype=block
|nameid=hopper
|foot=1}}
{{ID table
|displayname=Block entity
|spritename=hopper
|spritetype=block
|nameid=hopper
|foot=1}}
{{edition|bedrock}}:
{{ID table
|edition=bedrock
|firstcolumnname=Hopper
|shownumericids=y
|showforms=y
|generatetranslationkeys=y
|displayname=Block
|spritename=hopper
|spritetype=block
|nameid=hopper
|id=154
|form=block
|itemform=item.hopper}}
{{ID table
|displayname=Item
|spritename=hopper
|spritetype=item
|nameid=hopper
|id=527
|form=item
|translationkey=tile.hopper.name
|foot=1}}
{{ID table
|notnamespaced=y
|displayname=Block entity
|spritename=hopper
|spritetype=block
|nameid=Hopper
|foot=1}}
===Block states===
{{see also|Block states}}
{{/BS}}
===Block data===
A hopper has a block entity associated with it that holds additional data about the block.
{{el|java}}:
{{see also|Block entity format}}
{{/BE}}
{{el|bedrock}}:
:See [[Bedrock Edition level format/Block entity format]].
==Achievements==
{{load achievements|Freight Station;Smelt Everything}}
==Video==
<div style="text-align:center">{{yt|XO0IKUsGiG8}}</div>
==History==
{{History|java}}
{{History||1.5|snap=13w01a|[[File:Hopper (D) JE1.png|32px]] [[File:Hopper (N) JE1.png|32px]] [[File:Hopper (E) JE1.png|32px]] [[File:Hopper (S) JE1.png|32px]] [[File:Hopper (W) JE1.png|32px]] [[File:Hopper (U) JE1.png|32px]] Added hoppers.
|Hoppers with the [[damage]] value of 1, which are obtainable only through world editing, visually point in no direction. They functionally push items upward, however the behavior is inconsistent.
|[[File:Hopper (item) JE1.png|32px]] There is currently a temporary "work in progress" sprite for hoppers in the [[inventory]].
|Hoppers can be [[crafting|crafted]] from a [[chest]] and [[stone]] blocks with the following recipe:
{{{!}} class{{=}}"collapsible collapsed"
! Recipe
{{!}}-
{{!}}
{{Crafting Table
|A1= Stone
|C1= Stone
|A2= Stone
|B2= Chest
|C2= Stone
|B3= Stone
|Output= Hopper
}}
{{!}}}
}}
{{History|||snap=13w01b|[[Rail]]s can now be placed on top of hoppers.
|Hoppers no longer load [[item]]s into [[minecart]]s without [[chest]]s.}}
{{History|||snap=13w02a|[[File:Hopper (item) JE2 BE1.png|32px]] The [[inventory]] sprite of hoppers has been changed.
|[[File:Hopper (item) 13w02a.png|32px]] However, the [[item]] of hoppers appears bugged if [[drops|dropped]] or placed in an [[item frame]].<ref>{{bug|MC-6737}}</ref> This may be due to the game attempting to pull the item sprite from the hopper's equivalent spot in <samp>[[stitched_terrain.png]]</samp> (compare files: [[:File:13w02a stitched terrain.png|terrain]], [[:File:13w02a stitched items.png|items]]), a region which contains parts of the oak planks, end stone and iron bars textures.
|Applying a [[redstone]] signal to a hopper now deactivates the hopper until the signal is removed.
|Hoppers can no longer be used as [[fuel]] in a [[furnace]].
|Hoppers are now [[crafting|crafted]] using 5 [[iron ingot]]s rather than 5 [[stone]] blocks.
{{{!}} class{{=}}"collapsible collapsed"
! Recipe
{{!}}-
{{!}}
{{Crafting
|A1= Iron Ingot
|C1= Iron Ingot
|A2= Iron Ingot
|B2= Chest
|C2= Iron Ingot
|B3= Iron Ingot
|Output= Hopper
}}
{{!}}}
|Hoppers now pull only from the output slot of [[furnace]]s.
|Hoppers now output 1 signal strengh per 1/3 of a stack (21 [[item]]s) when interacting with a [[redstone comparator]].
|[[File:Hopper (D) JE2.png|32px]] [[File:Hopper (N) JE2.png|32px]] [[File:Hopper (E) JE2.png|32px]] [[File:Hopper (S) JE2.png|32px]] [[File:Hopper (W) JE2.png|32px]] [[File:Hopper (U) JE2.png|32px]] The texture of hoppers has been given a unique texture. Hoppers no longer use the [[cauldron]] texture. Note that the top texture does not rotate with facing direction.
|The preferred tool is now a pickaxe, rather than the axe.}}
{{History|||snap=13w02b|Hoppers now treat large [[chest]]s properly, no longer needing two hoppers connected to them to fill up the entire [[inventory]].
|Hoppers no longer take [[item]]s from containers when powered via a [[redstone]] current.
|Hoppers now display correctly as a [[drops|dropped]] or [[item frame|frame]] [[item]].}}
{{History|||snap=13w03a|Hoppers are now used to [[crafting|craft]] a [[minecart with hopper]].
|Hoppers can now empty a [[minecart with hopper]].}}
{{History|||snap=13w04a|The transfer rate of hoppers has been changed from 7 to 8 [[game tick]]s per [[item]] (2.5 items per second).}}
{{History||1.5.1|snap=pre|Hoppers now take empty [[bucket]]s out of furnace fuel slots.}}
{{History||1.7.2|snap=release|[[File:Hopper (D) JE3.png|32px]] [[File:Hopper (N) JE3.png|32px]] [[File:Hopper (E) JE3.png|32px]] [[File:Hopper (S) JE3.png|32px]] [[File:Hopper (W) JE3.png|32px]] [[File:Hopper (U) JE3.png|32px]] The UV of all blocks is broken on certain sides as a result of {{bug|MC-37106}} (few cases are listed on the wiki so far - this is a future project). This includes hoppers.}}
{{History||1.7.4|snap=13w47a|[[File:Hopper (D) JE4.png|32px]] [[File:Hopper (N) JE4.png|32px]] [[File:Hopper (E) JE4.png|32px]] [[File:Hopper (S) JE4.png|32px]] [[File:Hopper (W) JE4.png|32px]] [[File:Hopper (U) JE4.png|32px]] MC-37106 has been fixed, reverting hoppers to their pre-1.7.2 appearences.}}
{{History|||snap=13w48a|This version fixed {{bug|MC-190}}, which hoppers were allegedly subject to since their introduction. However, a comparison of hopper UV in 13w02a and 14w08a failed to reveal any visible differences, even accounting for the example images on the ticket. More research is needed on this matter.}}
{{History||1.8|snap=?|Hoppers no longer generate [[multiplayer]] lag when idle.}}
{{History|||snap=14w10a|[[File:Hopper (D) JE5.png|32px]] [[File:Hopper (N) JE5.png|32px]] [[File:Hopper (E) JE5.png|32px]] [[File:Hopper (S) JE5.png|32px]] [[File:Hopper (W) JE5.png|32px]] [[File:Missing Model JE2.png|32px]] Hoppers now use block models rather than having a hardcoded shape. This brings multiple changes: the inside texture now rotates with the hopper rather than being constant, the inside planes of hoppers are now shaded/have ambient occlusion, and some minor UV changes have occurred, notably on the smallest cuboid. The directionless hopper also [[Missing model|no longer has a model]].}}
{{History|||snap=14w26a|The directionless hopper has been removed.}}
{{History|||snap=14w31a|Hoppers now no longer use wood [[sound]]s.<ref>{{bug|MC-5991}}</ref>}}
{{History||1.9|snap=15w33c|A hopper now generates as a part of the [[end ship]] in the [[end city|end cities]].}}
{{History|||snap=15w41a|End ships no longer contain a hopper.}}
{{History|||snap=15w43a|[[Loot table]]s have been added; hoppers can now use loot tables.}}
{{History|||snap=15w43c|[[File:Hopper (D) JE6.png|32px]] [[File:Hopper (N) JE6.png|32px]] [[File:Hopper (E) JE6.png|32px]] [[File:Hopper (S) JE6.png|32px]] [[File:Hopper (W) JE6.png|32px]] The UV on the hopper model has changed, resulting in minor differences, particularly to the smallest cuboid. This is likely due to the fix for {{bug|MC-73401}}.}}
{{History|||snap=15w44a|[[File:Hopper (D) JE7.png|32px]] [[File:Hopper (N) JE7.png|32px]] [[File:Hopper (E) JE7.png|32px]] [[File:Hopper (S) JE7.png|32px]] [[File:Hopper (W) JE7.png|32px]] A mapping issue introduced in the previous snapshot for the sides of the large funnel region has been fixed. This may be due to the fix for {{bug|MC-50344}}.}}
{{History||1.9.1|snap=pre1|A hopper can now push into and pull [[item]]s from a blocked [[chest]].}}
{{History||1.13|snap=17w47a|Prior to [[1.13/Flattening|''The Flattening'']], this [[block]]'s numeral ID was 154.}}
{{History||1.14|snap=18w43a|[[File:Hopper (D) JE8.png|32px]] [[File:Hopper (N) JE8.png|32px]] [[File:Hopper (E) JE8.png|32px]] [[File:Hopper (S) JE8.png|32px]] [[File:Hopper (W) JE8.png|32px]]<br>[[File:Hopper (item) JE3 BE2.png|32px]] The textures of hoppers have been changed.}}
{{History|||snap=19w03c|Hoppers now use correct cullface arguments, and some redundant faces have also been deleted.}}
{{History||1.19|snap=22w13a|Hoppers no longer drop when breaking a [[minecart with hopper]].}}
{{History||1.19.4|snap=23w07a|Hoppers can now interact with jukeboxes.}}
{{History|pocket alpha}}
{{History||v0.14.0|snap=build 1|[[File:Hopper (D) JE2.png|32px]]{{verify|Is this model correct?}}<br>[[File:Hopper (item) JE2 BE1.png|32px]] Added hoppers. Upward hoppers also exist.}}
{{History||v0.15.0|snap=build 1|Hoppers can now be moved by [[piston]]s.}}
{{History|bedrock}}
{{History||1.10.0|snap=beta 1.10.0.3|[[File:Hopper (D) BE.png|32px]] [[File:Hopper (N) BE.png|32px]] [[File:Hopper (E) BE.png|32px]] [[File:Hopper (S) BE.png|32px]] [[File:Hopper (W) BE.png|32px]] [[File:Hopper (U) BE.png|32px]]<br>[[File:Hopper (item) JE3 BE2.png|32px]] The textures of hoppers have been changed.}}
{{History||1.19.70|snap=beta 1.19.70.20|Hoppers can now collect items through all blocks that have a lower height than a full block.}}
{{History|console}}
{{History||xbox=TU19|xbone=CU7|ps=1.12|wiiu=Patch 1|switch=1.0.1|[[File:Hopper (D) JE2.png|32px]]{{verify|Is this model correct?}}<br>[[File:Hopper (item) JE2 BE1.png|32px]] Added hoppers.}}
{{History||xbox=none|xbone=none|ps=1.90|wiiu=none|switch=none|[[File:Hopper (D) JE8.png|32px]]{{verify|Is this model correct?}}<br>[[File:Hopper (item) JE3 BE2.png|32px]] The textures of hoppers have been changed.}}
{{History||ps=1.91|Hoppers can now fill [[composter]]s.}}
{{History|new 3ds}}
{{History||0.1.0|[[File:Hopper (D) JE2.png|32px]]{{verify|Is this model correct?}}<br>[[File:Hopper (item) JE2 BE1.png|32px]] Added hoppers.}}
{{History|foot}}
==Issues==
{{Issue list}}
==Trivia==
* A [[wikipedia:Hopper (particulate collection container)|real-world hopper]] is a large, pyramidal or cone-shaped container used in industrial processes to hold particulate matter, like dust, gravel, nuts, seeds, etc., and can then dispense them from the bottom.
* A hopper can transfer 9000 items per hour, or 150 items per minute.
==Gallery==
=== Renders ===
<gallery>
Hopper (N).png
Hopper (E).png
Hopper (S).png
Hopper (W).png
</gallery>
<gallery>
Hopper (N) BE.png
Hopper (E) BE.png
Hopper (S) BE.png
Hopper (W) BE.png
</gallery>
=== Screenshots ===
<gallery>
File:Hopper screenshot 1.png|In snapshot 13w01a, the hopper item uses a 'WIP' sprite, though the item still read "Hopper".
File:13w02a Banner.png|The 13w02a Banner includes a [[minecart with TNT]] and a hopper.
</gallery>
==References==
{{Reflist}}
{{Redstone}}
{{Blocks|Utility}}
{{Items}}
[[Category:Mechanisms]]
[[Category:Redstone mechanics]]
[[Category:Mechanics]]
[[Category:Storage]]
[[Category:Utility blocks]]
[[Category:Manufactured blocks]]
[[Category:Block entities]]
[[cs:Násypka]]
[[de:Trichter]]
[[el:Hopper]]
[[es:Tolva]]
[[fr:Entonnoir]]
[[it:tramoggia]]
[[ja:ホッパー]]
[[ko:호퍼]]
[[nl:Trechter]]
[[pl:Lej]]
[[pt:Funil]]
[[ru:Загрузочная воронка]]
[[uk:Лійка]]
[[zh:漏斗]]</li><li>[[Scute|Scute]]<br/>{{about|the item used to craft turtle shell helmets|the helmet|Turtle Shell}}
{{Item
| image = Scute.png
| renewable = Yes
| stackable = Yes (64)
|title=Turtle scute}}
'''Turtle Scutes''' are [[item]]s that baby [[turtle]]s drop when they grow into adults. They can be used to craft [[turtle shell]]s which can be used to brew the [[potion of the Turtle Master]].
== Obtaining ==
=== Mob loot ===
Baby [[turtle]]s drop a single scute when they grow up into adults, which is the only way possible to obtain the [[item]].
== Usage ==
Scutes can be crafted into [[turtle shell]]s.
=== Crafting ingredient ===
{{crafting usage}}
=== Repairing ===
Scutes are the [[repair]] items for the turtle [[armor material]], and thus can be used to repair [[turtle shell]]s in an [[anvil]].
=== Trading ===
Expert-level cleric [[villager]]s have a {{frac|2|3}} chance to buy 4 scutes for an [[emerald]] as part of their [[trading|trades]].{{only|java}}
Expert-level cleric villagers have a 50% chance to buy 4 scutes for an emerald as part of their seventh trades.{{only|bedrock}}
Expert-level leatherworker villagers buy 4 scutes for an emerald as part of their trades.
== Data values ==
=== ID ===
{{edition|java}}:
{{ID table
|edition=java
|showforms=y
|generatetranslationkeys=y
|displayname=Scute
|spritetype=item
|nameid=scute
|form=item
|foot=1}}
{{edition|bedrock}}:
{{ID table
|edition=bedrock
|showaliasids=y
|shownumericids=y
|showforms=y
|notshowbeitemforms=y
|generatetranslationkeys=y
|displayname=Scute
|spritetype=item
|nameid=scute
|aliasid=turtle_shell_piece
|id=572
|form=item
|translationkey=item.turtle_shell_piece.name
|foot=1}}
== History ==
{{History|java}}
{{History||1.13|snap=18w07a|[[File:Scute JE1 BE1.png|32px]] Added turtle shell pieces.}}
{{History|||snap=18w07b|"Turtle Shell Pieces" have now been renamed to "Scutes."}}
{{History||1.14|snap=19w11a|Cleric and leatherworker [[villager]]s now [[trading|buy]] scutes.}}
{{History|bedrock}}
{{History||1.5.0|snap=beta 1.5.0.4|[[File:Scute JE1 BE1.png|32px]] Added scutes.}}
{{History||1.11.0|snap=beta 1.11.0.4|Scutes can be [[trading|sold]] to cleric and leatherworker [[villager]]s.}}
{{History|console}}
{{History||xbox=TU69|ps=1.76|wiiu=Patch 38|[[File:Scute JE1 BE1.png|32px]] Added scutes.}}
{{history|foot}}
== Issues ==
{{issue list}}
== Trivia ==
* Scutes used to be called "Turtle Shell Pieces", they were renamed after it was pointed out that "Scute" was a more technical term.<ref>https://www.reddit.com/r/minecraftsuggestions/comments/7xnp2o/rename_turtle_shell_pieces_to_scutes/</ref>
== References ==
{{reflist}}
{{Items}}
[[Category:Renewable resources]]
[[de:Hornschild]]
[[es:Escama de tortuga]]
[[fr:Écaille de tortue]]
[[ja:カメのウロコ]]
[[ko:인갑]]
[[lzh:鱗]]
[[pl:Tarczka]]
[[pt:Escama de tartaruga]]
[[ru:Щиток]]
[[th:เกล็ดเต่า]]
[[uk:Черепок]]
[[zh:鳞甲]]</li></ul> | Player skins can be modified. | ||||||||||||||||||||||||||||||||||
| Java Edition | |||||||||||||||||||||||||||||||||||
1.0.0{{Extension DPL}}<ul><li>[[Nether Wart|Nether Wart]]<br/><!--Please do not change "nether wart" to "Nether wart". According to style guide, block names should not be capitalized.-->
{{about|the fungus used for potions|the block found in crimson forests|Nether Wart Block}}{{Block
| group = Age 0
| 1-1 = Nether Wart Age 0.png
| 1-2 = Nether Wart Age 0 BE.png
| group2 = Age 1-2
| 2-1 = Nether Wart Age 1-2.png
| 2-2 = Nether Wart Age 1-2 BE.png
| group3 = Age 3
| 3-1 = Nether Wart Age 3.png
| 3-2 = Nether Wart Age 3 BE.png
|image= Nether Wart (item).png
|transparent=Yes
|light=No
|tool=any
|renewable=Yes
|stackable=Yes (64)
|flammable=No
|lavasusceptible=No
}}
'''Nether wart''' is a fungus harvested from nether wart crops and is used to plant them, as well as being vital in the creation of [[potions]].
'''Nether wart crops''' are found in [[Nether Fortress/Structure|nether fortresses]] and [[Bastion Remnant|bastions]] and is used to grow nether wart in [[Soul Sand|soul sand]].
== Obtaining ==
=== Breaking ===
Nether wart can be mined instantly with any tool. A fully mature nether wart crop yields 2–4 nether wart. This is increased by one for each level of [[Fortune]], this allows for a maximum of 7 nether warts dropping from one crop. Less mature stages drop one nether wart, even with the Fortune enchantment.
=== Natural generation ===
Nether wart can generate in [[nether fortress]]es in [[soul sand]] gardens around stairwells. Nether wart can also generate in the courtyards of housing unit [[bastion remnant]]s. Due to only spawning in these specific structures, it's entirely possible for a nether fortress or bastion remnant to generate without nether wart (though they may still appear in the chests that generate in the fortress).
{| class="wikitable"
|+
!Location
!Description
!Image
|-
|{{anchor|Nether Fortress}}'''Nether Fortress'''
|Nether wart can be found growing near stairwells in small soul sand gardens.
|[[File:Nether wart garden.png|thumb|Nether wart growing in a nether fortress.]]
|-
|{{anchor|Bastion Remnant}}'''Bastion Remnant'''
|Nether wart can be found growing in the central courtyard of each of the sections of piglin housing unit bastions.
|[[File:Bastion Courtyard.png|thumb|Nether wart growing in a bastion remnant.]]
|}
<br>
=== Chest loot ===
{{LootChestItem|nether-wart}}
== Usage ==
=== Brewing ingredient ===
Nether wart's primary purpose is to [[brew]] the [[Potion|awkward potion]], the base for all potions, but optional for Weakness.
{{brewing
|showname=1
|Nether Wart
|Awkward Potion
|base=Water Bottle
}}
=== Crafting ingredient ===
{{crafting usage}}
=== Trading ===
Master-level cleric [[villager]]s buy 22 nether warts for an [[emerald]] as part of their trades.
=== Farming ===
{{main|Tutorials/Nether Wart farming}}
When planted on [[soul sand]], nether wart grows through four stages, though the middle two stages use the same texture (the hitbox of stage 3 is three pixels taller). {{IN|java}}, the exact age can be seen using the [[debug screen]], and the ages range from 0 to 3. Each random tick, nether wart has a 10% chance of growing one stage. At default random tick speed, each nether wart grows one age step approximately every {{convert|13653|ticks|minutes}} on average, and fully grows from planting to harvest every {{convert|40960|ticks|minutes}} on average. The growth rate is not affected by light or any other environmental factors. [[Bone meal]] cannot be used on the nether wart.
Nether wart can only be planted on [[soul sand]]. It cannot be planted on [[soul soil]]. It can grow in any [[dimension]].
Nether wart is ready to harvest when it reaches its fourth stage (age:3). Breaking a fully grown nether wart drops 2 to 4 nether wart, while an immature one drops a single nether wart. Using a tool enchanted with fortune increases the maximum number of nether wart dropped by 1 per level, for a maximum of 7 for a tool enchanted with [[Fortune|Fortune III]].
=== Composting ===
Placing a nether wart into a [[composter]] has a 30% chance of raising the compost level by 1.
== Sounds ==
{{Sound table/Block/Nether wart}}
== Data values ==
=== ID ===
{{edition|java}}:
{{ID table
|edition=java
|showforms=y
|generatetranslationkeys=y
|displayname=Nether Wart
|spritetype=block
|nameid=nether_wart
|translationkey=block.minecraft.nether_wart,item.minecraft.nether_wart
|foot=1}}
{{edition|bedrock}}:
{{ID table
|edition=bedrock
|firstcolumnname=Nether Wart
|shownumericids=y
|showforms=y
|generatetranslationkeys=y
|displayname=Block
|spritename=nether-wart
|spritetype=block
|nameid=nether_wart
|id=115
|form=block
|itemform=item.nether_wart}}
{{ID table
|displayname=Item
|spritename=nether-wart
|spritetype=item
|nameid=nether_wart
|id=294
|form=item
|foot=1}}
=== Block states ===
{{see also|Block states}}
{{/BS}}
== Advancements ==
{{load advancements|A Seedy Place}}
== History ==
{{History|java}}
{{History||1.0.0|snap=Beta 1.9 Prerelease|[[File:Nether Wart Age 0 JE1.png|32px]] [[File:Nether Wart Age 1-2 JE1.png|32px]] [[File:Nether Wart Age 3 JE1.png|32px]] [[File:Nether Wart (item) JE1.png|32px]] Added nether wart.}}
{{History|||snap=Beta 1.9 Prerelease 3|Nether wart can now be brewed in a [[water bottle]] to create an [[awkward potion]].}}
{{History||1.3.1|snap=12w27a|Nether wart can now grow outside of [[the Nether]].}}
{{History|||snap=1.3|[[File:Nether Wart (item) JE2 BE1.png|32px]] The item texture has been changed.}}
{{History||1.4.2|snap=12w36a|Nether wart can now be used to breed [[chicken]]s.}}
{{History||1.6.1|snap=13w18a|Nether wart is now found in the new [[chest]]s in [[nether fortress]]es.}}
{{History||1.8|snap=14w06a|[[File:Nether Wart Age 0 JE2.png|32px]] [[File:Nether Wart Age 1-2 JE2.png|32px]] [[File:Nether Wart Age 3 JE2.png|32px]] Nether wart crops are now a pixel higher, likely as an accidental result of model conversion. Previously they were offset one pixel downwards like the other crops (wheat, carrots potatoes) to match farmland, although in nether wart's case such a downwards offset hides some pixels of the texture inside of the soul sand.<ref>{{bug|MC-250679}}</ref>}}
{{History|||snap=14w10a|[[File:Missing Model JE2.png|32px]] [[File:Missing Model JE2.png|32px]] [[File:Missing Model JE2.png|32px]]<br>[[File:Missing Model (anisotropic filtering) JE2.png|32px]] [[File:Missing Model (anisotropic filtering) JE2.png|32px]] [[File:Missing Model (anisotropic filtering) JE2.png|32px]] Nether wart crops of all ages [[Missing model|no longer have a model]].}}
{{History|||snap=14w10b|[[File:Nether Wart Age 0 JE4.png|32px]] [[File:Nether Wart Age 1-2 JE4.png|32px]] [[File:Nether Wart Age 3 JE4.png|32px]] Nether wart crops now have models again.<ref>{{bug|MC-50276}}</ref> In addition, they are now offset downwards by one pixel once more, hiding the bottom row of pixels again.}}
{{History|||snap=14w25a|[[File:Nether Wart Age 0 JE5.png|32px]] [[File:Nether Wart Age 1-2 JE5.png|32px]] [[File:Nether Wart Age 3 JE5.png|32px]] Nether wart crops are now darker and subject to directional shading.}}
{{History|||snap=14w27a|[[File:Nether Wart Age 0 JE6.png|32px]] [[File:Nether Wart Age 1-2 JE6.png|32px]] [[File:Nether Wart Age 3 JE6.png|32px]] Nether wart crops are no longer subject to directional shading.}}
{{History|||snap=14w34d|Nether wart can no longer be used to breed [[chicken]]s.}}
{{History||1.9|snap=15w43a|The average yield of nether wart from [[nether fortress]] chests has now been slightly decreased.}}
{{History||1.10|snap=16w20a|Nether wart can now be used to [[crafting|craft]] the new [[red nether brick]] blocks and [[nether wart block]]s.}}
{{History||1.12|snap=17w18b|Placing a nether wart in soul sand now gives the player the "A Seedy Place" [[advancement]].{{verify}}}}
{{History||1.13|snap=17w47a|Prior to [[1.13/Flattening|''The Flattening'']], this block's numeral ID was 115, and the item's 372.}}
{{History||1.14|snap=18w43a|[[File:Nether Wart Age 0 JE7.png|32px]] [[File:Nether Wart Age 1-2 JE7.png|32px]] [[File:Nether Wart Age 3 JE7.png|32px]] The textures of nether wart crops have changed.}}
{{History|||snap=19w03a|Placement and breaking [[sound]]s have now been added to nether wart. Before this version, nether wart made stone sounds.}}
{{History|||snap=19w11a|Cleric [[villager]]s now [[trading|buy]] nether wart.
|Nether wart can now be planted by aiming against the sides and underside of blocks, rather than just the top surface of the soul sand.}}
{{History||1.16|snap=20w15a|Nether wart can now be [[composter|composted]].}}
{{History|||snap=20w16a|Nether wart now generates as part of [[bastion remnant]]s.}}
{{History||1.17|snap=21w13a|[[File:Nether Wart Age 0 JE8.png|32px]] [[File:Nether Wart Age 1-2 JE8.png|32px]] [[File:Nether Wart Age 3 JE8.png|32px]] The "crop" template model has changed such that pixels appear in the same physical positions on opposite sides of texture planes, changing the nether wart crop's appearance in the process.<ref>{{bug|MC-199242}}</ref>}}
{{History|pocket alpha}}
{{History||v0.12.1|snap=build 1|[[File:Nether Wart Age 0 BE1.png|32px]] [[File:Nether Wart Age 1-2 BE1.png|32px]] [[File:Nether Wart Age 3 BE1.png|32px]] [[File:Nether Wart (item) JE2 BE1.png|32px]] Added nether wart.
|Nether wart uses a cross model instead of the "hash" shape associated with crops.}}
{{History||?|[[File:Nether Wart Age 0 JE6 BE2.png|32px]] [[File:Nether Wart Age 1-2 JE6 BE2.png|32px]] [[File:Nether Wart Age 3 JE6 BE2.png|32px]]{{verify|Correct models? check UV, etc.}} Nether wart now uses a more conventional crop model.}}
{{History|pocket}}
{{History||1.1.3|snap=alpha 1.1.3.0|Nether wart can now be used to [[crafting|craft]] [[red nether bricks]] and [[nether wart block]]s.}}
{{History|bedrock}}
{{History||1.10.0|snap=beta 1.10.0.3|[[File:Nether Wart Age 0 BE.png|32px]] [[File:Nether Wart Age 1-2 BE.png|32px]] [[File:Nether Wart Age 3 BE.png|32px]] The textures of nether wart crops have changed.
|Placement and breaking [[sound]]s have now been added to nether wart.}}
{{History||1.11.0|snap=beta 1.11.0.4|Nether wart can now be [[trading|sold]] to cleric [[villager]]s.}}
{{History||1.16.0|snap=beta 1.16.0.57|Nether wart now generates as part of [[bastion remnant]]s.
|The placement and breaking [[sound]]s for nether wart have been changed to match {{el|je}}.
|Nether wart can now be [[composter|composted]].}}
{{History|console}}
{{History||xbox=TU7|xbone=CU1|ps=1.0|wiiu=Patch 1|switch=1.0.1|[[File:Nether Wart Age 0 JE6 BE2.png|32px]] [[File:Nether Wart Age 1-2 JE6 BE2.png|32px]] [[File:Nether Wart Age 3 JE6 BE2.png|32px]]{{verify|Correct models? check UV, etc.}} [[File:Nether Wart (item) JE2 BE1.png|32px]] Added nether wart.}}
{{History||xbox=TU9|Nether wart now spawns randomly wherever [[soul sand]] is generated in [[the Nether]].
|[[Nether fortress]]es have now been changed to make nether wart rooms more likely.
|Nether wart can now grow outside of [[the Nether]].}}
{{History||xbox=none|xbone=none|ps=1.90|wiiu=none|switch=none|[[File:Nether Wart Age 0 JE7.png|32px]] [[File:Nether Wart Age 1-2 JE7.png|32px]] [[File:Nether Wart Age 3 JE7.png|32px]]{{verify|Correct models?}} The textures of nether wart crops have now been changed.}}
{{History|New 3DS}}
{{History||0.1.0|[[File:Nether Wart Age 0 JE6 BE2.png|32px]] [[File:Nether Wart Age 1-2 JE6 BE2.png|32px]] [[File:Nether Wart Age 3 JE6 BE2.png|32px]]{{verify|Correct models? check UV, etc.}} [[File:Nether Wart (item) JE2 BE1.png|32px]] Added nether wart.}}
{{History|foot}}
=== Nether wart "item" ===
{{:Technical blocks/Nether Wart}}
==Issues==
{{issue list}}
== Trivia ==
* Nether wart's stage changes cannot be detected by a [[block update detector]], but can by an [[observer]] block.
* Unlike other crimson "plants", nether wart doesn't have a warped equivalent. This is also the case with [[nether sprouts]], which lack a crimson equivalent.
== Gallery ==
<gallery>
Nether Brick And Wart.png|Nether wart found in a nether fortress.
Nether Wart Closeup.png| Another example of nether wart found in a nether fortress.
Nether wart three sizes.png|The three different sizes of the nether wart as viewed from the side.
Nether Fortress Large Stairs Room.png
</gallery>
== References ==
{{reflist}}
{{Blocks|vegetation}}
{{Items}}
[[Category:Nether blocks]]
[[Category:Fungi]]
[[Category:Non-solid blocks]]
[[Category:Generated structure blocks]]
[[de:Netherwarze]]
[[es:Verruga del Nether]]
[[fr:Verrues du Nether]]
[[hu:Bibircsók]]
[[it:Verruca del Nether]]
[[ja:ネザーウォート]]
[[ko:네더 사마귀]]
[[nl:Netherkruid]]
[[pl:Netherowa brodawka]]
[[pt:Fungo do Nether]]
[[ru:Адский нарост]]
[[th:หูดเนเธอร์]]
[[uk:Пекельний наріст]]
[[zh:下界疣]]
[[Category:Brewing recipe]]</li><li>[[Redstone Dust|Redstone Dust]]<br/>{{Redirect|Redstone|the ore|Redstone Ore|the powered mineral block|Block of Redstone|other uses|Redstone (disambiguation)}}
{{Block
| group = Inactive (connected)
| 1-1= Inactive Redstone Wire (NESW).png
| 1-2 = Inactive Redstone Wire (NESW) BE.png
| group2 = Inactive (unconnected)
| 2-1 = Inactive Redstone Wire (unconnected).png
| 2-2 = Inactive Redstone Wire (unconnected).png
| group3 = Active (connected)
| 3-1 = Active Redstone Wire (NESW).png
| 3-2 = Active Redstone Wire (NESW) BE.png
| group4 = Active (unconnected)
| 4-1 = Active Redstone Wire (unconnected).png
| 4-2 = Active Redstone Wire (unconnected).png
| image = Redstone Dust JE2 BE2.png
| extratext = [[#Gallery|View all renders]]
| transparent = Yes
| light = No
| tool = all
| renewable = Yes
| stackable = Yes (64)
| flammable = No
| lavasusceptible = No
}}
'''Redstone dust''' is a mineral that can transmit [[Redstone circuit#Power|redstone power]] as a wire when placed as a [[block]]. It is also used in [[crafting]] and [[brewing]].
== Obtaining ==
=== Mining ===
{{see also|Redstone Ore#Natural generation}}
[[Redstone ore]] mined using an iron [[pickaxe]] or higher drops 4 or 5 redstone dust (or more with [[Fortune]], averaging at 6 redstone dust with Fortune III). If mined with [[Silk Touch]], the block drops itself instead of redstone dust.
=== Natural generation ===
15 lengths of redstone dust are naturally generated as part of the trap in each [[jungle pyramid]]. 5 lengths of redstone dust can be found in one type of jail cell room in a [[woodland mansion]]. In [[Ancient City|ancient cities]], multiple pieces of redstone dust can be found integrated into circuitry.
=== Breaking ===
Redstone dust can be broken instantly using any tool, or without a tool, and drops itself as an item.
Redstone dust is removed and drops as an item if:
* its attachment block is moved, removed, or destroyed
* [[water]] or [[lava]] flows into its space
* a [[piston]] tries to push it or moves a block into its space
=== Mob loot ===
[[Witch]]es have a chance of dropping 0–2 redstone dust upon death. This is increased by 1 per level of [[Looting]], for a maximum of 0–5 redstone dust.
=== Chest loot ===
{{LootChestItem|redstone}}
=== Crafting ===
Redstone dust can be crafted from [[blocks of redstone]].
{{Crafting
|Block of Redstone
|Output=Redstone Dust,9
|type=Redstone
}}
=== Smelting ===
{{Smelting
|showname=1
|Redstone Ore; Deepslate Redstone Ore
|Redstone Dust
|0.7
}}
=== Trading ===
{{IN|java}}, novice-level cleric [[villager]]s sell two redstone dust for one [[emerald]].
{{IN|bedrock}}, novice-level cleric villagers sell four redstone dust for one emerald.
=== Villager gifts ===
{{see also|Tutorials/Raid farming}}
{{IN|Java}}, when the player has the [[Hero of the Village]] status effect, clerics might throw that player a redstone dust as a gift.
== Usage ==
Redstone dust is used for [[#Brewing ingredient|brewing]], [[#Crafting ingredient|crafting]], and in redstone circuits by placing it on the ground to create [[#Redstone component|redstone wire]]. It can also be used to power redstone components.
=== Brewing ingredient ===
{{Brewing
|head=1
|Redstone Dust
|Mundane Potion
|base=Water Bottle
}}
{{Brewing
|foot=1
|name=Increased Duration
|Redstone Dust
|showbase=1
|base=Potion of Fire Resistance; Potion of Invisibility; Potion of Night Vision; Potion of Poison; Potion of Regeneration; Potion of Slowness; Potion of Strength; Potion of Swiftness; Potion of Water Breathing; Potion of Weakness; Potion of Leaping; Potion of Slow Falling
}}
=== Crafting ingredient ===
{{crafting usage|Redstone Dust}}
=== {{anchor|Redstone dust}} Redstone component ===
When placed in the world, redstone dust becomes a block of "redstone wire"{{Info needed|other blco? BE?}}, which can transmit [[Redstone circuit#Power|redstone power]].
=== Smithing ingredient ===
{{Smithing
|head=1
|ingredients=Any Armor Trim +<br/>Any Armor Piece + <br/>Redstone Dust
|Any Armor Trim Smithing Template
|Netherite Chestplate
|Redstone
|Redstone Trim Netherite Chestplate
|showdescription=1
|description = All armor types can be used in this recipe,<br/>a netherite chestplate is shown as an example.<br/>
|tail=1
}}
;Trim color palette
The following color palette is shown on the designs on trimmed armor:
*{{TrimPalette|redstone dust}}
=== Placement ===
[[File:Redstone wire as circuit component.png|Examples of redstone wire configuration. ''Top Left:'' Redstone wire connects diagonally vertically through non-opaque blocks. ''Top Right:'' Redstone wire does ''not'' connect diagonally vertically through opaque blocks. ''Center:'' Redstone wire gets darker as its power level drops, to a maximum of 15 blocks from a power source.|thumb]]
[[File:Redstone on Glowstone, Stairs, Slabs.png|Examples of redstone wire placements.|thumb]]
Redstone dust can be placed on [[opaque]] blocks as well as [[glowstone]], upside-down [[slab]]s, [[glass]], upside-down [[stairs]], and [[hopper]]s. It can also be placed on some transparent blocks; see [[Opacity/Placement]] for more information. It cannot be placed suspended in midair, even with commands, which is not unintentional.<ref>{{bug|MC-182709}}</ref>
Redstone wire configures itself to point toward adjacent redstone [[Redstone components#Power components|power components]] and [[Redstone components#Transmission components|transmission component]] connection points. Redstone wire also configures itself to point toward adjacent redstone wire one block higher or lower – unless there is a solid opaque block above the lower redstone wire.
If there is only one such adjacent redstone component, redstone wire configures itself into a {{BlockSprite|redstone-dust}} line pointing both at the neighbor and away from it. If there are two or more such adjacent components, redstone wire connects them in the form of {{BlockSprite|redstone-dust}}, {{BlockSprite|redstone-dust-upleft}}, {{BlockSprite|redstone-dust-t-up}}, or {{BlockSprite|redstone-dust-cross}} as needed.
When there are no adjacent components, a single redstone wire configures itself into a {{BlockSprite|redstone-dust-cross}} plus sign, which can provide power in all four directions. By right-clicking it can be changed into a {{BlockSprite|redstone-dust-dot}} dot, which does not provide power to any of the four directions.
{{IN|bedrock}}, redstone wire automatically configures itself to point toward adjacent blocks or [[Redstone components#Mechanism components|mechanism components]]. {{IN|java}}, it does not. If such a configuration is desired, the other neighbors of the redstone wire must be arranged to create it, i.e the redstone dust must be placed in a way that it would be pointed at the block’s location even if it were not there.
When redstone wire is reconfigured after placement, it does not update other redstone components around it of the change unless that reconfiguration also includes a change in power level or another component provides an update. This can create situations where a mechanism component remains activated when it shouldn't, or vice versa, until it receives an update from something else – a "feature" of redstone wire that can be used to make a [[BUD|block update detector]].
{{-}}
=== Behavior ===
{{Schematic|caption=
{{IN|be}}, the signal can go down from glass blocks.
|||rd-$ew!|RL-!||||rd-$ew!|RL-!|-
|rt-$!|rd-$ew!|SB|||rt-$!|rd-$ew!|glass||-
|ts-$|SB|rd-$ew|RL||ts-$|SB|rd-$ew!|RL-!
}}{{Schematic|caption =
However, the signal can never go down from slabs.
|||rd-$ew!|RL-!||||rd-$ew!|RL-!|-
|rt-$!|rd-$ew!|SB|||rt-$!|rd-$ew!|glass||-
|ts-$|ts-$|rd-$ew|RL||ts-$|ts-$|rd-$ew|RL
}}
Redstone wire can transmit power, which can be used to operate [[Redstone components#Mechanism components|mechanism components]] ([[door]]s, [[piston]]s, [[redstone lamp]]s, etc.).
Redstone wire can be "powered" by a number of methods:
* from an adjacent [[Redstone components#Power components|power component]] or a strongly-powered block
* from the output of a redstone repeater or redstone comparator
* from adjacent redstone wire. The powering dust can be a level higher or lower, but with restrictions:
** Redstone dust can be powered by redstone dust that is one level lower, or on an [[opaque]] block one level higher. A transparent block cannot{{only|java}} pass power downward.
** The block "between" the two dust blocks must be air or transparent. A solid block there "cuts" the connection between the higher and lower dust.
The "power level" of redstone dust can vary from 0 to 15. Most power components power-up adjacent redstone dust to power level 15, but a few ([[daylight sensor]]s, [[trapped chest]]s, and [[weighted pressure plate]]s) may create a lower power level. Redstone repeaters output power level 15 (when turned on), but [[redstone comparator]]s may output a lower power level.
{{Schematic | caption =
Redstone wire can transmit power up to 15 blocks.
|rt-$!|rd-$ew!+15|rd-$ew!+14|rd-$ew!+13|rd-$ew!+12|rd-$ew!+11|rd-$ew!+10|rd-$ew!+9
|rd-$ew!+8|rd-$ew!+7|rd-$ew!+6|rd-$ew!+5|rd-$ew!+4|rd-$ew!+3|rd-$ew!+2|rd-$ew!+1|rd-$ew+0
}}
Power level drops by 1 for every block of redstone wire it crosses. Thus, redstone wire can transmit power for no more than 15 blocks. To go further, the power level must be re-strengthened – typically with a redstone repeater.
Powered redstone wire on top of, or pointing at, an opaque block provides ''weak'' power to the block. A weakly-powered block cannot power other adjacent redstone wire, but can still power redstone repeaters and comparators, and activate adjacent mechanism components. Transparent blocks cannot be powered.
When redstone wire is unpowered, it appears dark red. When powered, it becomes bright red at power level 15, fading to darker shades with decreasing power. Powered redstone wire also produces "dust" [[particles]] of the same color.
While redstone wire always provides power to the directions it points into, it can still point into directions in which it cannot give power. If redstone wire comes in the form of a cross, the player can right-click to toggle it between a cross and dot. A redstone dot does not power anything adjacent to it, but powers the block under it.
== Sounds ==
{{Sound table/Block/Normal}}
== Data values ==
=== ID ===
{{edition|java}}:
{{ID table
|edition=java
|firstcolumnname=Redstone Dust
|showforms=y
|generatetranslationkeys=y
|displayname=Block
|spritename=redstone-dust
|spritetype=block
|nameid=redstone_wire
|form=block}}
{{ID table
|displayname=Item
|spritename=redstone-dust
|spritetype=item
|nameid=redstone
|form=item
|foot=1}}
{{edition|bedrock}}:
{{ID table
|edition=bedrock
|firstcolumnname=Redstone Dust
|shownumericids=y
|showforms=y
|generatetranslationkeys=y
|displayname=Block
|spritename=redstone-dust
|spritetype=block
|nameid=redstone_wire
|id=55
|form=block}}
{{ID table
|displayname=Item
|spritename=redstone-dust
|spritetype=item
|nameid=redstone
|id=373
|form=item
|foot=1}}
=== Block states ===
{{see also|Block states}}
{{/BS}}
{{LoadPage|Redstone Dust/Asset history|List of block state combinations|h4}}
== Achievements ==
{{load achievements|Dispense With This}}
== Video ==
{{Video note|These videos do not show all uses for redstone in crafting and all methods of obtaining. This video is also outdated, as of 1.13 Java Edition, redstone is now called Redstone Dust.}}
<div style="text-align:center">
<span style="display:inline-block">{{yt|zldqknGFWb4}}</span>
<span style="display:inline-block">{{yt|_IApwvCLJW8}}</span>
</div>
== History ==
{{History||May 21, 2009|link=https://web.archive.org/web/0/http://notch.tumblr.com/post/110762705/my-list-on-tile-types-so-far|[[Notch]] shows interest in adding wire-type [[block]]s.}}
{{History|java alpha}}
{{History||v1.0.1|[[File:Redstone Dust JE1 BE1.png|32px]] Added redstone dust as an [[item]].
|[[File:Inactive Redstone Wire (NS) JE1.png|32px]] [[File:Inactive Redstone Wire (EW) JE1.png|32px]] [[File:Inactive Redstone Wire (NE) JE1.png|32px]] [[File:Inactive Redstone Wire (ES) JE1.png|32px]] [[File:Inactive Redstone Wire (SW) JE1.png|32px]] [[File:Inactive Redstone Wire (NW) JE1.png|32px]] [[File:Inactive Redstone Wire (NEW) JE1.png|32px]] [[File:Inactive Redstone Wire (NES) JE1.png|32px]] [[File:Inactive Redstone Wire (ESW) JE1.png|32px]] [[File:Inactive Redstone Wire (NSW) JE1.png|32px]] [[File:Inactive Redstone Wire (NESW) JE1.png|32px]]<br>[[File:Active Redstone Wire (NS) JE1.png|32px]] [[File:Active Redstone Wire (EW) JE1.png|32px]] [[File:Active Redstone Wire (NE) JE1.png|32px]] [[File:Active Redstone Wire (ES) JE1.png|32px]] [[File:Active Redstone Wire (SW) JE1.png|32px]] [[File:Active Redstone Wire (NW) JE1.png|32px]] [[File:Active Redstone Wire (NEW) JE1.png|32px]] [[File:Active Redstone Wire (NES) JE1.png|32px]] [[File:Active Redstone Wire (ESW) JE1.png|32px]] [[File:Active Redstone Wire (NSW) JE1.png|32px]] [[File:Active Redstone Wire (NESW) JE1.png|32px]] Added redstone dust as a placed [[block]].
|Redstone dust as a placed block has two power appearances; either completely on, or completely off.
|Redstone dust is used to craft [[redstone torch]]es.
|At this time, redstone has not been given an official name.}}
{{History||v1.0.2_01|Redstone dust now doesn't connect through solid [[block]]s diagonally down.{{needs testing|may have been changed in v1.0.2|type=untestable}}
|Walking on redstone dust no longer [[breaking|breaks]] it.{{needs testing|may have been changed in v1.0.2|type=untestable}}
|Active redstone dust now gives off [[particles]].{{needs testing|may have been changed in v1.0.2|type=untestable}}}}
{{History||v1.1.0|Redstone is now used to craft [[compass]]es.}}
{{History||v1.2.0|snap=<nowiki>?|slink=:Category:Information needed requiring unarchived version|Redstone is now used to craft [[clock]]s.}}
{{History|java beta}}
{{History||1.0|With the addition of inventory tooltips, the [[item]] form of redstone dust has been named "Redstone", and the usually unobtainable block form has been named "Redstone Dust".}}
{{History||1.2|Redstone is now used to craft [[dispenser]]s and [[note block]]s.}}
{{History||1.3|[[File:Inactive Redstone Wire (NS) JE2.png|32px]] [[File:Inactive Redstone Wire (EW) JE2.png|32px]] [[File:Inactive Redstone Wire (NE) JE2.png|32px]] [[File:Inactive Redstone Wire (ES) JE2.png|32px]] [[File:Inactive Redstone Wire (SW) JE2.png|32px]] [[File:Inactive Redstone Wire (NW) JE2.png|32px]] [[File:Inactive Redstone Wire (NEW) JE2.png|32px]] [[File:Inactive Redstone Wire (NES) JE2.png|32px]] [[File:Inactive Redstone Wire (ESW) JE2.png|32px]] [[File:Inactive Redstone Wire (NSW) JE2.png|32px]] [[File:Inactive Redstone Wire (NESW) JE2.png|32px]]<br>[[File:Active Redstone Wire (NS) JE2.png|32px]] [[File:Active Redstone Wire (EW) JE2.png|32px]] [[File:Active Redstone Wire (NE) JE2.png|32px]] [[File:Active Redstone Wire (ES) JE2.png|32px]] [[File:Active Redstone Wire (SW) JE2.png|32px]] [[File:Active Redstone Wire (NW) JE2.png|32px]] [[File:Active Redstone Wire (NEW) JE2.png|32px]] [[File:Active Redstone Wire (NES) JE2.png|32px]] [[File:Active Redstone Wire (ESW) JE2.png|32px]] [[File:Active Redstone Wire (NSW) JE2.png|32px]] [[File:Active Redstone Wire (NESW) JE2.png|32px]] Redstone wire gets darker the farther away it is from a source of power, using a dedicated [[tint]] system. Previously, it was fully on until it reached its limit.
|Its particles now appear gray due to not being tinted.
|Redstone is now used to craft [[redstone repeater]]s.}}
{{History||1.5|[[File:Inactive Redstone Wire (NS) JE3.png|32px]] [[File:Inactive Redstone Wire (EW) JE3.png|32px]] [[File:Inactive Redstone Wire (NE) JE3.png|32px]] [[File:Inactive Redstone Wire (ES) JE3.png|32px]] [[File:Inactive Redstone Wire (SW) JE3.png|32px]] [[File:Inactive Redstone Wire (NW) JE3.png|32px]] [[File:Inactive Redstone Wire (NEW) JE3.png|32px]] [[File:Inactive Redstone Wire (NES) JE3.png|32px]] [[File:Inactive Redstone Wire (ESW) JE3.png|32px]] [[File:Inactive Redstone Wire (NSW) JE3.png|32px]] [[File:Inactive Redstone Wire (NESW) JE3.png|32px]]<br>[[File:Active Redstone Wire (NS) JE3.png|32px]] [[File:Active Redstone Wire (EW) JE3.png|32px]] [[File:Active Redstone Wire (NE) JE3.png|32px]] [[File:Active Redstone Wire (ES) JE3.png|32px]] [[File:Active Redstone Wire (SW) JE3.png|32px]] [[File:Active Redstone Wire (NW) JE3.png|32px]] [[File:Active Redstone Wire (NEW) JE3.png|32px]] [[File:Active Redstone Wire (NES) JE3.png|32px]] [[File:Active Redstone Wire (ESW) JE3.png|32px]] [[File:Active Redstone Wire (NSW) JE3.png|32px]] [[File:Active Redstone Wire (NESW) JE3.png|32px]] Fully off redstone wire is no longer black.
|Redstone dust can now be placed on [[snow]].
|Redstone is now used to craft [[powered rail]]s and [[detector rail]]s.}}
{{History||1.6.6|Redstone dust now checks if the block below has a solid top face or [[glowstone]], allowing it to be placed on it.}}
{{History||1.7|Redstone dust now connects to a [[redstone repeater|repeater]] without the dust being explicitly pointed at it.
|Redstone can now be used to craft [[piston]]s.}}
{{History||1.8|snap=Pre-release|Redstone can now be found in the new [[stronghold]] storeroom [[chest]]s, and in the new [[mineshaft]] chests.}}
{{History|java}}
{{History||1.0.0|snap=Beta 1.9 Prerelease 3|Redstone can now be [[brewing|brewed]] in a [[water bottle]] to create a [[mundane potion]].
|Redstone can now be found in the new [[stronghold]] altar [[chest]]s.
|Redstone now extends the [[potion]]s of [[Fire Resistance]], [[Slowness]], [[Swiftness]], [[Poison]], [[Weakness]] and [[Strength]].}}
{{History|||snap=Beta 1.9 Prerelease 4|Redstone now extends the new potion of [[Regeneration]].}}
{{History|||snap=RC1|[[File:Inactive Redstone Wire (unconnected) JE1.png|32px]] <br>[[File:Active Redstone Wire (unconnected) JE1.png|32px]] Redstone dust placement on one [[block]] has been changed from a "+" to a "•" shape.}}
{{History||?|Redstone wire block particles are now correctly colored.}}
{{History||1.1|snap=11w49a|Fixed redstone update bug.{{more info}}}}
{{History||1.2.1|snap=12w06a|Redstone can now be placed on [[glowstone]].}}
{{History|||snap=12w07a|Redstone is now used to craft [[redstone lamp]]s.}}
{{History||1.3.1|snap=12w21a|Redstone can now be [[trading|bought]] from priest [[villager]]s, at 2–4 redstone for 1 [[emerald]], making them [[renewable]].}}
{{History|||snap=12w22a|Redstone dust now generates in [[jungle temple]]s.}}
{{History|||snap=12w25a|Redstone dust can now be placed on top of upside-down [[slabs]] and [[stairs]].}}
{{History||1.4.2|snap=12w34a|Redstone now extends the new [[potion]]s of [[Night Vision]] and [[Invisibility]].}}
{{History|||snap=12w38a|[[Witch]]es have been added, which sometimes [[drops|drop]] redstone when killed.}}
{{History||1.5|snap=13w01a|Redstone can now be used to craft [[blocks of redstone]] and [[dropper]]s.}}
{{History||1.7.2|snap=13w36a|Redstone now extends the new [[potion]] of [[Water Breathing]].}}
{{History||1.8|snap=14w02a|[[Trading]] has been changed: cleric [[villager]]s now [[trading|sell]] 1–4 redstone for 1 [[emerald]].}}
{{History|||snap=14w25a|Redstone dust no longer changes to [[obsidian]] next to water when [[lava]] flows into it.}}
{{History|||snap=14w27a|Redstone now extends the new [[potion]] of [[Leaping]].}}
{{History||1.9|snap=15w31a|[[File:Inactive Redstone Wire (unconnected) JE2.png|32px]] [[File:Inactive Redstone Wire (NS) JE4.png|32px]] [[File:Inactive Redstone Wire (EW) JE4.png|32px]] [[File:Inactive Redstone Wire (NE) JE4.png|32px]] [[File:Inactive Redstone Wire (ES) JE4.png|32px]] [[File:Inactive Redstone Wire (SW) JE4.png|32px]] [[File:Inactive Redstone Wire (NW) JE4.png|32px]] [[File:Inactive Redstone Wire (NEW) JE4.png|32px]] [[File:Inactive Redstone Wire (NES) JE4.png|32px]] [[File:Inactive Redstone Wire (ESW) JE4.png|32px]] [[File:Inactive Redstone Wire (NSW) JE4.png|32px]] [[File:Inactive Redstone Wire (NESW) JE4.png|32px]]<br>[[File:Active Redstone Wire (unconnected) JE2.png|32px]] [[File:Active Redstone Wire (NS) JE4.png|32px]] [[File:Active Redstone Wire (EW) JE4.png|32px]] [[File:Active Redstone Wire (NE) JE4.png|32px]] [[File:Active Redstone Wire (ES) JE4.png|32px]] [[File:Active Redstone Wire (SW) JE4.png|32px]] [[File:Active Redstone Wire (NW) JE4.png|32px]] [[File:Active Redstone Wire (NEW) JE4.png|32px]] [[File:Active Redstone Wire (NES) JE4.png|32px]] [[File:Active Redstone Wire (ESW) JE4.png|32px]] [[File:Active Redstone Wire (NSW) JE4.png|32px]] [[File:Active Redstone Wire (NESW) JE4.png|32px]] Some slight changes have been made to redstone wire's appearance - the dot now extends outward with two more pixels, and the south-facing section of bends, T shapes and crosses now has one fewer pixel. It also appears straighter and more continuous in straight wire form.
|Redstone can no longer be added to extended [[potion]]s or tier-II potions.}}
{{History|||snap=15w44a|The average yield of redstone from [[dungeon]] [[chest]]s has been cut by more than half.
|The average yield of redstone in [[mineshaft]] chests has been increased.}}
{{History|||snap=15w46a|The hitbox of redstone now covers only part of the surface of the [[block]] below, based on the orientation of the redstone.}}
{{History||1.11|snap=16w39a|Redstone dust can now be found in chests in [[woodland mansion]]s.
|Redstone can now used to craft [[observer]]s.}}
{{History||1.13|snap=17w47a|The [[item]] form of "Redstone" has been renamed to "Redstone Wire".
|Prior to [[1.13/Flattening|''The Flattening'']], this [[block]]'s numeral ID was 55, and the [[item]]'s 331.}}
{{History|||snap=17w48a|"Redstone" has been renamed to "Redstone Dust".}}
{{History|||snap=18w07a|Redstone now extends the new [[potion of the Turtle Master]].}}
{{History||1.14|snap=18w43a|[[File:Redstone Dust JE2 BE2.png|32px]] The texture of redstone dust has been changed.}}
{{History|||snap=18w50a|Redstone dust can now be found in chests in [[village]] temples.}}
{{History|||snap=19w12b|Redstone dust can now be placed on [[glass]], [[ice]] and [[sea lantern]]s.}}
{{History|||snap=19w13a|Cleric villagers now give redstone dust to players under the [[Hero of the Village]] effect.}}
{{History||1.16|snap=20w06a|Redstone dust now has a bottom texture.}}
{{History|||snap=20w09a|Redstone can now be used to craft [[target]]s.}}
{{History|||snap=20w18a|Redstone dust placement on one [[block]] has been changed from a "•" back to a "+" shape.
|Redstone dust's hitbox is now no longer strictly a cuboid, and more closely matches the shape of the wiring.<ref>{{bug|MC-137336}}</ref>
|Upward going redstone dust now has a hitbox on the side of the [[block]] too, rather than only on the floor.<ref>{{bug|MC-153508}}</ref>
|Unconnected redstone dust now has all direction block states set to "side".
|The direction block states of redstone dust are now properly set to "side" at the end of a redstone wire on both ends, rather than only the one with other redstone besides it.
|[[File:Inactive Redstone Wire (N).png|32px]] [[File:Inactive Redstone Wire (E).png|32px]] [[File:Inactive Redstone Wire (S).png|32px]] [[File:Inactive Redstone Wire (W).png|32px]]<br>[[File:Active Redstone Wire (N).png|32px]] [[File:Active Redstone Wire (E).png|32px]] [[File:Active Redstone Wire (S).png|32px]] [[File:Active Redstone Wire (W).png|32px]] While not accessible in normal gameplay, redstone dust that points into one side, but not the opposite, now visually reaches halfway across the [[block]].}}
{{History|||snap=20w19a|Redstone dust now visually connects when going up [[soul sand]], 8-layer [[snow]] stacks and the back side of upside-down [[stairs]].
|[[Particles]] are now generated across the length of the redstone wire rather than the center of the [[block]].}}
{{History|||snap=20w21a|Redstone dust placement on one [[block]] is now toggleable between a "+" and a "•" shape, by {{control|interacting}} with it.}}
{{History||1.17|snap=21w08a|Redstone dust can now drop and be smelted from [[deepslate redstone ore]].}}
{{History||1.19|snap=22w13a|Redstone wire now generates in [[Ancient City|ancient cities]].}}
{{History||1.20<br>(Experimental)|link=1.19.4|snap=23w04a|Redstone dust can now be used as an armor trim material.}}
{{History|pocket alpha}}
{{History||v0.8.0|snap=build 1|[[File:Redstone Dust JE1 BE1.png|32px]] Added redstone as an [[item]].
|Redstone is now [[drops|dropped]] when [[breaking|mined]] from [[redstone ore]].
|Redstone can be used to craft [[compass]]es and [[clock]]s.}}
{{History|||snap=build 2|Redstone can now be used to craft [[powered rail]]s.}}
{{History||v0.11.0|snap=build 1|Redstone is now used to craft [[redstone block]]s.}}
{{History||v0.12.1|snap=build 1|Redstone has been added to the [[Creative]] [[inventory]], but it still cannot be placed. }}
{{History||v0.13.0|snap=build 1|Redstone can now be placed.
|Redstone is now used to craft [[redstone lamp]]s, [[note block]]s, [[detector rail]]s and [[redstone torch]]es.}}
{{History||v0.14.0|snap=build 1|Redstone is now used to craft [[dispenser]]s and [[dropper]]s.}}
{{History||v0.15.0|snap=build 1|Redstone is now used to craft [[piston]]s and [[observer]]s.}}
{{History|pocket}}
{{History||1.0.4|snap=alpha 1.0.4.0|Cleric [[villager]]s now [[trading|sell]] 1–4 redstone for an [[emerald]].}}
{{History||1.1.0|snap=alpha 1.1.0.0|Redstone can now be found in [[woodland mansion]]s.}}
{{History|bedrock}}
{{History||?|[[File:Inactive Redstone Wire (NE) BE.png|32px]] [[File:Inactive Redstone Wire (ES) BE.png|32px]] [[File:Inactive Redstone Wire (SW) BE.png|32px]] [[File:Inactive Redstone Wire (NW) BE.png|32px]] [[File:Inactive Redstone Wire (NEW) BE.png|32px]] [[File:Inactive Redstone Wire (NES) BE.png|32px]] [[File:Inactive Redstone Wire (ESW) BE.png|32px]] [[File:Inactive Redstone Wire (NSW) BE.png|32px]] [[File:Inactive Redstone Wire (NESW) BE.png|32px]]<br>[[File:Active Redstone Wire (NE) BE.png|32px]] [[File:Active Redstone Wire (ES) BE.png|32px]] [[File:Active Redstone Wire (SW) BE.png|32px]] [[File:Active Redstone Wire (NW) BE.png|32px]] [[File:Active Redstone Wire (NEW) BE.png|32px]] [[File:Active Redstone Wire (NES) BE.png|32px]] [[File:Active Redstone Wire (ESW) BE.png|32px]] [[File:Active Redstone Wire (NSW) BE.png|32px]] [[File:Active Redstone Wire (NESW) BE.png|32px]]<br>Placed redstone now assumes its current appearance with a more solid center. Its linear state appearences are unknown.}}
{{History||1.10.0|snap=beta 1.10.0.3|[[File:Redstone Dust JE2 BE2.png|32px]] The texture of redstone has been changed.}}
{{History||1.11.0|snap=beta 1.11.0.1|Redstone can now be found in [[desert]] [[village]] temple [[chest]]s.}}
{{History|||snap=beta 1.11.0.4|Cleric [[villager]]s now [[trading|sell]] 4 redstone as part of their first tier [[trading|trade]].}}
{{History||1.16.210|snap=beta 1.16.210.57|"Redstone" has been renamed to "Redstone Dust".}}
{{History||1.17.0|snap=beta 1.16.230.52|Redstone dust can now drop and be smelted from [[deepslate redstone ore]].}}
{{History||1.19.0|snap=beta 1.19.0.26|Redstone wire now generates in [[Ancient City|ancient cities]].}}
{{History||1.19.80|snap=beta 1.19.80.21|Redstone dust can now be used as an armor trim material.}}
{{History|console}}
{{History||xbox=TU1|xbone=CU1|ps=1.0|wiiu=Patch 1|switch=1.0.1|[[File:Redstone Dust JE1 BE1.png|32px]] Added redstone.}}
{{History||xbox=TU3|Redstone now connects to a [[redstone repeater|repeater]] without the dust being explicitly pointed at it.}}
{{History||xbox=none|xbone=none|ps=1.90|wiiu=none|switch=none|[[File:Redstone Dust JE2 BE2.png|32px]] The texture of redstone has been changed.}}
{{History||ps=1.95|Redstone can now be placed on [[glass]].}}
{{History|new 3ds}}
{{History||0.1.0|[[File:Redstone Dust JE1 BE1.png|32px]] Added redstone dust.}}
{{History|foot}}
=== Redstone wire "item" ===
{{:Technical blocks/Redstone Wire}}
== Gallery ==
=== Renders ===
; Java Edition
<gallery>
Inactive Redstone Wire (NESW).png |
Inactive Redstone Wire (unconnected).png |
Inactive Redstone Wire (NS).png |
Inactive Redstone Wire (EW).png |
Inactive Redstone Wire (NE).png |
Inactive Redstone Wire (ES).png |
Inactive Redstone Wire (SW).png |
Inactive Redstone Wire (NW).png |
Inactive Redstone Wire (NEW).png |
Inactive Redstone Wire (NES).png |
Inactive Redstone Wire (ESW).png |
Inactive Redstone Wire (NSW).png
</gallery>
<gallery>
Active Redstone Wire (NESW).png |
Active Redstone Wire (unconnected).png |
Active Redstone Wire (NS).png |
Active Redstone Wire (EW).png |
Active Redstone Wire (NE).png |
Active Redstone Wire (ES).png |
Active Redstone Wire (SW).png |
Active Redstone Wire (NW).png |
Active Redstone Wire (NEW).png |
Active Redstone Wire (NES).png |
Active Redstone Wire (ESW).png |
Active Redstone Wire (NSW).png
</gallery>
; Bedrock Edition
<gallery>
Inactive Redstone Wire (NESW) BE.png |
Inactive Redstone Wire (NESW) BE.png |
Inactive Redstone Wire (NS).png |
Inactive Redstone Wire (EW).png |
Inactive Redstone Wire (NE) BE.png |
Inactive Redstone Wire (ES) BE.png |
Inactive Redstone Wire (SW) BE.png |
Inactive Redstone Wire (NW) BE.png |
Inactive Redstone Wire (NEW) BE.png |
Inactive Redstone Wire (NES) BE.png |
Inactive Redstone Wire (ESW) BE.png |
Inactive Redstone Wire (NSW) BE.png
</gallery>
<gallery>
Active Redstone Wire (NESW) BE.png |
Active Redstone Wire (NESW) BE.png |
Active Redstone Wire (NS).png |
Active Redstone Wire (EW).png |
Active Redstone Wire (NE) BE.png |
Active Redstone Wire (ES) BE.png |
Active Redstone Wire (SW) BE.png |
Active Redstone Wire (NW) BE.png |
Active Redstone Wire (NEW) BE.png |
Active Redstone Wire (NES) BE.png |
Active Redstone Wire (ESW) BE.png |
Active Redstone Wire (NSW) BE.png
</gallery>
=== Screenshots ===
<gallery>
Slab Stair Redstone.png|First image of redstone dust on top of slabs and stairs.
File:Olivia Tinkering.jpeg|[[Olivia]] using a scarce amount of redstone dust.
File:23w32a.jpg|[[Sunny]] using a very long strip of redstone dust.
</gallery>
=== In other media ===
<gallery>
Powered By Redstone JINX.jpg|Official T-shirt artwork "Powered By Redstone" made by [https://www.jinx.com JINX].
File:Redstone Behind Chiseled Bookshelf Pixel Art.png|Pixel art of redstone dust.
</gallery>
== Issues ==
{{issue list|redstone|redstone dust|redstone wire}}
== Trivia ==
* Five updates for [[wikipedia:Windows 10 version history|Windows 10]] released from 2016 to 2018 were codenamed "Redstone", referencing ''Minecraft''.<ref>{{link|url=https://www.theverge.com/2015/4/7/8364355/microsoft-redstone-windows-updates|title=Microsoft plans ‘Redstone’ updates for Windows 10 in 2016|author=Tom Warren|website=The Verge|date=April 7, 2015}}</ref>
* The block has 1,296 possible block state combinations, the highest of all blocks as of 1.15.2, beating [[fire]]'s 512 and [[note block]]'s 800.
* According to {{el|ee}}, redstone dust contains radioactive [[element]]s.
== References ==
{{Reflist}}
{{Redstone}}
{{Blocks|Utility}}
{{Items}}
[[Category:Redstone mechanics]]
[[Category:Mechanisms]]
[[Category:Mechanics]]
[[Category:Generated structure blocks]]
[[Category:Non-solid blocks]]
[[Category:Brewing recipe]]
[[cs:Rudit]]
[[de:Redstone]]
[[el:Σκόνη Κοκκινόπετρας]]
[[es:Polvo de redstone]]
[[fr:Poudre de redstone]]
[[hu:Redstone]]
[[it:Polvere di redstone]]
[[ja:レッドストーンダスト]]
[[ko:레드스톤 가루]]
[[nl:Redstonestof]]
[[pl:Redstone]]
[[pt:Pó de redstone]]
[[ru:Красная пыль]]
[[th:ผงเรดสโตน]]
[[tr:Kızıltaş]]
[[uk:Редстоун]]
[[zh:红石粉]]</li></ul></nowiki> | Beta 1.9 Prerelease | All "bottom" textures (including hand and foot) have been flipped 180 degrees. It's worth mentioning that the textures were specifically flipped and not rotated because an updated texture with the bottom surface rotated as opposed to flipped may display incorrectly depending on the intended alignment with relation to the rest of the skin. | |||||||||||||||||||||||||||||||||
| April 1, 2014 | On April 1st, all skins applied to players were changed and locked to Villager skins as an April Fools' prank. Capes were still shown, however, if the user had one. | ||||||||||||||||||||||||||||||||||
1.8{{Extension DPL}}<ul><li>[[Glow Berries|Glow Berries]]<br/>{{Block
|image=<gallery>
Cave Vines (head).png|Without Berries
Cave Vines (berries).png|With Berries
</gallery>
|image2 = Glow Berries JE1 BE1.png
|extratext=[[#Gallery|View all renders]]
|rarity=Common
|renewable=Yes
|stackable=Yes (64)
|tool=Any
|light=Yes
|transparent=Yes
|heals={{hunger|2}}
|flammable=Yes
|lavasusceptible=No
}}
'''Glow berries''' are a [[food]] [[item]] obtained from cave vines and can be used to plant them.
'''Cave vines''' are a climbable, [[Bone Meal|bonemealable]] plant that hangs off ceilings and grows glow berries. Cave vines with glow berries produce [[light]] and drop glow berries when broken or harvested. Cave vines with no glow berries will not drop anything.
== Obtaining ==
=== Natural generation ===
Cave vines can be found in [[lush caves]], hanging from cave ceilings.
=== Chest loot ===
{{LootChestItem|glow-berries}}
=== Post-generation ===
Glow berries can be collected from a cave vine by {{control|using}} or {{control|breaking}} the vine. This yields one glow berry when the vine is bearing them and nothing when it is not. A cave vine also breaks if [[water]] runs over its location or if a [[piston]] extends or pushes a block into its location.
{{IN|bedrock}}, using a tool with [[Silk Touch]] on cave vines always yields a glow berry, even if the vine appears empty.
[[Fortune]] has no effect on the number of glow berries dropped.
== Usage ==
=== Placement ===
Glow berries can be placed on and grown from the bottom of most blocks. They have no specific lighting requirements. When placed, they can be of any length.
=== Growth ===
Placing glow berries on the bottom of a block creates a cave vine that grows downward one block at a time as long as [[air]] is beneath it and its maximum height (2 to 26 blocks) has not been reached. Each newly-grown cave vine block has a 1 in 9 chance of bearing glow berries. Only this tip can ever naturally grow them.{{only|JE}}{{More info|exact growth rate and chance to bear glow berries}}
{{control|Using}} [[bone meal]] on a cave vine produces glow berries if the vine was not bearing any.
{{IN|Java}}, cave vines stop growing if [[shears]] are {{control|used}} on the tip.
{{IN|bedrock}}, if placing glow berries in the Nether, cave vines are able to grow and produces glow berries.
=== Food ===
To eat glow berries, press and hold {{control|use}} while it is selected in the hotbar. Eating one restores {{hunger|2}} [[hunger]] and 0.4 hunger [[Hunger#Mechanics|saturation]] points, like [[sweet berries]].
=== Light ===
When bearing glow berries, cave vines give off a [[light]] level of 14.
=== Composting ===
Placing glow berries into a [[composter]] by {{control|using}} them on it has a 30% chance of raising the compost level by 1.
=== Breeding ===
Glow berries can be fed to [[fox]]es to [[breeding|breed]] them. Foxes are similar to cats when being fed as a wild animal; a sudden movement by the player may cause the fox to flee even if the player holds glow berries. The resulting baby fox trusts the [[player]] and does not flee.
Glow berries can be {{control|used}} on baby foxes to reduce the time until they grow by 10%.
==Sounds==
===Glow berries===
{{Sound table/Entity/Food}}
===Cave vines===
====Generic====
{{Sound table/Block/Cave vines}}
==== Unique ====
{{edition|java}}:
{{Sound table
|sound=Berries pick1.ogg
|sound2=Berries pick2.ogg
|subtitle=Berries pop
|source=block
|description=When glow berries are picked
|id=block.cave_vines.pick_berries
|translationkey=subtitles.item.berries.pick
|volume=1.0
|pitch=0.8-1.2
|distance=16}}
{{Sound table
|sound=Shear.ogg
|subtitle=Plant cropped
|source=block
|description=When the tip of cave vines are cropped with [[Shears#Cropping growing plants|shears]]
|id=block.growing_plant.crop
|translationkey=subtitles.block.growing_plant.crop
|volume=1.0
|pitch=1.0
|distance=16
|foot=1}}
{{edition|bedrock}}:
{{Sound table
|type=bedrock
|sound=Berries pick1.ogg
|sound2=Berries pick2.ogg
|source=block
|description=When glow berries are picked
|id=pick_berries.cave_vines
|volume=1.0
|pitch=0.8-1.2
|foot=1}}
==Data values==
===ID===
{{edition|java}}:
{{ID table
|edition=java
|showblocktags=y
|showitemtags=y
|showforms=y
|generatetranslationkeys=y
|displayname=Cave Vines
|spritetype=block
|nameid=cave_vines
|blocktags=cave_vines,lush_plants_replaceable
|form=block
}}
{{ID table
|displayname=Cave Vines Plant
|spritetype=block
|nameid=cave_vines_plant
|blocktags=cave_vines,lush_plants_replaceable
|form=block
}}
{{ID table
|displayname=Glow Berries
|spritetype=item
|nameid=glow_berries
|itemtags=fox_food
|form=item
|foot=1}}
{{el|be}}:
{{ID table
|edition=bedrock
|shownumericids=y
|showforms=y
|generatetranslationkeys=y
|displayname=Cave Vines
|nameid=cave_vines
|spritetype=block
|id=577}}
{{ID table
|displayname=Cave Vines Body With Berries
|nameid=cave_vines_body_with_berries
|spritename=lit-cave-vines-plant
|spritetype=block
|id=630}}
{{ID table
|displayname=Cave Vines Head With Berries
|spritename=lit-cave-vines
|nameid=cave_vines_head_with_berries
|spritetype=block
|id=631}}
{{ID table
|displayname=Glow Berries
|spritetype=item
|nameid=glow_berries
|form=item
|id=638
|foot=1}}
=== Block states===
{{See also|Block states}}
{{/BS}}
==Advancements==
{{load advancements|Husbandry;A Balanced Diet}}
==History==
{{History||October 3, 2020|link={{ytl|DWZIfsaIgtE|t=1781}}|[[File:Cave Vines Plant JE1 BE1.png|32px]] [[File:Cave Vines Plant (berries) JE1 BE1.png|32px]] [[File:Cave Vines (head) JE1 BE1.png|32px]] [[File:Cave Vines (berries) JE1 BE1.png|32px]] Cave vines (named as glow berries) are shown as part of lush caves at [[Minecraft Live 2020]].}}
{{History|java}}
{{History||1.17|snap=21w05a|[[File:Glow Berries JE1 BE1.png|32px]] Added glow berries.
|[[File:Cave Vines Plant JE1 BE1.png|32px]] [[File:Cave Vines Plant (berries) JE1 BE1.png|32px]] [[File:Cave Vines (head) JE1 BE1.png|32px]] [[File:Cave Vines (berries) JE1 BE1.png|32px]] Added cave vines.}}
{{History|||snap=21w11a|Renamed from "cave vines head" and "cave vines body" to "cave vines" and "cave vines plant", respectively.
|The IDs have also changed.
|Cave vines now always give 14 light, regardless of the type of part.
|Now slow down the player.
|Can now be climbed.}}
{{History|||snap=21w13a|Glow berries now generate as loot in [[mineshaft]] [[Minecart with Chest|chest minecarts]].}}
{{History||1.18|snap=Experimental Snapshot 1|With the implementation of cave biomes including lush caves, caves vines can now generate in normal worlds.}}
{{History|||snap=21w37a|Cave vines stop growing if [[shears]] are used on the tip.}}
{{History|||snap=21w41a|[[File:Cave Vines Plant JE2.png|32px]] [[File:Cave Vines Plant (berries) JE2.png|32px]] Changed cave vines plant texture.}}
{{History||1.19|snap=22w13a|Glow Berries may now be found in [[ancient city]] [[chest]]s.}}
{{History|bedrock}}
{{History||Caves & Cliffs (experimental)|link=Bedrock Edition 1.17.0|snap=beta 1.16.220.52|[[File:Glow Berries JE1 BE1.png|32px]] Added glow berries.
|[[File:Cave Vines Plant JE1 BE1.png|32px]] [[File:Cave Vines Plant (berries) JE1 BE1.png|32px]] [[File:Cave Vines (head) JE1 BE1.png|32px]] [[File:Cave Vines (berries) JE1 BE1.png|32px]] Added cave vines.}}
{{History||1.17.0|snap=beta 1.16.230.54|Glow Berries now generate as loot in [[mineshaft]] [[Minecart with Chest|chest minecarts]].}}
{{History|||snap=beta 1.17.0.52|Glow Berries are now available without enabling [[experimental gameplay]].}}
{{History||1.17.20|snap=beta 1.17.20.20|Cave Vines can now be pollinated by [[bee]]s.}}
{{History||1.18.10|snap=beta 1.18.10.20|[[File:Cave Vines Plant JE2.png|32px]] [[File:Cave Vines Plant (berries) JE2.png|32px]] Changed cave vines plant texture.}}
{{History||1.19.20|snap=beta 1.19.20.20|Cave vines can now be destroyed by [[ravagers]].}}
{{History|foot}}
<gallery>
Lush_caves_overview_concept_art.jpg|Concept art for the lush caves and vegetation including Glow Berries.
JE_1.17_Development_Lush_Caves.jpg|A view of the lush caves with glow berries from Minecraft Live 2020.
Lushcaves_minecon.png|Lush cave in MINECON.
Cavesworkinprogress.jpg|A view of the lush caves with glow berries, tweeted by LadyAgnes.
Livestream_lush_cave.jpg|Another view of the lush caves with glow berries, in an interview with LadyAgnes.
Glow Berry Fox.jpg|A fox under a glow berry vine.
</gallery>
===Cave vines "item"===
{{:Technical blocks/Cave Vines}}
==Issues==
{{Issue list}}
==Trivia==
*They are the first item to be usable as both a food and a light source.
==Gallery==
<gallery>
Cave Vines (plant).png
Cave Vines (berries, plant).png
Cave Vines (head).png
Cave Vines (berries).png
Cave_Vines_Age2_(Possibility_pattern_1)_JE1.png|A possible pattern of the cave vines at Age 2.
Cave_Vines_Age2_(Possibility_pattern_2)_JE1.png|And another pattern.
</gallery>
{{Blocks|vegetation}}
{{Items}}
[[Category:Food]]
[[Category:Plants]]
[[Category:Natural blocks]]
[[Category:Non-solid blocks]]
[[Category:Light sources]]
[[Category:Flammable blocks]]
[[Category:Climbable blocks]]
[[de:Leuchtbeeren]]
[[es:Bayas luminosas]]
[[fr:Baies lumineuses]]
[[it:Bacche luminose]]
[[ja:グロウベリー]]
[[pt:Bagas brilhantes]]
[[ru:Светящиеся ягоды]]
[[zh:发光浆果]]</li><li>[[Portfolio|Portfolio]]<br/>{{exclusive|education}}
{{Item
| image = Portfolio.png
| renewable = No
| stackable = Yes (64)
}}
A '''portfolio''' is an [[item]] that can save [[photo]]s taken with a [[camera]].<ref>https://education.minecraft.net/support/knowledge-base/using-cameras-portfolios/</ref>
== Obtaining ==
Portfolios can be obtained in the [[creative inventory]] or through the {{cmd|give}} command.
== Usage ==
[[File:Portfolio Interface.png|thumb|upright=1.5|The portfolio interface]]
Once a photo has been taken using the [[camera]], it appears in the portfolio. Once equipped, right-clicking brings up a two-page book of photos the [[player]] has taken, in chronological order. Captions can be added below each picture. Pressing the "Export Portfolio" button creates a .zip file with all photos as JPGs in a specified folder. The portfolio is also used to load custom items in [[Minecraft China]].
== Data values ==
=== ID ===
{{ID table
|edition=bedrock
|shownumericids=y
|showforms=y
|notshowbeitemforms=y
|generatetranslationkeys=y
|displayname=Portfolio
|spritetype=item
|nameid=portfolio
|id=456
|form=item
|foot=1}}
== History ==
{{History|pocket alpha}}
{{History||v0.16.0|snap=build 1|[[File:Portfolio BE1.png|32px]] Added portfolios.}}
{{History|||snap=build 2|Portfolios have been removed.}}
{{History|bedrock}}
{{History||1.16.100|Data-driven portfolios, allowing for add-ons to create custom portfolios. Normal Portfolios are still unobtainable.}}
{{History|education}}
{{History||1.0|[[File:Portfolio BE1.png|32px]] Added portfolios.}}
{{History|foot}}
== References ==
{{Reflist}}
{{Items}}
{{Education Edition}}
[[Category:Non-renewable resources]]
[[Category:Education Edition items]]
[[Category:Storage]]
[[de:Fotoalbum]]
[[es:Portafolio]]
[[ja:ポートフォリオ]]
[[ko:포트폴리오]]
[[pl:Portfolio]]
[[pt:Portfólio]]
[[ru:Портфолио]]
[[uk:Портфоліо]]
[[zh:公文包]]</li></ul> | 14w03a | Skins have received an overhaul; right and left legs/arms can now be edited independently and the hat layer now counts for the whole body, meaning overlays can now be added on skins. This means there are now 3.06013 × 1023,581 unique Minecraft skins instead of 2.29507 × 1011,328 previously. | |||||||||||||||||||||||||||||||||
| 14w04a | Now displays the right arm's second layer in first person view. | ||||||||||||||||||||||||||||||||||
| pre1 | Added a new player model with smaller arms, and a new player skin called Alex. | ||||||||||||||||||||||||||||||||||
1.9{{Extension DPL}}<ul><li>[[Bundle|Bundle]]<br/>{{Experimental feature|bundle}}
{{planned|BE}}
{{Item
| image = Bundle.png
| image2 = Bundle Filled.png
| rarity = Common
| renewable = No
| stackable = No
}}
A '''bundle''' is an [[item]] that can store up to a stack's worth of mixed [[item]] types within itself in a single [[inventory]] slot. Items that stack to 16 occupy more space within the bundle, and items that do not stack occupy the entire bundle without allowing space for any other items.
== Obtaining ==
=== Crafting ===
{{Crafting
|showdescription=1
|A1=String |B1=Rabbit Hide |C1=String
|A2=Rabbit Hide |C2=Rabbit Hide
|A3=Rabbit Hide |B3=Rabbit Hide |C3=Rabbit Hide
|Output=Bundle
|type=Tool
|description={{OnlyExperimental|bundle}}
}}
== Usage ==
<!--The tooltip does not reflect the current bundle "tooltip"-->
{{FakeImage|style=max-width:250px;
|1={{Slot|Stick,64}}{{Slot|Ender Pearl,16}}{{Slot|Iron Sword}}<br>{{Slot|Stick,1}}{{Slot|Ender Pearl,4}}{{Slot|Iron Sword,64}}<br>{{Slot|Filled Bundle[Stick x32/Ender Pearl x8]| title = Bundle|link=none}}
|2=Item stack sizes (top row) and the number of bundle slots they take up (middle row). Sticks stack to 64, so they take up one bundle slot; ender pearls stack to 16, so they take up four; and swords do not stack, so they take up the whole bundle. So, for instance, a bundle may have 32 sticks and 8 ender pearls inside (bottom), which take up a total of {{Tooltip|(32×1)|32 Sticks}}+{{Tooltip|(8×4)|8 Ender Pearls}}=64 bundle slots.
}}
Bundles are used to store different [[item|item type]]s in the same [[inventory]] slot. This does not, however, increase the total capacity of the slot: each bundle has 64 "bundle slots" and each item placed in the bundle takes up these slots similar to how they take up space in a normal inventory slot: items that stack to 64 take up 1 bundle slot, items that stack to 16 (for example, [[egg]]s) take up 4, and items that do not stack (such as tools/weapons/armor) take up the whole bundle, all 64 slots.
Although bundles themselves cannot be stacked, a bundle can be placed inside another (nested): the inner bundle itself uses 4 slots plus the number of slots already occupied by the items in that bundle.<ref>{{bug|MC-203567||Bundles can be placed inside of bundles|WAI}}</ref>
To place items inside a bundle, either (1) pick up the bundle in the inventory and right-click on the item(s) to be placed inside or (2) pick up the item(s) and right-click on the bundle. When placing bundles inside another bundle, the interface uses the first method: picking up Bundle A and right clicking on Bundle B attempts to store Bundle B inside A.
Bundles can be {{ctrl|used}} inside the inventory to take out the last item put in. In this way, items are accessible LIFO (last in, first out). When {{ctrl|used}} outside the inventory, it dumps all the items out into the world.
Hovering over the bundle shows its contained items in its inventory slots. The number of bundle slots used is displayed as ''<fullness>''/64 in the tooltip. If the bundle is full, then the empty slots are greyed out with an <span class="invslot">{{SlotSprite|Bundle full}}</span>.
[[Shulker box]]es cannot be placed inside of bundles.
[[File:MinecraftBundle.jpg|thumb|Hovering the mouse over a bundle filled with mob loot, nearly full, with 61 items.]]
== Sounds ==
{{Sound table
|sound=Bundle drop contents1.ogg
|sound2=Bundle drop contents2.ogg
|sound3=Bundle drop contents3.ogg
|subtitle=Bundle empties
|source=player
|description=When a bundle's items are thrown onto the ground
|id=item.bundle.drop_contents
|translationkey=subtitles.item.bundle.drop_contents
|volume=0.8
|pitch=''varies'' <ref group=sound>Can be 0.8-1.2 or 0.76-1.14 for each sound</ref>
|distance=16}}
{{Sound table
|sound=Bundle insert1.ogg
|sound2=Bundle insert2.ogg
|sound3=Bundle insert3.ogg
|subtitle=Item packed
|source=player
|description=When items are placed into a bundle
|id=item.bundle.insert
|translationkey=subtitles.item.bundle.insert
|volume=0.8
|pitch=''varies'' <ref group=sound>Can be 0.8-1.2, 0.76-1.14, or 0.84-1.26 for each sound</ref>
|distance=16}}
{{Sound table
|sound=Bundle remove one1.ogg
|sound2=Bundle remove one2.ogg
|sound3=Bundle remove one3.ogg
|subtitle=Item unpacked
|source=player
|description=When items are removed from a bundle
|id=item.bundle.remove_one
|translationkey=subtitles.item.bundle.remove_one
|volume=0.8
|pitch=''varies' <ref group=sound>Can be 0.8-1.2, 0.84-1.26, or 0.88-1.32 for each sound</ref>
|distance=16
|foot=1}}
== Data values ==
=== ID ===
{{JE}}:
{{ID table
|edition=java
|showforms=y
|generatetranslationkeys=y
|displayname=Bundle
|spritetype=item
|nameid=bundle
|form=item
|foot=1}}
=== Item data ===
<div class="treeview" style="margin-top: 0;">
* {{nbt|compound|tag}}: The '''tag''' tag.
{{:Player.dat_format/Bundle}}
</div>
== History ==
{{History||October 3, 2020|link={{ytl|DBvZ2Iqmm3M|t=1846s}}|[[File:Bundle JE1.png|32px]][[File:Bundle Filled JE1.png|32px]] Bundles are revealed at [[Minecraft Live 2020]]. Hovering over them shows all items inside scattered around a large area, and incomplete bundles have the empty texture.}}
{{History||October 16, 2021|link=https://clips.twitch.tv/AffluentEncouragingOryxPeteZaroll-cd8pIapkfD4PRHxO|Ulraf, a game developer on ''Minecraft'', states that bundles will not be included in [[Caves & Cliffs]].}}
{{History||November 17, 2021|link=https://www.minecraft.net/en-us/article/caves---cliffs-update-part-ii-coming|Bundles are announced to be added after [[The Wild Update]].}}
{{History|java}}
{{History||1.17|snap=20w45a|[[File:Bundle JE1.png|32px]][[File:Bundle Filled JE1.png|32px]] Added bundles. Hovering over them shows some of the items contained and their quantities, much like the tooltip of a [[shulker box]]. Incomplete bundles have the full texture.}}
{{History|||snap=20w46a|[[File:Bundle JE2.png|32px]][[File:Bundle Filled JE2.png|32px]] The textures of bundles have been changed.
|Hovering over bundles now shows its contained items in special slots, similar to slots in the [[inventory]]. If the bundle is not full, it also has an empty slot with a plus on it.}}
{{History|||snap=20w48a|Bundles now show fullness as a number when [[advanced tooltips]] are enabled.
|{{ctrl|Using}} a bundle in the inventory now empties one item from the bundle instead of emptying all the contents out to the [[inventory]].
|{{ctrl|Using}} a bundle now throws out its entire content into the world.}}
{{History|||snap=20w49a|Bundle fullness is now always shown.
|Full bundles now show the blue bar instead of hiding it, to distinguish from empty bundles.}}
{{History|||snap=20w51a|Bundles now drop its contents when destroyed as an [[Item (entity)|item entity]].
|Bundle fullness has been changed from <code>Fullness: ''<fullness>'' / 64</code> to <code>''<fullness>''/64</code>
|The slots in the tooltip when hovering over bundles have changed to have a border, and rows of slot have a thicker edge between them.
|When the bundle is not full, it instead shows empty slots instead of one slot with a plus. When it is full, those empty slots become greyed out with an X.}}
{{History|||snap=21w05a|The player now receives a tutorial when first having a bundle in the inventory.}}
{{History|||snap=21w19a|Bundles are now accessible only through commands.}}
{{History||1.18|snap=Experimental Snapshot 1|Bundles are now available in the creative inventory and can be crafted once again.}}
{{History|||snap=21w37a|Bundles are once again accessible only through commands.}}
{{History||1.19.3|snap=22w42a|Bundles have been made available once again, and have been moved behind their own datapack.}}
{{h|bedrock}}
{{h||1.19.50|snap=beta 1.19.50.21|Added bundle GUI textures in the Vanilla Packs.}}
{{History|foot}}
== Issues ==
{{Issue list}}
== Gallery ==
<gallery>
JE 1.17 Development Bundle.png|The original bundle UI
Bundle in Inventory.jpg|A bundle inventory in the inventory
</gallery>
== References ==
{{Reflist}}
{{Items}}
[[Category:Storage]]
[[Category:Tools]]
[[Category:Renewable resources]]
[[de:Bündel]]
[[es:Saco]]
[[fr:Sac]]
[[ja:バンドル]]
[[pl:Sakwa]]
[[pt:Trouxa]]
[[ru:Мешок]]
[[zh:收纳袋]]</li><li>[[Milk Bucket|Milk Bucket]]<br/>{{Item
| title=Milk Bucket
| image = Milk Bucket.png
| renewable = Yes
| effects = Clears all
| stackable = No
}}
A '''milk bucket'''{{fn|Known as '''Milk Bucket''' {{in|java}} and '''Milk''' {{in|bedrock}}.}} is a [[drink]] obtained from {{Control|use|text=using}} a [[bucket]] on [[cow]]s, [[mooshroom]]s and [[goat]]s that can be consumed to clear all [[Effect|effects]].
== Obtaining ==
=== Harvesting ===
Milk buckets can be obtained from [[cow]]s, [[mooshroom]]s, and [[goat]]s by pressing {{control|use}} while looking at them with an empty [[bucket]].
=== Mob loot ===
A milk bucket has a chance of dropping from a [[wandering trader]], if the trader is killed while holding it.{{only|java}}
== Usage ==
Holding {{control|use}} with a milk bucket starts the drinking sound and animation. {{IN|java}}, the animation is shown only in first-person camera mode.
When consumed, milk immediately removes all status [[effect]]s from the [[player]]. [[Fire]] is not a status effect; therefore, drinking milk doesn't extinguish a burning player.
The benefits of area status effects granted by [[beacon]]s and [[Conduit Power|conduit power]] are restored almost immediately in Bedrock Edition and after a few seconds in ''Java Edition''.
=== Crafting ingredient ===
{{crafting usage|Milk Bucket}}
== Sounds ==
{{el|je}}:
{{Sound table
|sound=Drink.ogg
|subtitle=Sipping
|source=player
|description=While a player is drinking milk
|id=entity.generic.drink
|translationkey=subtitles.entity.generic.drink
|volume=0.5
|pitch=0.9-1.0
|distance=16}}
{{Sound table
|sound=Cow milk1.ogg
|sound2=Cow milk2.ogg
|sound3=Cow milk3.ogg
|source=player
|subtitle=Cow gets milked
|description=When a cow is milked
|id=entity.cow.milk
|translationkey=subtitles.entity.cow.milk
|volume=1.0
|pitch=1.0
|distance=16}}
{{Sound table
|sound=Mooshroom milk1.ogg
|sound2=Mooshroom milk2.ogg
|sound3=Mooshroom milk3.ogg
|subtitle=Goat gets milked
|description=When a regular goat is milked
|source=neutral
|id=entity.goat.milk
|translationkey=subtitles.entity.goat.milk
|volume=1.0
|pitch=1.0
|distance=16}}
{{Sound table
|sound=Goat screaming milk1.ogg
|sound2=Goat screaming milk2.ogg
|sound3=Goat screaming milk3.ogg
|sound4=Goat screaming milk4.ogg
|sound5=Goat screaming milk5.ogg
|subtitle=Goat gets milked
|description=When a screaming goat is milked
|source=neutral
|id=entity.goat.screaming.milk
|translationkey=subtitles.entity.goat.milk
|volume=1.0
|pitch=1.0
|distance=16}}
{{Sound table
|sound=Wandering trader drink milk1.ogg
|sound2=Wandering trader drink milk2.ogg
|sound3=Wandering trader drink milk3.ogg
|sound4=Wandering trader drink milk4.ogg
|sound5=Wandering trader drink milk5.ogg
|subtitle=Wandering Trader drinks milk
|source=neutral
|description=While a wandering trader is drinking milk to become visible during daytime
|id=entity.wandering_trader.drink_milk
|translationkey=subtitles.entity.wandering_trader.drink_milk
|volume=0.5
|pitch=0.9-1.0
|distance=16
|foot=1}}
{{el|be}}:
{{Sound table
|type=bedrock
|sound=Drink.ogg
|source=player
|description=While a player is drinking milk
|id=random.drink
|volume=0.35
|pitch=0.9-1.1}}
{{Sound table
|sound=Cow milk1.ogg
|sound2=Cow milk2.ogg
|sound3=Cow milk3.ogg
|source=neutral
|description=When a cow is milked
|id=mob.cow.milk
|volume=1.0
|pitch=1.0}}
{{Sound table
|sound=Mooshroom milk1.ogg
|sound2=Mooshroom milk2.ogg
|sound3=Mooshroom milk3.ogg
|description=When a regular goat is milked
|source=neutral
|id=mob.mooshroom.suspicious_milk
|volume=1.0
|pitch=1.0/0.9/1.1}}
{{Sound table
|sound=Goat screaming milk1.ogg
|sound2=Goat screaming milk2.ogg
|sound3=Goat screaming milk3.ogg
|sound4=Goat screaming milk4.ogg
|sound5=Goat screaming milk5.ogg
|description=When a screaming goat is milked
|source=neutral
|id=mob.goat.milk.screamer
|volume=1.0
|pitch=1.0}}
{{Sound table
|sound=Wandering trader drink milk1.ogg
|sound2=Wandering trader drink milk2.ogg
|sound3=Wandering trader drink milk3.ogg
|sound4=Wandering trader drink milk4.ogg
|sound5=Wandering trader drink milk5.ogg
|source=neutral
|description=While a wandering trader is drinking milk to become visible during daytime
|id=mob.wanderingtrader.drink_milk
|volume=1.0
|pitch=0.8-1.2
|foot=1}}
== Data values ==
=== ID ===
{{edition|java}}:
{{ID table
|edition=java
|showforms=y
|generatetranslationkeys=y
|displayname=Milk Bucket
|spritetype=item
|nameid=milk_bucket
|form=item
|foot=1}}
{{edition|bedrock}}:
{{ID table
|edition=bedrock
|showaliasids=y
|shownumericids=y
|showforms=y
|notshowbeitemforms=y
|generatetranslationkeys=y
|displayname=Milk
|spritetype=item
|nameid=milk_bucket
|aliasid=bucket / 1
|id=361
|form=item
|translationkey=item.milk.name
|foot=1}}
== Achievements ==
{{load achievements|The Lie}}
== Advancements ==
{{Load advancements|Husbandry}}
== Video ==
<div style="text-align:center">{{yt|eyxea_d0b3s}}</div>
== History ==
{{History|java alpha}}
{{History||v1.0.8|[[File:Milk Bucket JE1 BE1.png|32px]] Milk has been introduced, but it has no purpose and is obtainable only through inventory editing.}}
{{History||v1.0.11|Milk can now be obtained by {{control|use|text=milking}} a [[cow]] with a [[bucket]]. However, it is not yet drinkable.}}
{{History||v1.0.17|Milk buckets can now be emptied.}}
{{History|java beta}}
{{History||1.2|Milk has been incorporated into the [[crafting]] recipe of [[cake]].}}
{{History||1.2_01|[[Squid]] can now be milked by right-clicking on their mouth if part of their body was exposed to [[air]] or if they were not touching another [[block]]. An easy way to accomplish this is to pull a squid with a [[fishing rod]] away from other blocks and then milk it.}}
{{History||1.3_01|Squid milking has been removed.}}
{{History|java}}
{{History||1.0.0|snap=Beta 1.9 Prerelease|Milk can now be obtained by milking [[mooshroom]]s.}}
{{History|||snap=Beta 1.9 Prerelease 2|Milk has been made drinkable.
|According to a tweet by [[Jeb]] on September 30th 2011, milk was made a cure for all status effects.<ref>{{tweet|jeb_|119842906528944129|@Nexusdog_UK I haven't! In beta 1.9 pre2 milk works like a clear-everything drink|September 30, 2011}}</ref>
|Milk is no longer emptiable.}}
{{History||1.13|snap=17w47a|Prior to [[1.13/Flattening|''The Flattening'']], this [[item]]'s numeral ID was 335.}}
{{History|||snap=18w20a|"Milk" has been renamed to "Milk Bucket".}}
{{History||1.14|snap=18w43a|[[File:Milk Bucket JE2 BE2.png|32px]] The texture of milk buckets has been changed.}}
{{History||1.14|snap=19w06a|[[Wandering trader]]s now drink from milk buckets at dawn, and have a change to drop them.}}
{{History||1.17|snap=21w13a|Milk can now be obtained by milking [[goat]]s.}}
{{History|upcoming java}}
{{History||Villager Trade Rebalance<br>(Experimental)|link=Java Edition 1.20.2|snap=23w31a|Wander traders now have a chance to [[trading|buy]] a milk bucket from the player.}}
{{History|pocket alpha}}
{{History||v0.7.0|[[File:Milk Bucket JE1 BE1.png|32px]] Added milk buckets.
|Milk buckets are not yet drinkable.}}
{{History||v0.11.0|snap=build 4|Drinking milk now removes [[status effects]].
|Added milk buckets to the Creative inventory.{{verify|type=update}}{{info needed}}<!---same update?--->}}
{{History|bedrock}}
{{History||1.4.0|snap=beta 1.2.14.2|Moved all bucket items, including milk, from the Equipment tab to the Items tab in the [[Creative inventory]].{{verify|type=update}}{{info needed}}<!---please check snapshots, only 1 major release version was checked each--->}}
{{History||1.10.0|snap=beta 1.10.0.3|[[File:Milk Bucket JE2 BE2.png|32px]] The texture of milk buckets has been changed.}}
{{History||1.16.100|snap=beta 1.16.100.56|The ID of milk has been changed from <code>bucket/1</code> to <code>milk_bucket</code>.}}
{{History||1.16.200|snap=beta 1.16.200.52|Milk can now be obtained by milking [[goat]]s.}}
{{History|console}}
{{History||xbox=TU1|xbone=CU1|ps=1.0|wiiu=Patch 1|switch=1.0.1|[[File:Milk Bucket JE1 BE1.png|32px]] Added milk buckets.}}
{{History|Ps4}}
{{History||1.90|[[File:Milk Bucket JE2 BE2.png|32px]] The texture of milk buckets has been changed.}}
{{History|New 3DS}}
{{History||0.1.0|[[File:Milk Bucket JE1 BE1.png|32px]] Added milk buckets.}}
{{History|foot}}
== Issues ==
{{issue list}}
== See also ==
*[[Water Bucket]]
*[[Lava]]
*[[Food]]
*[[Cake]]
*[[Honey Bottle]] (alternative to remove poison effect)
*[[Medicine]]
== Notes ==
{{fnlist}}
== References ==
{{reflist}}
== External Links ==
*[https://www.minecraft.net/en-us/article/taking-inventory--milk-bucket Taking Inventory: Milk Bucket] – Minecraft.net on October 8, 2019
{{Items}}
[[Category:Food]]
[[Category:Renewable resources]]
[[Category:Tools]]
[[cs:Mléko]]
[[de:Milcheimer]]
[[es:Cubo con leche]]
[[fr:Seau de lait]]
[[hu:Tej]]
[[it:Secchio di latte]]
[[ja:ミルク入りバケツ]]
[[ko:우유 양동이]]
[[nl:Emmer melk]]
[[pl:Wiadro mleka]]
[[pt:Balde de leite]]
[[ru:Ведро с молоком]]
[[th:ถังนม]]
[[uk:Відро молока]]
[[zh:奶桶]]</li></ul> | 15w47a | Overlay layers (hat, jacket, sleeves, and pants) correctly render semitransparent pixels, instead of just fully opaque and fully transparent pixels. | |||||||||||||||||||||||||||||||||
| Pocket Edition Alpha | |||||||||||||||||||||||||||||||||||
v0.11.0{{Extension DPL}}<ul><li>[[Bundle|Bundle]]<br/>{{Experimental feature|bundle}}
{{planned|BE}}
{{Item
| image = Bundle.png
| image2 = Bundle Filled.png
| rarity = Common
| renewable = No
| stackable = No
}}
A '''bundle''' is an [[item]] that can store up to a stack's worth of mixed [[item]] types within itself in a single [[inventory]] slot. Items that stack to 16 occupy more space within the bundle, and items that do not stack occupy the entire bundle without allowing space for any other items.
== Obtaining ==
=== Crafting ===
{{Crafting
|showdescription=1
|A1=String |B1=Rabbit Hide |C1=String
|A2=Rabbit Hide |C2=Rabbit Hide
|A3=Rabbit Hide |B3=Rabbit Hide |C3=Rabbit Hide
|Output=Bundle
|type=Tool
|description={{OnlyExperimental|bundle}}
}}
== Usage ==
<!--The tooltip does not reflect the current bundle "tooltip"-->
{{FakeImage|style=max-width:250px;
|1={{Slot|Stick,64}}{{Slot|Ender Pearl,16}}{{Slot|Iron Sword}}<br>{{Slot|Stick,1}}{{Slot|Ender Pearl,4}}{{Slot|Iron Sword,64}}<br>{{Slot|Filled Bundle[Stick x32/Ender Pearl x8]| title = Bundle|link=none}}
|2=Item stack sizes (top row) and the number of bundle slots they take up (middle row). Sticks stack to 64, so they take up one bundle slot; ender pearls stack to 16, so they take up four; and swords do not stack, so they take up the whole bundle. So, for instance, a bundle may have 32 sticks and 8 ender pearls inside (bottom), which take up a total of {{Tooltip|(32×1)|32 Sticks}}+{{Tooltip|(8×4)|8 Ender Pearls}}=64 bundle slots.
}}
Bundles are used to store different [[item|item type]]s in the same [[inventory]] slot. This does not, however, increase the total capacity of the slot: each bundle has 64 "bundle slots" and each item placed in the bundle takes up these slots similar to how they take up space in a normal inventory slot: items that stack to 64 take up 1 bundle slot, items that stack to 16 (for example, [[egg]]s) take up 4, and items that do not stack (such as tools/weapons/armor) take up the whole bundle, all 64 slots.
Although bundles themselves cannot be stacked, a bundle can be placed inside another (nested): the inner bundle itself uses 4 slots plus the number of slots already occupied by the items in that bundle.<ref>{{bug|MC-203567||Bundles can be placed inside of bundles|WAI}}</ref>
To place items inside a bundle, either (1) pick up the bundle in the inventory and right-click on the item(s) to be placed inside or (2) pick up the item(s) and right-click on the bundle. When placing bundles inside another bundle, the interface uses the first method: picking up Bundle A and right clicking on Bundle B attempts to store Bundle B inside A.
Bundles can be {{ctrl|used}} inside the inventory to take out the last item put in. In this way, items are accessible LIFO (last in, first out). When {{ctrl|used}} outside the inventory, it dumps all the items out into the world.
Hovering over the bundle shows its contained items in its inventory slots. The number of bundle slots used is displayed as ''<fullness>''/64 in the tooltip. If the bundle is full, then the empty slots are greyed out with an <span class="invslot">{{SlotSprite|Bundle full}}</span>.
[[Shulker box]]es cannot be placed inside of bundles.
[[File:MinecraftBundle.jpg|thumb|Hovering the mouse over a bundle filled with mob loot, nearly full, with 61 items.]]
== Sounds ==
{{Sound table
|sound=Bundle drop contents1.ogg
|sound2=Bundle drop contents2.ogg
|sound3=Bundle drop contents3.ogg
|subtitle=Bundle empties
|source=player
|description=When a bundle's items are thrown onto the ground
|id=item.bundle.drop_contents
|translationkey=subtitles.item.bundle.drop_contents
|volume=0.8
|pitch=''varies'' <ref group=sound>Can be 0.8-1.2 or 0.76-1.14 for each sound</ref>
|distance=16}}
{{Sound table
|sound=Bundle insert1.ogg
|sound2=Bundle insert2.ogg
|sound3=Bundle insert3.ogg
|subtitle=Item packed
|source=player
|description=When items are placed into a bundle
|id=item.bundle.insert
|translationkey=subtitles.item.bundle.insert
|volume=0.8
|pitch=''varies'' <ref group=sound>Can be 0.8-1.2, 0.76-1.14, or 0.84-1.26 for each sound</ref>
|distance=16}}
{{Sound table
|sound=Bundle remove one1.ogg
|sound2=Bundle remove one2.ogg
|sound3=Bundle remove one3.ogg
|subtitle=Item unpacked
|source=player
|description=When items are removed from a bundle
|id=item.bundle.remove_one
|translationkey=subtitles.item.bundle.remove_one
|volume=0.8
|pitch=''varies' <ref group=sound>Can be 0.8-1.2, 0.84-1.26, or 0.88-1.32 for each sound</ref>
|distance=16
|foot=1}}
== Data values ==
=== ID ===
{{JE}}:
{{ID table
|edition=java
|showforms=y
|generatetranslationkeys=y
|displayname=Bundle
|spritetype=item
|nameid=bundle
|form=item
|foot=1}}
=== Item data ===
<div class="treeview" style="margin-top: 0;">
* {{nbt|compound|tag}}: The '''tag''' tag.
{{:Player.dat_format/Bundle}}
</div>
== History ==
{{History||October 3, 2020|link={{ytl|DBvZ2Iqmm3M|t=1846s}}|[[File:Bundle JE1.png|32px]][[File:Bundle Filled JE1.png|32px]] Bundles are revealed at [[Minecraft Live 2020]]. Hovering over them shows all items inside scattered around a large area, and incomplete bundles have the empty texture.}}
{{History||October 16, 2021|link=https://clips.twitch.tv/AffluentEncouragingOryxPeteZaroll-cd8pIapkfD4PRHxO|Ulraf, a game developer on ''Minecraft'', states that bundles will not be included in [[Caves & Cliffs]].}}
{{History||November 17, 2021|link=https://www.minecraft.net/en-us/article/caves---cliffs-update-part-ii-coming|Bundles are announced to be added after [[The Wild Update]].}}
{{History|java}}
{{History||1.17|snap=20w45a|[[File:Bundle JE1.png|32px]][[File:Bundle Filled JE1.png|32px]] Added bundles. Hovering over them shows some of the items contained and their quantities, much like the tooltip of a [[shulker box]]. Incomplete bundles have the full texture.}}
{{History|||snap=20w46a|[[File:Bundle JE2.png|32px]][[File:Bundle Filled JE2.png|32px]] The textures of bundles have been changed.
|Hovering over bundles now shows its contained items in special slots, similar to slots in the [[inventory]]. If the bundle is not full, it also has an empty slot with a plus on it.}}
{{History|||snap=20w48a|Bundles now show fullness as a number when [[advanced tooltips]] are enabled.
|{{ctrl|Using}} a bundle in the inventory now empties one item from the bundle instead of emptying all the contents out to the [[inventory]].
|{{ctrl|Using}} a bundle now throws out its entire content into the world.}}
{{History|||snap=20w49a|Bundle fullness is now always shown.
|Full bundles now show the blue bar instead of hiding it, to distinguish from empty bundles.}}
{{History|||snap=20w51a|Bundles now drop its contents when destroyed as an [[Item (entity)|item entity]].
|Bundle fullness has been changed from <code>Fullness: ''<fullness>'' / 64</code> to <code>''<fullness>''/64</code>
|The slots in the tooltip when hovering over bundles have changed to have a border, and rows of slot have a thicker edge between them.
|When the bundle is not full, it instead shows empty slots instead of one slot with a plus. When it is full, those empty slots become greyed out with an X.}}
{{History|||snap=21w05a|The player now receives a tutorial when first having a bundle in the inventory.}}
{{History|||snap=21w19a|Bundles are now accessible only through commands.}}
{{History||1.18|snap=Experimental Snapshot 1|Bundles are now available in the creative inventory and can be crafted once again.}}
{{History|||snap=21w37a|Bundles are once again accessible only through commands.}}
{{History||1.19.3|snap=22w42a|Bundles have been made available once again, and have been moved behind their own datapack.}}
{{h|bedrock}}
{{h||1.19.50|snap=beta 1.19.50.21|Added bundle GUI textures in the Vanilla Packs.}}
{{History|foot}}
== Issues ==
{{Issue list}}
== Gallery ==
<gallery>
JE 1.17 Development Bundle.png|The original bundle UI
Bundle in Inventory.jpg|A bundle inventory in the inventory
</gallery>
== References ==
{{Reflist}}
{{Items}}
[[Category:Storage]]
[[Category:Tools]]
[[Category:Renewable resources]]
[[de:Bündel]]
[[es:Saco]]
[[fr:Sac]]
[[ja:バンドル]]
[[pl:Sakwa]]
[[pt:Trouxa]]
[[ru:Мешок]]
[[zh:收纳袋]]</li><li>[[Rotten Flesh|Rotten Flesh]]<br/>{{Item
| title = Rotten Flesh
| image = Rotten Flesh.png
| renewable = Yes
| heals = {{hunger|4}}
|effects={{EffectLink|link=Hunger (status effect)|Hunger}} (0:30) (80% chance)
| stackable = Yes (64)
}}
'''Rotten flesh''' is a [[food]] item that can be eaten by the [[player]], with high risk of inflicting [[Hunger (status effect)|Hunger]] and low [[Saturation]].
== Obtaining ==
=== Mob loot ===
==== Zombies ====
[[Zombie]]s, [[zombie villager]]s, [[zombie horse]]s, [[husk]]s, and [[drowned]] drop from 0 to 2 units of rotten flesh. [[Looting]] can increase this by one per level, for a maximum of 5 rotten flesh.
==== Zoglins ====
[[Zoglin]]s drop 1-3. Looting III grants a maximum of 6.
==== Zombified piglins ====
[[Zombified Piglin|Zombified piglins]] drop 0-1. Looting III grants a maximum of 4.
=== Fishing ===
Rotten flesh can be obtained as a "junk" item while [[fishing]].
=== Chest loot ===
{{LootChestItem|rotten-flesh}}
=== Cat gifts ===
{{main|Cat#Gifts}}
Tamed [[cat]]s have a 70% chance of giving the [[player]] a gift when they wake up from a [[bed]], and the gift has a 16.13% chance to be a rotten flesh.
== Usage ==
=== Food ===
{{see also|Tutorials/Hunger management}}
To eat rotten flesh, press and hold {{control|use}} while rotten flesh is selected in the hotbar.
Eating rotten flesh restores {{hunger|4}} [[hunger]] and 0.8 hunger [[Hunger#Mechanics|saturation]], but has an 80% chance of inflicting {{EffectLink|Hunger (effect)|id=Hunger}} for 30 seconds. Note that the duration does ''not'' accumulate when eating multiple pieces. However, if more is consumed and the [[Hunger (effect)|Hunger]] status effect is inflicted, the duration resets to 30 seconds.
=== Wolves ===
Rotten flesh can be used to [[breed]] and heal tamed [[wolves]], lead them around, and make baby tamed wolves grow up faster by 10% of the remaining time.
Wolves are immune to the Hunger effect.
=== Trading ===
Novice-level [[Trading#Cleric|cleric villagers]] buy 32 rotten flesh for 1 [[emerald]] as part of their trades.
==Sounds==
{{Sound table/Entity/Food}}
== Data values ==
=== ID ===
{{edition|java}}:
{{ID table
|edition=java
|showforms=y
|generatetranslationkeys=y
|displayname=Rotten Flesh
|spritetype=item
|nameid=rotten_flesh
|form=item
|foot=1}}
{{edition|bedrock}}:
{{ID table
|edition=bedrock
|shownumericids=y
|showforms=y
|notshowbeitemforms=y
|generatetranslationkeys=y
|displayname=Rotten Flesh
|spritetype=item
|nameid=rotten_flesh
|id=277
|form=item
|foot=1}}
== Achievements ==
{{load achievements|Iron Belly}}
== Advancements ==
{{load advancements|Husbandry;A Balanced Diet}}
== Video ==
{{Video note|The video is outdated, as rotten flesh can now be also gained from [[fishing]], [[trading]], or loot chests.}}
<div style="text-align:center">{{yt|xTrUEVoe9Tw}}</div>
== History ==
{{History|java beta}}
{{History||1.8|snap=Pre-release|[[File:Rotten Flesh JE1.png|32px]] Added rotten flesh.
|[[Zombie]]s and [[zombie pigmen]] now drop rotten flesh instead of [[feather]]s and [[cooked porkchop]]s respectively.}}
{{History|java}}
{{History||1.0.0|snap=Beta 1.9 Prerelease 2|Food poisoning can now be stopped by drinking [[milk]].}}
{{History||1.2.1|snap=12w03a|Rotten flesh can now be used to [[Breeding|breed]] wolves. When a wolf eats rotten flesh, it will not receive the [[Hunger (effect)|Hunger]] effect.}}
{{History||1.3.1|snap=12w21a|Rotten flesh can now be found in [[desert temple]] [[chest]]s.
|Priest [[villager]]s now [[trading|buy]] rotten flesh.}}
{{History|||snap=1.3|[[File:Rotten Flesh JE2 BE1.png|32px]] The texture of rotten flesh has been changed.}}
{{History|||snap=12w22a|Rotten flesh now generates in [[jungle temple]] chests.
|Priest [[villager]]s no longer [[trading|buy]] rotten flesh.}}
{{History||1.7.2|snap=13w36a|Rotten flesh can now be obtained as one of the "junk" [[item]]s from [[fishing]].}}
{{History||1.8|snap=14w02a|Cleric [[villager]]s now [[trading|buy]] 36–40 rotten flesh for 1 [[emerald]], as their tier I trade.}}
{{history||1.9|snap=15w43a|Rotten flesh may now be found in [[igloo]] basement [[chest]]s.}}
{{history|||snap=15w44a|Rotten flesh now generates in [[dungeon]] chests.
|The average yield of rotten flesh has been decreased in [[desert temple]] chests.}}
{{History||1.11|snap=16w39a|Rotten flesh can now be found in [[woodland mansion]] [[chest]]s.}}
{{History||1.13|snap=17w47a|Prior to [[1.13/Flattening|''The Flattening'']], this [[item]]'s numeral ID was 367.}}
{{History|||snap=18w09a|Rotten flesh now generates in the loot [[chest]]s of [[underwater ruins]].}}
{{History|||snap=18w11a|[[Drowned]] may now [[drops|drop]] rotten flesh upon death.
|Rotten flesh now sometimes generates in [[shipwreck]] [[chest]]s.}}
{{History||1.14|snap=18w43a|[[File:Rotten Flesh JE3 BE2.png|32px]] The texture of rotten flesh has been changed.}}
{{History|||snap=18w44a|[[Cat]]s now offer rotten flesh as [[Cat#Gifts|gift]]s.}}
{{History|||snap=18w50a|Rotten flesh can now be found in [[village]] temple chests.}}
{{History||1.16|snap=20w06a|Added [[hoglin]]s, which can drop rotten flesh if killed.}}
{{History|||snap=20w07a|Rotten flesh has a {{frac|10|109}} (~9.17%) chance of being given by the new [[piglin]]s when [[bartering]], in a stack size of 4–12.
|[[Hoglin]]s no longer drop rotten flesh.}}
{{History|||snap=20w09a|Rotten flesh can no longer be obtained by bartering with piglins.}}
{{History|||snap=20w14a|Added [[zoglin]]s, which drop rotten flesh when killed.}}
{{History|pocket alpha}}
{{History||v0.11.0|snap=build 1|[[File:Rotten Flesh JE2 BE1.png|32px]] Added rotten flesh.
|As the hunger bar has not yet been added, rotten flesh inflicts [[poison]] rather than [[hunger]].
|[[Zombie]]s and [[zombie pigmen]] now [[drops|drop]] rotten flesh.}}
{{History|||snap=build 11|Rotten flesh can now be used to feed [[wolves]].}}
{{History||v0.12.1|snap=build 1|Eating rotten flesh now gives the [[player]] the [[Hunger]] status effect.
|Rotten flesh now restores [[hunger]] instead of [[health]].
|Added [[zombie villager]]s, which [[drops|drop]] rotten flesh when killed.}}
{{History||v0.13.0|snap=build 1|Rotten flesh can now be found inside [[desert temple]] [[chest]]s.}}
{{History||v0.15.0|snap=build 1|Added [[husk]]s and [[zombie horse]]s, both of which drop rotten flesh when killed.
|Rotten flesh can now be found inside [[jungle temple]] chests.}}
{{History|pocket}}
{{History||1.0.0|snap=alpha 0.17.0.1|Rotten flesh can now be found inside the basement [[chest]]s of [[igloo]]s.}}
{{History||1.0.4|snap=alpha 1.0.4.0|36-40 rotten flesh can now be [[trading|sold]] to cleric [[villager]]s.}}
{{History||1.1.0|snap=alpha 1.1.0.0|Rotten flesh can now be found in [[woodland mansion]] chests.}}
{{History|bedrock}}
{{History||1.4.0|snap=beta 1.2.13.8|Added [[drowned]], which [[drops|drop]] rotten flesh when killed.}}
{{History|||snap=beta 1.2.14.2|Rotten flesh can now be found in some [[shipwreck]] [[chest]]s.}}
{{History|||snap=beta 1.2.20.1|Rotten flesh can now be found inside [[underwater ruins]] chests.}}
{{History||1.8.0|snap=beta 1.8.0.8|Tamed [[cat]]s can now give the [[player]] rotten flesh as a gift.}}
{{History||1.10.0|snap=beta 1.10.0.3|[[File:Rotten Flesh JE3 BE2.png|32px]] The texture of rotten flesh has been changed.}}
{{History||1.11.0|snap=beta 1.11.0.1|Rotten flesh can now be found in [[desert]] [[village]] temple [[chest]]s.}}
{{History|||snap=beta 1.11.0.4|[[Trading]] has been changed, cleric [[villager]]s now [[trading|buy]] 32 rotten flesh for an [[emerald]].}}
{{History|console}}
{{History||xbox=TU5|xbone=CU1|ps=1.0|wiiu=Patch 1|switch=1.0.1|[[File:Rotten Flesh JE2 BE1.png|32px]] Added rotten flesh.}}
{{History||xbox=none|xbone=none|ps=1.90|wiiu=none|switch=none|[[File:Rotten Flesh JE3 BE2.png|32px]] The texture of rotten flesh has been changed.}}
{{History|new3ds}}
{{History||0.1.0|[[File:Rotten Flesh JE2 BE1.png|32px]] Added rotten flesh.}}
{{History|foot}}
== Issues ==
{{issue list}}
== External Links ==
*[https://www.minecraft.net/en-us/article/taking-inventory--rotten-flesh Taking Inventory: Rotten Flesh] – Minecraft.net on June 8, 2020
{{Items}}
[[cs:Shnilé maso]]
[[de:Verrottetes Fleisch]]
[[es:Carne podrida]]
[[fr:Chair putréfiée]]
[[hu:Rohadt hús]]
[[it:Carne marcia]]
[[ja:腐った肉]]
[[ko:썩은 살점]]
[[nl:Bedorven vlees]]
[[pl:Zgniłe mięso]]
[[pt:Carne podre]]
[[ru:Гнилая плоть]]
[[uk:Гнила плоть]]
[[zh:腐肉]]
[[Category:Renewable resources]]
[[Category:Food]]</li></ul> | build 1 | Added skins. Players can choose 'Steve' and 'Alex' models or their own custom skin (uses the same format as in Java Edition). | |||||||||||||||||||||||||||||||||
| build 10 | Added the first two skin packs: City Folk and Town Folk. Each skin pack has 5 free skins, and purchasing the skin pack unlocks the rest of the skins. Skin packs cost USD $0.99. | ||||||||||||||||||||||||||||||||||
v0.12.3{{Extension DPL}}<ul><li>[[Honey Bottle|Honey Bottle]]<br/>{{Item
| title = Honey Bottle
| image = Honey Bottle.png
| renewable = Yes
| heals = {{hunger|6}}
|effects=Clears {{EffectLink|Poison}}
| stackable = Yes (16)
}}
A '''honey bottle''' is a [[drinks|consumable drink]] [[item]] obtainable by using a [[glass bottle]] on a full [[beehive]]. Honey bottles remove [[poison]] when drunk and can be used to craft [[Honey Block|honey blocks]] and [[sugar]].
== Obtaining ==
{{See also|Tutorials/Honey farming}}
=== Harvesting ===
A honey bottle can be obtained by using a [[glass bottle]] on either a [[beehive]] or [[beehive|bee nest]] with a honey level of 5. Doing this angers any [[bee]]s inside, causing them to attack the player, unless there is a [[campfire]] or another [[block]] on [[fire]] beneath the bee nest or beehive.
A [[dispenser]] with glass bottles can be used to collect the honey without angering the bees. The honey bottle appears as an item in the dispenser's inventory. If the dispenser is full, the honey bottle is shot out.
=== Crafting ===
{{Crafting
|Glass Bottle
|Glass Bottle
|Honey Block
|Glass Bottle
|Glass Bottle
|Output=Honey Bottle, 4
|type= Foodstuff
}}
== Usage ==
To drink a honey bottle, press and hold {{control|use}} while it is selected in the [[hotbar]]. Drinking one restores {{hunger|6}} [[hunger]] and 1.2 hunger [[Hunger#Mechanics|saturation]]. Consuming the item also has the benefit of removing any [[poison]] effect applied to the player. Unlike drinking [[Milk Bucket|milk]], other applied effects are not removed upon drinking a honey bottle.
Honey bottles can be drunk even with a full hunger bar. Drinking a honey bottle takes 25% longer than eating other [[food]] - 2 seconds - and has a unique sound.
=== Crafting ingredient ===
{{Crafting usage}}
== Sounds ==
{{edition|java}}:
{{Sound table
|sound=Drink honey1.ogg
|sound2=Drink honey2.ogg
|sound3=Drink honey3.ogg
|sound4=Drink honey3.ogg
|subtitle=Gulping
|source=player
|description=While a player is drinking a honey bottle
|id=item.honey_bottle.drink
|translationkey=subtitles.item.honey_bottle.drink
|volume=0.5
|pitch=''varies'' <ref group=sound>0.9-1.0 for <code>drink_honey1</code> and <code>drink_honey2</code>, 0.315-0.35 for <code>drink_honey3</code>, and 0.675-0.75 for the second copy of <code>drink_honey3</code></ref>
|distance=16}}
{{Sound table
|sound=Bottle fill water1.ogg
|sound2=Bottle fill water2.ogg
|sound3=Bottle fill water3.ogg
|sound4=Bottle fill water4.ogg
|subtitle=Bottle fills
|source=block
|description=When a bottle is filled with honey
|id=item.bottle.fill
|translationkey = subtitles.item.bottle.fill
|volume=1.0
|pitch=1.0
|distance=16
|foot=1}}
{{edition|bedrock}}:
{{Sound table
|type=bedrock
|sound=Drink honey1.ogg
|sound2=Drink honey2.ogg
|sound3=Drink honey3.ogg
|sound4=Drink honey3.ogg<!--This is duplicated intentionally, see below-->
|source=player
|description=While a player is drinking a honey bottle
|id=random.drink_honey
|volume=''varies''<ref group="sound" name="bevarieshoney">0.5 for <code>drink_honey1</code> and <code>drink_honey2</code>, but <code>drink_honey3</code> is 0.175 or 0.375</ref>
|pitch=0.9-1.0}}
{{Sound table
|sound=Fill water bucket1.ogg
|sound2=Fill water bucket2.ogg
|sound3=Fill water bucket3.ogg
|source=block
|description=When a bottle is filled with honey<wbr><ref group=sound>{{Bug|MCPE-53881}}</ref>
|id=bucket.fill_water
|volume=1.0
|pitch=1.0
|foot=1}}
== Data values ==
=== ID ===
{{edition|java}}:
{{ID table
|edition=java
|showforms=y
|generatetranslationkeys=y
|displayname=Honey Bottle
|spritetype=item
|nameid=honey_bottle
|form=item
|foot=1}}
{{edition|bedrock}}:
{{ID table
|edition=bedrock
|shownumericids=y
|showforms=y
|notshowbeitemforms=y
|generatetranslationkeys=y
|displayname=Honey Bottle
|spritetype=item
|nameid=honey_bottle
|id=592
|form=item
|foot=1}}
== Achievements ==
{{Load achievements|Bee Our Guest}}
== Advancements ==
{{Load advancements|Husbandry;A Balanced Diet;Bee Our Guest}}
== History ==
{{History|java}}
{{History||1.15|snap=19w34a|[[File:Honey Bottle JE1.png|32px]] Added honey bottles.}}
{{History|||snap=19w35a|Honey bottles now remove the [[Poison]] effect when consumed.
|Honey bottles are now included in the "A Balanced Diet" [[advancement]].}}
{{History|||snap=19w36a|Honey bottles are now less filling, restoring 1.2 [[Hunger#Mechanics|saturation]] instead of 9.6.}}
{{History||1.15|snap=19w41a|Honey bottles can now be used to craft [[honey block]]s.}}
{{History||1.15|snap=19w44a|Honey bottles can now be [[crafting|crafted]] with four [[glass bottle]]s and one [[honey block]].
|Honey bottles are now stackable (up to 16).}}
{{History|||snap=19w46a|Using [[glass bottle]]s to collect honey now unlocks the [[Bee Our Guest]] advancement.}}
{{History|bedrock}}
{{History||1.14.0|snap=beta 1.14.0.1|[[File:Honey Bottle BE1.png|32px]] Added honey bottles.}}
{{History|||snap=beta 1.14.0.4|[[File:Honey Bottle BE2.png|32px]] The texture of honey bottles has been changed to match {{el|je}}'s.
|Honey bottles can now be crafted with four [[glass bottle]]s and one [[honey block]].
|Honey bottles are now stackable to 16.}}
{{History|||snap=release|slink=Bedrock Edition 1.14.0|Using [[glass bottle]]s to collect honey now unlocks the [[Bee our guest]] achievement.}}
{{History|foot}}
== Issues ==
{{issue list}}
== Trivia ==
* Honey bottles are the only drinkable [[item]]s that can stack. They have a maximum stack size of 16.
* Honey bottles are the only drinkable items that can restore hunger.
* Honey bottles are 4 pixels more full than [[water bottles]].
{{Items}}
[[cs:Lahvička medu]]
[[de:Honigflasche]]
[[es:Frasco con miel]]
[[fr:Fiole de miel]]
[[ja:ハチミツ入りの瓶]]
[[ko:꿀이 든 병]]
[[lzh:蜜瓶]]
[[pl:Butelka miodu]]
[[pt:Frasco de mel]]
[[ru:Бутылочка мёда]]
[[th:ขวดน้ำผึ้ง]]
[[uk:Пляшечка меду]]
[[zh:蜂蜜瓶]]
[[Category:Food]]
[[Category:Renewable resources]]</li><li>[[Painting|Painting]]<br/>{{ItemEntity
|title=Painting
|image=Painting JE2 BE2.png
|extratext=View [[#Renders|all renders]]
|renewable=Yes
|stackable=Yes (64)
|drops=1 {{ItemLink|Painting}}
}}
'''Paintings''' are decorative [[entity|entities]] that hang on walls.
== Obtaining ==
=== Crafting ===
{{Crafting
|A1= Stick |B1= Stick |C1= Stick
|A2= Stick |B2= Any Wool |C2= Stick
|A3= Stick |B3= Stick |C3= Stick
|Output= Painting
|type= Decoration block
}}
Paintings can be crafted with any color of [[wool]]. The color of the wool used does not influence the picture chosen when the painting is placed.
Once placed, it displays a random painting.
=== Breaking ===
To remove a painting from a wall, the player can {{control|attack}} it, break one of its supporting blocks, cover one square of it with a block, hit it with an arrow, egg, ender pearl, snowball, or fire charge, or subject it to an explosion. The painting then drops as an item. Arrows that hit paintings disappear.
=== Trading ===
Master-level shepherd [[villager]]s sell 3 paintings for 2 [[emerald]]s.
== Usage ==
=== Placement ===
Paintings can be placed on the sides of [[solid block]]s, [[sign]]s, [[banner]]s, or [[sculk vein]]s. A small gap is visible between the painting and attachment surface. There are several different sizes of paintings (see below). When placed, a painting checks for the largest amount of space it has. It then chooses a random painting of that size. The player can add blocks around the painting to ensure it is the size wanted. When the supporting blocks are removed, the painting breaks after 20 game [[tick]]s (1 second) if no supporting blocks are replaced during that interval.
=== Properties ===
Being an entity, paintings can simultaneously exist in the same space as blocks such as water or torches. Specifically, they can share the space with any block whose collision box does not intersect its hitbox.
Players and mobs are able to walk through paintings, as long as the blocks supporting the painting allow it. Secret doorways can be created this way. [[Light]] propagates through paintings as well.
If a player is concealed behind a painting, the player's name is also concealed from other players.{{verify|Is this true in Bedrock?}}
Paintings are non-flammable.
== Canvases ==
{{Stub|Needing the new painting renders}}
There are 31 paintings in the game. These are mostly based on paintings by [[Kristoffer Zetterstrand]], who also created the ''Minecraft'' versions.
{| class="wikitable stikitable" style="text-align: center" data-description="Paintings"
! style="min-width:150px" |Canvas
! style="min-width:3em;max-width:4em" |Size
! style="min-width:3em" |Original
! style="min-width:3em" |Name
! style="min-width:3em;max-width:4.5em" |[[Resource location]]
! style="min-width:10em" |Description
! Java Edition version added
|-
! [[File:Alban (texture).png|64px]]
| rowspan="7" | 1×1 blocks<br>16×16 pixels || [https://zetterstrand.com/work/pictures/archive/alban.jpeg "Albanian"] || Albanian || <code>alban</code> || A man wearing a fez next to a house and a bush. As the name of the painting suggests, it may be a landscape in [[Wikipedia:Albania|Albania]]. || rowspan="9" | [[Indev 20100223]]
|-
! [[File:Aztec (texture).png|64px]]
|[https://zetterstrand.com/eventz/wp-content/uploads/2aztbig.jpg "de_aztec"]|| de_aztec || <code>aztec</code> || [[Wikipedia:Noclip mode|Free-look]] perspective of the map [[w:c:counterstrike:Aztec|de_aztec]] from the video game ''[[Wikipedia:Counter-Strike (video game)|Counter-Strike]]''.
|-
! [[File:Aztec2 (texture).png|64px]]
|[https://zetterstrand.com/eventz/wp-content/uploads/11aztec_for_print.jpg "de_aztec"]|| de_aztec || <code>aztec2</code> || [[Wikipedia:Noclip mode|Free-look]] perspective of the map [[w:c:counterstrike:Aztec|de_aztec]] from the video game ''[[Wikipedia:Counter-Strike (video game)|Counter-Strike]]''.
|-
! [[File:Bomb (texture).png|64px]]
|[https://zetterstrand.com/eventz/wp-content/uploads/12bomb.jpg "Target successfully bombed"]|| Target Successfully Bombed || <code>bomb</code> || The map [[w:c:counterstrike:Dust II|de_dust2]] from the video game ''[[Wikipedia:Counter-Strike (video game)|Counter-Strike]]'', named “target successfully bombed" in reference to the game.
|-
! [[File:Kebab (texture).png|64px]]
|[https://zetterstrand.com/work/pictures/archive/kebab2.jpg "Kebab med tre pepperoni"] || Kebab med tre pepperoni || <code>kebab</code> || A kebab with three green chili peppers.
|-
! [[File:Plant (texture).png|64px]]
|[https://zetterstrand.com/work/pictures/archive/paradistrad.jpeg "Paradisträd"] || Paradisträd || <code>plant</code> || Still life of two plants in pots. "Paradisträd" is Swedish for "[[Wikipedia:Crassula ovata|money tree]]", which is a common name for the depicted species in Scandinavia.
|-
! [[File:Wasteland (texture).png|64px]]
|[https://zetterstrand.com/eventz/wp-content/uploads/Wasteland_1920.jpg "Wasteland"]|| Wasteland || <code>wasteland</code> || A view of some wastelands; a small animal (presumably a rabbit) is sitting on the window ledge.
|-
! [[File:Courbet (texture).png|128px]]
| rowspan="5" | 2×1 blocks<br>32×16 pixels ||[https://zetterstrand.com/eventz/wp-content/uploads/bonjourmonsieurcourbet_BIG.jpg "Bonjour monsieur Courbet"]|| Bonjour Monsieur Courbet || <code>courbet</code> || Two hikers with pointy beards seemingly greeting each other. Based on Gustave Courbet's painting ''[[Wikipedia:La rencontre|The Meeting or "Bonjour, Monsieur Courbet"]]''.
|-
! [[File:Pool (texture).png|128px]]
|[https://zetterstrand.com/eventz/wp-content/uploads/thepool_1920.jpg "The pool"]|| The Pool || <code>pool</code> || Some men and women skinny-dipping in a pool over a cube of sorts. Also there is an old man resting in the lower-right edge.
|-
! [[File:Sea (texture).png|128px]]
| rowspan=2 |[https://zetterstrand.com/eventz/wp-content/uploads/SeaSide_1920.jpg "Seaside"]
| Seaside
| <code>sea</code>
| Mountains and a lake, with a small photo of a mountain and a bright-colored plant on the window ledge. || [[Indev 20100223]] / [[Alpha v1.1.1]]
|-
! [[File:Creebet (texture).png|128px]]
| Creebet || <code>creebet</code> || Mountains and a lake, with a small photo of a mountain and a creeper looking at the viewer through a window. || [[Alpha v1.1.1]]
|-
! [[File:Sunset (texture).png|128px]]
|[https://zetterstrand.com/eventz/wp-content/uploads/sunset_dense.jpg "sunset_dense"]|| sunset_dense || <code>sunset</code> || A view of mountains at sunset. || [[Indev 20100223]]
|-
! [[File:Graham (texture).png|64px]]
| rowspan="2" | 1×2 blocks<br>16×32 pixels ||[https://zetterstrand.com/eventz/wp-content/uploads/graham.jpg "Graham"]|| Graham || <code>graham</code> || King Graham, the player character in the video game series ''[[Wikipedia:King's Quest|King's Quest]]''. The original is based on ''[[Wikipedia:File:Sánchez_Cotán_(Bodegón_con_membrillo,_repollo,_melón_y_pepino).jpg|Still Life with Quince, Cabbage, Melon, and Cucumber]]'' by Juan Sánchez Cotán.|| [[Alpha v1.1.1]]
|-
! [[File:Wanderer (texture).png|64px]]
|[https://zetterstrand.com/eventz/wp-content/uploads/wanderer_1920.jpg "Wanderer"]|| Wanderer || <code>wanderer</code> || A version of Caspar David Friedrich's famous painting ''[[Wikipedia:Wanderer above the Sea of Fog|Wanderer above the Sea of Fog]]''. || rowspan="4" | [[Indev 20100223]]
|-
! [[File:Bust (texture).png|128px]]
| rowspan="6" | 2×2 blocks<br>32×32 pixels ||[https://zetterstrand.com/eventz/wp-content/uploads/bust_1915.jpg "Bust"]|| Bust || <code>bust</code> || A bust of [[Wikipedia:Marcus Aurelius|Marcus Aurelius]] surrounded by fire.
|-
! [[File:Match (texture).png|128px]]
|[https://zetterstrand.com/eventz/wp-content/uploads/Match_rgb_1918.jpg "Match"]|| Match || <code>match</code> || A hand holding a match, causing fire on a white cubic gas fireplace.
|-
! [[File:Skull and Roses (texture).png|128px]]
|[https://zetterstrand.com/eventz/wp-content/uploads/moonlight-installation_1920.jpg "Moonlight Installation"]|| Skull and Roses || <code>skull_and_roses</code> || A skeleton at night with red flowers in the foreground. The original painting was different, depicting a woman sitting in a couch, while the skull is in the middle of a body of glacial water of sorts.
|-
! [[File:Stage (texture).png|128px]]
|[https://zetterstrand.com/eventz/wp-content/uploads/The-stage-is-set-1.jpg "The stage is set"]
| The Stage Is Set
| <code>stage</code>
| Scenery from ''[[Wikipedia:Space Quest I|Space Quest I]]'', with the character Graham from the video game series ''[[Wikipedia:King's Quest|King's Quest]]'' appearing twice. || [[Indev 20100223]] / [[Alpha v1.1.1]]
|-
! [[File:Void (texture).png|128px]]
|[https://zetterstrand.com/eventz/wp-content/uploads/the-void_1920.jpg "The Void"]|| The void || <code>void</code> || An angel praying into a void with fire below. || [[Indev 20100223]]
|-
! [[File:Wither (painting texture).png|128px]]
| – || Wither || <code>wither</code> || The creation of a [[wither]].
This is the only painting not based on a real painting. Made by Jens Bergensten.<ref>{{Citation|url=https://www.youtube.com/watch?v=kK5Y4k-vVXc|title=Who Made Minecraft’s LAST Painting?!|author=AntVenom|website=YouTube|date=29 October 2022}}</ref><ref>https://www.reddit.com/r/Minecraft/comments/1tzav2/comment/cedagcy/</ref>
|| [[Java Edition 1.4.2]] ([[12w36a]])
|-
! [[File:Fighters (texture).png|128px]]
| 4×2 blocks<br>64×32 pixels ||[https://zetterstrand.com/eventz/wp-content/uploads/fighters.jpg "Fighters"]|| Fighters || <code>fighters</code> || Two men poised to fight. Paper versions of fighters from the game ''[[Wikipedia:International Karate +|International Karate +]]''. || [[Indev 20100223]]
|-
! [[File:Donkey Kong (texture).png|128px]]
| rowspan="2" | 4×3 blocks<br>64×48 pixels ||[https://zetterstrand.com/eventz/wp-content/uploads/kong.jpg "Kong"]|| Kong || <code>donkey_kong</code> || A paper-looking screenshot of the level [https://www.mariowiki.com/100m 100m] from the arcade game ''[[Wikipedia:Donkey Kong (arcade game)|Donkey Kong]]''. || rowspan="2" | [[Alpha v1.1.1]]
|-
! [[File:Skeleton (painting texture).png|128px]]
|[https://zetterstrand.com/eventz/wp-content/uploads/mortal_coil.jpg "Mortal Coil"]|| Mortal Coil || <code>skeleton</code> || [[w:c:grim-fandango:Bruno Martinez|Bruno Martinez]] from the adventure game ''[[Wikipedia:Grim Fandango|Grim Fandango]]''.
|-
! [[File:Burning Skull (texture).png|128px]]
| rowspan="3" | 4×4 blocks<br>64×64 pixels ||[https://zetterstrand.com/eventz/wp-content/uploads/skull_on_fire_framed_c_1910.jpg "Skull on Fire"]|| Skull On Fire || <code>burning_skull</code> || A Skull on fire; in the background there is a moon in a clear night sky.<br>This painting is based on a Minecraft screenshot,<ref>{{Citation|url=https://web.archive.org/web/20220928041338/https://imgur.com/HVhrbnH|website=Imgur|date=22 August 2020|title=https://web.archive.org/web/20220928041338/https://imgur.com/HVhrbnH}}</ref> with the grass block and a 3D skull added on top.<ref>{{Citation|url=https://web.archive.org/web/20200906184721/https://imgur.com/AwqQFS6|title=https://web.archive.org/web/20200906184721/https://imgur.com/AwqQFS6|website=Imgur|date=23 August 2020}}</ref>
(See the [[:en:Painting#Trivia|trivia]] section for more info.)
| [[Java Edition Beta 1.2 01|Beta 1.2_01]] / [[Java Edition Beta 1.3|Beta 1.3]]
|-
! [[File:Pigscene (texture).png|128px]]
|[https://zetterstrand.com/eventz/wp-content/uploads/rgb_1914.jpg "RGB"]|| Pigscene || <code>pigscene</code> <!-- yes, without an underscore --> || A girl pointing to a pig on a canvas. In the original version, the canvas showed red, green and blue blocks, representing the three colors of the [[Wikipedia:RGB color model|RGB color model]] that is typically used by computer displays. It is based on the painting ''[[Wikipedia:File:Jacob van Oost (I) - The Artist's Studio - WGA16654.jpg|The Artist's Studio]]'' by Jacob van Oost.|| [[Alpha v1.1.1]]
|-
! [[File:Pointer (texture).png|128px]]
|[https://zetterstrand.com/eventz/wp-content/uploads/pointer_1920.jpg "Pointer"]|| Pointer || <code>pointer</code> || The main character of the game ''[[Wikipedia:International Karate +|International Karate +]]'' in a fighting stance touching a large hand. It could also be interpreted as a play on Michelangelo's famous painting ''[[Wikipedia:The Creation of Adam|The Creation of Adam]]''. || [[Indev 20100223]]
|-
! TBA ||
Pack || <code>pack</code> || Reference to the pack.png fi || [[Java Edition 1.21]]le
|}
=== Unused paintings ===
In [[Pocket Edition v0.5.0 alpha|v0.5.0 alpha]], with the addition of paintings to Pocket Edition, four unused 32×32 paintings were present in <samp>[[kz.png]]</samp> which remained unused. See {{slink|Bedrock Edition unused features|Paintings}} for more information. They were also added to Java Edition in snapshot [[Java Edition 22w16a|22w16a]]. They cannot be placed by default, but can be summoned by [[commands]] (such as {{cmd|/summon painting ~ ~ ~ {variant:"water"} }}) or through a [[datapack]].
According to [[Helen Zbihlyj]],<ref>https://old.reddit.com/r/Minecraft/comments/u8hpnx/thoughts_on_the_new_paintings/i5olue6/?context=3 ([https://web.archive.org/web/20220422115723/https://old.reddit.com/r/Minecraft/comments/u8hpnx/thoughts_on_the_new_paintings/i5olue6/?context=3 archived])</ref> these paintings were originally added "as part of a Pocket Edition promo map" (no footage found) which was planned to be a part of [[Pocket Edition]] promotion at [[MINECON 2012]] [[MINECON 2013|or 2013]] and have never been used in game. The artist of these paintings remains unknown.
{| class="wikitable stikitable" style="text-align: center" data-description="Paintings"
! style="min-width:100px" |Canvas
! style="min-width:3em;max-width:4em" |Size
! style="min-width:6em" |Name
! style="min-width:10em" |[[Resource location]]
! style="min-width:10em" |Description
! style="min-width:5em;max-width:10em" |Bedrock Edition version added
! style="min-width:5em;max-width:8em" |Java Edition version added
|-
! [[File:Earth (texture) BE2.png|128px]]
| rowspan="4" | 2×2 blocks<br>32×32 pixels || Earth || <code>earth</code> || One of the four {{Wikipedia|Classical element|classical elements}}: Earth. || rowspan="4" | [[Pocket Edition v0.5.0 alpha|v0.5.0 alpha]] || rowspan="4" | [[Java Edition 22w16a|22w16a]]
|-
! [[File:Fire (texture) BE2.png|128px]]
| Fire || <code>fire</code> || One of the four classical elements: Fire.
|-
! [[File:Water (texture) BE2.png|128px]]
| Water || <code>water</code> || One of the four classical elements: Water.
|-
! [[File:Wind (texture) BE2.png|128px]]
| Wind || <code>wind</code> || One of the four classical elements: Air.
|}
==Sounds==
{{Edition|Java}}:
{{Sound table
|sound=Painting break1.ogg
|sound2=Painting break2.ogg
|sound3=Painting break3.ogg
|subtitle=Painting breaks<ref>{{Cite bug|MC|194948|Painting, item frame and lead breaking subtitles inconsistent with block breaking subtitle|date=July 14, 2020}}</ref>
|source=neutral
|description=When a painting is broken or pops off
|id=entity.painting.break
|translationkey=subtitles.entity.painting.break
|volume=1.0
|pitch=1.0
|distance=16}}
{{Sound table
|sound=Painting place1.ogg
|sound2=Painting place2.ogg
|sound3=Painting place3.ogg
|sound4=Painting place4.ogg
|subtitle=Painting placed
|source=neutral
|description=When a painting is placed
|id=entity.painting.place
|translationkey=subtitles.entity.painting.place
|volume=1.0
|pitch=1.0
|distance=16
|foot=1}}
{{Edition|Bedrock}}:
{{Sound table
|type=bedrock
|sound=Item Frame break1.ogg
|sound2=Item Frame break2.ogg
|sound3=Item Frame break3.ogg
|source=block
|description=When a painting is broken or pops off
|id=block.itemframe.break
|volume=1.0
|pitch=1.0}}
{{Sound table
|sound=Item Frame add item1.ogg
|sound2=Item Frame add item2.ogg
|soumd3=Item Frame add item3.ogg
|sound4=Item Frame add item4.ogg
|source=block
|description=When a painting is placed
|id=block.itemframe.add_item
|volume=1.0
|pitch=1.0
|foot=1}}
== Data values ==
=== ID ===
{{edition|java}}:
{{ID table
|edition=java
|firstcolumnname=Item
|showforms=y
|generatetranslationkeys=y
|displayname=Painting
|spritetype=item
|nameid=painting
|form=item
|foot=1}}
{{ID table
|edition=java
|firstcolumnname=Entity
|generatetranslationkeys=y
|displayname=Painting
|spritetype=entity
|nameid=painting
|foot=1}}
{{edition|bedrock}}:
{{ID table
|edition=bedrock
|firstcolumnname=Item
|shownumericids=y
|showforms=y
|notshowbeitemforms=y
|generatetranslationkeys=y
|displayname=Painting
|spritetype=item
|nameid=painting
|id=357
|form=item
|foot=1}}
{{ID table
|edition=bedrock
|firstcolumnname=Entity
|shownumericids=y
|generatetranslationkeys=y
|displayname=Painting
|spritetype=entity
|nameid=painting
|id=83
|foot=1}}
=== Entity data ===
Paintings have entity data that defines various properties of the entity.
{{el|java}}:
{{main|Entity format}}
{{/ED}}
{{el|bedrock}}:
: See [[Bedrock Edition level format/Entity format]].
== Video ==
<div style="text-align:center">{{yt|M3vWDirTMek}}</div>
== History ==
{{History|java indev}}
{{History||20100223|[[File:Painting JE1 BE1.png|32px]] Added paintings.
|There are currently 19 canvases, which can be viewed at [[Java Edition history of textures/Paintings]].
|The [[crafting]] recipe of paintings uses eight [[planks]].
{{{!}} class{{=}}"collapsible collapsed"
! Recipe
{{!}}-
{{!}}
{{Crafting Table
|A1=Oak Planks
|B1=Oak Planks
|C1=Oak Planks
|A2=Oak Planks
|B2=Light Gray Wool
|C2=Oak Planks
|A3=Oak Planks
|B3=Oak Planks
|C3=Oak Planks
|Output=Painting
}}
{{!}}}
|Painting textures are currently stored on a [[texture atlas]] called <samp>[[kz.png]]</samp>.}}
{{History|java infdev}}
{{History||20100227-1|The [[crafting]] recipe has of paintings has been changed, so that it now uses [[stick]]s, rather than [[planks]].
{{{!}} class{{=}}"collapsible collapsed"
! Recipe
{{!}}-
{{!}}
{{Crafting Table
|A1=Stick
|B1=Stick
|C1=Stick
|A2=Stick
|B2=Light Gray Wool
|C2=Stick
|A3=Stick
|B3=Stick
|C3=Stick
|Output=Painting
}}
{{!}}}
}}
{{History|java alpha}}
{{History||v1.1.1|Added five more painting canvases, for a total of 24.
|The textures of two paintings have been changed.}}
{{History|java beta}}
{{History||1.2_01|Added a new painting, although it uses an untextured part of <samp>kz.png</samp> due to the painting texture not yet being implemented.}}
{{History||1.3|The texture of the new painting, has been added to the part of <samp>kz.png</samp> displayed by the new painting.}}
{{History||April 27, 2011|link=https://web.archive.org/web/20201111211000/https://notch.tumblr.com/post/4988431144/the-maps|Custom paintings are mentioned by [[Notch]].}}
{{History||1.7.3|Paintings pushed by [[piston]]s now pop off.}}
{{History|java}}
{{History||1.4.2|snap=12w36a|Added new painting canvas 'Wither'.
|Paintings can now be placed overlapping one another.}}
{{History||1.8|snap=14w10a|Paintings can no longer be placed directly inside of each other.}}
{{History||1.9|snap=15w49a|Paintings can no longer be destroyed by [[lightning]].}}
{{History|||snap=15w50a|Added [[sound]]s for placing and breaking paintings: <code>entity.painting.place</code> and <code>entity.painting.break</code>.}}
{{History||1.11|snap=16w32a|The [[entity]] ID for paintings has been changed from <code>Painting</code> to <code>painting</code>.}}
{{History||1.12|snap=17w06a|Paintings now have a more intuitive placement system. When placed, a painting always uses the maximum possible amount of available space.}}
{{History||1.13|snap=17w47a|Prior to [[1.13/Flattening|''The Flattening'']], this [[item]]'s numeral ID was 321.}}
{{History|||snap=18w02a|Paintings now use a [[resource location]] for their motive.}}
{{History||1.14|snap=18w43a|[[File:Painting JE2 BE2.png|32px]] The [[item]] texture of paintings has been changed.}}
{{History|||snap=19w07a|Paintings are now stored as individual image files instead of parts of a single large image file, and now support animations.}}
{{History|||snap=19w11a|Shepherd [[villager]]s now [[trading|sell]] paintings.}}
{{History||1.17|snap=21w11a|The painting back texture has been updated to be in line with the texture update.}}
{{History||1.19|snap=22w16a|Added the four unused paintings from Bedrock Edition: "Earth", "Wind", "Fire", and "Water".|These paintings can only be added through a [[data pack]], or with the {{cmd|summon}} command.}}
{{History||1.19.4|snap=23w06a|Added [[painting]] variants to "Functional Blocks" tab.|Paintings with pre-defined variant will now display author, title and size in description when hovered over.|The "Operator Utilities" tab now contains the four paintings that are not available in Survival mode.}}
{{History||1.21|snap=TBA|Added 5 new paintings, one 1x1, one 2x1, one 2x2, one 3x2 and one 4x4}}
}
{{History|pocket alpha}}
{{History||v0.5.0|[[File:Painting JE1 BE1.png|32px]] Added paintings.
|There are currently 25 canvases, which can be viewed at [[Bedrock Edition history of textures/Paintings]].}}
{{History||v0.8.0|snap=build 3|A new painting rendering has been added.{{info needed|What exactly changed?}}}}
{{History||v0.12.1|snap=build 1|Paintings are no longer available from the [[nether reactor]].}}
{{History||v0.15.0|snap=build 1|Paintings now have [[sound]]s when placed and broken.}}
{{History|pocket}}
{{History||1.0.7|Added new painting canvas 'Wither'.}}
{{History|bedrock}}
{{History||1.10.0|snap=beta 1.10.0.3|[[File:Painting JE2 BE2.png|32px]] The [[item]] texture of paintings has been changed.}}
{{History||1.11.0|snap=beta 1.11.0.4|Paintings can now be [[trading|bought]] from shepherd [[villager]]s.}}
{{History||1.17.0|snap=beta 1.17.0.50|The painting back texture has been updated to be in line with the texture update.}}
{{History|console}}
{{History||xbox=TU1|xbone=CU1|ps=1.0|wiiu=Patch 1|switch=1.0.1|[[File:Painting JE1 BE1.png|32px]] Added paintings.
|There are currently 25 canvases, which can be viewed at [[Legacy Console Edition history of textures/Paintings]].}}
{{History||xbox=TU11|The limit for paintings in a world has been increased.
|A message is now displayed when the maximum paintings are reached.}}
{{History||xbox=TU14|ps=1.04|Added new painting canvas 'Wither'.}}
{{History||xbox=TU43|xbone=CU33|ps=1.36|wiiu=Patch 13|Added [[sound]]s for paintings.}}
{{History||xbox=none|xbone=none|ps=1.90|wiiu=none|switch=none|[[File:Painting JE2 BE2.png|32px]] The [[item]] texture of paintings has been changed.}}
{{History|3ds}}
{{History||0.1.0|[[File:Painting JE1 BE1.png|32px]] Added paintings.
|There are currently 25 canvases, which can be viewed at [[New Nintendo 3DS Edition history of textures/Paintings]].}}
{{History|foot}}
== Issues ==
{{issue list}}
== Trivia ==
* On April 26, 2011, Notch stated that the automapping code can be used to share custom paintings and books in the future.<ref>{{tweet|notch|62970142207913984|The auto mapping code can be used to share custom paintings and books in the future. There's a hard cap on 65536 of each/world, though|April 26, 2011}}</ref>
* The texture on the back of a painting is the same as the wooden planks texture, but with a yellowish color similar to that of [[chests]] (but slightly darker).
* The "Skull on Fire" painting contains a Minecraft world in the background, which is based on a screenshot taken by the artist in [[Java Edition Alpha v1.1.2 01|Alpha 1.1.2_01]] (or earlier) on October 12, 2010, at 13:22:49 (UTC+2).<ref>{{cite|url=https://web.archive.org/web/20220928041338/https://imgur.com/HVhrbnH|title=The original (never publicly shared before) screenshot that Kristoffer Zetterstrand took and based his painting on.|website=Imgur}}</ref>
**The seeds for this world are -1044887956651363087 and -6984854390176336655 (both are the same), standing at X=-249.65, Y=91, Z=-29.04.<ref>https://pastebin.com/fzAY9ES4</ref><ref>https://www.reddit.com/r/Minecraft/comments/iqg3ey/the_original_screenshot_seed_of_the_minecraft/</ref>
* The "Skull on Fire" painting's texture was added in [[Java Edition Beta 1.3|Beta 1.3]]. However, the code for paintings to randomly display the part of the [[Kz.png]] texture that was to be occupied by the Burning Skull painting was added earlier, in [[Java Edition Beta 1.2_01|Beta 1.2_01]]. As there was nothing on this part of the texture except for a purple background grid, this is what would be displayed if the painting was randomly chosen, until the Burning Skull painting texture was actually added.
* The original "Skull on Fire" painting was given to the winner of an official texture pack competition by Mojang.<ref>https://web.archive.org/web/20110110003612/http://www.webhallen.com:80/minecraft/</ref>
== Gallery ==
<gallery>
File:Notch Painting Screenshot.png|The first image of paintings released by [[Notch]].
File:Skull on Fire world.jpg|The original screenshot behind the "Skull on Fire" painting.
File:Burning Skull Render.jpg|A render of the "Skull on Fire" painting that [[Kristoffer Zetterstrand]] used as a reference image.
File:Skull on Fire IRL.jpg|The original "Skull on Fire" painting being painted.
File:Burning Skull JE1.png|The "Skull on Fire" painting as it appeared between versions [[Java Edition Beta 1.2_01|Beta 1.2_01]] and [[Java Edition Beta 1.2_02|Beta 1.2_02]], prior to its texture being added in [[Java Edition Beta 1.3|Beta 1.3]].
</gallery>
=== Renders ===
<gallery>
Alban.png | Albanian
Aztec.png | de_aztec
Aztec2.png | de_aztec
Bomb.png | Target Successfully Bombed
Kebab.png | Kebab med tre pepperoni
Plant.png | Paradisträd
Wasteland.png | Wasteland
Courbet.png | Bonjour Monsieur Courbet
Creebet.png | Creebet
Pool.png | The Pool
Sea.png | Seaside
Sunset.png | sunset_dense
Graham.png | Graham
Wanderer.png | Wanderer
Bust.png | Bust
Match.png | Match
Skull and Roses.png | Skull and Roses
Stage.png | The Stage Is Set
Void.png | The void
Wither (painting).png | Wither
Fighters.png | Fighters
Donkey Kong.png | Kong
Skeleton (painting).png | Mortal Coil
Burning Skull.png | Skull On Fire
Pigscene.png | Pigscene
Pointer.png | Pointer
Earth BE2.png | Earth
Fire BE2.png | Fire
Water BE2.png | Water
Wind BE2.png | Wind
</gallery>
== See also ==
* [[Item Frame]]
* [[Bedrock Edition unused features#Paintings|Unused paintings]]
* [[Kz.png]]
* [[Kristoffer Zetterstrand]]
== References ==
{{reflist}}
== External links ==
*[https://www.minecraft.net/en-us/article/taking-inventory-painting Taking Inventory: Painting] – Minecraft.net on January 18, 2019
{{items}}
{{entities}}
[[cs:Obraz]]
[[de:Gemälde]]
[[es:Cuadro]]
[[fr:Tableau]]
[[hu:Festmény]]
[[it:Quadro]]
[[ja:絵画]]
[[ko:그림]]
[[nl:Schilderij]]
[[pl:Obraz]]
[[pt:Quadro]]
[[ru:Картина]]
[[th:ภาพวาด]]
[[uk:Картина]]
[[zh:画]]</li></ul> | Added the Halloween Costumes skin pack. | ||||||||||||||||||||||||||||||||||
v0.13.0{{Extension DPL}}<ul><li>[[Egg|Egg]]<br/>{{About|chicken eggs|the similar item that spawns mobs|Spawn egg|other uses}}
{{ItemEntity
|image=Egg.png
|renewable=Yes
|stackable=Yes (16)
|size=Height: 0.25 Blocks<br>Width: 0.25 Blocks
}}
An '''egg''' is an [[item]] that can be used to craft [[food]] items, or thrown for a chance to spawn [[chick]]s on impact.
== Obtaining ==
=== Mob loot ===
{{see also|Tutorials/Egg farming}}
A [[chicken]] drops an egg item every 5–10 minutes. The theoretical average would be expected at 1 egg every 7.5 minutes, or 0.1333 eggs per minute.
A [[fox]] sometimes spawns holding an egg, which it always drops upon death. Alternatively, a player dropping a food item causes the fox to drop the egg.
=== Chest loot ===
{{LootChestItem|egg}}
== Usage ==
=== Crafting ingredient ===
{{crafting usage}}
=== Combat ===
Players are able to throw eggs and deal knockback to [[mob]]s (but not other players{{only|JE|short=1}}<ref>{{bug|MC-3179|||WAI}}</ref>{{until|JE Combat Tests}}), but no damage is dealt, similar to a [[snowball]]. Likewise, throwing eggs at [[neutral mobs]] provokes them. Eggs can also be fired from [[dispenser]]s and are affected by gravity.
=== Spawning chickens ===
When thrown by a dispenser or by pressing the {{control|use}} button, an egg has a {{fraction|1|8}} (12.5%) chance of spawning a [[chick]]. If this occurs, there is a {{fraction|1|32}} (3.125%) chance of spawning three additional chicks (on average, 1 out of every 256 eggs spawns 4 chicks). In other words, whenever an egg is thrown, there is a {{fraction|31|256}} chance of spawning 1 chick and a {{fraction|1|256}} chance of spawning four chicks.
The expected value of the number of chicks an egg produces is {{fraction|35|256}} or 13.7%. This means that on average, a chick is spawned every 7.3 eggs, a stack of 16 eggs spawns 2.188 chicks, and a full inventory including the hotbar and off-hand (<code>37 * 16 = 592</code> eggs) is expected to spawn approximately 81 chicks.
== Sounds ==
{{Edition|Java}}:<br>
Thrown eggs use the Friendly Creatures sound category for entity-dependent sound events.
{{Sound table
|rowspan=2
|sound=Bow shoot.ogg
|subtitle=Egg flies
|source=player
|description=When an egg is thrown
|id=entity.egg.throw
|translationkey=subtitles.entity.egg.throw
|volume=0.5
|pitch={{frac|1|3}}-0.5
|distance=16}}
{{Sound table
|subtitle=Dispensed item
|source=block
|description=When a dispenser shoots an egg
|id=block.dispenser.launch
|translationkey=subtitles.block.dispenser.dispense
|volume=1.0
|pitch=1.2
|distance=16}}
{{Sound table
|sound=Chicken plop.ogg
|subtitle=Chicken plops
|source=Friendly Creatures
|description=When an egg is laid by a chicken
|id=entity.chicken.egg
|translationkey=subtitles.entity.chicken.egg
|volume=1.0
|pitch=0.8-1.2
|distance=16
|foot=1}}
{{Edition|Bedrock}}:
{{Sound table
|type=bedrock
|rowspan=2
|sound=Bow shoot.ogg
|source=player
|description=When an egg is thrown
|id=random.bow
|volume=0.5
|pitch=0.33-0.5}}
{{Sound table
|source=player
|description=When a dispenser shoots an egg
|id=random.bow
|volume=1.0
|pitch=0.83-1.25}}
{{Sound table
|sound=Chicken plop.ogg
|source=neutral
|description=When an egg is laid by a chicken
|id=mob.chicken.plop
|volume=1.0
|pitch=0.8-1.2
|foot=1}}
== Data values ==
=== ID ===
{{edition|java}}:
{{ID table
|edition=java
|showforms=y
|generatetranslationkeys=y
|displayname=Egg
|spritetype=item
|nameid=egg
|form=item
|foot=1}}
{{ID table
|edition=java
|showentitytags=y
|generatetranslationkeys=y
|displayname=Thrown Egg
|spritetype=entity
|spritename=Egg
|nameid=egg
|entitytags=impact_projectiles
|foot=1}}
{{edition|bedrock}}:
{{ID table
|edition=bedrock
|shownumericids=y
|showforms=y
|notshowbeitemforms=y
|generatetranslationkeys=y
|displayname=Egg
|spritetype=item
|nameid=egg
|id=390
|form=item
|foot=1}}
{{ID table
|edition=bedrock
|shownumericids=y
|generatetranslationkeys=y
|displayname=Egg
|spritetype=entity
|nameid=egg
|id=82
|foot=1}}
=== Entity Data ===
Thrown eggs have entity data that define various properties of the entity.
{{el|java}}:
{{main|Entity format}}
{{/ED}}
{{el|bedrock}}:
: See [[Bedrock Edition level format/Entity format]].
== Achievements ==
{{load achievements|The Lie}}
==Advancements==
{{Load advancements|Bullseye}}
== Video ==
<div style="text-align:center">{{yt|8rDbF8UYuTc}}</div>
== History ==
{{History|java alpha}}
{{History||v1.0.14|[[File:Egg JE1 BE1.png|32px]] Added eggs.
|Eggs currently have no purpose.}}
{{History|java beta}}
{{History||1.0|Eggs are now throwable at the request of a fan as the result of a [[wikipedia:Twitter|Twitter]] conversation about a man eating his [[wikipedia:USB|USB]], if [[Notch]] added egg throwing.<ref>{{tweet|notch|11773078791000065}}</ref>}}
{{History||1.2|Eggs are now used to craft [[cake]]s.
|Eggs can now be thrown by [[dispenser]]s.}}
{{History|java}}
{{History||1.0.0|snap=Beta 1.9 Prerelease 2|[[Breeding]] has been added, making eggs easier to obtain.}}
{{History|||snap=RC1|Thrown eggs now hatch chicks instead of adult chickens.
|The egg's throw [[sound]] has been changed.}}
{{History||1.4.2|snap=12w37a|Eggs are now used to craft [[pumpkin pie]]s.}}
{{History||1.9|snap=15w32a|Eggs no longer [[damage]] the [[ender dragon]].}}
{{History|||snap=15w36b|Eggs now produce particles when thrown at an entity.}}
{{History|||snap=15w49a|Eggs, like all throwable projectiles, now take the thrower's motion into account when fired.}}
{{History||1.11|snap=16w32a|The [[entity]] ID has now been changed from <code>ThrownEgg</code> to <code>egg</code>.}}
{{History||1.13|snap=17w47a|Prior to [[1.13/Flattening|''The Flattening'']], this [[item]]'s numeral ID was 344.}}
{{History||1.14|snap=18w43a|[[File:Egg JE2 BE2.png|32px]] The texture of eggs has been changed.}}
{{History|||snap=18w50a|Eggs can now be found in [[chest]]s in [[village]] fletcher houses.
|Therefore, chickens are no longer the only source of eggs.}}
{{History|||snap=19w07a|Added [[fox]]es, which sometimes spawn with eggs in their mouths.}}
{{History||1.16.2|snap=Pre-Release 1|Eggs are now affected by [[bubble column]]s.}}
{{History|pocket alpha}}
{{History||v0.4.0|[[File:Egg JE1 BE1.png|32px]] Added eggs. They are currently unobtainable.
|Eggs are throwable, but are unable to spawn chickens.}}
{{History||v0.7.0|[[Chicken]]s now occasionally lay eggs.
|Eggs can be used to craft [[cake]].
|Thrown eggs now have a chance of spawning adult chickens.}}
{{History||v0.8.0|snap=build 1|Eggs are now used to craft [[pumpkin pie]]s.}}
{{History|||snap=build 3|Thrown eggs now have a chance of spawning chicks instead of adult chickens.}}
{{History|pocket}}
{{History||1.1.0|snap=alpha 1.1.0.0|The [[entity]] ID has now been changed from <code>thrownegg</code> to <code>egg</code>.}}
{{History|bedrock}}
{{History||1.2.0|Eggs now deal knockback to [[player]]s.}}
{{History||1.10.0|snap=beta 1.10.0.3|[[File:Egg.png|32px]] The texture of eggs has been changed.}}
{{History||1.11.0|snap=beta 1.11.0.1|Eggs can now be found in [[village]] fletcher [[chest]]s.}}
{{History|||snap=beta 1.11.0.4|Eggs can now be [[trading|sold]] to farmer [[villager]]s.}}
{{History||1.13.0|snap=beta 1.13.0.1|Added [[fox]]es, which can [[drops|drop]] eggs.}}
{{History||1.16.0|snap=beta 1.16.0.57|[[Trading]] has now been changed, eggs can no longer be [[trading|sold]] to farmer [[villager]]s.}}
{{History|console}}
{{History||xbox=TU1|xbone=CU1|ps=1.0|wiiu=Patch 1|[[File:Egg JE1 BE1.png|32px]] Added eggs.}}
{{History|PS4}}
{{History||1.90|[[File:Egg JE2 BE2.png|32px]] The texture of eggs has been changed.}}
{{History|New 3DS}}
{{History||0.1.0|[[File:Egg JE1 BE1.png|32px]] Added eggs.}}
{{History|foot}}
== Issues ==
{{issue list}}
== Trivia ==
* Eggs break mid-fall if hit by another projectile; the chance of spawning a chick is not affected.
* Throwing an egg at a [[nether portal]] breaks the egg when it hits the portal.
* A thrown egg faces toward the [[player]] in first-person view, while it appears rotated horizontally in third-person view. This is the case for all throwable [[item]]s ([[ender pearl]]s, eggs, [[snowball]]s, and all throwable [[potion]]s).
== References ==
{{Reflist}}
{{Items}}
{{entities}}
[[Category:Combat]]
[[Category:Egg]]
[[cs:Vajíčko]]
[[de:Ei]]
[[es:Huevo]]
[[fr:Œuf]]
[[hu:Tojás]]
[[it:Uovo]]
[[ja:卵]]
[[ko:달걀]]
[[nl:Ei]]
[[pl:Jajko]]
[[pt:Ovo]]
[[ru:Яйцо]]
[[th:ไข่ไก่]]
[[uk:Яйце]]
[[zh:鸡蛋]]
<br /></li><li>[[Prismarine Shard|Prismarine Shard]]<br/>{{Item
| renewable = Yes
| stackable = Yes (64)
| type =
}}
A '''prismarine shard''' is an item obtained by defeating [[guardian]]s or [[elder guardian]]s. It can be used to craft various [[prismarine]] blocks as well as [[sea lantern]]s.
== Obtaining ==
Prismarine shards are dropped upon the death of [[guardian]]s and [[elder guardian]]s. From these mobs, 0–2 shards are dropped each time. This can be increased to a maximum of 5 with the [[Looting]] enchantment.
== Usage ==
=== Crafting ingredient ===
{{crafting usage}}
== Data values ==
=== ID ===
{{edition|java}}:
{{ID table
|edition=java
|showforms=y
|generatetranslationkeys=y
|displayname=Prismarine Shard
|spritetype=item
|nameid=prismarine_shard
|form=item
|foot=1}}
{{edition|bedrock}}:
{{ID table
|edition=bedrock
|showaliasids=y
|shownumericids=y
|showforms=y
|notshowbeitemforms=y
|generatetranslationkeys=y
|displayname=Prismarine Shard
|spritetype=item
|nameid=prismarine_shard
|aliasid=prismarineshard
|id=565
|form=item
|foot=1}}
== History ==
{{History|java}}
{{history||1.8|snap=14w25a|[[File:Prismarine Shard JE1 BE1.png|32px]] Added prismarine shards.}}
{{History||1.13|snap=17w47a|Prior to [[1.13/Flattening|''The Flattening'']], this [[item]]'s numeral ID was 409.}}
{{History||1.14|snap=18w43a|[[File:Prismarine Shard JE2 BE2.png|32px]] The texture of prismarine shards has now been changed.}}
{{History|pocket alpha}}
{{History||v0.16.0|snap=build 1|[[File:Prismarine Shard JE1 BE1.png|32px]] Added prismarine shards.}}
{{History|bedrock}}
{{History||1.10.0|snap=beta 1.10.0.3|[[File:Prismarine Shard JE2 BE2.png|32px]] The texture of prismarine shards has now been changed.}}
{{History|console}}
{{History||xbox=TU31|xbone=CU19|ps=1.22|wiiu=Patch 3|[[File:Prismarine Shard JE1 BE1.png|32px]] Added prismarine shards.}}
{{History||xbox=none|xbone=none|ps=1.90|wiiu=none|switch=none|[[File:Prismarine Shard JE2 BE2.png|32px]] The texture of prismarine shards has now been changed.}}
{{History|New 3DS}}
{{History||1.3.12|[[File:Prismarine Shard JE1 BE1.png|32px]] Added prismarine shards.}}
{{History|foot}}
== Issues ==
{{issue list}}
{{items}}
[[de:Prismarinscherbe]]
[[es:Fragmento de prismarina]]
[[fr:Éclat de prismarine]]
[[ja:プリズマリンの欠片]]
[[ko:프리즈머린 조각]]
[[nl:Prismarienscherf]]
[[pl:Odłamek pryzmarynu]]
[[pt:Pedaço de prismarinho]]
[[ru:Призмариновый осколок]]
[[uk:Призмариновий уламок]]
[[zh:海晶碎片]]
[[Category:Renewable resources]]</li></ul> | build 5 | Added the "Biome Settlers" skin pack. | |||||||||||||||||||||||||||||||||
v0.13.1{{Extension DPL}}<ul><li>[[Banner Pattern|Banner Pattern]]<br/>{{Item
| image = Banner Pattern.png
| rarity =
* '''Flower Charge, Field Masoned, Bordure Indented, Globe, Snout'''
* Common
* '''Creeper Charge, Skull Charge'''
* Uncommon
* '''Thing'''
* Epic
| renewable =
* '''Snout, Thing''': No
* '''All others''': Yes
| stackable = No
}}
'''Banner patterns''' are [[item]]s used to customize [[banner]]s inside [[loom]]s.
There are six patterns {{in|java}} and eight {{in|bedrock}}.
== Obtaining ==
[[File:Banner Patterns 20w15a.png|thumb|All six banner patterns {{in|java}} with their various sources.]]
=== Crafting ===
{{see also|Banner/Patterns|title1=List of patterned banners}}
4 out of 6 banner patterns {{only|JE}} and 2 more {{only|BE}} can be obtained by crafting. They are crafted by combining one [[paper]] along with a certain material.
{{Crafting
|head=1
|Paper
|Creeper Head
|Output=Banner Pattern Creeper
|type=Miscellaneous
|description=Creeper face
}}
{{Crafting
|Paper
|Wither Skeleton Skull
|Output=Banner Pattern Skull
|type=Miscellaneous
|description=Skeleton skull and crossbones
}}
{{Crafting
|Paper
|Oxeye Daisy
|Output=Banner Pattern Flower
|type=Miscellaneous
|description=Daisy
}}
{{Crafting
|Paper
|Enchanted Golden Apple
|Output=Banner Pattern Thing
|type=Miscellaneous
|showdescription=true
|description=Former [[Mojang Studios]] logo
}}
{{Crafting
|Paper
|Bricks
|Output=Banner Pattern Field Masoned
|type=Miscellaneous
|description={{only|bedrock}}
}}
{{Crafting
|Paper
|Vines
|Output=Banner Pattern Bordure Indented
|type=Miscellaneous
|description={{only|bedrock}}
|foot=1
}}
=== Trading ===
'''Globe banner pattern''' is obtained by trading with a master-level [[Trading#Cartographer|cartographer villager]] for a price of 8 emeralds.
=== Chest loot ===
'''Snout banner pattern''' is obtained in the [[Bastion Remnant]] as loot.
{{LootChestItem|snout-banner-pattern}}
== Usage ==
=== Loom ingredient ===
Banner patterns are used in [[loom]]s to add customization to [[banner]]s. The pattern must be combined with 1 banner and 1 [[dye]]. Upon usage in the loom, the banner pattern is not consumed.
{{Looming
|head=1
|showdescription=1
|name=[[Banner|Flower Charge Banner]]
|ingredients={{:Banner/recipe|ingredients}}
|{{:Banner/recipe|banner}}
|Matching Dye
|Banner Pattern Flower Charge
|Flower Charge
|{{:Banner/recipe|output|Flower Charge}}
|Blink=Banner
|Olink=Banner
|description=Emblazons a flower charge (flower icon)
}}
{{Looming
|name=[[Banner|Creeper Charge Banner]]
|ingredients={{:Banner/recipe|ingredients}}
|{{:Banner/recipe|banner}}
|Matching Dye
|Banner Pattern Creeper Charge
|Creeper Charge
|{{:Banner/recipe|output|Creeper Charge}}
|Blink=Banner
|Olink=Banner
|description=Emblazons a creeper charge (creeper face)
}}
{{Looming
|name=[[Banner|Skull Charge Banner]]
|ingredients={{:Banner/recipe|ingredients}}
|{{:Banner/recipe|banner}}
|Matching Dye
|Banner Pattern Skull Charge
|Skull Charge
|{{:Banner/recipe|output|Skull Charge}}
|Blink=Banner
|Olink=Banner
|description=Emblazons a skull charge (skull and crossbones)
}}
{{Looming
|name=[[Banner|Thing Banner]]
|ingredients={{:Banner/recipe|ingredients}}
|{{:Banner/recipe|banner}}
|Matching Dye
|Banner Pattern Thing
|Thing
|{{:Banner/recipe|output|Thing}}
|Blink=Banner
|Olink=Banner
|description=Emblazons a thing (old Mojang logo)}}
{{Looming
|name=[[Banner|Snout Banner]]
|ingredients={{:Banner/recipe|ingredients}}
|{{:Banner/recipe|banner}}
|Matching Dye
|Banner Pattern Snout
|Snout
|{{:Banner/recipe|output|Snout}}
|Blink=Banner
|Olink=Banner
|description=Emblazons a piglin snout
}}
{{Looming
|name=[[Banner|Globe Banner]]
|ingredients={{:Banner/recipe|ingredients}}
|{{:Banner/recipe|banner}}
|Matching Dye
|Banner Pattern Globe
|Globe
|{{:Banner/recipe|output|Globe}}
|Blink=Banner
|Olink=Banner
|description=Emblazons a globe (cube shaped earth)
}}
{{Looming
|name=[[Banner|Bordure Indented Banner]]
|ingredients={{:Banner/recipe|ingredients}}
|{{:Banner/recipe|banner}}
|Matching Dye
|Banner Pattern Bordure Indented
|Bordure Indented
|{{:Banner/recipe|output|Bordure Indented}}
|Blink=Banner
|Olink=Banner
|description=Emblazons a bordure indented (fancy border){{only|bedrock}}
}}
{{Looming
|name=[[Banner|Field Masoned Banner]]
|ingredients={{:Banner/recipe|ingredients}}
|{{:Banner/recipe|banner}}
|Matching Dye
|Banner Pattern Field Masoned
|Field Masoned
|{{:Banner/recipe|output|Field Masoned}}
|Blink=Banner
|Olink=Banner
|description=Emblazons a field masoned (brick pattern){{only|bedrock}}
|foot=1
}}
== Data values ==
=== ID ===
{{edition|java}}:
{{ID table
|edition=java
|firstcolumnname=Banner Pattern
|showforms=y
|generatetranslationkeys=y
|displayname=Flower Charge
|spritename=banner-pattern
|spritetype=item
|nameid=flower_banner_pattern
|form=item}}
{{ID table
|displayname=Creeper Charge
|spritename=banner-pattern
|spritetype=item
|nameid=creeper_banner_pattern
|form=item}}
{{ID table
|displayname=Skull Charge
|spritename=banner-pattern
|spritetype=item
|nameid=skull_banner_pattern
|form=item}}
{{ID table
|displayname=Thing
|spritename=banner-pattern
|spritetype=item
|nameid=mojang_banner_pattern
|form=item}}
{{ID table
|displayname=Globe
|spritename=banner-pattern
|spritetype=item
|nameid=globe_banner_pattern
|form=item}}
{{ID table
|displayname=Snout
|spritename=banner-pattern
|spritetype=item
|nameid=piglin_banner_pattern
|form=item
|foot=1}}
{{edition|bedrock}}:
{{ID table
|edition=bedrock
|firstcolumnname=Banner Pattern
|showaliasids=y
|shownumericids=y
|showforms=y
|notshowbeitemforms=y
|generatetranslationkeys=y
|displayname=Creeper Charge
|spritename=banner-pattern
|spritetype=item
|nameid=creeper_banner_pattern
|aliasid=banner_pattern / 0
|id=582
|form=item
|translationkey=item.banner_pattern.name, item.banner_pattern.creeper}}
{{ID table
|displayname=Skull Charge
|spritename=banner-pattern
|spritetype=item
|nameid=skull_banner_pattern
|aliasid=banner_pattern / 1
|id=583
|form=item
|translationkey=item.banner_pattern.name, item.banner_pattern.skull}}
{{ID table
|displayname=Flower Charge
|spritename=banner-pattern
|spritetype=item
|nameid=flower_banner_pattern
|aliasid=banner_pattern / 2
|id=581
|form=item
|translationkey=item.banner_pattern.name, item.banner_pattern.flower}}
{{ID table
|displayname=Thing
|spritename=banner-pattern
|spritetype=item
|nameid=mojang_banner_pattern
|aliasid=banner_pattern / 3
|id=584
|form=item
|translationkey=item.banner_pattern.name, item.banner_pattern.thing}}
{{ID table
|displayname=Field Masoned
|spritename=banner-pattern
|spritetype=item
|nameid=field_masoned_banner_pattern
|aliasid=banner_pattern / 4
|id=585
|form=item
|translationkey=item.banner_pattern.name, item.banner_pattern.bricks}}
{{ID table
|displayname=Bordure Indented
|spritename=banner-pattern
|spritetype=item
|nameid=bordure_indented_banner_pattern
|aliasid=banner_pattern / 5
|id=586
|form=item
|translationkey=item.banner_pattern.name, item.banner_pattern.vines}}
{{ID table
|displayname=Snout
|spritename=banner-pattern
|spritetype=item
|nameid=piglin_banner_pattern
|aliasid=banner_pattern / 6
|id=587
|form=item
|translationkey=item.banner_pattern.name, item.banner_pattern.piglin}}
{{ID table
|displayname=Globe
|spritename=banner-pattern
|spritetype=item
|nameid=globe_banner_pattern
|aliasid=banner_pattern / 7
|id=588
|form=item
|translationkey=item.banner_pattern.name, item.banner_pattern.globe
|foot=1}}
== Achievements ==
{{load achievements|Fruit on the Loom}}
== History ==
{{History|java}}
{{History||1.14|snap=18w43a|[[File:Banner Pattern JE1 BE1.png|32px]] [[File:Banner Pattern JE1 BE1.png|32px]] [[File:Banner Pattern JE1 BE1.png|32px]] [[File:Banner Pattern JE1 BE1.png|32px]] Added banner patterns for flower charge, creeper charge, skull charge and thing patterns.}}
{{History|||snap=19w11a|[[File:Banner Pattern JE1 BE1.png|32px]] Added banner pattern for globe.
|The banner pattern for globe can be [[trading|bought]] from master-level cartographer [[villager]]s for 8 [[emerald]]s.}}
{{History||1.16|snap=20w15a|[[File:Banner Pattern JE1 BE1.png|32px]] Added the piglin banner pattern.}}
{{History|||snap=20w16a|The piglin banner pattern can now be found in [[chest]]s in [[bastion remnants]].}}
{{History|||snap=20w18a|The piglin pattern has now been renamed to "Snout".}}
{{History||1.16.2|snap=20w30a|The chance of finding the "Snout" banner pattern in bastion remnant chests has been increased from 5.5% to 10.1%.}}
{{History|bedrock}}
{{History||1.10.0|snap=beta 1.10.0.3|[[File:Banner Pattern JE1 BE1.png|32px]] [[File:Banner Pattern JE1 BE1.png|32px]] [[File:Banner Pattern JE1 BE1.png|32px]] [[File:Banner Pattern JE1 BE1.png|32px]] [[File:Banner Pattern JE1 BE1.png|32px]] [[File:Banner Pattern JE1 BE1.png|32px]] Added banner patterns for creeper charge, skull charge, flower charge, thing, field masoned and bordure indented patterns.}}
{{History||1.11.0|snap=beta 1.11.0.4|The banner patterns flower charge, field masoned and bordure indented can now be [[trading|bought]] from cartographer [[villager]]s.}}
{{History||1.16.0|snap=beta 1.16.0.57|[[File:Banner Pattern JE1 BE1.png|32px]] Added the piglin banner pattern.}}
{{History|||snap=beta 1.16.0.59|The piglin pattern has now been renamed to "Snout".}}
{{History||1.16.100|snap=beta 1.16.100.55|The "Thing" banner pattern can now be crafted at the [[loom]].}}
{{History||1.16.100|snap=beta 1.16.100.56|The ID of banner patterns have been changed from <code>banner_pattern</code> to <code><type>_banner_pattern</code>.}}
{{History||1.18.10|snap=beta 1.18.10.24|[[File:Banner Pattern JE1 BE1.png|32px]] Added banner pattern for globe. It is currently unobtainable in survival.}}
{{History|||snap=beta 1.18.10.26|The banner pattern for globe are now obtainable in survival and can be [[trading|bought]] from master-level cartographer [[villager]]s for 8 [[emerald]]s.
|Removed flower charge, field masoned and bordure indented banner pattern from villager trading.}}
{{History|PS4}}
{{History||1.90|[[File:Banner Pattern JE1 BE1.png|32px]] [[File:Banner Pattern JE1 BE1.png|32px]] [[File:Banner Pattern JE1 BE1.png|32px]] [[File:Banner Pattern JE1 BE1.png|32px]] [[File:Banner Pattern JE1 BE1.png|32px]] [[File:Banner Pattern JE1 BE1.png|32px]] Added banner patterns for creeper charge, skull charge, flower charge, thing, field masoned and bordure indented patterns.}}
{{History|foot}}
== Issues ==
{{issue list}}
{{Items}}
[[de:Bannervorlage]]
[[es:Diseño de estandarte]]
[[fr:Motif de bannière]]
[[ja:旗の模様]]
[[ko:현수막 무늬]]
[[pl:Wzór sztandaru]]
[[pt:Desenho para estandarte]]
[[ru:Узор флага]]
[[th:ลวดลายธง]]
[[zh:旗帜图案]]</li><li>[[Gray Dye|Gray Dye]]<br/>{{Item
| image = Gray Dye.png
| renewable = Yes
| stackable = Yes (64)
}}
'''Gray dye'''{{fn|Known as '''Grey Dye''' in British, Canadian, Australian, and New Zealand English variants.}} is a [[Dyeing#Secondary colors|secondary color]] dye.
== Obtaining ==
=== Crafting ===
{{Crafting
|Black Dye
|White Dye
|Output=Gray Dye,2
|type=Material
|head=1
|showdescription=1
|showname=0
}}
{{Crafting
|Ink Sac;Black Dye;Ink Sac
|Bone Meal;Bone Meal;White Dye
|Output=Gray Dye,2
|type=Material
|description={{only|bedrock|education}}
|foot=1
}}
=== Trading ===
[[Wandering trader]]s sell 3 gray dye for an [[emerald]].{{only|bedrock}}
== Usage ==
{{dye usage}}
=== Crafting ingredient ===
{{crafting usage|ignore=Banner|continue=1}}
{{banner crafting usage}}
=== Loom ingredient ===
{{Banner loom usage|Gray Dye}}
=== Trading ===
Journeyman-level villagers have a 20% chance to buy 12 gray dye for an emerald.
== Data values ==
=== ID ===
{{edition|java}}:
{{ID table
|edition=java
|showforms=y
|generatetranslationkeys=y
|displayname=Gray Dye
|spritetype=item
|nameid=gray_dye
|form=item
|foot=1}}
{{edition|bedrock}}:
{{ID table
|edition=bedrock
|showaliasids=y
|shownumericids=y
|showforms=y
|notshowbeitemforms=y
|generatetranslationkeys=y
|displayname=Gray Dye
|spritetype=item
|nameid=gray_dye
|aliasid=dye / 8
|id=403
|form=item
|translationkey=item.dye.gray.name
|foot=1}}
== Video ==
{{yt|wGalHy0_fj0}}
== History ==
{{History|java beta}}
{{History||1.2|[[File:Gray Dye JE1 BE1.png|32px]] Added gray dye.}}
{{History|java}}
{{History||1.4.2|snap=12w34a|Added the ability to [[Armor#Dyeing|dye]] leather [[armor]] and [[wolf]] collars.}}
{{History||1.4.6|snap=12w49a|Gray dye can be now [[crafting|crafted]] with [[gunpowder]] to create a [[firework star]].}}
{{History||1.6.1|snap=13w19a|[[Stained clay]] can now be crafted.}}
{{history||1.7.2|snap=13w36a|With the addition of new [[flower]]s, many secondary and tertiary dyes are now primary [[dye]]s.}}
{{History|||snap=13w41a|[[Stained glass]] can now be crafted.}}
{{History||1.8|snap=14w30a|Added [[banner]]s, which can be dyed.}}
{{History||1.11|snap=16w39a|Added the ability to dye [[shulker box]]es.}}
{{History||1.12|snap=17w15a|Added the ability to dye [[bed]]s.}}
{{History||1.13|snap=17w47a|The different data values for the <code>dye</code> ID have now been split up into their own IDs.
|Prior to [[1.13/Flattening|''The Flattening'']], this [[item]]'s numeral ID was 351.}}
{{History||1.14|snap=18w43a|Gray dye is now [[crafting|crafted]] using [[black dye|black]] and [[white dye]]s, instead of [[ink sac]] and [[bone meal]].
|[[File:Gray Dye JE2 BE2.png|32px]] The texture of gray dye has now been changed.}}
{{History|||snap=18w44a|Gray dye can now change the text color on the [[sign]]s to gray.}}
{{History|||snap=19w05a|Added the [[wandering trader]], which sell gray dyes.}}
{{History|||snap=19w11a|Gray dye can now be [[trading|bought]] by shepherd villagers.}}
{{History||1.17|snap=20w45a|Gray dye can now used to craft [[gray candle]]s.}}
{{History|||snap=21w19a|Gray dye can no longer be used to craft gray candles.}}
{{History|||snap=Pre-release 1|Gray dye can once again be used to craft gray candles.}}
{{History||1.20<br>(Experimental)|link=1.19.3|snap=22w42a|Gray dye can now change the text color on [[hanging sign]]s to gray.}}
{{History|pocket alpha}}
{{History||v0.3.0|[[File:Gray Dye JE1 BE1.png|32px]] Added gray dye. It is currently unobtainable and serves no purpose.}}
{{History||v0.8.0|snap=build 1|Gray dye can be [[craft]]ed with [[bone meal]] and an [[ink sac]], despite there being no way of obtaining ink sacs at the time.}}
{{History|||snap=build 3|Gray dye is now available in [[creative]] mode.}}
{{History||v0.9.0|snap=build 3|Gray dye can now be obtained in [[survival]] mode.}}
{{History|||snap=build 11|Gray dye can now be used to craft colored [[terracotta]].}}
{{History||v0.11.0|snap=build 1|Gray dye can now be used to dye tamed [[wolf]] collars.}}
{{History||v0.14.0|snap=build 1|Gray dye can now be used to dye [[water]] in [[cauldron]]s.}}
{{History|pocket}}
{{History||1.0.0|snap=alpha 0.17.0.1|Gray dye can now be used to dye [[shulker]]s.}}
{{History||1.1.0|snap=alpha 1.1.0.0|Gray dye can now be used to craft [[concrete powder]], colored [[bed]]s and dyed [[shulker box]]es.}}
{{History|bedrock}}
{{History||1.2.0|snap=beta 1.2.0.2|Gray dye can now be used to craft [[firework star]]s, [[stained glass]] and patterns on [[banner]]s.}}
{{History||1.4.0|snap=beta 1.2.20.1|Gray dye can now be used to craft [[balloon]]s and [[glow stick]]s.}}
{{History||1.8.0|snap=beta 1.8.0.8|Gray dye can now be used to dye tamed [[cat]] collars.}}
{{History||1.10.0|snap=beta 1.10.0.3|Gray dye is now [[trading|sold]] by [[wandering trader]]s.
|Gray dye can now be used to dye white [[carpet]]s and undyed [[glass pane]]s.
|[[File:Gray Dye JE2 BE2.png|32px]] The texture of gray dye has now been changed.}}
{{History||1.11.0|snap=beta 1.11.0.1|Gray dye can now be [[trading|sold]] to shepherd [[villager]]s.}}
{{History||1.16.100|snap=beta 1.16.100.56|The ID of gray dye has been changed from <code>dye/8</code> to <code>gray_dye</code>.}}
{{History|console}}
{{History||xbox=TU1|xbone=CU1|ps=1.00|switch=1.0.1|wiiu=Patch 1|[[File:Gray Dye JE1 BE1.png|32px]] Added gray dye.}}
{{History|PS4}}
{{History||1.90|[[File:Gray Dye JE2 BE2.png|32px]] The texture of gray dye has now been changed.}}
{{History|new 3ds}}
{{History||0.1.0|[[File:Gray Dye JE1 BE1.png|32px]] Added gray dye.}}
{{History|foot}}
== Issues ==
{{Issue list}}
== Notes ==
{{fnlist}}
== References ==
{{Reflist}}
{{Items}}
[[Category:Dyes]]
[[Category:Renewable resources]]
[[cs:Šedé barvivo]]
[[de:Grauer Farbstoff]]
[[es:Tinte gris]]
[[fr:Teinture grise]]
[[hu:Szürke festék]]
[[ja:灰色の染料]]
[[ko:회색 염료]]
[[nl:Grijze kleurstof]]
[[pl:Szary barwnik]]
[[pt:Corante cinza]]
[[ru:Серый краситель]]
[[zh:灰色染料]]</li></ul> | Added the Holiday Festival 2015 skin pack. | ||||||||||||||||||||||||||||||||||
v0.13.2{{Extension DPL}}<ul><li>[[End Crystal|End Crystal]]<br/>{{ItemEntity
|image=End Crystal.gif
|imagesize=150px
|invimage=End Crystal
|renewable=Yes
|stackable=Yes (64)
|rarity=Rare
|drops=None
|size=
Height: 2 Blocks<br>Width: 2 Blocks
}}
An '''end crystal''' is an [[entity]] that can be [[Crafting|crafted]] or found on [[the End]]'s main island, where it heals the [[Ender Dragon|ender dragon]]. It can only be placed on [[obsidian]] or [[bedrock]] and [[Explosion|explodes]] instantly when attacked or damaged in most ways.
== Spawning ==
=== Natural generation ===
An end crystal is found atop each [[obsidian pillar]] on the central island of the End, each on top of a piece of [[bedrock]]. There are 10 end crystals in total, of which two are protected in "cages" of [[iron bars]]. All end crystals respawn one after another as the respawning process of the [[ender dragon]] starts.
== Obtaining ==
=== Crafting ===
{{Crafting
|A1=Glass
|B1=Glass
|C1=Glass
|A2=Glass
|B2=Eye of Ender
|C2=Glass
|A3=Glass
|B3=Ghast Tear
|C3=Glass
|Output= End Crystal
|type= Decoration block
}}
== Usage ==
=== Healing the ender dragon ===
Their primary purpose is to recharge the health of the ender dragon, who gains a charge from the nearest crystal within a cuboid extending 32 blocks from the dragon in all directions. The dragon is healed {{hp|1}} each half-second. If multiple ender dragons are spawned, an end crystal can affect multiple dragons at the same time. The healing beam is neither obstructed nor is its power diminished by entities or blocks.
=== Respawning the ender dragon ===
[[File:End Crystals on the Exit portal.png|right|thumb|How to arrange end crystals on the exit portal to respawn the ender dragon.]]
As items, end crystals may be placed on bedrock and [[obsidian]], if the two blocks above the bedrock or obsidian block are air or replaceable blocks and no other entities intersect the area. When an end crystal is placed in [[the End]], a [[fire]] block is created at the end crystal location. If four are placed on the end [[exit portal]], one on each of the flat sides, the crystals respawn the original end crystals on the obsidian pillars, as well as resurrect the dragon itself, before exploding. The top of each pillar also explodes, destroying any player-placed blocks. This happens even if TNT explosions are turned off in settings.
If the exit portal is ever broken for any reason, end crystals can still be placed on obsidian blocks with the same location as the exit portal.
=== Explosions ===
End crystals explode when attacked or damaged in most ways, even by attacks that normally do zero damage. They are not affected by exploding fireworks, and if damaged by an explosion, they disappear instead of exploding.{{Only|Java}}<ref>{{bug|MC-118429||End crystals don't explode when destroyed by nearby explosions}}</ref> The end crystal's [[explosion]] has an [[Explosion#Explosion strength|explosion strength]] of 6, the same as a [[charged creeper]]. The end crystal's fire often remains after the crystal explodes. Any ender dragon charging from the crystal when it is destroyed takes {{hp|10}} damage.
{{IN|java}}, an end crystal's explosion can be [[blocking|blocked]] by a [[shield]].
Although an ender dragon damages most blocks and entities in its path, it cannot destroy end crystals simply by going near them.
Placing [[water]] on the end crystal will neutralize the blast effect, but not the [[damage]] or knockback.
End crystals with obsidian or bedrock below them will not damage blocks below them when they explode.
{{IN|bedrock}}, having the game rule {{cd|mobGriefing}} to {{cd|false}} will prevent the End Crystal from destroying any blocks. While {{in|java}} the same game rule will not prevent the End Crystal from destroying any blocks.
=== Beams ===
The end crystal naturally shoots a beam at the ender dragon and heals it when the dragon is within range. This beam can be manually created using the command {{cmd|data merge entity @e[type{{=}}end_crystal,limit{{=}}1] {BeamTarget:{X:0, Y:0, Z:0<nowiki>}}}}. The beam can be pointed in any direction, allowing it to mark locations or objects.
=== Properties ===
[[File:End Crystal (Slateless).gif|thumb|A base-less end crystal.]]
End crystals are of two kinds: the ones with a base beneath them are created either by game mechanism or by the {{cmd|summon}} command; while the base-less ones are created by players by manually placing the crystal items on top of [[obsidian]] or [[bedrock]].
The base appears to be made of bedrock, with a crystal hovering over it. While in the End, a crystal continually generates fire at its current position, one block above the base (directly on top of the block the base is embedded in), replacing any other block at that location. This fire is capable of spreading.
The end crystal entity is not solid and can be walked through freely. End crystals can be pushed by [[piston]]s, but they explode if moved while on fire. Because fire is checked only when an entity moves, end crystals do not normally take damage from their own fire unless moved.
== Sounds ==
{{edition|java}}:
{{Sound table
|sound=Explosion1.ogg
|sound2=Explosion2.ogg
|sound3=Explosion3.ogg
|sound4=Explosion4.ogg
|subtitle=Explosion
|source=block
|description=When an end crystal explodes
|id=entity.generic.explode
|translationkey=subtitles.entity.generic.explode
|volume=4.0
|pitch=0.56-0.84
|distance=16
|foot=1}}
{{edition|bedrock}}:
{{Sound table
|type=bedrock
|sound=Explosion1.ogg
|sound2=Explosion2.ogg
|sound3=Explosion3.ogg
|sound4=Explosion4.ogg
|source=block
|description=When an end crystal explodes
|id=random.explode
|volume=4.0
|pitch=1.0
|foot=1}}
== Data values ==
=== ID ===
{{edition|java}}:
{{ID table
|edition=java
|firstcolumnname=Item
|showforms=y
|generatetranslationkeys=y
|displayname=End Crystal
|spritetype=item
|nameid=end_crystal
|form=item
|foot=1}}
{{ID table
|edition=java
|firstcolumnname=Entity
|generatetranslationkeys=y
|displayname=End Crystal
|spritetype=entity
|nameid=end_crystal
|foot=1}}
{{edition|bedrock}}:
{{ID table
|edition=bedrock
|firstcolumnname=Item
|shownumericids=y
|showforms=y
|notshowbeitemforms=y
|generatetranslationkeys=y
|displayname=End Crystal
|spritetype=item
|nameid=end_crystal
|id=637
|form=item
|foot=1}}
{{ID table
|edition=bedrock
|firstcolumnname=Entity
|shownumericids=y
|generatetranslationkeys=y
|displayname=End Crystal
|spritetype=entity
|nameid=ender_crystal
|id=71
|foot=1}}
=== Entity data ===
End crystals have entity data that define various properties of the entity.
{{el|java}}:
{{main|Entity format}}
{{/ED}}
{{el|bedrock}}:
: See [[Bedrock Edition level format/Entity format]].
== Achievements ==
{{load achievements|The End... Again...}}
== Advancements ==
{{load advancements|The End... Again...}}
== History ==
[[File:End Crystal 19w38a.gif|thumb|Java Edition 19w38a]]
{{History|java}}
{{History||1.0.0|snap=Beta 1.9 Prerelease 6|[[File:End Crystal JE1 BE1.png|32px]] Added ender crystals.}}
{{History||1.2.1|snap=12w04a|Previously, ender crystals could be spawned using [[spawn egg]]s with ID 200 (in a [[server]], these were created using {{cmd|give 383 1 200}}). The spawned crystal would be positioned where a natural crystal would be if there was a bedrock block at the location. It was still possible until 1.9 to obtain an end crystal spawn egg, but it would not spawn anything.}}
{{History||1.7.2|snap=13w36a|Ender crystals can now be spawned with the {{cmd|summon}} command.}}
{{History||1.8|snap=14w06a|Ender crystals now generate one [[block]] lower. The fire they generate destroys the [[bedrock]] block that is supposed to be underneath (see {{bug|MC-47526}}).}}
{{History||1.9|snap=15w31a|Ender crystals generate at the correct Y-level again.}}
{{History|||snap=15w33c|Respawning the ender dragon now also respawns the ender crystals on the obsidian pillars.
|Ender crystals now have a compound BeamTarget tag that hold the X, Y, Z block location the beam points to.}}
{{History|||snap=15w44a|"Ender crystals" have been renamed to "end crystals".
|[[File:End Crystal (item) JE1 BE1.png|32px]] End crystals can now be obtained as an item.
|End crystals now drop from [[skeleton trap]] horses and can be placed only on [[obsidian]] or bedrock. Placing several of them atop the end exit portal respawns the ender dragon.}}
{{History|||snap=15w44b|End crystals are no longer dropped by [[skeleton horse]]s.
|Added crafting recipe for end crystals, making end crystals [[renewable]].}}
{{History|||snap=15w49a|End crystals now require [[air]]/replaceable [[block]]s and lack of [[entity|entities]] for placement.}}
{{History|||snap=15w51a|End crystals can no longer be placed in [[Adventure mode]].}}
{{History||1.11|snap=16w32a|The entity ID has been changed from <code>EnderCrystal</code> to <code>ender_crystal</code>.}}
{{History||1.13|snap=17w47a|Prior to [[1.13/Flattening|''The Flattening'']], this [[item]]'s numeral ID was 426.}}
{{History|||snap=18w20b|Renamed to "End Crystal".}}
{{History|||snap=pre5|Entity ID has been changed to <code>end_crystal</code>.}}
{{History||1.14|snap=18w43a|[[File:End Crystal JE2.png|32px]][[File:End Crystal (item) JE2 BE2.png|32px]] The textures of end crystals and the end crystal [[item]] have been changed.}}
{{History||1.19.3|snap=22w43a|End crystal explosions can now be [[blocking|blocked]] by [[shield]]s.<ref>{{bug|MC-188247|||Fixed}}</ref>}}
{{History|pocket}}
{{History||1.0.0|snap=alpha 0.17.0.1|[[File:End Crystal JE1 BE1.png|32px]][[File:End Crystal (item) JE1 BE1.png|32px]] Added end crystals.}}
{{History|bedrock}}
{{History||1.6.0|snap=?|[[File:End Crystal BE2.png|32px]] [[File:End Crystal BE2.gif|32px]] The model of the end crystals has been changed. It has now two cubes instead of three.}}
{{History||1.10.0|snap=beta 1.10.0.3|[[File:End Crystal BE3.png|32px]][[File:End Crystal (item) JE2 BE2.png|32px]] The textures of end crystals and the end crystal item have been changed.}}
{{History||1.17.10|snap=beta 1.17.10.20|[[File:End Crystal JE2.png|32px]] The model of the end crystals has been changed to have three cubes again, and to match ''Java Edition''.}}
{{History||1.19.70|snap=beta 1.19.70.20|Increased end crystal collision box size to match ''Java Edition''.|End crystals with obsidian or bedrock below them now will not damage blocks below them when they explode.}}
{{History|console}}
{{History||xbox=TU9|xbone=CU1|ps=1.0|wiiu=Patch 1|[[File:End Crystal JE1 BE1.png|32px]] Added ender crystals.}}
{{History||xbox=TU31|xbone=CU19|ps=1.22|wiiu=Patch 3|Ender crystals now generate one block lower. The fire they generate destroys the [[bedrock]] block that is supposed to be underneath.}}
{{History||xbox=TU46|xbone=CU36|ps=1.38|wiiu=Patch 15|"Ender crystals" have been renamed to "end crystals".
|[[File:End Crystal (item) JE1 BE1.png|32px]] End crystals can now be obtained as an [[item]].
|End crystals now drop from [[skeleton trap]] horses and can be placed only on [[obsidian]] or bedrock. Placing several of them atop the [[end portal|end exit portal]] respawns the ender dragon.
|Added a crafting recipe for end crystals.}}
{{History||xbox=none|xbone=none|ps=1.90|wiiu=none|switch=none|[[File:End Crystal JE2.png|32px]][[File:End Crystal (item) JE2 BE2.png|32px]] The textures of end crystals and the end crystal item have been changed.}}
{{History|new 3ds}}
{{History||1.7.10|[[File:End Crystal JE1 BE1.png|32px]][[File:End Crystal (item) JE1 BE1.png|32px]] Added end crystals.}}
{{History|foot}}
== Issues ==
{{issue list}}
== Trivia ==
* According to [[Jens Bergensten|Jeb]], the reason behind the current crafting recipe using glass as opposed to [[Chorus Fruit|chorus fruit]] or any materials introduced in [[Java Edition 1.9|1.9]] is as a means for players to craft end crystals in older worlds that the dragon has already been killed in.<ref>{{tweet|jeb_|667000226524372992|The problem is that you need to be able to craft the crystals on worlds in which the dragon has been destroyed already|November 18, 2015}}</ref>
* A historical rendition of the [[beacon]] block featured an animated entity within it, which resembled a yellow miniaturized end crystal. The bedrock platform of the end crystal entity would also render below the beacon, though this would normally be hidden within the block below.
* Using a [[piston]] to push an end crystal's fire into an end portal block deletes the end portal block. However, natural portal blocks regenerate if the end crystal is moved.
== Gallery ==
<gallery>
End Crystal Usage.png|Using end crystals to respawn the ender dragon.
Crystal Link.png|An ender dragon being hit with the "healing beam" of an end crystal.
Ender Crystal.png|An end crystal.
EnderCrystalOverworld.png|An end crystal in the Overworld spawned using {{cmd|summon}} {{code|end_crystal}}.
Ender Dragon Revival.png|End crystals respawning the ender dragon.
CagedEnderCrystal.png|A caged end crystal.
Respawn ender dragon.png|A [[player]] trying to respawn the ender dragon.
End Crystal (item).gif|An animation of the item of the end crystal.
</gallery>
== References ==
{{reflist}}
{{Entities}}
{{Items}}
[[de:Enderkristall]]
[[el:Κρύσταλλος του Ender]]
[[es:Cristal del End]]
[[fr:Cristal de l'End]]
[[ja:エンドクリスタル]]
[[ko:엔드 수정]]
[[nl:Endkristal]]
[[pl:Kryształ Endu]]
[[pt:Cristal do End]]
[[ru:Кристалл Края]]
[[th:คริสตัลเอนด์]]
[[uk:Кристал Енду]]
[[zh:末影水晶]]</li><li>[[Magma Cream|Magma Cream]]<br/>{{Item
| title = Magma Cream
| image = Magma Cream.png
| renewable = Yes
| stackable = Yes (64)
}}
'''Magma cream''' is an [[item]] used in [[brewing]] to create [[potion]]s of [[Fire Resistance]], and to manually craft [[magma block]]s.
== Obtaining ==
=== Mob loot ===
==== Magma cubes ====
All but tiny-sized [[magma cube]]s drop 0–1 magma cream. The maximum amount of magma cream is increased by 1 per level of [[Looting]], for a maximum of 4 with Looting III.
=== Crafting ===
{{Crafting
|Blaze Powder
|Slimeball
|Output= Magma Cream
|type= Brewing
}}
=== Chest Loot ===
{{LootChestItem|magma-cream}}
== Usage ==
=== Brewing ingredient ===
{{brewing
|showname=1
|head=1
|Magma Cream|Mundane Potion|base=Water Bottle
}}
{{brewing
|foot=1
|Magma Cream
|Potion of Fire Resistance
}}
=== Crafting ingredient ===
{{crafting usage}}
== Data values ==
=== ID ===
{{edition|java}}:
{{ID table
|edition=java
|showforms=y
|generatetranslationkeys=y
|displayname=Magma Cream
|spritetype=item
|nameid=magma_cream
|form=item
|foot=1}}
{{edition|bedrock}}:
{{ID table
|edition=bedrock
|shownumericids=y
|showforms=y
|notshowbeitemforms=y
|generatetranslationkeys=y
|displayname=Magma Cream
|spritetype=item
|nameid=magma_cream
|id=430
|form=item
|foot=1}}
== History ==
{{History|java}}
{{History||1.0.0|snap=Beta 1.9 Prerelease 2|[[File:Magma Cream JE1.png|32px]] Added magma cream.}}
{{History|||snap=Beta 1.9 Prerelease 3|Magma cream can now be [[brewing|brewed]] in a [[water bottle]] to create a mundane [[potion]], or in an awkward potion to create a potion of [[Fire Resistance]].}}
{{History||1.1|snap=release|[[Magma cube]]s now [[drops|drop]] magma cream.}}
{{History||1.3.1|snap=1.3|[[File:Magma Cream JE2 BE1.png|32px]] The texture of magma cream has been changed.}}
{{History||1.10|snap=16w20a|Magma cream can now be [[crafting|crafted]] into [[magma block]]s.}}
{{History||1.13|snap=17w47a|Prior to [[1.13/Flattening|''The Flattening'']], this [[item]]'s numeral ID was 378.}}
{{History||1.14|snap=18w43a|[[File:Magma Cream JE3 BE2.png|32px]] The texture of magma cream has been changed.}}
{{History||1.16|snap=20w07a|Magma cream has a {{frac|2|109}} (~1.83%) chance of being offered by [[piglin]]s when [[bartering]], in a stack size of 1–3.}}
{{History|||snap=20w09a|Magma cream now has a {{frac|10|226}} (~4.42%) chance of being offered by piglins when bartering, in a stack size of 1–5.}}
{{History|||snap=20w16a|Magma cream now generates in [[bastion remnant]]s chests.}}
{{History||1.16.2|snap=20w28a|Magma cream can no longer be obtained from bartering with piglins.}}
{{History|||snap=20w30a|The average yield of magma cream from bastion remnant chests has been slightly increased.}}
{{History|pocket edition alpha}}
{{History||v0.11.0|snap=build 1|[[File:Magma Cream JE2 BE1.png|32px]] Added magma cream.
|Magma cream is currently unobtainable.}}
{{History||v0.11.0|snap=build 8|[[Magma cube]]s now [[drops|drop]] magma cream.}}
{{History||v0.12.1|snap=build 1|Added magma cream to the [[Creative]] mode [[inventory]].
|Magma cream can now be [[crafting|crafted]].}}
{{History|pocket}}
{{History||1.1.3|snap=alpha 1.1.3.0|Magma cream can now be crafted into [[magma block]]s.}}
{{History|bedrock}}
{{History||1.10.0|snap=beta 1.10.0.3|[[File:Magma Cream JE3 BE2.png|32px]] The texture of magma cream has been changed.}}
{{History||1.16.0|snap=beta 1.16.0.57|Magma cream can be obtained from bartering with piglins.
|Magma cream can now be found in [[bastion remnants]] chests.}}
{{History||1.16.100|snap=beta 1.16.100.54|Magma cream can no longer be obtained from [[barter]]ing with [[piglin]]s.}}
{{History|console}}
{{History||xbox=TU7|xbone=CU1|ps=1.0|wiiu=Patch 1|switch=1.0.1|[[File:Magma Cream JE2 BE1.png|32px]] Added magma cream.}}
{{History||xbox=none|xbone=none|ps=1.90|wiiu=none|switch=none|[[File:Magma Cream JE3 BE2.png|32px]] The texture of magma cream has been changed.}}
{{History|New 3DS}}
{{History||0.1.0|[[File:Magma Cream JE2 BE1.png|32px]] Added magma cream.}}
{{history|foot}}
== Issues ==
{{issue list}}
{{items}}
[[Category:Renewable resources]]
[[cs:Lávová pěna]]
[[de:Magmacreme]]
[[es:Crema de magma]]
[[fr:Crème de magma]]
[[hu:Magmakrém]]
[[ja:マグマクリーム]]
[[ko:마그마 크림]]
[[lzh:火漿膏]]
[[nl:Magmacrème]]
[[pl:Magmowy krem]]
[[pt:Creme de magma]]
[[ru:Лавовый крем]]
[[th:ครีมแมกม่า]]
[[uk:Магмовий крем]]
[[zh:岩浆膏]]</li></ul></nowiki> | Added the Journey to The West skin pack. | ||||||||||||||||||||||||||||||||||
v0.14.0{{Extension DPL}}<ul><li>[[Feather|Feather]]<br/>{{about|a item|a enchantent|Feather Falling}}
{{Item
| image = Feather.png
| stackable = Yes (64)
| renewable = Yes
}}
'''Feathers''' are items dropped by [[chicken]]s and [[parrot]]s, as well as tamed [[cats]] as morning gifts.
== Obtaining ==
=== Mob loot ===
Adult [[chicken]]s drop 0–2 feathers upon death. The maximum is increased by 1 per level of [[Looting]], for a maximum of 0–5 with Looting III.
[[Parrot]]s drop 1–2 feathers upon death. The maximum is increased by 1 per level of Looting, for a maximum of 1–5 with Looting III.
A [[fox]] sometimes spawns holding a feather, which always drops upon death. Alternatively, the player can drop a [[food]] item, causing the fox to drop the feather in favor of the food.
=== Natural generation ===
{{LootChestItem|feather}}
=== Cat gifts ===
{{main|Cat#Gifts}}
Tamed [[cat]]s have a 70% chance of giving the [[player]] a "morning gift", and the gift has a 16.13% chance to be a feather.
== Usage ==
=== Helmet ===
<div style='float:right'></div>
While a feather cannot be equipped in the head slot in [[Survival]] mode, equipping it using commands causes it to appear completely upright unlike other items.
[[File:Steve wearing Feather.png|75px]]
[[File:Alex wearing Feather.png|75px]]
=== Crafting ingredient ===
{{crafting usage}}
=== Trading ===
Expert-level fletcher [[villager]]s buy 24 feathers for an [[emerald]] as part of their trade.
== Data values ==
=== ID ===
{{edition|java}}:
{{ID table
|edition=java
|showforms=y
|generatetranslationkeys=y
|displayname=Feather
|spritetype=item
|nameid=feather
|form=item
|foot=1}}
{{edition|bedrock}}:
{{ID table
|edition=bedrock
|shownumericids=y
|showforms=y
|notshowbeitemforms=y
|generatetranslationkeys=y
|displayname=Feather
|spritetype=item
|nameid=feather
|id=327
|form=item
|foot=1}}
== History ==
{{History|java indev}}
{{History||0.31|snap=20100130|[[File:Feather JE1.png|32px]] Added feathers.|Feathers can be used to [[craft]] [[arrow]]s.
|Feathers are [[drop]]ped by every [[mob]] in quantities of 0 to 2.}}
{{History||20100206|[[File:Feather JE2 BE1.png|32px]] The feather's texture has been changed; it is now not as straight anymore.}}
{{History||20100219|[[Zombie]]s are now the only [[mob]] that can drop feathers. This was a placeholder as [[Notch]] has stated he currently doesn't know what else they should drop.<ref>{{tweet|notch|21723172931895296}}</ref>}}
{{History|java alpha}}
{{History||v1.0.14|[[Chicken]]s now [[drop]] 0–2 feathers upon death.}}
{{History|java beta}}
{{History||1.8|snap=Pre-release|[[Zombie]]s now drop [[rotten flesh]], instead of feathers.
|[[Chicken]]s are now the only source of feathers.}}
{{History|java}}
{{History||1.3.1|snap=12w17a|Feathers are now used to craft [[book and quill]]s.}}
{{History||1.4.6|snap=12w49a|Feathers are now used to craft a [[firework star]] with a burst effect.}}
{{History||1.12|snap=17w13a|[[Parrot]]s now [[drop]] feathers.}}
{{History||1.13|snap=17w47a|Prior to ''[[The Flattening]]'', this [[item]]'s numeral ID was 288.}}
{{History|||snap=18w11a|Feathers now generate in [[shipwreck]] [[chest]]s.}}
{{History||1.14|snap=18w43a|[[File:Feather JE3 BE2.png|32px]] The texture of feathers has been changed.}}
{{History|||snap=18w44a|[[Cat]]s now offer feathers as [[Cat#Gifts|gift]]s.}}
{{History|||snap=18w48a|Feathers can now be found in chests in plains [[village]] houses.}}
{{History|||snap=18w50a|Feathers can now be found in chests in fletcher houses.}}
{{History|||snap=19w07a|Added [[fox]]es, which sometimes spawn with feather in their mouths.}}
{{History|||snap=19w11a|Fletcher [[villager]]s now [[trading|buy]] feathers.}}
{{History||1.20<br>(Experimental)|link=1.19.4|snap=1.19.4 Pre-release 1|Feathers can now be used to craft [[brush]]es.}}
{{History|pocket alpha}}
{{History||v0.2.0|[[File:Feather JE2 BE1.png|32px]] Added feathers. They are currently unobtainable and serve no purpose.}}
{{History||v0.3.3|Chickens now drop 0–2 feathers upon death.|Feathers can now be used to [[craft]] [[arrow]]s.}}
{{History||v0.5.0|Feathers can now be obtained after activating the [[nether reactor]].}}
{{History||v0.11.0|snap=build 1|[[Zombie]]s now drop [[rotten flesh]], instead of feathers.}}
{{History||v0.12.1|snap=build 1|Feathers are no longer available from the [[nether reactor]].}}
{{History|bedrock}}
{{History||1.2.0|snap=beta 1.2.0.2|Feathers can now be used to craft [[book and quill]]s.|Added [[parrot]]s, which [[drop]] feathers.|Feathers can now be used as an ingredient to craft a [[firework star]].}}
{{History||1.4.0|snap=beta 1.2.14.2|Feathers can now be found in [[shipwreck]] [[chest]]s.}}
{{History||1.8.0|snap=beta 1.8.0.8|Feathers can now be given as a gift to the [[player]] by tamed [[cat]]s.}}
{{History||1.10.0|snap=beta 1.10.0.3|[[File:Feather JE3 BE2.png|32px]] The texture of feathers has been changed.|Feathers can now be found in the new [[plains]] [[village]] house.}}
{{History||1.11.0|snap=beta 1.11.0.1|Feathers can now be found in village fletcher [[chest]]s.}}
{{History|||snap=beta 1.11.0.4|Feathers can now be [[trading|sold]] to fletcher [[villager]]s.}}
{{History||1.13.0|snap=beta 1.13.0.1|Added [[fox]]es, which can [[drops|drop]] feathers.}}
{{History||1.20.0<br>(Experimental)|link=Bedrock Edition 1.19.80|snap=beta 1.19.80.20|Feathers can now be used to craft [[brush]]es.}}
{{History|console}}
{{History||xbox=TU1|xbone=CU1|ps=1.0|wiiu=Patch 1|[[File:Feather JE2 BE1.png|32px]] Added feathers.}}
{{History|Ps4}}
{{History||1.90|[[File:Feather JE3 BE2.png|32px]] The texture of feathers has been changed.}}
{{History|New Nintendo 3DS Edition}}
{{History||0.1.0|[[File:Feather JE2 BE1.png|32px]] Added feathers.}}
{{History|foot}}
== Issues ==
{{issue list}}
== References ==
{{reflist}}
== External Links ==
*[https://www.minecraft.net/en-us/article/taking-inventory--feather Taking Inventory: Feather] – Minecraft.net on March 3, 2019
{{Items}}
[[Category:Renewable resources]]
[[cs:Pírko]]
[[de:Feder]]
[[es:Pluma]]
[[fr:Plume]]
[[hu:Toll]]
[[it:Piuma]]
[[ja:羽根]]
[[ko:깃털]]
[[nl:Veer]]
[[pl:Pióro]]
[[pt:Pena]]
[[ru:Перо]]
[[uk:Перо]]
[[zh:羽毛]]</li><li>[[Popped Chorus Fruit|Popped Chorus Fruit]]<br/>{{Item
| image = Popped Chorus Fruit.png
| renewable = Yes
| stackable = Yes (64)
}}
'''Popped chorus fruit''' is an [[item]] obtained by [[smelting]] [[chorus fruit]], and used to craft [[End Rod|end rods]] and [[purpur blocks]]. Unlike raw chorus fruit, the popped fruit is inedible.
== Obtaining ==
=== Smelting ===
{{Smelting
|Chorus Fruit
|Popped Chorus Fruit
|0,1
}}
== Usage ==
=== Crafting ingredient ===
{{crafting usage}}
== Data values ==
=== ID ===
{{edition|java}}:
{{ID table
|edition=java
|showforms=y
|generatetranslationkeys=y
|displayname=Popped Chorus Fruit
|spritetype=item
|nameid=popped_chorus_fruit
|form=item
|foot=1}}
{{edition|bedrock}}:
{{ID table
|edition=bedrock
|showaliasids=y
|shownumericids=y
|showforms=y
|notshowbeitemforms=y
|generatetranslationkeys=y
|displayname=Popped Chorus Fruit
|spritetype=item
|nameid=popped_chorus_fruit
|aliasid=chorus_fruit_popped
|id=559
|form=item
|translationkey=item.chorus_fruit_popped.name
|foot=1}}
== History ==
{{History|java}}
{{History||1.9|snap=15w31a|[[File:Popped Chorus Fruit JE1 BE1.png|32px]] Added popped chorus fruit.
|Popped chorus fruit are used to craft [[purpur block]]s.}}
{{History|||snap=15w44b|Popped chorus fruit are now used to craft [[end rod]]s.}}
{{History||1.13|snap=17w47a|Prior to [[1.13/Flattening|''The Flattening'']], this [[item]]'s numeral ID was 433.}}
{{History|||snap=pre5|The ID of popped chorus fruit has now been changed to <code>popped_chorus_fruit</code>.}}
{{History||1.14|snap=18w43a|[[File:Popped Chorus Fruit JE2 BE2.png|32px]] The texture of popped chorus fruit has now been changed.}}
{{History|pocket}}
{{History||1.0.0|snap=alpha 0.17.0.1|[[File:Popped Chorus Fruit JE1 BE1.png|32px]] Added popped chorus fruit.}}
{{History|bedrock}}
{{History||1.10.0|snap=beta 1.10.0.3|[[File:Popped Chorus Fruit JE2 BE2.png|32px]] The texture of popped chorus fruit has now been changed.}}
{{History||1.16.100|snap=beta 1.16.100.56|The ID of popped chorus fruit has been changed from <code>chorus_fruit_popped</code> to <code>popped_chorus_fruit</code>.}}
{{History|console}}
{{History||xbox=TU46|xbone=CU36|ps=1.38|wiiu=Patch 15|[[File:Popped Chorus Fruit JE1 BE1.png|32px]] Added popped chorus fruit.}}
{{History||xbox=none|xbone=none|ps=1.90|wiiu=none|switch=none|[[File:Popped Chorus Fruit JE2 BE2.png|32px]] The texture of popped chorus fruit has now been changed.}}
{{History|new 3ds}}
{{History||1.7.10|[[File:Popped Chorus Fruit JE1 BE1.png|32px]] Added popped chorus fruit.}}
{{History|foot}}
== Issues ==
{{issue list}}
{{Items}}
[[cs:Vypukaný květ chorusu]]
[[de:Geplatzte Chorusfrucht]]
[[fr:Chorus éclaté]]
[[it:Frutto di chorus scoppiato]]
[[ja:焼いたコーラスフルーツ]]
[[ko:튀긴 후렴과]]
[[nl:Gepoft Chorusfruit]]
[[pl:Prażony owoc refrenusu]]
[[pt:Fruta do coro cozida]]
[[ru:Приготовленный плод коруса]]
[[zh:爆裂紫颂果]]
[[Category:Renewable resources]]</li></ul> | build 7 | Added the Redstone Specialists skin pack. | |||||||||||||||||||||||||||||||||
v0.14.1{{Extension DPL}}<ul><li>[[Bamboo|Bamboo]]<br/>{{for|the plant feature|Bamboo (feature)}}
{{Distinguish|text = [[Sugar Cane]], which was colloquially known as Bamboo}}
{{Block
| image = <gallery>
Leafless Bamboo.png|Leafless
Small Leaves Bamboo.png|Small
Big Leaves Bamboo.png|Big
Leafless Old Bamboo.png|Leafless Old
Small Leaves Old Bamboo.png|Small Old
Big Leaves Old Bamboo.png|Big Old
</gallery>
| image2 = Bamboo Shoot.png<!--different infobox for this later down the line, like with pistons?-->
| image3 = Bamboo (item) JE1 BE1.png
| transparent = Yes
| light = No
| tool = Sword
| tool2 = Axe
| renewable = Yes
| stackable = Yes (64)
| flammable = '''Bamboo''': Yes (60)<br>'''Shoot''': No
| lavasusceptible = Yes
}}
'''Bamboo''' is a versatile, fast-growing, [[Bone Meal|bonemealable]] [[plant]] found primarily in [[jungle]]s, which is used for [[crafting]] (particularly [[scaffolding]] and [[Block of Bamboo|bamboo wood]]), [[smelting]] and [[breeding]] [[Panda|pandas]].
A '''bamboo shoot''' is the initial non-solid sapling form of planted bamboo.
== Obtaining ==
Bamboo shoots cannot be obtained through vanilla means. {{IN|bedrock}}, they can be obtained through [[add-on]]s or inventory editing. {{IN|java}}, they are completely unobtainable.
=== Breaking ===
Bamboo can be mined with any [[tool]], but a [[sword]] breaks the block [[instant mining|instantly]], even with [[Mining Fatigue]]. Flowing [[water]] also breaks bamboo shoots, but not mature bamboo stalks.
{{breaking row|Bamboo|Sword|sword=1|horizontal=1}}
{{notelist}}
=== Natural generation ===
Bamboo generates in widely scattered single shoots within [[jungle]] [[biome]]s. Bamboo generates much more densely in the [[bamboo jungle|bamboo variant]]s of jungles, covering large areas of the landscape. Bamboo does ''not'' generate in [[sparse jungle]]s.<ref>{{bug|MC-156638|||WAI}}</ref>
=== Mob loot ===
{{IN|java}}, a [[panda]] drops 1 bamboo when killed. [[Looting]] does not affect the drop rate.<ref>{{bug|MC-160006}}</ref>
{{IN|bedrock}}, a panda drops 0-2 bamboo when killed. Looting increases the drop by 1 per level.
=== Fishing ===
Bamboo can be found while [[fishing]] in [[jungle]] [[biome]]s as a junk [[item]].
=== Chest loot ===
{{LootChestItem|bamboo}}
== Usage ==
When broken, any bamboo [[block]] placed or grown above it is also broken. A bamboo block drops itself as an [[item]] if a [[piston]] pushes it or moves a block into its space. When bamboo is first placed as a shoot it's not solid and can be destroyed by water flowing into it. After growing at least one block taller it becomes solid and can't be destroyed by water. To transform a bamboo shoot into a solid bamboo block place another bamboo on top of it.
Unlike most plants, bamboo cannot be [[Composter#Composting|composted]].<ref>{{bug|MC-142452|||WAI}}</ref>
=== Farming ===
Bamboo can be planted on [[moss block]]s{{only|java|short=1}}, [[grass block]]s, [[dirt]], [[coarse dirt]], [[rooted dirt]], [[gravel]], [[mycelium]], [[podzol]], [[sand]], [[red sand]], [[suspicious sand]], [[suspicious gravel]], [[mud]], bamboo shoot, or on itself. At default random tick speed (3), each plant grows on average every {{convert|4096|ticks|seconds}}. When [[bone meal]] is {{control|used}} on it, it grows by 1–2 [[blocks]]. Bamboo can grow up to 12–16 blocks tall. The top of a bamboo plant requires a [[light]] level of 9 or above to grow.
Because bamboo breaks in almost the same way as [[sugar cane]]s, [[Tutorials/Sugar cane farming|a sugar cane farm]] can be easily adapted to this use. While water is not needed with such a farm, some spacing is recommended if the harvest is done manually as mature stalks are solid.
=== Pandas ===
Bamboo [[item]]s are eaten by [[panda]]s and can be used to speed up the growth of baby pandas. Bamboo can also be used to breed pandas when at least 8 [[block]]s of bamboo are within 5 blocks of the pandas, making the panda the only animal in the game to have extra breeding requirements. At this point, the [[player]] can feed them bamboo and they [[breeding|mate]] to have a baby.
=== Fuel ===
Bamboo can be used as fuel for [[smelting]]. Each bamboo item smelts 0.25 [[item]]s. Crafting two bamboo into a [[stick]] and using that as fuel is equivalent, smelting 0.5 items.
Bamboo can be crafted into other items to increase its fuel efficiency.
* By crafting 9 bamboo into 2 [[bamboo planks]], 3 items can be smelted instead of 2.25, a 33.3% increase in efficiency.
** {{IN|bedrock}}, the fuel efficiency can be further doubled by crafting the bamboo planks into twice the amount of [[slab]]s.<ref>{{bug|MCPE-94368||Wooden slabs last for the same amount of time as planks in a furnace}}</ref>
* {{IN|java}}, by crafting 14 bamboo into 3 [[ladder]]s, 4.5 items can be smelted instead of 3.5, a 28.6% increase in efficiency.
=== Flower pots ===
Bamboo can be placed in a [[flower pot]], where it retains the design it has in its item form.
=== Crafting ingredient ===
{{crafting usage}}
== Appearance ==
[[File:Bamboo stages.png|thumb|The different stages of bamboo growth.]]
The appearance of bamboo changes as it grows. When first placed, it takes the form of a small shoot, which has no [[hitbox]]. When it grows one [[block]] taller it grows to 2 pixels in length and width and the top block has leaves coming off it. At 3 blocks, the top 2 blocks have leaves and at 4 blocks the bamboo expands to 3×3 pixels. At 5 blocks tall, the top 3 blocks have leaves on them. As the bamboo grows, the leaves move up and stay at the top 3 blocks. Destroying a block of bamboo does not change the appearance of the blocks below it. Bamboo is oriented at a random position in the block that it is in.
== Sounds ==
=== Bamboo ===
{{Sound table/Block/Bamboo}}
=== Bamboo Shoot ===
{{Sound table/Block/Bamboo shoot}}
== Data values ==
=== ID ===
{{edition|java}}:
{{ID table
|edition=java
|showblocktags=y
|showforms=y
|generatetranslationkeys=y
|displayname=Bamboo
|spritetype=block
|nameid=bamboo
|blocktags=bamboo_plantable_on}}
{{ID table
|displayname=Bamboo Shoot
|spritetype=block
|nameid=bamboo_sapling
|blocktags=bamboo_plantable_on
|form=block
|foot=1}}
{{edition|bedrock}}:
{{ID table
|edition=bedrock
|shownumericids=y
|showforms=y
|generatetranslationkeys=y
|displayname=Bamboo
|spritetype=block
|nameid=bamboo
|id=418}}
{{ID table
|displayname=Bamboo Sapling
|spritetype=block
|nameid=bamboo_sapling
|id=419
|form=block
|translationkey=-
|foot=1}}
=== Block states ===
{{see also|Block states}}
{{/BS}}
== Achievements ==
{{load achievements|Zoologist}}
== History ==
{{History||September 29, 2018|link={{tweet|minecraft|1046096508570009602}}|Bamboo is announced at [[MINECON Earth 2018]].}}
{{History|java}}
{{History||1.14|snap=18w43a|[[File:Leafless Bamboo JE1 BE2.png|32px]] [[File:Small Leaves Bamboo JE1 BE2.png|32px]] [[File:Big Leaves Bamboo JE1 BE2.png|32px]] [[File:Leafless Old Bamboo JE1 BE2.png|32px]] [[File:Small Leaves Old Bamboo JE1 BE2.png|32px]] [[File:Big Leaves Old Bamboo JE1 BE2.png|32px]] [[File:Bamboo Shoot JE1 BE1.png|32px]] Added bamboo.
|[[File:Bamboo (item) JE1 BE1.png|32px]] Bamboo as an [[item]] can be [[drops|dropped]] by bamboo and planted to grow bamboo.
|Added [[bamboo jungle]]s, where bamboo naturally generates.}}
{{History||1.16|snap=20w06a|"Bamboo Sapling" has been renamed to "Bamboo Shoot".}}
{{History|||snap=20w13a|Bamboo has been moved from the Miscellaneous tab to the Decoration Blocks tab in the [[Creative inventory]].<ref name="misc decoration">https://bugs.mojang.com/browse/MC-174434</ref>}}
{{History||1.17|snap=21w13a|Bamboo can now be planted on rooted dirt.}}
{{History|||snap=21w16a|Bamboo can now be planted on moss blocks.}}
{{History||1.18|snap=21w39a|Bamboo no longer generates underground.<ref>{{bug|MC-145376}}</ref><ref>{{bug|MC-214894}}</ref>}}
{{History||1.19|snap=22w15a|Bamboo can now be planted on mud.}}
{{History||1.20<br>(Experimental)|link=1.19.3|snap=22w42a|Bamboo can now be used to craft [[bamboo planks]].}}
{{History|||snap=22w45a|Bamboo can no longer be used to craft bamboo planks.|Bamboo can now be used to craft a [[block of bamboo]].}}
{{History||1.20<br>(Experimental)|link=1.19.4|snap=23w07a|Bamboo can now be planted on [[suspicious sand]].}}
{{History||1.20|snap=23w14a|Bamboo can now be planted on [[suspicious gravel]].}}
{{History|bedrock}}
{{History||1.8.0|snap=beta 1.8.0.8|[[File:Leafless Bamboo BE1.png|32px]] [[File:Small Leaves Bamboo BE1.png|32px]] [[File:Big Leaves Bamboo BE1.png|32px]] [[File:Leafless Old Bamboo BE1.png|32px]] [[File:Small Leaves Old Bamboo BE1.png|32px]] [[File:Big Leaves Old Bamboo BE1.png|32px]] [[File:Bamboo Shoot JE1 BE1.png|32px]] Added bamboo.
|[[File:Bamboo (item) JE1 BE1.png|32px]] Bamboo as an [[item]] can be [[drops|dropped]] by bamboo and planted to grow bamboo.}}
{{History||1.9.0|snap=beta 1.9.0.0|Bamboo can now generate in [[jungle]] [[biome]]s in single shoots.
|Added [[bamboo jungle]]s, where bamboo naturally generates.}}
{{History||1.12.0|snap=beta 1.12.0.3|[[File:Leafless Bamboo JE1 BE2.png|32px]] [[File:Small Leaves Bamboo JE1 BE2.png|32px]] [[File:Big Leaves Bamboo JE1 BE2.png|32px]] [[File:Leafless Old Bamboo JE1 BE2.png|32px]] [[File:Small Leaves Old Bamboo JE1 BE2.png|32px]] [[File:Big Leaves Old Bamboo JE1 BE2.png|32px]] The bamboo texture brightness has been updated to match {{el|je}}.<ref>{{bug|MCPE-42635}}</ref>}}
{{History||1.17.30|snap=beta 1.17.20.20|Swords now break bamboo instantly to match ''Java Edition''.<ref>{{bug|MCPE-64013}}</ref>}}
{{History||1.20.0|link=Bedrock Edition 1.20.0|snap=beta 1.19.50.21|Bamboo can now be used to craft [[bamboo planks]].}}
{{History|||snap=beta 1.19.60.20|Bamboo can no longer be used to craft bamboo planks.|Bamboo can now be used to craft a [[block of bamboo]].}}
{{History|console}}
{{History||xbox=none|xbone=none|ps=1.83|wiiu=none|switch=none|[[File:Leafless Bamboo JE1 BE2.png|32px]] [[File:Small Leaves Bamboo JE1 BE2.png|32px]] [[File:Big Leaves Bamboo JE1 BE2.png|32px]] [[File:Leafless Old Bamboo JE1 BE2.png|32px]] [[File:Small Leaves Old Bamboo JE1 BE2.png|32px]] [[File:Big Leaves Old Bamboo JE1 BE2.png|32px]] [[File:Bamboo Shoot JE1 BE1.png|32px]] Added bamboo.
|[[File:Bamboo (item) JE1 BE1.png|32px]] Bamboo as an [[item]] can be [[drops|dropped]] by bamboo and planted to grow bamboo.}}
{{History|foot}}
=== Bamboo shoot "item" ===
{{:Technical blocks/Bamboo Shoot}}
== Issues ==
{{Issue list}}
== Trivia ==
* Because bamboo grows quickly (on average 1 growth per 200 seconds), just 500 plants in an automatic farm produce more [[item]]s than a [[hopper]] can collect (2.5 items per second). A single hopper can move only enough items to keep 6.25 [[furnace]]s running.
* Bamboo is the fastest-growing plant in ''[[Minecraft]]'', which reflects its status as the fastest-growing plant known in real life.
* While bamboo cannot be composted in ''Minecraft'', it can be composted in real life.
== Gallery ==
<gallery>
File:PandaMinecon.png|The first image featuring bamboo, from [[MINECON Earth 2018]].
File:PandasEatingMinecon.jpg|A group of [[Panda|pandas]] eating bamboo, shown at [[MINECON Earth 2018]].
File:Growing bamboo BE.png|Planted bamboo growing.
File:Bamboo in tree.png|A bamboo shoot growing through a [[tree]].
File:Bamboo Jungle.png|Bamboo seen in a [[jungle]] [[biome]] variant.
File:Bamboo Jungle in Amplified world.png|Bamboo Jungle in an [[Amplified]] world in 1.19-rc2.
File:Naturalbamboo.png|Multiple naturally generated bamboo stems growing by a river.
File:Tall Bamboo.png|Grown Bamboo with three parts
File:Zuri Chopping Bamboo Pixel Art.png|[[Zuri]] chopping down bamboo for a baby panda.
File:Bamboo Wallpaper.png|Smartphone wallpaper of the aforementioned artwork, showing more of the treetops and bamboo.
File:Panda Packaging.jpg|Packing for the ''Diamond Level Panda'', modeled after bamboo.
</gallery>
==References==
{{Reflist}}
{{Blocks|vegetation}}
{{Items}}
[[Category:Plants]]
[[Category:Food]]
[[Category:Natural blocks]]
[[Category:Non-solid blocks]]
[[Category:Flammable blocks]]
[[cs:Bambus]]
[[de:Bambus]]
[[es:Bambú]]
[[fr:Bambou]]
[[it:Bambù]]
[[ja:竹]]
[[ko:대나무]]
[[pl:Bambus]]
[[pt:Bambu]]
[[ru:Бамбук]]
[[th:ไม้ไผ่]]
[[zh:竹子]]</li><li>[[Firework Star|Firework Star]]<br/>{{Item
| image = Firework Star.png
| renewable =
* '''Trail Effect''': No
* '''All Others''': Yes
| stackable = Yes (64)
}}
'''Firework stars''' are [[items]] used to determine the color, effect, and shape of [[firework rocket]]s.
== Obtaining ==
In [[Survival]] mode, firework stars are obtainable only through crafting. In [[Creative]] mode, they can be found in the creative inventory.
=== Crafting ===
{{Crafting
|head=1
|showname=0
|showdescription=1
|ingredients=[[Gunpowder]] +<br>Matching [[Dye]] +<br>Extra ingredients (optional)
|Gunpowder
|Matching Dye
|Head; Gold Nugget; Feather;Fire Charge;
|Glowstone Dust;
|Diamond;
|Output=Matching Firework Star
|arggroups=1;2,Output;3;4;5
|description=Up to eight dyes can be added.<br>One head, gold nugget, feather, or fire charge can be added.<br>Both the diamond and the glowstone dust can be added with any of the other ingredients.
|type=Miscellaneous
}}
{{Crafting
|ignoreusage=1
|Matching Firework Star
|Any Dye
|Output=Matching Firework Star
|type=Miscellaneous
|description=Adds a "fade to color" effect to the firework star, overwriting any existing fades.<br>Up to eight dyes can be added.
|foot=1
|arggroups=1,Output
}}
<div style="display:none">
<!--
This is so the pre-Village & Pillage dyes can have dye-related crafting recipes show on their respective pages.
They don't need to be displayed on this page because they already intuitively list "Any Matching/Colored Dye".
-->
{{Crafting
|head=1
|showname=0
|showdescription=1
|Gunpowder
|Bone Meal; Lapis Lazuli; Cocoa Beans; Ink Sac
|Head; Gold Nugget; Feather;Fire Charge;
|Glowstone Dust;
|Diamond;
|Output=White Firework Star; Blue Firework Star; Brown Firework Star; Black Firework Star
|arggroups=1;2,Output;3;4;5
|description={{only|bedrock|education}}<br>Up to eight dyes can be added.<br>One head, gold nugget, feather, or fire charge can be added.<br>Both the diamond and the glowstone dust can be added with any of the other ingredients.
|type=Miscellaneous
}}
{{Crafting
|showdescription=1
|White Firework Star; Blue Firework Star; Brown Firework Star; Black Firework Star
|Bone Meal; Lapis Lazuli; Cocoa Beans; Ink Sac
|Output=White Firework Star; Blue Firework Star; Brown Firework Star; Black Firework Star
|type=Decoration block
|description={{only|bedrock|education}}<br>Adds a "fade to color" effect to the firework star, overwriting any existing fades.<br>Up to eight dyes can be added.
|foot=1
}}
</div>
== Usage ==
The only usage of firework stars is to create [[firework rocket]]s.
=== Crafting ingredient ===
{{crafting usage|match=end}}
== Effects ==
=== Shape effects ===
A firework star can have only one shape effect.
{| class="wikitable"
|+ Shape Effects
! <abbr title="Type (Byte tag in NBT structure)">Type</abbr>
! Ingredient
! Effect
! Sample Animation
|-
| 0
| None
| Small Ball explosion (default)
| [[File:Firework Star (Small Sphere).gif|200px]]
|-
| 1
| {{ItemLink|Fire Charge}}
| Large Ball explosion and heavy sound.
| [[File:Firework Star (Large Sphere).gif|200px]]
|-
| 2
| {{ItemLink|Gold Nugget}}
| Star-shaped explosion
| [[File:Firework Star (Star Shape).gif|200px]]
|-
| 3
| {{BlockLink|id=Heads|Head}} (any)
| Creeper-shaped (Creeper Face) explosion
| [[File:Firework Star (Creeper Shape).gif|200px]]
|-
| 4
| {{ItemLink|Feather}}
| Burst explosion
| [[File:Firework Star (Burst).gif|200px]]
|}
=== Additional effects ===
In addition to the shape effects, any combination of these additional effects may be added to a firework star.
{| class="wikitable"
|+ Additional Effects
! Ingredient
! Effect
! Sample Animation
|-
| None
| Default
| [[File:Firework Star (Small Sphere).gif|200px]]
|-
| {{ItemLink|Glowstone Dust}}
| Twinkle (Crackle effect and sounds after the explosion)
| [[File:Firework Star (Twinkle effect).gif|200px]]
|-
| {{ItemLink|Diamond}}
| Trail effect after the explosion
| [[File:Firework Star (Trail effect).gif|200px]]
|-
| {{ItemLink|Glowstone Dust}} <br> {{ItemLink|Diamond}}
| Twinkle + Trail effect after the explosion
| [[File:Firework Star (Twinkle and Trail effect).gif|200px]]
|}
== Sounds ==
{{see also|Firework_Rocket#Sounds}}
== Data values ==
=== ID ===
{{edition|java}}:
{{ID table
|edition=java
|showforms=y
|generatetranslationkeys=y
|displayname=Firework Star
|spritetype=item
|nameid=firework_star
|form=item
|foot=1}}
{{edition|bedrock}}:
{{ID table
|edition=bedrock
|showaliasids=y
|shownumericids=y
|showforms=y
|notshowbeitemforms=y
|generatetranslationkeys=y
|displayname=Firework Star
|spritetype=item
|nameid=firework_star
|aliasid=fireworkscharge
|id=520
|form=item
|translationkey=item.fireworksCharge.name
|foot=1}}
=== Item data ===
{{el|java}}:
{{main|Player.dat format}}
<div class="treeview">
* {{nbt|compound|tag}}: The item's '''tag''' tag.
{{:Player.dat_format/Firework Stars}}
</div>
{{el|bedrock}}:
: See [[Bedrock Edition level format/Item format]].
== Video ==
<div style="text-align:center">{{yt|fYL1W9aW0UU}}</div>
== History ==
{{History|java}}
{{History||1.4.6|snap=12w49a|[[File:Firework Star JE1 BE1.png|32px]] Added firework stars.
|Firework stars in the [[Creative inventory]] come in only one variation; they do not have any color.}}
{{History||1.13|snap=17w47a|The ID of firework stars has now been changed from <code>firework_charge</code> to <code>firework_star</code>.
|Prior to [[Java Edition 1.13/Flattening|''The Flattening'']], this [[item]]'s numeral ID was 402.}}
{{History|bedrock}}
{{History||1.2.0|snap=beta 1.2.0.2|[[File:Firework Star JE1 BE1.png|32px]] Added firework stars.
|Firework stars come in all 16 colors in the [[Creative]] [[inventory]].{{verify|type=update}}{{info needed}}}}
{{History||1.16.100|snap=beta 1.16.100.56|The ID of firework star has been changed from <code>fireworkscharge</code> to <code>firework_star</code>.}}
{{History|console}}
{{History||xbox=TU19|xbone=CU7|ps=1.12|wiiu=Patch 1|switch=1.0.1|[[File:Firework Star JE1 BE1.png|32px]] Added firework stars.
|Firework stars cannot be obtained within the Creative inventory.}}
{{History||xbox=TU46|xbone=CU36|ps=1.38|wiiu=Patch 15|The [[crafting]] interface has now been updated to allow the crafting of firework stars and [[firework rocket]]s.}}
{{History|foot}}
== Issues ==
{{Issue list}}
== Trivia ==
* There are 29,617,272,331,290,537 (29.6 quintillion) unique firework stars.
* Putting firework stars on rockets causes the player to take explosion damage when using them for flying with [[elytra]].
== Gallery ==
<gallery>
File:Firework Star (Tricolor Star shaped with Twinkle and Trail effect).gif|Tricolor (Magenta, Pink, White dye) + Star shaped with Twinkle and Trail effect.
</gallery>
{{Items}}
[[cs:Ohňostrojová hvězda]]
[[de:Feuerwerksstern]]
[[es:Estrella de fuegos artificiales]]
[[fr:Étoile de feu d'artifice]]
[[hu:Tűzijáték csillag]]
[[it:Stella pirotecnica]]
[[ja:花火の星]]
[[ko:폭죽 탄약]]
[[nl:Vuurwerkster]]
[[pl:Gwiazdka pirotechniczna]]
[[pt:Estrela de fogo de artifício]]
[[ru:Пиротехническая звезда]]
[[uk:Зірка феєрверку]]
[[zh:烟火之星]]</li></ul> | Added Minecraft: Story Mode skins. | ||||||||||||||||||||||||||||||||||
v0.14.3
Template loop detected: Template:History Template loop detected: Template:History Template loop detected: Template:History Template loop detected: Template:History Template loop detected: Template:History Template loop detected: Template:History Template loop detected: Template:History Template loop detected: Template:History Template loop detected: Template:History Template loop detected: Template:History Template loop detected: Template:History Template loop detected: Template:History Template loop detected: Template:History Template loop detected: Template:History Template loop detected: Template:History Template loop detected: Template:History Template loop detected: Template:History Template loop detected: Template:History Template loop detected: Template:History Template loop detected: Template:History Template loop detected: Template:History Template loop detected: Template:History Template loop detected: Template:History Template loop detected: Template:History Template loop detected: Template:History Template loop detected: Template:History Template loop detected: Template:History Template loop detected: Template:History Template loop detected: Template:History Template loop detected: Template:History Template loop detected: Template:History Template loop detected: Template:History Template loop detected: Template:History Template loop detected: Template:History Template loop detected: Template:History Template loop detected: Template:History Template loop detected: Template:History Template loop detected: Template:History Template loop detected: Template:History Template loop detected: Template:History Template loop detected: Template:History Template loop detected: Template:History
| Added Biome Settlers Pack 2 Skin pack. | ||||||||||||||||||||||||||||||||||
v0.15.4{{Extension DPL}}<ul><li>[[Beetroot Soup|Beetroot Soup]]<br/>{{for|other uses|Soup}}
{{Item
| title = Beetroot Soup
| image = Beetroot Soup.png
| renewable = Yes
| heals = {{hunger|6}}
| stackable = No
}}
'''Beetroot soup''' is an unstackable [[food]] item.
== Obtaining ==
=== Crafting ===
{{Crafting
|Beetroot
|Beetroot
|Beetroot
|Beetroot
|Beetroot
|Beetroot
|Bowl
|Output=Beetroot Soup
|type=Foodstuff
}}
=== Natural generation ===
{{LootChestItem|beetroot-soup}}
== Usage ==
Beetroot soup can be eaten to restore {{hunger|6}} [[hunger]] points and 7.2 [[Hunger#Mechanics|saturation]], the same as [[cooked chicken]] and [[mushroom stew]]. After eating, the empty [[bowl]] remains, similarly to mushroom stew and [[rabbit stew]].
== Sounds ==
{{Sound table/Entity/Food}}
== Data values ==
=== ID ===
{{edition|java}}:
{{ID table
|edition=java
|showforms=y
|generatetranslationkeys=y
|displayname=Beetroot Soup
|spritetype=item
|nameid=beetroot_soup
|form=item
|foot=1}}
{{edition|bedrock}}:
{{ID table
|edition=bedrock
|shownumericids=y
|showforms=y
|notshowbeitemforms=y
|generatetranslationkeys=y
|displayname=Beetroot Soup
|spritetype=item
|nameid=beetroot_soup
|id=286
|form=item
|foot=1}}
== Advancements ==
{{load advancements|Husbandry;A Balanced Diet}}
== History ==
{{History|java}}
{{History||1.9|snap=15w31a|[[File:Beetroot Soup JE1 BE1.png|32px]] Added beetroot soup.}}
{{History||1.13|snap=17w47a|Prior to [[1.13/Flattening|''The Flattening'']], this [[item]]'s numeral ID was 436.}}
{{History||1.14|snap=18w43a|[[File:Beetroot Soup JE2 BE2.png|32px]] The texture of beetroot soup has been changed.
|The recipe for beetroot soup is now shapeless.}}
{{History|||snap=18w49a|Beetroot soup can now be found in [[chest]]s in [[snowy tundra]] [[village]] houses.}}
{{History|pocket alpha}}
{{History||November 14, 2013|link={{tweet|jbernhardsson|400902957782147072}}|[[Johan Bernhardsson]] posts an image of beetroot soup.}}
{{History||v0.8.0|snap=build 2|[[File:Beetroot Soup JE1 BE1.png|32px]] Added beetroot soup. It is not obtainable in the Creative inventory.}}
{{History||v0.9.0|snap=build 1|Beetroot soup now requires 6 [[beetroot]]s instead of 4.}}
{{History||v0.12.1|snap=build 12|Beetroot soup now restores {{hunger|6}} instead of {{health|8}}.}}
{{History||v0.13.0|snap=build 3|Beetroot soup can now be stacked.}}
{{history|pocket}}
{{History||1.0.0|snap=alpha 0.17.0.1|Beetroot soup has been added to the Creative inventory.<ref name="missing beetroot soup">{{Bug|MCPE-13804}}</ref>}}
{{History|bedrock}}
{{History||1.10.0|snap=beta 1.10.0.3|[[File:Beetroot Soup JE2 BE2.png|32px]] The texture of beetroot soup has been changed.
|The recipe for beetroot soup is now shapeless.}}
{{History||1.11.0|snap=beta 1.11.0.1|Beetroot soup can now be found in [[snowy tundra]] [[village]] house [[chest]]s.}}
{{History|console}}
{{History||xbox=TU43|xbone=CU33|ps=1.36|switch=1.0.1|wiiu=Patch 13|[[File:Beetroot Soup JE1 BE1.png|32px]] Added beetroot soup.}}
{{History||xbox=none|xbone=none|ps=1.90|wiiu=none|switch=none|[[File:Beetroot Soup JE2 BE2.png|32px]] The texture of beetroot soup has been changed.
|The recipe for beetroot soup is now shapeless.}}
{{History|new 3ds}}
{{History||0.1.0|[[File:Beetroot Soup JE1 BE1.png|32px]] Added beetroot soup.
|Beetroot soup is not available within the [[Creative inventory]].}}
{{History||?|Added beetroot soup to the Creative inventory.{{info needed|Which update did this occur?}}}}
{{History|foot}}
== Issues ==
{{issue list}}
== References ==
{{reflist}}
{{Items}}
[[Category:Food]]
[[Category:Renewable resources]]
[[de:Borschtsch]]
[[es:Estofado de remolacha]]
[[fr:Soupe de betteraves]]
[[it:Zuppa di barbabietole]]
[[ja:ビートルートスープ]]
[[ko:비트 수프]]
[[nl:Bietensoep]]
[[pl:Barszcz]]
[[pt:Ensopado de beterraba]]
[[ru:Свекольный суп]]
[[th:ซุปบีทรูท]]
[[uk:Борщ]]
[[zh:甜菜汤]]</li><li>[[Nether Wart|Nether Wart]]<br/><!--Please do not change "nether wart" to "Nether wart". According to style guide, block names should not be capitalized.-->
{{about|the fungus used for potions|the block found in crimson forests|Nether Wart Block}}{{Block
| group = Age 0
| 1-1 = Nether Wart Age 0.png
| 1-2 = Nether Wart Age 0 BE.png
| group2 = Age 1-2
| 2-1 = Nether Wart Age 1-2.png
| 2-2 = Nether Wart Age 1-2 BE.png
| group3 = Age 3
| 3-1 = Nether Wart Age 3.png
| 3-2 = Nether Wart Age 3 BE.png
|image= Nether Wart (item).png
|transparent=Yes
|light=No
|tool=any
|renewable=Yes
|stackable=Yes (64)
|flammable=No
|lavasusceptible=No
}}
'''Nether wart''' is a fungus harvested from nether wart crops and is used to plant them, as well as being vital in the creation of [[potions]].
'''Nether wart crops''' are found in [[Nether Fortress/Structure|nether fortresses]] and [[Bastion Remnant|bastions]] and is used to grow nether wart in [[Soul Sand|soul sand]].
== Obtaining ==
=== Breaking ===
Nether wart can be mined instantly with any tool. A fully mature nether wart crop yields 2–4 nether wart. This is increased by one for each level of [[Fortune]], this allows for a maximum of 7 nether warts dropping from one crop. Less mature stages drop one nether wart, even with the Fortune enchantment.
=== Natural generation ===
Nether wart can generate in [[nether fortress]]es in [[soul sand]] gardens around stairwells. Nether wart can also generate in the courtyards of housing unit [[bastion remnant]]s. Due to only spawning in these specific structures, it's entirely possible for a nether fortress or bastion remnant to generate without nether wart (though they may still appear in the chests that generate in the fortress).
{| class="wikitable"
|+
!Location
!Description
!Image
|-
|{{anchor|Nether Fortress}}'''Nether Fortress'''
|Nether wart can be found growing near stairwells in small soul sand gardens.
|[[File:Nether wart garden.png|thumb|Nether wart growing in a nether fortress.]]
|-
|{{anchor|Bastion Remnant}}'''Bastion Remnant'''
|Nether wart can be found growing in the central courtyard of each of the sections of piglin housing unit bastions.
|[[File:Bastion Courtyard.png|thumb|Nether wart growing in a bastion remnant.]]
|}
<br>
=== Chest loot ===
{{LootChestItem|nether-wart}}
== Usage ==
=== Brewing ingredient ===
Nether wart's primary purpose is to [[brew]] the [[Potion|awkward potion]], the base for all potions, but optional for Weakness.
{{brewing
|showname=1
|Nether Wart
|Awkward Potion
|base=Water Bottle
}}
=== Crafting ingredient ===
{{crafting usage}}
=== Trading ===
Master-level cleric [[villager]]s buy 22 nether warts for an [[emerald]] as part of their trades.
=== Farming ===
{{main|Tutorials/Nether Wart farming}}
When planted on [[soul sand]], nether wart grows through four stages, though the middle two stages use the same texture (the hitbox of stage 3 is three pixels taller). {{IN|java}}, the exact age can be seen using the [[debug screen]], and the ages range from 0 to 3. Each random tick, nether wart has a 10% chance of growing one stage. At default random tick speed, each nether wart grows one age step approximately every {{convert|13653|ticks|minutes}} on average, and fully grows from planting to harvest every {{convert|40960|ticks|minutes}} on average. The growth rate is not affected by light or any other environmental factors. [[Bone meal]] cannot be used on the nether wart.
Nether wart can only be planted on [[soul sand]]. It cannot be planted on [[soul soil]]. It can grow in any [[dimension]].
Nether wart is ready to harvest when it reaches its fourth stage (age:3). Breaking a fully grown nether wart drops 2 to 4 nether wart, while an immature one drops a single nether wart. Using a tool enchanted with fortune increases the maximum number of nether wart dropped by 1 per level, for a maximum of 7 for a tool enchanted with [[Fortune|Fortune III]].
=== Composting ===
Placing a nether wart into a [[composter]] has a 30% chance of raising the compost level by 1.
== Sounds ==
{{Sound table/Block/Nether wart}}
== Data values ==
=== ID ===
{{edition|java}}:
{{ID table
|edition=java
|showforms=y
|generatetranslationkeys=y
|displayname=Nether Wart
|spritetype=block
|nameid=nether_wart
|translationkey=block.minecraft.nether_wart,item.minecraft.nether_wart
|foot=1}}
{{edition|bedrock}}:
{{ID table
|edition=bedrock
|firstcolumnname=Nether Wart
|shownumericids=y
|showforms=y
|generatetranslationkeys=y
|displayname=Block
|spritename=nether-wart
|spritetype=block
|nameid=nether_wart
|id=115
|form=block
|itemform=item.nether_wart}}
{{ID table
|displayname=Item
|spritename=nether-wart
|spritetype=item
|nameid=nether_wart
|id=294
|form=item
|foot=1}}
=== Block states ===
{{see also|Block states}}
{{/BS}}
== Advancements ==
{{load advancements|A Seedy Place}}
== History ==
{{History|java}}
{{History||1.0.0|snap=Beta 1.9 Prerelease|[[File:Nether Wart Age 0 JE1.png|32px]] [[File:Nether Wart Age 1-2 JE1.png|32px]] [[File:Nether Wart Age 3 JE1.png|32px]] [[File:Nether Wart (item) JE1.png|32px]] Added nether wart.}}
{{History|||snap=Beta 1.9 Prerelease 3|Nether wart can now be brewed in a [[water bottle]] to create an [[awkward potion]].}}
{{History||1.3.1|snap=12w27a|Nether wart can now grow outside of [[the Nether]].}}
{{History|||snap=1.3|[[File:Nether Wart (item) JE2 BE1.png|32px]] The item texture has been changed.}}
{{History||1.4.2|snap=12w36a|Nether wart can now be used to breed [[chicken]]s.}}
{{History||1.6.1|snap=13w18a|Nether wart is now found in the new [[chest]]s in [[nether fortress]]es.}}
{{History||1.8|snap=14w06a|[[File:Nether Wart Age 0 JE2.png|32px]] [[File:Nether Wart Age 1-2 JE2.png|32px]] [[File:Nether Wart Age 3 JE2.png|32px]] Nether wart crops are now a pixel higher, likely as an accidental result of model conversion. Previously they were offset one pixel downwards like the other crops (wheat, carrots potatoes) to match farmland, although in nether wart's case such a downwards offset hides some pixels of the texture inside of the soul sand.<ref>{{bug|MC-250679}}</ref>}}
{{History|||snap=14w10a|[[File:Missing Model JE2.png|32px]] [[File:Missing Model JE2.png|32px]] [[File:Missing Model JE2.png|32px]]<br>[[File:Missing Model (anisotropic filtering) JE2.png|32px]] [[File:Missing Model (anisotropic filtering) JE2.png|32px]] [[File:Missing Model (anisotropic filtering) JE2.png|32px]] Nether wart crops of all ages [[Missing model|no longer have a model]].}}
{{History|||snap=14w10b|[[File:Nether Wart Age 0 JE4.png|32px]] [[File:Nether Wart Age 1-2 JE4.png|32px]] [[File:Nether Wart Age 3 JE4.png|32px]] Nether wart crops now have models again.<ref>{{bug|MC-50276}}</ref> In addition, they are now offset downwards by one pixel once more, hiding the bottom row of pixels again.}}
{{History|||snap=14w25a|[[File:Nether Wart Age 0 JE5.png|32px]] [[File:Nether Wart Age 1-2 JE5.png|32px]] [[File:Nether Wart Age 3 JE5.png|32px]] Nether wart crops are now darker and subject to directional shading.}}
{{History|||snap=14w27a|[[File:Nether Wart Age 0 JE6.png|32px]] [[File:Nether Wart Age 1-2 JE6.png|32px]] [[File:Nether Wart Age 3 JE6.png|32px]] Nether wart crops are no longer subject to directional shading.}}
{{History|||snap=14w34d|Nether wart can no longer be used to breed [[chicken]]s.}}
{{History||1.9|snap=15w43a|The average yield of nether wart from [[nether fortress]] chests has now been slightly decreased.}}
{{History||1.10|snap=16w20a|Nether wart can now be used to [[crafting|craft]] the new [[red nether brick]] blocks and [[nether wart block]]s.}}
{{History||1.12|snap=17w18b|Placing a nether wart in soul sand now gives the player the "A Seedy Place" [[advancement]].{{verify}}}}
{{History||1.13|snap=17w47a|Prior to [[1.13/Flattening|''The Flattening'']], this block's numeral ID was 115, and the item's 372.}}
{{History||1.14|snap=18w43a|[[File:Nether Wart Age 0 JE7.png|32px]] [[File:Nether Wart Age 1-2 JE7.png|32px]] [[File:Nether Wart Age 3 JE7.png|32px]] The textures of nether wart crops have changed.}}
{{History|||snap=19w03a|Placement and breaking [[sound]]s have now been added to nether wart. Before this version, nether wart made stone sounds.}}
{{History|||snap=19w11a|Cleric [[villager]]s now [[trading|buy]] nether wart.
|Nether wart can now be planted by aiming against the sides and underside of blocks, rather than just the top surface of the soul sand.}}
{{History||1.16|snap=20w15a|Nether wart can now be [[composter|composted]].}}
{{History|||snap=20w16a|Nether wart now generates as part of [[bastion remnant]]s.}}
{{History||1.17|snap=21w13a|[[File:Nether Wart Age 0 JE8.png|32px]] [[File:Nether Wart Age 1-2 JE8.png|32px]] [[File:Nether Wart Age 3 JE8.png|32px]] The "crop" template model has changed such that pixels appear in the same physical positions on opposite sides of texture planes, changing the nether wart crop's appearance in the process.<ref>{{bug|MC-199242}}</ref>}}
{{History|pocket alpha}}
{{History||v0.12.1|snap=build 1|[[File:Nether Wart Age 0 BE1.png|32px]] [[File:Nether Wart Age 1-2 BE1.png|32px]] [[File:Nether Wart Age 3 BE1.png|32px]] [[File:Nether Wart (item) JE2 BE1.png|32px]] Added nether wart.
|Nether wart uses a cross model instead of the "hash" shape associated with crops.}}
{{History||?|[[File:Nether Wart Age 0 JE6 BE2.png|32px]] [[File:Nether Wart Age 1-2 JE6 BE2.png|32px]] [[File:Nether Wart Age 3 JE6 BE2.png|32px]]{{verify|Correct models? check UV, etc.}} Nether wart now uses a more conventional crop model.}}
{{History|pocket}}
{{History||1.1.3|snap=alpha 1.1.3.0|Nether wart can now be used to [[crafting|craft]] [[red nether bricks]] and [[nether wart block]]s.}}
{{History|bedrock}}
{{History||1.10.0|snap=beta 1.10.0.3|[[File:Nether Wart Age 0 BE.png|32px]] [[File:Nether Wart Age 1-2 BE.png|32px]] [[File:Nether Wart Age 3 BE.png|32px]] The textures of nether wart crops have changed.
|Placement and breaking [[sound]]s have now been added to nether wart.}}
{{History||1.11.0|snap=beta 1.11.0.4|Nether wart can now be [[trading|sold]] to cleric [[villager]]s.}}
{{History||1.16.0|snap=beta 1.16.0.57|Nether wart now generates as part of [[bastion remnant]]s.
|The placement and breaking [[sound]]s for nether wart have been changed to match {{el|je}}.
|Nether wart can now be [[composter|composted]].}}
{{History|console}}
{{History||xbox=TU7|xbone=CU1|ps=1.0|wiiu=Patch 1|switch=1.0.1|[[File:Nether Wart Age 0 JE6 BE2.png|32px]] [[File:Nether Wart Age 1-2 JE6 BE2.png|32px]] [[File:Nether Wart Age 3 JE6 BE2.png|32px]]{{verify|Correct models? check UV, etc.}} [[File:Nether Wart (item) JE2 BE1.png|32px]] Added nether wart.}}
{{History||xbox=TU9|Nether wart now spawns randomly wherever [[soul sand]] is generated in [[the Nether]].
|[[Nether fortress]]es have now been changed to make nether wart rooms more likely.
|Nether wart can now grow outside of [[the Nether]].}}
{{History||xbox=none|xbone=none|ps=1.90|wiiu=none|switch=none|[[File:Nether Wart Age 0 JE7.png|32px]] [[File:Nether Wart Age 1-2 JE7.png|32px]] [[File:Nether Wart Age 3 JE7.png|32px]]{{verify|Correct models?}} The textures of nether wart crops have now been changed.}}
{{History|New 3DS}}
{{History||0.1.0|[[File:Nether Wart Age 0 JE6 BE2.png|32px]] [[File:Nether Wart Age 1-2 JE6 BE2.png|32px]] [[File:Nether Wart Age 3 JE6 BE2.png|32px]]{{verify|Correct models? check UV, etc.}} [[File:Nether Wart (item) JE2 BE1.png|32px]] Added nether wart.}}
{{History|foot}}
=== Nether wart "item" ===
{{:Technical blocks/Nether Wart}}
==Issues==
{{issue list}}
== Trivia ==
* Nether wart's stage changes cannot be detected by a [[block update detector]], but can by an [[observer]] block.
* Unlike other crimson "plants", nether wart doesn't have a warped equivalent. This is also the case with [[nether sprouts]], which lack a crimson equivalent.
== Gallery ==
<gallery>
Nether Brick And Wart.png|Nether wart found in a nether fortress.
Nether Wart Closeup.png| Another example of nether wart found in a nether fortress.
Nether wart three sizes.png|The three different sizes of the nether wart as viewed from the side.
Nether Fortress Large Stairs Room.png
</gallery>
== References ==
{{reflist}}
{{Blocks|vegetation}}
{{Items}}
[[Category:Nether blocks]]
[[Category:Fungi]]
[[Category:Non-solid blocks]]
[[Category:Generated structure blocks]]
[[de:Netherwarze]]
[[es:Verruga del Nether]]
[[fr:Verrues du Nether]]
[[hu:Bibircsók]]
[[it:Verruca del Nether]]
[[ja:ネザーウォート]]
[[ko:네더 사마귀]]
[[nl:Netherkruid]]
[[pl:Netherowa brodawka]]
[[pt:Fungo do Nether]]
[[ru:Адский нарост]]
[[th:หูดเนเธอร์]]
[[uk:Пекельний наріст]]
[[zh:下界疣]]
[[Category:Brewing recipe]]</li></ul> | Added Villians Skin pack. | ||||||||||||||||||||||||||||||||||
v0.15.9{{Extension DPL}}<ul><li>[[Bleach|Bleach]]<br/>{{education feature}}
{{exclusive|bedrock|education}}
{{Item
| image = Bleach.png
| renewable = No
| stackable = Yes (64)
}}
'''Bleach''' is an [[item]] used to [[dye]] things white. It is a [[compound]], as it is made using a [[lab table]].
== Obtaining ==
=== Lab Table ===
Bleach is not obtainable in the [[creative inventory]] or {{cmd|give}}. The only way to obtain it is using a [[lab table]].
{| class="wikitable"
! Result
! Materials Needed
|-
!rowspan=2|{{slot|Bleach}}<br>[[Bleach]]
|{{slot|Water (compound)|link=Compound}}{{slot|Water (compound)|link=Compound}}{{slot|Water (compound)|link=Compound}}{{slot|Sodium Hypochlorite|link=Compound}}{{slot|Sodium Hypochlorite|link=Compound}}{{slot|Sodium Hypochlorite|link=Compound}}
|-
|<center>[[Water (compound)|Water]] x3, [[Compound|Sodium Hypochlorite]] x3</center>
|}
== Usage ==
=== Crafting ingredient ===
{{crafting usage}}
== Sounds ==
{{Sound table
|type=bedrock
|sound=Fire.ogg
|source=sound
|description=When bleach is created by a lab table
|id=lt.reaction.fire
|volume=6.0
|pitch=0.7/0.9
|foot=1}}
== Data values ==
=== ID ===
{{ID table
|edition=bedrock
|shownumericids=y
|showforms=y
|notshowbeitemforms=y
|generatetranslationkeys=y
|displayname=Bleach
|spritetype=item
|nameid=bleach
|id=596
|form=item
|foot=1}}
== History ==
{{History|bedrock}}
{{History||1.4.0|snap=beta 1.2.20.1|[[File:Bleach BE1.png|32px]] Added bleach.}}
{{History|education}}
{{History||1.0.27|[[File:Bleach BE1.png|32px]] Added bleach.}}
{{History|foot}}
== Trivia ==
*[[File:Bleach (compound).png|32px]] There is an [[History of textures/Unused textures#Unused compounds|unused bleach texture]] in the compounds folder of the chemistry resource pack, which is slightly different from the one used in the game.
== Issues ==
{{issue list}}
{{Items}}
{{Education Edition}}
[[Category:Dyes]]
[[Category:Non-renewable resources]]
[[Category:Education Edition items]]
[[de:Bleichmittel]]
[[es:Lejía]]
[[ja:漂白剤]]
[[ko:표백제]]
[[pl:Wybielacz]]
[[pt:Alvejante]]
[[zh:漂白剂]]
[[lzh:素精]]</li><li>[[Redstone Repeater|Redstone Repeater]]<br/>{{Block
| image = <gallery>
Redstone Repeater.png|Redstone Repeater
Redstone Repeater BE.png|Redstone Repeater (BE)
</gallery>
| extratext = View [[#Renders|all renders]]
| transparent = Yes
| light = No
| tool = any
| stackable = Yes (64)
| flammable = No
| lavasusceptible = No
| renewable = Yes
}}
{{about|the block|repeater circuits|Transmission circuit#Repeater|other topics related to redstone|Redstone (disambiguation)}}
A '''redstone repeater''' is a [[block]] that produces a full-strength [[Redstone Dust|output signal]] from its front when its back is powered, with four configurable delay settings. It can also be locked into a power state by its side being directly powered by a repeater or a [[Redstone Comparator|comparator]].
== Obtaining ==
=== Breaking ===
A redstone repeater can be broken instantly using any [[tool]], or without a tool, and drops itself as an item. To remove a redstone repeater, {{control|mine}} it.
A redstone repeater is removed and drops as an item if:
* its attachment block is moved, removed, or destroyed;
* [[water]] or [[lava]] flows into its space;{{only|java}}
* a [[piston]] tries to push it or moves a block into its space.
=== Natural generation ===
[[File:Redstone Repeater naturally generated.png|thumb|A redstone repeater generated in the jungle temple's hidden room.]]
A single redstone repeater is generated naturally in each [[jungle temple]].
They also generate in [[Ancient City|ancient cities]].
=== Crafting ===
{{Crafting
|A2= Redstone Torch
|B2= Redstone Dust
|C2= Redstone Torch
|B3= Stone
|C3= Stone
|A3= Stone
|Output= Redstone Repeater
|type= Redstone
}}
== Usage ==
{{see also|Redstone circuit}}
A redstone repeater can be used in four different ways: to "repeat" redstone signals back to full strength, delay signals, prevent signals moving backwards, or to "lock" signals in one state.
A repeater can be placed only on top of [[opaque]] blocks (dirt, stone, etc.), on top of upside-down [[slab]]s, upside-down [[stairs]], furnaces, and glass. {{IN|be}}, a repeater can also be placed on fences and stone walls. They can also be placed on some transparent blocks. See [[Opacity/Placement]] for more information. To place a repeater, use the {{control|Place Block}} [[control]].
A redstone repeater has a front and back – the arrow on the top points to the repeater's front. A repeater also has two small redstone torches on its top – the color of the torches indicates whether its output is on (dark red when off, bright red when on) and the distance between them indicates the delay the repeater adds to the signal transmission.
A repeater is 0.125 ({{frac|1|8}}) blocks high.
=== Signal transmission ===
A repeater transmits signals only from its back to its front, but its behavior can be modified from the side (see [[#Signal locking|signal locking]], below).
[[File:Redstone Torch Power.png|Different ways to power a repeater|thumb]]
A redstone repeater can be powered by any of the following components at its back:
* an active [[power component]] (redstone torch, lever, block of redstone, etc.)
* powered [[redstone dust]]
* a powered [[redstone comparator]] or another powered redstone repeater facing the repeater
* a powered opaque block (including any opaque [[mechanism component]]s, such as [[dispenser]]s, [[redstone lamp]]s, etc.)
A redstone repeater can power any of the following components at its front:
* redstone dust
* a redstone comparator or another redstone repeater facing away from the repeater
* any opaque block (including any opaque [[mechanism component]]s)
A redstone repeater can activate any [[mechanism component]] it is facing.
An opaque block powered by a redstone repeater is called "strongly-powered" (as opposed to an opaque block "weakly-powered" by redstone dust). A strongly-powered opaque block can power adjacent redstone dust, as well as other redstone components.
=== Signal repeating ===
{{see also|Transmission circuit#Repeater}}
A redstone repeater can "repeat" a [[Redstone Dust|redstone]] signal, boosting it back up to power level 15.
Redstone signals have a maximum power level of 15 and that level drops by 1 for every block of [[redstone dust]] the signal travels through. If a signal must travel through more than 15 [[block]]s of redstone dust, a redstone repeater can be used to boost the signal back up to full strength. An extra two blocks of distance can be achieved by placing solid opaque blocks before and after the repeater.
While redstone repeaters can allow signals to travel great distances, each always adds some delay to the transmission since the minimum amount of delay is 1 redstone tick (0.1 seconds, barring lag).
=== Signal delay ===
When initially placed, a redstone repeater has a delay of one [[redstone tick]] (equivalent to two game ticks, or 0.1 seconds barring lag).
A repeater's delay can be modified by using the {{control|Use Item}} control. Each use increases the repeater's delay by one redstone tick, to a maximum of four redstone ticks, then back to one redstone tick. Longer delays can be made with multiple repeaters – for example, a repeater set to 'four' and another to 'one' provides a half-second delay (0.4s + 0.1s = 0.5s).
A repeater set to a delay of two to four redstone ticks increases the length of any shorter [[Pulse circuit#Pulses|on-pulse]] to match the length of the repeater's delay, and suppress any shorter off-pulse. For example, a repeater set to a 4-tick delay changes a 1-tick, 2-tick, or 3-tick on-pulse into a 4-tick on-pulse, and does not allow through any off-pulse shorter than 4 ticks.
Although a repeater cannot be set to have a delay of zero, [[Transmission circuit#Instant repeater|instant repeater circuits]] are possible (circuits that repeat a signal with no delay).
In Bedrock Edition, the first repeater have a delay of zero but the repeater is still showing 1-tick{{info needed}}
=== {{anchor|diode}} Signal direction ===
{{see also| Mechanics/Redstone/Transmission circuit#Diode}}
A redstone repeater acts as a diode – it allows redstone signals through in one direction (unlike [[redstone dust]] or opaque blocks that can transmit redstone signals in any direction).
A diode can be used to protect a [[redstone circuit]] from redstone signals feeding back into the circuit from its output, or can be used to isolate one part of a circuit from another.
=== {{anchor|lock}} Signal locking ===
{{see also| Mechanics/Redstone/Memory circuit}}
[[File:Latch.png|thumb|The left repeater has been locked in an unpowered output state by the right repeater.]]
A redstone repeater can be "locked" by another powered redstone repeater facing its side. When locked, the repeater does not change its output (whether powered or unpowered), no matter what the input does. When the side repeater turns back off, the repeater returns to its normal behavior.
A repeater can also be locked by a powered [[redstone comparator]] facing its side. This offers additional possibilities for locking signals because a comparator's output can be affected from 3 sides as well as by containers.
If a repeater is locked again too quickly after unlocking (e.g. the lock is controlled by a fast clock circuit), or the lock and the input are changed only on the same tick (e.g. because they're fed by the same clock and both repeaters have the same delay), the repeater does not switch states.
== Sounds ==
{{Edition|java}}:
{{Sound table/Block/Stone/JE}}
{{Edition|bedrock}}:
{{Sound table/Block/Wood/BE}}
== Data values ==
=== ID ===
{{edition|java}}:
{{ID table
|edition=java
|showforms=y
|generatetranslationkeys=y
|displayname=Redstone Repeater
|spritetype=block
|nameid=repeater
|foot=1}}
{{edition|bedrock}}:
{{ID table
|edition=bedrock
|firstcolumnname=Redstone Repeater
|shownumericids=y
|showforms=y
|generatetranslationkeys=y
|displayname=Unpowered block
|spritename=unpowered-repeater
|spritetype=block
|nameid=unpowered_repeater
|id=93
|form=block
|translationkey=-}}
{{ID table
|displayname=Powered block
|spritename=powered-repeater
|spritetype=block
|nameid=powered_repeater
|id=94
|form=block
|translationkey=-}}
{{ID table
|displayname=Item
|spritename=redstone-repeater
|spritetype=item
|nameid=repeater
|id=419
|form=item
|foot=1}}
=== Block states ===
{{see also|Block states}}
{{/BS}}
== Video ==
<div style="text-align:center">{{yt|0Ij_qMLiRzE}}</div>
== History ==
''For a more in-depth breakdown of changes to repeater textures and models, including a set of renders for each state combination, see [[/Asset history]]''
{{History|java beta}}
{{History||1.3|[[File:Redstone Repeater (S) JE1.png|32px]] [[File:Redstone Repeater (item) JE1.png|32px]] Added redstone repeaters.
|Originally, the four possible settings were "1, 2, 5 and 7",<ref>http://twitter.com/jeb_/status/33888465502339073</ref> but [[Jeb]] decided to change the settings to "1, 2, 3, and 4".<ref>http://www.reddit.com/r/Minecraft/comments/fmdtp/teammojang_redstone_repeater_video/c1gzrn6</ref>
|The particles when [[breaking]] redstone repeaters erroneously use the [[pumpkin]] top texture.}}
{{History||unknown|The breaking particles of redstone repeaters now use the smooth stone [[slab]] top texture, even though none of the elements on the [[model]] use it.}}
{{History||1.7|[[File:Redstone Repeater (S) JE2.png|32px]] The side texture of redstone repeaters has been changed to the previous bottom part of the texture.
|[[Redstone dust]] now automatically connects to the input of a redstone repeater. Previously, it needed to be specifically pointed towards the repeater like with other blocks.}}
{{History||unknown|Redstone dust now visually connects to the output of redstone repeaters, though this does not change its behavior.}}
{{History|java}}
{{History||unknown|The breaking particles of redstone repeaters have been changed to an unlit [[redstone torch]] when unpowered and a lit redstone torch when powered.}}
{{History||1.3.1|snap=12w22a|Redstone repeaters now naturally generate inside [[jungle temple]]s.}}
{{History|||snap=1.3|[[File:Redstone Repeater (item) JE2 BE1.png|32px]] The texture of redstone repeater [[item]]s have been changed.}}
{{History||1.4.2|snap=12w42a|[[File:Redstone Repeater (S) JE3.png|32px]] The top texture of redstone repeaters has now been changed.
|[[File:Locked Redstone Repeater (S) JE1.png|32px]] Added repeater locking to redstone repeaters. Interestingly, the smallest face of the bedrock cuboid's texture changes depending on the delay, but the other two faces remain the same. When/if this changed is unknown.}}
{{History||1.5|snap=13w02a|[[File:Redstone Repeater (S) JE4.png|32px]] The side textures of redstone repeaters have been changed to use the top texture of stone [[slab]]s.}}
{{History||unknown|The breaking [[particles|particle]] of redstone repeaters has been changed once again and now matches the top texture of redstone repeaters.}}
{{History||1.8|snap=14w06a|Repeaters no longer produce block [[light]] when powered.}}
{{History|||snap=14w10a|[[File:Powered Redstone Repeater (S) JE5.png|32px]] Torches on repeaters now no longer have protruding features.
|The torches underneath redstone repeaters have now been shortened, which has changed the underside textures from [[File:Redstone Repeater JE2 BE1 (facing NWU).png|32px]] [[File: Redstone Repeater Delay 2 JE2 BE1 (facing NWU).png|32px]] [[File: Redstone Repeater Delay 3 JE2 BE1 (facing NWU).png|32px]] [[File: Redstone Repeater Delay 4 JE2 BE1 (facing NWU).png|32px]] [[File: Active Redstone Repeater JE2 BE1 (facing NWU).png|32px]] [[File: Active Redstone Repeater Delay 2 JE2 BE1 (facing NWU).png|32px]] [[File: Active Redstone Repeater Delay 3 JE2 BE1 (facing NWU).png|32px]] [[File: Active Redstone Repeater Delay 4 JE2 BE1 (facing NWU).png|32px]] [[File: Locked Redstone Repeater JE2 BE1 (facing NWU).png|32px]] [[File: Locked Redstone Repeater Delay 2 JE2 BE1 (facing NWU).png|32px]] [[File: Locked Redstone Repeater Delay 3 JE2 BE1 (facing NWU).png|32px]] [[File: Locked Redstone Repeater Delay 4 JE2 BE1 (facing NWU).png|32px]] [[File: Active Locked Redstone Repeater JE2 BE1 (facing NWU).png|32px]] [[File: Active Locked Redstone Repeater Delay 2 JE2 BE1 (facing NWU).png|32px]] [[File: Active Locked Redstone Repeater Delay 3 JE2 BE1 (facing NWU).png|32px]] [[File: Active Locked Redstone Repeater Delay 4 JE2 BE1 (facing NWU).png|32px]] to [[File:Redstone Repeater JE3 (facing NWU).png|32px]] [[File: Redstone Repeater Delay 2 JE3 (facing NWU).png|32px]] [[File: Redstone Repeater Delay 3 JE3 (facing NWU).png|32px]] [[File: Redstone Repeater Delay 4 JE3 (facing NWU).png|32px]] [[File: Active Redstone Repeater JE3 (facing NWU).png|32px]] [[File: Active Redstone Repeater Delay 2 JE3 (facing NWU).png|32px]] [[File: Active Redstone Repeater Delay 3 JE3 (facing NWU).png|32px]] [[File: Active Redstone Repeater Delay 4 JE3 (facing NWU).png|32px]] [[File: Locked Redstone Repeater JE3 (facing NWU).png|32px]] [[File: Locked Redstone Repeater Delay 2 JE3 (facing NWU).png|32px]] [[File: Locked Redstone Repeater Delay 3 JE3 (facing NWU).png|32px]] [[File: Locked Redstone Repeater Delay 4 JE3 (facing NWU).png|32px]] [[File: Locked Active Redstone Repeater JE3 (facing NWU).png|32px]] [[File: Locked Active Redstone Repeater Delay 2 JE3 (facing NWU).png|32px]] [[File: Locked Active Redstone Repeater Delay 3 JE3 (facing NWU).png|32px]] [[File: Locked Active Redstone Repeater Delay 4 JE3 (facing NWU).png|32px]].}}
{{History|||snap=14w10b|[[File:Powered Redstone Repeater (S) JE4.png|32px]] Repeater torches now have protruding features again.<ref>{{bug|MC-50242}}</ref>}}
{{History|||snap=?|[[File:Powered Redstone Repeater (S) JE7.png|32px]] The torches on redstone repeaters are now affected by directional shading.}}
{{History||1.13|snap=17w47a|All 3 IDs for the redstone repeater have now been merged into 1 ID: <code>repeater</code>.
|Added powered block state to redstone repeaters.
|Redstone repeaters now render their underside, which has changed their undersides from [[File:Redstone Repeater JE3 (facing NWU).png|32px]] [[File: Redstone Repeater Delay 2 JE3 (facing NWU).png|32px]] [[File: Redstone Repeater Delay 3 JE3 (facing NWU).png|32px]] [[File: Redstone Repeater Delay 4 JE3 (facing NWU).png|32px]] [[File: Active Redstone Repeater JE3 (facing NWU).png|32px]] [[File: Active Redstone Repeater Delay 2 JE3 (facing NWU).png|32px]] [[File: Active Redstone Repeater Delay 3 JE3 (facing NWU).png|32px]] [[File: Active Redstone Repeater Delay 4 JE3 (facing NWU).png|32px]] [[File: Locked Redstone Repeater JE3 (facing NWU).png|32px]] [[File: Locked Redstone Repeater Delay 2 JE3 (facing NWU).png|32px]] [[File: Locked Redstone Repeater Delay 3 JE3 (facing NWU).png|32px]] [[File: Locked Redstone Repeater Delay 4 JE3 (facing NWU).png|32px]] [[File: Locked Active Redstone Repeater JE3 (facing NWU).png|32px]] [[File: Locked Active Redstone Repeater Delay 2 JE3 (facing NWU).png|32px]] [[File: Locked Active Redstone Repeater Delay 3 JE3 (facing NWU).png|32px]] [[File: Locked Active Redstone Repeater Delay 4 JE3 (facing NWU).png|32px]] to [[File:Redstone Repeater JE4 BE2 (facing NWU).png|32px]] [[File: Redstone Repeater Delay 2 JE4 BE2 (facing NWU).png|32px]] [[File: Redstone Repeater Delay 3 JE4 BE2 (facing NWU).png|32px]] [[File: Redstone Repeater Delay 4 JE4 BE2 (facing NWU).png|32px]] [[File: Active Redstone Repeater JE4 BE2 (facing NWU).png|32px]] [[File: Active Redstone Repeater Delay 2 JE4 BE2 (facing NWU).png|32px]] [[File: Active Redstone Repeater Delay 3 JE4 BE2 (facing NWU).png|32px]] [[File: Active Redstone Repeater Delay 4 JE4 BE2 (facing NWU).png|32px]] [[File: Locked Redstone Repeater JE4 BE2 (facing NWU).png|32px]] [[File: Locked Redstone Repeater Delay 2 JE4 BE2 (facing NWU).png|32px]] [[File: Locked Redstone Repeater Delay 3 JE4 BE2 (facing NWU).png|32px]] [[File: Locked Redstone Repeater Delay 4 JE4 BE2 (facing NWU).png|32px]] [[File: Locked Active Redstone Repeater JE4 BE2 (facing NWU).png|32px]] [[File: Locked Active Redstone Repeater Delay 2 JE4 BE2 (facing NWU).png|32px]] [[File: Locked Active Redstone Repeater Delay 3 JE4 BE2 (facing NWU).png|32px]] [[File: Locked Active Redstone Repeater Delay 4 JE4 BE2 (facing NWU).png|32px]].
|Prior to [[1.13/Flattening|''The Flattening'']], these [[block]]s' numeral IDs were 93 and 94, and the [[item]]'s 356.}}
{{History||1.14|snap=18w43a|[[File:Redstone Repeater (S) JE5.png|32px]] [[File:Powered Redstone Repeater (S) JE9.png|32px]] [[File:Locked Redstone Repeater (S) JE5.png|32px]] [[File:Powered Locked Redstone Repeater (S) JE6.png|32px]] [[File:Redstone Repeater (item) JE3 BE2.png|32px]] The textures of redstone repeaters have now been changed.}}
{{History|||snap=18w50a|[[File:Locked Redstone Repeater (S) JE6.png|32px]] [[File:Powered Locked Redstone Repeater (S) JE7.png|32px]] As the texture of [[bedrock]] has been changed, the textures of locked redstone repeaters have also now been changed.}}
{{History|||snap=19w12b|Redstone repeaters can now be placed on [[glass]], [[ice]], [[glowstone]] and [[sea lantern]]s.}}
{{History||1.19|snap=22w13a|Redstone repeaters now generate in [[Ancient City|ancient cities]].}}
{{History||1.20.2|snap=23w33a|Redstone repeaters now use stone sounds instead of wood sounds.<ref>{{bug|MC-182820|||Fixed}}</ref>}}
{{History|pocket alpha}}
{{History||v0.14.0|snap=build 1|[[File:Redstone Repeater (S) JE3.png|32px]] [[File:Redstone Repeater (item) JE2 BE1.png|32px]] Added redstone repeaters.}}
{{History|bedrock}}
{{History||1.2.0|snap=beta 1.2.0.2|Redstone repeaters now render their underside, which has changed their undersides from [[File:Redstone Repeater JE2 BE1 (facing NWU).png|32px]] [[File: Redstone Repeater Delay 2 JE2 BE1 (facing NWU).png|32px]] [[File: Redstone Repeater Delay 3 JE2 BE1 (facing NWU).png|32px]] [[File: Redstone Repeater Delay 4 JE2 BE1 (facing NWU).png|32px]] [[File: Active Redstone Repeater JE2 BE1 (facing NWU).png|32px]] [[File: Active Redstone Repeater Delay 2 JE2 BE1 (facing NWU).png|32px]] [[File: Active Redstone Repeater Delay 3 JE2 BE1 (facing NWU).png|32px]] [[File: Active Redstone Repeater Delay 4 JE2 BE1 (facing NWU).png|32px]] [[File: Locked Redstone Repeater JE2 BE1 (facing NWU).png|32px]] [[File: Locked Redstone Repeater Delay 2 JE2 BE1 (facing NWU).png|32px]] [[File: Locked Redstone Repeater Delay 3 JE2 BE1 (facing NWU).png|32px]] [[File: Locked Redstone Repeater Delay 4 JE2 BE1 (facing NWU).png|32px]] [[File: Active Locked Redstone Repeater JE2 BE1 (facing NWU).png|32px]] [[File: Active Locked Redstone Repeater Delay 2 JE2 BE1 (facing NWU).png|32px]] [[File: Active Locked Redstone Repeater Delay 3 JE2 BE1 (facing NWU).png|32px]] [[File: Active Locked Redstone Repeater Delay 4 JE2 BE1 (facing NWU).png|32px]] to [[File:Redstone Repeater JE4 BE2 (facing NWU).png|32px]] [[File: Redstone Repeater Delay 2 JE4 BE2 (facing NWU).png|32px]] [[File: Redstone Repeater Delay 3 JE4 BE2 (facing NWU).png|32px]] [[File: Redstone Repeater Delay 4 JE4 BE2 (facing NWU).png|32px]] [[File: Active Redstone Repeater JE4 BE2 (facing NWU).png|32px]] [[File: Active Redstone Repeater Delay 2 JE4 BE2 (facing NWU).png|32px]] [[File: Active Redstone Repeater Delay 3 JE4 BE2 (facing NWU).png|32px]] [[File: Active Redstone Repeater Delay 4 JE4 BE2 (facing NWU).png|32px]] [[File: Locked Redstone Repeater JE4 BE2 (facing NWU).png|32px]] [[File: Locked Redstone Repeater Delay 2 JE4 BE2 (facing NWU).png|32px]] [[File: Locked Redstone Repeater Delay 3 JE4 BE2 (facing NWU).png|32px]] [[File: Locked Redstone Repeater Delay 4 JE4 BE2 (facing NWU).png|32px]] [[File: Locked Active Redstone Repeater JE4 BE2 (facing NWU).png|32px]] [[File: Locked Active Redstone Repeater Delay 2 JE4 BE2 (facing NWU).png|32px]] [[File: Locked Active Redstone Repeater Delay 3 JE4 BE2 (facing NWU).png|32px]] [[File: Locked Active Redstone Repeater Delay 4 JE4 BE2 (facing NWU).png|32px]].}}
{{History||1.10.0|snap=beta 1.10.0.3|[[File:Redstone Repeater (S) BE2.png|32px]] [[File:Powered Redstone Repeater (S) BE2.png|32px]] [[File:Redstone Repeater (item) JE3 BE2.png|32px]] The textures of redstone repeaters have now been changed.}}
{{History||1.20.30|snap=beta 1.20.30.20|Redstone Repeaters now use the <code>minecraft:cardinal_direction</code> [[block state]] instead of <code>direction</code>.}}
{{History|console}}
{{History||xbox=TU1|xbone=CU1|ps=1.0|wiiu=Patch 1|switch=1.0.1|[[File:Redstone Repeater (S) JE3.png|32px]]{{verify|Was this model actually used here?}} [[File:Redstone Repeater (item) JE2 BE1.png|32px]] Added redstone repeaters.}}
{{History||xbox=TU19|xbone=CU7|ps=1.12|wiiu=Patch 1|switch=1.0.1|[[File:Locked Redstone Repeater (S) JE1.png|32px]]{{verify|Was this model actually used here?}} Added repeater locking to redstone repeaters.}}
{{History||xbox=none|xbone=none|ps=1.90|wiiu=none|switch=none|[[File:Redstone Repeater (S) JE4.png|32px]]{{verify|Was this model actually used here?}} [[File:Redstone Repeater (item) JE3 BE2.png|32px]] The textures of redstone repeaters have now been changed.}}
{{History|new 3ds}}
{{History||0.1.0|[[File:Redstone Repeater (S) JE3.png|32px]]{{verify|Was this model actually used here?}} [[File:Redstone Repeater (item) JE2 BE1.png|32px]] Added redstone repeaters and repeater locking.}}
{{History|foot}}
=== Redstone repeater "items" ===
{{:Technical blocks/Redstone Repeater}}
== Issues ==
{{Issue list}}
== Trivia ==
* The recipe and appearance of redstone repeaters are a likely reference to the old method of repeating signals, which would also use two torches at a time, inverting each other
== Gallery ==
<gallery>
Repeater clock.gif|A redstone clock formed from a redstone torch and a repeater.
Repeater feedback.gif|A redstone clock formed from two repeaters.
Two way repeater.gif|MCRedstoneSim diagram of a two-way repeater.
Repeater bridge.png|Crossing redstone wires using repeaters.
Jeb Repeaters 1.png|
Jeb Repeaters 2.png|
Jeb Repeaters 3.png|
</gallery>
=== Renders ===
<gallery>
Redstone Repeater.png
Redstone Repeater Delay 2.png
Redstone Repeater Delay 3.png
Redstone Repeater Delay 4.png
Powered Redstone Repeater.png
Powered Redstone Repeater Delay 2.png
Powered Redstone Repeater Delay 3.png
Powered Redstone Repeater Delay 4.png
Locked Redstone Repeater.png
Locked Redstone Repeater Delay 2.png
Locked Redstone Repeater Delay 3.png
Locked Redstone Repeater Delay 4.png
Powered Locked Redstone Repeater.png
Powered Locked Redstone Repeater Delay 2.png
Powered Locked Redstone Repeater Delay 3.png
Powered Locked Redstone Repeater Delay 4.png
Redstone Repeater BE.png
Redstone Repeater Delay 2 BE.png
Redstone Repeater Delay 3 BE.png
Redstone Repeater Delay 4 BE.png
Powered Redstone Repeater BE.png
Powered Redstone Repeater Delay 2 BE.png
Powered Redstone Repeater Delay 3 BE.png
Powered Redstone Repeater Delay 4 BE.png
Locked Redstone Repeater BE.png
Locked Redstone Repeater Delay 2 BE.png
Locked Redstone Repeater Delay 3 BE.png
Locked Redstone Repeater Delay 4 BE.png
Powered Locked Redstone Repeater BE.png
Powered Locked Redstone Repeater Delay 2 BE.png
Powered Locked Redstone Repeater Delay 3 BE.png
Powered Locked Redstone Repeater Delay 4 BE.png
</gallery>
== References ==
{{Reflist}}
{{Redstone}}
{{Blocks|Utility}}
{{Items}}
[[Category:Mechanics]]
[[Category:Redstone mechanics]]
[[Category:Redstone]]
[[Category:Mechanisms]]
[[Category:Manufactured blocks]]
[[Category:Generated structure blocks]]
[[Category:Non-solid blocks]]
[[de:Redstone-Verstärker]]
[[es:Repetidor de redstone]]
[[fr:Répéteur de redstone]]
[[hu:Redstone-jelismétlő]]
[[it:Ripetitore di redstone]]
[[ja:レッドストーンリピーター]]
[[ko:레드스톤 중계기]]
[[nl:Redstoneversterker]]
[[pl:Przekaźnik]]
[[pt:Repetidor de redstone]]
[[ru:Красный повторитель]]
[[tr:Kızıltaş tekrarlayıcı]]
[[zh:红石中继器]]</li></ul> | Added MineCon 2016 Skin pack, available for a limited time. | ||||||||||||||||||||||||||||||||||
| 30 September 2016 | The Minecraft twitter starts tweeting out teasers for skins planned to be added in the Campfire Tales Skin pack in v0.15.10 | ||||||||||||||||||||||||||||||||||
v0.15.10{{Extension DPL}}<ul><li>[[Milk Bucket|Milk Bucket]]<br/>{{Item
| title=Milk Bucket
| image = Milk Bucket.png
| renewable = Yes
| effects = Clears all
| stackable = No
}}
A '''milk bucket'''{{fn|Known as '''Milk Bucket''' {{in|java}} and '''Milk''' {{in|bedrock}}.}} is a [[drink]] obtained from {{Control|use|text=using}} a [[bucket]] on [[cow]]s, [[mooshroom]]s and [[goat]]s that can be consumed to clear all [[Effect|effects]].
== Obtaining ==
=== Harvesting ===
Milk buckets can be obtained from [[cow]]s, [[mooshroom]]s, and [[goat]]s by pressing {{control|use}} while looking at them with an empty [[bucket]].
=== Mob loot ===
A milk bucket has a chance of dropping from a [[wandering trader]], if the trader is killed while holding it.{{only|java}}
== Usage ==
Holding {{control|use}} with a milk bucket starts the drinking sound and animation. {{IN|java}}, the animation is shown only in first-person camera mode.
When consumed, milk immediately removes all status [[effect]]s from the [[player]]. [[Fire]] is not a status effect; therefore, drinking milk doesn't extinguish a burning player.
The benefits of area status effects granted by [[beacon]]s and [[Conduit Power|conduit power]] are restored almost immediately in Bedrock Edition and after a few seconds in ''Java Edition''.
=== Crafting ingredient ===
{{crafting usage|Milk Bucket}}
== Sounds ==
{{el|je}}:
{{Sound table
|sound=Drink.ogg
|subtitle=Sipping
|source=player
|description=While a player is drinking milk
|id=entity.generic.drink
|translationkey=subtitles.entity.generic.drink
|volume=0.5
|pitch=0.9-1.0
|distance=16}}
{{Sound table
|sound=Cow milk1.ogg
|sound2=Cow milk2.ogg
|sound3=Cow milk3.ogg
|source=player
|subtitle=Cow gets milked
|description=When a cow is milked
|id=entity.cow.milk
|translationkey=subtitles.entity.cow.milk
|volume=1.0
|pitch=1.0
|distance=16}}
{{Sound table
|sound=Mooshroom milk1.ogg
|sound2=Mooshroom milk2.ogg
|sound3=Mooshroom milk3.ogg
|subtitle=Goat gets milked
|description=When a regular goat is milked
|source=neutral
|id=entity.goat.milk
|translationkey=subtitles.entity.goat.milk
|volume=1.0
|pitch=1.0
|distance=16}}
{{Sound table
|sound=Goat screaming milk1.ogg
|sound2=Goat screaming milk2.ogg
|sound3=Goat screaming milk3.ogg
|sound4=Goat screaming milk4.ogg
|sound5=Goat screaming milk5.ogg
|subtitle=Goat gets milked
|description=When a screaming goat is milked
|source=neutral
|id=entity.goat.screaming.milk
|translationkey=subtitles.entity.goat.milk
|volume=1.0
|pitch=1.0
|distance=16}}
{{Sound table
|sound=Wandering trader drink milk1.ogg
|sound2=Wandering trader drink milk2.ogg
|sound3=Wandering trader drink milk3.ogg
|sound4=Wandering trader drink milk4.ogg
|sound5=Wandering trader drink milk5.ogg
|subtitle=Wandering Trader drinks milk
|source=neutral
|description=While a wandering trader is drinking milk to become visible during daytime
|id=entity.wandering_trader.drink_milk
|translationkey=subtitles.entity.wandering_trader.drink_milk
|volume=0.5
|pitch=0.9-1.0
|distance=16
|foot=1}}
{{el|be}}:
{{Sound table
|type=bedrock
|sound=Drink.ogg
|source=player
|description=While a player is drinking milk
|id=random.drink
|volume=0.35
|pitch=0.9-1.1}}
{{Sound table
|sound=Cow milk1.ogg
|sound2=Cow milk2.ogg
|sound3=Cow milk3.ogg
|source=neutral
|description=When a cow is milked
|id=mob.cow.milk
|volume=1.0
|pitch=1.0}}
{{Sound table
|sound=Mooshroom milk1.ogg
|sound2=Mooshroom milk2.ogg
|sound3=Mooshroom milk3.ogg
|description=When a regular goat is milked
|source=neutral
|id=mob.mooshroom.suspicious_milk
|volume=1.0
|pitch=1.0/0.9/1.1}}
{{Sound table
|sound=Goat screaming milk1.ogg
|sound2=Goat screaming milk2.ogg
|sound3=Goat screaming milk3.ogg
|sound4=Goat screaming milk4.ogg
|sound5=Goat screaming milk5.ogg
|description=When a screaming goat is milked
|source=neutral
|id=mob.goat.milk.screamer
|volume=1.0
|pitch=1.0}}
{{Sound table
|sound=Wandering trader drink milk1.ogg
|sound2=Wandering trader drink milk2.ogg
|sound3=Wandering trader drink milk3.ogg
|sound4=Wandering trader drink milk4.ogg
|sound5=Wandering trader drink milk5.ogg
|source=neutral
|description=While a wandering trader is drinking milk to become visible during daytime
|id=mob.wanderingtrader.drink_milk
|volume=1.0
|pitch=0.8-1.2
|foot=1}}
== Data values ==
=== ID ===
{{edition|java}}:
{{ID table
|edition=java
|showforms=y
|generatetranslationkeys=y
|displayname=Milk Bucket
|spritetype=item
|nameid=milk_bucket
|form=item
|foot=1}}
{{edition|bedrock}}:
{{ID table
|edition=bedrock
|showaliasids=y
|shownumericids=y
|showforms=y
|notshowbeitemforms=y
|generatetranslationkeys=y
|displayname=Milk
|spritetype=item
|nameid=milk_bucket
|aliasid=bucket / 1
|id=361
|form=item
|translationkey=item.milk.name
|foot=1}}
== Achievements ==
{{load achievements|The Lie}}
== Advancements ==
{{Load advancements|Husbandry}}
== Video ==
<div style="text-align:center">{{yt|eyxea_d0b3s}}</div>
== History ==
{{History|java alpha}}
{{History||v1.0.8|[[File:Milk Bucket JE1 BE1.png|32px]] Milk has been introduced, but it has no purpose and is obtainable only through inventory editing.}}
{{History||v1.0.11|Milk can now be obtained by {{control|use|text=milking}} a [[cow]] with a [[bucket]]. However, it is not yet drinkable.}}
{{History||v1.0.17|Milk buckets can now be emptied.}}
{{History|java beta}}
{{History||1.2|Milk has been incorporated into the [[crafting]] recipe of [[cake]].}}
{{History||1.2_01|[[Squid]] can now be milked by right-clicking on their mouth if part of their body was exposed to [[air]] or if they were not touching another [[block]]. An easy way to accomplish this is to pull a squid with a [[fishing rod]] away from other blocks and then milk it.}}
{{History||1.3_01|Squid milking has been removed.}}
{{History|java}}
{{History||1.0.0|snap=Beta 1.9 Prerelease|Milk can now be obtained by milking [[mooshroom]]s.}}
{{History|||snap=Beta 1.9 Prerelease 2|Milk has been made drinkable.
|According to a tweet by [[Jeb]] on September 30th 2011, milk was made a cure for all status effects.<ref>{{tweet|jeb_|119842906528944129|@Nexusdog_UK I haven't! In beta 1.9 pre2 milk works like a clear-everything drink|September 30, 2011}}</ref>
|Milk is no longer emptiable.}}
{{History||1.13|snap=17w47a|Prior to [[1.13/Flattening|''The Flattening'']], this [[item]]'s numeral ID was 335.}}
{{History|||snap=18w20a|"Milk" has been renamed to "Milk Bucket".}}
{{History||1.14|snap=18w43a|[[File:Milk Bucket JE2 BE2.png|32px]] The texture of milk buckets has been changed.}}
{{History||1.14|snap=19w06a|[[Wandering trader]]s now drink from milk buckets at dawn, and have a change to drop them.}}
{{History||1.17|snap=21w13a|Milk can now be obtained by milking [[goat]]s.}}
{{History|upcoming java}}
{{History||Villager Trade Rebalance<br>(Experimental)|link=Java Edition 1.20.2|snap=23w31a|Wander traders now have a chance to [[trading|buy]] a milk bucket from the player.}}
{{History|pocket alpha}}
{{History||v0.7.0|[[File:Milk Bucket JE1 BE1.png|32px]] Added milk buckets.
|Milk buckets are not yet drinkable.}}
{{History||v0.11.0|snap=build 4|Drinking milk now removes [[status effects]].
|Added milk buckets to the Creative inventory.{{verify|type=update}}{{info needed}}<!---same update?--->}}
{{History|bedrock}}
{{History||1.4.0|snap=beta 1.2.14.2|Moved all bucket items, including milk, from the Equipment tab to the Items tab in the [[Creative inventory]].{{verify|type=update}}{{info needed}}<!---please check snapshots, only 1 major release version was checked each--->}}
{{History||1.10.0|snap=beta 1.10.0.3|[[File:Milk Bucket JE2 BE2.png|32px]] The texture of milk buckets has been changed.}}
{{History||1.16.100|snap=beta 1.16.100.56|The ID of milk has been changed from <code>bucket/1</code> to <code>milk_bucket</code>.}}
{{History||1.16.200|snap=beta 1.16.200.52|Milk can now be obtained by milking [[goat]]s.}}
{{History|console}}
{{History||xbox=TU1|xbone=CU1|ps=1.0|wiiu=Patch 1|switch=1.0.1|[[File:Milk Bucket JE1 BE1.png|32px]] Added milk buckets.}}
{{History|Ps4}}
{{History||1.90|[[File:Milk Bucket JE2 BE2.png|32px]] The texture of milk buckets has been changed.}}
{{History|New 3DS}}
{{History||0.1.0|[[File:Milk Bucket JE1 BE1.png|32px]] Added milk buckets.}}
{{History|foot}}
== Issues ==
{{issue list}}
== See also ==
*[[Water Bucket]]
*[[Lava]]
*[[Food]]
*[[Cake]]
*[[Honey Bottle]] (alternative to remove poison effect)
*[[Medicine]]
== Notes ==
{{fnlist}}
== References ==
{{reflist}}
== External Links ==
*[https://www.minecraft.net/en-us/article/taking-inventory--milk-bucket Taking Inventory: Milk Bucket] – Minecraft.net on October 8, 2019
{{Items}}
[[Category:Food]]
[[Category:Renewable resources]]
[[Category:Tools]]
[[cs:Mléko]]
[[de:Milcheimer]]
[[es:Cubo con leche]]
[[fr:Seau de lait]]
[[hu:Tej]]
[[it:Secchio di latte]]
[[ja:ミルク入りバケツ]]
[[ko:우유 양동이]]
[[nl:Emmer melk]]
[[pl:Wiadro mleka]]
[[pt:Balde de leite]]
[[ru:Ведро с молоком]]
[[th:ถังนม]]
[[uk:Відро молока]]
[[zh:奶桶]]</li><li>[[Mushroom Stew|Mushroom Stew]]<br/>{{Item
| title = Mushroom Stew
| image = Mushroom Stew.png
| renewable = Yes
| heals = {{hunger|6}}
| stackable = No
}}
'''Mushroom stew''' is a [[food]] item.
== Obtaining ==
=== Harvesting ===
Mushroom stew can be obtained by “milking” a [[mooshroom]] with an empty [[bowl]]. This is accomplished by {{Control|using}} a bowl on a mooshroom. The bowl gets replaced by the mushroom stew item. There is no cooldown for doing so.
If a stack of more than one bowl is used on a mooshroom, only one bowl is consumed, and the mushroom stew goes into an empty inventory slot, or is dropped if the player's inventory is full.
=== Crafting ===
{{Crafting
|Red Mushroom
|Brown Mushroom
|Bowl
|Output= Mushroom Stew
|type= Foodstuff
}}
== Usage ==
=== Food ===
{{see also|Tutorials/Hunger management|title1=Hunger management}}
To eat mushroom stew, press and hold {{control|use}} while it is selected in the hotbar. Eating one restores {{hunger|6}} [[hunger]] and 7.2 hunger
[[Hunger#Mechanics|saturation]].
The bowl is returned to the player empty after the mushroom stew has been eaten, and can be reused to craft more, similarly to [[Rabbit Stew|rabbit stew]] and [[Beetroot Soup|beetroot soup]].
== Sounds ==
=== Generic ===
{{Sound table/Entity/Food}}
=== Unique ===
{{Edition|Java}}:
{{Sound table
|sound=Mooshroom milk1.ogg
|sound2=Mooshroom milk2.ogg
|sound3=Mooshroom milk3.ogg
|subtitle=Mooshroom gets milked
|source=neutral
|description=When a mooshroom is milked with a bowl
|id=entity.mooshroom.milk
|translationkey=subtitles.entity.mooshroom.milk
|volume=1.0
|pitch=''varies'' <ref group=sound name=milkpitch>Can be 1.0, 0.9, or 1.1 for each sound</ref>
|distance=16
|foot=1}}
{{Edition|Bedrock}}:
{{Sound table
|type=bedrock
|sound=Mooshroom milk1.ogg
|sound2=Mooshroom milk2.ogg
|sound3=Mooshroom milk3.ogg
|subtitle=Mooshroom gets milked
|source=Friendly Creatures
|description=When a mooshroom is milked with a bowl
|id=mob.mooshroom.suspicious_milk
|volume=1.0/0.9/1.1
|pitch=1.0
|foot=1}}
== Data values ==
=== ID ===
{{edition|java}}:
{{ID table
|edition=java
|showforms=y
|generatetranslationkeys=y
|displayname=Mushroom Stew
|spritetype=item
|nameid=mushroom_stew
|form=item
|foot=1}}
{{edition|bedrock}}:
{{ID table
|edition=bedrock
|shownumericids=y
|showforms=y
|notshowbeitemforms=y
|generatetranslationkeys=y
|displayname=Mushroom Stew
|spritetype=item
|nameid=mushroom_stew
|id=260
|form=item
|foot=1}}
== Advancements ==
{{load advancements|Husbandry;A Balanced Diet}}
== History ==
{{History|java indev}}
{{History||0.31|snap=20100130|[[File:Mushroom Stew JE1 BE1.png|32px]] Added mushroom stew.
|Restores {{hp|8}} [[health]].}}
{{History||20100206|Mushroom stew now restores {{hp|10}} health.}}
{{History|java beta}}
{{History||1.6|snap=Test Build 3|[[Mushroom]] spreading mechanic added, making mushroom stew [[renewable]].}}
{{History||1.8|snap=Pre-release|Now restores {{hunger|8}} [[hunger]].}}
{{History|java}}
{{History||1.0.0|snap=Beta 1.9 Prerelease|More fungi sources have now been introduced with the addition of the [[Mushroom Fields|mushroom biome]].
|A [[mooshroom]] can now be "milked" with a [[bowl]] to obtain mushroom stew.}}
{{History|||snap=Beta 1.9 Prerelease 3|Mushroom stew can now be crafted in the [[2×2 crafting grid]] in the [[inventory]]. Previously, the crafting recipe was shaped, now it's shapeless.}}
{{History||1.2.5|snap=release|The [[player]] milking a [[mooshroom]] with a stack of [[bowl]]s no longer results in receiving back a single bowl of mushroom stew.}}
{{History||1.4.2|snap=?|Mushroom stew now restores {{Hunger|6}} instead of {{Hunger|8}}.}}
{{History||1.13|snap=17w47a|Prior to [[1.13/Flattening|''The Flattening'']], this [[item]]'s numeral ID was 282.}}
{{History||1.14|snap=18w43a|[[File:Mushroom Stew JE2 BE2.png|32px]] The texture of mushroom stew has now been changed.}}
{{History||1.16|snap=Pre-release 1|Mooshrooms can now be milked for mushroom stew in Creative mode.<ref>{{Cite bug|MC|90969|Cannot get mushroom stew from mooshrooms / milk from cows in creative mode|date=October 19, 2015}}</ref>}}
{{History|pocket alpha}}
{{History||v0.4.0|[[File:Mushroom Stew JE1 BE1.png|32px]] Added mushroom stew.}}
{{History||v0.5.0|Mushroom stew now restores {{hp|8}} instead of {{hp|4}}.}}
{{History||v0.9.0|snap=build 1|A mooshroom can now be "milked" with a [[bowl]] to obtain mushroom stew.}}
{{History||v0.12.1|snap=build 1|Mushroom stew now restores [[hunger]] instead of [[health]].}}
{{History|bedrock}}
{{History||1.10.0|snap=beta 1.10.0.3|[[File:Mushroom Stew JE2 BE2.png|32px]] The texture of mushroom stew has now been changed.}}
{{History|console}}
{{History||xbox=TU1|xbone=CU1|ps=1.0|switch=1.0.1|wiiu=Patch 1|[[File:Mushroom Stew JE1 BE1.png|32px]] Added mushroom stew.}}
{{History||xbox=none|xbone=none|ps=1.90|wiiu=none|switch=none|[[File:Mushroom Stew JE2 BE2.png|32px]] The texture of mushroom stew has now been changed.}}
{{History|new3ds}}
{{History||0.1.0|[[File:Mushroom Stew JE1 BE1.png|32px]] Added mushroom stew.}}
{{History|foot}}
== Issues ==
{{Issue list}}
== References ==
{{reflist}}
== External Links ==
*[https://www.minecraft.net/en-us/article/taking-inventory--mushroom-stew Taking Inventory: Mushroom Stew] – Minecraft.net on September 1, 2022
{{items}}
[[de:Pilzsuppe]]
[[es:Estofado de champiñones]]
[[fr:Soupe de champignons]]
[[hu:Gombaragu]]
[[ja:キノコシチュー]]
[[ko:버섯 스튜]]
[[nl:Paddenstoelenstoofpot]]
[[pl:Zupa grzybowa]]
[[pt:Ensopado de cogumelos]]
[[ru:Тушёные грибы]]
[[zh:蘑菇煲]]
[[Category:Food]]
[[Category:Renewable resources]]
<references /></li></ul> | Added Campfire Tales Skin pack. | ||||||||||||||||||||||||||||||||||
| 4 October 2016 | The last 'teaser-tweet' for the Campfire Tales Skin pack is sent, after the skin pack was released. | ||||||||||||||||||||||||||||||||||
| 7 October 2016 | The limited-time offer for the MineCon 2016 Skin pack is over, it has been removed from all app stores and its redemption code is now expired. Players who obtained it while it was available are still able to use it. | ||||||||||||||||||||||||||||||||||
| Pocket Edition | |||||||||||||||||||||||||||||||||||
1.0.0{{Extension DPL}}<ul><li>[[Bleach|Bleach]]<br/>{{education feature}}
{{exclusive|bedrock|education}}
{{Item
| image = Bleach.png
| renewable = No
| stackable = Yes (64)
}}
'''Bleach''' is an [[item]] used to [[dye]] things white. It is a [[compound]], as it is made using a [[lab table]].
== Obtaining ==
=== Lab Table ===
Bleach is not obtainable in the [[creative inventory]] or {{cmd|give}}. The only way to obtain it is using a [[lab table]].
{| class="wikitable"
! Result
! Materials Needed
|-
!rowspan=2|{{slot|Bleach}}<br>[[Bleach]]
|{{slot|Water (compound)|link=Compound}}{{slot|Water (compound)|link=Compound}}{{slot|Water (compound)|link=Compound}}{{slot|Sodium Hypochlorite|link=Compound}}{{slot|Sodium Hypochlorite|link=Compound}}{{slot|Sodium Hypochlorite|link=Compound}}
|-
|<center>[[Water (compound)|Water]] x3, [[Compound|Sodium Hypochlorite]] x3</center>
|}
== Usage ==
=== Crafting ingredient ===
{{crafting usage}}
== Sounds ==
{{Sound table
|type=bedrock
|sound=Fire.ogg
|source=sound
|description=When bleach is created by a lab table
|id=lt.reaction.fire
|volume=6.0
|pitch=0.7/0.9
|foot=1}}
== Data values ==
=== ID ===
{{ID table
|edition=bedrock
|shownumericids=y
|showforms=y
|notshowbeitemforms=y
|generatetranslationkeys=y
|displayname=Bleach
|spritetype=item
|nameid=bleach
|id=596
|form=item
|foot=1}}
== History ==
{{History|bedrock}}
{{History||1.4.0|snap=beta 1.2.20.1|[[File:Bleach BE1.png|32px]] Added bleach.}}
{{History|education}}
{{History||1.0.27|[[File:Bleach BE1.png|32px]] Added bleach.}}
{{History|foot}}
== Trivia ==
*[[File:Bleach (compound).png|32px]] There is an [[History of textures/Unused textures#Unused compounds|unused bleach texture]] in the compounds folder of the chemistry resource pack, which is slightly different from the one used in the game.
== Issues ==
{{issue list}}
{{Items}}
{{Education Edition}}
[[Category:Dyes]]
[[Category:Non-renewable resources]]
[[Category:Education Edition items]]
[[de:Bleichmittel]]
[[es:Lejía]]
[[ja:漂白剤]]
[[ko:표백제]]
[[pl:Wybielacz]]
[[pt:Alvejante]]
[[zh:漂白剂]]
[[lzh:素精]]</li><li>[[Smithing Template|Smithing Template]]<br/>{{for|the block|Smithing Table}}
{{Item
| title = Smithing Template
| image = <gallery>
Netherite Upgrade Smithing Template.png | Netherite Upgrade
Sentry Armor Trim Smithing Template.png | Armor Trim
</gallery>
| rarity = Rare
| renewable = No<!--Smithing templates are not renewable because diamonds, their only other method of creation, are not renewable.-->
| stackable = Yes (64)
}}
'''Smithing templates''' are items used in [[Smithing Table|smithing tables]] to alter [[Tool|tools]] and [[armor]]. They are consumed when used, but can be [[Crafting|duplicated]] using an existing template, its material and [[Diamond|diamonds]].
The sixteen '''armor trim smithing templates''' are found in a variety of [[Generated structures|structures]], and are used to apply various decorative trims (dependent on the variant) to armor using certain minerals for different colors.
'''Netherite upgrade smithing templates''' are required to upgrade diamond equipment with a [[Netherite Ingot|netherite ingot]]. They are only found in [[Bastion Remnant|bastion remnants]], but are guaranteed only in [[:en:Bastion_Remnant#Treasure_room|treasure rooms]].
== Obtaining ==
Smithing templates can be found in various [[Generated structures|structures]] and can be duplicated by using seven diamonds and a block based on what the template is.
=== Crafting ===
{{Crafting
|A1=Diamond |B1=Matching Smithing Template |C1=Diamond
|A2=Diamond |B2=Netherrack;Cobblestone;Sandstone;End Stone;Terracotta;Terracotta;Netherrack;Cobblestone;Terracotta;Cobbled Deepslate;Blackstone;Purpur Block;Prismarine;Cobblestone;Cobbled Deepslate;Terracotta;Mossy Cobblestone |C2=Diamond
|A3=Diamond |B3=Diamond |C3=Diamond
|Output=Matching Smithing Template,2
}}
{| class="article-table"
|+ Duplication
! Item !! Material
|-
| {{ItemSprite|netherite-upgrade|text=Netherite Upgrade}} || {{BlockSprite|Netherrack|text=Netherrack}}
|-
| {{ItemSprite|sentry-armor-trim|text=Sentry Armor Trim}} || {{BlockSprite|Cobblestone|text=Cobblestone}}
|-
| {{ItemSprite|vex-armor-trim|text=Vex Armor Trim}} || {{BlockSprite|Cobblestone|text=Cobblestone}}
|-
| {{ItemSprite|wild-armor-trim|text=Wild Armor Trim}} || {{BlockSprite|Mossy Cobblestone|text=Mossy Cobblestone}}
|-
| {{ItemSprite|coast-armor-trim|text=Coast Armor Trim}} || {{BlockSprite|Cobblestone|text=Cobblestone}}
|-
| {{ItemSprite|dune-armor-trim|text=Dune Armor Trim}} || {{BlockSprite|Sandstone|text=Sandstone}}
|-
| {{ItemSprite|wayfinder-armor-trim|text=Wayfinder Armor Trim}} || {{BlockSprite|Terracotta|text=Terracotta}}
|-
| {{ItemSprite|raiser-armor-trim|text=Raiser Armor Trim}} || {{BlockSprite|Terracotta|text=Terracotta}}
|-
| {{ItemSprite|shaper-armor-trim|text=Shaper Armor Trim}} || {{BlockSprite|Terracotta|text=Terracotta}}
|-
| {{ItemSprite|host-armor-trim|text=Host Armor Trim}} || {{BlockSprite|Terracotta|text=Terracotta}}
|-
| {{ItemSprite|ward-armor-trim|text=Ward Armor Trim}} || {{BlockSprite|Cobbled Deepslate|text=Cobbled Deepslate}}
|-
| {{ItemSprite|silence-armor-trim|text=Silence Armor Trim}} || {{BlockSprite|Cobbled Deepslate|text=Cobbled Deepslate}}
|-
| {{ItemSprite|tide-armor-trim|text=Tide Armor Trim}} || {{BlockSprite|Prismarine|text=Prismarine}}
|-
| {{ItemSprite|snout-armor-trim|text=Snout Armor Trim}} || {{BlockSprite|Blackstone|text=Blackstone}}
|-
| {{ItemSprite|rib-armor-trim|text=Rib Armor Trim}} || {{BlockSprite|Netherrack|text=Netherrack}}
|-
| {{ItemSprite|eye-armor-trim|text=Eye Armor Trim}} || {{BlockSprite|End Stone|text=End Stone}}
|-
| {{ItemSprite|spire-armor-trim|text=Spire Armor Trim}} || {{BlockSprite|Purpur Block|text=Purpur Block}}
|}
{{IN|bedrock}}, spire, tide, and dune armor trims can be duplicated with more blocks than {{in|java}}. In addition to the normal blocks, Tide armor trims can be duplicated using Prismarine Bricks or Dark Prismarine, dune armor trims can be duplicated with smooth sandstone, cut sandstone, or chiseled sandstone, and spire armor trims can be duplicated with purpur pillars.<ref>{{bug|MCPE-172711||Tide, Spire, and Dune Armor Trims can be crafted from more blocks than in Java Edition}}</ref>
=== Mob loot ===
[[Elder guardian]]s have a 20% chance to drop 1 tide armor trim upon death. [[Looting]] doesn't affect this percentage, and the elder guardian doesn't need to be killed by a player in order for the trim to drop and can be duplicated with [[prismarine]].
=== Chest loot ===
{{#invoke:LootChest|base3|netherite-upgrade-smithing-template,sentry-armor-trim-smithing-template,vex-armor-trim-smithing-template,wild-armor-trim-smithing-template,coast-armor-trim-smithing-template,dune-armor-trim-smithing-template,ward-armor-trim-smithing-template,silence-armor-trim-smithing-template,snout-armor-trim-smithing-template,rib-armor-trim-smithing-template,eye-armor-trim-smithing-template,spire-armor-trim-smithing-template}}
Note: In Woodland Mansions, only chests with random loot have the chance to contain the Vex Smithing Template, chests in the "Allium room", "Sapling farm", "Tree-chopping room" and "Fake End portal room" always generate with the same, room specific, loot.
=== Suspicious block loot ===
Items can only be extracted from [[Suspicious Block|suspicious blocks]] using a [[brush]].{{#invoke:LootChest|base3|wayfinder-armor-trim-smithing-template,raiser-armor-trim-smithing-template,shaper-armor-trim-smithing-template,host-armor-trim-smithing-template}}
== Usage ==
=== Crafting ingredient ===
{{Crafting
|A1=Diamond |B1=Matching Smithing Template |C1=Diamond
|A2=Diamond |B2=Netherrack;Cobblestone;Sandstone;End Stone;Terracotta;Terracotta;Netherrack;Cobblestone;Terracotta;Cobbled Deepslate;Blackstone;Purpur Block;Prismarine;Cobblestone;Cobbled Deepslate;Terracotta;Mossy Cobblestone |C2=Diamond
|A3=Diamond |B3=Diamond |C3=Diamond
|Output=Matching Smithing Template,2
}}
=== Smithing ingredient ===
Smithing templates are used at a [[smithing table]]. Netherite upgrade smithing templates are used to upgrade diamond gear into netherite gear by using a netherite upgrade, a piece of diamond gear, and a [[netherite ingot]].
{{Smithing
|head=1
|ingredients=Netherite Upgrade +<br>Any Diamond Gear +<br>[[Netherite Ingot]]
|Netherite Upgrade
|Diamond Helmet; Diamond Chestplate; Diamond Leggings; Diamond Boots; Diamond Sword; Diamond Pickaxe; Diamond Axe; Diamond Shovel
|Netherite Ingot
|Netherite Helmet; Netherite Chestplate; Netherite Leggings; Netherite Boots; Netherite Sword; Netherite Pickaxe; Netherite Axe; Netherite Shovel
|tail=1
}}
{{FakeImage|{{Animate|Iron_Armor_with_Iron_Shaper_Trim.png; Golden_Armor_with_Golden_Shaper_Trim.png; Diamond_Armor_with_Diamond_Shaper_Trim.png; Netherite_Armor_with_Netherite_Shaper_Trim.png|180px}}|If the armor material and the trimming material are the same, the color palette used for the armor trim is darker.}}
Armor trim smithing templates are used to customize an armor piece's appearance by using a smithing template, an armor piece, and an ingot or crystal ([[emerald]], [[redstone dust]], [[lapis lazuli]], [[amethyst shard]], [[nether quartz]], [[netherite ingot]], [[diamond]], [[gold ingot]], [[iron ingot]], or [[copper ingot]]). Including all dyed leather armor colors and regular armor, there are ≈3.679x10<sup>9</sup> different possible armor pieces<!--5713438 leather colors, plus the 4 other armor materials = 5713442. 5713442 * 161 (the 160 trim combos (16 trims, 10 materials) + untrimmed) = 919864162. 919864162 * 4 (helmet, chestplate, leggings, boots) = 3679456648 ≈ 3.679x10^9-->, and 7.16x10<sup>35</sup> <!--919864162 + 1 (no armor in that slot) = 919864163. 919864163^4 = 715969952015045562662444917041515536 ≈ 7.16x10^35 total possible armor combinations-->total possible armor combinations excluding enchantments and the player not wearing armor.
Already trimmed armor can be trimmed again by applying another template on it; the old trim pattern is overwritten in the process.<ref>{{bug|MC-262538||When combining armor trims the new trim deletes the old one|WAI}}</ref> Therefore, one piece of armor cannot possess multiple trims at the same time.
Most armor trims cover a small portion of the armor piece's surface with the trim material, except for the silence armor trim, which allows the trim material to cover a majority of the armor piece's surface.
All of the trims are purely decorative, and don't impact gameplay or strength(without the use of mods or plugins) of the armor they are applied to in any way. [[Piglin]]s do not pick up any gold-trimmed armor pieces, and they are not pacified by players wearing even a full set of gold-trimmed armor (unless, of course, the armor pieces in question are themselves golden), and netherite-trimmed armor pieces can still be burned by [[fire]].
{{Smithing
|head=1
|ingredients=Any Armor Trim +<br>Any Armor Piece +<br>Any Ingot/Crystal
|Any Armor Trim Smithing Template
|Iron Helmet; Netherite Chestplate;Golden Leggings;Diamond Boots
|Amethyst Shard; Copper Ingot; Diamond; Emerald; Gold Ingot; Iron Ingot; Lapis Lazuli; Nether Quartz; Netherite Ingot; Redstone Dust; Diamond; Emerald
|Amethyst Trim Iron Helmet; Copper Trim Netherite Chestplate; Diamond Trim Golden Leggings; Emerald Trim Diamond Boots; Gold Trim Iron Helmet; Iron Trim Netherite Chestplate; Lapis Trim Golden Leggings; Quartz Trim Diamond Boots; Netherite Trim Iron Helmet; Redstone Trim Netherite Chestplate; Diamond Trim Golden Leggings; Emerald Trim Diamond Boots
|tail=1
}}
;List of color palettes for all materials
*{{ItemSprite|emerald }} - {{TrimPalette| emerald }}
*{{ItemSprite|redstone dust }} - {{TrimPalette| redstone dust }}
*{{ItemSprite|lapis lazuli }} - {{TrimPalette| lapis lazuli }}
*{{ItemSprite|amethyst shard }} - {{TrimPalette| amethyst shard }}
*{{ItemSprite|nether quartz }} - {{TrimPalette| nether quartz }}
*{{ItemSprite|netherite ingot }} - {{TrimPalette| netherite ingot }} (Darker: {{TrimPalette| netherite ingot |darker=1}})
*{{ItemSprite|diamond }} - {{TrimPalette| diamond }} (Darker: {{TrimPalette| diamond |darker=1}})
*{{ItemSprite|gold ingot }} - {{TrimPalette| gold ingot }} (Darker: {{TrimPalette| gold ingot |darker=1}})
*{{ItemSprite|iron ingot }} - {{TrimPalette| iron ingot }} (Darker: {{TrimPalette| iron ingot |darker=1}})
*{{ItemSprite|copper ingot }} - {{TrimPalette| copper ingot }}
== Data values ==
=== ID ===
{{edition|java}}:
{{ID table
|edition=java
|firstcolumnname=Smithing Template
|showforms=y
|generatetranslationkeys=y
|displayname=Netherite Upgrade
|spritename=netherite-upgrade-smithing-template
|spritetype=item
|nameid=netherite_upgrade_smithing_template
|form=item}}
{{ID table
|displayname=Sentry Armor Trim
|spritename=sentry-armor-trim-smithing-template
|spritetype=item
|nameid=sentry_armor_trim_smithing_template
|form=item}}
{{ID table
|displayname=Vex Armor Trim
|spritename=vex-armor-trim-smithing-template
|spritetype=item
|nameid=vex_armor_trim_smithing_template
|form=item}}
{{ID table
|displayname=Wild Armor Trim
|spritename=wild-armor-trim-smithing-template
|spritetype=item
|nameid=wild_armor_trim_smithing_template
|form=item}}
{{ID table
|displayname=Coast Armor Trim
|spritename=coast-armor-trim-smithing-template
|spritetype=item
|nameid=coast_armor_trim_smithing_template
|form=item}}
{{ID table
|displayname=Dune Armor Trim
|spritename=dune-armor-trim-smithing-template
|spritetype=item
|nameid=dune_armor_trim_smithing_template
|form=item}}
{{ID table
|displayname=Wayfinder Armor Trim
|spritename=wayfinder-armor-trim-smithing-template
|spritetype=item
|nameid=wayfinder_armor_trim_smithing_template
|form=item}}
{{ID table
|displayname=Raiser Armor Trim
|spritename=raiser-armor-trim-smithing-template
|spritetype=item
|nameid=raiser_armor_trim_smithing_template
|form=item}}
{{ID table
|displayname=Shaper Armor Trim
|spritename=shaper-armor-trim-smithing-template
|spritetype=item
|nameid=shaper_armor_trim_smithing_template
|form=item}}
{{ID table
|displayname=Host Armor Trim
|spritename=host-armor-trim-smithing-template
|spritetype=item
|nameid=host_armor_trim_smithing_template
|form=item}}
{{ID table
|displayname=Ward Armor Trim
|spritename=ward-armor-trim-smithing-template
|spritetype=item
|nameid=ward_armor_trim_smithing_template
|form=item}}
{{ID table
|displayname=Silence Armor Trim
|spritename=silence-armor-trim-smithing-template
|spritetype=item
|nameid=silence_armor_trim_smithing_template
|form=item}}
{{ID table
|displayname=Tide Armor Trim
|spritename=tide-armor-trim-smithing-template
|spritetype=item
|nameid=tide_armor_trim_smithing_template
|form=item}}
{{ID table
|displayname=Snout Armor Trim
|spritename=snout-armor-trim-smithing-template
|spritetype=item
|nameid=snout_armor_trim_smithing_template
|form=item}}
{{ID table
|displayname=Rib Armor Trim
|spritename=rib-armor-trim-smithing-template
|spritetype=item
|nameid=rib_armor_trim_smithing_template
|form=item}}
{{ID table
|displayname=Eye Armor Trim
|spritename=eye-armor-trim-smithing-template
|spritetype=item
|nameid=eye_armor_trim_smithing_template
|form=item}}
{{ID table
|displayname=Spire Armor Trim
|spritename=spire-armor-trim-smithing-template
|spritetype=item
|nameid=spire_armor_trim_smithing_template
|form=item
|foot=1}}
{{edition|bedrock}}:
{{ID table
|edition=bedrock
|firstcolumnname=Smithing Template
|shownumericids=y
|showforms=y
|notshowbeitemforms=y
|generatetranslationkeys=y
|displayname=Netherite Upgrade
|spritename=netherite-upgrade-smithing-template
|spritetype=item
|nameid=netherite_upgrade_smithing_template
|id=685
|form=item
|translationkey=item.smithing_template.name, upgrade.netherite_upgrade.name}}
{{ID table
|displayname=Sentry Armor Trim
|spritename=sentry-armor-trim-smithing-template
|spritetype=item
|nameid=sentry_armor_trim_smithing_template
|id=686
|form=item
|translationkey=item.smithing_template.name, trim_pattern.sentry.name}}
{{ID table
|displayname=Vex Armor Trim
|spritename=vex-armor-trim-smithing-template
|spritetype=item
|nameid=vex_armor_trim_smithing_template
|id=692
|form=item
|translationkey=item.smithing_template.name, trim_pattern.vex.name}}
{{ID table
|displayname=Wild Armor Trim
|spritename=wild-armor-trim-smithing-template
|spritetype=item
|nameid=wild_armor_trim_smithing_template
|id=689
|form=item
|translationkey=item.smithing_template.name, trim_pattern.wild.name}}
{{ID table
|displayname=Coast Armor Trim
|spritename=coast-armor-trim-smithing-template
|spritetype=item
|nameid=coast_armor_trim_smithing_template
|id=688
|form=item
|translationkey=item.smithing_template.name, trim_pattern.coast.name}}
{{ID table
|displayname=Dune Armor Trim
|spritename=dune-armor-trim-smithing-template
|spritetype=item
|nameid=dune_armor_trim_smithing_template
|id=687
|form=item
|translationkey=item.smithing_template.name, trim_pattern.dune.name}}
{{ID table
|displayname=Wayfinder Armor Trim
|spritename=wayfinder-armor-trim-smithing-template
|spritetype=item
|nameid=wayfinder_armor_trim_smithing_template
|id=698
|form=item
|translationkey=item.smithing_template.name, trim_pattern.wayfinder.name}}
{{ID table
|displayname=Raiser Armor Trim
|spritename=raiser-armor-trim-smithing-template
|spritetype=item
|nameid=raiser_armor_trim_smithing_template
|id=699
|form=item
|translationkey=item.smithing_template.name, trim_pattern.raiser.name}}
{{ID table
|displayname=Shaper Armor Trim
|spritename=shaper-armor-trim-smithing-template
|spritetype=item
|nameid=shaper_armor_trim_smithing_template
|id=700
|form=item
|translationkey=item.smithing_template.name, trim_pattern.shaper.name}}
{{ID table
|displayname=Host Armor Trim
|spritename=host-armor-trim-smithing-template
|spritetype=item
|nameid=host_armor_trim_smithing_template
|id=701
|form=item
|translationkey=item.smithing_template.name, trim_pattern.host.name}}
{{ID table
|displayname=Ward Armor Trim
|spritename=ward-armor-trim-smithing-template
|spritetype=item
|nameid=ward_armor_trim_smithing_template
|id=690
|form=item
|translationkey=item.smithing_template.name, trim_pattern.ward.name}}
{{ID table
|displayname=Silence Armor Trim
|spritename=silence-armor-trim-smithing-template
|spritetype=item
|nameid=silence_armor_trim_smithing_template
|id=697
|form=item
|translationkey=item.smithing_template.name, trim_pattern.silence.name}}
{{ID table
|displayname=Tide Armor Trim
|spritename=tide-armor-trim-smithing-template
|spritetype=item
|nameid=tide_armor_trim_smithing_template
|id=693
|form=item
|translationkey=item.smithing_template.name, trim_pattern.tide.name}}
{{ID table
|displayname=Snout Armor Trim
|spritename=snout-armor-trim-smithing-template
|spritetype=item
|nameid=snout_armor_trim_smithing_template
|id=694
|form=item
|translationkey=item.smithing_template.name, trim_pattern.snout.name}}
{{ID table
|displayname=Rib Armor Trim
|spritename=rib-armor-trim-smithing-template
|spritetype=item
|nameid=rib_armor_trim_smithing_template
|id=695
|form=item
|translationkey=item.smithing_template.name, trim_pattern.rib.name}}
{{ID table
|displayname=Eye Armor Trim
|spritename=eye-armor-trim-smithing-template
|spritetype=item
|nameid=eye_armor_trim_smithing_template
|id=691
|form=item
|translationkey=item.smithing_template.name, trim_pattern.eye.name}}
{{ID table
|displayname=Spire Armor Trim
|spritename=spire-armor-trim-smithing-template
|spritetype=item
|nameid=spire_armor_trim_smithing_template
|id=696
|form=item
|translationkey=item.smithing_template.name, trim_pattern.spire.name
|foot=1}}
== Achievements ==
{{load achievements|Smithing with style}}
== Advancements ==
{{load advancements|Crafting a New Look;Smithing with Style}}
== Video ==
{{yt|klP9SrJFDU8}}
== History ==
{{History|java}}
{{History||1.20<br>(Experimental)|link=1.19.4|snap=23w04a|[[File:Netherite Upgrade Smithing Template JE1 BE1.png|32px]] [[File:Sentry Armor Trim Smithing Template JE1 BE1.png|32px]] [[File:Vex Armor Trim Smithing Template JE1 BE1.png|32px]] [[File:Wild Armor Trim Smithing Template JE1 BE1.png|32px]] [[File:Coast Armor Trim Smithing Template JE1 BE1.png|32px]] [[File:Dune Armor Trim Smithing Template JE1 BE1.png|32px]] [[File:Ward Armor Trim Smithing Template JE1 BE1.png|32px]] [[File:Tide Armor Trim Smithing Template JE1 BE1.png|32px]] [[File:Snout Armor Trim Smithing Template JE1 BE1.png|32px]] [[File:Rib Armor Trim Smithing Template JE1 BE1.png|32px]] [[File:Eye Armor Trim Smithing Template JE1 BE1.png|32px]] [[File:Spire Armor Trim Smithing Template JE1 BE1.png|32px]] Added smithing templates behind the "Update 1.20" experimental datapack.}}
{{History|||snap=23w05a|Smithing templates can be used to trim leather armor.
|Gold, iron, diamond, and netherite armor can be trimmed with their respective material.
|The dune, coast, wild, and sentry armor trims now always generate two templates in a chest when found.
|Increased the chances for all smithing templates that generate in chest loot to spawn:
*Netherite upgrade chance to find increased from 3.2% to 10%.
*Coast chance to find increased from 11.1% to 16.7%.
*Dune chance to find increased from 11.1% to 14.3%.
*Eye chance to find increased from 4.7% to 10% in alter chests, and to 100% in library chests.
*Rib chance to find increased from 4.7% to 6.7%.
*Sentry chance to find increased from 20% to 25%.
*Snout chance to find increased from 4.7% to 8.3%.
*Spire chance to find increased from 4.7% to 6.7%.
*Vex chance to find increased from 4.7% to 50%.
*Ward chance to find increased from 4.7% to 5%.
*Wild chance to find increased from 20% to 33%.}}
{{History||1.20|snap=23w12a|Smithing templates are now available without using the "Update 1.20" experimental datapack.|[[File:Wayfinder Armor Trim Smithing Template JE1 BE1.png|32px]] [[File:Raiser Armor Trim Smithing Template JE1 BE1.png|32px]] [[File:Shaper Armor Trim Smithing Template JE1 BE1.png|32px]] [[File:Host Armor Trim Smithing Template JE1 BE1.png|32px]] [[File:Silence Armor Trim Smithing Template JE1 BE1.png|32px]] Added wayfinder, raiser, shaper, host, and silence armor trim smithing templates.
|[[File:Sentry Armor Trim Smithing Template JE2 BE2.png|32px]] [[File:Dune Armor Trim Smithing Template JE2 BE2.png|32px]] Changed the textures of the sentry and dune armor trim smithing templates.
|The pattern textures of dune and sentry armor trims are changed from [[File:Armor Trim Dune (sample model) JE1 BE1.png|24px]] [[File:Armor Trim Sentry (sample model) JE1 BE1.png|24px]] to [[File:Armor Trim Dune (sample model) JE2 BE2.png|24px]] [[File:Armor Trim Sentry (sample model) JE2 BE2.png|24px]].<br>
Those previous patterns were left with different names: dune was renamed sentry and sentry was renamed shaper.}}
{{History|||snap=23w16a|Wayfinder, raiser, shaper, and host armor trim no longer generates in [[suspicious sand]] in [[trail ruins]].|Due to the split of the archaeological loot tables for the suspicious gravel within the [[trail ruins]]; wayfinder, raiser, shaper, and host armor trim now are in the rare loot.}}
{{History|||snap=23w17a|The probability of the wayfinder, raiser, shaper, and host armor trim to generate in [[suspicious gravel]] in [[trail ruins]] has been changed from 1/11 to 1/12.|The player now get the [[advancement]] "Crafting a new look" when they craft a trimmed armor at a [[smithing table]] using a smithing template, "Smithing with style" when they apply these smithing templates at least once on their armor: Spire, Snout, Rib, Ward, Silence, Vex, Tide, and Wayfinder.}}
{{History|bedrock}}
{{History||Next Major Update<br>(Experimental)|link=Bedrock Edition 1.19.80|snap=beta 1.19.80.21|[[File:Netherite Upgrade Smithing Template JE1 BE1.png|32px]] [[File:Sentry Armor Trim Smithing Template JE1 BE1.png|32px]] [[File:Vex Armor Trim Smithing Template JE1 BE1.png|32px]] [[File:Wild Armor Trim Smithing Template JE1 BE1.png|32px]] [[File:Coast Armor Trim Smithing Template JE1 BE1.png|32px]] [[File:Dune Armor Trim Smithing Template JE1 BE1.png|32px]] [[File:Ward Armor Trim Smithing Template JE1 BE1.png|32px]] [[File:Tide Armor Trim Smithing Template JE1 BE1.png|32px]] [[File:Snout Armor Trim Smithing Template JE1 BE1.png|32px]] [[File:Rib Armor Trim Smithing Template JE1 BE1.png|32px]] [[File:Eye Armor Trim Smithing Template JE1 BE1.png|32px]] [[File:Spire Armor Trim Smithing Template JE1 BE1.png|32px]] Added smithing templates behind the "[[Bedrock Edition 1.20.0|Next Major Update]]" [[experimental]] toggle.}}
{{History|||snap=beta 1.19.80.22|[[File:Wayfinder Armor Trim Smithing Template JE1 BE1.png|32px]] [[File:Raiser Armor Trim Smithing Template JE1 BE1.png|32px]] [[File:Shaper Armor Trim Smithing Template JE1 BE1.png|32px]] [[File:Host Armor Trim Smithing Template JE1 BE1.png|32px]] [[File:Silence Armor Trim Smithing Template JE1 BE1.png|32px]] Added wayfinder, raiser, shaper, host, and silence armor trim smithing templates.
|[[File:Sentry Armor Trim Smithing Template JE2 BE2.png|32px]] [[File:Dune Armor Trim Smithing Template JE2 BE2.png|32px]] Changed the textures of the sentry and dune armor trim smithing templates.
|The pattern textures of dune and sentry armor trims are changed from [[File:Armor Trim Dune (sample model) JE1 BE1.png|24px]] [[File:Armor Trim Sentry (sample model) JE1 BE1.png|24px]] to [[File:Armor Trim Dune (sample model) JE2 BE2.png|24px]] [[File:Armor Trim Sentry (sample model) JE2 BE2.png|24px]].<br>
Those previous patterns were left with different names: dune was renamed sentry and sentry was renamed shaper.}}
{{History||1.20.0|snap=beta 1.20.0.21|Smithing templates are now available without using the "Next Major Update" experimental toggle.}}
{{History|foot}}
== Issues ==
{{Issue list}}
== Trivia ==
* Smithing templates were named "Smithing Blueprints" in the prototype but was changed because the word "blueprint" sounded modern and technical.<ref>{{ytl|klP9SrJFDU8|Minecraft 1.20: Armor Trims - What Do They Mean?|Minecraft|May 4, 2023|t=98}}</ref>
* When Mojang developer Gnembon was working on armor trims, he accidentally messed up their rendering, making them jet through the player's body in a weird fashion, similar to what appears in {{w|Salvador Dalí}}'s paintings where a hand might poke through a forehead.<ref>{{ytl|ghQODkq4ITI|Mojang Dev Comes To Hermitcraft! (Mojang Developer Gnembom Interview)|GoodVodsWithScar|June 23, 2023|t=1980}}</ref>
* Some of the armor trims feature patterns based on a [[mob]] or [[block]] that is found in the same [[Generated structures|structure]] as the corresponding smithing template.<ref name=":0">"Some of the armor trims reflect the place where you found the template, for example bastions contain a piglin-inspired trim."-[[Sofia Dankis]]-{{Mcnet|armor-trims-coming-minecraft-1-20|Armor Trims Coming to Minecraft 1.20|January 24, 2023}}</ref>
** The spire armor trim resembles a [[shulker]].
** The vex armor trim resembles an [[evoker]]. As an item in the [[inventory]], it resembles the wing or the vein texture of a [[vex]].
** The wild armor trim has moss growing on 3 of its corners.
** The coast armor trim appears to have barnacles attached to it.
** The ward armor trim, as an item in the inventory, resembles the faces inside a [[warden]]'s chest.
** The silence armor trim appears to have sculk creeping onto / infecting it.
** The tide armor trim resembles [[Prismarine|prismarine bricks]].
** The snout armor trim resembles a [[piglin]]<ref name=":0" />.
** The rib armor trim resembles a [[wither skeleton]].
** The eye armor trim resembles an [[eye of ender]]. There are also two eyes on the head part of the armor trim that resemble those of an [[enderman]].
* ''Netherite upgrade smithing template'' (35 characters with "_" and 32 characters without "_") and ''sentry armor trim smithing template'' (35 characters with "_" and 31 characters without "_") are the current longest name for item ID, while ''[[polished blackstone pressure plate]]'' and ''[[cracked polished blackstone bricks]]'' have 34 characters with "_" and 31 characters without "_".
* The silence armor trim is the rarest trim, due to being found in ancient cities in the deep dark, and having only a 1.2% chance to be per chest.
* When [[lapis lazuli]] is used as trim material, it is called "Lapis" instead of its full name "Lapis Lazuli"; this is the only instance of the abbreviation "Lapis" being used in-game.<ref>{{bug|MC-262486|||WAI}}</ref>
== Gallery ==
=== Sprites ===
<gallery>
Netherite Upgrade Smithing Template.png|Netherite Upgrade
Sentry Armor Trim Smithing Template.png|Sentry Armor Trim
Vex Armor Trim Smithing Template.png|Vex Armor Trim
Wild Armor Trim Smithing Template.png|Wild Armor Trim
Coast Armor Trim Smithing Template.png|Coast Armor Trim
Dune Armor Trim Smithing Template.png|Dune Armor Trim
Wayfinder Armor Trim Smithing Template.png|Wayfinder Armor Trim
Raiser Armor Trim Smithing Template.png|Raiser Armor Trim
Shaper Armor Trim Smithing Template.png|Shaper Armor Trim
Host Armor Trim Smithing Template.png|Host Armor Trim
Ward Armor Trim Smithing Template.png|Ward Armor Trim
Silence Armor Trim Smithing Template.png|Silence Armor Trim
Tide Armor Trim Smithing Template.png|Tide Armor Trim
Snout Armor Trim Smithing Template.png|Snout Armor Trim
Rib Armor Trim Smithing Template.png|Rib Armor Trim
Eye Armor Trim Smithing Template.png|Eye Armor Trim
Spire Armor Trim Smithing Template.png|Spire Armor Trim
</gallery>
=== Armor trim patterns ===
<gallery>
Armor Trim Sentry (sample model).png|Sentry Armor Trim
Armor Trim Vex (sample model).png|Vex Armor Trim
Armor Trim Wild (sample model).png|Wild Armor Trim
Armor Trim Coast (sample model).png|Coast Armor Trim
Armor Trim Dune (sample model).png|Dune Armor Trim
Armor Trim Wayfinder (sample model).png|Wayfinder Armor Trim
Armor Trim Raiser (sample model).png|Raiser Armor Trim
Armor Trim Shaper (sample model).png|Shaper Armor Trim
Armor Trim Host (sample model).png|Host Armor Trim
Armor Trim Ward (sample model).png|Ward Armor Trim
Armor Trim Silence (sample model).png|Silence Armor Trim
Armor Trim Tide (sample model).png|Tide Armor Trim
Armor Trim Snout (sample model).png|Snout Armor Trim
Armor Trim Rib (sample model).png|Rib Armor Trim
Armor Trim Eye (sample model).png|Eye Armor Trim
Armor Trim Spire (sample model).png|Spire Armor Trim
</gallery>
=== Official Artwork ===
<gallery>
T&T Thumbnail.jpg|[[Sunny]] wearing amethyst armor trims.
Warden Chasing Alex with Silence Trim Pixel Art.png|A [[warden]] chasing Alex holding the silence armor trim.
Alex Trimming Armor in Smithing Table Pixel Art.png|Alex adding the silence armor trim and amethyst on iron armor.
Alex Wearing Iron Armor with Amethyst Pixel Art.jpg|Alex wearing the trimmed iron armor.
File:Live2023-01.jpeg|Noor working on trimmed iron armor.
</gallery>
=== Screenshots ===
<gallery>
Kingbdogz Armor Trim 1.jpg|Redstone trims on diamond armor.
Kingbdogz Armor Trim 2.jpg|Gold trims on netherite armor.
Too Many Trims.jpg|A large amount of armor trims.
Kingbdogz Armor Trim 3.jpg|Gold on netherite.
Kingbdogz Armor Trim 4.jpg|Diamond on diamond.
New Armor Trims in 23W12A.jpg|<ref>{{Tweet|kingbdogz|1638580472962850831|new trims got the drip The new "Silence" armor trim to the left is now the hardest trim to get, with only a 1% chance per chest to spawn in Ancient Cities. Definitely gonna be a challenge to get!|March 22, 2023}}</ref>
Emerald Armor.png|Emerald on gold.
Xilefian Armor Trims 1.png|[[Xilefian]] showing how armor trims work.
Xilefian Armor Trims 2.png|[[Xilefian]] showing how armor trims work.
Xilefian Armor Trims 3.png|[[Xilefian]] showing how armor trims work.
Armor Trims On Netherite Armors.png|A display of all eleven (before [[Java Edition 23w12a]]) armor trims and ten colors on netherite armors.
Armor Trim Showcase.png|A display of all eleven (before [[Java Edition 23w12a]]) armor trims, on netherite armor using emerald as the trim material.
Armor Trim Colors.png|A display of all ten armor trim colors, using the ward trim on a netherite helmet.
Silence Armor Trim on All Armors.png|A display of all ten colors of the silence armor trim on all armors.
Image 2023-06-07 154100087.png|A screenshot of every armor trim in every color(besides quartz) on leather armor.
Armor Trim Friends.jpg|Official screenshot of [[Alex]] and [[Zuri]] wearing armor trims.
LadyAgnes Armor Trims.jpg|Copper trims on netherite armor.
Trim Lineup.jpg
Fancy Delta.jpg|[[Kai]] wearing trimmed armor in a [[Basalt Delta]].
Trims & Pots.jpg
Noor Gold Armor Trim .jpeg
Noor Diamond Armor Trim.jpeg
Noor Netherite Armor Trim.jpeg
Noor Iron Armor Trim.jpeg
</gallery>
== References ==
{{Reflist}}
{{Items}}
[[Category:Bedrock Edition]]
[[Category:Non-renewable resources]]
[[de:Schmiedevorlage]]
[[es:Molde de herrería]]
[[fr:Modèle de forge]]
[[ja:鍛冶型]]
[[pl:Szablon kowalski]]
[[pt:Molde de ferraria]]
[[ru:Кузнечный шаблон]]
[[uk:Ковальський шаблон]]
[[zh:锻造模板]]</li></ul> | alpha 0.17.0.1 | Added Festive 2016 Mash-up pack. | |||||||||||||||||||||||||||||||||
1.0.4{{Extension DPL}}<ul><li>[[Dye|Dye]]<br/>{{Item
| title = Dyes
| image = White Dye.png
| extratext = View [[#Gallery|all renders]]
| renewable = Yes
| stackable = Yes (64)
}}
'''Dyes''' are a set of sixteen items used to change the color of [[wool]], [[carpet]]s, [[terracotta]], [[concrete powder]], [[glass]], [[shulker box]]es, [[bed]]s, [[candle]]s, the patterns on [[banner]]s, [[firework star]]s, certain mobs, and text on [[sign]]s and [[hanging sign]]s. {{IN|bedrock}} they can also be used to dye water in a [[cauldron]] (which is thereafter used to dye leather [[armor]]); {{in|java}} leather armor can be dyed directly. {{IN|education}} dyes can also be used to dye [[balloon]]s and [[glow stick]]s.
{{IN|bedrock|education}}, [[bone meal]], [[ink sac]]s, [[lapis lazuli]], and [[cocoa bean]]s can generally substitute for [[white dye]], [[black dye]], [[blue dye]], and [[brown dye]], respectively, in crafting recipes and for use in dyeing items or mobs. However, they have other important uses that aren't related to color, and are therefore not considered true dyes. They are mentioned in this article only in regard to their use as dyeing agents; see their individual articles for complete information about them.
[[File:Dye Recipes.png|400px|thumb|A guide for creating all the dyes]]
== Obtaining ==
<!--[[File:Dye Chart.png|350px|thumb|A guide to crafting all the dyes.{{until|java 1.14}}]]-->
Dyes can be produced by crafting them from plants (mainly flowers), by crafting dyes of different colors together, by smelting plants, or by trading with a [[wandering trader]].
{{loadPage|Crafting/Dye|Crafting|h3}}
=== Smelting ===
{{smelting|head=1|Sea Pickle|Lime Dye|0,2}}
{{smelting|foot=1|Cactus|Green Dye|1||b=Lapis Lazuli|c=Any fuel|d=1}}
=== Trading ===
[[Wandering trader]]s can sell 3 dyes for an [[emerald]]. {{IN|bedrock}}, they can also sell 3 lapis lazuli, bone meal, cocoa beans, or ink sacs for one emerald.
Apprentice-level cleric [[villager]]s sell one lapis lazuli per emerald.
=== Chest loot ===
{{#invoke:LootChest|base3|blue-dye,green-dye,orange-dye,light-blue-dye,yellow-dye,white-dye}}
=== Other ===
Ink sacs can also be created using 1 iron, 1 sulfur, and 4 oxygen in the [[compound creator]]. {{only|bedrock|education}}
== Usage ==
Similar to their use in crafting, [[bone meal]], [[ink sac]]s, [[lapis lazuli]], and [[cocoa beans]] can be substituted for the corresponding dye in any of the following usages unless otherwise specified.{{only|bedrock}} <!--- sections are ordered by craftable dyeable blocks, dyeable items, version exclusive sections, and non-crafting miscellaneous uses--->
=== Dyeing wool and mobs ===
Players can dye wool by placing [[wool]] and any dye in a crafting grid.
{{Crafting
|nocat=1
|Any Wool
|Matching Dye
|Output=Any Wool
}}
Dyes can be {{control|use|text=used}} on sheep to change the color of the wool. Shearing a colored sheep drops the corresponding color of the wool, and the sheep retains the color when the wool regenerates. [[Breeding]] colored sheep produces a lamb colored as one of the parent sheep, or a color resulting from the combination of both parents' color. The color combining follows the same rules that dyes use – red and yellow sheep produce an orange lamb, but a blue and yellow sheep cannot create a green lamb. The unlimited reproduction of colored sheep makes dyeing and shearing sheep infinitely more efficient than just dyeing wool directly.
Dye can also be used on a tamed [[wolf]] or [[cat]] to change the color of its collar from the default red to the color of the dye.
=== Dyeing carpets ===
Carpets can be dyed.
{{Crafting
|Any Carpet
|Matching Dye
|Output= Matching Carpet
|type= Building block
}}
=== Dyeing terracotta ===
[[Terracotta]] can be dyed by placing 8 blocks around a dye on a crafting table.
{{Crafting
|nocat=1
|A1=Terracotta |B1=Terracotta |C1=Terracotta
|A2=Terracotta |B2=Matching Dye |C2=Terracotta
|A3=Terracotta |B3=Terracotta |C3=Terracotta
|Output=Matching Dyed Terracotta,8
}}
=== Creating concrete powder ===
Dyes can also be used to craft [[concrete powder]], which can then be set into their respective [[concrete]] blocks (they cannot be dyed directly).
{{Crafting
|nocat=1
|Sand |Gravel |Sand
|Gravel |Matching Dye |Gravel
|Sand |Gravel |Sand
|Output=Matching Concrete Powder,8
}}
=== Staining glass ===
[[Stained glass]] can be stained by placing 8 blocks of glass around a dye on a [[crafting table]]. Just like regular glass, stained glass can be crafted into stained glass panes. The recipe for this is the same as with regular glass.
{{Crafting
|nocat=1
|A1=Glass |B1=Glass |C1=Glass
|A2=Glass |B2=Matching Dye |C2=Glass
|A3=Glass |B3=Glass |C3=Glass
|Output=Matching Stained Glass,8
|head=1
}}
{{Crafting
|nocat=1
|A1= Glass Pane
|B1= Glass Pane
|C1= Glass Pane
|A2= Glass Pane
|B2= Matching Dye
|C2= Glass Pane
|A3= Glass Pane
|B3= Glass Pane
|C3= Glass Pane
|Output= Matching Stained Glass Pane,8
|type= Decoration block
|foot=1
}}
=== Dyeing shulker boxes ===
[[Shulker box]]es are generated in a light shade of purple (like the [[purpur block]]), but can be dyed any color. They can also be re-dyed as often as desired.
{{Crafting
|ignoreusage=1
|showname=1
|Any Shulker Box
|Matching Dye
|Output=Matching Shulker Box
}}
=== Dyeing beds ===
Players can dye beds by placing a [[bed]] and any color dye in a crafting grid.
{{Crafting
|nocat=1
|Any Bed
|Matching Dye
|Output=Matching Bed
}}
=== Dyeing candles ===
Players can dye [[candles]] by placing an undyed candle and any color dye in a crafting grid.
{{Crafting
|ignoreusage=1
|Candle
|Matching Dye
|Output=Matching Dyed Candle
}}
=== Banner patterns ===
{{main|Banner#Patterns}}
Dyes are used in most banner patterns to determine the pattern and color displayed.
=== Dyeing armor ===
[[File:DyeGraph2.png|200px|thumb|A graph showing all combinations of two dyes on a [[tunic]].]]
Leather [[armor]] can be dyed by:
* Crafting dyes with a piece of leather armor or leather [[horse armor]].{{Only|java}}
* Dousing the leather armor or leather [[horse armor]] in a [[cauldron]] to which dyes have been added.{{Only|bedrock}}
There are 5,713,438<ref>https://anrar4.github.io/DyeLeatherArmor/</ref> (34.1% of sRGB) colors leather armor can be, as it is possible to put more than one dye on the crafting bench alongside the leather armor. Armor can be dyed multiple times with previous colors affecting the final outcome. Colored armor can be reverted to their original color using a [[cauldron]] with undyed water.
The game has a specific formula for calculating the color of dyed armor: each color, in the RGB color model, has a red value, green value, and blue value. For each dye in the crafting grid, and the armor itself (if it is already dyed), the red, green, and blue values are added to running totals. In addition, a running total of the highest value (be it red, green, or blue) is also kept. After this, each total is divided by the number of colors used. This effectively produces the average red, green, blue, and maximum values. The maximum value of the average RGB values is also calculated. Finally, each average RGB value is multiplied by the average maximum value and divided by the maximum of the average RGB values. The modified average RGB values are then used as the final color. This procedure can be summed up with the following equations:
for each color (all "total" variables start at 0 before counting):
totalRed = totalRed + redValue
totalGreen = totalGreen + greenValue
totalBlue = totalBlue + blueValue
totalMaximum = totalMaximum + max(redValue, greenValue, blueValue)
numberOfColors = numberOfColors + 1
averageRed = totalRed / numberOfColors
averageGreen = totalGreen / numberOfColors
averageBlue = totalBlue / numberOfColors
averageMaximum = totalMaximum / numberOfColors
maximumOfAverage = max(averageRed, averageGreen, averageBlue)
gainFactor = averageMaximum / maximumOfAverage
resultRed = averageRed * gainFactor
resultGreen = averageGreen * gainFactor
resultBlue = averageBlue * gainFactor
Due to the way this formula works, the resulting color can never be darker than the average of the input colors and is often lighter and more saturated. Of course, the resulting color can never be lighter or more saturated than the lightest or most saturated input color. In addition, this formula never creates an RGB value higher than 255 (which would be invalid in the 8-bit RGB color model).
If leather armor is renamed on an [[anvil]], it retains its name when dyed or undyed.
;Mixing Samples
: {{ItemSprite|Yellow Dye}} + {{ItemSprite|Yellow Dye}} = {{Tint|leather-chestplate| #{{CalcDye| yellow=2 }} | code=1}}
: {{ItemSprite|Red Dye}} + {{ItemSprite|Blue Dye}} + {{ItemSprite|White Dye}} = {{Tint|leather-chestplate| #{{CalcDye| red=1 | blue=1 | white=1}} | code=1}}
: {{ItemSprite|Green Dye}} + {{ItemSprite|Red Dye}} + {{ItemSprite|Pink Dye}} = {{Tint|leather-chestplate| #{{CalcDye| green=1 | red=1 | pink=1}} | code=1}}
=== Dyeing firework stars ===
A [[firework star]] can have a single color or a combination of up to eight colors when crafted with dyes. Adding one or more dyes to a crafted firework star adds a "fade to color" effect to it, overwriting any existing fade colors.
{{Crafting
|head=1
|ignoreusage=1
|ingredients=[[Gunpowder]] +<br>Any Dye (1–8) +<br>Extra ingredient (optional)
|Gunpowder
|Matching Dye
|Diamond;Glowstone Dust;Head;Gold Nugget;Feather;Fire Charge;
|Output=Matching Firework Star
}}
{{Crafting
|ignoreusage=1
|Matching Firework Star
|Any Dye
|Output=Matching Firework Star
|foot=1
}}
=== Creating balloons ===
Dye can be used to craft balloons.{{only|education}}
{{Crafting
|nocat=1
|A1= Latex
|B1= Matching Dye
|C1= Latex
|A2= Latex
|B2= Helium
|C2= Latex
|A3= Latex
|B3= Lead
|C3= Latex
|Output= Matching Balloon
}}
=== Creating glow sticks ===
Dye can also be used to craft glow sticks.{{only|education}}
{{Crafting
|nocat=1
|A1= Polyethylene
|B1= Hydrogen Peroxide
|C1= Polyethylene
|A2= Polyethylene
|B2= Matching Dye
|C2= Polyethylene
|A3= Polyethylene
|B3= Luminol
|C3= Polyethylene
|Output= Matching Glow Stick
}}
=== Dyeing water inside cauldrons ===
Water can be dyed in a cauldron by holding any dye in the hand and pressing {{Ctrl|use}} on a cauldron filled with water.{{only|bedrock}}
=== Signs ===
Dye can be {{control|used}} on a [[sign]] or a [[hanging sign]] to change the text color. {{IN|bedrock}}, [[ink sac]]s cannot be used for this purpose; black dye must be used to change the text to black.
=== Trading ===
Apprentice, journeyman and expert-level shepherd [[villager]]s buy any of the 12 dyes for an [[emerald]].
== Color values ==
The "color codes" are used to determine the color imparted on sheep, wolf and cat collars, firework stars, [[beacon]] beams, and dyed leather armor. The hex value is shown in the extended tooltips of dyed leather armor; however, to set the color using an NBT data tag in a [[command]], the decimal value must be used instead. The color values for firework stars are slightly different from the ones listed below, and use [[Item colors#Firework stars|these values]] instead.
{| class="wikitable" style="margin:2px; border: 1px solid silver; text-align: left;" data-description="Data values"
! rowspan=2 | Description
! colspan=2 style="text-align:center" | Color Code
|-
! Dec
! <abbr title="Hexadecimal color code">Hex</abbr>
|-
| style="text-align:center" | White || 16383998 || {{color|#F9FFFE}}
|-
| style="text-align:center" | Light gray || 10329495 || {{color|#9D9D97}}
|-
| style="text-align:center" | Gray || 4673362 || {{color|#474F52}}
|-
| style="text-align:center" | Black || 1908001|| {{color|#1D1D21}}
|-
| style="text-align:center" | Brown || 8606770 || {{color|#835432}}
|-
| style="text-align:center" | Red || 11546150 || {{color|#B02E26}}
|-
| style="text-align:center" | Orange || 16351261 || {{color|#F9801D}}
|-
| style="text-align:center" | Yellow || 16701501 || {{color|#FED83D}}
|-
| style="text-align:center" | Lime || 8439583 || {{color|#80C71F}}
|-
| style="text-align:center" | Green || 6192150 || {{color|#5E7C16}}
|-
| style="text-align:center" | Cyan || 1481884|| {{color|#169C9C}}
|-
| style="text-align:center" | Light blue || 3847130 || {{color|#3AB3DA}}
|-
| style="text-align:center" | Blue || 3949738 || {{color|#3C44AA}}
|-
| style="text-align:center" | Purple || 8991416 || {{color|#8932B8}}
|-
| style="text-align:center" | Magenta || 13061821 || {{color|#C74EBD}}
|-
| style="text-align:center" | Pink || 15961002 || {{color|#F38BAA}}
|}
== Sounds ==
{{edition|java}}:
{{Sound table
|rowspan=2
|sound=Dye.ogg
|subtitle=Dye stains
|source=block
|description=When dye is used on a [[sign]]
|id=item.dye.use
|translationkey=subtitles.item.dye.use
|volume=1.0
|pitch=1.0/0.9/0.95/1.1
|distance=16}}
{{Sound table
|subtitle=Dye stains
|source=player
|description=When dye is used on a [[sheep]]
|id=item.dye.use
|translationkey=subtitles.item.dye.use
|volume=1.0
|pitch=1.0/0.9/0.95/1.1
|distance=16
|foot=1}}
{{edition|bedrock}}:
{{Sound table
|type=bedrock
|sound=Dye.ogg
|source=sound
|description=When dye is used on a sign
|id=sign.dye.use
|volume=1.0
|pitch=1.0}}
{{Sound table
|rowspan=3
|sound=Water Splash Old.ogg
|source=block
|description=When dye is added to a cauldron
|id=cauldron.adddye
|volume=0.1
|pitch=1.0}}
{{Sound table
|source=block
|description=When armor is dyed using a cauldron
|id=cauldron.dyearmor
|volume=0.1
|pitch=1.0}}
{{Sound table
|source=block
|description=When dye is removed from armor using a cauldron
|id=cauldron.cleanarmor
|volume=0.1
|pitch=1.0
|foot=1}}
== Achievements ==
{{load achievements|Rainbow Collection;Tie dye outfit}}
== Video ==
{{Video note|These videos are outdated, as it does not include details of the [[Java Edition 1.7.2|1.7.2]] update's changes to the dyeing system/production chain.}}
<div style="text-align:center">
<span style="display:inline-block">{{yt|8YD7oauNZHE}}</span>
<span style="display:inline-block">{{yt|7tETaRt7STM}}</span>
</div>
== History ==
{{History|java beta}}
{{History||January 3, 2011|link=https://web.archive.org/web/0/http://notch.tumblr.com/post/2582321901/2011-here-we-go|Notch mentions adding a "paint" feature if he can figure out how.}}
{{History||January 10, 2011<ref group="n">Supposed time when fragment was filmed. Based on modified date of client.jar/gui/trap.png in [[Beta 1.2]].</ref>|link=https://www.youtube.com/watch?v=cBF2ugTzXqQ&t=181s|[[File:Red Dye (pre-release).png|32px]] Shown rose red in development as part of [[Minecraft: The Story of Mojang]].}}
{{History||1.2|[[File:Ink Sac JE1 BE1.png|32px]] [[File:Red Dye JE1 BE1.png|32px]] [[File:Green Dye JE1 BE1.png|32px]] [[File:Cocoa Beans JE1 BE1.png|32px]] [[File:Lapis Lazuli JE1 BE1.png|32px]] [[File:Purple Dye JE1 BE1.png|32px]] [[File:Cyan Dye JE1 BE1.png|32px]] [[File:Light Gray Dye JE1 BE1.png|32px]] [[File:Gray Dye JE1 BE1.png|32px]] [[File:Pink Dye JE1 BE1.png|32px]] [[File:Lime Dye JE1 BE1.png|32px]] [[File:Yellow Dye JE1 BE1.png|32px]] [[File:Light Blue Dye JE1 BE1.png|32px]] [[File:Magenta Dye JE1 BE1.png|32px]] [[File:Orange Dye JE1 BE1.png|32px]] [[File:Bone Meal JE1 BE1.png|32px]] Added dyes.
|[[File:Black Dye (Recreated).png|32px]] [[File:Red Dye (pre-release).png|32px]] [[File:Green Dye (Recreated).png|32px]] [[File:Brown Dye (Recreated).png|32px]] [[File:Blue Dye (Recreated).png|32px]] [[File:Purple Dye (Recreated).png|32px]] [[File:Cyan Dye (Recreated).png|32px]] [[File:Light Gray Dye (Recreated).png|32px]] [[File:Gray Dye (Recreated).png|32px]] [[File:Pink Dye (Recreated).png|32px]] [[File:Lime Dye (Recreated).png|32px]] [[File:Yellow Dye (Recreated).png|32px]] [[File:Light Blue Dye (Recreated).png|32px]] [[File:Magenta Dye (Recreated).png|32px]] [[File:Orange Dye (Recreated).png|32px]] [[File:White Dye (Recreated).png|32px]] Leftovers of old textures can be seen in [[items.png]] with 100% opacity. The white dye texture was reused for [[Sugar]].
| The colors were as follows:{{verify|Did the color codes remain the same between Beta 1.2 and Java 1.11.2?}}
{{:Color/Java Edition dye colors before 17w06a}}
}}
{{History|java}}
{{History||1.1|snap=11w49a|[[Sheep]] can now regrow their [[wool]] by eating [[grass block|grass]]. Dyed sheep regrow wool in their new color.}}
{{History||1.3.1|snap=12w19a|[[File:Cocoa Beans JE2.png|32px]] The texture of [[cocoa beans]] has been changed.}}
{{History|||snap=1.3|[[File:bone meal changes.gif|32px]] The textures of [[bone meal]], [[cactus green]], cocoa beans and [[rose red]] have been changed. The textures have been lowered one pixel.}}
{{History||1.4.2|snap=12w34a|Added the ability to dye leather [[armor]] and [[wolf]] collars.}}
{{History||1.4.4|snap=1.4.3|Color codes have been changed. The colors of red, brown, blue, purple, cyan, pink, light blue, magenta and orange were adjusted a little vividly.}}
{{History||1.6.1|snap=13w19a|[[Stained clay]] can now be crafted using dyes.}}
{{history||1.7.2|snap=13w36a|With the addition of new [[flower]]s, many secondary and tertiary dyes are now primary dyes.}}
{{History|||snap=13w41a|[[Stained glass]] can now be crafted using dyes.}}
{{History||1.8|snap=14w02a|As cleric [[villager]]s now sell lapis lazuli, all dyes have become fully renewable.}}
{{History|||snap=14w30a|Added [[banner]]s, which can be dyed.}}
{{History||1.9|snap=15w34a|Added [[shield]]s, which can be dyed indirectly by applying a matching [[banner]].}}
{{History||1.11|snap=16w39b|Dyes are now used to change the color of [[shulker box]]es.}}
{{History||1.12|snap=17w06a|Dyes are now used to craft [[concrete powder]].
|Color codes have been changed. All colors are adjusted more vividly. The changes were as follows:
{{:Color/Java Edition dye color changes in 17w06a}}
|Light blue dye, stained glass, and stained glass panes, did not change colors in this update. This means that they still use old colors.<ref name="unchanged dyes">{{Bug|MC-214643}}<br>{{Bug|MC-214641}}</ref>
}}
{{History|||snap=17w15a|Dyes can now apply color to white [[bed]]s.}}
{{History||1.13|snap=17w47a|The different data values for the <code>dye</code> ID have been split up into their own IDs.}}
{{History||1.14|snap=18w43a|[[Bone meal]], [[ink sac]]s, [[cocoa beans]] and [[lapis lazuli]] are no longer considered dyes.
|[[File:White Dye JE1 BE1.png|32px]] [[File:Black Dye JE1 BE1.png|32px]] [[File:Brown Dye JE1 BE1.png|32px]] [[File:Blue Dye JE1 BE1.png|32px]] Added [[white dye|white]], [[black dye|black]], [[brown dye|brown]] and [[blue dye]]s.
|"Rose Red", "Dandelion Yellow" and "Cactus Green" have been renamed to "Red Dye", "Yellow Dye" and "Green Dye", respectively.
|[[Glass pane]]s and [[carpet]]s can now be dyed.
|[[File:Light Gray Dye JE2 BE2.png|32px]] [[File:Gray Dye JE2 BE2.png|32px]] [[File:Red Dye JE2 BE2.png|32px]] [[File:Orange Dye JE2 BE2.png|32px]] [[File:Yellow Dye JE2 BE2.png|32px]] [[File:Lime Dye JE2 BE2.png|32px]] [[File:Green Dye JE2 BE2.png|32px]] [[File:Cyan Dye.png|32px]] [[File:Light Blue Dye JE2 BE2.png|32px]] [[File:Purple Dye JE2 BE2.png|32px]] [[File:Magenta Dye JE2 BE2.png|32px]] [[File:Pink Dye JE2 BE2.png|32px]] The textures of light gray, gray, red, orange, yellow, lime, green, cyan, light blue, purple, magenta, and pink dyes, have been changed. The color texture for light blue dye was not changed to reflect the updated colors from 1.12.<ref name="unchanged dyes"></ref>}}
{{History|||snap=18w44a|The color of the text on [[sign]]s can now be changed with dye.}}
{{History|||snap=18w49a|Yellow dyes can now be found in [[chest]]s in [[village]] mason houses.}}
{{History|||snap=18w50a|Green dyes can now be found in [[chest]]s in [[desert]] [[village]] houses.}}
{{History|||snap=19w05a|Added the [[wandering trader]], which can sell any type of dye.}}
{{History|||snap=19w11a|All 16 types of dyes can now be [[trading|bought]] by shepherd villagers.}}
{{History||1.16.2|snap=Pre-release 2|Reversed the order of dyes to match other colored items in the [[Creative inventory]].<ref name="reverse dye">{{Bug|MC-136553}}</ref>
|Regrouped dyes in the Creative inventory such that white, blue, brown, and black dyes are within and not [[cocoa beans]], [[ink sacs]], [[lapis lazuli]], and [[bone meal]].<ref name="regroup dye">{{Bug|MC-177684}}</ref>}}
{{History||1.17|snap=20w45a|Added [[candle]]s, which can be dyed.}}
{{History|||snap=21w03a|Added a sound for applying dyes.}}
{{History|||snap=21w19a|Candles can no longer be dyed.}}
{{History|||snap=Pre-release 1|Candles can now once again be dyed.}}
{{History||1.20<br>(Experimental)|link=1.19.3|snap=22w42a|The color of the text on [[hanging sign]]s can now be changed with dye.}}
{{History||1.20<br>(Experimental)|link=1.19.4|snap=23w07a|[[Torchflower]]s can now be crafted into orange dye.|[[Pink petals]] can now be crafted into pink dye.}}
{{History||1.20|snap=23w12a|[[Pitcher plant]]s can now be crafted into cyan dye.|Blue, light blue, orange, white, and yellow dye can now be found in [[suspicious gravel]] and [[suspicious sand]] in [[trail ruins]].}}
{{History|||snap=23w14a|Pitcher plants can now craft two [[cyan dye]] instead of one.}}
{{History|||snap=23w16a|Blue, light blue, orange, white, and yellow dye no longer generates in [[suspicious sand]] in [[trail ruins]].|Due to the split of the archaeological loot tables for the suspicious gravel within the [[trail ruins]]; blue, light blue, orange, white, and yellow dye now are in the common loot.}}
{{History|pocket alpha}}
{{History||v0.3.0|[[File:Bone Meal JE1 BE1.png|32px]] [[File:Light Gray Dye JE1 BE1.png|32px]] [[File:Gray Dye JE1 BE1.png|32px]] [[File:Ink Sac JE1 BE1.png|32px]] [[File:Cocoa Beans JE1 BE1.png|32px]] [[File:Red Dye JE1 BE1.png|32px]] [[File:Orange Dye JE1 BE1.png|32px]] [[File:Yellow Dye JE1 BE1.png|32px]] [[File:Lime Dye JE1 BE1.png|32px]] [[File:Green Dye JE1 BE1.png|32px]] [[File:Cyan Dye JE1 BE1.png|32px]] [[File:Light Blue Dye JE1 BE1.png|32px]] [[File:Lapis Lazuli JE1 BE1.png|32px]] [[File:Purple Dye JE1 BE1.png|32px]] [[File:Magenta Dye JE1 BE1.png|32px]] [[File:Pink Dye JE1 BE1.png|32px]] Added dyes. Only [[dandelion yellow]] and [[lapis lazuli]] are currently obtainable and have functionality.}}
{{History||v0.3.2|[[Cactus green]] is now obtainable by smelting [[cacti]].}}
{{History||v0.3.3|[[Bone meal]] is now obtainable via [[crafting]].}}
{{History||v0.4.0|[[Cyan dye]], [[light blue dye]], [[lime dye]], [[magenta dye]], [[orange dye]], [[pink dye]], and [[purple dye]] are now obtainable via crafting.
|[[Rose red]] is now obtainable by smelting red [[mushroom]]s.
|All available dyes, excluding bone meal, can now be used to craft their respective [[wool]] color.}}
{{History||v0.8.0|snap=build 1|[[File:Cocoa Beans JE3 BE2.png|32px]] The texture of cocoa beans has been changed.}}
{{History|||snap=build 3|[[Ink sac]]s, [[cocoa bean]]s, [[gray dye]], and [[light gray dye]] are now available in the [[creative]] [[inventory]].
|Rose red can now be obtained from [[beetroot]]s.}}
{{History||v0.9.0|snap=build 1|Cocoa beans can now be obtained from [[cocoa pod]]s.
|The [[rose]] has been removed and replaced with a new poppy [[flower]] that can be crafted into rose red.}}
{{History|||snap=build 3|All new [[flower]]s can now be [[crafting|crafted]] into dyes. Because of this, many secondary and tertiary dyes are now primary dyes.
|[[Gray dye]] and [[light gray dye]] can now be obtained in [[survival]].}}
{{History|||snap=build 11|[[Terracotta|Stained clay]] can now be crafted using dyes.}}
{{History||v0.11.0|snap=build 1|[[Ink sac]]s can now be obtained from [[squid]].
|Added the ability to dye [[wolf]] collars.}}
{{History||v0.12.1|snap=build 1|Red [[mushroom]]s can no longer be smelted to obtain [[rose red]].}}
{{History||v0.14.0|snap=build 1|[[Cauldron]]s now used for leather dyeing, by applying a dye to a [[water]]-filled cauldron.}}
{{History||v0.16.0|snap=build 1|[[Cocoa bean]]s can no longer be crafted.}}
{{History|pocket}}
{{History||1.0.0|snap=alpha 0.17.0.1|Added a ''Dye'' button for [[sheep]].
|Added [[shulker]]s, which can be dyed.
|Added [[stained glass]]. Stain glass cannot be [[crafting|crafted]], but purple glass generates in [[end city|end cities]].}}
{{History||1.1.0|snap=alpha 1.1.0.0|Dyes can now apply color to a white [[bed]]s.
|Dyes are now used to craft [[concrete powder]].
|The color palette has been changed.}}
{{History|bedrock}}
{{History||1.2.0|snap=beta 1.2.0.2|Dyes can now be used for [[banner]] crafting.
|Dyes can now be used to craft [[firework star]]s.
|[[Stained glass]] is now [[crafting|craftable]], using dyes.}}
{{History||1.4.0|snap=beta 1.2.20.1|[[Lime dye]] can now be obtained from smelting [[sea pickle]]s.
|Dyes can now used to craft [[glow stick]]s and [[balloon]]s.}}
{{History||1.8.0|snap=beta 1.8.0.8|Dyes can now be used to dye [[cat]] collars.}}
{{History|||snap=beta 1.8.0.10|[[File:White Dye JE1 BE1.png|32px]] [[File:Black Dye JE1 BE1.png|32px]] [[File:Brown Dye JE1 BE1.png|32px]] [[File:Blue Dye JE1 BE1.png|32px]] Added [[white dye|white]], [[brown dye|brown]], [[black dye|black]] and [[blue dye]]s, which can be crafted from [[lapis lazuli]], [[bone meal]], [[cocoa beans]] and [[ink sac]]s. This, however, the later four still use as dyes.<ref>{{Bug|MCPE-42473}}</ref>
|"Rose Red", "Dandelion Yellow" and "Cactus Green" have been renamed to "Red Dye", "Yellow Dye" and "Green Dye", respectively.}}
{{History||1.9.0|snap=beta 1.9.0.0|Blue and white dye can now be obtained from [[cornflower]]s and [[lily of the valley]]s.}}
{{History||1.10.0|snap=beta 1.10.0.3|[[Glass pane]]s and [[carpet]]s can now be dyed.
|Only a single dye is now required to apply a banner pattern in a [[loom]].
|Various dyes except black dye, white dye, brown dye and blue dye are now [[trading|sold]] by [[wandering trader]]s.
|[[File:Bone Meal JE2 BE2.png|32px]] [[File:Light Gray Dye JE2 BE2.png|32px]] [[File:Gray Dye JE2 BE2.png|32px]] [[File:Ink Sac JE2 BE2.png|32px]] [[File:Cocoa Beans JE4 BE3.png|32px]] [[File:Red Dye JE3 BE3.png|32px]] [[File:Orange Dye JE2 BE2.png|32px]] [[File:Yellow Dye JE2 BE2.png|32px]] [[File:Lime Dye JE2 BE2.png|32px]] [[File:Green Dye JE2 BE2.png|32px]] [[File:Cyan Dye.png|32px]] [[File:Light Blue Dye JE2 BE2.png|32px]] [[File:Lapis Lazuli JE2 BE2.png|32px]] [[File:Purple Dye JE2 BE2.png|32px]] [[File:Magenta Dye JE2 BE2.png|32px]] [[File:Pink Dye JE2 BE2.png|32px]] The textures of bone meal, light gray, gray, ink sac, cocoa beans, red, orange, yellow, lime, green, cyan, light blue, lapis lazuli, purple, magenta, and pink dyes have been changed.}}
{{History||1.11.0|snap=beta 1.11.0.4|Dye can now be [[trading|sold]] to shepherd [[villager]]s.}}
{{History||1.16.210|snap=beta 1.16.210.59|The color of the text on [[sign]]s can now be changed with dye.}}
{{History|||snap=beta 1.16.210.60|The ability to dye the color of the text on [[sign]]s was temporarily removed.}}
{{History||1.16.220|snap=beta 1.16.220.50|The color of the text on [[sign]]s can now be changed with dye again.}}
{{History||1.17.10|snap=beta 1.17.10.22|Added [[candles]], which can be dyed.}}
{{History|console}}
{{History||xbox=TU1|xbone=CU1|ps=1.0|wiiu=Patch 1|switch=1.0.1|[[File:Bone Meal JE1 BE1.png|32px]] [[File:Light Gray Dye JE1 BE1.png|32px]] [[File:Gray Dye JE1 BE1.png|32px]] [[File:Ink Sac JE1 BE1.png|32px]] [[File:Cocoa Beans JE1 BE1.png|32px]] [[File:Red Dye JE1 BE1.png|32px]] [[File:Orange Dye JE1 BE1.png|32px]] [[File:Yellow Dye JE1 BE1.png|32px]] [[File:Lime Dye JE1 BE1.png|32px]] [[File:Green Dye JE1 BE1.png|32px]] [[File:Cyan Dye JE1 BE1.png|32px]] [[File:Light Blue Dye JE1 BE1.png|32px]] [[File:Lapis Lazuli JE1 BE1.png|32px]] [[File:Purple Dye JE1 BE1.png|32px]] [[File:Magenta Dye JE1 BE1.png|32px]] [[File:Pink Dye JE1 BE1.png|32px]] Added dyes.}}
{{History||xbox=TU9|[[File:Cocoa Beans JE3 BE2.png|32px]] The texture of cocoa beans has been changed.}}
{{History||xbox=none|xbone=none|ps=1.83|wiiu=none|switch=none|[[File:White Dye JE1 BE1.png|32px]] [[File:Black Dye JE1 BE1.png|32px]] [[File:Brown Dye JE1 BE1.png|32px]] [[File:Blue Dye JE1 BE1.png|32px]] Added [[white dye|white]], [[black dye|black]], [[brown dye|brown]], and [[blue dye|blue]] dyes, which can crafted from [[bone meal]], [[ink sac]], [[cocoa beans]], and [[lapis lazuli]].
|"Rose Red", "Dandelion Yellow" and "Cactus Green" have been renamed to "Red Dye", "Yellow Dye" and "Green Dye", respectively.}}
{{History||ps=1.90|[[File:Bone Meal JE2 BE2.png|32px]] [[File:Light Gray Dye JE2 BE2.png|32px]] [[File:Gray Dye JE2 BE2.png|32px]] [[File:Ink Sac JE2 BE2.png|32px]] [[File:Cocoa Beans JE4 BE3.png|32px]] [[File:Red Dye JE2 BE2.png|32px]] [[File:Orange Dye JE2 BE2.png|32px]] [[File:Yellow Dye JE2 BE2.png|32px]] [[File:Lime Dye JE2 BE2.png|32px]] [[File:Green Dye JE2 BE2.png|32px]] [[File:Cyan Dye.png|32px]] [[File:Light Blue Dye JE2 BE2.png|32px]] [[File:Lapis Lazuli JE2 BE2.png|32px]] [[File:Purple Dye JE2 BE2.png|32px]] [[File:Magenta Dye JE2 BE2.png|32px]] [[File:Pink Dye JE2 BE2.png|32px]] The textures of bone meal, light gray, gray, ink sac, cocoa beans, red, orange, yellow, lime, green, cyan, light blue, lapis lazuli, purple, magenta, and pink dyes have been changed.}}
{{History|3ds}}
{{History||0.1.0|[[File:Bone Meal JE1 BE1.png|32px]] [[File:Light Gray Dye JE1 BE1.png|32px]] [[File:Gray Dye JE1 BE1.png|32px]] [[File:Ink Sac JE1 BE1.png|32px]] [[File:Cocoa Beans JE3 BE2.png|32px]] [[File:Red Dye JE1 BE1.png|32px]] [[File:Orange Dye JE1 BE1.png|32px]] [[File:Yellow Dye JE1 BE1.png|32px]] [[File:Lime Dye JE1 BE1.png|32px]] [[File:Green Dye JE1 BE1.png|32px]] [[File:Cyan Dye JE1 BE1.png|32px]] [[File:Light Blue Dye JE1 BE1.png|32px]] [[File:Lapis Lazuli JE1 BE1.png|32px]] [[File:Purple Dye JE1 BE1.png|32px]] [[File:Magenta Dye JE1 BE1.png|32px]] [[File:Pink Dye JE1 BE1.png|32px]] Added dyes from [[Pocket Edition v0.15.4 alpha]].}}
{{History|foot}}
<gallery>
Pre-release dyes.png|Pre-release dye textures hidden within [[Items.png]].
</gallery>
;Notes
{{reflist|group=n}}
== Gallery ==
<gallery>
White Dye.png|White Dye
Light Gray Dye.png|Light Gray Dye
Gray Dye.png|Gray Dye
Black Dye.png|Black Dye
Brown Dye.png|Brown Dye
Red Dye.png|Red Dye
Orange Dye.png|Orange Dye
Yellow Dye.png|Yellow Dye
Lime Dye.png|Lime Dye
Green Dye.png|Green Dye
Cyan Dye.png|Cyan Dye
Light Blue Dye.png|Light Blue Dye
Blue Dye.png|Blue Dye
Purple Dye.png|Purple Dye
Magenta Dye.png|Magenta Dye
Pink Dye.png|Pink Dye
</gallery>
==Issues==
{{issue list}}
== Trivia ==
* Players can obtain each one of every color with 1 cocoa bean, 2 yellow dye, 2 ink sac, 3 green dye, 4 lapis lazuli, 4 red dye, and 6 bone meal (2 bones).
* The dyed sheep breeding behavior mirrors [[wikipedia:Lamarckism|Lamarck's theory]], in which the organisms evolve inheriting the external changes and adaptations of the previous generation, transmitting them to their offspring.
* In ''Bedrock Edition'', tertiary colors, along with their regular crafting recipes, can be crafted with primary colors. E.g.: Magenta can be crafted with one rose red and two bone meals.
* The colors of the dyes match the chat colors in [[color codes]] except for brown (dye only), light aqua, and gold (color codes only).
* The texture for light blue dye still uses the color from prior to the 1.12 World of Color update.<ref name="unchanged dyes"></ref>
== References ==
{{reflist}}
== External Links ==
* Tools for calculating leather dye combination: [https://minecraft.tools/en/armor.php minecraft.tools] (webapp); [https://github.com/pudquick/pyMCdyes/ pyMCDyes] (open-source Python script, outdated); [https://anrar4.github.io/DyeLeatherArmor/ DyeLeatherArmor]: a tool for calculating an exact crafting recipe for any sRGB color
{{Items}}
[[Category:Dyes]]
[[Category:Renewable resources]]
[[cs:Barvivo]]
[[de:Farbstoff]]
[[es:Tinte]]
[[fr:Teinture]]
[[hu:Színezés]]
[[it:Colorante]]
[[ja:染料]]
[[ko:염료]]
[[nl:Kleurstof]]
[[pl:Barwniki]]
[[pt:Corante]]
[[ru:Красители]]
[[th:สีย้อม]]
[[uk:Барвники]]
[[zh:染料]]</li><li>[[Minecart|Minecart]]<br/>{{about|the rideable minecart in Minecraft|other uses|Minecart (disambiguation)|}}
{{distinguish|Minecraft}}
{{ItemEntity
|image=Minecart.png
|renewable=Yes
|stackable=No
|size=Height: 0.7 Blocks<br>Width: 0.98 Blocks
|networkid='''[[JE]]''': 10
|drops={{ItemLink|Minecart}} (1)
|health={{hp|6}}
}}
A '''minecart''' is a train-like vehicle [[entity]] that runs on [[Rail (disambiguation)|rail]]s.
== Obtaining ==
Minecarts can be retrieved by {{control|attack|text=attacking}} them for some time. Minecarts can also be retrieved with one attack from a [[pickaxe]] provided the player's attack cooldown is reset. A minecart is also destroyed if it makes contact with a [[cactus]], or if shot with a [[bow]] and arrow.
=== Crafting ===
{{Crafting
|A2= Iron Ingot
|C2= Iron Ingot
|A3= Iron Ingot
|B3= Iron Ingot
|C3= Iron Ingot
|Output= Minecart
|type= Transportation
}}
=== Entity loot ===
[[Minecart with command block]]s can be given to the player with the {{cmd|/give}} command or through the creative inventory under certain conditions{{only|java}}; [[minecart with spawner]]s{{only|java}} are available only via the {{cmd|/summon}} command. Each drop 1 minecart when broken.
== Usage ==
[[File:RideableMinecart.png|thumb|right|A rideable minecart on rails surrounded by wood slabs]]
A minecart can be placed in the same manner as most blocks but can be placed only on top of a [[rail]]. Once placed, it may be derailed by pushing it off the end of the track. After this, it can be railed again by placing a rail directly below it or pushing it onto a track.
=== Crafting ingredient ===
{{crafting usage}}
=== Transportation ===
[[File:Steve Riding a Minecart.png|thumb|right|upright|[[Steve]] riding a minecart]]
{{see also|Transportation|Riding}}
Minecarts can be ridden by {{control|use|text=pressing the "use" control}} on them. Once inside, an external impulse may be needed to make the minecart start moving. The player can slowly move the minecart forward while riding it, by pressing {{control|forward}}. If a mob walks in front of an empty minecart, it is pulled into the cart.
After rolling off of the end of a track, a minecart can be pushed around on open blocks. If a minecart is pushed onto or falls onto tracks, it "snaps" to those tracks. When riding a minecart, if the minecart lands on a rail, the player does not take any fall damage. <!--Minecarts and arrows don't interact anymore.-->
Unlike with [[bed]]s, there is no message above the hotbar for attempting to enter a fully occupied minecart.<ref>{{Cite bug|MC|161251|Attempting to enter an occupied bed displays a message over the hotbar, but attempting to enter an occupied vehicle does not|date=September 18, 19|resolution=Works as Intended}}</ref>
=== Dismounting ===
Players can exit the minecart by pressing {{control|sneak}}. When a player or mob dismounts a minecart, either by choice, by breaking the minecart, or by passing over an [[activator rail]], the minecart tries to find a safe ejection destination one block away. First it checks the eight horizontally adjacent blocks in the following order of priority relative to direction of travel: right, left, rear right, rear left, front right, front left, rear, front. A valid destination has a block underneath with a solid (not necessarily full) top surface and a space with enough headroom and width for the passenger to fit in when standing at the center. The space can even contain liquid or have open trapdoors if the mob is slim enough, and presence of other mobs doesn't matter. If no valid destination exists on same horizontal level, the minecart then checks the blocks one above, then one below. For a player, the minecart also checks for crawlable destinations. If still none, the minecart chooses its own location. Once the minecart picks a destination, it actually ejects the passenger one block up in the air and the passenger settles down on its own. Under a low ceiling this may cause one tick of suffocation damage. The air drop exists to allow passengers to land on carpet or bottom slabs.
== Behavior ==
=== Speed ===
Minecarts have a predefined speed limit of exactly 8 blocks per second. However, this speed limit does not change the minecart's speed value but instead limits how far a minecart can travel each tick to 0.4 blocks. Therefore, a minecart moving from powered rail to normal rail will move at constant speed for some time until decelerating because its internal speed value is over its speed limit of 8.
[[Powered rail]]s powered by redstone give minecarts a boost of speed. Speed is gradually decreased (due to drag) if there are no powered rails to assist its movement, and an unpowered powered rail slows down a minecart rapidly. The speed decreases at a faster rate when going uphill, compared to when moving horizontally. A minecart does not need powered rails to assist its movement down a hill.
<!-- Is this comparison to real-life physics necessary? - One unit of kinetic energy could be defined as the energy gained by a cart going down a one-block slope and lost by a cart when it goes up a one-block slope. If a 45-degree downward slope is connected directly into an upward slope, an initial height of 60 blocks results in a final height of 40 blocks, a loss of 20 units of potential energy. But if 20 sections of flat track are inserted between the slopes, the final height is 35. This implies that one unit of energy is lost for every 4 sections of horizontal track traveled with an initial stored energy of between 60 and 40. At much lower speeds, much less energy is lost, implying that the energy lost is a percentage of the cart's current energy. The above gives about 0.5% energy loss per section of track. One implication of this is that more energy lost when the cart has more energy, so a gradual slope should allow you to travel much farther distances than a steep slope followed by a long flat section. (This is different from real-life physics, where friction does not increase with velocity. However, it may be an attempt to mirror air resistance, which ''does'' increase with velocity.) -->
Anything in the way of the minecart brings it to a stop. Once a minecart has left the track, it rapidly decelerates within one or two blocks. When mobs touch a minecart, they affect it in the same way a player would, i.e. mobs that move up against a still cart set it in motion.
If a minecart is moving fast enough, it can skip across one block without a track and reattach to track on the other side, at significantly reduced energy and speed. A minecart's hitbox can skip turns if the minecart is boosted using enough powered rails.<ref>{{Cite bug|MC|179971|Minecart skips turns if too fast|date=April 22, 2020}}</ref>
The speed and momentum of a minecart can differ depending on whether or not it is empty, and in the case where a minecart has a container, the speed can differ depending on the quantity and type of items inside.
=== Merged minecarts ===
{{IN|java}}, two or more minecarts can be merged by pushing them into each other so that they overlap. Merged minecarts move as a collective, like a train, and can be useful for long-distance transport because while moving in a straight line, they ''do not need powered rails to keep their speed''.
To summarize:
* Minecarts can also be merged by ''dropping'' a minecart on another minecart.
* Merged minecarts do not lose speed while traveling on straight rails
* ''Corners'' in the rails might cause merged minecarts to unmerge.
* Minecarts with ''chest'' (even fully filled) can also be merged and also do ''not'' require powered rails.
=== Distance traveled by empty carts starting on a downward slope ===
This table shows the distance traveled by an unoccupied minecart on a downward slope, with a boost (or no boost). The most efficient way is to use only 1 boost at the bottom of the incline on the flat surface. Using 2 increases distance by about 20% or 1.5 blocks. All distance trends based on the height seem to be logarithmic.
The carts started from rest, on a slope Height blocks up.
{| class="wikitable" data-description="Distance traveled"
|-
! Height !! No Boost !! Bottom !! Bottom and Top !! All boosts on incline and bottom
|-
| 1 || 2.77m || 8.77 || 10.8 || 10.8
|-
| 2 || 4.59m || 9.59 || 10.83 || 13.37
|-
| 3 || 5.81m || 9.81 || 11.66 || 15.12
|-
| 4 || 7.04m || 10.04 || 12.46 || 16.95
|-
| 5 || 7.87m || 10.87 || 12.29<!--(Yes, it did actually travel less)--> || 17.95
|-
| 10 || 11.65m || 13.38 || 15.12 || 21.68
|-
| 100 || 15.87m || 17.05 || 17.54 || 25.34
|}
=== Collision ===
Minecarts are about the same size as a block (1×1). Because of this, a ladder, door, or trapdoor prevents it from falling down a 1×1 hole. Carts on [[rail]]s also ignore collision in certain situations. A cart traveling uphill, downhill, or on a curve with a block placed in front of it, goes through the block.<ref>{{Cite bug|MC|8004|Minecarts glitch through the stop block of a track that ends with a turn or a downward slope|date=January 20, 2013}}</ref>
A minecart that reaches the end of a rail up against an opaque solid block bounces back, but if the block is transparent then it stops. The minecart can even bounce against an opaque block from a standstill if the rail underneath is powered. A player or mob riding in a minecart does not collide with or suffocate in any transparent blocks but suffocates inside opaque blocks.
Minecarts are completely unaffected by [[ice]], [[packed ice]], and [[blue ice]]<ref>{{Cite bug|MC|8265|Minecarts don't slide on any sort of ice|date=January 25, 2013}}</ref>; they can also be destroyed by coming in contact with [[lava]] or [[fire]].
=== Mobs ===
{{missing information|section|some other mobs that cannot be picked up by minecarts}}
[[File:Minecart shake.gif|thumb|right|Minecart shaking due to being on top of an activator rail.]]
Mobs can ride minecarts, but cannot control them. Mobs cannot exit the minecart unless the minecart is destroyed or moves onto an active [[activator rail]].<ref>{{bug|MC-3866||Endermen, Tamed Wolves and Ocelots cannot teleport when in a Minecart|WAI}}</ref> However, {{in|bedrock}}, [[endermen]] are able to teleport out of minecarts.<ref>{{bug|MCPE-31761||Endermen can still teleport out of the boats and minecarts}}</ref>
A mob can ride a minecart when pushing by a moving minecart on rails {{in|java}} or when colliding with a minecart {{in|bedrock}}. It is easier to pick up a mob when a minecart is turning. {{IN|bedrock}}, [[armor stand]]s can also be picked up.
Most mobs can be picked up by minecarts, except [[ender dragon]]s, [[warden]]s, and [[wither]]s. {{IN|java}}, [[iron golem]]s cannot be picked up either.
A [[jockey]] riding a minecart automatically accelerates the minecart.<ref>{{bug|MC-71998||Minecarts that have passengers within them riding mobs can move automatically when not on rails}}</ref> Mobs in minecarts don't despawn, and don't count towards the mob cap.{{only|java}}<ref>{{bug|MC-182897||Some passenger mobs don't count to the mob cap|WAI}}</ref>
=== Boats ===
{{exclusive|java|section=yes}}
{{UsesBug|section=yes}}
Due to the bug {{bug|MC-113871}}, [[boat]]s can be captured by minecarts. When a boat is placed in a minecart, the minecart travels faster on rails, approximately as fast as on powered rails. The movement in the boat minecart is glitchy and moving forward with the W key moves the cart backward relative to the player, and vice versa for moving backward with the S key. The minecart also moves on the rail-less ground at a crawling speed, but it does not float in the water despite being in a boat.
Using this glitch can be far more resource-efficient since the boat minecart can move at the speed of a powered rail track on flat ground and on slopes. Another physics glitch with the boat minecart is the extreme reduction in friction when the minecart is on rails, which is similar to the lack of friction when a boat is riding on ice. This glitch can be done in Survival without cheats simply by pushing a minecart into a boat on the track. This bug is now patched.
== Sounds ==
{{Edition|Java}}:<br>
Minecarts use the Friendly Creatures sound category for entity-dependent sound events.<ref group="sound" name="oddcats" />
{{Sound table
|sound=Minecart inside.ogg
|subtitle=MC-177078
|source=Friendly Creatures <ref group="sound" name="oddcats">{{Cite bug|MC|42132|The sounds of minecarts aren't controlled by the correct sound slider|date=December 13, 2013}}</ref>
|overridesource=1
|description=While the player is inside of a moving minecart
|id=entity.minecart.inside
|translationkey=-
|volume=0.0-0.75 <ref group=sound name=insidevolume>Based on horizontal speed; it is clamped between 0.0 and 0.75 and will not play if speed is less than 0.01</ref>
|pitch=1.0
|distance=16 (technical) / rider only (effective)}}
{{Sound table
|sound=Minecart inside underwater1.ogg
|sound2=Minecart inside underwater2.ogg
|sound3=Minecart inside underwater3.ogg
|subtitle=MC-204124
|source=Friendly Creatures <ref group="sound" name="oddcats"/>
|overridesource=1
|description=While inside of a moving minecart when the player's eye level is underwater
|id=entity.minecart.inside.underwater
|translationkey=-
|volume=0.0-0.75 <ref group=sound name=insidevolume/>
|pitch=1.0
|distance=16 (technical) / rider only (effective)}}
{{Sound table
|sound=Minecart rolling.ogg
|subtitle=Minecart rolls <ref group="sound">Shows far less often than it should - see {{bug|MC-181831}}</ref>
|source=Friendly Creatures <ref group="sound" name="oddcats"/>
|overridesource=1
|description=While a minecart is moving
|id=entity.minecart.riding
|translationkey=subtitles.entity.minecart.riding
|volume=0.0-0.35 <ref group=sound>Relates linearly with horizontal velocity (max 0.5)</ref>
|pitch=0.0-1.0 <ref group=sound>Will increase by 0.0025 per tick if the minecart's horizontal velocity is more than 0.01</ref>
|distance=16
|foot=1}}
{{Edition|Bedrock}}:
{{Sound table
|type=bedrock
|sound=Minecart inside.ogg
|source=neutral
|description=While the player is inside of a moving minecart
|id=minecart.inside}}
{{Sound table
|sound=Minecart rolling.ogg
|source=neutral
|description=While a minecart is moving
|id=minecart.base
|foot=1}}
== Data values ==
=== ID ===
{{edition|java}}:
{{ID table
|edition=java
|firstcolumnname=Item
|showforms=y
|generatetranslationkeys=y
|displayname=Minecart
|spritetype=item
|nameid=minecart
|form=item
|foot=1}}
{{ID table
|edition=java
|generatetranslationkeys=y
|firstcolumnname=Entity
|displayname=Minecart
|spritetype=entity
|nameid=minecart
|foot=1}}
{{edition|bedrock}}:
{{ID table
|edition=bedrock
|firstcolumnname=Item
|shownumericids=y
|showforms=y
|notshowbeitemforms=y
|generatetranslationkeys=y
|displayname=Minecart
|spritetype=item
|nameid=minecart
|id=370
|form=item
|foot=1}}
{{ID table
|edition=bedrock
|firstcolumnname=Entity
|shownumericids=y
|generatetranslationkeys=y
|displayname=Minecart
|spritetype=entity
|nameid=minecart
|id=84
|foot=1}}
=== Entity data ===
Minecarts have entity data associated with them that contain various properties of the entity.
{{el|java}}:
{{main|Entity format}}
{{/ED}}
{{el|bedrock}}:
: See [[Bedrock Edition level format/Entity format]]
== Achievements ==
{{load achievements|On A Rail}}
== History ==
{{History|java infdev}}
{{History||20100618|[[File:Minecart JE1.png|32px]] [[File:Minecart (item) JE1.png|32px]] Added minecarts.
|Minecarts are not rideable but instead are used to store things in.
|Right-clicking minecarts opens them like a [[chest]] (with the container called "Minecart". Filling them up makes the [[dirt]] layer inside them rise.}}
{{History||20100624|[[File:Minecart JE2.png|32px]] [[File:Minecart (item) JE2 BE1.png|32px]] The entity model and item texture of minecarts have been changed.
|The minecart mechanics have been changed to being rideable, removing their ability to store items.
| Minecarts now render a chest inside for unknown reasons.}}
{{History|java alpha}}
{{History||v1.0.4|[[File:Minecart JE3 BE1.png|32px]] Removed the phantom chest from minecarts.
|A [[sitting]] animation for riding minecarts has been added.}}
{{History||v1.0.14|Minecarts are now used to craft [[minecart with furnace]] and [[minecart with chest]].}}
{{History||v1.2.2|Minecarts now appear to other players and can be ridden in multiplayer.
|Minecarts are no longer fully solid - they no longer block movement, and can no longer be stood on top of.}}
{{History|java beta}}
{{History||1.5|Minecarts now break faster with hands.
|[[Powered rail]]s have been introduced, which enables minecarts to move automatically, although previous methods of boosting no longer works, or does not work as effectively.
|The [[detector rail]]s have been introduced for use in detecting minecarts. Prior to this update, carts were detected by using [[pressure plate]]s in line with cart tracks. This had the often undesirable effect of dramatically slowing or even stopping the minecart, which limited the use of this design mostly to boosters.}}
{{History||1.6|snap=Test Build 3|A minecart now transfers any [[Damage#Fall damage|fall damage]] it suffers onto its rider and is not destroyed upon impact.}}
{{History||1.8|snap=Pre-release|If the [[player]] punches a minecart when descending from a jump, it shows the [[Damage#Critical hit|critical hit]] animation. This also happens if the player punches the cart while still in it.}}
{{History|java}}
{{History||1.0.0|snap=Beta 1.9 Prerelease|[[Daniel Rosenfeld|C418]] posted a [[sound]] showing the sound that minecarts make.}}
{{History|||snap=Beta 1.9 Prerelease 6|The texture of minecarts has changed slightly.}}
{{History||1.3.1|snap=12w15a|Minecarts can now be shot out from [[dispenser]]s.}}
{{History|||snap=12w21b|The [[player]] no longer spawns on top/inside of the minecart after getting out. Instead, the player gets out a few [[block]]s away. Also, the player can nudge a stationary minecart while inside it to move onto a [[Powered Rail|powered rail]], etc.}}
{{History||1.4.2|snap=12w38b|[[Sound]]s for minecarts have been added.}}
{{History||1.5|snap=13w02a|Minecarts can now be edited with a third-party program to show any [[block]] inside of it (it does not take on the characteristics of this block), as well as make it take on the characteristics of any cart.
|Minecart types no longer all share the same [[entity]] ID – <code>Minecart</code> – and are no longer distinguished by a <code>Type</code> field. They have been given separate entity IDs.
|Minecarts are now used to craft [[TNT minecart]]s.}}
{{History|||snap=13w03a|Minecarts are now used to craft [[hopper minecart]]s.}}
{{History|||snap=13w06a|Added [[minecart with spawner]].}}
{{History||1.6.2|snap=release|A [[player]] in a moving minecart no longer turns with the minecart.}}
{{History||1.7.2|snap=13w39a|Added [[minecart with command block]].}}
{{History||1.8|snap=14w11a|Minecart physics have been changed - they now go faster and further, can derail at corners if going too fast and refuse to go uphill and they can also (if going fast enough) go over 1 [[block]].
|The collision and position handling of minecarts have been improved.}}
{{History|||snap=14w17a|All changes to old minecart physics used before 14w11a have been reverted.}}
{{History||1.9.1|snap=pre2|Extreme typos in minecarts with hoppers and chests, reading "''container.minecart'''' have been fixed.}}
{{History||1.11|snap=16w32a|The [[entity]] ID has been changed from <code>MinecartRideable</code> to <code>minecart</code>.
|The player's [[hunger]] bar is now visible when riding in a minecart.}}
{{History||1.13|snap=17w47a|Prior to [[Java Edition 1.13/Flattening|''The Flattening'']], this [[item]]'s numeral ID was 328.}}
{{History||1.14|snap=18w43a|[[File:Minecart JE4 BE2.png|32px]] [[File:Minecart (item) JE3 BE2.png|32px]] The textures of minecarts have been changed.}}
{{History|||snap=19w13a|Minecarts now move much slower when pushed along standard [[rail]]s using the W key, even slower on unpowered golden rails, and cannot be pushed off of unpowered golden rails without the [[player]] looking at a certain angle.}}
{{History||1.16|snap=20w09a|Minecart now checks dismount position height against entity height.}}
{{History|||snap=20w16a<!--cannot confirm due to how assets are handled - assuming this due to MC-91163 fix version-->|Minecarts no longer have subtitles for movement.}}
{{History|||snap=20w18a|Mobs in minecarts no longer [[Spawn#Despawning|despawn]].}}
{{History||1.17|snap=20w45a|Minecarts can now move in [[water]].}}
{{History||1.19|snap=22w13a|Minecarts no longer drop when breaking a [[Minecart with Chest|minecart with chest]], [[Minecart with Hopper|hopper]], [[Minecart with Furnace|furnace]], or [[Minecart with TNT|TNT]].<ref>{{bug|MC-249493|||Fixed}}</ref>}}
{{History||1.20|snap=23w16a|Sniffers can now enter [[minecart]]s.}}
{{History|pocket alpha}}
{{History||v0.8.0|snap=build 2|[[File:Minecart JE3 BE1.png|32px]] [[File:Minecart (item) JE2 BE1.png|32px]] Added minecarts.}}
{{History|||snap=build 3|Minecarts now ride smoother.}}
{{History||v0.13.0|snap=build 1|[[Sound]]s for minecarts have been added.}}
{{History|||snap=build 2|Minecarts now stack on top of each other.}}
{{History||v0.14.0|snap=build 1|Minecarts can now be used to craft [[Minecart with Chest|storage]], [[Minecart with TNT|TNT]], and [[Minecart with Hopper|hopper minecart]]s.}}
{{History|bedrock}}
{{History||1.10.0|snap=beta 1.10.0.3|[[File:Minecart JE4 BE2.png|32px]] [[File:Minecart (item) JE3 BE2.png|32px]] The textures of minecarts have been changed.}}
{{History|console}}
{{History||xbox=TU1|xbone=CU1|ps=1.0|wiiu=Patch 1|switch=1.0.1|[[File:Minecart JE3 BE1.png|32px]] [[File:Minecart (item) JE2 BE1.png|32px]] Added minecarts.}}
{{History||xbox=TU1|xbone=CU1|ps=1.0|wiiu=Patch 1|Minecarts are now twice the speed than in other editions.}}
{{History||xbox=TU12|Minecarts are now slower.}}
{{History||xbox=TU13|ps=1.0|Minecarts are now faster again.}}
{{History||xbox=TU21|xbone=CU9|ps=1.14|The minecart limit has been increased.}}
{{History||xbox=TU31|xbone=CU19|ps=1.22|wiiu=Patch 3|Minecart [[sound]]s have been updated.}}
{{History||xbox=none|xbone=none|ps=1.90|wiiu=none|switch=none|[[File:Minecart JE4 BE2.png|32px]] [[File:Minecart (item) JE3 BE2.png|32px]] The texture of minecarts has been changed.}}
{{History|new 3DS}}
{{History||0.1.0|[[File:Minecart JE3 BE1.png|32px]] [[File:Minecart_(item)_JE2_BE1.png|32px]] Added minecarts.}}
{{History|foot}}
== Issues ==
{{issue list}}
== Trivia ==
* Minecarts appear to float above the track, as their model has no wheels.
* If the player views their inventory while riding in a minecart, they appear sitting down in mid-air.
* The player can teleport to another minecart while sitting in a minecart by right-clicking a minecart in their range. This can be used as an elevator to quickly rise up when minecarts are placed on top of each other.
* If the sound is muted in the options while riding a minecart, and then turned back up, the minecart no longer makes noise in the client until the player exits the minecart.
* If a saddled pig is riding a minecart, the player can ride the pig. Doing so causes the minecart to be able to ride freely at the player's walking speed. It is unknown whether this is a glitch.
* It seems that hunger does not deplete while inactive in a minecart (at least in normal difficulty).
* A minecart (alongside rails and powered rails) are used as Steve's Side-Special in the crossover fighting game Super Smash Bros. Ultimate.
== Gallery ==
<gallery>
Minecart fire pig.png|A pig inside a burning minecart
MinecartInfdev1.png|A Minecart opened in Minecraft Infdev
MinecartInfdev2.png|A Minecart filled in Minecraft Infdev
2ed Spawner Minecart Image and 1st Dispenser cart image.jpg|An image of two [[Minecart with Spawner]]s and unimplemented Minecart with Dispensers.
Minecart with chest and head thing.png|The first image [[Jens Bergensten|Jeb]] released.<ref>{{Tweet|jeb|289000646210904064}}</ref>
Pocket Edition v0.8.0 alpha Development minecarts.png|The first image of minecarts in {{edition|PE}}.
Minecart Booster.png|Minecart booster.
MinecartStack.png|Minecarts being stacked on each other.
Villager minecart.png|Villager in a minecart.
Minecartride.jpg|Player in minecart.
Blocks in Invisible Minecarts.png|Minecarts can be edited to show any block inside, and can also be edited to be invisible.
File:Minecart (Trails and Tales Summer Event) Render.png|A wooden minecart, featured in the [[Trails & Tales Event]].
File:Minecoins 5.png|Two minecarts, as depicted on [[Minecraft Marketplace|Minecoin]] gift cards.
</gallery>
== References ==
{{reflist}}
== External Links ==
*[https://www.minecraft.net/en-us/article/taking-inventory--minecart Taking Inventory: Minecart] – Minecraft.net on September 6, 2019
{{Items}}
{{entities}}
[[Category:Mechanics]]
[[cs:Vozík]]
[[de:Lore]]
[[es:Vagoneta]]
[[fr:Wagonnet]]
[[hu:Csille]]
[[it:Carrello da miniera]]
[[ja:トロッコ]]
[[ko:광산 수레]]
[[nl:Mijnkar]]
[[pl:Wagonik]]
[[pt:Carrinho de mina]]
[[ru:Вагонетка]]
[[th:รถราง]]
[[uk:Вагонетка]]
[[zh:矿车]]</li></ul> | Added Strangers "Biome Settlers Pack 3" Skin pack. | ||||||||||||||||||||||||||||||||||
1.0.5{{Extension DPL}}<ul><li>[[Camera|Camera]]<br/>{{about|the entity|the command|commands/camera}}
{{exclusive|edu}}
{{unobtainable|edition=be}}
{{ItemEntity
|imagesize=80px
|renewable=No
|stackable=Yes (64)
|health={{hp|4}}
|image=Camera.png}}
{{Block
| title = Camera Block
| image = Camera (block).png
| invimage = none
| transparent = No
| light = 0
| tool = any
| stackable = Yes (64)
| flammable = No
| lavasusceptible = No
| renewable = No
}}
The '''camera''' is an [[entity]] that is capable of capturing and storing images. {{IN|edu}}, it works together with the [[portfolio]] item to create collections of [[photo]]s.<ref>https://education.minecraft.net/support/knowledge-base/using-cameras-portfolios/</ref>
== Obtaining ==
The camera can be obtained in the [[Creative inventory]] in ''Minecraft Education''. It can be obtained either by NBT editors, inventory editors, or glitches in Bedrock Edition.
To get the block form of the camera in Bedrock Edition using an NBT editor, you need to set the item name of the block in the inventory slot (<code>name:</code> ) to <code>item.camera</code>, then you need to add a compound tag called <code>Block</code> and inside of that put the int tag <code>version: 18040335</code> and the text tag <code>name: minecraft:camera</code> into the block compound tag. For the usable "[[spawn egg]]" form of the camera, you only need to set the item name of the block in the inventory slot (<code>name:</code> ) to <code>camera</code>; you do not need to add the block compound for this form of the camera.
== Usage ==
Using a camera from the [[inventory]] captures a first-person screenshot. It can also be placed, creating a camera [[entity]] that can track the user, and take pictures from the camera's perspective. Photos that are taken using the camera appear in the [[portfolio]].
Close-up snapshots of an [[item]] on the ground can be taken by holding the Shift key while right-clicking.
Photos that are taken with the camera block are stored in <code>%localappdata%\Packages\MinecraftUWP_8wekyb3d8bbwe\LocalState\screenshots</code>.
== Sounds ==
=== Generic ===
{{Sound table/Block/Normal/BE}}
=== Unique ===
{{Sound table
|sound=Camera1.ogg
|sound2=Camera2.ogg
|sound3=Camera3.ogg
|type=bedrock
|description=When a picture is taken with a camera
|source=Players
|id=camera.take_picture
|volume=1.0
|pitch=1.0
|foot=1}}
== Data values ==
=== ID ===
{{ID table
|edition=bedrock
|firstcolumnname=Camera
|shownumericids=y
|showforms=y
|generatetranslationkeys=y
|displayname=Block
|spritename=camera
|spritetype=block
|nameid=camera
|id=242
|form=block
|itemform=item.camera}}
{{ID table
|displayname=Item
|spritename=camera
|spritetype=item
|translationtype=item
|nameid=camera
|id=593
|form=item
|foot=1}}
{{ID table
|edition=bedrock
|firstcolumnname=Camera
|shownumericids=y
|generatetranslationkeys=y
|displayname=Entity
|spritename=camera
|spritetype=entity
|nameid=tripod_camera
|id=62
|foot=1}}
=== Entity data ===
See [[Bedrock Edition level format/Entity format]].
== Video ==
{{yt|1XLRGFibFNQ}}
== History ==
{{History|pocket alpha}}
{{History||v0.1.0|[[File:Camera BE1.png|50px]] [[File:Camera (item texture) BE1.png|32px]] The textures and model of the camera can be found in the game apk file.<ref name="found">[{{Reddit|jkkmr/found_image_file_for_camera_in_minecraft_portable}} Reddit - Found image file for camera in Minecraft Portable Edition Demo APK file.]</ref><ref>https://web.archive.org/web/20160604161800/https://twitter.com/Kappische/status/103548954368679936</ref>}}
{{History||v0.2.0|[[File:Camera BE2.png|50px]] [[File:Music Disc Blocks JE1 BE1.png|32px]] Added cameras
|Changed item and tripod textures.
|To use a camera, equip it in the [[player]]'s hand, then look in the direction the player wants the picture to be taken. Long-press the screen, and a camera [[drops]] to the ground where the player are standing. Step back, then press on the camera until it starts emitting smoke [[particles]]. The smoke means a picture has been taken, and the camera may disappear immediately afterward.
|Cameras have infinite uses.
|Entity id 62 and item id 456.<ref>https://www.minecraftforum.net/topic/1233138-i-found-the-camera-id/</ref>}}
{{History||v0.5.0|The camera is now invisible and makes the standard player [[damage]] [[sound]].}}
{{History||v0.7.0|Added the "F1" feature (Hide GUI), which has now made the camera obsolete.}}
{{History||v0.8.0|snap=build 2|[[File:Egg JE1 BE1.png|32px]] Item form now uses [[egg]] texture.}}
{{History||v0.9.0|snap=build 1|The camera [[entity]] has been removed. [[Tommaso]] also stated: ''"It doesn't mean that it's dead forever, in fact I have a lot of ideas for it! I think it will be back when have [[shader]]s, sharing and [[redstone]]."''<ref>{{Reddit|sub=MCPE|281sep/camera|ci6znr8}}</ref>}}
{{History||v0.14.0|snap=build 1|[[File:Camera BE3.png|32px]] [[File:Camera (item) BE2.png|32px]] Re-added the camera. It is accessible only with [[inventory]] editors.
|In this version, if the player spawns a camera, leaves the [[world]] and joins back, it summons [[lightning]].}}
{{History||v0.14.2|The camera [[item]] ID has been changed to 498, but it cannot be used at the moment. The [[entity]] can now be spawned with a [[spawn egg]] with a [[damage]] value of 62.
|According to the language files of the game, the empty label that shows up whenever hovering a finger to a camera would now say "Take Picture". However, the button doesn't do anything.}}
{{History||v0.15.0|snap=build 1|The previous empty label on the camera mentioned above now displays the words "Take Picture".
|The [[health]] of the camera [[entity]] is now {{hp|2}} instead {{hp|4}}.
|The camera no longer summons [[lightning]].}}
{{History||v0.16.0|snap=build 1|The camera now has a [[block]] form in [[inventory]], but still spawns the entity. However, the block can be placed only with [[commands]] and editing.
|"Take picture" button on the camera works now, but no image files are created.
|The oldest ID for camera (456) now refers to [[portfolio]].}}
{{History|||snap=build 2|[[File:Camera Block.png|32px]] The camera now has an [[item]] form and the [[block]] has been removed. However, it is still obtainable in servers.
|[[Portfolio]], which works together with the camera to create collections of pictures, has been removed.}}
{{History|||snap=build 4|Camera item form has been removed, and the camera can no longer be obtained or placed using any [[commands|command]].}}
{{History|bedrock}}
{{History||1.8.0|snap=beta 1.8.0.8|[[File:Camera BE3.png|32px]] [[File:Camera Block.png|32px]] The camera has been reimplemented.
|The camera [[entity]] can now be spawned with a [[spawn egg]] with [[damage]] value 258.}}
{{History||1.12.0|snap=beta 1.12.0.2|The camera can now be obtained with the {{cmd|give}} [[commands|command]].}}
{{History||1.13.0|snap=beta 1.13.0.1|The camera can no longer be obtained with the {{cmd|give}} command.
|Functionality has been added to the camera. Screenshots that are taken by the camera can now be saved into the {{cd|screenshots}} folder.
|Cameras are now a part of the {{el|ee}} toggle as a hidden feature.
|Cameras no longer have a [[death]] animation when killed by the [[player]] and instead, instantly emit smoke [[particles]].}}
{{History||1.16.100|snap=beta 1.16.100.50|The camera can now be obtained with the {{cmd|give}} [[commands|command]] once again.}}
{{History|||snap=beta 1.16.100.55|The camera can no longer be obtained with the {{cmd|give}} command.}}
{{History|education}}
{{History||1.0|[[File:Camera BE3.png|32px]] [[File:Camera Block.png|32px]] Added cameras.}}
{{History||1.4.0|Cameras no longer have a [[death]] animation when killed by the [[player]] and instead instantly emit smoke [[particles]].}}
{{History|foot}}
=== Future ===
At the Minecraft [[Pocket Edition]] panel at [[MineCon 2012]], as well as one of [[Johan Bernhardsson|Jbernhardsson]]'s livestreams, it was stated that future plans include trying to have a proper use for cameras, perhaps an easier way to take screenshots and share them with others.<ref>{{ytl|YMhyX_lKWV4}}</ref> In the BlockTalk Q&A, the camera was briefly mentioned as part of a broader "sharing" theme planned for {{el|be}} in the future.<ref>{{ytl|Ruf6tvqsD84}}</ref>
It later got implemented into {{el|ee}}, using the camera to make screenshots and share them in a special book.
== Issues ==
{{Issue list}}
== Trivia ==
* A camera prevents a [[Book and Quill]] from working. Attempting to craft it or obtain it by commands gives a regular book instead, due to non-implementation of photo attaching to written books.
* The camera can take a screenshot, which appears a bit smaller with a thick paper outline having cuts on its edges, making it look like an old photograph.
* This feature is hidden from the Creative inventory and from the /give command item menu.
== Gallery ==
<gallery>
PEcameras030.jpg|A row of cameras, as seen in [[Pocket Edition v0.3.0 alpha|v0.3.0]].
PEcameraphoto.jpg|Example image taken by the camera [[entity]].
CameraUse-1.png|The first method of using cameras.
CameraUse-2.png|The second method of using cameras.
Dinnerbone Camera.png|A camera spawned using a [[spawn egg]] named "[[Dinnerbone]]" in the v0.15.0 beta.
Cam2.png|A camera falling from a [[tree]]. This shows that cameras are entities.
Education Edition Exclusive Features.png|The camera and camera block placed in a world along with other Education Edition features.
Screenshot by camera.jpg|An example of the screenshot taken by a camera in [[Bedrock Edition beta 1.13.0.1|beta 1.13.0.1]].
File:Say Cheese.jpeg|[[Steve]], [[Alex]], [[Jesse]], and an [[Agent]] getting their picture taken.
</gallery>
== See also ==
* [[Portfolio]]
* [[Screenshot]]
== References ==
{{Reflist}}
{{Items}}
{{Entities}}
{{Education Edition}}
[[Category:Education Edition entities]]
[[Category:Education Edition items]]
[[Category:Tools]]
[[cs:Kamera]]
[[de:Kamera]]
[[el:Camera]]
[[es:Cámara]]
[[fr:Appareil photo]]
[[hu:Kamera]]
[[ja:カメラ]]
[[ko:카메라]]
[[nl:Camera]]
[[pl:Kamera]]
[[pt:Câmera]]
[[ru:Камера]]
[[uk:Камера]]
[[zh:相机]]</li><li>[[Glistering Melon Slice|Glistering Melon Slice]]<br/>{{Item
| image = Glistering Melon Slice.png
| renewable = Yes
| stackable = Yes (64)
}}
A '''glistering melon slice'''{{fn|Known as '''Glistering Melon Slice''' {{in|java}} and '''Glistering Melon''' {{in|bedrock}}.}} is an inedible [[item]] used for brewing [[potion]]s of [[Healing]]. It is also one of the many potion ingredients that can be used to make mundane potions.
== Obtaining ==
=== Chest loot ===
{{LootChestItem|glistering-melon-slice}}
=== Crafting ===
{{Crafting
|A1= Gold Nugget
|B1= Gold Nugget
|C1= Gold Nugget
|A2= Gold Nugget
|B2= Melon Slice
|C2= Gold Nugget
|A3= Gold Nugget
|B3= Gold Nugget
|C3= Gold Nugget
|Output= Glistering Melon Slice
|type= Brewing
}}
=== Trading ===
Master-level farmer [[villager]]s sell 3 glistering melon for 4 [[emerald]]s.
== Usage ==
Despite being crafted with a [[melon slice]], a glistering melon slice cannot be eaten, unlike a [[golden apple]] or [[golden carrot]].
=== Brewing ingredient ===
{{Brewing
|head=1
|Glistering Melon Slice
|Mundane Potion
|base=Water Bottle
}}
{{Brewing
|Glistering Melon Slice
|Potion of Healing
|foot=1}}
===Piglins===
[[Piglin]]s are attracted to glistering melon slices. They run toward any glistering melon slice on the ground, and inspect it for 6 to 8 seconds before putting it in their inventory.
== Achievements ==
{{load achievements|Oooh, shiny!}}
== Advancements ==
{{load advancements|Oh Shiny}}
== Data values ==
=== ID ===
{{edition|java}}:
{{ID table
|edition=java
|showforms=y
|generatetranslationkeys=y
|displayname=Glistering Melon Slice
|spritetype=item
|nameid=glistering_melon_slice
|form=item
|foot=1}}
{{edition|bedrock}}:
{{ID table
|edition=bedrock
|showaliasids=y
|shownumericids=y
|showforms=y
|notshowbeitemforms=y
|generatetranslationkeys=y
|displayname=Glistering Melon
|spritetype=item
|nameid=glistering_melon_slice
|aliasid=speckled_melon
|id=434
|form=item
|translationkey=item.speckled_melon.name
|foot=1}}
== History ==
{{History|java}}
{{History||1.0.0|snap=Beta 1.9 Prerelease 4|[[File:Glistering Melon Slice JE1 BE1.png|32px]] Added glistering melons.
|The [[crafting]] recipe of glistering melons is one [[melon slice]] and one [[gold nugget]].
|Glistering melons have replaced [[ghast tear]]s as the ingredient to produce [[potions of Healing]] due to the difficulty in getting tears.<ref>{{tweet|jeb_|123671273904680960}}</ref> They also now brew with [[water bottle]]s to create [[mundane potion]]s.}}
{{History||1.6.1|snap=13w23a|The [[crafting]] recipe of glistering melons is changed from one [[gold nugget]] to eight.}}
{{History||1.9|snap=15w49a|[[File:Glistering Melon Slice JE2.png|32px]] The rotation of glistering melon [[item]]s has been changed to be consistent with [[melon slice]]s.<ref>{{bug|MC-85963}}</ref>}}
{{History|||snap=15w49b|[[File:Glistering Melon Slice JE1 BE1.png|32px]] The rotation of glistering melons has been reverted and is no longer consistent with melon slices.}}
{{History||1.13|snap=17w47a|Prior to [[1.13/Flattening|''The Flattening'']], this [[item]]'s numeral ID was 382.}}
{{History|||snap=18w20b|"Glistering Melon" has been renamed to "Glistering Melon Slice".
|The ID of glistering melon slices has been changed from <code>speckled_melon</code> to <code>glistering_melon_slice</code>.}}
{{History||1.14|snap=18w43a|[[File:Glistering Melon Slice JE3 BE2.png|32px]] The texture of glistering melon slices has been changed.}}
{{History|||snap=19w11a|Farmer [[villager]]s now [[trading|sell]] glistering melon slices.}}
{{History||1.16|snap=20w09a|Glistering melon slices are now admired by [[piglin]]s.<ref>{{bug|MC-172363}}</ref>}}
{{History|||snap=20w16a|Glistering melon slices now generate in [[ruined portal]] chests.}}
{{History|pocket alpha}}
{{History||v0.12.1|snap=build 1|[[File:Glistering Melon Slice JE1 BE1.png|32px]] Added glistering melons.}}
{{History|bedrock}}
{{History||1.10.0|snap=beta 1.10.0.3|[[File:Glistering Melon Slice JE3 BE2.png|32px]] The texture of glistering melons has been changed.}}
{{History||1.11.0|snap=beta 1.11.0.4|Glistering melons can now be [[trading|bought]] from farmer [[villager]]s.}}
{{History||1.13.0|snap=beta 1.13.0.9|[[Trading]] has been changed. Master-level farmer villagers now have a {{frac|1|3}} chance to [[trading|sell]] glistering melon slices.}}
{{History||1.16.0|snap=beta 1.16.0.57|Glistering melons are [[trading|sold]] from farmer villagers under a 50% chance, once again.
|Glistering melons now generate in [[ruined portal]] chests.}}
{{History||1.16.100|snap=beta 1.16.100.54|[[Ruined Portal]]s can now generate with 4–12 glistering melons instead of only one.}}
{{History|||snap=beta 1.16.100.56|The ID of glistering melon slices has been changed from <code>speckled_melon</code> to <code>glistering_melon_slice</code>.}}
{{History|console}}
{{History||xbox=TU7|xbone=CU1|ps=1.0|wiiu=Patch 1|[[File:Glistering Melon Slice JE1 BE1.png|32px]] Added glistering melons.}}
{{History||xbox=none|xbone=none|ps=1.90|wiiu=none|switch=none|[[File:Glistering Melon Slice JE3 BE2.png|32px]] The texture of glistering melons has been changed.}}
{{History|New 3DS}}
{{History||0.1.0|[[File:Glistering Melon Slice JE1 BE1.png|32px]] Added glistering melons.}}
{{History|foot}}
== Issues ==
{{issue list}}
== See also ==
* [[Melon Slice]]
* [[Melon]]
== Notes ==
{{fnlist}}
== References ==
{{reflist}}
{{Items}}
[[Category:Renewable resources]]
[[cs:Zlatavý kousek melounu]]
[[de:Glitzernde Melonenscheibe]]
[[es:Rodaja de sandía reluciente]]
[[fr:Tranche de pastèque scintillante]]
[[hu:Ragyogó dinnye]]
[[ja:きらめくスイカの薄切り]]
[[ko:반짝이는 수박 조각]]
[[nl:Glinsterende meloenschijf]]
[[pl:Błyszczący arbuz]]
[[pt:Fatia de melancia reluzente]]
[[ru:Сверкающий ломтик арбуза]]
[[uk:Блискуча скибка кавуна]]
[[zh:闪烁的西瓜片]]</li></ul> | Added Power Rangers Skin pack. | ||||||||||||||||||||||||||||||||||
1.0.6{{Extension DPL}}<ul><li>[[Debug Stick|Debug Stick]]<br/>{{about|the item|other uses|Debug}}
{{exclusive|java}}
{{Item
| image = Debug Stick.gif
| rarity = Epic
| renewable = No
| stackable = No
}}
The '''debug stick''' is an [[item]] used to edit the [[block states]] of [[block]]s. It is visually identical to a regular [[stick]], but with a glint (as if [[Enchanting|enchanted]]).
== Obtaining ==
The debug stick is obtainable via [[commands]] such as {{cmd|/give}} or {{Cmd|/item}}, or the Creative inventory if the player has the appropriate permissions. It can be obtained only in worlds with cheats on.
== Usage ==
The debug stick can be used to change block states. {{control|Hitting}} the block allows players to select the block state key they wish to change, for an example, switching between the ''conditional'' and the ''facing'' block state keys for a [[command block]]. {{control|Using}} the block allows them to cycle through the valid values for the block state key, again as an example, the player can make the command block face, ''down'', ''east'', ''north'', ''south'', ''up'', or ''west'' if they chose the ''facing'' block state key. {{control|Sneaking}} while {{control|hitting}} or {{control|using}} cycles through the block state keys or values in reverse order.
It is notable that {{Control|using}} debug stick directly on an interactive block without {{Control|sneaking}} uses the block itself instead of the stick.<ref>{{bug|MC-200199}} </ref>
The debug stick cannot be used while in Survival or Adventure mode. It works only in creative mode with cheats enabled. In modes other than Creative, it acts like a regular item — although when {{control|using}} it on a block, the player swings the stick as if interacting with it (but nothing happens).
== Data values ==
=== ID ===
{{ID table
|edition=java
|showforms=y
|generatetranslationkeys=y
|displayname=Debug Stick
|spritetype=item
|nameid=debug_stick
|form=item
|foot=1}}
=== Item data ===
<div class="treeview">
* {{nbt|compound|tag}}: The item's '''tag''' tag.
{{:Player.dat_format/Debug Sticks}}
</div>
== History ==
{{History|java}}
{{History||1.13|snap=17w47a|[[File:Debug Stick.gif|32px]] Added debug sticks.}}
{{History||1.16|snap=20w10a|Debug sticks are now capable of editing [[fire]] due to its added hitbox.}}
{{History||1.19.3|snap=22w44a|The debug stick is now available in the creative inventory, but only if cheats are enabled.}}
{{History|||snap=22w45a|Moved the debug stick behind the Operator Utilities tab in the creative inventory. The tab is only available if cheats are enabled and the "Operator Items Tab" option in the controls menu is turned on.}}
{{History|foot}}
== Issues ==
The debug stick is not supported, and any issues resulting of its usage are closed as "Won't Fix" in the issue tracker.<br/> Issues with the stick itself are considered valid.<ref>https://bugs.mojang.com/browse/MC-122323?focusedCommentId=419481&page=com.atlassian.jira.plugin.system.issuetabpanels:comment-tabpanel#comment-419481</ref><ref>{{reddit|7es23r||Just be aware that any weird state you create with it you cannot naturally create and any bugs that come from it will be shot down as 'Wont fix' :D|_Grum|November 22, 2017}}</ref>
{{issue list}}
== Trivia ==
*An [[add-on]] made by Mineplex was showcased in [[MINECON Live 2019]], which had an editor stick for {{el|be}}, similar to the Debug Stick.<ref>{{ytl|OZqNaEX8208|MINECON Live 2019 @ 1:05:02|Minecraft|September 28, 2019|t=3902}}</ref>
== Gallery ==
<gallery>
Technically Updated.jpg|Artwork of Steve and Alex wielding debug sticks.
</gallery>
== See also ==
*[[Block states]]
== References ==
{{Reflist}}
{{Items}}
[[Category:Non-renewable resources]]
[[de:Debug-Stab]]
[[es:Palo de depuración]]
[[fr:Bâton de débogage]]
[[ja:デバッグ棒]]
[[ko:디버그 막대기]]
[[pl:Patyk debugujący]]
[[pt:Graveto de depuração]]
[[ru:Палка отладки]]
[[zh:调试棒]]</li><li>[[Reality Vision|Reality Vision]]<br/>{{Joke feature}}
{{Item
| title = Reality Vision
| image = Reality Vision.png
| renewable = No
| stackable = Yes (64)
}}
The '''Reality vision''' was a joke [[helmet]].
== Usage ==
Reality vision was equipped via the [[helmet]] slot. When equipped, it showed a [[wikipedia:Mini-map|minimap]] in the bottom-center of the screen (which moved when the [[player]]'s camera moves). The minimap showed all [[chunk]]s that were currently rendered. The player's location was represented by a green [[beacon]] beam marker on the map.
It displayed a vision overlay (similar to the [[pumpkin]] overlay). The overlay would change to a new overlay if the player went into third person (unlike the pumpkin overlay), which made the screen appear like an old [[wikipedia:Television|television]] screen. The overlay was called <code>cantseeshit<!-- Do not change this; this is that word that is actually used-->captain.png</code> in the assets folder. It activated a [[Shaders|shader]] when equipped (<code>scan_pincushion</code>).
== Sounds ==
{{Sound table
|sound=Equipvr.ogg
|subtitle=''None''
|source=player
|description=When equipped
|id=item.reality_vision.use
|translationkey=''None''
|volume=1.0
|pitch=1.0
|distance=16
|foot=1}}
== Data values ==
=== ID ===
{{ID table
|edition=java
|shownumericids=y
|showforms=y
|generatetranslationkeys=y
|displayname=Reality Vision
|spritetype=item
|nameid=reality_vision
|id=500
|form=item
|translationkey=item.realityVision.name
|foot=1}}
== History ==
{{History|java}}
{{History||1.RV-Pre1|[[File:Reality_Vision_(item).png|32px]] [[File:Reality Vision.png|32px]] Added reality vision.}}
{{History|foot}}
== Issues ==
Reality Vision is an unsupported item due to being an [[Wikipedia:April Fools' Day|April Fools']] joke, and therefore such issues relating to them will not be fixed.
== Trivia ==
* [[Sign]]s display the text "OBEY" while equipped, a reference to the movie [[wikipedia:They Live|''They Live'']].
== Gallery ==
<gallery>
Sign2.png|The [[sign]] texture found in the game files.
OBEY.png|OBEY seen in a sign.
OBEY sign in 1.RV-Pre1..png|OBEY seen in a sign, but seen from a better perspective.
TechGear.png|A [[player]] wearing reality vision, featured in this [[wikipedia:April Fools' Day|April Fools']] joke version.
</gallery>
{{Items}}
{{Jokes}}
[[Category:Non-renewable resources]]
[[Category:Joke items]]
[[pt:Visão da realidade]]
[[es:Reality Vision]]</li></ul> | Added Chinese Mythology Mash-up pack. | ||||||||||||||||||||||||||||||||||
1.0.7{{Extension DPL}}<ul><li>[[Eye of Ender|Eye of Ender]]<br/>{{redirect|Ender Eye|the boss|Ender Dragon|item that teleports the player to where it lands|Ender Pearl}}
{{ItemEntity
|image=Eye of Ender.png
|stackable=Yes (64)
|renewable=Yes
|size=Height: 0.25 Blocks<br>Width: 0.25 Blocks
|networkid='''[[JE]]''': 72
}}
An '''eye of ender''' is a craftable item used to locate [[stronghold]]s and activate the [[end portal]]s within them.
== Obtaining ==
=== Crafting ===
{{Crafting
|Blaze Powder
|Ender Pearl
|Output=Eye of Ender
|type=Miscellaneous
}}
== Usage ==
=== Locating strongholds ===
[[File:Eye of Ender (break).gif|thumb|right|An animation of an eye of ender shattering.]]
To locate [[stronghold]]s (and the [[end portal]]s they house):
* Pressing {{control|use}} while holding an eye of ender causes it to fly approximately 12 blocks in the direction of the nearest stronghold, traveling through any blocks necessary, and leave a trail of purple particles, the same particle effect used for [[endermen]] and [[ender chests]].
** The eye leads to the [[chunk]] where a spiral staircase, the first room generated in the stronghold, is located.
** The center of this entrance staircase is always exactly at the chunk coordinates 4, ~, 4, although the eye of ender leads to chunk coordinates 0, ~, 0 (the northwest corner of the chunk).
* While over 12 blocks away from the northwest corner of the staircase chunk, the eye will travel upward to offer an easily-visible indication of the horizontal direction the player must travel.
* When closer than 12 blocks to the northwest corner of the staircase chunk, the eye will travel downward, to indicate the player is above a stronghold and must mine downward.
* After two or three seconds of travel, the eye floats in the air briefly, then either falls (becoming collectable again) or shatters in mid-air. The eye has a 20% chance of shattering (80% chance of surviving) per throw, therefore throwing it three times has approximately 50% overall chance to shatter the eye (0.8<sup>3</sup>=51.2%).
* The eye of ender's flying function works only in the [[Overworld]]. It does nothing in [[the Nether]], [[the End]], [[custom dimension]]s{{verify|type=current}}, or in worlds with no strongholds.
Note that the eyes may point to an incorrect location if the target chunks were generated with a different biomes map in an older version or through different generation settings.<ref>See also {{bug|MC-135996}}</ref>
=== Activating end portals ===
[[File:Active End Portal.png|thumb|right|An end portal activated with eyes of ender.]]
Once an end portal is found, the eyes of ender are required to activate it. End portals require a total of 12 eyes of ender in order to activate, though each individual frame-block has a 10% chance of containing an eye of ender when generated. Eyes can be placed in empty [[End portal frame]]s by pressing {{control|use}} on them until the entire ring of 12 is filled, thereby activating the portal. Due to the fact that there is a 10% chance of each individual end portal frame having an eye in it, there is a one out of one trillion chance of every frame having an eye in it thereby activating the portal even if the player doesn't have any eyes of ender.
{| class="wikitable sortable mw-collapsible"
|+End Portal Pre-Filled Eyes
!Eyes
!0
!1
!2
!3
!4
!5-12
|-
|Exactly
|28%
|38%
|23%
|9%
|2%
|<1%
|-
|Or More
|100%
|72%
|34%
|11%
|3%
|<1%
|}
=== Crafting ingredient ===
{{crafting usage}}
== Sounds ==
{{Edition|Java}}:<br>
Eyes of ender use the Friendly Creatures sound category for entity-dependent sound events.
{{Sound table
|sound=Ender Eye death1.ogg
|sound2=Ender Eye death2.ogg
|subtitle=Eye of Ender falls <ref group=sound name=LousyEvents>{{Bug|MC-98316||Wrong subtitles caused by missing distinction}}</ref>
|source=neutral
|description=When an eye of ender drops or breaks
|id=entity.ender_eye.death|idnote=<ref group=sound name=LousyEvents/>
|translationkey=subtitles.entity.ender_eye.death|translationkeynote=<ref group=sound name=LousyEvents/>
|volume=1.3
|pitch=1.0
|distance=16}}
{{Sound table
|sound=Ender Eye launch1.ogg
|sound2=Ender Eye launch2.ogg
|subtitle=Eye of Ender shoots
|source=neutral
|description=When an eye of ender is thrown
|id=entity.ender_eye.launch
|translationkey=subtitles.entity.ender_eye.launch
|volume=0.5
|pitch={{frac|1|3}}-0.5
|distance=16}}
{{Sound table
|sound=End portal eye place1.ogg
|sound2=End portal eye place2.ogg
|sound3=End portal eye place3.ogg
|subtitle=Eye of Ender attaches
|source=block
|description=When an eye of ender is placed in an end portal frame
|id=block.end_portal_frame.fill
|translationkey=subtitles.block.end_portal_frame.fill
|volume=1.0
|pitch=1.0
|distance=16
|foot=1}}
{{Edition|Bedrock}}:
{{Sound table
|type=bedrock
|sound=Item Frame break1.ogg
|sound2=Item Frame break2.ogg
|sound3=Item Frame break3.ogg
|source=block
|description=When an eye of ender breaks <ref group=sound>{{Bug|MCPE-115646}}</ref>
|id=block.itemframe.break}}
{{Sound table
|sound=Bow shoot.ogg
|source=player
|description=When an eye of ender is thrown
|id=random.bow
|volume=0.5
|pitch=0.33-0.5}}
{{Sound table
|sound=End portal eye place1.ogg
|sound2=End portal eye place2.ogg
|sound3=End portal eye place3.ogg
|source=block
|description=When an eye of ender is placed in an end portal frame
|id=block.end_portal_frame.fill
|volume=0.3
|pitch=0.9/1.0/1.1
|foot=1}}
==Data values==
===ID===
{{edition|java}}:
{{ID table
|edition=java
|firstcolumnname=Item
|showforms=y
|generatetranslationkeys=y
|displayname=Eye of Ender
|spritetype=item
|nameid=ender_eye
|form=item
|foot=1}}
{{ID table
|edition=java
|firstcolumnname=Entity
|generatetranslationkeys=y
|displayname=Eye of Ender
|spritetype=entity
|nameid=eye_of_ender
|foot=1}}
{{edition|bedrock}}:
{{ID table
|edition=bedrock
|firstcolumnname=Item
|shownumericids=y
|showforms=y
|notshowbeitemforms=y
|generatetranslationkeys=y
|displayname=Eye of Ender
|spritetype=item
|nameid=ender_eye
|id=433
|form=item
|foot=1}}
{{ID table
|edition=bedrock
|firstcolumnname=Entity
|shownumericids=y
|generatetranslationkeys=y
|displayname=Eye of Ender
|spritetype=entity
|nameid=eye_of_ender_signal
|id=70
|foot=1}}
===Entity data===
The purple particles left by eyes of ender have entity data that define various properties of the entity.
{{el|java}}:
{{main|Entity format}}
{{/ED}}
{{el|bedrock}}:
:See [[Bedrock Edition level format/Entity format]].
==Advancements==
{{load advancements|Eye Spy}}
==Video ==
{{Video note|This video does not mention that eyes of ender can be used to craft [[ender chest]]s or [[end crystal]]s.}}
<div style="text-align:center">{{yt|E0AhoxYLomc}}</div>
==History==
{{History|java}}
{{History||1.0.0|snap=Beta 1.9 Prerelease 3|[[File:Eye of Ender JE1 BE1.png|32px]] Added eyes of ender.
|Eyes of ender can be used on a [[end portal frame|portal block]] to repair them, but repairing them does nothing.}}
{{History|||snap=Beta 1.9 Prerelease 4|Each eye can now be placed in a [[end portal frame|portal block]] or used to hone in on a [[stronghold]]. [[Jens Bergensten|Jeb]] demonstrated the new uses for an eye in his livestream.<ref>http://www.twitch.tv/jebox/b/297000418</ref> An [[end portal]] within a stronghold could be seen in the stream with two eyes inserted into blocks.
|In older worlds with chunks generated before [[Java Edition Beta 1.9 Prerelease 3|Beta 1.9 Prerelease 3]], the eyes may mislead the [[player]] to a place where there isn't a [[stronghold]] at all. This happens because the eyes lead to where a stronghold should be based on the world seed in the current version, but before Beta 1.9 Prerelease 3 strongholds generated differently based on the seed. Therefore, if the player saved the coordinates the eye traveled to in an old world and generated a new world with the same seed, the player could travel to those same coordinates and find a stronghold.}}
{{History|||snap=Beta 1.9 Prerelease 6|Eyes of ender no longer render like a tool in third person.}}
{{History|||snap=RC1|The throwing sound of eyes of ender has been changed.}}
{{History||1.3.1|snap=12w21a|Eyes of ender can now be used to craft [[ender chest]]s.
|Priest [[villager]]s would [[trading|buy]] 2–3 eyes of ender for one [[emerald]].}}
{{History|||snap=12w22a|Priest villagers no longer buy eyes of ender, instead selling them for 7–10 emeralds.}}
{{History||1.6.4|snap=1.6.3-pre|Eyes of ender now lead to [[stronghold]]s based on the structure data saved in the world file instead of calculating their approximate location via the [[seed (level generation)|world seed]]. Therefore, strongholds generated in old versions can still be found even if the distribution of strongholds is changed.}}
{{History||1.7.2|snap=13w41a|Eyes of Ender now lead to the entrance of a stronghold instead of the portal room.}}
{{History||1.8|snap=14w02a|With changes that have been made to villagers and the [[trading]] system, cleric villagers now sell eyes of ender for 7–11 [[emerald]]s, as one of their tier III trades.}}
{{History||1.9|snap=15w41a|Eyes of ender are no longer [[trading|sold]] by cleric [[villager]]s.}}
{{History|||snap=15w44b|An eye of ender is now used to craft an [[end crystal]].}}
{{History|||snap=pre3|Eyes of ender now point to the 125 new strongholds.<ref>{{bug|MC-91173}} resolved as "Fixed"</ref>}}
{{History||1.11|snap=16w32a|The [[entity]] ID has been changed from <code>EyeOfEnderSignal</code> to <code>eye_of_ender_signal</code>.}}
{{History||1.12|snap=17w17a|A new ''pop'' [[sound]] has been added when a thrown eye of ender bursts.}}
{{History||1.13|snap=17w47a|Prior to [[1.13/Flattening|''The Flattening'']], this [[item]]'s numeral ID was 381.}}
{{History|||snap=pre5|The [[entity]] ID has been changed to <code>eye_of_ender</code>.}}
{{History||1.14|snap=18w43a|[[File:Eye of Ender JE2 BE2.png|32px]] The texture of eyes of ender has been changed.}}
{{History||1.19|snap=22w11a|Eyes of Ender now lead to the corner of the chunk (0, ~, 0) instead of the center (8-9, ~, 8-9).<ref>{{bug|MC-253394}}</ref>}}
{{History|pocket}}
{{History||1.0.0|snap=alpha 0.17.0.1|[[File:Eye of Ender JE1 BE1.png|32px]] Added eyes of ender.}}
{{History|bedrock}}
{{History||1.10.0|snap=beta 1.10.0.3|[[File:Eye of Ender JE2 BE2.png|32px]] The texture of eyes of ender has been changed.}}
{{History||1.16.0|snap=beta 1.15.0.51|The [[particles]] of eyes of ender have been changed to match {{el|je}}.}}
{{History|console}}
{{History||xbox=TU7|xbone=CU1|ps=1.0|wiiu=Patch 1|[[File:Eye of Ender JE1 BE1.png|32px]] Added eyes of ender.}}
{{History||xbox=none|xbone=none|ps=1.90|wiiu=none|switch=none|[[File:Eye of Ender JE2 BE2.png|32px]] The texture of eyes of ender has been changed.}}
{{History|new 3ds}}
{{History||1.7.10|[[File:Eye of Ender JE1 BE1.png|32px]] Added eyes of ender.}}
{{History|foot}}
=== Historical images ===
<gallery>
File:Held_Eye_of_Ender.png|The eye of ender used to appear large in third-person view.
</gallery>
==Issues==
{{issue list}}
==Trivia ==
*When thrown in third-person view, the eyes of ender fly out from the player's feet instead of their hand.
*Before [[Java Edition 1.9]], eyes of ender can be purchased from cleric villagers, which means players can find a [[stronghold]] and go to [[the End]] without accessing [[the Nether]] at all.
*{{IN|bedrock}} if the player travels beyond a certain radius (roughly 740,000 blocks), eyes of ender always point to a stronghold near spawn, even though strongholds continue to generate past this limit. If one travels to this limit, they can see eyes of ender suddenly switching direction. A similar phenomenon occurs with the {{cmd|locate}} command.
==Gallery==
===Screenshots===
<gallery>
Stronghold Portal Room.png|An end portal frame containing a few eyes of ender.
EnderChestexample.png|An [[ender chest]] depicting an eye of ender on the front.
</gallery>
===In other media===
<gallery>
File:Eye of Ender JINX.jpg|Official T-shirt artwork "Eye of Ender" sold by JINX.
File:Happy Halloween Eye.jpg|A Halloween T-Shirt design featuring an eye of ender.
</gallery>
==External links==
*[http://www.strongholdfinder.com/ A super-easy stronghold triangulation tool]
*[http://jsfiddle.net/42EDX/40/ JSFiddle Eye of Ender triangulator - can guess the location of other 2 strongholds in the first ring]
*[https://ens-gijs.github.io/minecraft-stronghold-locator/ Minecraft Stronghold Locator Eye of Ender throw plotting visualizer - zoomable to show all possible stronghold rings]
*[https://github.com/winny-/stronghold Python Eye of Ender throw plotting tool]
*[http://www.purplefrog.com/~thoth/MinecraftStronghold/stronghold.html HTML Eye of Ender throw plotting visualizer (not updated after 1.9 stronghold placement changes)]
*[http://chunkbase.com/apps/stronghold-finder Chunk Base Stronghold Finder (seed-based)]
*[https://github.com/toolbox4minecraft/amidst/releases Amidst - File-based world visualizer]
*[http://minecraft.tournier.org/StrongholdLocator/ Find strongholds by analyzing stronghold.dat file]
== References==
{{reflist}}
{{Items}}
{{entities}}
[[cs:Endové oko]]
[[de:Enderauge]]
[[es:Ojo de ender]]
[[fr:Œil de l'Ender]]
[[hu:Végzet szeme]]
[[ja:エンダーアイ]]
[[ko:엔더의 눈]]
[[nl:Enderoog]]
[[pl:Oko Endera]]
[[pt:Olho de ender]]
[[ru:Око Края]]
[[th:ดวงตาแห่งเอนเดอร์]]
[[uk:Око Краю]]
[[zh:末影之眼]]</li><li>[[Powder Snow Bucket|Powder Snow Bucket]]<br/>{{Item
| title = Powder Snow Bucket
| image = Powder Snow Bucket.png
| renewable = Yes
| stackable = No
}}
A '''powder snow bucket''' is a [[bucket]] with [[powder snow]] inside.
== Obtaining ==
A powder snow bucket can be obtained by {{ctrl|using}} an [[empty bucket]] on a [[powder snow block]] or [[powder snow cauldron]].
== Usage ==
Pressing {{control|use}} while holding a powder snow bucket places a [[powder snow]] block. {{IN|Java}}, powder snow may also be placed inside empty [[cauldron]]s, creating powder snow cauldrons.
[[Dispenser]]s can also create and place powder snow buckets. However, they cannot do so with [[cauldron]]s. You can also use it to cushion falls in the [[nether]] by placing it below you when falling.
== Sounds ==
{{el|je}}:
{{Sound table
|sound=Empty powder snow bucket1.ogg
|sound2=Empty powder snow bucket2.ogg
|subtitle=Bucket empties
|source=block
|description=When a powder snow bucket is placed
|id=item.bucket.empty_powder_snow
|translationkey=subtitles.item.bucket.empty
|volume=1.0
|pitch=''varies'' <ref group=sound>Each sound event can be 1.0, 0.95, or 1.1</ref>
|distance=16}}
{{Sound table
|sound=Fill powder snow bucket1.ogg
|sound2=Fill powder snow bucket2.ogg
|subtitle=Bucket fills
|source=player
|description=When a bucket is filled with powder snow
|id=item.bucket.fill_powder_snow
|translationkey=subtitles.item.bucket.fill
|volume=1.0
|pitch=''varies'' <ref group=sound>Each sound event can be 1.0, 0.9, or 1.1</ref>
|distance=16}}
{{Sound table
|sound=Powder Snow break1.ogg
|sound2=Powder Snow break2.ogg
|sound3=Powder Snow break3.ogg
|sound4=Powder Snow break4.ogg
|sound5=Powder Snow break5.ogg
|sound6=Powder Snow break6.ogg
|sound7=Powder Snow break7.ogg
|subtitle=Block broken
|source=block
|description=When a bucket is filled with powder snow
|id=block.powder_snow.break
|translationkey=subtitles.block.generic.break
|volume=1.0
|pitch=0.8
|distance=16
|foot=1}}
{{el|be}}:
{{Sound table
|type=bedrock
|sound=Fill powder snow bucket1.ogg
|sound2=Fill powder snow bucket2.ogg
|source=player
|description=When a bucket is filled with powder snow
|id=bucket.fill_powder_snow
|volume=1.0
|pitch=1.0}}
{{Sound table
|sound=Empty powder snow bucket1.ogg
|sound2=Empty powder snow bucket2.ogg
|source=block
|description=When a powder snow bucket is placed
|id=bucket.empty_powder_snow
|volume=1.0
|pitch=1.0
|foot=1}}
== Data values ==
=== ID ===
{{edition|java}}:
{{ID table
|edition=java
|showforms=y
|generatetranslationkeys=y
|displayname=Powder Snow Bucket
|spritetype=item
|nameid=powder_snow_bucket
|form=item
|foot=1}}
{{edition|bedrock}}:
{{ID table
|edition=bedrock
|shownumericids=y
|showforms=y
|showaliasids=y
|notshowbeitemforms=y
|generatetranslationkeys=y
|displayname=Powder Snow Bucket
|spritetype=item
|nameid=powder_snow_bucket
|aliasid=bucket / 11
|form=item
|id=368
|foot=1}}
== History ==
{{History|java}}
{{History||1.17|snap=20w46a|[[File:Powder Snow Bucket JE1 BE1.png|32px]] Added powder snow buckets.}}
{{History|bedrock}}
{{History||Caves & Cliffs<br>(experimental)|link=Bedrock Edition 1.17.0|snap=beta 1.16.210.53|[[File:Powder Snow Bucket JE1 BE1.png|32px]] Added powder snow buckets.
|The powder snow bucket replaced the powder snow block in the creative inventory.}}
{{History||1.17.0|snap=beta 1.17.0.50|Powder snow bucket are now available without enabling [[Experimental Gameplay]].}}
{{h|foot}}
== Issues ==
{{Issue list}}
==Gallery==
<gallery>
Cozy Cabin Powder Snow Bucket 1.jpg|Teaser image with a barely visible powder snow bucket.
Cozy Cabin Powder Snow Bucket 2.jpg|Teaser image with a barely visible powder snow bucket.
Cozy Cabin Powder Snow Bucket 3.jpg|Teaser image with a barely visible powder snow bucket.
</gallery>
{{Items}}
[[Category:Renewable resources]]
[[Category:Tools]]
[[de:Pulverschneeeimer]]
[[es:Cubo con nieve polvo]]
[[fr:Seau de neige poudreuse]]
[[it:Secchio di neve polverosa]]
[[ja:粉雪入りバケツ]]
[[pl:Wiadro sypkiego śniegu]]
[[pt:Balde de neve fofa]]
[[ru:Ведро с рыхлым снегом]]
[[zh:细雪桶]]</li></ul> | Added Fallout Mash-up pack. | ||||||||||||||||||||||||||||||||||
1.0.8{{Extension DPL}}<ul><li>[[Arrow|Arrow]]<br/>{{ItemEntity
|title=Arrow
|image=Arrow.png
|image2=Spectral Arrow.png
|renewable='''Uncraftable and Luck{{only|java|short=1}}''': No <br/>
'''All others''': Yes
|stackable='''Normal / Spectral:''' Yes (64)<br/>
'''Tipped:''' Yes (64, only if same effect)
|size=Height: 0.5 Blocks<br>Width: 0.5 Blocks
|networkid='''Normal / Tipped:'''<br>'''[[JE]]''': 60<br>
'''Spectral:'''<br>'''[[JE]]''': 91
}}
An '''arrow''' serves as ammunition for [[bow]]s, [[crossbow]]s, and [[dispenser]]s. Arrows can be modified to give [[status effects]] to [[player]]s and [[mob]]s.
== Obtaining ==
=== Picking up arrows ===
Arrows shot by players can always be [[#Retrieving|picked up]] in Creative mode.
An arrow ''cannot'' be picked up by a player in [[Survival]] or [[Adventure]] mode if:
* It is shot by a player in [[Creative]] mode.
* It is shot by any [[mob]] able to shoot arrows, such as [[skeleton]]s, [[stray]]s, [[pillager]]s, or [[piglin]]s. This includes mobs that do not shoot arrows in normal gameplay, such as [[illusioner]]s and bow-wielding [[wither skeleton]]s.
** This is the case even in Creative mode.<ref>{{bug|MC-128845|||WAI}}</ref>
* It is shot with an [[Infinity]]-enchanted [[bow]].
* It is one of the two extra arrows shot with a [[Multishot]]-enchanted [[crossbow]].
=== Mob loot ===
[[Skeleton]]s and [[stray]]s drop 0-2 arrows upon death. The maximum drop is increased by 1 per level of [[Looting]], for a maximum of 0–5 arrows with Looting III.
Strays have a 50% chance of dropping 1 arrow of [[Slowness]] when killed by a player. Each level of Looting increases the chance of this drop by 50% of the previous chance. This results in a maximum of 93.75% with Looting III.
{{IN|bedrock}}, [[pillager]]s also drop 0–2 arrows upon death. The maximum drop is increased by 1 per level of Looting, for a maximum of 0-5 arrows with Looting III.
=== Trading ===
Novice-level fletcher [[villager]]s have a 50% chance {{in|bedrock}}, or a {{frac|2|3}} chance {{in|java}}, to sell 16 arrows for one [[emerald]] as part of their trades.
{{IN|bedrock}}, master-level fletcher villagers have a {{frac|1|2}} chance to sell 5 tipped arrows for 2 emeralds and 5 arrows. {{IN|java}}, they have a {{frac|2|3}} chance to sell 5 tipped arrows for 2 emeralds and 5 arrows. Trades {{in|java}} can be the base effect, level II, or extended; {{in|bedrock}}, only the arrow of decay is level II.<!-- A check should be made if it chooses randomly from the whole of the list of possible arrows variants, or it it chooses a base arrow potion effect, then randomly choose from that arrow's options. The first one would make arrow's without a level II, like Fire Resistance for example, slightly less likely than ones with all three options like Swiftness. -->
<!-- None are extended duration, but villagers can trade level 2 arrows. -->
* Arrow of [[Fire Resistance]]
* Arrow of [[Harming]]
* Arrow of [[Healing]]
* Arrow of [[Invisibility]]
* Arrow of [[Leaping]]
* Arrow of [[Night Vision]]
* Arrow of [[Poison]]
* Arrow of [[Regeneration]]
* Arrow of [[Slowness]]
* Arrow of [[Strength]]
* Arrow of [[Swiftness]]
* Arrow of the [[Potion of the Turtle Master|Turtle Master]]
* Arrow of [[Water Breathing]]
* Arrow of [[Weakness]]
* Arrow of [[Slow Falling]]{{only|java}}<!-- bedrock fletchers never sell arrows of slow falling -->
* Arrow of [[Decay]]{{only|bedrock}}
These are all potion effects except Slow Falling {{in|bedrock}} and [[Luck]] {{in|java}}. Trading is the only legitimate way to obtain arrows of Decay in [[Survival]] mode.
=== Bartering ===
Spectral arrows{{only|java}}/normal arrows{{only|bedrock}} can be obtained through [[bartering]] with [[piglin]]s, and have a ~8.71% chance to give the [[player]] 6-12 arrows.
=== Villager gifts ===
{{IN|java}}, any regular or tipped arrow (except for [[luck]] and [[Bad Luck]] arrows) can be obtained as a reward item from [[fletcher]] [[villager]]s when the player has the [[Hero of the Village]] status effect.
=== Crafting ===
{{Crafting
|head=1
|B1= Flint
|B2= Stick
|B3= Feather
|Output = Arrow,4
|type = Combat
|showdescription=1
}}
{{Crafting
|A2= Glowstone Dust
|B1= Glowstone Dust
|B2= Arrow
|B3= Glowstone Dust
|C2= Glowstone Dust
|Output = Spectral Arrow,2
|type = Combat
|description = {{only|java}}
}}
{{Crafting
|foot=1
|description=Arrows of Decay are exclusive to {{el|be}} unless obtained via [[creative]] or [[commands]]. Arrows of luck are exclusive to {{el|je}}. A custom potion obtained via [[commands]] cannot craft arrows with the potion's custom name, lore, or the <code>CustomPotionColor</code>.
|A1= Arrow
|A2= Arrow
|A3= Arrow
|B1= Arrow
|B2= Matching Lingering Potion
|B3= Arrow
|C1= Arrow
|C2= Arrow
|C3= Arrow
|Output = Matching Tipped Arrow,8
|type = Combat
}}
=== Chest loot ===
{{LootChestItem|arrow}}
{{LootChestItem|spectral-arrow}}
=== Retrieving ===
Arrows stuck in a block that were originally shot by dispensers or by players in [[Survival]] without the [[Infinity]] enchantment may be collected. Arrows originally shot by [[skeleton]]s, [[stray]]s, [[illusioner]]s, [[pillager]]s, [[piglin]]s, players in [[Creative]], players using the [[Infinity]] enchantment, or duplicate arrows created by [[Crossbow]]s with the [[Multishot]] enchantment cannot be collected. Arrows cannot be retrieved when they are stuck in a player or mob, and players or mobs do not drop them when killed. Retrievable arrows have a despawn timer of 60 seconds.
=== Cauldrons ===
{{main|Cauldron#Potions}}
{{IN|bedrock}}, tipped arrows can also be obtained by using arrows on [[Cauldron#Potions|cauldrons]] that contain [[potion]]s. The number of tipped arrows created depends on the potion inside the cauldron. When the cauldron is {{frac|1|3}} full, 16 arrows can be tipped. When the cauldron is {{frac|2|3}} full, up to 32 arrows can be tipped and when the cauldron is full, an entire stack of 64 arrows can be tipped. This is more efficient than using lingering potions as up to 21.33 arrows can be tipped per potion.
== Usage ==
{{see also|Bow}}
When fired, arrows fly in a [[wikipedia:Trajectory of a projectile|ballistic trajectory]] affected by gravity and drag in [[air]], [[water]], and [[lava]]. The arrow's velocity is multiplied by 0.99 every game tick, and it also experiences 20 block/s<sup>2</sup> of downward acceleration induced by gravity.
Arrows travel approximately 3 [[block]]s when fired parallel to a flat plane with no charge, 15 blocks average with medium charge, and 24 blocks average with maximum charge. When fired from a fully charged bow, arrows can travel 120 blocks if fired from an optimal angle. The maximum height an arrow fired by a bow can reach is around 66 blocks.
An arrow fired in water experiences much more drag than in air: it moves less than 8 blocks before completely losing horizontal speed and falling straight down, although the knockback of the arrow remains unaffected. It also leaves a trail of bubbles in its wake.
There is a random variable to the trajectory of an arrow, given by <code>this.rand.nextGaussian() * 0.0075 * (double)inaccuracy</code> for the x, y and z coordinate. The inaccuracy is relatively small, becoming noticeable over larger distances. The inaccuracy of different arrow delivery devices may differ. Dispensers fire with an inaccuracy of 6, while bows fire with an inaccuracy of 1.
An arrow's speed determine the damage it inflicts. The damage inflicted is calculated by multiplying the arrow's [[#Entity data|damage value]] with its velocity in blocks per [[Tick#Game tick|game tick]]. When fired from a fully-charged unenchanted bow, arrows do {{hp|6}} of damage, with a smaller chance to damage for up to {{hp|11}} via critical hits. They inflict up to {{hp|5}} damage from a medium-charged bow, and {{hp|1}} from a bow with no charge. Arrows fired from dispensers always do {{hp|3}} of damage unless their velocity is modified by an external source. Arrows fired from [[crossbow]]s do {{hp|6}} to {{hp|11}} of damage.
Arrows trigger [[Damage#Immunity|damage immunity]] on hit. However, unlike other methods of damage that may bypass invulnerability under certain conditions, arrows hitting the mob while it is invulnerable lose all speed and drop to the ground, dealing no damage unless they contact another mob.
[[File:ArrowShotInTree.png|thumb|An arrow shot into a [[tree]].]]
Arrows also stick into objects they come in contact with and remain there for one minute before disappearing; the distance from the object and the angle determine how far into the target the arrow penetrates. Such arrows may be [[#Retrieving|retrieved]].
If the arrow has any custom potion effects (NBT tag <code>CustomPotionEffects</code>), all potion effects, including vanilla potion effects (NBT tag <code>Potion</code>) are removed 30 seconds after the arrow stops moving.
If an arrow is stuck in a block, and that block is broken or disappears (e.g., [[leaves]] upon decay), then the arrow falls straight down and damages entities below, but never deals a critical hit. The 1-minute despawn timer is then refreshed, meaning it will take another minute for the arrow to despawn.
Arrows bounce off players and mobs immune to damage, like a player in Creative mode, a [[wither]] under the "wither armor" effect, and a perching [[ender dragon]].
Arrows shot through [[lava]] or (if there's at least a 2 block gap) [[fire]] catch on fire and show an appropriate animation until they pass through water. Like arrows shot from a bow with the Flame enchantment, they can set other entities they hit on fire for 5 seconds as well as ignite TNT and campfires.
An arrow shot at any kind of boat{{only|java|short=1}} or minecart causes the vehicle to break, dropping any components (including container contents).
Arrows can get visually stuck in players {{in|java}}, although not any mobs. They appear as regular arrows regardless of type.<ref>{{bug|MC-83933|||WAI}}</ref>
<gallery>
Steve got shot.png|Steve got shot.
Alex got shot.png|Alex got shot.
</gallery>
=== Redstone circuits ===
An arrow can activate a wooden [[button]], wooden [[pressure plate]], a [[tripwire]], or a [[target]]. An arrow will continue to power these blocks until it is removed, either due to despawning, or being picked up. Target blocks emit a redstone pulse for one second, as opposed to the static depressed state of the other switches. Non-wooden switches are not affected by arrows.
When arrows are fired into the sides of blocks, they change their orientation to point more downward than their original flight path might indicate. This can cause them to intersect and thus trigger switches above them that they didn't actually hit, or block rails above them.
=== Explosions ===
Arrows are affected by explosions while they are in flight. Since explosions can increase the speed of an arrow, they can also increase the damage dealt by them. {{only|Java}}
== Variants ==
=== Tipped arrows ===
{{See also|#Crafting}}
Tipped arrows are arrows that imbue a potion effect when hitting a mob or player. The duration of the effect is {{frac|1|8}} that of the corresponding potion, if applicable, and is not affected by the power of the arrow. The status effect is the same as the regular power effect for the potion. If a bow is enchanted with [[Infinity]], tipped arrows are still consumed.
The types of arrows are:
<div class="list-style-none" style="-moz-column-width:19em;-webkit-column-width:19em;column-width:19em">
* {{ItemLink|link=none|Arrow of Regeneration}}
* {{ItemLink|link=none|Arrow of Swiftness}}
* {{ItemLink|link=none|Arrow of Fire Resistance}}
* {{ItemLink|link=none|Arrow of Healing}}
* {{ItemLink|link=none|Arrow of Night Vision}}
* {{ItemLink|link=none|Arrow of Strength}}
* {{ItemLink|link=none|Arrow of Leaping}}
* {{ItemLink|link=none|Arrow of Invisibility}}
* {{ItemLink|link=none|Arrow of Poison}}
* {{ItemLink|link=none|Arrow of Weakness}}
* {{ItemLink|link=none|Arrow of Slowness}}
* {{ItemLink|link=none|Arrow of Harming}}
* {{ItemLink|link=none|Arrow of Water Breathing}}
* {{ItemLink|link=none|Arrow of Luck}}{{only|java|short=1}}
* {{ItemLink|link=none|Arrow of Decay}}{{only|bedrock|short=1}}
* {{ItemLink|link=none|Arrow of the Turtle Master}}
* {{ItemLink|link=none|Arrow of Slow Falling}}
</div>
Arrows of Harming (and arrows of Healing when used against undead mobs) do not add a static amount of damage to the arrow.<ref>{{bug|MC-107856||Arrows of harming/healing do not stack with bow damage}}</ref> Instead, the arrow's damage is first calculated, then checked to see if it is below {{Health|12}}. If the arrow's damage is less than 12, the Harming effect of the arrow makes up the difference, to ensure the arrow does exactly {{Health|12}}. Therefore, an unenchanted bow cannot deal more than 12 damage using Harming (or Healing) arrows, as it can deal a maximum of {{Health|11}} damage on level ground. However, if the arrow would deal more than 12 damage, the harming effect is entirely neutralized. This means that bows enchanted with Power I through Power III has a chance to not utilize the arrow at full charge, and any Power level above III never utilizes Arrows of Harming effectively at full charge when against unarmored mobs/players.
==== No-effect tipped arrows ====
It is possible to craft tipped arrows using [[Lingering Potion#Lingering water bottle|Lingering Water Bottles]] as well as Awkward, Thick, and Mundane [[Lingering Potion|Lingering potions]]. If crafted with a water bottle, the arrow is called an arrow of Splashing. If crafted with Mundane, Awkward, or Thick potions, it is called a tipped arrow.<ref>{{bug|MC-158539}}</ref> Tipped arrows crafted from different potions do not stack, as resultant tipped arrows all have different potion tags.
In Bedrock Edition, all four kinds as well as the long mundane tipped arrow aren't obtainable either in creative, by cauldrons, by crafting, or by commands.
All four kinds generate blue particles in flight and upon landing, but otherwise behave like regular arrows. In particular, arrow of Splashing has no effect on fire and campfires and when shot from a bow with the Flame enchantment, can light campfires and TNT just like regular arrows on fire.
{| class="wikitable" style="text-align: center;" data-description="Unused potions"
! Icon
! Name
|-
| {{Slot|Arrow of Splashing|link=none}}
! Arrow of Splashing
|-
| {{Slot|Tipped Arrow|link=none}}
! Tipped Arrow
|}
==== Uncraftable tipped arrows ====
{{IN|java}}, the uncraftable tipped arrow is a tipped arrow with no effect that is unobtainable in regular gameplay. It is available in two variants that don't stack together:
* {{cmd|/give @s minecraft:tipped_arrow{Potion:"minecraft:empty"} }} - arrow assigned an effect placeholder "empty"
* {{cmd|/give @s minecraft:tipped_arrow }} - arrow not assigned any effect.
The uncraftable arrow doesn't differ from regular arrows in behavior when used as a projectile.
{| class="wikitable" style="text-align: center;" data-description="Unused potions"
! Icon
! Name
|-
| {{Slot|Uncraftable Tipped Arrow|link=none}}
! Uncraftable Tipped Arrow
|}
=== Spectral arrows ===
{{exclusive|java}}
A spectral arrow confers the [[Glowing]] status effect for 10 seconds. The Glowing effect creates an outline of the target, which is visible through blocks, and colored based on the target's [[team]] (white by default). Even if a bow is enchanted with [[Infinity]], spectral arrows are still consumed. Spectral arrows can be acquired through [[bartering]] or crafted by combining 4 [[Glowstone Dust#Crafting ingredient|glowstone dust]] with one arrow, yielding 2 spectral arrows.
{| class="wikitable" style="text-align: center;"
! Icon
! Name
|-
| {{Slot|Spectral Arrow|link=none}}
! Spectral Arrow
|}
== Sounds ==
{{edition|java}}:<br>
Arrows and spectral arrows use the Friendly Creatures sound category for entity-dependent sound events.
{{Sound table
|sound=Arrow hit1.ogg
|sound2=Arrow hit2.ogg
|sound3=Arrow hit3.ogg
|sound4=Arrow hit4.ogg
|subtitle=Arrow hits
|source=Friendly Creatures
|description=When an arrow impacts something
|id=entity.arrow.hit
|translationkey=subtitles.entity.arrow.hit
|volume=1.0
|pitch={{frac|12|11}} - {{frac|4|3}}
|distance=16}}
{{Sound table
|sound=Succesfull Hit.ogg
|subtitle=Player hit
|source=Players
|description=When an arrow shot by a player hits another player
|id=entity.arrow.hit_player
|translationkey=subtitles.entity.arrow.hit_player
|volume=1.0
|pitch=1.0
|distance=16}}
{{Sound table
|rowspan=3
|sound=Bow shoot.ogg
|subtitle=Arrow fired
|source=Players
|description=When an arrow is fired by a player
|id=entity.arrow.shoot
|translationkey=subtitles.entity.arrow.shoot
|volume=1.0
|pitch=Around 1.2<ref group=sound>Depends on how long the bow is charged for, around 1.2 with a fully charged bow. The exact formula is <math>\frac{1}{\operatorname{randomFloat()}\times 4+1.2}+\frac{\text{progress}}{2}</math> </ref>
|distance=16}}
{{Sound table
|subtitle=Skeleton shoots
|source=Hostile Creatures
|description=When a skeleton shoots an arrow
|id=entity.skeleton.shoot
|translationkey=subtitles.entity.skeleton.shoot
|volume=1.0
|pitch={{frac|5|6}} - 1.25
|distance=16}}
{{Sound table
|subtitle=Dispensed item
|source=Blocks
|description=When a dispenser shoots an arrow
|id=block.dispenser.launch
|translationkey=subtitles.block.dispenser.dispense
|volume=1.0
|pitch=1.2
|distance=16}}
{{Sound table
|sound=Crossbow shoot1.ogg
|sound2=Crossbow shoot2.ogg
|sound3=Crossbow shoot3.ogg
|subtitle=Crossbow fires
|source=Players
|description=When a crossbow shoots an arrow
|id=item.crossbow.shoot
|translationkey=subtitles.item.crossbow.shoot
|volume=0.8 / 0.9
|pitch=0.9 / 1.0
|distance=16
|foot=1}}
{{edition|bedrock}}:
{{Sound table
|type=bedrock
|sound=Arrow hit1.ogg
|sound2=Arrow hit2.ogg
|sound3=Arrow hit3.ogg
|sound4=Arrow hit4.ogg
|source=player
|description=When an arrow impacts something
|id=random.bowhit
|volume=1.0
|pitch=1.09-1.3}}
{{Sound table
|sound=Bow shoot.ogg
|source=player
|description=When something shoots an arrow
|id=random.bow
|volume=1.0
|pitch=0.83-1.25}}
{{Sound table
|sound=Crossbow shoot1.ogg
|sound2=Crossbow shoot2.ogg
|sound3=Crossbow shoot3.ogg
|source=player
|description=When a crossbow shoots an arrow
|id=crossbow.shoot
|volume=1.0
|pitch=1.0
|foot=1}}
== Data values ==
=== ID ===
{{edition|java}}:
{{ID table
|edition=java
|showitemtags=y
|showforms=y
|generatetranslationkeys=y
|displayname=Arrow
|spritetype=item
|nameid=arrow
|itemtags=arrows
|form=item}}
{{ID table
|displayname=Spectral Arrow
|spritetype=item
|nameid=spectral_arrow
|itemtags=arrows
|form=item}}
{{ID table
|displayname=Tipped Arrow
|spritetype=item
|nameid=tipped_arrow
|itemtags=arrows
|form=item
|translationkey=item.minecraft.tipped_arrow, item.minecraft.tipped_arrow.effect.empty, item.minecraft.tipped_arrow.effect.water, item.minecraft.tipped_arrow.effect.mundane, item.minecraft.tipped_arrow.effect.thick, item.minecraft.tipped_arrow.effect.awkward, item.minecraft.tipped_arrow.effect.night_vision, item.minecraft.tipped_arrow.effect.invisibility, item.minecraft.tipped_arrow.effect.leaping, item.minecraft.tipped_arrow.effect.fire_resistance, item.minecraft.tipped_arrow.effect.swiftness, item.minecraft.tipped_arrow.effect.slowness, item.minecraft.tipped_arrow.effect.water_breathing, item.minecraft.tipped_arrow.effect.healing, item.minecraft.tipped_arrow.effect.harming, item.minecraft.tipped_arrow.effect.poison, item.minecraft.tipped_arrow.effect.regeneration, item.minecraft.tipped_arrow.effect.strength, item.minecraft.tipped_arrow.effect.weakness, item.minecraft.tipped_arrow.effect.levitation, item.minecraft.tipped_arrow.effect.luck, item.minecraft.tipped_arrow.effect.turtle_master, item.minecraft.tipped_arrow.effect.slow_falling
|foot=1}}
{{ID table
|edition=java
|showentitytags=y
|generatetranslationkeys=y
|displayname=Arrow
|spritetype=entity
|nameid=arrow
|entitytags=arrows, impact_projectiles}}
{{ID table
|displayname=Spectral Arrow
|spritetype=entity
|nameid=spectral_arrow
|entitytags=arrows, impact_projectiles
|foot=1}}
{{edition|bedrock}}:
{{ID table
|edition=bedrock
|showitemtags=y
|notshowbeitemforms=y
|shownumericids=y
|showforms=y
|generatetranslationkeys=y
|displayname=Arrow
|spritetype=item
|nameid=arrow
|id=301
|itemtags=minecraft:arrow
|form=item
|translationkey=item.arrow.name, item.tipped_arrow.name, tipped_arrow.effect.water, tipped_arrow.effect.mundane, tipped_arrow.effect.thick, tipped_arrow.effect.awkward, tipped_arrow.effect.nightVision, tipped_arrow.effect.invisibility, tipped_arrow.effect.jump, tipped_arrow.effect.fireResistance, tipped_arrow.effect.moveSpeed, tipped_arrow.effect.moveSlowdown, tipped_arrow.effect.waterBreathing, tipped_arrow.effect.heal, tipped_arrow.effect.harm, tipped_arrow.effect.poison, tipped_arrow.effect.regeneration, tipped_arrow.effect.damageBoost, tipped_arrow.effect.weakness, tipped_arrow.effect.wither, tipped_arrow.effect.turtleMaster, tipped_arrow.effect.slowFalling
|foot=1}}
{{ID table
|edition=bedrock
|shownumericids=y
|generatetranslationkeys=y
|displayname=Arrow
|spritetype=entity
|nameid=arrow
|id=80
|foot=1}}
=== Metadata ===
{{IN|bedrock}}, arrows use the following item data values:
{{/DV}}
=== Entity data ===
==== Normal and tipped arrows ====
Arrows have entity data that define various properties of the entity.
{{el|java}}:
{{main|Entity format}}
{{/ED}}
{{el|bedrock}}:
: See [[Bedrock Edition level format/Entity format]].
==== Spectral arrows ====
Spectral arrows also have entity data that define various properties of the entity.
{{el|java}}:
{{main|Entity format}}
{{/ED1}}
{{el|bedrock}}
: See [[Bedrock Edition level format/Entity format]].
== Achievements ==
{{load achievements|Sniper Duel;Archer;Bullseye}}
== Advancements ==
{{load advancements|Take Aim;Sniper Duel;Not Today;Bullseye;Ol' Betsy;Two Birds;Who's the Pillager Now;Arbalistic;How Did We Get Here}}
== Video ==
<div style="text-align:center">{{yt|STQkD1Oa65s}}</div>
== History ==
{{History|java classic}}
{{History||0.24_SURVIVAL_TEST|[[File:Arrow JE1.png|42px]] Arrows have been added as an object and are fired by pressing {{Key|Tab}}.}}
{{History||0.25 SURVIVAL TEST|[[File:Arrow JE2 BE1.png|42px]] The texture of arrows has been changed.
|Arrows now deal more [[damage]], and can damage the player.
|The [[player]] now spawns with 20 arrows; the remaining amount is shown above the hotbar labeled as "Arrows".
|[[File:Purple Arrow JE1.png|42px]] [[Skeleton]]s now fire purple arrows, instead of hitting the [[player]] directly. These arrows can't be collected by the [[player]].
|When a skeleton is killed, it now drops 6-9 normal arrows for the player to gather.}}
{{History||0.29|Arrows can no longer be shot by the player in Creative Mode.}}
{{History|java indev}}
{{History||0.31|snap=20100122|[[File:Arrow (item) JE1 BE1.png|32px]] Arrows have been added as [[item]]s alongside with [[bow]]s.
|The "Arrows" display above the hotbar has been removed.}}
{{History|||snap=20100124|Arrows now have a [[sound]] effect. What this sound effect is is completely unknown; it could be for hitting a block, for being fired or for something else entirely.}}
{{History|||snap=20100128|Arrows can now be [[craft]]ed using [[apple]]s.}}
{{History|||snap=20100129|Arrows can no longer be crafted.}}
{{History|||snap=20100130|Arrows are once again now craftable. Iron is used instead of steel.}}
{{History||20100219|Arrows are now dropped by [[skeleton]]s.}}
{{History|java infdev}}
{{History||20100316|Arrows now have a high chance of spawning either a [[sheep]], a [[pig]], a [[skeleton]], a [[creeper]], a [[spider]], or a [[zombie]] upon hitting a [[block]].
|The player now spawns with 999 arrows.}}
{{History||20100320|The player now spawns with 64 arrows.}}
{{History||20100327|The player no longer spawns with any arrows in new worlds.}}
{{History||20100413|Arrows no longer spawn [[mob]]s.}}
{{History|java alpha}}
{{History||v1.0.14|The tip of an arrow in crafting is now made from [[flint]] rather than an [[iron ingot]].}}
{{History|java beta}}
{{History||1.2|Arrows can now be fired by [[dispenser]]s.}}
{{History||1.6|snap=Test Build 3|Arrows could be used to stick in any [[block]] before this update, even some non-solid ones. For example, they could stick in [[torch]]es, [[sugar cane]] and [[nether portal]]s.}}
{{History||1.8|snap=Pre-release|Arrows can no longer be rapid-fired from [[bow]]s; they must be charged first.
|Arrows (with a bow at full strength) can now travel 120 blocks when fired from the optimal angle, and stick to [[mob]]s.}}
{{History||Sound Update|Arrow firing [[sound]]s have been changed - see sounds section}}
{{History|java}}
{{History||November 21, 2011|link={{ytl|BES9EKK4Aw4}}|Exploding arrows are mentioned.}}
{{History||1.0.0|snap=Beta 1.9 Prerelease|Arrows no longer stick to [[mob]]s.
|Arrows remain visible in players.{{verify|then when were they removed? bug fix in 1.4.3 implies it was removed for players as well in this version}}}}
{{History|||snap=RC1|Arrow landing [[sound]]s have been changed.}}
{{History||1.1|snap=release|Arrows on [[fire]] now set the [[entity|entities]] they hit on fire. Before, arrows could be on fire (like other [[entities]]), but they did not set what they hit on fire, and there was no [[enchanting|enchantment]] to fire flaming arrows.}}
{{History||1.3.1|snap=12w21a|Farmer [[villager]]s now [[trading|sell]] 9–12 arrows for 1 [[emerald]].}}
{{History|||snap=12w22a|Arrows can now be found inside [[dispenser]]s in the newly added [[jungle temple]]s.}}
{{History|||snap=12w23a|Arrows can now activate [[tripwire]] switches and wooden [[pressure plate]]s.}}
{{History||1.4.2|snap=12w34a|Arrows can now activate wooden [[button]]s.}}
{{History|||snap=12w34b|Arrows on [[fire]] can now ignite [[TNT]].}}
{{History||1.4.4|snap=1.4.3|Arrows now stick to [[player]]s again, but not [[mob]]s.}}
{{History||1.4.6|snap=pre|Arrows now make a "ding" sound when they hit a player.}}
{{History||1.8|snap=14w02a|Farmer [[villager]]s no longer [[trading|sell]] arrows.
|Fletcher villagers now sell 8–12 arrows for 1 [[emerald]].}}
{{History|||snap=14w25a|An underwater arrow now loses all velocity after a few blocks and slowly falls.
|A flaming arrow underwater now gets extinguished.}}
{{History|||snap=14w26a|Fire arrows can now be used to detonate [[minecarts with TNT]].}}
{{History||1.9|snap=15w31a|[[File:Tipped Arrow Revision 1.png|32px]] [[File:Tipped Arrow MC-84253.png|32px]] Added 14 new tipped arrows. Due to a bug<ref>{{bug|MC-84253}}</ref>, all tipped arrows except arrow of Splashing are black.
|[[File:Spectral Arrow JE1.png|42px]] [[File:Spectral Arrow (item) JE1.png|32px]] Added spectral arrows. They show [[mob]] and [[player]] outlines in their team color when hit. They have no texture when shot.}}
{{History|||snap=15w31b|[[File:Spectral Arrow JE2.png|42px]] Spectral arrows now use their intended texture.<ref>{{bug|MC-82809}}</ref>}}
{{History|||snap=15w32a|[[File:Arrow of Night Vision JE1 BE1.png|32px]] [[File:Arrow of Invisibility JE1 BE1.png|32px]] [[File:Arrow of Leaping JE1 BE1.png|32px]] [[File:Arrow of Fire Resistance JE1 BE1.png|32px]] [[File:Arrow of Swiftness JE1 BE1.png|32px]] [[File:Arrow of Slowness JE1 BE1.png|32px]] [[File:Arrow of Water Breathing JE1 BE1.png|32px]] [[File:Arrow of Healing JE1 BE1.png|32px]] [[File:Arrow of Harming JE1 BE1.png|32px]] [[File:Arrow of Poison JE1 BE1.png|32px]] [[File:Arrow of Regeneration JE1 BE1.png|32px]] [[File:Arrow of Strength JE1 BE1.png|32px]] [[File:Arrow of Weakness JE1 BE1.png|32px]] 13 tipped arrows now have the correct textures.}}
{{History|||snap=15w33c|Added [[shield]]s; though they fully block [[damage]] from arrows, arrows still visually stick into the [[player]].}}
{{History|||snap=15w37a|Arrows now ricochet off of [[shield]]s.}}
{{History|||snap=15w44b|Added the initial method for obtaining tipped arrows, which lasted until snapshot [[16w06a]] – firing arrows into a [[lingering potion]] cloud.
|[[File:Arrow of Luck JE1 BE1.png|32px]] Added the Arrow of [[Luck]].
|[[File:Tipped Arrow Revision 1.png|32px]] [[File:Tipped Arrow Revision 1.png|32px]] [[File:Tipped Arrow Revision 1.png|32px]] [[File:Tipped Arrow Revision 1.png|32px]] Add tipped arrows for uncraftable potions, mundane potions, thick potions, and awkward potions. These are all available in the creative inventory.
|Add tipped arrows for all enhanced and extended potions
|[[File:Tipped Arrow Revision 1.png|32px]] Arrow of Splashing has been added to the creative inventory.}}
{{History|||snap=15w47b|Arrows now ricochet off of [[creative]] mode [[player]]s, whereas before they would pass straight through.}}
{{History|||snap=15w49a|Arrows now take the archer's motion into account. For example, if the player is falling, an arrow fired upward travels slower than if the player was standing still, and an arrow fired downward flies faster.
|Tipped and spectral arrows are no longer affected by the [[Infinity]] [[enchanting|enchantment]].}}
{{History|||snap=16w06a|Tipped arrows have been given a crafting recipe, and are no longer obtained by shooting them into a [[lingering potion]] cloud.}}
{{History||1.10|snap=16w20a|Arrows of [[slowness]] may now drop from [[stray]]s when they are killed by a [[player]].}}
{{History||1.11|snap=16w32a|The [[entity]] IDs have been changed from {{cd|Arrow}} and {{cd|SpectralArrow}} to {{cd|arrow}} and {{cd|spectral_arrow}}.|Tipped arrows of instant healing and instant damage now function. Previously, the fact that tipped arrows have 1/8th the duration was reducing 1 game tick to zero game ticks.}}{{History|||snap=16w42a|Arrows now have a {{cd|crit}} tag that determines whether it deals [[critical hit|critical damage]].}}
{{History||1.11|snap=16w39a|Tipped arrows without effects and the uncraftable tipped arrow have been removed from the creative inventory.<ref name="removed tipped arrow">https://bugs.mojang.com/browse/MC-92139</ref>}}
{{History||1.11.1|snap=16w50a|The arrow [[entity]] now has a {{cd|Color}} integer tag, for displaying the custom [[potion]] color of a fired arrow item that has a {{cd|CustomPotionColor}} tag.}}
{{History||1.13|snap=17w47a|Prior to [[1.13/Flattening|''The Flattening'']], these [[item]]s' numeral IDs were 262, 439 and 440.}}
{{History|||snap=18w07a|[[File:Arrow of the Turtle Master JE1 BE1.png|32px]] Added the Arrow of the Turtle Master.}}
{{History|||snap=18w14a|[[File:Arrow of Slow Falling JE1 BE1.png|32px]] Added the Arrow of [[Slow Falling]].}}
{{History||1.14|snap=18w43a|Arrows are now used as ammo for [[crossbow]]s.
|Arrows can now break [[chorus flower]]s.
|[[File:Uncraftable Tipped Arrow JE2.png|32px]] [[File:Arrow of Splashing JE2.png|32px]] [[File:Arrow of Night Vision JE2 BE2.png|32px]] [[File:Arrow of Invisibility JE2 BE2.png|32px]] [[File:Arrow of Leaping JE2 BE2.png|32px]] [[File:Arrow of Fire Resistance JE2 BE2.png|32px]] [[File:Arrow of Swiftness JE2 BE2.png|32px]] [[File:Arrow of Slowness JE2 BE2.png|32px]] [[File:Arrow of the Turtle Master JE2 BE2.png|32px]] [[File:Arrow of Water Breathing JE2 BE2.png|32px]] [[File:Arrow of Healing JE2 BE2.png|32px]] [[File:Arrow of Harming JE2 BE2.png|32px]] [[File:Arrow of Poison JE2 BE2.png|32px]] [[File:Arrow of Regeneration JE2 BE2.png|32px]] [[File:Arrow of Strength JE2 BE2.png|32px]] [[File:Arrow of Weakness JE2 BE2.png|32px]] [[File:Arrow of Luck JE2 BE2.png|32px]] [[File:Arrow of Slow Falling JE2 BE2.png|32px]] The [[item]] sprite textures of tipped arrows has been changed.
|[[File:Spectral Arrow (item) JE2.png|32px]] The [[item]] sprite texture for spectral arrows has been changed.}}
{{History|||snap=18w47a|Arrows can now be generated inside of [[pillager outpost]] chests.}}
{{History|||snap=18w50a|Arrows can now be found in chests in fletcher houses.}}
{{History|||snap=19w11a|Fletcher [[villager]]s now [[trading|sell]] tipped arrows.}}
{{History|||snap=19w13a|Any regular or tipped arrow can be obtained as a reward [[item]] from fletcher villagers when the [[player]] has the [[Hero of the Village]] status effect.}}
{{History||1.14.1|snap=Pre-Release 2|Flaming arrows can now light [[campfire]]s.}}
{{History||1.16|snap=20w16a|Arrows and spectral arrows now generate in [[bastion remnant]] chests.}}
{{History||1.16.2|snap=20w28a|Spectral arrows can now be obtained through [[bartering]] with [[piglin]]s.}}
{{History|||snap=20w30a|The average yield of spectral arrows from bastion remnant chests have been substantially increased.}}
{{History||1.17|snap=21w11a|[[File:Spectral Arrow JE3.png|42px]] The texture of the spectral arrow is now have been changed.}}
{{History|||snap=21w13a|The unused original texture of the arrow<ref>[[File:Arrow (texture) JE2.png|48px]] <code>/asset/minecraft/textures/entity/arrow.png</code></ref> have been removed.}}
{{History||1.19.3|snap=22w43a|Tipped arrows for mundane, thick, and awkward potions, and the no-effect tipped arrow, are now available again in the Creative inventory.}}
{{History||1.19.4|snap=Pre-release 3|[[File:Arrow of Night Vision JE3.png|32px]] [[File:Arrow of Invisibility JE3.png|32px]] [[File:Arrow of Leaping JE3.png|32px]] [[File:Arrow of Fire Resistance JE3.png|32px]] [[File:Arrow of Swiftness JE3.png|32px]] [[File:Arrow of Slowness JE3.png|32px]] [[File:Arrow of the Turtle Master JE3.png|32px]] [[File:Arrow of Water Breathing JE3.png|32px]] [[File:Arrow of Harming JE3.png|32px]] [[File:Arrow of Poison JE3.png|32px]] [[File:Arrow of Strength JE3.png|32px]] Changed colors of the following tipped arrows: Night Vision, Invisibility, Leaping, Fire Resistance, Swiftness, Slowness, Turtle Master, Water Breathing, Harming, Poison, Strength, Resistance.}}
{{History||1.20|snap=23w12a|Wither [[effect]] particle colors have been adjusted to make them more distinguishable.
|The arrow of [[Slow Falling]] has had its color tweaked to make it more distinguishable from the arrow of [[Invisibility]].}}
{{History|pocket alpha}}
{{History||v0.2.0|[[File:Arrow (item) JE1 BE1.png|32px]] Added arrows. They are currently unobtainable and serve no purpose.}}
{{History||v0.3.3|[[File:Arrow JE2 BE1.png|42px]] Arrows now serve as ammunition for bows.
|Added skeletons, which drop arrows when they die.
|Arrows are now craftable.}}
{{History||v0.5.0|Arrows can now be obtained after activating the [[nether reactor]].}}
{{History||v0.12.1|snap=build 1|Arrows on [[fire]] now set the [[entity|entities]] they hit on fire. Before, arrows could be on fire (like other entities), but they would not set what they hit on fire, and there was no [[enchantment]] to fire flaming arrows.
|Arrows on fire can now ignite [[TNT]].
|An underwater arrow now loses all velocity after a few [[block]]s and slowly falls.
|Arrows are no longer available from the [[nether reactor]].}}
{{History||v0.13.0|snap=build 1|Arrows now update [[sand]] and [[gravel]].}}
{{History||v0.15.0|snap=build 1|[[File:Arrow of Night Vision JE1 BE1.png|32px]] [[File:Arrow of Invisibility JE1 BE1.png|32px]] [[File:Arrow of Leaping JE1 BE1.png|32px]] [[File:Arrow of Fire Resistance JE1 BE1.png|32px]] [[File:Arrow of Swiftness JE1 BE1.png|32px]] [[File:Arrow of Slowness JE1 BE1.png|32px]] [[File:Arrow of Water Breathing JE1 BE1.png|32px]] [[File:Arrow of Healing JE1 BE1.png|32px]] [[File:Arrow of Harming JE1 BE1.png|32px]] [[File:Arrow of Poison JE1 BE1.png|32px]] [[File:Arrow of Regeneration JE1 BE1.png|32px]] [[File:Arrow of Strength JE1 BE1.png|32px]] [[File:Arrow of Weakness JE1 BE1.png|32px]] Added tipped arrows.
|Tipped arrows are made by using [[cauldron]]s filled with [[potion]]s.
|Arrows can now be found inside [[dispenser]]s in [[jungle temple]]s.}}
{{History||v0.16.0|snap=build 4|[[File:Arrow of Decay BE1.png|32px]] Added the Arrow of [[Wither (status effect)|Decay]].
|Arrows of Decay currently have a white pixelated texture.}}
{{History|pocket}}
{{History||1.0.0|snap=alpha 0.17.0.1|Tipped arrows are now [[crafting|craftable]], but they can still be obtained by using [[cauldron]]s filled with [[potion]]s.}}
{{History||1.0.4|snap=alpha 1.0.4.0|Arrows are now [[trading|sold]] by fletcher [[villager]]s.}}
{{History||1.1.0|snap=alpha 1.1.0.0|The [[entity]] ID has been changed from {{cd|arrow.skeleton}} to {{cd|arrow}}.}}
{{History|||snap=alpha 1.1.0.9|[[File:Arrow of Decay BE2.png|32px]] The texture of arrows of [[Wither (status effect)|Decay]] has been changed.}}
{{History|bedrock}}
{{History||1.5.0|snap=beta 1.5.0.4|[[File:Arrow of the Turtle Master JE1 BE1.png|32px]] Added the Arrow of the Turtle Master.}}
{{History||1.6.0|snap=beta 1.6.0.5|[[File:Arrow of Slow Falling JE1 BE1.png|32px]] Added the Arrow of [[Slow Falling]].}}
{{History||1.8.0|snap=beta 1.8.0.10|Arrows can now be used as ammo for the new [[crossbow]]s.}}
{{History||1.9.0|snap=beta 1.9.0.0|Added [[pillager]]s, which [[drops|drop]] arrows upon [[death]].}}
{{History|||snap=beta 1.9.0.2|Arrows and tipped arrows can now be used to craft [[fletching table]]s.}}
{{History||1.10.0|snap=beta 1.10.0.3|[[File:Arrow of Night Vision JE2 BE2.png|32px]] [[File:Arrow of Invisibility JE2 BE2.png|32px]] [[File:Arrow of Leaping JE2 BE2.png|32px]] [[File:Arrow of Fire Resistance JE2 BE2.png|32px]] [[File:Arrow of Swiftness JE2 BE2.png|32px]] [[File:Arrow of Slowness JE2 BE2.png|32px]] [[File:Arrow of Water Breathing JE2 BE2.png|32px]] [[File:Arrow of Healing JE2 BE2.png|32px]] [[File:Arrow of Harming JE2 BE2.png|32px]] [[File:Arrow of Poison JE2 BE2.png|32px]] [[File:Arrow of Regeneration JE2 BE2.png|32px]] [[File:Arrow of Strength JE2 BE2.png|32px]] [[File:Arrow of Weakness JE2 BE2.png|32px]] [[File:Arrow of Decay BE3.png|32px]] [[File:Arrow of the Turtle Master JE2 BE2.png|32px]] [[File:Arrow of Slow Falling JE2 BE2.png|32px]] The [[item]] sprite textures of tipped arrows have been changed.
|Arrows can now be found in [[pillager outpost]] chests.
|Arrows can now break [[chorus flower]]s.}}
{{History||1.11.0|snap=beta 1.11.0.1|Arrows can now be found in [[village]] fletcher [[chest]]s.
|Flaming arrows can now light [[campfire]]s.}}
{{History|||snap=beta 1.11.0.4|Fletcher [[villager]]s now [[trading|sell]] 5 arrows for one [[emerald]].
|Various regular tipped arrows can now be obtained via [[trading]] with fletcher villagers.}}
{{History|||snap=beta 1.11.0.7|Arrow no longer can be used to craft [[fletching table]].}}
{{History||1.12.0|snap=beta 1.12.0.3|Novice-level fletcher villagers now [[trading|sell]] 16 regular arrows instead of 5 arrows.}}
{{History||1.16.0|snap=beta 1.16.0.51|Added [[piglin]]s, which [[drops|drop]] arrows upon [[death]].}}
{{History|||snap=beta 1.16.0.57|Arrows now generate in [[bastion remnants]] chests.
|Master-level fletcher villager now always offer 1 of 15 tipped arrows.
|Piglins no longer drop arrows upon death.}}
{{History||1.16.100|snap=beta 1.16.100.54|Arrows can now be obtained through [[bartering]].}}
{{History||1.19.80|snap=beta 1.19.80.21|Changed potion colors for the following tipped arrows: Fire Resistance, Harming, Invisibility, Leaping, Night Vision, Poison, Slowness, Strength, Swiftness, Turtle Master, and Water Breathing.}}
{{History|console}}
{{History||xbox=TU1|xbone=CU1|ps=1.00|wiiu=Patch 1|switch=1.0.1|[[File:Arrow JE2 BE1.png|42px]] [[File:Arrow (item) JE1 BE1.png|32px]] Added arrows.}}
{{History||xbox=TU31|xbone=CU19|ps=1.22|wiiu=Patch 3|An underwater arrow now loses all velocity after a few [[block]]s and slowly falls.
|A flaming arrow underwater now gets extinguished.}}
{{History||xbox=TU46|xbone=CU36|ps=1.38|wiiu=Patch 15|[[File:Arrow of Night Vision JE1 BE1.png|32px]] [[File:Arrow of Invisibility JE1 BE1.png|32px]] [[File:Arrow of Leaping JE1 BE1.png|32px]] [[File:Arrow of Fire Resistance JE1 BE1.png|32px]] [[File:Arrow of Swiftness JE1 BE1.png|32px]] [[File:Arrow of Slowness JE1 BE1.png|32px]] [[File:Arrow of Water Breathing JE1 BE1.png|32px]] [[File:Arrow of Healing JE1 BE1.png|32px]] [[File:Arrow of Harming JE1 BE1.png|32px]] [[File:Arrow of Poison JE1 BE1.png|32px]] [[File:Arrow of Regeneration JE1 BE1.png|32px]] [[File:Arrow of Strength JE1 BE1.png|32px]] [[File:Arrow of Weakness JE1 BE1.png|32px]] [[File:Arrow of Luck JE1 BE1.png|32px]] Added tipped arrows.
|[[File:Spectral Arrow (item) JE1.png|32px]] Added spectral arrows.
|Spectral arrows are currently unobtainable and do not any effects.}}
{{History||xbox=TU57|xbone=CU49|ps=1.56|wiiu=Patch 27|switch=1.0.7|Spectral arrows now have effects but are not craftable. They can be obtained only via inventory editing.}}
{{History||xbox=TU69|xbone=none|ps=1.76|wiiu=Patch 38|switch=none|[[File:Arrow of Decay BE2.png|32px]] [[File:Arrow of the Turtle Master JE1 BE1.png|32px]] [[File:Arrow of Slow Falling JE1 BE1.png|32px]] Added the Arrow of the [[Wither (status effect)|Decay]], Turtle Master, and [[Slow Falling]].}}
{{History||xbox=none|xbone=none|ps=1.90|wiiu=none|switch=none|[[File:Arrow of Night Vision JE2 BE2.png|32px]] [[File:Arrow of Invisibility JE2 BE2.png|32px]] [[File:Arrow of Leaping JE2 BE2.png|32px]] [[File:Arrow of Fire Resistance JE2 BE2.png|32px]] [[File:Arrow of Swiftness JE2 BE2.png|32px]] [[File:Arrow of Slowness JE2 BE2.png|32px]] [[File:Arrow of Water Breathing JE2 BE2.png|32px]] [[File:Arrow of Healing JE2 BE2.png|32px]] [[File:Arrow of Harming JE2 BE2.png|32px]] [[File:Arrow of Poison JE2 BE2.png|32px]] [[File:Arrow of Regeneration JE2 BE2.png|32px]] [[File:Arrow of Strength JE2 BE2.png|32px]] [[File:Arrow of Weakness JE2 BE2.png|32px]] [[File:Arrow of Luck JE2 BE2.png|32px]] [[File:Arrow of Decay BE3.png|32px]] [[File:Arrow of the Turtle Master JE2 BE2.png|32px]] [[File:Arrow of Slow Falling JE2 BE2.png|32px]] The [[item]] sprite textures of tipped arrows have been changed.
|[[File:Spectral Arrow (item) JE2.png|32px]] The [[item]] sprite texture for spectral arrow has been changed.}}
{{History|3ds}}
{{History||0.1.0|[[File:Arrow JE2 BE1.png|42px]] [[File:Arrow (item) JE1 BE1.png|32px]] Added arrows.
|[[File:Arrow of Night Vision JE1 BE1.png|32px]] [[File:Arrow of Invisibility JE1 BE1.png|32px]] [[File:Arrow of Leaping JE1 BE1.png|32px]] [[File:Arrow of Fire Resistance JE1 BE1.png|32px]] [[File:Arrow of Swiftness JE1 BE1.png|32px]] [[File:Arrow of Slowness JE1 BE1.png|32px]] [[File:Arrow of Water Breathing JE1 BE1.png|32px]] [[File:Arrow of Healing JE1 BE1.png|32px]] [[File:Arrow of Harming JE1 BE1.png|32px]] [[File:Arrow of Poison JE1 BE1.png|32px]] [[File:Arrow of Regeneration JE1 BE1.png|32px]] [[File:Arrow of Strength JE1 BE1.png|32px]] [[File:Arrow of Weakness JE1 BE1.png|32px]] Added tipped arrows.}}
{{History||1.3.12|[[File:Arrow of Decay BE2.png|32px]] Added arrows of [[Wither (effect)|Decay]].}}
{{History|foot}}
Historical sounds:
{| class="wikitable"
! Sound
! From
! to
! Pitch
|-
| {{sound||Arrow Old.ogg}}
| ?
| ?
| ?
|}
== Issues ==
{{issue list}}
== Trivia ==
* By default, arrows fly slightly offset to the right. If the player stands close to a wall and fires several arrows without moving the crosshair, the arrows cluster around a point slightly to the right of the crosshair. If the player switches their main hand to be the left hand in options, the arrows instead cluster to the left.
* Arrows fired at [[Nether Portal]]s often skip through the portal block completely and fail to collide, thus continuing through to the opposite side of the block.
* Arrows stuck in blocks vibrate upon a world reload.<ref>{{bug|MC-93992}} – "Arrow shakes when world loads" resolved as "Won't Fix"</ref>
* Although [[enderman|endermen]] teleport when hit by any tipped arrow, they are still given the said effects while avoiding arrow damage.
* {{IN|bedrock}}, even if a tipped arrow is blocked with a shield, while the direct damage from the arrows is negated, the player still gets the effect from the tipped arrow.<ref>{{bug|MCPE-52904}}</ref>
== Gallery ==
===Renders===
<gallery>
Arrow (item).png|Arrow
Spectral Arrow (item) JE2.png|Spectral Arrow
</gallery>
;Tipped Arrows
<gallery>
Arrow of Splashing JE2.png|Splashing
Arrow of Night Vision.png|Night Vision
Arrow of Invisibility.png|Invisibility
Arrow of Leaping.png|Leaping
Arrow of Fire Resistance.png|Fire Resistance
Arrow of Swiftness.png|Swiftness
Arrow of Slowness.png|Slowness
Arrow of the Turtle Master.png|Turtle Master
Arrow of Water Breathing.png|Water Breathing
Arrow of Healing.png|Healing
Arrow of Harming.png|Harming
Arrow of Poison.png|Poison
Arrow of Regeneration.png|Regeneration
Arrow of Strength.png|Strength
Arrow of Weakness.png|Weakness
Arrow of Slow Falling.png|Slow Falling
Arrow of Luck.png|Luck
Arrow of Decay.png|Decay
Uncraftable Tipped Arrow JE2.png|Uncraftable
</gallery>
===Other Media===
<gallery>
Tipped Arrow Ultra High Resolution Screenshot.png|Teaser image from [[Searge]] showing tipped arrows.
AllArrowTypes.png|All the arrow types present in [[Minecraft]].
Custom arrows.png|Examples of custom arrow types using {{cmd|/give}}.
Arrow in Sugar Cane.png|Some arrows stick into [[sugar cane]]s. This no longer works since Java Edition Beta 1.6.
Arrow Burning.gif|An arrow caught on [[fire]].
Flaming_stuck_spectral_arrow.png|A flaming spectral arrow stuck in a tree.
arrows_in_player.png|Many arrows stuck in the player, seen through the [[inventory]] screen.
Arrow Debugging.png|[[Searge]] with a bunch of arrows summoned above him.
Inventory Tipped Arrows 1.jpg|Tipped arrows in the inventory.
Inventory Tipped Arrows 2.jpg|Tipped arrows in the inventory.
Inventory Tipped Arrows 3.jpg|Tipped arrows in the inventory.
Inventory Tipped Arrows 4.jpg|Tipped arrows in the inventory.
Tipped Arrow (empty texture) BE1.png|Unused old texture file for an empty tipped arrow on ''Bedrock Edition''.
</gallery>
== References ==
{{reflist}}
{{Items}}
{{Entities}}
[[Category:Combat]]
[[Category:Renewable resources]]
[[de:Pfeil]]
[[es:Flecha]]
[[fr:Flèche]]
[[hu:Nyíl]]
[[it:Freccia]]
[[ja:矢]]
[[ko:화살]]
[[nl:Pijl]]
[[pl:Strzała]]
[[pt:Flecha]]
[[ru:Стрела]]
[[th:ลูกธนู]]
[[zh:箭]]</li><li>[[Fermented Spider Eye|Fermented Spider Eye]]<br/>{{Item
| image = Fermented Spider Eye.png
| renewable = Yes
| stackable = Yes (64)
}}
A '''fermented spider eye''' is a [[brewing]] ingredient.
== Obtaining ==
=== Crafting ===
{{Crafting
|Brown Mushroom
|Sugar
|Spider Eye
|Output= Fermented Spider Eye
|type= Brewing
}}
== Usage ==
They can be used to brew [[potion]]s with negative effects, as well as the [[Potion of Invisibility]].
=== Brewing ingredient ===
{{brewing
|showname=1
|head=1
|Fermented Spider Eye
|Potion of Weakness
|base=Water Bottle
}}
{{brewing
|Fermented Spider Eye
|Potion of Harming
|base=Potion of Poison;Potion of Healing
}}
{{brewing
|Fermented Spider Eye
|Potion of Slowness
|base=Potion of Swiftness;Potion of Leaping
}}
{{brewing
|foot=1
|Fermented Spider Eye
|Potion of Invisibility
|base=Potion of Night Vision
}}
== Data values ==
=== ID ===
{{edition|java}}:
{{ID table
|edition=java
|showforms=y
|generatetranslationkeys=y
|displayname=Fermented Spider Eye
|spritetype=item
|nameid=fermented_spider_eye
|form=item
|foot=1}}
{{edition|bedrock}}:
{{ID table
|edition=bedrock
|shownumericids=y
|showforms=y
|notshowbeitemforms=y
|generatetranslationkeys=y
|displayname=Fermented Spider Eye
|spritetype=item
|nameid=fermented_spider_eye
|id=428
|form=item
|foot=1}}
== Video ==
<div style="text-align:center">{{yt|ln8ZQn5MtFI}}</div>
== History ==
{{History|java}}
{{History||1.0.0|snap=Beta 1.9 Prerelease 2|[[File:Fermented Spider Eye JE1 BE1.png|32px]] Added fermented spider eyes.}}
{{History|||snap=Beta 1.9 Prerelease 3|Fermented spider eyes can now be [[brewing|brewed]] in a [[water bottle]] to create a [[potion of Weakness]].
|Fermented spider eyes now corrupt potions of [[Swiftness]] and [[Fire Resistance]] into potions of [[Slowness]], for both normal and extended types.
|Fermented spider eyes now corrupts potions of [[Healing]] and [[Poison]] into potions of [[Harming]], as well as Healing II and extended Poison into extended Harming.}}
{{History||1.4.2|snap=12w34a|Fermented spider eyes now change potions of [[Night Vision]] into the new potions of [[Invisibility]], for both normal and extended types.}}
{{History||1.7.2|snap=13w36a|Fermented spider eyes now corrupt the new [[potion of Water Breathing]] into a potion of Harming.}}
{{History||1.8|snap=14w27a|Fermented spider eyes now corrupt the new [[potion of Leaping]] into a potion of Slowness.}}
{{History||1.9|snap=15w31a|[[Potions of Weakness]] can no longer be made using a [[thick potion]], [[mundane potion]], [[awkward potion]], [[potion of Regeneration]], or [[potion of Strength]].
|[[Potions of Slowness]] can no longer be made using a [[potion of Fire Resistance]].
|[[Potions of Harming]] can no longer be made using a [[potion of Water Breathing]].}}
{{History||1.13|snap=17w47a|Prior to [[1.13/Flattening|''The Flattening'']], this [[item]]'s numeral ID was 376.}}
{{History||1.14|snap=18w50a|[[File:Fermented Spider Eye JE2 BE2.png|32px]] The texture of fermented spider eyes has been changed.}}
{{History|upcoming java}}
{{History||Villager Trade Rebalance<br>(Experimental)|link=Java Edition 1.20.2|snap=23w31a|[[Wandering trader]]s now have a chance to [[trading|buy]] a fermented spider eye from the player.}}
{{History|pocket alpha}}
{{History||v0.12.1|snap=build 1|[[File:Fermented Spider Eye JE1 BE1.png|32px]] Added fermented spider eyes.}}
{{History|bedrock}}
{{History||1.10.0|snap=beta 1.10.0.3|[[File:Fermented Spider Eye JE2 BE2.png|32px]] The texture of fermented spider eyes has been changed.}}
{{History|console}}
{{History||xbox=TU7|xbone=CU1|ps=1.0|wiiu=Patch 1|switch=1.0.1|[[File:Fermented Spider Eye JE1 BE1.png|32px]] Added fermented spider eyes.}}
{{History||xbox=none|xbone=none|ps=1.90|wiiu=none|switch=none|[[File:Fermented Spider Eye JE2 BE2.png|32px]] The texture of fermented spider eyes has been changed.}}
{{History|New 3DS}}
{{History||0.1.0|[[File:Fermented Spider Eye JE1 BE1.png|32px]] Added fermented spider eyes.}}
{{History|foot}}
== Issues ==
{{issue list}}
{{items}}
[[Category:Renewable resources]]
[[cs:Zkvašené pavoučí oko]]
[[de:Fermentiertes Spinnenauge]]
[[es:Ojo de araña fermentado]]
[[fr:Œil d'araignée fermenté]]
[[it:Occhio di ragno fermentato]]
[[ja:発酵したクモの目]]
[[ko:발효된 거미 눈]]
[[nl:Gefermenteerd spinnenoog]]
[[pl:Sfermentowane oko pająka]]
[[pt:Olho de aranha fermentado]]
[[ru:Приготовленный паучий глаз]]
[[th:ตาแมงมุมดอง]]
[[uk:Оброблене павуче око]]
[[zh:发酵蛛眼]]</li></ul> | Added Magic: The Gathering Skin pack. | ||||||||||||||||||||||||||||||||||
1.0.9{{Extension DPL}}<ul><li>[[Rabbit Hide|Rabbit Hide]]<br/>{{Item
| title = Rabbit Hide
| image = Rabbit Hide.png
| renewable = Yes
| stackable = Yes (64)
}}
'''Rabbit hide''' is an [[item]] dropped by [[rabbit]]s.
== Obtaining ==
===Mob loot===
[[Rabbit]]s drop 0–1 rabbit hide upon death. The maximum number of drops can be increased by 1 per level of [[Looting]] used, for a maximum of 0–4 rabbit hides with Looting III.
Some [[foxes]] spawn holding rabbit hides, which always drop upon death. Alternatively, the player can drop a food item, which causes the fox to drop the rabbit hide.
=== Cat gifts ===
{{main|Cat#Gifts}}
Tamed [[cat]]s have a 70% chance of giving the [[player]] a gift when they wake up from a [[bed]], and the gift has a 16.13% chance to be a rabbit hide.
== Usage ==
Rabbit hide can be crafted into leather, or into bundles to store stacks of items.
=== Crafting ingredient ===
{{crafting usage}}
=== Trading ===
Journeyman-level leatherworker [[villager]]s buy 9 rabbit hide for an [[emerald]] as part of their trades.
== Data values ==
=== ID ===
{{edition|java}}:
{{ID table
|edition=java
|showforms=y
|generatetranslationkeys=y
|displayname=Rabbit Hide
|spritetype=item
|nameid=rabbit_hide
|form=item
|foot=1}}
{{edition|bedrock}}:
{{ID table
|edition=bedrock
|shownumericids=y
|showforms=y
|notshowbeitemforms=y
|generatetranslationkeys=y
|displayname=Rabbit Hide
|spritetype=item
|nameid=rabbit_hide
|id=529
|form=item
|foot=1}}
== History ==
{{History|java}}
{{History||1.8|snap=June 30, 2014|slink={{tweet|TheMogMiner|483636993780232192}}|[[Ryan Holtz]] tweeted images of rabbit hide and some other new [[item]]s.}}
{{History|||snap=14w27a|[[File:Rabbit Hide JE1.png|32px]] Added rabbit hide.}}
{{History|||snap=14w33b|[[File:Rabbit Hide JE2 BE1.png|32px]] The texture of rabbit hide has been changed.}}
{{History||1.13|snap=17w47a|Prior to [[1.13/Flattening|''The Flattening'']], this [[item]]'s numeral ID was 415.}}
{{History||1.14|snap=18w43a|[[File:Rabbit Hide JE3 BE2.png|32px]] The texture of rabbit hide has been changed.}}
{{History|||snap=18w44a|Cats now offer rabbit hides as [[Cat#Gifts|gifts]].}}
{{History|||snap=19w07a|Added [[fox]]es, which sometimes spawn with rabbit hides in their mouths.}}
{{History|||snap=19w11a|Leatherworker [[villager]]s now [[trading|buy]] rabbit hides.}}
{{History||1.17|snap=20w45a|Rabbit hide can now be used to craft [[bundle]]s.}}
{{History|||snap=21w18a|Rabbit hide can no longer be used to craft bundles.}}
{{History||1.18|snap=Experimental Snapshot 1|Rabbit hide can now once again be used to craft bundles.}}
{{History|||snap=21w37a|Rabbit hide once again can no longer be used to craft bundles.}}
{{History||1.20<br>(Experimental)|link=1.19.3|snap=22w42a|Rabbit hide can now once again be used to craft bundles.}}
{{History|pocket alpha}}
{{History||v0.13.0|snap=build 1|[[File:Rabbit Hide JE2 BE1.png|32px]] Added rabbit hide.}}
{{History|bedrock}}
{{History||1.8.0|snap=beta 1.8.0.8|Tamed [[cat]]s can now give [[player]]s rabbit hide as a gift.}}
{{History||1.10.0|snap=beta 1.10.0.3|[[File:Rabbit Hide JE3 BE2.png|32px]] The texture of rabbit hide has been changed.}}
{{History||1.11.0|snap=beta 1.11.0.4|Rabbit hide can be [[trading|sold]] to leatherworker [[villager]]s.}}
{{History||1.13.0|snap=beta 1.13.0.1|Added [[fox]]es, which can [[drops|drop]] rabbit hide.}}
{{History|console}}
{{History||xbox=TU31|xbone=CU19|ps=1.22|wiiu=Patch 3|switch=1.0.1|[[File:Rabbit Hide JE2 BE1.png|32px]] Added rabbit hide.}}
{{History||xbox=none|xbone=none|ps=1.90|wiiu=none|switch=none|[[File:Rabbit Hide JE3 BE2.png|32px]] The texture of rabbit hide has been changed.}}
{{History|new 3ds}}
{{History||0.1.0|[[File:Rabbit Hide JE2 BE1.png|32px]] Added rabbit hide.}}
{{History|foot}}
== Issues ==
{{issue list}}
== Gallery ==
<gallery>
File:Rabbit Items 1 Ryan Holtz.png|First image of the item by [[Ryan Holtz]].
</gallery>
{{items}}
[[de:Kaninchenfell]]
[[es:Piel de conejo]]
[[fr:Peau de lapin]]
[[hu:Nyúlbőr]]
[[it:Pelle di coniglio]]
[[ja:ウサギの皮]]
[[ko:토끼 가죽]]
[[nl:Konijnenhuid]]
[[pl:Królicza skóra]]
[[pt:Pele de coelho]]
[[ru:Кроличья шкурка]]
[[zh:兔子皮]]
[[Category:Renewable resources]]</li><li>[[:Category:Planned items|Category:Planned items]]<br/>All pages relating to items that have been officially announced, but are not yet in the game.
__EXPECTUNUSEDCATEGORY__
[[Category:Items]]
[[Category:Planned]]
[[pt:Itens planejados]]</li></ul> | Added Greek Mythology Mash-up pack. | ||||||||||||||||||||||||||||||||||
1.1.0{{Extension DPL}}<ul><li>[[Blaze Powder|Blaze Powder]]<br/>{{Item
| image = Blaze Powder.png
| renewable = Yes
| stackable = Yes (64)
}}
'''Blaze powder''' is an item made from a [[blaze rod]], which is dropped by a [[blaze]] when killed. Its main uses are to fuel [[brewing stand]]s, to brew [[strength]] [[potions]], and to make [[eyes of ender]] to take the player to [[the End]].
== Obtaining ==
=== Crafting ===
{{Crafting
|Blaze Rod
|Output= Blaze Powder,2
|type= Brewing
}}
== Usage ==
=== Crafting Ingredient ===
{{crafting usage}}
=== Brewing stand fuel ===
In addition to being a [[brewing]] ingredient, blaze powder is needed to fuel a [[brewing stand]]. Each piece of blaze powder can brew up to 20 batches of [[Potion|potions]].
=== Brewing ingredient ===
{{brewing
|showname=1
|head=1
|Blaze Powder
|Mundane Potion
|base=Water Bottle
}}
{{brewing
|foot=1
|Blaze Powder
|Potion of Strength
}}
== Data values ==
=== ID ===
{{edition|java}}:
{{ID table
|edition=java
|showforms=y
|generatetranslationkeys=y
|displayname=Blaze Powder
|spritetype=item
|nameid=blaze_powder
|form=item
|foot=1}}
{{edition|bedrock}}:
{{ID table
|edition=bedrock
|shownumericids=y
|showforms=y
|notshowbeitemforms=y
|generatetranslationkeys=y
|displayname=Blaze Powder
|spritetype=item
|nameid=blaze_powder
|id=429
|form=item
|foot=1}}
== Video ==
{{Video note|This video does not mention that blaze powder must be used to fuel [[brewing stand]]s.|minor}}
<div style="text-align:center">{{yt|FSP2qBpe9vI}}</div>
==History==
{{History|java}}
{{History||1.0.0|snap=Beta 1.9 Prerelease 2|[[File:Blaze Powder JE1.png|32px]] Added blaze powder.
|Blaze powder can be used to craft [[eyes of ender]] and [[magma cream]].}}
{{History|||snap=Beta 1.9 Prerelease 3|Blaze powder can now be [[brewing|brewed]] in a [[water bottle]] to create a [[mundane potion]], or in an [[awkward potion]] to create a [[potion of Strength]].}}
{{History||1.2.1|snap=12w04a|Blaze powder can now be used to craft [[fire charge]]s.}}
{{History||1.3.1|snap=1.3|[[File:Blaze Powder JE2 BE1.png|32px]] The texture of blaze powder has been changed.}}
{{History||1.9|snap=15w42a|Blaze powder is now required to operate a [[brewing stand]].}}
{{History|||snap=15w43a|Blaze powder now [[fuel]]s 20 operations rather than 30.}}
{{History||1.13|snap=17w47a|Prior to [[1.13/Flattening|''The Flattening'']], this [[item]]'s numeral ID was 377.}}
{{History|pocket alpha}}
{{History||v0.12.1|snap=build 1|[[File:Blaze Powder JE2 BE1.png|32px]] Added blaze powder.
|Blaze powder can be used to craft [[magma cream]].
|Blaze powder is used as an ingredient to brew [[potion]]s.}}
{{History||v0.15.0|snap=build 1|Blaze powder is now used to craft [[fire charge]]s.}}
{{History|pocket}}
{{History||1.0.0|snap=alpha 0.17.0.1|Blaze powder is now used to craft [[eyes of ender]].}}
{{History|bedrock}}
{{History||1.2.0|snap=beta 1.2.0.2|Blaze powder is now required to operate a [[brewing stand]].}}
{{History|console}}
{{History||xbox=TU7|xbone=CU1|ps=1.00|wiiu=Patch 1|switch=1.0.1|[[File:Blaze Powder JE2 BE1.png|32px]] Added blaze powder.}}
{{History||xbox=TU46|xbone=CU36|ps=1.38|wiiu=Patch 15|Blaze powder is now required to operate a [[brewing stand]].}}
{{History|New 3DS}}
{{History||0.1.0|[[File:Blaze Powder JE2 BE1.png|32px]] Added blaze powder.}}
{{History|foot}}
== Issues ==
{{issue list}}
== See also ==
* [[The Nether]]
* [[Potions]]
== External Links ==
*[https://www.minecraft.net/en-us/article/taking-inventory--blaze-powder Taking Inventory: Blaze Powder] – Minecraft.net on November 25, 2021
{{Items}}
[[Category:Renewable resources]]
[[cs:Ohnivý prach]]
[[de:Lohenstaub]]
[[es:Polvo de blaze]]
[[fr:Poudre de Blaze]]
[[hu:Őrlángpor]]
[[ja:ブレイズパウダー]]
[[ko:블레이즈 가루]]
[[nl:Blazepoeder]]
[[pl:Płomienny proszek]]
[[pt:Pó de blaze]]
[[ru:Огненный порошок]]
[[th:ผงปีศาจไฟ]]
[[zh:烈焰粉]]</li><li>[[Clay Ball|Clay Ball]]<br/>{{Item
| image = Clay Ball.png
| stackable = Yes (64)
| renewable = Yes
}}
{{about|the item|the block|Clay|other uses|Clay (disambiguation)}}
A '''clay ball''' is the item obtained from [[clay]] used for [[crafting]] or making [[brick]]s.
== Obtaining ==
=== Block loot ===
Clay balls are obtained when a [[clay]] block is broken with a non-[[Silk Touch]] tool. Each block yields four clay balls regardless of [[Fortune]].
=== Chest loot ===
{{LootChestItem|clay-ball}}
=== Villager gifts ===
If a [[player]] has the [[Hero of the Village]] status effect, a Mason [[villager]] might throw that player a [[clay block]] as a gift. {{Only|java}} This can be placed and [[breaking|broken]] to harvest clay balls.
== Usage ==
Clay balls can be [[crafting|crafted]] back together to form [[clay]] blocks or baked in a [[furnace]] to create [[brick]]s.
=== Crafting ingredient ===
{{crafting usage}}
=== Smelting ingredient ===
{{Smelting
|showname=1
|Clay Ball
|Brick
|0.3
}}
=== Trading ===
Novice-level [[Villager|mason villagers]] buy 10 clay balls for 1 [[emerald]] as part of their [[trades]].
== Data values ==
=== ID ===
{{edition|java}}:
{{ID table
|edition=java
|showforms=y
|generatetranslationkeys=y
|displayname=Clay Ball
|spritetype=item
|nameid=clay_ball
|form=item
|foot=1}}
{{edition|bedrock}}:
{{ID table
|edition=bedrock
|shownumericids=y
|showforms=y
|notshowbeitemforms=y
|generatetranslationkeys=y
|displayname=Clay
|spritetype=item
|nameid=clay_ball
|id=384
|form=item
|foot=1}}
== History ==
{{History|java alpha}}
{{History||v1.0.11|[[File:Clay Ball JE1 BE1.png|32px]] Added clay.}}
{{History|java}}
{{History||1.13|snap=17w47a|Prior to [[1.13/Flattening|''The Flattening'']], this [[item]]'s numeral ID was 337.}}
{{History||1.14|snap=18w43a|[[File:Clay Ball JE2 BE2.png|32px]] The texture of clay has been changed.}}
{{History|||snap=18w49a|Clay can now be found in [[chest]]s in [[village]] mason houses.}}
{{History|||snap=18w50a|Clay can now be found in [[chest]]s in [[desert]] [[village]] houses.}}
{{History|||snap=19w11a|Clay is now [[trading|bought]] by [[villager]]s of the new mason profession.}}
{{History||1.16|snap=20w06a|"Clay" has been renamed to "Clay Ball."}}
{{History|pocket alpha}}
{{History||v0.2.0|[[File:Clay Ball JE1 BE1.png|32px]] Added clay. It is currently unobtainable and serves no purpose.}}
{{History||v0.3.2|4 clay items are now dropped from clay blocks when broken.
|Clay can now be crafted into clay blocks.
|Clay can now be smelted into bricks.}}
{{History|bedrock}}
{{History||1.10.0|snap=beta 1.10.0.3|[[File:Clay Ball JE2 BE2.png|32px]] The texture of clay has been changed.|10–13 clay can now be [[trading|sold]] to stone mason [[villager]]s for an [[emerald]].}}
{{History||1.11.0|snap=beta 1.11.0.1|Clay can now be found in [[village]] mason [[chest]]s and [[desert]] village house chests.}}
{{History|||snap=beta 1.11.0.4|[[Trading]] has been changed, stone mason villagers now [[trading|buy]] 10 clay for an emerald<!-- previously 10-13 -->.}}
{{History||1.19.0|snap=beta 1.19.0.24|Clay ball now [[renewable]] by placing [[mud]] above a block which has [[pointed dripstone]] underneath.}}
{{History|console}}
{{History||xbox=TU1|xbone=CU1|ps=1.0|wiiu=Patch 1|[[File:Clay Ball JE1 BE1.png|32px]] Added clay.}}
{{History||xbox=none|xbone=none|ps=1.90|wiiu=none|switch=none|[[File:Clay Ball JE2 BE2.png|32px]] The texture of clay has been changed.}}
{{History|3ds}}
{{History||0.1.0|[[File:Clay Ball JE1 BE1.png|32px]] Added clay.}}
{{History|foot}}
== Issues ==
{{issue list}}
== Gallery ==
<gallery>
File:ClayInNumerousForms.png
</gallery>
== Notes ==
{{fnlist}}
{{Items}}
[[cs:Jíl]]
[[de:Tonklumpen]]
[[es:Bola de arcilla]]
[[fr:Motte d'argile]]
[[hu:Agyag (Tárgy)]]
[[it:Zolla di argilla]]
[[ja:粘土玉]]
[[ko:점토 덩이]]
[[nl:Klei (voorwerp)]]
[[pl:Glina]]
[[pt:Bola de argila]]
[[ru:Глина]]
[[uk:Глиняна кулька]]
[[zh:黏土球]]</li></ul> | Added Minecraft Marketplace, which has the community skin packs. | ||||||||||||||||||||||||||||||||||
| Added Skyrim Mash-up pack. | |||||||||||||||||||||||||||||||||||
1.1.3{{Extension DPL}}<ul><li>[[Bleach|Bleach]]<br/>{{education feature}}
{{exclusive|bedrock|education}}
{{Item
| image = Bleach.png
| renewable = No
| stackable = Yes (64)
}}
'''Bleach''' is an [[item]] used to [[dye]] things white. It is a [[compound]], as it is made using a [[lab table]].
== Obtaining ==
=== Lab Table ===
Bleach is not obtainable in the [[creative inventory]] or {{cmd|give}}. The only way to obtain it is using a [[lab table]].
{| class="wikitable"
! Result
! Materials Needed
|-
!rowspan=2|{{slot|Bleach}}<br>[[Bleach]]
|{{slot|Water (compound)|link=Compound}}{{slot|Water (compound)|link=Compound}}{{slot|Water (compound)|link=Compound}}{{slot|Sodium Hypochlorite|link=Compound}}{{slot|Sodium Hypochlorite|link=Compound}}{{slot|Sodium Hypochlorite|link=Compound}}
|-
|<center>[[Water (compound)|Water]] x3, [[Compound|Sodium Hypochlorite]] x3</center>
|}
== Usage ==
=== Crafting ingredient ===
{{crafting usage}}
== Sounds ==
{{Sound table
|type=bedrock
|sound=Fire.ogg
|source=sound
|description=When bleach is created by a lab table
|id=lt.reaction.fire
|volume=6.0
|pitch=0.7/0.9
|foot=1}}
== Data values ==
=== ID ===
{{ID table
|edition=bedrock
|shownumericids=y
|showforms=y
|notshowbeitemforms=y
|generatetranslationkeys=y
|displayname=Bleach
|spritetype=item
|nameid=bleach
|id=596
|form=item
|foot=1}}
== History ==
{{History|bedrock}}
{{History||1.4.0|snap=beta 1.2.20.1|[[File:Bleach BE1.png|32px]] Added bleach.}}
{{History|education}}
{{History||1.0.27|[[File:Bleach BE1.png|32px]] Added bleach.}}
{{History|foot}}
== Trivia ==
*[[File:Bleach (compound).png|32px]] There is an [[History of textures/Unused textures#Unused compounds|unused bleach texture]] in the compounds folder of the chemistry resource pack, which is slightly different from the one used in the game.
== Issues ==
{{issue list}}
{{Items}}
{{Education Edition}}
[[Category:Dyes]]
[[Category:Non-renewable resources]]
[[Category:Education Edition items]]
[[de:Bleichmittel]]
[[es:Lejía]]
[[ja:漂白剤]]
[[ko:표백제]]
[[pl:Wybielacz]]
[[pt:Alvejante]]
[[zh:漂白剂]]
[[lzh:素精]]</li><li>[[Raw Chicken|Raw Chicken]]<br/>{{about|a food item|the mob "chicken"|Chicken}}{{About|a food item|the cooked version|Cooked Chicken}}{{Item
| title = Raw Chicken
| image = Raw Chicken.png
| heals = {{hunger|2}}
| effects = {{EffectLink|Hunger}} (0:30) (30% chance)
| renewable = Yes
| stackable = Yes (64)
}}
'''Raw chicken''' is a [[food]] item that can be eaten by the [[player]]. It can be cooked in a [[furnace]], [[smoker]], or a [[campfire]] to make [[cooked chicken]].
==Obtaining==
===Mob loot ===
Upon death, an adult [[chicken]] drops 1 raw chicken. The maximum is increased by 1 per level of [[Looting]], for a maximum of 1-4 with Looting III. Chickens that die while on [[fire]] drop [[cooked chicken]] instead.
===Cat gifts===
{{main|Cat#Gifts}}
Tamed [[cat]]s have a 70% chance to give the [[player]] a gift as they wake up from a [[bed]], and the gift has a 16.13% chance to be raw chicken.
==Usage==
=== Food===
To eat raw chicken, press and hold {{control|use}} while it is selected in the hotbar. Eating one restores {{hunger|2}} hunger and 1.2 hunger [[Hunger#Mechanics|saturation]], but has a 30% chance of inflicting food poisoning (the {{EffectLink|link=Hunger (status effect)|Hunger}} effect for 30 seconds).
<nowiki>*This has a similar effect as [[Rotten Flesh]].
===Smelting ingredient===
{{Smelting
|showname=1
|Raw Chicken
|Cooked Chicken
|0.35
}}
===Wolves===
Raw chicken can be used to [[breed]] and heal tamed [[wolves]], lead them around, and make baby tamed wolves grow up faster by 10% of the remaining time.
Wolves are at no risk of food poisoning.
===Trading===
Novice-level Butcher villagers have a {{frac|1|3}} chance to buy 14 raw chicken for an emerald.{{only|bedrock}}
Novice-level Butcher villagers have a 50% chance of offering to buy 14 raw chicken for an emerald.{{only|java}}
==Sounds==
{{Sound table/Entity/Food}}
==Data values==
===ID ===
{{edition|java}}:
{{ID table
|edition=java
|showforms=y
|generatetranslationkeys=y
|displayname=Raw Chicken
|spritetype=item
|nameid=chicken
|form=item
|foot=1}}
{{edition|bedrock}}:
{{ID table
|edition=bedrock
|shownumericids=y
|showforms=y
|notshowbeitemforms=y
|generatetranslationkeys=y
|displayname=Raw Chicken
|spritetype=item
|nameid=chicken
|id=275
|form=item
|foot=1}}
==Advancements ==
{{load advancements|Husbandry;A Balanced Diet}}
==Video==
<div style="text-align:center">{{yt|ux362Ae8Llc}}</div>
==History==
{{History|java beta}}
{{History||July 19, 2011|link=https://twitter.com/jeb_/status/93330811608240128|A teaser image for [[cooked chicken]] is revealed by [[Jeb]].}}
{{History||July 19, 2011|link=https://twitter.com/jeb_/status/93946593748852736|[[File:Raw Chicken (pre-release).png|32px]] Jens reveals raw chicken with changed texture based on feedback, saying "the chicken may be too smooth compared to other MC [[item]]s."<ref>https://twitter.com/jeb_/status/93335976298033152</ref>}}
{{History||1.8|snap=Pre-release|[[File:Raw Chicken JE1 BE1.png|32px]] Added raw chicken.
|Raw chicken is a new [[drops|drop]], obtained by killing a [[chicken]], usually along with a [[feather]].}}
{{History|java}}
{{History||1.2.1|snap=12w03a|Raw chicken can now be used to [[breeding|breed]] wolves.}}
{{History||1.3.1|snap=12w21a|Raw chicken can now be [[trading|sold]] to farmer [[villager]]s, at 14–17 raw chicken for 1 [[emerald]].}}
{{History||1.4.2|snap=12w37a|[[File:Raw Chicken JE2 BE2.png|32px]] The texture of raw chicken has been changed, so that it no longer has a dark outline.}}
{{History||1.8|snap=14w02a|Trading has been changed: butcher [[villager]]s now [[trading|buy]] 14–18 raw chicken for 1 [[emerald]].
|Farmer villagers no longer [[trading|trade]] raw chicken.}}
{{History||1.9|snap=15w43a|[[Chicken]]s can now [[drops|drop]] several raw chickens, if killed with a [[Looting]]-[[enchanting|enchanted]] [[weapon]].}}
{{History||1.13|snap=17w47a|Prior to [[1.13/Flattening|''The Flattening'']], this [[item]]'s numeral ID was 365.}}
{{History||1.14|snap=18w43a|[[File:Raw Chicken JE3 BE3.png|32px]] The texture of raw chicken has been changed.}}
{{History|||snap=18w44a|[[Cat]]s now offer raw chicken as [[Cat#Gifts|gift]]s.}}
{{History|pocket alpha}}
{{History||v0.4.0|[[File:Raw Chicken JE1 BE1.png|32px]] Added raw chicken.}}
{{History||v0.5.0|Raw chicken now restores {{hp|2}} instead of {{hp|1}}.}}
{{History||v0.8.0|snap=build 1|[[File:Raw Chicken JE2 BE2.png|32px]] The texture of raw chicken has been changed, so that it no longer has a dark outline.}}
{{History||v0.11.0|snap=build 1|Raw chicken now sometimes inflicts the [[hunger]] effect, despite the hunger bar not existing yet.}}
{{History||v0.12.1|snap=build 1|Raw chicken now restores [[hunger]] instead of [[health]].}}
{{History|pocket}}
{{History||1.0.4|snap=alpha 1.0.4.0|Butcher [[villager]]s now [[trading|buy]] 14-18 raw chicken for one [[emerald]].}}
{{History|bedrock}}
{{History||?|[[Chicken]]s can now [[drops|drop]] several raw chicken, if killed with a [[Looting]]-[[enchanting|enchanted]] [[weapon]].}}
{{History||1.8.0|snap=beta 1.8.0.8|Tamed [[cat]]s can now give the [[player]] raw chicken as a gift.}}
{{History||1.10.0|snap=beta 1.10.0.3|[[File:Raw Chicken JE3 BE3.png|32px]] The texture of raw chicken has been changed.}}
{{History||1.11.0|snap=beta 1.11.0.4|Butcher [[villager]]s now have {{frac|1|3}} of a chance to [[trading|buy]] 14 raw chicken.}}
{{History|console}}
{{History||xbox=TU5|xbone=CU1|ps=1.0|wiiu=Patch 1|[[File:Raw Chicken JE1 BE1.png|32px]] Added raw chicken.}}
{{History||xbox=TU12|[[File:Raw Chicken JE2 BE2.png|32px]] The texture of raw chicken has been changed, so that it no longer has a dark outline.}}
{{History|PS4}}
{{History||1.90|[[File:Raw Chicken JE3 BE3.png|32px]] The texture of raw chicken has been changed.}}
{{History|new3DS}}
{{History||0.1.0|[[File:Raw Chicken JE2 BE2.png|32px]] Added raw chicken.}}
{{History|foot}}
==Issues==
{{issue list}}
==Gallery ==
<gallery>
Beta 1.8 Dev Chicken 2.png|First image of raw chicken.
</gallery>
==References==
{{reflist}}
{{Items}}
[[de:Rohes Hühnchen]]
[[es:Pollo crudo]]
[[fr:Poulet cru]]
[[hu:Nyers csirkehús]]
[[ja:生の鶏肉]]
[[ko:익히지 않은 닭고기]]
[[nl:Rauwe kip]]
[[pl:Surowy kurczak]]
[[pt:Frango cru]]
[[ru:Сырая курятина]]
[[th:ไก่ดิบ]]
[[zh:生鸡肉]]
[[Category:Food]]
[[Category:Renewable resources]]</li></ul></nowiki> | Added Adventure Time Mash-up pack. | ||||||||||||||||||||||||||||||||||
| Bedrock Edition | |||||||||||||||||||||||||||||||||||
1.7.0{{Extension DPL}}<ul><li>[[Milk Bucket|Milk Bucket]]<br/>{{Item
| title=Milk Bucket
| image = Milk Bucket.png
| renewable = Yes
| effects = Clears all
| stackable = No
}}
A '''milk bucket'''{{fn|Known as '''Milk Bucket''' {{in|java}} and '''Milk''' {{in|bedrock}}.}} is a [[drink]] obtained from {{Control|use|text=using}} a [[bucket]] on [[cow]]s, [[mooshroom]]s and [[goat]]s that can be consumed to clear all [[Effect|effects]].
== Obtaining ==
=== Harvesting ===
Milk buckets can be obtained from [[cow]]s, [[mooshroom]]s, and [[goat]]s by pressing {{control|use}} while looking at them with an empty [[bucket]].
=== Mob loot ===
A milk bucket has a chance of dropping from a [[wandering trader]], if the trader is killed while holding it.{{only|java}}
== Usage ==
Holding {{control|use}} with a milk bucket starts the drinking sound and animation. {{IN|java}}, the animation is shown only in first-person camera mode.
When consumed, milk immediately removes all status [[effect]]s from the [[player]]. [[Fire]] is not a status effect; therefore, drinking milk doesn't extinguish a burning player.
The benefits of area status effects granted by [[beacon]]s and [[Conduit Power|conduit power]] are restored almost immediately in Bedrock Edition and after a few seconds in ''Java Edition''.
=== Crafting ingredient ===
{{crafting usage|Milk Bucket}}
== Sounds ==
{{el|je}}:
{{Sound table
|sound=Drink.ogg
|subtitle=Sipping
|source=player
|description=While a player is drinking milk
|id=entity.generic.drink
|translationkey=subtitles.entity.generic.drink
|volume=0.5
|pitch=0.9-1.0
|distance=16}}
{{Sound table
|sound=Cow milk1.ogg
|sound2=Cow milk2.ogg
|sound3=Cow milk3.ogg
|source=player
|subtitle=Cow gets milked
|description=When a cow is milked
|id=entity.cow.milk
|translationkey=subtitles.entity.cow.milk
|volume=1.0
|pitch=1.0
|distance=16}}
{{Sound table
|sound=Mooshroom milk1.ogg
|sound2=Mooshroom milk2.ogg
|sound3=Mooshroom milk3.ogg
|subtitle=Goat gets milked
|description=When a regular goat is milked
|source=neutral
|id=entity.goat.milk
|translationkey=subtitles.entity.goat.milk
|volume=1.0
|pitch=1.0
|distance=16}}
{{Sound table
|sound=Goat screaming milk1.ogg
|sound2=Goat screaming milk2.ogg
|sound3=Goat screaming milk3.ogg
|sound4=Goat screaming milk4.ogg
|sound5=Goat screaming milk5.ogg
|subtitle=Goat gets milked
|description=When a screaming goat is milked
|source=neutral
|id=entity.goat.screaming.milk
|translationkey=subtitles.entity.goat.milk
|volume=1.0
|pitch=1.0
|distance=16}}
{{Sound table
|sound=Wandering trader drink milk1.ogg
|sound2=Wandering trader drink milk2.ogg
|sound3=Wandering trader drink milk3.ogg
|sound4=Wandering trader drink milk4.ogg
|sound5=Wandering trader drink milk5.ogg
|subtitle=Wandering Trader drinks milk
|source=neutral
|description=While a wandering trader is drinking milk to become visible during daytime
|id=entity.wandering_trader.drink_milk
|translationkey=subtitles.entity.wandering_trader.drink_milk
|volume=0.5
|pitch=0.9-1.0
|distance=16
|foot=1}}
{{el|be}}:
{{Sound table
|type=bedrock
|sound=Drink.ogg
|source=player
|description=While a player is drinking milk
|id=random.drink
|volume=0.35
|pitch=0.9-1.1}}
{{Sound table
|sound=Cow milk1.ogg
|sound2=Cow milk2.ogg
|sound3=Cow milk3.ogg
|source=neutral
|description=When a cow is milked
|id=mob.cow.milk
|volume=1.0
|pitch=1.0}}
{{Sound table
|sound=Mooshroom milk1.ogg
|sound2=Mooshroom milk2.ogg
|sound3=Mooshroom milk3.ogg
|description=When a regular goat is milked
|source=neutral
|id=mob.mooshroom.suspicious_milk
|volume=1.0
|pitch=1.0/0.9/1.1}}
{{Sound table
|sound=Goat screaming milk1.ogg
|sound2=Goat screaming milk2.ogg
|sound3=Goat screaming milk3.ogg
|sound4=Goat screaming milk4.ogg
|sound5=Goat screaming milk5.ogg
|description=When a screaming goat is milked
|source=neutral
|id=mob.goat.milk.screamer
|volume=1.0
|pitch=1.0}}
{{Sound table
|sound=Wandering trader drink milk1.ogg
|sound2=Wandering trader drink milk2.ogg
|sound3=Wandering trader drink milk3.ogg
|sound4=Wandering trader drink milk4.ogg
|sound5=Wandering trader drink milk5.ogg
|source=neutral
|description=While a wandering trader is drinking milk to become visible during daytime
|id=mob.wanderingtrader.drink_milk
|volume=1.0
|pitch=0.8-1.2
|foot=1}}
== Data values ==
=== ID ===
{{edition|java}}:
{{ID table
|edition=java
|showforms=y
|generatetranslationkeys=y
|displayname=Milk Bucket
|spritetype=item
|nameid=milk_bucket
|form=item
|foot=1}}
{{edition|bedrock}}:
{{ID table
|edition=bedrock
|showaliasids=y
|shownumericids=y
|showforms=y
|notshowbeitemforms=y
|generatetranslationkeys=y
|displayname=Milk
|spritetype=item
|nameid=milk_bucket
|aliasid=bucket / 1
|id=361
|form=item
|translationkey=item.milk.name
|foot=1}}
== Achievements ==
{{load achievements|The Lie}}
== Advancements ==
{{Load advancements|Husbandry}}
== Video ==
<div style="text-align:center">{{yt|eyxea_d0b3s}}</div>
== History ==
{{History|java alpha}}
{{History||v1.0.8|[[File:Milk Bucket JE1 BE1.png|32px]] Milk has been introduced, but it has no purpose and is obtainable only through inventory editing.}}
{{History||v1.0.11|Milk can now be obtained by {{control|use|text=milking}} a [[cow]] with a [[bucket]]. However, it is not yet drinkable.}}
{{History||v1.0.17|Milk buckets can now be emptied.}}
{{History|java beta}}
{{History||1.2|Milk has been incorporated into the [[crafting]] recipe of [[cake]].}}
{{History||1.2_01|[[Squid]] can now be milked by right-clicking on their mouth if part of their body was exposed to [[air]] or if they were not touching another [[block]]. An easy way to accomplish this is to pull a squid with a [[fishing rod]] away from other blocks and then milk it.}}
{{History||1.3_01|Squid milking has been removed.}}
{{History|java}}
{{History||1.0.0|snap=Beta 1.9 Prerelease|Milk can now be obtained by milking [[mooshroom]]s.}}
{{History|||snap=Beta 1.9 Prerelease 2|Milk has been made drinkable.
|According to a tweet by [[Jeb]] on September 30th 2011, milk was made a cure for all status effects.<ref>{{tweet|jeb_|119842906528944129|@Nexusdog_UK I haven't! In beta 1.9 pre2 milk works like a clear-everything drink|September 30, 2011}}</ref>
|Milk is no longer emptiable.}}
{{History||1.13|snap=17w47a|Prior to [[1.13/Flattening|''The Flattening'']], this [[item]]'s numeral ID was 335.}}
{{History|||snap=18w20a|"Milk" has been renamed to "Milk Bucket".}}
{{History||1.14|snap=18w43a|[[File:Milk Bucket JE2 BE2.png|32px]] The texture of milk buckets has been changed.}}
{{History||1.14|snap=19w06a|[[Wandering trader]]s now drink from milk buckets at dawn, and have a change to drop them.}}
{{History||1.17|snap=21w13a|Milk can now be obtained by milking [[goat]]s.}}
{{History|upcoming java}}
{{History||Villager Trade Rebalance<br>(Experimental)|link=Java Edition 1.20.2|snap=23w31a|Wander traders now have a chance to [[trading|buy]] a milk bucket from the player.}}
{{History|pocket alpha}}
{{History||v0.7.0|[[File:Milk Bucket JE1 BE1.png|32px]] Added milk buckets.
|Milk buckets are not yet drinkable.}}
{{History||v0.11.0|snap=build 4|Drinking milk now removes [[status effects]].
|Added milk buckets to the Creative inventory.{{verify|type=update}}{{info needed}}<!---same update?--->}}
{{History|bedrock}}
{{History||1.4.0|snap=beta 1.2.14.2|Moved all bucket items, including milk, from the Equipment tab to the Items tab in the [[Creative inventory]].{{verify|type=update}}{{info needed}}<!---please check snapshots, only 1 major release version was checked each--->}}
{{History||1.10.0|snap=beta 1.10.0.3|[[File:Milk Bucket JE2 BE2.png|32px]] The texture of milk buckets has been changed.}}
{{History||1.16.100|snap=beta 1.16.100.56|The ID of milk has been changed from <code>bucket/1</code> to <code>milk_bucket</code>.}}
{{History||1.16.200|snap=beta 1.16.200.52|Milk can now be obtained by milking [[goat]]s.}}
{{History|console}}
{{History||xbox=TU1|xbone=CU1|ps=1.0|wiiu=Patch 1|switch=1.0.1|[[File:Milk Bucket JE1 BE1.png|32px]] Added milk buckets.}}
{{History|Ps4}}
{{History||1.90|[[File:Milk Bucket JE2 BE2.png|32px]] The texture of milk buckets has been changed.}}
{{History|New 3DS}}
{{History||0.1.0|[[File:Milk Bucket JE1 BE1.png|32px]] Added milk buckets.}}
{{History|foot}}
== Issues ==
{{issue list}}
== See also ==
*[[Water Bucket]]
*[[Lava]]
*[[Food]]
*[[Cake]]
*[[Honey Bottle]] (alternative to remove poison effect)
*[[Medicine]]
== Notes ==
{{fnlist}}
== References ==
{{reflist}}
== External Links ==
*[https://www.minecraft.net/en-us/article/taking-inventory--milk-bucket Taking Inventory: Milk Bucket] – Minecraft.net on October 8, 2019
{{Items}}
[[Category:Food]]
[[Category:Renewable resources]]
[[Category:Tools]]
[[cs:Mléko]]
[[de:Milcheimer]]
[[es:Cubo con leche]]
[[fr:Seau de lait]]
[[hu:Tej]]
[[it:Secchio di latte]]
[[ja:ミルク入りバケツ]]
[[ko:우유 양동이]]
[[nl:Emmer melk]]
[[pl:Wiadro mleka]]
[[pt:Balde de leite]]
[[ru:Ведро с молоком]]
[[th:ถังนม]]
[[uk:Відро молока]]
[[zh:奶桶]]</li><li>[[Raw Chicken|Raw Chicken]]<br/>{{about|a food item|the mob "chicken"|Chicken}}{{About|a food item|the cooked version|Cooked Chicken}}{{Item
| title = Raw Chicken
| image = Raw Chicken.png
| heals = {{hunger|2}}
| effects = {{EffectLink|Hunger}} (0:30) (30% chance)
| renewable = Yes
| stackable = Yes (64)
}}
'''Raw chicken''' is a [[food]] item that can be eaten by the [[player]]. It can be cooked in a [[furnace]], [[smoker]], or a [[campfire]] to make [[cooked chicken]].
==Obtaining==
===Mob loot ===
Upon death, an adult [[chicken]] drops 1 raw chicken. The maximum is increased by 1 per level of [[Looting]], for a maximum of 1-4 with Looting III. Chickens that die while on [[fire]] drop [[cooked chicken]] instead.
===Cat gifts===
{{main|Cat#Gifts}}
Tamed [[cat]]s have a 70% chance to give the [[player]] a gift as they wake up from a [[bed]], and the gift has a 16.13% chance to be raw chicken.
==Usage==
=== Food===
To eat raw chicken, press and hold {{control|use}} while it is selected in the hotbar. Eating one restores {{hunger|2}} hunger and 1.2 hunger [[Hunger#Mechanics|saturation]], but has a 30% chance of inflicting food poisoning (the {{EffectLink|link=Hunger (status effect)|Hunger}} effect for 30 seconds).
<nowiki>*This has a similar effect as [[Rotten Flesh]].
===Smelting ingredient===
{{Smelting
|showname=1
|Raw Chicken
|Cooked Chicken
|0.35
}}
===Wolves===
Raw chicken can be used to [[breed]] and heal tamed [[wolves]], lead them around, and make baby tamed wolves grow up faster by 10% of the remaining time.
Wolves are at no risk of food poisoning.
===Trading===
Novice-level Butcher villagers have a {{frac|1|3}} chance to buy 14 raw chicken for an emerald.{{only|bedrock}}
Novice-level Butcher villagers have a 50% chance of offering to buy 14 raw chicken for an emerald.{{only|java}}
==Sounds==
{{Sound table/Entity/Food}}
==Data values==
===ID ===
{{edition|java}}:
{{ID table
|edition=java
|showforms=y
|generatetranslationkeys=y
|displayname=Raw Chicken
|spritetype=item
|nameid=chicken
|form=item
|foot=1}}
{{edition|bedrock}}:
{{ID table
|edition=bedrock
|shownumericids=y
|showforms=y
|notshowbeitemforms=y
|generatetranslationkeys=y
|displayname=Raw Chicken
|spritetype=item
|nameid=chicken
|id=275
|form=item
|foot=1}}
==Advancements ==
{{load advancements|Husbandry;A Balanced Diet}}
==Video==
<div style="text-align:center">{{yt|ux362Ae8Llc}}</div>
==History==
{{History|java beta}}
{{History||July 19, 2011|link=https://twitter.com/jeb_/status/93330811608240128|A teaser image for [[cooked chicken]] is revealed by [[Jeb]].}}
{{History||July 19, 2011|link=https://twitter.com/jeb_/status/93946593748852736|[[File:Raw Chicken (pre-release).png|32px]] Jens reveals raw chicken with changed texture based on feedback, saying "the chicken may be too smooth compared to other MC [[item]]s."<ref>https://twitter.com/jeb_/status/93335976298033152</ref>}}
{{History||1.8|snap=Pre-release|[[File:Raw Chicken JE1 BE1.png|32px]] Added raw chicken.
|Raw chicken is a new [[drops|drop]], obtained by killing a [[chicken]], usually along with a [[feather]].}}
{{History|java}}
{{History||1.2.1|snap=12w03a|Raw chicken can now be used to [[breeding|breed]] wolves.}}
{{History||1.3.1|snap=12w21a|Raw chicken can now be [[trading|sold]] to farmer [[villager]]s, at 14–17 raw chicken for 1 [[emerald]].}}
{{History||1.4.2|snap=12w37a|[[File:Raw Chicken JE2 BE2.png|32px]] The texture of raw chicken has been changed, so that it no longer has a dark outline.}}
{{History||1.8|snap=14w02a|Trading has been changed: butcher [[villager]]s now [[trading|buy]] 14–18 raw chicken for 1 [[emerald]].
|Farmer villagers no longer [[trading|trade]] raw chicken.}}
{{History||1.9|snap=15w43a|[[Chicken]]s can now [[drops|drop]] several raw chickens, if killed with a [[Looting]]-[[enchanting|enchanted]] [[weapon]].}}
{{History||1.13|snap=17w47a|Prior to [[1.13/Flattening|''The Flattening'']], this [[item]]'s numeral ID was 365.}}
{{History||1.14|snap=18w43a|[[File:Raw Chicken JE3 BE3.png|32px]] The texture of raw chicken has been changed.}}
{{History|||snap=18w44a|[[Cat]]s now offer raw chicken as [[Cat#Gifts|gift]]s.}}
{{History|pocket alpha}}
{{History||v0.4.0|[[File:Raw Chicken JE1 BE1.png|32px]] Added raw chicken.}}
{{History||v0.5.0|Raw chicken now restores {{hp|2}} instead of {{hp|1}}.}}
{{History||v0.8.0|snap=build 1|[[File:Raw Chicken JE2 BE2.png|32px]] The texture of raw chicken has been changed, so that it no longer has a dark outline.}}
{{History||v0.11.0|snap=build 1|Raw chicken now sometimes inflicts the [[hunger]] effect, despite the hunger bar not existing yet.}}
{{History||v0.12.1|snap=build 1|Raw chicken now restores [[hunger]] instead of [[health]].}}
{{History|pocket}}
{{History||1.0.4|snap=alpha 1.0.4.0|Butcher [[villager]]s now [[trading|buy]] 14-18 raw chicken for one [[emerald]].}}
{{History|bedrock}}
{{History||?|[[Chicken]]s can now [[drops|drop]] several raw chicken, if killed with a [[Looting]]-[[enchanting|enchanted]] [[weapon]].}}
{{History||1.8.0|snap=beta 1.8.0.8|Tamed [[cat]]s can now give the [[player]] raw chicken as a gift.}}
{{History||1.10.0|snap=beta 1.10.0.3|[[File:Raw Chicken JE3 BE3.png|32px]] The texture of raw chicken has been changed.}}
{{History||1.11.0|snap=beta 1.11.0.4|Butcher [[villager]]s now have {{frac|1|3}} of a chance to [[trading|buy]] 14 raw chicken.}}
{{History|console}}
{{History||xbox=TU5|xbone=CU1|ps=1.0|wiiu=Patch 1|[[File:Raw Chicken JE1 BE1.png|32px]] Added raw chicken.}}
{{History||xbox=TU12|[[File:Raw Chicken JE2 BE2.png|32px]] The texture of raw chicken has been changed, so that it no longer has a dark outline.}}
{{History|PS4}}
{{History||1.90|[[File:Raw Chicken JE3 BE3.png|32px]] The texture of raw chicken has been changed.}}
{{History|new3DS}}
{{History||0.1.0|[[File:Raw Chicken JE2 BE2.png|32px]] Added raw chicken.}}
{{History|foot}}
==Issues==
{{issue list}}
==Gallery ==
<gallery>
Beta 1.8 Dev Chicken 2.png|First image of raw chicken.
</gallery>
==References==
{{reflist}}
{{Items}}
[[de:Rohes Hühnchen]]
[[es:Pollo crudo]]
[[fr:Poulet cru]]
[[hu:Nyers csirkehús]]
[[ja:生の鶏肉]]
[[ko:익히지 않은 닭고기]]
[[nl:Rauwe kip]]
[[pl:Surowy kurczak]]
[[pt:Frango cru]]
[[ru:Сырая курятина]]
[[th:ไก่ดิบ]]
[[zh:生鸡肉]]
[[Category:Food]]
[[Category:Renewable resources]]</li></ul></nowiki> | Added "Pirates Of The Caribbean" Mash-up | ||||||||||||||||||||||||||||||||||
1.8.0{{Extension DPL}}<ul><li>[[Cocoa Beans|Cocoa Beans]]<br/>{{Block
|image=<gallery>
Cocoa Age 0.png|Age 0 JE
Cocoa Age 1.png|Age 1 JE
Cocoa Age 2.png|Age 2 JE
</gallery>
|image2=<gallery>
Cocoa Age 0 BE.png|Age 0 BE
Cocoa Age 1 BE.png|Age 1 BE
Cocoa Age 2 BE.png|Age 2 BE
</gallery>
|transparent=Yes
|light=No
|tool=axe
|renewable=Yes
|stackable=Yes (64)
|flammable=No
|lavasusceptible=No
}} '''Cocoa beans''' are items obtained from cocoa pods and are used to plant them, as well as to craft [[dye|brown dye]] and [[cookie|cookies]].
'''Cocoa pods''' are [[Bone Meal|bonemealable]] [[plant]]s placed on [[Log|jungle log]] sides that grow cocoa beans, and can be found naturally in [[Jungle|jungles]].
==Obtaining==
In ''Java Edition'', cocoa beans are only obtained through the natural generation of cocoa pods, while in ''Bedrock Edition'', they can also be gotten in bonus chests, from [[fishing]] inside the jungle, bamboo jungle and sparse jungle biomes and during a [[trading]] with a wandering trader.
Cocoa beans come from cocoa pods, which are found on the trunks of normal-sized naturally-generated [[jungle tree]]s in [[jungle]], [[bamboo jungle]]s and [[sparse jungle]] temperate [[biome]]s.
Cocoa pods can be mined with any item, but [[axe]]s are the quickest. Fully grown cocoa pods drop 3 cocoa beans. Using a tool enchanted with Fortune does not increase the amount of cocoa beans dropped.
{{breaking row|horizontal=1|Cocoa|Axe|sword=1|link=none}}
The block itself can be obtained by inventory editing or [[add-on]]s {{in|bedrock}}.
From one to two cocoa beans can be found in 40% of bonus [[chest]]s {{in|bedrock}}.
{{LootChestItem|cocoa-beans}}
Cocoa beans can be obtained from [[fishing]] in a jungle {{in|bedrock}}.
[[Wandering trader]]s may sell 3 cocoa beans for an [[emerald]] during a [[trading]] {{in|bedrock}}.
==Usage==
===Farming===
{{main|Tutorials/Cocoa bean farming}}
Placing cocoa beans on the side of a jungle [[log]] plants a new cocoa pod. The log does not need to be attached to a tree. A cocoa pod can be placed on jungle logs, jungle [[wood]], stripped jungle logs and stripped jungle wood.
[[File:Cocoaplant farm.png|thumb|left|A somewhat efficient cocoa pod farm, minimizing space and wood use.]]
Cocoa has three stages of growth. During its first stage, the pod is small and green. In the second stage, the plant is bigger and colored tan. In its last stage, the pod is even larger and orange. The cocoa block has a 20% chance to grow a stage when receiving a [[Tick#Random tick|random tick]], giving it an average time of 5 minutes and 41 seconds per stage. When destroyed in the first two stages, the pod yields only one cocoa bean. When destroyed in the third stage, it gives 3 cocoa beans. [[Bone meal]] can be used to force the cocoa pod forward by one growth stage. Cocoa pods burst and drop their beans when struck by flowing water, pushed by a piston or if their [[log]] or wood are removed by any means.
===Composting===
Placing cocoa beans into a [[composter]] has a 65% chance of raising the compost level by 1. {{IN|bedrock}}, cocoa beans are accepted as a direct substitute of brown dye in many recipes.
===Crafting ingredient===
{{crafting usage}}
{{Dye usage}}
{{IN|bedrock}}, cocoa beans can be also used in banner patterns:
{{banner crafting usage}}
{{Banner loom usage|Cocoa Beans}}
==Sounds==
{{Sound table/Block/Wood}}
==Data values==
===ID===
{{edition|java}}:
{{ID table
|edition=java
|showforms=y
|generatetranslationkeys=y
|displayname=Cocoa
|spritetype=block
|nameid=cocoa
|form=block}}
{{ID table
|displayname=Cocoa Beans
|spritetype=item
|nameid=cocoa_beans
|form=item
|foot=1}}
{{edition|bedrock}}:
{{ID table
|edition=bedrock
|showforms=y
|showaliasids=y
|shownumericids=y
|generatetranslationkeys=y
|displayname=Cocoa
|spritetype=block
|nameid=cocoa
|id=127
|form=block}}
{{ID table
|displayname=Cocoa Beans
|spritetype=item
|nameid=cocoa_beans
|aliasid=dye / 3
|id=412
|form=item
|translationkey=item.dye.brown.name
|foot=1}}
===Block states===
{{see also|Block states}}
{{/BS}}
==History==
''For a more in-depth breakdown of changes to textures and models, including a set of renders for each state combination, see [[/Asset history]]''
{{History|java beta}}
{{History||1.2|[[File:Cocoa Beans JE1 BE1.png|32px]] Added cocoa beans.
|Cocoa beans are currently obtainable only through an inventory editor.}}
{{History||1.2_02|Prior to this, Cocoa Beans were misspelled as 'Coco Beans'.}}
{{History||1.4|Cocoa beans have been formally brought into the game as a reward found in [[dungeon]] chests.<ref>{{tweet|notch|53161729990987776}}</ref> (53% chance) Also, brown [[sheep]] now naturally spawn, making brown [[wool]] obtainable without hacking the game.
|Cocoa beans can now be used to craft [[cookie]]s.}}
{{History|java}}
{{History||May 8, 2012|link={{tweet|jeb|199867730927697920}}|[[Jeb]] revealed cocoa with a screenshot.}}
{{History||1.3.1|snap=12w18a|For only this snapshot, cocoa beans have been given a small (0.5%) chance of dropping from destroyed [[jungle tree]] [[leaves]] in a similar fashion to [[apple]]s from oak leaves, which makes cocoa beans [[renewable resource|renewable]] for the first time.}}
{{History|||snap=12w19a|[[File:Cocoa Age 0 (S) JE1.png|32px]] [[File:Cocoa Age 1 (S) JE1.png|32px]] [[File:Cocoa Age 2 (S) JE1.png|32px]] Added cocoa. The top textures of cocoa always keep a completely constant rotation, regardless of what direction they face. They also not shaded.
|[[File:Cocoa Beans JE2.png|32px]] The texture of cocoa beans has been changed.
|Cocoa has replaced jungle [[leaves]] as the main method of finding cocoa beans.
|[[File:Cocoa Age 3 (S) JE1.png|32px]] Cocoa with values 12–15 is inaccessible normally, and use the texture of the [[dragon egg]]. This is due to the dragon egg texture being to the left of the ripe cocoa texture in <samp>[[terrain.png]]</samp>, as cocoa textures are arranged with the oldest on the left and the youngest on the right, resulting in the unusually ripe cocoa reading the dragon egg texture.}}
{{History|||snap=1.3|[[File:Cocoa Beans JE3 BE2.png|32px]] The texture of cocoa beans has been changed.}}
{{History||1.4.2|snap=12w34a|Cocoa beans have been given the ability to [[Armor#Dyeing|dye]] leather [[armor]] and [[wolf]] collars.}}
{{History||1.4.6|snap=12w49a|Cocoa beans can now be [[crafting|crafted]] with [[gunpowder]] to create a [[firework star]].}}
{{History||1.5|snap=13w02a|Due to textures being stored in individual files, cocoa beans with data 12–15 no longer have a texture to use, and now crash the game if a [[chunk]] containing one is loaded.}}
{{History|||snap=13w03a|Cocoa with data values 12–15 now only crash the game if one is directly in the field of view.}}
{{History|||snap=13w04a|[[Bone meal]] now grows cocoa by only one stage.}}
{{History|||snap=13w10a|[[File:Cocoa Age 3 (S) JE2.png|32px]] Cocoa with data 12–15 now use the age 2 texture, resulting in a broken appearance, preventing previously mentioned crashes.}}
{{History||1.6.1|snap=13w18a|Cocoa beans have been removed from [[dungeon]] [[chest]]s.}}
{{History|||snap=13w19a|Brown [[Terracotta|stained clay]] can now be [[crafting|crafted]] using cocoa beans.}}
{{History||1.7.2|snap=13w41a|Brown [[stained glass]] can now be crafted using cocoa beans.}}
{{History||1.8|snap=14w07a|[[File:Cocoa Age 0 (S) JE2.png|32px]] [[File:Cocoa Age 1 (S) JE2.png|32px]] [[File:Cocoa Age 2 (S) JE2.png|32px]] [[File:Missing Model JE1.png|32px]] The top textures of cocoa now rotate with the blocks themselves (cocoa facing north remaining visually unaffected), and cocoa of age 3 has [[Missing model|no model]].}}
{{History|||snap=14w10a|[[File:Cocoa Age 0 (S) JE3.png|32px]] [[File:Cocoa Age 1 (S) JE3.png|32px]] [[File:Cocoa Age 2 (S) JE3.png|32px]] [[File:Missing Model JE2.png|32px]] The large section of cocoa is shaded, and the missing model (which age 3 cocoa uses) has changed.}}
{{History|||snap=14w25a|[[File:Cocoa Age 0 (S) JE4.png|32px]] [[File:Cocoa Age 1 (S) JE4.png|32px]] [[File:Cocoa Age 2 (S) JE4.png|32px]] The connecting region of cocoa is now shaded.}}
{{History|||snap=14w26a|Cocoa with data 12–15 has been effectively removed from the game, as such blocks now convert to a proper value with {{cmd|setblock}}. Loading worlds with existing out of range cocoa crash the game.}}
{{History|||snap=14w30a|Cocoa beans can now be used to dye [[banner]]s.}}
{{History||1.13|snap=17w47a|The different data values for the <code>dye</code> ID have been split up into their own IDs.
|Prior to [[1.13/Flattening|''The Flattening'']], this block's and item's numeral ID were respectively 127 and 351.}}
{{History||1.14|snap=18w43a|Cocoa beans can now be used to craft [[brown dye]].
|Cocoa beans can no longer be used as a [[dye]].
|All of the dye-related functions and crafting recipes of cocoa beans (except cookies) have been transferred to brown dye.
|"Cocoa Beans" item has been renamed to "Cocoa".
|[[File:Cocoa Beans JE4 BE3.png|32px]] The texture of cocoa has been changed.
|[[File:Cocoa Age 0 (S) JE5.png|32px]] [[File:Cocoa Age 1 (S) JE5.png|32px]] [[File:Cocoa Age 2 (S) JE5.png|32px]] The textures of cocoa have been changed.
|[[File:Cocoa Age 0 (texture) JE2 BE2.png|32px]] [[File:Cocoa Age 1 (texture) JE2 BE2.png|32px]] Textures for cocoa age 0 and 1 has palette left, visible only on particles.
|Cocoa now has a placement [[sound]].}}
{{History|||snap=19w03a|Placing cocoa into the new [[composter]] has a 50% chance of raising the compost level by 1.}}
{{History|||snap=19w05a|Cocoa now has a 65% chance of increasing the compost level in a composter by 1.}}
{{History|||snap=19w11b|"Cocoa" item has been renamed back to "Cocoa Beans".{{verify|was this not just one bug that affected other crops as well? if so cite the ticket and add to all other affected pages}}}}
{{History||1.18|snap=Pre-release 5|[[File:Cocoa Age 0 (texture) JE3 BE3.png|32px]] [[File:Cocoa Age 1 (texture) JE3 BE3.png|32px]] Textures for cocoa age 0 and 1 were changed. This visually changes only particles.}}
{{History||1.19|snap=22w11a|[[File:Cocoa Age 2 (S) JE6.png|32px]] The texture and model of cocoa age 2 have been changed.}}
{{History|pocket alpha}}
{{History||v0.3.0|[[File:Cocoa Beans JE1 BE1.png|32px]] Added cocoa beans. They are currently unobtainable and serve no purpose.}}
{{History||v0.8.0|snap=build 1|[[File:Cocoa Beans JE3 BE2.png|32px]] The texture of cocoa beans has been changed.
|Cocoa beans can be [[crafted]] from an [[orange dye]] and an [[ink sac]], or from [[dandelion yellow]], [[rose red]], and an ink sac, despite there being no way of obtaining ink sacs at the time.}}
{{History|||snap=build 3|Cocoa beans are now available in [[creative]].}}
{{History||v0.9.0|snap=build 1|[[File:Cocoa Age 0 (S) JE1.png|32px]] [[File:Cocoa Age 1 (S) JE1.png|32px]] [[File:Cocoa Age 2 (S) JE1.png|32px]] {{info needed|How did 12-16 appear?}} Added cocoa.
|Cocoa provides an additional way of obtaining cocoa beans.
|Cocoa beans are now used to craft [[cookie]]s.}}
{{History||v0.11.0|snap=build 14|Cocoa now grows over time.<ref>{{bug|MCPE-7887}}</ref>}}
{{History||?|[[File:Cocoa Age 0 (S) BE4.png|32px]] [[File:Cocoa Age 1 (S) BE4.png|32px]] [[File:Cocoa Age 2 (S) BE2.png|32px]] Cocoa no longer has a stem connecting it to the log.}}
{{History||v0.15.0|snap=Realms build 4|[[File:Cocoa Age 0 (S) JE1.png|32px]] [[File:Cocoa Age 1 (S) JE1.png|32px]] [[File:Cocoa Age 2 (S) JE1.png|32px]] Cocoa stems now render again.<ref>{{bug|MCPE-13579}}</ref>}}
{{History||v0.16.0|snap=build 1|Cocoa beans can no longer be crafted from [[orange dye]] and an ink sac.
|Cocoa beans can no longer be crafted from rose red, dandelion yellow and ink sacs.}}
{{History|pocket}}
{{History||1.0.0|snap=alpha 0.17.0.1|Cocoa beans can now be used to dye [[shulker]]s.}}
{{History||1.1.0|snap=alpha 1.1.0.0|Cocoa beans can now be used to dye [[shulker box]]es and [[bed]]s.
|Cocoa beans can now be used to craft [[concrete powder]].}}
{{History|bedrock}}
{{History||1.2.0|snap=beta 1.2.0.2|Cocoa beans can now be used to dye [[banner]]s, [[firework star]]s, and [[glass]].
|Cocoa beans can now be found in [[bonus chest]]s.}}
{{History||1.4.0|snap=beta 1.2.20.1|Cocoa beans can now be used to craft brown [[balloon]]s and [[glow stick]]s.}}
{{History||1.8.0|snap=beta 1.8.0.10|Cocoa beans can now be used to craft [[brown dye]].}}
{{History||1.10.0|snap=beta 1.10.0.3|Cocoa beans are now [[trading|sold]] by [[wandering trader]]s.
|[[File:Cocoa Beans JE4 BE3.png|32px]] The texture of cocoa beans has been changed.
|[[File:Cocoa Age 0 (S) BE4.png|32px]] [[File:Cocoa Age 1 (S) BE4.png|32px]] [[File:Cocoa Age 2 (S) BE4.png|32px]] The textures of cocoa have been changed.}}
{{History||1.11.0|snap=beta 1.11.0.1|Cocoa beans can now be used to fill up [[composter]]s.}}
{{History||1.16.100|snap=beta 1.16.100.56|The ID of cocoa beans has been changed from <code>dye/3</code> to <code>cocoa_beans</code>.}}
{{History||1.18.10|snap=beta 1.18.10.22|[[File:Cocoa Age 0 (texture) JE3 BE3.png|32px]] [[File:Cocoa Age 1 (texture) JE3 BE3.png|32px]] Textures for cocoa age 0 and 1 were changed. This visually changes only particles.}}
{{History|console}}
{{History||xbox=TU1|xbone=CU1|ps=1.0|wiiu=Patch 1|switch=1.0.1|[[File:Cocoa Beans JE1 BE1.png|32px]] Added cocoa beans.}}
{{History||xbox=TU9|[[File:Cocoa Beans JE3 BE2.png|32px]] The texture of cocoa beans has been changed.}}
{{History||xbox=TU12|[[File:Cocoa Age 0 (S) JE3.png|32px]] [[File:Cocoa Age 1 (S) JE3.png|32px]] [[File:Cocoa Age 2 (S) JE3.png|32px]]{{verify|Were these the models used?}} Added cocoa.}}
{{History||xbox=none|xbone=none|ps=1.90|wiiu=none|switch=none|[[File:Cocoa Beans JE4 BE3.png|32px]] The texture of cocoa beans has been changed once again.
|[[File:Cocoa Age 0 (S) JE5.png|32px]] [[File:Cocoa Age 1 (S) JE5.png|32px]] [[File:Cocoa Age 2 (S) JE5.png|32px]]{{verify|Were these the models used?}} The textures of cocoa have been changed.}}
{{History|new 3ds}}
{{History||0.1.0|[[File:Cocoa Beans JE3 BE2.png|32px]] Added cocoa beans.
|[[File:Cocoa Age 0 (S) JE3.png|32px]] [[File:Cocoa Age 1 (S) JE3.png|32px]] [[File:Cocoa Age 2 (S) JE3.png|32px]]{{verify|Were these the models used?}} Added cocoa.}}
{{History|foot}}
=== Cocoa "item" ===
{{:Technical blocks/Cocoa}}
== Issues ==
{{issue list|Cocoa Beans|Cocoa Pod}}
== Trivia ==
*Cocoa pods have a different hitbox for each size; however, the top is always 0.25 blocks below the top of the [[log]] it is on.
*If a cocoa pod grows while the player is standing next to it, the player is forced into the appropriate form of [[suffocation prevention]] depending on available space.
*{{IN|be}}, the pixels on top of the fully grown pod are 8/7 the size of those on the side.<ref>{{bug|MC-109055||Fixed}}</ref><ref>{{bug|MCPE-152862}}</ref>
== Gallery ==
<gallery>
CocoaReveal.png|The first screenshot of cocoa pods tweeted by [[Jens Bergensten]], which revealed the plants.
CocoaPlant.png|A screenshot tweeted by Jens Bergensten, showing the pod.
Cocoa Plants in a Jungle Biome (12w19a).png|Naturally generated cocoa pods.
CPlantsJWood.png|A cocoa pod farm.
Cocoa2.jpg|A cocoa farm.
Cocoa beans phases.png|Three growing phases of the cocoa pod.
AreaOptimizedBeanPods.gif|A log and pod layout for optimizing an example area of 14×14 (including walls).
File:CocoaBean15.png|Cocoa beans with values greater than 12 appeared this way
</gallery>
==Literature==
===References===
{{reflist}}
===External Links===
*[https://www.minecraft.net/en-us/article/taking-inventory--cocoa-beans Taking Inventory: Cocoa Beans] – Minecraft.net on December 5, 2019
{{Items}}
{{Blocks|vegetation}}
[[Category:Dyes]]
[[Category:Food]]
[[Category:Plants]]
[[Category:Renewable resources]]
[[Category:Non-solid blocks]]
[[Category:Natural blocks]]
[[cs:Kakaové boby]]
[[de:Kakaobohnen]]
[[es:Semillas de cacao]]
[[fr:Fèves de cacao]]
[[hu:Kakaóbab]]
[[ja:カカオ豆]]
[[ko:코코아 콩]]
[[nl:Cacaobonen]]
[[pl:Ziarna kakaowe]]
[[pt:Sementes de cacau]]
[[ru:Какао-бобы]]
[[uk:Какао-боби]]
[[zh:可可豆]]</li><li>[[Golden Carrot|Golden Carrot]]<br/>{{Item
| title = Golden Carrot
| image = Golden Carrot.png
| heals = {{hunger|6}}
| renewable = Yes
| stackable = Yes (64)
}}
A '''golden carrot''' is a valuable [[food]] item and [[brewing]] ingredient. It provides the second most saturation in the game, behind [[suspicious stew]] crafted with either a [[Flower|dandelion]] or [[Flower|blue orchid]].
==Obtaining==
=== Chest loot ===
{{LootChestItem|golden-carrot}}
=== Crafting ===
{{Crafting
|A1= Gold Nugget
|B1= Gold Nugget
|C1= Gold Nugget
|A2= Gold Nugget
|B2= Carrot
|C2= Gold Nugget
|A3= Gold Nugget
|B3= Gold Nugget
|C3= Gold Nugget
|Output= Golden Carrot
|type= Foodstuff
}}
=== Trading ===
Master-level farmer [[villager]]s have a 50% chance to sell 3 golden carrots for 3 [[emerald]]s {{in|bedrock}}, and always offer the same trade {{in|java}}.
== Usage ==
=== Food ===
To eat a golden carrot, press and hold {{control|use}} while it is selected in the hotbar. Eating one restores {{hunger|6}} and 14.4 [[Hunger#Mechanics|saturation points]].
=== Animal food ===
Golden carrots are used to tame, [[breed]], lead, grow, and heal [[horse]]s, [[donkey]]s, and [[mule]]s, and to breed, lead, and grow [[rabbit]]s.
=== Brewing ingredient ===
{{Brewing
|showname=1
|Golden Carrot
|Potion of Night Vision
}}
== Sounds ==
{{Sound table/Entity/Food}}
== Data values ==
=== ID ===
{{edition|java}}:
{{ID table
|edition=java
|showforms=y
|generatetranslationkeys=y
|displayname=Golden Carrot
|spritetype=item
|nameid=golden_carrot
|form=item
|foot=1}}
{{edition|bedrock}}:
{{ID table
|edition=bedrock
|shownumericids=y
|showforms=y
|notshowbeitemforms=y
|generatetranslationkeys=y
|displayname=Golden Carrot
|spritetype=item
|nameid=golden_carrot
|id=283
|form=item
|foot=1}}
== Achievements ==
{{load achievements|Artificial Selection;Oooh, shiny!}}
== Advancements ==
{{load advancements|Oh Shiny;Husbandry;A Balanced Diet}}
== Video ==
{{Video note|this video is outdated; it does not mention that golden carrots can be used as animal food.}}
<div style="text-align:center">{{yt|HJUaKroydLQ}}</div>
== History ==
{{History|java}}
{{History||1.4.2|snap=12w34a|[[File:Golden Carrot JE1.png|32px]] Added golden carrots.
|The new [[Potion of Night Vision]] is brewed by adding a golden carrot to an [[Awkward Potion]].}}
{{History|||snap=12w36a|[[File:Golden Carrot JE2.png|32px]] The texture of golden carrots has been changed.}}
{{History|||snap=12w37a|[[File:Golden Carrot JE3 BE1.png|32px]] The texture of golden carrots has been changed in order to match the new [[carrot]] texture. The [[item]] sprite no longer has a dark outline.}}
{{History||1.6.1|snap=?|Golden carrots can now be used to tame, breed and heal horses and donkeys.}}
{{History||1.8|snap=?|Golden carrots can now be used to breed rabbits.}}
{{History|||snap=14w32a|Moved golden carrots from the Foodstuffs tab to the Brewing tab in the [[Creative inventory]].<ref name="gold carrot inventory">https://bugs.mojang.com/browse/MC-3664</ref>}}
{{History||1.8.1|snap=pre1|Rabbits now follow players holding golden carrots.<ref>{{bug|MC-70054|||Fixed}}</ref>}}
{{History||1.13|snap=17w47a|Prior to [[1.13/Flattening|''The Flattening'']], this [[item]]'s numeral ID was 396.}}
{{History||1.14|snap=18w43a|[[File:Golden Carrot JE4 BE2.png|32px]] The texture of golden carrots has been changed.}}
{{History|||snap=19w11a|Farmer [[villager]]s now [[trading|sell]] golden carrots.}}
{{History||1.16|snap=20w16a|Golden carrots can now be found in [[ruined portal]] chests.}}
{{History||1.16.2|snap=20w30a|Golden carrots can now be found in [[bastion remnant]] chests.}}
{{History||1.18|snap=experimental snapshot 6|Horses, donkeys and mules now follow players holding golden carrots.}}
{{History||1.19|snap=22w13a|Golden carrots may now be found in [[ancient city]] ice box [[chest]]s.
|A single golden carrot now generates in the [[chest]] in <code>ancient_city/city_center/city_center_2</code>.}}
{{History|||snap=22w14a|The golden carrot in the chest in <code>ancient_city/city_center/city_center_2</code> has been replaced with a [[golden apple]].}}
{{History|pocket alpha}}
{{History||v0.12.1|snap=build 1|[[File:Golden Carrot JE3 BE1.png|32px]] Added golden carrots.}}
{{History||v0.13.0|snap=build 1| Golden carrots can now be used to feed [[rabbit]]s.}}
{{History||v0.15.0|snap=build 1|Golden carrots can now be used to feed [[horse]]s and [[donkey]]s.}}
{{History|bedrock}}
{{History||1.10.0|snap=beta 1.10.0.3|[[File:Golden Carrot JE4 BE2.png|32px]] The texture of golden carrots has been changed.}}
{{History||1.11.0|snap=beta 1.11.0.4|Golden carrots can now be [[trading|bought]] from farmer [[villager]]s.}}
{{History||1.13.0|snap=beta 1.13.0.9|Trading has been changed, master-level farmer now has {{frac|1|3}} chance to sell golden carrots.}}
{{History||1.16.0|snap=beta 1.16.0.57|Golden carrots now generate in [[ruined portal]] chests.
|Golden carrots trade offering chance changed to 50%.}}
{{History|console}}
{{History||xbox=TU14|xbone=CU1|ps=1.04|wiiu=Patch 1|[[File:Golden Carrot JE3 BE1.png|32px]] Added golden carrots.}}
{{History||xbox=none|xbone=none|ps=1.90|wiiu=none|switch=none|[[File:Golden Carrot JE4 BE2.png|32px]] The texture of golden carrots has been changed.}}
{{History|New 3DS}}
{{History||0.1.0|[[File:Golden Carrot JE3 BE1.png|32px]] Added golden carrots.}}
{{History|foot}}
== Issues ==
{{issue list}}
== See also ==
* [[Carrot]]
* [[Golden Apple]]
== External Links ==
*[https://www.minecraft.net/en-us/article/taking-inventory--golden-carrot Taking Inventory: Golden Carrot] – Minecraft.net on September 6, 2022
{{items}}
[[cs:Zlatá mrkev]]
[[de:Goldene Karotte]]
[[es:Zanahoria dorada]]
[[fr:Carotte dorée]]
[[hu:Aranyrépa]]
[[ja:金のニンジン]]
[[ko:황금 당근]]
[[nl:Gouden wortel]]
[[pl:Złota marchewka]]
[[pt:Cenoura dourada]]
[[ru:Золотая морковь]]
[[uk:Золота морква]]
[[zh:金胡萝卜]]
[[Category:Renewable resources]]
[[Category:Food]]
[[Category:Brewing recipe]]</li></ul> | Added "The Nightmare Before Christmas" Mash-up | ||||||||||||||||||||||||||||||||||
1.9.0{{Extension DPL}}<ul><li>[[Banner|Banner]]<br/>{{for|the image|Banner (image)}}
{{Block
| image = <gallery>
White Banner.gif | Banner
White Wall Banner.png | Wall Banner
</gallery>
| rarity = Common
| transparent = Yes
| light = No
| tool = axe
| renewable = Yes
| stackable = Yes (16)
| flammable = No
| lavasusceptible = Yes
}}
'''Banners''' are tall decorative [[blocks]], featuring a field that is highly customizable using [[dye]]s and [[banner pattern]]s.
== Obtaining ==
=== Breaking ===
Banners can be broken with or without a [[tool]], but an [[axe]] is fastest.
{{breaking row|horizontal=1|Banners|Axe}}
A banner also breaks and drops itself as an [[Item (entity)|item]] if the block the banner is attached to is moved, removed, or destroyed.
=== Natural generation ===
{| class="wikitable collapsible"
! Name !! Location !! Appearance !! Design
|-
! Magenta Banner
| Outside of [[end cities]].
| style="text-align: center" | [[File:End City Banner.png|32px]]
| Magenta Banner
* Black Inverted Chevron
* Black Chevron
|-
! Gray Banner
| In banner room in [[woodland mansion]]s.
| style="text-align: center" | [[File:Gray Banner.png|32px]]
| Gray Banner
|-
! Light Gray Banner
| In master bedroom in [[woodland mansion]]s.
| style="text-align: center" | [[File:Master Bedroom Banner.png|32px]]
| Light Gray Banner
* White Flower Charge
|- id="Ominous Banner"
! Ominous Banner{{only|java|short=1}}
Illager Banner{{only|bedrock|education|short=1}}
| Carried by [[raid captain]]s.<br> Located in [[pillager outpost]]s.
{{IN|java}}, the ominous banner cannot be crafted or copied because the design uses 8 patterns.
{{IN|bedrock}}, the illager banner is a separate type that cannot be placed in a loom.
| style="text-align: center" | [[File:Ominous Banner.png|32px]]<br/>[[File:Ominous Banner BE.png|32px]]
| White Banner{{only|java|short=1}}
* Cyan Lozenge
* Light Gray Base
* Gray Pale
* Light Gray Bordure
* Black Fess
* Light Gray Per Fess
* Light Gray Roundel
* Black Bordure
Separate type entirely{{only|bedrock|short=1}}
|-
! Brown Banner
| Outside of some houses, meeting points, and pillar fountains in savanna [[village]]s.
| style="text-align: center" | [[File:Brown Banner.png|32px]]
| Brown Banner
|-
! Black Banner
| In altar room in [[woodland mansions]].
| style="text-align: center" | [[File:Black Banner.png|32px]]
| Black Banner
|}
=== Crafting ===
Banners can be crafted from six [[wool]] and a [[stick]] in a pattern resembling a [[sign]].
{{Crafting
|head=1
|showdescription=1
|A1=Matching Wool |B1=Matching Wool |C1=Matching Wool
|A2=Matching Wool |B2=Matching Wool |C2=Matching Wool
|B3=Stick
|Output=Matching Banner
|Olink=Banner
|type=Decoration block
|description=Once the banner is crafted, its base color cannot be changed.{{only|java}}
}}
{{Crafting
|showdescription=1
|Any Banner
|Bleach
|Output=White Banner
|type=Decoration block
|description=Bleach can be used to remove the color of a banner, resulting in a white banner. This includes removing patterns from a white banner.{{only|bedrock|education}}
|foot=1
}}
=== Trading ===
Expert-level cartographer [[villager]]s always offer to [[trading|sell]] 1 or 2 blank banners of a random color for 3 [[emeralds]]. Expert-level shepherd villagers have a {{frac|2|7}} chance of offering the same trade.{{only|java}}
{{IN|bedrock}}, expert-level cartographer and shepherd villagers both offer to sell one of 16 blank banners for 3 emeralds as part of their trades.
=== Mob loot ===
[[Illager]]s that spawn carrying an ominous banner{{only|java|short=1}} / illager banner{{only|bedrock|education|short=1}} always drop it upon death.
== Usage ==
[[File:Standing banner with block.png|thumb|upright|Overlapping block on a banner.]]
[[File:Wall banner with block.png|thumb|upright|Overlapping on a wall mounted banner.]]
There are 16 colored blank banners, and numerous patterns each available in each of the 16 colors. A banner can feature up to 6 different patterns. The top layer of a banner (or the last pattern added) can be washed off by {{control|using}} it on a [[cauldron]] containing water.
Banners, much like signs, can be placed both on the ground facing in any direction, or on a wall. They gently sway as if affected by a breeze, regardless of dimension or location.
Banners have no collision mask as they are completely non-solid, so [[entities]] can move through them.
Other blocks (including other banners) can be placed on any edge of a banner's hitbox, which is only one block high despite the banner appearing as two blocks tall. This makes it possible to overlap another solid block on the top half of a banner for floor banners, or the bottom half of wall banners.
When a banner is placed on the side of a block, its position is set by the top block, and it is possible to place it so it appears half buried.
Banners can also be placed in [[item frame]]s, where they simply appear as their item model.
[[Water]] and [[lava]] flow around banners. {{IN|bedrock}}, banners can be [[waterlogged]].
<gallery>
File:Wall banner with water below.png| Water can be placed below wall banners
File:Water flowing around banner.png| Water flows around a banner on the ground
</gallery>
Lava can create [[fire]] in air blocks next to banners as if the banners were flammable, but the banners do not burn (and cannot be burned by other methods). Banners also cannot be moved by [[piston]]s.
If a banner is renamed on an [[anvil]], it retains its name when a pattern is added, but not when a pattern is removed.
=== Helmet ===
{{exclusive|java|section=13}}
While a banner cannot be equipped in the [[Helmet|head slot]] in [[Survival]] mode, equipping it using commands causes it to appear on top of the player. This is how [[raid captain]]s wear banners{{only|java|short=1}}.
=== Chestplate ===
{{exclusive|bedrock|section=13}}
While a banner cannot be equipped in the [[chestplate]] slot in Survival mode, equipping it using NBT editors causes it to appear on top of the player. This is how [[raid captain]]s wear banners{{only|bedrock|education|short=1}}.
<gallery>
Steve wearing White Banner.png|
Alex wearing White Banner.png|
Pillager with Ominous Banner.png|
Vindicator with Ominous Banner.png|
Evoker with Ominous Banner.png|Illusioner with Ominous Banner.png|
</gallery>
=== Crafting ingredient ===
[[Shield]]s can have patterns applied to them using banners. The shield pattern has a smaller resolution than the banner pattern, causing them to look different or offset. Banners that have more than six patterns, such as Ominous Banners or banners obtained through inventory editors, will be reduced to six patterns on the shield.
{{Crafting
|showdescription=1
|Shield
|Matching Banner; Ominous Banner
|Output=Matching Shield; Ominous Shield
|B2link=Banner
|type=Combat
|description=Applies the banner pattern to the shield. The banner is consumed.<br>The shield must have no pre-existing patterns.<br>Does not change existing durability or enchantments on the shield.
}}
=== Copying ===
Banners can be copied with a blank banner to make multiple identical banners. Banners with more than 6 patterns applied using commands cannot be copied in this manner.
{{Crafting
|showdescription=1
|Matching Banner
|Matching Banner
|Output=Matching Banner
|A2link=Banner
|B2link=Banner
|Olink=Banner
|type=Decoration block
|ignoreusage=1
|description=Copies pattern; both banners must have the same base color, and the one having a pattern copied onto it must have no preexisting pattern.
}}
=== Map marker ===
[[File:Banner marked map.png|alt=All banners marked on a map, alongside a named banner.|thumb|right|How every banner appears {{IN|java}} on a map, including named banners.]]
{{exclusive|java|section=13}}
{{IN|java}}, {{control|using}} on a standing banner with a [[map]] selected places a marker of the banner's position on the selected map, and {{control|using}} on the banner again removes the marker. Note that wall banners cannot serve as map markers. The marker has the same color as the banner's base without decorations. The marker is removed if the banner is destroyed unless the map is locked using a [[cartography table]]. If the banner is renamed, the name appears below the marker.
=== Patterns ===
{{see also|Banner/Patterns|title1=List of patterned banners}}
[[File:Spawned-in Banner.png|thumb|100px|Example of a banner with more than 6 patterns, a result of using the {{cmd|give}} command.]]
A banner may have up to six layers of patterns, which are overlaid with the last-crafted on top. A banner can have up to 16 layers of patterns with the use of commands. The total number of unique banners is approximately 2.3x10^16 (or 23 quadrillion).
Any color banner can be used; the pattern overlays the color. {{IN|java}}, a [[loom]] is used to make patterns. However, {{in|bedrock}}, the patterns can be made in a [[loom]] or a [[crafting table]].
A banner can have more than six layers of patterns through the commands <code>/[[Commands/give|give]]</code>, <code>/[[Commands/setblock|setblock]]</code> or <code>/[[Commands/fill|fill]]</code>. This only works in ''Java Edition'', as Bedrock Edition doesn't have any NBT commands. Here is an example of a mining banner with seven different patterns. There is specific codes for the [[Banner#Item data:~:text=white-,Item,-In Java Edition|colors]] and [[Banner/Patterns|patterns]] that you have to input.
<code><nowiki>/give @p white_banner{display:{Name:"\"Mining Industries Banner\""},BlockEntityTag:{Patterns:[{Pattern:"cr",Color:15},{Pattern:"bs",Color:15},{Pattern:"sc",Color:12},{Pattern:"ms",Color:0},{Pattern:"hh",Color:15},{Pattern:"bo",Color:15},{Pattern:"tts",Color:8}]}} 1</code>
{{LoadPage|Template:Banner pattern loom recipes|Loom recipes|h4}}
{{LoadPage|Banner/Banner pattern crafting recipes|Crafting recipes|h4|transcluded=1}}
=== Renaming ===
{{IN|java}}, a banner can be given a custom name that remains as the banner is placed and retrieved. The player can use an [[anvil]] to rename the banner item, or may change the <code>CustomName</code> tag using the {{cmd|data}} command on the banner block.
=== Fuel ===
Banners can be used as a fuel in [[furnace]]s, smelting 1.5 items per banner.
=== Note Blocks ===
Banners can be placed under [[note block]]s to produce "bass" sounds.
== Sounds ==
=== Generic ===
{{Sound table/Block/Wood}}
=== Unique ===
{{edition|java}}: ''None''
{{edition|bedrock}}:
{{Sound table
|type=bedrock
|sound=Water Splash Old.ogg
|source=block
|description=When all patterns are removed from a banner using a cauldron
|id=cauldron.cleanbanner
|volume=0.1
|pitch=1.0
|foot=1}}
== Data values ==
=== ID ===
{{edition|java}}:
{{ID table
|edition=java
|showblocktags=y
|showitemtags=y
|showforms=y
|generatetranslationkeys=y
|displayname=White Banner
|spritetype=block
|nameid=white_banner
|blocktags=banners, wall_post_override
|itemtags=banners
|translationkey=block.minecraft.white_banner,block.minecraft.ominous_banner
}}
{{ID table
|displayname=Orange Banner
|spritetype=block
|nameid=orange_banner
|blocktags=banners, wall_post_override
|itemtags=banners}}
{{ID table
|displayname=Magenta Banner
|spritetype=block
|nameid=magenta_banner
|blocktags=banners, wall_post_override
|itemtags=banners}}
{{ID table
|displayname=Light Blue Banner
|spritetype=block
|nameid=light_blue_banner
|blocktags=banners, wall_post_override
|itemtags=banners}}
{{ID table
|displayname=Yellow Banner
|spritetype=block
|nameid=yellow_banner
|blocktags=banners, wall_post_override
|itemtags=banners}}
{{ID table
|displayname=Lime Banner
|spritetype=block
|nameid=lime_banner
|blocktags=banners, wall_post_override
|itemtags=banners}}
{{ID table
|displayname=Pink Banner
|spritetype=block
|nameid=pink_banner
|blocktags=banners, wall_post_override
|itemtags=banners}}
{{ID table
|displayname=Gray Banner
|spritetype=block
|nameid=gray_banner
|blocktags=banners, wall_post_override
|itemtags=banners}}
{{ID table
|displayname=Light Gray Banner
|spritetype=block
|nameid=light_gray_banner
|blocktags=banners, wall_post_override
|itemtags=banners}}
{{ID table
|displayname=Cyan Banner
|spritetype=block
|nameid=cyan_banner
|blocktags=banners, wall_post_override
|itemtags=banners}}
{{ID table
|displayname=Purple Banner
|spritetype=block
|nameid=purple_banner
|blocktags=banners, wall_post_override
|itemtags=banners}}
{{ID table
|displayname=Blue Banner
|spritetype=block
|nameid=blue_banner
|blocktags=banners, wall_post_override
|itemtags=banners}}
{{ID table
|displayname=Brown Banner
|spritetype=block
|nameid=brown_banner
|blocktags=banners, wall_post_override
|itemtags=banners}}
{{ID table
|displayname=Green Banner
|spritetype=block
|nameid=green_banner
|blocktags=banners, wall_post_override
|itemtags=banners}}
{{ID table
|displayname=Red Banner
|spritetype=block
|nameid=red_banner
|blocktags=banners, wall_post_override
|itemtags=banners}}
{{ID table
|displayname=Black Banner
|spritetype=block
|nameid=black_banner
|blocktags=banners, wall_post_override
|itemtags=banners}}
{{ID table
|displayname=White Wall Banner
|spritetype=block
|nameid=white_wall_banner
|blocktags=banners, wall_post_override
|form=block
|translationkey=block.minecraft.white_banner,block.minecraft.ominous_banner}}
{{ID table
|displayname=Orange Wall Banner
|spritetype=block
|nameid=orange_wall_banner
|blocktags=banners, wall_post_override
|form=block
|translationkey=block.minecraft.orange_banner}}
{{ID table
|displayname=Magenta Wall Banner
|spritetype=block
|nameid=magenta_wall_banner
|blocktags=banners, wall_post_override
|form=block
|translationkey=block.minecraft.magenta_banner}}
{{ID table
|displayname=Light Blue Wall Banner
|spritetype=block
|nameid=light_blue_wall_banner
|blocktags=banners, wall_post_override
|form=block
|translationkey=block.minecraft.light_blue_banner}}
{{ID table
|displayname=Yellow Wall Banner
|spritetype=block
|nameid=yellow_wall_banner
|blocktags=banners, wall_post_override
|form=block
|translationkey=block.minecraft.yellow_banner}}
{{ID table
|displayname=Lime Wall Banner
|spritetype=block
|nameid=lime_wall_banner
|blocktags=banners, wall_post_override
|form=block
|translationkey=block.minecraft.lime_banner}}
{{ID table
|displayname=Pink Wall Banner
|spritetype=block
|nameid=pink_wall_banner
|blocktags=banners, wall_post_override
|form=block
|translationkey=block.minecraft.pink_banner}}
{{ID table
|displayname=Gray Wall Banner
|spritetype=block
|nameid=gray_wall_banner
|blocktags=banners, wall_post_override
|form=block
|translationkey=block.minecraft.gray_banner}}
{{ID table
|displayname=Light Gray Wall Banner
|spritetype=block
|nameid=light_gray_wall_banner
|blocktags=banners, wall_post_override
|form=block
|translationkey=block.minecraft.light_gray_banner}}
{{ID table
|displayname=Cyan Wall Banner
|spritetype=block
|nameid=cyan_wall_banner
|blocktags=banners, wall_post_override
|form=block
|translationkey=block.minecraft.cyan_banner}}
{{ID table
|displayname=Purple Wall Banner
|spritetype=block
|nameid=purple_wall_banner
|blocktags=banners, wall_post_override
|form=block
|translationkey=block.minecraft.purple_banner}}
{{ID table
|displayname=Blue Wall Banner
|spritetype=block
|nameid=blue_wall_banner
|blocktags=banners, wall_post_override
|form=block
|translationkey=block.minecraft.blue_banner}}
{{ID table
|displayname=Brown Wall Banner
|spritetype=block
|nameid=brown_wall_banner
|blocktags=banners, wall_post_override
|form=block
|translationkey=block.minecraft.brown_banner}}
{{ID table
|displayname=Green Wall Banner
|spritetype=block
|nameid=green_wall_banner
|blocktags=banners, wall_post_override
|form=block
|translationkey=block.minecraft.green_banner}}
{{ID table
|displayname=Red Wall Banner
|spritetype=block
|nameid=red_wall_banner
|blocktags=banners, wall_post_override
|form=block
|translationkey=block.minecraft.red_banner}}
{{ID table
|displayname=Black Wall Banner
|spritetype=block
|nameid=black_wall_banner
|blocktags=banners, wall_post_override
|form=block
|translationkey=block.minecraft.black_banner
|foot=1}}
{{ID table
|displayname=Block entity
|spritename=Banners
|spritetype=block
|nameid=banner
|foot=1}}
{{edition|bedrock}}:
{{ID table
|edition=bedrock
|firstcolumnname=Banner
|shownumericids=y
|showforms=y
|generatetranslationkeys=y
|displayname=Standing
|spritename=Banners
|spritetype=block
|nameid=standing_banner
|translationkey=tile.standing_banner.black.name, tile.standing_banner.red.name, tile.standing_banner.green.name, tile.standing_banner.brown.name, tile.standing_banner.blue.name, tile.standing_banner.purple.name, tile.standing_banner.cyan.name, tile.standing_banner.silver.name, tile.standing_banner.gray.name, tile.standing_banner.pink.name, tile.standing_banner.lime.name, tile.standing_banner.yellow.name, tile.standing_banner.lightBlue.name, tile.standing_banner.magenta.name, tile.standing_banner.orange.name, tile.standing_banner.white.name
|id=176
|form=block}}
{{ID table
|displayname=Wall
|spritename=Banners
|spritetype=block
|nameid=wall_banner
|id=177
|form=block
|translationkey=-}}
{{ID table
|displayname=Item
|spritename=Banners
|spritetype=item
|nameid=banner
|translationkey=item.banner.black.name, item.banner.red.name, item.banner.green.name, item.banner.brown.name, item.banner.blue.name, item.banner.purple.name, item.banner.cyan.name, item.banner.silver.name, item.banner.gray.name, item.banner.pink.name, item.banner.lime.name, item.banner.yellow.name, item.banner.lightBlue.name, item.banner.magenta.name, item.banner.orange.name, item.banner.white.name
|id=567
|form=item
|foot=1}}
{{ID table
|notnamespaced=y
|displayname=Block entity
|spritename=Banners
|spritetype=block
|nameid=Banner
|foot=1}}
=== Metadata ===
==== Item ====
{{IN|Bedrock}}, banner items use the following data values:
{| class="wikitable"
! DV !! Banner color
|-
|| 0 || black
|-
|| 1 || red
|-
|| 2 || green
|-
|| 3 || brown
|-
|| 4 || blue
|-
|| 5 || purple
|-
|| 6 || cyan
|-
|| 7 || light gray
|-
|| 8 || gray
|-
|| 9 || pink
|-
|| 10 || lime
|-
|| 11 || yellow
|-
|| 12 || light blue
|-
|| 13 || magenta
|-
|| 14 || orange
|-
|| 15 || white
|}
=== Item ===
{{IN|Java}}, banner items use the following data values:
{| class="wikitable"
! DV !! Banner color
|-
|| 15 || black
|-
|| 14 || red
|-
|| 13 || green
|-
|| 12 || brown
|-
|| 11 || blue
|-
|| 10 || purple
|-
|| 9 || cyan
|-
|| 8 || light gray
|-
|| 7 || gray
|-
|| 6 || pink
|-
|| 5 || lime
|-
|| 4 || yellow
|-
|| 3 || light blue
|-
|| 2 || magenta
|-
|| 1 || orange
|-
|| 0 || white
|}
=== Block states ===
{{see also|Block states}}
{{/BS}}
=== Block data ===
A banner has a block entity associated with it that holds additional data about the block.
{{el|bedrock}}:
: See [[Bedrock Edition level format/Block entity format]].
{{el|java}}:
{{see also|Block entity format}}
{{/BE}}
=== Item data ===
{{el|java}}:
{{main|Player.dat format}}
Banners, as items, use an NBT tag <code>BlockEntityTag</code> to indicate the patterns and details when it is placed.
<div class="treeview" style="margin-top: 0;">
* {{nbt|compound|Item}}: The item
** {{nbt|compound|tag}}: Additional information about the item. This tag is optional for most items.
*** {{nbt|compound|BlockEntityTag}}: The details of the shulker box.
**** All block data, except tags common to all block entities.
</div>
{{el|bedrock}}:
: See [[Bedrock Edition level format/Item format]].
== Achievements ==
{{load achievements|Fruit on the Loom}}
== Advancements ==
{{load advancements|Voluntary Exile}}
== History ==
{{info needed section|The Nether Update}}
{{History|java}}
{{History||1.8|snap=July 21, 2014|slink=https://twitter.com/jeb_/status/491238882789572608|[[Jeb]] posted a picture of banners, and stated that he is working on them.}}
{{History|||snap=14w30a|[[File:White Banner Revision 1.png|22px]][[File:Light Gray Banner Revision 1.png|22px]][[File:Gray Banner Revision 1.png|22px]][[File:Black Banner Revision 1.png|22px]][[File:Brown Banner Revision 1.png|22px]][[File:Red Banner Revision 1.png|22px]][[File:Orange Banner Revision 1.png|22px]][[File:Yellow Banner Revision 1.png|22px]][[File:Lime Banner Revision 1.png|22px]][[File:Green Banner Revision 1.png|22px]][[File:Cyan Banner Revision 1.png|22px]][[File:Light Blue Banner Revision 1.png|22px]][[File:Blue Banner Revision 1.png|22px]][[File:Purple Banner Revision 1.png|22px]][[File:Magenta Banner Revision 1.png|22px]][[File:Pink Banner Revision 1.png|22px]] Added banners.}}
{{History|||snap=14w30c|Added four additional patterns: Cross (+), Border, Curly Border and Thing (Mojang logo).}}
{{History|||snap=14w31a|Added two additional patterns: Inverted Halves and Base Gradient.
|The banner pattern terminology has been changed based on vexillology advice [[Jeb]] received from [http://www.reddit.com/r/Minecraft/comments/2bkxej/i_made_a_huge_mistake_banners/ his Reddit post].
|Banners can now be used as a [[fuel]] in [[furnace]]s.}}
{{History||1.8.8|snap=pre|The number of layers attainable by using [[commands]] is now limited to 16 per banner.}}
{{History||1.9|snap=15w31a|[[File:End City Banner.png|17px]] Magenta banners with a black chevron and inverted chevron are now naturally generated on the outside walls of [[end city|end cities]].}}
{{History|||snap=15w33c|Banners can be used to apply patterns to [[shield]]s.}}
{{History||1.11|snap=16w33a|Banners now require a [[dye]] when applying a pattern that uses a non-dye [[item]], such as a [[mob head|creeper head]] or [[golden apple|enchanted golden apple]]. Previously, the lack of a dye would have applied the black variant of the pattern.}}
{{History|||snap=16w39a|Black and gray banners, and light gray banners with a white flower charge are now naturally generated in rooms of [[woodland mansion]]s.}}
{{History||1.12|snap=January 24, 2017|slink={{tweet|jeb_|823817090511601664}}|[[Jeb]] tweets a screenshot of the changes to the banner color palette.}}
{{History|||snap=17w06a|[[File:White Banner.png|17px]] [[File:Light Gray Banner.png|17px]] [[File:Gray Banner.png|17px]] [[File:Black Banner.png|17px]] [[File:Brown Banner.png|17px]] [[File:Red Banner.png|17px]] [[File:Orange Banner.png|17px]] [[File:Yellow Banner.png|17px]] [[File:Lime Banner.png|17px]] [[File:Green Banner.png|17px]] [[File:Cyan Banner.png|17px]] [[File:Light Blue Banner.png|17px]] [[File:Blue Banner.png|17px]] [[File:Purple Banner.png|17px]] [[File:Magenta Banner.png|17px]] [[File:Pink Banner.png|17px]] Changed banners' [[tint]]s.}}
{{History|||snap=pre6|"Chief fess" and "base fess" banners are now just "chief" and "base" banners.}}
{{History||1.13|snap=17w47a|The colors for the <code>banner</code>, <code>wall_banner</code> and <code>standing_banner</code> ID have been split up into their own IDs.
|Prior to [[1.13/Flattening|''The Flattening'']], these [[block]]s' numeral IDs were 176 and 177, and the [[item]]'s 425.}}
{{History|||snap=18w10a|{{control|Using}} a [[map]] on a banner now mark the spot of the banner on the map.}}
{{History||1.14|snap=18w43a|[[Loom]]s have been added to help the [[player]] edit banners more easily.
|All recipes for banner patterns have been removed.}}
{{History|||snap=18w45a|[[File:Ominous Banner Revision 1.png|17px]] Added [[illager patrol]]s, where the leader of an illager patrol carries an [[illager]] banner.}}
{{History|||snap=18w46a|[[File:Ominous Banner.png|17px]] The pattern of [[illager]] banner now has a black border.}}
{{History|||snap=19w11a|Cartographer and shepherd [[villager]]s now [[trading|sell]] banners.}}
{{History|||snap=Pre-Release 2|"Illager Banners" have been renamed to "Ominous Banners".}}
{{History||1.17|snap=20w46a|The unused "base" pattern has been renamed to the "field" pattern and given proper translation strings (its ID is still "base").}}
{{History||1.19.3|snap=22w43a|The ominous banner is now available in the Creative inventory.}}
{{History|bedrock}}
{{History||1.2.0|snap=beta 1.2.0.2|[[File:White Banner.png|17px]] [[File:Light Gray Banner.png|17px]] [[File:Gray Banner.png|17px]] [[File:Black Banner.png|17px]] [[File:Brown Banner.png|17px]] [[File:Red Banner.png|17px]] [[File:Orange Banner.png|17px]] [[File:Yellow Banner.png|17px]] [[File:Lime Banner.png|17px]] [[File:Green Banner.png|17px]] [[File:Cyan Banner.png|17px]] [[File:Light Blue Banner.png|17px]] [[File:Blue Banner.png|17px]] [[File:Purple Banner.png|17px]] [[File:Magenta Banner.png|17px]] [[File:Pink Banner.png|17px]] Added banners.
|[[File:End City Banner.png|17px]] Magenta banners with a black chevron and inverted chevron are now naturally generated on the outside walls of [[end city|end cities]].
|Black and gray banners, and light gray banners with a white flower charge are now naturally generated in rooms of [[woodland mansion]]s.}}
{{History||1.4.0|snap=beta 1.2.20.1|The white banner can now be crafted from a colored banner and [[bleach]], which also removes all patterns, if used on a white banner.}}
{{History||1.10.0|snap=beta 1.10.0.3|[[Loom]]s have been added to help the [[player]] edit banners more easily.
|Brown banners now generate in new [[savanna]] [[village]]s.
|Black banners now generate in [[pillager outpost]] watchtowers.}}
{{History||1.11.0|snap=beta 1.11.0.1|Gray banners now generate in pillager outpost watchtowers, instead of black banners.
|[[File:Ominous Banner BE.png|17px]] Added [[illager captain]]s, which drop an [[illager]] banner upon [[death]].}}
{{History|||snap=beta 1.11.0.3|Illager banners now generate in [[pillager outpost]] watchtowers, instead of gray banners.}}
{{History|||snap=beta 1.11.0.4|Banners can now be [[trading|bought]] from cartographer and shepherd [[villager]]s.}}
{{History||1.20.0|snap=beta 1.20.0.20|Banners can now be used to customise [[shield]]s.}}
{{History|console}}
{{History||xbox=TU43|xbone=CU33|ps=1.36|wiiu=Patch 13|switch=1.0.1|[[File:White Banner Revision 1.png|22px]][[File:Light Gray Banner Revision 1.png|22px]][[File:Gray Banner Revision 1.png|22px]][[File:Black Banner Revision 1.png|22px]][[File:Brown Banner Revision 1.png|22px]][[File:Red Banner Revision 1.png|22px]][[File:Orange Banner Revision 1.png|22px]][[File:Yellow Banner Revision 1.png|22px]][[File:Lime Banner Revision 1.png|22px]][[File:Green Banner Revision 1.png|22px]][[File:Cyan Banner Revision 1.png|22px]][[File:Light Blue Banner Revision 1.png|22px]][[File:Blue Banner Revision 1.png|22px]][[File:Purple Banner Revision 1.png|22px]][[File:Magenta Banner Revision 1.png|22px]][[File:Pink Banner Revision 1.png|22px]] Added banners.}}
{{History||xbox=TU46|xbone=CU36|ps=1.38|wiiu=Patch 15|switch=1.0.1|[[File:End City Banner.png|17px]] Magenta banners with a black chevron and inverted chevron are now naturally generated on the outside walls of [[end city|end cities]].}}
{{History||xbox=TU53|xbone=CU43|ps=1.49|wiiu=Patch 23|switch=1.0.3|[[File:White Banner.png|17px]] [[File:Light Gray Banner.png|17px]] [[File:Gray Banner.png|17px]] [[File:Black Banner.png|17px]] [[File:Brown Banner.png|17px]] [[File:Red Banner.png|17px]] [[File:Orange Banner.png|17px]] [[File:Yellow Banner.png|17px]] [[File:Lime Banner.png|17px]] [[File:Green Banner.png|17px]] [[File:Cyan Banner.png|17px]] [[File:Light Blue Banner.png|17px]] [[File:Blue Banner.png|17px]] [[File:Purple Banner.png|17px]] [[File:Magenta Banner.png|17px]] [[File:Pink Banner.png|17px]] Changed banners' [[tint]]s.}}
{{History||xbox=none|xbone=none|ps=1.90|wiiu=none|switch=none|[[Loom]]s have been added to help the [[player]] edit banners more easily.}}
{{History||ps=1.91|[[File:Ominous Banner BE.png|17px]] Added [[illager]] banners, which generate with [[pillager outpost]]s and are [[drops|dropped]] by [[illager captain]]s upon [[death]].}}
{{History|foot}}
== Issues ==
{{issue list}}
== Trivia ==
* With 16 blank banners, 38 patterns of 16 colors each (608 uniquely-colored patterns), and 0 to 6 patterns per banner, the number of uniquely crafted banners is 16 × (608<sup>0</sup> + 608<sup>1</sup> + 608<sup>2</sup> + 608<sup>3</sup> + 608<sup>4</sup> + 608<sup>5</sup> + 608<sup>6</sup>) ≈ 809 quadrillion - 809 with 15 zeros (809,573,616,779,945,488). The number of visually distinct banners is smaller, because one or more patterns may completely cover other patterns, or the entire banner, or be duplicated due to the symmetric set of patterns (e.g. field or (yellow) + per pale azure (blue) = field azure + per pale or inverted).
** Not 38 patterns are available on BE, but 40 patterns of 16 colors each (640 uniquely-colored patterns), so the number is even greater. 16 × (640<sup>0</sup> + 640<sup>1</sup> + 640<sup>2</sup> + 640<sup>3</sup> + 640<sup>4</sup> + 640<sup>5</sup> + 640<sup>6</sup>) ≈ 1 quintillion - 1 with 18 zeros (1,101,232,303,249,827,856). This increases the number by almost 1.4 times, or almost 292 quadrillion, despite the addition of only 2 patterns.
* If a banner has over 6 patterns, only the six bottom-most patterns are displayed when hovered over in the [[inventory]].
* The Mojang logo is called "Thing" in-game, which could be considered an alternate translation for [[wiktionary:mojäng|mojäng]]. If [[wikipedia:Google Translate|Google Translate]] is used, it translates to "thingys" or "contraption".
** In the Swedish translation of the game, this pattern is, in fact, called ''mojäng''.
* [[List of block textures#Banner Textures|Banner textures]] are located in \assets\minecraft\textures\entity\banner.
** There are 40 monochrome textures, each containing all 6 sides of the banner.
** The texture of the back side is the mirrored texture of the front side.
** Compared to the texture files, textures' colors are inverted in-game due to them acting as masks for the re-colored base texture, base.png. That means white is visible, while black is transparent.
* Banners that have the purple NBT+ line in the bottom (obtained by holding Ctrl and middle-clicking the banner, which also copies the NBT [[tag]] of anything that the player points their crosshair to) actually have no difference with the base banner obtained by middle click.
*The Illager Banner in Bedrock Edition is available as a separate item but is just a second variant of the white banner.
**Standard variant of white banner is set to type 0.
**Illager variant is set to type 1.
== Gallery ==
<gallery>
Banners Jeb.png|The first image of banners, as tweeted by Jens Bergensten.
Iceland and Norway Flags.png|Another banner image from Jeb.
Searge Banners.png|Several banners made by Searge.
The Bountiful Update.png|Banners in the official 1.8 poster.
BannersBeforeAndAfter.png|An image, tweeted by Jeb, showcasing the changes he made to the banner color palette in the 1.12 update.
Gradients Overlay.png|The result of using gradient different numbers of times, each time increasing the level of gradient by 1.
All positions and rotations of a banner.png|All positions and rotations of a banner
Item Frame with Banner.png|A banner with the [[Mojang]] logo in an [[item frame]].
EndCityBanners.png|Banners floating outside of an [[End city]] tower.
Woodland mansion 1x2 d1.png|Banners hanging above the doorway of a [[woodland mansion]] master bedroom.
Replaceitembanner.png|Banner put in the helmet slot by using the command {{cmd|replaceitem}}{{Only|BE}} or {{cmd|item replace}}{{Only|JE}}.
Better Together Banners.jpg|Banners in ''Bedrock Edition''.
Better Together Banner Crafting 1.jpg|A banner in the hand.
Better Together Banner Crafting 2.jpg|A banner in the inventory.
Better Together Banner Crafting 3.jpg|A banner in the crafting grid.
Better Together Banner Crafting 4.jpg|A banner being given a pattern.
</gallery>
=== Renders ===
<gallery>
Ominous Banner.gif
White Banner.gif
Light Gray Banner.gif
Gray Banner.gif
Black Banner.gif
Brown Banner.gif
Red Banner.gif
Orange Banner.gif
Yellow Banner.gif
Lime Banner.gif
Green Banner.gif
Cyan Banner.gif
Light Blue Banner.gif
Blue Banner.gif
Purple Banner.gif
Magenta Banner.gif
Pink Banner.gif
Ominous Wall Banner.png|
White Wall Banner.png|
Light Gray Wall Banner.png|
Gray Wall Banner.png|
Black Wall Banner.png|
Brown Wall Banner.png|
Red Wall Banner.png|
Orange Wall Banner.png|
Yellow Wall Banner.png|
Lime Wall Banner.png|
Green Wall Banner.png|
Cyan Wall Banner.png|
Light Blue Wall Banner.png|
Blue Wall Banner.png|
Purple Wall Banner.png|
Magenta Wall Banner.png|
Pink Wall Banner.png
</gallery>
<gallery>
File:Ominous Banner.gif|Ominous banner pattern in Java Edition.
File:Ominous Banner BE.gif|Illager banner pattern in Bedrock Edition.
File:Ominous Banner Revision 1.gif|Old Ominous banner pattern.
File:Ominous Banner washing.gif|Washing with cauldron shows how to apply the ominous banner pattern.
</gallery>
=== [[Lego Minecraft]] Banners ===
<gallery>
File:Lego Red Creeper Banner Collage.jpg|Lego banners from 21127 and 21131
File:Lego Melon Banner.png|Lego banner from 21138
File:Lego Fish Banner.png|Lego banner from 21142
File:Lego Beetroot Banner.png|Lego banner from 21144
File:Lego Wheat Banner.png|Another lego banner from 21144
File:Lego Carrot Banner.png|A third lego banner from 21144
File:Lego Crossbones Banner.png|Lego banner from 21152
File:Lego Green Creeper Banner Collage.jpg|Lego banners from 21155
File:Lego Ominous Banner.png|Lego ominous banner from 21160
</gallery>
== References ==
{{reflist}}
{{Blocks|Utility}}
{{Items}}
[[Category:Generated structure blocks]]
[[Category:Manufactured blocks]]
[[Category:Block entities]]
[[Category:Non-solid blocks]]
[[cs:Prapor]]
[[de:Banner]]
[[es:Estandarte]]
[[fr:Bannière]]
[[ja:旗]]
[[ko:현수막]]
[[nl:Banier]]
[[pl:Sztandar]]
[[pt:Estandarte]]
[[ru:Флаг]]
[[uk:Стяг]]
[[zh:旗帜]]</li><li>[[Raw Porkchop|Raw Porkchop]]<br/>{{Item
| title = Raw Porkchop
| image = Raw Porkchop.png
| renewable = Yes
| heals = {{hunger|3}}
| stackable = Yes (64)
}}
A '''raw porkchop''' is a [[food]] item that can be eaten by the [[player]] or cooked to make a [[cooked porkchop]].
== Obtaining ==
=== Mob loot ===
==== Pigs ====
Adult [[pig]]s drop 1–3 raw porkchop when killed. The maximum amount is increased by 1 per level of [[Looting]], for a maximum of 1-6 with Looting III. If killed while on fire, they drop [[cooked porkchop]] instead.
==== Hoglins ====
Adult [[hoglin]]s drop 2–4 raw porkchop when killed. The maximum amount is increased by 1 per level of [[Looting]], for a maximum of 7 with Looting III. If killed while on fire, they drop [[cooked porkchop]] instead.
=== Chest loot ===
{{LootChestItem|raw-porkchop}}
== Usage ==
=== Food ===
To eat raw porkchop, press and hold {{control|use}} while it is selected in the hotbar. Eating one restores {{hunger|3}} [[hunger]] and 0.6 [[Hunger#Mechanics|saturation]].
=== Smelting ingredient ===
{{Smelting
|showname=1
|Raw Porkchop
|Cooked Porkchop
|0.35
}}
=== Trading ===
{{IN|bedrock}}, novice-level butcher [[villager]]s have a {{frac|1|3}} chance to [[trading|buy]] 7 raw porkchop for an [[emerald]] as part of their [[trading|trades]].
{{IN|java}}, novice-level butcher villagers have a 40% chance to buy 7 raw porkchop for an emerald.
=== Wolves ===
Raw porkchops can be used to [[breed]] and heal tamed [[wolves]], lead them around, and make baby tamed wolves grow up faster by 10% of the remaining time.
=== Piglins ===
[[Piglin|Piglins]] instantly pick up raw or [[Cooked Porkchop|cooked porkchops]] that are within 1 block of them, unless they have already picked up one within the last 10 seconds. Porkchops picked up are not dropped upon the piglin's death.
==Sounds==
{{Sound table/Entity/Food}}
== Data values ==
=== ID ===
{{edition|java}}:
{{ID table
|edition=java
|showitemtags=y
|showforms=y
|generatetranslationkeys=y
|displayname=Raw Porkchop
|spritetype=item
|nameid=porkchop
|itemtags=piglin_food
|form=item
|foot=1}}
{{edition|bedrock}}:
{{ID table
|edition=bedrock
|shownumericids=y
|showforms=y
|notshowbeitemforms=y
|generatetranslationkeys=y
|displayname=Raw Porkchop
|spritetype=item
|nameid=porkchop
|id=262
|form=item
|foot=1}}
== Achievements ==
{{load achievements|Pork Chop}}
== Advancements ==
{{load advancements|Husbandry;A Balanced Diet}}
== History ==
{{History|java indev}}
{{History||20100219|[[File:Raw Porkchop JE1 BE1.png|32px]] Added raw porkchops.
|Raw porkchops restore {{hp|3}} and do not stack in the [[inventory]].
|Raw porkchops are [[drops|dropped]] by [[pig]]s.}}
{{History|java beta}}
{{History||1.4|Raw porkchops can now be given to [[wolf|wolves]].}}
{{History||1.8|snap=Pre-release|Raw porkchops can now be stacked to 64.<ref>{{Tweet|jeb|103408168356421632|Some Minecraft food changes...}}</ref>
|Raw porkchops now restore {{hunger|3}} to the [[Hunger|food bar]].}}
{{History|java}}
{{History||1.2.1|snap=12w03a|Raw porkchops can now be used to breed wolves.}}
{{History||1.3.1|snap=12w21a|Raw porkchops can now be [[trading|sold]] to butcher [[villager]]s, at 14–17 pork chops for 1 [[emerald]].}}
{{History|||snap=12w25a|[[Pig]]s now [[drops|drop]] 1–3 porkchops instead of 0–2.}}
{{History||1.4.2|snap=12w37a|[[File:Raw Porkchop JE2 BE2.png|32px]] The texture of raw porkchops has been changed, so that it no longer has a dark outline.}}
{{History||1.8|snap=14w02a|[[Trading]] has been changed; butcher villagers now [[trading|buy]] 14–18 porkchops for 1 emerald.}}
{{History||1.13|snap=17w47a|Prior to [[1.13/Flattening|''The Flattening'']], this [[item]]'s numeral ID was 319.}}
{{History||1.14|snap=18w43a|[[File:Raw Porkchop.png|32px]] The texture of raw porkchops has been changed.}}
{{History|||snap=18w49a|Raw porkchops can now be found in [[chest]]s in [[village]] butcher shops.}}
{{History||1.16|snap=20w07a|Raw porkchops are dropped by the new [[hoglin]]s.
|Raw porkchops have a {{frac|5|109}} (~4.59%) chance of being given by the new [[piglin]]s when [[bartering]], in a stack size of 2–5.}}
{{History|||snap=20w09a|Raw porkchops can no longer be obtained by bartering with piglins.}}
{{History|||snap=20w16a|Raw porkchops now generate in [[bastion remnants]] chests.}}
{{History|pocket alpha}}
{{History||v0.4.0|[[File:Raw Porkchop JE1 BE1.png|32px]] Added raw porkchops.}}
{{History||v0.5.0|Raw porkchops now restore {{hp|3}} instead of {{hp|1}}.}}
{{History||v0.8.0|snap=build 1|[[File:Raw Porkchop JE2 BE2.png|32px]] The texture of raw porkchops has been changed, so that it no longer has that dark outline.}}
{{History||v0.12.1|snap=build 1|Raw porkchops now restore [[hunger]] instead of [[health]].}}
{{History||v0.16.2|[[Pig]]s now [[drops|drop]] 1–3 raw porkchops rather than 0–2.}}
{{History|pocket}}
{{History||1.0.4|snap=alpha 1.0.4.0|14–18 raw porkchops can now be [[trading|sold]] to butcher [[villager]]s for an [[emerald]].}}
{{History|bedrock}}
{{History||1.10.0|snap=beta 1.10.0.3|[[File:Raw Porkchop.png|32px]] The texture of raw porkchops has been changed.}}
{{History||1.11.0|snap=beta 1.11.0.3|Raw porkchops can now be found in [[village]] butcher [[chest]]s.}}
{{History|||snap=beta 1.11.0.4|Butcher [[villager]]s now have {{frac|1|3}} chance to [[trading|buy]] 7 raw porkchops.}}
{{History|console}}
{{History||xbox=TU1|xbone=CU1|ps=1.0|wiiu=Patch 1|switch=1.0.1|[[File:Raw Porkchop JE1 BE1.png|32px]] Added raw porkchops.}}
{{History||xbox=TU5|Raw porkchops are now stackable to 64 and fills [[hunger]] instead of [[health]].}}
{{History||xbox=TU12|[[File:Raw Porkchop JE2 BE2.png|32px]] The texture of raw porkchops has been changed, so that it no longer has a dark outline.}}
{{History||xbox=none|xbone=none|ps=1.90|wiiu=none|switch=none|[[File:Raw Porkchop.png|32px]] The texture of raw porkchops has been changed.}}
{{History|new3DS}}
{{History||0.1.0|[[File:Raw Porkchop JE2 BE2.png|32px]] Added raw porkchops.}}
{{History|foot}}
== Issues ==
{{issue list}}
== Gallery ==
<gallery>
I Porkchop Minecraft JINX.jpg|Official T-shirt artwork "I Porkchop Minecraft" sold by [https://www.jinx.com JINX].
I Brake for Porkchop Bumper Sticker JINX.jpg|An official bumper sticker featuring a raw porkchop sold by JINX.
</gallery>
== References ==
{{reflist}}
== External Links ==
*[https://www.minecraft.net/en-us/article/taking-inventory--porkchop Taking Inventory: Porkchop] – Minecraft.net on February 13, 2020
{{Items}}
[[Category:Food]]
[[cs:Syrová kotleta]]
[[de:Rohes Schweinefleisch]]
[[es:Chuleta de cerdo cruda]]
[[fr:Côtelette de porc crue]]
[[hu:Nyers disznóhús]]
[[ja:生の豚肉]]
[[nl:Rauw varkensvlees]]
[[pl:Surowy schab]]
[[pt:Costeleta de porco crua]]
[[ru:Сырая свинина]]
[[uk:Сира свинина]]
[[zh:生猪排]]
[[Category:Renewable resources]]</li></ul></nowiki> | Added "Steven Universe" Mash-up | ||||||||||||||||||||||||||||||||||
1.11.4{{Extension DPL}}<ul><li>[[Pink Dye|Pink Dye]]<br/>{{Item
| image = Pink Dye.png
| renewable = Yes
| stackable = Yes (64)
}}
'''Pink dye''' is a [[Dyeing#Quasi-Primary|quasi-primary color dye]].
== Obtaining ==
=== Crafting ===
{{Crafting
|head=1
|showname=0
|showdescription=1
|Peony;Pink Tulip;Pink Petals
|Output=Pink Dye,2;Pink Dye;Pink Dye
|type=Material
}}
{{Crafting
|Red Dye
|White Dye
|Output=Pink Dye,2
|type=Material
}}
{{Crafting
|Red Dye
|Bone Meal
|Output=Pink Dye,2
|type=Material
|foot=1
|description={{only|bedrock|education}}
}}
=== Trading ===
[[Wandering trader]]s sell 3 pink dye for an [[emerald]].
== Usage ==
{{dye usage}}
=== Crafting ingredient ===
{{crafting usage|ignore=Banner|continue=1}}
{{banner crafting usage}}
=== Loom ingredient ===
{{Banner loom usage|Pink Dye}}
== Data values ==
=== ID ===
{{edition|java}}:
{{ID table
|edition=java
|showforms=y
|generatetranslationkeys=y
|displayname=Pink Dye
|spritetype=item
|nameid=pink_dye
|form=item
|foot=1}}
{{edition|bedrock}}:
{{ID table
|edition=bedrock
|showaliasids=y
|shownumericids=y
|showforms=y
|notshowbeitemforms=y
|generatetranslationkeys=y
|displayname=Pink Dye
|spritetype=item
|nameid=pink_dye
|aliasid=dye / 9
|id=404
|form=item
|translationkey=item.dye.pink.name
|foot=1}}
== Video ==
{{yt|pPq-Hs9ZPx4}}
== History ==
{{History|java beta}}
{{History||1.2|[[File:Pink Dye JE1 BE1.png|32px]] Added pink dye.}}
{{History|java}}
{{History||1.4.2|snap=12w34a|Added the ability to [[Armor#Dyeing|dye]] leather [[armor]] and [[wolf]] collars.}}
{{History||1.4.6|snap=12w49a|Pink dye can now be [[crafting|crafted]] with [[gunpowder]] to create a [[firework star]].}}
{{History||1.6.1|snap=13w19a|[[Stained clay]] can now be crafted.}}
{{history||1.7.2|snap=13w36a|With the addition of new [[flower]]s, many secondary and tertiary dyes are now primary [[dye]]s.}}
{{History|||snap=13w41a|[[Stained glass]] can now be crafted.}}
{{History||1.8|snap=14w30a|Added [[banner]]s, which can be dyed.}}
{{History||1.11|snap=16w39a|Added the ability to dye [[shulker box]]es.}}
{{History||1.12|snap=17w15a|Added the ability to dye [[bed]]s.}}
{{History||1.13|snap=17w47a|The different data values for the <code>dye</code> ID have now been split up into their own IDs.
|Prior to [[1.13/Flattening|''The Flattening'']], this [[item]]'s numeral ID was 351.}}
{{History||1.14|snap=18w43a|Pink dye is now crafted using [[white dye]], instead of [[bone meal]].
|[[File:Pink Dye JE2 BE2.png|32px]] The texture of pink dye has now been changed.}}
{{History|||snap=18w44a|Pink dye can now change the text color on [[sign]]s to pink.}}
{{History|||snap=19w05a|Added the [[wandering trader]], which sells pink dye.}}
{{History|||snap=19w11a|Pink dye can now be [[trading|bought]] by shepherd villagers.}}
{{History||1.17|snap=20w45a|Pink dye can now be used to craft [[pink candle]]s.}}
{{History|||snap=21w19a|Pink dye can no longer be used to craft pink candles.}}
{{History|||snap=Pre-release 1|Pink dye can now once again be used to craft pink candles.}}
{{History||1.20<br>(Experimental)|link=1.19.3|snap=22w42a|Pink dye can now change the text color on [[hanging sign]]s to pink.}}
{{History||1.20<br>(Experimental)|link=1.19.4|snap=23w07a|[[Pink petals]] can now be crafted into pink dye.}}
{{History|pocket alpha}}
{{History||v0.3.0|[[File:Pink Dye JE1 BE1.png|32px]] Added pink dye.}}
{{History||v0.4.0|Pink dye is now craftable with [[rose red]] and [[bone meal]].
|Pink dye can now be used to craft pink wool.}}
{{History||v0.6.0|Pink dye can now be used to dye [[sheep]].}}
{{History||v0.8.0|snap=build 1|Pink dye can now be used to craft [[magenta dye]].}}
{{History||v0.9.0|snap=build 11|Pink dye can now be used to craft colored [[terracotta]].}}
{{History||v0.11.0|snap=build 1|Pink dye can now be used to dye tamed [[wolf]] collars.}}
{{History||v0.14.0|snap=build 1|Pink dye can now be used to dye [[water]] in [[cauldron]]s.}}
{{History|pocket}}
{{History||1.0.0|snap=alpha 0.17.0.1|Pink dye can now be used to dye [[shulker]]s.}}
{{History||1.1.0|snap=alpha 1.1.0.0|Pink dye can now be used to craft [[concrete powder]], colored [[bed]]s and dyed [[shulker box]]es.}}
{{History|bedrock}}
{{History||1.2.0|snap=beta 1.2.0.2|Pink dye can now be used to craft [[firework star]]s, [[stained glass]] and patterns on [[banner]]s.}}
{{History||1.4.0|snap=beta 1.2.20.1|Pink dye can now be used to craft [[balloon]]s and [[glow stick]]s.}}
{{History||1.8.0|snap=beta 1.8.0.8|Pink dye can now be used to dye tamed [[cat]] collars.}}
{{History||1.10.0|snap=beta 1.10.0.3|Pink dye is now [[trading|sold]] by [[wandering trader]]s.
|Pink dye can now be used to dye white [[carpet]]s and undyed [[glass pane]]s.
|[[File:Pink Dye JE2 BE2.png|32px]] The texture of pink dye has now been changed.}}
{{History||1.16.100|snap=beta 1.16.100.56|The ID of pink dye has been changed from <code>dye/9</code> to <code>pink_dye</code>.}}
{{History|console}}
{{History||xbox=TU1|xbone=CU1|ps=1.00|switch=1.0.1|wiiu=Patch 1|[[File:Pink Dye JE1 BE1.png|32px]] Added pink dye.}}
{{History|PS4}}
{{History||1.90|[[File:Pink Dye JE2 BE2.png|32px]] The texture of pink dye has now been changed.}}
{{History|new 3ds}}
{{History||0.1.0|[[File:Pink Dye JE1 BE1.png|32px]] Added pink dye.}}
{{History|foot}}
== Issues ==
{{issue list}}
{{Items}}
[[Category:Dyes]]
[[cs:Růžové barvivo]]
[[de:Rosa Farbstoff]]
[[es:Tinte rosa]]
[[fr:Teinture rose]]
[[hu:Rózsaszín festék]]
[[ja:桃色の染料]]
[[ko:분홍색 염료]]
[[nl:Roze kleurstof]]
[[pl:Różowy barwnik]]
[[pt:Corante rosa]]
[[ru:Розовый краситель]]
[[zh:粉红色染料]]
[[Category:Renewable resources]]</li><li>[[Rabbit Stew|Rabbit Stew]]<br/>{{Item
| title = Rabbit Stew
| heals = {{hunger|10}}
| renewable = Yes
| stackable = No
}}
'''Rabbit stew''' is a [[food]] [[item]] that can be eaten by the [[player]].
== Obtaining ==
=== Crafting ===
{{Crafting
|shapeless=true
|B1=Cooked Rabbit
|A2=Carrot
|B2=Baked Potato
|C2=Any Mushroom
|B3=Bowl
|Output=Rabbit Stew
|type=Foodstuff
}}
=== Trading ===
{{IN|bedrock}}, novice-level Butcher villagers always offer to sell rabbit stew for one emerald as their second trade.
{{IN|java}}, novice-level Butcher villagers have a 50% chance of offering rabbit stew for one emerald.
== Usage ==
=== Food ===
To eat rabbit stew, press and hold {{control|use}} while it is selected in the hotbar. Eating one restores {{hunger|10}} [[hunger]] and 12 hunger [[Hunger#Mechanics|saturation]]. This restores more hunger than any other food type in the game except [[cake]], but has less saturation than a [[golden carrot]], a [[cooked porkchop]], or a [[steak]].
Eating rabbit stew leaves the player with an empty bowl, similar to [[mushroom stew]], [[suspicious stew]], and [[beetroot soup]].
=== Wolves ===
{{IN|bedrock}}, rabbit stew can be used to feed [[wolves]], healing them by {{hp|10|mob=1}}. However, unlike other wolf food, rabbit stew does not speed up the growth of baby wolves, and it cannot be used to breed them. It is usable only on a wolf that has less than full health.
== Sounds ==
{{Sound table/Entity/Food}}
== Data values ==
=== ID ===
{{edition|java}}:
{{ID table
|edition=java
|showforms=y
|generatetranslationkeys=y
|displayname=Rabbit Stew
|spritetype=item
|nameid=rabbit_stew
|form=item
|foot=1}}
{{edition|bedrock}}:
{{ID table
|edition=bedrock
|shownumericids=y
|showforms=y
|notshowbeitemforms=y
|generatetranslationkeys=y
|displayname=Rabbit Stew
|spritetype=item
|nameid=rabbit_stew
|id=290
|form=item
|foot=1}}
== Advancements ==
{{load advancements|Husbandry;A Balanced Diet}}
== Video ==
<div style="text-align:center">{{yt|GwCqwtydRBc}}</div>
== History ==
{{History|java}}
{{History||1.8|snap=June 30, 2014|slink={{tweet|TheMogMiner|483725253018157057}}|[[Ryan Holtz]] tweets the recipe of rabbit stew, and that it can restore hunger better than any other item other than [[golden apple]]s (which was incorrect, as golden apples restore less hunger, but a whole [[cake]] restores more).}}
{{History|||snap=14w27a|[[File:Rabbit Stew JE1 BE1.png|32px]] Added rabbit stew.}}
{{History||1.13|snap=17w47a|Prior to [[1.13/Flattening|''The Flattening'']], this [[item]]'s numeral ID was 413.}}
{{History||1.14|snap=18w43a|[[File:Rabbit Stew JE2.png|32px]] The texture of rabbit stew has been changed.
|The rabbit stew's [[recipe]] is now shapeless.}}
{{History|||snap=18w50a|[[File:Rabbit Stew JE3 BE2.png|32px]] The texture of rabbit stew has been changed.}}
{{History|||snap=19w11a|Butcher [[villager]]s now [[trading|sell]] rabbit stew.}}
{{History|pocket alpha}}
{{History||v0.13.0|snap=build 1|[[File:Rabbit Stew JE1 BE1.png|32px]] Added rabbit stew.}}
{{History|bedrock}}
{{History||1.10.0|snap=beta 1.10.0.3|[[File:Rabbit Stew JE3 BE2.png|32px]] The texture of rabbit stew has been changed.
|The recipe for rabbit stew is now shapeless.}}
{{History||1.11.0|snap=beta 1.11.0.4|Butcher [[villager]]s now [[trading|sell]] rabbit stew.}}
{{History|console}}
{{History||xbox=TU31|xbone=CU19|ps=1.22|wiiu=Patch 3|switch=1.0.1|[[File:Rabbit Stew JE1 BE1.png|32px]] Added rabbit stew.}}
{{History||xbox=none|xbone=none|ps=1.90|wiiu=none|switch=none|[[File:Rabbit Stew JE3 BE2.png|32px]] The texture of rabbit stew has been changed.
|The recipe for rabbit stew is now shapeless.}}
{{History|new 3ds}}
{{History||0.1.0|[[File:Rabbit Stew JE1 BE1.png|32px]] Added rabbit stew.}}
{{History|foot}}
== Issues ==
{{issue list}}
== Trivia ==
* If the ingredients of rabbit stew were eaten separately and the [[mushroom]] had become half of a [[mushroom stew]], they would restore a total of {{Hunger|16}} and 19.2 saturation points. Without counting the mushroom, the separate ingredients would restore {{Hunger|13}} and 15.6 saturation points. Therefore, crafting rabbit stew results in a net loss of restorative points, though it is quicker than eating all the ingredients separately.
* Rabbit stew restores more hunger and total food points (hunger + saturation) than nearly any other single item (the exception is a suspicious stew with Saturation). This is balanced by the point that the stew does not stack, and with its complex recipe it's not so easy to make "on the road". The suspicious stew shares the unstackability, but with only four ingredients it can at least be crafted in the inventory.
==Gallery==
<gallery>
Rabbit Stew Crafting.jpg|Crafting rabbit stew.
</gallery>
== References ==
{{Reflist}}
{{items}}
[[de:Kaninchenragout]]
[[es:Estofado de conejo]]
[[it:Stufato di coniglio]]
[[fr:Ragoût de lapin]]
[[ja:ウサギシチュー]]
[[ko:토끼 스튜]]
[[nl:Konijnenstoofpot]]
[[pl:Gulasz z królika]]
[[pt:Ensopado de coelho]]
[[ru:Тушёный кролик]]
[[uk:Тушкований кролик]]
[[zh:兔肉煲]]
[[Category:Food]]
[[Category:Renewable resources]]</li></ul> | Added "Toy Story" Mash-up | ||||||||||||||||||||||||||||||||||
1.13.0{{Extension DPL}}<ul><li>[[Bone|Bone]]<br/>{{about|the item|the block|Bone Block|other uses|Bone (disambiguation)}}
{{Item
| image = Bone.png
| renewable = Yes
| stackable = Yes (64)
}}
A '''bone''' is an [[item]] primarily obtained from [[skeleton]]s and similar mobs. It can be crafted into [[Bone Meal|bone meal]] or used to tame wild [[Wolf|wolves]].
== Obtaining ==
=== Chest loot ===
{{LootChestItem|bone}}
=== Mob loot ===
Skeletons, [[wither skeleton]]s, [[skeleton horse]]s, and [[stray]]s may drop 0–2 bones upon death. The maximum drop is increased by 1 per level of Looting, for a maximum of 0-5 bones with Looting III.
{{IN|bedrock}}, [[salmon]], [[cod]], [[pufferfish]], and [[tropical fish]] have 25% chance to drop 1-2 bones upon death. The maximum drop is increased by 1 to 2 per level of Looting, for a maximum of 2-8 bones with Looting III.
Salmon (small and medium size) have 25% chance to drop 1 bone upon death, The maximum drop is increased by 1 to 2 per level of [[Looting]], for a maximum of 2-7 bones with Looting III. The chance of dropping bones increases by 1% per looting level, so with Looting III there is up to a 28% chance of bones dropping.
=== Fishing ===
Bones can also be obtained by [[fishing]] as part of the junk category. The best chance of catching a bone is achieved without the [[Luck of the Sea]] enchantment, yielding a 1.1% chance.
== Usage ==
=== Helmet ===
[[File:Steve wearing Bone.png|thumb|right|75px]]
[[File:Alex wearing Bone.png|thumb|right|75px]]
While a bone cannot be equipped in the head slot in Survival mode, equipping it using commands causes it to appear in the player's mouth.
=== Taming ===
Using a bone on a wild [[wolf]] has a {{frac|1|3}} chance of [[taming]] it. Bones cannot tame a hostile wolf or a wolf that has already been tamed. However, bones can be used to attract the attention of the tamed ones.
=== Crafting ingredient ===
A bone can be crafted into 3 bone meal.
{{crafting usage}}
== Achievements ==
{{load achievements|Leader of the pack}}
== Advancements ==
{{load advancements|Best Friends Forever}}
== Data values ==
=== ID ===
{{edition|java}}:
{{ID table
|edition=java
|showforms=y
|generatetranslationkeys=y
|displayname=Bone
|spritetype=item
|nameid=bone
|form=item
|foot=1}}
{{edition|bedrock}}:
{{ID table
|edition=bedrock
|shownumericids=y
|showforms=y
|notshowbeitemforms=y
|generatetranslationkeys=y
|displayname=Bone
|spritetype=item
|nameid=bone
|id=415
|form=item
|foot=1}}
== History ==
{{History|java beta}}
{{History||1.2|[[File:Bone JE1 BE1.png|32px]] Added bones.
|Bones can be [[crafting|crafted]] into [[bone meal]].}}
{{History||1.4|Bones can now be used to tame [[wolves]].}}
{{History|java}}
{{History||1.3.1|snap=12w21a|Bones can now be found within [[desert temple]]s, allowing bones to be obtainable on Peaceful difficulty.}}
{{History||1.4.2|snap=12w36a|Added [[wither skeleton]]s, which has a chance to [[drops|drop]] bones when killed.}}
{{History||1.6.1|snap=13w16a|Added [[skeleton horse]]s, which drop bones when killed.}}
{{History||1.7.2|snap=13w36a|Bones can now be more easily obtained in Peaceful difficulty by [[fishing]]. Although, they are considered a "junk" [[item]].}}
{{History||1.9|snap=15w44a|The average yield of bones in [[desert temple]]s has been slightly decreased.
|Bones can now be found in [[dungeon]] [[chest]]s.}}
{{History||1.10|snap=16w20a|Added [[stray]]s, which [[drops|drop]] bones when killed.}}
{{History||1.11|snap=16w39a|Bones can now found in the new [[woodland mansion]] chests.}}
{{History||1.13|snap=17w47a|Prior to [[1.13/Flattening|''The Flattening'']], this [[item]]'s numeral ID was 352.}}
{{History||1.14|snap=18w43a|[[File:Bone JE2.png|32px]] The texture of bones has now been changed.}}
{{History|||snap=18w44a|[[File:Bone JE3 BE2.png|32px]] The texture of bones has now been slightly changed.}}
{{History||1.19|snap=Deep Dark Experimental Snapshot 1|Bones now generate in [[ancient city]] chests.}}
{{History|pocket alpha}}
{{History||v0.2.0|[[File:Bone JE1 BE1.png|32px]] Added bones. They are currently unobtainable and serve no purpose.}}
{{History||v0.3.3|Added skeletons, which drop bones when they die.
|Bones can now be used to craft [[bone meal]].}}
{{History||v0.5.0|Bones can now be obtained after activating the [[nether reactor]].}}
{{History||v0.9.0|snap=build 1|Added bones to [[Creative]] mode.}}
{{History||v0.11.0|snap=build 1|Bones can now be more easily obtained in Peaceful difficulty by [[fishing]]. Although, they are considered a "junk" [[item]].}}
{{History||v0.12.1|snap=build 1|Added [[wither skeleton]]s, which have a chance to [[drops|drop]] bones when killed.
|Bones are no longer available from the [[nether reactor]].}}
{{History||v0.13.0|snap=build 1|Bones can now be found inside of the [[desert temple]] hidden [[chest]] room.}}
{{History||v0.15.0|snap=build 1|Added [[stray]]s and [[skeleton horse]]s, which drop bones when killed.
|Bones can now be found in [[jungle temple]] [[chest]]s.}}
{{History|pocket}}
{{History||1.1.0|snap=alpha 1.1.0.0|Bone can now be found inside [[woodland mansion]] chests.}}
{{History|bedrock}}
{{History||1.4.0|snap=beta 1.2.14.2|Bones now [[drops|drop]] from [[fish]] mobs.}}
{{History||1.10.0|snap=beta 1.10.0.3|[[File:Bone JE3 BE2.png|32px]] The texture of bones has now been changed.}}
{{History|console}}
{{History||xbox=TU1|xbone=CU1|ps=1.00|wiiu=Patch 1|[[File:Bone JE1 BE1.png|32px]] Added bones.}}
{{History||xbox=TU5|Bones can be found in the Miscellaneous tab in the [[Creative inventory]].}}
{{History||xbox=TU12|Moved bones to the Materials tab in the Creative inventory.}}
{{History||xbox=TU19|xbone=CU7|ps=1.12|wiiu=Patch 1|Added [[wither skeleton]]s, which have a chance to [[drops|drop]] bones when killed.}}
{{History||xbox=TU31|xbone=CU19|ps=1.22|wiiu=Patch 3|Bones can now be obtained from [[fishing]].}}
{{History||xbox=TU46|xbone=CU36|ps=1.38|wiiu=Patch 15|Added [[stray]]s and [[skeleton horse]]s, which drop bones when killed.}}
{{History||xbox=none|xbone=none|ps=1.90|wiiu=none|switch=none|[[File:Bone JE3 BE2.png|32px]] The texture of bones has now been changed.}}
{{History|new 3ds}}
{{History||0.1.0|[[File:Bone JE1 BE1.png|32px]] Added bones.}}
{{History|foot}}
== Issues ==
{{issue list}}
== See also ==
* [[Bone meal]]
* [[Wolf]]
* [[Dyeing]]
{{Items}}
[[Category:Renewable resources]]
[[de:Knochen]]
[[es:Hueso]]
[[fr:Os]]
[[hu:Csont]]
[[it:Osso]]
[[ja:骨]]
[[ko:뼈]]
[[nl:Bot]]
[[pl:Kość]]
[[pt:Osso]]
[[ru:Кость]]
[[th:กระดูก]]
[[tr:Kemik]]
[[uk:Кістка]]
[[zh:骨头]]</li><li>[[Echo Shard|Echo Shard]]<br/>{{Item
| title = Echo Shard
| image = Echo Shard.png
| renewable = No
| stackable = Yes (64)
}}
An '''echo shard''' is an item found in [[ancient cities]] which can be used to craft [[recovery compass]]es.
== Obtaining ==
=== Chest loot ===
{{LootChestItem|echo-shard}}
== Usage ==
=== Crafting ingredient ===
{{crafting usage|Echo Shard}}
== History ==
{{History|java}}
{{History||1.19|snap=22w14a|[[File:Echo Shard JE1 BE1.png|32px]] Added echo shards.}}
{{History|bedrock}}
{{History||1.19.0|snap=beta 1.19.0.24|[[File:Echo Shard JE1 BE1.png|32px]] Added echo shards.
|Currently cannot be found inside [[ancient city]] chests due to outdated structures and loot chests.}}
{{History||1.19.0|snap=beta 1.19.0.26|Echo shards now generate inside [[ancient city]] loot chests.}}
{{History|foot}}
== Issues ==
{{issue list}}
{{Items}}
[[Category:Non-renewable resources]]
[[de:Echoscherbe]]
[[es:Fragmento resonante]]
[[fr:Éclat d'écho]]
[[ja:残響の欠片]]
[[lzh:回音殘片]]
[[pt:Fragmento de eco]]
[[pl:Odłamek pogłosu]]
[[ru:Осколок эха]]
[[th:เศษเอคโค]]
[[uk:Уламок відлуння]]
[[zh:回响碎片]]</li></ul> | beta 1.13.0.15 | The character creator has been added in-game. | |||||||||||||||||||||||||||||||||
| Legacy Console Edition | |||||||||||||||||||||||||||||||||||
| TU3 | CU1 | 1.0 | Patch 1 | 1.0.1 | The first skin pack is available as downloadable content. | ||||||||||||||||||||||||||||||
| TU24 | CU12 | 1.16 | 8 'Alex' model skins added to default skin pack. | ||||||||||||||||||||||||||||||||
A camouflage skin in Minecraft Classic.
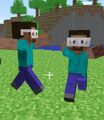
The first image of a skin's hat layer, from Notch's blog.
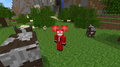
Deadmau5's unique skin with ears.

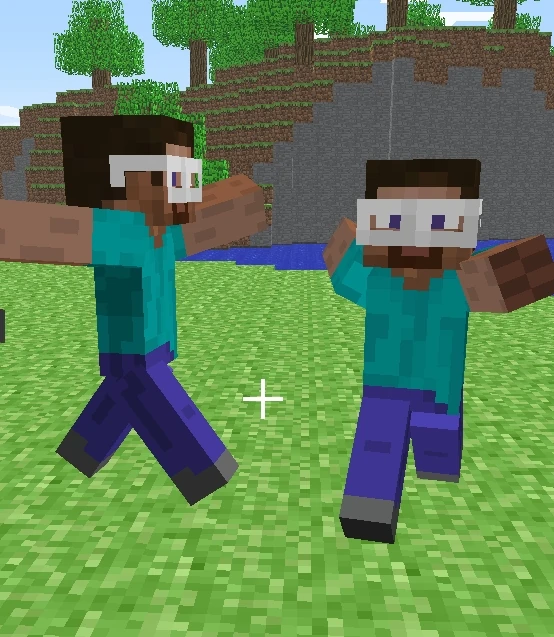
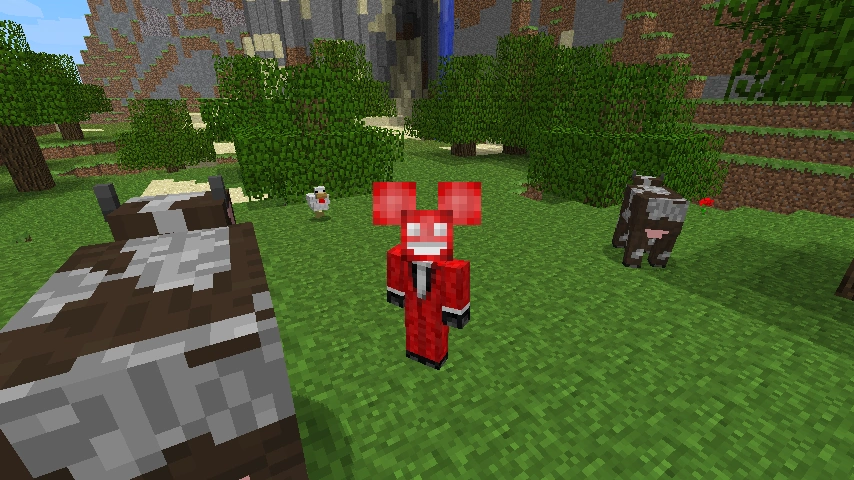
Gallery
Notch's skin.
Jeb's skin.
C418's skin.
Jappa's skin.
Slicedlime's skin.
Henrik Kniberg's skin.
LadyAgnes's skin.
Kingbdogz's skin.
Searge's skin.
Dinnerbone's skin.
Grum's skin.
- Mollstam skin render.png
Tobias Möllstam's skin.
Maria Lemón's skin.
Deadmau5's skin.
One of the 7 Villager skins that all players wore during April Fools 2014.

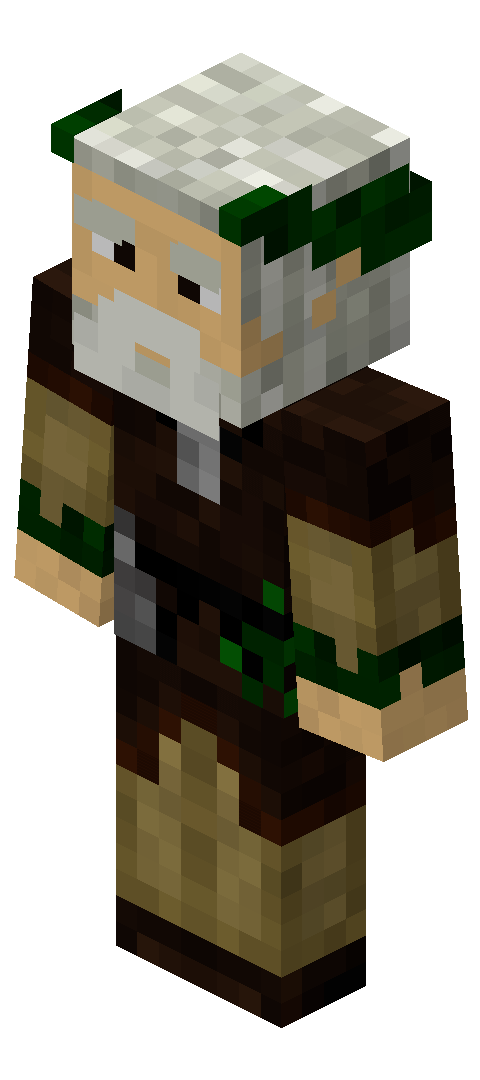


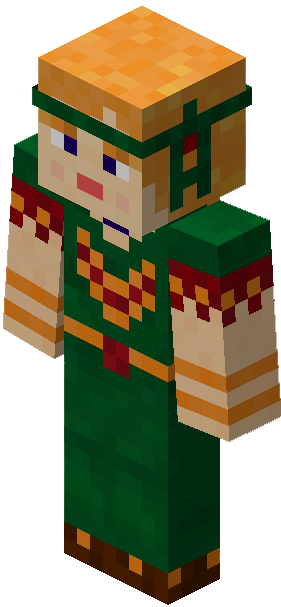


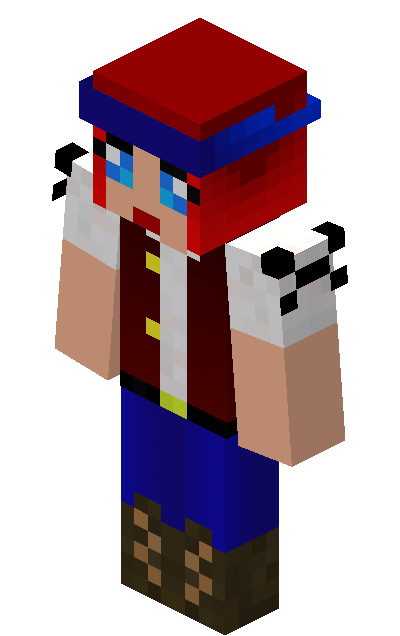

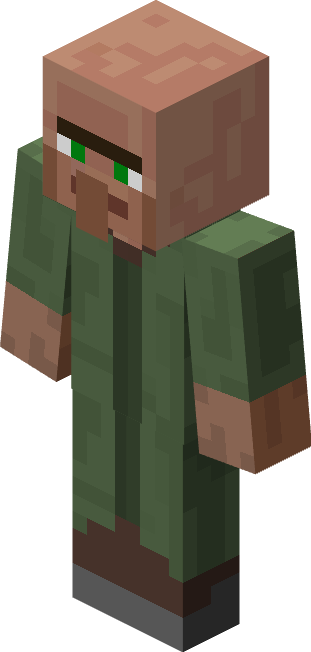
.png)
References
| Help | |||||||||||||||||||
|---|---|---|---|---|---|---|---|---|---|---|---|---|---|---|---|---|---|---|---|
| Menu screens |
| ||||||||||||||||||
| Game customization | |||||||||||||||||||
| Editions |
| ||||||||||||||||||
| Miscellaneous | |||||||||||||||||||