Coolio12309 (talk | contribs) No edit summary |
|||
| Line 1: | Line 1: | ||
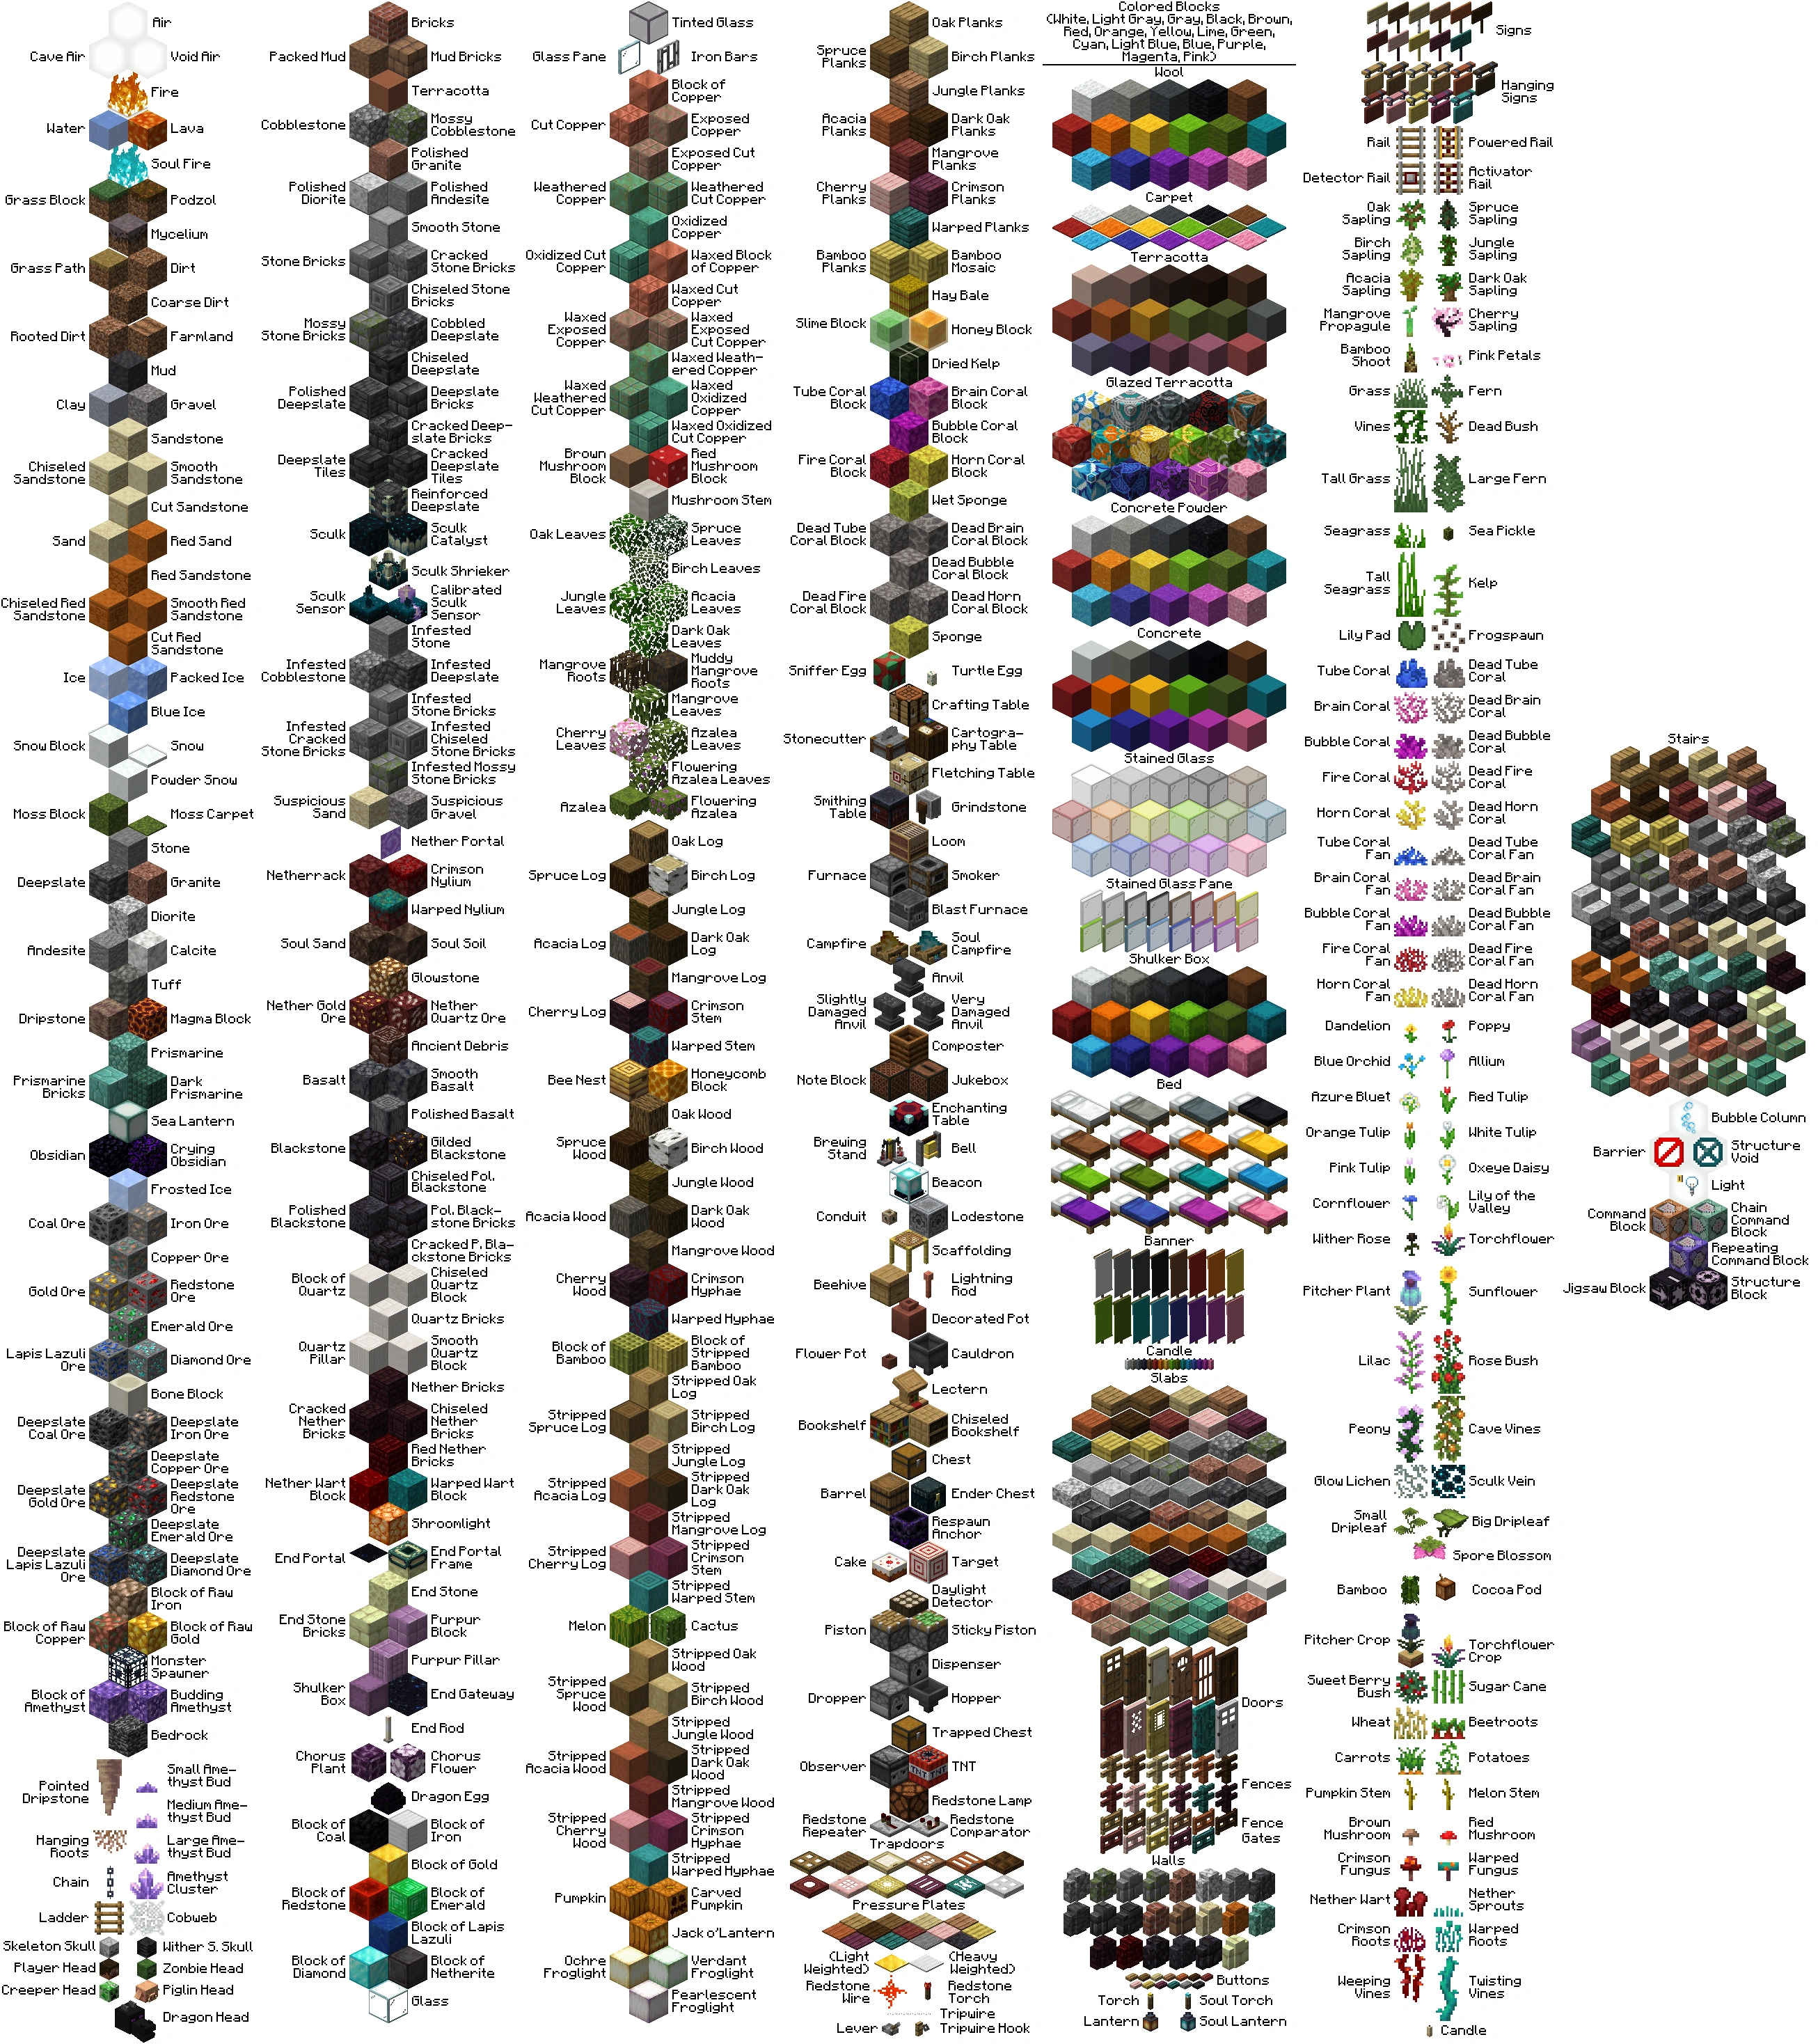
| + | [[File:Template1.png|thumb|right|250px|Types of blocks from 1.7.3.]] <!-- Someone needs to update the image to 1.8 /--> |
||
| − | This guide is intended for those who are not familiar with Minecraft. |
||
| + | '''Blocks''' are the basic units in [[Minecraft]], and are integral to the gameplay. Together, they build up the in-game environment, and can be mined and utilized in various fashions. |
||
| + | The face of a block is 16x16 pixels, and each block is proportionately one cubic meter.<ref>http://notch.tumblr.com/post/422515389/clearing-up-the-world-size-math</ref> Most blocks are static, although [[Water]], [[Lava]] and [[Portal]] blocks have a shifting pattern for each face. |
||
| − | It describes how to play and how to survive the first night of single player mode ([[Beta]]), assuming you are playing on the default 'Normal' [[difficulty|difficulty setting]] and in survival mode. |
||
| − | == |
+ | ==Types of Blocks== |
| − | The default keys for movement are as follows: |
||
| − | * {{key|W}} move forward (double-tap to sprint) |
||
| − | * {{key|S}} move backward |
||
| − | * {{key|A}} move left (strafe) |
||
| − | * {{key|D}} move right (strafe) |
||
| − | * {{key|space}} jump |
||
| − | * {{key|shift}} crouch/sneak |
||
| − | :(These are just the default movement controls. They can be changed by going to the Options screen in the menu, after pressing {{key|Esc}}) |
||
| + | There are currently over one hundred different types of blocks, including [[Air]], still [[Water]], and still [[Lava]], which cannot be built, various types of [[Wood]], various colors of [[Wool]], various types of [[Pressure Plate]]s, [[Slab]]s, [[Stairs]] and [[Slab|Double Slabs]]. See [[Data Values]] for the full list. |
||
| − | The mouse is used to look around the world. Move the mouse to turn your head. Click and '''hold''' the left mouse button to break down (or mine) blocks. Right click to place (or use) the currently highlighted item from your inventory hot bar. The mouse wheel cycles through the currently held item in your inventory hot bar, or you can use the number keys {{key|1}} - {{key|9}}. |
||
| − | {{key|E}} opens your inventory window and {{key|Q}} will drop a held item. These can also be changed in the options menu. |
||
| + | In a standard randomly generated [[Beta]] [[Map]], you can find [[Air]], [[Stone]], [[Grass]], [[Snow]], [[Dirt]], [[Water]], [[Water|Water Source]], [[Lava]], [[Lava|Lava Source]], [[Sand]], [[Sandstone]], [[Gravel]], [[Gold Ore]], [[Iron (Ore)|Iron Ore]], [[Diamond Ore]], [[Redstone (Ore)|Redstone Ore]], [[Lapis Lazuli Ore]], [[Clay Block]], [[Coal Ore]], [[Bedrock]], [[Ice]], [[Wood]], [[Wood|Birch Wood]], [[Wooden Planks]] in Abandoned Mines [[Wood|Pine/Spruce Wood]], [[Leaves]], [[Cactus]], [[Sugar Cane]]s, [[Vines]], [[Pumpkin]]s, yellow and red [[Decorations|Flowers]], brown and red [[Mushrooms]], dead and living [[Shrubs]] and [[Tall Grass]]. In dungeons (added in Seecret<!--THIS IS THE CORRECT SPELLING. DO NOT CHANGE /--> Friday Update 2), you can also find [[Cobblestone]], [[Moss Stone]], a [[Mob Spawner]], and [[Chest]]s, even though cobblestone and chests are usually made by the player. [[Moss Stone]], [[Cobblestone]], [[Wooden Planks]], [[Fences]], [[Pressure Plates]], [[Bookshelves]], [[Crafting Table]]s, [[Stairs]], [[Black Wool]], [[Iron Bars]], and [[Furnace]]s may also be found in the randomly generated NPC villiages that were added in 1.8, and [[Stone Brick]], [[Mossy Stone Brick]], [[Cracked Stone Brick]], [[Iron Bars]], [[Bookshelves]], [[Wooden Planks]], [[Chest]], and [[Cobweb]] can be found in the strongholds and abandoned mines also added in 1.8. [[Obsidian]] can be found naturally, but it is not part of the random generation; instead it is created when naturally occurring lava source blocks and water come in contact. [[Cobblestone]] can also be found naturally, and is formed with the same circumstances as obsidian, except that it is formed when water and moving lava contact. Dungeons are also built of cobblestone in parts. |
||
| − | * {{key|F1}} will toggle all HUD (Heads Up Display) and darkness effects |
||
| − | * {{key|F2}} will take a screenshot, which saves in the directory “<code>.minecraft\screenshots</code>”. Since Beta 1.2, it is possible to make screenshots using {{key|F2}} without holding {{key|F1}} at the same time. It will keep the HUD. |
||
| − | * {{key|F5}} will toggle 3rd-person view |
||
| + | In the initial, free version of [[Survival]] the player began with 10 [[TNT]] blocks and could obtain Dirt, [[Cobblestone]] from [[Stone]], [[Wooden Plank]]s from [[Wood]], [[Gold (Block)|Gold Blocks]] from [[Gold Ore]], [[Iron (block)|Iron Blocks]] from [[Iron (Ore)|Iron ore]], [[Stone Slab]]s from [[Coal Ore]], and white [[Wool]] from [[Sheep]]. |
||
| − | {{key|F3+F}} (pressing both {{key|F3}} and {{key|F}} at the same time) will cycle through the levels of fog in the world. This sets the render distance and can reduce lag, however it prevents you from seeing as far as possible across the map. This will make it more difficult to see mobs and anything else. |
||
| − | :There are four different stages of fog: |
||
| − | ::1) No fog. You can see the maximum distance (around a 256 block diameter) |
||
| − | ::2) Low fog. You can see about half of your maximum range. (around a 128 block diameter) |
||
| − | ::3) Medium fog. This prevents you from determining what time of day it is as it blocks the sun. You can only see about thirty-two blocks away from you. (around a 64 block diameter) |
||
| − | ::4) Heavy fog. Same as medium fog but you can only see sixteen blocks away. (around a 32 block diameter) |
||
| + | In [[Creative|Classic]] mode the player can build with naturally occurring blocks (except for [[Redstone]] and [[Diamond]]), and can use [[Bookcase]], [[Sponge]], Coloured [[Wool]], [[Brick]], [[Obsidian]] and [[Moss Stone]]. [[Operator]]s of [[server]]s can also build [[Bedrock]]. Some custom servers give the ability to place [[Grass]] and (still) [[Fluids]], too. |
||
| − | *Note: As of Beta 1.8, the deeper underground you are, the stronger the fog will be. And {{key|F}} will no longer change fog levels, you will have to go to the video settings and manually change it. |
||
| + | When playing the current [[Beta]], the player can [[Crafting|craft]] a variety of blocks not naturally found in maps, including [[Crafting Table]]s, [[Bookshelves]], [[Furnace]]s and more. [[Redstone]], [[Diamond]], [[Gold]] and [[Lapis Lazuli]] can be found in the lower areas of maps, and [[Obsidian]] forms when water touches a spring lava block. |
||
| − | ==Initial Priorities== |
||
| − | As Minecraft is a sandbox game there is no defined or proper way and style to play this game. However, in [[Survival (Game Mode)]] one common theme found for all players is the need to create ways to defend and fend off hostiles, or [[mobs]] that [[spawn]] in the dark when night falls. As of Beta 1.8, there is a food bar, you have to eat periodically to survive. To protect one’s self; it is a good idea to start gathering resources and construct a [[light|lit]] shelter immediately after the player spawns on the first day (which lasts about 10 minutes). It is advised that the player does not forgo the shelter and dive straight into attacking hostiles, since the player will likely lack the resources to fend off large groups of [[mobs]]. It should be noted that the player has the option to play Minecraft on peaceful mode, where no hostile mobs will spawn at all. The [[difficulty]] settings are in the options menu, which can be changed even when a game is in session. |
||
| + | [[Netherrack]], [[Glowstone]], [[Gravel]], [[Soul Sand]], [[Nether Brick]], [[Nether Brick Fence]], [[Nether Brick Stairs]] and [[Nether Wart]] can be found in [[The Nether]], which the player can only enter by creating a [[Portal]]. |
||
| − | On the first day, it is a good idea to mark where the world's default spawn point is; by building a landmark such as a tall pillar, it is possible to orient yourself in the world, as well as locate your spawnpoint if you get lost. Should the resources be available to craft a [[bed]], a spawn marker is not necessary, as sleeping in the bed will move the spawn point. It is also a good idea to make your first home very near the spawnpoint; this way, should you die, you'll be near shelter and hopefully some of your saved resources and/or your dropped resources. |
||
| + | The [[Pocket Edition]] has 2 additional blocks: The [[Cyan Flower]] and [[Camera]]. |
||
| − | Note that when you die in Minecraft, all items you were carrying or wearing in your [[inventory]] are scattered around your point of death, and you will respawn at your original spawnpoint unless you have slept in a bed. Like any dropped items in Minecraft, your scattered [[inventory]] will disappear after 5 minutes if they are not recovered. If you are building far from your spawnpoint without a bed, it is generally a good idea to mark the spawn and make a marker over your home in case of death. |
||
| + | == World-generated Blocks == |
||
| − | While you are making your preparations for nightfall, keep an eye on the sun. When you first start a new world in single player, it will be early morning. The sun always rises in the east and sets in the west; at midday, it will be directly above you. To better help you navigate, the [[Clouds]] in Minecraft always travel north. |
||
| + | Entries marked with a <sup>D</sup> require additional data values to fully define the block in a Beta world. Entries marked with an <sup>I</sup> have a different ID as an inventory item. Entries marked with a <sup>B</sup> require additional inventory data to fully define the inventory item. Entries marked with a <sup>[[Tile entity|T]]</sup> have tile entities associated with them to store additional data. Items with IDs in <span style='color:red'>red</span> cannot be legitimately obtained in the player's inventory in the game; they can only be obtained by "hacking" (such as the use of Inventory editors) or, in multiplayer using the /give server command. Items available only in Creative mode are in <span style='color:blue'>blue</span>. |
||
| + | === [[The Overworld]] === |
||
| − | It is best to work quickly, as a Minecraft day is only about ten minutes. |
||
| + | ====Naturally Generated==== |
||
| + | Naturally Generated includes blocks that are created through the world seed. |
||
| + | {| align="left" style="margin:2px; border: 1px solid silver; text-align: center;" |
||
| + | ! Icon !! Dec !! Hex !! Block type |
||
| + | |- |
||
| + | | height="27px" | || <span style='color:red'>00</span> || <span style='color:red'>00</span> || [[Air]] |
||
| + | |- |
||
| + | | height="27px" | [[File:Stone.png|25px]] || 01 || 01 || [[Stone]] |
||
| + | |- |
||
| + | | height="27px" | [[File:Grass.png|25px]] || <span style='color:blue'>02</span> || <span style='color:blue'>02</span> || [[Grass]] |
||
| + | |- |
||
| + | | height="27px" | [[File:Dirt.png|25px]] || 03 || 03 || [[Dirt]] |
||
| + | |- |
||
| + | | height="27px" | [[File:Bedrock.png|25px]] || <span style='color:blue'>07</span> || <span style='color:blue'>07</span> || [[Bedrock]] |
||
| + | |- |
||
| + | | height="27px" | [[File:Water.png|25px]] || <span style='color:red'>08</span> || <span style='color:red'>08</span> || [[Water]] <sup>[[Data Values#Water and Lava|D]]</sup> |
||
| + | |- |
||
| + | | height="27px" | [[File:Lava.png|25px]] || <span style='color:red'>10</span> || <span style='color:red'>0A</span> || [[Lava]] <sup>[[Data Values#Water and Lava|D]]</sup> |
||
| + | |- |
||
| + | | height="27px" | [[File:Sand.png|25px]] || 12 || 0C || [[Sand]] |
||
| + | |- |
||
| + | | height="27px" | [[File:Gravel.png|25px]] || 13 || 0D || [[Gravel]] |
||
| + | |- |
||
| + | | height="27px" | [[File:Gold (Ore).png|25px]] || 14 || 0E || [[Gold Ore]] |
||
| + | |- |
||
| + | | height="27px" | [[File:Iron (Ore).png|25px]] || 15 || 0F || [[Iron (Ore)|Iron Ore]] |
||
| + | |- |
||
| + | | height="27px" | [[File:Coal (Ore).png|25px]] || <span style='color:blue'>16</span> || <span style='color:blue'>10</span> || [[Coal Ore]] |
||
| + | |- |
||
| + | | height="27px" | [[File:Wood.png|25px]] || 17 || 11 || [[Wood]] <sup>[[Data Values#Wood|D]] [[Data Values#Wood|B]] |
||
| + | |- |
||
| + | | height="27px" | [[File:Leaves.png|25px]] || 18 || 12 || [[Leaves]] <sup>[[Data Values#Leaves|D]] [[Data Values#Leaves|B]]</sup> |
||
| + | |- |
||
| + | | height="27px" | [[File:Lapis Lazuli (Ore).png|25px]] || <span style='color:blue'>21</span> || <span style='color:blue'>15</span> || [[Lapis Lazuli (Ore)|Lapis Lazuli Ore]] |
||
| + | |- |
||
| + | | height="27px" | [[File:Sandstone.png|25px]] || 24 || 18 || [[Sandstone]] |
||
| + | |- |
||
| + | | height="27px" | [[File:Tall Grass.png|25px]] || 31 || 1F || [[Tall Grass]] <sup>[[Data Values#Tall Grass|D]] [[Data Values#Wood|B]]</sup> |
||
| + | |- |
||
| + | | height="27px" | [[File:Grid Dead Bush.png|25px]] || <span style='color:blue'>32</span> || <span style='color:blue'>20</span> || [[Dead Bush]] |
||
| + | |} |
||
| + | {| align="left" style="margin:2px; border: 1px solid silver; text-align: center;" |
||
| + | ! Icon !! Dec !! Hex !! Block type |
||
| + | |- |
||
| + | | height="27px" | [[File:Dandelion.png|25px]] || 37 || 25 || [[Flowers#Dandelion|Dandelion]] |
||
| + | |- |
||
| + | | height="27px" | [[File:Rose.png|25px]] || 38 || 26 || [[Flowers#Rose|Rose]] |
||
| + | |- |
||
| + | | height="27px" | [[File:Brown Mushroom.png|25px]] || 39 || 27 || [[Mushrooms#Brown Mushroom|Brown Mushroom]] |
||
| + | |- |
||
| + | | height="27px" | [[File:Red Mushroom.png|25px]] || 40 || 28 || [[Mushrooms#Red Mushroom|Red Mushroom]] |
||
| + | |- |
||
| + | | height="27px" | [[File:Diamond (Ore).png|25px]] || <span style='color:blue'>56</span> || <span style='color:blue'>38</span> || [[Diamond Ore]] |
||
| + | |- |
||
| + | | height="27px" | [[File:Redstone (Ore).png|25px]] || <span style='color:blue'>73</span> || <span style='color:blue'>49</span> || [[Redstone (Ore)|Redstone Ore]] |
||
| + | |- |
||
| + | | height="27px" | [[File:Snow.png|25px]] || <span style='color:red'>78</span> || <span style='color:red'>4E</span> || [[Snow]] |
||
| + | |- |
||
| + | | height="27px" | [[File:Ice.png|25px]] || <span style='color:blue'>79</span> || <span style='color:blue'>4F</span> || [[Ice]] |
||
| + | |- |
||
| + | | height="27px" | [[File:Cactus.png|25px]] || 81 || 51 || [[Cactus]] <sup>[[Data Values#Cactus|D]]</sup> |
||
| + | |- |
||
| + | | height="27px" | [[File:Clay (Block).png|25px]] || 82 || 52 || [[Clay (Block)|Clay Block]] |
||
| + | |- |
||
| + | | height="27px" | [[File:Sugar Cane.png|25px]] || <span style='color:blue'>83</span> || <span style='color:blue'>53</span> || [[Sugar Cane]] <sup>[[Data Values#Sugar Canes|D]] [[Data Values#Item IDs|I]]</sup> |
||
| + | |- |
||
| + | | height="27px" | [[File:Pumpkin.png|25px]] || 86 || 56 || [[Pumpkin]] <sup>[[Data Values#Pumpkins and Jack-o-Lanterns|D]]</sup> |
||
| + | |- |
||
| + | | height="27px" | [[File:BrownMushroomCap.png|25px]] || <span style='color:red'>99</span> || <span style='color:red'>63</span> || [[Huge Mushroom|Huge Brown Mushroom]] <sup>[[Data Values#Huge brown and red mushroom|D]]</sup> |
||
| + | |- |
||
| + | | height="27px" | [[File:RedMushroomCap.png|25px]] || <span style='color:red'>100</span> || <span style='color:red'>64</span> || [[Huge Mushroom|Huge Red Mushroom]] <sup>[[Data Values#Huge brown and red mushroom|D]]</sup> |
||
| + | |- |
||
| + | | height="27px" | [[File:Vine.png|25px]] || 106 || 6A || [[Vines]] <sup>[[Data Values#Vines|D]]</sup> |
||
| + | |- |
||
| + | | height="27px" | [[File:Mycelium.png|25px]] || <span style='color:red'>110</span> || <span style='color:red'>6E</span> || [[Mycelium]] |
||
| + | |- |
||
| + | | height="27px" | [[File:Lily Pad.png|25px]] || 111 || 6F || [[Lily Pad]] |
||
| + | |- |
||
| + | | height="27px" | [[File:End Portal Frame.png|25px]] || 120 || 78 || [[Air Portal Frame]] |
||
| + | |} |
||
| + | {{-}} |
||
| − | === |
+ | ====Naturally Created==== |
| + | Naturally Created means a combination of events that cause a new block to be placed by natural causes, not the player. |
||
| − | ''Multiplayer note: On most servers, only administrators and ops can destroy blocks.'' |
||
| + | {| align="left" style="margin:2px; border: 1px solid silver; text-align: center;" |
||
| − | However you approach your first night, you will need at least [[wood]] and ideally [[Coal (Item)|coal]] or [[charcoal]] to have a fighting chance. |
||
| + | ! Icon !! Dec !! Hex !! Block type |
||
| + | |- |
||
| + | | height="27px" | || <span style='color:red'>00</span> || <span style='color:red'>00</span> || [[Air]] |
||
| + | |- |
||
| + | | height="27px" | [[File:Grass.png|25px]] || <span style='color:blue'>02</span> || <span style='color:blue'>02</span> || [[Grass]] |
||
| + | |- |
||
| + | | height="27px" | [[File:Dirt.png|25px]] || 03 || 03 || [[Dirt]] |
||
| + | |- |
||
| + | | height="27px" | [[File:Cobblestone.png|25px]] || 04 || 04 || [[Cobblestone]] |
||
| + | |- |
||
| + | | height="27px" | [[File:Water.png|25px]] || <span style='color:red'>09</span> || <span style='color:red'>09</span> || Stationary water <sup>[[Data Values#Water and Lava|D]]</sup> |
||
| + | |- |
||
| + | | height="27px" | [[File:Tall Grass.png|25px]] || 31 || 1F || [[Tall Grass]] <sup>[[Data Values#Tall Grass|D]] [[Data Values#Tall Grass|B]] </sup> |
||
| + | |- |
||
| + | | height="27px" | [[File:Brown Mushroom.png|25px]] || 39 || 27 || [[Mushrooms#Brown Mushroom|Brown Mushroom]] |
||
| + | |- |
||
| + | | height="27px" | [[File:Red Mushroom.png|25px]] || 40 || 28 || [[Mushrooms#Red Mushroom|Red Mushroom]] |
||
| + | |} |
||
| + | {| align="left" style="margin:2px; border: 1px solid silver; text-align: center;" |
||
| + | ! Icon !! Dec !! Hex !! Block type |
||
| + | |- |
||
| + | | height="27px" | [[File:Obsidian.png|25px]] || 49 || 31 || [[Obsidian]] |
||
| + | |- |
||
| + | | height="27px" | [[File:Fire.png|25px]] || <span style='color:red'>51</span> || <span style='color:red'>33</span> || [[Fire]] <sup>[[Data Values#Fire|D]]</sup> |
||
| + | |- |
||
| + | | height="27px" | [[File:Snow.png|25px]] || <span style='color:red'>78</span> || <span style='color:red'>4E</span> || [[Snow]] |
||
| + | |- |
||
| + | | height="27px" | [[File:Ice.png|25px]] || <span style='color:blue'>79</span> || <span style='color:blue'>4F</span> || [[Ice]] |
||
| + | |- |
||
| + | | height="27px" | [[File:Cactus.png|25px]] || 81 || 51 || [[Cactus]] <sup>[[Data Values#Cactus|D]]</sup> |
||
| + | |- |
||
| + | | height="27px" | [[File:Sugar Cane.png|25px]] || <span style='color:blue'>83</span> || <span style='color:blue'>53</span> || [[Sugar Cane]] <sup>[[Data Values#Sugar Canes|D]] [[Data Values#Item IDs|I]]</sup> |
||
| + | |- |
||
| + | | height="27px" | [[File:Vine.png|25px]] || 106 || 6A || [[Vines]] <sup>[[Data Values#Vines|D]]</sup> |
||
| + | |- |
||
| + | | height="27px" | [[File:Mycelium.png|25px]] || <span style='color:red'>110</span> || <span style='color:red'>6E</span> || [[Mycelium]] |
||
| + | |} |
||
| + | {{-}} |
||
| + | ====Structures==== |
||
| − | To collect resources, aim the crosshair at the block representing the resource and press and '''hold''' the left mouse button. This will instruct the avatar to punch the block repeatedly. Cracks will gradually appear in the block. Keep holding the left mouse button until the block breaks and drops. You can collect the dropped resource by moving near its spinning representation. It will then appear in the [[inventory]]. Note that some resources only drop if destroyed with the correct tool. |
||
| + | Same as Naturally Generated, but these blocks are only created with the "Generate Structures" option enabled. |
||
| + | {| align="left" style="margin:2px; border: 1px solid silver; text-align: center;" |
||
| − | To place resources in the environment, press {{key|E}} on your keyboard to bring up your [[inventory]] and drag and drop the desired item to the quick access bar at the bottom of your inventory. Select the item by pressing the number representative of the box order (1,2,3 etc.) on your keyboard or scrolling with the mousewheel. Lastly, click the right mouse button to place the resource. |
||
| + | ! Icon !! Dec !! Hex !! Block type |
||
| + | |- |
||
| + | | height="27px" | [[File:Cobblestone.png|25px]] || 04 || 04 || [[Cobblestone]] |
||
| + | |- |
||
| + | | height="27px" | [[File:Wooden Plank.png|25px]] || 05 || 05 || [[Wooden Plank]] |
||
| + | |- |
||
| + | | height="27px" | [[File:Water.png|25px]] || <span style='color:red'>09</span> || <span style='color:red'>09</span> || Stationary [[Water]] <sup>[[Data Values#Water and Lava|D]]</sup> |
||
| + | |- |
||
| + | | height="27px" | [[File:Lava.png|25px]] || <span style='color:red'>11</span> || <span style='color:red'>0B</span> || Stationary [[Lava]] <sup>[[Data Values#Water and Lava|D]]</sup> |
||
| + | |- |
||
| + | | height="27px" | [[File:Gravel.png|25px]] || 13 || 0D || [[Gravel]] |
||
| + | |- |
||
| + | | height="27px" | [[File:Wood.png|25px]] || 17 || 11 || [[Wood]] <sup>[[Data Values#Wood|D]] [[Data Values#Wood|B]] |
||
| + | |- |
||
| + | | height="27px" | [[File:WebBlock.png|25px]] || <span style='color:blue'>30</span> || <span style='color:blue'>1E</span> || [[Cobweb]] |
||
| + | |- |
||
| + | | height="27px" | [[File:Grid Black Wool.png|25px]] || 35 || 23 || [[Wool]] (Black) <sup>[[Data Values#Wool|D]] [[Data Values#Wool|B]]</sup> |
||
| + | |- |
||
| + | | height="27px" | [[File:Stone Slab.png|25px]] || 44 || 2C || [[Slabs]] <sup>[[Data Values#Slab and Double Slab material|D]] [[Data Values#Slab and Double Slab material|B]] |
||
| + | |- |
||
| + | | height="27px" | [[File:Bookshelf.png|25px]] || 47 || 2F || [[Bookshelf]] |
||
| + | |- |
||
| + | | height="27px" | [[File:Moss Stone.png|25px]] || 48 || 30 || [[Moss Stone]] |
||
| + | |- |
||
| + | | height="27px" | [[File:Torch.png|25px]] || 50 || 32 || [[Torch]] <sup>[[Data Values#Torches and Redstone Torches|D]]</sup> |
||
| + | |- |
||
| + | | height="27px" | [[File:Monster Spawner.png|25px]] || <span style='color:red'>52</span> || <span style='color:red'>34</span> || [[Monster Spawner]] <sup>[[Tile entity|T]]</sup> |
||
| + | |- |
||
| + | | height="27px" | [[File:Wooden Stairs.png|25px]] || 53 || 35 || Wooden [[Stairs]] <sup>[[Data Values#Stairs|D]]</sup> |
||
| + | |- |
||
| + | | height="27px" | [[File:Chest.png|25px]] || 54 || 36 || [[Chest]] <sup>[[#Furnaces, Dispensers and Chests|D]]</sup> <sup>[[Tile entity|T]]</sup> |
||
| + | |- |
||
| + | | height="27px" | [[File:Crafting Table.png|25px]] || 58 || 3A || [[Crafting Table]] |
||
| + | |} |
||
| + | {| align="left" style="margin:2px; border: 1px solid silver; text-align: center;" |
||
| + | ! Icon !! Dec !! Hex !! Block type |
||
| + | |- |
||
| + | | height="27px" | [[File:Crops.png|25px]] || <span style='color:red'>59</span> || <span style='color:red'>3B</span> || [[Seeds (Item)|Seeds]] <sup>[[Data Values#Crops|D]]</sup> |
||
| + | |- |
||
| + | | height="27px" | [[File:Farmland.png|25px]] || <span style='color:red'>60</span> || <span style='color:red'>3C</span> || [[Farmland]] <sup>[[Data Values#Farmland|D]]</sup> |
||
| + | |- |
||
| + | | height="27px" | [[File:Furnace.png|25px]] || 61 || 3D || [[Furnace]] <sup>[[Data Values#Furnaces, Dispensers and Chests|D]]</sup> <sup>[[Tile entity|T]]</sup> |
||
| + | |- |
||
| + | | height="27px" | [[File:Wooden Door.png|25px]] || <span style='color:red'>64</span> || <span style='color:red'>40</span> || Wooden [[Doors|Door]] <sup>[[Data Values#Doors|D]] [[Data Values#Item_IDs|I]]</sup> |
||
| + | |- |
||
| + | | height="27px" | [[File:Ladders.png|25px]] || 65 || 41 || [[Ladders]] <sup>[[Data Values#Ladders|D]]</sup> |
||
| + | |- |
||
| + | | height="27px" | [[File:Rails.png|25px]] || 66 || 42 || [[Rails]] <sup>[[Data Values#Rails|D]]</sup> |
||
| + | |- |
||
| + | | height="27px" | [[File:Cobblestone Stairs.png|25px]] || 67 || 43 || Stone [[Stairs]] |
||
| + | |- |
||
| + | | height="27px" | [[File:Iron Door.png|25px]] || <span style='color:red'>71</span> || <span style='color:red'>47</span> || Iron [[Door]] <sup>[[Data Values#Doors|D]] [[Data Values#Item_IDs|I]]</sup> |
||
| + | |- |
||
| + | | height="27px" | [[File:Wooden Pressure Plate.png|25px]] || 72 || 48 || Wooden [[Pressure Plates|Pressure Plate]] <sup>[[Data Values#Pressure Plates|D]]</sup> |
||
| + | |- |
||
| + | | height="27px" | [[File:Stone Button.png|25px]] || 77 || 4D || [[Button]] <sup>[[Data Values#Button|D]] </sup> |
||
| + | |- |
||
| + | | height="27px" | [[File:Fence.png|25px]] || 85 || 55 || [[Fence]] |
||
| + | |- |
||
| + | | height="27px" | [[File:Stone.png|25px]] || <span style='color:red'>97</span> || <span style='color:red'>61</span> || Hidden [[Silverfish]] <sup>[[Data Values#Hidden Silverfish|D]]</sup> |
||
| + | |- |
||
| + | | height="27px" | [[File:Stone Brick.png|25px]] || 98 || 62 || [[Stone Brick]]s <sup>[[Data Values#Stone Brick|D]]</sup> <sup>[[Data Values#Stone Brick|B]]</sup> |
||
| + | |- |
||
| + | | height="27px" | [[File:Iron Bars.png|25px]] || 101 || 65 || [[Iron Bars]] |
||
| + | |- |
||
| + | | height="27px" | [[File:Glass Pane.png|25px]] || 102 || 66 || [[Glass Pane]] |
||
| + | |} |
||
| + | {{-}} |
||
| + | === [[The Nether]] === |
||
| − | To drop resources in the environment, press {{key|Q}} on the keyboard when the resource is selected in the quick access bar, and 1 quantity of the selected item will be dropped onto the ground. Alternatively, open the inventory window and move a stack of items outside the window to drop the entire stack. |
||
| + | ====Naturally Generated==== |
||
| + | {| align="left" style="margin:2px; border: 1px solid silver; text-align: center;" |
||
| + | ! Icon !! Dec !! Hex !! Block type |
||
| + | |- |
||
| + | | height="27px" | || <span style='color:red'>00</span> || <span style='color:red'>00</span> || [[Air]] |
||
| + | |- |
||
| + | | height="27px" | [[File:Bedrock.png|25px]] || <span style='color:blue'>07</span> || <span style='color:blue'>07</span> || [[Bedrock]] |
||
| + | |- |
||
| + | | height="27px" | [[File:Lava.png|25px]] || <span style='color:red'>11</span> || <span style='color:red'>0B</span> || Stationary lava <sup>[[Data Values#Water and Lava|D]]</sup> |
||
| + | |- |
||
| + | | height="27px" | [[File:Gravel.png|25px]] || 13 || 0D || [[Gravel]] |
||
| + | |- |
||
| + | | height="27px" | [[File:Brown Mushroom.png|25px]] || 39 || 27 || [[Mushrooms#Brown Mushroom|Brown Mushroom]] |
||
| + | |- |
||
| + | | height="27px" | [[File:Red Mushroom.png|25px]] || 40 || 28 || [[Mushrooms#Red Mushroom|Red Mushroom]] |
||
| + | |- |
||
| + | | height="27px" | [[File:Fire.png|25px]] || <span style='color:red'>51</span> || <span style='color:red'>33</span> || [[Fire]] <sup>[[Data Values#Fire|D]]</sup> |
||
| + | |- |
||
| + | | height="27px" | [[File:Netherrack.png|25px]] || 87 || 57 || [[Netherrack]] |
||
| + | |- |
||
| + | | height="27px" | [[File:Soul Sand.png|25px]] || 88 || 58 || [[Soul Sand]] |
||
| + | |- |
||
| + | | height="27px" | [[File:Glowstone (Block).png|25px]] || 89 || 59 || [[Glowstone]] |
||
| + | |} |
||
| + | {{-}} |
||
| − | ==== |
+ | ====Naturally Created==== |
| + | {| align="left" style="margin:2px; border: 1px solid silver; text-align: center;" |
||
| − | Walk over to closest [[tree]] (should there be no trees around, just roam a little and you'll surely find one) and start punching [[wood]] blocks. They are very important ingredient of nearly everything, but 4 of them will be enough to get started. More is better, and makes a larger house. Build it near your spawn point or make a bed. (3 Wool, 3 Planks) |
||
| + | ! Icon !! Dec !! Hex !! Block type |
||
| + | |- |
||
| + | | height="27px" | || <span style='color:red'>00</span> || <span style='color:red'>00</span> || [[Air]] |
||
| + | |- |
||
| + | | height="27px" | [[File:Lava.png|25px]] || <span style='color:red'>10</span> || <span style='color:red'>0A</span> || [[Lava]] <sup>[[Data Values#Water and Lava|D]]</sup> |
||
| + | |- |
||
| + | | height="27px" | [[File:Brown Mushroom.png|25px]] || 39 || 27 || [[Mushrooms#Brown Mushroom|Brown Mushroom]] |
||
| + | |- |
||
| + | | height="27px" | [[File:Red Mushroom.png|25px]] || 40 || 28 || [[Mushrooms#Red Mushroom|Red Mushroom]] |
||
| + | |- |
||
| + | | height="27px" | [[File:Obsidian.png|25px]] || 49 || 31 || [[Obsidian]] |
||
| + | |- |
||
| + | | height="27px" | [[File:Portal.png|25px]] || <span style='color:red'>90</span> || <span style='color:red'>5A</span> || [[Portal]] |
||
| + | |} |
||
| + | {{-}} |
||
| − | ====Craft a Crafting table==== |
||
| − | Crafting is core to Minecraft. While there are a small amount of items that can be crafted directly from the inventory, a [[Crafting table]] is required to craft almost all tools and most other items. |
||
| + | ====Structures==== |
||
| − | To craft a crafting table, first open the inventory and click on a stack of wood: |
||
| + | {| align="left" style="margin:2px; border: 1px solid silver; text-align: center;" |
||
| + | ! Icon !! Dec !! Hex !! Block type |
||
| + | |- |
||
| + | | height="27px" | || <span style='color:red'>00</span> || <span style='color:red'>00</span> || [[Air]] |
||
| + | |- |
||
| + | | height="27px" | [[File:Monster Spawner.png|25px]] || <span style='color:red'>52</span> || <span style='color:red'>34</span> || [[Monster Spawner]] <sup>[[Tile entity|T]]</sup> |
||
| + | |- |
||
| + | | height="27px" | [[File:Nether Brick.png|25px]] || 112 || 70 || [[Nether Brick]] |
||
| + | |- |
||
| + | | height="27px" | [[File:Nether Brick Fence.png|25px]] || 113 || 71 || [[Nether Brick Fence]] |
||
| + | |- |
||
| + | | height="27px" | [[File:Nether Brick Stairs.png|25px]] || 114 || 72 || Nether Brick [[Stairs]]<sup>[[Data Values#Stairs|D]]</sup> |
||
| + | |- |
||
| + | | height="27px" | [[File:Nether Wart.png|25px]] || 115 || 73 || [[Nether Wart]] <sup>[[Data Values#Nether Wart|D]]</sup> |
||
| + | |} |
||
| + | {{-}} |
||
| + | == See also == |
||
| − | [[File:Crafting square Wood.png]] |
||
| + | *[[Data values]] |
||
| + | *[[Item]] |
||
| + | *[[Opacity]] |
||
| + | *[[Luminance]] |
||
| + | *[[Ore]] |
||
| + | *[[Technical blocks]] |
||
| + | == References == |
||
| − | Then place that in the 2x2 crafting square in your inventory. This will produce planks: |
||
| + | <references/> |
||
| + | {{Blocks}} |
||
| − | [[File:Crafting square Wooden Plank.png]] |
||
| + | {{Environment}} |
||
| − | Left clicking on the plank icon will craft four planks for every one piece of wood you have but if you hold down the right mouse button it creates an instant stack of 64 say if you have 16 logs so you don't have to keep clicking the left mouse button to get the desired amount.The planks can then be moved to the inventory. Click on the remaining wood in your 2x2 crafting square and return it to your inventory. Click on the planks you just crafted and instead of left clicking, right click once in each of your four crafting squares. This drops one item instead of all items each click. |
||
| + | [[Category:Blocks]] |
||
| − | You should see this (with the exception that instead of a 3x3 grid of slots, you will only see a 2x2 grid for now): |
||
| + | [[Category:Environment]] |
||
| + | [[de:Blöcke]] |
||
| − | {{Grid/Crafting Table |
||
| + | [[es:Bloques]] |
||
| − | |A1= |B1= |C1= |
||
| + | [[fr:Blocs]] |
||
| − | |A2= Wooden Plank |B2= Wooden Plank |C2= |
||
| + | [[hu:Blokkok]] |
||
| − | |A3= Wooden Plank |B3= Wooden Plank |C3= |
||
| + | [[ko:블록]] |
||
| − | |Output= Crafting Table |
||
| + | [[nl:Blokken]] |
||
| − | }} |
||
| + | [[pl:Bloki]] |
||
| − | |||
| + | [[pt-br:Blocks/ptbr]] |
||
| − | Click on the result and place it in an empty square of your hotbar. |
||
| + | [[ru:Блоки]] |
||
| − | |||
| − | Press escape to return to the world view and walk to a spot you think appropriate, select your newly crafted crafting table with either the mouse wheel or number key, point at a flat square of ground (not directly where you are standing) and right click. This will place your crafting table on the ground ready for use. If you wish to pick it up again to move it, left click and hold to punch it to pieces and pick up its spinning icon. |
||
| − | |||
| − | Now I feel sutipd. That's cleared it up for me |
||
| − | |||
| − | ====Gathering resources==== |
||
| − | Once you've crafted a [[pickaxe]], you can successfully acquire [[cobblestone]]. Start by finding stone in the world; it should be fairly easy, as it's extremely common. If you don't see any on the surface, dig down in a staircase fashion - it is highly recommended not to dig straight down. Mine 9 stone blocks (after mining it'll become cobblestone) and approach your crafting table. |
||
| − | |||
| − | Using sticks and cobblestone, you can now make some stone tools: |
||
| − | |||
| − | {{Grid/Crafting Table |
||
| − | |A1= |B1= Cobblestone |C1= |
||
| − | |A2= |B2= Cobblestone|C2= |
||
| − | |A3= |B3= Stick|C3= |
||
| − | |Output= Stone Sword |
||
| − | }} |
||
| − | |||
| − | Sword can be used to effectively slay some animals or other creatures. |
||
| − | <br/><br/> |
||
| − | {{Grid/Crafting Table |
||
| − | |A1= Cobblestone |B1= Cobblestone |C1= Cobblestone |
||
| − | |A2= |B2= Stick |C2= |
||
| − | |A3= |B3= Stick |C3= |
||
| − | |Output= Stone Pickaxe |
||
| − | }} |
||
| − | |||
| − | Stone pickaxe is more durable and more efficent version of wooden one. You will use it to mine stone (and other "rocky") blocks.<br/><br/> |
||
| − | |||
| − | {{Grid/Crafting Table |
||
| − | |A1= |B1= Cobblestone |C1= |
||
| − | |A2= |B2= Stick|C2= |
||
| − | |A3= |B3= Stick|C3= |
||
| − | |Output= Stone Shovel |
||
| − | }} |
||
| − | |||
| − | Shovels are mainly used to destroy grass and dirt blocks.<br/><br/> |
||
| − | |||
| − | {{Grid/Crafting Table |
||
| − | |A1= Cobblestone |B1= Cobblestone |C1= |
||
| − | |A2= Cobblestone |B2= Stick |C2= |
||
| − | |A3= |B3= Stick|C3= |
||
| − | |Output= Stone Axe |
||
| − | }} |
||
| − | |||
| − | Stone axe makes process of gathering wood much faster. |
||
| − | |||
| − | Once you have all the basic tools it's time to gather some wood supplies. Despite some trees might look different and some wood types might not stack together, they all are equal in terms of what can be done with them. You might also notice, that saplings will be dropped from leaf blocks. They are currently of no use for you. Get as much wood as possible, but wander a little around, looking for another very important resource. Stop cutting trees when you reach number of 128 blocks or your axe breaks down. |
||
| − | |||
| − | ==== Animal resources ==== |
||
| − | You should gather wool during first day. You will only need 3 pieces. You can get one wool from killing a sheep. To find a sheep, just walk a little in one direction. |
||
| − | |||
| − | You will probably encounter other animals, such as cows, pigs and chickens. You can kill them to get some food; it's not a priority, though. |
||
| − | |||
| − | In the new update for survival mode, eating is essential, and if you forget to feed yourself every now and again you tend to lose health. |
||
| − | |||
| − | ====A Word about Digging==== |
||
| − | One of the immutable rules of Minecraft is: |
||
| − | :''Do not dig straight down.'' |
||
| − | It is possible to stand on a block while destroying it. Once it's destroyed you will fall down one block to whatever is beneath it. The problem is, this might be thin air. You could fall into a deep dark cavern, not only suffering fall damage, and being in the dark, but be beset upon by all kinds of hostile mobs who reside underground. You could even fall into a pool of [[lava]], which is near-certain death not just for you, but for any items you might be carrying! |
||
| − | |||
| − | Another one of the immutable rules of Minecraft is: |
||
| − | :''Do not dig straight up.'' |
||
| − | Again, it's perfectly possible to do, but if you don't know what's above you, you might find yourself drop-kicked by a mob, or buried under [[sand]] or [[gravel]] which unlike other blocks, obey gravity and suffocate whoever they fall on. This would kill you and you would need to start again. If you can find your start of a house or just the workbench that you placed, then you can continue, but you will not have any of the items that you had before. In 1.9, fluids such as water or lava drip from the ceiling if they are above it, so you will be able to tell what's above then. Still, it doesn't tend to be a good idea considering that you might drown in the water or be killed in the lavafall. |
||
| − | |||
| − | ====Strike a Light==== |
||
| − | Initially, your sole light source at night will be [[torches]]. These are made from coal or charcoal and sticks. You don't need a crafting table to make torches, as they can be made in your 2x2 inventory grid. |
||
| − | |||
| − | Make some sticks from planks as required and place coal above sticks in your crafting squares as follows: |
||
| − | |||
| − | {{Grid/Crafting Table |
||
| − | |A1= |B1= |C1= |
||
| − | |A2= |B2= Coal (Item) |C2= |
||
| − | |A3= |B3= Stick |C3= |
||
| − | |Output= Torch |OA= 4 |
||
| − | }} |
||
| − | |||
| − | One piece of coal or charcoal and one stick make four torches. You can place multiple quantities on your crafting squares and each left click of the result will use one set of ingredients. |
||
| − | |||
| − | If you cannot find coal on your first night use wooden planks to heat wood, and create charcoal. In order to create charcoal from wooden planks and wood you need a [[furnace]]. |
||
| − | {{Grid/Furnace |
||
| − | |Input= Wood |IA= 10 |
||
| − | |Output= Charcoal (Item) |OA= 5 |
||
| − | |Fuel= Wooden Plank |FA= 5 |
||
| − | }}<br /> |
||
| − | |||
| − | Now that you have the means to craft and a means of producing light, it's time to find a hole to cower in for the night. |
||
| − | |||
| − | ==Build a Shelter== |
||
| − | There are several ways to construct a shelter. You can either build one in the open from materials you collect ([[dirt]], [[wood]], [[stone]], [[sandstone]]), you can enclose the mouth of a cave, hole or other naturally occurring hollow, or you can dig a hollow in the side of a hill or make a hole in the ground. Be careful around cave entrances, as hostiles often lurk in those even during the day. |
||
| − | |||
| − | When choosing a method, you should consider your surroundings, what you have managed to collect, how much time you have until nightfall and your personal preference; however, it must have these key features: |
||
| − | * Light. Mostly so you can see what you're doing. If you are in a sufficiently small area (less than 25 square radius) hostiles cannot spawn next to you. So even if you fail to find coal on your first day, you can make a small rudimentary shelter to see out the night. |
||
| − | * Walls. Hostiles cannot deal you damage or shoot arrows at you through walls. |
||
| − | * A door. If you have six planks, you can make a [[door]] for your shelter. When placing it make sure you place the door from the outside of your house as doors have direction. Skeletons can shoot at you from an inward facing door. <small>Prior to patch 1.6, you could attack mobs from behind a door while remaining unharmed.</small> |
||
| − | * No big holes. It's sometimes a good idea to leave a hole high up in a wall so you can see when the morning breaks if you couldn't build a door. However, be aware that you can be shot at through a hole, some hostiles can drop through holes in roofs if they can get up there, and spiders can crawl through one-block-high holes if they can gain access. So choose the position with care. An alternative is a one block high outer wall, with an over hanging roof, and a one block high "window" so you can see outside. Then a full height internal wall that you can duck behind in case of [[skeletons]] who can shoot at you through your window. |
||
| − | * A safe area to place your workbench. To pass the time waiting for morning, you might want to craft a few more [[tools]] for the next day. Initially consider making a few stone pickaxes if you were able to collect any [[cobblestone]] during the day, more torches, and definitely a sword. If you have encounters with hostiles during the night, you can deal more damage with a sword. [[Swords]] are crafted from one stick (not two) and two blocks for the blade. You can use [[planks]] or [[cobblestone]]. |
||
| − | |||
| − | So, depending on how much time you have left, what your surroundings provide, and what you have managed to collect, choose to either dig into the side of a hill, dig a small hole, live in the hollow your coal mining created, or build a shelter from materials you have collected. Remember not to dig straight down. |
||
| − | |||
| − | Be aware that building a hut is usually the most time-consuming and resource-consuming method. For example, to build a simple 5x5x3 hut you'll need 55 blocks of [[dirt]], [[wood]], [[cobblestone|stone]] or a combination of those materials (a few less for [[doors]] or windows). Digging a hole in the side of a cliff is usually a good plan, as you can collect cobblestone and dirt while simultaneously hollowing out a shelter. Watch out that you don't accidentally connect to a cave system while knocking out a wall. If you do, it's probably best to block it with dirt or cobblestone until you're prepared to explore it. |
||
| − | |||
| − | Once your work on your structure is complete, you can light it by right clicking on a wall or floor while holding a [[torch]]. |
||
| − | |||
| − | Also think a bit about the structure of your house as this will really be your only chance to change it. |
||
| − | |||
| − | ==Waiting Until Morning== |
||
| − | |||
| − | <!-- This part should be revised. Beds are now an essential part of the game, so few nights are actually waited all the way through. --> |
||
| − | |||
| − | Enjoy your first night. If you have made a cave, you can extend it with a [[shovel]], a [[pickaxe]] if you have to go through stone, or your bare hands, but be sure to keep any additions well lit. You can either spend the night in your hole/house/cave, or, if you're feeling brave, you can venture out with your sword and take your chances with the mobs. If you do, stay away from the walls of your shelter in case a [[Creeper]] follows you and decides to explode, in which case your shelter could be destroyed. Another alternative is to begin digging into the earth a bit. Creating a mine in your house isn't a bad idea, but as was said before, '''never''' dig straight down. Dig in front of you, and if you want to descend, dig through a block a step or two away from your character. If you break through into a cave system, it's probably a good idea to block it off for now and come back to it when you're prepared. Mining in this manner should give you a significant amount of cobblestone and some more coal, should you find any. If you're really lucky, you might stumble upon some iron, which is valuable in making tools. This option will probably pass the time the fastest; so fast, in fact, you may find yourself mining well into the day, and perhaps into another night if you get carried away. |
||
| − | |||
| − | Creating an underground farm is a good way to pass the night. It has advantages such as constant light and not being trampled by friendly mobs. |
||
| − | |||
| − | Once the sun rises, your troubles aren't completely over. [[Zombies]] and [[skeletons]] will eventually catch fire in the sunlight and burn to death, but beware of them until then, and be aware because if you come out when the sun has just about risen and the zombies and skeletons are burning, will never stop their natural instinct to chase you. Be careful! [[Spiders]] and [[creepers]] still wander about in the morning. Spiders will become passive in the daylight, just so long as they remain in the light and you don't attack them, but creepers remain aggressive and dangerous, so keep your sword at hand when you venture out. |
||
| − | |||
| − | Since Beta 1.3 [[Beds]] have been added. You can make them by putting a row of [[Wool]] on top of a row of [[Wooden Planks]], like so: |
||
| − | {{Crafting grid |
||
| − | |A1= |B1= |C1= |A2= White Wool |B2= White Wool |C2= White Wool |A3= Wooden Plank |B3= Wooden Plank |C3= Wooden Plank |Output= Bed |OA = }} |
||
| − | |||
| − | You can just right-click it after being sure that it is in a safe, well-lit location that is '''at least one block away from a wall''' that mobs can't enter. If it isn't, you will wake up with an aggressive [[mob]] next to you. In a few seconds it will be morning again. Since Beta 1.4 sleeping in a bed will change your spawn point to the location of that bed. Players can collect loot dropped from mobs during the day by waiting until the sun is completely down, to assure that mobs spawn. By morning, [[zombies]], [[skeletons]], and [[endermen]] will catch fire and drop loot. You must still, however, beware of [[Creepers]]. |
||
| − | |||
| − | As of Beta 1.8, '''nights now last longer.''' Beds are considered much more essential, since long nights are very hindering to progress and can be hazardous to survival. |
||
| − | |||
| − | ==If All Else Fails== |
||
| − | Sometimes, you won't have the luck to spawn in a forest or near [[coal]]. Maybe you fall into a hole and it takes you 5 minutes to get out. If this happens, you can still survive, but if this is your first day and you have not done anything important, you make a new world. To survive, dig a hole in the side of a cliff or hill. Make it at least 3 blocks deep. Then go inside the hole. You can keep digging as far as you can, if you want. But when you see the sun start to set, fill in your entrance. If it is at least 3 blocks high and you are a good distance off the ground (8+ blocks) then you can leave a one-block window. Otherwise, it is safer to wait until night is over. If you don't have a window, mine one of your bricks every minute, and check if it is still night. If it is, fill it back in and repeat in one minute. If it is daytime, then congratulations: You have survived your first night. If you don't like the digging option you can swim out to sea and wait for dawn. Hostile mobs will only spawn on solid blocks (besides ice) so you don't have to worry about them. Just make sure you are sufficiently far from land that they can't spot you. Or you could find a large tree. Pillar up to the top and stay there. Mobs will not spot you if it is a large enough tree and if they do, just move to the other side of the tree. Spiders could give you a problem, but hopefully, they won't see you. A word of advice if you do this, trees contain wood. Use it to your advantage. |
||
| − | |||
| − | ==Home Safety== |
||
| − | By the end of the first day the shelter will likely be primitive and small, in the days after it's more easy to build a 'home', in whatever shape or form you can imagine. In the first shelter it's likely you only have 1 entrance, therefore it may be wise to add a crude 'defense' or trap to stop monsters from 'grouping up' at the door. For example, when you do not use a bed to skip the night and get disturbed while you are building, it would be best to have an alternative to fighting off the mobs. A simple and effective defense is to dig a small 3 block deep trench on both sides next to the door. The monster will have a hard time not falling down when it's following you to the shelter. |
||
| − | |||
| − | [[File:Day1 example.png|320px | a 3x3x2 chamber in stone, filled with 1 bed, 1 furnace, 1 crafting table and 1 torch. Sealed with door, and defended by dry moat.]] |
||
| − | |||
| − | This design can be spiced up with a [[Trapdoor]] or you can make one of countless other possible [[Trap]]s, though on the first day it's often suggested to keep it simple. Over time you will acquire other resources to assist in a myriad of different traps and defenses. You can find many examples of them, including but not limited to: TNT based traps, Mob Grinders, Lava Pits, etc. |
||
| − | |||
| − | TNT is an example of something that requires resources that are difficult to gather on your first day, not to mention they are a one-time use option. Another way to protect your home is to 'plant' cacti around it. Simply find at least one cactus block, gather some sand, and place them in defensive positions around your home. The cactus will grow and the extra blocks can be used to make additional cacti. You won't be able to make straight 'wall' of them, since cacti self-destruct with something adjacent to it, but you can stagger them diagonally, creating a checkerboard pattern. Alternatively a straight wall can still be achieved when you place a block one level above the adjacent block,however when the cactus grows a block this new block which would be adjacent to another block and gets destroyed immediately. Remember to leave yourself a way in no matter what device you scheme to ensure home safety. Make a yard and build fences all around it except for one block where you can put a [[Fence Gate]]. |
||
| − | |||
| − | == Sleeping safely outdoors == |
||
| − | |||
| − | Another option, for example when you are not yet done with the shelter but the sun starts setting, is to build an emergency bed outside while still being safe! |
||
| − | |||
| − | requirements are: |
||
| − | * 3 [[Planks]] |
||
| − | * 3 [[Wool]] |
||
| − | * 5 [[Dirt]] |
||
| − | * and of course a [[crafting table]] to make the bed |
||
| − | |||
| − | If you just place a bed outside you will get attacked by monsters during your nap. There is however a way to avoid that. |
||
| − | |||
| − | The trick is elevation. |
||
| − | |||
| − | {{BlockGrid |
||
| − | |b=bed-side-foot|B=bed-side-head|.=air|d=dirt|c=crafting-table-side |
||
| − | |.bB |
||
| − | |ddd |
||
| − | |d.. |
||
| − | |d.. |
||
| − | |d.c |
||
| − | }} |
||
| − | |||
| − | In this example dirt is used since that is quick to remove when it turns dawn again but other materials are possible. |
||
| − | To build this; |
||
| − | * make a bed as described earlier. |
||
| − | * drop a dirt block on the floor. |
||
| − | * jump up the recently placed dirt block |
||
| − | * look down, jump up and quickly place a new dirt block.. do this thrice. |
||
| − | * while holding the [[sneak]] button move backwards so you can attach a block to the side of the stack. - do this twice. |
||
| − | * put down bed on the overhang. |
||
| − | |||
| − | The single block that is not build upon will be the block you wake up on. |
||
| − | With this setup you will not get woken up by monsters since they can not reach you. Monsters can't reach you when you make a three-block-high tower to do this, but [[Endermen]] can pick up dirt three blocks above the ground where they stand. And if they take away the dirt block where you're supposed to wake up, then you won't be safely elevated when you awake. |
||
| − | |||
| − | An alternative but easy way to building this, for when you have not mastered the sneak and/or placing blocks while jumping; for obvious reasons, this requires 3 more blocks of dirt by comparison |
||
| − | |||
| − | * put one block down |
||
| − | * put two blocks next to this |
||
| − | * put three blocks next to this |
||
| − | * from the ground floor attach two blocks to the top block of the three block stack |
||
| − | * go up the stairs you made, dig away the top block of the two block high stack - below the {{BlockSprite|lever-alt}} |
||
| − | |||
| − | {{BlockGrid |
||
| − | |b=bed-side-foot|B=bed-side-head|.=air|d=dirt|c=crafting-table-side|a=lever-alt |
||
| − | |...bB |
||
| − | |.addd |
||
| − | |.dd.. |
||
| − | |ddd.c |
||
| − | }} |
||
| − | |||
| − | So the result is this |
||
| − | |||
| − | {{BlockGrid |
||
| − | |b=bed-side-foot|B=bed-side-head|.=air|d=dirt|c=crafting-table-side |
||
| − | |...bB |
||
| − | |..ddd |
||
| − | |..d.. |
||
| − | |ddd.c |
||
| − | }} |
||
| − | |||
| − | == Emergency Shelter == |
||
| − | |||
| − | If everything else is unsuccessful, and you somehow die and spawn in your default spawn point (which hopefully is near your shelter), and night has already fallen...fear not! Dig three blocks down, cover your head with another block. Then wait out the night. Sure, you'll survive the night, but due to the lack of resources you have now, you'll survive the night in a cramped, dark, 1x1x2 hole. At least you're safe.Collect some dirt and then build a tower up to a tree and stay there for the night. |
||
| − | |||
| − | == Next Day == |
||
| − | Here's a tutorial for [[the Second Day]]. |
||
| − | |||
| − | == The shopping list == |
||
| − | This is a quick reference for what you will need to survive your first night. |
||
| − | |||
| − | ;Bearings |
||
| − | * Mark spawn and observe what north and east are. |
||
| − | |||
| − | ;Gather and craft |
||
| − | * Get 10 logs: See note below |
||
| − | * Get 3 wool blocks |
||
| − | * Make a crafting table |
||
| − | * Make a wooden pickaxe |
||
| − | * Get 11 cobblestone<sup>*</sup> |
||
| − | * Make a stone pickaxe |
||
| − | |||
| − | ;Shelter |
||
| − | * Make a bed |
||
| − | * Start on shelter (materials depend, not counted) |
||
| − | * ''Create a [[door]] for your shelter'' |
||
| − | * Create a storage chest and place it in the shelter |
||
| − | * Create a furnace |
||
| − | * Smelt 1 log to make charcoal unless you found coal |
||
| − | * Create some torches and place them |
||
| − | |||
| − | ;Resource usage |
||
| − | 9 logs equal 32 planks and a leftover log |
||
| − | * 4 planks for crafting table |
||
| − | * 4 planks for sticks for pickaxe's and some torches |
||
| − | * 3 planks for head of pickaxe |
||
| − | * 8 planks for storage chest |
||
| − | * 6 planks for door |
||
| − | * 3 planks for bed |
||
| − | * 1 log + 1 plank for furnace (plank as fuel, log for charcoal) |
||
| − | |||
| − | <sup>*</sup>tip; gather 3 stone first, then make stone pick; use it to gather the 8 stone for the furnace |
||
| − | |||
| − | ==Tutorial Videos== |
||
| − | * [http://www.youtube.com/watch?v=uJZDwjf_tRs The First Day (Beginners' Essentials) (Minecraft Tutorial)] |
||
| − | * [http://www.youtube.com/watch?v=movidld1fPw Minecraft The First 10 Minutes (Minecraft Tutorial)] |
||
| − | * [http://www.youtube.com/watch?v=ylVtj-1Ccgg&feature=channel Your First Shelter in Minecraft (Tutorial Machinima)] |
||
| − | * [http://www.youtube.com/watch?v=qss4uy6C_g0&feature=fvw Minecraft: Building a Starting House (Minecraft Tutorial)] |
||
| − | * [http://www.youtube.com/watch?v=y9r_qaU_YFI Minecraft Efficient Farm (Minecraft Tutorial)] |
||
| − | |||
| − | [[Category:Guides]] |
||
| − | |||
| − | [[de:Anleitungen/Die Grundlagen]] |
||
| − | [[fr:Tutoriels/Guide de survie]] |
||
| − | [[hu:Útmutatók/A kezdők útmutatója]] |
||
| − | [[ko:튜토리얼/초보자를 위한 가이드]] |
||
| − | [[nl:Lessen/Beginnersgids]] |
||
| − | [[pl:Poradniki/Pierwsza noc]] |
||
| − | [[ru:Гид для начинающих]] |
||
Revision as of 00:01, 29 October 2011
Types of blocks from 1.7.3.
Blocks are the basic units in Minecraft, and are integral to the gameplay. Together, they build up the in-game environment, and can be mined and utilized in various fashions.
The face of a block is 16x16 pixels, and each block is proportionately one cubic meter.[1] Most blocks are static, although Water, Lava and Portal blocks have a shifting pattern for each face.
Types of Blocks
There are currently over one hundred different types of blocks, including Air, still Water, and still Lava, which cannot be built, various types of Wood, various colors of Wool, various types of Pressure Plates, Slabs, Stairs and Double Slabs. See Data Values for the full list.
In a standard randomly generated Beta Map, you can find Air, Stone, Grass, Snow, Dirt, Water, Water Source, Lava, Lava Source, Sand, Sandstone, Gravel, Gold Ore, Iron Ore, Diamond Ore, Redstone Ore, Lapis Lazuli Ore, Clay Block, Coal Ore, Bedrock, Ice, Wood, Birch Wood, Wooden Planks in Abandoned Mines Pine/Spruce Wood, Leaves, Cactus, Sugar Canes, Vines, Pumpkins, yellow and red Flowers, brown and red Mushrooms, dead and living Shrubs and Tall Grass. In dungeons (added in Seecret Friday Update 2), you can also find Cobblestone, Moss Stone, a Mob Spawner, and Chests, even though cobblestone and chests are usually made by the player. Moss Stone, Cobblestone, Wooden Planks, Fences, Pressure Plates, Bookshelves, Crafting Tables, Stairs, Black Wool, Iron Bars, and Furnaces may also be found in the randomly generated NPC villiages that were added in 1.8, and Stone Brick, Mossy Stone Brick, Cracked Stone Brick, Iron Bars, Bookshelves, Wooden Planks, Chest, and Cobweb can be found in the strongholds and abandoned mines also added in 1.8. Obsidian can be found naturally, but it is not part of the random generation; instead it is created when naturally occurring lava source blocks and water come in contact. Cobblestone can also be found naturally, and is formed with the same circumstances as obsidian, except that it is formed when water and moving lava contact. Dungeons are also built of cobblestone in parts.
In the initial, free version of Survival the player began with 10 TNT blocks and could obtain Dirt, Cobblestone from Stone, Wooden Planks from Wood, Gold Blocks from Gold Ore, Iron Blocks from Iron ore, Stone Slabs from Coal Ore, and white Wool from Sheep.
In Classic mode the player can build with naturally occurring blocks (except for Redstone and Diamond), and can use Bookcase, Sponge, Coloured Wool, Brick, Obsidian and Moss Stone. Operators of servers can also build Bedrock. Some custom servers give the ability to place Grass and (still) Fluids, too.
When playing the current Beta, the player can craft a variety of blocks not naturally found in maps, including Crafting Tables, Bookshelves, Furnaces and more. Redstone, Diamond, Gold and Lapis Lazuli can be found in the lower areas of maps, and Obsidian forms when water touches a spring lava block.
Netherrack, Glowstone, Gravel, Soul Sand, Nether Brick, Nether Brick Fence, Nether Brick Stairs and Nether Wart can be found in The Nether, which the player can only enter by creating a Portal.
The Pocket Edition has 2 additional blocks: The Cyan Flower and Camera.
World-generated Blocks
Entries marked with a D require additional data values to fully define the block in a Beta world. Entries marked with an I have a different ID as an inventory item. Entries marked with a B require additional inventory data to fully define the inventory item. Entries marked with a T have tile entities associated with them to store additional data. Items with IDs in red cannot be legitimately obtained in the player's inventory in the game; they can only be obtained by "hacking" (such as the use of Inventory editors) or, in multiplayer using the /give server command. Items available only in Creative mode are in blue.
The Overworld
Naturally Generated
Naturally Generated includes blocks that are created through the world seed.
| Icon | Dec | Hex | Block type |
|---|---|---|---|
| 00 | 00 | Air | |
| 01 | 01 | Stone | |
| 02 | 02 | Grass | |
| 03 | 03 | Dirt | |
| 07 | 07 | Bedrock | |
| 08 | 08 | Water D | |
| 10 | 0A | Lava D | |
| 12 | 0C | Sand | |
| 13 | 0D | Gravel | |
| File:Gold (Ore).png | 14 | 0E | Gold Ore |
| File:Iron (Ore).png | 15 | 0F | Iron Ore |
| File:Coal (Ore).png | 16 | 10 | Coal Ore |
| File:Wood.png | 17 | 11 | Wood D B |
| File:Leaves.png | 18 | 12 | Leaves D B |
| File:Lapis Lazuli (Ore).png | 21 | 15 | Lapis Lazuli Ore |
| 24 | 18 | Sandstone | |
| 31 | 1F | Tall Grass D B | |
| File:Grid Dead Bush.png | 32 | 20 | Dead Bush |
.png)
.png)
.png)
.png)
| Icon | Dec | Hex | Block type |
|---|---|---|---|
| 37 | 25 | Dandelion | |
| 38 | 26 | Rose | |
| 39 | 27 | Brown Mushroom | |
| 40 | 28 | Red Mushroom | |
| File:Diamond (Ore).png | 56 | 38 | Diamond Ore |
| File:Redstone (Ore).png | 73 | 49 | Redstone Ore |
| 78 | 4E | Snow | |
| 79 | 4F | Ice | |
| 81 | 51 | Cactus D | |
| File:Clay (Block).png | 82 | 52 | Clay Block |
| 83 | 53 | Sugar Cane D I | |
| 86 | 56 | Pumpkin D | |
| File:BrownMushroomCap.png | 99 | 63 | Huge Brown Mushroom D |
| File:RedMushroomCap.png | 100 | 64 | Huge Red Mushroom D |
| File:Vine.png | 106 | 6A | Vines D |
| 110 | 6E | Mycelium | |
| 111 | 6F | Lily Pad | |
| 120 | 78 | Air Portal Frame |
.png)
.png)
.png)
Naturally Created
Naturally Created means a combination of events that cause a new block to be placed by natural causes, not the player.
| Icon | Dec | Hex | Block type |
|---|---|---|---|
| 00 | 00 | Air | |
| 02 | 02 | Grass | |
| 03 | 03 | Dirt | |
| 04 | 04 | Cobblestone | |
| 09 | 09 | Stationary water D | |
| 31 | 1F | Tall Grass D B | |
| 39 | 27 | Brown Mushroom | |
| 40 | 28 | Red Mushroom |
| Icon | Dec | Hex | Block type |
|---|---|---|---|
| 49 | 31 | Obsidian | |
| 51 | 33 | Fire D | |
| 78 | 4E | Snow | |
| 79 | 4F | Ice | |
| 81 | 51 | Cactus D | |
| 83 | 53 | Sugar Cane D I | |
| File:Vine.png | 106 | 6A | Vines D |
| 110 | 6E | Mycelium |
Structures
Same as Naturally Generated, but these blocks are only created with the "Generate Structures" option enabled.
| Icon | Dec | Hex | Block type |
|---|---|---|---|
| 04 | 04 | Cobblestone | |
| File:Wooden Plank.png | 05 | 05 | Wooden Plank |
| 09 | 09 | Stationary Water D | |
| 11 | 0B | Stationary Lava D | |
| 13 | 0D | Gravel | |
| File:Wood.png | 17 | 11 | Wood D B |
| File:WebBlock.png | 30 | 1E | Cobweb |
| File:Grid Black Wool.png | 35 | 23 | Wool (Black) D B |
| 44 | 2C | Slabs D B | |
| 47 | 2F | Bookshelf | |
| File:Moss Stone.png | 48 | 30 | Moss Stone |
| 50 | 32 | Torch D | |
| 52 | 34 | Monster Spawner T | |
| File:Wooden Stairs.png | 53 | 35 | Wooden Stairs D |
| 54 | 36 | Chest D T | |
| 58 | 3A | Crafting Table |
| Icon | Dec | Hex | Block type |
|---|---|---|---|
| File:Crops.png | 59 | 3B | Seeds D |
| 60 | 3C | Farmland D | |
| 61 | 3D | Furnace D T | |
| File:Wooden Door.png | 64 | 40 | Wooden Door D I |
| File:Ladders.png | 65 | 41 | Ladders D |
| File:Rails.png | 66 | 42 | Rails D |
| 67 | 43 | Stone Stairs | |
| 71 | 47 | Iron Door D I | |
| File:Wooden Pressure Plate.png | 72 | 48 | Wooden Pressure Plate D |
| 77 | 4D | Button D | |
| File:Fence.png | 85 | 55 | Fence |
| 97 | 61 | Hidden Silverfish D | |
| File:Stone Brick.png | 98 | 62 | Stone Bricks D B |
| 101 | 65 | Iron Bars | |
| 102 | 66 | Glass Pane |
The Nether
Naturally Generated
| Icon | Dec | Hex | Block type |
|---|---|---|---|
| 00 | 00 | Air | |
| 07 | 07 | Bedrock | |
| 11 | 0B | Stationary lava D | |
| 13 | 0D | Gravel | |
| 39 | 27 | Brown Mushroom | |
| 40 | 28 | Red Mushroom | |
| 51 | 33 | Fire D | |
| 87 | 57 | Netherrack | |
| 88 | 58 | Soul Sand | |
| File:Glowstone (Block).png | 89 | 59 | Glowstone |
.png)
Naturally Created
| Icon | Dec | Hex | Block type |
|---|---|---|---|
| 00 | 00 | Air | |
| 10 | 0A | Lava D | |
| 39 | 27 | Brown Mushroom | |
| 40 | 28 | Red Mushroom | |
| 49 | 31 | Obsidian | |
| File:Portal.png | 90 | 5A | Portal |
Structures
| Icon | Dec | Hex | Block type |
|---|---|---|---|
| 00 | 00 | Air | |
| 52 | 34 | Monster Spawner T | |
| 112 | 70 | Nether Brick | |
| 113 | 71 | Nether Brick Fence | |
| 114 | 72 | Nether Brick StairsD | |
| 115 | 73 | Nether Wart D |