A rabbit is an uncommon passive mob and is a source of rabbit's foot, rabbit hide, and raw rabbit.
Spawning[]
Rabbits spawn above grass, snow blocks, or sand. They generate individually after the generation of the world.
Rabbits of the following colors spawn in the following biomes:
- Yellow:
- White, Black & White:
- Snowy Plains
- Snowy Taiga
- Grove
- Snowy Slopes
- Frozen Ocean[BE only]
- Frozen River[BE only]
- Snowy Beach[BE only]
- Black, Brown, Brown & White:
- Flower Forest
- Taiga
- Meadow
- Old Growth Pine Taiga[JE only]
- Old Growth Spruce Taiga[JE only]
- Cherry Grove
Creamy rabbits are the most common rabbit color and are found only in deserts and its variants. White and black and white rabbits are also quite common and spawn in snowy biomes such as snowy taigas, snowy plains, groves and snowy slopes. Default rabbit colors such as brown, black and salt and pepper spawn naturally in flower forests, taigas and meadows, but can also spawn in any other non-snowy biome via spawn eggs, commands, spawners or breeding. In all these places, groups of an adult and one to two babies spawn.
In Bedrock Edition, up to three kits spawn in flower forests and rabbits can also spawn in frozen aquatic biomes: snowy beaches, frozen oceans, and frozen rivers.
In Java Edition, rabbits can also be found in giant tree taigas.
In taigas, wolves and foxes are also found. If left alone, these may quickly kill rabbits, so rabbits are generally more plentiful in the desert, flowery or icy biomes.
The Killer Bunny does not spawn naturally and must instead be spawned using the /summon command, although it is exclusive to Java Edition.
| Desert | Forest | Taiga | Frozen | Snowy plains | Mountain | |
|---|---|---|---|---|---|---|
| Biome | Desert | Flower forest | Taiga Old growth taiga[JE only] Snowy taiga |
Frozen river Legacy frozen ocean[BE only] Snowy beach[BE only] Frozen ocean[BE only] |
All snowy plains variants | Meadow Grove Snowy slopes |
Drops[]
When killed, an adult rabbit drops:
- 0–1 rabbit hide. The maximum is increased by 1 per level of Looting, for a maximum of 0-4 with Looting III.
- 0–1 raw rabbit (cooked rabbit if killed while on fire).[Bedrock Edition only] The maximum amount is increased by 1 per level of Looting, for a maximum of 0-4 with Looting III.
- 1 raw rabbit (cooked rabbit if killed while on fire).[Java Edition only] The maximum amount is increased by 1 per level of Looting, for a maximum of 1-4 with Looting III.
- There is a 10% chance of dropping a rabbit's foot upon death when killed by the player or a tamed wolf. The chance can be increased by 3% per level of Looting, up to a maximum chance of 19% with Looting III.
- 1–3 upon player kills.
- Upon successful breeding, 1–7 is dropped.
Behavior[]
Rabbits hop around aimlessly instead of walking. They can jump up almost 2 blocks in height. They slowly approach players holding carrots, golden carrots or dandelions within 8 blocks. They don't follow the players that hold carrot on a stick although pigs do.[1] Rabbits also jump off of cliffs to reach carrots but do not go into lava for them. They randomly flee around if attacked. All non-hostile rabbits avoid players within 8 blocks and avoid most hostile mobs within 4 blocks (except slimes, magma cubes, and ghasts). They also avoid wolves within 10 blocks.
If /gamerule mobGriefing is true, rabbits find and eat mature carrot crops[Java Edition only] / carrot crops with growth stage greater than 1[Bedrock Edition only]. This reduces the growth stage by one, removing the crop completely when the growth stage reaches 0.
Wild wolves, foxes, and stray cats track down and kill any rabbits.
Breeding[]
Rabbits can be bred using carrots, golden carrots or dandelions.
Baby rabbits usually inherit the same type of fur as one of the parents (47.5% chance of each), but there is a 5% chance for the baby to have the fur type matching the current biome. Baby rabbits grow to adulthood after 20 minutes, although their growth can be slowly accelerated using carrots, golden carrots or dandelions; each use reduces 10% of the remaining time to grow up.
Despite their hostile nature, killer bunnies can breed with other rabbits and with each other, having the unusual chance of creating a baby killer bunny.
A Toast rabbit does not produce a Toast rabbit baby, however.
In Bedrock Edition and Minecraft Education, baby rabbits follow their parents; this behavior is absent in Java Edition.[2]
Variations[]

The six natural types of rabbits.
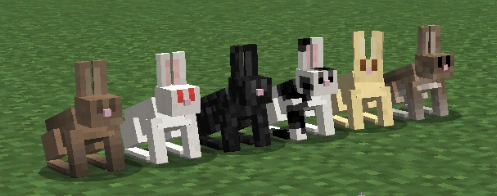
Rabbits typically spawn using one of six different skins. Skins include regular brown fur, white fur with red eyes (albino), black mottled fur, black and white spotted fur, gold (cream) fur, and salt and pepper fur. The biome determines the skin used:
- Rabbits in snowy biomes have 80% white fur and 20% black and white fur.
- Rabbits in deserts have 100% gold fur.
- Rabbits in other biomes have 50% brown fur, 40% salt & pepper fur, and 10% black fur.
- Rabbits with specific skins can be spawned using
/summon rabbit ~ ~ ~ {RabbitType: (Number from 0 - 5)}[Java Edition only] or/summon rabbit ~ ~ ~ in_desert (gold)/in_snow (white)[Bedrock Edition only]. - While it is possible to go above 5, this results in rabbits with skins identical to
RabbitType: 0, with the exception ofRabbitType: 99, the Killer Bunny.
There are two special variants of rabbits:
The Killer Bunny[]
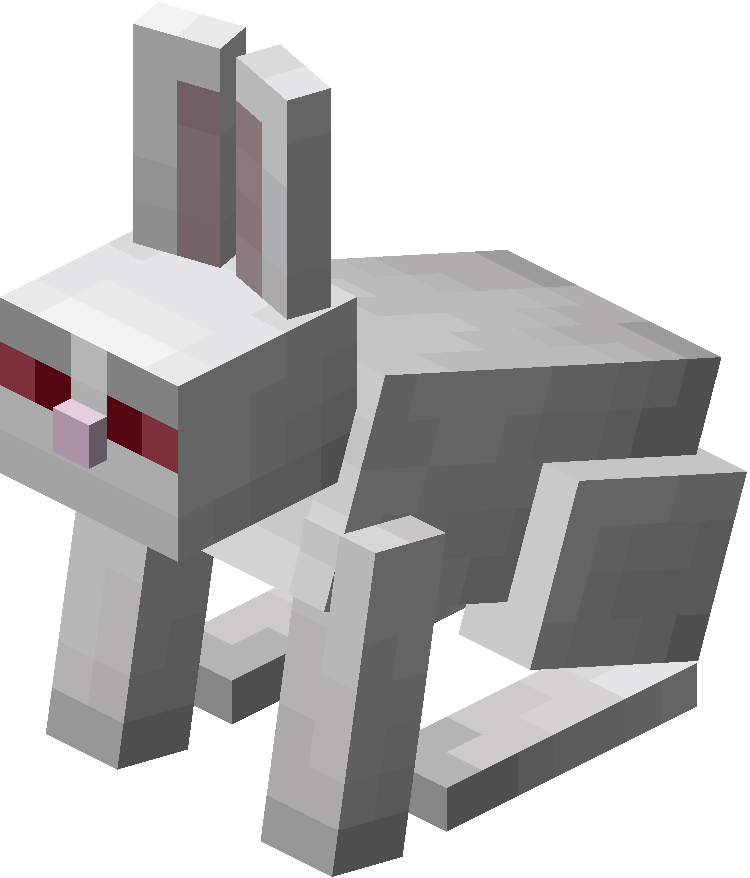
The current killer bunny texture
The killer bunny is an aggressive variant of the rabbit exclusive to Java Edition that is hostile toward players, foxes, and wolves. Its fur is pure white with blood-red eyes that are horizontal, compared to a normal rabbit's vertical eyes. It can be spawned only by using the /summon rabbit ~ ~ ~ {RabbitType:99} command. It appears with a nameplate over its head reading "The Killer Bunny".
If the killer bunny finds any player within a 16-block radius, it hops toward the player much faster than a normal rabbit. It moves in a style similar to that of a spider. Once it closes in, it jumps at the player, dealing 8![]()
![]()
![]()
![]() damage on Normal difficulty. If the player strikes at the killer bunny, it runs away for a brief moment, then returns to lunging at the player. Killer bunnies are immune to the Thorns enchantment.
damage on Normal difficulty. If the player strikes at the killer bunny, it runs away for a brief moment, then returns to lunging at the player. Killer bunnies are immune to the Thorns enchantment.
If it cannot find a player, the killer bunny actively seeks out and attacks any foxes or wolves, including tamed wolves. These mobs, in return, attack the killer bunny, leading to a vicious fight.
On peaceful difficulty, the killer bunny does not despawn, despite its hostile nature. It still attacks wolves and tamed wolves, but not the player.
The killer bunny can be bred and leashed and follows players holding carrots, despite its hostile nature.
Toast[]
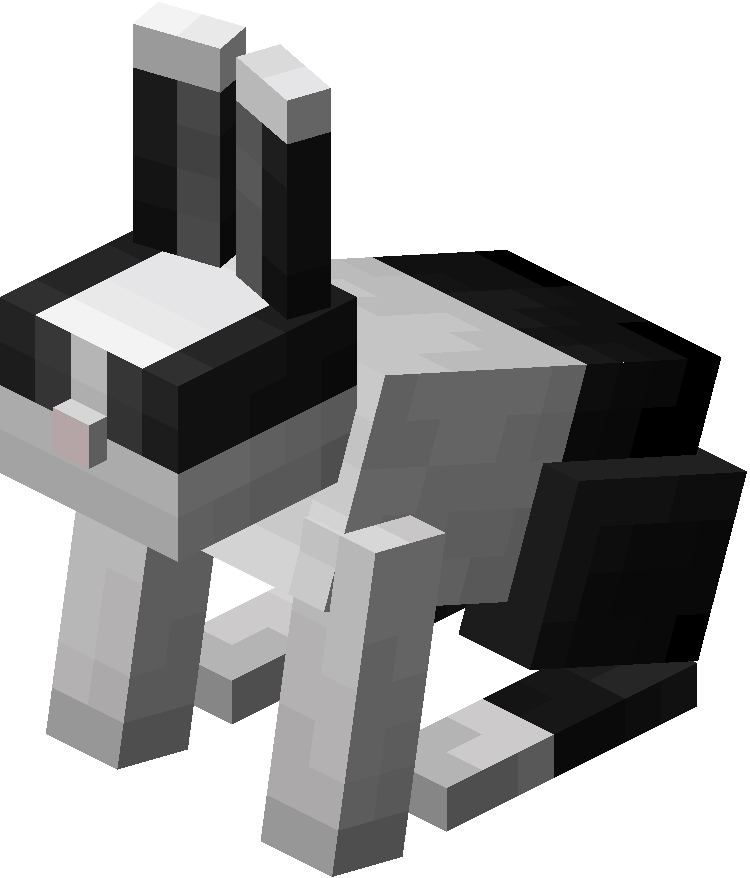
The rabbit named "Toast"
Naming a rabbit Toast (using either a name tag or a renamed spawn egg) re-textures it to have the appearance of a black dutch, with a large black and white patch and more black fur around the face than the natural black and white spotted rabbit. Other than its name and skin, Toast behaves exactly like it would if it were unnamed. When Toast rabbits are bred, whether with each other or with regular rabbits, their offspring do not have the Toast pattern; they have a pattern consistent with the parents' original coloring prior to renaming. If the player renames a killer bunny to Toast, it still attacks players and wolves. Like the killer bunny, Toast does not spawn naturally.
This rabbit is the skin of user xyzen420's girlfriend's missing rabbit, which Ryan Holtz implemented as a memorial.[3]
Sounds[]
Java Edition:
Regular rabbits use the Friendly Creatures sound category for entity-dependent sound events. Killer bunnies use the Hostile Creatures sound category for entity-dependent sound events.
| Sound | Subtitles | Source | Description | Resource location | Translation key | Volume | Pitch | Attenuation distance |
|---|---|---|---|---|---|---|---|---|
| Rabbit squeaks | Friendly Creatures(normal) Hostile Creatures(killer) | Randomly | entity | subtitles | 0.25 | 0.8-1.2 (Baby: 1.3-1.7) | 16 | |
| Rabbit attacks | Hostile Creatures | When the killer bunny attacks something | entity | subtitles | 1.0 | 0.8-1.2 | 16 | |
| Rabbit dies | Friendly Creatures(normal) Hostile Creatures(killer) | When a rabbit dies | entity | subtitles | 0.5 | 0.8-1.2 (Baby: 1.3-1.7) | 16 | |
| Rabbit hurts | Friendly Creatures(normal) Hostile Creatures(killer) | When a rabbit is damaged | entity | subtitles | 0.5 | 0.8-1.2 (Baby: 1.3-1.7) | 16 | |
| Rabbit hops | Friendly Creatures(normal) Hostile Creatures(killer) | When a rabbit hops | entity | subtitles | 0.1 | 0.64-0.96 | 16 |
| Sound | Source | Description | Resource location | Volume | Pitch |
|---|---|---|---|---|---|
| Friendly Creatures | Randomly | mob | 0.2 | 0.8-1.2 (Baby: 1.3-1.7) | |
| Friendly Creatures | When a rabbit dies | mob | 0.4 | 0.8-1.2 (Baby: 1.3-1.7) | |
| Friendly Creatures | When a rabbit is damaged | mob | 0.4 | 0.8-1.2 (Baby: 1.3-1.7) | |
| Friendly Creatures | Unused sound event | mob | 0.1 | 1.0 |
Data values[]
ID[]
| Name | Identifier | Entity tags (JE) | Translation key |
|---|---|---|---|
| Rabbit | rabbit | powder_snow_walkable_mobs | entity.minecraft.rabbit |
| Name | Identifier | Numeric ID | Translation key |
|---|---|---|---|
| Rabbit | rabbit | 18 | entity.rabbit.name |
Entity data[]
Rabbits have entity data associated with them that contain various properties.
- Entity data
- Additional fields for mobs that can breed
- Tags common to all entities
- Tags common to all mobs
- MoreCarrotTicks: Set to 40 when a carrot crop is eaten, decreases by 0–2 every tick until it reaches 0. Has no effect in game.
- RabbitType: Determines the skin of the rabbit. Also determines if rabbit should be hostile.
Achievements[]
| Icon | Achievement | In-game description | Actual requirements (if different) | Gamerscore earned | Trophy type (PS4) | |
|---|---|---|---|---|---|---|
| PS4 | Other | |||||
| Rabbit Season | Cook and Eat Rabbit Meat | — | 15G | Bronze | ||
Advancements[]
| Icon | Advancement | In-game description | Parent | Actual requirements (if different) | Resource location |
|---|---|---|---|---|---|
 | It Spreads | Kill a mob near a Sculk Catalyst | Monster Hunter | Kill one of these 70 mobs near a sculk catalyst:
| adventure/kill_mob_near_sculk_catalyst
|
 | The Parrots and the Bats | Breed two animals together | Husbandry | Breed a pair of any of these 25 mobs:
| husbandry/breed_an_animal
|
| Two by Two | Breed all the animals! | The Parrots and the Bats | Breed a pair of each of these 24 mobs:
| husbandry/bred_all_animals
|
Video[]
Note: this video is outdated as rabbits can no longer be tamed, rabbits are smaller now, and the killer rabbit is now called the killer bunny.
History[]
| Java Edition Classic | |||||
|---|---|---|---|---|---|
| May 19, 2009 | Bunnies were originally an idea for a mob in Survival Test. They would spawn randomly and jump around. When attacked, they would pop into many pieces and start bleeding. | ||||
| May 20, 2009 | Bunnies were ultimately rejected at the time due to negative feedback. | ||||
| Java Edition | |||||
1.8{{Extension DPL}}<ul><li>[[Brush|Brush]]<br/>{{Item
|image=Brush.png
|rarity=Common
|renewable=Yes
|durability=64
|stackable=No
}}
A '''brush''' is a [[tool]] used in [[archaeology]] to excavate [[suspicious block]]s for different items.
==Obtaining==
===Crafting===
{{Crafting
|head=1
|showname=0
|showdescription=1
|B1=Feather
|B2=Copper Ingot
|B3=Stick
|Output=Brush
|type=Tool
}}
{{crafting
|foot=1
|ignoreusage=1
|Damaged Brush
|Damaged Brush
|Output=Brush
|description=The durability of the two brushes is added together, plus an extra 5% durability.
|type=Tool
}}
==Usage==
{{Main|Suspicious Block}}
{{Control|Using}} the brush on any block displays a brushing animation, slowing down the player and creating breaking [[particles]], but not actually damaging the block or brush. When continuously brushing a [[suspicious block]], a random item slowly emerges from it until it drops out, and the block turns into regular [[sand]] or regular [[gravel]], depleting 1 [[durability]] point on the brush. It takes 96 [[game tick]]s (4.8 seconds) to brush a single suspicious block.
=== Enchantments ===
A brush can receive the following [[enchantment]]s:
{|class="wikitable col-2-center col-3-right"
|+
!Name
!Max Level
![[Enchanting|Method]]
|-
|[[Unbreaking]]
|III
|{{Inventory slot|Anvil}}
|-
|[[Mending]]
|I
|{{Inventory slot|Anvil}}
|-
|[[Curse of Vanishing]]
|I
|{{Inventory slot|Anvil}}
|}
== Sounds ==
{{Edition|Java}}:
{{Sound table
<!--All of these sounds are, in fact, different-->
|sound=Brushing sand1.ogg
|sound2=Brushing sand2.ogg
|sound3=Brushing sand3.ogg
|sound4=Brushing sand4.ogg
|subtitle=Brushing Sand
|source=block
|description=While a brush is brushing suspicious sand
|id=item.brush.brushing.sand
|translationkey=subtitles.item.brush.brushing.sand
|volume=0.6
|pitch=0.6
|distance=16}}
{{Sound table
|sound=Brushing gravel1.ogg
|sound2=Brushing gravel2.ogg
|sound3=Brushing gravel3.ogg
|sound4=Brushing gravel4.ogg
|subtitle=Brushing Gravel
|source=block
|description=While a brush is brushing suspicious gravel
|id=item.brush.brushing.gravel
|translationkey=subtitles.item.brush.brushing.gravel
|volume=0.6
|pitch=0.6
|distance=16}}
{{Sound table
|sound=Brushing generic1.ogg
|sound2=Brushing generic2.ogg
|sound3=Brushing generic3.ogg
|sound4=Brushing generic4.ogg
|subtitle=Brushing
|source=block
|description=While a brush is brushing any other block
|id=item.brush.brushing.generic
|translationkey=subtitles.item.brush.brushing.generic
|volume=0.6
|pitch=0.6
|distance=16}}
{{Sound table
|sound=Brushing sand completed1.ogg
|sound2=Brushing sand completed2.ogg
|sound3=Brushing sand completed3.ogg
|sound4=Brushing sand completed4.ogg
|sound5=Brushing sand completed5.ogg
|subtitle=Brushing Sand completed
|source=Players<ref group=sound name=badsource>{{Bug|MC-260202}}</ref>|overridesource=1
|description=When a brush finishes brushing suspicious sand
|id=item.brush.brushing.sand.complete
|translationkey=subtitles.item.brush.brushing.sand.complete
|volume=1.0
|pitch=1.0
|distance=16}}
{{Sound table
|sound=Brushing gravel completed1.ogg
|sound2=Brushing gravel completed2.ogg
|sound3=Brushing gravel completed3.ogg
|sound4=Brushing gravel completed4.ogg
|subtitle=Brushing Gravel completed
|source=Players<ref group=sound name=badsource/>|overridesource=1
|description=When a brush finishes brushing suspicious gravel
|id=item.brush.brushing.gravel.complete
|translationkey=subtitles.item.brush.brushing.gravel.complete
|volume=1.0
|pitch=1.0
|distance=16
|foot=1}}
{{Edition|Bedrock}}:
{{Sound table
|type=bedrock
|sound=Brushing sand1.ogg
|sound2=Brushing sand2.ogg
|sound3=Brushing sand3.ogg
|sound4=Brushing sand4.ogg
|source=player
|description=While a brush is brushing suspicious sand
|id=brush.suspicious_sand
|volume=1.0
|pitch=0.8-1.0}}
{{Sound table
|sound=Brushing gravel1.ogg
|sound2=Brushing gravel2.ogg
|sound3=Brushing gravel3.ogg
|sound4=Brushing gravel4.ogg
|source=player
|description=While a brush is brushing suspicious gravel
|id=brush.suspicious_gravel
|volume=1.0
|pitch=0.8-1.0}}
{{Sound table
|sound=Brushing generic1.ogg
|sound2=Brushing generic2.ogg
|sound3=Brushing generic3.ogg
|sound4=Brushing generic4.ogg
|source=player
|description=While a brush is brushing any other block
|id=brush.generic
|volume=1.0
|pitch=0.8-1.0}}
{{Sound table
|sound=Brushing sand completed1.ogg
|sound2=Brushing sand completed2.ogg
|sound3=Brushing sand completed3.ogg
|sound4=Brushing sand completed4.ogg
|sound5=Brushing sand completed5.ogg
|source=player
|description=When a brush finishes brushing suspicious sand
|id=brush_completed.suspicious_sand
|volume=1.0
|pitch=0.8-1.0}}
{{Sound table
|sound=Brushing gravel completed1.ogg
|sound2=Brushing gravel completed2.ogg
|sound3=Brushing gravel completed3.ogg
|sound4=Brushing gravel completed4.ogg
|source=player
|description=When a brush finishes brushing suspicious gravel
|id=brush_completed.suspicious_gravel
|volume=1.0
|pitch=0.8-1.0
|foot=1}}
== Data values ==
=== ID ===
{{edition|java}}:
{{ID table
|edition=java
|showforms=y
|generatetranslationkeys=y
|displayname=Brush
|spritetype=item
|nameid=brush
|form=item
|foot=1}}
{{edition|bedrock}}:
{{ID table
|edition=bedrock
|shownumericids=y
|showforms=y
|notshowbeitemforms=y
|generatetranslationkeys=y
|displayname=Brush
|spritetype=item
|nameid=brush
|id=684
|form=item
|foot=1}}
== Advancements ==
{{load advancements|Respecting the Remnants}}
== History ==
{{History||October 3, 2020|link=https://youtu.be/DBvZ2Iqmm3M?t=2178|[[File:Brush (pre-release 1).png|32px]][[File:Brush 2.png|32px]] Brushes were announced at [[Minecraft Live 2020]] with two variants.}}
{{History||?|link=https://youtu.be/klP9SrJFDU8?t=206|[[File:Brush (pre-release 2).png|32px]] Changed the brush's item texture.}}
{{History||February 10, 2023|[[File:Brush JE1 BE1.png|32px]] [[Sofia Dankis]] posted an article about upcoming archaeology features, including brushes.|link=https://www.minecraft.net/en-us/article/archeology-coming-minecraft-120}}
{{History|java}}
{{History||1.20<br>(Experimental)|link=1.19.4|snap=23w07a|[[File:Brush JE1 BE1.png|32px]] Added brushes with an updated texture behind the [[Java Edition 1.20|Update 1.20 experimental datapack]].|The crafting recipe was originally three [[string]] and two [[stick]]s.
{{{!}} class{{=}}"collapsible collapsed" data-description{{=}}"Recipe"
! Recipe
{{!}}-
{{!}}{{Crafting Table
|A1 = String
|B1 = String
|C1 = String
|B2 = Stick
|B3 = Stick
|Output = Brush
|type = Tool
|ignoreusage=1}}
{{!}}}
}}
{{History|||snap=1.19.4 Pre-release 1|The crafting recipe for brushes has been changed:
{{{!}} class{{=}}"collapsible collapsed" data-description{{=}}"Recipe"
! Recipe
{{!}}-
{{!}}{{Crafting Table
|B1 = Feather
|B2 = Copper Ingot
|B3 = Stick
|Output = Brush
|type = Tool
|ignoreusage=1}}
{{!}}}
}}
{{History||1.20|snap=23w12a|Brushes are now available without using the "Update 1.20" experimental data pack.
|Brushes can now brush [[suspicious gravel]].}}
{{History|||snap=23w14a|The brushing sound of brush is now controlled by the "Blocks" sound slider instead of the "Players" sound slider.}}
{{History|||snap=23w17a|The player now gets the [[advancement]] "Respecting the Remnants" when they use a brush on a [[suspicious block]] to obtain a [[pottery sherd]].}}
{{History|bedrock}}
{{History||Next Major Update<br>(Experimental)|link=Bedrock Edition 1.19.70|snap=beta 1.19.70.23|[[File:Brush JE1 BE1.png|32px]] Added brushes behind the "[[Bedrock Edition 1.20.0|Next Major Update]]" [[experimental]] toggle.
|The crafting recipe is originally three [[string]] and two [[stick]]s.
{{{!}} class{{=}}"collapsible collapsed" data-description{{=}}"Recipe"
! Recipe
{{!}}-
{{!}}{{Crafting Table
|A1 = String
|B1 = String
|C1 = String
|B2 = Stick
|B3 = Stick
|Output = Brush
|type = Tool
|ignoreusage=1}}
{{!}}}
}}
{{History||Next Major Update<br>(Experimental)|link=Bedrock Edition 1.19.80|snap=beta 1.19.80.20|The crafting recipe for brushes has been changed:
{{{!}} class{{=}}"collapsible collapsed" data-description{{=}}"Recipe"
! Recipe
{{!}}-
{{!}}{{Crafting Table
|B1 = Feather
|B2 = Copper Ingot
|B3 = Stick
|Output = Brush
|type = Tool
|ignoreusage=1}}
{{!}}}
}}
{{History||1.20.0|snap=beta 1.20.0.21|Brushes are now available without using the "Next Major Update" experimental toggle.}}
{{History|foot}}
== Issues ==
{{Issue list}}
== References ==
{{Reflist}}
==External Links==
*[https://www.minecraft.net/en-us/article/brush Taking Inventory: Brush] – Minecraft.net on July 6, 2023
{{Items}}
[[Category:Renewable resources]]
[[de:Pinsel]]
[[es:Pincel]]
[[ja:ブラシ]]
[[pt:Pincel]]
[[pl:Pędzel]]
[[uk:Щітка]]
[[zh:刷子]]</li><li>[[Chalkboard|Chalkboard]]<br/>{{Education feature}}
{{unobtainable|edition=be}}{{Block
|image=<gallery>
Chalkboard Slate.png|Slate
Chalkboard Poster.png|Poster
Chalkboard Board.png|Board
</gallery>
|invimage=Slate
|invimage2=Poster
|invimage3=Board
|transparent=Yes
|renewable=No
|light=No
|tool=None
|stackable=Yes (16)
|flammable=No
}}
A '''chalkboard''' is a [[block]] that can display more text than a [[sign]].<ref>https://education.minecraft.net/support/knowledge-base/using-slates-posters-boards/</ref> Three sizes are available: 1×1 (slate), 2×1 (poster), and 3×2 (board).
== Obtaining ==
In ''[[Education Edition]]'', chalkboards can be obtained in the [[Creative inventory]] or through the {{cmd|give}} command.
In ''[[Bedrock Edition]]'', chalkboards cannot be obtained by commands or the creative inventory, and can only be obtained by using glitches or inventory editors.
== Usage ==
A chalkboard can be used similarly to a [[sign]], to display text. Once placed, select the chalkboard and enter the desired text and click the "OK" button. The "×" in the upper right corner of the board closes the edit screen.
=== Placement ===
Chalkboards may be placed on the top or side of other blocks (including non-solid blocks like [[fence]]s, [[glass]], [[rail]]s, and other chalkboards). To place a chalkboard, {{control|use}} a chalkboard item while pointing at the block the chalkboard should be attached to. To place a chalkboard on a block that can be interacted with by the {{control|use}} control (for example, [[chest]]s, [[note block]]s, etc.), {{control|sneak}} while placing the chalkboard.
1×1 slates placed on the top of a block stand on a short post, facing in the direction of the player who placed it, in any of 16 different directions. 2×1 posters and 2×3 boards can be placed in any of 4 different directions. Chalkboards placed on the side of a block simply float there, even if the block doesn't make contact with the chalkboards.
=== Text ===
When entering text, six lines of text are available for the slates and posters, while fifteen lines of text are available for the 2×3 boards. To switch between lines, the player can press Enter or the up/down arrow keys. The location of text currently selected has a flashing cursor.
While editing, typing and backspacing can occur at any point in the line by moving the cursor using the left and right arrow keys. Once the end of the line has been reached, the word is hyphenated and is continued on the next line.
After the editing window is closed, right-clicking on a chalkboard reopens the editing menu. Copy and paste can be performed, and no more than the basic/shifted keyboard characters may be entered.
=== Interaction ===
Chalkboards act as though they have a {{control|use}} action, so {{control|sneaking}} is required to place blocks or use items while the cursor is pointed at them.
Unlike signs, boards block a [[piston]] from moving.
Boards have no collision box (they are completely non-solid), so [[item]]s and [[mob]]s can move through boards blocks. Other blocks (including other boards) can be placed on any edge of a board.
[[Water]] and [[lava]] flow around boards. Lava can create [[fire]] in [[air]] blocks next to boards as if the boards were flammable, but the boards do not burn.
== Sounds ==
{{Sound table/Block/Stone/BE}}
== Data values ==
=== ID ===
{{ID table
|edition=bedrock
|shownumericids=y
|showforms=y
|generatetranslationkeys=y
|displayname=Block
|spritename=chalkboard
|spritetype=block
|nameid=chalkboard
|id=230
|form=block
|translationkey=tile.chalkboard.oneByOne.name, tile.chalkboard.twoByOne.name, tile.chalkboard.threeByTwo.name}}
{{ID table
|displayname=Item
|spritename=board
|spritetype=item
|nameid=board
|translationkey=tile.chalkboard.oneByOne.name, tile.chalkboard.twoByOne.name, tile.chalkboard.threeByTwo.name
|id=454
|form=item
|foot=1}}
=== Metadata ===
{{see also|Data values}}
Chalkboards uses the following data values:
*Slate: 1
*Board: 2
*Poster: 3
<!--{{/DV}}-->
=== Block states ===
{{see also|Block states}}
{{info needed}}
<!--{{/BS}}-->
== History ==
{{History|pocket alpha}}
{{History||v0.16.0|snap=build 1|[[File:Chalkboard Slate.png|32px]] [[File:Chalkboard Poster.png|32px]] [[File:Chalkboard Board.png|32px]]<br>[[File:Chalkboard_Slate_(item)_BE1.png|32px]] [[File:Chalkboard_Poster_(item)_BE1.png|32px]] [[File:Chalkboard_Board_(item)_BE1.png|32px]] Added chalkboards, likely as an accidental addition.
|Chalkboards can be obtained and placed using the {{cmd|give}} and {{cmd|setblock}} [[command]]s respectively. However, they serve no purpose.}}
{{History|||snap=build 2|Chalkboards have now been removed. However, the textures still exist.}}
{{History|bedrock}}
{{History||1.11.0|snap=beta 1.11.0.1|Re-added chalkboards. They still exist as entities, but can't be spawned. The items can't be spawned either.}}
{{h||1.17.30|snap=beta 1.17.30.20|Chalkboards can now be placed consistently.}}
{{History|education}}
{{History||MinecraftEdu|link=MinecraftEdu|[[File:Oak Sign JE1 BE1.png|30px]] [[MinecraftEdu]], Education Edition's predecessor, had "[[Big Sign]]s", 3 block wide signs that served a similar purpose.}}
{{History||1.0|[[File:Chalkboard Slate.png|32px]] [[File:Chalkboard Poster.png|32px]] [[File:Chalkboard Board.png|32px]]<br>[[File:Chalkboard_Slate_(item)_BE1.png|32px]] [[File:Chalkboard_Poster_(item)_BE1.png|32px]] [[File:Chalkboard_Board_(item)_BE1.png|32px]] Added chalkboards.}}
{{History||1.0.2|The UI of chalkboards now has a locked option.
|[[Player|Students]] now can place their own chalkboards even without a worldbuilder ability.}}
{{History|foot}}
== Gallery ==
<gallery>
Education Edition Exclusive Features.png|The chalkboard placed in a world along with other Education Edition features.
Chalkboardsingamepe.png|The chalkboard in [[Pocket Edition v0.16.0 alpha build 1]].
</gallery>
== References ==
{{Reflist}}
{{Blocks|Utility}}
{{Items}}
{{Education Edition}}
[[Category:Utility blocks]]
[[Category:Block entities]]
[[Category:Education Edition blocks]]
[[Category:Education Edition items]]
[[pt:Lousa]]
[[de:Tafel]]
[[fr:Ardoise]]
[[ja:黒板]]
[[pl:Tablica kredowa]]
[[ru:Доска]]
[[uk:Дошка]]
[[zh:黑板]]</li></ul> | May 17, 2014 | Screenshots of rabbits were released by Ryan Holtz. | |||
| June 5, 2014 | Rabbits are revealed as a feature to be added to Minecraft. | ||||
| June 6, 2014 | Twitter user @xyZenTV asks Ryan Holtz to add Toast to the game. | ||||
| Ryan Holtz accepts the Toast suggestion, and reveals he is planning for rabbits to have multiple skins, similar to horses and cats. | |||||
| June 30, 2014 | Holtz uploaded a "video" showcasing the mob's path-finding and animation. | ||||
| Holtz reveals a preview of the rabbit's drops. | |||||
| July 1, 2014 | |||||
| July 2, 2014 | Holtz tweets a screenshot of all six natural rabbit types, just prior to their introduction. | ||||
| 14w27a | |||||
| 14w28a | The spawn rate of killer rabbits has been reduced from 1/1000 to 1/2500. | ||||
| 14w29a | Killer rabbits no longer spawn in peaceful difficulty. | ||||
| 14w31a | Rabbits now have sounds. | ||||
| Rabbits can now take fall damage. | |||||
| 14w34a | Rabbits can no longer be tamed and do not flee from players. | ||||
| "Killer Rabbit" has been been renamed to 'The Killer Bunny'. | |||||
| Killer bunnies now ignore creative mode players. | |||||
| Killer bunnies no longer spawn without the use of commands. According to a later comment by Jeb, the Killer Bunny was removed from normal gameplay because "it's a tired joke and it's been referenced in so many games," another reason being "they're basically a random death event."[4] | |||||
| pre1 | |||||
1.8.1{{Extension DPL}}<ul><li>[[Mushroom Stew|Mushroom Stew]]<br/>{{Item
| title = Mushroom Stew
| image = Mushroom Stew.png
| renewable = Yes
| heals = {{hunger|6}}
| stackable = No
}}
'''Mushroom stew''' is a [[food]] item.
== Obtaining ==
=== Harvesting ===
Mushroom stew can be obtained by “milking” a [[mooshroom]] with an empty [[bowl]]. This is accomplished by {{Control|using}} a bowl on a mooshroom. The bowl gets replaced by the mushroom stew item. There is no cooldown for doing so.
If a stack of more than one bowl is used on a mooshroom, only one bowl is consumed, and the mushroom stew goes into an empty inventory slot, or is dropped if the player's inventory is full.
=== Crafting ===
{{Crafting
|Red Mushroom
|Brown Mushroom
|Bowl
|Output= Mushroom Stew
|type= Foodstuff
}}
== Usage ==
=== Food ===
{{see also|Tutorials/Hunger management|title1=Hunger management}}
To eat mushroom stew, press and hold {{control|use}} while it is selected in the hotbar. Eating one restores {{hunger|6}} [[hunger]] and 7.2 hunger
[[Hunger#Mechanics|saturation]].
The bowl is returned to the player empty after the mushroom stew has been eaten, and can be reused to craft more, similarly to [[Rabbit Stew|rabbit stew]] and [[Beetroot Soup|beetroot soup]].
== Sounds ==
=== Generic ===
{{Sound table/Entity/Food}}
=== Unique ===
{{Edition|Java}}:
{{Sound table
|sound=Mooshroom milk1.ogg
|sound2=Mooshroom milk2.ogg
|sound3=Mooshroom milk3.ogg
|subtitle=Mooshroom gets milked
|source=neutral
|description=When a mooshroom is milked with a bowl
|id=entity.mooshroom.milk
|translationkey=subtitles.entity.mooshroom.milk
|volume=1.0
|pitch=''varies'' <ref group=sound name=milkpitch>Can be 1.0, 0.9, or 1.1 for each sound</ref>
|distance=16
|foot=1}}
{{Edition|Bedrock}}:
{{Sound table
|type=bedrock
|sound=Mooshroom milk1.ogg
|sound2=Mooshroom milk2.ogg
|sound3=Mooshroom milk3.ogg
|subtitle=Mooshroom gets milked
|source=Friendly Creatures
|description=When a mooshroom is milked with a bowl
|id=mob.mooshroom.suspicious_milk
|volume=1.0/0.9/1.1
|pitch=1.0
|foot=1}}
== Data values ==
=== ID ===
{{edition|java}}:
{{ID table
|edition=java
|showforms=y
|generatetranslationkeys=y
|displayname=Mushroom Stew
|spritetype=item
|nameid=mushroom_stew
|form=item
|foot=1}}
{{edition|bedrock}}:
{{ID table
|edition=bedrock
|shownumericids=y
|showforms=y
|notshowbeitemforms=y
|generatetranslationkeys=y
|displayname=Mushroom Stew
|spritetype=item
|nameid=mushroom_stew
|id=260
|form=item
|foot=1}}
== Advancements ==
{{load advancements|Husbandry;A Balanced Diet}}
== History ==
{{History|java indev}}
{{History||0.31|snap=20100130|[[File:Mushroom Stew JE1 BE1.png|32px]] Added mushroom stew.
|Restores {{hp|8}} [[health]].}}
{{History||20100206|Mushroom stew now restores {{hp|10}} health.}}
{{History|java beta}}
{{History||1.6|snap=Test Build 3|[[Mushroom]] spreading mechanic added, making mushroom stew [[renewable]].}}
{{History||1.8|snap=Pre-release|Now restores {{hunger|8}} [[hunger]].}}
{{History|java}}
{{History||1.0.0|snap=Beta 1.9 Prerelease|More fungi sources have now been introduced with the addition of the [[Mushroom Fields|mushroom biome]].
|A [[mooshroom]] can now be "milked" with a [[bowl]] to obtain mushroom stew.}}
{{History|||snap=Beta 1.9 Prerelease 3|Mushroom stew can now be crafted in the [[2×2 crafting grid]] in the [[inventory]]. Previously, the crafting recipe was shaped, now it's shapeless.}}
{{History||1.2.5|snap=release|The [[player]] milking a [[mooshroom]] with a stack of [[bowl]]s no longer results in receiving back a single bowl of mushroom stew.}}
{{History||1.4.2|snap=?|Mushroom stew now restores {{Hunger|6}} instead of {{Hunger|8}}.}}
{{History||1.13|snap=17w47a|Prior to [[1.13/Flattening|''The Flattening'']], this [[item]]'s numeral ID was 282.}}
{{History||1.14|snap=18w43a|[[File:Mushroom Stew JE2 BE2.png|32px]] The texture of mushroom stew has now been changed.}}
{{History||1.16|snap=Pre-release 1|Mooshrooms can now be milked for mushroom stew in Creative mode.<ref>{{Cite bug|MC|90969|Cannot get mushroom stew from mooshrooms / milk from cows in creative mode|date=October 19, 2015}}</ref>}}
{{History|pocket alpha}}
{{History||v0.4.0|[[File:Mushroom Stew JE1 BE1.png|32px]] Added mushroom stew.}}
{{History||v0.5.0|Mushroom stew now restores {{hp|8}} instead of {{hp|4}}.}}
{{History||v0.9.0|snap=build 1|A mooshroom can now be "milked" with a [[bowl]] to obtain mushroom stew.}}
{{History||v0.12.1|snap=build 1|Mushroom stew now restores [[hunger]] instead of [[health]].}}
{{History|bedrock}}
{{History||1.10.0|snap=beta 1.10.0.3|[[File:Mushroom Stew JE2 BE2.png|32px]] The texture of mushroom stew has now been changed.}}
{{History|console}}
{{History||xbox=TU1|xbone=CU1|ps=1.0|switch=1.0.1|wiiu=Patch 1|[[File:Mushroom Stew JE1 BE1.png|32px]] Added mushroom stew.}}
{{History||xbox=none|xbone=none|ps=1.90|wiiu=none|switch=none|[[File:Mushroom Stew JE2 BE2.png|32px]] The texture of mushroom stew has now been changed.}}
{{History|new3ds}}
{{History||0.1.0|[[File:Mushroom Stew JE1 BE1.png|32px]] Added mushroom stew.}}
{{History|foot}}
== Issues ==
{{Issue list}}
== References ==
{{reflist}}
== External Links ==
*[https://www.minecraft.net/en-us/article/taking-inventory--mushroom-stew Taking Inventory: Mushroom Stew] – Minecraft.net on September 1, 2022
{{items}}
[[de:Pilzsuppe]]
[[es:Estofado de champiñones]]
[[fr:Soupe de champignons]]
[[hu:Gombaragu]]
[[ja:キノコシチュー]]
[[ko:버섯 스튜]]
[[nl:Paddenstoelenstoofpot]]
[[pl:Zupa grzybowa]]
[[pt:Ensopado de cogumelos]]
[[ru:Тушёные грибы]]
[[zh:蘑菇煲]]
[[Category:Food]]
[[Category:Renewable resources]]
<references /></li><li>[[Kelp|Kelp]]<br/>{{About|the plant|the dried variant|Dried Kelp}}
{{For}}
{{Block
|image=Kelp.gif
|invimage=Kelp
|transparent=Yes
|tool=Any
|renewable=Yes
|stackable=Yes (64)
|flammable=No
|lavasusceptible=No
|light=No
|hardness=0}}
'''Kelp''' is an underwater plant that generates in most [[ocean]]s.
== Obtaining ==
=== Natural generation ===
Kelp naturally generates in any [[ocean]] [[biome]]s (except in [[Frozen Ocean|frozen]], [[Deep Frozen Ocean|deep frozen]] and [[Warm Ocean|warm]]), near and around [[seagrass]]. Each chunk has {{frac|1|18}} chance to generate a [[vegetation]] of kelp.
=== Breaking ===
Kelp can be mined instantly with any [[tool]] or with the player's fist. Removing water from the kelp block destroys the kelp. Breaking one part of a kelp stalk destroys all kelp [[block]]s above it. Each block drops a kelp [[item (entity)|item]].
=== Trading ===
Kelp can be bought from [[wandering trader]]s for 3 emeralds.
== Usage ==
Kelp can be placed underwater by hand, or anywhere by the use of [[commands]] such as {{cmd|setblock}}. Placing it by hand gives it a random {{code|age}} value between 0 and 24. Kelp can be placed only in [[water]] source blocks or downward-flowing water, not horizontally flowing water.
When placed in downward-flowing water, the flowing water transforms into a water source block,<ref>{{bug|MC-134229}}</ref> which is useful for faster [[bubble column]] elevator creation.
Any building block can be placed on top of a kelp plant, which is useful for building structures over a deep ocean without needing to build from the ocean floor (see also [[lily pad]]).
=== Cooking ingredient ===
{{smelting
| showname = 1
| Kelp
| Dried Kelp
| 0.1
}}
=== Composting ===
Placing kelp into a [[composter]] has a 30% chance of raising the compost level by 1.
=== Growth mechanics ===
Kelp can be planted on a broad variety of blocks. It grows underwater if it has either a source block of water or, {{in|Java}}, flowing water above it.<ref>{{bug|MC-133354}}</ref> Neither [[player]]s nor [[dispenser]]s can remove the water source block that kelp grows in without breaking the kelp first.
Kelp does not require any [[light]] level to grow. Kelp also grows without having [[sky]] access. [[Bone meal]] can be used to grow kelp by 1 block on each use.
Kelp, when planted, is generated with a randomly chosen age value, which can be checked when pressing [[Debug screen|<kbd>F3</kbd>]]{{only|java}}. The age value of a newly planted kelp plant varies randomly from 0 to 24. Each time the kelp grows in height by one block, the newly generated top of the kelp plant increases its age by 1. When the top block of the kelp plant reaches an age of 25, it stops growing. This means that kelp can naturally grow to a height between 2 (if the first kelp plant had an age of 24) and 26 blocks (if the first kelp plant had an age of 0).
When a kelp plant block is broken, the age of the kelp plant block underneath is randomized to a value from 0 to 24 and the kelp continues growing until it reaches age 25. It is possible to use this mechanic to cultivate a kelp plant to increase its growth height beyond its natural maximum height of 26 blocks. This can be done by breaking the top-most block of the kelp plant each time it reaches age 25. A kelp plant cultivated by a player in this way repeatedly grows until it reaches the water surface.
Each time it receives a [[random tick]], kelp has a 14% chance of growing.
If [[shears]] are used on the topmost block of kelp, that block automatically sets its {{cd|age}} value to {{cd|25}} and stop growing.{{only|JE}}
=== Farming ===
{{Main|Tutorials/Kelp farming}}
Kelp farming is similar to farming [[sugar cane]], although kelp must be placed underwater. Automation of harvest is easier because items float up in water.
== Sounds ==
=== Generic ===
{{Sound table/Block/Wet grass}}
=== Unique ===
{{edition|java}}:
{{Sound table
|sound=Shear.ogg
|subtitle=Plant cropped
|source=block
|description=When the tip of kelp is cropped with [[Shears#Cropping growing plants|shears]]
|id=block.growing_plant.crop
|translationkey=subtitles.block.growing_plant.crop
|volume=1.0
|pitch=1.0
|distance=16
|foot=1}}
{{edition|bedrock}}: ''None''
== Data values ==
=== ID ===
{{edition|java}}:
{{ID table
|edition=java
|showforms=y
|generatetranslationkeys=y
|displayname=Kelp
|spritetype=block
|nameid=kelp}}
{{ID table
|displayname=Kelp Plant
|spritetype=block
|nameid=kelp_plant
|form=block
|foot=1}}
{{edition|bedrock}}:
{{ID table
|edition=bedrock
|firstcolumnname=Kelp
|shownumericids=y
|showforms=y
|generatetranslationkeys=y
|displayname=Item
|spritename=kelp
|spritetype=item
|nameid=kelp
|id=382
|form=item}}
{{ID table
|displayname=Block
|spritename=kelp
|spritetype=block
|nameid=kelp
|id=393
|form=block
|itemform=item.kelp
|translationkey=-
|foot=1}}
=== Block states ===
{{see also|Block states}}
{{/BS}}
== History ==
{{History|java classic}}
{{History||May 21, 2009|link=https://web.archive.org/web/0/http://notch.tumblr.com/post/110762705/my-list-on-tile-types-so-far|[[Notch]] shows interest in adding a "[[seaweed]]" [[block]].}}
{{History|java}}
{{History||November 18, 2017|link={{YouTubeLink|mAapz_nIC_Y}}|Kelp plants were shown in a clip of [[MineCon Earth]].}}
{{History||1.13|snap=18w07a|[[File:Kelp JE1 BE1.gif|32px]] [[File:Kelp (item) JE1 BE2.png|32px]] Added kelp.}}
{{History|||snap=18w07b|Kelp now behaves more like [[water]], meaning [[mob]]s can no longer spawn within the plant under water nor can they replenish their breath by [[swimming]] through it.}}
{{History|||snap=18w10a|[[File:Kelp JE2.gif|32px]] The texture for kelp has been overhauled.}}
{{History|||snap=18w14a|[[File:Kelp.gif|32px]] Top of the kelp textures have been shifted slightly downward.
|The generation rules for kelp have been changed, it now mainly generates in [[cold ocean]] [[biome]]s and can no longer generate in [[warm ocean]]s.}}
{{History|||snap=18w20a|The {{cd|kelp_top}} has been changed ID to {{cd|kelp}} and {{cd|kelp}} has been changed to {{cd|kelp_plant}}, for both the [[block]] and [[item]] forms.}}
{{History|||snap=pre2|Kelp is now destroyed by [[sponge]]s.<ref>{{bug|MC-127111}}</ref>}}
{{History|||snap=pre6|Added 5 new [[sound]] events that apply to kelp: <code>block.wet_grass.break</code>, <code>block.wet_grass.fall</code>, <code>block.wet_grass.hit</code>, <code>block.wet_grass.place</code>, and <code>block.wet_grass.step</code>.}}
{{History||1.14|snap=19w03a|Placing kelp into the new [[composter]] has a 10% chance of raising the compost level by 1.}}
{{History|||snap=19w05a|Kelp now has a 30% chance of increasing the compost level in a composter by 1.
|Added [[Wandering Trader|wandering trader]]s, which sell kelp.}}
{{History||1.16|snap=20w11a|Kelp can now be grown with [[bone meal]].}}
{{History|||snap=20w13a|Kelp has been moved from the Miscellaneous tab to the Decoration Blocks tab in the [[Creative inventory]].<ref name="misc decoration">https://bugs.mojang.com/browse/MC-174434</ref>}}
{{History||1.17|snap=20w46a|Kelp no longer generates on magma blocks.<ref>{{Bug|MC-185605|resolution=Fixed}}</ref>}}
{{History||1.18|snap=21w37a|Kelp now stops growing if [[shears]] are used on the tip.}}
{{History|bedrock}}
{{History||1.4.0|snap=beta 1.2.14.2|[[File:Kelp JE1 BE1.gif|32px]] [[File:Kelp (item) BE1.png|32px]] Added kelp.}}
{{History|||snap=beta 1.2.20.1|[[File:Kelp (item) JE1 BE2.png|32px]] The kelp [[item]] texture has been updated to the {{el|je}}'s.}}
{{History||1.5.0|snap=beta 1.5.0.4|[[File:Kelp.gif|32px]] The texture of the kelp plant has been updated.}}
{{History||1.10.0|snap=beta 1.10.0.3|Kelp can now be bought from [[wandering trader]]s for 3 [[emerald]]s.}}
{{History||1.11.0|snap=beta 1.11.0.1|Kelp can now be used to fill [[composter]]s.}}
{{History|console}}
{{History||xbox=TU69|ps=1.76|wiiu=Patch 38|[[File:Kelp.gif|32px]] [[File:Kelp (item) JE1 BE2.png|32px]] Added kelp.}}
{{History|foot}}
== Issues ==
{{issue list}}
== Trivia ==
* In real life, [[wikipedia:kelp|kelp]] is not considered a [[wikipedia:plant|plant]]. It is classified by scientists as a [[wikipedia:Brown algae|brown algae]].
** Kelp in real life absorbs nutrients directly from the water, instead of through its root-like structure, [[wikipedia:Holdfast (biology)|holdfast]], which merely attaches it to the seabed. This is in accordance with kelp being able to grow on almost any solid block in ''Minecraft''.
== Gallery ==
<gallery heights="60">
SeaPlantsMineConEarth2017.jpg|Kelp shown in a clip from MINECON Earth 2017.
Kelp in ocean with Jappa textures.jpg|Naturally generated kelp in an [[ocean]] biome.
Kelp on shoreline.png|Naturally generated kelp near the shore.
Ocean life.png|An ocean with kelp visible in the far distance.
Kelp on Land.png|Kelp placed outside of [[water]] using the {{cmd|setblock}} command before 18w07b.
Waterless kelp.png|What kelp looks like without water (water removed using a [[resource pack]]).
Coral reef at night.png|Kelp within a [[coral reef]].
Floating Kelp.png|Kelp that generated in mid-air due to an [[ocean monument]]'s water cutting through it.
Kelp in ocean.jpg|Multiple kelps.
Kelp 255 blocks tall.png|Without obstacles, kelp can grow all the way to building limit.
ArgoMajor Kelp.jpg|First image of kelp in ''Bedrock Edition''.
</gallery>
== References ==
{{reflist}}
{{Blocks|vegetation}}
{{Items}}
[[Category:Plants]]
[[Category:Natural blocks]]
[[Category:Non-solid blocks]]
[[de:Seetang]]
[[es:Alga]]
[[fr:Algue]]
[[ja:コンブ]]
[[ko:켈프]]
[[pl:Wodorosty]]
[[pt:Alga]]
[[ru:Ламинария]]
[[th:สาหร่ายทะเล]]
[[zh:海带]]</li></ul> | pre1 | Rabbits now follow players holding dandelions or golden carrots. | |||
1.9{{Extension DPL}}<ul><li>[[Amethyst Shard|Amethyst Shard]]<br/>{{Item
| title = Amethyst Shard
| image = Amethyst Shard.png
| renewable = Yes
| stackable = Yes (64)
}}
An '''amethyst shard''' is a crystal ore obtained from mining a fully grown [[amethyst cluster]] or can be obtained from chests in [[Ancient City|ancient cities]].
== Obtaining ==
=== Mining ===
An [[amethyst cluster]] mined using a non-[[Silk Touch]], non-[[Fortune]] [[pickaxe]] drops 4 amethyst shards. When mined using any other tool, [[item]] or mechanism (such as [[explosion]]s or [[piston]]s) it drops 2 shards. The maximum amount of amethyst shards dropped can be increased with Fortune. Fortune I gives a {{frac|1|3}} chance for eight shards, averaging 5.33 shards; Fortune II gives a 25% chance (each) to give eight or 12 shards, averaging 7 shards, and Fortune III gives a 20% chance (each) to give 8, 12, or 16 shards, averaging 8.8 shards.
If the amethyst cluster in any of its growth stages is mined using a pickaxe enchanted with [[Silk Touch]], it drops itself rather than amethyst shards.
=== Chest loot ===
{{LootChestItem|amethyst-shard}}
== Usage ==
=== Crafting ingredient ===
{{Crafting usage}}
=== Smithing ingredient ===
{{Smithing
|head=1
|ingredients=Any Armor Trim +<br/>Any Armor Piece + <br/>Amethyst Shard
|Any Armor Trim Smithing Template
|Netherite Chestplate
|Amethyst Shard
|Amethyst Trim Netherite Chestplate
|showdescription=1
|description = All armor types can be used in this recipe;<br/>a netherite chestplate is shown as an example.<br/>
|tail=1
}}
;Trim color palette
The following color palette is shown on the designs on trimmed armor:
*{{TrimPalette|amethyst shard}}
=== Allay duplication ===
If an amethyst shard is given to an [[allay]] that is currently dancing to an active [[jukebox]], the allay emits heart particles, consumes the amethyst shard and duplicates into another allay. After this, there is a 5 minute cool down until both allays can be duplicated like this again.
== Sounds ==
{{Edition|Java}}:
{{Sound table
|sound=Amethyst shimmer.ogg
|subtitle=Amethyst chimes
|source=neutral
|description=When an amethyst shard duplicates an allay
|id=block.amethyst_block.chime
|translationkey=subtitles.block.amethyst_block.chime
|volume=0.4
|pitch=1.0
|distance=16
|foot=1}}
{{Edition|Bedrock}}:
{{Sound table
|type=bedrock
|sound=Amethyst shimmer.ogg
|source=block
|description=When an amethyst shard duplicates an allay
|id=chime.amethyst_block
|volume=1.0
|pitch=0.5-1.7
|foot=1}}
== Data values ==
=== ID ===
{{edition|java}}:
{{ID table
|edition=java
|showforms=y
|generatetranslationkeys=y
|displayname=Amethyst Shard
|spritetype=item
|nameid=amethyst_shard
|form=item
|foot=1}}
{{edition|bedrock}}:
{{ID table
|edition=bedrock
|shownumericids=y
|showforms=y
|notshowbeitemforms=y
|generatetranslationkeys=y
|displayname=Amethyst Shard
|spritetype=item
|nameid=amethyst_shard
|form=item
|id=625
|foot=1}}
==History==
{{History||October 3, 2020|link={{ytl|DBvZ2Iqmm3M|t=23m14s}}|Amethyst shards are mentioned, but not shown at [[Minecraft Live 2020]].}}
{{History|java}}
{{History||1.17|snap=20w45a|[[File:Amethyst Shard JE1.png|32px]] Added amethyst shards.}}
{{History|||snap=20w46a|[[File:Amethyst Shard JE2 BE1.png|32px]] The texture for amethyst shards has changed.}}
{{History||1.19|snap=22w13a|Amethyst shards can now be found in [[ancient city]] [[chest]]s.}}
{{History||1.19.1|snap=22w24a|Amethyst shards can now be used to duplicate [[allay]]s.}}
{{History||1.20<br>(Experimental)|link=1.19.4|snap=23w04a|Amethyst shards can now be used as an armor trim material.}}
{{History||1.20|snap=23w12a|Amethyst shards can now be used to craft [[calibrated sculk sensor]]s.}}
{{History|bedrock}}
{{History||1.17.0|snap=beta 1.17.0.50|[[File:Amethyst Shard JE2 BE1.png|32px]] Added amethyst shards.}}
{{History|||snap=beta 1.17.0.52|Amethyst shards are now available without enabling [[Experimental Gameplay]].}}
{{History||1.19.0|snap=beta 1.19.0.26|Amethyst shards can now be found in [[ancient city]] [[chest]]s.}}
{{History||1.19.10|snap=beta 1.19.10.22|Amethyst shards can now be used to duplicate allays.}}
{{History||1.20.0<br>(Experimental)|link=Bedrock Edition 1.19.80|snap=beta 1.19.80.21|Amethyst shards can now be used as an armor trim material.}}
{{History|||snap=beta 1.19.80.22|Amethyst shards can now be used to craft calibrated sculk sensors.}}
{{History|foot}}
==Issues==
{{issue list}}
==Trivia==
* Although in real life {{w|amethyst}} is a variety of {{w|quartz}} like [[Nether Quartz|nether quartz]], the two resources are not interchangeable.
* besides netherite, amethyst is the only or to be attempted not from an ore in caves
== External Links ==
*[https://www.minecraft.net/en-us/article/taking-inventory--amethyst-shard Taking Inventory: Amethyst Shard] – Minecraft.net on May 20, 2021
{{Items}}
[[Category:Renewable resources]]
[[de:Amethystscherbe]]
[[es:Fragmento de amatista]]
[[fr:Éclat d'améthyste]]
[[it:Scheggia di ametista]]
[[ja:アメジストの欠片]]
[[lzh:紫水玉片]]
[[pl:Odłamek ametystu]]
[[pt:Fragmento de ametista]]
[[ru:Осколок аметиста]]
[[uk:Уламок аметисту]]
[[zh:紫水晶碎片]]
[[Category:Ore]]</li><li>[[Map|Map]]<br/>{{about|the craftable map|maps showing the locations of certain structures|Explorer Map|other uses|Map (disambiguation)}}
{{distinguish|World}}
{{Item
| image = Map Zoom 4.png
| renewable = Yes
| stackable = Yes (64)
}}
A '''map''' is an [[item]] used to view explored [[Chunk|terrain]] and mark landmarks.
==Obtaining==
===Crafting===
{{crafting
|head=1
|showname=0
|showdescription=1
|A1= Paper
|B1= Paper
|C1= Paper
|A2= Paper
|B2= Compass
|C2= Paper
|A3= Paper
|B3= Paper
|C3= Paper
|Output= Empty Map
|type= Miscellaneous
|description=This variation is called an "empty locator map" {{in|bedrock}}, or an "empty map" {{in|java}}.
When the player first creates a map, it is blank. It needs to be activated by holding it and pressing ''{{Control|use item}}''. after which it records terrain and location markers as the player travels within (or close to) the area it maps.
}}
{{crafting
|A1= Paper
|B1= Paper
|C1= Paper
|A2= Paper
|B2= Paper
|C2= Paper
|A3= Paper
|B3= Paper
|C3= Paper
|Output= Empty Map
|type= Miscellaneous
|description={{only|bedrock}}
This variation is called an "empty map". It does not show location markers. It is intended for cloning and zooming locator maps without having to consume an additional [[compass]] (thereby saving [[iron ingot]]s and [[redstone dust]]), but it can also be {{Control|use|text=activated}} and later converted to a locator map by combining it with a compass on an [[anvil]], [[crafting table]], or [[cartography table]].
|foot=1
}}
=== Natural generation ===
==== Chest loot ====
{{LootChestItem|empty-map,map
}}
=== Cartography table ===
A map can also be created using a single paper on a [[cartography table]] to create an empty map, or a paper with a compass for an empty locator map.{{only|bedrock}}
=== Starting map ===
{{exclusive|bedrock|section=1}}
When creating a new world {{in|bedrock}}, the player can enable the "Starting Map" option to spawn with an empty locator map in the hotbar. The map's zoom scale is 1:8. The map is updated only while the player holds it.
=== Trading ===
Novice-level cartographer [[Villager|villagers]] sell a single empty map for 7 [[Emerald|emeralds]] as their trades.
{{IN|java}}, cartographer villagers may give players with the [[Hero of the Village]] effect an empty map.
== Usage ==
{{See also|Tutorials/Mapping}}
=== Mapping ===
Crafting a map creates an empty map. The map is drawn for the first time when it is held and used (with ''{{control|use item}}''). This map can then be adjusted to different zoom levels. After conversion to a drawn map item, it starts to draw a top-down view of the player's surroundings, with North pointing to the top of the map. A pointed oval pointer indicates the player's position on the map, and moves in real-time as the player moves across the terrain shown on the map. The map does ''not'' center on the player when created, rather, the world is broken up into large invisible grid squares, and the map displays the area of whichever grid square it is in when it is first used. For example, if a player uses a new map in a certain grid square, and then moves a distance away and uses another fresh map but is still within the same grid square, both maps appear identical. To make a map that is not identical to the first one, the player would have to move outside of the edges of the first map (because then they would be in a new grid square). This way, no two maps of the same size can ever partially overlap and every map can display only a fixed area.
To record the world on a map, that specific map must be held in the player's hands while the player moves around the world. The world is recorded as-is during exploration, meaning that if the world is modified, a player must revisit the area while holding the map to update the map's view. Maps can also be [[Map#Cloning|cloned]]. If a player holds a map whose one or more clones are on display in item frames, updates are made on all clone-connected maps.
Other players are displayed on the map only if they have a map in their inventory cloned from the one being looked at. When placing a map into an [[item frame]], the map displays with a green pointer shown at the location of the item frame. This is to help the player see where they are in relation to the area that the map is showing. If the player leaves a map in an item frame and views a clone of it, the green pointer remains in the spot of the framed copy. This can be used to set up waypoints. Unexplored areas are transparent, making the item frame visible.
When the player leaves the area shown on a specific map, the player pointer transforms into a white dot that moves on that map. The marker shrinks to a smaller white dot if the player is far from the map's center: the area is 320 by 320 blocks per scale factor. The dot moves along the edge of the map to show the relative location of the player. However {{in|bedrock}}, the pointer remains as an arrow but shrinks until the player is near the area shown on the map.
While maps in [[the Nether]] work, they show only the red-and-gray pattern, regardless of the blocks placed. The only useful function is finding where the player is in relation to placed framed maps, which show as green pointers. Additionally, the player pointer rapidly spins and is not a good indicator of direction. Placing a [[banner]] in [[the Nether]] still shows it on the map as usual. Having a smaller map image while riding a [[strider]] in the Nether can help one to see one's footing while traveling over [[lava]].
{{IN|java}}, when using a map from another dimension, the map shows the player's position and direction when they were last in the dimension of the map. {{IN|bedrock}}, however, the player can use maps from one dimension while in another dimension. For locator maps, the place marker changes color depending on the dimension that the player is currently in (white for the Overworld, red for [[the Nether]], and magenta for [[the End]]). An Overworld map in the Nether shows the player's corresponding location and direction in the Overworld.<ref name=multiverse>{{ytl|EpP1diZdEdI}}</ref> Similarly, a Nether Map in the Overworld shows the player's corresponding location in the Overworld, but the place marker spins, just like a Nether map in the Nether. An Overworld map in the End shows the world spawn.<ref name=multiverse/> A Nether map cannot be used in the End — the map appears, but the place marker is not shown anywhere — and similarly, an End map cannot be used in the Overworld or the Nether.
A player can make a large piece of pixel art (128×128) facing upward, center a map on it, and place that map in an [[item frame]] to create a custom picture. Locking is recommended. See [[Map item format#Map Pixel Art]] for details on the techniques.
Maps display as a mini-map when held in the off-hand, or if the off-hand slot is occupied; the map is full-sized only when held in the dominant hand with both hands free.
A map always positions itself facing towards North when placed horizontally within an item frame regardless of how the map is placed.
=== Map content ===
{{Main|Map item format}}
Maps consist of square pixels arranged like pixels in a 128×128 square pattern, with each pixel representing a square portion of land. {{IN|java}}, the [[Map item format#Color table|color of a map pixel]] generally matches the color of the most common [[opaque]] block in the corresponding area, as seen from the sky. 'Minority blocks' in the target area have no effect on the color of the pixel, thus small features tend to be undetectable on zoomed-out maps.
{{IN|bedrock}}, the [[Map item format#Color table|color of a map pixel]] instead matches the single top-most opaque block in a grid sized by the map magnification pixel size (see the table in the "Player marker and pointer" section below). For example, a 3/4 magnification map has a pixel size of 8x8 blocks; this means the map will read only the top-most opaque blocks at the 0,0 coordinate, the 8,0 coordinate, the 0,8 coordinate, etcetera, ignoring all other blocks in the area. This means that {{in|bedrock}}, map pixel art requires only one block per pixel regardless of map magnification.
{{IN|bedrock}}, grass, foliage and water colors that are biome-dependent are represented accurately on a map.
{| class="wikitable"
|-
! style="width: 300px;" | {{el|je}}
! style="width: 300px;" | {{el|be}}
|-
| style="text-align: center;" | [[File:Map Zoom 4.png|alt=All banners marked on a map, alongside a named banner.|216px]]
| style="text-align: center;" | [[File:Map item BE.png|216px]]
|-
| Biome colors on ''Java Edition''.
| Biome colors on ''Bedrock Edition''.
|-
|}
Maps also show ground up to about 15 blocks below the surface of the water in oceans as slightly lighter blue, to show where the ground rises. This is not true with land above water. Higher elevations in the world mean lighter colors on the map. The map records the surface even as the player moves below the surface.
A standard map represents 128x128 blocks (1 block per pixel, 8x8 [[chunks]]) but maps can be zoomed-out to represent up to 2048x2048 blocks (16 square blocks per pixel, 128x128 [[chunks]]).
Some relevant distances: 64 blocks (4 chunks) is the update radius from a player in the Overworld and the End. However, it is half this (32 blocks) in the Nether. Also, 1024 blocks is the minimum Overworld distance from a [[nether portal]], at which players can build another portal and expect to reach a new location in the Nether. This is the distance across a 1:8 map, and also from a 1:16 map's center to its edge.
=== Player marker and pointer ===
{{IN|java}}, every map contains a marker that marks the position of the player, and points in the same direction as the player. When a player moves out of a map, a big white dot appears and moves relative to the player's position. The pointer either disappears when the player moves away a certain distance from the border of the map or, in case of [[explorer map]]s, the big white dot changes to a smaller white dot. The distance required for the small white dot to appear(explorer maps) or for the big dot to vanish (normal maps) changes with the scaling of the map.
* '''Level 0/4 :''' 128×128 blocks (each map pixel represents 1 block)
* '''Level 1/4 :''' 256×256 blocks (2×2 blocks per map pixel)
* '''Level 2/4 :''' 512×512 blocks (4×4 blocks per map pixel)
* '''Level 3/4 :''' 1024×1024 blocks (8×8 blocks per map pixel)
* '''Level 4/4 :''' 2048×2048 blocks (16×16 blocks per map pixel)
{{IN|bedrock}}, a map can be crafted with or without this marker, and a map without a position marker can add one later by adding a compass to the map. When a map is crafted without a compass, it's simply called an "empty map", but when crafted with a compass, it's called an "empty locator map". The marker also turns red if the player enters the Nether with an Overworld map and shows the player's Overworld location relative to the Nether location. A map created in the End has a purple marker showing the player's location. If an Overworld map is used in the End, a magenta dot appears on the player's spawn point.{{/BE|position}}
{{crafting
|name=Map<br>(with marker)
|ingredients=[[Map]] or Empty Map +<br>[[Compass]]
|showdescription=1
|Map (no markers);Empty Map
|Compass
|Output= Locator Map;Empty Locator Map
|type= Miscellaneous
|description={{el|be}} only.
Maps crafted from only paper do not show the location marker; to add it, a compass must be added to the map.
|foot=1
}}
{{IN|bedrock}}, a cartography table can also be used to add a pointer to create a locator map or empty locator map. This can be done by adding a compass to paper, or to an empty map or map.
=== Zooming out ===
[[File:Cartography table UI zoom.png|thumb|300px|{{IN|java}}, cartography table's UI, showing the map is being zoomed out.]]
A [[cartography table]] can also be used to zoom out, taking only one piece of paper per zoom level.
A blank map can not be zoomed out. A map has to have something already marked on it for the zooming to be possible.
{{Crafting
|A1= Paper |B1= Paper |C1= Paper
|A2= Paper |B2= Map;Locator Map |C2= Paper
|A3= Paper |B3= Paper |C3= Paper
|Output= Map;Locator Map
|showdescription=1
|description=Locator Map {{el|be}} only.
}}
{{/BE|zoom}}
==== Zoom details ====
The zooming function starts from when the map is created (zoom level 0) up to its fourth zoom step (zoom level 4).
{| class="wikitable" style="text-align: center" data-description="Zoom levels"
! colspan="2" |
! Zoom step 0
! Zoom step 1
! Zoom step 2
! Zoom step 3
! Zoom step 4
|-
! colspan="2" |
| [[File:Map Zoom 0.png|116px|Zoom step 0, 1:1]]
| [[File:Map Zoom 1.png|116px|Zoom step 1, 1:2]]
| [[File:Map Zoom 2.png|116px|Zoom step 2, 1:4]]
| [[File:Map Zoom 3.png|116px|Zoom step 3, 1:8]]
| [[File:Map Zoom 4.png|116px|Zoom step 4, 1:16]]
|-
! colspan="2" | Zoom level
| 0/4
| 1/4
| 2/4
| 3/4
| 4/4
|-
! colspan="2" | 1 map pixel represents
| 1 block
| 2×2 blocks
| 4×4 blocks
| 8×8 blocks
| 16×16 blocks<br>(1×1 chunk)
|-
! colspan="2" | Scaling ratio
| 1:1
| 1:2
| 1:4
| 1:8
| 1:16
|-
! rowspan="2" colspan="2" | Map covers an area of
| 128×128 blocks
| 256×256 blocks
| 512×512 blocks
| 1024×1024 blocks
| 2048×2048 blocks
|-
| 8×8 chunks
| 16×16 chunks
| 32×32 chunks
| 64×64 chunks
| 128×128 chunks
|-
! colspan="2" | Smallest discernible features
| Blocks
| Trees, Paths
| Lakes, Buildings
| Mountains, Rivers
| Biomes, Mountain Ranges
|-
! colspan="2" | Use cases
| Pixel art, Base plans
| Base surroundings
| Structure mapping
| Landscape mapping
| Biome mapping
|-
! rowspan="2" | Total paper needed to zoom out from Level 0
! in anvil{{only|bedrock|short=1}} or crafting table
| -
| {{ItemSprite|Paper}} 8
| {{ItemSprite|Paper}} 16
| {{ItemSprite|Paper}} 24
| {{ItemSprite|Paper}} 32
|-
! in cartography table
| -
| {{ItemSprite|Paper}} 1
| {{ItemSprite|Paper}} 2
| {{ItemSprite|Paper}} 3
| {{ItemSprite|Paper}} 4
|}
Maps are always aligned to a grid at all zoom levels. That means zooming out any different map in a specific area covered by that map always has the same center. As such, maps are aligned by map width (1024 blocks for a level 3 maps) minus 64. A level 3 map generated at spawn covers X and Z coordinates from -64 to 959. All maps generated in this area zoom out to the same coordinates, guaranteeing that they are always 'aligned' on a map wall. For a zoomed-out map to cover a new area, it must start with a base (level 0) map that is in that area.
At zoom level 0, a map created on the point (0,0) has (0,0) at the center of the map. At higher zoom levels of the same map, the coordinate (0,0) is in the top left square of the map.
{{IN|java}}, zoom level can be seen on a map by turning on Advanced Tooltips (a [[Debug screen#More debug keys|debug screen]] option that can be toggled by using the key combination {{key|F3+H}}). The tooltip of the map then shows the zoom level, scaling factors, and map ID.
=== Cloning ===
[[File:Cartography table UI clone.png|thumb|300px|{{IN|Java}}, cartography table's UI, showing the map is being cloned.]]
A mix of empty maps and empty locator maps may be used. Whether the cloned maps show position markers is dependent only on the input map.
A [[cartography table]] can also be used to clone a map.
The parts of the world that have already been explored and mapped are copied, and newly explored areas appear on both instances. If one of the maps is later zoomed out, then the maps lose their connection to each other and function as completely separate maps that have to be individually filled by exploring.
In Creative mode, a map in an item frame may be cloned by using {{control|pick block}} on it, as long as that map is not also in the player's inventory.
It doesn't matter if the map to be cloned is at a higher zoom level (made of more paper) than the blank map. Upon copying the map, both resulting maps have the same magnification as the starting map.
{{/BE|clone}}
=== Crafting ingredient ===
{{crafting usage|Map, Empty Map}}
=== Marking points ===
{{IN|java}} the player has the ability to mark spots on a map. To do this, {{control|use}} a map on a placed-down [[banner]], and the spot of the banner gets marked on the map. The mark takes the color of whatever the base color is for the banner, and if the banner has a name, the mark shows that name. Banner marks on a map are always oriented with their top facing north, regardless of the banner's actual orientation. If the banner is destroyed, the mark of the banner remains at first, but if the player gets closer to where the banner previously was, it disappears as the area is updated on the map.
If a map is mounted on an item frame and is within the area it depicts, the mounted map displays its current location with a green indicator rotated to match its orientation.
[[File:Map Marker Bedrock on Item frame.png|thumb|181x181px|{{IN|bedrock}} this is what a map lying on an item frame looks like, while showing markers.]]
{{IN|bedrock}} the player can place copies of locator maps in [[item frame]]s in order to create a land mark. The marker is a green dot that resembles the shape of the player's marker, but in green color. The position the marker points at depends on the direction the item frame is facing. It is worth noting that the markers work only on copies of the same map. Other maps of the same area do not show the existing markers that the player(s) had placed.
If a player has a cloned map in their inventory, their pointer appears white when viewed on the same map held by another player. Hence, if all players have the same cloned map in their inventory, all markers would appear white when the clone map is viewed.
{| class="wikitable"
|-
! style="width: 300px;" | {{el|je}}
! style="width: 300px;" | {{el|be}}
|-
| style="text-align: center;" | [[File:Banner marked map.png|alt=All banners marked on a map, alongside a named banner.|216px]]
| style="text-align: center;" | [[File:Tracking map with markers bedrock.png|216px]]
|-
| How every banner appears {{IN|java}} on a map, including named banners.
| {{IN|bedrock}} this is how a locator map shows map markers while held by a player.
|-
|}
===Locking===
[[File:Cartography table UI lock.png|thumb|300px|{{IN|Java}}, cartography table's UI, showing the map is being locked.]]
Maps can be locked when using a [[glass pane]] in a [[cartography table]]. This creates a new map containing the same data and locks it. All copies of this new map are also locked. A locked map never changes, even when the depicted terrain changes. {{IN|Be}}, locked maps have a unique texture.
{| class="wikitable" style="text-align: center;"
|-
! Condition
! style="width: 200px;" | Newly created map
! style="width: 200px;" | Map after terrain alteration
|-
! Unlocked map
| [[File:Map Zoom 0.png|174px]] || [[File:Unlocked Map.png|174px]]
|-
! Locked map
| [[File:Map Zoom 0.png|174px]] || [[File:Map Zoom 0.png|174px]]
|-
|}
{{-}}
== Sounds ==
{{Edition|Java}}:
{{Sound table
|rowspan=2
|sound=Drawmap1.ogg
|sound2=Drawmap2.ogg
|sound3=Drawmap3.ogg
|subtitle=Map drawn
|source=player
|description=When a map is drawn
|id=ui.cartography_table.take_result
|translationkey=subtitles.ui.cartography_table.take_result
|volume=1.0
|pitch=1.0
|distance=16}}
{{Sound table
|subtitle=Map drawn
|source=block
|description=When a map is edited using a cartography table
|id=ui.cartography_table.take_result
|translationkey=subtitles.ui.cartography_table.take_result
|volume=1.0
|pitch=1.0
|distance=16
|foot=1}}
{{Edition|Bedrock}}:
{{Sound table
|type=bedrock
|rowspan=2
|sound=Drawmap1.ogg
|sound2=Drawmap2.ogg
|sound3=Drawmap3.ogg
|source=block
|description=When a map is drawn<wbr>{{Upcoming|BE 1.20.20.20}}
|id=ui.cartography_table.take_result|idnote={{Verify|Could be block.cartography_table.use}}
|volume=0.8
|pitch=1.0}}
{{Sound table
|type=bedrock
|source=block
|description=When a map is edited using a cartography table
|id=ui.cartography_table.take_result
|volume=0.8
|pitch=1.0
|foot=1}}
== Data values ==
=== ID ===
{{edition|java}}:
{{ID table
|edition=java
|showforms=y
|generatetranslationkeys=y
|displayname=Empty Map
|spritetype=item
|nameid=map
|form=item}}
{{ID table
|displayname=Map
|spritetype=item
|nameid=filled_map
|form=item
|translationkey=item.minecraft.filled_map, filled_map.buried_treasure, filled_map.explorer_jungle{{upcoming|java 1.20.2}}, filled_map.explorer_swamp{{upcoming|java 1.20.2}}, filled_map.mansion, filled_map.monument, filled_map.unknown, filled_map.village_desert{{upcoming|java 1.20.2}}, filled_map.village_plains{{upcoming|java 1.20.2}}, filled_map.village_savanna{{upcoming|java 1.20.2}}, filled_map.village_snowy{{upcoming|java 1.20.2}}, filled_map.village_taiga{{upcoming|java 1.20.2}}
|foot=1}}
{{edition|bedrock}}:
{{ID table
|edition=bedrock
|showaliasids=y
|shownumericids=y
|showforms=y
|notshowbeitemforms=y
|generatetranslationkeys=y
|displayname=Empty Map
|spritetype=item
|nameid=empty_map
|aliasid=emptymap
|id=515
|form=item
|translationkey=item.emptyMap.name, item.emptyLocatorMap.name}}
{{ID table
|displayname=Map
|spritetype=item
|spritename=map-be
|nameid=filled_map
|aliasid=map
|id=420
|form=item
|translationkey=item.map.name, item.map.exploration.mansion.name, item.map.exploration.monument.name, item.map.exploration.treasure.name
|foot=1}}
=== Metadata ===
{{see also|Bedrock Edition data values}}
{{IN|bedrock}}, maps use the following data values:
{{/DV}}
=== Item data ===
{{el|java}}:
{{main|Player.dat format}}
<div class="treeview">
* {{nbt|compound|tag}}: The item's '''tag''' tag.
{{:Player.dat_format/Maps}}
</div>
{{el|bedrock}}:
: See [[Bedrock Edition level format/Item format]].
=== Map icons ===
{{see also|Player.dat format|Map item format|map_icons.png}}
Map icons are 8×8 in ''Java Edition'', but 16×16 in Bedrock Edition. As such, there are minor misalignment issues in ''Java Edition''.<ref>{{bug|MC-214649|||WF}}</ref>
[[File:Map icons.png|thumb|128px|Map icons texture {{in|Java}}]]
[[File:Map icons BE.png|thumb|128px|Map icons texture {{in|Bedrock}}]]
{| class="wikitable"
|-
! Java ID !! Bedrock ID !! Text ID !! Appearance !! Purpose !! Shown in item frames?
|-
| 0 || ||<code>player</code> || [[File:Player (texture) JE1 BE1.png|16px]] [[File:Player (texture) BE2.png|16px]] White marker || Players (on map) || No
|-
| 1 || 1 ||<code>frame</code> || [[File:Green Marker (texture) JE1 BE1.png|16px]] [[File:Green Marker (texture) BE2.png|16px]] Green marker || The current map in an item frame || Yes
|-
| 2 || ||<code>red_marker</code> || [[File:Red Marker (texture) JE1 BE1.png|16px]] [[File:Red Marker (texture) BE2.png|16px]] Red marker || Position converted to Overworld when opening Overworld map in the Nether{{Only|bedrock}} || No
|-
| 3 || ||<code>blue_marker</code> || [[File:Blue Marker (texture) JE1 BE1.png|16px]] [[File:Blue Marker (texture) BE2.png|16px]] Blue marker || Other players || No
|-
| 4 || ||<code>target_x</code> || [[File:Target X (texture) JE1 BE1.png|16px]] White X || Unused || Yes
|-
| 5 ||5
|<code>target_point</code> || [[File:Target Point (texture) JE1 BE1.png|16px]] [[File:Target Point (texture) BE2.png|16px]] Red triangle || Unused || Yes
|-
| 6 || 6 ||<code>player_off_map</code> || [[File:Player Off Map (texture) JE1 BE1.png|16px]] Large white dot || Players off map, nearby{{only|java}} || No
|-
| 7 || 13 ||<code>player_off_limits</code> || [[File:Player Off Limits (texture) JE1.png|16px]] [[File:Player Off Limits (texture) BE.png|16px]] Small white dot || Players off map, far away{{only|java}} || No
|-
| 8 ||14
|<code>mansion</code> || [[File:Mansion (texture) JE1.png|16px]] [[File:Mansion (Texture) BE2.png|frameless|16x16px]] Woodland mansion || Woodland mansion || Yes
|-
| 9 || 15 ||<code>monument</code> || [[File:Monument (texture) JE1.png|16px]] [[File:Monument Texture BE2.png|frameless|16x16px]] Ocean monument || Ocean monument || Yes
|-
| 10 - 25 || ||<code>{{tooltip|banner_*|banner_white, banner_orange, banner_magenta, banner_light_blue, banner_yellow, banner_lime, banner_pink, banner_gray, banner_light_gray, banner_cyan, banner_purple, banner_blue, banner_brown, banner_green, banner_red, banner_black}}</code> || [[File:Banner White (texture) JE1.png|16px]] [[File:Banner Light Gray (texture) JE1.png|16px]] [[File:Banner Gray (texture) JE1.png|16px]] [[File:Banner Black (texture) JE1.png|16px]] [[File:Banner Brown (texture) JE1.png|16px]] [[File:Banner Red (texture) JE1.png|16px]] [[File:Banner Orange (texture) JE1.png|16px]] [[File:Banner Yellow (texture) JE1.png|16px]] [[File:Banner Lime (texture) JE1.png|16px]] [[File:Banner Green (texture) JE1.png|16px]] [[File:Banner Cyan (texture) JE1.png|16px]] [[File:Banner Light Blue (texture) JE1.png|16px]] [[File:Banner Blue (texture) JE1.png|16px]] [[File:Banner Magenta (texture) JE1.png|16px]] [[File:Banner Purple (texture) JE1.png|16px]] [[File:Banner Pink (texture) JE1.png|16px]]<br>Banners in all 16 wool colors{{only|java}}|| Banner markers || Yes
|-
| 26 ||4
|<code>red_x</code> || [[File:Red X (texture) JE1.png|16px]] [[File:Target X (texture) BE2.png|16px]] Red X || Buried treasure || Yes
|-
| || 8 || || [[File:Magenta Marker (texture) BE1.png|16px]] Magenta marker
| Position converted to Overworld when opening Overworld map in the End{{Only|bedrock}} || No
|-
| || 9 || || [[File:Orange Marker (texture) BE1.png|16px]] Orange marker{{more info}}
|Other players
|Yes
|-
| || 10 || || [[File:Yellow Marker (texture) BE1.png|16px]] Yellow marker
| Other players || No
|-
| || 11 || || [[File:Cyan Marker (texture) BE1.png|16px]] Cyan marker
| Other players || No
|-
| -
|12
| || [[File:Green Point (texture) BE1.png|16px]] Green Triangle
| Other structure such as stronghold, fortress, end city, etc. when used as explorer map destination{{Only|bedrock}} || Yes
|}
It should be noted that even if the player used a NBT editor to add an additional icon on the map, ''Minecraft'' shows only the first one listed when the player loads up their world.
== Achievements ==
{{load achievements|Map Room}}
== History ==
{{see also|section=24|map_icons.png|Java Edition history of textures#Map icons}}
{{more images|section=24|{{bug|MC-72962}}}}
{{History||April 27, 2011|link=https://web.archive.org/web/0/http://notch.tumblr.com/post/4988431144/the-maps|[[Notch]] unveiled screenshots of the map.}}
{{History||April 28, 2011|link={{tweet|notch|63500114005721088}}|[[Notch]] said that he would try to make maps place-able on [[wall]]s.}}
{{History|java beta}}
{{History||1.6|snap=Test Build 3|[[File:Map (item) JE1 BE1.png|32px]] Added maps.}}
{{History||1.6.6|The ability to auto-craft maps using shift-click has been disabled.}}
{{History||1.8|snap=Pre-release|Maps can now be found in library chests in the brand-new [[stronghold]]s.
|Auto crafting maps has been restored. Map cloning, therefore, is unavailable for a period of time.}}
{{History||1.8.1|Maps now work both while walking and flying.}}
{{History|java}}
{{History||1.0.0|snap=Beta 1.9 Prerelease 5|Prior to this update, the [[sun]] in ''[[Minecraft]]'' rose in the North, which threw off many [[player]]s and led to a common misconception that ''Minecraft'' maps/[[world]]s were oriented with East at the top. The sun now rises in the east and sets in the west, making navigation much more intuitive.
|Before the change in sun position, it was commonly said that ''Minecraft'' maps/worlds are oriented with East at the top; sunrise, by definition, occurs at the East, which means it is certainly true that the maps were oriented "East" since the Sun rose from the top (North). However, [[Jeb]] asserted (and [[Notch]] agreed) that the sun rose in the north.<ref>{{Tweet|jeb|87815841160237056}}</ref><ref>{{Tweet|notch|88155424880201728}}</ref> Most mods and map-making tools, however, used the terms East and North consistent with their actual definitions (e.g. a [[Programs and editors/Cartograph|Cartograph]]-generated map with North at the top is rotated 90 degrees from the in-game map).}}
{{History||1.4.2|snap=12w34a|[[File:Empty Map JE1 BE1.png|32px]] [[Crafting]] a map now creates an empty map. The map is drawn for the first time when it is held and right clicked, and is centered near the location of the [[player]] when clicked (not as before where it was centered on the location it was crafted.)
|Previously, in order to map a new area, the map had to be ''crafted'' in that area (rather than carrying a previously-crafted map to the new area). The point where a map is crafted becomes its permanent center, and could never be changed.
|The pointer no longer disappears when leaving the map, but transforms into a white dot, indicating on what side of the map the player is located.
|Maps now align to a grid, making it easier to create adjacent maps.
|Maps can now be zoomed out (but not zoomed in).
|Maps can now be cloned and scaled.}}
{{History||1.4.2|snap=12w34b|Maps now have a ''zoom level'', which was fixed at 1:8 prior to snapshot [[Java Edition 12w34a|12w34a]],<ref name="mapinfo">https://web.archive.org/web/0/http://notch.tumblr.com/post/4988431144/the-maps</ref> but now starts at 1:1 and can be increased up to 1:16 by re-crafting an existing map.
|Maps are no longer numbered on the top-left corner and is labeled through the tooltip.}}
{{History|||snap=12w36a|New maps are now crafted at a scale factor of 1:1. A zoomed in map can be zoomed out by re-crafting it with another 8 sheets of [[paper]] on a [[crafting table]]. Each time this is done, the scale increases - 1:1, 1:2, 1:4, 1:8, 1:16 with a map scale of 1:16 being the current maximum.}}
{{History||1.7.2|snap=13w38a|The map size has been increased when placed on a [[wall]] using the [[item frame]].
|More colors have been added to maps for different [[block]]s.<ref name="infodump2">https://web.archive.org/web/0/https://www.mojang.com/2013/10/minecraft-1-7-the-update-that-changed-the-world</ref>}}
{{History||1.8|snap=14w31a|Zoomed maps now conform to an expanded grid based on their zoom level. Previously, careful considerations would need to be taken to creating a wall of adjoining maps.}}
{{History||1.8.1|snap=pre1|Some colors have been changed on maps to more accurately represent their respective [[block]].}}
{{History||1.9|snap=15w31a|Maps now display as a mini-map when held in the off-hand, or if the off-hand slot is occupied; the (old) large version is visible only when held in the dominant hand with the secondary hand free.}}
{{History|||snap=15w34a|New maps can now be [[crafting|crafted]] at a scale factor of 1:4.
|A crafting recipe has been added for zooming in maps.}}
{{History|||snap=15w43a|The average yield of empty maps from [[stronghold]] library [[chest]]s has been doubled.}}
{{History|||snap=15w45a|New maps are once again [[crafting|crafted]] at a scale factor of 1:1, as they had been before snapshot [[15w34a]].
|The [[crafting]] recipe, that was introduced in 15w34a, for zooming in maps has been removed.}}
{{History|||snap=15w49a|Map making now uses armor equipping sounds.}}
{{History||1.11|snap=16w39a|Maps now work in [[the End]].
|Empty maps are now [[trading|sold]] by cartographer [[villager]]s as their tier 3 [[trading|trade]].
|Added [[explorer map]]s, sold by cartographers as their tier 4 trades.}}
{{History||1.12|snap=17w17a|Maps now have separate colors for colored [[terracotta]] blocks from other colored blocks.}}
{{History||1.13|snap=17w47a|Prior to [[1.13/Flattening|''The Flattening'']], these [[item]]s' numeral IDs were 358 and 395.
|Maps now use additional NBT to specify which map they contain. Prior to this version, they used the [[damage]] value instead.
|Map IDs are no longer limited to 32,768.}}
{{History|||snap=17w50a|Maps can now be placed on floor and ceiling [[item frame]]s.}}
{{History|||snap=18w10a|Spots on maps can now be marked using [[banner]]s.}}
{{History|||snap=18w11a|Empty maps can now generate in [[shipwreck]] [[chest]]s.}}
{{History|||snap=pre7|Maps have been changed slightly, in regard to which [[block]]s are shown and which blocks are not.}}
{{History||1.14|snap=18w43a|[[File:Empty Map JE2 BE2.png|32px]] [[File:Map (item) JE2 BE2.png|32px]] The textures of maps have been changed.}}
{{History|||snap=18w48a|Empty maps can now be found in chests in [[village]] cartographer houses.}}
{{History|||snap=19w02a|Maps can now be cloned and zoomed out (extended) by using a [[cartography table]].
|Maps can now be locked by using a [[glass pane]] with a cartography table.
|The recipes for cloning and zooming out maps have been removed.}}
{{History|||snap=19w06a|Map making is now silent again.}}
{{History|||snap=19w13a|Cartographer villagers now give empty maps to players under the [[Hero of the Village]] effect.}}
{{History||1.16|snap=20w21a|Map making sounds are now the same as when using a cartography table.}}
{{History|pocket alpha}}
{{History||v0.14.0|snap=build 1|[[File:Empty Map JE1 BE1.png|32px]] [[File:Map (item) JE1 BE1.png|32px]] Added maps.
|Maps are crafted using nine [[paper]], one for every slot of the [[crafting]] grid.
|Maps must be combined with a [[compass]] using an [[anvil]] in order to show the [[player]]'s position.
|Maps can be zoomed using an anvil.}}
{{History|||snap=build 3|New maps are now [[crafting|crafted]] at full zoom.
|Empty maps now have a "Create Map" button to initialize them.}}
{{History|||snap=build 7|New maps are now crafted at a scale factor of 1:1.}}
{{History||v0.15.0|snap=unknown|Maps can now be crafted either with 8 pieces of [[paper]] and a [[compass]] ''or'' 9 pieces of paper, to get a map with or without a position marker.}}
{{History||v0.16.0|snap=build 1|Different colors have been added to maps for different [[biome]]s.}}
{{History|pocket}}
{{History||1.0.0|snap=?|[[Windows 10 Edition]] can now use the [[anvil]] as well as the [[crafting table]] to clone, zoom and apply markers, just as [[Pocket Edition]] in general could.
|Maps can now be found inside [[stronghold]] library [[chest]]s.}}
{{History||1.1.0|snap=alpha 1.1.0.0|Empty maps with direction markers built-in are now called "locator maps".}}
{{History|||snap=alpha 1.1.0.3|"Locator maps" are now called "empty locator maps".
|Empty maps are now [[trading|sold]] by cartographer [[villager]]s for 7-11 [[emerald]]s as their tier 3 [[trading|trade]].}}
{{History|bedrock}}
{{History||1.4.0|snap=beta 1.2.14.2|Maps can now be found inside map room [[chest]]s in [[shipwreck]]s.}}
{{History||?|The texture of the filled map overlay has been changed.}}
{{History||?|Maps now function in dimensions other than the dimension in which they were created.}}
{{History||1.10.0|snap=beta 1.10.0.3|Maps can now be found in cartographer house [[chest]]s in [[village]]s.
|[[File:Empty Map JE2 BE2.png|32px]] The texture of empty maps has been changed.}}
{{History||1.11.0|snap=beta 1.11.0.1|Empty maps can now be created from 1 [[paper]] in [[cartography table]]s.
|Maps can now be zoomed, cloned, renamed, and have pointers added in cartography tables.}}
{{History|||snap=beta 1.11.0.4|Cartographer [[villager]]s now [[trading|sell]] empty map for an [[emerald]] as their first tier [[trading|trades]].
|Empty locator maps can now be [[trading|bought]] from cartographer villagers.}}
{{History||1.13.0|snap=beta 1.13.0.1|[[File:Map (item) BE3.png|32px]] [[File:Locked Map (item) BE2.png|32px]] Filled maps and locked maps now have unique inventory icons.}}
{{History||1.16.0|snap=beta 1.16.0.57|Trading has been changed, novice-level cartographer now sell an empty map for 7 emeralds. Cartographer villager no longer sell empty locator map.}}
{{History||1.16.100|snap=beta 1.16.100.56|The ID of maps have been changed from <code>emptymap</code> to <code>empty_map</code> and <code>map</code> to <code>filled_map</code>.}}
{{History|console}}
{{History||xbox=TU1|xbone=CU1|ps=1.00|wiiu=Patch 1|switch=1.0.1|[[File:Map (item) JE1 BE1.png|32px]] Added maps.
|The [[player]] spawns with a free map.
|Maps are available only as zoom step 3 maps centered at coordinates 0,0. Biome colors do not appear on maps.}}
{{History||xbox=none|xbone=CU1|ps=1.0|wiiu=none|Larger sized worlds on Xbox One, Playstation 4, and Nintendo Switch have zoom step 3 maps aligned to a grid with maps centered at 0, 1024, or 2048 on the X or Z coordinates.}}
{{History||xbox=TU21|xbone=CU9|ps=1.14|wiiu=Patch 1|[[File:Empty Map JE1 BE1.png|32px]] [[Crafting]] a map now produces an empty map.}}
{{History||xbox=TU46|xbone=CU36|ps=1.38|wiiu=Patch 15|The outer end islands appear on different maps; even on Xbox 360, Playstation 3, Vita, and Wii U editions.}}
{{History||xbox=none|xbone=none|ps=1.90|wiiu=none|switch=none|[[File:Empty Map JE2 BE2.png|32px]] [[File:Map (item) JE2 BE2.png|32px]] The textures of maps have been changed.}}
{{History||ps=1.91|Maps can now be created and used in [[cartography table]]s.}}
{{History|foot}}
== Issues ==
{{issue list}}
== Trivia ==
* Use of the {{key|F1}} key can allow the player to hold a map without blocking their view at all.
* In ''Java Edition'', a map created using {{cmd|give}} can be any map by using the Map parameter to specify the map number desired. E.g. {{cmd|give [player] minecraft:filled_map{map:5<nowiki>}}} gives the specified player map_5. If no data value is supplied it defaults to map_0. If map_0 has not ever been crafted, it is centered on x=0, z=0.
* The maps are stored separately as their own data (<code>.dat</code>) file as <code>map_x.dat</code> with (x) being the map number, see [[map item format]] for more info. By manipulating this number, players can organize their maps to suit them, or if they accidentally create a map in the same location, they can delete their extra map so as to save the number they make.
* Certain programs can be used to make customized maps with images or text on them instead of actual maps, many people use these in adventure maps to show pictures or to tell a story.
* Since all copies of a map are links to the same file, copying an unfinished map keeps it synchronized with the copy as the player fills it in. Thus, a copy stored in a chest can act as a remote backup.
* A map that is in an item frame does not update itself until a player picks it up, lets it reload, and places it back again. However, if a player holds a clone of the map, both maps update.
* Filled maps are the only items that make 90 degree rotations in item frames, and also the only items that can expand the item frame into full block wide.
* On [[Legacy Console Edition]], the player always spawns with a map in their inventory after creating a world. This was later added to Bedrock Edition as an optional feature in the world creation menu.
* Maps on Legacy Console Edition always show the player's current coordinates, as a substitute for the optional [[Coordinates|coordinate display]] in other editions.
* A map cannot be created on [[New Nintendo 3DS Edition]]. Instead, the map is always displayed on the bottom screen along with the coordinates. Biome colors do not appear on maps.
== Gallery ==
<gallery>
MapItem1.png|A fully zoomed map.
MapRotation.png|Having a map in hand does not stop the ability to see ahead.
MapItem3.png|A world being recorded onto a map.
Mcmap4.png|Nearly fully explored map.
Zoomed Map.png|A map edited to the scale of 1.
Sky Map.png|A map mapping the [[Sky Dimension]].
MapOfVillage.png|A village and how it is represented on a map.
Pumpkin map.png|A map containing a custom image made by placing a large number of blocks.
Complete Map.png|A completely explored map.
MapZooms.png|A diagram showing how maps zoomed out before [[Java Edition 1.8]]. Notice how the larger maps have borders made of half and quarter small maps.
Map18zooms.png|From 1.8, zoomed maps are aligned to this grid exactly.
Large Biome Map.png|A map of a [[Large Biomes]] world.
Map0140-0160.png|A comparison of maps between versions in Pocket Edition Alpha [[Pocket Edition Alpha 0.14.0|0.14.0]] and [[Pocket Edition Alpha 0.16.0|0.16.0]].
Mycelium Map.png|A map view of a mushroom biome, showing that mycelium appears purple on a map.
MiniMap.png|Maps held in the off-hand or in either hand while [[dual wielding]] appear as mini-maps.
Partly filled treasure map.png|Partly filled treasure map with an odd area at the bottom left. Normally a partly filled map would look striped (as in the top left), but this map seems to be bugged and is possibly showing caves, or something, in the bottom left.
Partly filled ocean explorer map.png|Partly filled ocean explorer map. Updating the game from an older version (in this case the area was first generated before 1.18) and buying a map after updating (in this case in 1.19.4) can result in the map displaying rivers and terrain where there is really a frozen sea.
Map Stained Glass 1.png|Stained glasses' appearances on maps before and after 1.13.
Map Stained Glass 2.png|Stained glasses' appearances on maps before and after 1.13.
Map Various Blocks 1.png|Various blocks' appearances on maps before and after 1.13.
Map Various Blocks 2.png|Various blocks' appearances on maps before and after 1.13.
Better Together Map.jpg|Holding a map in the offhand in ''Bedrock Edition''.
Better Together Map Icon.jpg|Holding a map in both hands in ''Bedrock Edition''.
File:MapFailedtoFill.png|A map that has not yet filled. A rare bug in Java.
</gallery>
=== The Nether ===
<gallery>
Nethermap.png|A map in [[the Nether]].
Maponnether.png|A map in the Nether; the arrow turns around itself, like in [[compass]].
</gallery>
=== The End ===
<gallery>
Jeb End Map.png|The first image of a map in [[the End]].
Endmap.png|A map in the End.
</gallery>
=== Maps in item frames ===
<gallery>
FramedMap.png|A map displayed on an item frame, as it looked before [[Java Edition 1.7.2]].
Structure Map Collection.png|Multiple maps in item frames. Notice a [[village]], two [[desert temple]]s and a lava lake.
Minecraft maps 3by3.png|A collection of 9 connected full maps.
Full Map.png|A combination of 25 maps pasted together as one map.
Map wall BE.png|A map wall on ''Bedrock Edition'', showing large areas of biome colors for each biome.
Map's in item frames.png|Maps can be placed into [[item frame]]s so they can be viewed together.
Comparing Maps.png|The comparison between 3 zooms of maps.
SuperflatMap.png|A map in a [[Superflat]] world, with some [[village]]s.
MapWallWithMarkers.png|A 3x3 map wall with banner markers.
HEYYEYAAEYAAAEYAEYAA.png|He-Man map art.
Map Player Icons 1.png|First image of player icons on maps.
Map Player Icons 2.png|Second image of player icons on maps.
</gallery>
== See also ==
* [[Explorer Map]]
* [[Clock]]
* [[Tutorials/Navigation|Navigation]]
== References ==
{{Reflist}}
{{Items}}
[[cs:Mapa]]
[[de:Karte]]
[[es:Mapa]]
[[fr:Carte (objet)]]
[[hu:Térkép (tárgy)]]
[[ja:地図]]
[[ko:지도]]
[[nl:Kaart]]
[[pl:Mapa]]
[[pt:Mapa]]
[[ru:Карта]]
[[tr:Harita]]
[[th:แผนที่]]
[[uk:Мапа]]
[[zh:地图]]
[[Category:Renewable resources]]</li></ul></nowiki> | 15w46a | Rabbits are now smaller. | |||
| The drop chance of rabbit's foot from rabbits has been increased from 2.5% to a 10% chance. | |||||
| Rabbits no longer spawn in all "usual" passive mob biomes. The groups are smaller and rare (weight 4 out of 44–52 rather than 10 out of 50–58). | |||||
| The speed of rabbits has been increased when they're panicking. | |||||
| Rabbits now avoid all players within 8 blocks and most hostile mobs within 4 blocks. | |||||
| The rabbit's avoidance range for wolves has been reduced from 16 blocks. | |||||
| Rabbits no longer prefer begging for food to mating. | |||||
| The health of rabbits has been reduced from 10 | |||||
| The speed of rabbits has been generally increased. | |||||
| The skins of rabbits now depend on their spawning biome. There is now a 5% chance a bred baby matches the biome rather than the parents. | |||||
The crop eating of rabbits is now less destructive (used to completely destroy the crop block regardless of growth), but MoreCarrotTicks is now reduced and ignored. | |||||
| 15w47b | Added killer rabbit attack sounds. | ||||
1.11{{Extension DPL}}<ul><li>[[Glistering Melon Slice|Glistering Melon Slice]]<br/>{{Item
| image = Glistering Melon Slice.png
| renewable = Yes
| stackable = Yes (64)
}}
A '''glistering melon slice'''{{fn|Known as '''Glistering Melon Slice''' {{in|java}} and '''Glistering Melon''' {{in|bedrock}}.}} is an inedible [[item]] used for brewing [[potion]]s of [[Healing]]. It is also one of the many potion ingredients that can be used to make mundane potions.
== Obtaining ==
=== Chest loot ===
{{LootChestItem|glistering-melon-slice}}
=== Crafting ===
{{Crafting
|A1= Gold Nugget
|B1= Gold Nugget
|C1= Gold Nugget
|A2= Gold Nugget
|B2= Melon Slice
|C2= Gold Nugget
|A3= Gold Nugget
|B3= Gold Nugget
|C3= Gold Nugget
|Output= Glistering Melon Slice
|type= Brewing
}}
=== Trading ===
Master-level farmer [[villager]]s sell 3 glistering melon for 4 [[emerald]]s.
== Usage ==
Despite being crafted with a [[melon slice]], a glistering melon slice cannot be eaten, unlike a [[golden apple]] or [[golden carrot]].
=== Brewing ingredient ===
{{Brewing
|head=1
|Glistering Melon Slice
|Mundane Potion
|base=Water Bottle
}}
{{Brewing
|Glistering Melon Slice
|Potion of Healing
|foot=1}}
===Piglins===
[[Piglin]]s are attracted to glistering melon slices. They run toward any glistering melon slice on the ground, and inspect it for 6 to 8 seconds before putting it in their inventory.
== Achievements ==
{{load achievements|Oooh, shiny!}}
== Advancements ==
{{load advancements|Oh Shiny}}
== Data values ==
=== ID ===
{{edition|java}}:
{{ID table
|edition=java
|showforms=y
|generatetranslationkeys=y
|displayname=Glistering Melon Slice
|spritetype=item
|nameid=glistering_melon_slice
|form=item
|foot=1}}
{{edition|bedrock}}:
{{ID table
|edition=bedrock
|showaliasids=y
|shownumericids=y
|showforms=y
|notshowbeitemforms=y
|generatetranslationkeys=y
|displayname=Glistering Melon
|spritetype=item
|nameid=glistering_melon_slice
|aliasid=speckled_melon
|id=434
|form=item
|translationkey=item.speckled_melon.name
|foot=1}}
== History ==
{{History|java}}
{{History||1.0.0|snap=Beta 1.9 Prerelease 4|[[File:Glistering Melon Slice JE1 BE1.png|32px]] Added glistering melons.
|The [[crafting]] recipe of glistering melons is one [[melon slice]] and one [[gold nugget]].
|Glistering melons have replaced [[ghast tear]]s as the ingredient to produce [[potions of Healing]] due to the difficulty in getting tears.<ref>{{tweet|jeb_|123671273904680960}}</ref> They also now brew with [[water bottle]]s to create [[mundane potion]]s.}}
{{History||1.6.1|snap=13w23a|The [[crafting]] recipe of glistering melons is changed from one [[gold nugget]] to eight.}}
{{History||1.9|snap=15w49a|[[File:Glistering Melon Slice JE2.png|32px]] The rotation of glistering melon [[item]]s has been changed to be consistent with [[melon slice]]s.<ref>{{bug|MC-85963}}</ref>}}
{{History|||snap=15w49b|[[File:Glistering Melon Slice JE1 BE1.png|32px]] The rotation of glistering melons has been reverted and is no longer consistent with melon slices.}}
{{History||1.13|snap=17w47a|Prior to [[1.13/Flattening|''The Flattening'']], this [[item]]'s numeral ID was 382.}}
{{History|||snap=18w20b|"Glistering Melon" has been renamed to "Glistering Melon Slice".
|The ID of glistering melon slices has been changed from <code>speckled_melon</code> to <code>glistering_melon_slice</code>.}}
{{History||1.14|snap=18w43a|[[File:Glistering Melon Slice JE3 BE2.png|32px]] The texture of glistering melon slices has been changed.}}
{{History|||snap=19w11a|Farmer [[villager]]s now [[trading|sell]] glistering melon slices.}}
{{History||1.16|snap=20w09a|Glistering melon slices are now admired by [[piglin]]s.<ref>{{bug|MC-172363}}</ref>}}
{{History|||snap=20w16a|Glistering melon slices now generate in [[ruined portal]] chests.}}
{{History|pocket alpha}}
{{History||v0.12.1|snap=build 1|[[File:Glistering Melon Slice JE1 BE1.png|32px]] Added glistering melons.}}
{{History|bedrock}}
{{History||1.10.0|snap=beta 1.10.0.3|[[File:Glistering Melon Slice JE3 BE2.png|32px]] The texture of glistering melons has been changed.}}
{{History||1.11.0|snap=beta 1.11.0.4|Glistering melons can now be [[trading|bought]] from farmer [[villager]]s.}}
{{History||1.13.0|snap=beta 1.13.0.9|[[Trading]] has been changed. Master-level farmer villagers now have a {{frac|1|3}} chance to [[trading|sell]] glistering melon slices.}}
{{History||1.16.0|snap=beta 1.16.0.57|Glistering melons are [[trading|sold]] from farmer villagers under a 50% chance, once again.
|Glistering melons now generate in [[ruined portal]] chests.}}
{{History||1.16.100|snap=beta 1.16.100.54|[[Ruined Portal]]s can now generate with 4–12 glistering melons instead of only one.}}
{{History|||snap=beta 1.16.100.56|The ID of glistering melon slices has been changed from <code>speckled_melon</code> to <code>glistering_melon_slice</code>.}}
{{History|console}}
{{History||xbox=TU7|xbone=CU1|ps=1.0|wiiu=Patch 1|[[File:Glistering Melon Slice JE1 BE1.png|32px]] Added glistering melons.}}
{{History||xbox=none|xbone=none|ps=1.90|wiiu=none|switch=none|[[File:Glistering Melon Slice JE3 BE2.png|32px]] The texture of glistering melons has been changed.}}
{{History|New 3DS}}
{{History||0.1.0|[[File:Glistering Melon Slice JE1 BE1.png|32px]] Added glistering melons.}}
{{History|foot}}
== Issues ==
{{issue list}}
== See also ==
* [[Melon Slice]]
* [[Melon]]
== Notes ==
{{fnlist}}
== References ==
{{reflist}}
{{Items}}
[[Category:Renewable resources]]
[[cs:Zlatavý kousek melounu]]
[[de:Glitzernde Melonenscheibe]]
[[es:Rodaja de sandía reluciente]]
[[fr:Tranche de pastèque scintillante]]
[[hu:Ragyogó dinnye]]
[[ja:きらめくスイカの薄切り]]
[[ko:반짝이는 수박 조각]]
[[nl:Glinsterende meloenschijf]]
[[pl:Błyszczący arbuz]]
[[pt:Fatia de melancia reluzente]]
[[ru:Сверкающий ломтик арбуза]]
[[uk:Блискуча скибка кавуна]]
[[zh:闪烁的西瓜片]]</li><li>[[Torchflower Seeds|Torchflower Seeds]]<br/>{{wip}}
{{Block
| image = <gallery>
Torchflower Age 0.png| Age 0
Torchflower Age 1.png| Age 1
Torchflower Age 2.png| Age 2
</gallery>
| image2 = Torchflower Seeds JE1.png
| transparent = Yes
| light = No
| tool = N/A
| renewable = Yes
| stackable = Yes (64)
| rarity = Common
|flammable=No
|lavasusceptible=No
}}
'''Torchflower seeds''' are seeds that have a chance to be dropped by [[Sniffer|sniffers]] when they finish digging.
== Obtaining ==
[[Sniffer]]s will occasionally bury their nose in the ground and start digging. Once the sniffer has finished digging, one torchflower seed will have a chance to be dropped on the floor as an item.
Sniffers can only dig for torchflower seeds in the following blocks:
*{{BlockLink|Dirt}}
*{{BlockLink|Grass Block}}
*{{BlockLink|Podzol}}
*{{BlockLink|Coarse Dirt}}
*{{BlockLink|Rooted Dirt}}
*{{BlockLink|Moss Block}}
*{{BlockLink|Mud}}
*{{BlockLink|Muddy Mangrove Roots}}
They cannot dig for torchflower seeds on [[mycelium]], which is intended.<ref>{{bug|MC-260259||Sniffers cannot dig nor find seeds on mycelium|WAI}}</ref>
== Usage ==
=== Crop ===
{{main|Tutorials/Crop farming|title1=Crop farming}}
Torchflower seeds can be {{control|placed}} on [[farmland]], where they grow through three stages. Breaking the torchflower crop before it matures drops the seed, while breaking the final stage produces one [[torchflower]] and does not yield the seed.
Crops break if pushed by a [[piston]] or if their supporting farmland breaks or turns to dirt (i.e. by being trampled), dropping their usual drops.
Farmer [[villager]]s can plant torchflower seeds, but cannot harvest them after they have fully grown.<ref>{{bug|MC-263382|||WAI}}</ref>
=== Feeding ===
Torchflower seeds can be used to breed [[sniffer]]s and [[chicken]]s and reduce the remaining growth duration of snifflets and chicks by 10%. Also, if some torchflower seeds were fed to an injured sniffer, it will heal it by {{hp|2}} health points.
=== Taming ===
Torchflower seeds can be used to tame [[parrot]]s.
=== Composting ===
Placing torchflower seeds into a [[composter]] has a 30% chance of raising the compost level by 1.
== Sounds ==
{{Sound table/Block/Crop}}
== Data values ==
=== ID ===
{{edition|java}}:
{{ID table
|edition=java
|showblocktags=y
|showitemtags=y
|showforms=y
|generatetranslationkeys=y
|displayname=Torchflower Crop
|spritetype=block
|nameid=torchflower_crop
|form=block
|blocktags=bee_growables, crops}}
{{ID table
|displayname=Torchflower Seeds
|spritetype=item
|nameid=torchflower_seeds
|form=item
|itemtags=villager_plantable_seeds
|foot=1}}
{{edition|bedrock}}:
{{ID table
|edition=bedrock
|shownumericids=y
|showforms=y
|generatetranslationkeys=y
|displayname=Torchflower Crop
|spritetype=block
|nameid=torchflower_crop
|id=-567
|form=block
|translationkey=-}}
{{ID table
|displayname=Torchflower Seeds
|spritetype=item
|nameid=torchflower_seeds
|id=296
|form=item
|foot=1}}
=== Block states ===
{{see also|Block states}}
{{/BS}}
== Achievements ==
{{Load achievements|Planting The Past}}
== Advancements ==
{{load advancements|A Seedy Place;Planting The Past;Little Sniffs}}
== History ==
{{History|java}}
{{History||1.20<br>(Experimental)|link=1.19.4|snap=23w07a|[[File:Torchflower Seeds JE1.png|32px]] Added torchflower seeds behind the [[Java Edition 1.20|Update 1.20 experimental datapack]].}}
{{History|||snap=1.19.4 Pre-release 1|Torchflower seeds can now be used to breed [[chicken]]s and tame [[parrot]]s.<ref>{{bug|MC-260035|||Fixed}}</ref>|Torchflower seeds are now next to other seeds in the [[Creative inventory]].|Placing torchflower seeds in farmland now gives the player the "A Seedy Place" [[advancement]].}}
{{History||1.20|snap=23w12a|[[Sniffer]]s can now be obtained in Survival, making torchflower seeds [[renewable]].|Torchflower seeds are now available without using the "Update 1.20" experimental datapack.}}
{{History|||snap=23w14a|Torchflower seeds can now be picked up by farmer [[villager]]s.|[[Sniffer]]s can now be tempted with torchflower seeds.}}
{{History|||snap=23w16a|[[Villager]]s can now plant torchflower seeds.}}
{{History|||snap=23w17a|The player now get the [[advancement]] "Little sniffs" when they feed a [[snifflet]] using torchflower seeds, "Planting the past" when they plant torchflower seeds on [[farmland]].}}
{{History|bedrock}}
{{History||Sniffer<br>(Experimental)|link=Bedrock Edition 1.19.70|snap=beta 1.19.70.23|[[File:Torchflower Seeds JE1.png|32px]] Added torchflower seeds behind the "[[Bedrock Edition 1.20.0|Sniffer]]" [[experimental]] toggle.}}
{{History||1.20.0|snap=beta 1.20.0.20|Torchflower seeds are now available without using the "Sniffer" experimental toggle.}}
{{History|foot}}
== Issues ==
{{issue list}}
== Trivia ==
* The final growth stage of the torchflower crop uses the same ID as the actual torchflower. This causes some side effects, such as the plant becoming offset and randomly jumping to the side.<ref>{{bug|MC-260472|resolution=wai}}</ref>
== Gallery ==
<gallery>
Torchflower Seeds stages.png|All the growth stages of torchflower seeds.
</gallery>
== Notes ==
{{notelist}}
== References ==
{{reflist}}
{{Blocks|upcoming}}
{{Items}}
[[Category:Plants]]
[[Category:Non-solid blocks]]
[[de:Fackelliliensamen]]
[[es:Semillas de plantorcha]]
[[ja:トーチフラワーの種]]
[[pt:Sementes de plantocha]]
[[zh:火把莲种子]]</li></ul> | 16w32a | The entity ID of rabbits has been changed from Rabbit to rabbit. | |||
1.14{{Extension DPL}}<ul><li>[[Green Dye|Green Dye]]<br/>{{redirect|Cactus Green|the plant|Cactus}}{{Item
| title = Green Dye
| renewable = Yes
| stackable = Yes (64)
}}
'''Green dye''' is a [[primary color dye]].
== Obtaining ==
=== Chest loot ===
{{LootChestItem|green-dye}}
=== Smelting ===
{{Smelting
|head=1
|showdescription=1
|Cactus
|Green Dye
|1
|description={{only|Java}}<ref>{{bug|MC-210211||Smelting cactus gives too much experience since 1.13}}</ref>
}}
{{Smelting
|head=0
|showdescription=1
|Cactus
|Green Dye
|0,2
|description={{only|Bedrock}}
|foot=1
}}
=== Trading ===
[[Wandering trader]]s sell 3 green dye for an [[emerald]].
== Usage ==
{{dye usage}}
=== Crafting ingredient ===
{{crafting usage|ignore=Banner|continue=1}}
{{banner crafting usage}}
=== Loom ingredient ===
{{Banner loom usage|Green Dye}}
=== Trading ===
Expert level shepherd villagers have {{frac|1|6}} chance to buy 12 green dye for an emerald.{{only|bedrock}} Expert level shepherds have a {{frac|2|7}} chance to buy 12 green dye for 1 emerald.{{only|java}}
== Data values ==
=== ID ===
{{edition|java}}:
{{ID table
|edition=java
|showforms=y
|generatetranslationkeys=y
|displayname=Green Dye
|spritetype=item
|nameid=green_dye
|form=item
|foot=1}}
{{edition|bedrock}}:
{{ID table
|edition=bedrock
|showaliasids=y
|shownumericids=y
|showforms=y
|notshowbeitemforms=y
|generatetranslationkeys=y
|displayname=Green Dye
|spritetype=item
|nameid=green_dye
|aliasid=dye / 2
|id=397
|form=item
|translationkey=item.dye.green.name
|foot=1}}
== Video ==
<div style="text-align:center">{{yt|O4KVTPI4qIc}}</div>
== History ==
{{History|java beta}}
{{History||1.2|[[File:Green Dye JE1 BE1.png|32px]] Added cactus green, together with all other dyes.}}
{{History|java}}
{{History||1.3.1|snap=1.3|[[File:Green Dye JE2 BE2.png|32px]] The texture of cactus green has been changed.}}
{{History||1.4.2|snap=12w34a|Added the ability to [[Armor#Dyeing|dye]] leather [[armor]] and [[wolf]] collars.}}
{{History||1.4.6|snap=12w49a|Cactus green can be crafted with [[gunpowder]] to create a [[firework star]].}}
{{History||1.6.1|snap=13w19a|[[Stained clay]] can now be [[crafting|crafted]].}}
{{History||1.7.2|snap=13w41a|[[Stained glass]] can now be crafted.}}
{{History||1.8|snap=14w30a|Added [[banner]]s, which can be dyed.}}
{{History||1.11|snap=16w39a|Added the ability to dye [[shulker box]]es.}}
{{History||1.12|snap=17w06a|Cactus green can now be used to craft green [[concrete powder]].}}
{{History||1.12|snap=17w15a|Added the ability to dye [[bed]]s.}}
{{History||1.13|snap=17w47a|The different data values for the <code>dye</code> ID have now been split up into their own IDs.
|Prior to [[1.13/Flattening|''The Flattening'']], this [[item]]'s numeral ID was 351.}}
{{History||1.14|snap=18w43a|"Cactus Green" has been renamed to "Green Dye".
|[[File:Green Dye JE3 BE3.png|32px]] The texture of green dye has been changed.}}
{{History|||snap=18w44a|Green dye can now change the text color on [[sign]]s to green.}}
{{History|||snap=18w50a|Green dye can now be found in [[chest]]s in [[desert]] [[village]] houses.}}
{{History|||snap=19w05a|Added the [[wandering trader]], which sells green dye.}}
{{History|||snap=19w11a|Green dye can now be [[trading|bought]] by shepherd villagers.}}
{{History||1.17|snap=20w45a|Green dye can now be used to craft [[green candle]]s.}}
{{History|||snap=21w19a|Green dye can no longer be used to craft green candles.}}
{{History|||snap=Pre-release 1|Green dye can once again be used to craft green candles.}}
{{History||1.20<br>(Experimental)|link=1.19.3|snap=22w42a|Green dye can now change the text color on [[hanging sign]]s to green.}}
{{History|pocket alpha}}
{{History||v0.3.0|[[File:Green Dye JE1 BE1.png|32px]] Added cactus green. It is currently unobtainable and has no usage.}}
{{History||v0.3.2|Cactus green is now obtainable by [[smelting]] cacti in a [[furnace]]. It still has no usage.}}
{{History||v0.4.0|Cactus green can now be used to craft [[cyan dye]], [[lime dye]], and [[green wool]].}}
{{History||v0.8.0|snap=build 1|[[File:Green Dye JE2 BE2.png|32px]] The texture of cactus green has been changed.}}
{{History||v0.14.0|snap=build 1|Cactus green can now be used to dye [[water]] in [[cauldron]]s.}}
{{History|pocket}}
{{History||1.0.0|snap=alpha 0.17.0.1|Cactus green can now be used to dye [[shulker]]s.}}
{{History||1.1.0|snap=alpha 1.1.0.0|Cactus green can now be used to dye [[bed]]s, [[shulker box]]es, and craft [[concrete powder]].}}
{{History|bedrock}}
{{History||1.2.0|snap=beta 1.2.0.2|Cactus green can now be used to craft [[stained glass]], patterns on [[banner]]s, and [[firework star]]s.}}
{{History||1.4.0|snap=beta 1.2.20.1|Cactus green can now be used to craft [[balloon]]s and [[glow stick]]s.}}
{{History||1.8.0|snap=beta 1.8.0.10|"Cactus Green" has been renamed to "Green Dye".}}
{{History||1.10.0|snap=beta 1.10.0.3|Green dye is now sold by [[wandering trader]]s.
|[[File:Green Dye JE3 BE3.png|32px]] The texture of green dye has been changed.}}
{{History||1.11.0|snap=beta 1.11.0.1|Green dye can now be found in [[desert]] [[village]] house [[chest]]s.}}
{{History|||snap=beta 1.11.0.4|Green dye can now be [[trading|sold]] to shepherd [[villager]]s.}}
{{History||1.16.100|snap=beta 1.16.100.56|The ID of green dye has been changed from <code>dye/2</code> to <code>green_dye</code>.}}
{{History|console}}
{{History||xbox=TU1|xbone=CU1|ps=1.00|wiiu=Patch 1|[[File:Green Dye JE1 BE1.png|32px]] Added cactus green.}}
{{History|PS4}}
{{History||1.83|"Cactus Green" has been renamed to "Green Dye".}}
{{History||1.90|[[File:Green Dye JE3 BE3.png|32px]] The texture of green dye has been changed.}}
{{History|new 3ds}}
{{History||0.1.0|[[File:Green Dye JE1 BE1.png|32px]] Added cactus green.}}
{{History|foot}}
== Issues ==
{{issue list}}
{{Items}}
[[cs:Kaktusová zeleň]]
[[de:Grüner Farbstoff]]
[[es:Tinte verde]]
[[fr:Teinture verte]]
[[hu:Kaktuszzöld]]
[[ja:緑色の染料]]
[[ko:초록색 염료]]
[[nl:Cactusgroen]]
[[pl:Zielony barwnik]]
[[pt:Corante verde]]
[[ru:Зелёный краситель]]
[[Category:Items]]
[[Category:Dyes]]
[[Category:Renewable resources]]</li><li>[[Pumpkin Seeds|Pumpkin Seeds]]<br/>{{Block
| image = <gallery>
Pumpkin Stem Age 0.png | Age 0
Pumpkin Stem Age 1.png | Age 1
Pumpkin Stem Age 2.png | Age 2
Pumpkin Stem Age 3.png | Age 3
Pumpkin Stem Age 4.png | Age 4
Pumpkin Stem Age 5.png | Age 5
Pumpkin Stem Age 6.png | Age 6
Pumpkin Stem Age 7.png | Age 7
</gallery>
|image2 = <gallery>
Attached Pumpkin Stem (N).png | North
Attached Pumpkin Stem (E).png | East
Attached Pumpkin Stem (S).png | South
Attached Pumpkin Stem (W).png | West
</gallery>
| transparent = Yes
| light = No
| tool = none
| renewable = Yes
| stackable = Yes (64)
| flammable = No
| lavasusceptible = No
}}
'''Pumpkin seeds''' are items obtained from pumpkins that can be used to grow pumpkin stems.
'''Pumpkin stems''' are plants grown on [[farmland]] that, over time, grow [[pumpkin]]s on dirt, mud and moss blocks adjacent to them.
== Obtaining ==
=== Breaking ===
When broken, a pumpkin stem drops 0–3 pumpkin seeds. The chance for pumpkin seeds to drop increases with the stem's age.
{| class="wikitable"
! rowspan="3" |[[Resource location]]
! rowspan="3" | Source
! colspan="4" | Default
|-
| colspan="1" rowspan="2" style="text-align:center" | Nothing || colspan="3" style="text-align:center" |{{ItemLink|Pumpkin Seeds|Pumpkin seeds}}
|-
| style="text-align:center" | 1 || style="text-align:center" | 2 || style="text-align:center" | 3
|-
| rowspan="8" |<code>blocks/pumpkin_stem</code>
|{{BlockLink|Pumpkin Stem|Pumpkin stem}} <code>age = 0</code>
| style="text-align:center" |81.3%|| style="text-align:center" |17.42%|| style="text-align:center" |1.24%|| style="text-align:center" |0.03%
|-
|{{BlockLink|Pumpkin Stem|Pumpkin stem}} <code>age = 1</code>
| style="text-align:center" |65.1%|| style="text-align:center" |30.04%|| style="text-align:center" |4.62%|| style="text-align:center" |0.24%
|-
|{{BlockLink|Pumpkin Stem|Pumpkin stem}} <code>age = 2</code>
| style="text-align:center" |51.2%|| style="text-align:center" |38.4%|| style="text-align:center" |9.6%|| style="text-align:center" |0.8%
|-
|{{BlockLink|Pumpkin Stem|Pumpkin stem}} <code>age = 3</code>
| style="text-align:center" |39.44%|| style="text-align:center" |43.02%|| style="text-align:center" |15.64%|| style="text-align:center" |1.9%
|-
|{{BlockLink|Pumpkin Stem|Pumpkin stem}} <code>age = 4</code>
| style="text-align:center" |29.13%|| style="text-align:center" |44.44%|| style="text-align:center" |22.22%|| style="text-align:center" |3.7%
|-
|{{BlockLink|Pumpkin Stem|Pumpkin stem}} <code>age = 5</code>
| style="text-align:center" |21.6%|| style="text-align:center" |43.2%|| style="text-align:center" |28.8%|| style="text-align:center" |6.4%
|-
|{{BlockLink|Pumpkin Stem|Pumpkin stem}} <code>age = 6</code>
| style="text-align:center" |15.17%|| style="text-align:center" |39.82%|| style="text-align:center" |34.84%|| style="text-align:center" |10.16%
|-
|{{BlockLink|Pumpkin Stem|Pumpkin stem}} <code>age = 7</code>
| style="text-align:center" |10.16%|| style="text-align:center" |34.84%|| style="text-align:center" |39.82%|| style="text-align:center" |15.17%
|-
| rowspan="1" |<code>blocks/attached_pumpkin_stem</code>
|{{BlockLink|Attached Pumpkin Stem|Attached Pumpkin stem}}
| style="text-align:center" |10.16%|| style="text-align:center" |34.84%|| style="text-align:center" |39.82%|| style="text-align:center" |15.17%
|}
=== Natural generation ===
Pumpkin stems generate naturally in stem farm rooms in [[woodland mansion]]s.
Pumpkin stems generate in [[taiga]] and [[snowy taiga]]{{only|be|short=1}} [[village]] farms.
=== Chest loot ===
{{LootChestItem|pumpkin-seeds}}
=== Crafting ===
{{Crafting
|Pumpkin
|Output= Pumpkin Seeds,4
|type= Material
}}
=== Trading ===
[[Wandering trader]]s sell pumpkin seeds for 1 [[emerald]].
=== Post-generation ===
Shearing an uncarved pumpkin yields 4 pumpkin seeds.
== Usage ==
=== Farming ===
{{see also|Tutorials/Pumpkin and melon farming}}
Pumpkin seeds can be planted only on [[farmland]], as stems. Over time, a stem grows through several stages{{Needs testing}} and, at its final growth stage, will produce [[pumpkin]]s on any adjacent [[dirt]], [[Coarse Dirt|coarse dirt]], [[Rooted Dirt|rooted dirt]], [[Grass Block|grass block]], [[farmland]], [[podzol]], [[mycelium]], [[Moss Block|moss block]], [[mud]] or [[Muddy Mangrove Roots|muddy mangrove roots]]. If a pumpkin is already occupying a spot adjacent to a stem it does not grow more pumpkins until the pumpkin is removed. A single stem can grow an unlimited number of pumpkins. Pumpkin stems need a minimum light level of 10 in the block above the stem to grow and give pumpkins. Pumpkin seeds are affected by [[bone meal]] only with respect to stem growth; bone meal does not help produce the actual pumpkins.
=== Breeding ===
Like other seeds, pumpkin seeds can be used to [[breed]] [[chicken]]s, lead chickens around, and make baby chickens grow up faster by 10% of the remaining time.
=== Taming ===
Like other seeds, pumpkin seeds can be used to tame [[parrot]]s.
=== Composting ===
Placing pumpkin seeds into a [[composter]] has a 30% chance of raising the compost level by 1.
== Pumpkin stem ==
A '''pumpkin stem''' is the block that is planted on [[farmland]] when pumpkin seeds are used on it. It starts underground, and rises up as the plant grows. The stem is colored green when young, and then yellow once fully grown.
The stem curves once a pumpkin has grown from it. A fully-grown single stem connects to any [[pumpkin]] in an adjacent square, thus there are 5 possible appearances to a stem. If there are multiple pumpkins it can connect to, it favors the east, then west, north, and south. When the pumpkin is removed, the stem returns to its straight shape.
== Sounds ==
{{Sound table/Block/Hard crop}}
== Data values ==
=== ID ===
{{edition|java}}:
{{ID table
|edition=java
|showblocktags=y
|showforms=y
|generatetranslationkeys=y
|displayname=Pumpkin Stem
|spritetype=block
|nameid=pumpkin_stem
|blocktags=bee_growables, crops
|form=block}}
{{ID table
|displayname=Attached Pumpkin Stem
|spritetype=block
|nameid=attached_pumpkin_stem
|form=block}}
{{ID table
|displayname=Pumpkin Seeds
|spritetype=item
|nameid=pumpkin_seeds
|form=item
|foot=1}}
{{edition|bedrock}}:
{{ID table
|edition=bedrock
|shownumericids=y
|showforms=y
|generatetranslationkeys=y
|displayname=Pumpkin Stem
|spritetype=block
|nameid=pumpkin_stem
|id=104
|form=block}}
{{ID table
|displayname=Pumpkin Seeds
|spritetype=item
|nameid=pumpkin_seeds
|id=292
|form=item
|foot=1}}
=== Block states ===
{{see also|Block states}}
{{/BS}}
== Advancements ==
{{load advancements|A Seedy Place}}
== History ==
{{info needed section|check if stems floated above farmland upon initial implementation}}
{{History|java beta}}
{{History||1.8|snap=Pre-release|[[File:Pumpkin Seeds JE1 BE1.png|32px]] Added pumpkin seeds.
|[[File:Pumpkin Stem Age 0 JE1.png|32px]] [[File:Pumpkin Stem Age 1 JE1.png|32px]] [[File:Pumpkin Stem Age 2 JE1.png|32px]] [[File:Pumpkin Stem Age 3 JE1.png|32px]] [[File:Pumpkin Stem Age 4 JE1.png|32px]] [[File:Pumpkin Stem Age 5 JE1.png|32px]] [[File:Pumpkin Stem Age 6 JE1.png|32px]] [[File:Pumpkin Stem Age 7 JE1.png|32px]] Added the pumpkin stem, with seven stages of growth.
|Pumpkin seeds can be found in the new [[mineshaft]] [[chest]]s.
|[[File:Attached Pumpkin Stem (N) JE1.png|32px]] [[File:Attached Pumpkin Stem (E) JE1.png|32px]] [[File:Attached Pumpkin Stem (S) JE1.png|32px]] [[File:Attached Pumpkin Stem (W) JE1.png|32px]] The pumpkin stem has four slightly visually distinct appearances for each facing direction - the bent part of the stem rotates, but the other two planes do not.
|[[File:Pumpkin Stem Age 8 JE1.png|32px]] [[File:Pumpkin Stem Age 9 JE1.png|32px]] [[File:Pumpkin Stem Age 10 JE1.png|32px]] [[File:Pumpkin Stem Age 11 JE1.png|32px]] [[File:Pumpkin Stem Age 12 JE1.png|32px]] [[File:Pumpkin Stem Age 13 JE1.png|32px]] [[File:Pumpkin Stem Age 14 JE1.png|32px]] [[File:Pumpkin Stem Age 15 JE1.png|32px]] Pumpkin stem data values from 8 through 15 now show a glitched formation, with a floating stem with an attached stem cross eventually emerging below.
|[[File:Attached Stem Age 8 JE1.png|32px]] [[File:Attached Stem Age 9 JE1.png|32px]] [[File:Attached Stem Age 10 JE1.png|32px]] [[File:Attached Stem Age 11 JE1.png|32px]] [[File:Attached Stem Age 12 JE1.png|32px]] [[File:Attached Stem Age 13 JE1.png|32px]] [[File:Attached Stem Age 14 JE1.png|32px]] [[File:Attached Stem Age 15 JE1.png|32px]] Pumpkin stem blocks with data values higher than 7 can attach to adjacent fruits, which results in buggy stem textures with [[vines]] in the mix due to vines being below attached stems in [[terrain.png]].}}
{{History|||snap=Pre-release 2 ;)|Pumpkin stems can now be grown faster using [[bone meal]].}}
{{History|java}}
{{History||1.0.0|snap=Beta 1.9 Prerelease 2|Pumpkins can now be [[crafting|crafted]] into [[pumpkin seeds]].}}
{{History||1.3.1|snap=1.3|The texture of pumpkin stems has been moved one pixel to the left in [[terrain.png]].
|[[File:Pumpkin Stem Age 0 JE2.png|32px]] [[File:Pumpkin Stem Age 1 JE2.png|32px]] [[File:Pumpkin Stem Age 2 JE2.png|32px]] [[File:Pumpkin Stem Age 3 JE2.png|32px]] [[File:Pumpkin Stem Age 4 JE2.png|32px]] [[File:Pumpkin Stem Age 5 JE2.png|32px]] [[File:Pumpkin Stem Age 6 JE2.png|32px]] [[File:Pumpkin Stem Age 7 JE2.png|32px]] Stems now appear slightly different.
|[[File:Pumpkin Stem Age 8 JE2.png|32px]] [[File:Pumpkin Stem Age 9 JE2.png|32px]] [[File:Pumpkin Stem Age 10 JE2.png|32px]] [[File:Pumpkin Stem Age 11 JE2.png|32px]] [[File:Pumpkin Stem Age 12 JE2.png|32px]] [[File:Pumpkin Stem Age 13 JE2.png|32px]] [[File:Pumpkin Stem Age 14 JE2.png|32px]] [[File:Pumpkin Stem Age 15 JE2.png|32px]] Overgrown attached pumpkin stems now appear slightly different.
|[[File:Attached Pumpkin Stem (N) JE2.png|32px]] [[File:Attached Pumpkin Stem (E) JE2.png|32px]] [[File:Attached Pumpkin Stem (S) JE2.png|32px]] [[File:Attached Pumpkin Stem (W) JE2.png|32px]] Attached pumpkin stems now appear slightly different.
|[[File:Attached Stem Age 8 JE2.png|32px]] [[File:Attached Stem Age 9 JE2.png|32px]] [[File:Attached Stem Age 10 JE2.png|32px]] [[File:Attached Stem Age 11 JE2.png|32px]] [[File:Attached Stem Age 12 JE2.png|32px]] [[File:Attached Stem Age 13 JE2.png|32px]] [[File:Attached Stem Age 14 JE2.png|32px]] [[File:Attached Stem Age 15 JE2.png|32px]] Overgrown attached pumpkin stems now appear slightly different.}}
{{History||1.4.2|snap=12w36a|[[Chicken]]s now use [[wheat seeds]], [[melon seeds]] and pumpkin seeds, instead of [[wheat]] to [[breeding|breed]].}}
{{History||1.5|snap=13w02a|[[File:Pumpkin Stem Age 0 JE3.png|32px]] [[File:Pumpkin Stem Age 1 JE3.png|32px]] [[File:Pumpkin Stem Age 2 JE3.png|32px]] [[File:Pumpkin Stem Age 3 JE3.png|32px]] [[File:Pumpkin Stem Age 4 JE3.png|32px]] [[File:Pumpkin Stem Age 5 JE3.png|32px]] [[File:Pumpkin Stem Age 6 JE3.png|32px]] Pumpkin stems now use a squished version of their texture for immature stems, depending on age.
|[[File:Pumpkin Stem Age 8 JE3.png|32px]] [[File:Pumpkin Stem Age 9 JE3.png|32px]] [[File:Pumpkin Stem Age 10 JE3.png|32px]] [[File:Pumpkin Stem Age 11 JE3.png|32px]] [[File:Pumpkin Stem Age 12 JE3.png|32px]] [[File:Pumpkin Stem Age 13 JE3.png|32px]] [[File:Pumpkin Stem Age 14 JE3.png|32px]] [[File:Pumpkin Stem Age 15 JE3.png|32px]] This also affects pumpkin stems of ages 8-15, which are likewise stretched to accommodate its predicted size.
|[[File:Attached Stem Age 8 JE3.png|32px]] [[File:Attached Stem Age 9 JE3.png|32px]] [[File:Attached Stem Age 10 JE3.png|32px]] [[File:Attached Stem Age 11 JE3.png|32px]] [[File:Attached Stem Age 12 JE3.png|32px]] [[File:Attached Stem Age 13 JE3.png|32px]] [[File:Attached Stem Age 14 JE3.png|32px]] [[File:Attached Stem Age 15 JE3.png|32px]] Pumpkin stems of extreme ages, which are attached to adjacent fruits, now show a stretched and tinted stem appearance.}}
{{History|||snap=13w03a|[[File:Pumpkin Stem Age 0 JE4.png|32px]] [[File:Pumpkin Stem Age 1 JE4.png|32px]] [[File:Pumpkin Stem Age 2 JE4.png|32px]] [[File:Pumpkin Stem Age 3 JE4.png|32px]] [[File:Pumpkin Stem Age 4 JE4.png|32px]] [[File:Pumpkin Stem Age 5 JE4.png|32px]] [[File:Pumpkin Stem Age 6 JE4.png|32px]] [[File:Pumpkin Stem Age 7 JE4.png|32px]] Pumpkin stems are no longer squished or stretched to account for age.<ref>{{bug|MC-7111}}</ref>
|[[File:Pumpkin Stem Age 8 JE4.png|32px]] [[File:Pumpkin Stem Age 9 JE4.png|32px]] [[File:Pumpkin Stem Age 10 JE4.png|32px]] [[File:Pumpkin Stem Age 11 JE4.png|32px]] [[File:Pumpkin Stem Age 12 JE4.png|32px]] [[File:Pumpkin Stem Age 13 JE4.png|32px]] [[File:Pumpkin Stem Age 14 JE4.png|32px]] [[File:Pumpkin Stem Age 15 JE4.png|32px]] Pumpkin stems with age values 8 through 15 now show a tinted [[trapdoor]] texture.
|From this version up until 14w08a, overgrown pumpkin stems start to draw from the texture below them on the [[texture atlas]], in much the same way they previously did with terrain.png. However, as texture atlases are unstable and textures tend to change positions as new blocks and textures are added, overgrown stems change the texture they draw from every time new textures are added, which includes when textures added by [[mods]].}}
{{History|||snap=13w09a|[[File:Pumpkin Stem Age 8 JE5.png|32px]] [[File:Pumpkin Stem Age 9 JE5.png|32px]] [[File:Pumpkin Stem Age 10 JE5.png|32px]] [[File:Pumpkin Stem Age 11 JE5.png|32px]] [[File:Pumpkin Stem Age 12 JE5.png|32px]] [[File:Pumpkin Stem Age 13 JE5.png|32px]] [[File:Pumpkin Stem Age 14 JE5.png|32px]] [[File:Pumpkin Stem Age 15 JE5.png|32px]] Pumpkin stems with age values 8 through 15 now show a tinted [[birch wood]] texture.}}
{{History||1.6.1|snap=13w24a|Melon and pumpkin stems have now been assigned separate textures.
|[[File:Pumpkin Stem Age 8 JE6.png|32px]] [[File:Pumpkin Stem Age 9 JE6.png|32px]] [[File:Pumpkin Stem Age 10 JE6.png|32px]] [[File:Pumpkin Stem Age 11 JE6.png|32px]] [[File:Pumpkin Stem Age 12 JE6.png|32px]] [[File:Pumpkin Stem Age 13 JE6.png|32px]] [[File:Pumpkin Stem Age 14 JE6.png|32px]] [[File:Pumpkin Stem Age 15 JE6.png|32px]] Pumpkin stems with age values 8 through 15 now show a tinted curving [[rail]] texture.}}
{{History||1.7.2|snap=13w37a|Added the {{cmd|setblock}} command, allowing for invalid pumpkin stem ages to be placed in the world without using external editors. This also allows them to be obtained in earlier versions via backdating.}}
{{History|||snap=13w41a|[[File:Pumpkin Stem Age 8 JE7.png|32px]] [[File:Pumpkin Stem Age 9 JE7.png|32px]] [[File:Pumpkin Stem Age 10 JE7.png|32px]] [[File:Pumpkin Stem Age 11 JE7.png|32px]] [[File:Pumpkin Stem Age 12 JE7.png|32px]] [[File:Pumpkin Stem Age 13 JE7.png|32px]] [[File:Pumpkin Stem Age 14 JE7.png|32px]] [[File:Pumpkin Stem Age 15 JE7.png|32px]] Pumpkin stems with age values 8 through 15 now show a tinted lit [[furnace]] texture.}}
{{History|||snap=13w43a|[[File:Pumpkin Stem Age 8 JE8.png|32px]] [[File:Pumpkin Stem Age 9 JE8.png|32px]] [[File:Pumpkin Stem Age 10 JE8.png|32px]] [[File:Pumpkin Stem Age 11 JE8.png|32px]] [[File:Pumpkin Stem Age 12 JE8.png|32px]] [[File:Pumpkin Stem Age 13 JE8.png|32px]] [[File:Pumpkin Stem Age 14 JE8.png|32px]] [[File:Pumpkin Stem Age 15 JE8.png|32px]] Pumpkin stems with age values 8 through 15 now show a tinted [[pumpkin]] top texture.}}
{{History||1.8|snap=14w10a|[[File:Pumpkin Stem Age 8 JE9.png|32px]] [[File:Pumpkin Stem Age 9 JE9.png|32px]] [[File:Pumpkin Stem Age 10 JE9.png|32px]] [[File:Pumpkin Stem Age 11 JE9.png|32px]] Pumpkin stems with data values 8-11 now display a tinted attached stem, with 8 facing west, 9 facing east, 10 facing north and 11 facing south.
|Invalid pumpkin stems with data values 12-15 now crash the game.}}
{{History|||snap=14w25a|[[File:Pumpkin Stem Age 0 JE5.png|32px]] [[File:Pumpkin Stem Age 1 JE5.png|32px]] [[File:Pumpkin Stem Age 2 JE5.png|32px]] [[File:Pumpkin Stem Age 3 JE5.png|32px]] [[File:Pumpkin Stem Age 4 JE5.png|32px]] [[File:Pumpkin Stem Age 5 JE5.png|32px]] [[File:Pumpkin Stem Age 6 JE5.png|32px]] [[File:Pumpkin Stem Age 7 JE5.png|32px]] Pumpkin stems now render as a single diagonal plane, or, in the case of attached stems, a diagonal and orthogonal plane.
|[[File:Attached Pumpkin Stem (N) JE3.png|32px]] [[File:Attached Pumpkin Stem (E) JE3.png|32px]] [[File:Attached Pumpkin Stem (S) JE3.png|32px]] [[File:Attached Pumpkin Stem (W) JE3.png|32px]] The attached pumpkin stem [[model]] now fully rotates to the direction the stem points. Prior to this update, the base of the pumpkin stem would stay the same while the long attaching section would differ, resulting in four possible attached stem appearances.
|Invalid overgrown pumpkin stems have now effectively been removed from the game, as attempting to place an out of range stem via {{cmd|setblock}} creates a stem of age 0 and loading a world with existing such stems cause a game crash.}}
{{History|||snap=14w26a|[[File:Pumpkin Stem Age 0 JE6.png|32px]] [[File:Pumpkin Stem Age 1 JE6.png|32px]] [[File:Pumpkin Stem Age 2 JE6.png|32px]] [[File:Pumpkin Stem Age 3 JE6.png|32px]] [[File:Pumpkin Stem Age 4 JE6.png|32px]] [[File:Pumpkin Stem Age 5 JE6.png|32px]] [[File:Pumpkin Stem Age 6 JE6.png|32px]] [[File:Pumpkin Stem Age 7 JE6.png|32px]] [[File:Attached Pumpkin Stem (N) JE4.png|32px]] [[File:Attached Pumpkin Stem (E) JE4.png|32px]] [[File:Attached Pumpkin Stem (S) JE4.png|32px]] [[File:Attached Pumpkin Stem (W) JE4.png|32px]] Pumpkin stems now correctly render as crosses again.<ref>{{bug|MC-58136}}</ref>}}
{{History|||snap=14w27a|[[File:Attached Stem Age 0 14w27a.png|32px]] [[File:Attached Stem Age 1 14w27a.png|32px]] [[File:Attached Stem Age 2 14w27a.png|32px]] [[File:Attached Stem Age 3 14w27a.png|32px]] [[File:Attached Stem Age 4 14w27a.png|32px]] [[File:Attached Stem Age 5 14w27a.png|32px]] [[File:Attached Stem Age 6 14w27a.png|32px]] Due to a bug, all pumpkin stems now appear attached regardless of age or any actual attachment.<ref>{{bug|MC-60208}}</ref>}}
{{History|||snap=14w28a|All pumpkin stems appearing attached regardless of the age of any actual attachment has been fixed. However, pumpkin stems still appear attached to adjacent fruits regardless of age due to a similar bug.<ref>{{bug|MC-61716}}</ref>}}
{{History|||snap=14w34d|Pumpkin seeds no longer can be used to breed [[chicken]]s.}}
{{History||1.9|snap=15w31a|Chickens can now use pumpkin seeds to [[breeding|breed]] again.}}
{{History|||snap=15w44a|Pumpkin seeds have been added to [[dungeon]] [[chest]]s.
|The average yield of pumpkin seeds in [[mineshaft]] chests has been decreased.}}
{{History|||snap=15w45a|Pumpkin stems must now be fully grown again to attach.}}
{{History||1.11|snap=16w39a|Pumpkin seeds are now found in the new [[woodland mansion]] chests.
|Pumpkin stems now generate inside [[woodland mansion]]s.}}
{{History||1.13|snap=17w47a|The different [[block]] states for the <code>pumpkin_stem</code> ID have been split up into their own IDs.
|Pumpkin seeds can now be obtained by [[shear]]ing an uncarved pumpkin.
|Prior to [[1.13/Flattening|''The Flattening'']], this [[block]]'s numeral ID was 104, and the [[item]]'s 361.}}
{{History|||snap=17w48a|Attached pumpkin stems no longer [[drops|drop]] seeds.}}
{{History||1.14|snap=18w43a|[[File:Pumpkin Stem Age 0 JE7.png|32px]] [[File:Pumpkin Stem Age 1 JE7.png|32px]] [[File:Pumpkin Stem Age 2 JE7.png|32px]] [[File:Pumpkin Stem Age 3 JE7.png|32px]] [[File:Pumpkin Stem Age 4 JE7.png|32px]] [[File:Pumpkin Stem Age 5 JE7.png|32px]] [[File:Pumpkin Stem Age 6 JE7.png|32px]] [[File:Pumpkin Stem Age 7 JE7.png|32px]] The stem texture has changed.
|[[File:Attached Pumpkin Stem (N) JE5.png|32px]] [[File:Attached Pumpkin Stem (E) JE5.png|32px]] [[File:Attached Pumpkin Stem (S) JE5.png|32px]] [[File:Attached Pumpkin Stem (W) JE5.png|32px]] The pumpkin stem texture change also affects the base cross on pumpkin stems.}}
{{History|||snap=18w50a|Pumpkin stems now generate in the updated [[taiga]] [[village]] farms.
|Pumpkin seeds can now be found in [[chest]]s in taiga village houses.}}
{{History|||snap=19w03a|Placing pumpkin seeds into the new [[composter]] has a 10% chance of raising the compost level by 1.}}
{{History|||snap=19w05a|Pumpkin seeds now have a 30% chance of increasing the compost level in a composter by 1.
|Added [[Wandering Trader|wandering trader]]s, which sell pumpkin seeds.}}
{{History||1.15|snap=19w34a|[[Bee]]s can now pollinate pumpkin stems.}}
{{History|||snap=19w39a|Attached pumpkin stems now [[drops|drop]] seeds again.<ref>{{bug|MC-136360}}</ref>}}
{{History|pocket alpha}}
{{History||v0.8.0|snap=build 1|[[File:Pumpkin Seeds JE1 BE1.png|32px]] Added pumpkin seeds.
|[[File:Pumpkin Stem Age 0 JE1.png|32px]] [[File:Pumpkin Stem Age 1 JE1.png|32px]] [[File:Pumpkin Stem Age 2 JE1.png|32px]] [[File:Pumpkin Stem Age 3 JE1.png|32px]] [[File:Pumpkin Stem Age 4 JE1.png|32px]] [[File:Pumpkin Stem Age 5 JE1.png|32px]] [[File:Pumpkin Stem Age 6 JE1.png|32px]] [[File:Pumpkin Stem Age 7 JE1.png|32px]] [[File:Attached Pumpkin Stem (N) JE1.png|32px]] [[File:Attached Pumpkin Stem (E) JE1.png|32px]] [[File:Attached Pumpkin Stem (S) JE1.png|32px]] [[File:Attached Pumpkin Stem (W) JE1.png|32px]]{{verify|Were these the models used by this edition?}} Added pumpkin stems.
|Pumpkin seeds are obtainable from the [[Nether reactor]].}}
{{History||v0.12.1|snap=build 1|Pumpkin seeds are no longer available from the Nether reactor.}}
{{History||v0.14.0|snap=build 1|Pumpkin seeds can now be found in [[minecart with chest]]s inside [[mineshaft]]s.}}
{{History|pocket}}
{{History||1.1.0|snap=alpha 1.1.0.0|Pumpkin stems now generate inside [[woodland mansion]]s.}}
{{History|bedrock}}
{{History||1.2.0|snap=beta 1.2.0.2|Pumpkin seeds are now used to tame [[parrot]]s.}}
{{History||1.4.0|snap=beta 1.2.13.8|Pumpkin seeds can now be obtained by [[shear]]ing an uncarved [[pumpkin]].}}
{{History||1.10.0|snap=beta 1.10.0.3|[[File:Attached Pumpkin Stem (W) JE5.png|32px]]{{info needed|More accurate image}} The texture of attached pumpkin stems has been changed.
|Pumpkin seeds can now be [[trading|bought]] from [[wandering trader]]s.
|A single pumpkin crop now generates in the new [[taiga]] and [[snowy taiga]] [[village]]s.}}
{{History||1.11.0|snap=beta 1.11.0.1|A single pumpkin seed can now be used to fill the [[composter]].
|Pumpkin seeds can now be found in [[taiga]] and [[snowy taiga]] [[village]] house [[chest]]s.}}
{{History|console}}
{{History||xbox=TU5|xbone=CU1|ps=1.0|wiiu=Patch 1|[[File:Pumpkin Seeds JE1 BE1.png|32px]] Added pumpkin seeds.
|[[File:Pumpkin Stem Age 0 JE1.png|32px]] [[File:Pumpkin Stem Age 1 JE1.png|32px]] [[File:Pumpkin Stem Age 2 JE1.png|32px]] [[File:Pumpkin Stem Age 3 JE1.png|32px]] [[File:Pumpkin Stem Age 4 JE1.png|32px]] [[File:Pumpkin Stem Age 5 JE1.png|32px]] [[File:Pumpkin Stem Age 6 JE1.png|32px]] [[File:Pumpkin Stem Age 7 JE1.png|32px]] [[File:Attached Pumpkin Stem (N) JE1.png|32px]] [[File:Attached Pumpkin Stem (E) JE1.png|32px]] [[File:Attached Pumpkin Stem (S) JE1.png|32px]] [[File:Attached Pumpkin Stem (W) JE1.png|32px]]{{verify|Were these the models used by this edition?}} Added pumpkin stems.}}
{{History||xbox=TU69|ps=1.76|wiiu=Patch 38|Pumpkin seeds can now be obtained by [[shear]]ing an uncarved [[pumpkin]].}}
{{History||xbox=none|xbone=none|ps=1.90|wiiu=none|switch=none|[[File:Attached Pumpkin Stem (W) JE5.png|32px]]{{info needed|More accurate image}} The texture of attached pumpkin stems has been changed.}}
{{History|New 3DS}}
{{History||0.1.0|[[File:Pumpkin Stem Age 0 JE1.png|32px]] [[File:Pumpkin Stem Age 1 JE1.png|32px]] [[File:Pumpkin Stem Age 2 JE1.png|32px]] [[File:Pumpkin Stem Age 3 JE1.png|32px]] [[File:Pumpkin Stem Age 4 JE1.png|32px]] [[File:Pumpkin Stem Age 5 JE1.png|32px]] [[File:Pumpkin Stem Age 6 JE1.png|32px]] [[File:Pumpkin Stem Age 7 JE1.png|32px]] [[File:Attached Pumpkin Stem (N) JE1.png|32px]] [[File:Attached Pumpkin Stem (E) JE1.png|32px]] [[File:Attached Pumpkin Stem (S) JE1.png|32px]] [[File:Attached Pumpkin Stem (W) JE1.png|32px]]{{verify|Were these the models used by this edition?}} Added pumpkin stems.}}
{{History|foot}}
<gallery>
Pumpkin Stem with data value 15.png|The final version of the pumpkin stem with age 15, as seen in-game.
Pumpkinstems.png|Pumpkin stems of ages 1 to 15 on a modded version of [[Java Edition 1.7.2|1.7.2]], hence the nearby melon stems using the melon top texture.
Stems of 13w02a.png|All 16 stem sizes in [[Java Edition 13w02a|13w02a]], with accompanying data values.
</gallery>
=== Pumpkin stem "item" ===
{{:Technical blocks/Pumpkin Stem}}
== Issues ==
{{issue list}}
== Gallery ==
<gallery>
Stem All Ages.png|All stages of growth.
AllSeeds.png|All the [[seeds]] that exist in the game.
</gallery>
== References ==
{{reflist}}
{{Blocks|vegetation}}
{{Items}}
[[Category:Plants]]
[[Category:Food]]
[[Category:Non-solid blocks]]
[[Category:Generated structure blocks]]
[[cs:Dýňová semínka]]
[[de:Kürbiskerne]]
[[es:Semillas de calabaza]]
[[fr:Graines de citrouille]]
[[hu:Tökmagok]]
[[ja:カボチャの種]]
[[ko:호박씨]]
[[nl:Pompoenpitten]]
[[pl:Nasiona dyni]]
[[pt:Sementes de abóbora]]
[[ru:Семена тыквы]]
[[th:เมล็ดฝักทอง]]
[[zh:南瓜种子]]</li></ul> | 18w43a | Added illager beasts, which flee from rabbits. | |||
| 18w44a | Illager beasts no longer flee from rabbits.[5] | ||||
1.18{{Extension DPL}}<ul><li>[[Ankle Monitor|Ankle Monitor]]<br/>{{Joke feature}}
{{Item
| title = Ankle Monitor
| image = Ankle Monitor.png
| renewable = No
| stackable = Yes (64)
}}
The '''Ankle monitor''' was a joke foot item.
== Usage ==
Ankle monitors were equipped in the boots slot. In survival mode, when equipped, it could not be taken off. However, players in Creative mode are unaffected.
When equipped, the player would be afflicted with {{EffectLink|Slowness}} I.
During the night, being a certain number of blocks from the world spawn, above a certain minimum,{{checkthecode|how much?}} would prompt the following message in chat: "CURFEW WARNING! You are violating your house arrest! Get back by [distance] meters!"
If in [[the Nether]] or [[the End]], a different set of messages would be cycled through which can be seen in the section below.
=== Nether and End messages ===
* CURFEW WARNING! You are violating your house arrest! Uuuh... where are you anyway?
* CURFEW WARNING! Hello, are you there?
* CURFEW WARNING! I'm sure you have important things to do, but you need to go back!
* CURFEW WARNING! We're lonely back home!
* CURFEW WARNING! By "we" I mean I. I'm lonely.
* CURFEW WARNING! Ok enough games... GET BACK RIGHT NOW!
* CURFEW WARNING! LAST WARNING!
* CURFEW WARNING! LASTEST WARNING (really now)
* CURFEW WARNING! ...
* CURFEW WARNING! So... Where are you?
* CURFEW WARNING! Having a good day?
* CURFEW WARNING! Did you see that monster over there?
* CURFEW WARNING! Give it a whack, if you would be so kind.
* CURFEW WARNING! Teheee...
* CURFEW WARNING! Ok, enough of this!
* CURFEW WARNING! Last straw!
* CURFEW WARNING! Now you die.
* CURFEW WARNING! Boom!
* CURFEW WARNING! Hehe, fun right?
* CURFEW WARNING! Ok, you will not hear anything more from me now!
* CURFEW WARNING! You'll be as lonely as I am.
* CURFEW WARNING! How does that feel?
* CURFEW WARNING! Stop. Please. Stupid.
* CURFEW WARNING! I know, I'll wipe my memory. That way, I can start over!
* CURFEW WARNING! *bzzzzttt*
== Sounds ==
{{Sound table
|sound=Robot1arm1.ogg
|sound2=Robot1arm2.ogg
|sound3=Robot1arm3.ogg
|sound4=Robot1arm4.ogg
|source=dependent
|subtitle=''None''
|description=When a notification is displayed
|id=item.ankle_monitor.warning
|translationkey=''None''
|volume=1.0
|pitch=1.0
|distance=16
|foot=1}}
== Data values ==
=== ID ===
{{ID table
|shownumericids=y
|showforms=y
|generatetranslationkeys=java
|displayname=Ankle Monitor
|spritetype=item
|nameid=ankle_monitor
|id=501
|form=item
|translationkey=item.ankleMonitor.name
|foot=1}}
== History ==
{{History|java}}
{{History||1.RV-Pre1|[[File:Ankle_Monitor_(item).png|32px]] [[File:Ankle Monitor.png|32px]] Added ankle monitors.}}
{{History||1.11|snap=16w39a|The inability to remove ankle monitors was somewhat implemented into the canonical game through the addition of [[Curse of Binding]].<ref>{{ytl|Vm6oplvyyh0|t=3m31s}}</ref>}}
{{History|foot}}
== Issues ==
Ankle monitors are an unsupported [[item]] due to being an [[Wikipedia:April Fools' Day|April Fools']] joke, and therefore such issues relating to them will not be fixed.
== Gallery ==
<gallery>
TechGear.png|A [[player]] wearing the gear featured in this [[wikipedia:April Fools' Day|April Fools']] joke version.
</gallery>
==References==
{{Reflist}}
{{Items}}
{{Jokes}}
[[Category:Non-renewable resources]]
[[Category:Joke items]]
[[es:Ankle monitor]]</li><li>[[Emerald|Emerald]]<br/>{{About|the item|the currency in ''Minecraft Dungeons''|MCD:Emerald|the skin|MCD:Emerald (skin)|the ore|Emerald Ore|the mineral block|Block of Emerald}}
{{Item
| image = Emerald.png
| renewable = Yes
| stackable = Yes (64)
| rarity = Common}}
'''Emeralds''' are rare minerals that are used primarily as the currency for [[trading]] with [[villager]]s and [[wandering trader]]s. Naturally-occurring emeralds are rarer than [[diamond]]s.
== Obtaining ==
=== Trading (how emerald is renewable) ===
{{main|Trading}}
Emeralds can be obtained by trading with [[villager]]s, since they are the currency that villagers use for trading. Villagers either buy or sell specific goods for emeralds. Some villagers trade stuff that is renewable with emerald.
=== Mining ===
[[Emerald ore]] drops one emerald when mined using an iron or better [[pickaxe]]. If the pickaxe is enchanted with [[Fortune]], it may drop an extra emerald per level of Fortune, up to a maximum of 4 emeralds with Fortune III. If the ore is mined using a pickaxe enchanted with [[Silk Touch]], it drops itself in ore form instead of an emerald.
=== Crafting ===
{{Crafting
|Block of Emerald
|Output= Emerald,9
|type= Material
}}
=== Smelting ===
{{Smelting
|Emerald Ore; Deepslate Emerald Ore
|Emerald
|1
}}
=== Natural generation ===
{{see also|Emerald Ore#Natural generation}}
Emeralds can generate in [[chest]]s in some [[village]] houses or other generated [[Generated structures|structures]].
{{needs update|inaccurate=1|section=1}}
{{LootChestItem|emerald}}
=== Drops ===
[[Vindicator]]s and [[evoker]]s drop 0–1 emeralds upon death. [[Looting]] increases the maximum emerald drop by one per level, for a maximum of 4 emeralds with Looting III.
[[Fox]]es that are holding emeralds also have a chance of 100% to drop the emerald they are holding upon death. Alternatively, the player can drop a food item to entice the fox to drop the emerald without killing it.
{{IN|bedrock}}, vindicators and [[pillager]]s spawned from [[raids]] can drop 0–1 emeralds. Depending on difficulty, vindicators and pillagers spawned from raids also have a chance of dropping additional emeralds. There is a 65% chance of dropping on easy and normal, and an 80% chance of dropping on hard. If this additional drop condition is met, different emerald counts can drop with different chances. There is a {{frac|10|39}} chance to drop an additional 0–1 emeralds, a {{frac|5|39}} chance to drop an additional 2–3, and a {{frac|2|39}} chance to drop an additional 4–5.
{{IN|bedrock}}, with Looting III, it is possible for a vindicator in a raid to drop up to 16 emeralds upon death (vindicator drops + raid drops + an additional drop<!-- emerald from 2/39 chance-->).
== Usage ==
=== Trading ===
{{main|Trading}}
Emeralds are primarily used as currency for [[trading]] with villagers and wandering traders. Trading is typically a faster way to obtain emeralds than by mining, as an emerald ore is rarer than a diamond ore.
=== Crafting ingredient ===
{{crafting usage}}
===Beacons===
Emeralds can be used to select powers from a [[beacon]]. The player must select one of the available powers and then insert an emerald into the item slot.
An emerald can be substituted for an [[iron ingot]], a [[gold ingot]], a [[diamond]] or a [[netherite ingot]] in a beacon.
=== Smithing ingredient ===
{{Smithing
|head=1
|ingredients=Any Armor Trim +<br/>Any Armor Piece + <br/>Emerald
|Any Armor Trim Smithing Template
|Netherite Chestplate
|Emerald
|Emerald Trim Netherite Chestplate
|showdescription=1
|description = All armor types can be used in this recipe,<br/>a netherite chestplate is shown as an example.
|tail=1
}}
;Trim color palette
The following color palette is shown on the designs on trimmed armor:
*{{TrimPalette|emerald}}
== Achievements ==
{{load achievements|The Haggler;Buy Low;Master Trader}}
== Advancements ==
{{load advancements|What a Deal!}}
== Data values ==
=== ID ===
{{edition|java}}:
{{ID table
|edition=java
|showitemtags=y
|showforms=y
|generatetranslationkeys=y
|displayname=Emerald
|spritetype=item
|nameid=emerald
|itemtags=beacon_payment_items
|form=item
|foot=1}}
{{edition|bedrock}}:
{{ID table
|edition=bedrock
|shownumericids=y
|showforms=y
|notshowbeitemforms=y
|generatetranslationkeys=y
|displayname=Emerald
|spritetype=item
|nameid=emerald
|id=512
|form=item
|foot=1}}
== History ==
{{History|java indev}}
{{History||0.31|snap=20100129|Added [[diamond]]s, referred to as emeralds in the code.}}
{{History|java}}
{{History||May 21, 2012|link={{tweet|jeb_|204619936616808451}}|[[File:Ruby pJE20120521.png|32px]] [[Jens Bergensten|Jeb]] released a screenshot of himself testing the [[trading]] system. At this time, what would become emeralds were [[History_of_textures/Unused_textures#Ruby|rubies]].<ref>http://www.minecraftforum.net/topic/1621716-15-new-blocksitems/#entry19977082</ref>}}
{{History||1.3.1|snap=12w21a|[[File:Emerald JE1 BE1.png|32px]] Added emeralds and [[emerald ore]].
|Emeralds can be [[trading|traded]] with [[villager]]s in exchange for different [[item]]s.
|Added [[desert temple]]s, with a hidden [[chest]] room and loot containing emeralds.
|[[File:Ruby JE1 BE1.png|32px]] The texture of [[History_of_textures/Unused_textures#Ruby|rubies]] can be found in the (at this time unused) file {{cd|items.png}}.<ref name="en_US 12w21">Snapshot 12w21a/b ''lang/en_US.lang'': '''item.ruby.name=Ruby'''</ref>}}
{{History|||snap=12w22a|[[Block of emerald]] has now been added, which is [[crafting|crafted]] from nine emeralds and can be placed as a decorative [[block]].
|Added [[jungle temple]]s, which contain loot [[chest]]s with emeralds.}}
{{History||1.4.2|snap=12w32a|As [[zombie villager]]s can now spawn and be cured, emeralds can now still be obtained in [[trading|trades]] even if [[generated structures]] are disabled.}}
{{history||1.9|snap=15w31a|Emeralds now generate in [[end city]] ship [[chest]]s.}}
{{history|||snap=15w43a|Emeralds now generate in [[igloo]] basement chests.}}
{{history|||snap=15w44a|The average yield of emeralds in [[desert temple]] chests has now been increased.}}
{{History||1.11|snap=16w39a|Added [[vindicator]]s and [[evoker]]s, which drop emeralds if killed by a player.}}
{{History||1.13|snap=17w47a|Prior to [[1.13/Flattening|''The Flattening'']], this [[item]]'s numeral ID was 388.}}
{{History|||snap=18w09a|Emeralds can now generate in the loot [[chest]]s of [[underwater ruins]].}}
{{History|||snap=18w10a|Emeralds can now generate in [[buried treasure]] chests.}}
{{History|||snap=18w11a|Emeralds can now generate in the chests of [[shipwreck]]s.}}
{{History||1.14|snap=18w43a|[[File:Emerald JE2 BE2.png|32px]] The texture of emeralds has now been changed.
|Added [[pillager]]s, which can [[drops|drop]] emeralds.}}
{{History|||snap=18w46a|Pillagers no longer drop emeralds.}}
{{History|||snap=18w48a|Emeralds now generate in chests in [[village]] tanneries, fisher cottages and plains village houses.}}
{{History|||snap=18w49a|Emeralds now generate in chests in [[village]] shepherd houses, mason houses, butcher shops, and savanna and snowy village houses.}}
{{History|||snap=18w50a|Emeralds now generate in chests in [[village]] fletcher houses, temples, and desert and taiga village houses.}}
{{History|||snap=19w07a|Added [[fox]]es, which sometimes spawn with emeralds in their mouths.}}
{{History|||snap=19w08a|[[File:Emerald JE3 BE3.png|32px]] The texture of emeralds has now been changed, once again and it looks smaller.}}
{{History||1.17|snap=21w13a|The unused [[History_of_textures/Unused_textures#Ruby|rubies]] texture was removed.}}
{{History||1.20<br>(Experimental)|link=1.19.4|snap=23w04a|Emeralds can now be used as an armor trim material.}}
{{History|||snap=23w07a|Emeralds now drop when brushing [[suspicious sand]] in [[desert pyramid]]s or [[desert well]]s.}}
{{History||1.20|snap=23w12a|The probability for the emerald to generate in the [[suspicious sand]] in [[desert temple]] and in [[desert well]] has been changed from 1/7 to 1/8.|Emerald can now be found in [[suspicious gravel]] and [[suspicious sand]] in cold and warm [[ocean ruins]] and in [[trail ruins]].}}
{{History|||snap=23w16a|Emerald no longer generates in [[suspicious sand]] in [[trail ruins]].|Due to the split of the archaeological loot tables for the suspicious gravel within the [[trail ruins]]; emerald now is in the common loot.}}
{{History|pocket alpha}}
{{History||v0.9.0|snap=build 1|[[File:Emerald JE1 BE1.png|32px]] Added emeralds.}}
{{History|||snap=build 5|Emeralds can now be used to craft [[blocks of emerald]].}}
{{History||v0.13.0|snap=build 1|Emeralds can now be found inside [[desert temple]] [[chest]]s.}}
{{History||v0.15.0|snap=build 1|Added [[jungle temple]]s, which contain loot chests with emeralds.}}
{{History||v0.16.0|snap=build 1|Emeralds can now be used to power [[beacon]]s.}}
{{History|pocket}}
{{History||1.0.0|snap=alpha 0.17.0.1|Emeralds can now be found in [[end city]] ship [[chest]]s.
|Emeralds can now be found in [[igloo]] basement chests.}}
{{History||1.0.4|snap=alpha 1.0.4.0|Emeralds are now used as "currency" for [[villager]] [[trading]].}}
{{History||1.1.0|snap=alpha 1.1.0.0|Added [[evoker]]s and [[vindicator]]s, which [[drops|drop]] emeralds when killed.}}
{{History|bedrock}}
{{History||1.4.0|snap=beta 1.2.14.2|Emeralds can now be found in some [[shipwreck]] [[chest]]s.}}
{{History|||snap=beta 1.2.20.1|Emeralds can now be found inside [[underwater ruins]] chests.}}
{{History||1.10.0|snap=beta 1.10.0.3|Emeralds can now be used to [[trading|buy]] items from [[wandering trader]]s.
|Emeralds can now be found in [[plains]] [[village]] house and tannery [[chest]]s.
|[[File:Emerald JE2 BE2.png|32px]] The texture of emeralds has now been changed.}}
{{History||1.11.0|snap=beta 1.11.0.1|Emeralds can now be found in [[village]] [[chest]]s other than [[plains]].}}
{{History|||snap=beta 1.11.0.4|[[Vindicator]]s and [[pillager]]s that spawn from [[raid]]s can now [[drops|drop]] bonus emeralds.}}
{{History|||snap=beta 1.11.0.5|[[File:Emerald JE3 BE3.png|32px]] The texture of emeralds has now been changed, once again.}}
{{History||1.13.0|snap=beta 1.13.0.1|Added [[fox]]es, which can [[drops|drop]] emeralds.}}
{{History||Next Major Update<br>(Experimental)|link=Bedrock Edition 1.19.70|snap=beta 1.19.70.23|Emeralds now drop when brushing [[suspicious sand]] in [[desert pyramid]]s or [[desert well]]s.}}
{{History|||snap=beta 1.19.80.21|Emeralds can now be used as an armor trim material.}}
{{History|console}}
{{History||xbox=TU14|xbone=CU1|ps=1.04|wiiu=Patch 1|switch=1.0.1|[[File:Emerald JE1 BE1.png|32px]] Added emeralds.}}
{{History|Ps4}}
{{History||1.90|[[File:Emerald JE2 BE2.png|32px]] The texture of emeralds has now been changed.}}
{{History|new3DS}}
{{History||0.1.0|[[File:Emerald JE1 BE1.png|32px]] Added emeralds.}}
{{History|foot}}
== Issues ==
{{issue list}}
== Gallery ==
<gallery>
Villager trading preview.png|The first image of the trading system released by [[Jeb]]. What would become emeralds can be seen in the [[inventory]] space.
Emerald Ore 12w21a.png|A wall of [[emerald ore]] utilizing a previous texture in snapshot [[12w21a]].
Room of Emeralds.png|All forms of emeralds in one photo: emerald (in the form of [[emerald block|block]], [[emerald ore|ore]] and the emerald itself).
</gallery>
==Trivia==
*The [[History_of_textures/Unused_textures#Ruby|ruby]] was going to be the [[villager]] currency but was changed to emeralds before the update's release.
== References ==
{{Reflist}}
{{Items}}
[[Category:Renewable resources]]
[[cs:Smaragd]]
[[de:Smaragd]]
[[es:Esmeralda]]
[[fr:Émeraude]]
[[hu:Smaragd]]
[[it:Smeraldo]]
[[ja:エメラルド]]
[[ko:에메랄드]]
[[nl:Smaragd]]
[[pl:Szmaragd]]
[[pt:Esmeralda]]
[[ru:Изумруд]]
[[th:มรกต]]
[[tr:Zümrüt]]
[[uk:Смарагд]]
[[zh:绿宝石]]</li></ul> | Experimental Snapshot 1 | Rabbits now spawn in the newly added meadow, grove and snowy slopes biomes. | |||
| experimental snapshot 2 | Rabbits now spawn more frequently in meadows. | ||||
| 21w37a | Rabbits can now spawn on snow blocks. | ||||
1.19.3{{Extension DPL}}<ul><li>[[Fish|Fish]]<br/>{{About|the type of mob|the action|Fishing}}
'''Fish''' are aquatic creatures that are found in [[river]] and [[ocean]] biomes.
== Mobs ==
There are four categories of fish mobs in ''Minecraft'':
*{{EntityLink|Cod}}
*{{EntityLink|Salmon}}
*{{EntityLink|Pufferfish}}
*{{EntityLink|Tropical Fish}} - many color and pattern varieties
In addition, there are other fish-like mobs that have different characteristics from fish: {{EntityLink|Axolotl}}, {{EntityLink|Guardian}}, and {{EntityLink|Elder Guardian}}.
==Obtaining and transporting==
A live fish can be captured by using a [[water bucket]] on a fish, to obtain a [[bucket of fish]], which is the only way to obtain the live mob in item form. Using the bucket of fish on a water source block transfers the fish from the bucket to the body of water. A water bucket may also be used on [[axolotl]]s in this manner.
==Items==
Fish exist in several different item forms. Upon death, fish drop their item form equivalent (cooked if on fire), with a chance to drop a [[bone]]{{only|bedrock}} or [[bone meal]].{{only|java}}
;Non-living
*{{ItemLink|Raw Cod}}
*{{ItemLink|Cooked Cod}}
*{{ItemLink|Raw Salmon}}
*{{ItemLink|Cooked Salmon}}
*{{ItemLink|Pufferfish|link=Pufferfish (item)}}
*{{ItemLink|Tropical Fish|link=Tropical Fish (item)}}
;Living
*{{ItemLink|Bucket of Cod}}
*{{ItemLink|Bucket of Salmon}}
*{{ItemLink|Bucket of Pufferfish}}
*{{ItemLink|Bucket of Tropical Fish}}
== Spawning ==
Various fish can be found in different [[ocean]] [[biomes]], but only [[salmon]] appear in rivers. Fish can also spawn in player-created bodies of water, as long as they are within a river or ocean biome.
{| class="wikitable sortable" style="text-align:left" data-description="Fish biomes"
!'''Fish'''
! style="text-align:left" |{{BiomeLink|Warm Ocean}}
! style="text-align:left" |{{BiomeLink|Lukewarm Ocean}}<br>{{BiomeLink|Deep Lukewarm Ocean}}
! style="text-align:left" |{{BiomeLink|Ocean}}<br>{{BiomeLink|Deep Ocean}}
! style="text-align:left" |{{BiomeLink|Cold Ocean}}<br>{{BiomeLink|Deep Cold Ocean}}
! style="text-align:left" |{{BiomeLink|Frozen Ocean}}<br>{{BiomeLink|Deep Frozen Ocean}}
! style="text-align:left" |{{BiomeLink|River}}<br>{{BiomeLink|Frozen River}}
|-
! rowspan=2 style="text-align:left" |{{EntityLink|Cod}}
| rowspan=2 {{tc|no}}
| rowspan=2 {{tc|yes}}
| rowspan=2 {{tc|yes}}
| rowspan=2 {{tc|yes}}
| {{tc|no|No{{only|je|short=1}}}}
| rowspan=2 {{tc|no}}
|-
| {{tc|yes|Yes{{only|be|short=1}}}}
|-
! rowspan=2 style="text-align:left" |{{EntityLink|Salmon}}
| rowspan=2 {{tc|no}}
| {{tc|no|No{{only|je|short=1}}}}
| {{tc|no|No{{only|je|short=1}}}}
| rowspan=2 {{tc|yes}}
| rowspan=2 {{tc|yes}}
| rowspan=2 {{tc|yes}}
|-
| {{tc|yes|Yes{{only|be|short=1}}}}
| {{tc|yes|Yes{{only|be|short=1}}}}
|-
! rowspan=2 style="text-align:left" |{{EntityLink|Pufferfish}}
| rowspan=2 {{tc|yes}}
| {{tc|yes|Yes{{only|je|short=1}}}}
| rowspan=2 {{tc|no}}
| rowspan=2 {{tc|no}}
| rowspan=2 {{tc|no}}
| rowspan=2 {{tc|no}}
|-
| {{tc|no|No{{only|be|short=1}}}}
|-
! style="text-align:left" |{{EntityLink|Tropical Fish}}<ref group="note">Also spawns in {{BiomeLink|Lush Caves}} at any Y-level.</ref>
| {{tc|yes}}
| {{tc|yes}}
| {{tc|no}}
| {{tc|no}}
| {{tc|no}}
| {{tc|no}}
|-
! style="text-align:left" |{{EntityLink|Squid}}
| {{tc|yes}}
| {{tc|yes}}
| {{tc|yes}}
| {{tc|yes}}
| {{tc|yes}}
| {{tc|yes}}
|-
! rowspan=2 style="text-align:left" |{{EntityLink|Dolphin}}
| rowspan=2 {{tc|yes}}
| rowspan=2 {{tc|yes}}
| rowspan=2 {{tc|yes}}
| {{tc|no|No{{only|je|short=1}}}}
| rowspan=2 {{tc|no}}
| rowspan=2 {{tc|no}}
|-
| {{tc|yes|Yes{{only|be|short=1}}}}
|}
{{notelist}}
In ''Java Edition'', fish can spawn inside a water block at Y-level 50 to 63 (from 13 blocks below sea level up to inside the block one above it), that also has water above and below it. The spawn block and the block below can be any kind of water, such as a source block, falling water, bubble column, kelp, or even a waterlogged block (as long as the fish can be placed at the bottom center of the spawn block without colliding with anything solid). The block above must be pure water, such as a source block, falling water, or flowing water of any depth. Particularly, the block above cannot also be a bubble column, so fish no longer spawn inside bubble elevators.<ref>{{cite bug|MC|244683|Tropical fish spawn in bubble columns (fixed in 22w07a)}}</ref>
''Bedrock Edition'' does permit fish to spawn in bubble columns.<ref>{{cite bug|MCPE|73967|Squids, Dolphins, and fish not spawning in bubble columns (fixed in 1.16.20)}}</ref>
Fish can spawn between 24 and 64 block spherical range away from the player.{{only|java}}
=== Despawning ===
As of [[1.16]], fish can despawn at range of 40 blocks or more from the player, and will instantly despawn more than 64 blocks away, except when spawned using a [[bucket of fish]].
{{Items}}
{{Entities}}
[[cs:Ryba]]
[[de:Fisch (Begriffsklärung)]]
[[es:Pez]]
[[fr:Poisson]]
[[it:Pesce]]
[[ja:魚]]
[[ko:물고기]]
[[nl:Vis]]
[[pl:Ryba (ujednoznacznienie)]]
[[pt:Peixe]]
[[ru:Рыба]]
[[th:ปลา (แก้ความกำกวม)]]
[[uk:Риба]]
[[zh:鱼]]</li><li>[[Spawn Egg|Spawn Egg]]<br/>{{distinguish|Egg|Frogspawn|Dragon Egg|Sniffer Egg|Turtle Egg}}
{{Item
| image = Spawn Egg.png
| extratext = View [[#Gallery|all renders]]
| stackable = Yes (64), the same type of spawn egg only
| renewable = No
}}
{{Many images}}
A '''spawn egg'''<ref group=fn>Known as '''''<Mob>'' Spawn Egg''' {{in|java}} and '''Spawn ''<Mob>''''' {{in|bedrock}}, where ''<Mob>'' is the name of the mob it spawns.</ref> is an [[item]] used to spawn [[mobs]] directly.
== Obtaining ==
Spawn eggs can be obtained only in [[Creative]] mode or using [[commands]]. In Creative mode, the [[player]] can press {{control|pick block}} on an existing mob to obtain their respective egg. Spawn eggs are also available in the Creative inventory. There are 77 spawn eggs {{in|bedrock}} and 75 spawn eggs {{in|java}}.
== Usage ==
A spawn egg is used by pressing {{control|use}} on any surface (top, bottom, or side) with the egg. When used on a top surface, the egg's [[mob]] appears with its feet immediately adjacent to the surface, and its ambient sound is played.
Spawn eggs are not thrown (unlike normal [[egg]]s); the player must be within normal range of the block to use the spawn egg. Ocelot and all monster mobs (except [[shulker]]s, [[piglin]]s, [[hoglin]]s; and in Bedrock Edition, also include [[vindicator]]s, [[evoker]]s, [[zoglin]]s, [[piglin brute]]s) spawned while on Peaceful difficulty get created and immediately deleted from the world.
The surfaces of blocks are prioritized for spawning; if none are within reach, mobs can also be spawned in [[water]].
=== Dispensers ===
A spawn egg fired from a [[dispenser]] spawns the [[mob]] directly in front of the dispenser. The spawn egg is consumed when fired.
=== Baby mobs ===
If the [[player]] {{control|uses}} a spawn egg on the type of [[mob]] it spawns, and that mob has a baby form, the egg spawns a baby version of the mob. In mobs that can breed, the baby is created by breeding the clicked mob to itself. For instance, using a sheep spawn egg on a [[sheep]] makes a baby sheep with the same wool color.{{only|java}}
Other mobs such as [[evoker]]s, [[vindicator]]s, [[vex]]es, [[piglin brute]]s, [[ravager]]s, [[phantom]]s, [[skeleton]]s, [[pillager]]s, [[creeper]]s and [[wither skeleton]]s do not have a baby variant, so the egg still spawns an adult.
=== Monster spawners ===
All spawn eggs can also be {{Control|used}} on a [[monster spawner]] to change the [[mob]] the monster spawner spawns. {{IN|bedrock}}, spawn eggs for any of the fish mobs spawn them only if the monster spawner is waterlogged.
=== Renaming ===
A spawn egg can be renamed on an [[anvil]], and when used it spawns a [[mob]] with that name appearing over its head. The name can be seen only by aiming at the mob from four or fewer blocks away. This name also appears in [[death messages]] from the mob killing a [[player]]. If the player renames a spawn egg by the names described below, the mob appears described below. If the player renames a [[rabbit]] spawn egg "Toast", the secret skin of the rabbit appears when the egg is used. Naming a spawn egg "Dinnerbone" or "Grumm" causes the mob to appear upside down and show the given name above it. Renaming a [[vindicator]] "Johnny" causes it to act hostile to all mobs except for other illagers. Renaming a [[sheep]] "jeb_" makes the sheep's wool color cycle in a rainbow loop. This doesn't change the color of the wool the sheep drops. Renaming a spawn egg of a [[Hostile mob|hostile mob]] with an [[anvil]] and then spawning the hostile mob with the renamed spawn egg does not prevent the hostile mob from despawning, unlike using a [[Name Tag|name tag]] on the mob.
=== Survival mode ===
Mobs can be spawned with spawn eggs in [[Survival]] mode, but spawn eggs are [[Content inaccessible in Survival|not obtainable in Survival]] without cheats; they can be obtained only using the Creative menu or commands. Unlike in creative, spawn eggs are consumed when used in survival.
== List of spawn eggs ==
There is a spawn egg for almost every mob in the game; exceptions are listed below this table.
{| class="wikitable" data-description="Spawn eggs and availability"
! Egg
! Spawns
! Notes
|-
! colspan="4"| Hostile and neutral mobs
|-
| align="center"| {{InvSprite|Bee Spawn Egg}}
| {{EntityLink|Bee}}
| Bees have 5% chance of spawning as a baby.
|-
|align="center"| {{InvSprite|Blaze Spawn Egg}}
| {{EntityLink|Blaze}}
|
|-
|align="center"| {{InvSprite|Bogged Spawn Egg}}
| {{EntityLink|Bogged}}
|
|-
|align="center"| {{InvSprite|Cave Spider Spawn Egg}}
| {{EntityLink|Cave Spider}}
| Cave spiders have a 1% chance of spawning a {{EntityLink|Cave Spider Jockey}}. {{only|bedrock}}
|-
|align="center"| {{InvSprite|Creeper Spawn Egg}}
| {{EntityLink|Creeper}}
| Creepers can never spawn [[Creeper#Charged creeper|charged]].
|-
|align="center"| {{InvSprite|Dolphin Spawn Egg}}
| {{EntityLink|Dolphin}}
| {{IN|bedrock}}, dolphins have 10% chance of spawning as a baby.
|-
|align="center" |{{InvSprite|Drowned Spawn Egg}}
| {{EntityLink|Drowned}}
| Drowned can spawn holding [[trident]]s, [[fishing rod]]s, or [[nautilus shell]]s. Drowned have 5% chance of spawning as a baby.<ref name="LazilyCodedSpawnEggs">{{bug|MC-167377}}</ref>
|-
|align="center"| {{InvSprite|Elder Guardian Spawn Egg}}
| {{EntityLink|Elder Guardian}}
|
|-
|align="center"| {{InvSprite|Ender Dragon Spawn Egg}}
| {{EntityLink|Ender Dragon}}
| Only accessible via commands to prevent accidental destruction of player builds.
|-
|align="center"| {{InvSprite|Enderman Spawn Egg}}
| {{EntityLink|Enderman}}
| Endermen spawn neutral and not holding a block.
|-
|align="center"| {{InvSprite|Endermite Spawn Egg}}
| {{EntityLink|Endermite}}
|
|-
|align="center"| {{InvSprite|Evoker Spawn Egg}}
| {{EntityLink|Evoker}}
|
|-
|align="center"| {{InvSprite|Ghast Spawn Egg}}
| {{EntityLink|Ghast}}
|
|-
|align="center"| {{InvSprite|Goat Spawn Egg}}
| {{EntityLink|Goat}}
|Goats spawn with two horns and have a 5% chance spawning as a baby, and a 2% chance of spawning as a screaming goat.
|-
|align="center"| {{InvSprite|Guardian Spawn Egg}}
| {{EntityLink|Guardian}}
|
|-
|align="center"| {{InvSprite|Hoglin Spawn Egg}}
| {{EntityLink|Hoglin}}
| Hoglins have 5% chance of spawning as a baby.
|-
|align="center"| {{InvSprite|Husk Spawn Egg}}
| {{EntityLink|Husk}}
| Husks have a 5% chance of spawning as a baby. Baby husks have a 5%{{only|java|short=1}} or 15%{{only|bedrock|short=1}} chance of spawning as a {{EntityLink|Chicken Husk Jockey|Chicken Jockey}}. There is also a chance of them holding [[Zombie#Armed zombies|tools, weapons or armor]]. Baby variants are randomly spawned.<ref name="LazilyCodedSpawnEggs"/>
|-
|align="center"| {{InvSprite|Iron Golem Spawn Egg}}
| {{EntityLink|Iron Golem}}
|These golems are neutral like the [[village]] golems.
|-
|align="center"| {{InvSprite|Llama Spawn Egg}}
| {{EntityLink|Llama}}
| Llamas spawn untamed and have a 10% chance of spawning as a baby.
|-
|align="center"| {{InvSprite|Magma Cube Spawn Egg}}
| {{EntityLink|Magma Cube}}
| Magma cubes spawn with a random size.
|-
|align="center"| {{InvSprite|Panda Spawn Egg}}
| {{EntityLink|Panda}}
| Pandas spawn with a random personality and have a 5% chance of spawning as a baby.
|-
|align="center"| {{InvSprite|Phantom Spawn Egg}}
| {{EntityLink|Phantom}}
|
|-
|align="center"| {{InvSprite|Piglin Spawn Egg}}
| {{EntityLink|Piglin}}
| Piglins have a 25%{{only|Java|short=1}} or 5%{{only|bedrock|short=1}} chance of spawning as a baby. They may also spawn with an [[enchanted]] [[crossbow]] or [[golden sword]] and [[golden armor]].
|-
|align="center"| {{InvSprite|Piglin Brute Spawn Egg}}
| {{EntityLink|Piglin Brute}}
| Piglin brutes never spawn with armor.
|-
|align="center"| {{InvSprite|Pillager Spawn Egg}}
| {{EntityLink|Pillager}}
| Pillagers have a chance of spawning with an [[enchanted]] [[crossbow]].
|-
|align="center"| {{InvSprite|Polar Bear Spawn Egg}}
| {{EntityLink|Polar Bear}}
| Polar bears have a 10% chance of spawning as a baby.
|-
|align="center"| {{InvSprite|Ravager Spawn Egg}}
| {{EntityLink|Ravager}}
| Ravagers never spawn being ridden by [[illager]]s.
|-
|align="center"| {{InvSprite|Shulker Spawn Egg}}
| {{EntityLink|Shulker}}
| Shulkers spawn undyed. Their orientation is also dependent on where the shulker is placed.
|-
|align="center"| {{InvSprite|Silverfish Spawn Egg}}
| {{EntityLink|Silverfish}}
|
|-
|align="center"| {{InvSprite|Skeleton Spawn Egg}}
| {{EntityLink|Skeleton}}
|[[Skeleton]] eggs used in the [[Overworld]] and [[the End]] always spawn regular [[skeleton]]s.<br>{{IN|bedrock}}, eggs used in [[the Nether]] have an 80% chance to spawn [[wither skeleton]]s.<br>{{IN|bedrock}}, eggs used in [[Snowy Tundra]], [[Ice Spikes]], [[Snowy Mountains]], [[Frozen River]], [[Frozen Ocean]], [[Deep Frozen Ocean]] and [[Legacy Frozen Ocean]] [[biome]]s have an 80% chance to spawn [[stray]]s, if spawned with a clear view of the sky. They may also spawn with an [[enchanted]] [[bow]] and [[armor]].
|-
|align="center"| {{InvSprite|Slime Spawn Egg}}
| {{EntityLink|Slime}}
| Slimes spawn with a random size.
|-
|align="center"| {{InvSprite|Spider Spawn Egg}}
| {{EntityLink|Spider}}
| Spiders have a 1% chance to spawn a {{EntityLink|Spider Jockey}}.
|-
|align="center"| {{InvSprite|Stray Spawn Egg}}
| {{EntityLink|Stray}}
| Strays may spawn with an [[enchanted]] [[bow]] and [[armor]].
|-
|align="center"| {{InvSprite|Trader Llama Spawn Egg}}
| {{EntityLink|Trader Llama}}
|
|-
|align="center"| {{InvSprite|Vex Spawn Egg}}
| {{EntityLink|Vex}}
|
|-
|align="center"| {{InvSprite|Vindicator Spawn Egg}}
| {{EntityLink|Vindicator}}
| Vindicators never spawn as captains.{{only|bedrock}} They may spawn with an [[enchanted]] [[axe]].
|-
|align="center"| {{InvSprite|Warden Spawn Egg}}
| {{EntityLink|Warden}}
|
|-
|align="center"| {{InvSprite|Witch Spawn Egg}}
| {{EntityLink|Witch}}
|
|-
|align="center"| {{InvSprite|Wither Spawn Egg}}
| {{EntityLink|Wither}}
| Only accessible via commands to prevent accidental destruction of player builds.
|-
|align="center"| {{InvSprite|Wither Skeleton Spawn Egg}}
| {{EntityLink|Wither Skeleton}}
|
|-
|align="center"| {{InvSprite|Wolf Spawn Egg}}
| {{EntityLink|Wolf}}
| Wolves spawn untamed and neutral. Wolves have a 5% chance of spawning as a baby.
|-
|align="center"| {{InvSprite|Zoglin Spawn Egg}}
| {{EntityLink|Zoglin}}
|
|-
|align="center"| {{InvSprite|Zombie Spawn Egg}}
| {{EntityLink|Zombie}}
| Zombies do not spawn as [[zombie villager]]s, but they have a 5% chance of spawning as a baby.<ref name="LazilyCodedSpawnEggs"/> There is also a chance of them holding [[Zombie#Geared zombies|tools, weapons or armor]]. A baby zombie has a 5%{{only|java|short=1}} or 15%{{only|bedrock}} chance of spawning as a {{EntityLink|Chicken Jockey}}.
|-
|align="center"| {{InvSprite|Zombie Villager Spawn Egg}}
| {{EntityLink|Zombie Villager}}
| Zombie villagers' professions are randomized.{{only|Java}} Their outfit depends on the biome, and they have a 5% chance of spawning as a baby.<ref name="LazilyCodedSpawnEggs"/> A baby zombie villager has a 5%{{only|java|short=1}} or 15%{{only|bedrock}} chance of spawning as a {{EntityLink|Chicken Zombie Villager Jockey|Chicken Jockey}}.
{{IN|bedrock}}, they never spawn with equipment.
|-
|align="center"| {{InvSprite|Zombified Piglin Spawn Egg}}
| {{EntityLink|Zombified Piglin}}
| Zombified piglins spawn neutral and have a 5% chance of spawning as a baby.<ref name="LazilyCodedSpawnEggs"/> A baby zombified piglin has a 5% chance of spawning as a {{EntityLink|Chicken Zombified Piglin Jockey|Chicken Jockey}}.{{only|java|short=1}} They may also spawn with an [[enchanted]] [[sword]].
|-
!colspan="4"| Passive mobs
|-
|align="center"| {{InvSprite|Spawn Agent}}
| {{EntityLink|Agent}}
|
|-
|align="center"| {{InvSprite|Allay Spawn Egg}}
| {{EntityLink|Allay}}
|
|-
|align="center"| {{InvSprite|Axolotl Spawn Egg}}
| {{EntityLink|Axolotl}}
|Axolotls' skins are randomized and have a 5% chance of spawning as a baby.
|-
|align="center"| {{InvSprite|Bat Spawn Egg}}
| {{EntityLink|Bat}}
| If the player is far enough away when using the spawn egg on the bottom of an opaque block, the bat hangs upside down from it.
|-
|align="center"| {{InvSprite|Camel Spawn Egg}}
| {{EntityLink|Camel}}
|
|-
|align="center"| {{InvSprite|Cat Spawn Egg}}
| {{EntityLink|Cat}}
| Cats' skins are randomized and always spawn stray cats. Cats have a 25% chance of spawning as a baby.
|-
|align="center"| {{InvSprite|Chicken Spawn Egg}}
| {{EntityLink|Chicken}}
| Chickens have a 5% chance of spawning as a baby.
|-
|align="center"| {{InvSprite|Cod Spawn Egg}}
| {{EntityLink|Cod}}
|Cods have a 0% chance of spawning as a baby. Baby cods can only be found naturally.
|-
|align="center"| {{InvSprite|Cow Spawn Egg}}
| {{EntityLink|Cow}}
| Cows have a 5% chance of spawning as a baby.
|-
|align="center"| {{InvSprite|Donkey Spawn Egg}}
| {{EntityLink|Donkey}}
| Donkeys spawn untamed and have a 20% chance of spawning as a baby.
|-
|align="center"| {{InvSprite|Fox Spawn Egg}}
| {{EntityLink|Fox}}
| Foxes spawn untrusting, with their skins depending on the biome. They can spawn holding items and have 5% chance of spawning as a baby.
|-
|align="center"| {{InvSprite|Frog Spawn Egg}}
| {{EntityLink|Frog}}
| Frog skins are biome-dependent.
|-
|align="center"| {{InvSprite|Glow Squid Spawn Egg}}
| {{EntityLink|Glow Squid}}
| {{IN|bedrock}}, glow squids have a 5% chance of spawning as a baby.
|-
|align="center"| {{InvSprite|Horse Spawn Egg}}
| {{EntityLink|Horse}}
| Horses spawn untamed and have a 20% chance of spawning as a baby.
|-
|align="center"| {{InvSprite|Mooshroom Spawn Egg}}
| {{EntityLink|Mooshroom}}
| Mooshrooms always spawn red and have a 5% chance of spawning as a baby.
|-
|align="center"| {{InvSprite|Mule Spawn Egg}}
| {{EntityLink|Mule}}
| Mules have a 20% chance of spawning as a baby.
|-
|align=“center” | {{InvSprite|Spawn NPC}}
| {{EntityLink|NPC}}
|There is an equal chance of spawning each of the 5 variants of this mob from the egg.
|-
|align="center"| {{InvSprite|Ocelot Spawn Egg}}
| {{EntityLink|Ocelot}}
| Ocelots spawn untrusting.<br>{{frac|1|7}} of the time (14.3%), an ocelot spawns with two ocelot kittens.
|-
|align="center"| {{InvSprite|Parrot Spawn Egg}}
| {{EntityLink|Parrot}}
| Parrots spawn untamed and with a random color.
|-
|align="center"| {{InvSprite|Pig Spawn Egg}}
| {{EntityLink|Pig}}
| Pigs spawn without a [[saddle]] and have a 5% chance of spawning as a baby.
|-
|align="center"| {{InvSprite|Pufferfish Spawn Egg}}
| {{EntityLink|Pufferfish}}
|
|-
|align="center"| {{InvSprite|Rabbit Spawn Egg}}
| {{EntityLink|Rabbit}}
| Rabbit skins are random and biome-dependent. The black-and-white rabbit spawns only if the spawn egg is renamed <code>[[Rabbit#Toast|Toast]]</code>. Rabbits have a 25% chance of spawning as a baby.
|-
|align="center"| {{InvSprite|Salmon Spawn Egg}}
| {{EntityLink|Salmon}}
| {{IN|bedrock}}, salmon spawn with a random size.
|-
|align="center"| {{InvSprite|Sheep Spawn Egg}}
| {{EntityLink|Sheep}}
| Sheep spawn with the colors that can appear naturally; see {{slink|Sheep|Spawning}} for details. Sheep have a 5% chance of spawning as a baby.
|-
|align="center"| {{InvSprite|Skeleton Horse Spawn Egg}}
| {{EntityLink|Skeleton Horse}}
| Skeleton horses have a 20% chance of spawning as a baby and never spawn as a skeleton trap.
|-
|align="center"| {{InvSprite|Sniffer Spawn Egg}}
| {{EntityLink|Sniffer}}
|Baby sniffers can also be spawned by the [[Sniffer Egg|Sniffer Egg.]]
|-
|align="center"| {{InvSprite|Snow Golem Spawn Egg}}
| {{EntityLink|Snow Golem}}
|
|-
|align="center"| {{InvSprite|Squid Spawn Egg}}
| {{EntityLink|Squid}}
| {{IN|bedrock}}, squid have a 5% chance of spawning as a baby.
|-
|align="center"| {{InvSprite|Strider Spawn Egg}}
| {{EntityLink|Strider}}
| Striders have a {{frac|1|10}} chance of spawning ridden by a baby strider and a {{frac|1|30}} chance of spawning ridden by a [[zombified piglin]].
|-
|align="center"| {{InvSprite|Tadpole Spawn Egg}}
| {{EntityLink|Tadpole}}
| Also spawned from [[frogspawn]].
|-
|align="center"| {{InvSprite|Tropical Fish Spawn Egg}}
| {{EntityLink|Tropical Fish}}
| Shapes, colors, and patterns are randomized, though 90% of the time the tropical fish will spawn as 1 of the 22 uniquely-named variants.
|-
|align="center"| {{InvSprite|Turtle Spawn Egg}}
| {{EntityLink|Turtle}}
| Turtles have a 10% chance of spawning as a baby.
|-
|align="center"| {{InvSprite|Villager Spawn Egg}}
| {{EntityLink|Villager}}
| Villagers' professions are randomized{{only|bedrock|short=1}}<ref>{{bug|MCPE-46034}}</ref> or unemployed{{only|java|short=1}}, but their outfit is biome-dependent. They have a 5% chance of spawning as a baby.
|-
|align="center"| {{InvSprite|Wandering Trader Spawn Egg}}
| {{EntityLink|Wandering Trader}}
| {{IN|bedrock}}, wandering traders always spawn with two leashed trader llamas.
|-
|align="center"| {{InvSprite|Zombie Horse Spawn Egg}}
| {{EntityLink|Zombie Horse}}
| Zombie horses have a 20% chance of spawning as a baby.
|}
=== Mobs without spawn eggs ===
The following mobs do not have explicitly defined spawn eggs. Custom spawn eggs can be created with a custom NBT tag that changes the spawned entity, however no spawn egg explicitly associated with any of the mobs exist.
{| class="wikitable" data-description="spawn eggs and availability"
! Mob
! Reason
|-
! colspan="2" | Variants
|-
! {{EntityLink|Brown Mooshroom}}
| Shares ID with red variant
|-
! colspan="2" | Other mobs
|-
! {{EntityLink|Giant}}
| Unused<ref>{{bug|MC-257115|||WAI}}</ref>
|-
! {{EntityLink|Illusioner}}
| Unused<ref>{{bug|MC-257115|||WAI}}</ref>
|}
=== Education Edition spawn eggs ===
These spawn eggs exist {{in|education}} and {{in|bedrock}}:
* {{InvSprite|Spawn Agent}} {{EntityLink|Agent}}
* {{InvSprite|Spawn NPC}} {{EntityLink|NPC}}
The NPC and agent can both be spawned {{in|bedrock}}, however, the agent is not visible or interactable in any way, though it still prevents the placing of blocks and entities.
=== Minecraft Earth spawn eggs ===
These unused spawn egg textures existed {{in|earth}}:
* {{InvSprite|Cluckshroom Spawn Egg}} {{EntityLink|Cluckshroom}}
* {{InvSprite|Horned Sheep Spawn Egg}} {{EntityLink|Horned Sheep}}
* {{InvSprite|Jumbo Rabbit Spawn Egg}} {{EntityLink|Jumbo Rabbit}}
* {{InvSprite|Moobloom Spawn Egg}} {{EntityLink|Moobloom}}
=== April Fools spawn eggs ===
* {{InvSprite|Moon Cow Spawn Egg}} {{EntityLink|Moon Cow}}
== Sounds ==
When a mob is spawned, it immediately makes its ambient sound.
== Data values ==
=== ID ===
{{edition|java}}:
{{ID table
|edition=java
|showforms=y
|generatetranslationkeys=y
|displayname=Allay Spawn Egg
|spritetype=item
|nameid=allay_spawn_egg
|form=item}}
{{ID table
|displayname=Axolotl Spawn Egg
|spritetype=item
|nameid=axolotl_spawn_egg
|form=item}}
{{ID table
|displayname=Bat Spawn Egg
|spritetype=item
|nameid=bat_spawn_egg
|form=item}}
{{ID table
|displayname=Bee Spawn Egg
|spritetype=item
|nameid=bee_spawn_egg
|form=item}}
{{ID table
|displayname=Blaze Spawn Egg
|spritetype=item
|nameid=blaze_spawn_egg
|form=item}}
{{ID table
|displayname=Camel Spawn Egg
|spritetype=item
|nameid=camel_spawn_egg
|form=item}}
{{ID table
|displayname=Cat Spawn Egg
|spritetype=item
|nameid=cat_spawn_egg
|form=item}}
{{ID table
|displayname=Cave Spider Spawn Egg
|spritetype=item
|nameid=cave_spider_spawn_egg
|form=item}}
{{ID table
|displayname=Chicken Spawn Egg
|spritetype=item
|nameid=chicken_spawn_egg
|form=item}}
{{ID table
|displayname=Cod Spawn Egg
|spritetype=item
|nameid=cod_spawn_egg
|form=item}}
{{ID table
|displayname=Cow Spawn Egg
|spritetype=item
|nameid=cow_spawn_egg
|form=item}}
{{ID table
|displayname=Creeper Spawn Egg
|spritetype=item
|nameid=creeper_spawn_egg
|form=item}}
{{ID table
|displayname=Dolphin Spawn Egg
|spritetype=item
|nameid=dolphin_spawn_egg
|form=item}}
{{ID table
|displayname=Donkey Spawn Egg
|spritetype=item
|nameid=donkey_spawn_egg
|form=item}}
{{ID table
|displayname=Drowned Spawn Egg
|spritetype=item
|nameid=drowned_spawn_egg
|form=item}}
{{ID table
|displayname=Elder Guardian Spawn Egg
|spritetype=item
|nameid=elder_guardian_spawn_egg
|form=item}}
{{ID table
|displayname=Ender Dragon Spawn Egg
|spritetype=item
|nameid=ender_dragon_spawn_egg
|form=item}}
{{ID table
|displayname=Enderman Spawn Egg
|spritetype=item
|nameid=enderman_spawn_egg
|form=item}}
{{ID table
|displayname=Endermite Spawn Egg
|spritetype=item
|nameid=endermite_spawn_egg
|form=item}}
{{ID table
|displayname=Evoker Spawn Egg
|spritetype=item
|nameid=evoker_spawn_egg
|form=item}}
{{ID table
|displayname=Fox Spawn Egg
|spritetype=item
|nameid=fox_spawn_egg
|form=item}}
{{ID table
|displayname=Frog Spawn Egg
|spritetype=item
|nameid=frog_spawn_egg
|form=item}}
{{ID table
|displayname=Ghast Spawn Egg
|spritetype=item
|nameid=ghast_spawn_egg
|form=item}}
{{ID table
|displayname=Glow Squid Spawn Egg
|spritename=glow-squid-spawn-egg
|spritetype=item
|nameid=glow_squid_spawn_egg
|form=item}}
{{ID table
|displayname=Goat Spawn Egg
|spritetype=item
|nameid=Goat_spawn_egg
|form=item}}
{{ID table
|displayname=Guardian Spawn Egg
|spritetype=item
|nameid=guardian_spawn_egg
|form=item}}
{{ID table
|displayname=Hoglin Spawn Egg
|spritetype=item
|nameid=hoglin_spawn_egg
|form=item}}
{{ID table
|displayname=Horse Spawn Egg
|spritetype=item
|nameid=horse_spawn_egg
|form=item}}
{{ID table
|displayname=Husk Spawn Egg
|spritetype=item
|nameid=husk_spawn_egg
|form=item}}
{{ID table
|displayname=Iron Golem Spawn Egg
|spritetype=item
|nameid=iron_golem_spawn_egg
|form=item}}
{{ID table
|displayname=Llama Spawn Egg
|spritetype=item
|nameid=llama_spawn_egg
|form=item}}
{{ID table
|displayname=Magma Cube Spawn Egg
|spritetype=item
|nameid=magma_cube_spawn_egg
|form=item}}
{{ID table
|displayname=Mooshroom Spawn Egg
|spritetype=item
|nameid=mooshroom_spawn_egg
|form=item}}
{{ID table
|displayname=Mule Spawn Egg
|spritetype=item
|nameid=mule_spawn_egg
|form=item}}
{{ID table
|displayname=Ocelot Spawn Egg
|spritetype=item
|nameid=ocelot_spawn_egg
|form=item}}
{{ID table
|displayname=Panda Spawn Egg
|spritetype=item
|nameid=panda_spawn_egg
|form=item}}
{{ID table
|displayname=Parrot Spawn Egg
|spritetype=item
|nameid=parrot_spawn_egg
|form=item}}
{{ID table
|displayname=Phantom Spawn Egg
|spritetype=item
|nameid=phantom_spawn_egg
|form=item}}
{{ID table
|displayname=Pig Spawn Egg
|spritetype=item
|nameid=pig_spawn_egg
|form=item}}
{{ID table
|displayname=Piglin Spawn Egg
|spritetype=item
|nameid=piglin_spawn_egg
|form=item}}
{{ID table
|displayname=Piglin Brute Spawn Egg
|spritetype=item
|nameid=piglin_brute_spawn_egg
|form=item}}
{{ID table
|displayname=Pillager Spawn Egg
|spritetype=item
|nameid=pillager_spawn_egg
|form=item}}
{{ID table
|displayname=Polar Bear Spawn Egg
|spritetype=item
|nameid=polar_bear_spawn_egg
|form=item}}
{{ID table
|displayname=Pufferfish Spawn Egg
|spritetype=item
|nameid=pufferfish_spawn_egg
|form=item}}
{{ID table
|displayname=Rabbit Spawn Egg
|spritetype=item
|nameid=rabbit_spawn_egg
|form=item}}
{{ID table
|displayname=Ravager Spawn Egg
|spritetype=item
|nameid=ravager_spawn_egg
|form=item}}
{{ID table
|displayname=Salmon Spawn Egg
|spritetype=item
|nameid=salmon_spawn_egg
|form=item}}
{{ID table
|displayname=Sheep Spawn Egg
|spritetype=item
|nameid=sheep_spawn_egg
|form=item}}
{{ID table
|displayname=Shulker Spawn Egg
|spritetype=item
|nameid=shulker_spawn_egg
|form=item}}
{{ID table
|displayname=Silverfish Spawn Egg
|spritetype=item
|nameid=silverfish_spawn_egg
|form=item}}
{{ID table
|displayname=Skeleton Spawn Egg
|spritetype=item
|nameid=skeleton_spawn_egg
|form=item}}
{{ID table
|displayname=Skeleton Horse Spawn Egg
|spritetype=item
|nameid=skeleton_horse_spawn_egg
|form=item}}
{{ID table
|displayname=Slime Spawn Egg
|spritetype=item
|nameid=slime_spawn_egg
|form=item}}
{{ID table
|displayname=Sniffer Spawn Egg
|spritetype=item
|nameid=sniffer_spawn_egg
|form=item}}
{{ID table
|displayname=Snow Golem Spawn Egg
|spritetype=item
|nameid=snow_golem_spawn_egg
|form=item}}
{{ID table
|displayname=Spider Spawn Egg
|spritetype=item
|nameid=spider_spawn_egg
|form=item}}
{{ID table
|displayname=Squid Spawn Egg
|spritetype=item
|nameid=squid_spawn_egg
|form=item}}
{{ID table
|displayname=Stray Spawn Egg
|spritetype=item
|nameid=stray_spawn_egg
|form=item}}
{{ID table
|displayname=Strider Spawn Egg
|spritetype=item
|nameid=strider_spawn_egg
|form=item}}
{{ID table
|displayname=Tadpole Spawn Egg
|spritetype=item
|nameid=tadpole_spawn_egg
|form=item}}
{{ID table
|displayname=Trader Llama Spawn Egg
|spritetype=item
|nameid=trader_llama_spawn_egg
|form=item}}
{{ID table
|displayname=Tropical Fish Spawn Egg
|spritetype=item
|nameid=tropical_fish_spawn_egg
|form=item}}
{{ID table
|displayname=Turtle Spawn Egg
|spritetype=item
|nameid=turtle_spawn_egg
|form=item}}
{{ID table
|displayname=Vex Spawn Egg
|spritetype=item
|nameid=vex_spawn_egg
|form=item}}
{{ID table
|displayname=Villager Spawn Egg
|spritetype=item
|nameid=villager_spawn_egg
|form=item}}
{{ID table
|displayname=Vindicator Spawn Egg
|spritetype=item
|nameid=vindicator_spawn_egg
|form=item}}
{{ID table
|displayname=Wandering Trader Spawn Egg
|spritetype=item
|nameid=wandering_trader_spawn_egg
|form=item}}
{{ID table
|displayname=Warden Spawn Egg
|spritetype=item
|nameid=warden_spawn_egg
|form=item}}
{{ID table
|displayname=Witch Spawn Egg
|spritetype=item
|nameid=witch_spawn_egg
|form=item}}
{{ID table
|displayname=Wither Spawn Egg
|spritetype=item
|nameid=wither_spawn_egg
|form=item}}
{{ID table
|displayname=Wither Skeleton Spawn Egg
|spritetype=item
|nameid=wither_skeleton_spawn_egg
|form=item}}
{{ID table
|displayname=Wolf Spawn Egg
|spritetype=item
|nameid=wolf_spawn_egg
|form=item}}
{{ID table
|displayname=Zoglin Spawn Egg
|spritetype=item
|nameid=zoglin_spawn_egg
|form=item}}
{{ID table
|displayname=Zombie Spawn Egg
|spritetype=item
|nameid=zombie_spawn_egg
|form=item}}
{{ID table
|displayname=Zombie Horse Spawn Egg
|spritetype=item
|nameid=zombie_horse_spawn_egg
|form=item}}
{{ID table
|displayname=Zombie Villager Spawn Egg
|spritetype=item
|nameid=zombie_villager_spawn_egg
|form=item}}
{{ID table
|displayname=Zombified Piglin Spawn Egg
|spritetype=item
|nameid=zombified_piglin_spawn_egg
|form=item
|foot=1}}
{{edition|bedrock}}:
{{ID table
|edition=bedrock
|showaliasids=y
|shownumericids=y
|showforms=y
|notshowbeitemforms=y
|generatetranslationkeys=y
|displayname=item.spawn_egg.name
|spritename=chicken-spawn-egg
|spritetype=item
|nameid=spawn_egg
|aliasid=spawn_egg / 0
|id=718
|form=item
|translationkey=-}}
{{ID table
|displayname=Spawn Agent
|spritetype=item
|nameid=agent_spawn_egg
|aliasid=spawn_egg / 56
|id=489
|form=item
|translationkey=item.spawn_egg.entity.agent.name}}
{{ID table
|displayname=Spawn Allay
|spritename=Allay Spawn Egg
|spritetype=item
|nameid=allay_spawn_egg
|aliasid=spawn_egg / 134
|id=639
|form=item
|translationkey=item.spawn_egg.entity.allay.name}}
{{ID table
|displayname=Spawn Axolotl
|spritename=Axolotl Spawn Egg
|spritetype=item
|nameid=axolotl_spawn_egg
|aliasid=spawn_egg / 130
|id=503
|form=item
|translationkey=item.spawn_egg.entity.axolotl.name}}
{{ID table
|displayname=Spawn Bat
|spritetype=item
|nameid=bat_spawn_egg
|aliasid=spawn_egg / 19
|id=455
|form=item
|translationkey=item.spawn_egg.entity.bat.name}}
{{ID table
|displayname=Spawn Bee
|spritetype=item
|nameid=bee_spawn_egg
|aliasid=spawn_egg / 122
|id=496
|form=item
|translationkey=item.spawn_egg.entity.bee.name}}
{{ID table
|displayname=Spawn Blaze
|spritetype=item
|nameid=blaze_spawn_egg
|aliasid=spawn_egg / 43
|id=458
|form=item
|translationkey=item.spawn_egg.entity.blaze.name}}
{{ID table
|displayname=Spawn Camel
|spritename=Camel Spawn Egg
|spritetype=item
|nameid=camel_spawn_egg
|aliasid=spawn_egg / 138
|id=663
|form=item
|translationkey=item.spawn_egg.entity.camel.name}}
{{ID table
|displayname=Spawn Cat
|spritetype=item
|nameid=cat_spawn_egg
|aliasid=spawn_egg / 75
|id=490
|form=item
|translationkey=item.spawn_egg.entity.cat.name}}
{{ID table
|displayname=Spawn Cave Spider
|spritetype=item
|nameid=cave_spider_spawn_egg
|aliasid=spawn_egg / 40
|id=459
|form=item
|translationkey=item.spawn_egg.entity.cave_spider.name}}
{{ID table
|displayname=Spawn Chicken
|spritetype=item
|nameid=chicken_spawn_egg
|aliasid=spawn_egg / 10
|id=437
|form=item
|translationkey=item.spawn_egg.entity.chicken.name}}
{{ID table
|displayname=Spawn Cod
|spritetype=item
|nameid=cod_spawn_egg
|aliasid=spawn_egg / 112
|id=482
|form=item
|translationkey=item.spawn_egg.entity.cod.name}}
{{ID table
|displayname=Spawn Cow
|spritetype=item
|nameid=cow_spawn_egg
|aliasid=spawn_egg / 11
|id=438
|form=item
|translationkey=item.spawn_egg.entity.cow.name}}
{{ID table
|displayname=Spawn Creeper
|spritetype=item
|nameid=creeper_spawn_egg
|aliasid=spawn_egg / 33
|id=443
|form=item
|translationkey=item.spawn_egg.entity.creeper.name}}
{{ID table
|displayname=Spawn Dolphin
|spritetype=item
|nameid=dolphin_spawn_egg
|aliasid=spawn_egg / 31
|id=486
|form=item
|translationkey=item.spawn_egg.entity.dolphin.name}}
{{ID table
|displayname=Spawn Donkey
|spritetype=item
|nameid=donkey_spawn_egg
|aliasid=spawn_egg / 24
|id=467
|form=item
|translationkey=item.spawn_egg.entity.donkey.name}}
{{ID table
|displayname=Spawn Drowned
|spritetype=item
|nameid=drowned_spawn_egg
|aliasid=spawn_egg / 110
|id=485
|form=item
|translationkey=item.spawn_egg.entity.drowned.name}}
{{ID table
|displayname=Spawn Elder Guardian
|spritetype=item
|nameid=elder_guardian_spawn_egg
|aliasid=spawn_egg / 50
|id=473
|form=item
|translationkey=item.spawn_egg.entity.elder_guardian.name}}
{{ID table
|displayname=Spawn Ender Dragon
|spritetype=item
|nameid=ender_dragon_spawn_egg
|aliasid=spawn_egg / 53
|id=508
|form=item
|translationkey=item.spawn_egg.entity.ender_dragon.name}}
{{ID table
|displayname=Spawn Enderman
|spritetype=item
|nameid=enderman_spawn_egg
|aliasid=spawn_egg / 38
|id=444
|form=item
|translationkey=item.spawn_egg.entity.enderman.name}}
{{ID table
|displayname=Spawn Endermite
|spritetype=item
|nameid=endermite_spawn_egg
|aliasid=spawn_egg / 55
|id=462
|form=item
|translationkey=item.spawn_egg.entity.endermite.name}}
{{ID table
|displayname=Spawn Evoker
|spritetype=item
|nameid=evoker_spawn_egg
|aliasid=spawn_egg / 104
|id=477
|form=item
|translationkey=item.spawn_egg.entity.evocation_illager.name}}
{{ID table
|displayname=Spawn Fox
|spritetype=item
|nameid=fox_spawn_egg
|aliasid=spawn_egg / 121
|id=492
|form=item
|translationkey=item.spawn_egg.entity.fox.name}}
{{ID table
|displayname=Spawn Frog
|spritetype=item
|nameid=frog_spawn_egg
|aliasid=spawn_egg / 132
|id=636
|form=item
|translationkey=item.spawn_egg.entity.frog.name}}
{{ID table
|displayname=Spawn Ghast
|spritetype=item
|nameid=ghast_spawn_egg
|aliasid=spawn_egg / 41
|id=456
|form=item
|translationkey=item.spawn_egg.entity.ghast.name}}
{{ID table
|displayname=Spawn Glow Squid
|spritename=glow-squid-spawn-egg
|spritetype=item
|nameid=glow_squid_spawn_egg
|aliasid=spawn_egg / 129
|id=505
|form=item
|translationkey=item.spawn_egg.entity.glow_squid.name}}
{{ID table
|displayname=Spawn Goat
|spritename=spawn-goat
|spritetype=item
|nameid=goat_spawn_egg
|aliasid=spawn_egg / 128
|id=504
|form=item
|translationkey=item.spawn_egg.entity.goat.name}}
{{ID table
|displayname=Spawn Guardian
|spritetype=item
|nameid=guardian_spawn_egg
|aliasid=spawn_egg / 49
|id=463
|form=item
|translationkey=item.spawn_egg.entity.guardian.name}}
{{ID table
|displayname=Spawn Hoglin
|spritetype=item
|nameid=hoglin_spawn_egg
|aliasid=spawn_egg / 124
|id=498
|form=item
|translationkey=item.spawn_egg.entity.hoglin.name}}
{{ID table
|displayname=Spawn Horse
|spritetype=item
|nameid=horse_spawn_egg
|aliasid=spawn_egg / 23
|id=460
|form=item
|translationkey=item.spawn_egg.entity.horse.name}}
{{ID table
|displayname=Spawn Husk
|spritetype=item
|nameid=husk_spawn_egg
|aliasid=spawn_egg / 47
|id=465
|form=item
|translationkey=item.spawn_egg.entity.husk.name}}
{{ID table
|displayname=Spawn Iron Golem
|spritetype=item
|nameid=iron_golem_spawn_egg
|aliasid=spawn_egg / 20
|id=506
|form=item
|translationkey=item.spawn_egg.entity.iron_golem.name}}
{{ID table
|displayname=Spawn Llama
|spritetype=item
|nameid=llama_spawn_egg
|aliasid=spawn_egg / 29
|id=475
|form=item
|translationkey=item.spawn_egg.entity.llama.name}}
{{ID table
|displayname=Spawn Magma Cube
|spritetype=item
|nameid=magma_cube_spawn_egg
|aliasid=spawn_egg / 42
|id=457
|form=item
|translationkey=item.spawn_egg.entity.magma_cube.name}}
{{ID table
|displayname=Spawn Mooshroom
|spritetype=item
|nameid=mooshroom_spawn_egg
|aliasid=spawn_egg / 16
|id=442
|form=item
|translationkey=item.spawn_egg.entity.mooshroom.name}}
{{ID table
|displayname=Spawn Mule
|spritetype=item
|nameid=mule_spawn_egg
|aliasid=spawn_egg / 25
|id=468
|form=item
|translationkey=item.spawn_egg.entity.mule.name}}
{{ID table
|displayname=Spawn NPC
|spritetype=item
|nameid=npc_spawn_egg
|aliasid=spawn_egg / 51
|id=472
|form=item
|translationkey=item.spawn_egg.entity.npc.name}}
{{ID table
|displayname=Spawn Ocelot
|spritetype=item
|nameid=ocelot_spawn_egg
|aliasid=spawn_egg / 22
|id=453
|form=item
|translationkey=item.spawn_egg.entity.ocelot.name}}
{{ID table
|displayname=Spawn Panda
|spritetype=item
|nameid=panda_spawn_egg
|aliasid=spawn_egg / 113
|id=491
|form=item
|translationkey=item.spawn_egg.entity.panda.name}}
{{ID table
|displayname=Spawn Parrot
|spritetype=item
|nameid=parrot_spawn_egg
|aliasid=spawn_egg / 30
|id=480
|form=item
|translationkey=item.spawn_egg.entity.parrot.name}}
{{ID table
|displayname=Spawn Phantom
|spritetype=item
|nameid=phantom_spawn_egg
|aliasid=spawn_egg / 58
|id=488
|form=item
|translationkey=item.spawn_egg.entity.phantom.name}}
{{ID table
|displayname=Spawn Pig
|spritetype=item
|nameid=pig_spawn_egg
|aliasid=spawn_egg / 12
|id=439
|form=item
|translationkey=item.spawn_egg.entity.pig.name}}
{{ID table
|displayname=Spawn Piglin Brute
|spritetype=item
|nameid=piglin_brute_spawn_egg
|aliasid=spawn_egg / 127
|id=501
|form=item
|translationkey=item.spawn_egg.entity.piglin_brute.name}}
{{ID table
|displayname=Spawn Piglin
|spritetype=item
|nameid=piglin_spawn_egg
|aliasid=spawn_egg / 123
|id=499
|form=item
|translationkey=item.spawn_egg.entity.piglin.name}}
{{ID table
|displayname=Spawn Pillager
|spritetype=item
|nameid=pillager_spawn_egg
|aliasid=spawn_egg / 114
|id=493
|form=item
|translationkey=item.spawn_egg.entity.pillager.name}}
{{ID table
|displayname=Spawn Polar Bear
|spritetype=item
|nameid=polar_bear_spawn_egg
|aliasid=spawn_egg / 28
|id=474
|form=item
|translationkey=item.spawn_egg.entity.polar_bear.name}}
{{ID table
|displayname=Spawn Pufferfish
|spritetype=item
|nameid=pufferfish_spawn_egg
|aliasid=spawn_egg / 108
|id=483
|form=item
|translationkey=item.spawn_egg.entity.pufferfish.name}}
{{ID table
|displayname=Spawn Rabbit
|spritetype=item
|nameid=rabbit_spawn_egg
|aliasid=spawn_egg / 18
|id=461
|form=item
|translationkey=item.spawn_egg.entity.rabbit.name}}
{{ID table
|displayname=Spawn Ravager
|spritetype=item
|nameid=ravager_spawn_egg
|aliasid=spawn_egg / 59
|id=495
|form=item
|translationkey=item.spawn_egg.entity.ravager.name}}
{{ID table
|displayname=Spawn Salmon
|spritetype=item
|nameid=salmon_spawn_egg
|aliasid=spawn_egg / 109
|id=484
|form=item
|translationkey=item.spawn_egg.entity.salmon.name}}
{{ID table
|displayname=Spawn Sheep
|spritetype=item
|nameid=sheep_spawn_egg
|aliasid=spawn_egg / 13
|id=440
|form=item
|translationkey=item.spawn_egg.entity.sheep.name}}
{{ID table
|displayname=Spawn Shulker
|spritetype=item
|nameid=shulker_spawn_egg
|aliasid=spawn_egg / 54
|id=471
|form=item
|translationkey=item.spawn_egg.entity.shulker.name}}
{{ID table
|displayname=Spawn Silverfish
|spritetype=item
|nameid=silverfish_spawn_egg
|aliasid=spawn_egg / 39
|id=445
|form=item
|translationkey=item.spawn_egg.entity.silverfish.name}}
{{ID table
|displayname=Spawn Skeleton Horse
|spritetype=item
|nameid=skeleton_horse_spawn_egg
|aliasid=spawn_egg / 26
|id=469
|form=item
|translationkey=item.spawn_egg.entity.skeleton_horse.name}}
{{ID table
|displayname=Spawn Skeleton
|spritetype=item
|nameid=skeleton_spawn_egg
|aliasid=spawn_egg / 34
|id=446
|form=item
|translationkey=item.spawn_egg.entity.skeleton.name}}
{{ID table
|displayname=Spawn Slime
|spritetype=item
|nameid=slime_spawn_egg
|aliasid=spawn_egg / 37
|id=447
|form=item
|translationkey=item.spawn_egg.entity.slime.name}}
{{ID table
|displayname=Spawn Sniffer
|spritetype=item
|nameid=sniffer_spawn_egg
|aliasid=spawn_egg / 139
|id=502
|form=item
|translationkey=item.spawn_egg.entity.sniffer.name}}
{{ID table
|displayname=Spawn Snow Golem
|spritetype=item
|nameid=snow_golem_spawn_egg
|aliasid=spawn_egg / 21
|id=507
|form=item
|translationkey=item.spawn_egg.entity.snow_golem.name}}
{{ID table
|displayname=Spawn Spider
|spritetype=item
|nameid=spider_spawn_egg
|aliasid=spawn_egg / 35
|id=448
|form=item
|translationkey=item.spawn_egg.entity.spider.name}}
{{ID table
|displayname=Spawn Squid
|spritetype=item
|nameid=squid_spawn_egg
|aliasid=spawn_egg / 17
|id=452
|form=item
|translationkey=item.spawn_egg.entity.squid.name}}
{{ID table
|displayname=Spawn Stray
|spritetype=item
|nameid=stray_spawn_egg
|aliasid=spawn_egg / 46
|id=464
|form=item
|translationkey=item.spawn_egg.entity.stray.name}}
{{ID table
|displayname=Spawn Strider
|spritetype=item
|nameid=strider_spawn_egg
|aliasid=spawn_egg / 125
|id=497
|form=item
|translationkey=item.spawn_egg.entity.strider.name}}
{{ID table
|displayname=Spawn Tadpole
|spritetype=item
|nameid=tadpole_spawn_egg
|aliasid=spawn_egg / 133
|id=637
|form=item
|translationkey=item.spawn_egg.entity.tadpole.name}}
{{ID table
|displayname=Spawn Trader Llama
|spritetype=item
|nameid=trader_llama_spawn_egg
|aliasid=spawn_egg / 157
|id=656
|form=item
|translationkey=item.spawn_egg.entity.trader_llama.name}}
{{ID table
|displayname=Spawn Tropical Fish
|spritetype=item
|nameid=tropical_fish_spawn_egg
|aliasid=spawn_egg / 111
|id=481
|form=item
|translationkey=item.spawn_egg.entity.tropicalfish.name}}
{{ID table
|displayname=Spawn Sea Turtle
|spritetype=item
|nameid=turtle_spawn_egg
|aliasid=spawn_egg / 74
|id=487
|form=item
|translationkey=item.spawn_egg.entity.turtle.name}}
{{ID table
|displayname=Spawn Vex
|spritetype=item
|nameid=vex_spawn_egg
|aliasid=spawn_egg / 105
|id=478
|form=item
|translationkey=item.spawn_egg.entity.vex.name}}
{{ID table
|displayname=Spawn Villager
|spritetype=item
|nameid=villager_spawn_egg
|aliasid=spawn_egg / 15, 115
|id=451
|form=item
|translationkey=item.spawn_egg.entity.villager_v2.name, item.spawn_egg.entity.villager.name}}
{{ID table
|displayname=Spawn Vindicator
|spritetype=item
|nameid=vindicator_spawn_egg
|aliasid=spawn_egg / 57
|id=476
|form=item
|translationkey=item.spawn_egg.entity.vindicator.name}}
{{ID table
|displayname=Spawn Wandering Trader
|spritetype=item
|nameid=wandering_trader_spawn_egg
|aliasid=spawn_egg / 118
|id=494
|form=item
|translationkey=item.spawn_egg.entity.wandering_trader.name}}
{{ID table
|displayname=Spawn Warden
|spritetype=item
|nameid=warden_spawn_egg
|aliasid=spawn_egg / 131
|id=640
|form=item
|translationkey=item.spawn_egg.entity.warden.name}}
{{ID table
|displayname=Spawn Witch
|spritetype=item
|nameid=witch_spawn_egg
|aliasid=spawn_egg / 45
|id=454
|form=item
|translationkey=item.spawn_egg.entity.witch.name}}
{{ID table
|displayname=Spawn Wither
|spritetype=item
|nameid=wither_spawn_egg
|aliasid=spawn_egg / 52
|id=509
|form=item
|translationkey=item.spawn_egg.entity.wither.name}}
{{ID table
|displayname=Spawn Wither Skeleton
|spritetype=item
|nameid=wither_skeleton_spawn_egg
|aliasid=spawn_egg / 48
|id=466
|form=item
|translationkey=item.spawn_egg.entity.wither_skeleton.name}}
{{ID table
|displayname=Spawn Wolf
|spritetype=item
|nameid=wolf_spawn_egg
|aliasid=spawn_egg / 14
|id=441
|form=item
|translationkey=item.spawn_egg.entity.wolf.name}}
{{ID table
|displayname=Spawn Zoglin
|spritetype=item
|nameid=zoglin_spawn_egg
|aliasid=spawn_egg / 126
|id=500
|form=item
|translationkey=item.spawn_egg.entity.zoglin.name}}
{{ID table
|displayname=Spawn Zombie Horse
|spritetype=item
|nameid=zombie_horse_spawn_egg
|aliasid=spawn_egg / 27
|id=470
|form=item
|translationkey=item.spawn_egg.entity.zombie_horse.name}}
{{ID table
|displayname=Spawn Zombified Piglin
|spritetype=item
|nameid=zombie_pigman_spawn_egg
|aliasid=spawn_egg / 36
|id=450
|form=item
|translationkey=item.spawn_egg.entity.zombie_pigman.name}}
{{ID table
|displayname=Spawn Zombie
|spritetype=item
|nameid=zombie_spawn_egg
|aliasid=spawn_egg / 32
|id=449
|form=item
|translationkey=item.spawn_egg.entity.zombie.name}}
{{ID table
|displayname=Spawn Zombie Villager
|spritetype=item
|nameid=zombie_villager_spawn_egg
|aliasid=spawn_egg / 44, 116
|id=479
|form=item
|translationkey=item.spawn_egg.entity.zombie_villager_v2.name, item.spawn_egg.entity.zombie_villager.name
|foot=1}}
=== Item data ===
{{el|java}}:
{{main|Player.dat format}}
<div class="treeview">
* {{nbt|compound|tag}}: The item's '''tag''' tag.
{{:Player.dat_format/Entity Spawners}}
</div>
{{el|bedrock}}:
: {{IN|bedrock}}, spawn eggs have no additional tags.
: See [[Bedrock Edition level format/Item format]].
== History ==
{{for|information on the historical colors of spawn eggs|Spawn Egg colors}}
{{Info needed|{{Edition|BE}} is outdated}}
{{History|java}}
{{History||1.1|snap=11w49a|[[File:Creeper Spawn Egg JE1.png|32px]] [[File:Spider Spawn Egg JE1.png|32px]] [[File:Skeleton Spawn Egg JE1.png|32px]] [[File:Zombie Spawn Egg JE1.png|32px]] [[File:Slime Spawn Egg JE1.png|32px]] [[File:Ghast Spawn Egg JE1.png|32px]] [[File:Zombie Pigman Spawn Egg JE1.png|32px]] [[File:Enderman Spawn Egg JE1.png|32px]] [[File:Cave Spider Spawn Egg JE1.png|32px]] [[File:Silverfish Spawn Egg JE1.png|32px]] [[File:Blaze Spawn Egg JE1.png|32px]] [[File:Magma Cube Spawn Egg JE1.png|32px]] [[File:Pig Spawn Egg JE1.png|32px]] [[File:Sheep Spawn Egg JE1.png|32px]] [[File:Cow Spawn Egg JE1.png|32px]] [[File:Chicken Spawn Egg JE1.png|32px]] [[File:Squid Spawn Egg JE1.png|32px]] [[File:Wolf Spawn Egg JE1.png|32px]] [[File:Mooshroom Spawn Egg JE1.png|32px]] [[File:Villager Spawn Egg JE1.png|32px]] Added spawn eggs for [[creeper]]s, [[spider]]s, [[skeleton]]s, [[zombie]]s, [[slime]]s, [[ghast]]s, [[zombie pigman|zombie pigmen]], [[endermen]], [[cave spider]]s, [[silverfish]], [[blaze]]s, [[magma cube]]s, [[pig]]s, [[sheep]], [[cow]]s, [[chicken]]s, [[squid]], [[wolf|wolves]], [[mooshroom]]s and [[villager]]s.
|The spawn egg has a single texture file, which is [[tint]]ed different colors.}}
{{History|||snap=12w01a|[[File:Creeper Spawn Egg JE2 BE1.png|32px]] [[File:Spider Spawn Egg JE2 BE1.png|32px]] [[File:Skeleton Spawn Egg JE2 BE1.png|32px]] [[File:Zombie Spawn Egg JE2 BE1.png|32px]] [[File:Slime Spawn Egg JE2 BE1.png|32px]] [[File:Ghast Spawn Egg JE2 BE1.png|32px]] [[File:Zombie Pigman Spawn Egg JE2 BE1.png|32px]] [[File:Enderman Spawn Egg JE2 BE1.png|32px]] [[File:Cave Spider Spawn Egg JE2 BE1.png|32px]] [[File:Silverfish Spawn Egg JE2 BE2.png|32px]] [[File:Blaze Spawn Egg JE2 BE1.png|32px]] [[File:Magma Cube Spawn Egg JE2 BE1.png|32px]] [[File:Pig Spawn Egg JE2 BE1.png|32px]] [[File:Sheep Spawn Egg JE2 BE1.png|32px]] [[File:Cow Spawn Egg JE2 BE1.png|32px]] [[File:Chicken Spawn Egg JE2 BE1.png|32px]] [[File:Squid Spawn Egg JE2 BE1.png|32px]] [[File:Wolf Spawn Egg JE2 BE1.png|32px]] [[File:Mooshroom Spawn Egg JE2 BE1.png|32px]] [[File:Villager Spawn Egg JE2 BE1.png|32px]] The spawn egg and its markings now have their textures separated, allowing them to have entirely different colors. This allows their colors to better match the colors of the [[mob]]s themselves.}}
{{History||1.2.1|snap=12w03a|Spawn eggs can now be placed into a [[dispenser]]. Activating the dispenser spawns the mob, instead of dispensing the egg as an [[item]].
|Spawn eggs are now stackable, which allows dispensers to hold more than nine of them at one time.}}
{{History|||snap=12w04a|[[File:Ocelot Spawn Egg JE1 BE1.png|32px]] Added [[ocelot]] spawn eggs with the addition of the ocelot itself.
|Before 1.2, edited spawn eggs for [[snow golem]]s, [[ender dragon]]s and [[giant]]s (and other "unspawnable" [[mob]]s) produced mobs of their types. Now, this is restricted to those eggs available in the [[creative]] [[inventory]].}}
{{History||1.3.1|snap=12w18a|[[Villager]]s spawned from spawn eggs were always farmers before this update and now their professions are randomized.}}
{{History||1.4.2|snap=12w32a|[[Zombie villager]]s can now be spawned using [[zombie]] spawn eggs.
|[[Sheep]] from spawn eggs can now spawn naturally-colored sheep (white, gray, brown, pink, etc.).}}
{{History|||snap=12w36a|[[Wither skeleton]]s now have a high chance to spawn from a [[skeleton]] spawn egg, if the [[player]] is in [[the Nether]].
|[[Skeleton]]s on [[spider jockey]]s can now be replaced with [[wither skeleton]]s when using [[spider]] spawn eggs in the Nether.}}
{{History|||snap=12w38a|[[File:Witch Spawn Egg JE1 BE1.png|32px]] [[File:Bat Spawn Egg JE1 BE1.png|32px]] Added [[witch]] and [[bat]] spawn eggs.}}
{{History||1.4.4|snap=pre|Baby [[mob]]s are now spawn-able by right-clicking a mob with a corresponding mob egg. Although, this doesn't work with [[zombie]]s.}}
{{History||1.5|snap=January 7, 2013|slink={{tweet|Dinnerbone|288322623916617728}}|[[Dinnerbone]] tweeted the first image of a renamed mob appearing in a [[death messages|death message]].}}
{{History|||snap=13w02a|[[Mob]]s spawned from renamed eggs now have the name of the egg and the names appear in death messages.
|Mobs can now display their custom name as nametag using an NBT tag.}}
{{History||1.6.1|snap=13w16a|[[File:Horse Spawn Egg JE1 BE1.png|32px]] Added [[horse]] spawn eggs.}}
{{History|||snap=13w24a|Spawn eggs now work on [[water]].}}
{{History|||snap=1.6|Renaming a spawn egg "''Dinnerbone''" or "''Grumm''" now cause the [[mob]] to spawn upside-down.}}
{{History||1.7.4|snap=13w48b|Renaming a [[sheep]] or sheep spawn egg "''jeb_''" give it a rainbow wool changing effect. This does not affect the wool dropped after death or [[shear]]ing, however.}}
{{History||1.8|snap=14w11a|[[File:Endermite Spawn Egg JE1 BE1.png|32px]] Added [[endermite]] spawn eggs.}}
{{History|||snap=14w25a|[[File:Guardian Spawn Egg JE1 BE1.png|32px]] Added [[guardian]] spawn eggs.}}
{{History|||snap=14w27a|[[File:Rabbit Spawn Egg JE1 BE1.png|32px]] Added [[rabbit]] spawn eggs.}}
{{History|||snap=14w28b|Spawn eggs can now be used to program [[monster spawner]] blocks.}}
{{History||1.9|snap=15w31a|[[File:Shulker Spawn Egg JE1 BE2.png|32px]] Added [[shulker]] spawn eggs.}}
{{History|||snap=15w33a|Spawn eggs can no longer be addressed by numeric data id, like: <code>give @p spawn_egg 1 50</code>. The spawnable [[entity]] from a spawn egg is now addressed by a datatag: <code>/give @p spawn_egg 1 0 <nowiki>{EntityTag:{id:"Creeper"}}</code>.}}
{{History||1.10|snap=16w20a|[[File:Polar Bear Spawn Egg JE1 BE1.png|32px]] [[File:Wither Skeleton Spawn Egg JE1 BE1.png|32px]] [[File:Stray Spawn Egg JE1 BE2.png|32px]] [[File:Husk Spawn Egg JE1 BE2.png|32px]] [[File:Elder Guardian Spawn Egg JE1 BE1.png|32px]] [[File:Cat Spawn Egg JE1.png|32px]] [[File:Donkey Spawn Egg JE1 BE1.png|32px]] [[File:Mule Spawn Egg JE1 BE1.png|32px]] [[File:Skeleton Horse Spawn Egg JE1 BE1.png|32px]] [[File:Zombie Horse Spawn Egg JE1 BE2.png|32px]] Added spawn eggs for [[polar bear]]s, [[wither skeleton]]s, [[stray]]s, [[husk]]s, [[elder guardian]], [[cat]]s, donkeys, mules, skeleton horses and zombie horses.}}
{{History|||snap=pre2|Removed spawn eggs for wither skeletons, strays, husks, elder guardians, cats, donkeys, mules, skeleton horses and zombie horses that were added in [[16w20a]].}}
{{History||1.11|snap=16w32a|[[File:Polar Bear Spawn Egg JE1 BE1.png|32px]] [[File:Wither Skeleton Spawn Egg JE1 BE1.png|32px]] [[File:Stray Spawn Egg JE1 BE2.png|32px]] [[File:Husk Spawn Egg JE1 BE2.png|32px]] [[File:Elder Guardian Spawn Egg JE1 BE1.png|32px]] [[File:Donkey Spawn Egg JE1 BE1.png|32px]] [[File:Mule Spawn Egg JE1 BE1.png|32px]] [[File:Skeleton Horse Spawn Egg JE1 BE1.png|32px]] [[File:Zombie Horse Spawn Egg JE1 BE2.png|32px]] Re-added the spawn eggs that were removed in [[1.10-pre2]], except the [[cat]] spawn egg.
|[[File:Zombie Villager Spawn Egg JE1 BE1.png|32px]] Added a [[zombie villager]] spawn egg. It can spawn only zombie farmers.
|Using a spawn egg on top of a block such as a [[fence]] no longer cause the spawned [[mob]] to fall inside the fence.<ref>{{bug|MC-88096|| When using spawn eggs on fences the mobs fall through}} – resolved as "Fixed"</ref>}}
{{History|||snap=16w32b|The [[zombie villager]] spawn egg now spawns different zombie professions.}}
{{History|||snap=16w39a|[[File:Evoker Spawn Egg JE1 BE1.png|32px]] [[File:Llama Spawn Egg JE1 BE1.png|32px]] [[File:Vex Spawn Egg JE1 BE1.png|32px]] [[File:Vindicator Spawn Egg JE1 BE1.png|32px]] Added spawn eggs for [[evoker]]s, [[llama]]s, [[vex]]es and [[vindicator]]s.}}
{{History||1.12|snap=17w13a|[[File:Parrot Spawn Egg JE1 BE1.png|32px]] Added spawn egg for [[parrot]]s.}}
{{History||1.13|snap=17w47a|The different {{nbt|compound|EntityTag}} [[entity]] IDs for the <code>spawn_egg</code> ID have now been split up into their own IDs.
|Prior to [[1.13/Flattening|''The Flattening'']], this [[item]]'s numeral ID was 383.}}
{{History|||snap=18w07a|[[File:Phantom Spawn Egg JE1.png|32px]] [[File:Turtle Spawn Egg JE1 BE1.png|32px]] Added spawn eggs for [[phantom]]s and [[turtle]]s.}}
{{History|||snap=18w08b|[[File:Cod Spawn Egg JE1 BE2.png|32px]] [[File:Salmon Spawn Egg JE1 BE2.png|32px]] [[File:Pufferfish Spawn Egg JE1 BE2.png|32px]] Added spawn eggs for the 3 [[fish mob]] variants: cod, salmon, and "puffer fish".}}
{{History|||snap=18w10a|[[File:Tropical Fish Spawn Egg JE1 BE2.png|32px]] Added a spawn egg for the new [[tropical fish]].}}
{{History|||snap=18w11a|[[File:Drowned Spawn Egg JE1 BE1.png|32px]] Added [[drowned]] spawn eggs.}}
{{History|||snap=18w15a|[[File:Dolphin Spawn Egg JE1 BE1.png|32px]] Added [[dolphin]] spawn eggs.}}
{{History|||snap=18w19a|[[File:Phantom Spawn Egg JE2 BE1.png|32px]] The [[phantom]] spawn egg has been changed to look more like [[mob]]'s updated texture.
|The "puffer fish" spawn egg has been renamed to "pufferfish" spawn egg.}}
{{History|||snap=18w20a|"Spawn ''x''" has been changed to "''x'' Spawn Egg".}}
{{History||1.14|snap=18w43a|[[File:Panda Spawn Egg JE1.png|32px]] [[File:Pillager Spawn Egg JE1 BE1.png|32px]] [[File:Ravager Spawn Egg JE1 BE1.png|32px]] Added [[panda]], [[pillager]] and [[ravager|"illager beast"]] spawn eggs.}}
{{History|||snap=18w44a|[[File:Cat Spawn Egg JE2.png|32px]] Re-added [[cat]] spawn eggs.}}
{{History|||snap=19w05a|The "illager beast" spawn egg has been renamed to "ravager" spawn egg.
|[[File:Wandering Trader Spawn Egg JE1.png|32px]] [[File:Trader Llama Spawn Egg JE1 BE1.png|32px]] Added [[wandering trader]] and [[trader llama]] spawn eggs.}}
{{History|||snap=19w07a|[[File:Fox Spawn Egg JE1 BE1.png|32px]] Added [[fox]] spawn eggs.}}
{{History||1.15|snap=19w34a|[[File:Bee Spawn Egg JE1.png|32px]] Added [[bee]] spawn eggs.}}
{{History|||snap=19w41a|[[File:Bee Spawn Egg JE2 BE1.png|32px]] The texture of the bee spawn egg has been changed.}}
{{History|||snap=19w46a|[[Drowned]], [[husk]], [[zombie]], and [[zombie villager]] spawn eggs can now be used on adult versions of these [[mob]]s to spawn baby variants.}}
{{History|||snap=Pre-release 1|[[Zombie pigmen]] spawn eggs can now be used on adult zombie pigmen to spawn the baby variant.}}
{{History||September 28, 2019|link={{ytl|OZqNaEX8208&t|t=2h17m19s}}|[[File:Hoglin Spawn Egg BE1.png|32px]] [[File:Piglin spawn egg.png|32px]] [[Hoglin]] and [[piglin]] spawn eggs were shown.}}
{{History||1.16|snap=20w06a|[[File:Hoglin Spawn Egg JE1.png|30px]] Added [[hoglin]] spawn eggs.
|Currently, the hoglin spawn egg substitutes the [[zombie pigman]]'s spawn egg texture.}}
{{History|||snap=20w07a|[[File:Piglin Spawn Egg JE1.png|32px]] Added [[piglin]] spawn eggs.
|[[File:Hoglin Spawn Egg JE2.png|30px]] The texture of the hoglin spawn egg has been changed.}}
{{History|||snap=20w09a|"Zombie Pigman Spawn Egg" has been renamed to "Zombified Piglin Spawn Egg".}}
{{History|||snap=20w13a|[[File:Strider Spawn Egg JE1 BE1.png|32px]] Added [[strider]] spawn eggs.}}
{{History|||snap=20w14a|[[File:Zoglin Spawn Egg JE1 BE1.png|32px]] Added [[zoglin]] spawn eggs.}}
{{History||1.16.2|snap=20w27a|[[File:Piglin Brute Spawn Egg JE1 BE1.png|32px]] Added [[piglin brute]] spawn eggs.}}
{{History||October 6, 2020|link={{tweet|kingbdogz|1313451032383574017}}|[[File:Warden Spawn Egg (pre-release).png|32px]] [[Kingbdogz]] showed a warden spawn egg.}}
{{History||1.17|snap=20w51a|[[File:Axolotl Spawn Egg JE1 BE1.png|32px]] Added [[axolotl]] spawn eggs.}}
{{History|||snap=21w03a|[[File:Glow Squid Spawn Egg JE1 BE1.png|32px]] Added [[glow squid]] spawn eggs.}}
{{History|||snap=21w13a|[[File:Goat Spawn Egg BE2.png|32px]] Added [[goat]] spawn eggs.}}
{{History||October 16, 2021|link={{ytl|w6zLprHHZOk&t|t=7447s}}|[[File:Frog Spawn Egg (pre-release).png|32px]] [[File:Tadpole Spawn Egg (pre-release).png|32px]] [[Frog]] and [[tadpole]] spawn eggs were shown.}}
{{History||1.19|snap=Deep Dark Experimental Snapshot 1|[[File:Warden Spawn Egg JE1 BE1.png|32px]] Added [[warden]] spawn eggs.}}
{{History|||snap=22w11a|[[File:Frog Spawn Egg JE1 BE1.png|32px]][[File:Tadpole Spawn Egg JE1 BE1.png|32px]] Added [[frog]] and [[tadpole]] spawn eggs.
|As with the warden itself, warden spawn eggs are not added in this snapshot.}}
{{History|||snap=22w12a|[[File:Warden Spawn Egg JE1 BE1.png|32px]] Re-added [[warden]] spawn eggs.}}
{{History|||snap=22w13a|[[File:Allay Spawn Egg JE1 BE1.png|32px]] Added [[allay]] spawn eggs.}}
{{History||1.20<br>(Experimental)|link=1.19.3|snap=22w42a|[[File:Camel Spawn Egg JE1 BE1.png|32px]] Added [[camel]] spawn eggs behind the [[Java Edition 1.20|Update 1.20 experimental datapack]].}}
{{History|||snap=22w43a|[[File:Camel Spawn Egg JE2 BE2.png|32px]] The texture of the camel spawn egg has been changed.}}
{{History||1.19.3|snap=22w44a|[[File:Iron Golem Spawn Egg JE1 BE1.png|32px]] [[File:Snow Golem Spawn Egg JE2 BE1.png|32px]] [[File:Wither Spawn Egg JE1 BE1.png|32px]] [[File:Ender Dragon Spawn Egg JE2 BE1.png|32px]] Added [[iron golem]], [[snow golem]], [[wither]], and [[ender dragon]] spawn eggs. The wither and ender dragon spawn eggs are only available through [[commands]] to prevent accidental destruction of [[Creative]] builds.
|[[File:Polar Bear Spawn Egg JE2 BE2.png|32px]] The texture of the polar bear spawn egg has been changed.<ref>{{bug|MC-242097||Ghast and Polar Bear Spawn Eggs are nearly indistinguishable|Fixed}}</ref>}}
{{History||1.20<br>(Experimental)|link=1.19.4|snap=23w07a|[[File:Sniffer Spawn Egg JE1 BE1.png|32px]] Added [[sniffer]] spawn eggs behind the [[Java Edition 1.20|Update 1.20 experimental datapack]].}}
{{History|||snap=1.19.4-pre1|[[File:Sniffer Spawn Egg JE2.png|32px]] The texture of the sniffer spawn egg has been changed.}}
{{History||1.20|snap=23w12a|Camel and sniffer spawn eggs are now available without using the "Update 1.20" experimental datapack.}}
{{History|pocket alpha}}
{{History||v0.7.0|[[File:Chicken Spawn Egg JE2 BE1.png|32px]] [[File:Sheep Spawn Egg JE2 BE1.png|32px]] [[File:Cow Spawn Egg JE2 BE1.png|32px]] [[File:Pig Spawn Egg JE2 BE1.png|32px]] Added spawn eggs for [[chicken]]s, [[sheep]], [[pig]]s and [[cow]]s.}}
{{History||v0.7.0|All spawn eggs with damage/metadata values 30 and higher, would display a unique texture.}}
{{History||v0.8.0|snap=build 1|The texture of the default spawn egg is now [[File:Chicken Spawn Egg JE2 BE1.png|32px]], instead of having a completely blank texture.}}
{{History||v0.9.0|snap=build 1|[[File:Mooshroom Spawn Egg JE2 BE1.png|32px]] [[File:Creeper Spawn Egg JE2 BE1.png|32px]] [[File:Enderman Spawn Egg JE2 BE1.png|32px]] [[File:Silverfish Spawn Egg BE1.png|32px]] [[File:Skeleton Spawn Egg JE2 BE1.png|32px]] [[File:Slime Spawn Egg JE2 BE1.png|32px]] [[File:Spider Spawn Egg JE2 BE1.png|32px]] [[File:Zombie Spawn Egg JE2 BE1.png|32px]] [[File:Zombie Pigman Spawn Egg JE2 BE1.png|32px]] [[File:Wolf Spawn Egg JE2 BE1.png|32px]] Added more spawn eggs, including [[mooshroom]], [[creeper]], [[enderman]], [[silverfish]], [[skeleton]], [[slime]], [[spider]], [[zombie]], [[zombie pigman]] and [[wolf]].
|Spawn eggs now have the correct name in the [[inventory]].}}
{{History|||snap=build 2|[[File:Villager Spawn Egg JE2 BE1.png|32px]] Added (Old) [[villager]] spawn eggs.
|Spawn eggs can now be used to program [[monster spawner]] blocks.}}
{{History||v0.11.0|All spawn eggs that are obtained in this version with an invalid damage/metadata value would result in the name of that spawn egg displaying as the following: item.monsterPlacer.name.name.}}
{{History||v0.11.0|snap=build 1|[[File:Squid Spawn Egg JE2 BE1.png|32px]] [[File:Bat Spawn Egg JE1 BE1.png|32px]] Added [[squid]] and [[bat]] spawn eggs.
|[[File:Ghast Spawn Egg JE2 BE1.png|32px]] [[File:Magma Cube Spawn Egg JE2 BE1.png|32px]] [[File:Cave Spider Spawn Egg JE2 BE1.png|32px]] Added [[ghast]], [[magma cube]] and [[cave spider]] spawn eggs, which are currently unobtainable.}}
{{History|||snap=build 3|Added [[cave spider]] spawn eggs to the [[creative]] mode [[inventory]].}}
{{History|||snap=build 8|Added [[magma cube]] spawn eggs to the creative mode inventory.}}
{{History||v0.12.1|snap=build 1|[[File:Blaze Spawn Egg JE2 BE1.png|32px]] [[File:Ocelot Spawn Egg JE1 BE1.png|32px]] [[File:Zombie Villager Spawn Egg JE1 BE1.png|32px]] Added [[blaze]], [[ocelot]], and (Old) [[zombie villager]] spawn eggs.
|Added [[ghast]] spawn eggs to the [[creative]] mode [[inventory]].
|[[Wither skeleton]]s now have a high chance to spawn from an [[skeleton]] spawn egg, if the [[player]] is in [[the Nether]].}}
{{History|||snap=build 9|[[Mob]]s spawned from renamed eggs now have the name of the egg and the names appear in [[death messages]].}}
{{History|||snap=build 12|[[Zombie villager]]s can now be spawned using [[zombie]] spawn eggs.}}
{{History||v0.13.0|snap=build 1|[[File:Rabbit Spawn Egg JE1 BE1.png|32px]] Added [[rabbit]] spawn eggs.}}
{{History||v0.14.0|snap=build 1|[[File:Witch Spawn Egg JE1 BE1.png|32px]] Added [[witch]] spawn eggs.}}
{{History||v0.15.0|snap=build 1|[[File:Horse Spawn Egg JE1 BE1.png|32px]] [[File:Mule Spawn Egg JE1 BE1.png|32px]] [[File:Donkey Spawn Egg JE1 BE1.png|32px]] [[File:Zombie Horse Spawn Egg BE1.png|32px]] [[File:Skeleton Horse Spawn Egg JE1 BE1.png|32px]] [[File:Stray Spawn Egg BE1.png|32px]] [[File:Husk Spawn Egg BE1.png|32px]] [[File:Wither Skeleton Spawn Egg JE1 BE1.png|32px]] Added [[horse]], [[mule]], [[donkey]], [[zombie horse]], [[skeleton horse]], [[stray]], [[husk]] and [[wither skeleton]] spawn eggs to the [[creative]] [[inventory]].}}
{{History||v0.15.1|snap=build 1|The texture of the default spawn egg has been changed from [[File:Chicken Spawn Egg JE2 BE1.png|32px]] to [[File:Spawn Egg.png|32px]].
|The empty spawn egg named "Spawn" is now available through [[inventory]] editing, but crashes the game.{{info needed|How? On use? Simply by being in the inventory?}}}}
{{History||v0.16.0|snap=build 1|[[File:Guardian Spawn Egg JE1 BE1.png|32px]] Added [[guardian]] spawn eggs.
|[[File:Spawn Egg.png|32px]] Added [[elder guardian]] spawn egg without colors, which is currently unavailable in the [[creative]] [[inventory]].
|[[File:NPC Spawn Egg BE1.png|32px]] Added a non-functional [[NPC]] spawn egg.}}
{{History|||snap=build 2|The NPC spawn egg has been removed from the creative inventory.}}
{{History|||snap=build 4|The NPC spawn egg has been removed completely.}}
{{History|||snap=build 5|[[File:Elder Guardian Spawn Egg JE1 BE1.png|32px]] Added [[elder guardian]] spawn eggs to the [[creative]] [[inventory]].}}
{{History|pocket}}
{{History||1.0.0|snap=alpha 0.17.0.1|[[File:Shulker Spawn Egg BE1.png|32px]] [[File:Endermite Spawn Egg JE1 BE1.png|32px]] [[File:Polar Bear Spawn Egg JE1 BE1.png|32px]] Added spawn eggs for [[shulker]]s, [[endermite]]s and [[polar bear]]s.}}
{{History||1.1.0|snap=alpha 1.1.0.0|[[File:Llama Spawn Egg JE1 BE1.png|32px]] [[File:Vindicator Spawn Egg JE1 BE1.png|32px]] [[File:Evoker Spawn Egg JE1 BE1.png|32px]] [[File:Vex Spawn Egg JE1 BE1.png|32px]] Added spawn eggs for [[llama]]s, [[vindicator]]s, [[evoker]]s and [[vex]]es.}}
{{History|||snap=alpha 1.1.0.9|[[File:Husk Spawn Egg JE1 BE2.png|32px]] [[File:Shulker Spawn Egg JE1 BE2.png|32px]] [[File:Silverfish Spawn Egg JE2 BE2.png|32px]] [[File:Stray Spawn Egg JE1 BE2.png|32px]] [[File:Zombie Horse Spawn Egg JE1 BE2.png|32px]] The spawn egg textures for [[husk]]s, [[shulker]]s, [[silverfish]]ses, [[stray]]s and [[zombie horse]]s have been updated; probably due to {{bug|MCPE-18348}}.}}
{{History|bedrock}}
{{History||1.2.0|snap=beta 1.2.0.2|[[File:Parrot Spawn Egg JE1 BE1.png|32px]] [[File:Zombie Villager Spawn Egg JE1 BE1.png|32px]] Added [[parrot]] and [[zombie villager]] spawn eggs.}}
{{History||1.4.0|snap=beta 1.2.13.8|[[File:Drowned Spawn Egg JE1 BE1.png|32px]] Added [[drowned]] spawn eggs.}}
{{History|||snap=beta 1.2.14.2|[[File:Cod Spawn Egg BE1.png|32px]] [[File:Salmon Spawn Egg BE1.png|32px]] [[File:Pufferfish Spawn Egg BE1.png|32px]] [[File:Tropical Fish Spawn Egg BE1.png|32px]] Added spawn eggs for each [[fish]], which have different textures compared to {{JE}}.}}
{{History|||snap=beta 1.2.20.1|[[File:Cod Spawn Egg JE1 BE2.png|32px]] [[File:Salmon Spawn Egg JE1 BE2.png|32px]] [[File:Pufferfish Spawn Egg JE1 BE2.png|32px]] [[File:Tropical Fish Spawn Egg JE1 BE2.png|32px]] The fish spawn egg textures have been made less unique; it matches {{JE}}.
|[[File:Dolphin Spawn Egg JE1 BE1.png|32px]] Added [[dolphin]] spawn eggs.}}
{{History||1.5.0|snap=beta 1.5.0.4|[[File:Turtle Spawn Egg JE1 BE1.png|32px]] Added spawn eggs for [[turtle]]s.}}
{{History||1.6.0|snap=beta 1.6.0.1|[[File:Phantom Spawn Egg JE2 BE1.png|32px]] Added spawn eggs for [[phantom]]s.}}
{{History||1.8.0|snap=beta 1.8.0.8|[[File:Panda Spawn Egg BE1.png|32px]] [[File:Cat Spawn Egg BE1.png|32px]] Added spawn eggs for [[panda]]s and [[cat]]s.
|[[File:NPC Spawn Egg BE1.png|32px]] The NPC spawn egg has been re-added.
|[[File:Agent Spawn Egg BE1.png|32px]] Added spawn eggs for [[agent]]s.
|[[File:Spawn Egg BE2.png|32px]] Unknown spawn eggs now use a completely black spawn egg as the default texture.
|[[File:Mask Spawn Egg BE1.png|32px]] Added mask spawn egg texture.}}
{{History||1.9.0|snap=beta 1.9.0.0|[[File:Pillager Spawn Egg JE1 BE1.png|32px]] Added [[pillager]] spawn eggs.}}
{{History||1.10.0|snap=beta 1.10.0.3|[[File:Ravager Spawn Egg JE1 BE1.png|32px]] [[File:Wandering Trader Spawn Egg BE1.png|32px]] [[File:Villager Spawn Egg JE2 BE1.png|32px]] [[File:Zombie Villager Spawn Egg JE1 BE1.png|32px]] Added [[wandering trader]], [[Ravager|"illager beast"]], (New) [[villager]] and (New) [[zombie villager]] spawn eggs.}}
{{History||1.11.0|snap=beta 1.11.0.1|The old villager and old zombie villager spawn eggs have been removed.
|"Spawn Illager Beast" has been renamed to "Spawn Ravager".}}
{{History||1.13.0|snap=beta 1.13.0.1|[[File:Fox Spawn Egg JE1 BE1.png|32px]] Added [[fox]] spawn eggs.}}
{{History||1.14.0|snap=beta 1.14.0.1|[[File:Bee Spawn Egg JE2 BE1.png|32px]] Added [[bee]] spawn eggs.}}
{{History||1.16.0|snap=beta 1.16.0.51|[[File:Hoglin Spawn Egg BE1.png|32px]] [[File:Piglin Spawn Egg BE1.png|32px]] Added [[hoglin]] and [[piglin]] spawn eggs.
|"Spawn Zombie Pigman" has been renamed to "Spawn Zombified Piglin".}}
{{History|||snap=beta 1.16.0.57|[[File:Strider Spawn Egg JE1 BE1.png|32px]] [[File:Zoglin Spawn Egg JE1 BE1.png|32px]] Added [[strider]] and [[zoglin]] spawn eggs.}}
{{History|||snap=beta 1.16.0.59|[[File:Piglin Spawn Egg JE1.png|32px]] [[File:Hoglin Spawn Egg JE2.png|30px]] The textures of the piglin and hoglin spawn eggs have been changed to match [[Java Edition]].}}
{{History||1.16.20|snap=beta 1.16.20.50|[[File:Piglin Brute Spawn Egg JE1 BE1.png|32px]] Added [[piglin brute]] spawn eggs.}}
{{History||1.16.100|snap=beta 1.16.100.56|The different [[entity]] IDs for the <code>spawn_egg</code> ID have now been split up into their own IDs.
|Unused spawn eggs (such as [[Iron Golem]], [[End Crystal]] and [[Wither]]) are completely removed. Attempts to put such spawn eggs in an inventory gives the default spawn egg instead.
|The texture of the default spawn egg is now [[File:Chicken Spawn Egg JE2 BE1.png|32px]], instead of having a completely black texture.}}
{{History||1.16.200|snap=beta 1.16.200.52|[[File:Goat Spawn Egg BE1.png|32px]] Added [[goat]] spawn eggs behind the "Caves and Cliffs" experimental toggle.}}
{{History|||snap=beta 1.16.210.51|[[File:Goat Spawn Egg BE2.png|32px]] The texture for [[goat]] spawn eggs has been changed.}}
{{History||1.16.210|snap=beta 1.16.210.59|[[File:Glow Squid Spawn Egg JE1 BE1.png|32px]] Added [[glow squid]] spawn eggs.}}
{{History|||snap=beta 1.16.210.60|[[Glow squid]] spawn egg is temporarily removed.}}
{{History||1.16.220|snap=beta 1.16.220.50|[[File:Glow Squid Spawn Egg JE1 BE1.png|32px]] Re-added [[glow squid]] spawn egg.}}
{{History||1.17.0|snap=beta 1.16.230.52|[[File:Axolotl Spawn Egg JE1 BE1.png|32px]] Added [[axolotl]] spawn eggs.}}
{{History|||snap=beta 1.17.0.52|[[Goat]], [[glow squid]] and [[axolotl]] spawn eggs are now available without enabling [[experimental gameplay]].}}
{{History||1.18.10|snap=beta 1.18.10.24|[[File:Frog Spawn Egg JE1 BE1.png|32px]][[File:Tadpole Spawn Egg JE1 BE1.png|32px]] Added [[frog]] and [[tadpole]] spawn eggs behind the "Wild Update" experimental toggle.}}
{{History||1.18.30|snap=beta 1.18.30.22|[[File:Allay Spawn Egg JE1 BE1.png|32px]] Added [[allay]] spawn eggs behind the "Wild Update" experimental toggle.}}
{{History|||snap=beta 1.18.30.32|[[File:Warden Spawn Egg JE1 BE1.png|32px]] Added [[warden]] spawn eggs behind the "Wild Update" experimental toggle.}}
{{History||1.19.0|snap=beta 1.19.0.20|Both spawn eggs mentioned above are now available without enabling experimental gameplay.}}
{{History||1.19.10|snap=beta 1.19.10.20|[[File:Trader Llama Spawn Egg JE1 BE1.png|32px]] Added the [[trader llama]] spawn egg.}}
{{History||Next Major Update<br>(Experimental)|link=Bedrock Edition 1.19.50|snap=beta 1.19.50.21|[[File:Camel Spawn Egg JE1 BE1.png|32px]] Added [[camel]] spawn eggs behind the "[[Bedrock Edition 1.20|Next Major Update]]" [[experimental]] toggle.}}
{{History|||snap=beta 1.19.50.22|[[File:Camel Spawn Egg JE2 BE2.png|32px]] The texture of the camel spawn egg has been changed.}}
{{History||1.19.60|snap=beta 1.19.60.20|[[File:Iron Golem Spawn Egg JE1 BE1.png|32px]] [[File:Snow Golem Spawn Egg JE2 BE1.png|32px]] [[File:Wither Spawn Egg JE1 BE1.png|32px]] [[File:Ender Dragon Spawn Egg JE2 BE1.png|32px]] Added [[iron golem]], [[snow golem]], [[wither]], and [[ender dragon]] spawn eggs. The wither and ender dragon spawn eggs will only be available through [[commands]] to prevent accidental destruction of [[Creative]] builds.|[[File:Polar Bear Spawn Egg JE2 BE2.png|32px]] The texture of the polar bear spawn egg has been changed.}}
{{History||1.19.60|snap=beta 1.19.60.25|The wither and ender dragon spawn eggs are no longer available in the creative inventory, only via [[command]]s.}}
{{History||Sniffer<br>(Experimental)|link=Bedrock Edition 1.19.70|snap=beta 1.19.70.23|[[File:Sniffer Spawn Egg JE1 BE1.png|32px]] Added [[sniffer]] spawn eggs behind the "[[Bedrock Edition 1.19.70|Sniffer]]" [[experimental]] toggle.}}
{{History||1.20.0|snap=beta 1.20.0.20|Sniffer spawn eggs are now available without using the "Sniffer" experimental toggle.}}
{{History|||snap=beta 1.20.0.21|Camel spawn eggs are now available without using the "Next Major Update" experimental toggle.}}
{{History|console}}
{{History||xbox=TU9|xbone=CU1|ps=1.0|wiiu=Patch 1|switch=1.0.1|[[File:Creeper Spawn Egg JE2 BE1.png|32px]] [[File:Skeleton Spawn Egg JE2 BE1.png|32px]] [[File:Spider Spawn Egg JE2 BE1.png|32px]] [[File:Zombie Spawn Egg JE2 BE1.png|32px]] [[File:Slime Spawn Egg JE2 BE1.png|32px]] [[File:Ghast Spawn Egg JE2 BE1.png|32px]] [[File:Zombie Pigman Spawn Egg JE2 BE1.png|32px]] [[File:Enderman Spawn Egg JE2 BE1.png|32px]] [[File:Cave Spider Spawn Egg JE2 BE1.png|32px]] [[File:Silverfish Spawn Egg JE2 BE2.png|32px]] [[File:Blaze Spawn Egg JE2 BE1.png|32px]] [[File:Magma Cube Spawn Egg JE2 BE1.png|32px]] [[File:Pig Spawn Egg JE2 BE1.png|32px]] [[File:Sheep Spawn Egg JE2 BE1.png|32px]] [[File:Cow Spawn Egg JE2 BE1.png|32px]] [[File:Chicken Spawn Egg JE2 BE1.png|32px]] [[File:Squid Spawn Egg JE2 BE1.png|32px]] [[File:Wolf Spawn Egg JE2 BE1.png|32px]] [[File:Mooshroom Spawn Egg JE2 BE1.png|32px]] [[File:Villager Spawn Egg JE2 BE1.png|32px]] Added spawn eggs for [[creeper]]s, [[skeleton]]s, [[spider]]s, [[zombie]]s, [[slime]]s, [[ghast]]s, [[zombie pigman]]s, [[enderman]]s, [[cave spider]]s, [[silverfish]]s, [[blaze]]s, [[magma cube]]s, [[pig]]s, [[sheep]]s, [[cow]]s, [[chicken]]s, [[squid]], [[wolf]]s, [[mooshroom]] and [[villager]]s.
|Spawn eggs can now be placed into a [[dispenser]]. Activating the dispenser spawns the [[mob]], instead of dispensing the egg as an [[item]].}}
{{History||xbox=TU11|Added a message when the user tries to spawn a [[hostile mob]] from a spawn egg in Peaceful [[difficulty]].}}
{{History||xbox=TU12|[[File:Ocelot Spawn Egg JE1 BE1.png|32px]] Added [[ocelot]] spawn eggs.}}
{{History||xbox=TU19|xbone=CU7|ps=1.12|[[File:Horse Spawn Egg JE1 BE1.png|32px]] [[File:Witch Spawn Egg JE1 BE1.png|32px]] [[File:Bat Spawn Egg JE1 BE1.png|32px]] [[File:Donkey Spawn Egg CE1.png|32px]] [[File:Mule Spawn Egg CE1.png|32px]] Added [[horse]], [[witch]], [[bat]], donkey and mule spawn eggs.}}
{{History||xbox=TU31|xbone=CU19|ps=1.22|wiiu=Patch 3|[[File:Endermite Spawn Egg JE1 BE1.png|32px]] [[File:Guardian Spawn Egg JE1 BE1.png|32px]] [[File:Rabbit Spawn Egg JE1 BE1.png|32px]] Added [[endermite]], [[guardian]] and [[rabbit]] spawn eggs.}}
{{History||xbox=TU46|xbone=CU36|ps=1.38|wiiu=Patch 15|[[File:Shulker Spawn Egg JE1 BE2.png|32px]] Added [[shulker]] spawn eggs.
|[[File:Donkey Spawn Egg JE1 BE1.png|32px]] [[File:Mule Spawn Egg JE1 BE1.png|32px]] Donkey and mule spawn eggs now match the textures of their [[Bedrock Edition|Bedrock]] and [[Java Edition|Java]] edition counterparts.}}
{{History||xbox=TU54|xbone=CU44|ps=1.52|wiiu=Patch 24|switch=1.0.4|[[File:Skeleton Horse Spawn Egg JE1 BE1.png|32px]] [[File:Zombie Horse Spawn Egg JE1 BE2.png|32px]] [[File:Elder Guardian Spawn Egg JE1 BE1.png|32px]] [[File:Stray Spawn Egg JE1 BE2.png|32px]] [[File:Wither Skeleton Spawn Egg JE1 BE1.png|32px]] [[File:Husk Spawn Egg JE1 BE2.png|32px]] [[File:Zombie Villager Spawn Egg JE1 BE1.png|32px]] [[File:Parrot Spawn Egg JE1 BE1.png|32px]] [[File:Llama Spawn Egg JE1 BE1.png|32px]] [[File:Vindicator Spawn Egg JE1 BE1.png|32px]] [[File:Evoker Spawn Egg JE1 BE1.png|32px]] [[File:Vex Spawn Egg JE1 BE1.png|32px]] Added spawn eggs for [[skeleton horse]]s, [[zombie horse]]s, [[elder guardian]]s, [[stray]]s, [[wither skeleton]]s, [[husk]]s, [[zombie villager]]s, [[parrot]]s, [[llama]]s, [[vindicator]]s, [[evoker]]s and [[vex]]es.}}
{{History||xbox=TU69|xbone=none|ps=1.76|wiiu=Patch 38|switch=none|[[File:Drowned Spawn Egg JE1 BE1.png|32px]] [[File:Cod Spawn Egg JE1 BE2.png|32px]] [[File:Salmon Spawn Egg JE1 BE2.png|32px]] [[File:Pufferfish Spawn Egg JE1 BE2.png|32px]] [[File:Tropical Fish Spawn Egg JE1 BE2.png|32px]] [[File:Dolphin Spawn Egg JE1 BE1.png|32px]] [[File:Turtle Spawn Egg JE1 BE1.png|32px]] [[File:Phantom Spawn Egg JE2 BE1.png|32px]] Added spawn eggs for [[drowned]], [[cod]], [[salmon]], [[pufferfish]], [[tropical fish]], [[dolphin]]s, [[sea turtle]]s and [[phantom]]s.}}
{{History||xbox=none|ps=1.83|wiiu=none|[[File:Panda Spawn Egg BE1.png|32px]] [[File:Cat Spawn Egg BE1.png|32px]] Added spawn eggs for [[panda]]s and [[cat]]s.}}
{{History||ps=1.90|[[File:Pillager Spawn Egg JE1 BE1.png|32px]] Added [[pillager]] spawn eggs.}}
{{History||ps=1.91|[[File:Ravager Spawn Egg JE1 BE1.png|32px]] [[File:Wandering Trader Spawn Egg JE1.png|32px]] Added spawn eggs for [[ravager]]s and [[wandering trader]]s.}}
{{History|New 3DS}}
{{History||0.1.0|[[File:Creeper Spawn Egg JE2 BE1.png|32px]] [[File:Skeleton Spawn Egg JE2 BE1.png|32px]] [[File:Spider Spawn Egg JE2 BE1.png|32px]] [[File:Zombie Spawn Egg JE2 BE1.png|32px]] [[File:Slime Spawn Egg JE2 BE1.png|32px]] [[File:Ghast Spawn Egg JE2 BE1.png|32px]] [[File:Zombie Pigman Spawn Egg JE2 BE1.png|32px]] [[File:Enderman Spawn Egg JE2 BE1.png|32px]] [[File:Cave Spider Spawn Egg JE2 BE1.png|32px]] [[File:Silverfish Spawn Egg JE2 BE2.png|32px]] [[File:Blaze Spawn Egg JE2 BE1.png|32px]] [[File:Magma Cube Spawn Egg JE2 BE1.png|32px]] [[File:Pig Spawn Egg JE2 BE1.png|32px]] [[File:Sheep Spawn Egg JE2 BE1.png|32px]] [[File:Cow Spawn Egg JE2 BE1.png|32px]] [[File:Chicken Spawn Egg JE2 BE1.png|32px]] [[File:Squid Spawn Egg JE2 BE1.png|32px]] [[File:Wolf Spawn Egg JE2 BE1.png|32px]] [[File:Mooshroom Spawn Egg JE2 BE1.png|32px]] [[File:Villager Spawn Egg JE2 BE1.png|32px]] [[File:Ocelot Spawn Egg JE1 BE1.png|32px]] [[File:Guardian Spawn Egg JE1 BE1.png|32px]] [[File:Rabbit Spawn Egg JE1 BE1.png|32px]] [[File:Horse Spawn Egg JE1 BE1.png|32px]] [[File:Witch Spawn Egg JE1 BE1.png|32px]] [[File:Bat Spawn Egg JE1 BE1.png|32px]] [[File:Donkey Spawn Egg JE1 BE1.png|32px]] [[File:Mule Spawn Egg JE1 BE1.png|32px]] Added spawn eggs.}}
{{History||1.7.10|[[File:Endermite Spawn Egg JE1 BE1.png|32px]] [[File:Polar Bear Spawn Egg JE1 BE1.png|32px]] [[File:Shulker Spawn Egg JE1 BE2.png|32px]] Added spawn eggs for [[endermite]]s, [[polar bear]]s and [[shulker]]s.}}
{{History||1.9.19|[[File:Llama Spawn Egg JE1 BE1.png|32px]] [[File:Vindicator Spawn Egg JE1 BE1.png|32px]] [[File:Evoker Spawn Egg JE1 BE1.png|32px]] [[File:Vex Spawn Egg JE1 BE1.png|32px]] Added spawn eggs for [[llama]]s, [[vindicator]]s, [[evoker]]s and [[vex]]es.}}
{{History|Education}}
{{History||1.0|[[File:Creeper Spawn Egg JE2 BE1.png|32px]] [[File:Skeleton Spawn Egg JE2 BE1.png|32px]] [[File:Spider Spawn Egg JE2 BE1.png|32px]] [[File:Zombie Spawn Egg JE2 BE1.png|32px]] [[File:Slime Spawn Egg JE2 BE1.png|32px]] [[File:Ghast Spawn Egg JE2 BE1.png|32px]] [[File:Zombie Pigman Spawn Egg JE2 BE1.png|32px]] [[File:Enderman Spawn Egg JE2 BE1.png|32px]] [[File:Cave Spider Spawn Egg JE2 BE1.png|32px]] [[File:Silverfish Spawn Egg JE2 BE2.png|32px]] [[File:Blaze Spawn Egg JE2 BE1.png|32px]] [[File:Magma Cube Spawn Egg JE2 BE1.png|32px]] [[File:Pig Spawn Egg JE2 BE1.png|32px]] [[File:Sheep Spawn Egg JE2 BE1.png|32px]] [[File:Cow Spawn Egg JE2 BE1.png|32px]] [[File:Chicken Spawn Egg JE2 BE1.png|32px]] [[File:Squid Spawn Egg JE2 BE1.png|32px]] [[File:Wolf Spawn Egg JE2 BE1.png|32px]] [[File:Mooshroom Spawn Egg JE2 BE1.png|32px]] [[File:Villager Spawn Egg JE2 BE1.png|32px]] [[File:Ocelot Spawn Egg JE1 BE1.png|32px]] [[File:Guardian Spawn Egg JE1 BE1.png|32px]] [[File:Elder Guardian Spawn Egg JE1 BE1.png|32px]] [[File:Rabbit Spawn Egg JE1 BE1.png|32px]] [[File:Horse Spawn Egg JE1 BE1.png|32px]] [[File:Husk Spawn Egg JE1 BE2.png|32px]] [[File:Stray Spawn Egg JE1 BE2.png|32px]] [[File:Witch Spawn Egg JE1 BE1.png|32px]] [[File:Bat Spawn Egg JE1 BE1.png|32px]] [[File:Wither Skeleton Spawn Egg JE1 BE1.png|32px]] [[File:Donkey Spawn Egg JE1 BE1.png|32px]] [[File:Mule Spawn Egg JE1 BE1.png|32px]] [[File:Skeleton Horse Spawn Egg JE1 BE1.png|32px]] [[File:Zombie Horse Spawn Egg JE1 BE2.png|32px]] [[File:Endermite Spawn Egg JE1 BE1.png|32px]] [[File:Zombie Villager Spawn Egg JE1 BE1.png|32px]] [[File:Polar Bear Spawn Egg JE1 BE1.png|32px]] [[File:Shulker Spawn Egg JE1 BE2.png|32px]] [[File:Llama Spawn Egg JE1 BE1.png|32px]] [[File:Vindicator Spawn Egg JE1 BE1.png|32px]] [[File:Evoker Spawn Egg JE1 BE1.png|32px]] [[File:Vex Spawn Egg JE1 BE1.png|32px]] [[File:Parrot Spawn Egg JE1 BE1.png|32px]] [[File:NPC Spawn Egg BE1.png|32px]] Added spawn eggs.}}
{{History||1.4|[[File:Cod Spawn Egg JE1 BE2.png|32px]] [[File:Salmon Spawn Egg JE1 BE2.png|32px]] [[File:Pufferfish Spawn Egg JE1 BE2.png|32px]] [[File:Tropical Fish Spawn Egg JE1 BE2.png|32px]] [[File:Dolphin Spawn Egg JE1 BE1.png|32px]] Added spawn eggs for [[cod]], [[salmon]], [[pufferfish]], [[tropical fish]] and [[dolphin]]s.}}
{{History||1.7|[[File:Drowned Spawn Egg JE1 BE1.png|32px]] [[File:Turtle Spawn Egg JE1 BE1.png|32px]] [[File:Phantom Spawn Egg JE2 BE1.png|32px]] [[File:Agent Spawn Egg BE1.png|32px]] Added spawn eggs for [[drowned]], [[turtle|sea turtles]], [[phantom]]s and [[agent]]s.}}
{{History||?|[[File:Mask Spawn Egg BE1.png|32px]] Added mask spawn egg texture.}}
{{History||1.9|[[File:Panda Spawn Egg BE1.png|32px]] [[File:Cat Spawn Egg BE1.png|32px]] Added spawn eggs for [[panda]]s and [[cat]]s.}}
{{History||1.12.0|[[File:Pillager Spawn Egg JE1 BE1.png|32px]] [[File:Ravager Spawn Egg JE1 BE1.png|32px]] [[File:Wandering Trader Spawn Egg BE1.png|32px]] Added spawn eggs for [[pillager]]s, [[ravager]]s and [[wandering trader]]s.}}
{{History||1.14.31|[[File:Bee Spawn Egg JE2 BE1.png|32px]] [[File:Fox Spawn Egg JE1 BE1.png|32px]] Added spawn eggs for [[bee]]s and [[fox]]es.}}
{{History||1.17.30|[[File:Piglin Spawn Egg JE1.png|32px]] [[File:Hoglin Spawn Egg JE2.png|30px]] [[File:Strider Spawn Egg JE1 BE1.png|32px]] [[File:Zoglin Spawn Egg JE1 BE1.png|32px]] [[File:Piglin Brute Spawn Egg JE1 BE1.png|32px]] [[File:Goat Spawn Egg BE2.png|32px]] [[File:Axolotl Spawn Egg JE1 BE1.png|32px]] [[File:Glow Squid Spawn Egg JE1 BE1.png|32px]] Added spawn eggs for [[piglin]]s, [[hoglin]]s, [[strider]]s, [[zoglin]]s, [[piglin brute]]s, [[goat]]s, [[axolotl]]s and [[glow squid]]s.}}
{{History|earth}}
{{History||Release|[[File:Cluckshroom Spawn Egg.png|32px]] [[File:Horned Sheep Spawn Egg.png|32px]] [[File:Moobloom Spawn Egg.png|32px]] Added [[cluckshroom]], [[horned sheep]] and [[moobloom]] spawn egg textures.}}
{{History||0.4.0|[[File:Jumbo Rabbit Spawn Egg.png|32px]] Added [[jumbo rabbit]] spawn egg texture.}}
{{History|foot}}
==Issues==
{{issue list}}
==Gallery==
{{Hidden begin|View all renders}}
<gallery>
Spawn Egg.png|frame|Uncolored Spawn Egg
Agent Spawn Egg.png|Agent Spawn Egg
Allay Spawn Egg.png|Allay Spawn Egg
Axolotl Spawn Egg.png|Axolotl Spawn Egg
Bat Spawn Egg.png|Bat Spawn Egg
Bee Spawn Egg.png|Bee Spawn Egg
Blaze Spawn Egg.png|Blaze Spawn Egg
Camel Spawn Egg.png|Camel Spawn Egg
Cat Spawn Egg.png|Cat Spawn Egg (Java)
Cat Spawn Egg BE1.png|Cat Spawn Egg (Bedrock)
Cave Spider Spawn Egg.png|Cave Spider Spawn Egg
Chicken Spawn Egg.png|Chicken Spawn Egg
Cod Spawn Egg.png|Cod Spawn Egg
Cow Spawn Egg.png|Cow Spawn Egg
Creeper Spawn Egg.png|Creeper Spawn Egg
Dolphin Spawn Egg.png|Dolphin Spawn Egg
Donkey Spawn Egg.png|Donkey Spawn Egg
Drowned Spawn Egg.png|Drowned Spawn Egg
Elder Guardian Spawn Egg.png|Elder Guardian Spawn Egg
Ender Dragon Spawn Egg.png|Ender Dragon Spawn Egg
Enderman Spawn Egg.png|Enderman Spawn Egg
Endermite Spawn Egg.png|Endermite Spawn Egg
Evoker Spawn Egg.png|Evoker Spawn Egg
Fox Spawn Egg.png|Fox Spawn Egg
Frog Spawn Egg.png|Frog Spawn Egg
Ghast Spawn Egg.png|Ghast Spawn Egg
Glow Squid Spawn Egg.png|Glow Squid Spawn Egg
Goat Spawn Egg.png|Goat Spawn Egg
Guardian Spawn Egg.png|Guardian Spawn Egg
Hoglin Spawn Egg.png|Hoglin Spawn Egg
Horse Spawn Egg.png|Horse Spawn Egg
Husk Spawn Egg.png|Husk Spawn Egg
Iron Golem Spawn Egg.png|Iron Golem Spawn Egg
Llama Spawn Egg.png|Llama Spawn Egg
Magma Cube Spawn Egg.png|Magma Cube Spawn Egg
Mooshroom Spawn Egg.png|Mooshroom Spawn Egg
Mule Spawn Egg.png|Mule Spawn Egg
NPC Spawn Egg.png|NPC Spawn Egg
Ocelot Spawn Egg.png|Ocelot Spawn Egg
Panda Spawn Egg.png|Panda Spawn Egg (Java)
Panda Spawn Egg BE1.png|Panda Spawn Egg (Bedrock)
Parrot Spawn Egg.png|Parrot Spawn Egg
Phantom Spawn Egg.png|Phantom Spawn Egg
Pig Spawn Egg.png|Pig Spawn Egg
Piglin Spawn Egg.png|Piglin Spawn Egg
Piglin Brute Spawn Egg.png|Piglin Brute Spawn Egg
Pillager Spawn Egg.png|Pillager Spawn Egg
Polar Bear Spawn Egg.png|Polar Bear Spawn Egg
Pufferfish Spawn Egg.png|Pufferfish Spawn Egg
Rabbit Spawn Egg.png|Rabbit Spawn Egg
Ravager Spawn Egg.png|Ravager Spawn Egg
Salmon Spawn Egg.png|Salmon Spawn Egg
Sheep Spawn Egg.png|Sheep Spawn Egg
Shulker Spawn Egg.png|Shulker Spawn Egg
Silverfish Spawn Egg.png|Silverfish Spawn Egg
Skeleton Spawn Egg.png|Skeleton Spawn Egg
Skeleton Horse Spawn Egg.png|Skeleton Horse Spawn Egg
Slime Spawn Egg.png|Slime Spawn Egg
Sniffer Spawn Egg.png|Sniffer Spawn Egg
Snow Golem Spawn Egg.png|Snow Golem Spawn Egg
Spider Spawn Egg.png|Spider Spawn Egg
Squid Spawn Egg.png|Squid Spawn Egg
Stray Spawn Egg.png|Stray Spawn Egg
Strider Spawn Egg.png|Strider Spawn Egg
Tadpole Spawn Egg.png|Tadpole Spawn Egg
Trader Llama Spawn Egg.png|Trader Llama Spawn Egg
Tropical Fish Spawn Egg.png|Tropical Fish Spawn Egg
Turtle Spawn Egg.png|Turtle Spawn Egg
Vex Spawn Egg.png|Vex Spawn Egg
Villager Spawn Egg.png|Villager Spawn Egg
Vindicator Spawn Egg.png|Vindicator Spawn Egg
Wandering Trader Spawn Egg.png|Wandering Trader Spawn Egg (Java)
Wandering Trader Spawn Egg BE1.png|Wandering Trader Spawn Egg (Bedrock)
Warden Spawn Egg.png|Warden Spawn Egg
Witch Spawn Egg.png|Witch Spawn Egg
Wither Spawn Egg.png|Wither Spawn Egg
Wither Skeleton Spawn Egg.png|Wither Skeleton Spawn Egg
Wolf Spawn Egg.png|Wolf Spawn Egg
Zoglin Spawn Egg.png|Zoglin Spawn Egg
Zombie Spawn Egg.png|Zombie Spawn Egg
Zombie Horse Spawn Egg.png|Zombie Horse Spawn Egg
Zombie Villager Spawn Egg.png|Zombie Villager Spawn Egg
Zombified Piglin Spawn Egg.png|Zombified Piglin Spawn Egg
Mask Spawn Egg.png|Mask Spawn Egg (texture)
</gallery>
{{Hidden end}}
===Screenshots===
<gallery>
Classic eggs.png|Various spawn eggs utilizing their old color scheme before [[12w01a]].
Upsidedownmob.png|An example of an upside-down mob by renaming the spawn egg "Dinnerbone".
UpsideDownMobsEasterEgg.png|Two mobs spawned with the names "Grumm" and "Dinnerbone," respectively.
TheLeadPig.png|First screenshot relating to a named mob shown, through a spawn egg.
</gallery>
==Notes==
{{notelist|fn}}
==References==
{{reflist}}
==External Links==
*[https://www.minecraft.net/en-us/article/taking-inventory--spawn-egg Taking Inventory: Spawn Egg] – Minecraft.net on January 6, 2022
{{Items}}
[[de:Spawn-Ei]]
[[es:Huevo generador]]
[[fr:Œufs d'apparition]]
[[it:Uovo generatore]]
[[ja:スポーンエッグ]]
[[ko:생성 알]]
[[nl:Spawnei]]
[[pl:Jajo przyzywające]]
[[pt:Ovo gerador]]
[[ru:Яйца призывания]]
[[th:ไข่เสก]]
[[zh:刷怪蛋]]
[[Category:Non-renewable resources]]</li></ul></nowiki> | 22w42a | Rabbits now have a 100% chance to drop raw rabbit when killed.[6] | |||
| 1.20 (Experimental) | 23w07a | Rabbits now spawn in cherry groves. | |||
| Pocket Edition Alpha | |||||
v0.13.0{{Extension DPL}}<ul><li>[[Ghast Tear|Ghast Tear]]<br/>{{Item
| image = Ghast Tear.png
| renewable = Yes
| stackable = Yes (64)
}}
'''Ghast tears''' are items [[Drops|dropped]] by [[ghast]]s. They can be used to make potions of [[Regeneration]] and [[end crystal]]s.
== Obtaining ==
=== Mob loot ===
[[Ghast]]s drop 0–1 ghast tears. [[Looting]] increases the maximum ghast tears dropped by one per level, for a maximum of 4 ghast tears with Looting III. Looting also works when knocking back a [[fireball]] with an enchanted item.
== Usage ==
=== Brewing ingredient ===
{{brewing
|showname=1
|head=1
|Ghast Tear
|Mundane Potion
|base=Water Bottle
}}
{{brewing
|foot=1
|Ghast Tear
|Potion of Regeneration
}}
=== Crafting ingredient ===
{{crafting usage}}
== Data values ==
=== ID ===
{{edition|java}}:
{{ID table
|edition=java
|showforms=y
|generatetranslationkeys=y
|displayname=Ghast Tear
|spritetype=item
|nameid=ghast_tear
|form=item
|foot=1}}
{{edition|bedrock}}:
{{ID table
|edition=bedrock
|shownumericids=y
|showforms=y
|notshowbeitemforms=y
|generatetranslationkeys=y
|displayname=Ghast Tear
|spritetype=item
|nameid=ghast_tear
|id=424
|form=item
|foot=1}}
== History ==
{{History|java}}
{{History||1.0.0|snap=Beta 1.9 Prerelease|[[File:Ghast Tear JE1 BE1.png|32px]] Added ghast tears.}}
{{History|||snap=Beta 1.9 Prerelease 3|Ghast tears can now be brewed in a [[water bottle]] to create a [[mundane potion]], or in an [[awkward potion]] to create a [[potion of Healing]].}}
{{History|||snap=Beta 1.9 Prerelease 4|Ghast tears now create [[potion of regeneration|potions of Regeneration]]. This was due to the sheer difficulty in obtaining them.<ref>{{tweet|jeb|123671273904680960|Since Ghast Tears are so hard to get, I've decided to replace the "Instant Health" with "Regeneration" for them|October 11, 2011}}</ref> [[Glistering melon]]s have been added to create potions of Healing, instead.}}
{{History||1.9|snap=15w44b|A ghast tear is now used to [[crafting|craft]] an [[end crystal]].}}
{{History||1.13|snap=17w47a|Prior to [[1.13/Flattening|''The Flattening'']], this [[item]]'s numeral ID was 370.}}
{{History||1.14|snap=18w43a|[[File:Ghast Tear JE2 BE2.png|32px]] The texture of ghast tears has been changed.}}
{{History|pocket alpha}}
{{History||v0.12.1|snap=build 1|[[File:Ghast Tear JE1 BE1.png|32px]] Added ghast tears.|Ghast tears are currently unobtainable as [[ghast]]s don’t [[drops|drop]] them.}}
{{History|||snap=build 7|Ghasts now drop ghast tears.<ref>{{bug|MCPE-9338}}</ref>}}
{{History|pocket}}
{{History||1.0.0|snap=alpha 0.17.0.1|A ghast tear is now used to [[crafting|craft]] an [[end crystal]].}}
{{History|bedrock}}
{{History||1.10.0|snap=beta 1.10.0.3|[[File:Ghast Tear JE2 BE2.png|32px]] The texture of ghast tears has been changed.}}
{{History|console}}
{{History||xbox=TU7|xbone=CU1|ps=1.0|wiiu=Patch 1|switch=1.0.1|[[File:Ghast Tear JE1 BE1.png|32px]] Added ghast tears.}}
{{History||xbox=none|xbone=none|ps=1.90|wiiu=none|switch=none|[[File:Ghast Tear JE2 BE2.png|32px]] The texture of ghast tears has been changed.}}
{{History|New 3DS}}
{{History||0.1.0|[[File:Ghast Tear JE1 BE1.png|32px]] Added ghast tears.}}
{{History|foot}}
== Issues ==
{{issue list}}
== References ==
{{reflist}}
{{items}}
[[Category:Renewable resources]]
[[Category:Brewing recipe]]
[[cs:Ďasova slza]]
[[de:Ghast-Träne]]
[[es:Lágrima de ghast]]
[[fr:Larme de Ghast]]
[[hu:Kísértetkönny]]
[[it:Lacrima di ghast]]
[[ja:ガストの涙]]
[[ko:가스트 눈물]]
[[nl:Ghasttraan]]
[[pl:Łza ghasta]]
[[pt:Lágrima de ghast]]
[[ru:Слеза гаста]]
[[uk:Сльоза ґаста]]
[[zh:恶魂之泪]]</li><li>[[Brewing Stand|Brewing Stand]]<br/>{{Block
| image = <gallery>
Brewing Stand (empty) JE10.png | Empty
Brewing Stand (right) JE10.png | Right
Brewing Stand (left) JE10.png | Left
Brewing Stand (full) JE10.png | Full
</gallery>
| transparent = Yes
| light = Yes (1)
| tool = Wooden Pickaxe
| renewable = Yes
| stackable = Yes (64)
| flammable = No
| lavasusceptible = No
}}
A '''brewing stand''' is a [[block]] used for [[brewing]] [[potion]]s using [[Glass Bottle|bottles]] and suitable ingredients. It also serves as a [[cleric]]'s [[job site block]].
== Obtaining ==
=== Breaking ===
A brewing stand can be obtained using any [[pickaxe]]. If mined without a pickaxe, it drops nothing {{in|JE}}, while it drops itself {{in|BE}}.
{{breaking row|horizontal=1|Brewing Stand|Pickaxe|Wood|foot=1}}
=== Natural generation ===
Brewing stands generate in [[end ship]]s. They have two [[potion of Healing|Instant Health II potions]] in their holders.
A brewing stand also generates in the basement of [[igloo]]s with a [[splash potion of Weakness]] in it.
Brewing stands can generate without potions in [[village]] churches.
=== Crafting ===
{{Crafting
|head=1
|showdescription=1
|B1= Blaze Rod
|A2= Any stone-tier block |B2= Any stone-tier block |C2= Any stone-tier block
|Output= Brewing Stand
|type= Brewing
|description=Can use cobblestone and its other variants interchangeably.
|foot=1
}}
== Usage ==
[[File:Brewing Stand GUI.png|thumb|right|176px|Brewing stand GUI {{in|java}}]]
By default, the interface of a brewing stand is labeled "Brewing Stand", but this name can be customized by naming it in an [[anvil]] before placing it.
Brewing stands cannot be pushed by [[piston]]s {{in|java}}.
=== Brewing ===
{{main|Brewing}}
The main purpose of brewing stands is to allow for the [[brewing]] of [[potion]]s. Its interface can be opened by pressing {{control|use}} on them.
Brewing stands need [[blaze powder]] as fuel. Each piece brews 20 batches of potions, with each stage of brewing counting separately. Unlike [[furnace]]s, there is no time limit; fuel is consumed only when there are [[Glass Bottle|bottles]] and an ingredient to brew into it.
Brewing stands interact with [[hopper]]s as follows:
* They accept brewing ingredients from hoppers pointing down into the top.
* Any valid potion recipe can be preloaded for "hands-free" brewing of a complex recipe, with the [[Nether Wart|nether wart]] falling through into the stand for the first step.
* Bottles and fuel are accepted from hoppers pointing into the side.
* Finished products can be pulled out by hoppers below, but each stage of brewing counts as a batch of "finished" potions.
{{IN|education}}, elements can be combined in the brewing stand to make the [[medicine]] potions: antidote, elixir, eye drops, and tonic.
=== Changing profession ===
If a village has a brewing stand that has not been claimed by a villager, any villager who hasn't already picked a [[job site]] block in the village has a chance to change their profession into cleric.
=== Light source ===
Brewing stands emit a light level of 1.
== Sounds ==
=== Generic ===
{{Sound table/Block/Stone}}
=== Unique ===
{{edition|java}}:
{{Sound table
|rowspan=2
|sound=Brewing Stand brew1.ogg
|sound2=Brewing Stand brew2.ogg
|subtitle=Brewing Stand bubbles
|source=block
|description=When a potion finishes brewing
|id=block.brewing_stand.brew
|translationkey=subtitles.block.brewing_stand.brew
|volume=1.0
|pitch=1.0
|distance=16}}
{{Sound table
|subtitle=Cleric works
|source=neutral
|description=Randomly while a cleric is working
|id=entity.villager.work_cleric
|translationkey=subtitles.entity.villager.work_cleric
|volume=1.0
|pitch=0.8-1.2
|distance=16}}
{{Sound table
|sound=Door close.ogg
|sound2=Door open.ogg
|subtitle=Chest locked<ref group=sound name=lock>{{Bug|MC-98316||Wrong subtitles caused by missing distinction}}</ref>
|source=block
|description=When a player attempts to open a brewing stand locked using the {{nbt|string|Lock}} tag
|id=block.chest.locked|idnote=<ref group=sound name=lock/>
|translationkey=subtitles.block.chest.locked|translationkeynote=<ref group=sound name=lock/>
|volume=1.0
|pitch=1.0
|distance=16
|foot=1}}
{{Edition|Bedrock}}:
{{Sound table
|type=bedrock
|rowspan=2
|sound=Brewing Stand brew1.ogg
|sound2=Brewing Stand brew2.ogg
|source=block
|description=When a potion finishes brewing
|id=random.potion.brewed
|volume=1.0
|pitch=1.0}}
{{Sound table
|source=block
|description=Randomly while a cleric is working
|id=random.potion.brewed
|volume=1.0
|pitch=1.0
|foot=1}}
== Data values ==
=== ID ===
{{edition|java}}:
{{ID table
|edition=java
|showforms=y
|generatetranslationkeys=y
|displayname=Brewing Stand
|spritetype=block
|nameid=brewing_stand
|translationkey=block.minecraft.brewing_stand, item.minecraft.brewing_stand
|foot=1}}
{{ID table
|displayname=Block entity
|spritename=brewing-stand
|spritetype=block
|nameid=brewing_stand
|foot=1}}
{{edition|bedrock}}:
{{ID table
|edition=bedrock
|firstcolumnname=Brewing Stand
|shownumericids=y
|showforms=y
|generatetranslationkeys=y
|displayname=Block
|spritename=brewing-stand
|spritetype=block
|nameid=brewing_stand
|id=117
|form=block
|itemform=item.brewing_stand
|translationkey=-}}
{{ID table
|displayname=Item
|spritename=brewing-stand
|spritetype=item
|nameid=brewing_stand
|id=431
|form=item
|foot=1}}
{{ID table
|notnamespaced=y
|displayname=Block entity
|spritename=brewing-stand
|spritetype=block
|nameid=BrewingStand
|foot=1}}
=== Block states ===
{{see also|Block states}}
{{/BS}}
=== Block data ===
A brewing stand has a block entity associated with it that holds additional data about the block.
{{el|java}}:
{{see also|Block entity format}}
{{/BE}}
{{el|bedrock}}:
: See [[Bedrock Edition level format/Block entity format]].
== Achievements ==
{{load achievements|Local Brewery}}
== Advancements ==
{{Load advancements|Local Brewery}}
== History ==
{{History|java}}
{{History||1.0.0|snap=Beta 1.9 Prerelease 2|[[Cauldron]]s are implemented to be used to brew [[potion]]s, but are not available in-game yet.}}
{{History|||snap=September 30, 2011|slink={{tweet|jeb|119762786619359232}}|[[File:Brewing Stand (pre-release).png|32px]] [[Jens Bergensten|Jeb]] reveals that brewing is done through a brewing stand instead of a [[cauldron]].}}
{{History|||snap=Beta 1.9 Prerelease 3|[[File:Brewing Stand (empty) JE1 BE1.png|32px]] [[File:Brewing Stand (right) JE1.png|32px]] [[File:Brewing Stand (left) JE1.png|32px]] [[File:Brewing Stand (full) JE1.png|32px]] [[File:Brewing Stand (item) JE1 BE1.png|32px]] Added brewing stands.
|Brewing [[potion]]s with brewing stands currently take 30 seconds.
|When the first brewing stand was shown by Jeb, it had an additional 2D sub-stand for [[Glass Bottle|bottles]], but the stands for bottles are now designed in 3D.<ref>{{tweet|jeb|119763532312096769|I'm fully aware the potions are very thin (diet?), but it looks cute. (Always work in progress, of course)|September 30, 2011}}</ref>}}
{{History||1.1|snap=12w01a|Brewing time for brewing stands has been reduced to 20 seconds.}}
{{History||1.3.1|snap=12w15a|{{key|Shift}} + clicking can now be used to put items in brewing stands.}}
{{History||1.8|snap=14w11a|[[File:Brewing Stand (empty) JE2.png|32px]] [[File:Brewing Stand (right) JE2.png|32px]] [[File:Brewing Stand (left) JE2.png|32px]] [[File:Brewing Stand (full) JE2.png|32px]] The [[model]] of brewing stands has been changed. Stands with no bottles appear glitched from some angles, the left and right slots appear identical when filled in (although both distinct appearences still exist as metadata), and the arm angles have changed due to the 22.5º rotation limit.
|Brewing stands' targeting [[hitbox]] is now a full cube - previously it was a cuboid around the base plates.}}
{{History|||snap=14w11b|[[File:Brewing Stand (empty) JE3.png|32px]] [[File:Brewing Stand (right) JE3.png|32px]] [[File:Brewing Stand (left) JE3.png|32px]] [[File:Brewing Stand (full) JE3.png|32px]] Empty brewing stands' model have been fixed, although the other changes still remain.}}
{{History|||snap=14w25a|[[File:Brewing Stand (empty) JE4.png|32px]] [[File:Brewing Stand (right) JE4.png|32px]] [[File:Brewing Stand (left) JE4.png|32px]] [[File:Brewing Stand (full) JE4.png|32px]] Brewing stand models have changed such that bottles in the left and right slots now indeed appear different. However, the leftmost one appears stretched. Arms are also now affected by directional shading.<ref>{{bug|MC-68302|||WAI}}</ref>}}
{{History||1.9|snap=15w31a|Brewing stands now generate in [[End City|end cities]].}}
{{History|||snap=15w33a|Brewing stands can now brew [[Lingering Potion|lingering potion]]s.}}
{{History|||snap=15w33c|A bug where the [[player]] couldn't put in a [[splash potion]] to make a lingering potion has been fixed.}}
{{History|||snap=15w42a|Brewing stands now require [[Blaze Powder|blaze powder]] to operate.}}
{{History|||snap=15w43a|Brewing stands now generate in the basement of [[igloo]]s.
|Each blaze powder now fuels 20 brewing stand operations rather than 30.}}
{{History|||snap=15w44a|[[File:Brewing Stand (empty) JE5.png|32px]] [[File:Brewing Stand (right) JE5.png|32px]] [[File:Brewing Stand (left) JE5.png|32px]] [[File:Brewing Stand (full) JE5.png|32px]] Brewing stand models no longer have a stretched bottle.}}
{{History|||snap=15w47b|[[Sound]]s have been added for brewing stands.}}
{{History||1.11|snap=16w32a|The block entity ID has been changed from <code>Cauldron</code> to <code>brewing_stand</code>.}}
{{History||1.13|snap=17w47a|Prior to [[Java Edition 1.13/Flattening|''The Flattening'']], this [[block]]'s numeral ID was 117, and the [[item]]'s 379.}}
{{History||1.14|snap=18w43a|[[File:Brewing Stand (empty) JE6 BE2.png|32px]] <!-- [[File:Brewing Stand (left) JE6 BE2.png|32px]] [[File:Brewing Stand (right) JE6 BE2.png|32px]] -->[[File:Brewing Stand (Full) JE6 BE2.png|32px]] [[File:Brewing Stand (item) JE2.png|32px]] The textures of brewing stands have been changed.}}
{{History|||snap=18w44a|[[File:Brewing Stand (item) JE3 BE2.png|32px]] The texture of the brewing stand [[item]] has been changed.}}
{{History|||snap=18w48a|Brewing stands now generate in the updated [[plains]] [[village]]s.}}
{{History|||snap=18w49a|Brewing stands now generate in the updated [[savanna]] villages and the new [[Snowy Tundra|snowy]] villages.}}
{{History|||snap=18w50a|Brewing stands now generate in the updated [[desert]] and [[taiga]] villages.}}
{{History|||snap=19w03c|The three plates, but not the rod, of a brewing stand now use correct cullface arguments.}}
{{History|||snap=19w11a|Brewing stands now serve as cleric [[villager]]s' job site block.}}
{{History||1.16.2|snap=20w28a|Brewing stands can now be [[crafting|crafted]] with [[blackstone]].}}
{{History||1.17|snap=21w07a|Brewing stands can now be crafted with [[deepslate|grimstone]] (now deepslate).}}
{{History||1.17|snap=21w08a|Brewing stands can no longer be crafted with deepslate.
|Brewing stands can now be crafted with [[Cobbled Deepslate|cobbled deepslate]].}}
{{History|||snap=21w11a|<!--[[File:Brewing Stand (empty) JE7.png|32px]] [[File:Brewing Stand (right) JE7.png|32px]] [[File:Brewing Stand (left) JE7.png|32px]] [[File:Brewing Stand (Full) JE7.png|32px]] Changed [[lighting]].-->Tweaked the brewing stand GUI texture.}}
{{History||1.18|snap=21w39a|[[File:Brewing Stand (empty) JE8.png|32px]] [[File:Brewing Stand (right) JE8.png|32px]] [[File:Brewing Stand (left) JE8.png|32px]] [[File:Brewing Stand (full) JE8.png|32px]] The default [[brightness]] has been changed from "Moody" to 50.}}
{{History||1.19|snap=22w11a|[[File:Brewing Stand (empty) JE9.png|32px]] [[File:Brewing Stand (right) JE9.png|32px]] [[File:Brewing Stand (left) JE9.png|32px]] [[File:Brewing Stand (full) JE9.png|32px]] Changed texture and model.}}
{{History|||snap=22w17a|[[File:Brewing Stand (empty) JE10.png|32px]] [[File:Brewing Stand (right) JE10.png|32px]] [[File:Brewing Stand (left) JE10.png|32px]] [[File:Brewing Stand (full) JE10.png|32px]] Changed base texture and model.}}
{{History|pocket alpha}}
{{History||v0.12.1|snap=build 1|[[File:Brewing Stand (empty) JE1 BE1.png|32px]] [[File:Brewing Stand (item) JE1 BE1.png|32px]] Added brewing stands.}}
{{History|pocket}}
{{History||1.0.0|snap=alpha 0.17.0.1|Brewing stands now generate in [[igloo]] basements.
|Brewing stands now generate in [[end ship]]s.}}
{{History|bedrock}}
{{History||1.2.0|snap=beta 1.2.0.2|Brewing stands now require [[blaze powder]] to operate.}}
{{History||1.10.0|snap=beta 1.10.0.3|[[File:Brewing Stand (empty) JE6 BE2.png|32px]] [[File:Brewing Stand (item) JE3 BE2.png|32px]] The textures of brewing stands have been changed.|A brewing stand can now generate in [[village]] temples.}}
{{History||1.16.100|snap=beta 1.16.100.52|Brewing stands can now be [[craft]]ed with [[blackstone]].}}
{{History||1.17.0|snap=beta 1.17.0.50|Brewing stands can now be [[craft]]ed with [[cobbled deepslate]].}}
{{History||1.19.0|snap=beta 1.19.0.20|[[File:Brewing Stand (empty) JE10.png|32px]] [[File:Brewing Stand (right) JE10.png|32px]] [[File:Brewing Stand (left) JE10.png|32px]] [[File:Brewing Stand (full) JE10.png|32px]] Slightly changed its texture, to make their arms connect to their bases.}}
{{History|console}}
{{History||xbox=TU7|xbone=CU1|ps=1.0|wiiu=Patch 1|switch=1.0.1|[[File:Brewing Stand (empty) JE1 BE1.png|32px]] [[File:Brewing Stand (item) JE1 BE1.png|32px]] Added brewing stands.}}
{{History||xbox=TU43|xbone=CU33|ps=1.36|wiiu=Patch 13|Brewing stands now appear in [[igloo]]s. The lack of a fuel requirement means that potions can now be made without going to the Nether.}}
{{History||xbox=TU46|xbone=CU36|ps=1.38|wiiu=Patch 15|Brewing stands now require [[blaze powder]] to operate.}}
{{History||xbox=none|xbone=none|ps=1.90|wiiu=none|switch=none|[[File:Brewing Stand.png|32px]] [[File:Brewing Stand (item) JE3 BE2.png|32px]] The textures of brewing stands have been changed.}}
{{History|new 3ds}}
{{History||0.1.0|[[File:Brewing Stand (empty) JE1 BE1.png|32px]] [[File:Brewing Stand (item) JE1 BE1.png|32px]] Added brewing stands.}}
{{History|foot}}
<gallery>
File:Brewingstand Potion.png|The first picture of a brewing stand. A [[giant mushroom]] is also seen in this picture.
</gallery>
=== Brewing stand "item" ===
{{:Technical blocks/Brewing Stand}}
== Issues ==
{{issue list}}
== Trivia ==
* Even when the brewing stand is not in use, there is still smoke coming out of the top of it.
* In ''[[Java Edition]]'', when a brewing stand is broken, particles from a bottle appear, even if no bottle is in the stand.
* No matter what potion (including water bottles) is in the stand it always looks like a full red bottle.
* Brewing stands always face east, no matter what direction they are placed.
* According to [[Michael Stoyke|Searge]], for thematic reasons, a brewing stand was added to the basement of the [[igloo]]. Because of this, blaze powder was required for fuel to preserve game progression. In this way, the player is prevented from using it before going to the Nether.<ref>https://minecraft.net/en-us/article/meet-blaze</ref>
== Gallery ==
<gallery>
File:Brewing stand in action.png|A brewing stand in action.
File:Igloobasement.png|A brewing stand in an igloo basement.
File:1.8 and below brewing stand.png|The GUI of the brewing stand in 1.8.x and below.
</gallery>
== See also ==
*[[Glass Bottle]]
*[[Splash Potion]]
== References ==
{{reflist}}
== External links ==
*[https://www.minecraft.net/en-us/article/taking-inventory--brewing-stand Taking Inventory: Brewing Stand] – Minecraft.net on October 11, 2019
{{Blocks|Utility}}
{{items}}
[[Category:Job blocks]]
[[Category:Utility blocks]]
[[Category:Manufactured blocks]]
[[Category:Generated structure blocks]]
[[Category:Storage]]
[[Category:Block entities]]
[[Category:Light sources]]
[[de:Braustand]]
[[es:Soporte para pociones]]
[[fr:Alambic]]
[[hu:Főzőállvány]]
[[it:Alambicco]]
[[ja:醸造台]]
[[nl:Brouwstandaard]]
[[pl:Statyw alchemiczny]]
[[pt:Suporte de poções]]
[[ru:Варочная стойка]]
[[uk:Варильна стійка]]
[[zh:酿造台]]</li></ul> | build 1 | ||||
| The spawn rate of rabbits has weight 20, while usual passive mobs have a weight of 100. | |||||
v0.15.0{{Extension DPL}}<ul><li>[[Melon Seeds|Melon Seeds]]<br/>{{Block
|image = <gallery>
Melon Stem Age 0.png | Age 0
Melon Stem Age 1.png | Age 1
Melon Stem Age 2.png | Age 2
Melon Stem Age 3.png | Age 3
Melon Stem Age 4.png | Age 4
Melon Stem Age 5.png | Age 5
Melon Stem Age 6.png | Age 6
Melon Stem Age 7.png | Age 7
</gallery>
| image2 = <gallery>
Attached Melon Stem (N).png | North
Attached Melon Stem (E).png | East
Attached Melon Stem (S).png | South
Attached Melon Stem (W).png | West
</gallery>
| transparent = Yes
| light = No
| tool = none
| renewable = Yes
| stackable = Yes (64)
| flammable = No
| lavasusceptible = No
}}'''Melon seeds''' are items obtained from [[Melon Slice|melon slices]] that can be used to grow melon stems.
'''Melon stems''' are plants grown on [[farmland]] that, over time, grow [[melon]]s on dirt, mud and moss blocks adjacent to them.
== Obtaining ==
=== Breaking ===
When broken, a melon stem drops 0–3 melon seeds. The chance for melon seeds to drop increases with the stem's age.
{| class="wikitable"
! rowspan="3" |[[Resource location]]
! rowspan="3" | Source
! colspan="4" | Default
|-
| colspan="1" rowspan="2" style="text-align:center" | Nothing || colspan="3" style="text-align:center" |{{ItemLink|Melon Seeds|Melon seeds}}
|-
| style="text-align:center" | 1 || style="text-align:center" | 2 || style="text-align:center" | 3
|-
| rowspan="8" |<code>blocks/melon_stem</code>
|{{BlockLink|Melon Stem|Melon stem}} <code>age = 0</code>
| style="text-align:center" |81.3%|| style="text-align:center" |17.42%|| style="text-align:center" |1.24%|| style="text-align:center" |0.03%
|-
|{{BlockLink|Melon Stem|Melon stem}} <code>age = 1</code>
| style="text-align:center" |65.1%|| style="text-align:center" |30.04%|| style="text-align:center" |4.62%|| style="text-align:center" |0.24%
|-
|{{BlockLink|Melon Stem|Melon stem}} <code>age = 2</code>
| style="text-align:center" |51.2%|| style="text-align:center" |38.4%|| style="text-align:center" |9.6%|| style="text-align:center" |0.8%
|-
|{{BlockLink|Melon Stem|Melon stem}} <code>age = 3</code>
| style="text-align:center" |39.44%|| style="text-align:center" |43.02%|| style="text-align:center" |15.64%|| style="text-align:center" |1.9%
|-
|{{BlockLink|Melon Stem|Melon stem}} <code>age = 4</code>
| style="text-align:center" |29.13%|| style="text-align:center" |44.44%|| style="text-align:center" |22.22%|| style="text-align:center" |3.7%
|-
|{{BlockLink|Melon Stem|Melon stem}} <code>age = 5</code>
| style="text-align:center" |21.6%|| style="text-align:center" |43.2%|| style="text-align:center" |28.8%|| style="text-align:center" |6.4%
|-
|{{BlockLink|Melon Stem|Melon stem}} <code>age = 6</code>
| style="text-align:center" |15.17%|| style="text-align:center" |39.82%|| style="text-align:center" |34.84%|| style="text-align:center" |10.16%
|-
|{{BlockLink|Melon Stem|Melon stem}} <code>age = 7</code>
| style="text-align:center" |10.16%|| style="text-align:center" |34.84%|| style="text-align:center" |39.82%|| style="text-align:center" |15.17%
|-
| rowspan="1" |<code>blocks/attached_melon_stem</code>
|{{BlockLink|Attached Melon Stem|Attached Melon stem}}
| style="text-align:center" |10.16%|| style="text-align:center" |34.84%|| style="text-align:center" |39.82%|| style="text-align:center" |15.17%
|}
=== Natural generation ===
Melon stems generate naturally in stem farm inside [[woodland mansion]]s.
Melon stems generate in 20% of the farm plots in [[savanna]] [[village]]s, and 10% of the farm plots in [[desert]] villages.
=== Chest loot ===
{{LootChestItem|melon-seeds}}
=== Crafting ===
{{Crafting
|Melon Slice
|Output= Melon Seeds
|type= Material
}}
=== Trading ===
[[Wandering trader]]s sell melon seeds for 1 [[emerald]].
== Usage ==
=== Farming ===
{{see also|Tutorials/Pumpkin and melon farming}}
Melon seeds can be planted only on [[farmland]], as stems. Over time, a stem grows through several stages<sup>[''[[Talk:Pumpkin Seeds|needs testing]]'']</sup> and, at its final growth stage, will produce [[melon]]s on any adjacent [[dirt]], [[Coarse Dirt|coarse dirt]], [[Rooted Dirt|rooted dirt]], [[Grass Block|grass block]], [[farmland]], [[podzol]], [[mycelium]], [[Moss Block|moss block]], [[mud]] or [[Muddy Mangrove Roots|muddy mangrove roots]]. If a melon is already occupying a spot adjacent to a stem it does not grow more melons until the melons is removed. A single stem can grow an unlimited number of melons. Melon stems need a minimum light level of 10 in the block above the stem to grow and give melons. Melon seeds are affected by [[bone meal]] only with respect to stem growth; bone meal does not help produce the actual melons.
=== Breeding ===
Like other seeds, melon seeds can be used to [[breed]] [[chicken]]s, lead chickens around, and make baby chickens grow up faster by 10% of the remaining time.
=== Taming ===
Like other seeds, melon seeds can be used to tame [[parrot]]s.
=== Composting ===
Placing melon seeds into a [[composter]] has a 30% chance of raising the compost level by 1.
== Melon Stem ==
A '''melon stem''' is the block that is planted on [[farmland]] when melon seeds are used on it. It starts underground, and rises up as the plant grows. The stem is colored green when young, and then yellow once fully grown.
The stem curves once a melon has grown from it. A fully-grown single stem connects to any [[melon]] in an adjacent square, thus there are 5 possible appearances to a stem. If there are multiple melons it can connect to, it favors the east, then west, north, and south. When the melon is removed, the stem returns to its straight shape.
== Sounds ==
{{Sound table/Block/Hard crop}}
== Data values ==
=== ID ===
{{edition|java}}:
{{ID table
|edition=java
|showblocktags=y
|showforms=y
|generatetranslationkeys=y
|displayname=Melon Stem
|spritetype=block
|nameid=melon_stem
|blocktags=bee_growables, crops
|form=block}}
{{ID table
|displayname=Attached Melon Stem
|spritetype=block
|nameid=attached_melon_stem
|form=block}}
{{ID table
|displayname=Melon Seeds
|spritetype=item
|nameid=melon_seeds
|form=item
|foot=1}}
{{edition|bedrock}}:
{{ID table
|edition=bedrock
|shownumericids=y
|showforms=y
|generatetranslationkeys=y
|displayname=Melon Stem
|spritetype=block
|nameid=melon_stem
|id=105
|form=block
|translationkey=-}}
{{ID table
|displayname=Melon Seeds
|spritetype=item
|nameid=melon_seeds
|id=293
|form=item
|foot=1}}
=== Block states ===
{{see also|Block states}}
{{/BS}}
== Advancements ==
{{load advancements|A Seedy Place}}
== History ==
{{info needed section|check if stems floated above farmland upon initial implementation}}
{{History|java beta}}
{{History||1.8|snap=Pre-release|[[File:Melon Seeds JE1 BE1.png|32px]] Added melon seeds.
|[[File:Melon Stem Age 0 JE1.png|32px]] [[File:Stem Age 1 JE1.png|32px]] [[File:Melon Stem Age 2 JE1.png|32px]] [[File:Melon Stem Age 3 JE1.png|32px]] [[File:Melon Stem Age 4 JE1.png|32px]] [[File:Melon Stem Age 5 JE1.png|32px]] [[File:Melon Stem Age 6 JE1.png|32px]] [[File:Melon Stem Age 7 JE1.png|32px]] Added the melon stem, with seven stages of growth.
|Melon seeds can found in the new [[mineshaft]] [[chest]]s.
|[[File:Attached Melon Stem (N) JE1.png|32px]] [[File:Attached Melon Stem (E) JE1.png|32px]] [[File:Attached Melon Stem (S) JE1.png|32px]] [[File:Attached Melon Stem (W) JE1.png|32px]] Melon stems have four slightly visually distinct appearances for each facing direction - the bent part of the stem rotates, but the other two planes do not.
|[[File:Melon Stem Age 8 JE1.png|32px]] [[File:Melon Stem Age 9 JE1.png|32px]] [[File:Melon Stem Age 10 JE1.png|32px]] [[File:Melon Stem Age 11 JE1.png|32px]] [[File:Melon Stem Age 12 JE1.png|32px]] [[File:Melon Stem Age 13 JE1.png|32px]] [[File:Melon Stem Age 14 JE1.png|32px]] [[File:Melon Stem Age 15 JE1.png|32px]] Melon stem data values 8–15 now show a glitched formation, with a floating stem with an attached stem cross eventually emerging below.
|[[File:Attached Stem Age 8 JE1.png|32px]] [[File:Attached Stem Age 9 JE1.png|32px]] [[File:Attached Stem Age 10 JE1.png|32px]] [[File:Attached Stem Age 11 JE1.png|32px]] [[File:Attached Stem Age 12 JE1.png|32px]] [[File:Attached Stem Age 13 JE1.png|32px]] [[File:Attached Stem Age 14 JE1.png|32px]] [[File:Attached Stem Age 15 JE1.png|32px]] Melon stem blocks with data values higher than 7 can now attach to adjacent fruits, which results in buggy stem textures with [[vines]] in the mix due to vines being below attached stems in [[terrain.png]].}}
{{History|||snap=Pre-release 2 ;)|Melon stems can now be grown faster using [[bone meal]].}}
{{History|java}}
{{History||1.3.1|snap=1.3|The texture of melon stems has been moved one pixel to the left in [[terrain.png]].
|[[File:Melon Stem Age 0 JE2.png|32px]] [[File:Melon Stem Age 1 JE2.png|32px]] [[File:Melon Stem Age 2 JE2.png|32px]] [[File:Melon Stem Age 3 JE2.png|32px]] [[File:Melon Stem Age 4 JE2.png|32px]] [[File:Melon Stem Age 5 JE2.png|32px]] [[File:Melon Stem Age 6 JE2.png|32px]] [[File:Melon Stem Age 7 JE2.png|32px]] Stems now appear slightly different.
|[[File:Melon Stem Age 8 JE2.png|32px]] [[File:Melon Stem Age 9 JE2.png|32px]] [[File:Melon Stem Age 10 JE2.png|32px]] [[File:Melon Stem Age 11 JE2.png|32px]] [[File:Melon Stem Age 12 JE2.png|32px]] [[File:Melon Stem Age 13 JE2.png|32px]] [[File:Melon Stem Age 14 JE2.png|32px]] [[File:Melon Stem Age 15 JE2.png|32px]] Overgrown stems now appear slightly different.
|[[File:Attached Melon Stem (N) JE2.png|32px]] [[File:Attached Melon Stem (E) JE2.png|32px]] [[File:Attached Melon Stem (S) JE2.png|32px]] [[File:Attached Melon Stem (W) JE2.png|32px]] Attached melon stems now appear slightly different.
|[[File:Attached Stem Age 8 JE2.png|32px]] [[File:Attached Stem Age 9 JE2.png|32px]] [[File:Attached Stem Age 10 JE2.png|32px]] [[File:Attached Stem Age 11 JE2.png|32px]] [[File:Attached Stem Age 12 JE2.png|32px]] [[File:Attached Stem Age 13 JE2.png|32px]] [[File:Attached Stem Age 14 JE2.png|32px]] [[File:Attached Stem Age 15 JE2.png|32px]] Overgrown attached melon stems now appear slightly different.}}
{{History||1.4.2|snap=12w36a|[[Chicken]]s now use [[wheat seeds]], melon seeds, and [[pumpkin seeds]], instead of [[wheat]] to breed.}}
{{History||1.5|snap=13w02a|[[File:Melon Stem Age 0 JE3.png|32px]] [[File:Melon Stem Age 1 JE3.png|32px]] [[File:Melon Stem Age 2 JE3.png|32px]] [[File:Melon Stem Age 3 JE3.png|32px]] [[File:Melon Stem Age 4 JE3.png|32px]] [[File:Melon Stem Age 5 JE3.png|32px]] [[File:Melon Stem Age 6 JE3.png|32px]] Melon stems now use a squished version of their texture for immature stems, depending on age.
|[[File:Melon Stem Age 8 JE3.png|32px]] [[File:Melon Stem Age 9 JE3.png|32px]] [[File:Melon Stem Age 10 JE3.png|32px]] [[File:Melon Stem Age 11 JE3.png|32px]] [[File:Melon Stem Age 12 JE3.png|32px]] [[File:Melon Stem Age 13 JE3.png|32px]] [[File:Melon Stem Age 14 JE3.png|32px]] [[File:Melon Stem Age 15 JE3.png|32px]] This also affects melon stems of ages 8–15, which are likewise stretched to accommodate its predicted size.
|[[File:Attached Stem Age 8 JE3.png|32px]] [[File:Attached Stem Age 9 JE3.png|32px]] [[File:Attached Stem Age 10 JE3.png|32px]] [[File:Attached Stem Age 11 JE3.png|32px]] [[File:Attached Stem Age 12 JE3.png|32px]] [[File:Attached Stem Age 13 JE3.png|32px]] [[File:Attached Stem Age 14 JE3.png|32px]] [[File:Attached Stem Age 15 JE3.png|32px]] Melon stems of extreme ages, which are attached to adjacent fruits, now show a stretched and tinted stem appearance.}}
{{History|||snap=13w03a|[[File:Melon Stem Age 0 JE4.png|32px]] [[File:Melon Stem Age 1 JE4.png|32px]] [[File:Melon Stem Age 2 JE4.png|32px]] [[File:Melon Stem Age 3 JE4.png|32px]] [[File:Melon Stem Age 4 JE4.png|32px]] [[File:Melon Stem Age 5 JE4.png|32px]] [[File:Melon Stem Age 6 JE4.png|32px]] [[File:Melon Stem Age 7 JE4.png|32px]] Melon stems are no longer squished or stretched to account for age.<ref>{{bug|MC-7111}}</ref>
|[[File:Melon Stem Age 8 JE4.png|32px]] [[File:Melon Stem Age 9 JE4.png|32px]] [[File:Melon Stem Age 10 JE4.png|32px]] [[File:Melon Stem Age 11 JE4.png|32px]] [[File:Melon Stem Age 12 JE4.png|32px]] [[File:Melon Stem Age 13 JE4.png|32px]] [[File:Melon Stem Age 14 JE4.png|32px]] [[File:Melon Stem Age 15 JE4.png|32px]] Melon stems with age values 8 through 15 now show a tinted [[trapdoor]] texture.
|From this version up until 14w08a, overgrown melon stems start to draw from the texture below them on the [[texture atlas]], in much the same way they previously did with terrain.png. However, as texture atlases are unstable and textures tend to change positions as new blocks and textures are added, overgrown stems change the texture they draw from every time new textures are added, which includes when textures added by [[mods]].}}
{{History|||snap=13w09a|[[File:Melon Stem Age 8 JE5.png|32px]] [[File:Melon Stem Age 9 JE5.png|32px]] [[File:Melon Stem Age 10 JE5.png|32px]] [[File:Melon Stem Age 11 JE5.png|32px]] [[File:Melon Stem Age 12 JE5.png|32px]] [[File:Melon Stem Age 13 JE5.png|32px]] [[File:Melon Stem Age 14 JE5.png|32px]] [[File:Melon Stem Age 15 JE5.png|32px]] Melon stems with age values 8–15 now show a tinted [[birch wood]] texture.}}
{{History||1.6.1|snap=13w24a|Melon and pumpkin stems have now been assigned separate textures.
|[[File:Melon Stem Age 8 JE6.png|32px]] [[File:Melon Stem Age 9 JE6.png|32px]] [[File:Melon Stem Age 10 JE6.png|32px]] [[File:Melon Stem Age 11 JE6.png|32px]] [[File:Melon Stem Age 12 JE6.png|32px]] [[File:Melon Stem Age 13 JE6.png|32px]] [[File:Melon Stem Age 14 JE6.png|32px]] [[File:Melon Stem Age 15 JE6.png|32px]] Melon stems with age values 8–15 now show a tinted [[note block]] texture.}}
{{History||1.7.2|snap=13w37a|Added the {{cmd|setblock}} [[commands|command]], allowing for invalid stem ages to be placed in the world without using external editors. This also allows them to be obtained in earlier versions via backdating.}}
{{History|||snap=13w41a|[[File:Melon Stem Age 8 JE7.png|32px]] [[File:Melon Stem Age 9 JE7.png|32px]] [[File:Melon Stem Age 10 JE7.png|32px]] [[File:Melon Stem Age 11 JE7.png|32px]] [[File:Melon Stem Age 12 JE7.png|32px]] [[File:Melon Stem Age 13 JE7.png|32px]] [[File:Melon Stem Age 14 JE7.png|32px]] [[File:Melon Stem Age 15 JE7.png|32px]] Melon stems with age values 8–15 now show a tinted [[netherrack]] texture.}}
{{History||1.8|snap=14w10a|[[File:Melon Stem Age 8 JE8.png|32px]] [[File:Melon Stem Age 9 JE8.png|32px]] [[File:Melon Stem Age 10 JE8.png|32px]] [[File:Melon Stem Age 11 JE8.png|32px]] Melon stems with data values 8–11 now display a tinted attached stem, with 8 facing west, 9 facing east, 10 facing north and 11 facing south.
|Invalid melon stems with data values 12-15 now crash the game.}}
{{History|||snap=14w25a|[[File:Melon Stem Age 0 JE5.png|32px]] [[File:Melon Stem Age 1 JE5.png|32px]] [[File:Melon Stem Age 2 JE5.png|32px]] [[File:Melon Stem Age 3 JE5.png|32px]] [[File:Melon Stem Age 4 JE5.png|32px]] [[File:Melon Stem Age 5 JE5.png|32px]] [[File:Melon Stem Age 6 JE5.png|32px]] [[File:Melon Stem Age 7 JE5.png|32px]] Melon stems now render as a single diagonal plane, or, in the case of attached stems, a diagonal and orthogonal plane.
|[[File:Attached Melon Stem (N) JE3.png|32px]] [[File:Attached Melon Stem (E) JE3.png|32px]] [[File:Attached Melon Stem (S) JE3.png|32px]] [[File:Attached Melon Stem (W) JE3.png|32px]] The attached melon stem [[model]] now fully rotates to the direction the stem points. Prior to this update, the base of the melon stem would stay the same while the long attaching section would differ, resulting in four possible attached stem appearances.
|Invalid overgrown melon stems have effectively been removed from the game, as attempting to place an out of range stem via {{cmd|setblock}} creates a stem of age 0 and loading a world with such stems existing causes a game crash.}}
{{History|||snap=14w26a|[[File:Melon Stem Age 0 JE6.png|32px]] [[File:Melon Stem Age 1 JE6.png|32px]] [[File:Melon Stem Age 2 JE6.png|32px]] [[File:Melon Stem Age 3 JE6.png|32px]] [[File:Melon Stem Age 4 JE6.png|32px]] [[File:Melon Stem Age 5 JE6.png|32px]] [[File:Melon Stem Age 6 JE6.png|32px]] [[File:Melon Stem Age 7 JE6.png|32px]] [[File:Attached Melon Stem (N) JE4.png|32px]] [[File:Attached Melon Stem (E) JE4.png|32px]] [[File:Attached Melon Stem (S) JE4.png|32px]] [[File:Attached Melon Stem (W) JE4.png|32px]] Melon stems now correctly render as crosses again.<ref>{{bug|MC-58136}}</ref>}}
{{History|||snap=14w27a|[[File:Attached Stem Age 0 14w27a.png|32px]] [[File:Attached Stem Age 1 14w27a.png|32px]] [[File:Attached Stem Age 2 14w27a.png|32px]] [[File:Attached Stem Age 3 14w27a.png|32px]] [[File:Attached Stem Age 4 14w27a.png|32px]] [[File:Attached Stem Age 5 14w27a.png|32px]] [[File:Attached Stem Age 6 14w27a.png|32px]] Due to a bug, all melon stems appear attached regardless of age or any actual attachment.<ref>{{bug|MC-60208}}</ref>}}
{{History|||snap=14w28a|All melon stems appearing attached regardless of age or any actual attachment has been fixed. However, melon stems still appear attached to adjacent fruits regardless of age due to a similar bug.<ref>{{bug|MC-61716}}</ref>}}
{{History|||snap=14w34d|Melon seeds can no longer be used for [[breeding]] [[chicken]]s.}}
{{History||1.9|snap=15w31a|Chickens can now use melon seeds to breed again.}}
{{History|||snap=15w44a|Melon seeds have been added to [[dungeon]] [[chest]]s.
|The average yield of melon seeds from [[mineshaft]] chests has been decreased.}}
{{History|||snap=15w45a|Melon stems must now be fully grown again to attach.}}
{{History||1.11|snap=16w39a|Melon seeds can now be found inside chests in the new [[woodland mansion]]s.
|Melon crops now generate inside woodland mansions.}}
{{History||1.12|snap=17w18b|Placing a melon seeds in farmland now gives the player the "A Seedy Place" [[advancement]].{{verify}}}}
{{History||1.13|snap=17w47a|The different block states for the <code>melon_stem</code> ID have been split up into their own IDs.
|Prior to [[1.13/Flattening|''The Flattening'']], this [[block]]'s numeral ID was 105, and the [[item]]'s 362.}}
{{History|||snap=17w48a|Attached melon stems no longer [[drops|drop]] seeds.}}
{{History||1.14|snap=18w43a|[[File:Attached Melon Stem (N) JE5.png|32px]] [[File:Attached Melon Stem (E) JE5.png|32px]] [[File:Attached Melon Stem (S) JE5.png|32px]] [[File:Attached Melon Stem (W) JE5.png|32px]] The texture of attached melon stems has been changed.}}
{{History|||snap=18w49a|Melon stems now generate in the updated [[savanna]] [[village]]s.}}
{{History|||snap=18w50a|Melon stems now generate in the updated [[desert]] [[village]]s.}}
{{History|||snap=19w03a|Placing melon seeds into the new [[composter]] has a 10% chance of raising the compost level by 1.}}
{{History|||snap=19w05a|Melon seeds now have a 30% chance of increasing the compost level in a composter by 1.
|Added [[Wandering Trader|wandering trader]]s, which sell melon seeds.}}
{{History||1.15|snap=19w34a|[[Bee]]s can now pollinate melon stems.}}
{{History|||snap=19w39a|Attached melon stems now [[drops|drop]] seeds again.<ref>{{bug|MC-136360}}</ref>}}
{{History||1.18|snap=Pre-release 5|[[File:Melon Seeds JE2.png|32px]] The texture of melon seeds has been changed.}}
{{History|pocket alpha}}
{{History||v0.5.0|Added melon seeds.
|[[File:Melon Stem Age 0 JE1.png|32px]] [[File:Stem Age 1 JE1.png|32px]] [[File:Melon Stem Age 2 JE1.png|32px]] [[File:Melon Stem Age 3 JE1.png|32px]] [[File:Melon Stem Age 4 JE1.png|32px]] [[File:Melon Stem Age 5 JE1.png|32px]] [[File:Melon Stem Age 6 JE1.png|32px]] [[File:Melon Stem Age 7 JE1.png|32px]] [[File:Attached Melon Stem (N) JE1.png|32px]] [[File:Attached Melon Stem (E) JE1.png|32px]] [[File:Attached Melon Stem (S) JE1.png|32px]] [[File:Attached Melon Stem (W) JE1.png|32px]]{{verify|Are these models correct?}} Added melon stems.}}
{{History||v0.6.0|[[File:Melon Seeds JE1 BE1.png|32px]] Melon seeds no longer use the pumpkin seeds texture.}}
{{History||v0.9.0|snap=?|Melon seeds can now be found in [[mineshaft]] chests.}}
{{History||v0.12.1|snap=build 1|Melon seeds are no longer available from the [[Nether reactor]].}}
{{History||v0.14.0|snap=build 1|Melon seeds can now be found in [[minecart with chest|minecarts with chests]] in [[mineshaft]]s.}}
{{History|pocket}}
{{History||1.0.0|snap=alpha 0.17.0.1|Melon seeds now generate inside [[dungeon]] [[chest]]s.}}
{{History||1.1.0|snap=alpha 1.1.0.0|Melon crops now generate inside [[woodland mansion]]s.
|Melon seeds can now be found in woodland mansion chests.}}
{{History|bedrock}}
{{History||1.2.0|snap=beta 1.2.0.2|Melon seeds can now be found inside [[bonus chest]]s.
|Melon seeds are now used to tame [[parrot]]s.}}
{{History||1.10.0|snap=beta 1.10.0.3|[[File:Attached Melon Stem (W) JE5.png|32px]]{{info needed|More accurate image}} The texture of attached melon stems has been changed.
|Melon stems now generate in [[savanna]] and [[desert]] [[village]] farms.
|Added [[wandering trader]]s, who [[trading|sell]] melon seeds.}}
{{History||1.11.0|snap=beta 1.11.0.1|Melon seeds can now be used to fill up [[composter]]s.}}
{{History||1.14.0|snap=beta 1.14.0.1|[[Bee]]s can now pollinate melon stems.}}
{{History|console}}
{{History||xbox=TU5|xbone=CU1|ps=1.0|wiiu=Patch 1|[[File:Melon Seeds JE1 BE1.png|32px]] Added melon seeds.
|[[File:Melon Stem Age 0 JE1.png|32px]] [[File:Stem Age 1 JE1.png|32px]] [[File:Melon Stem Age 2 JE1.png|32px]] [[File:Melon Stem Age 3 JE1.png|32px]] [[File:Melon Stem Age 4 JE1.png|32px]] [[File:Melon Stem Age 5 JE1.png|32px]] [[File:Melon Stem Age 6 JE1.png|32px]] [[File:Melon Stem Age 7 JE1.png|32px]] [[File:Attached Melon Stem (N) JE1.png|32px]] [[File:Attached Melon Stem (E) JE1.png|32px]] [[File:Attached Melon Stem (S) JE1.png|32px]] [[File:Attached Melon Stem (W) JE1.png|32px]]{{verify|Are these models correct?}} Added melon stems.}}
{{History||xbox=none|xbone=none|ps=1.90|wiiu=none|switch=none|[[File:Attached Melon Stem (W) JE5.png|32px]]{{info needed|More accurate image}} The texture of attached melon stems has been changed.}}
{{History|New 3DS}}
{{History||0.1.0|[[File:Melon Stem Age 0 JE1.png|32px]] [[File:Stem Age 1 JE1.png|32px]] [[File:Melon Stem Age 2 JE1.png|32px]] [[File:Melon Stem Age 3 JE1.png|32px]] [[File:Melon Stem Age 4 JE1.png|32px]] [[File:Melon Stem Age 5 JE1.png|32px]] [[File:Melon Stem Age 6 JE1.png|32px]] [[File:Melon Stem Age 7 JE1.png|32px]] [[File:Attached Melon Stem (N) JE1.png|32px]] [[File:Attached Melon Stem (E) JE1.png|32px]] [[File:Attached Melon Stem (S) JE1.png|32px]] [[File:Attached Melon Stem (W) JE1.png|32px]]{{verify|Are these models correct?}} Added melon stems.}}
{{History|foot}}
<gallery>
Melon Stem with data value 15.png|The final version of the melon stem with age 15, as seen in-game.
Melonstems.png|Melon stems of ages 1–15 on a modded version of 1.7.2, hence the melon stems using the melon top texture.
Stems of 13w02a.png|All 16 stem sizes in 13w02a, with accompanying data values.
</gallery>
=== Melon stem "item" ===
{{:Technical blocks/Melon Stem}}
== Issues ==
{{issue list}}
== Gallery ==
<gallery>
Stem All Ages.png|All stages of growth.
AllSeeds.png|All the [[seeds]] that exist in the game.
</gallery>
== See also ==
* [[Melon]]
* [[Pumpkin Seeds]]
==References==
{{Reflist}}
{{Blocks|vegetation}}
{{Items}}
[[Category:Plants]]
[[Category:Food]]
[[Category:Non-solid blocks]]
[[Category:Generated structure blocks]]
[[cs:Semínka melounu]]
[[de:Melone]]
[[es:Semillas de sandía]]
[[fr:Graines de pastèque]]
[[hu:Dinnyemagok]]
[[it:Anguria]]
[[ja:スイカの種]]
[[ko:수박씨]]
[[nl:Meloenzaden]]
[[pl:Nasiona arbuza]]
[[pt:Sementes de melancia]]
[[ru:Семена арбуза]]
[[th:เมล็ดแตงโม]]
[[zh:西瓜种子]]</li><li>[[Door|Door]]<br/>{{About|the block|the music track|Minecraft - Volume Alpha}}
{{See also|Trapdoor}}
{{Block
| image = <gallery>
Iron Door.png|Java Edition
Iron Door BE.png|Bedrock Edition
</gallery>
| extratext = View [[#Gallery|all renders]]
| transparent = Partial
| light = No
| tntres = {{Blast resistance values|Wooden Door}} <small>(Wood)</small><br>{{Blast resistance values|Iron Door|Copper Door}}<small> (Iron)</small>
| hardness = {{Hardness values|Wooden Door}} <small>(Wood)</small><br>{{Hardness values|Iron Door|Copper Door}}<small> (Iron)</small>
| tool = axe
| tool2 = wooden pickaxe
| renewable = Yes
| stackable = Yes (64)
| flammable = No
| lavasusceptible = '''Overworld wood''': Yes<br>'''Nether wood''','''iron''','''copper''': No
}}
A '''door''' is a block that can be used as a barrier that can be opened by hand or with [[redstone]].
== Obtaining ==
Doors can be found in any Overworld biome, and can also be crafted from any type of [[wood]] as well as materials found in [[the Nether]]. Some have built-in openings that are useful for determining the time of day.
=== Breaking ===
Wooden doors can be broken with anything, but [[axe]]s are fastest. An iron door can be broken with anything if the top half of the door is broken.<ref>{{bug|MC-189739}}</ref><ref>{{bug|MCPE-126620}}</ref> All doors drop themselves if they no longer have a block beneath them that can support them.
{{breaking row
|Oak Door, Spruce Door, Birch Door, Jungle Door, Acacia Door, Dark Oak Door, Mangrove Door, Cherry Door, Bamboo Door, Crimson Door, Warped Door; Iron Door
|textTrim=Door
|Axe;Pickaxe
|;
|item=1;1
|link=none;none
}}
A door is removed and drops itself as an item:
* if the block beneath the door is moved, removed, or destroyed
* if a [[piston]] tries to push the door (trying to pull a door does nothing) or moves a block into its space
=== Natural generation ===
Doors generate in some generated structures, forming the entrances to the majority of buildings. Doors do not generate in [[zombie village]]s.
;{{BlockSprite|Oak Door|text=Oak}}
Oak doors generate as part of:
* Plains [[village]]s
* [[Stronghold]]s
* Right-side-up [[shipwreck]]s
;{{BlockSprite|Spruce Door|text=Spruce}}
Spruce doors generate as part of:
* Taiga, snowy tundra and snowy taiga [[village]]s
* Right-side-up [[shipwreck]]s
;{{BlockSprite|Jungle Door|text=Jungle}}
Jungle doors generate as part of:
* Desert [[village]]s
* Right-side-up [[shipwreck]]s
;{{BlockSprite|Acacia Door|text=Acacia}}
Acacia doors generate as part of:
* Savanna [[village]]s
<!-- * Right-side-up [[shipwreck]]s{{only|BE}}{{need testing}} -->
;{{BlockSprite|Dark Oak Door|text=Dark oak}}
Dark oak doors generate as part of:
* Master bedroom closets in [[woodland mansion]]s
* Right-side-up [[shipwreck]]s
;{{BlockSprite|Iron Door|text=Iron}}
Iron doors generate as part of:
* Prison rooms in [[woodland mansion]]s
* [[Stronghold]]s with a stone [[button]] to open{{only|JE}}
=== Crafting ===
{{Crafting
|head=1
|name=[[Wood Door]]
|A1= Matching Planks
|B1= Matching Planks
|A2= Matching Planks
|B2= Matching Planks
|A3= Matching Planks
|B3= Matching Planks
|Output= Matching wood Door,3
|type= Redstone
}}
{{Crafting
|A1= Iron Ingot
|B1= Iron Ingot
|A2= Iron Ingot
|B2= Iron Ingot
|A3= Iron Ingot
|B3= Iron Ingot
|Output= Iron Door,3
|type= Redstone
|foot=1
}}
== Usage ==
Wooden doors can be opened and closed by players, [[villager]]s, [[wandering trader]]s{{only|bedrock|short=1}}<!--Wandering traders cannot open doors in java edition. -->, [[vindicator]]s{{only|java|short=1}}, and [[piglin]]s. Wooden doors can be broken by all variants of [[zombie]]s (except [[drowned]]) and [[vindicator]]s in Hard difficulty.
Iron doors can be opened only with redstone power.
=== Placement ===
Doors must be "attached" to a block beneath them. To place a door, {{control|use}} a door item while pointing at the top of the block it should be attached to. A door can be attached to:
* the '''top''' of any full solid [[opaque]] block ([[stone]], [[dirt]], [[blocks of gold]], etc.)
* the '''top''' of an upside-down [[slab]] or upside-down [[stairs]]
* the '''top''' of a [[slime block]] or downward-facing [[piston]]
More information about placement on transparent blocks can be found at [[Opacity/Placement]].
When placed, a door occupies the side of the block facing the player, or behind a player if placed in the player's own space.
By default, a door's "hinge" appears on the side of the half of the block that the player pointed at when placing and its "handle" on the opposite side{{only|java}}, but the hinge is forced to other side by:
* Placing a door besides another door (creating a double door where both doors open away from each other)
* Placing a door between a full solid and any opaque block (top or bottom), making the hinge appear to attach to the solid block.
=== Behavior ===
[[Water]] and [[lava]] flow around doors. Lava can create [[fire]] in air blocks next to wooden doors as if the wooden doors were flammable, but the doors do not burn (and cannot be burned by other methods either, except throwing them into lava).
[[Mob]]s can spawn in a space occupied by a door.
The sound of opening and closing of a door can be heard up to 16 blocks away, like most mob sounds.
When placed using the {{cmd|setblock}} command, only one half of a door is placed, because doors are actually two separate blocks. The lower half still works, but with graphical bugs, and the upper half does not. Redstone cannot be used because it updates the half, breaking it. The upper half does not drop anything when broken, the lower half drops a normal door. This implies that the upper half is dependent on the lower.
=== Barrier ===
A door can be used as a switchable barrier to entity movement. Although primarily used to block movement by mobs and players, a door can also be used to control the movement of boats (for example, a door placed in a two-wide water flow stops a boat when perpendicular to the flow, but allow it to move again when parallel), items and minecarts (a door can stop a falling item or minecart, then allow it to drop again when the door moves), etc.
{{IN|Java}}, doors provide a breathable space if placed underwater. {{IN|bedrock}}, doors in water source blocks are [[waterlogging|waterlogged]] and do not displace water source blocks.
Doors are 0.1875 ({{frac|3|16}}) blocks thick (0.1825 {{in|bedrock}}). The rest of a door's space can be moved through freely. A door occupies two block spaces and both halves normally act as a single barrier, although doors can be opened or closed with a player or mob occupying the bottom block of the door,<ref>{{bug|MC-54255}} – "You can stand on the bottom block of a door, allowing you to climb it like a ladder" resolved as "Won't Fix"</ref> in which case the player can jump up to land on the bottom half of the door and then again to land on top of the door.
To open or close a wooden door, use the {{control|use|text=Use Item/Place Block}} [[control]]. When a door opens or closes, it immediately changes its orientation without affecting anything in the space it "swings through". Moving doors do not push entities the way that pistons do.
[[Villager]]s, [[wandering trader]]s,{{only|bedrock|short=1}} [[vindicator]]s{{only|java|short=1}}, [[piglin]]s and [[piglin brute]]s can open and close wooden doors when pathfinding.
Some [[zombie]]s can break wooden doors in [[Hard]] [[difficulty]]. Zombies have a 5% chance to spawn with the ability to break doors. Vindicators spawned from a [[raid]] in [[Normal]] and Hard difficulty can also break wooden doors, but they do so only to reach targeted players, villagers, or wandering traders. Some vindicators may sometimes open a wooden door instead of breaking it.{{only|java}} Both zombies and vindicators attempt to break wooden doors only when in their "closed" state, even if a door is placed so that its "open" state blocks access (for example, by facing sideways when placing a door so that it allows passage when closed and blocks passage when open).
Iron doors can be opened only with redstone power (a [[button]], a [[redstone circuit]], etc.). Any mob can activate an iron door by stepping on a pressure plate or by triggering a tripwire.
=== Redstone component ===
{{see also|Redstone circuit}}
Both wood and iron doors can be controlled with redstone power.
A door is a redstone [[mechanism component]] and can be activated by:
* an adjacent active '''[[power component]]''', including above or below: for example, a [[redstone torch]], a [[block of redstone]], a [[daylight sensor]], etc.
* an adjacent '''powered block''' (for example, a block with an active redstone torch under it), including above or below
* a powered '''[[redstone comparator]]''' or '''[[redstone repeater]]''' facing the door
* powered '''[[redstone dust]]''' configured to point at the door or a directionless "dot" next to it; a door is ''not'' activated by adjacent powered redstone dust that is configured to point in another direction.
All methods of activating a door can be applied to either the top or bottom parts of a door.
When activated, a door immediately rotates around its hinge side to its open state. When deactivated, a door immediately returns to its closed state.
An activated wood door can still be closed by a player or villager and does not re-open until it receives a new activation signal (if a door has been closed "by hand", it still needs to be deactivated and then reactivated to open by redstone).
=== Fuel ===
Overworld wooden doors can be used as a [[Smelting#Fuel|fuel]] in [[furnace]]s, smelting 1 item per door.
=== Note blocks ===
Wooden doors can be placed under [[note block]]s to produce "bass" sound.
== Sounds ==
=== Generic ===
==== Iron ====
{{Sound table/Block/Metal}}
==== Normal wood ====
{{Sound table/Block/Wood}}
==== Cherry wood ====
{{Sound table/Block/Cherry wood}}
==== Bamboo wood ====
{{Sound table/Block/Bamboo wood}}
==== Nether wood ====
{{Sound table/Block/Nether wood}}
=== Unique ===
{{el|java}}:
{{Sound table
|sound=Iron Door open1.ogg
|sound2=Iron Door open2.ogg
|sound3=Iron Door open3.ogg
|sound4=Iron Door open4.ogg
|subtitle=Door creaks
|source=block
|description=When an iron door opens
|id=block.iron_door.open
|translationkey=subtitles.block.door.toggle
|volume=0.9
|pitch=0.9-1.0
|distance=16}}
{{Sound table
|sound=Iron Door close1.ogg
|sound2=Iron Door close2.ogg
|sound3=Iron Door close3.ogg
|sound4=Iron Door close4.ogg
|subtitle=Door creaks
|source=block
|description=When an iron door closes
|id=block.iron_door.close
|translationkey=subtitles.block.door.toggle
|volume=0.9
|pitch=0.9-1.0
|distance=16}}
{{Sound table
|sound=Wooden Door open3.ogg
|sound2=Wooden Door open4.ogg
|subtitle=Door creaks
|source=block
|description=When a wooden door opens
|id=block.wooden_door.open
|translationkey=subtitles.block.door.toggle
|volume=0.9
|pitch=0.9-1.0
|distance=16}}
{{Sound table
|sound=Wooden Door close2.ogg
|sound2=Wooden Door close5.ogg
|sound3=Wooden Door close6.ogg
|subtitle=Door creaks
|source=block
|description=When a wooden door closes
|id=block.wooden_door.close
|translationkey=subtitles.block.door.toggle
|volume=0.9
|pitch=0.9-1.0
|distance=16}}
{{Sound table
|rowspan=2
|sound=Cherry door toggle1.ogg
|sound2=Cherry door toggle2.ogg
|sound3=Cherry door toggle3.ogg
|sound4=Cherry door toggle4.ogg
|subtitle=Door creaks
|source=block
|description=When a cherry wood door opens
|id=block.cherry_wood_door.open
|translationkey=subtitles.block.door.toggle
|volume=0.9
|pitch=0.9-1.0
|distance=16}}
{{Sound table
|subtitle=Door creaks
|source=block
|description=When a cherry wood door closes
|id=block.cherry_wood_door.close
|translationkey=subtitles.block.door.toggle
|volume=0.9
|pitch=0.9-1.0
|distance=16}}
{{Sound table
|rowspan=2
|sound=Bamboo Door toggle1.ogg
|sound2=Bamboo Door toggle2.ogg
|sound3=Bamboo Door toggle3.ogg
|sound4=Bamboo Door toggle4.ogg
|subtitle=Door creaks
|source=block
|description=When a bamboo wood door opens
|id=block.bamboo_wood_door.open
|translationkey=subtitles.block.door.toggle
|volume=0.9
|pitch=0.9-1.0
|distance=16}}
{{Sound table
|subtitle=Door creaks
|source=block
|description=When a bamboo wood door closes
|id=block.bamboo_wood_door.close
|translationkey=subtitles.block.door.toggle
|volume=0.9
|pitch=0.9-1.0
|distance=16}}
{{Sound table
|rowspan=2
|sound=Nether Door toggle1.ogg
|sound2=Nether Door toggle2.ogg
|sound3=Nether Door toggle3.ogg
|sound4=Nether Door toggle4.ogg
|subtitle=Door creaks
|source=block
|description=When a Nether wood door opens
|id=block.nether_wood_door.open
|translationkey=subtitles.block.door.toggle
|volume=1.0
|pitch=0.9-1.0
|distance=16}}
{{Sound table
|subtitle=Door creaks
|source=block
|description=When a Nether wood door closes
|id=block.nether_wood_door.close
|translationkey=subtitles.block.door.toggle
|volume=1.0
|pitch=0.9-1.0
|distance=16}}
{{Sound table
|sound=Zombie hit wood1.ogg
|sound2=Zombie hit wood2.ogg
|sound3=Zombie hit wood3.ogg
|sound4=Zombie hit wood4.ogg
|subtitle=Door shakes
|source=hostile
|description=When a [[zombie]] attacks a door
|id=entity.zombie.attack_wooden_door
|translationkey=subtitles.entity.zombie.attack_wooden_door
|volume=2.0
|pitch=0.8-1.2
|distance=16}}
{{Sound table
|sound=Zombie hit metal1.ogg
|sound2=Zombie hit metal2.ogg
|sound3=Zombie hit metal3.ogg
|subtitle=Block broken <ref group=sound name=ironsubtitle>{{Bug|MC-226770}}</ref>
|source=None
|description=''Unused sound event''<ref group=sound>{{bug|MC-218122}}</ref>
|id=entity.zombie.attack_iron_door
|translationkey=subtitles.block.generic.break|translationkeynote=<ref group=sound name=ironsubtitle/>
|volume=''None''
|pitch=''None''
|distance=''None''}}
{{Sound table
|sound=Zombie breaks door.ogg
|subtitle=Door breaks
|source=hostile
|description=When a zombie breaks a door
|id=entity.zombie.break_wooden_door
|translationkey=subtitles.entity.zombie.break_wooden_door
|volume=2.0
|pitch=0.8-1.2
|distance=16
|foot=1}}
{{el|bedrock}}:
{{Sound table
|type=bedrock
|sound=Iron Door open1.ogg
|sound2=Iron Door open2.ogg
|sound3=Iron Door open3.ogg
|sound4=Iron Door open4.ogg
|source=block
|description=When an iron door opens
|id=open.iron_door
|volume=0.9
|pitch=0.9-1.0}}
{{Sound table
|sound=Iron Door close1.ogg
|sound2=Iron Door close2.ogg
|sound3=Iron Door close3.ogg
|sound4=Iron Door close4.ogg
|source=block
|description=When an iron door closes
|id=close.iron_door
|volume=0.9
|pitch=0.9-1.0}}
{{Sound table
|sound=Wooden Door open3.ogg
|sound2=Wooden Door open4.ogg
|source=block
|description=When a wooden door opens
|id=open.wooden_door
|volume=0.9
|pitch=0.9-1.0}}
{{Sound table
|sound=Wooden Door close2.ogg
|sound2=Wooden Door close5.ogg
|sound3=Wooden Door close6.ogg
|source=block
|description=When a wooden door closes
|id=close.wooden_door
|volume=0.9
|pitch=0.9-1.0}}
{{Sound table
|rowspan=2
|sound=Cherry door toggle1.ogg
|sound2=Cherry door toggle2.ogg
|sound3=Cherry door toggle3.ogg
|sound4=Cherry door toggle4.ogg
|source=block
|description=When a cherry wood door opens
|id=open.cherry_wood_door
|volume=1.0
|pitch=0.9-1.0}}
{{Sound table
|source=block
|description=When a cherry wood door closes
|id=close.cherry_wood_door
|volume=1.0
|pitch=0.9-1.0}}
{{Sound table
|rowspan=2
|sound=Bamboo Door toggle1.ogg
|sound2=Bamboo Door toggle2.ogg
|sound3=Bamboo Door toggle3.ogg
|sound4=Bamboo Door toggle4.ogg
|source=block
|description=When a bamboo wood door opens
|id=open.bamboo_wood_door
|volume=0.9
|pitch=0.9-1.0}}
{{Sound table
|source=block
|description=When a bamboo wood door closes
|id=close.bamboo_wood_door
|volume=0.9
|pitch=0.9-1.0}}
{{Sound table
|rowspan=2
|sound=Nether Door toggle1.ogg
|sound2=Nether Door toggle2.ogg
|sound3=Nether Door toggle3.ogg
|sound4=Nether Door toggle4.ogg
|source=block
|description=When a Nether wood door opens
|id=open.nether_wood_door
|volume=1.0
|pitch=0.9-1.0}}
{{Sound table
|source=block
|description=When a Nether wood door closes
|id=close.nether_wood_door
|volume=1.0
|pitch=0.9-1.0}}
{{Sound table
|sound=Zombie hit wood1.ogg
|sound2=Zombie hit wood2.ogg
|sound3=Zombie hit wood3.ogg
|sound4=Zombie hit wood4.ogg
|source=hostile
|description=While a zombie is breaking a wooden door
|id=mob.zombie.wood
|volume=1.0
|pitch=1.0}}
{{Sound table
|sound=Zombie breaks door.ogg
|source=hostile
|description=When a zombie breaks a wooden door
|id=mob.zombie.woodbreak
|volume=1.0
|pitch=1.0
|foot=1}}
== Data values ==
=== ID ===
{{edition|java}}:
{{ID table
|edition=java
|showblocktags=y
|showitemtags=y
|showforms=y
|generatetranslationkeys=y
|displayname=Iron Door
|spritetype=block
|nameid=iron_door
|blocktags=doors
|itemtags=doors}}
{{ID table
|displayname=Oak Door
|spritetype=block
|nameid=oak_door
|blocktags=doors, wooden_doors
|itemtags=doors, wooden_doors}}
{{ID table
|displayname=Spruce Door
|spritetype=block
|nameid=spruce_door
|blocktags=doors, wooden_doors
|itemtags=doors, wooden_doors}}
{{ID table
|displayname=Birch Door
|spritetype=block
|nameid=birch_door
|blocktags=doors, wooden_doors
|itemtags=doors, wooden_doors}}
{{ID table
|displayname=Jungle Door
|spritetype=block
|nameid=jungle_door
|blocktags=doors, wooden_doors
|itemtags=doors, wooden_doors}}
{{ID table
|displayname=Acacia Door
|spritetype=block
|nameid=acacia_door
|blocktags=doors, wooden_doors
|itemtags=doors, wooden_doors}}
{{ID table
|displayname=Dark Oak Door
|spritetype=block
|nameid=dark_oak_door
|blocktags=doors, wooden_doors
|itemtags=doors, wooden_doors}}
{{ID table
|displayname=Mangrove Door
|spritetype=block
|nameid=mangrove_door
|blocktags=doors, wooden_doors
|itemtags=doors, wooden_doors}}
{{ID table
|displayname=Cherry Door
|spritetype=block
|nameid=cherry_door
|blocktags=doors, wooden_doors
|itemtags=doors, wooden_doors}}
{{ID table
|displayname=Bamboo Door
|spritetype=block
|nameid=bamboo_door
|blocktags=doors, wooden_doors
|itemtags=doors, wooden_doors}}
{{ID table
|displayname=Crimson Door
|spritetype=block
|nameid=crimson_door
|blocktags=doors, non_flammable_wood, wooden_doors
|itemtags=doors, non_flammable_wood, wooden_doors}}
{{ID table
|displayname=Warped Door
|spritetype=block
|nameid=warped_door
|blocktags=doors, non_flammable_wood, wooden_doors
|itemtags=doors, non_flammable_wood, wooden_doors
|foot=1}}
{{edition|bedrock}}:
{{ID table
|edition=bedrock
|showitemtags=y
|firstcolumnname=Door
|shownumericids=y
|showforms=y
|generatetranslationkeys=y
|spritename=iron-door
|displayname=Iron block
|spritetype=block
|nameid=iron_door
|id=71
|form=block
|itemform=item.iron_door}}
{{ID table
|spritename=oak-door
|displayname=Oak block
|spritetype=block
|nameid=wooden_door
|id=64
|form=block
|itemform=item.wooden_door
|translationkey=-}}
{{ID table
|spritename=spruce-door
|displayname=Spruce block
|spritetype=block
|nameid=spruce_door
|id=193
|form=block
|itemform=item.spruce_door
|translationkey=-}}
{{ID table
|spritename=birch-door
|displayname=Birch block
|spritetype=block
|nameid=birch_door
|id=194
|form=block
|itemform=item.birch_door
|translationkey=-}}
{{ID table
|spritename=jungle-door
|displayname=Jungle block
|spritetype=block
|nameid=jungle_door
|id=195
|form=block
|itemform=item.jungle_door
|translationkey=-}}
{{ID table
|spritename=acacia-door
|displayname=Acacia block
|spritetype=block
|nameid=acacia_door
|id=196
|form=block
|itemform=item.acacia_door
|translationkey=-}}
{{ID table
|spritename=dark-oak-door
|displayname=Dark Oak block
|spritetype=block
|nameid=dark_oak_door
|id=197
|form=block
|itemform=item.dark_oak_door
|translationkey=-}}
{{ID table
|spritename=mangrove-door
|displayname=Mangrove block
|spritetype=block
|nameid=mangrove_door
|id=-493
|form=block
|itemform=item.mangrove_door
|translationkey=-}}
{{ID table
|displayname=Cherry Door
|spritetype=block
|nameid=cherry_door
|id=-531
|itemtags=minecraft:door
|translationkey=item.cherry_door.name}}
{{ID table
|displayname=Bamboo Door
|spritetype=block
|nameid=bamboo_door
|id=-517
|itemtags=minecraft:door
|translationkey=item.bamboo_door.name}}
{{ID table
|spritename=crimson-door
|displayname=Crimson block
|spritetype=block
|nameid=crimson_door
|id=499
|form=block
|itemform=item.crimson_door}}
{{ID table
|spritename=warped-door
|displayname=Warped block
|spritetype=block
|nameid=warped_door
|id=500
|form=block
|itemform=item.warped_door}}
{{ID table
|spritename=iron-door
|displayname=Iron item
|spritetype=item
|nameid=iron_door
|id=372
|form=item
|itemtags=minecraft:door}}
{{ID table
|spritename=oak-door
|displayname=Oak item
|spritetype=item
|nameid=wooden_door
|id=359
|form=item
|itemtags=minecraft:door}}
{{ID table
|spritename=spruce-door
|displayname=Spruce item
|spritetype=item
|nameid=spruce_door
|id=553
|form=item
|itemtags=minecraft:door}}
{{ID table
|spritename=birch-door
|displayname=Birch item
|spritetype=item
|nameid=birch_door
|id=554
|form=item
|itemtags=minecraft:door}}
{{ID table
|spritename=jungle-door
|displayname=Jungle item
|spritetype=item
|nameid=jungle_door
|id=555
|form=item
|itemtags=minecraft:door}}
{{ID table
|spritename=acacia-door
|displayname=Acacia item
|spritetype=item
|nameid=acacia_door
|id=556
|form=item
|itemtags=minecraft:door}}
{{ID table
|spritename=dark-oak-door
|displayname=Dark Oak item
|spritetype=item
|nameid=dark_oak_door
|id=557
|form=item
|itemtags=minecraft:door}}
{{ID table
|spritename=mangrove-door
|displayname=Mangrove item
|spritetype=item
|nameid=mangrove_door
|id=641
|form=item
|itemtags=minecraft:door}}
{{ID table
|spritename=crimson-door
|displayname=Crimson item
|spritetype=item
|nameid=crimson_door
|id=616
|form=item
|itemtags=minecraft:door}}
{{ID table
|spritename=warped-door
|displayname=Warped item
|spritetype=item
|nameid=warped_door
|id=617
|form=item
|itemtags=minecraft:door
|foot=1}}
=== Block states ===
{{see also|Block states}}
{{/BS}}
== Video ==
Note: The videos do not mention or state Crimson, Warped, Bamboo, or Cherry doors, since the videos were uploaded before 1.16.
<div style="text-align:center">
<span style="display:inline-block">{{yt|7jlIQcbHFts}}</span>
<span style="display:inline-block">{{yt|CC6ujEdvzQY}}</span>
</div>
== History ==
''For a history of changes to textures and models for each block state, see [[/Asset history]]''
{{History||3 June 2010|link=https://notch.tumblr.com/post/659506746/asynchronous-saving-and-loading-and-slightly-more|Notch states plans to implement doors.}}
{{History|java infdev}}{{History||20100607|[[File:Oak Door JE1.png|32px]] [[File:Oak Door (Right) JE1.png|32px]] [[File:Oak Door (item) JE1.png|32px]] Added wooden doors.}}
{{History||20100608|Doors have been given smarter rotation logic.}}
{{History||20100611|[[File:Oak Door JE2.png|32px]] [[File:Oak Door (Right) JE2.png|32px]] The models of doors have been changed to use door bottom half texture on sides instead of the wooden [[planks]] texture.}}
{{History||20100618|[[File:Oak Door JE3 BE1.png|32px]] [[File:Oak Door (Right) JE3.png|32px]] The textures of doors have been changed.}}
{{History||20100624|[[File:Oak Door (Right) JE4 BE1.png|32px]] The model of door with right hinge has been changed to mirror and use textures of door with left hinge.}}
{{History|java alpha}}
{{History||v1.0.1|[[File:Iron Door JE1 BE1.png|32px]] [[File:Iron Door (Right) JE1 BE1.png|32px]] [[File:Iron Door (item) JE1 BE1.png|32px]] Added iron doors.
|[[File:Oak Door (item) JE2 BE1.png|32px]] The texture of wooden doors in [[item]] form has been changed.
|Doors can now be controlled by redstone power.}}
{{History|java beta}}
{{History||1.7|Punching the back face of a left-hinge oak or iron door or the front face of a right-hinge door, as well as destroying a door, would [[Java Edition placeholder texture uses|create]] particles using the [[Placeholder texture#Texture atlas blank spaces|block placeholder texture]].}}
{{History||1.7.3|Doors no longer produce placeholder texture particles.}}
{{History||1.8|snap=Pre-release|Doors now occur naturally in [[village]]s and [[stronghold]]s.}}
{{History|java}}
{{History||1.0.0|snap=Beta 1.9 Prerelease 6|Wooden doors are now broken faster using an [[axe]].
|Iron doors are broken much faster using a [[pickaxe]], and the [[mining]] speed is now [[tier]] dependent.}}
{{History|||snap=RC1|The opening and closing [[sound]]s for doors have been changed.}}
{{History||1.1|snap=11w47a|Double doors now open correctly.}}
{{History||1.2.1|snap=12w05b|[[Villager]]s can now open and close doors.}}
{{History|||snap=12w06a|[[File:Oak Door JE4 BE3.png|32px]] [[File:Iron Door JE2 BE5.png|32px]] Changed top model of door.
|[[Zombie]]s can now break wooden doors.
|Doors have been changed to properly detect if they are open or closed. Placing two [[pressure plate]]s directly in front of doors and stepping on them now opens them correctly.}}
{{History|||snap=12w07a|Zombies can no longer break iron doors.}}
{{History||1.4.2|snap=12w40a|Wooden doors can no longer be opened by attacking (left-click).}}
{{History||1.8|snap=December 13, 2013|slink=https://twitter.com/jeb_/status/411425952338808832|[[Jens Bergensten|Jeb]] tweeted an image showing that the crafting recipes for doors are changed so that 3 doors are crafted at once. Doors are also stackable to 64.}}
{{History|||snap=14w02a|Doors are now stackable to 64.
|The [[crafting]] recipes of doors now yield 3 doors instead of 1.}}
{{History|||snap=14w10a|[[File:Oak Door JE5.png|32px]] [[File:Iron Door JE3.png|32px]] The models of doors have been changed.}}
{{History|||snap=August 8, 2014|slink=https://twitter.com/TheMogMiner/status/497751889102905344|[[Ryan Holtz|TheMogMiner]] tweeted an image showing new types of [[wood]] doors.}}
{{History|||snap=14w32d|[[File:Spruce Door JE1 BE1.png|32px]] [[File:Birch Door JE1 BE1.png|32px]] [[File:Jungle Door JE1.png|32px]] [[File:Acacia Door JE1.png|32px]] [[File:Dark Oak Door JE1 BE1.png|32px]] [[File:Spruce Door (item) JE1.png|32px]] [[File:Birch Door (item) JE1.png|32px]] [[File:Jungle Door (item) JE1.png|32px]] [[File:Acacia Door (item) JE1.png|32px]] [[File:Dark Oak Door (item) JE1.png|32px]] New types of wood doors have been added: spruce, birch, jungle, acacia and dark oak.}}
{{History|||snap=14w33a|[[File:Jungle Door JE2 BE1.png|32px]] [[File:Acacia Door JE2 BE1.png|32px]] The models of jungle and acacia doors no longer have inner faces in the holes in their models.
|[[File:Spruce Door (item) JE2.png|32px]] [[File:Birch Door (item) JE2.png|32px]] [[File:Jungle Door (item) JE2.png|32px]] [[File:Acacia Door (item) JE2.png|32px]] [[File:Dark Oak Door (item) JE2.png|32px]] [[Item]] textures of new doors have been changed to match the dimensions of oak and iron doors.
|The wooden door (''Door'') has been renamed to ''Oak Door''.}}
{{History|||snap=14w33b|[[File:Oak Door (item) JE3 BE2.png|32px]] [[File:Spruce Door (item) JE3 BE1.png|32px]] [[File:Birch Door (item) JE3 BE1.png|32px]] [[File:Jungle Door (item) JE3 BE1.png|32px]] [[File:Acacia Door (item) JE3 BE1.png|32px]] [[File:Dark Oak Door (item) JE3 BE1.png|32px]][[File:Iron Door (item) JE2 BE2.png|32px]] All [[item]] textures for all doors have been changed. Doors now have hinges on the left and handles on the right, existing wooden doors & iron doors have a slight item textures change as well.}}
{{History||1.9|snap=15w31a|[[File:Birch Door JE2.png|32px]] [[File:Jungle Door JE3.png|32px]] [[File:Acacia Door JE3.png|32px]] [[File:Dark Oak Door JE2.png|32px]] Shading on the [[block]] textures of birch, jungle, acacia, and dark oak doors have been changed, so that the shadow is in the upper left and the highlight is in the lower right.}}
{{History|||snap=15w43a|Iron doors now have different [[sound]]s than wooden doors.
|Doors now have [[sound]]s for placing and different sounds for opening and closing - see sounds section.}}
{{History|||snap=15w47a|Doors now make [[sound]]s when placed,<ref>{{bug|MC-2844}} – "Doors have no placement sound." resolved as "Fixed"</ref> despite these apparently already being added in 15w43a.}}
{{History|||snap=15w49a|Doors are now placed facing left/right depending on which half of the [[block]] the [[player]] clicks on, unless neighboring doors or solid/opaque blocks cause them to place a certain way.}}
{{History||1.10|snap=16w20a|Acacia and spruce doors now generate in [[savanna]] and [[taiga]] [[villages]].}}
{{History||1.11|snap=16w33a|Wooden doors can now be used to fuel [[furnace]]s.|Iron doors no longer have a right-click action - previously they would result in the hand swinging, and would override other valid right click actions such as snowball throwing.}}
{{History|||snap=16w39a|Dark oak doors and iron doors now generate in [[woodland mansion]]s.}}
{{History||July 19, 2017|link=https://twitter.com/jeb_/status/887599625045250048|[[Jeb]] tweets image of a new jungle [[wood planks]], jungle doors, [[cauldron]], and [[dandelion]] textures.}}
{{History||1.13|snap=17w47a|The oak door ID has been changed from <code>wooden_door</code> to <code>oak_door</code>.
|Prior to [[1.13/Flattening|''The Flattening'']], these [[block]]s' numeral IDs were 64, 71, 193, 194, 195, 196 and 197, and the [[item]]s' 324, 330, 427, 428, 429, 430 and 431.}}
{{History|||snap=18w11a|Doors now generate as part of the newly added [[shipwreck]]s.}}
{{History||1.14|snap=18w43a|[[File:Oak Door JE6.png|32px]] [[File:Spruce Door JE2.png|32px]] [[File:Birch Door JE3.png|32px]] [[File:Jungle Door JE4.png|32px]] [[File:Acacia Door JE4.png|32px]] [[File:Dark Oak Door JE3.png|32px]] [[File:Iron Door JE4.png|32px]] The textures of all doors have been changed.
|[[Vindicator]]s can now break doors.}}
{{History|||snap=18w47b|[[File:Spruce Door JE3.png|32px]] The textures of spruce doors have been changed.}}
{{History|||snap=18w49a|Added [[snowy tundra]] villages, which generate with spruce doors.}}
{{History|||snap=18w50a|The updated [[desert]] villages now generate with jungle doors instead of oak doors.}}
{{History|||snap=19w08a|[[File:Oak Door JE7.png|32px]] The texture of oak doors has been changed.}}
{{History|||snap=19w12b|Doors can now be placed on glass, ice, glowstone and sea lanterns.}}
{{History|||snap=19w13a|[[Evoker]]s and [[pillager]]s can now open doors during [[raid]]s.}}
{{History|||snap=19w14a|Pillagers can no longer open doors.}}
{{History||1.15|snap=19w39a|Iron doors must now be mined with a [[pickaxe]] for it to be dropped as an [[item]].}}
{{History||1.16|snap=20w06a|[[File:Crimson Door JE1.png|32px]] [[File:Warped Door JE1.png|32px]] [[File:Crimson Door (item) JE1 BE1.png|32px]] [[File:Warped Door (item) JE1 BE1.png|32px]] Added crimson and warped doors.}}
{{History|||snap=20w07a|Added [[piglin]]s, which can open and close doors.}}
{{History|||snap=20w19a|[[File:Crimson Door JE2.png|32px]] [[File:Warped Door JE2.png|32px]] [[File:Crimson Door (item) JE2 BE2.png|32px]] [[File:Warped Door (item) JE2 BE2.png|32px]] The textures of crimson and warped doors have been changed.}}
{{History||1.17|snap=21w11a|[[File:Jungle Door (item) JE4 BE2.png|32px]] Changed the texture of the jungle door item.}}
{{History||1.18|snap=21w41a|[[File:Oak Door (item) JE4 BE3.png|32px]] [[File:Spruce Door (item) JE4 BE2.png|32px]] [[File:Birch Door (item) JE4 BE2.png|32px]] [[File:Jungle Door (item) JE5 BE3.png|32px]] [[File:Acacia Door (item) JE4 BE2.png|32px]] [[File:Dark Oak Door (item) JE4 BE2.png|32px]][[File:Iron Door (item) JE3 BE3.png|32px]] All [[item]] textures for all doors except crimson and warped have been changed.}}
{{History|||snap=Pre-release 5|[[File:Oak Door JE8.png|32px]] [[File:Spruce Door JE4.png|32px]] [[File:Birch Door JE4.png|32px]] [[File:Jungle Door JE5.png|32px]] [[File:Acacia Door JE5.png|32px]] [[File:Dark Oak Door JE4.png|32px]] [[File:Crimson Door JE3.png|32px]] [[File:Warped Door JE3.png|32px]] [[File:Iron Door JE5.png|32px]] Changed top and bottom models of door. Changed oak and iron doors textures.}}
{{History||1.19|snap=22w11a|[[File:Mangrove Door JE1.png|32px]][[File:Mangrove Door (item) JE1 BE1.png|32px]] Added mangrove door.}}
{{History|||snap=22w14a|Due to the addition of the [[mangrove tree]] and [[mangrove swamp]], mangrove doors are now obtainable and renewable.}}
{{History||October 15, 2022|link={{ytl|https://youtu.be/iM9KtHaDcUg?t=5659}}|[[File:Bamboo Door JE1.png|32px]] Bamboo doors were shown on [[Minecraft Live 2022]].}}
{{History||1.20<br>(Experimental)|link=1.19.3|snap=22w42a|[[File:Bamboo Door JE1.png|32px]] [[File:Bamboo Door (item) JE1 BE1.png|32px]] Added bamboo doors behind the [[Java Edition 1.20|Update 1.20 experimental datapack]].}}
{{History||1.20<br>(Experimental)|link=1.19.4|snap=23w07a|[[File:Cherry Door JE1.png|32px]] [[File:Cherry Door (item) JE1.png|32px]] Added cherry doors behind the [[Java Edition 1.20|Update 1.20 experimental datapack]].}}
{{History|||snap=1.19.4-pre2|[[File:Cherry Door JE2.png|32px]] [[File:Cherry Door (item) JE2.png|32px]] Changed the texture of cherry doors.}}
{{History||1.20|snap=23w12a|Bamboo and cherry doors are now available without using the "Update 1.20" experimental datapack.}}
{{History|pocket alpha}}
{{History||v0.1.0|[[File:Oak Door JE3 BE1.png|32px]] [[File:Iron Door JE1 BE1.png|32px]] Added doors.
[[File:Oak Door (bottom texture) JE2 BE1.png|32px]] [[File:Iron Door (bottom texture) JE1 BE1.png|32px]] These are the textures defined for the door blocks in <samp>[[gui_blocks.png]]</samp>. The door items exist, but due to a bug in the code that renders items in the hotbar, they cannot be used.}}
{{History||v0.1.3|[[File:Oak Door BE2.png|32px]] [[File:Iron Door BE2.png|32px]] The models of doors have been changed to not display transparency on upper half.}}
{{History||v0.2.0|[[File:Oak Door (item) JE2 BE1.png|32px]] [[File:Iron Door (item) JE1 BE1.png|32px]] Added door inventory icons.
|[[File:Oak Door JE3 BE1.png|32px]] [[File:Iron Door JE1 BE1.png|32px]] The models of doors have been changed to display transparency on upper half.
|Wooden doors are now available in the inventory, including in [[Creative]].}}
{{History||v0.2.1 alpha2|link=Pocket Edition v0.2.1 alpha2|[[File:Iron Door BE3.png|32px]] The textures of iron doors have been changed.}}
{{History||v0.3.0|A crafting recipe for wooden doors has been added.
|Survival players no longer start out with an infinite stack of wooden doors in the inventory.}}
{{History||v0.3.2|Wooden doors now drop their item form when broken.}}
{{History||v0.5.0|[[File:Oak Door JE4 BE3.png|32px]] [[File:Iron Door BE4.png|32px]] The models of doors have been changed.
|Wooden doors can now be obtained after activating the [[nether reactor]].}}
{{History||v0.8.0|snap=build 2|[[File:Iron Door JE2 BE5.png|32px]] The textures of iron doors have been changed to before v0.2.1 alpha2.}}
{{History||v0.11.0|snap=build 1|''Door'' has been now renamed to ''Oak Door''.}}
{{History||v0.12.1|snap=build 1|Doors are now stackable to 64.
|The [[crafting]] recipes of doors now yield 3 doors instead of 1.
|[[Zombie]]s can now break down wooden doors.
|Oak doors can now be opened by [[villager]]s.
|Oak doors are no longer available from the [[nether reactor]].}}
{{History||v0.13.0|snap=build 1|[[File:Spruce Door JE1 BE1.png|32px]] [[File:Birch Door JE1 BE1.png|32px]] [[File:Jungle Door JE2 BE1.png|32px]] [[File:Acacia Door JE2 BE1.png|32px]] [[File:Dark Oak Door JE1 BE1.png|32px]] [[File:Spruce Door (item) JE3 BE1.png|32px]] [[File:Birch Door (item) JE3 BE1.png|32px]] [[File:Jungle Door (item) JE3 BE1.png|32px]] [[File:Acacia Door (item) JE3 BE1.png|32px]] [[File:Dark Oak Door (item) JE3 BE1.png|32px]] Added spruce, birch, jungle, acacia and dark oak doors.
|Iron doors are now available in the [[Creative]] [[inventory]].
|A [[crafting]] recipe for iron doors has been added.
|Redstone mechanics added, making iron doors able to function normally.}}
{{History|||snap=build 2|Spruce, birch, jungle, acacia, and dark oak doors can now be opened by [[villager]]s.}}
{{History|||snap=build 4|[[File:Oak Door (item) JE3 BE2.png|32px]] [[File:Iron Door (item) JE2 BE2.png|32px]] The [[item]] textures of oak and iron door has been changed.}}
{{History||v0.15.0|snap=build 1|Acacia doors now generate in [[savanna]] [[village]]s.
|Spruce doors now generate in [[taiga]] and [[snowy tundra]] villages.}}
{{History|pocket}}
{{History||1.1.0|snap=alpha 1.1.0.0|Dark oak doors and iron doors now generate in [[woodland mansion]]s.
|Doors now have [[sound]]s when placed.<ref>{{bug|MCPE-10079}} – "Doors don't have a placement sound" resolved as "Fixed"</ref>}}
{{History|bedrock}}
{{History||1.4.0|snap=beta 1.2.14.2|Various wooden doors now generate in [[shipwreck]]s.}}
{{History||1.10.0|snap=beta 1.10.0.3|[[File:Oak Door BE4.png|32px]] [[File:Spruce Door BE2.png|32px]] [[File:Birch Door BE2.png|32px]] [[File:Jungle Door BE2.png|32px]] [[File:Acacia Door BE2.png|32px]] [[File:Dark Oak Door BE2.png|32px]] [[File:Iron Door BE6.png|32px]] The textures of all doors have been changed.
|Jungle doors now generate in the new [[desert]] [[village]]s.
|Added [[wandering trader]]s, which can open and close wooden doors.}}
{{History||1.11.0|snap=beta 1.11.0.7|[[Vindicator]]s can now break doors during [[raid]]s.}}
{{History||1.16.0|snap=beta 1.15.0.51|Zombies can no longer break iron doors.<ref>{{bug|MCPE-43725}}</ref>}}
{{History|||snap=beta 1.16.0.51|[[File:Crimson Door BE1.png|32px]] [[File:Warped Door BE1.png|32px]] [[File:Crimson Door (item) JE1 BE1.png|32px]] [[File:Warped Door (item) JE1 BE1.png|32px]] Added crimson and warped doors.
|Added [[piglin]]s, which can open and close doors.}}
{{History|||snap=beta 1.16.0.63|[[File:Crimson Door BE2.png|32px]] [[File:Warped Door BE2.png|32px]] [[File:Crimson Door (item) JE2 BE2.png|32px]] [[File:Warped Door (item) JE2 BE2.png|32px]] The textures of crimson and warped doors have been changed.}}
{{History||1.17.0|snap=beta 1.17.0.50|[[File:Jungle Door (item) JE4 BE2.png|32px]] Changed the texture of the jungle door item.}}
{{History||1.18.10|snap=beta 1.18.10.20|[[File:Oak Door (item) JE4 BE3.png|32px]] [[File:Spruce Door (item) JE4 BE2.png|32px]] [[File:Birch Door (item) JE4 BE2.png|32px]] [[File:Jungle Door (item) JE5 BE3.png|32px]] [[File:Acacia Door (item) JE4 BE2.png|32px]] [[File:Dark Oak Door (item) JE4 BE2.png|32px]][[File:Iron Door (item) JE3 BE3.png|32px]] All [[item]] textures for all doors except crimson and warped have been changed.}}
{{History||1.19.0|snap=beta 1.19.0.20|[[File:Mangrove Door BE1.png|32px]] [[File:Mangrove Door (item) JE1 BE1.png|32px]] Added mangrove doors.}}
{{History||Next Major Update<br>(Experimental)|link=Bedrock Edition 1.19.50|snap=beta 1.19.50.21|[[File:Bamboo Door BE1.png|32px]] [[File:Bamboo Door (item) JE1 BE1.png|32px]] Added bamboo doors behind the "[[Bedrock Edition 1.20|Next Major Update]]" [[experimental]] toggle.
|The doors now use the same opening and closing [[sound]] effects as ''[[Java Edition]]''.}}
{{History||Next Major Update<br>(Experimental)|link=Bedrock Edition 1.19.80|snap=beta 1.19.80.20|[[File:Cherry Door JE2.png|32px]] [[File:Cherry Door (item) JE2.png|32px]] Added cherry doors behind the "[[Bedrock Edition 1.20|Next Major Update]]" [[experimental]] toggle.}}
{{History||1.20.0|snap=beta 1.20.0.21|Bamboo and cherry doors are now available without using the "Next Major Update" experimental toggle.}}
{{History|console}}
{{History||xbox=TU1|xbone=CU1|ps=1.0|wiiu=Patch 1|switch=1.0.1|[[File:Oak Door JE3 BE1.png|32px]] [[File:Iron Door JE1 BE1.png|32px]] [[File:Oak Door (item) JE2 BE1.png|32px]] [[File:Iron Door (item) JE1 BE1.png|32px]] Added doors.}}
{{History||xbox=TU5|Doors can be found in the Redstone & Transportation tab in the [[Creative inventory]].}}
{{History||xbox=TU14|ps=1.04|Doors being broken by [[zombie]]s now show [[damage]].
|Moved doors to the Building Blocks tab in the Creative inventory.}}
{{History||xbox=TU25|xbone=CU14|ps=1.17|[[File:Spruce Door JE1 BE1.png|32px]] [[File:Birch Door JE1 BE1.png|32px]] [[File:Jungle Door JE2 BE1.png|32px]] [[File:Spruce Door (item) JE3 BE1.png|32px]] [[File:Birch Door (item) JE3 BE1.png|32px]] [[File:Jungle Door (item) JE3 BE1.png|32px]] Added spruce, birch, and jungle door variants.
|The [[crafting]] recipes of doors now yield 3 doors instead of 1.
|The original wooden door (''Door'') has been renamed to ''Oak Door''.}}
{{History||xbox=TU27|xbone=CU15|ps=1.18|[[File:Acacia Door JE2 BE1.png|32px]] [[File:Dark Oak Door JE1 BE1.png|32px]] [[File:Acacia Door (item) JE3 BE1.png|32px]] [[File:Dark Oak Door (item) JE3 BE1.png|32px]] Acacia and dark oak doors have been added to the [[Creative]] [[inventory]].}}
{{History||xbox=TU31|xbone=CU19|ps=1.22|wiiu=Patch 3|Acacia doors and dark oak doors are now obtainable in [[survival]] mode.}}
{{History||?| [[File:Oak Door (item) JE3 BE2.png|32px]] [[File:Iron Door (item) JE2 BE2.png|32px]] Oak and iron door's inventory textures have been changed to match Java Edition}}
{{History||xbox=none|xbone=none|ps=1.90|wiiu=none|switch=none|[[File:Oak Door BE4.png|32px]] [[File:Spruce Door BE2.png|32px]] [[File:Birch Door BE2.png|32px]] [[File:Jungle Door BE2.png|32px]] [[File:Acacia Door BE2.png|32px]] [[File:Dark Oak Door BE2.png|32px]] [[File:Iron Door BE6.png|32px]] The textures of all doors have been changed.}}
{{History|new 3ds}}
{{History||0.1.0|[[File:Oak Door JE2.png|32px]] [[File:Spruce Door JE1 BE1.png|32px]] [[File:Birch Door JE1 BE1.png|32px]] [[File:Jungle Door JE2 BE1.png|32px]] [[File:Acacia Door JE2 BE1.png|32px]] [[File:Dark Oak Door JE1 BE1.png|32px]] [[File:Iron Door JE2 BE5.png|32px]] [[File:Oak Door (item) JE3 BE2.png|32px]] [[File:Spruce Door (item) JE3 BE1.png|32px]] [[File:Birch Door (item) JE3 BE1.png|32px]] [[File:Jungle Door (item) JE3 BE1.png|32px]] [[File:Acacia Door (item) JE3 BE1.png|32px]] [[File:Dark Oak Door (item) JE3 BE1.png|32px]] [[File:Iron Door (item) JE1 BE1.png|32px]] Added doors.}}
{{History|foot}}
<gallery>
Beta 1.7 punching oak door.png|From [[Java Edition Beta 1.7]] to Beta 1.7.2, doors produced [[placeholder texture]] particles when broken or punched on some sides.
</gallery>
Historical sounds:
{| class="wikitable"
! Sound
! From
! to
! Pitch
|-
| {{sound||Door closing old.ogg|Door opening old.ogg}}
| ?
| Sound Update
| ?
|-
| {{sound||Door open.ogg|Door close.ogg}}
| Sound Update
| 15w43a
| ?
|}
=== Door "items" ===
{{:Technical blocks/Doors}}
== Issues ==
{{Issue list}}
== Trivia ==
* Door models have an extra hinge on the opposite side of the actual functional hinge.<ref>{{bug|MC-106697|||WAI}}</ref>
== Gallery ==
<gallery>
Oak Door.png|Oak Door
Spruce Door.png|Spruce Door
Birch Door.png|Birch Door
Jungle Door.png|Jungle Door
Acacia Door.png|Acacia Door
Dark Oak Door.png|Dark Oak Door
Mangrove Door.png|Mangrove Door
Cherry Door.png|Cherry Door
Bamboo Door.png|Bamboo Door
Crimson Door.png|Crimson Door
Warped Door.png|Warped Door
Iron Door.png|Iron Door
Oak Door (item) JE4 BE3.png|Oak Door (item)
Spruce Door (item) JE4 BE2.png|Spruce Door (item)
Birch Door (item) JE4 BE2.png|Birch Door (item)
Jungle Door (item) JE5 BE3.png|Jungle Door (item)
Acacia Door (item) JE4 BE2.png|Acacia Door (item)
Dark Oak Door (item) JE4 BE2.png|Dark Oak Door (item)
Mangrove Door (item) JE1 BE1.png|Mangrove Door (item)
Cherry Door (item) JE2.png|Cherry Door (item)
Bamboo Door (item) JE1 BE1.png|Bamboo Door (item)
Crimson Door (item) JE2 BE2.png|Crimson Door (item)
Warped Door (item) JE2 BE2.png|Warped Door (item)
Iron Door (item) JE3 BE3.png|Iron Door (item)
</gallery>
=== Screenshots ===
<gallery>
Iron Door in Stronghold.png|Naturally occurring iron door in a [[stronghold]].
Wooden Doors 1.8.png|First picture of brand-new 1.8 variants of doors.
Door Creeper.png|A creeper behind some dark oak doors.
Doortypes.png|All types of doors with their respective trapdoors.
FloatingDoorArrows.jpg|Arrows shot into a door that was opened, causing a floating bug.
Jeb Crafting Doors.png|First image of three doors being crafted at once.
Jappa Closet.jpg|A closet made from oak doors.
</gallery>
=== Concept Art ===
<gallery>
Bamboo Wood and Door Concept Art.png|Bamboo door concept art.
Bamboo Door Prototype Textures.png|Bamboo door prototype textures.
</gallery>
== References ==
{{Reflist}}
== External Links ==
*[https://www.minecraft.net/en-us/article/taking-inventory--door Taking Inventory: Door] – Minecraft.net on September 29, 2022
{{Redstone}}
{{Blocks|Utility}}
{{Items}}
[[Category:Manufactured blocks]]
[[Category:Generated structure blocks]]
[[Category:Utility blocks]]
[[Category:Mechanics]]
[[Category:Redstone mechanics]]
[[Category:Mechanisms]]
[[cs:Dveře]]
[[de:Tür]]
[[el:Door]]
[[es:Puerta]]
[[fr:Porte]]
[[hu:Ajtók]]
[[it:Porta]]
[[ja:ドア]]
[[ko:문]]
[[nl:Deur]]
[[pl:Drzwi]]
[[pt:Porta]]
[[ru:Дверь]]
[[th:ประตู]]
[[uk:Двері]]
[[zh:门]]</li></ul> | build 1 | ||||
| Bedrock Edition | |||||
1.8.0{{Extension DPL}}<ul><li>[[Footprint|Footprint]]<br/>{{about|the joke item|the unused particle|Java Edition unused features#Footprint particle}}
{{Joke feature}}
{{Item
| image = Footprint (item).png
| renewable = No
| stackable = Yes (64)
}}
The '''Footprint''' was a joke item from [[Java Edition 20w14∞]], found only in the {{code|missing}} dimension.
== Appearance ==
This item is semi-transparent with a grey colour scheme.
== Obtaining ==
=== Dimension ===
Footprints were obtained only from a chest in the {{Code|missing}} dimension. Only existing in 2020 April fools snapshot 20w14∞, it cannot exist in any non-April Fool's joke versions and April Fool's joke versions before or after 20w14∞. There is a maximum of 2 footprints that can be obtained legitimately in any given world.
=== Cheats/Creative Mode ===
Despite these footprints not being available in the creative inventory, it is still possible to acquire them via the command {{Code|code=give <target> minecraft:footprint <amount>}} or duplicating them by holding down middle-click whilst in creative mode.
== Usage ==
As of snapshot 20w14∞, this item cannot be placed or used in any way other than a trophy. This item can be inserted and/or rotated inside of an item frame, and it has a stack limit of 64.
== Data values ==
=== ID ===
{{ID table
|showforms=y
|generatetranslationkeys=java
|displayname=Footprint
|spritetype=item
|nameid=footprint
|form=item
|foot=1}}
== History ==
{{History|java}}
{{History||20w14∞|[[File:Footprint (item).png|32px]] Added the footprint item.}}
{{History|foot}}
== Gallery ==
<gallery>
File:Missing biome.png|The Easter Egg dimension that the item spawns in.
</gallery>
== Trivia ==
* This is a reference to the removed "Footstep" particle, hence in the "missing" dimension.
** This item is intended as a joke directed towards the commands' community where the "Footstep" particle is commonly requested.<ref>https://gist.github.com/boq/8e65cb85badc75765eeb8956af78aaa5</ref>
== References ==
{{reflist}}
{{Items}}
{{Jokes}}
[[Category:Non-renewable resources]]
[[Category:Joke items]]
[[es:Footprint]]
[[pt:Pegada]]</li><li>[[Shovel|Shovel]]<br/>{{Item
| image = <gallery>
Wooden Shovel.png | Wooden
Stone Shovel.png | Stone
Iron Shovel.png | Iron
Golden Shovel.png | Golden
Diamond Shovel.png | Diamond
Netherite Shovel.png | Netherite
</gallery>
| rarity = Common
| renewable = '''Netherite''': No<br>'''All others''': Yes
| durability =
* Wood: 59
* Stone: 131
* Iron: 250
* Golden: 32
* Diamond: 1561
* Netherite: 2031
| stackable = No
}}
'''Shovels''' are [[tool]]s used to hasten the process of breaking [[dirt]], [[sand]], [[gravel]] and other soil blocks, as well as to convert [[Dirt (disambiguation)|dirt]] blocks into [[Dirt Path|dirt paths]].
== Obtaining ==
=== Crafting ===
{{Crafting
|head=1
|showname=0
|showdescription=1
|name=[[Shovel]]s
|B1= {Any Planks}; Iron Ingot; Gold Ingot; Diamond
|B2= Stick
|B3= Stick
|Output= Wooden Shovel; Iron Shovel; Golden Shovel; Diamond Shovel
|type= Tool
}}
{{Crafting
|name=[[Stone Shovel]]
|B1=Any stone-tier block
|B2=Stick
|B3=Stick
|Output=Stone Shovel
|description=Can use any variant of cobblestone
|type=Tool
}}
{{Crafting
|foot=1
|ignoreusage=1
|name=[[Shovel]]
|ingredients=Damaged Matching [[Shovel]]
|Damaged Wooden Shovel; Damaged Stone Shovel; Damaged Iron Shovel; Damaged Golden Shovel; Damaged Diamond Shovel; Damaged Netherite Shovel
|Damaged Wooden Shovel; Damaged Stone Shovel; Damaged Iron Shovel; Damaged Golden Shovel; Damaged Diamond Shovel; Damaged Netherite Shovel
|Output=Wooden Shovel; Stone Shovel; Iron Shovel; Golden Shovel; Diamond Shovel; Netherite Shovel
|description= The durability of the two shovels is added together, plus an extra 5% durability.
|type= Tool
}}
=== Upgrading ===
Like other diamond tools, a diamond shovel can be upgraded to a netherite shovel, although increased durability and resistance to fire/lava in item form are the only benefits. The shovel's performance as a digging tool or a weapon is unchanged by the upgrade.
{{Smithing
|Netherite Upgrade
|Diamond Shovel
|Netherite Ingot
|Netherite Shovel
|description=
|tail=1
}}
=== Repairing ===
==== Grinding ====
{{Grinding
|showdescription=1
|ingredients=2x Damaged [[Wooden Shovel]] or<br>2x Damaged [[Stone Shovel]] or<br>2x Damaged [[Iron Shovel]] or<br>2x Damaged [[Golden Shovel]] or<br>2x Damaged [[Diamond Shovel]] or<br>2x Damaged [[Netherite Shovel]]
|Damaged Wooden Shovel; Damaged Stone Shovel; Damaged Iron Shovel; Damaged Golden Shovel; Damaged Diamond Shovel; Damaged Netherite Shovel
|Damaged Wooden Shovel; Damaged Stone Shovel; Damaged Iron Shovel; Damaged Golden Shovel; Damaged Diamond Shovel; Damaged Netherite Shovel
|Wooden Shovel; Stone Shovel; Iron Shovel; Golden Shovel; Diamond Shovel; Netherite Shovel
|description=The durability of the two shovels is added together, plus an extra 5% durability.
}}
==== [[Anvil mechanics#Unit repair|Unit repair]] ====
{{/Repairing with Anvils}}
A shovel can be repaired in an [[anvil]] by adding units of the [[tiers]]' repair material, with each repair material restoring 25% the shovel's maximum durability, rounded down. It also keeps the shovel's [[Enchanting|enchantments]].
=== Chest loot ===
On <code>ancient_city/city_center/city_center_2</code>, they generate a furnace with a wooden shovel inside of it.
{{LootChestItem|iron-shovel,level-enchanted-iron-shovel,random-enchanted-golden-shovel,diamond-shovel,level-enchanted-diamond-shovel,damaged-random-enchanted-diamond-shovel,damaged-random-enchanted-diamond-shovel-2}}
=== Mob loot ===
==== Equipment ====
{{Main|Drops#Equipped items}}
[[Zombie]]s and [[husk]]s have a 0.67% (3.33% in Hard [[difficulty]]) chance of spawning with an iron shovel. They have an 8.5% (9.5% with [[Looting]] I, 10.5% with Looting II and 11.5% with Looting III) chance of dropping that shovel if they are killed by the player. The dropped shovel is usually badly damaged, and may be enchanted: 0%–25% on Normal difficulty and 3.125%–25% on Hard difficulty, varying with [[regional difficulty]], and enchanted as if on an enchanting table at level 5–22.
==== Raids ====
Vindicators and pillagers that spawn from raids have a 4.1% chance(5.12% on hard) to drop a badly-damaged iron shovel that is sometimes enchanted with a random enchantment.{{only|bedrock}}
=== Trading ===
Novice-level toolsmith villagers have a 25% chance to sell stone shovels for one emerald, journeyman-level toolsmith villagers have a 25% chance to sell enchanted iron shovels for 2 emeralds, and expert-level toolsmith villagers have a 50% chance to sell enchanted diamond shovels for 5 emeralds as part of their trades.{{only|bedrock}}
Novice-level toolsmith villagers have a 40% chance to sell stone shovels for one emerald, journeyman-level tool smiths have a 40% chance to sell an enchanted iron shovel for 7-22 emeralds, and expert-level tool smiths have a {{frac|2|3}} chance to sell an enchanted diamond shovel for 11-27 emeralds.{{only|java}}
The enchantments are the same as the ones obtained from an [[enchanting table]] at levels 5–19.
=== Villager gifts ===
{{in|java}}, toolsmith [[villager]]s occasionally throw stone shovels at players with the [[Hero of the Village]] effect.
== Usage ==
=== Digging ===
A shovel can be used to break some materials faster. When breaking a block, it uses 1 durability. For blocks that break instantly, it uses 0 durability.
==== Durability ====
Each different tier of shovel has a different durability:
{| class="wikitable sortable"
! Material
! [[Durability]]
|-
| {{itemLink|Wooden Shovel|Wood|link=Shovel}}
| 59
|-
| {{itemLink|Stone Shovel|Stone|link=Shovel}}
| 131
|-
| {{itemLink|Iron Shovel|Iron|link=Shovel}}
| 250
|-
| {{itemLink|Diamond Shovel|Diamond|link=Shovel}}
| 1561
|-
| {{itemLink|Golden Shovel|Golden|link=Shovel}}
| 32
|-
| {{itemLink|Netherite Shovel|Netherite|link=Shovel}}
| 2031
|}
==== Speed ====
The following table summarizes the speed at which different quality shovels perform on different block types. Values with a red background indicate that no resource is dropped when the block is destroyed without a shovel.
{{breaking row|Clay|simple=1}}
{{breaking row|Coarse Dirt}}
{{Breaking row|Concrete Powder}}
{{breaking row|Dirt}}
{{breaking row|Dirt Path}}
{{breaking row|Farmland}}
{{breaking row|Grass Block}}
{{breaking row|Gravel}}
{{breaking row|Mud}}
{{breaking row|Muddy Mangrove Roots}}
{{breaking row|Mycelium}}
{{breaking row|Podzol}}
{{breaking row|Red Sand}}
{{breaking row|Rooted Dirt}}
{{breaking row|Sand}}
{{breaking row|Snow|Wooden}}
{{breaking row|Snow Block|Wooden}}
{{breaking row|Soul Sand}}
{{breaking row|Soul Soil}}
{{breaking row|Suspicious Gravel}}
{{breaking row|Suspicious Sand|foot=1}}
=== Dirt paths ===
A shovel can be used to create a [[dirt path]] by {{control|using}} (not digging) the shovel on any one of the following blocks, losing one durability point:
* {{BlockLink|Grass Block}}
* {{BlockLink|Dirt}}
* {{BlockLink|Coarse Dirt}}
* {{BlockLink|Rooted Dirt}}
* {{BlockLink|Podzol}}
* {{BlockLink|Mycelium}}
=== Campfire ===
A shovel can be used to extinguish a [[campfire]].
===Weapon===
Hitting a mob while holding a shovel is a stronger attack than barehanded. Shovels take 2 damage when used as a weapon.
====Java Edition====
[[Category:Java Edition specific information]]
Shovels have an attack speed modifier of -3, meaning they take 1 second to [[Damage#Attack cooldown|recover]]. Shovels deal different damage based on the type:
{| class="wikitable" style="text-align:center" data-description="Attack damage"
!Shovel type
! Attack damage
! Attack speed
!Damage per<br>second (DPS)
|-
|{{ItemLink|Wooden Shovel}}<br>{{ItemLink|Golden Shovel}}||{{hp|2.5}}|| rowspan="4" |1||2.5
|-
|{{ItemLink|Stone Shovel}}||{{hp|3.5}}||3.5
|-
|{{ItemLink|Iron Shovel}}||{{hp|4.5}}||4.5
|-
|{{ItemLink|Diamond Shovel}}||{{hp|5.5}}||5.5
|-
|{{ItemLink|Netherite Shovel}}||{{hp|6.5}}
|1.6||10.4
|}
====Bedrock Edition====
{{IN|bedrock}}, shovels always attack instantly and do the following damage:
{| class="wikitable" style="text-align:center" data-description="Attack damage"
! colspan="5" |Attack damage
|-
|{{ItemSprite|Wooden Shovel}}{{ItemSprite|Golden Shovel}} {{hp|2}}
|{{ItemSprite|Stone Shovel}} {{hp|3}}
|{{ItemSprite|Iron Shovel}} {{hp|4}}
|{{ItemSprite|Diamond Shovel}} {{hp|5}}
|{{ItemSprite|Netherite Shovel}} {{hp|6}}
|}
===Enchantments===
A shovel can receive, or be found in an [[End City]] with the following [[enchantment]]s:
{| class="wikitable col-2-center col-3-right"
|+
!Name
!Max Level
![[Enchanting|Method]]
|-
|[[Fortune]]<ref group="note" name="exc">Silk Touch and Fortune are mutually exclusive</ref>
|III
|{{Inventory slot|Enchanting Table}}{{Inventory slot|Anvil}}
|-
|[[Silk Touch]]<ref group="note" name="exc" />
|I
|{{Inventory slot|Enchanting Table}}{{Inventory slot|Anvil}}
|-
|[[Efficiency]]
|V
|{{Inventory slot|Enchanting Table}}{{Inventory slot|Anvil}}
|-
|[[Unbreaking]]
|III
|{{Inventory slot|Enchanting Table}}{{Inventory slot|Anvil}}
|-
|[[Mending]]
|I
|{{Inventory slot|Anvil}}
|-
|[[Curse of Vanishing]]
|I
|{{Inventory slot|Anvil}}
|}
{{notelist}}
=== Fuel===
Wooden shovels can be used as a fuel in [[furnace]]s, smelting 1 item per shovel.
===Smelting ingredient===
{{Smelting|showname=1|Iron Shovel;Golden Shovel|Iron Nugget;Gold Nugget|0,1}}
===Piglins ===
{{EntityLink|Piglin|Piglins}} are attracted to golden shovels and run toward any golden shovels on the ground, and inspect it for 6 to 8 seconds before putting it in their inventory.
== Sounds ==
{{edition|java}}:
{{Sound table
|sound=Shovel flatten1.ogg
|sound2=Shovel flatten2.ogg
|sound3=Shovel flatten3.ogg
|sound4=Shovel flatten4.ogg
|subtitle=Shovel flattens
|source=block
|description=When a shovel creates a [[dirt path]]
|id=item.shovel.flatten
|translationkey=subtitles.item.shovel.flatten
|volume=1.0
|pitch=1.0
|distance=16}}
{{Sound table
|sound=Random break.ogg
|subtitle=Item breaks
|source=player
|description=When a shovel's durability is exhausted
|id=entity.item.break
|translationkey=subtitles.entity.item.break
|volume=0.8
|pitch=0.8-1.2
|distance=16
|foot=1}}
{{edition|bedrock}}:
{{Sound table
|type=bedrock
|sound=Grass hit1.ogg
|sound2=Grass hit2.ogg
|sound3=Grass hit3.ogg
|sound4=Grass hit4.ogg
|sound5=Grass hit5.ogg
|sound6=Grass hit6.ogg
|source=block
|description=When a shovel creates a dirt path <ref group=sound>{{Bug|MCPE-114390}}</ref>
|id=use.grass
|volume=1.0
|pitch=0.8}}
{{Sound table
|sound=Random break.ogg
|source=player
|description=When a shovel's durability is exhausted
|id=random.break
|volume=1.0
|pitch=0.9
|foot=1}}
==Data values==
===ID===
{{edition|java}}:
{{ID table
|edition=java
|showforms=y
|generatetranslationkeys=y
|displayname=Wooden Shovel
|spritetype=item
|nameid=wooden_shovel
|form=item}}
{{ID table
|displayname=Stone Shovel
|spritetype=item
|nameid=stone_shovel
|form=item}}
{{ID table
|displayname=Iron Shovel
|spritetype=item
|nameid=iron_shovel
|form=item}}
{{ID table
|displayname=Diamond Shovel
|spritetype=item
|nameid=diamond_shovel
|form=item}}
{{ID table
|displayname=Golden Shovel
|spritetype=item
|nameid=golden_shovel
|form=item}}
{{ID table
|displayname=Netherite Shovel
|spritetype=item
|nameid=netherite_shovel
|form=item
|foot=1}}
{{edition|bedrock}}:
{{ID table
|edition=bedrock
|shownumericids=y
|showforms=y
|notshowbeitemforms=y
|generatetranslationkeys=y
|displayname=Wooden Shovel
|spritetype=item
|nameid=wooden_shovel
|id=309
|form=item}}
{{ID table
|displayname=Stone Shovel
|spritetype=item
|nameid=stone_shovel
|id=313
|form=item}}
{{ID table
|displayname=Iron Shovel
|spritetype=item
|nameid=iron_shovel
|id=296
|form=item}}
{{ID table
|displayname=Diamond Shovel
|spritetype=item
|nameid=diamond_shovel
|id=317
|form=item}}
{{ID table
|displayname=Golden Shovel
|spritetype=item
|nameid=golden_shovel
|id=323
|form=item}}
{{ID table
|displayname=Netherite Shovel
|spritetype=item
|nameid=netherite_shovel
|id=605
|form=item
|foot=1}}
==Achievements==
{{load achievements|MOAR Tools ;Oooh, shiny!}}
==Advancements==
{{load advancements|Oh Shiny}}
== Video==
<div style="text-align:center">{{yt|U4X-4S4neYM}}</div>
==History==
{{Missing information|there are so many missing blocks that need shovel to break}}
{{History|java indev}}
{{History||0.31|snap=20091231-2|[[File:Iron Shovel JE1.png|32px]] Added iron shovels which are located in the player's [[inventory]].
|Shovels cannot be crafted yet and are not functional in this version.}}
{{History|||snap=20100110|Shovels are now functional and can now be used to gather [[material]]s like [[dirt]], [[sand]] and [[gravel]] 400% faster than by hand.}}
{{History|||snap=20100124|A complete [[tool]] set is no longer given to the [[player]] on starting a new world. Instead, there are multiple [[chest]]s in the later called "[[Indev House]]" containing a stack of most accessible [[blocks]]/[[items]] including [[tools]].}}
{{History|||snap=20100128|[[File:Wooden Shovel JE1 BE1.png|32px]] [[File:Stone Shovel JE1 BE1.png|32px]] [[File:Diamond Shovel JE1 BE1.png|32px]] [[Tools]] now have tiers. Shovels made from wood, stone, and diamond have been added.
|[[File:Iron Shovel JE2 BE1.png|32px]] The texture of iron shovels has been changed.
|A shovel held by the player is now rendered to appear more 3D.|They cannot be crafted yet, but have been added to the item chest in the Indev house.}}
{{History|||snap=20100129|Wood, stone, iron, and diamond shovels can now be [[craft]]ed.}}
{{History|||snap=20100130|[[File:Golden Shovel JE1.png|32px]] Shovels can now be made out of gold.}}
{{History|||snap=20100201-1|[[Tools]], including shovels, now take [[damage]] when being used.
|Better tools, including shovels, now last longer.}}
{{History||20100206|[[File:Golden Shovel JE2 BE1.png|32px]] The texture of golden shovels has been changed.}}
{{History|java alpha}}
{{History||1.0.5_01|Shovels are now used to get snowballs out of snow layers.}}
{{History|java beta}}
{{History||April 9, 2011|link=https://www.youtube.com/watch?v=qy882ILYJMM&t=154s|[[File:Iron Shovel (pre-release).png|32px]] Alternate iron shovel texture was shown in [[Mojang]] test video.}}
{{History|java}}
{{History||1.2.4|snap=release|[[Spruce planks]], [[birch planks]], and [[jungle planks]] can now be used to craft wooden shovels.}}
{{History||1.3.1|snap=12w18a|Wooden shovels can now be used as [[fuel]] in a [[furnace]].}}
{{History|||snap=12w21a|Blacksmith [[villager]]s now [[trading|sell]] diamond shovels for 7 [[emerald]]s, and iron shovels for 4–5 emeralds.}}
{{History||1.6.1|snap=13w21a|Instead of replacing the barehanded [[damage]] ({{hp|1}}), shovels now add their damage onto the barehanded damage, which results in all shovels doing {{hp|1}} more damage than before.}}
{{History||1.7.2|snap=1.7.1|[[Acacia planks]] and [[dark oak planks]] can now be used to craft wooden shovels.}}
{{History||1.8|snap=14w02a|Tool smith villagers now [[trading|sell]] enchanted iron shovels for 5–7 emeralds. The previous trades are now unavailable, making diamond shovels [[non-renewable resource|non-renewable]].}}
{{History||1.9|snap=15w31a|A shovel can now be used on a [[grass block]] to create [[grass path]] blocks.
|[[Enchanting|Enchanted]] iron or diamond shovels can now be found in [[end city]] chests.}}
{{History|||snap=15w34a|Shovels now use the "attack strength" combat mechanic meter. The time it takes for the meter to fill up for a shovel is 0.8 seconds.}}
{{History|||snap=15w34c|Shovels now do more [[damage]] and take longer to recover.}}
{{History|||snap=15w35a|The damage of shovels has been reduced.}}
{{History|||snap=15w41a|Wooden shovels are now used to craft [[boat]]s.}}
{{History|||snap=15w50a|The [[sound]] <code>item.shovel.flatten</code> has been added to shovels.}}
{{History|||snap=16w04a|Wooden shovels are no longer used to [[crafting|craft]] boats.}}
{{History||1.11.1|snap=16w50a|Golden and iron shovels now [[smelting|smelt]] down into one of their respective [[nugget]]s.}}
{{History||1.13|snap=17w47a|Prior to [[1.13/Flattening|''The Flattening'']], these [[item]]s' numeral IDs were 269, 273, 256, 277 and 284.}}
{{History||1.14|snap=18w43a|[[File:Wooden Shovel JE2 BE2.png|32px]] [[File:Stone Shovel JE2 BE2.png|32px]] [[File:Iron Shovel JE3 BE2.png|32px]] [[File:Golden Shovel JE3 BE2.png|32px]] [[File:Diamond Shovel JE2 BE2.png|32px]] The textures of all shovels have been changed.}}
{{History|||snap=18w50a|Iron shovels can now be found in chests in [[village]] toolsmith houses.}}
{{History|||snap=19w11a|Toolsmith [[villager]]s now [[trading|sell]] stone shovels and enchanted diamond shovels, making diamond shovels [[renewable resource|renewable]] again.}}
{{History|||snap=19w13a|Toolsmith villagers now give stone shovels to players under the [[Hero of the Village]] effect.}}
{{History||1.15|snap=19w37a|Shovels can now be used to extinguish [[campfire]]s.}}
{{History||1.16|snap=20w06a|[[File:Netherite Shovel JE1.png|32px]] Added netherite shovels.
|Netherite shovels are obtained by combining one diamond shovel and one netherite ingot in a crafting table.
|[[Crimson planks]] and [[warped planks]] can now be used to craft wooden shovels.}}
{{History|||snap=20w09a|[[File:Diamond Shovel JE3 BE3.png|32px]] The texture of diamond shovels has been changed.
|Shovels can now break soul soil quickly.}}
{{History|||snap=20w10a|[[File:Netherite Shovel JE2 BE1.png|32px]] The texture of netherite shovels has been changed.
|Netherite shovels can no longer be crafted.
|Netherite shovels are now obtained by combining one diamond shovel and one netherite ingot in a smithing table.}}
{{History|||snap=20w15a|Stone shovels can now be crafted using [[blackstone]].}}
{{History|||snap=20w16a|Netherite shovels now generate randomly enchanted in [[bastion remnants]] chests.
|Golden shovels now generate randomly enchanted in [[ruined portal]] chests.}}
{{History|||snap=20w17a|Diamonds shovels now generate in place of netherite shovels in bastion remnant chests.}}
{{History||1.16.2|snap=20w30a|Increases the chance of finding randomly enchanted diamond shovels in bastion remnant chests.
|Unenchanted, undamaged diamond shovels can also be found in bastion remnant chests.}}
{{History||1.17|snap=21w08a|Stone shovels can now be crafted using [[cobbled deepslate]].}}
{{History||1.19|snap=22w11a|[[Mangrove planks]] can now be used to craft wooden shovels.}}
{{History|||snap=22w13a|Wooden shovels may now be found in [[ancient city]] [[furnace]]s.}}
{{History||1.20<br>(Experimental)|link=1.19.4|snap=23w04a|Upgrading diamond shovels to netherite shovels now requires the netherite upgrade [[smithing template]].}}
{{History||1.20|snap=23w14a|Shovel now breaks [[suspicious sand]] and [[suspicious gravel]] quickly.}}
{{History|upcoming java}}
{{History||Combat Tests|snap=1.14.3 - Combat Test|The attack speed for all shovels has been increased to 2.|The [[damage]] for all shovels has been decreased by {{hp|1}}.}}
{{History|pocket alpha}}
{{History||v0.2.0|[[File:Stone Shovel JE1 BE1.png|32px]] Added stone shovels.}}
{{History||v0.3.0|[[File:Wooden Shovel JE1 BE1.png|32px]] Added wooden shovels.
|Survival players no longer start out with an infinite durability stone shovel in the inventory.}}
{{History||v0.3.2|[[File:Iron Shovel JE2 BE1.png|32px]] [[File:Golden Shovel JE2 BE1.png|32px]] [[File:Diamond Shovel JE1 BE1.png|32px]] Added iron, gold, and diamond shovels.}}
{{History||v0.4.0|Removed stone shovels from the creative inventory.}}
{{History||v0.11.0|snap=build 1|Wooden shovels are now used to craft [[boat]]s.
|Iron shovels are now available in the [[creative]] [[inventory]].
|A shovel can now be used on a [[grass block]] to create [[grass path]] blocks.}}
{{History|||snap=build 11|Wooden, stone, golden, and diamond shovels are now available in the [[creative]] inventory.}}
{{History|||snap=build 12|All shovels have been removed from creative.}}
{{History|||snap=build 13|Shovel have been re-added to creative mode.}}
{{History||v0.12.1|snap=build 1|Shovels can now be [[enchanting|enchanted]].
|[[Zombie]]s now have a small chance to spawn holding an iron shovel.}}
{{History||v0.15.0|snap=build 1|Added [[husk]]s, which have a small chance to spawn holding an iron shovel.}}
{{History|pocket}}
{{History||1.0.0|snap=alpha 0.17.0.1|[[Enchanting|Enchanted]] iron and diamond shovels can now be found inside [[end city]] chests.}}
{{History||1.0.4|snap=alpha 1.0.4.0|Enchanted iron shovels are now [[trading|sold]] by toolsmith [[villager]]s for 4-5 [[emerald]]s.}}
{{History||1.1.0|snap=alpha 1.1.0.0|Iron and golden shovels are now [[smelting|smeltable]].}}
{{History|bedrock}}
{{History||1.10.0|snap=beta 1.10.0.3|[[File:Wooden Shovel JE2 BE2.png|32px]] [[File:Stone Shovel JE2 BE2.png|32px]] [[File:Iron Shovel JE3 BE2.png|32px]] [[File:Golden Shovel JE3 BE2.png|32px]] [[File:Diamond Shovel JE2 BE2.png|32px]] The textures of all shovels have been changed.}}
{{History||1.11.0|snap=beta 1.11.0.1|Iron shovels can now be found in [[village]] toolsmith houses.}}
{{History|||snap=beta 1.11.0.4|[[Vindicator]]s and [[pillager]]s that spawn in [[raid]]s can now drop iron shovels upon [[death]].
|[[Trading]] has been changed, toolsmith [[villager]]s now have a 25% chance to [[trading|sell]] enchanted iron shovels for 2 [[emerald]]s as part of their third tier trades.
|Stone shovels and [[enchanting|enchanted]] diamond shovels can now be [[trading|bought]] from toolsmith villagers.}}
{{History||1.16.0|snap=beta 1.16.0.51|[[File:Netherite Shovel JE2 BE1.png|32px]] Added netherite shovels.|Netherite shovels are obtained by combining one diamond shovel and one netherite ingot in a crafting table.
|[[File:Diamond Shovel JE3 BE3.png|32px]] The texture of diamond shovels has been changed.}}
{{History|||snap=beta 1.16.0.57|Netherite shovels can no longer be crafted.
|Netherite shovels are now obtained by combining one diamond shovel and one netherite ingot in a smithing table.
|Stone shovels can now be crafted using [[blackstone]].
|Netherite shovels now generate randomly enchanted in [[bastion remnants]] chests.
|Golden shovels now generate randomly enchanted in [[ruined portal]] chests.}}
{{History|||snap=beta 1.16.0.63|Diamonds shovels now generate in place of netherite shovels in bastion remnant chests.}}
{{History||1.20.10|snap=beta 1.20.10.20|The [[wooden shovel]] in the crafting recipe has been removed for all boat types except the bamboo raft.}}
{{History|||snap=beta 1.20.10.21|The bamboo raft recipe no longer needs a wooden shovel.}}
{{History|console}}
{{History||xbox=TU1|xbone=CU1|ps=1.0|wiiu=Patch 1|switch=1.0.1|[[File:Wooden Shovel JE1 BE1.png|32px]] [[File:Stone Shovel JE1 BE1.png|32px]] [[File:Iron Shovel JE2 BE1.png|32px]] [[File:Golden Shovel JE2 BE1.png|32px]] [[File:Diamond Shovel JE1 BE1.png|32px]] Added shovels (all five types).}}
{{History||xbox=TU53|xbone=CU43|ps=1.49|wiiu=Patch 23|switch=1.0.3|Iron and golden shovels are now [[smelting|smeltable]].}}
{{History||xbox=none|xbone=none|ps=1.90|wiiu=none|switch=none|[[File:Wooden Shovel JE2 BE2.png|32px]] [[File:Stone Shovel JE2 BE2.png|32px]] [[File:Iron Shovel JE3 BE2.png|32px]] [[File:Golden Shovel JE3 BE2.png|32px]] [[File:Diamond Shovel JE2 BE2.png|32px]] The textures of all shovels have been changed.}}
{{History|New Nintendo 3DS Edition}}
{{History||0.1.0|[[File:Wooden Shovel JE1 BE1.png|32px]] [[File:Stone Shovel JE1 BE1.png|32px]] [[File:Iron Shovel JE2 BE1.png|32px]] [[File:Golden Shovel JE2 BE1.png|32px]] [[File:Diamond Shovel JE1 BE1.png|32px]] Added shovels.}}
{{History|foot}}
==Issues==
{{issue list}}
==Gallery==
<gallery>
Shovel JINX.jpg|Official shovel T-shirt made by JINX.
Stone Shovel SDGP.png|Stone shovel in the [[Super Duper Graphics Pack]].
Adventure Shovel.png|An "adventure shovel" that can break blocks in [[adventure mode]].
</gallery>
===Enchanted shovels===
<gallery>
Enchanted_Wooden_Shovel.gif
Enchanted_Stone_Shovel.gif
Enchanted_Iron_Shovel.gif
Enchanted_Golden_Shovel.gif
Enchanted_Diamond_Shovel.gif
Enchanted_Netherite_Shovel.gif
</gallery>
==References==
{{reflist}}
== External Links ==
*[https://www.minecraft.net/en-us/article/taking-inventory-shovel Taking Inventory: Shovel] – Minecraft.net on November 16, 2018
{{items}}
[[Category:Combat]]
[[cs:Lopata]]
[[de:Schaufel]]
[[es:Pala]]
[[fr:Pelle]]
[[hu:Ásó]]
[[ja:シャベル]]
[[ko:삽]]
[[nl:Schep]]
[[pl:Łopata]]
[[pt:Pá]]
[[ru:Лопата]]
[[uk:Лопата]]
[[zh:锹]]</li></ul> | beta 1.8.0.8 | Added stray cats, which try to attack and kill rabbits. | |||
1.10.0{{Extension DPL}}<ul><li>[[Glow Ink Sac|Glow Ink Sac]]<br/>{{For|the regular sac dropped by squids|Ink Sac}}
{{Item
|Image=Glow Ink Sac.png
| renewable = Yes
| stackable = Yes (64)
|}}
A '''glow ink sac''' is an item dropped by a [[glow squid]] upon death. Unlike regular ink sacs, it can be added to [[sign]]s to make glowing text, and can be used to craft glow item frames.
== Obtaining ==
=== Mob loot ===
[[Glow squid]]s drop 1–3 glow ink sacs upon death. The maximum amount is increased by 1 per level of [[Looting]], for a maximum of 1–6 with Looting III.
=== Compound creation ===
A glow ink sac can be created from its base [[element]]s, using the [[compound creator]].{{only|bedrock|education}}
{| class="wikitable"
!Name
!Elements
!Example recipe
|- <!-- Temporarily using crafting grid as substitute for compound creator (template not yet available), since the layout is the same, even if the appearance is different -->
!Glow Ink Sac
|1 Iron<br>1 Sulfur<br>4 Oxygen
|{{Crafting Table
|shapeless= 1
|A2=Iron |B2=Sulfur |C2=Oxygen,4
|Output=Glow Ink Sac}}
|}
== Usage ==
=== Crafting ingredient ===
{{Crafting usage}}
=== Signs ===
[[File:Glow Ink Sign with Orange Dye JE2.png|thumb|150px|An oak sign with a glow ink sac used on it.]]
Glow ink sacs can be used on [[sign]]s or [[hanging sign]]s to make their text brighter in low light levels. This also adds an outline around the text on the sign, the color of which is based on the color of the sign's text. The text does not emit any light, it is only more visible in darkness, similarly to the eyes of spiders and endermen. Normal [[ink sacs]] can be applied to revert glowing text back to default.
== Sounds ==
{{edition|java}}:
{{Sound table
|sound=Ink sac1.ogg
|sound2=Ink sac2.ogg
|sound3=Ink sac3.ogg
|subtitle=Glow Ink Sac splotches
|source=block
|description=When a glow ink sac is used on a [[sign]]
|id=item.glow_ink_sac.use
|translationkey=subtitles.item.glow_ink_sac.use
|volume=1.0
|pitch=''varies'' <ref group=sound>Can be 1.0, 0.95, or 1.05</ref>
|distance=16
|foot=1}}
{{edition|bedrock}}:
{{Sound table
|type=bedrock
|sound=Ink sac1.ogg
|sound2=Ink sac2.ogg
|sound3=Ink sac3.ogg
|source=sound
|description=When a glow ink sac is used on a sign
|id=sign.ink_sac.use
|volume=1.0
|pitch=1.0
|foot=1}}
== Data values ==
=== ID ===
{{edition|java}}:
{{ID table
|edition=java
|showforms=y
|generatetranslationkeys=y
|displayname=Glow Ink Sac
|spritetype=item
|nameid=glow_ink_sac
|form=item
|foot=1}}
{{edition|bedrock}}:
{{ID table
|edition=bedrock
|shownumericids=y
|showforms=y
|notshowbeitemforms=y
|generatetranslationkeys=y
|displayname=Glow Ink Sac
|spritetype=item
|nameid=glow_ink_sac
|form=item
|id=503
|foot=1}}
== Advancements ==
{{load advancements|Glow and Behold}}
== History ==
{{History|java}}
{{History||1.17|snap=21w03a|[[File:Glow Ink Sac JE1 BE1.png|32px]] Added glow ink sacs.}}
{{History||1.17.1|snap=Pre-release 1|[[Zombie]]s, [[husk]]s, [[zombie villager]]s, and [[drowned]] no longer pick up [[glow ink sac]]s.}}
{{History||1.20<br>(Experimental)|link=1.19.3|snap=22w42a|Glow ink sacs can now be used to make the text glow on a [[hanging sign]].}}
{{History|bedrock}}
{{History||Caves & Cliffs (experimental)|link=Bedrock Edition 1.17.0|snap=beta 1.16.210.59|[[File:Glow Ink Sac JE1 BE1.png|32px]] Added glow ink sacs.}}
{{History|||snap=beta 1.16.210.60|Glow ink sacs have been removed temporarily.}}
{{History|||snap=beta 1.16.220.50|[[File:Glow Ink Sac JE1 BE1.png|32px]] Re-added glow ink sacs.}}
{{History||1.17.0|snap=beta 1.17.0.52|Glow ink sacs are now available without enabling [[experimental gameplay]].}}
{{History||1.17.30|snap=beta 1.17.30.20|[[Zombie]]s, [[husk]]s, [[zombie villager]]s, and [[drowned]] no longer pick up [[glow ink sac]]s.}}
{{History|foot}}
== Issues ==
{{Issue list}}
== External Links ==
*[https://www.minecraft.net/en-us/article/taking-inventory--glow-ink-sac Taking Inventory: Glow Ink Sac] – Minecraft.net on October 14, 2021
{{Items}}
[[Category:Items]]
[[Category:Dyes]]
[[Category:Renewable resources]]
[[de:Leuchttintenbeutel]]
[[es:Saco de tinta luminosa]]
[[it:Sacca d'inchiostro luminescente]]
[[ja:輝くイカスミ]]
[[pl:Torbiel ze świecącym atramentem]]
[[pt:Bolsa de tinta brilhante]]
[[ru:Светящийся чернильный мешок]]
[[uk:Сяйний чорнильний мішок]]
[[zh:荧光墨囊]]</li><li>[[Hopper|Hopper]]<br/>{{About|the block|the crash utility|Hopper (crash utility)}}
{{Block
|image=<gallery>
Hopper (D).png|Java
Hopper (D) BE.png|Bedrock
</gallery>
|extratext = View [[#Gallery|all renders]]
|transparent=Yes
|light=No
|tool=wooden pickaxe
|renewable=Yes
|stackable=Yes (64)
|flammable=No
|lavasusceptible=No
}}
A '''hopper''' is a low-capacity storage [[block]] that can be used to collect [[item (entity)|item entities]] directly above it, as well as to transfer [[item]]s into and out of other containers. A hopper can be locked with [[Redstone Dust|redstone power]] to stop it from moving items into or out of itself.
== Obtaining ==
=== Breaking ===
To obtain a hopper, {{control|mine}} it with a [[pickaxe]]. Using any other item to mine a hopper drops only its contents.
{{breaking row|horizontal=1|Hopper|Pickaxe|Wood|foot=1}}
===Crafting===
A hopper can be crafted from 5 iron ingots and a chest.
{{Crafting
|A1= Iron Ingot
|C1= Iron Ingot
|A2= Iron Ingot
|B2= Chest
|C2= Iron Ingot
|B3= Iron Ingot
|Output= Hopper
|type= Redstone
}}
==Usage==
{{see also|Tutorials/Hopper}}
[[File:Hopper aligment.png|Hoppers can face down or sideways.|thumb]]
A hopper can be used as a container, as a crafting ingredient, and as a redstone component.
A hopper has an "output" tube at its bottom that can face down or sideways and provides a visual indication of which block the hopper is set up to drop its items into, if that block has an inventory. To place a hopper, use the {{control|Place Block}} control while aiming at the surface to which its output should face (Hoppers ''do not'' orient themselves automatically). To place a hopper directly on the face of an already interactable block, the player can {{control|sneak}} while placing the hopper. Attempting to place a hopper aimed on the bottom face of a block instead faces downward. With some blocks, such as the [[furnace]] and [[brewing stand]], the hopper has multiple uses. A hopper does not change direction after placement, and it is not attached to the container it faces; the container can be removed or replaced, and the hopper remains unchanged.
Hoppers cannot be moved by [[piston]]s.{{only|java}} Despite not being a solid block, attached blocks such as [[rail]]s, [[lever]]s, [[tripwire]] and [[redstone]] dust can be placed on top of hoppers, but not on their sides.
===Container===
[[File:Hopper GUI.png|thumb|176px|Hopper GUI showing the hopper's five slots of inventory at the top and the player's inventory below.]]
A hopper can be used as a container and has 5 slots of inventory space.
To open the hopper GUI, use the {{control|use item|text=Use Item/Place Block}} [[control]]. To move items between the hopper inventory and the player inventory or hotbar while the hopper GUI is open, drag or shift-click the items. To exit the hopper GUI, use the {{key|Esc}} key, B button or circle button, depending on the device.
By default, the GUI of a hopper is labeled "Item Hopper". A hopper's GUI label can be changed by naming the hopper in an [[anvil]] before placing it, or, {{in|java}}, by using the [[Commands#data|data]] command (for example, to label a hopper at (0,64,0) "Steve's Hopper", use <code>/data merge block 0 64 0 {CustomName:'"Steve's Hopper"'}</code>).
{{IN|java}}, a hopper's GUI can be "locked" (or subsequently unlocked) by setting the hopper's <code>Lock</code> tag with the [[Commands#data|data]] command. If a hopper's <code>Lock</code> tag is not blank, the hopper cannot be accessed except by players holding an item with the same name as the <code>Lock</code> tag's text. For example, to lock a hopper at (0,64,0) so that only players holding an item named "Steve's Key" can access the hopper, use <code>/data merge block 0 64 0 {Lock:"Steve's Key"}</code>.
===Crafting ingredient===
A hopper can be used to craft a [[minecart with hopper]].
{{crafting usage}}
===Redstone component===
{{see also|Redstone circuit|Redstone components#Hopper}}
[[File:Hopper logic flowchart.png|thumb|Flowchart of hopper logic]]
While a hopper is ''not'' powered by redstone signals, it operates with three functions:
*'''Collect''' [[Item (entity)|item entities]] (free-floating items in the world) into its inventory from the space above it
*'''Pull''' a single item into its inventory from a container above it
*'''Push''' a single item from its own inventory into a container it faces
A hopper first attempts to push any items inside it. Afterward, it checks if the block above it is a type of container. If so, it attempts to pull from it. Otherwise, the hopper attempts to collect item entities. Notably, hoppers can push to and pull from other hoppers, forming '''hopper pipes''' or '''hopper chains''', which allow transporting items across several blocks and are further discussed below.
====Redstone signals====
When a hopper receives a redstone signal (and is considered to be "activated"), all three functions stop. To avoid confusion over the terms "activated" and "deactivated", powered hoppers are often described as being '''locked''' and unpowered hoppers described as being '''unlocked'''. Hoppers can be powered by [[Redstone_mechanics#Power|soft powered]] blocks, meaning a [[redstone dust]] trail pointing into a block touching the hopper locks it just as effectively as a [[redstone block]] or any other [[Redstone components#Power components|power component]] touching the hopper. When the hopper is unlocked during a redstone tick, it does not push or pull/collect during the same tick, but has a delay of 1 redstone tick instead.
While a locked hopper does not push or pull/collect items, it may still receive items from [[dispenser]]s, [[dropper]]s and other hoppers, and may have its items pulled out by another hopper beneath it. Hence, the item flow in a horizontal hopper pipe may be stopped by locking just one of the hoppers, but stopping a vertical hopper pipe requires locking two adjacent hoppers at the same time, such that both the pushing of the top one and the pulling of the bottom one are stopped.
A hopper does not output any redstone signals by itself, but its fullness can be read using a [[Redstone Comparator|redstone comparator]], which needs to be placed next to it and facing away from it. An empty hopper outputs a signal strength of 0 and a completely full hopper outputs a signal strength of 15. Notably, a single stackable item (16 or 64) outputs a signal strength of 1 and a single non-stackable item outputs a signal strength of 3.
{{IN|Java}}, if the hopper being read is part of a horizontal hopper pipe, the comparator can individually read each item passing through the chain, because items are pushed through the hoppers one by one at a speed that is manageable by the comparator. If there is an uninterrupted stream of items, the comparator does not switch off in between items. On the other hand, in a vertical hopper pipe, some of the hoppers may never produce a reading above 0, even with a continuous stream of items, because pushes and pulls both occur in the same game tick: The hoppers' items get pulled out a single game tick after they're pushed in and this isn't measurable by a comparator, because comparators need measurements lasting at least 1.5 redstone ticks to produce a reading.
====Collecting items====
A hopper collects items dropped on top of it if the space above the hopper not occupied by a storage block. Items are gathered from the entire 1 block space above the hopper, meaning that items sitting on partial blocks such as [[soul sand]] directly above a hopper can be collected.<ref>https://bugs.mojang.com/browse/MCPE-55824</ref> It is also possible for a hopper to collect items from inside a full, solid block, a situation that might come from items rising up through solid blocks or being [[commands/summon|summoned]]. Item entities are not collected when they are outside of the collection area however; for example, items on top of a stone block directly above a hopper are not collected. Collected items are placed in the leftmost empty slot of a hopper's inventory.
{{IN|java}}, if there is no container above the hopper, then the hopper collects dropped items in the order in which they landed on the hopper. This order is remembered even while a hopper is locked. For instance, if a hopper is locked under a carpet while a fully equipped [[armor stand]] is broken above it, then it always collects items in this order when it is unlocked: [[armor stand]], [[boots]], [[leggings]], [[chestplates]], [[helmets]]. This is due to the order in which these items land.{{Verify|Wouldn't this be due to the order in which the game creates the item entities that drop drop from the armor stand?}} {{IN|Bedrock}}, hoppers do not remember the order in which items land on the hopper. Instead, hoppers with multiple dropped items above them collect the items in the order in which they entered the chunk in which the hopper is located. Items that drop from a broken armor stand are collected in a random order.<ref>https://bugs.mojang.com/browse/MCPE-120586</ref>
Hoppers usually check for dropped items every [[game tick]] and they can collect items even before they are picked up by a [[player]]{{Verify|Does this happen always, or sometimes, and in Java only or also in Bedrock?}} or destroyed by [[lava]]. However, {{In|Bedrock}} hoppers have a "collection cooldown" time. After collecting an item (or stack of items), a hopper waits {{tooltip|4 redstone ticks|8 game ticks}} (0.4 seconds, barring lag) before attempting to collect again.
Hoppers collect groups of items all at once rather than collecting them as single items one at a time. As a result, hoppers can collect item entities much faster than they can pull items from a container. Pulling from a moving [[minecart with chest]] or [[minecart with hopper]] is even slower, since the minecart is not always above the hopper.
====Pushing and pulling items====
A hopper with a storage container above it (such as a [[furnace]], [[chest]], [[dropper]], [[composter]], or another hopper) attempts to pull from the container instead of checking for floating items above it, and hence can not collect items. A hopper always tries to push or pull items using the leftmost available slot. When a hopper is removing items from a chest, the items disappear from left to right. Similarly, when filling up a chest, the chest fills up from left to right. Hoppers prioritize pulling from the first slot of a container over pulling into the first hopper slot. If a hopper has stone in its first slot and nothing in its second while the container it is pulling from has chicken in its first slot but stone in the second, the hopper pulls the chicken from the first slot of the container into its empty second slot. However, if the hopper is unable to pull the chicken, such as if all slots are filled with stone, the hopper pulls the stone from the second slot of the container instead. Similarly, hoppers prioritize pushing from their first slot over pushing into the first slot of a container. If a hopper has stone in its first slot and chicken in its second while the container it is pushing to has chicken it its first slot but stone in the second, the hopper pushes stone from its first slot into the second slot of the container.
In [[Java Edition]] the checks done by a hopper while pulling generally require less processing than the checks done by a hopper attempting collection. Therefore, a chain of hoppers topped with storage containers rather than air/solid blocks has better performance (measured as milliseconds of processing per tick) and lower potential for processing lag. <ref name=":0">https://www.youtube.com/watch?v=LC3ZOOI1Rf0</ref> The performance improvement achieved is correlated with the number of storage slots the container has. Placing composters (with no storage slots but still with custom output logic) on top of hoppers provide the greatest efficiency, while double chests actually degrade performance, even when sharing each double chest across two hoppers.<ref name=":0" /> In [[Bedrock Edition]] a chain of hoppers with air or non-container blocks on top has better performance than a chain of hoppers topped by container blocks.<ref>https://cdn.discordapp.com/attachments/715523208530362389/890030941282631741/Redstone_MSPT_measure.xlsx</ref> This may be because, even though hoppers with containers on top do not check for items, they do check for hopper-minecarts and chest-minecarts to pull from, and that involves scanning the chunk entity list.<ref>{{bug|MCPE-109449}}</ref>
{{Schematic|caption='''Push then Pull'''
Chest A is full of items while the hopper and Chest B are empty.
|ch-$+A||-
|ho-$e|ch-$+B
}}
Item pushes and pulls are processed in the same game tick, but pushes are processed before pulls. In the schematic, the empty hopper first pulls an item from chest A as it cannot push anything into chest B. After the cooldown, the hopper first pushes its item into chest B before pulling another item from chest A, both pushing and pulling in the same tick, and the process repeats. The hopper stops pulling when A is empty, and stops pushing when B becomes full.
Hoppers also have a "transfer cooldown" time. After pulling and/or pushing items, a hopper waits {{tooltip|4 redstone ticks|8 game ticks}} (0.4 seconds, barring lag) before pulling or pushing again (a transfer rate of 2.5 items per second, barring lag). A hopper that has an item pushed into it from another hopper also starts a 4 tick cooldown period, regardless of whether it pushed or pulled items itself. Item entities can be collected at any time without affecting the transfer cooldown time. The transfer cooldown and the Bedrock Edition collection cooldown are independent of each other.
====Container interactions====
Some [[container]]s interact with hoppers in specific ways:
:;{{BlockLink|Composter}}
::Hoppers above composters can push compostable items into the composter's top face with a chance of increasing the level of the composter as if the player used the item on the composter. Items that are not compostable cannot be pushed into the composter. Hoppers below the composter can pull [[bone meal]] when the composter is in stage 8, emptying the composter and resetting it to stage 0. Hoppers to the side of a composter do not interact with it.
:;{{BlockLink|Brewing Stand}}
::A working hopper on the top face of a brewing stand deposits only into the ingredient slot and it can push only valid [[brewing]] ingredients. A hopper on side face of a brewing stand can deposit only [[blaze powder]] or filled bottles into the three brew slots. A hopper underneath a brewing stand always extracts from the three brew slots, whether brewing is finished or not—The hopper must be locked to allow potions to finish brewing.
:;{{BlockLink|Chest}}
:;{{BlockLink|Trapped Chest}}
::Large chests and large trapped chests are treated as a single container: A hopper depositing into a large chest fills up the entire chest and a hopper underneath a large chest empties the entire chest. Trapped chests being accessed by a player lock any adjacent hoppers, per the standard behavior of a hopper next to an active power source.
:;{{BlockLink|Furnace}}
:;{{BlockLink|Blast Furnace}}
:;{{BlockLink|Smoker}}
::A working hopper pointing into top of a furnace deposits only into the ingredient slot. It can push any item, including items that can't be smelted by the furnace. A hopper pointing into the side of a furnace deposits into the fuel slot, and only items that are usable as fuel. A hopper below a furnace pulls everything from the output slot and empty [[bucket]]s from the fuel slot left over from using [[lava bucket]]s as fuel. When a hopper removes items from a furnace, the experience points are 'stored' in the furnace until a player removes at least one smelted item, or the furnace block is broken.
:;{{BlockSprite|Hopper}} Hopper
::A sequence of three or more hoppers, each pushing items into the next, is called a '''hopper pipe'''. Working horizontal hopper pipes simply push items into each other at the expected rate of 2.5 items per second, but vertical hopper pipes are more complicated, as the hoppers are trying both to pull and to push. When a vertical pipe pulls from a single container, it simply transfers items at 2.5 items per second because the transfer rate is limited by the first hopper pulling items from the container. If a ''stack of items'' is in a vertical pipe, the items can be transferred twice as fast, because the hopper with the item stack is pushing items down while the hopper below it is also pulling items down.
:;{{EntityLink|Minecart with Chest}}
:;{{EntityLink|Minecart with Hopper}}
::Unlocked hoppers fill chest minecarts and hopper minecarts if any part of the entity's hitbox is within the hopper's target block-space. Hopper minecarts try to pull items from the hopper at high speed. Hoppers can pull items from minecarts above them so rails can be placed directly on the top faces of a hoppers. If a [[detector rail]] is in the right position, it could lock the hopper per standard redstone-hopper behavior.
:;{{BlockLink|Jukebox}}
::Hoppers can insert [[music disc]]s into jukeboxes, and extract the music discs after they finish playing.
:;{{BlockLink|Shulker Box}}
::Hoppers cannot put shulker boxes into other shulker boxes. This allows for the creation of certain [[Tutorials/Hopper#Potions and shulker boxes|item filters]].
::Otherwise, hoppers interact with shulker boxes normally.
:;{{BlockLink|Lectern}}
::Hoppers cannot remove or place books on lecterns. The redstone pulse emitted from a lectern when a page is turned can temporarily lock hoppers.
:;{{BlockLink|Ender Chest}}
::Hoppers cannot interact with ender chests in any way.
:;{{BlockLink|Barrel}}
:;{{BlockLink|Dispenser}}
:;{{BlockLink|Dropper}}
:;{{EntityLink|Boat with Chest}}
::Hoppers interact normally with barrels, dispensers, droppers, and boats with chests.
:;{{BlockLink|Chiseled Bookshelf}}
::Hoppers and minecart with hoppers can insert and remove books from the bookshelf. As with any other container, items are taken from the first slot that has an item that can fit in the hopper and are inserted into the first empty slot.
==Sounds==
===Generic===
{{Sound table/Block/Metal}}
===Unique===
{{Edition|Java}}:
{{Sound table
|sound=Door close.ogg
|sound2=Door open.ogg
|subtitle=Chest locked<ref group=sound name=lock>{{Bug|MC-98316||Wrong subtitles caused by missing distinction}}</ref>
|source=block
|description=When a player attempts to open a hopper locked using the {{nbt|string|Lock}} tag
|id=block.chest.locked|idnote=<ref group=sound name=lock/>
|translationkey=subtitles.block.chest.locked|translationkeynote=<ref group=sound name=lock/>
|volume=1.0
|pitch=1.0
|distance=16
|foot=1}}
{{Edition|Bedrock}}: ''None''
==Data values==
===ID===
{{edition|java}}:
{{ID table
|edition=java
|showforms=y
|generatetranslationkeys=y
|displayname=Hopper
|spritetype=block
|nameid=hopper
|foot=1}}
{{ID table
|displayname=Block entity
|spritename=hopper
|spritetype=block
|nameid=hopper
|foot=1}}
{{edition|bedrock}}:
{{ID table
|edition=bedrock
|firstcolumnname=Hopper
|shownumericids=y
|showforms=y
|generatetranslationkeys=y
|displayname=Block
|spritename=hopper
|spritetype=block
|nameid=hopper
|id=154
|form=block
|itemform=item.hopper}}
{{ID table
|displayname=Item
|spritename=hopper
|spritetype=item
|nameid=hopper
|id=527
|form=item
|translationkey=tile.hopper.name
|foot=1}}
{{ID table
|notnamespaced=y
|displayname=Block entity
|spritename=hopper
|spritetype=block
|nameid=Hopper
|foot=1}}
===Block states===
{{see also|Block states}}
{{/BS}}
===Block data===
A hopper has a block entity associated with it that holds additional data about the block.
{{el|java}}:
{{see also|Block entity format}}
{{/BE}}
{{el|bedrock}}:
:See [[Bedrock Edition level format/Block entity format]].
==Achievements==
{{load achievements|Freight Station;Smelt Everything}}
==Video==
<div style="text-align:center">{{yt|XO0IKUsGiG8}}</div>
==History==
{{History|java}}
{{History||1.5|snap=13w01a|[[File:Hopper (D) JE1.png|32px]] [[File:Hopper (N) JE1.png|32px]] [[File:Hopper (E) JE1.png|32px]] [[File:Hopper (S) JE1.png|32px]] [[File:Hopper (W) JE1.png|32px]] [[File:Hopper (U) JE1.png|32px]] Added hoppers.
|Hoppers with the [[damage]] value of 1, which are obtainable only through world editing, visually point in no direction. They functionally push items upward, however the behavior is inconsistent.
|[[File:Hopper (item) JE1.png|32px]] There is currently a temporary "work in progress" sprite for hoppers in the [[inventory]].
|Hoppers can be [[crafting|crafted]] from a [[chest]] and [[stone]] blocks with the following recipe:
{{{!}} class{{=}}"collapsible collapsed"
! Recipe
{{!}}-
{{!}}
{{Crafting Table
|A1= Stone
|C1= Stone
|A2= Stone
|B2= Chest
|C2= Stone
|B3= Stone
|Output= Hopper
}}
{{!}}}
}}
{{History|||snap=13w01b|[[Rail]]s can now be placed on top of hoppers.
|Hoppers no longer load [[item]]s into [[minecart]]s without [[chest]]s.}}
{{History|||snap=13w02a|[[File:Hopper (item) JE2 BE1.png|32px]] The [[inventory]] sprite of hoppers has been changed.
|[[File:Hopper (item) 13w02a.png|32px]] However, the [[item]] of hoppers appears bugged if [[drops|dropped]] or placed in an [[item frame]].<ref>{{bug|MC-6737}}</ref> This may be due to the game attempting to pull the item sprite from the hopper's equivalent spot in <samp>[[stitched_terrain.png]]</samp> (compare files: [[:File:13w02a stitched terrain.png|terrain]], [[:File:13w02a stitched items.png|items]]), a region which contains parts of the oak planks, end stone and iron bars textures.
|Applying a [[redstone]] signal to a hopper now deactivates the hopper until the signal is removed.
|Hoppers can no longer be used as [[fuel]] in a [[furnace]].
|Hoppers are now [[crafting|crafted]] using 5 [[iron ingot]]s rather than 5 [[stone]] blocks.
{{{!}} class{{=}}"collapsible collapsed"
! Recipe
{{!}}-
{{!}}
{{Crafting
|A1= Iron Ingot
|C1= Iron Ingot
|A2= Iron Ingot
|B2= Chest
|C2= Iron Ingot
|B3= Iron Ingot
|Output= Hopper
}}
{{!}}}
|Hoppers now pull only from the output slot of [[furnace]]s.
|Hoppers now output 1 signal strengh per 1/3 of a stack (21 [[item]]s) when interacting with a [[redstone comparator]].
|[[File:Hopper (D) JE2.png|32px]] [[File:Hopper (N) JE2.png|32px]] [[File:Hopper (E) JE2.png|32px]] [[File:Hopper (S) JE2.png|32px]] [[File:Hopper (W) JE2.png|32px]] [[File:Hopper (U) JE2.png|32px]] The texture of hoppers has been given a unique texture. Hoppers no longer use the [[cauldron]] texture. Note that the top texture does not rotate with facing direction.
|The preferred tool is now a pickaxe, rather than the axe.}}
{{History|||snap=13w02b|Hoppers now treat large [[chest]]s properly, no longer needing two hoppers connected to them to fill up the entire [[inventory]].
|Hoppers no longer take [[item]]s from containers when powered via a [[redstone]] current.
|Hoppers now display correctly as a [[drops|dropped]] or [[item frame|frame]] [[item]].}}
{{History|||snap=13w03a|Hoppers are now used to [[crafting|craft]] a [[minecart with hopper]].
|Hoppers can now empty a [[minecart with hopper]].}}
{{History|||snap=13w04a|The transfer rate of hoppers has been changed from 7 to 8 [[game tick]]s per [[item]] (2.5 items per second).}}
{{History||1.5.1|snap=pre|Hoppers now take empty [[bucket]]s out of furnace fuel slots.}}
{{History||1.7.2|snap=release|[[File:Hopper (D) JE3.png|32px]] [[File:Hopper (N) JE3.png|32px]] [[File:Hopper (E) JE3.png|32px]] [[File:Hopper (S) JE3.png|32px]] [[File:Hopper (W) JE3.png|32px]] [[File:Hopper (U) JE3.png|32px]] The UV of all blocks is broken on certain sides as a result of {{bug|MC-37106}} (few cases are listed on the wiki so far - this is a future project). This includes hoppers.}}
{{History||1.7.4|snap=13w47a|[[File:Hopper (D) JE4.png|32px]] [[File:Hopper (N) JE4.png|32px]] [[File:Hopper (E) JE4.png|32px]] [[File:Hopper (S) JE4.png|32px]] [[File:Hopper (W) JE4.png|32px]] [[File:Hopper (U) JE4.png|32px]] MC-37106 has been fixed, reverting hoppers to their pre-1.7.2 appearences.}}
{{History|||snap=13w48a|This version fixed {{bug|MC-190}}, which hoppers were allegedly subject to since their introduction. However, a comparison of hopper UV in 13w02a and 14w08a failed to reveal any visible differences, even accounting for the example images on the ticket. More research is needed on this matter.}}
{{History||1.8|snap=?|Hoppers no longer generate [[multiplayer]] lag when idle.}}
{{History|||snap=14w10a|[[File:Hopper (D) JE5.png|32px]] [[File:Hopper (N) JE5.png|32px]] [[File:Hopper (E) JE5.png|32px]] [[File:Hopper (S) JE5.png|32px]] [[File:Hopper (W) JE5.png|32px]] [[File:Missing Model JE2.png|32px]] Hoppers now use block models rather than having a hardcoded shape. This brings multiple changes: the inside texture now rotates with the hopper rather than being constant, the inside planes of hoppers are now shaded/have ambient occlusion, and some minor UV changes have occurred, notably on the smallest cuboid. The directionless hopper also [[Missing model|no longer has a model]].}}
{{History|||snap=14w26a|The directionless hopper has been removed.}}
{{History|||snap=14w31a|Hoppers now no longer use wood [[sound]]s.<ref>{{bug|MC-5991}}</ref>}}
{{History||1.9|snap=15w33c|A hopper now generates as a part of the [[end ship]] in the [[end city|end cities]].}}
{{History|||snap=15w41a|End ships no longer contain a hopper.}}
{{History|||snap=15w43a|[[Loot table]]s have been added; hoppers can now use loot tables.}}
{{History|||snap=15w43c|[[File:Hopper (D) JE6.png|32px]] [[File:Hopper (N) JE6.png|32px]] [[File:Hopper (E) JE6.png|32px]] [[File:Hopper (S) JE6.png|32px]] [[File:Hopper (W) JE6.png|32px]] The UV on the hopper model has changed, resulting in minor differences, particularly to the smallest cuboid. This is likely due to the fix for {{bug|MC-73401}}.}}
{{History|||snap=15w44a|[[File:Hopper (D) JE7.png|32px]] [[File:Hopper (N) JE7.png|32px]] [[File:Hopper (E) JE7.png|32px]] [[File:Hopper (S) JE7.png|32px]] [[File:Hopper (W) JE7.png|32px]] A mapping issue introduced in the previous snapshot for the sides of the large funnel region has been fixed. This may be due to the fix for {{bug|MC-50344}}.}}
{{History||1.9.1|snap=pre1|A hopper can now push into and pull [[item]]s from a blocked [[chest]].}}
{{History||1.13|snap=17w47a|Prior to [[1.13/Flattening|''The Flattening'']], this [[block]]'s numeral ID was 154.}}
{{History||1.14|snap=18w43a|[[File:Hopper (D) JE8.png|32px]] [[File:Hopper (N) JE8.png|32px]] [[File:Hopper (E) JE8.png|32px]] [[File:Hopper (S) JE8.png|32px]] [[File:Hopper (W) JE8.png|32px]]<br>[[File:Hopper (item) JE3 BE2.png|32px]] The textures of hoppers have been changed.}}
{{History|||snap=19w03c|Hoppers now use correct cullface arguments, and some redundant faces have also been deleted.}}
{{History||1.19|snap=22w13a|Hoppers no longer drop when breaking a [[minecart with hopper]].}}
{{History||1.19.4|snap=23w07a|Hoppers can now interact with jukeboxes.}}
{{History|pocket alpha}}
{{History||v0.14.0|snap=build 1|[[File:Hopper (D) JE2.png|32px]]{{verify|Is this model correct?}}<br>[[File:Hopper (item) JE2 BE1.png|32px]] Added hoppers. Upward hoppers also exist.}}
{{History||v0.15.0|snap=build 1|Hoppers can now be moved by [[piston]]s.}}
{{History|bedrock}}
{{History||1.10.0|snap=beta 1.10.0.3|[[File:Hopper (D) BE.png|32px]] [[File:Hopper (N) BE.png|32px]] [[File:Hopper (E) BE.png|32px]] [[File:Hopper (S) BE.png|32px]] [[File:Hopper (W) BE.png|32px]] [[File:Hopper (U) BE.png|32px]]<br>[[File:Hopper (item) JE3 BE2.png|32px]] The textures of hoppers have been changed.}}
{{History||1.19.70|snap=beta 1.19.70.20|Hoppers can now collect items through all blocks that have a lower height than a full block.}}
{{History|console}}
{{History||xbox=TU19|xbone=CU7|ps=1.12|wiiu=Patch 1|switch=1.0.1|[[File:Hopper (D) JE2.png|32px]]{{verify|Is this model correct?}}<br>[[File:Hopper (item) JE2 BE1.png|32px]] Added hoppers.}}
{{History||xbox=none|xbone=none|ps=1.90|wiiu=none|switch=none|[[File:Hopper (D) JE8.png|32px]]{{verify|Is this model correct?}}<br>[[File:Hopper (item) JE3 BE2.png|32px]] The textures of hoppers have been changed.}}
{{History||ps=1.91|Hoppers can now fill [[composter]]s.}}
{{History|new 3ds}}
{{History||0.1.0|[[File:Hopper (D) JE2.png|32px]]{{verify|Is this model correct?}}<br>[[File:Hopper (item) JE2 BE1.png|32px]] Added hoppers.}}
{{History|foot}}
==Issues==
{{Issue list}}
==Trivia==
* A [[wikipedia:Hopper (particulate collection container)|real-world hopper]] is a large, pyramidal or cone-shaped container used in industrial processes to hold particulate matter, like dust, gravel, nuts, seeds, etc., and can then dispense them from the bottom.
* A hopper can transfer 9000 items per hour, or 150 items per minute.
==Gallery==
=== Renders ===
<gallery>
Hopper (N).png
Hopper (E).png
Hopper (S).png
Hopper (W).png
</gallery>
<gallery>
Hopper (N) BE.png
Hopper (E) BE.png
Hopper (S) BE.png
Hopper (W) BE.png
</gallery>
=== Screenshots ===
<gallery>
File:Hopper screenshot 1.png|In snapshot 13w01a, the hopper item uses a 'WIP' sprite, though the item still read "Hopper".
File:13w02a Banner.png|The 13w02a Banner includes a [[minecart with TNT]] and a hopper.
</gallery>
==References==
{{Reflist}}
{{Redstone}}
{{Blocks|Utility}}
{{Items}}
[[Category:Mechanisms]]
[[Category:Redstone mechanics]]
[[Category:Mechanics]]
[[Category:Storage]]
[[Category:Utility blocks]]
[[Category:Manufactured blocks]]
[[Category:Block entities]]
[[cs:Násypka]]
[[de:Trichter]]
[[el:Hopper]]
[[es:Tolva]]
[[fr:Entonnoir]]
[[it:tramoggia]]
[[ja:ホッパー]]
[[ko:호퍼]]
[[nl:Trechter]]
[[pl:Lej]]
[[pt:Funil]]
[[ru:Загрузочная воронка]]
[[uk:Лійка]]
[[zh:漏斗]]</li></ul> | beta 1.10.0.3 | ||||
| The texture of the white rabbit has been changed to the albino rabbit texture, which has changed the texture from | |||||
1.13.0{{Extension DPL}}<ul><li>[[:Category:Tools|Category:Tools]]<br/>[[Category:Items]]
[[fr:Catégorie:Outil]]
[[it:Categoria:Attrezzi]]</li><li>[[:Category:Invalid data value items|Category:Invalid data value items]]<br/>[[Category:Items]]</li></ul> | beta 1.13.0.1 | Added foxes, which attack rabbits. | |||
| Caves & Cliffs (experimental) | beta 1.16.220.50 | Rabbits now spawn in mountain groves. | |||
| Legacy Console Edition | |||||
| TU31 | CU19 | 1.22 | Patch 3 | 1.0.1 | |
| New Nintendo 3DS Edition | |||||
0.1.0{{Extension DPL}}<ul><li>[[Dupe Hack|Dupe Hack]]<br/>{{for|the method to duplicate items and blocks|Tutorials/Block and item duplication}}
{{stub}}
{{Joke feature}}
{{exclusive|java}}{{item
| image = Missing Texture.png
| rarity=Common
| stackable=No
|title=minecraft:dupe_hack|renewable=Yes}}
'''minecraft:dupe_hack''' is a joke item from [[Java Edition 23w13a_or_b]].
==Obtaining==
Once the <code>dupe_hack_occurrence_chance</code> vote is approved the '''dupe hack''' item has a random chance of dropping whenever an entity with chests is killed by a player, e.g. when destroying a [[Minecart with Chest|minecart with chest]] with a [[sword]].
It doesn't appear in the [[creative]] menu, not even when the [[Options#Controls|option]] "Operator Items Tab" is enabled, but can be given to the player with [[Commands/give|<code>/give</code>]] and other commands.
==Usage==
The dupe hack item can be used to create a limited amount of duplicate items by placing it on a [[crafting table]] with any other item. It has a random chance of breaking, controlled by the <code>dupe_hack_break_chance</code> vote. This limitation can be mostly bypassed by putting the items in an [[Ender Chest|ender chest]] first and duplicating the chest.
When using the Dupe Hack, it has a random chance of breaking, which is often decided by votes.
===Crafting ingredient===
{{Crafting
|Any Item
|Dupe Hack
|Output=Any Item, 2
|showdescription=1
|description=The dupe hack item remains in the crafting grid after duplicating an item.
|foot=1
}}
==Data values==
===ID===
{{edition|java}}:{{ID table
|edition=java
|showforms=y
|generatetranslationkeys=y
|displayname=minecraft:dupe_hack
|spritetype=item
|nameid=dupe_hack
|form=item|foot=1|spritename=missingno}}
==History==
{{History|java}}
{{History||23w13a_or_b|[[File:Missing Texture JE4.png|32px]] Added minecraft:dupe_hack.}}
{{History|foot}}
{{items}}
{{Jokes}}
<references />
[[Category:Joke items]]
[[ja:Dupe Hack]]
[[pt:Dupe Hack]]</li><li>[[Feather|Feather]]<br/>{{about|a item|a enchantent|Feather Falling}}
{{Item
| image = Feather.png
| stackable = Yes (64)
| renewable = Yes
}}
'''Feathers''' are items dropped by [[chicken]]s and [[parrot]]s, as well as tamed [[cats]] as morning gifts.
== Obtaining ==
=== Mob loot ===
Adult [[chicken]]s drop 0–2 feathers upon death. The maximum is increased by 1 per level of [[Looting]], for a maximum of 0–5 with Looting III.
[[Parrot]]s drop 1–2 feathers upon death. The maximum is increased by 1 per level of Looting, for a maximum of 1–5 with Looting III.
A [[fox]] sometimes spawns holding a feather, which always drops upon death. Alternatively, the player can drop a [[food]] item, causing the fox to drop the feather in favor of the food.
=== Natural generation ===
{{LootChestItem|feather}}
=== Cat gifts ===
{{main|Cat#Gifts}}
Tamed [[cat]]s have a 70% chance of giving the [[player]] a "morning gift", and the gift has a 16.13% chance to be a feather.
== Usage ==
=== Helmet ===
<div style='float:right'></div>
While a feather cannot be equipped in the head slot in [[Survival]] mode, equipping it using commands causes it to appear completely upright unlike other items.
[[File:Steve wearing Feather.png|75px]]
[[File:Alex wearing Feather.png|75px]]
=== Crafting ingredient ===
{{crafting usage}}
=== Trading ===
Expert-level fletcher [[villager]]s buy 24 feathers for an [[emerald]] as part of their trade.
== Data values ==
=== ID ===
{{edition|java}}:
{{ID table
|edition=java
|showforms=y
|generatetranslationkeys=y
|displayname=Feather
|spritetype=item
|nameid=feather
|form=item
|foot=1}}
{{edition|bedrock}}:
{{ID table
|edition=bedrock
|shownumericids=y
|showforms=y
|notshowbeitemforms=y
|generatetranslationkeys=y
|displayname=Feather
|spritetype=item
|nameid=feather
|id=327
|form=item
|foot=1}}
== History ==
{{History|java indev}}
{{History||0.31|snap=20100130|[[File:Feather JE1.png|32px]] Added feathers.|Feathers can be used to [[craft]] [[arrow]]s.
|Feathers are [[drop]]ped by every [[mob]] in quantities of 0 to 2.}}
{{History||20100206|[[File:Feather JE2 BE1.png|32px]] The feather's texture has been changed; it is now not as straight anymore.}}
{{History||20100219|[[Zombie]]s are now the only [[mob]] that can drop feathers. This was a placeholder as [[Notch]] has stated he currently doesn't know what else they should drop.<ref>{{tweet|notch|21723172931895296}}</ref>}}
{{History|java alpha}}
{{History||v1.0.14|[[Chicken]]s now [[drop]] 0–2 feathers upon death.}}
{{History|java beta}}
{{History||1.8|snap=Pre-release|[[Zombie]]s now drop [[rotten flesh]], instead of feathers.
|[[Chicken]]s are now the only source of feathers.}}
{{History|java}}
{{History||1.3.1|snap=12w17a|Feathers are now used to craft [[book and quill]]s.}}
{{History||1.4.6|snap=12w49a|Feathers are now used to craft a [[firework star]] with a burst effect.}}
{{History||1.12|snap=17w13a|[[Parrot]]s now [[drop]] feathers.}}
{{History||1.13|snap=17w47a|Prior to ''[[The Flattening]]'', this [[item]]'s numeral ID was 288.}}
{{History|||snap=18w11a|Feathers now generate in [[shipwreck]] [[chest]]s.}}
{{History||1.14|snap=18w43a|[[File:Feather JE3 BE2.png|32px]] The texture of feathers has been changed.}}
{{History|||snap=18w44a|[[Cat]]s now offer feathers as [[Cat#Gifts|gift]]s.}}
{{History|||snap=18w48a|Feathers can now be found in chests in plains [[village]] houses.}}
{{History|||snap=18w50a|Feathers can now be found in chests in fletcher houses.}}
{{History|||snap=19w07a|Added [[fox]]es, which sometimes spawn with feather in their mouths.}}
{{History|||snap=19w11a|Fletcher [[villager]]s now [[trading|buy]] feathers.}}
{{History||1.20<br>(Experimental)|link=1.19.4|snap=1.19.4 Pre-release 1|Feathers can now be used to craft [[brush]]es.}}
{{History|pocket alpha}}
{{History||v0.2.0|[[File:Feather JE2 BE1.png|32px]] Added feathers. They are currently unobtainable and serve no purpose.}}
{{History||v0.3.3|Chickens now drop 0–2 feathers upon death.|Feathers can now be used to [[craft]] [[arrow]]s.}}
{{History||v0.5.0|Feathers can now be obtained after activating the [[nether reactor]].}}
{{History||v0.11.0|snap=build 1|[[Zombie]]s now drop [[rotten flesh]], instead of feathers.}}
{{History||v0.12.1|snap=build 1|Feathers are no longer available from the [[nether reactor]].}}
{{History|bedrock}}
{{History||1.2.0|snap=beta 1.2.0.2|Feathers can now be used to craft [[book and quill]]s.|Added [[parrot]]s, which [[drop]] feathers.|Feathers can now be used as an ingredient to craft a [[firework star]].}}
{{History||1.4.0|snap=beta 1.2.14.2|Feathers can now be found in [[shipwreck]] [[chest]]s.}}
{{History||1.8.0|snap=beta 1.8.0.8|Feathers can now be given as a gift to the [[player]] by tamed [[cat]]s.}}
{{History||1.10.0|snap=beta 1.10.0.3|[[File:Feather JE3 BE2.png|32px]] The texture of feathers has been changed.|Feathers can now be found in the new [[plains]] [[village]] house.}}
{{History||1.11.0|snap=beta 1.11.0.1|Feathers can now be found in village fletcher [[chest]]s.}}
{{History|||snap=beta 1.11.0.4|Feathers can now be [[trading|sold]] to fletcher [[villager]]s.}}
{{History||1.13.0|snap=beta 1.13.0.1|Added [[fox]]es, which can [[drops|drop]] feathers.}}
{{History||1.20.0<br>(Experimental)|link=Bedrock Edition 1.19.80|snap=beta 1.19.80.20|Feathers can now be used to craft [[brush]]es.}}
{{History|console}}
{{History||xbox=TU1|xbone=CU1|ps=1.0|wiiu=Patch 1|[[File:Feather JE2 BE1.png|32px]] Added feathers.}}
{{History|Ps4}}
{{History||1.90|[[File:Feather JE3 BE2.png|32px]] The texture of feathers has been changed.}}
{{History|New Nintendo 3DS Edition}}
{{History||0.1.0|[[File:Feather JE2 BE1.png|32px]] Added feathers.}}
{{History|foot}}
== Issues ==
{{issue list}}
== References ==
{{reflist}}
== External Links ==
*[https://www.minecraft.net/en-us/article/taking-inventory--feather Taking Inventory: Feather] – Minecraft.net on March 3, 2019
{{Items}}
[[Category:Renewable resources]]
[[cs:Pírko]]
[[de:Feder]]
[[es:Pluma]]
[[fr:Plume]]
[[hu:Toll]]
[[it:Piuma]]
[[ja:羽根]]
[[ko:깃털]]
[[nl:Veer]]
[[pl:Pióro]]
[[pt:Pena]]
[[ru:Перо]]
[[uk:Перо]]
[[zh:羽毛]]</li></ul> | |||||
Issues[]
Issues relating to "Rabbit" are maintained on the bug tracker. Report issues there.
Trivia[]
- The Killer Bunny is a reference to the Killer Rabbit of Caerbannog from the British comedy film Monty Python and the Holy Grail, which it was formerly named.
- The Killer Bunny was suggested by Twitter user @88bully.[7]
- The death sound for the rabbit is called
bunnymurder.ogg.
Gallery[]
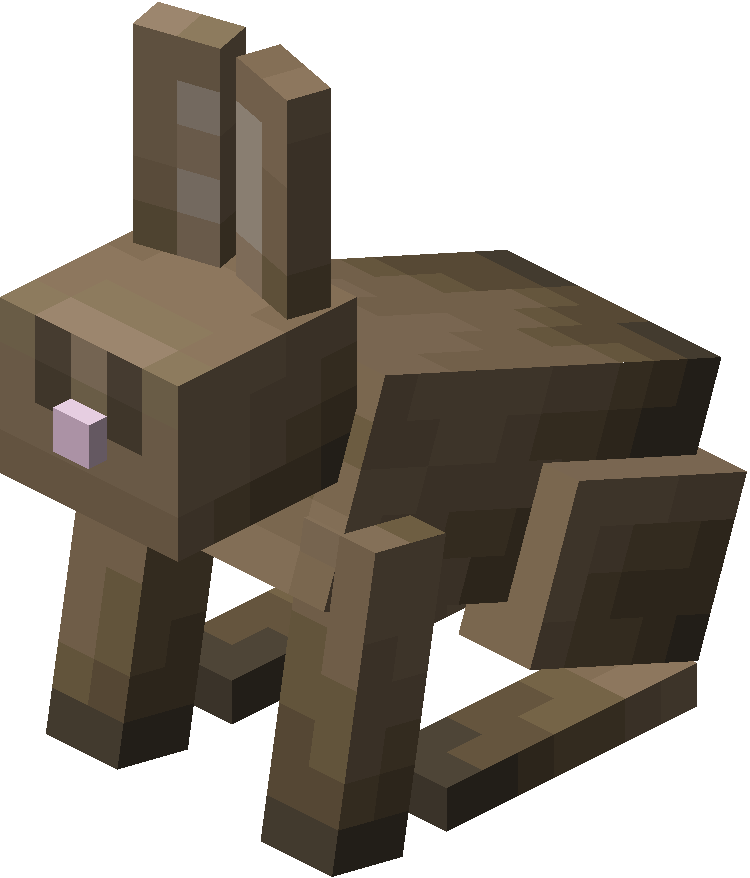

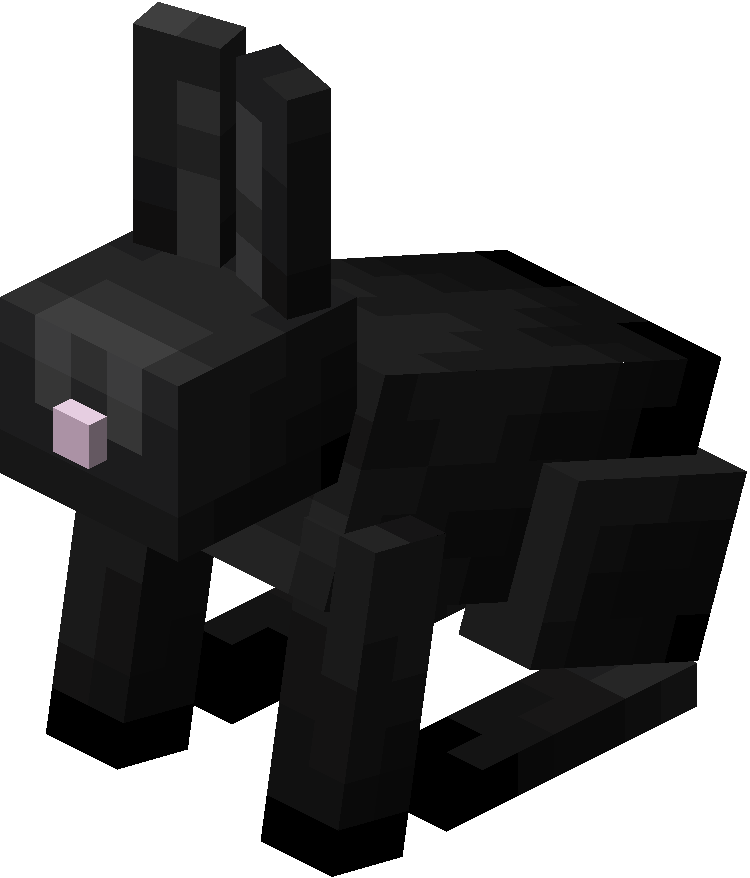
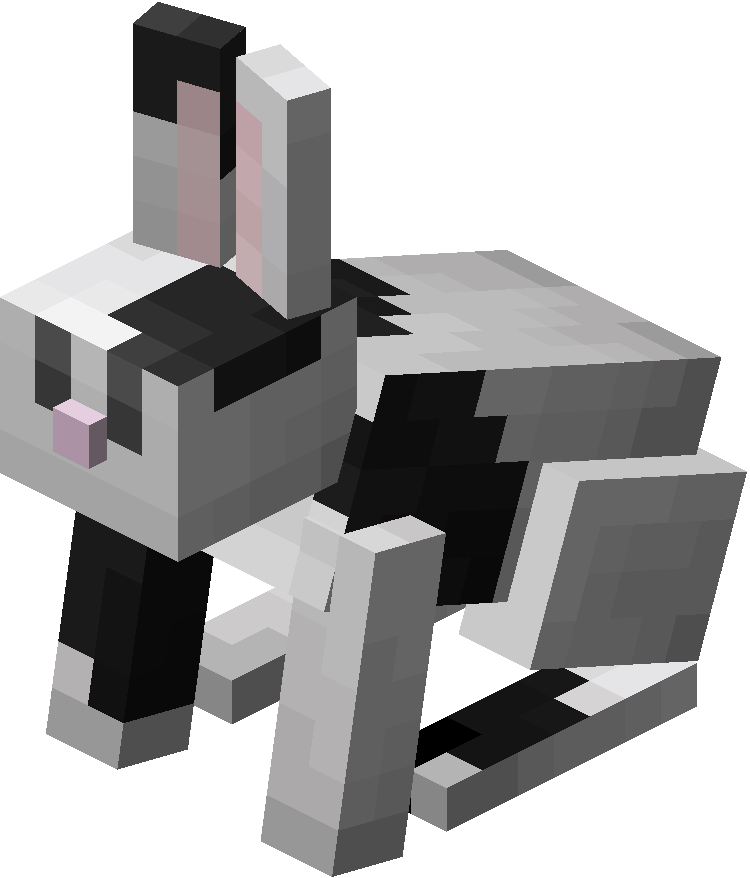
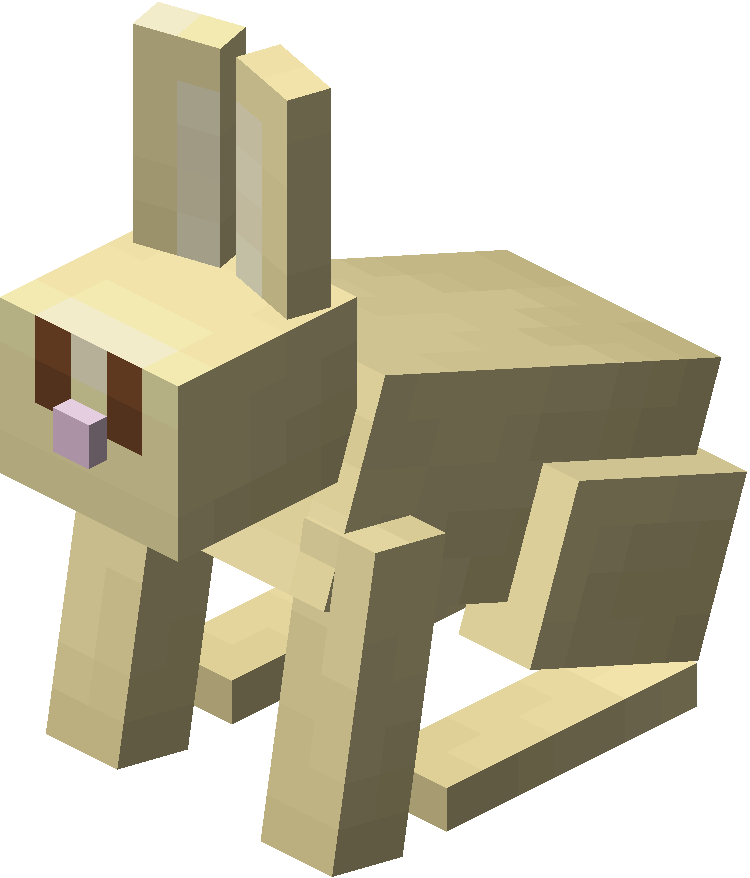
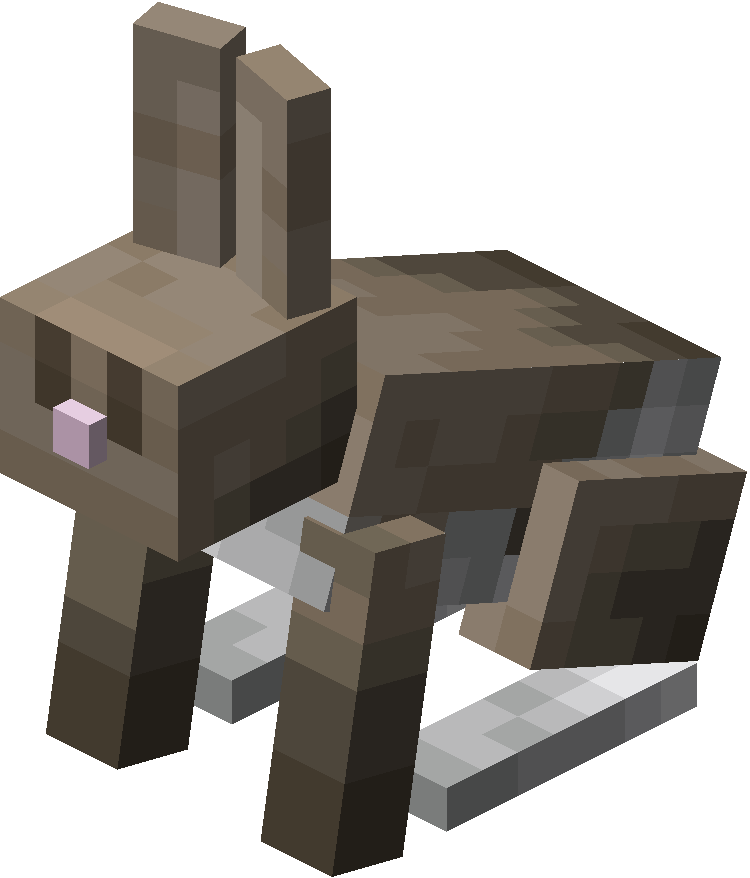
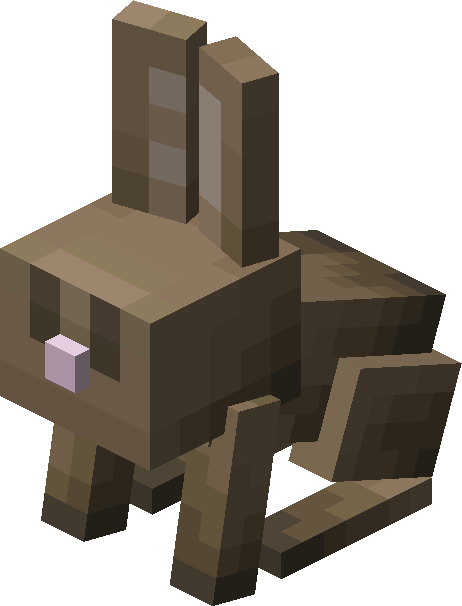
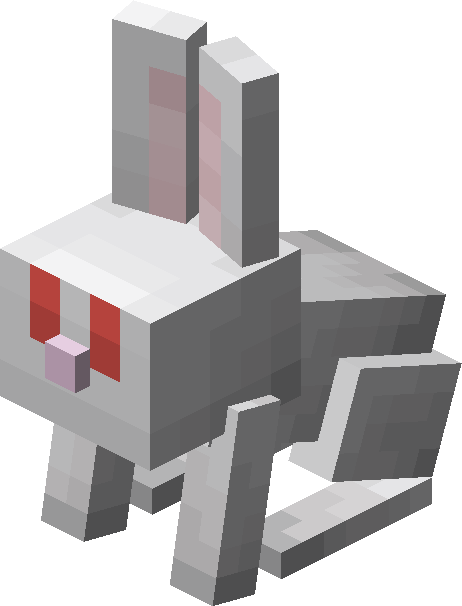
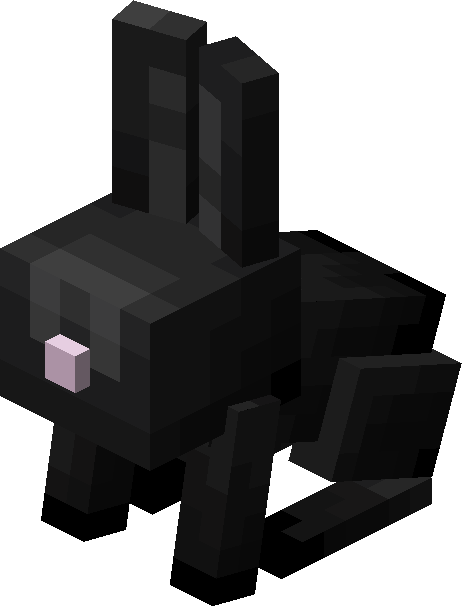
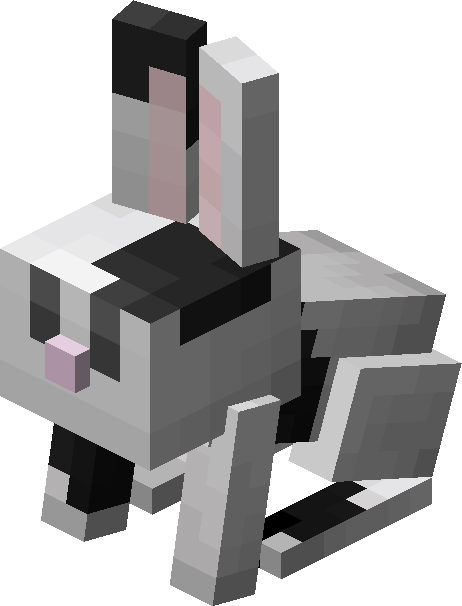
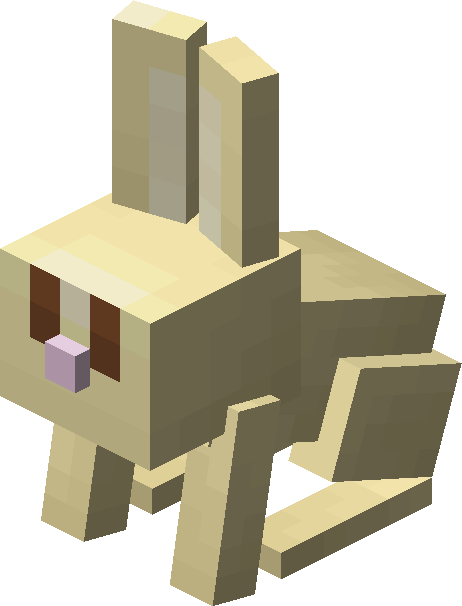
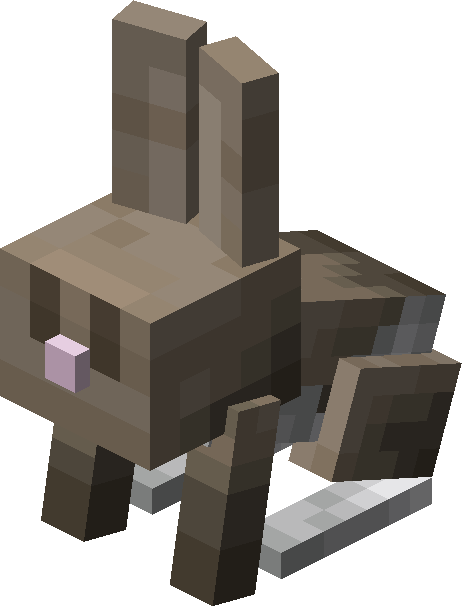
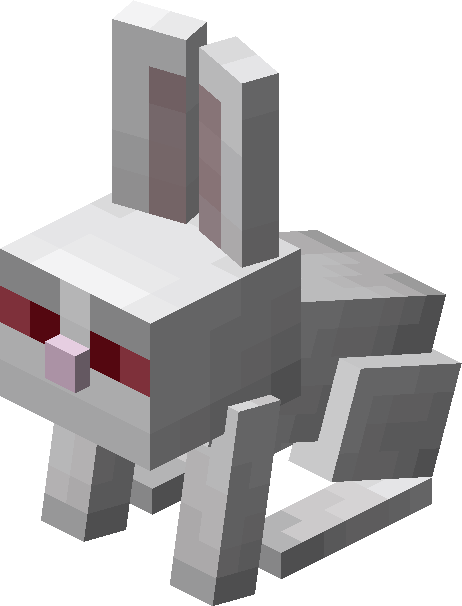
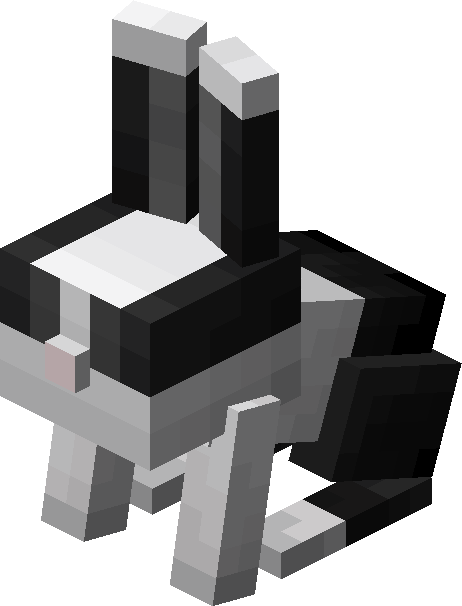
Animations[]

A brown rabbit running.
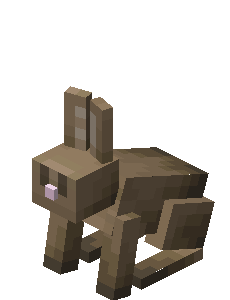
Screenshots[]
Ryan Holtz modeling the rabbit.
The first image of a rabbit tweeted by Ryan Holtz.
The second image of a rabbit tweeted by Ryan Holtz.
The third image of a rabbit tweeted by Ryan Holtz.
The fourth image of a rabbit tweeted by Ryan Holtz.
The fifth image of a rabbit tweeted by Ryan Holtz.
Baby rabbits.
First image of Toast.
Second image of Toast.
Third image of Toast.
Fourth image of Toast.
The first image of the Killer Bunny.
The second image of the Killer Bunny.
A pen of rabbits.
The second Killer Bunny texture, similar to a normal white rabbit.
All of the available rabbit skins.
The Killer Rabbit of Caerbannog as a baby.
The third Killer Bunny texture, with blood on its mouth and paws.
Killer bunny.
A rabbit eating a carrot.
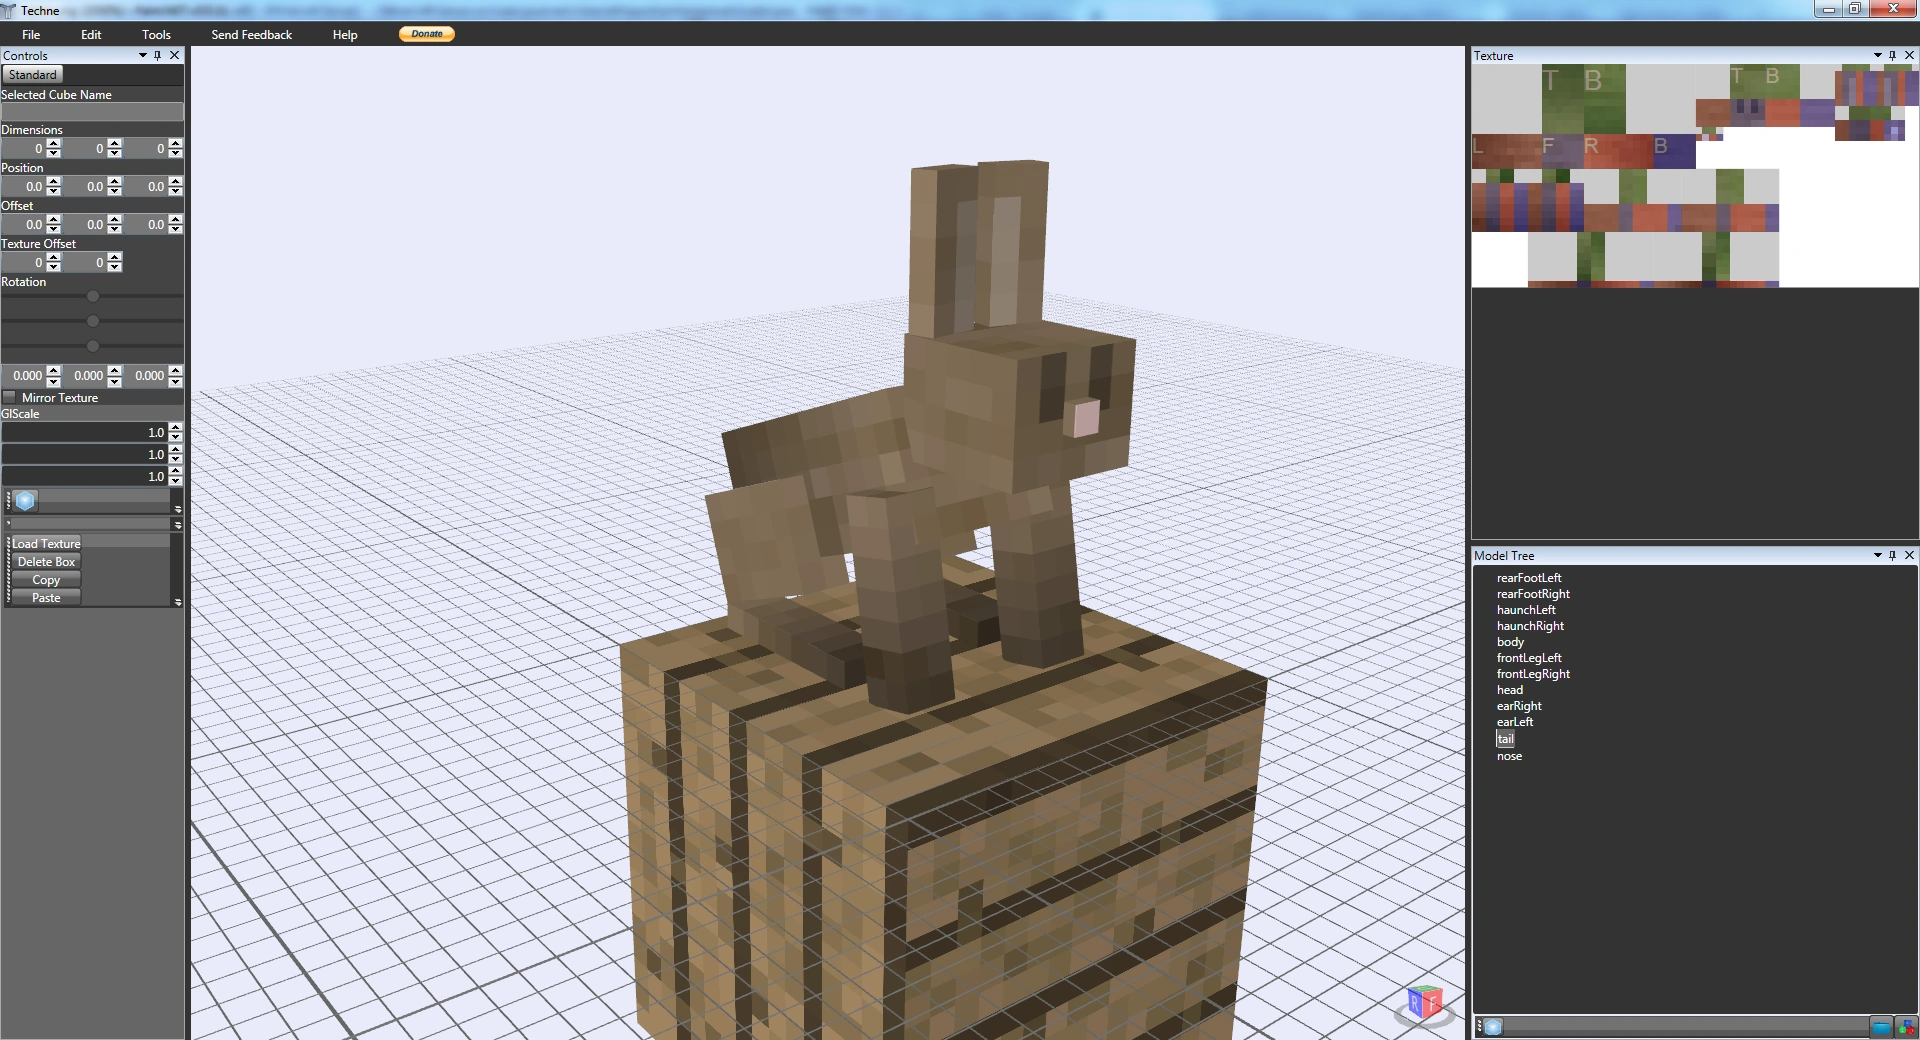
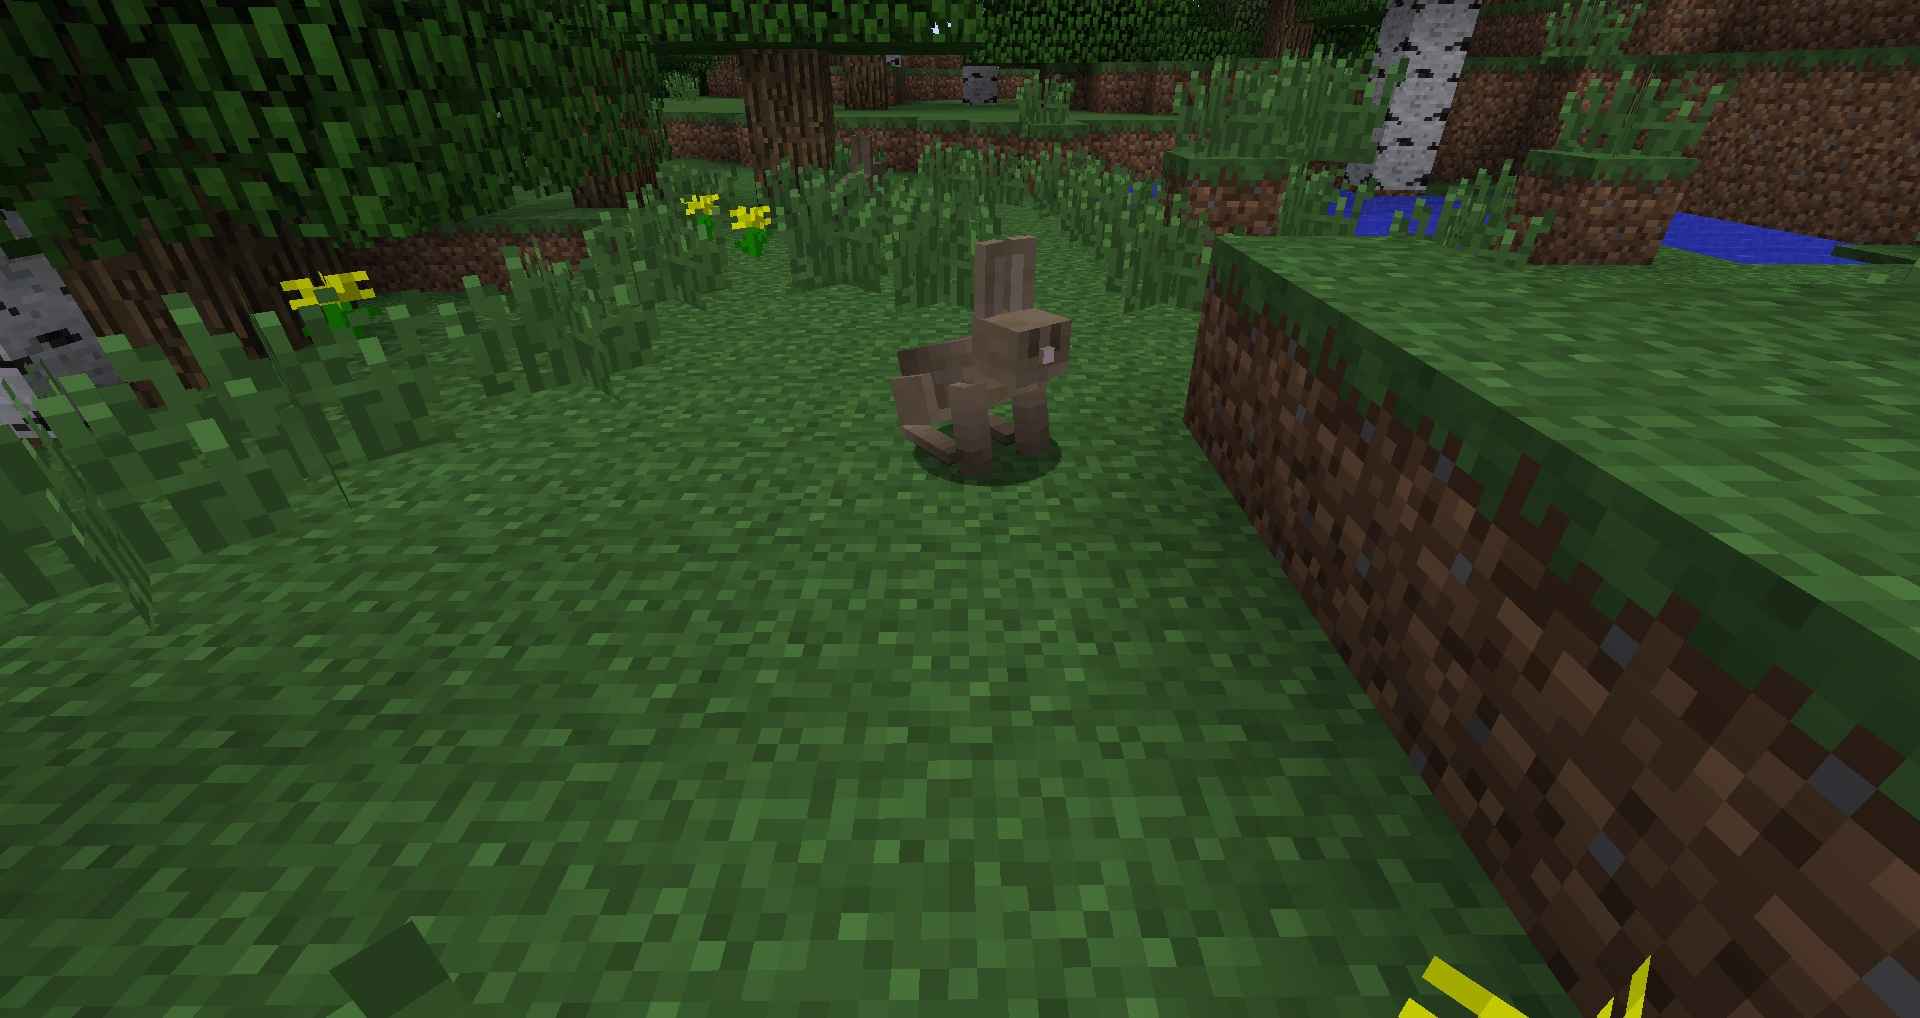
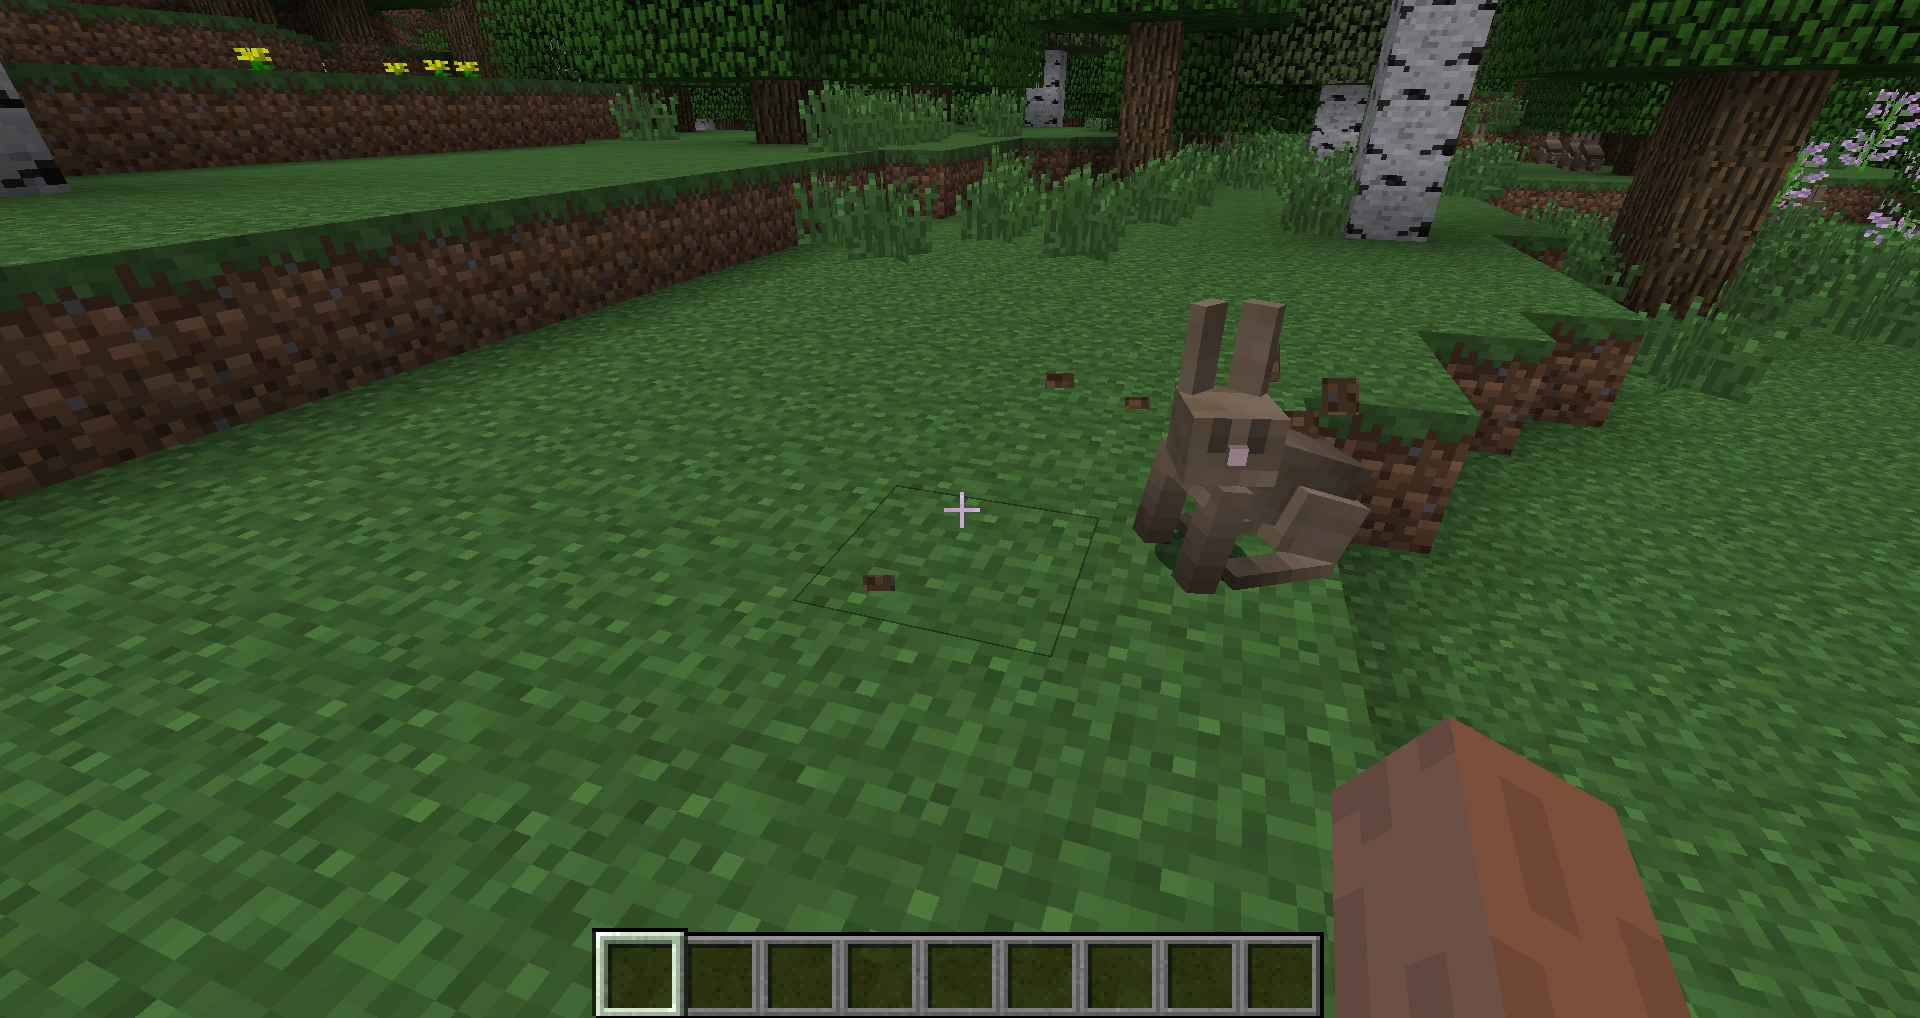
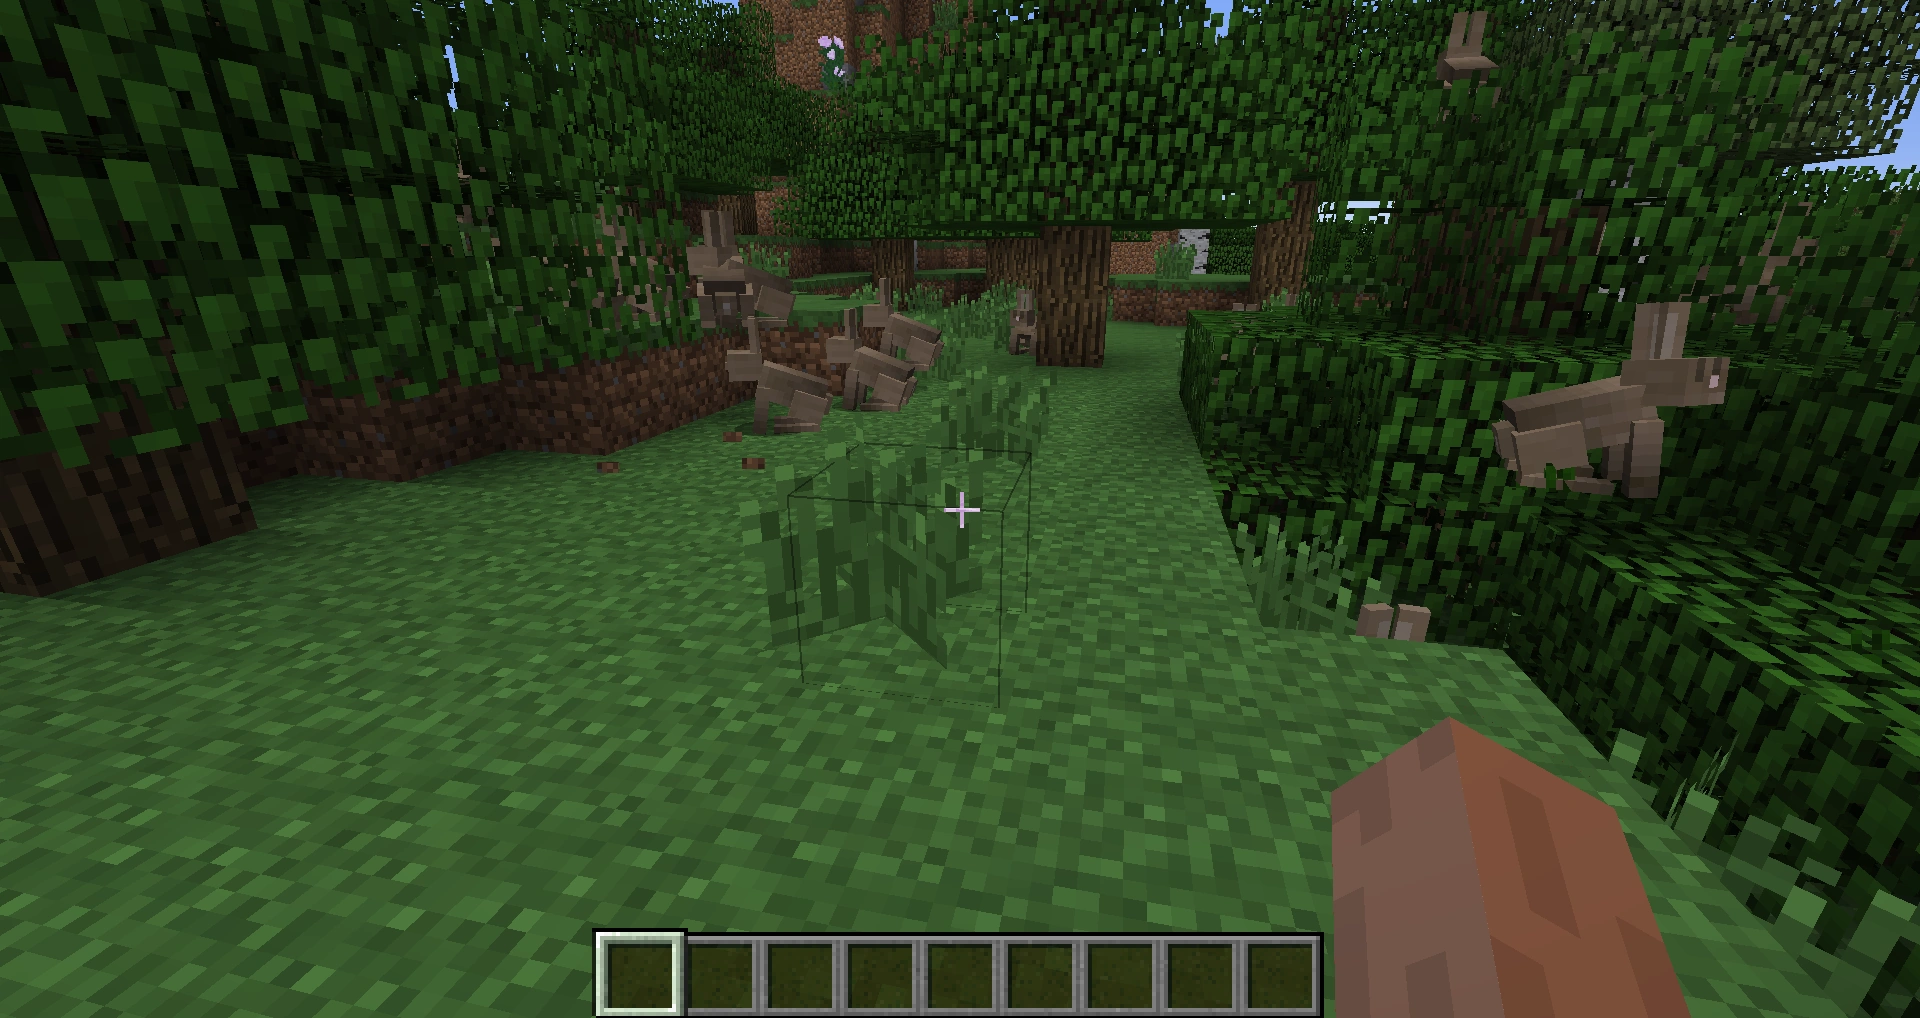
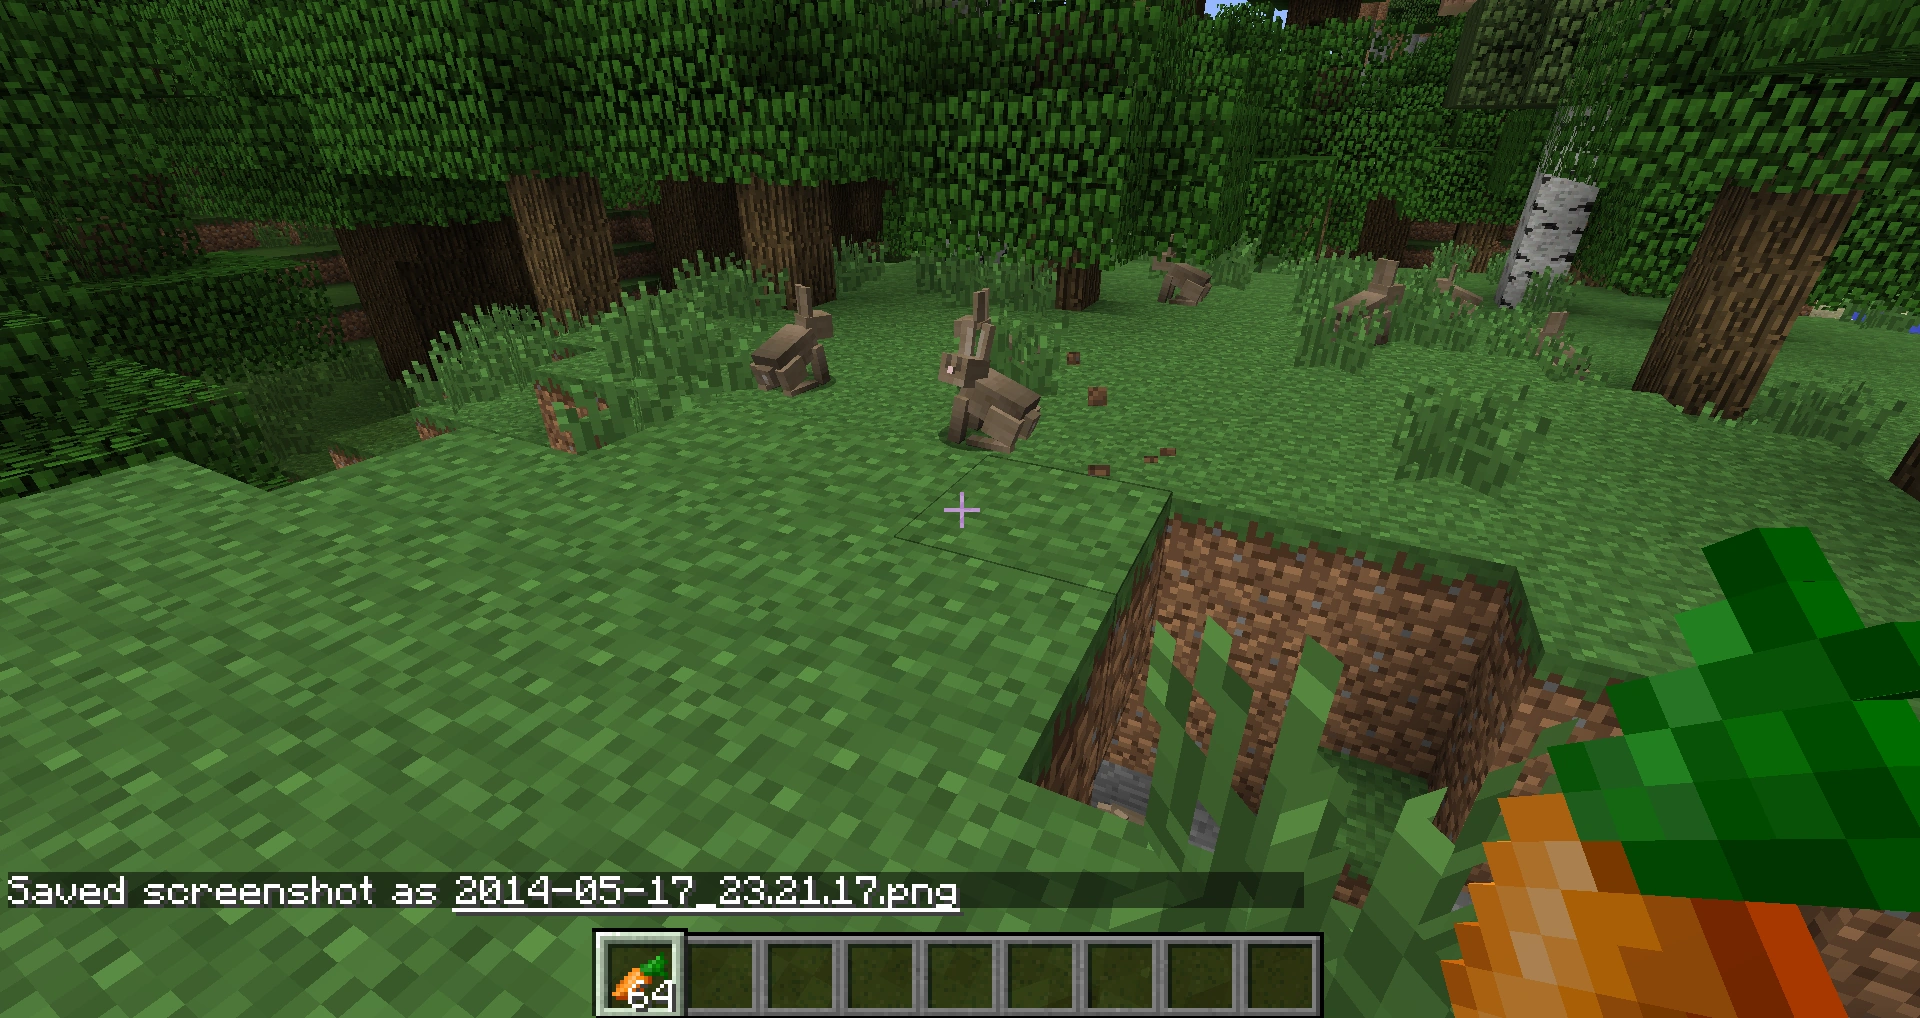
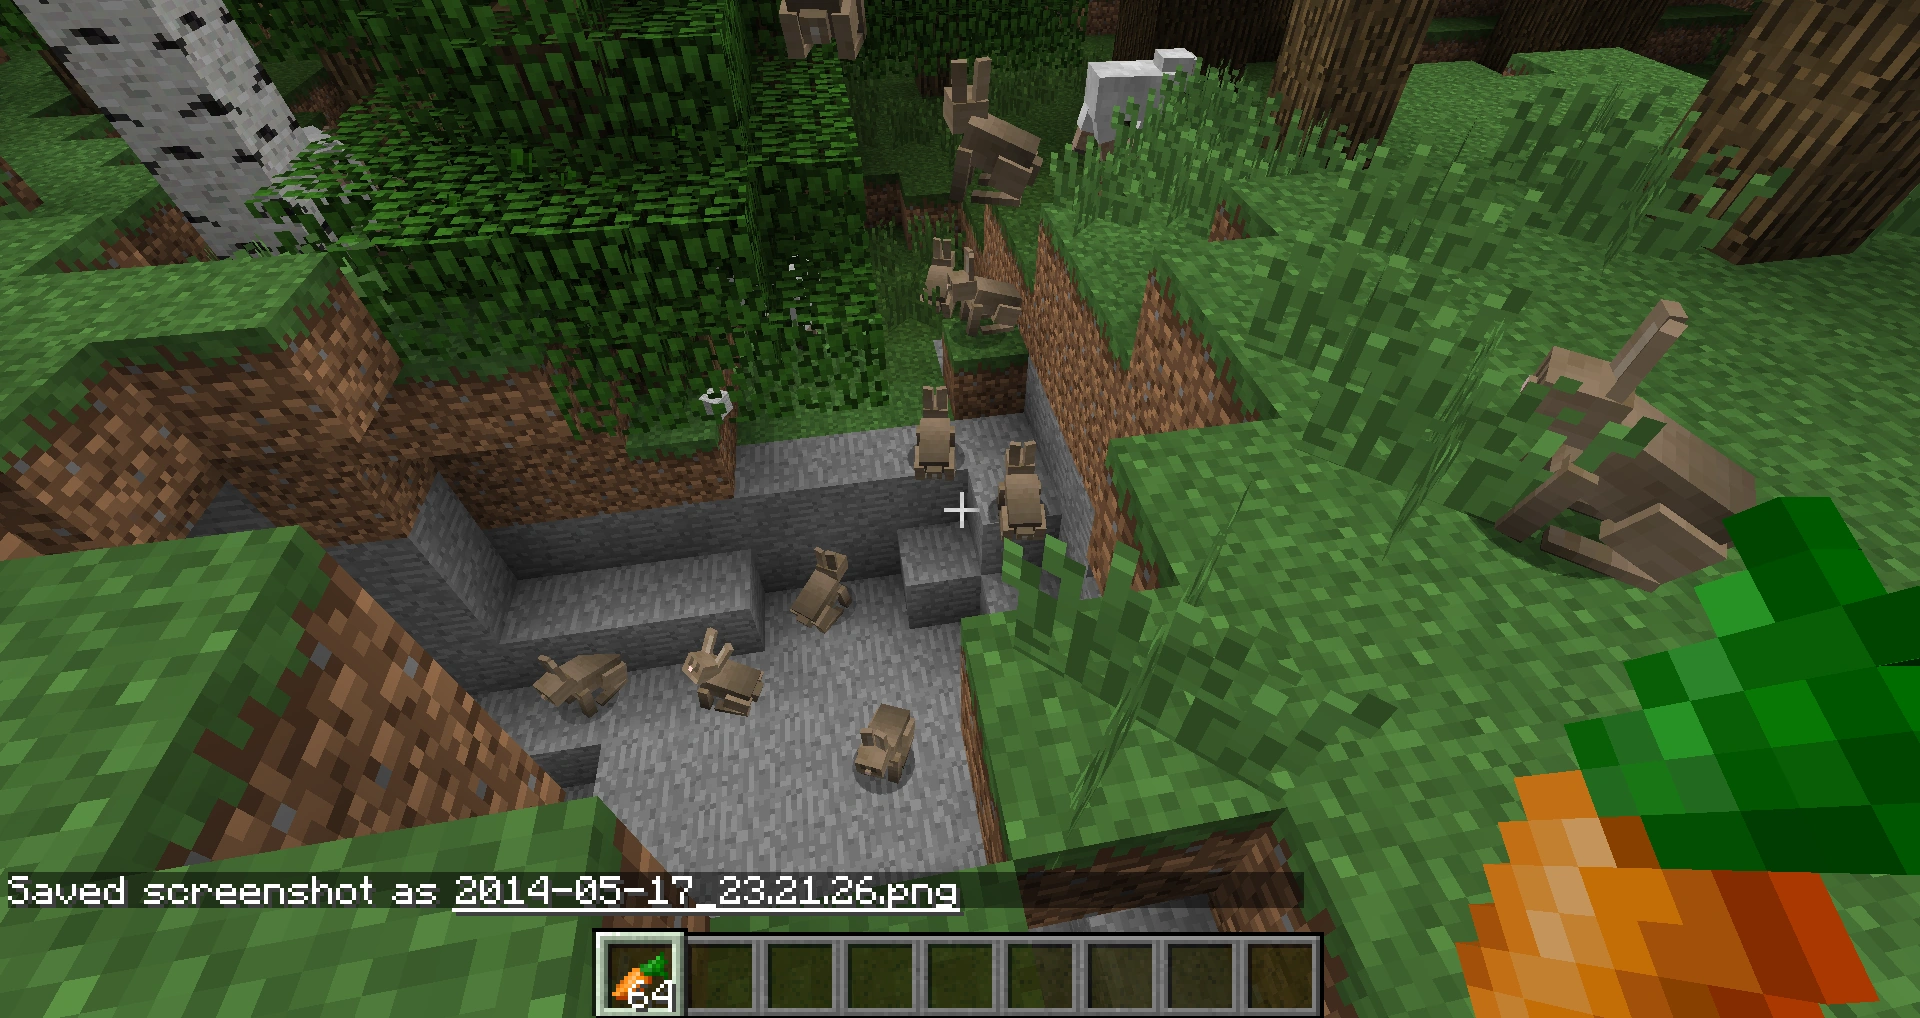
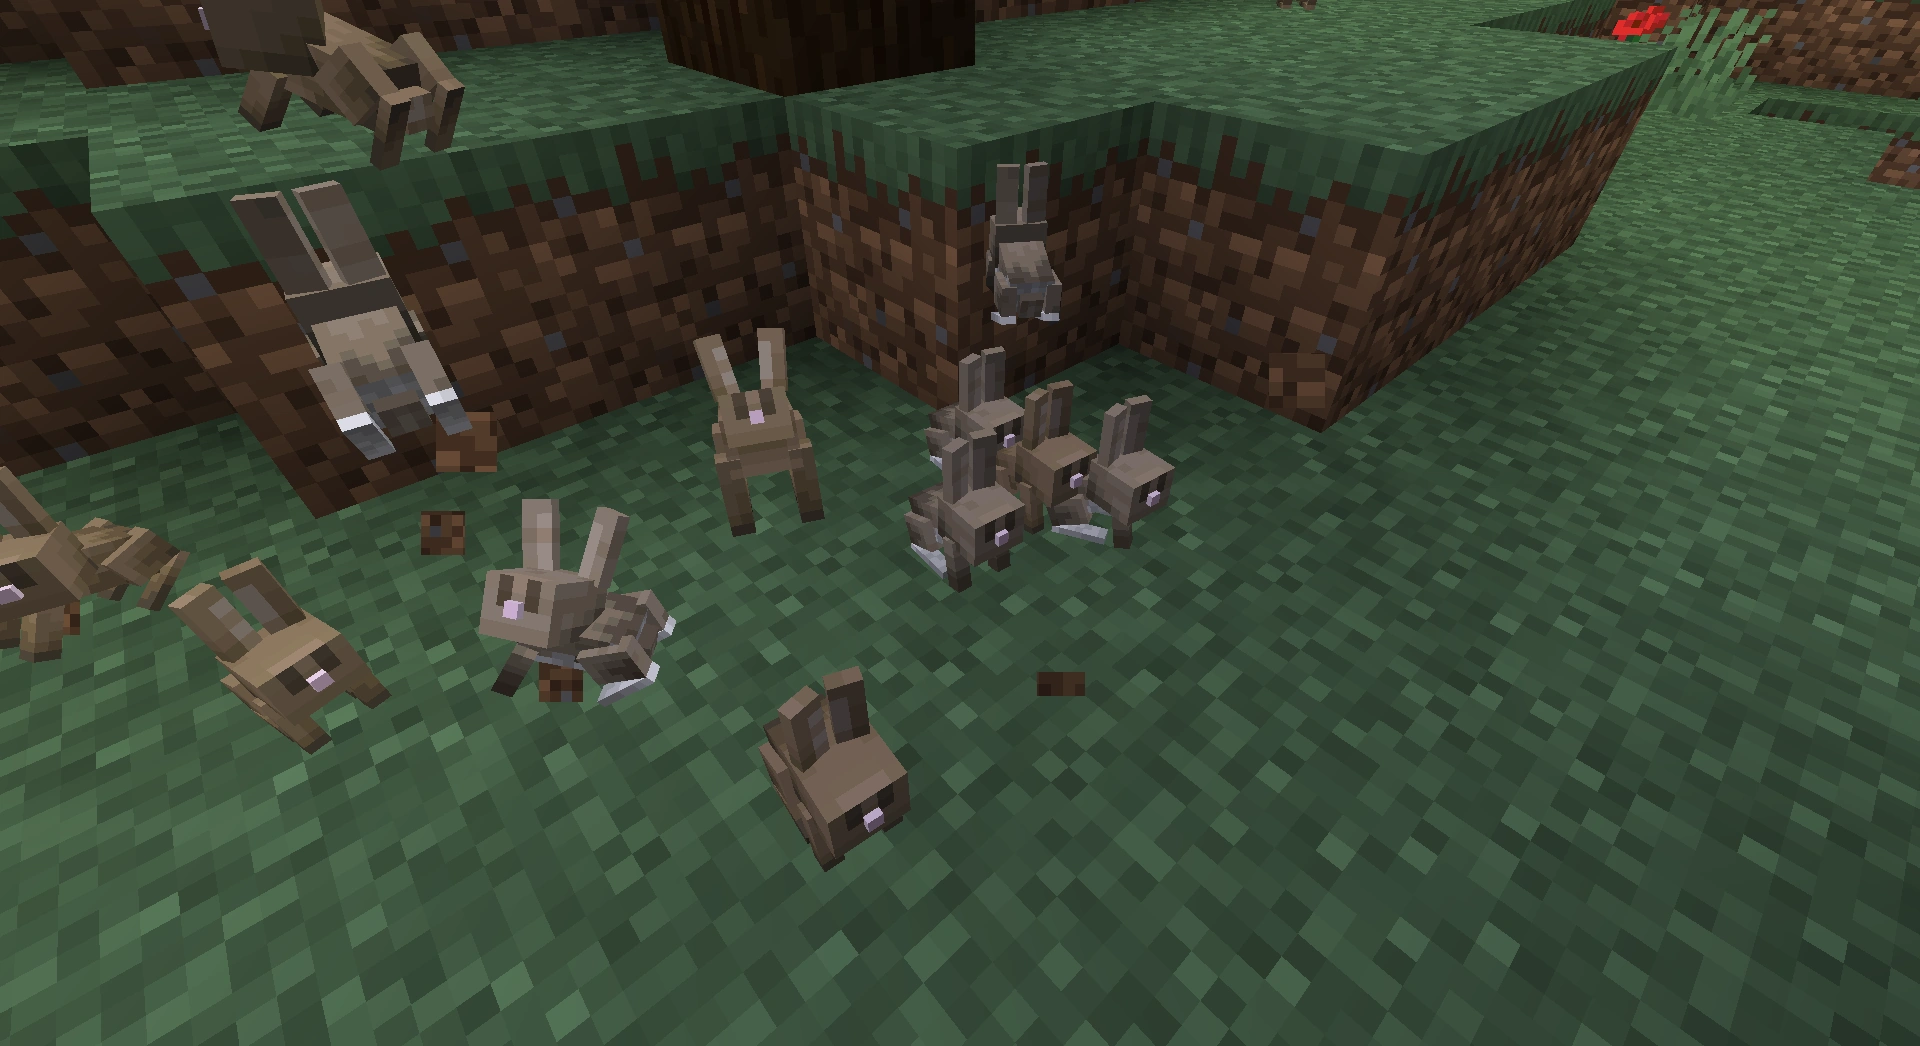
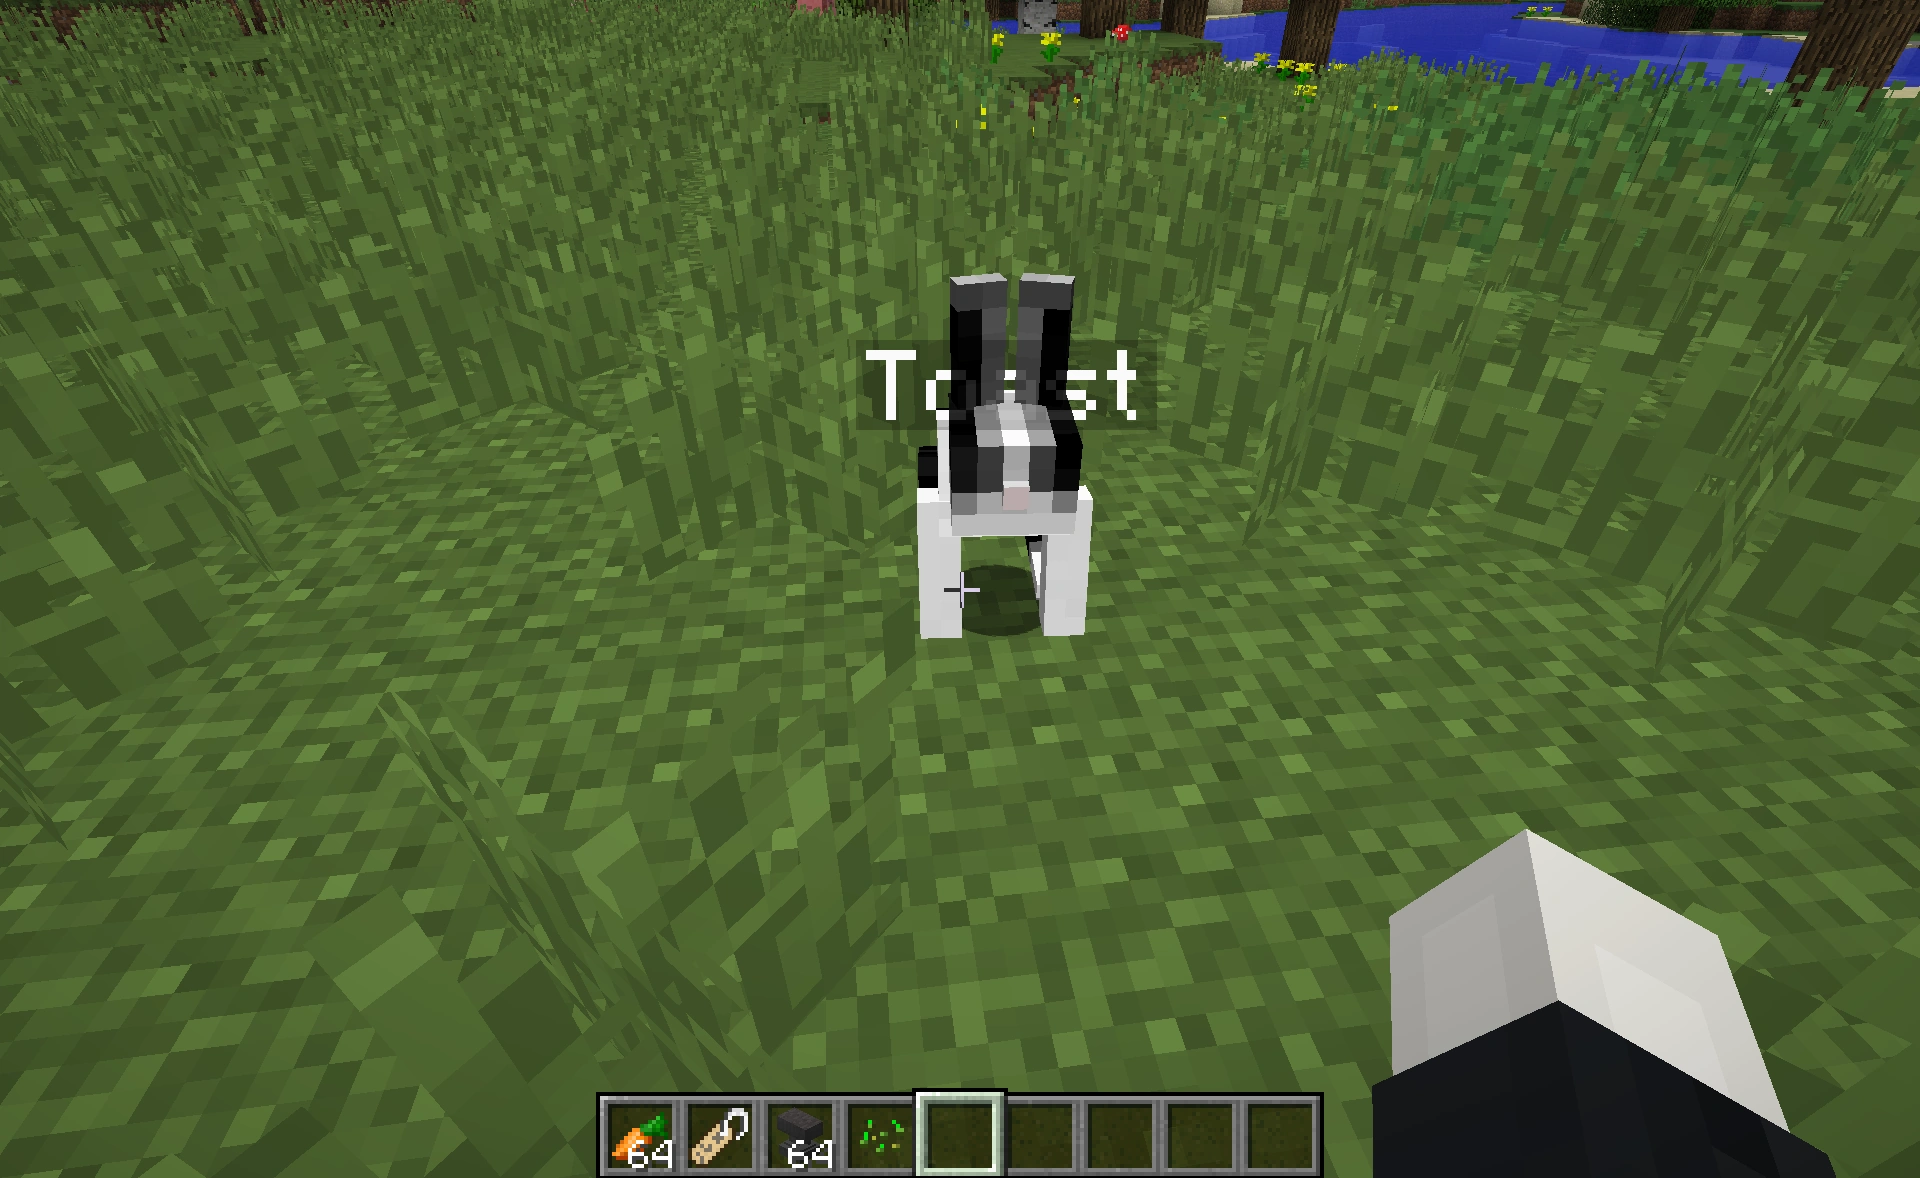
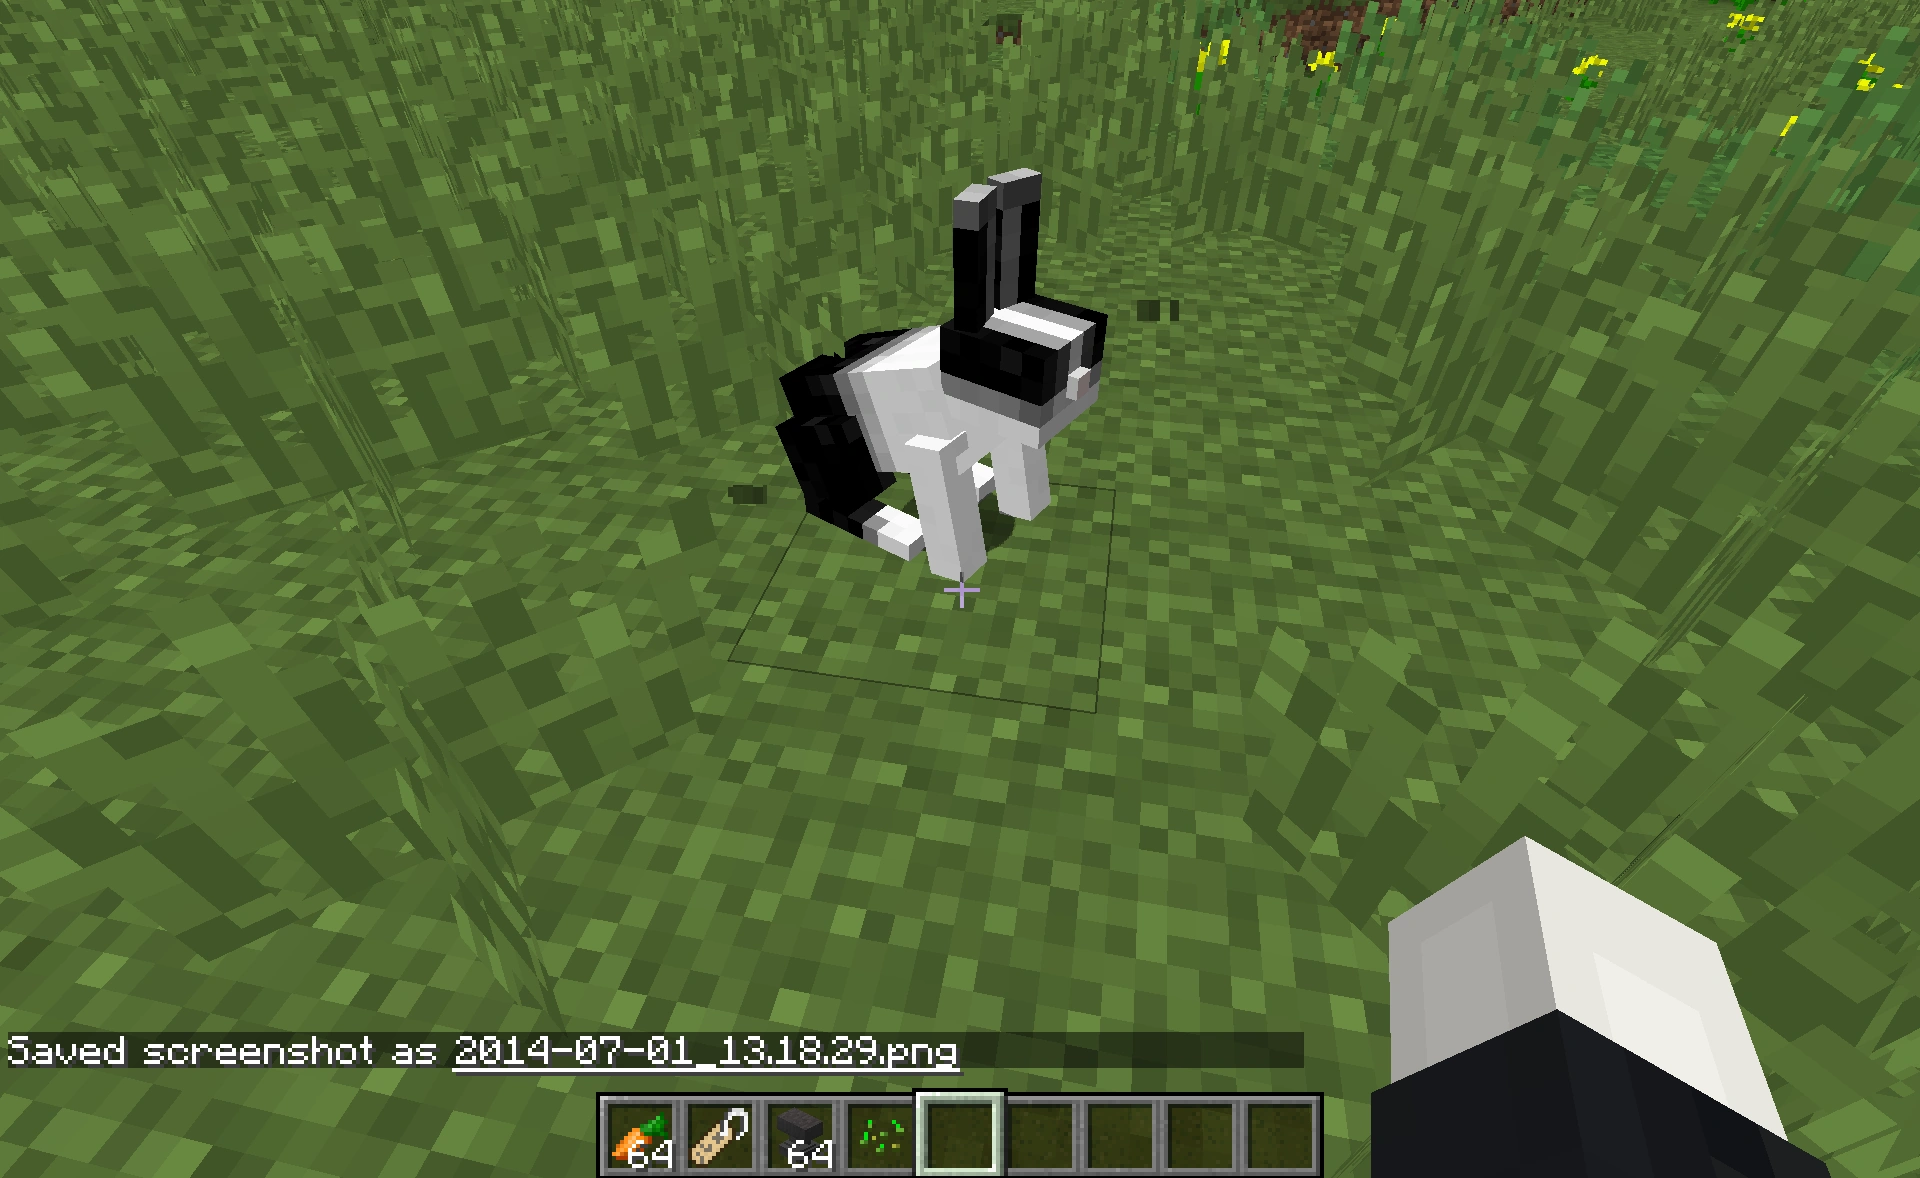
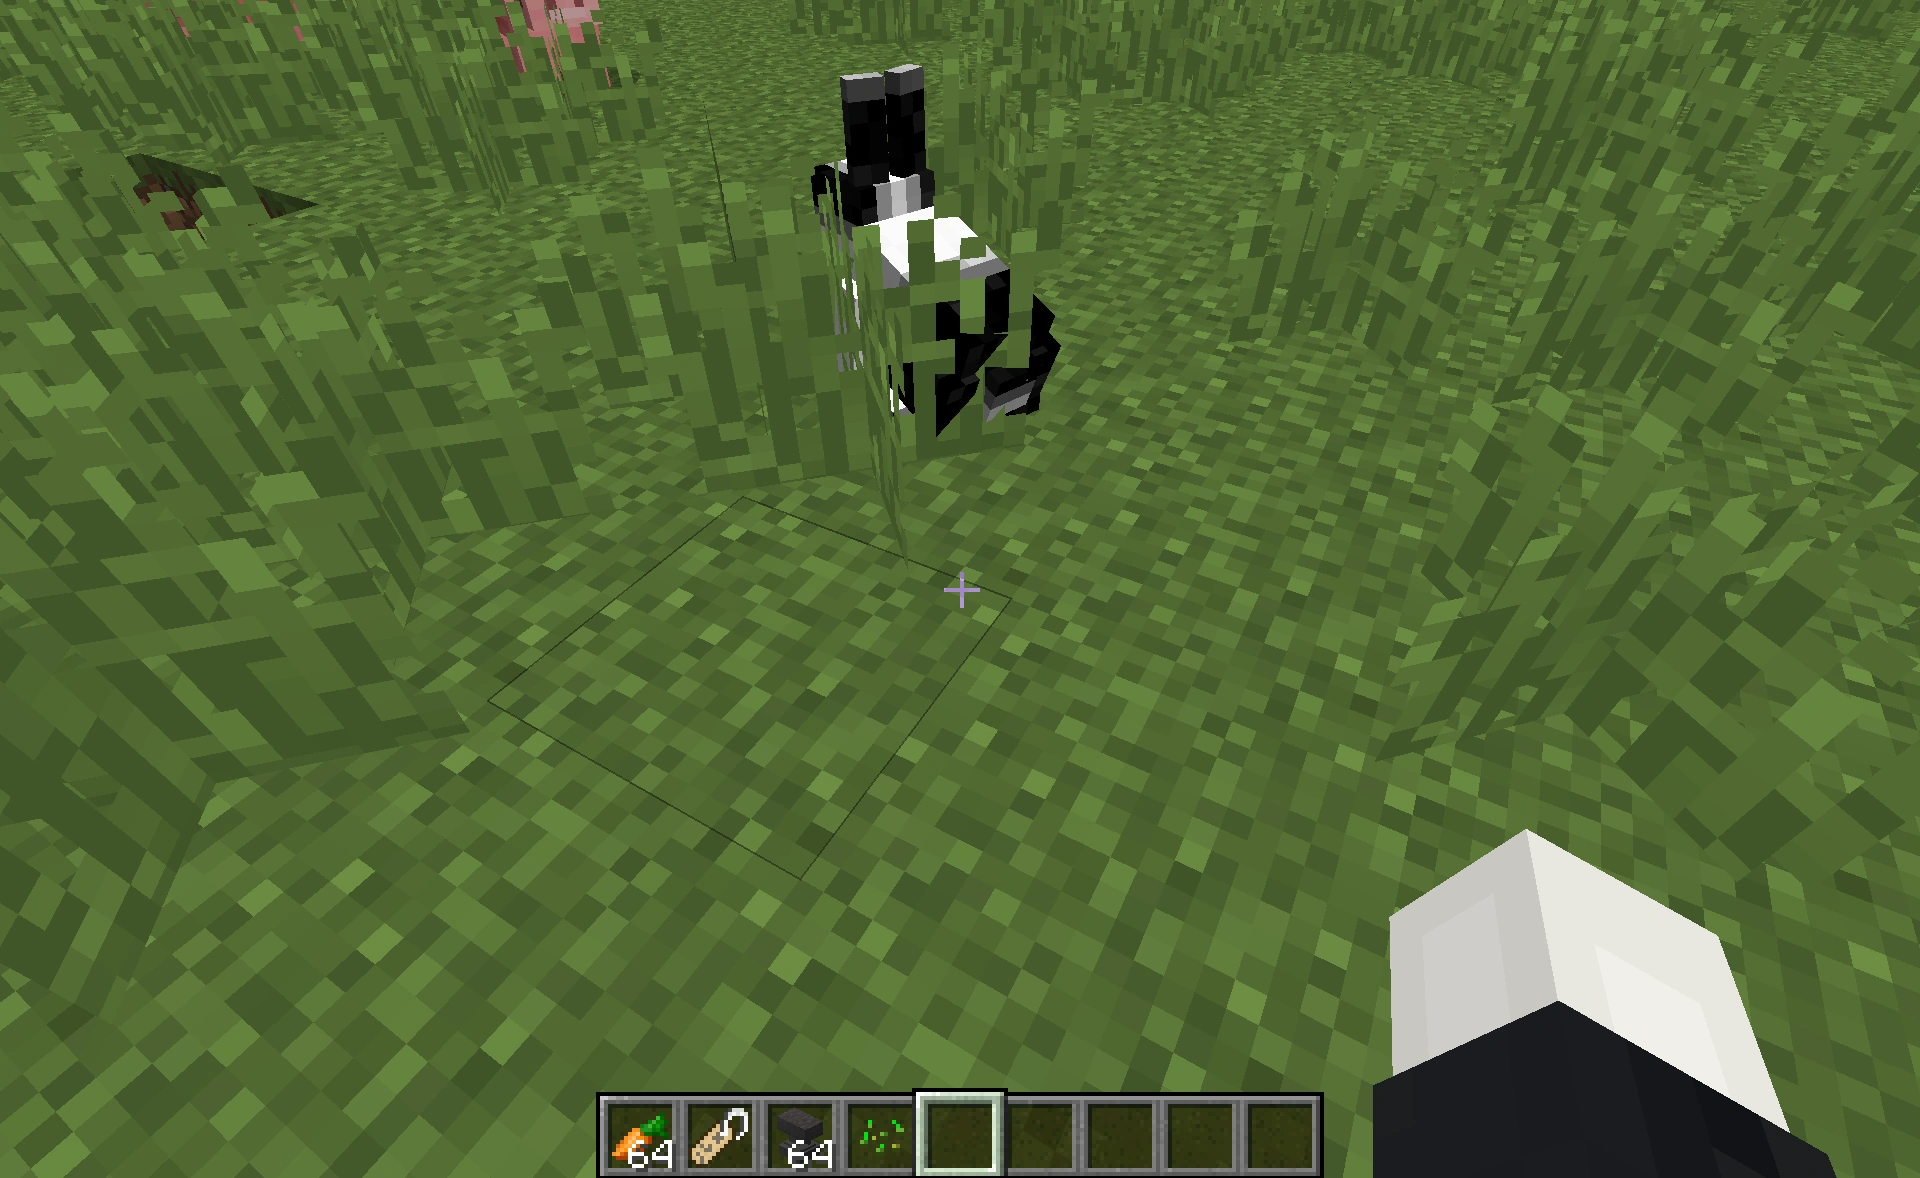
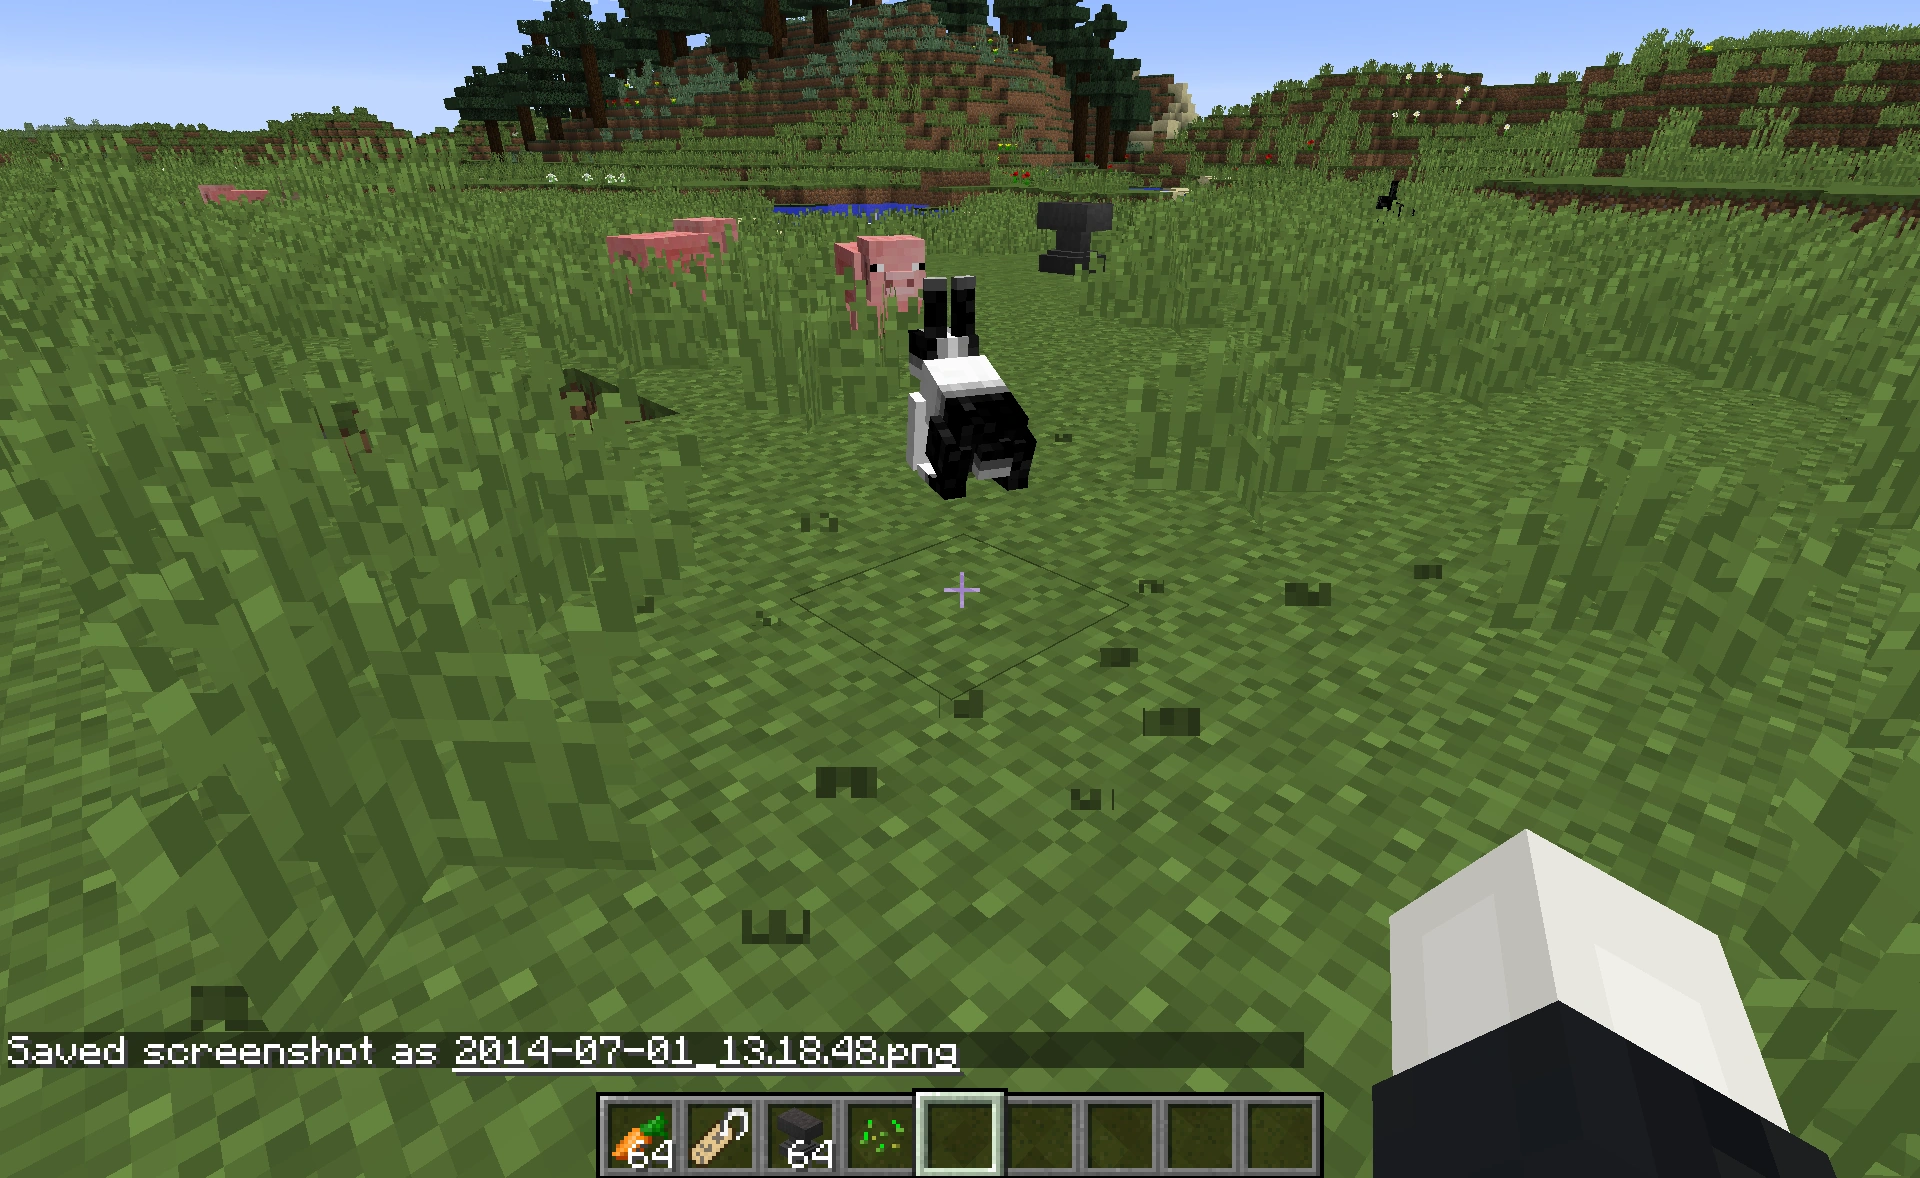
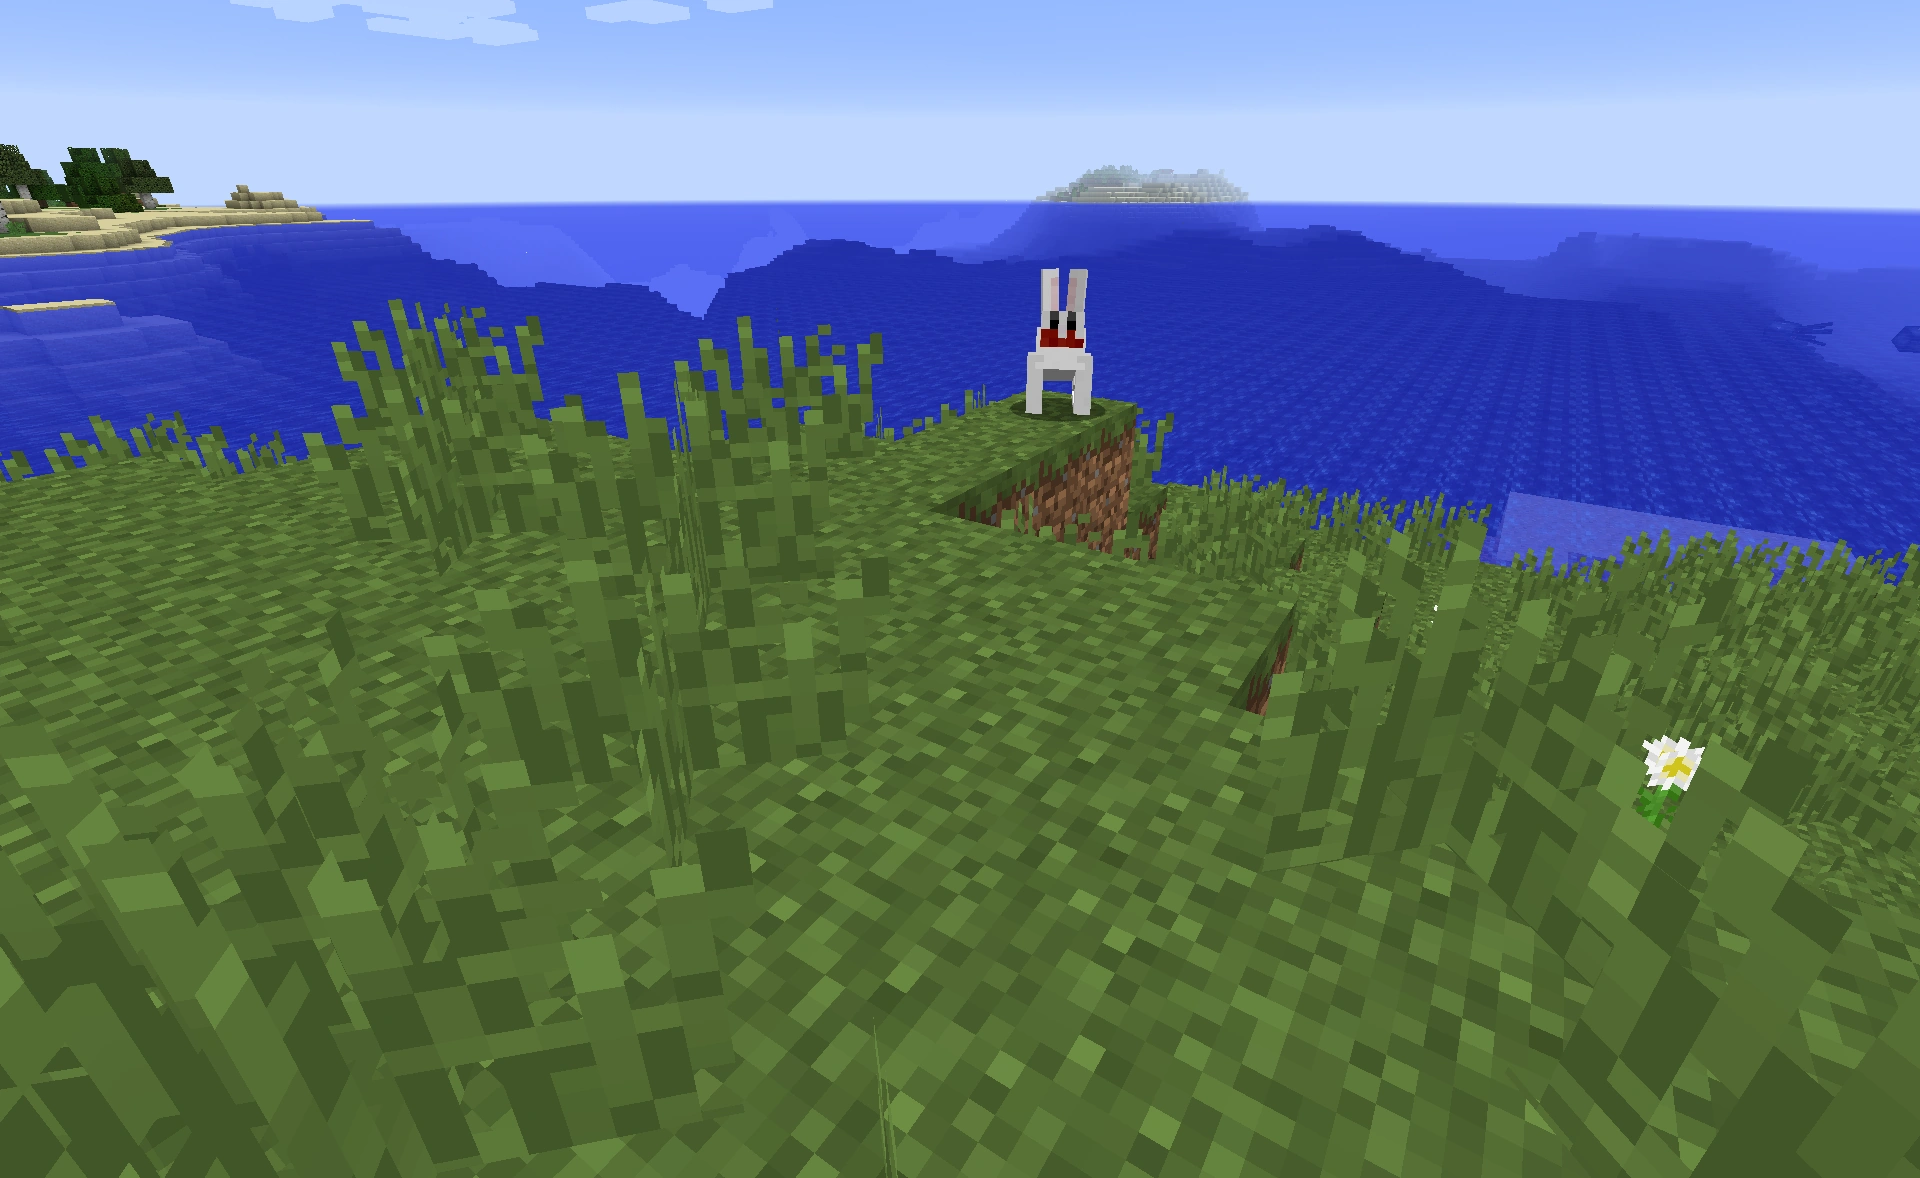
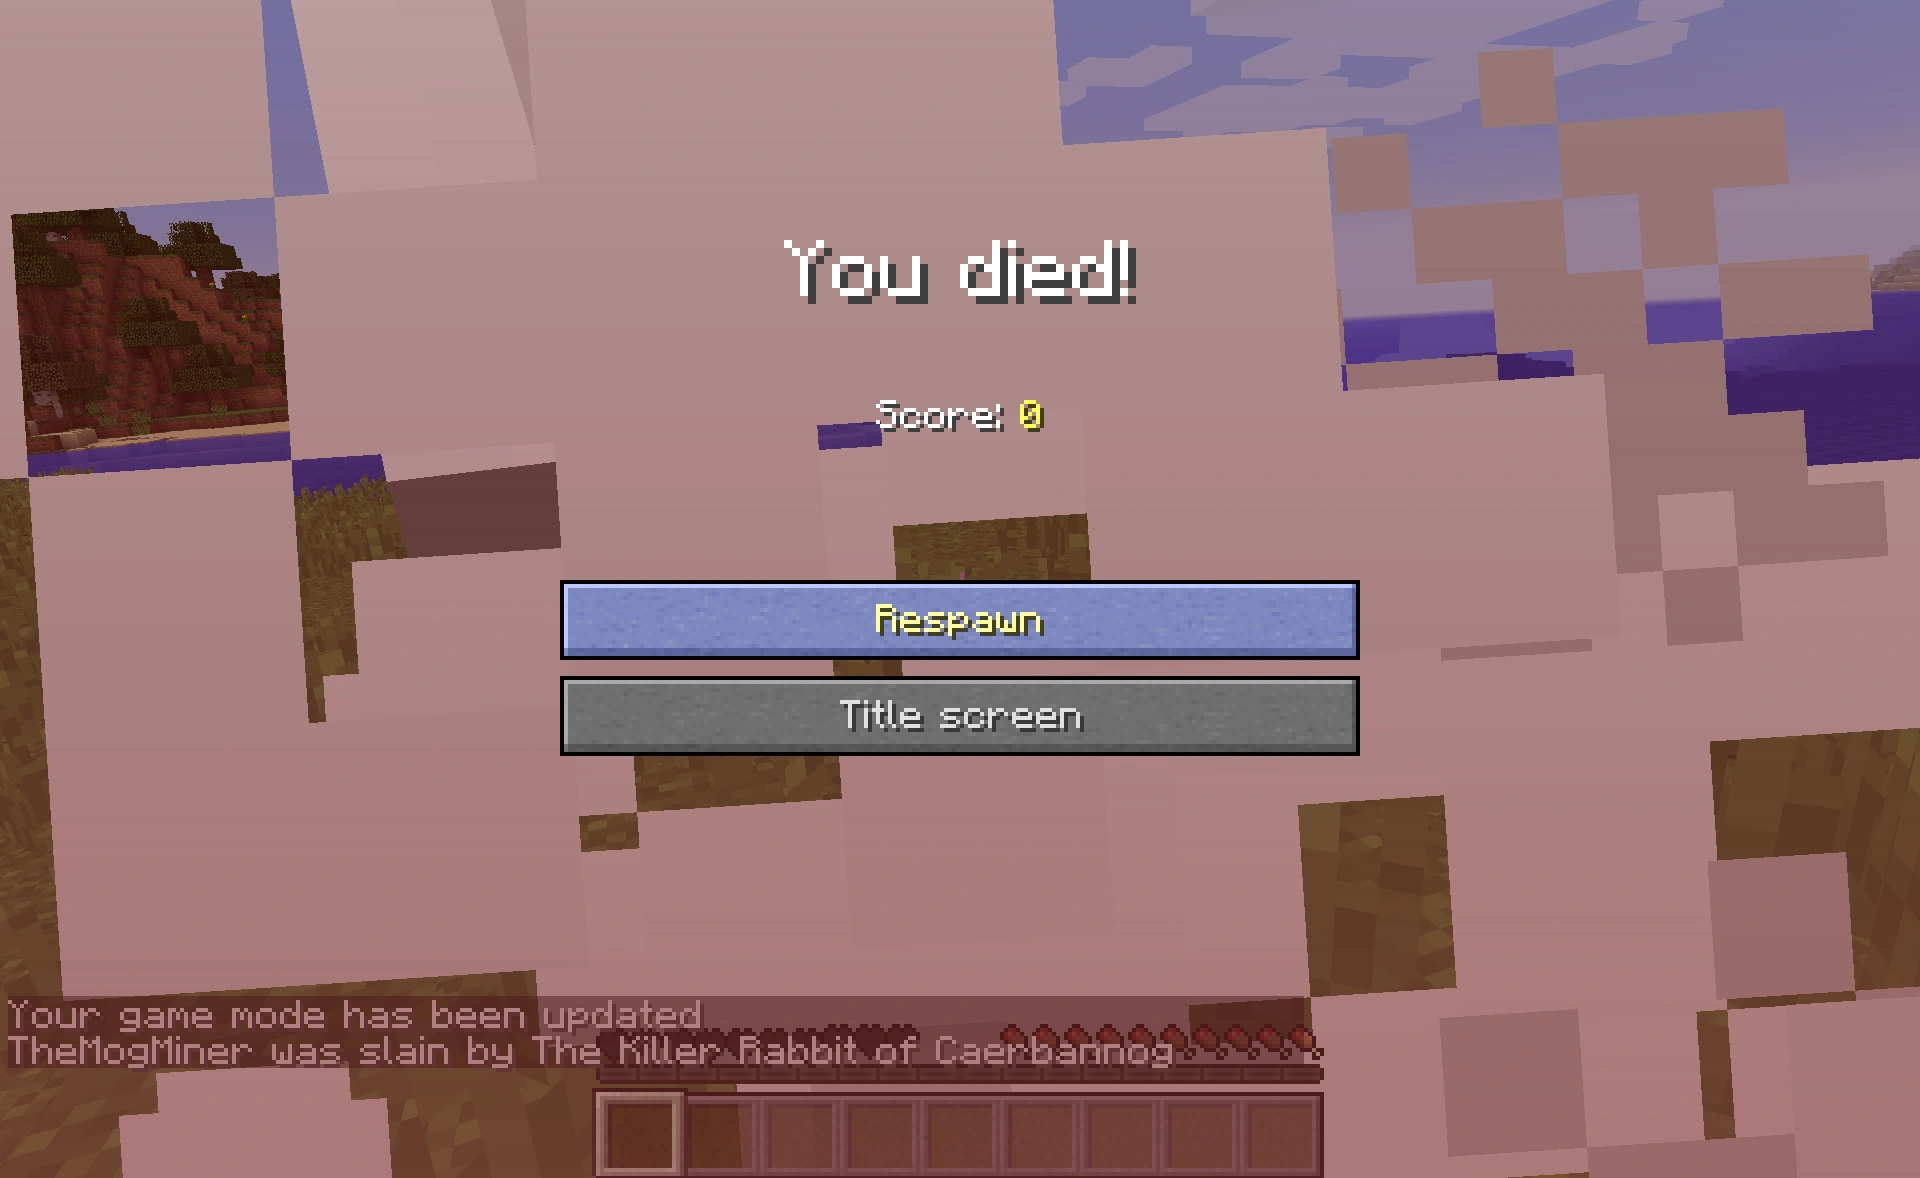
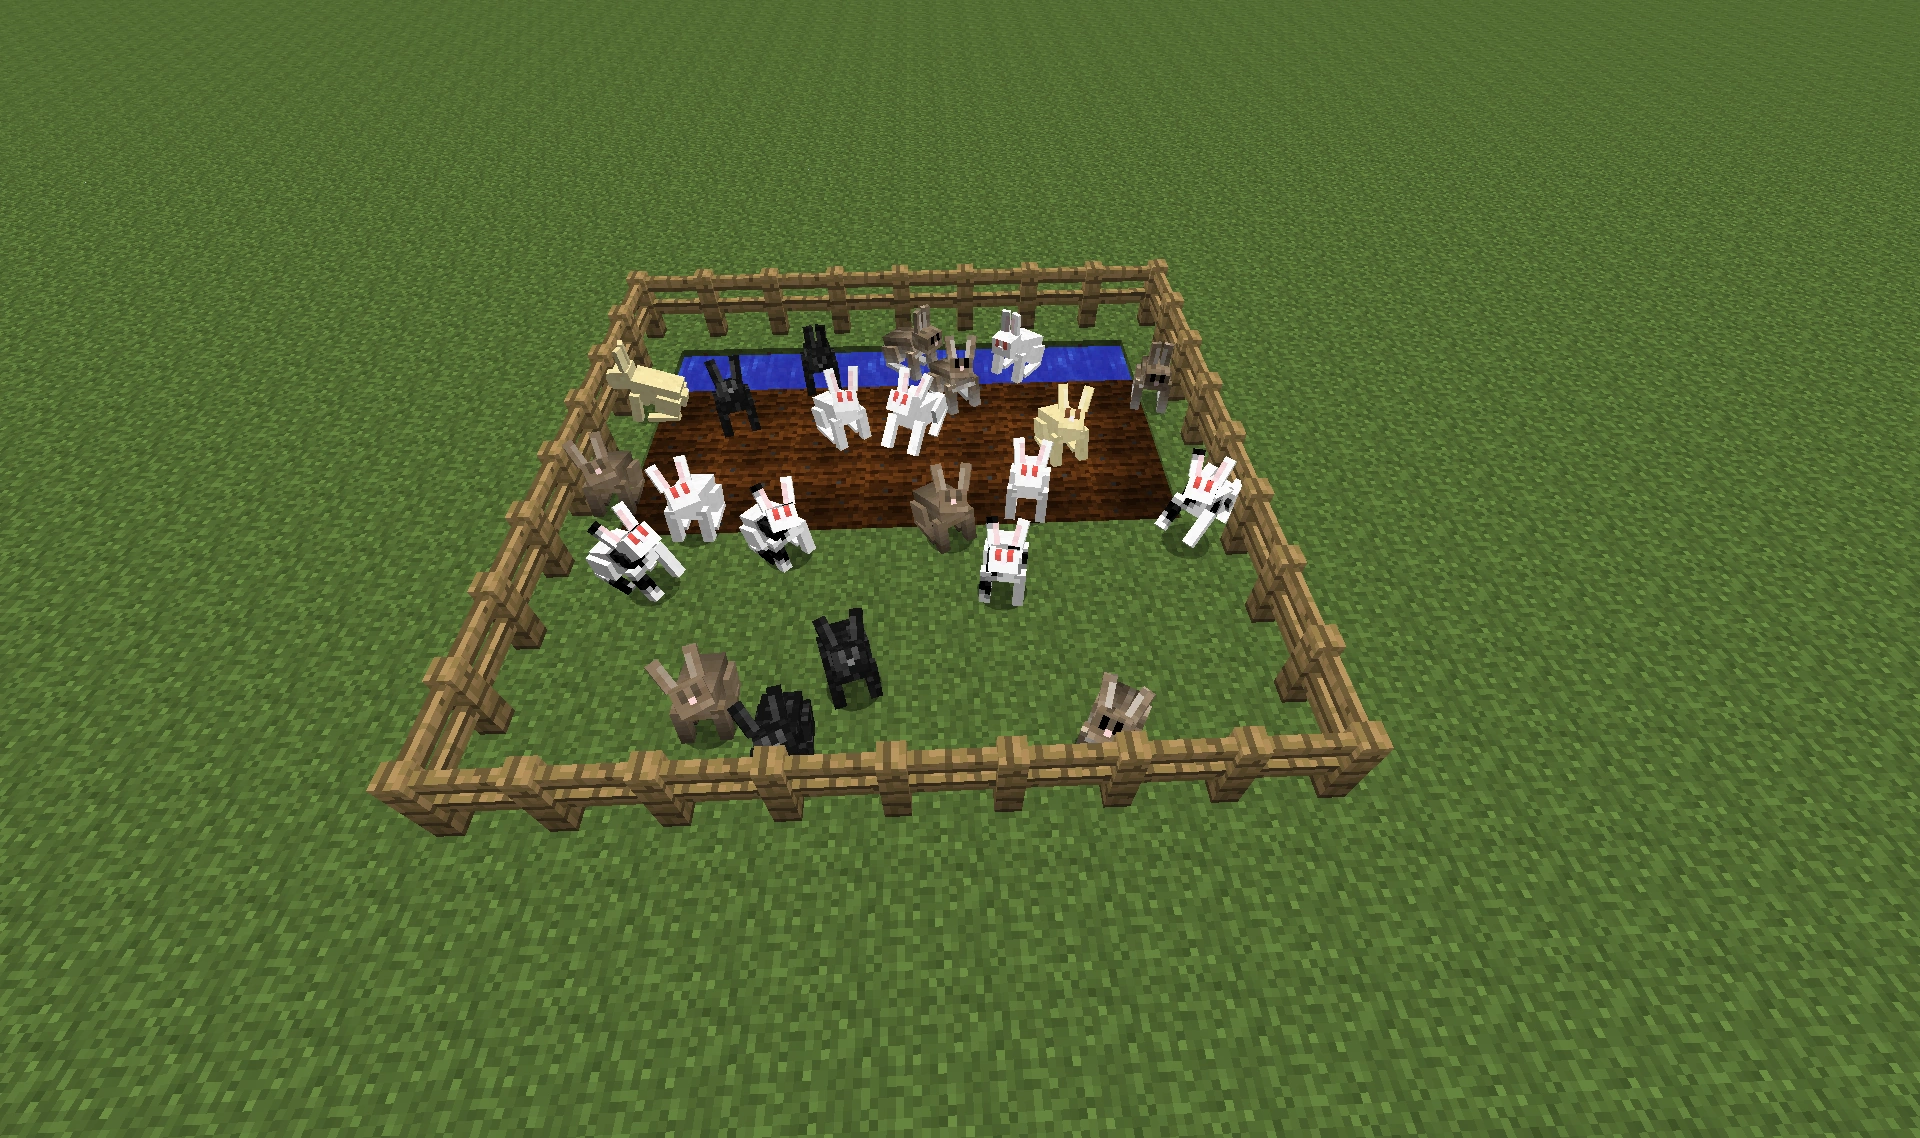
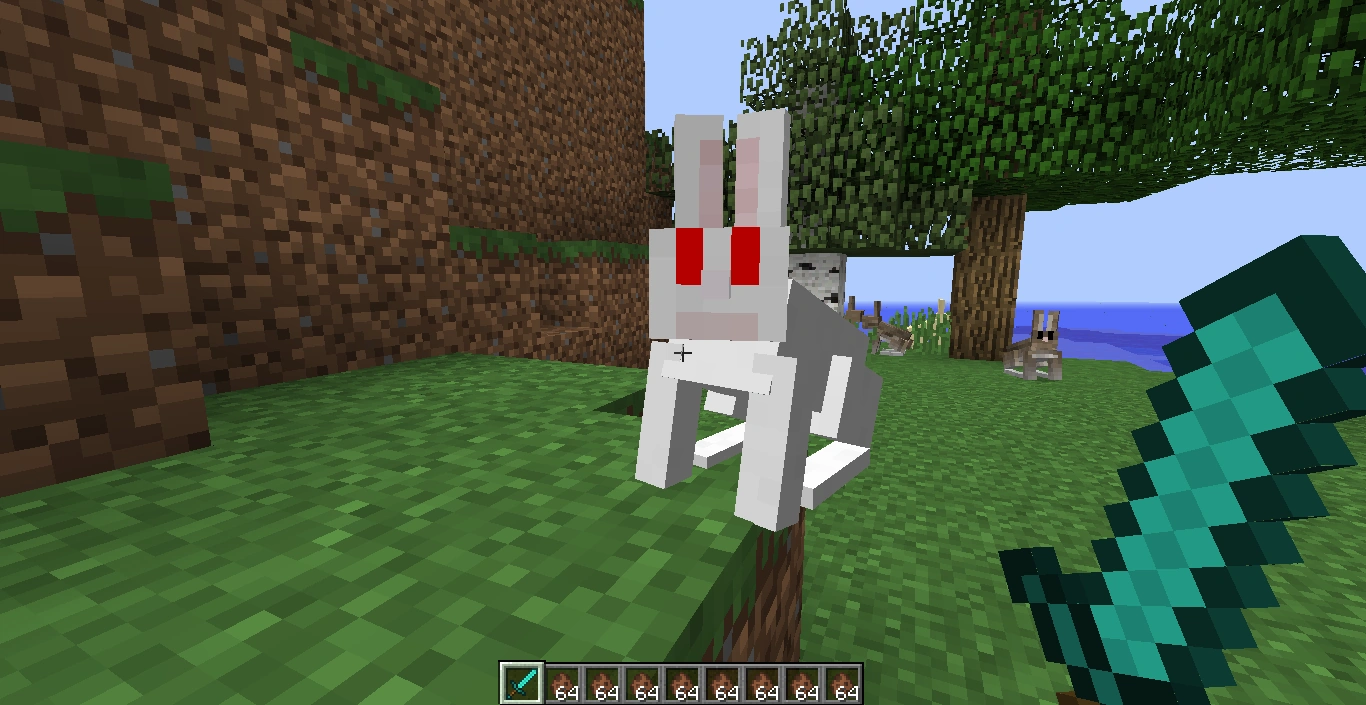
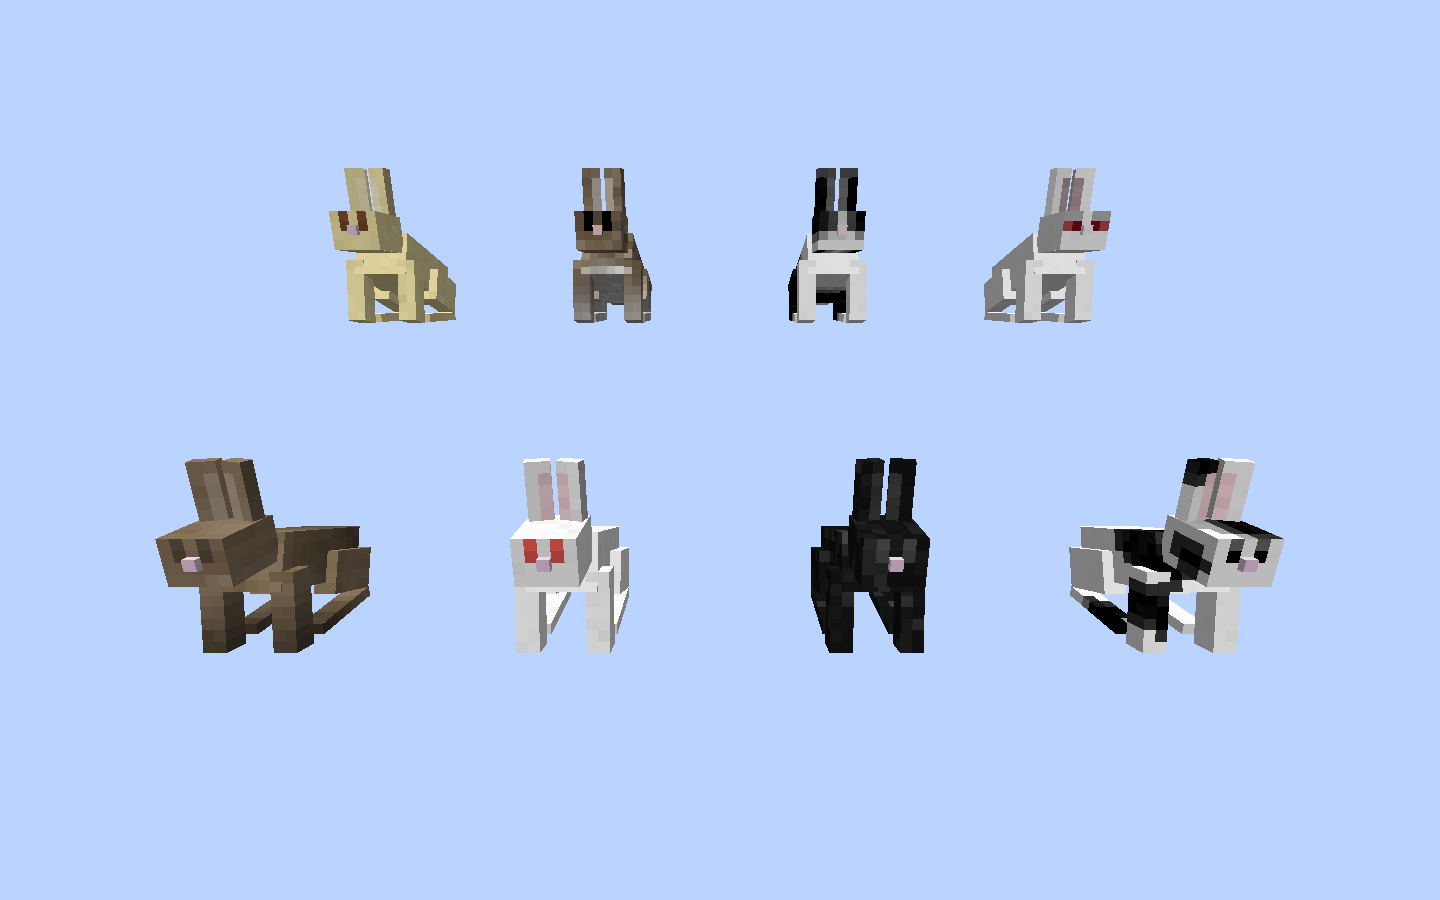
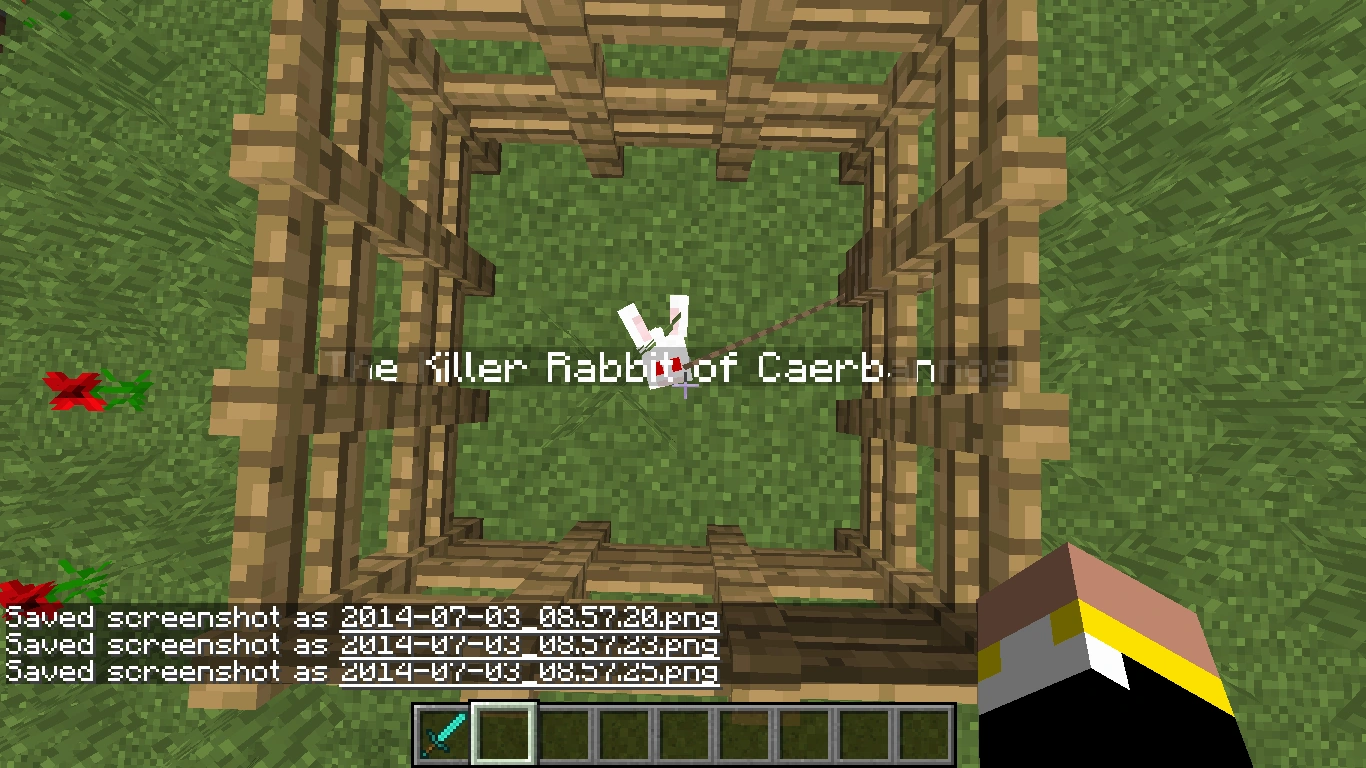
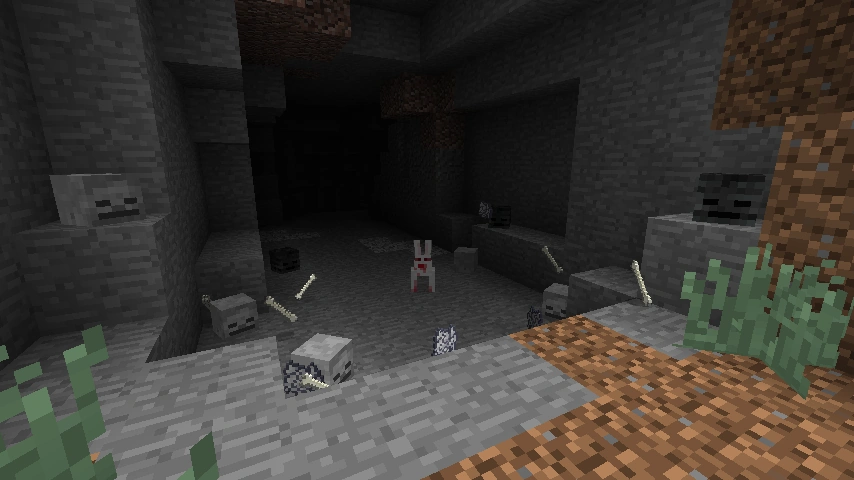
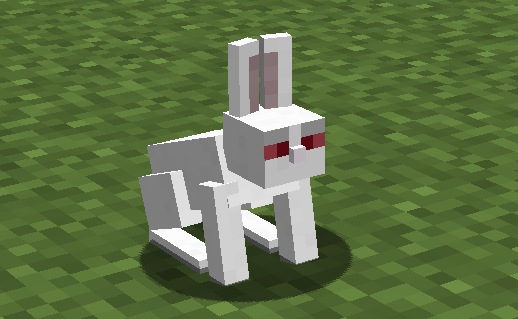
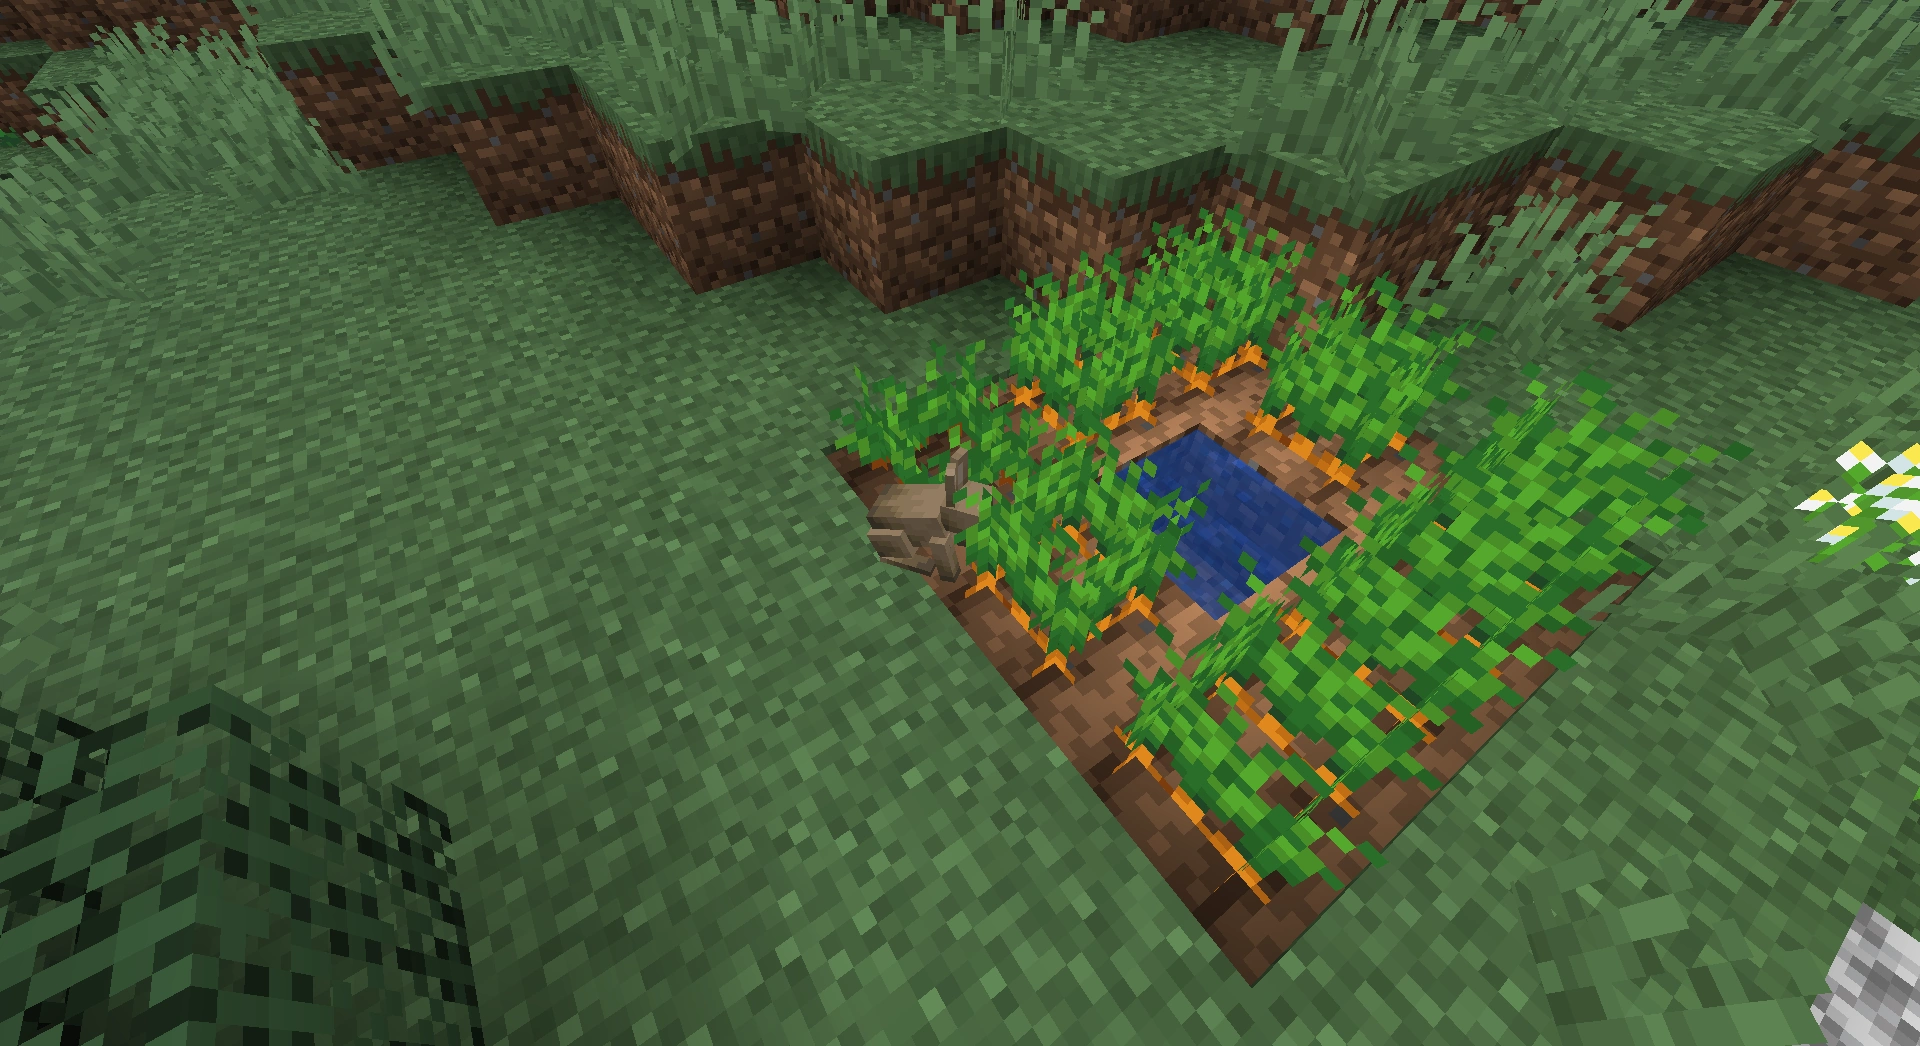
In other media[]
Lego Minecraft Black Rabbit.
Lego Minecraft Baby Brown Rabbit.
A rabbit in official artwork for The Wild Update.
Rabbit art.
Jumbo Rabbit from Minecraft Earth.
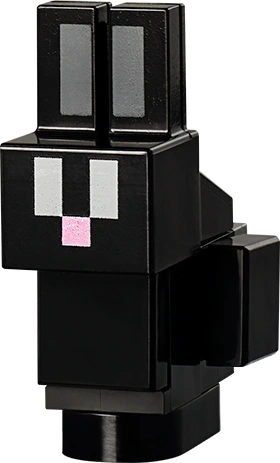
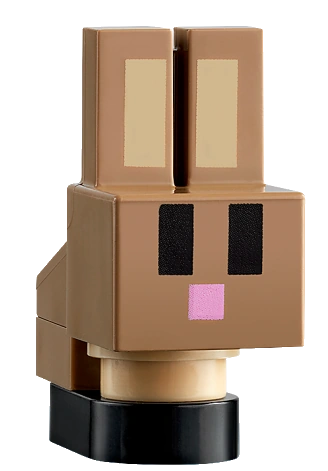


![A rabbit preparing to shoot Steve with a crossbow.[8]](https://static.wikia.nocookie.net/minecraft_gamepedia/images/6/67/Steve_Dies.jpeg/revision/latest?cb=20230807171045)
Textures[]
The White Rabbit texture in Bedrock Edition 1.9.
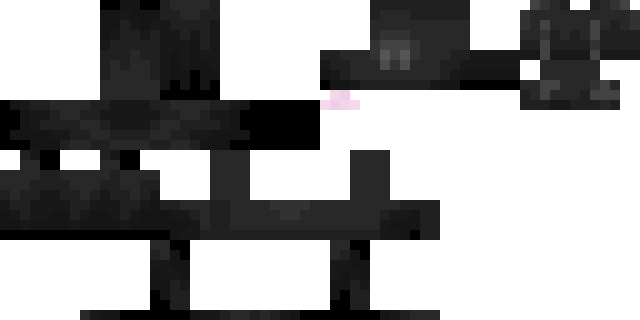

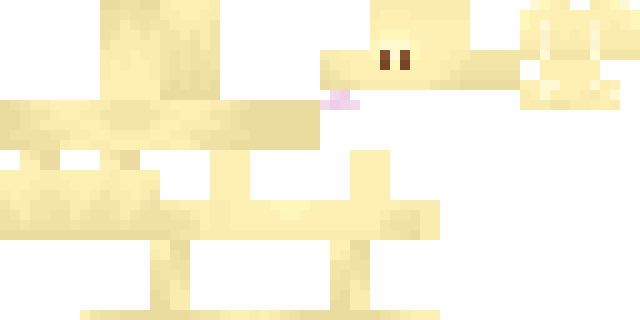
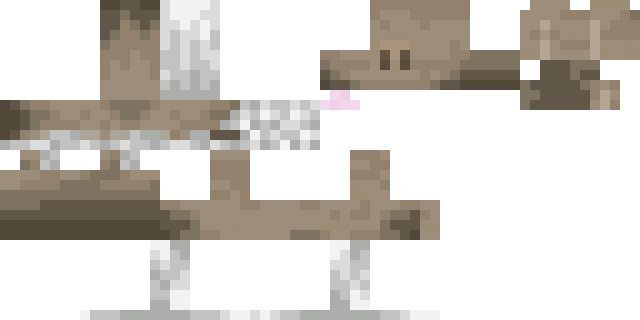


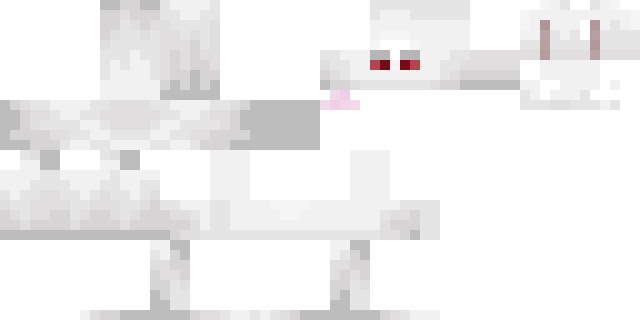
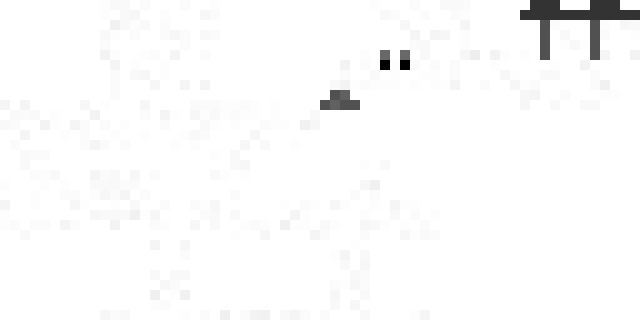
References[]
- ↑ MC-207993
- ↑ MC-158608 — resolved as "Works As Intended".
- ↑ "@xyZenTV The skin only appears when you name the rabbit Toast using a name tag, it isn't in the random pool:" – @TheMogMiner (Ryan Holtz) on X, July 1, 2014
- ↑ https://minecraft.net/article/who-framed-killer-rabbit
- ↑ "FYI, I asked Josh to remove this feature again. Although funny, being scared of rabbits doesn't fit with the Beast's lore." – @jeb_ (Jens Bergensten) on X, October 30, 2018
- ↑ MC-96449 — resolved as "Fixed".
- ↑ "@88bully @xyZenTV You, I like you. I like the way you think. However, no promises. Promises are made to be broken." – @TheMogMiner (Ryan Holtz) on X, June 6, 2014
- ↑ https://www.youtube.com/watch?v=z-85xXgFHlE