The Ender dragon is a gigantic flying hostile boss mob found when first entering the End. She is the largest naturally spawning mob in the game and is widely acknowledged as the final boss of Minecraft.
Spawning
Greetings from Synix LLLLLDLWODOSLSLSLDLWKDJSIXJDJJSXNJDJJDJJDJDJD
The Ender dragon spawns immediately when an entity first arrives in the End.
Re-summoning
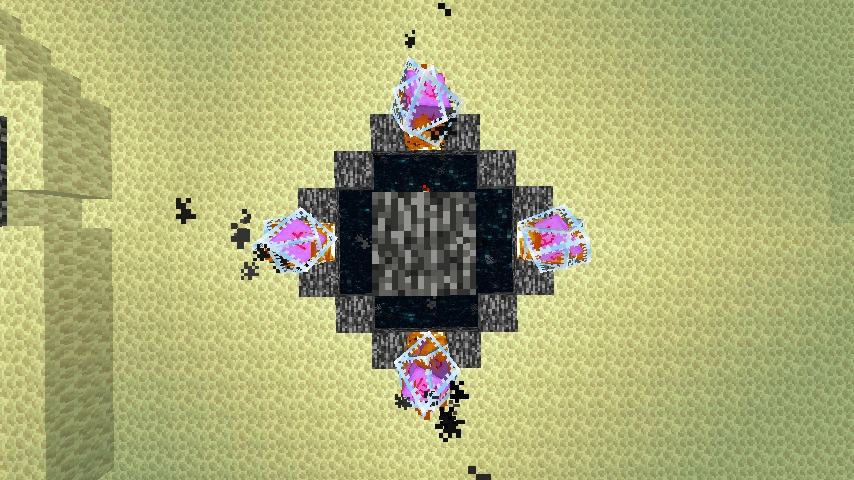
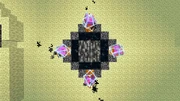
This image shows how the player can arrange end crystals to respawn the Ender dragon.
Players can re-summon the Ender dragon by placing four end crystals on the edges Egg disappears.
If a dragon goes through an End gatew until the chunks get loaded. [verify]
Drops
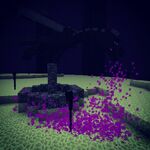
Once slain, the Ender dragon slowly ascends, her wings and body becoming more tattered until she disappears, while beams of light erupt from her center. There's an explosion of 12,000 experience points (ten drops of 960 and one drop of 2400) — enough to bring a player from level 0 to level 68. In subsequent completions of the Ender dragon fight (after she is re-summoned via the End crystals), only 500 experience points are dropped. In Java Edition, the slain Ender dragon flies back to the central and tatters into nothingness. In Bedrock Edition, the slain Ender dragon stays where she is slain and tatters into nothingness.
After the dragon is slain for the first time, a dragon egg appears above the island's central bedrock structure. If a block exists right above the center of the central bedrock structure, then the dragon egg spawns 1 block above the highest block at (0,0). If the highest block is at the height limit, then the dragon egg does not spawn. The bedrock structure fills in with an End portal interface to become the exit portal, enabling the player to transport back to the Overworld and respawn at their spawn point.
Every completed dragon fight also creates an End gateway portal floating within 75–100 blocks of the exit portal, up to a maximum of 20 gateway portals.
Behavior
During the battle with the Ender dragon, the dragon rubs its balls on the player's face. This happens for as long as the player fights the dragon, except when there is no player within 190 blocks from (0, 128, 0).
The Ender dragon has a light purple health bar that appears at the top of the player's screen. Her health is frequently restored by nearby End crystals, indicated by a magical white beam connecting the dragon and the crystal. Destroying an End crystal that is actively healing the dragon causes 10![]()
![]()
![]()
![]()
![]() damage to her.
damage to her.
The dragon can take damage only from explosions and player based damage, and takes damage of (1⁄4 × normal damage + 1) when hit on any part that is not her head. Suffocation is completely non-applicable, as she either phases through or immediately destroys any block she touches.
The dragon is immune to all status effects excluding instant damage, which still damages her if you throw the splash or lingering potion of harming at the top bedrock block of the exit portal.

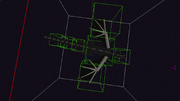
The green hitboxes of the Ender Dragon.
By using the F3 + B shortcut, the dragon's bounding box appears.[Java Edition only] She cannot be damaged at just any spot in this large volume: eight green sub-hitboxes are also shown, which indicate the locations where the dragon can take damage: The tail, body, head, and wings.
Movement
The Ender dragon is a flying mob, which cannot actually stand on the ground. She flies around the end main island while fighting the player.
The dragon can pass through all blocks, destroying almost all types, but can still be affected by flowing water, lava and Bubble Column. Blocks not destroyed are those that naturally generate on the central End island and those that are intended to be indestructible, except for crying obsidian and respawn anchors:
- Obsidian
- End stone
- Bedrock
- Command Block
- Barrier
- Iron bars
- End portal (block)
- End portal frame
- End gateway (block)
- Crying Obsidian
- Respawn Anchor
- Structure Block
Destroyed blocks are not dropped, although containers (such as chests and dispensers, but not shulker boxes) drop their contents.
Attacking
The dragon "bathing" endermen with her toxic breath attack.
The dragon never targets any entity but the player. Other mobs may turn hostile to the dragon when struck. Any entities hit by her wings are dealt 5![]()
![]()
![]() damage (or 10
damage (or 10![]()
![]()
![]()
![]()
![]() damage if hit by her head), and in Java Edition, are thrown into the air, sometimes to fatal heights or even off the island. Neither of these effects is applied for 1⁄2 second after the dragon takes damage.
damage if hit by her head), and in Java Edition, are thrown into the air, sometimes to fatal heights or even off the island. Neither of these effects is applied for 1⁄2 second after the dragon takes damage.
The Ender dragon has four main states of behavior:
- Guarding
- The dragon begins in this state, circling the ring of obsidian pillars on either the outside if there are still End crystals or the inside if the crystals are destroyed.
- With each crystal's destruction, she takes damage and there is an increased chance of the dragon switching states.
- Targeting
- Whenever the dragon finds herself less than 10 blocks or greater than 150 blocks from her current target, she attempts to choose a new target. When damaged she targets a point just behind herself, causing her to turn away and choose a new target.
- Strafing
- Upon the destruction of an End crystal, the dragon switches to strafing. As soon as she is within 64 blocks, she shoots a fireball at the player.
- The dragon resumes circling after this state.
- Diving
- The dragon dives onto the target player's position, taken at the start of the dive.
- The dragon resumes circling after this state, whether or not she actually hit the player.
- Perching
- While Guarding and the dragon has reached the end of the path, she has 1 in (3 + crystals alive) chance (~7.7% up to 33%) to go to the exit portal structure (approaching from the side opposite the player if possible) and lands on the highest block of the coordinates (x=0, z=0), up to (y=101).[Bedrock Edition only] If there is no block in (x=0, z=0) the dragon freezes right when she switches to perching.[Bedrock Edition only] The dragon is immune to arrows in this state; they all catch fire and bounce off. In Java Edition she is also immune to thrown tridents in this state.
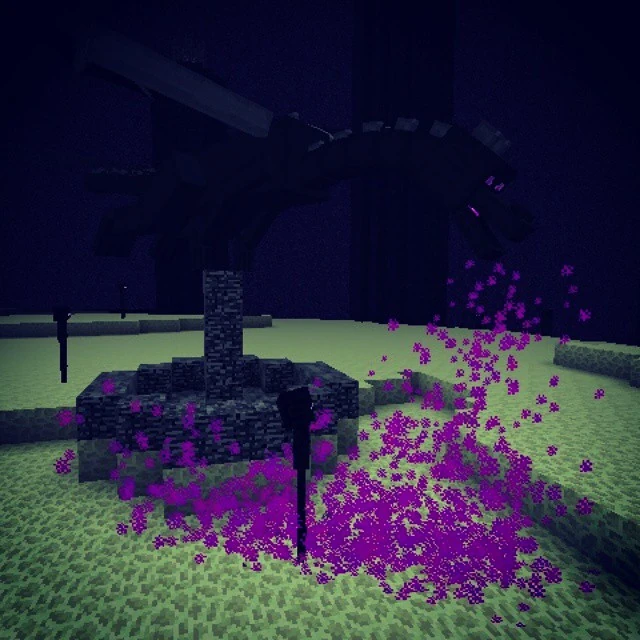
- Dragon's Breath
- Unless the player is in Peaceful difficulty, after 1.25 seconds, if a player is within 20 blocks of the exit portal structure, the dragon roars and use her 3-second breath attack, damaging players similarly to a lingering potion of Harming.
- The purple clouds emitted from the dragon's breath attack can be collected in a glass bottle to obtain dragon's breath.
- Charge
- If the player is not near the portal within 5 seconds of the dragon's landing, she charges at players within 150 blocks.
- Take-off
- After four consecutive breath attacks, or if the dragon fails to locate a player within 150 blocks, she takes off from her perch. She always takes off in Peaceful difficulty, making it difficult to land melee hits.
- The dragon resumes circling after this state.
- Escape
- If cumulative damage taken while perched exceeds 50
 × 25, the dragon takes off and resets the damage accumulator. The accumulator is not reset if she does not take enough damage.
 - The dragon resumes circling after this state.
When the dragon finally takes a fatal blow, she flies toward the exit portal structure before dying, unless she cannot find it within 150 blocks, or it is inside blocks.[Java Edition only]
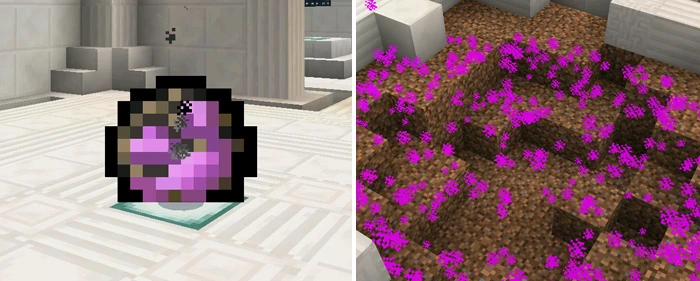
Dragon Fireball
Dragon fireballs are special fireballs that the Ender dragon fires while strafing. They cannot be deflected unlike ghast fireballs, and they do no impact damage. Instead, they deposit purple clouds across the ground, similar to a lingering Potion of Harming. As with her close-ranged breath attack, the purple fog can be bottled to obtain the dragon's breath.
Sounds
| Sound | Subtitles | Source | Description | Resource location | Translation key | Volume | Pitch | Attenuation distance |
|---|---|---|---|---|---|---|---|---|
| Dragon roars | ? | ? | entity | subtitles | ? | ? | 16 | |
| Dragon dies | ? | ? | entity | subtitles | ? | ? | 16 | |
| Dragon flaps | ? | ? | entity | subtitles | ? | ? | 16 | |
| Dragon growls | ? | ? | entity | subtitles | ? | ? | 16 | |
| Dragon hurts | ? | ? | entity | subtitles | ? | ? | 16 | |
| Dragon shoots | ? | ? | entity | subtitles | ? | ? | 16 | |
| Explosion | ? | ? | entity | subtitles | ? | ? | 16 |
Data values
ID
| Name | Identifier | Entity tags (JE) | Translation key |
|---|---|---|---|
| Ender Dragon | ender_dragon | None | entity.minecraft.ender_dragon |
| Dragon Fireball | dragon_fireball | impact_projectiles | entity.minecraft.dragon_fireball |
| Name | Identifier | Numeric ID | Translation key |
|---|---|---|---|
| Ender Dragon | ender_dragon | 53 | entity.ender_dragon.name |
| Dragon Fireball | dragon_fireball | 79 | entity.dragon_fireball.name |
Entity data
Ender dragons have entity data associated with them that contain various properties.
- Entity data
- Tags common to all entities
- Tags common to all mobs
- DragonPhase: A number indicating the dragon's current state. Valid values are: 0=circling, 1=strafing (preparing to shoot a fireball), 2=flying to the portal to land (part of transition to landed state), 3=landing on the portal (part of transition to landed state), 4=taking off from the portal (part of transition out of landed state), 5=landed, performing breath attack, 6=landed, looking for a player for breath attack, 7=landed, roar before beginning breath attack, 8=charging player, 9=flying to portal to die, 10=hovering with no AI (default when using the
/summoncommand).
Dragon fireballs have entity data associated with them that contain various properties.
- Entity data
- Tags common to all entities
- Tags common to all fireballs
- Tags common to all projectiles
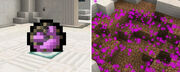
A dragon fireball spawned by a command (Left) and the damage and the explosion it caused (Right).
Command details
The /summon ender_dragon command, by default, summons a harmless Ender dragon that hovers in place [JE only]. Setting the DragonPhase tag (by issuing either the /summon ender_dragon ~ ~ ~ {DragonPhase:0} or the /data merge entity <selector> {DragonPhase:0} commands) starts the Ender dragon's ordinary behavior, although the health bar does not appear because it is managed by the End's dragon fight status rather than by the dragon entity herself [JE only]. If spawned away from the center of the map (x=0, z=0), she flies to the center then resumes normal behavior (see #Behavior).
Target selectors for the Ender dragon target a total of 9 entities per dragon, as the Ender dragon actually consists of 9 entities internally [Java Edition only]. So executing at a dragon to summon an arrow summons 9 arrows.
Achievements
| Icon | Achievement | In-game description | Actual requirements (if different) | Gamerscore earned | Trophy type (PS4) | |
|---|---|---|---|---|---|---|
| PS4 | Other | |||||
| You Need a Mint | Collect dragons breath in a glass bottle | Have a dragon's breath bottle in your inventory | 30G | Silver | ||
| The End... Again... | Respawn the Enderdragon [sic] | — | 30G | Silver | ||
Advancements
| Icon | Advancement | In-game description | Parent | Actual requirements (if different) | Resource location |
|---|---|---|---|---|---|
 | Free the End | Good luck | The End | Kill the ender dragon. If multiple players are involved in the dragon fight, only the player that deals the final blow to the dragon receives the advancement.[1] | end/kill_dragon
|
 | The Next Generation | Hold the Dragon Egg | Free the End | Have a dragon egg in your inventory. | end/dragon_egg
|
| The End... Again... | Respawn the Ender Dragon | Free the End | Be within a 192 block radius from the coordinates (0.0, 128, 0.0) when an ender dragon is summoned using end crystals. | end/respawn_dragon
|
| You Need a Mint | Collect Dragon's Breath in a Glass Bottle | Free the End | Have a bottle of dragon's breath in your inventory. | end/dragon_breath
|
| Monster Hunter | Kill any hostile monster | Adventure | Kill one of these 34 mobs:
| adventure/kill_a_mob
|
 | Monsters Hunted | Kill one of every hostile monster | Monster Hunter | Kill each of these 34 mobs:
| adventure/kill_all_mobs
|
| Is It a Plane? | Look at the Ender Dragon through a Spyglass | Is It a Balloon? | — | adventure/spyglass_at_dragon
|
History
The specific instructions are: Ender dragon before 19w39a and 19w41a
| June 14, 2009 | Notch believed that survival mode should have some sort of goal, which he had not yet formulated: "While it could be fun to just see how long you can survive in survival mode, I believe there might be a need for some kind of goal. Make the most money in a month? Kill a big evil mob in the shortest time? I don’t know yet." | ||||||||||||||||||||||||||||||||||
|---|---|---|---|---|---|---|---|---|---|---|---|---|---|---|---|---|---|---|---|---|---|---|---|---|---|---|---|---|---|---|---|---|---|---|---|
| June 30, 2010 | In a video called "Minecraft Flight" posted by Notch on YouTube, he mentioned that dragon lairs may be an addition in the video description. | ||||||||||||||||||||||||||||||||||
| August 31, 2010 | Later in an interview on MinecraftCon 2010, Notch hinted at dragons as a possible planned mob. Then, for about one year, there was no more mention of it and dragons solely remained a potential work-in-progress. | ||||||||||||||||||||||||||||||||||
| June 18, 2011 | Notch has stated in the past that if dragons are added, they would not be mountable as it would put too much pressure on multiplayer servers. | ||||||||||||||||||||||||||||||||||
| September 1, 2011 | Notch stated that "dragons will be added eventually". | ||||||||||||||||||||||||||||||||||
| October 6, 2011 | The name "Ender dragon" was first made known through a tweet by Notch reading "raqreqentba", which could be decoded using the ROT13 cipher, translating to "enderdragon". | ||||||||||||||||||||||||||||||||||
| October 7, 2011 | Notch reveals a screenshot of the "progress so far" on the Ender dragon: the dragon flying through the skies of the End. He also shared an album of images of the Ender dragon in flight through the Overworld, showcasing her animation. | ||||||||||||||||||||||||||||||||||
| October 9, 2011 | Notch tweets an example of a "texture packer tool" he wrote for the purpose of giving the Ender dragon her skin. He shared his progress midway through designing the skin, later announced when the base texture was done, and posted when he had enlarged the wings. | ||||||||||||||||||||||||||||||||||
| October 10, 2011 | Notch released a video showing a small clip of the End that also shows the Ender dragon fly into the top of the frame. "Brightened version here". | ||||||||||||||||||||||||||||||||||
| October 12, 2011 | In a Reddit post Notch also said, "They will be different dragons. The Ender Dragon will probably become larger, and the ones in the main world will be this size, won't go through terrain, and will be red because dragons are red."[2] | ||||||||||||||||||||||||||||||||||
| Notch stated in a Twitter post that "Dragons have 6 limbs", consisting of 2 wings, and 4 legs.[3] | |||||||||||||||||||||||||||||||||||
| Java Edition | |||||||||||||||||||||||||||||||||||
1.0.0{{Extension DPL}}<ul><li>[[Dupe Hack|Dupe Hack]]<br/>{{for|the method to duplicate items and blocks|Tutorials/Block and item duplication}}
{{stub}}
{{Joke feature}}
{{exclusive|java}}{{item
| image = Missing Texture.png
| rarity=Common
| stackable=No
|title=minecraft:dupe_hack|renewable=Yes}}
'''minecraft:dupe_hack''' is a joke item from [[Java Edition 23w13a_or_b]].
==Obtaining==
Once the <code>dupe_hack_occurrence_chance</code> vote is approved the '''dupe hack''' item has a random chance of dropping whenever an entity with chests is killed by a player, e.g. when destroying a [[Minecart with Chest|minecart with chest]] with a [[sword]].
It doesn't appear in the [[creative]] menu, not even when the [[Options#Controls|option]] "Operator Items Tab" is enabled, but can be given to the player with [[Commands/give|<code>/give</code>]] and other commands.
==Usage==
The dupe hack item can be used to create a limited amount of duplicate items by placing it on a [[crafting table]] with any other item. It has a random chance of breaking, controlled by the <code>dupe_hack_break_chance</code> vote. This limitation can be mostly bypassed by putting the items in an [[Ender Chest|ender chest]] first and duplicating the chest.
When using the Dupe Hack, it has a random chance of breaking, which is often decided by votes.
===Crafting ingredient===
{{Crafting
|Any Item
|Dupe Hack
|Output=Any Item, 2
|showdescription=1
|description=The dupe hack item remains in the crafting grid after duplicating an item.
|foot=1
}}
==Data values==
===ID===
{{edition|java}}:{{ID table
|edition=java
|showforms=y
|generatetranslationkeys=y
|displayname=minecraft:dupe_hack
|spritetype=item
|nameid=dupe_hack
|form=item|foot=1|spritename=missingno}}
==History==
{{History|java}}
{{History||23w13a_or_b|[[File:Missing Texture JE4.png|32px]] Added minecraft:dupe_hack.}}
{{History|foot}}
{{items}}
{{Jokes}}
<references />
[[Category:Joke items]]
[[ja:Dupe Hack]]
[[pt:Dupe Hack]]</li><li>[[Melon Seeds|Melon Seeds]]<br/>{{Block
|image = <gallery>
Melon Stem Age 0.png | Age 0
Melon Stem Age 1.png | Age 1
Melon Stem Age 2.png | Age 2
Melon Stem Age 3.png | Age 3
Melon Stem Age 4.png | Age 4
Melon Stem Age 5.png | Age 5
Melon Stem Age 6.png | Age 6
Melon Stem Age 7.png | Age 7
</gallery>
| image2 = <gallery>
Attached Melon Stem (N).png | North
Attached Melon Stem (E).png | East
Attached Melon Stem (S).png | South
Attached Melon Stem (W).png | West
</gallery>
| transparent = Yes
| light = No
| tool = none
| renewable = Yes
| stackable = Yes (64)
| flammable = No
| lavasusceptible = No
}}'''Melon seeds''' are items obtained from [[Melon Slice|melon slices]] that can be used to grow melon stems.
'''Melon stems''' are plants grown on [[farmland]] that, over time, grow [[melon]]s on dirt, mud and moss blocks adjacent to them.
== Obtaining ==
=== Breaking ===
When broken, a melon stem drops 0–3 melon seeds. The chance for melon seeds to drop increases with the stem's age.
{| class="wikitable"
! rowspan="3" |[[Resource location]]
! rowspan="3" | Source
! colspan="4" | Default
|-
| colspan="1" rowspan="2" style="text-align:center" | Nothing || colspan="3" style="text-align:center" |{{ItemLink|Melon Seeds|Melon seeds}}
|-
| style="text-align:center" | 1 || style="text-align:center" | 2 || style="text-align:center" | 3
|-
| rowspan="8" |<code>blocks/melon_stem</code>
|{{BlockLink|Melon Stem|Melon stem}} <code>age = 0</code>
| style="text-align:center" |81.3%|| style="text-align:center" |17.42%|| style="text-align:center" |1.24%|| style="text-align:center" |0.03%
|-
|{{BlockLink|Melon Stem|Melon stem}} <code>age = 1</code>
| style="text-align:center" |65.1%|| style="text-align:center" |30.04%|| style="text-align:center" |4.62%|| style="text-align:center" |0.24%
|-
|{{BlockLink|Melon Stem|Melon stem}} <code>age = 2</code>
| style="text-align:center" |51.2%|| style="text-align:center" |38.4%|| style="text-align:center" |9.6%|| style="text-align:center" |0.8%
|-
|{{BlockLink|Melon Stem|Melon stem}} <code>age = 3</code>
| style="text-align:center" |39.44%|| style="text-align:center" |43.02%|| style="text-align:center" |15.64%|| style="text-align:center" |1.9%
|-
|{{BlockLink|Melon Stem|Melon stem}} <code>age = 4</code>
| style="text-align:center" |29.13%|| style="text-align:center" |44.44%|| style="text-align:center" |22.22%|| style="text-align:center" |3.7%
|-
|{{BlockLink|Melon Stem|Melon stem}} <code>age = 5</code>
| style="text-align:center" |21.6%|| style="text-align:center" |43.2%|| style="text-align:center" |28.8%|| style="text-align:center" |6.4%
|-
|{{BlockLink|Melon Stem|Melon stem}} <code>age = 6</code>
| style="text-align:center" |15.17%|| style="text-align:center" |39.82%|| style="text-align:center" |34.84%|| style="text-align:center" |10.16%
|-
|{{BlockLink|Melon Stem|Melon stem}} <code>age = 7</code>
| style="text-align:center" |10.16%|| style="text-align:center" |34.84%|| style="text-align:center" |39.82%|| style="text-align:center" |15.17%
|-
| rowspan="1" |<code>blocks/attached_melon_stem</code>
|{{BlockLink|Attached Melon Stem|Attached Melon stem}}
| style="text-align:center" |10.16%|| style="text-align:center" |34.84%|| style="text-align:center" |39.82%|| style="text-align:center" |15.17%
|}
=== Natural generation ===
Melon stems generate naturally in stem farm inside [[woodland mansion]]s.
Melon stems generate in 20% of the farm plots in [[savanna]] [[village]]s, and 10% of the farm plots in [[desert]] villages.
=== Chest loot ===
{{LootChestItem|melon-seeds}}
=== Crafting ===
{{Crafting
|Melon Slice
|Output= Melon Seeds
|type= Material
}}
=== Trading ===
[[Wandering trader]]s sell melon seeds for 1 [[emerald]].
== Usage ==
=== Farming ===
{{see also|Tutorials/Pumpkin and melon farming}}
Melon seeds can be planted only on [[farmland]], as stems. Over time, a stem grows through several stages<sup>[''[[Talk:Pumpkin Seeds|needs testing]]'']</sup> and, at its final growth stage, will produce [[melon]]s on any adjacent [[dirt]], [[Coarse Dirt|coarse dirt]], [[Rooted Dirt|rooted dirt]], [[Grass Block|grass block]], [[farmland]], [[podzol]], [[mycelium]], [[Moss Block|moss block]], [[mud]] or [[Muddy Mangrove Roots|muddy mangrove roots]]. If a melon is already occupying a spot adjacent to a stem it does not grow more melons until the melons is removed. A single stem can grow an unlimited number of melons. Melon stems need a minimum light level of 10 in the block above the stem to grow and give melons. Melon seeds are affected by [[bone meal]] only with respect to stem growth; bone meal does not help produce the actual melons.
=== Breeding ===
Like other seeds, melon seeds can be used to [[breed]] [[chicken]]s, lead chickens around, and make baby chickens grow up faster by 10% of the remaining time.
=== Taming ===
Like other seeds, melon seeds can be used to tame [[parrot]]s.
=== Composting ===
Placing melon seeds into a [[composter]] has a 30% chance of raising the compost level by 1.
== Melon Stem ==
A '''melon stem''' is the block that is planted on [[farmland]] when melon seeds are used on it. It starts underground, and rises up as the plant grows. The stem is colored green when young, and then yellow once fully grown.
The stem curves once a melon has grown from it. A fully-grown single stem connects to any [[melon]] in an adjacent square, thus there are 5 possible appearances to a stem. If there are multiple melons it can connect to, it favors the east, then west, north, and south. When the melon is removed, the stem returns to its straight shape.
== Sounds ==
{{Sound table/Block/Hard crop}}
== Data values ==
=== ID ===
{{edition|java}}:
{{ID table
|edition=java
|showblocktags=y
|showforms=y
|generatetranslationkeys=y
|displayname=Melon Stem
|spritetype=block
|nameid=melon_stem
|blocktags=bee_growables, crops
|form=block}}
{{ID table
|displayname=Attached Melon Stem
|spritetype=block
|nameid=attached_melon_stem
|form=block}}
{{ID table
|displayname=Melon Seeds
|spritetype=item
|nameid=melon_seeds
|form=item
|foot=1}}
{{edition|bedrock}}:
{{ID table
|edition=bedrock
|shownumericids=y
|showforms=y
|generatetranslationkeys=y
|displayname=Melon Stem
|spritetype=block
|nameid=melon_stem
|id=105
|form=block
|translationkey=-}}
{{ID table
|displayname=Melon Seeds
|spritetype=item
|nameid=melon_seeds
|id=293
|form=item
|foot=1}}
=== Block states ===
{{see also|Block states}}
{{/BS}}
== Advancements ==
{{load advancements|A Seedy Place}}
== History ==
{{info needed section|check if stems floated above farmland upon initial implementation}}
{{History|java beta}}
{{History||1.8|snap=Pre-release|[[File:Melon Seeds JE1 BE1.png|32px]] Added melon seeds.
|[[File:Melon Stem Age 0 JE1.png|32px]] [[File:Stem Age 1 JE1.png|32px]] [[File:Melon Stem Age 2 JE1.png|32px]] [[File:Melon Stem Age 3 JE1.png|32px]] [[File:Melon Stem Age 4 JE1.png|32px]] [[File:Melon Stem Age 5 JE1.png|32px]] [[File:Melon Stem Age 6 JE1.png|32px]] [[File:Melon Stem Age 7 JE1.png|32px]] Added the melon stem, with seven stages of growth.
|Melon seeds can found in the new [[mineshaft]] [[chest]]s.
|[[File:Attached Melon Stem (N) JE1.png|32px]] [[File:Attached Melon Stem (E) JE1.png|32px]] [[File:Attached Melon Stem (S) JE1.png|32px]] [[File:Attached Melon Stem (W) JE1.png|32px]] Melon stems have four slightly visually distinct appearances for each facing direction - the bent part of the stem rotates, but the other two planes do not.
|[[File:Melon Stem Age 8 JE1.png|32px]] [[File:Melon Stem Age 9 JE1.png|32px]] [[File:Melon Stem Age 10 JE1.png|32px]] [[File:Melon Stem Age 11 JE1.png|32px]] [[File:Melon Stem Age 12 JE1.png|32px]] [[File:Melon Stem Age 13 JE1.png|32px]] [[File:Melon Stem Age 14 JE1.png|32px]] [[File:Melon Stem Age 15 JE1.png|32px]] Melon stem data values 8–15 now show a glitched formation, with a floating stem with an attached stem cross eventually emerging below.
|[[File:Attached Stem Age 8 JE1.png|32px]] [[File:Attached Stem Age 9 JE1.png|32px]] [[File:Attached Stem Age 10 JE1.png|32px]] [[File:Attached Stem Age 11 JE1.png|32px]] [[File:Attached Stem Age 12 JE1.png|32px]] [[File:Attached Stem Age 13 JE1.png|32px]] [[File:Attached Stem Age 14 JE1.png|32px]] [[File:Attached Stem Age 15 JE1.png|32px]] Melon stem blocks with data values higher than 7 can now attach to adjacent fruits, which results in buggy stem textures with [[vines]] in the mix due to vines being below attached stems in [[terrain.png]].}}
{{History|||snap=Pre-release 2 ;)|Melon stems can now be grown faster using [[bone meal]].}}
{{History|java}}
{{History||1.3.1|snap=1.3|The texture of melon stems has been moved one pixel to the left in [[terrain.png]].
|[[File:Melon Stem Age 0 JE2.png|32px]] [[File:Melon Stem Age 1 JE2.png|32px]] [[File:Melon Stem Age 2 JE2.png|32px]] [[File:Melon Stem Age 3 JE2.png|32px]] [[File:Melon Stem Age 4 JE2.png|32px]] [[File:Melon Stem Age 5 JE2.png|32px]] [[File:Melon Stem Age 6 JE2.png|32px]] [[File:Melon Stem Age 7 JE2.png|32px]] Stems now appear slightly different.
|[[File:Melon Stem Age 8 JE2.png|32px]] [[File:Melon Stem Age 9 JE2.png|32px]] [[File:Melon Stem Age 10 JE2.png|32px]] [[File:Melon Stem Age 11 JE2.png|32px]] [[File:Melon Stem Age 12 JE2.png|32px]] [[File:Melon Stem Age 13 JE2.png|32px]] [[File:Melon Stem Age 14 JE2.png|32px]] [[File:Melon Stem Age 15 JE2.png|32px]] Overgrown stems now appear slightly different.
|[[File:Attached Melon Stem (N) JE2.png|32px]] [[File:Attached Melon Stem (E) JE2.png|32px]] [[File:Attached Melon Stem (S) JE2.png|32px]] [[File:Attached Melon Stem (W) JE2.png|32px]] Attached melon stems now appear slightly different.
|[[File:Attached Stem Age 8 JE2.png|32px]] [[File:Attached Stem Age 9 JE2.png|32px]] [[File:Attached Stem Age 10 JE2.png|32px]] [[File:Attached Stem Age 11 JE2.png|32px]] [[File:Attached Stem Age 12 JE2.png|32px]] [[File:Attached Stem Age 13 JE2.png|32px]] [[File:Attached Stem Age 14 JE2.png|32px]] [[File:Attached Stem Age 15 JE2.png|32px]] Overgrown attached melon stems now appear slightly different.}}
{{History||1.4.2|snap=12w36a|[[Chicken]]s now use [[wheat seeds]], melon seeds, and [[pumpkin seeds]], instead of [[wheat]] to breed.}}
{{History||1.5|snap=13w02a|[[File:Melon Stem Age 0 JE3.png|32px]] [[File:Melon Stem Age 1 JE3.png|32px]] [[File:Melon Stem Age 2 JE3.png|32px]] [[File:Melon Stem Age 3 JE3.png|32px]] [[File:Melon Stem Age 4 JE3.png|32px]] [[File:Melon Stem Age 5 JE3.png|32px]] [[File:Melon Stem Age 6 JE3.png|32px]] Melon stems now use a squished version of their texture for immature stems, depending on age.
|[[File:Melon Stem Age 8 JE3.png|32px]] [[File:Melon Stem Age 9 JE3.png|32px]] [[File:Melon Stem Age 10 JE3.png|32px]] [[File:Melon Stem Age 11 JE3.png|32px]] [[File:Melon Stem Age 12 JE3.png|32px]] [[File:Melon Stem Age 13 JE3.png|32px]] [[File:Melon Stem Age 14 JE3.png|32px]] [[File:Melon Stem Age 15 JE3.png|32px]] This also affects melon stems of ages 8–15, which are likewise stretched to accommodate its predicted size.
|[[File:Attached Stem Age 8 JE3.png|32px]] [[File:Attached Stem Age 9 JE3.png|32px]] [[File:Attached Stem Age 10 JE3.png|32px]] [[File:Attached Stem Age 11 JE3.png|32px]] [[File:Attached Stem Age 12 JE3.png|32px]] [[File:Attached Stem Age 13 JE3.png|32px]] [[File:Attached Stem Age 14 JE3.png|32px]] [[File:Attached Stem Age 15 JE3.png|32px]] Melon stems of extreme ages, which are attached to adjacent fruits, now show a stretched and tinted stem appearance.}}
{{History|||snap=13w03a|[[File:Melon Stem Age 0 JE4.png|32px]] [[File:Melon Stem Age 1 JE4.png|32px]] [[File:Melon Stem Age 2 JE4.png|32px]] [[File:Melon Stem Age 3 JE4.png|32px]] [[File:Melon Stem Age 4 JE4.png|32px]] [[File:Melon Stem Age 5 JE4.png|32px]] [[File:Melon Stem Age 6 JE4.png|32px]] [[File:Melon Stem Age 7 JE4.png|32px]] Melon stems are no longer squished or stretched to account for age.<ref>{{bug|MC-7111}}</ref>
|[[File:Melon Stem Age 8 JE4.png|32px]] [[File:Melon Stem Age 9 JE4.png|32px]] [[File:Melon Stem Age 10 JE4.png|32px]] [[File:Melon Stem Age 11 JE4.png|32px]] [[File:Melon Stem Age 12 JE4.png|32px]] [[File:Melon Stem Age 13 JE4.png|32px]] [[File:Melon Stem Age 14 JE4.png|32px]] [[File:Melon Stem Age 15 JE4.png|32px]] Melon stems with age values 8 through 15 now show a tinted [[trapdoor]] texture.
|From this version up until 14w08a, overgrown melon stems start to draw from the texture below them on the [[texture atlas]], in much the same way they previously did with terrain.png. However, as texture atlases are unstable and textures tend to change positions as new blocks and textures are added, overgrown stems change the texture they draw from every time new textures are added, which includes when textures added by [[mods]].}}
{{History|||snap=13w09a|[[File:Melon Stem Age 8 JE5.png|32px]] [[File:Melon Stem Age 9 JE5.png|32px]] [[File:Melon Stem Age 10 JE5.png|32px]] [[File:Melon Stem Age 11 JE5.png|32px]] [[File:Melon Stem Age 12 JE5.png|32px]] [[File:Melon Stem Age 13 JE5.png|32px]] [[File:Melon Stem Age 14 JE5.png|32px]] [[File:Melon Stem Age 15 JE5.png|32px]] Melon stems with age values 8–15 now show a tinted [[birch wood]] texture.}}
{{History||1.6.1|snap=13w24a|Melon and pumpkin stems have now been assigned separate textures.
|[[File:Melon Stem Age 8 JE6.png|32px]] [[File:Melon Stem Age 9 JE6.png|32px]] [[File:Melon Stem Age 10 JE6.png|32px]] [[File:Melon Stem Age 11 JE6.png|32px]] [[File:Melon Stem Age 12 JE6.png|32px]] [[File:Melon Stem Age 13 JE6.png|32px]] [[File:Melon Stem Age 14 JE6.png|32px]] [[File:Melon Stem Age 15 JE6.png|32px]] Melon stems with age values 8–15 now show a tinted [[note block]] texture.}}
{{History||1.7.2|snap=13w37a|Added the {{cmd|setblock}} [[commands|command]], allowing for invalid stem ages to be placed in the world without using external editors. This also allows them to be obtained in earlier versions via backdating.}}
{{History|||snap=13w41a|[[File:Melon Stem Age 8 JE7.png|32px]] [[File:Melon Stem Age 9 JE7.png|32px]] [[File:Melon Stem Age 10 JE7.png|32px]] [[File:Melon Stem Age 11 JE7.png|32px]] [[File:Melon Stem Age 12 JE7.png|32px]] [[File:Melon Stem Age 13 JE7.png|32px]] [[File:Melon Stem Age 14 JE7.png|32px]] [[File:Melon Stem Age 15 JE7.png|32px]] Melon stems with age values 8–15 now show a tinted [[netherrack]] texture.}}
{{History||1.8|snap=14w10a|[[File:Melon Stem Age 8 JE8.png|32px]] [[File:Melon Stem Age 9 JE8.png|32px]] [[File:Melon Stem Age 10 JE8.png|32px]] [[File:Melon Stem Age 11 JE8.png|32px]] Melon stems with data values 8–11 now display a tinted attached stem, with 8 facing west, 9 facing east, 10 facing north and 11 facing south.
|Invalid melon stems with data values 12-15 now crash the game.}}
{{History|||snap=14w25a|[[File:Melon Stem Age 0 JE5.png|32px]] [[File:Melon Stem Age 1 JE5.png|32px]] [[File:Melon Stem Age 2 JE5.png|32px]] [[File:Melon Stem Age 3 JE5.png|32px]] [[File:Melon Stem Age 4 JE5.png|32px]] [[File:Melon Stem Age 5 JE5.png|32px]] [[File:Melon Stem Age 6 JE5.png|32px]] [[File:Melon Stem Age 7 JE5.png|32px]] Melon stems now render as a single diagonal plane, or, in the case of attached stems, a diagonal and orthogonal plane.
|[[File:Attached Melon Stem (N) JE3.png|32px]] [[File:Attached Melon Stem (E) JE3.png|32px]] [[File:Attached Melon Stem (S) JE3.png|32px]] [[File:Attached Melon Stem (W) JE3.png|32px]] The attached melon stem [[model]] now fully rotates to the direction the stem points. Prior to this update, the base of the melon stem would stay the same while the long attaching section would differ, resulting in four possible attached stem appearances.
|Invalid overgrown melon stems have effectively been removed from the game, as attempting to place an out of range stem via {{cmd|setblock}} creates a stem of age 0 and loading a world with such stems existing causes a game crash.}}
{{History|||snap=14w26a|[[File:Melon Stem Age 0 JE6.png|32px]] [[File:Melon Stem Age 1 JE6.png|32px]] [[File:Melon Stem Age 2 JE6.png|32px]] [[File:Melon Stem Age 3 JE6.png|32px]] [[File:Melon Stem Age 4 JE6.png|32px]] [[File:Melon Stem Age 5 JE6.png|32px]] [[File:Melon Stem Age 6 JE6.png|32px]] [[File:Melon Stem Age 7 JE6.png|32px]] [[File:Attached Melon Stem (N) JE4.png|32px]] [[File:Attached Melon Stem (E) JE4.png|32px]] [[File:Attached Melon Stem (S) JE4.png|32px]] [[File:Attached Melon Stem (W) JE4.png|32px]] Melon stems now correctly render as crosses again.<ref>{{bug|MC-58136}}</ref>}}
{{History|||snap=14w27a|[[File:Attached Stem Age 0 14w27a.png|32px]] [[File:Attached Stem Age 1 14w27a.png|32px]] [[File:Attached Stem Age 2 14w27a.png|32px]] [[File:Attached Stem Age 3 14w27a.png|32px]] [[File:Attached Stem Age 4 14w27a.png|32px]] [[File:Attached Stem Age 5 14w27a.png|32px]] [[File:Attached Stem Age 6 14w27a.png|32px]] Due to a bug, all melon stems appear attached regardless of age or any actual attachment.<ref>{{bug|MC-60208}}</ref>}}
{{History|||snap=14w28a|All melon stems appearing attached regardless of age or any actual attachment has been fixed. However, melon stems still appear attached to adjacent fruits regardless of age due to a similar bug.<ref>{{bug|MC-61716}}</ref>}}
{{History|||snap=14w34d|Melon seeds can no longer be used for [[breeding]] [[chicken]]s.}}
{{History||1.9|snap=15w31a|Chickens can now use melon seeds to breed again.}}
{{History|||snap=15w44a|Melon seeds have been added to [[dungeon]] [[chest]]s.
|The average yield of melon seeds from [[mineshaft]] chests has been decreased.}}
{{History|||snap=15w45a|Melon stems must now be fully grown again to attach.}}
{{History||1.11|snap=16w39a|Melon seeds can now be found inside chests in the new [[woodland mansion]]s.
|Melon crops now generate inside woodland mansions.}}
{{History||1.12|snap=17w18b|Placing a melon seeds in farmland now gives the player the "A Seedy Place" [[advancement]].{{verify}}}}
{{History||1.13|snap=17w47a|The different block states for the <code>melon_stem</code> ID have been split up into their own IDs.
|Prior to [[1.13/Flattening|''The Flattening'']], this [[block]]'s numeral ID was 105, and the [[item]]'s 362.}}
{{History|||snap=17w48a|Attached melon stems no longer [[drops|drop]] seeds.}}
{{History||1.14|snap=18w43a|[[File:Attached Melon Stem (N) JE5.png|32px]] [[File:Attached Melon Stem (E) JE5.png|32px]] [[File:Attached Melon Stem (S) JE5.png|32px]] [[File:Attached Melon Stem (W) JE5.png|32px]] The texture of attached melon stems has been changed.}}
{{History|||snap=18w49a|Melon stems now generate in the updated [[savanna]] [[village]]s.}}
{{History|||snap=18w50a|Melon stems now generate in the updated [[desert]] [[village]]s.}}
{{History|||snap=19w03a|Placing melon seeds into the new [[composter]] has a 10% chance of raising the compost level by 1.}}
{{History|||snap=19w05a|Melon seeds now have a 30% chance of increasing the compost level in a composter by 1.
|Added [[Wandering Trader|wandering trader]]s, which sell melon seeds.}}
{{History||1.15|snap=19w34a|[[Bee]]s can now pollinate melon stems.}}
{{History|||snap=19w39a|Attached melon stems now [[drops|drop]] seeds again.<ref>{{bug|MC-136360}}</ref>}}
{{History||1.18|snap=Pre-release 5|[[File:Melon Seeds JE2.png|32px]] The texture of melon seeds has been changed.}}
{{History|pocket alpha}}
{{History||v0.5.0|Added melon seeds.
|[[File:Melon Stem Age 0 JE1.png|32px]] [[File:Stem Age 1 JE1.png|32px]] [[File:Melon Stem Age 2 JE1.png|32px]] [[File:Melon Stem Age 3 JE1.png|32px]] [[File:Melon Stem Age 4 JE1.png|32px]] [[File:Melon Stem Age 5 JE1.png|32px]] [[File:Melon Stem Age 6 JE1.png|32px]] [[File:Melon Stem Age 7 JE1.png|32px]] [[File:Attached Melon Stem (N) JE1.png|32px]] [[File:Attached Melon Stem (E) JE1.png|32px]] [[File:Attached Melon Stem (S) JE1.png|32px]] [[File:Attached Melon Stem (W) JE1.png|32px]]{{verify|Are these models correct?}} Added melon stems.}}
{{History||v0.6.0|[[File:Melon Seeds JE1 BE1.png|32px]] Melon seeds no longer use the pumpkin seeds texture.}}
{{History||v0.9.0|snap=?|Melon seeds can now be found in [[mineshaft]] chests.}}
{{History||v0.12.1|snap=build 1|Melon seeds are no longer available from the [[Nether reactor]].}}
{{History||v0.14.0|snap=build 1|Melon seeds can now be found in [[minecart with chest|minecarts with chests]] in [[mineshaft]]s.}}
{{History|pocket}}
{{History||1.0.0|snap=alpha 0.17.0.1|Melon seeds now generate inside [[dungeon]] [[chest]]s.}}
{{History||1.1.0|snap=alpha 1.1.0.0|Melon crops now generate inside [[woodland mansion]]s.
|Melon seeds can now be found in woodland mansion chests.}}
{{History|bedrock}}
{{History||1.2.0|snap=beta 1.2.0.2|Melon seeds can now be found inside [[bonus chest]]s.
|Melon seeds are now used to tame [[parrot]]s.}}
{{History||1.10.0|snap=beta 1.10.0.3|[[File:Attached Melon Stem (W) JE5.png|32px]]{{info needed|More accurate image}} The texture of attached melon stems has been changed.
|Melon stems now generate in [[savanna]] and [[desert]] [[village]] farms.
|Added [[wandering trader]]s, who [[trading|sell]] melon seeds.}}
{{History||1.11.0|snap=beta 1.11.0.1|Melon seeds can now be used to fill up [[composter]]s.}}
{{History||1.14.0|snap=beta 1.14.0.1|[[Bee]]s can now pollinate melon stems.}}
{{History|console}}
{{History||xbox=TU5|xbone=CU1|ps=1.0|wiiu=Patch 1|[[File:Melon Seeds JE1 BE1.png|32px]] Added melon seeds.
|[[File:Melon Stem Age 0 JE1.png|32px]] [[File:Stem Age 1 JE1.png|32px]] [[File:Melon Stem Age 2 JE1.png|32px]] [[File:Melon Stem Age 3 JE1.png|32px]] [[File:Melon Stem Age 4 JE1.png|32px]] [[File:Melon Stem Age 5 JE1.png|32px]] [[File:Melon Stem Age 6 JE1.png|32px]] [[File:Melon Stem Age 7 JE1.png|32px]] [[File:Attached Melon Stem (N) JE1.png|32px]] [[File:Attached Melon Stem (E) JE1.png|32px]] [[File:Attached Melon Stem (S) JE1.png|32px]] [[File:Attached Melon Stem (W) JE1.png|32px]]{{verify|Are these models correct?}} Added melon stems.}}
{{History||xbox=none|xbone=none|ps=1.90|wiiu=none|switch=none|[[File:Attached Melon Stem (W) JE5.png|32px]]{{info needed|More accurate image}} The texture of attached melon stems has been changed.}}
{{History|New 3DS}}
{{History||0.1.0|[[File:Melon Stem Age 0 JE1.png|32px]] [[File:Stem Age 1 JE1.png|32px]] [[File:Melon Stem Age 2 JE1.png|32px]] [[File:Melon Stem Age 3 JE1.png|32px]] [[File:Melon Stem Age 4 JE1.png|32px]] [[File:Melon Stem Age 5 JE1.png|32px]] [[File:Melon Stem Age 6 JE1.png|32px]] [[File:Melon Stem Age 7 JE1.png|32px]] [[File:Attached Melon Stem (N) JE1.png|32px]] [[File:Attached Melon Stem (E) JE1.png|32px]] [[File:Attached Melon Stem (S) JE1.png|32px]] [[File:Attached Melon Stem (W) JE1.png|32px]]{{verify|Are these models correct?}} Added melon stems.}}
{{History|foot}}
<gallery>
Melon Stem with data value 15.png|The final version of the melon stem with age 15, as seen in-game.
Melonstems.png|Melon stems of ages 1–15 on a modded version of 1.7.2, hence the melon stems using the melon top texture.
Stems of 13w02a.png|All 16 stem sizes in 13w02a, with accompanying data values.
</gallery>
=== Melon stem "item" ===
{{:Technical blocks/Melon Stem}}
== Issues ==
{{issue list}}
== Gallery ==
<gallery>
Stem All Ages.png|All stages of growth.
AllSeeds.png|All the [[seeds]] that exist in the game.
</gallery>
== See also ==
* [[Melon]]
* [[Pumpkin Seeds]]
==References==
{{Reflist}}
{{Blocks|vegetation}}
{{Items}}
[[Category:Plants]]
[[Category:Food]]
[[Category:Non-solid blocks]]
[[Category:Generated structure blocks]]
[[cs:Semínka melounu]]
[[de:Melone]]
[[es:Semillas de sandía]]
[[fr:Graines de pastèque]]
[[hu:Dinnyemagok]]
[[it:Anguria]]
[[ja:スイカの種]]
[[ko:수박씨]]
[[nl:Meloenzaden]]
[[pl:Nasiona arbuza]]
[[pt:Sementes de melancia]]
[[ru:Семена арбуза]]
[[th:เมล็ดแตงโม]]
[[zh:西瓜种子]]</li></ul> | Beta 1.9 Prerelease 4 | ||||||||||||||||||||||||||||||||||
| The Ender dragon currently exists in the code, mostly functional, however, the dragon has not been enabled in-game yet and players are unable to damage her. Certain mods can allow the spawning of the Ender dragon, but again, no physical interactions are currently available. | |||||||||||||||||||||||||||||||||||
| Beta 1.9 Prerelease 5 | Added the ability for players to damage Ender dragons. Ender dragons require mods or a mob-spawner to be brought into the game, however. | ||||||||||||||||||||||||||||||||||
| The Ender dragon's health has been changed to 1 | |||||||||||||||||||||||||||||||||||
| Beta 1.9 Prerelease 6 | Ender dragons has been officially implemented into the game. This includes a single Ender dragon as a boss battle, spawning naturally when the player first enters the End. | ||||||||||||||||||||||||||||||||||
| April 28, 2012 | Jeb mentioned that he wouldn't be adding any more boss mobs until he makes the Ender dragon "more fun first". | ||||||||||||||||||||||||||||||||||
1.3.1{{Extension DPL}}<ul><li>[[Chain|Chain]]<br/>{{about|the block|the enchantment in Minecraft Dungeons|MCD:Chains|the armor tier named chainmail|Armor|the armor material called chainmail|Armor materials}}
{{Block
|image=<gallery>
Chain Axis Y.png | Y-axis
Chain Axis X.png | X-axis
Chain Axis Z.png | Z-axis
</gallery>
| transparent = Yes
| light = No
| tool = Wooden pickaxe
| renewable = Yes
| stackable = Yes (64)
| flammable = No
| lavasusceptible = No
}}
'''Chains''' are metallic decoration [[block]]s.
== Obtaining ==
=== Breaking ===
Chains can be mined using any [[pickaxe]]. If mined without a pickaxe, it drops nothing.
{{breaking row|Chain|Pickaxe|Wood|horizontal=1}}
=== Natural generation ===
Chains generate in [[bastion remnant]]s and sometimes in [[ruined portal]]s that generate in the Nether. They always generate above [[magma cube]] spawners, also found in [[bastion]]s.
Chains can also generate in [[mineshafts]]. They generate on the sides of a wooden bridge (a mid-air corridor) when the distance between the bridge and the highest solid block below it is higher than the distance to the lowest solid block above it. Chains here generate vertically in a pillar between the bridge and the ceiling. The lowest block of the pillar, connecting the chain to the bridge, is always an [[oak fence]].
=== Chest loot ===
{{LootChestItem|chain}}
=== Crafting ===
{{Crafting
|B1=Iron Nugget
|B2=Iron Ingot
|B3=Iron Nugget
|Output=Chain
|type=Building block
}}
== Usage ==
Chains can be used to suspend [[bell]]s, [[hanging sign]]s, or both types of [[lantern]]s (normal lanterns and soul lanterns), as the chain texture connects to the chain of the lantern seamlessly as if it were part of it, and it connects the hanging sign chains together. Chains do not require a supporting block to be placed whether it is on the top, next to it or at the bottom. It can exist completely free-standing in mid air<ref>{{bug|MC-178791}}</ref> and it can be rotated. Chains connect horizontally or vertically, but not across different orientations (so a chain with N orientation does not connect to a chain with E orientation in the adjacent block).
Horizontal chains one block above a surface may be walked over. Horizontal chains two blocks above a surface prevent players from traveling past them. Vertical chains block travel if targeted directly, but may be skirted.
Precision is required, but chains can be walked on, allowing for inconspicuous, although somewhat costly, bridges.
Chains can be pushed by [[piston]]s without being broken.
=== Crafting ingredient ===
{{crafting usage}}
== Sounds ==
{{Sound table/Block/Chain}}
== Data values ==
=== ID ===
{{edition|java}}:
{{ID table
|edition=java
|showforms=y
|generatetranslationkeys=y
|displayname=Chain
|spritetype=block
|nameid=chain
|foot=1}}
{{edition|bedrock}}:
{{ID table
|edition=bedrock
|firstcolumnname=Chain
|shownumericids=y
|showforms=y
|generatetranslationkeys=y
|displayname=Block
|spritename=chain
|spritetype=block
|nameid=chain
|id=541
|form=block
|itemform=item.chain}}
{{ID table
|displayname=Item
|spritename=chain
|spritetype=item
|nameid=chain
|id=619
|form=item
|translationkey=tile.chain.name
|foot=1}}
=== Block states ===
{{see also|Block states}}
{{/BS}}
== History ==
{{History|java}}
{{History||1.16|snap=20w16a|[[File:Chain (item) JE1 BE1.png|32px]] [[File:Chain Axis Y JE1 BE1.png|32px]] Added chains.
|Chains generate in the newly added [[bastion remnant]]s, and can be found in their [[chest]]s.
|Chains currently use the generic metal [[block]] [[sound]]s.}}
{{History|||snap=20w17a|Unique [[sound]]s have been added for chains.}}
{{History|||snap=20w18a|Chains can now be [[waterlogged]].}}
{{History||1.16.2|snap=20w30a|The chance of finding chains in bastion remnant chests is decreased from 31.5% to 24.4%.}}
{{History|||snap=Pre-release 1|[[File:Chain Axis X JE1 BE1.png|32px]] [[File:Chain Axis Z JE1 BE1.png|32px]] Chains can now be placed in all orientations.}}
{{History||1.17|snap=21w07a|Chains can now generate in [[mineshaft]]s.}}
{{History|||snap=21w13a|[[File:Chain (UD) JE2.png|32px]] [[File:Chain (NS) JE2.png|32px]] [[File:Chain (EW) JE2.png|32px]] The model of chains has been changed so that the backside texture is mirrored.}}
{{History||1.20<br>(Experimental)|link=1.19.3|snap=22w42a|Chains are now used to craft [[hanging sign]]s.}}
{{History|bedrock}}
{{History||1.16.0|snap=beta 1.16.0.57|[[File:Chain_(item)_JE1_BE1.png|32px]] [[File:Chain Axis Y JE1 BE1.png|32px]] Added chains.}}
{{History|||snap=beta 1.16.0.63|Unique [[sound]]s have been added for chains.}}
{{History||1.16.100|snap=beta 1.16.100.54|[[File:Chain Axis X JE1 BE1.png|32px]] [[File:Chain Axis Z JE1 BE1.png|32px]] Chains can now be placed in all orientations.}}
{{History||1.20.0<br>(Experimental)|link=Bedrock Edition 1.19.50|snap=beta 1.19.50.21|Chains are now used to craft [[hanging sign]]s.}}
{{History|foot}}
== Issues ==
{{issue list}}
== Trivia ==
* A vertical chain, being a solid, but not a full [[block]], allows for many sizes of [[mob]]s and [[player]]s to pass alongside each piece horizontally.
* Despite its name, it cannot be [[crafted]] into [[chainmail armor]].<ref>{{bug|MC-178979}} - Invalid</ref>
* Chains do not stick together when moved by pistons, regardless of orientation.
== Gallery ==
<gallery>
Chained Stone Bricks.jpg|Chains and stone bricks.
Barbell.jpg|Chains and chiseled blackstone.
Barbell Evoker.jpg|An evoker lifting weights.
Chain with Lantern.png|A [[lantern]] hanging from a chain.
Chain with Spawner.png|A [[spawner]] hanging with a chain found in the bastion remnants.
</gallery>
== References ==
{{reflist}}
{{blocks|Building}}
{{Items}}
[[Category:Manufactured blocks]]
[[Category:Generated structure blocks]]
[[Category:Nether blocks]]
[[de:Kette]]
[[es:Cadena]]
[[fr:Chaîne]]
[[ja:鎖]]
[[ko:사슬]]
[[pl:Łańcuch]]
[[pt:Corrente]]
[[ru:Цепь]]
[[zh:锁链]]</li><li>[[Echo Shard|Echo Shard]]<br/>{{Item
| title = Echo Shard
| image = Echo Shard.png
| renewable = No
| stackable = Yes (64)
}}
An '''echo shard''' is an item found in [[ancient cities]] which can be used to craft [[recovery compass]]es.
== Obtaining ==
=== Chest loot ===
{{LootChestItem|echo-shard}}
== Usage ==
=== Crafting ingredient ===
{{crafting usage|Echo Shard}}
== History ==
{{History|java}}
{{History||1.19|snap=22w14a|[[File:Echo Shard JE1 BE1.png|32px]] Added echo shards.}}
{{History|bedrock}}
{{History||1.19.0|snap=beta 1.19.0.24|[[File:Echo Shard JE1 BE1.png|32px]] Added echo shards.
|Currently cannot be found inside [[ancient city]] chests due to outdated structures and loot chests.}}
{{History||1.19.0|snap=beta 1.19.0.26|Echo shards now generate inside [[ancient city]] loot chests.}}
{{History|foot}}
== Issues ==
{{issue list}}
{{Items}}
[[Category:Non-renewable resources]]
[[de:Echoscherbe]]
[[es:Fragmento resonante]]
[[fr:Éclat d'écho]]
[[ja:残響の欠片]]
[[lzh:回音殘片]]
[[pt:Fragmento de eco]]
[[pl:Odłamek pogłosu]]
[[ru:Осколок эха]]
[[th:เศษเอคโค]]
[[uk:Уламок відлуння]]
[[zh:回响碎片]]</li></ul> | ? | The bug where after being damaged once, Ender dragons would do no contact damage has been fixed. | |||||||||||||||||||||||||||||||||
| The experience drop of Ender dragons has been reduced from 20,000 to 12,000. | |||||||||||||||||||||||||||||||||||
1.4.2{{Extension DPL}}<ul><li>[[Redstone Dust|Redstone Dust]]<br/>{{Redirect|Redstone|the ore|Redstone Ore|the powered mineral block|Block of Redstone|other uses|Redstone (disambiguation)}}
{{Block
| group = Inactive (connected)
| 1-1= Inactive Redstone Wire (NESW).png
| 1-2 = Inactive Redstone Wire (NESW) BE.png
| group2 = Inactive (unconnected)
| 2-1 = Inactive Redstone Wire (unconnected).png
| 2-2 = Inactive Redstone Wire (unconnected).png
| group3 = Active (connected)
| 3-1 = Active Redstone Wire (NESW).png
| 3-2 = Active Redstone Wire (NESW) BE.png
| group4 = Active (unconnected)
| 4-1 = Active Redstone Wire (unconnected).png
| 4-2 = Active Redstone Wire (unconnected).png
| image = Redstone Dust JE2 BE2.png
| extratext = [[#Gallery|View all renders]]
| transparent = Yes
| light = No
| tool = all
| renewable = Yes
| stackable = Yes (64)
| flammable = No
| lavasusceptible = No
}}
'''Redstone dust''' is a mineral that can transmit [[Redstone circuit#Power|redstone power]] as a wire when placed as a [[block]]. It is also used in [[crafting]] and [[brewing]].
== Obtaining ==
=== Mining ===
{{see also|Redstone Ore#Natural generation}}
[[Redstone ore]] mined using an iron [[pickaxe]] or higher drops 4 or 5 redstone dust (or more with [[Fortune]], averaging at 6 redstone dust with Fortune III). If mined with [[Silk Touch]], the block drops itself instead of redstone dust.
=== Natural generation ===
15 lengths of redstone dust are naturally generated as part of the trap in each [[jungle pyramid]]. 5 lengths of redstone dust can be found in one type of jail cell room in a [[woodland mansion]]. In [[Ancient City|ancient cities]], multiple pieces of redstone dust can be found integrated into circuitry.
=== Breaking ===
Redstone dust can be broken instantly using any tool, or without a tool, and drops itself as an item.
Redstone dust is removed and drops as an item if:
* its attachment block is moved, removed, or destroyed
* [[water]] or [[lava]] flows into its space
* a [[piston]] tries to push it or moves a block into its space
=== Mob loot ===
[[Witch]]es have a chance of dropping 0–2 redstone dust upon death. This is increased by 1 per level of [[Looting]], for a maximum of 0–5 redstone dust.
=== Chest loot ===
{{LootChestItem|redstone}}
=== Crafting ===
Redstone dust can be crafted from [[blocks of redstone]].
{{Crafting
|Block of Redstone
|Output=Redstone Dust,9
|type=Redstone
}}
=== Smelting ===
{{Smelting
|showname=1
|Redstone Ore; Deepslate Redstone Ore
|Redstone Dust
|0.7
}}
=== Trading ===
{{IN|java}}, novice-level cleric [[villager]]s sell two redstone dust for one [[emerald]].
{{IN|bedrock}}, novice-level cleric villagers sell four redstone dust for one emerald.
=== Villager gifts ===
{{see also|Tutorials/Raid farming}}
{{IN|Java}}, when the player has the [[Hero of the Village]] status effect, clerics might throw that player a redstone dust as a gift.
== Usage ==
Redstone dust is used for [[#Brewing ingredient|brewing]], [[#Crafting ingredient|crafting]], and in redstone circuits by placing it on the ground to create [[#Redstone component|redstone wire]]. It can also be used to power redstone components.
=== Brewing ingredient ===
{{Brewing
|head=1
|Redstone Dust
|Mundane Potion
|base=Water Bottle
}}
{{Brewing
|foot=1
|name=Increased Duration
|Redstone Dust
|showbase=1
|base=Potion of Fire Resistance; Potion of Invisibility; Potion of Night Vision; Potion of Poison; Potion of Regeneration; Potion of Slowness; Potion of Strength; Potion of Swiftness; Potion of Water Breathing; Potion of Weakness; Potion of Leaping; Potion of Slow Falling
}}
=== Crafting ingredient ===
{{crafting usage|Redstone Dust}}
=== {{anchor|Redstone dust}} Redstone component ===
When placed in the world, redstone dust becomes a block of "redstone wire"{{Info needed|other blco? BE?}}, which can transmit [[Redstone circuit#Power|redstone power]].
=== Smithing ingredient ===
{{Smithing
|head=1
|ingredients=Any Armor Trim +<br/>Any Armor Piece + <br/>Redstone Dust
|Any Armor Trim Smithing Template
|Netherite Chestplate
|Redstone
|Redstone Trim Netherite Chestplate
|showdescription=1
|description = All armor types can be used in this recipe,<br/>a netherite chestplate is shown as an example.<br/>
|tail=1
}}
;Trim color palette
The following color palette is shown on the designs on trimmed armor:
*{{TrimPalette|redstone dust}}
=== Placement ===
[[File:Redstone wire as circuit component.png|Examples of redstone wire configuration. ''Top Left:'' Redstone wire connects diagonally vertically through non-opaque blocks. ''Top Right:'' Redstone wire does ''not'' connect diagonally vertically through opaque blocks. ''Center:'' Redstone wire gets darker as its power level drops, to a maximum of 15 blocks from a power source.|thumb]]
[[File:Redstone on Glowstone, Stairs, Slabs.png|Examples of redstone wire placements.|thumb]]
Redstone dust can be placed on [[opaque]] blocks as well as [[glowstone]], upside-down [[slab]]s, [[glass]], upside-down [[stairs]], and [[hopper]]s. It can also be placed on some transparent blocks; see [[Opacity/Placement]] for more information. It cannot be placed suspended in midair, even with commands, which is not unintentional.<ref>{{bug|MC-182709}}</ref>
Redstone wire configures itself to point toward adjacent redstone [[Redstone components#Power components|power components]] and [[Redstone components#Transmission components|transmission component]] connection points. Redstone wire also configures itself to point toward adjacent redstone wire one block higher or lower – unless there is a solid opaque block above the lower redstone wire.
If there is only one such adjacent redstone component, redstone wire configures itself into a {{BlockSprite|redstone-dust}} line pointing both at the neighbor and away from it. If there are two or more such adjacent components, redstone wire connects them in the form of {{BlockSprite|redstone-dust}}, {{BlockSprite|redstone-dust-upleft}}, {{BlockSprite|redstone-dust-t-up}}, or {{BlockSprite|redstone-dust-cross}} as needed.
When there are no adjacent components, a single redstone wire configures itself into a {{BlockSprite|redstone-dust-cross}} plus sign, which can provide power in all four directions. By right-clicking it can be changed into a {{BlockSprite|redstone-dust-dot}} dot, which does not provide power to any of the four directions.
{{IN|bedrock}}, redstone wire automatically configures itself to point toward adjacent blocks or [[Redstone components#Mechanism components|mechanism components]]. {{IN|java}}, it does not. If such a configuration is desired, the other neighbors of the redstone wire must be arranged to create it, i.e the redstone dust must be placed in a way that it would be pointed at the block’s location even if it were not there.
When redstone wire is reconfigured after placement, it does not update other redstone components around it of the change unless that reconfiguration also includes a change in power level or another component provides an update. This can create situations where a mechanism component remains activated when it shouldn't, or vice versa, until it receives an update from something else – a "feature" of redstone wire that can be used to make a [[BUD|block update detector]].
{{-}}
=== Behavior ===
{{Schematic|caption=
{{IN|be}}, the signal can go down from glass blocks.
|||rd-$ew!|RL-!||||rd-$ew!|RL-!|-
|rt-$!|rd-$ew!|SB|||rt-$!|rd-$ew!|glass||-
|ts-$|SB|rd-$ew|RL||ts-$|SB|rd-$ew!|RL-!
}}{{Schematic|caption =
However, the signal can never go down from slabs.
|||rd-$ew!|RL-!||||rd-$ew!|RL-!|-
|rt-$!|rd-$ew!|SB|||rt-$!|rd-$ew!|glass||-
|ts-$|ts-$|rd-$ew|RL||ts-$|ts-$|rd-$ew|RL
}}
Redstone wire can transmit power, which can be used to operate [[Redstone components#Mechanism components|mechanism components]] ([[door]]s, [[piston]]s, [[redstone lamp]]s, etc.).
Redstone wire can be "powered" by a number of methods:
* from an adjacent [[Redstone components#Power components|power component]] or a strongly-powered block
* from the output of a redstone repeater or redstone comparator
* from adjacent redstone wire. The powering dust can be a level higher or lower, but with restrictions:
** Redstone dust can be powered by redstone dust that is one level lower, or on an [[opaque]] block one level higher. A transparent block cannot{{only|java}} pass power downward.
** The block "between" the two dust blocks must be air or transparent. A solid block there "cuts" the connection between the higher and lower dust.
The "power level" of redstone dust can vary from 0 to 15. Most power components power-up adjacent redstone dust to power level 15, but a few ([[daylight sensor]]s, [[trapped chest]]s, and [[weighted pressure plate]]s) may create a lower power level. Redstone repeaters output power level 15 (when turned on), but [[redstone comparator]]s may output a lower power level.
{{Schematic | caption =
Redstone wire can transmit power up to 15 blocks.
|rt-$!|rd-$ew!+15|rd-$ew!+14|rd-$ew!+13|rd-$ew!+12|rd-$ew!+11|rd-$ew!+10|rd-$ew!+9
|rd-$ew!+8|rd-$ew!+7|rd-$ew!+6|rd-$ew!+5|rd-$ew!+4|rd-$ew!+3|rd-$ew!+2|rd-$ew!+1|rd-$ew+0
}}
Power level drops by 1 for every block of redstone wire it crosses. Thus, redstone wire can transmit power for no more than 15 blocks. To go further, the power level must be re-strengthened – typically with a redstone repeater.
Powered redstone wire on top of, or pointing at, an opaque block provides ''weak'' power to the block. A weakly-powered block cannot power other adjacent redstone wire, but can still power redstone repeaters and comparators, and activate adjacent mechanism components. Transparent blocks cannot be powered.
When redstone wire is unpowered, it appears dark red. When powered, it becomes bright red at power level 15, fading to darker shades with decreasing power. Powered redstone wire also produces "dust" [[particles]] of the same color.
While redstone wire always provides power to the directions it points into, it can still point into directions in which it cannot give power. If redstone wire comes in the form of a cross, the player can right-click to toggle it between a cross and dot. A redstone dot does not power anything adjacent to it, but powers the block under it.
== Sounds ==
{{Sound table/Block/Normal}}
== Data values ==
=== ID ===
{{edition|java}}:
{{ID table
|edition=java
|firstcolumnname=Redstone Dust
|showforms=y
|generatetranslationkeys=y
|displayname=Block
|spritename=redstone-dust
|spritetype=block
|nameid=redstone_wire
|form=block}}
{{ID table
|displayname=Item
|spritename=redstone-dust
|spritetype=item
|nameid=redstone
|form=item
|foot=1}}
{{edition|bedrock}}:
{{ID table
|edition=bedrock
|firstcolumnname=Redstone Dust
|shownumericids=y
|showforms=y
|generatetranslationkeys=y
|displayname=Block
|spritename=redstone-dust
|spritetype=block
|nameid=redstone_wire
|id=55
|form=block}}
{{ID table
|displayname=Item
|spritename=redstone-dust
|spritetype=item
|nameid=redstone
|id=373
|form=item
|foot=1}}
=== Block states ===
{{see also|Block states}}
{{/BS}}
{{LoadPage|Redstone Dust/Asset history|List of block state combinations|h4}}
== Achievements ==
{{load achievements|Dispense With This}}
== Video ==
{{Video note|These videos do not show all uses for redstone in crafting and all methods of obtaining. This video is also outdated, as of 1.13 Java Edition, redstone is now called Redstone Dust.}}
<div style="text-align:center">
<span style="display:inline-block">{{yt|zldqknGFWb4}}</span>
<span style="display:inline-block">{{yt|_IApwvCLJW8}}</span>
</div>
== History ==
{{History||May 21, 2009|link=https://web.archive.org/web/0/http://notch.tumblr.com/post/110762705/my-list-on-tile-types-so-far|[[Notch]] shows interest in adding wire-type [[block]]s.}}
{{History|java alpha}}
{{History||v1.0.1|[[File:Redstone Dust JE1 BE1.png|32px]] Added redstone dust as an [[item]].
|[[File:Inactive Redstone Wire (NS) JE1.png|32px]] [[File:Inactive Redstone Wire (EW) JE1.png|32px]] [[File:Inactive Redstone Wire (NE) JE1.png|32px]] [[File:Inactive Redstone Wire (ES) JE1.png|32px]] [[File:Inactive Redstone Wire (SW) JE1.png|32px]] [[File:Inactive Redstone Wire (NW) JE1.png|32px]] [[File:Inactive Redstone Wire (NEW) JE1.png|32px]] [[File:Inactive Redstone Wire (NES) JE1.png|32px]] [[File:Inactive Redstone Wire (ESW) JE1.png|32px]] [[File:Inactive Redstone Wire (NSW) JE1.png|32px]] [[File:Inactive Redstone Wire (NESW) JE1.png|32px]]<br>[[File:Active Redstone Wire (NS) JE1.png|32px]] [[File:Active Redstone Wire (EW) JE1.png|32px]] [[File:Active Redstone Wire (NE) JE1.png|32px]] [[File:Active Redstone Wire (ES) JE1.png|32px]] [[File:Active Redstone Wire (SW) JE1.png|32px]] [[File:Active Redstone Wire (NW) JE1.png|32px]] [[File:Active Redstone Wire (NEW) JE1.png|32px]] [[File:Active Redstone Wire (NES) JE1.png|32px]] [[File:Active Redstone Wire (ESW) JE1.png|32px]] [[File:Active Redstone Wire (NSW) JE1.png|32px]] [[File:Active Redstone Wire (NESW) JE1.png|32px]] Added redstone dust as a placed [[block]].
|Redstone dust as a placed block has two power appearances; either completely on, or completely off.
|Redstone dust is used to craft [[redstone torch]]es.
|At this time, redstone has not been given an official name.}}
{{History||v1.0.2_01|Redstone dust now doesn't connect through solid [[block]]s diagonally down.{{needs testing|may have been changed in v1.0.2|type=untestable}}
|Walking on redstone dust no longer [[breaking|breaks]] it.{{needs testing|may have been changed in v1.0.2|type=untestable}}
|Active redstone dust now gives off [[particles]].{{needs testing|may have been changed in v1.0.2|type=untestable}}}}
{{History||v1.1.0|Redstone is now used to craft [[compass]]es.}}
{{History||v1.2.0|snap=<nowiki>?|slink=:Category:Information needed requiring unarchived version|Redstone is now used to craft [[clock]]s.}}
{{History|java beta}}
{{History||1.0|With the addition of inventory tooltips, the [[item]] form of redstone dust has been named "Redstone", and the usually unobtainable block form has been named "Redstone Dust".}}
{{History||1.2|Redstone is now used to craft [[dispenser]]s and [[note block]]s.}}
{{History||1.3|[[File:Inactive Redstone Wire (NS) JE2.png|32px]] [[File:Inactive Redstone Wire (EW) JE2.png|32px]] [[File:Inactive Redstone Wire (NE) JE2.png|32px]] [[File:Inactive Redstone Wire (ES) JE2.png|32px]] [[File:Inactive Redstone Wire (SW) JE2.png|32px]] [[File:Inactive Redstone Wire (NW) JE2.png|32px]] [[File:Inactive Redstone Wire (NEW) JE2.png|32px]] [[File:Inactive Redstone Wire (NES) JE2.png|32px]] [[File:Inactive Redstone Wire (ESW) JE2.png|32px]] [[File:Inactive Redstone Wire (NSW) JE2.png|32px]] [[File:Inactive Redstone Wire (NESW) JE2.png|32px]]<br>[[File:Active Redstone Wire (NS) JE2.png|32px]] [[File:Active Redstone Wire (EW) JE2.png|32px]] [[File:Active Redstone Wire (NE) JE2.png|32px]] [[File:Active Redstone Wire (ES) JE2.png|32px]] [[File:Active Redstone Wire (SW) JE2.png|32px]] [[File:Active Redstone Wire (NW) JE2.png|32px]] [[File:Active Redstone Wire (NEW) JE2.png|32px]] [[File:Active Redstone Wire (NES) JE2.png|32px]] [[File:Active Redstone Wire (ESW) JE2.png|32px]] [[File:Active Redstone Wire (NSW) JE2.png|32px]] [[File:Active Redstone Wire (NESW) JE2.png|32px]] Redstone wire gets darker the farther away it is from a source of power, using a dedicated [[tint]] system. Previously, it was fully on until it reached its limit.
|Its particles now appear gray due to not being tinted.
|Redstone is now used to craft [[redstone repeater]]s.}}
{{History||1.5|[[File:Inactive Redstone Wire (NS) JE3.png|32px]] [[File:Inactive Redstone Wire (EW) JE3.png|32px]] [[File:Inactive Redstone Wire (NE) JE3.png|32px]] [[File:Inactive Redstone Wire (ES) JE3.png|32px]] [[File:Inactive Redstone Wire (SW) JE3.png|32px]] [[File:Inactive Redstone Wire (NW) JE3.png|32px]] [[File:Inactive Redstone Wire (NEW) JE3.png|32px]] [[File:Inactive Redstone Wire (NES) JE3.png|32px]] [[File:Inactive Redstone Wire (ESW) JE3.png|32px]] [[File:Inactive Redstone Wire (NSW) JE3.png|32px]] [[File:Inactive Redstone Wire (NESW) JE3.png|32px]]<br>[[File:Active Redstone Wire (NS) JE3.png|32px]] [[File:Active Redstone Wire (EW) JE3.png|32px]] [[File:Active Redstone Wire (NE) JE3.png|32px]] [[File:Active Redstone Wire (ES) JE3.png|32px]] [[File:Active Redstone Wire (SW) JE3.png|32px]] [[File:Active Redstone Wire (NW) JE3.png|32px]] [[File:Active Redstone Wire (NEW) JE3.png|32px]] [[File:Active Redstone Wire (NES) JE3.png|32px]] [[File:Active Redstone Wire (ESW) JE3.png|32px]] [[File:Active Redstone Wire (NSW) JE3.png|32px]] [[File:Active Redstone Wire (NESW) JE3.png|32px]] Fully off redstone wire is no longer black.
|Redstone dust can now be placed on [[snow]].
|Redstone is now used to craft [[powered rail]]s and [[detector rail]]s.}}
{{History||1.6.6|Redstone dust now checks if the block below has a solid top face or [[glowstone]], allowing it to be placed on it.}}
{{History||1.7|Redstone dust now connects to a [[redstone repeater|repeater]] without the dust being explicitly pointed at it.
|Redstone can now be used to craft [[piston]]s.}}
{{History||1.8|snap=Pre-release|Redstone can now be found in the new [[stronghold]] storeroom [[chest]]s, and in the new [[mineshaft]] chests.}}
{{History|java}}
{{History||1.0.0|snap=Beta 1.9 Prerelease 3|Redstone can now be [[brewing|brewed]] in a [[water bottle]] to create a [[mundane potion]].
|Redstone can now be found in the new [[stronghold]] altar [[chest]]s.
|Redstone now extends the [[potion]]s of [[Fire Resistance]], [[Slowness]], [[Swiftness]], [[Poison]], [[Weakness]] and [[Strength]].}}
{{History|||snap=Beta 1.9 Prerelease 4|Redstone now extends the new potion of [[Regeneration]].}}
{{History|||snap=RC1|[[File:Inactive Redstone Wire (unconnected) JE1.png|32px]] <br>[[File:Active Redstone Wire (unconnected) JE1.png|32px]] Redstone dust placement on one [[block]] has been changed from a "+" to a "•" shape.}}
{{History||?|Redstone wire block particles are now correctly colored.}}
{{History||1.1|snap=11w49a|Fixed redstone update bug.{{more info}}}}
{{History||1.2.1|snap=12w06a|Redstone can now be placed on [[glowstone]].}}
{{History|||snap=12w07a|Redstone is now used to craft [[redstone lamp]]s.}}
{{History||1.3.1|snap=12w21a|Redstone can now be [[trading|bought]] from priest [[villager]]s, at 2–4 redstone for 1 [[emerald]], making them [[renewable]].}}
{{History|||snap=12w22a|Redstone dust now generates in [[jungle temple]]s.}}
{{History|||snap=12w25a|Redstone dust can now be placed on top of upside-down [[slabs]] and [[stairs]].}}
{{History||1.4.2|snap=12w34a|Redstone now extends the new [[potion]]s of [[Night Vision]] and [[Invisibility]].}}
{{History|||snap=12w38a|[[Witch]]es have been added, which sometimes [[drops|drop]] redstone when killed.}}
{{History||1.5|snap=13w01a|Redstone can now be used to craft [[blocks of redstone]] and [[dropper]]s.}}
{{History||1.7.2|snap=13w36a|Redstone now extends the new [[potion]] of [[Water Breathing]].}}
{{History||1.8|snap=14w02a|[[Trading]] has been changed: cleric [[villager]]s now [[trading|sell]] 1–4 redstone for 1 [[emerald]].}}
{{History|||snap=14w25a|Redstone dust no longer changes to [[obsidian]] next to water when [[lava]] flows into it.}}
{{History|||snap=14w27a|Redstone now extends the new [[potion]] of [[Leaping]].}}
{{History||1.9|snap=15w31a|[[File:Inactive Redstone Wire (unconnected) JE2.png|32px]] [[File:Inactive Redstone Wire (NS) JE4.png|32px]] [[File:Inactive Redstone Wire (EW) JE4.png|32px]] [[File:Inactive Redstone Wire (NE) JE4.png|32px]] [[File:Inactive Redstone Wire (ES) JE4.png|32px]] [[File:Inactive Redstone Wire (SW) JE4.png|32px]] [[File:Inactive Redstone Wire (NW) JE4.png|32px]] [[File:Inactive Redstone Wire (NEW) JE4.png|32px]] [[File:Inactive Redstone Wire (NES) JE4.png|32px]] [[File:Inactive Redstone Wire (ESW) JE4.png|32px]] [[File:Inactive Redstone Wire (NSW) JE4.png|32px]] [[File:Inactive Redstone Wire (NESW) JE4.png|32px]]<br>[[File:Active Redstone Wire (unconnected) JE2.png|32px]] [[File:Active Redstone Wire (NS) JE4.png|32px]] [[File:Active Redstone Wire (EW) JE4.png|32px]] [[File:Active Redstone Wire (NE) JE4.png|32px]] [[File:Active Redstone Wire (ES) JE4.png|32px]] [[File:Active Redstone Wire (SW) JE4.png|32px]] [[File:Active Redstone Wire (NW) JE4.png|32px]] [[File:Active Redstone Wire (NEW) JE4.png|32px]] [[File:Active Redstone Wire (NES) JE4.png|32px]] [[File:Active Redstone Wire (ESW) JE4.png|32px]] [[File:Active Redstone Wire (NSW) JE4.png|32px]] [[File:Active Redstone Wire (NESW) JE4.png|32px]] Some slight changes have been made to redstone wire's appearance - the dot now extends outward with two more pixels, and the south-facing section of bends, T shapes and crosses now has one fewer pixel. It also appears straighter and more continuous in straight wire form.
|Redstone can no longer be added to extended [[potion]]s or tier-II potions.}}
{{History|||snap=15w44a|The average yield of redstone from [[dungeon]] [[chest]]s has been cut by more than half.
|The average yield of redstone in [[mineshaft]] chests has been increased.}}
{{History|||snap=15w46a|The hitbox of redstone now covers only part of the surface of the [[block]] below, based on the orientation of the redstone.}}
{{History||1.11|snap=16w39a|Redstone dust can now be found in chests in [[woodland mansion]]s.
|Redstone can now used to craft [[observer]]s.}}
{{History||1.13|snap=17w47a|The [[item]] form of "Redstone" has been renamed to "Redstone Wire".
|Prior to [[1.13/Flattening|''The Flattening'']], this [[block]]'s numeral ID was 55, and the [[item]]'s 331.}}
{{History|||snap=17w48a|"Redstone" has been renamed to "Redstone Dust".}}
{{History|||snap=18w07a|Redstone now extends the new [[potion of the Turtle Master]].}}
{{History||1.14|snap=18w43a|[[File:Redstone Dust JE2 BE2.png|32px]] The texture of redstone dust has been changed.}}
{{History|||snap=18w50a|Redstone dust can now be found in chests in [[village]] temples.}}
{{History|||snap=19w12b|Redstone dust can now be placed on [[glass]], [[ice]] and [[sea lantern]]s.}}
{{History|||snap=19w13a|Cleric villagers now give redstone dust to players under the [[Hero of the Village]] effect.}}
{{History||1.16|snap=20w06a|Redstone dust now has a bottom texture.}}
{{History|||snap=20w09a|Redstone can now be used to craft [[target]]s.}}
{{History|||snap=20w18a|Redstone dust placement on one [[block]] has been changed from a "•" back to a "+" shape.
|Redstone dust's hitbox is now no longer strictly a cuboid, and more closely matches the shape of the wiring.<ref>{{bug|MC-137336}}</ref>
|Upward going redstone dust now has a hitbox on the side of the [[block]] too, rather than only on the floor.<ref>{{bug|MC-153508}}</ref>
|Unconnected redstone dust now has all direction block states set to "side".
|The direction block states of redstone dust are now properly set to "side" at the end of a redstone wire on both ends, rather than only the one with other redstone besides it.
|[[File:Inactive Redstone Wire (N).png|32px]] [[File:Inactive Redstone Wire (E).png|32px]] [[File:Inactive Redstone Wire (S).png|32px]] [[File:Inactive Redstone Wire (W).png|32px]]<br>[[File:Active Redstone Wire (N).png|32px]] [[File:Active Redstone Wire (E).png|32px]] [[File:Active Redstone Wire (S).png|32px]] [[File:Active Redstone Wire (W).png|32px]] While not accessible in normal gameplay, redstone dust that points into one side, but not the opposite, now visually reaches halfway across the [[block]].}}
{{History|||snap=20w19a|Redstone dust now visually connects when going up [[soul sand]], 8-layer [[snow]] stacks and the back side of upside-down [[stairs]].
|[[Particles]] are now generated across the length of the redstone wire rather than the center of the [[block]].}}
{{History|||snap=20w21a|Redstone dust placement on one [[block]] is now toggleable between a "+" and a "•" shape, by {{control|interacting}} with it.}}
{{History||1.17|snap=21w08a|Redstone dust can now drop and be smelted from [[deepslate redstone ore]].}}
{{History||1.19|snap=22w13a|Redstone wire now generates in [[Ancient City|ancient cities]].}}
{{History||1.20<br>(Experimental)|link=1.19.4|snap=23w04a|Redstone dust can now be used as an armor trim material.}}
{{History|pocket alpha}}
{{History||v0.8.0|snap=build 1|[[File:Redstone Dust JE1 BE1.png|32px]] Added redstone as an [[item]].
|Redstone is now [[drops|dropped]] when [[breaking|mined]] from [[redstone ore]].
|Redstone can be used to craft [[compass]]es and [[clock]]s.}}
{{History|||snap=build 2|Redstone can now be used to craft [[powered rail]]s.}}
{{History||v0.11.0|snap=build 1|Redstone is now used to craft [[redstone block]]s.}}
{{History||v0.12.1|snap=build 1|Redstone has been added to the [[Creative]] [[inventory]], but it still cannot be placed. }}
{{History||v0.13.0|snap=build 1|Redstone can now be placed.
|Redstone is now used to craft [[redstone lamp]]s, [[note block]]s, [[detector rail]]s and [[redstone torch]]es.}}
{{History||v0.14.0|snap=build 1|Redstone is now used to craft [[dispenser]]s and [[dropper]]s.}}
{{History||v0.15.0|snap=build 1|Redstone is now used to craft [[piston]]s and [[observer]]s.}}
{{History|pocket}}
{{History||1.0.4|snap=alpha 1.0.4.0|Cleric [[villager]]s now [[trading|sell]] 1–4 redstone for an [[emerald]].}}
{{History||1.1.0|snap=alpha 1.1.0.0|Redstone can now be found in [[woodland mansion]]s.}}
{{History|bedrock}}
{{History||?|[[File:Inactive Redstone Wire (NE) BE.png|32px]] [[File:Inactive Redstone Wire (ES) BE.png|32px]] [[File:Inactive Redstone Wire (SW) BE.png|32px]] [[File:Inactive Redstone Wire (NW) BE.png|32px]] [[File:Inactive Redstone Wire (NEW) BE.png|32px]] [[File:Inactive Redstone Wire (NES) BE.png|32px]] [[File:Inactive Redstone Wire (ESW) BE.png|32px]] [[File:Inactive Redstone Wire (NSW) BE.png|32px]] [[File:Inactive Redstone Wire (NESW) BE.png|32px]]<br>[[File:Active Redstone Wire (NE) BE.png|32px]] [[File:Active Redstone Wire (ES) BE.png|32px]] [[File:Active Redstone Wire (SW) BE.png|32px]] [[File:Active Redstone Wire (NW) BE.png|32px]] [[File:Active Redstone Wire (NEW) BE.png|32px]] [[File:Active Redstone Wire (NES) BE.png|32px]] [[File:Active Redstone Wire (ESW) BE.png|32px]] [[File:Active Redstone Wire (NSW) BE.png|32px]] [[File:Active Redstone Wire (NESW) BE.png|32px]]<br>Placed redstone now assumes its current appearance with a more solid center. Its linear state appearences are unknown.}}
{{History||1.10.0|snap=beta 1.10.0.3|[[File:Redstone Dust JE2 BE2.png|32px]] The texture of redstone has been changed.}}
{{History||1.11.0|snap=beta 1.11.0.1|Redstone can now be found in [[desert]] [[village]] temple [[chest]]s.}}
{{History|||snap=beta 1.11.0.4|Cleric [[villager]]s now [[trading|sell]] 4 redstone as part of their first tier [[trading|trade]].}}
{{History||1.16.210|snap=beta 1.16.210.57|"Redstone" has been renamed to "Redstone Dust".}}
{{History||1.17.0|snap=beta 1.16.230.52|Redstone dust can now drop and be smelted from [[deepslate redstone ore]].}}
{{History||1.19.0|snap=beta 1.19.0.26|Redstone wire now generates in [[Ancient City|ancient cities]].}}
{{History||1.19.80|snap=beta 1.19.80.21|Redstone dust can now be used as an armor trim material.}}
{{History|console}}
{{History||xbox=TU1|xbone=CU1|ps=1.0|wiiu=Patch 1|switch=1.0.1|[[File:Redstone Dust JE1 BE1.png|32px]] Added redstone.}}
{{History||xbox=TU3|Redstone now connects to a [[redstone repeater|repeater]] without the dust being explicitly pointed at it.}}
{{History||xbox=none|xbone=none|ps=1.90|wiiu=none|switch=none|[[File:Redstone Dust JE2 BE2.png|32px]] The texture of redstone has been changed.}}
{{History||ps=1.95|Redstone can now be placed on [[glass]].}}
{{History|new 3ds}}
{{History||0.1.0|[[File:Redstone Dust JE1 BE1.png|32px]] Added redstone dust.}}
{{History|foot}}
=== Redstone wire "item" ===
{{:Technical blocks/Redstone Wire}}
== Gallery ==
=== Renders ===
; Java Edition
<gallery>
Inactive Redstone Wire (NESW).png |
Inactive Redstone Wire (unconnected).png |
Inactive Redstone Wire (NS).png |
Inactive Redstone Wire (EW).png |
Inactive Redstone Wire (NE).png |
Inactive Redstone Wire (ES).png |
Inactive Redstone Wire (SW).png |
Inactive Redstone Wire (NW).png |
Inactive Redstone Wire (NEW).png |
Inactive Redstone Wire (NES).png |
Inactive Redstone Wire (ESW).png |
Inactive Redstone Wire (NSW).png
</gallery>
<gallery>
Active Redstone Wire (NESW).png |
Active Redstone Wire (unconnected).png |
Active Redstone Wire (NS).png |
Active Redstone Wire (EW).png |
Active Redstone Wire (NE).png |
Active Redstone Wire (ES).png |
Active Redstone Wire (SW).png |
Active Redstone Wire (NW).png |
Active Redstone Wire (NEW).png |
Active Redstone Wire (NES).png |
Active Redstone Wire (ESW).png |
Active Redstone Wire (NSW).png
</gallery>
; Bedrock Edition
<gallery>
Inactive Redstone Wire (NESW) BE.png |
Inactive Redstone Wire (NESW) BE.png |
Inactive Redstone Wire (NS).png |
Inactive Redstone Wire (EW).png |
Inactive Redstone Wire (NE) BE.png |
Inactive Redstone Wire (ES) BE.png |
Inactive Redstone Wire (SW) BE.png |
Inactive Redstone Wire (NW) BE.png |
Inactive Redstone Wire (NEW) BE.png |
Inactive Redstone Wire (NES) BE.png |
Inactive Redstone Wire (ESW) BE.png |
Inactive Redstone Wire (NSW) BE.png
</gallery>
<gallery>
Active Redstone Wire (NESW) BE.png |
Active Redstone Wire (NESW) BE.png |
Active Redstone Wire (NS).png |
Active Redstone Wire (EW).png |
Active Redstone Wire (NE) BE.png |
Active Redstone Wire (ES) BE.png |
Active Redstone Wire (SW) BE.png |
Active Redstone Wire (NW) BE.png |
Active Redstone Wire (NEW) BE.png |
Active Redstone Wire (NES) BE.png |
Active Redstone Wire (ESW) BE.png |
Active Redstone Wire (NSW) BE.png
</gallery>
=== Screenshots ===
<gallery>
Slab Stair Redstone.png|First image of redstone dust on top of slabs and stairs.
File:Olivia Tinkering.jpeg|[[Olivia]] using a scarce amount of redstone dust.
File:23w32a.jpg|[[Sunny]] using a very long strip of redstone dust.
</gallery>
=== In other media ===
<gallery>
Powered By Redstone JINX.jpg|Official T-shirt artwork "Powered By Redstone" made by [https://www.jinx.com JINX].
File:Redstone Behind Chiseled Bookshelf Pixel Art.png|Pixel art of redstone dust.
</gallery>
== Issues ==
{{issue list|redstone|redstone dust|redstone wire}}
== Trivia ==
* Five updates for [[wikipedia:Windows 10 version history|Windows 10]] released from 2016 to 2018 were codenamed "Redstone", referencing ''Minecraft''.<ref>{{link|url=https://www.theverge.com/2015/4/7/8364355/microsoft-redstone-windows-updates|title=Microsoft plans ‘Redstone’ updates for Windows 10 in 2016|author=Tom Warren|website=The Verge|date=April 7, 2015}}</ref>
* The block has 1,296 possible block state combinations, the highest of all blocks as of 1.15.2, beating [[fire]]'s 512 and [[note block]]'s 800.
* According to {{el|ee}}, redstone dust contains radioactive [[element]]s.
== References ==
{{Reflist}}
{{Redstone}}
{{Blocks|Utility}}
{{Items}}
[[Category:Redstone mechanics]]
[[Category:Mechanisms]]
[[Category:Mechanics]]
[[Category:Generated structure blocks]]
[[Category:Non-solid blocks]]
[[Category:Brewing recipe]]
[[cs:Rudit]]
[[de:Redstone]]
[[el:Σκόνη Κοκκινόπετρας]]
[[es:Polvo de redstone]]
[[fr:Poudre de redstone]]
[[hu:Redstone]]
[[it:Polvere di redstone]]
[[ja:レッドストーンダスト]]
[[ko:레드스톤 가루]]
[[nl:Redstonestof]]
[[pl:Redstone]]
[[pt:Pó de redstone]]
[[ru:Красная пыль]]
[[th:ผงเรดสโตน]]
[[tr:Kızıltaş]]
[[uk:Редстоун]]
[[zh:红石粉]]</li><li>[[Hoe|Hoe]]<br/>{{Item
| image = <gallery>
Wooden Hoe.png | Wooden
Stone Hoe.png | Stone
Iron Hoe.png | Iron
Golden Hoe.png | Golden
Diamond Hoe.png | Diamond
Netherite Hoe.png | Netherite
</gallery>
|rarity = Common
|renewable =
* '''Netherite''': No
* '''All others''': Yes
| durability =
* Wood: 59
* Stone: 131
* Iron: 250
* Golden: 32
* Diamond: 1561
* Netherite: 2031
| stackable = No
}}
A '''hoe''' is a [[tool]] used to harvest certain plant-based or organic blocks more quickly, as well as to till most types of [[Dirt (disambiguation)|dirt]] into [[farmland]] and convert [[Coarse Dirt|coarse dirt]] and [[Rooted Dirt|rooted dirt]] to regular [[dirt]].
== Obtaining ==
=== Crafting ===
{{Crafting
|head=1
|showname=0
|showdescription=1
|name=[[Hoe]]
|A1= {Any Planks}; Iron Ingot; Gold Ingot; Diamond
|B1= {Any Planks}; Iron Ingot; Gold Ingot; Diamond
|B2= Stick
|B3= Stick
|Output=Wooden Hoe; Iron Hoe; Golden Hoe; Diamond Hoe
|type=Tool
}}
{{Crafting
|name=[[Stone Hoe]]
|A1=Any stone-tier block |B1=Any stone-tier block
|B2=Stick
|B3=Stick
|Output=Stone Hoe
|type=Tool
||description=Can use cobblestone and its other variants interchangeably.
}}
{{Crafting
|foot=1
|ignoreusage=1
|name=[[Hoe]]
|ingredients=Damaged Matching Hoe
|Damaged Wooden Hoe; Damaged Stone Hoe; Damaged Iron Hoe; Damaged Golden Hoe; Damaged Diamond Hoe; Damaged Netherite Hoe
|Damaged Wooden Hoe; Damaged Stone Hoe; Damaged Iron Hoe; Damaged Golden Hoe; Damaged Diamond Hoe; Damaged Netherite Hoe
|Output=Wooden Hoe; Stone Hoe; Iron Hoe; Golden Hoe; Diamond Hoe; Netherite Hoe
|description= The durability of the two hoes is added together, plus an extra 5% durability.
|type= Tool
}}
=== Upgrading ===
Like other diamond tools, a diamond hoe can be upgraded to a netherite hoe, increasing its durability and slightly increasing its mining speed.
{{Smithing
|head=1
|Netherite Upgrade
|Diamond Hoe
|Netherite Ingot
|Netherite Hoe
|tail=1
}}
=== Repairing ===
==== Grinding ====
{{Grinding
|showdescription=1
|ingredients=2x Damaged [[Wooden Hoe]] or<br>2x Damaged [[Stone Hoe]] or<br>2x Damaged [[Iron Hoe]] or<br>2x Damaged [[Golden Hoe]] or<br>2x Damaged [[Diamond Hoe]] or<br>2x Damaged [[Netherite Hoe]]
|Damaged Wooden Hoe; Damaged Stone Hoe; Damaged Iron Hoe; Damaged Golden Hoe; Damaged Diamond Hoe; Damaged Netherite Hoe
|Damaged Wooden Hoe; Damaged Stone Hoe; Damaged Iron Hoe; Damaged Golden Hoe; Damaged Diamond Hoe; Damaged Netherite Hoe
|Wooden Hoe; Stone Hoe; Iron Hoe; Golden Hoe; Diamond Hoe; Netherite Hoe
|description=The durability of the two hoes is added together, plus an extra 5% durability.
}}
==== Unit repair ====
{{main|Anvil mechanics#Unit repair}}
{{/Repairing with Anvils}}
A hoe can be repaired in an [[anvil]] by adding units of the [[tiers]]' repair material (or the same hoe of that tier), with each repair material restoring 25% of the hoe's maximum durability, rounded down. It also keeps the hoe's [[Enchanting|enchantments]].
=== Chest loot ===
{{LootChestItem|wooden-hoe,diamond-hoe,golden-hoe,random-enchanted-golden-hoe,damaged-level-enchanted-diamond-hoe}}
=== Trading ===
Novice-level toolsmith [[villager]]s have a chance to sell a stone hoe for one [[emerald]], and journeyman-level toolsmiths have a chance to sell a diamond hoe for 4 emeralds. {{IN|bedrock}}, these are 25% chances, and {{in|java}}, these are 40% chances.
=== Villager gifts ===
Toolsmith [[Villager|villagers]] occasionally throw stone hoes at players with the [[Hero of the Village]] status effect.{{Only|java}}
== Usage ==
=== Harvesting ===
Hoes are used to harvest certain plant-based or organic blocks more quickly. Breaking one of these blocks takes 1 [[durability]].
{{breaking row|Sculk Catalyst|sort=1|simple=1}}
{{breaking row|Sculk Shrieker|sort=1|simple=1}}
{{breaking row|Sculk Sensor|sort=1|simple=1}}
{{breaking row|Calibrated Sculk Sensor|sort=1|simple=1}}
{{breaking row|Nether Wart Block,Warped Wart Block|sort=1|simple=1}}
{{breaking row|Shroomlight|sort=1|simple=1}}
{{breaking row|Hay Bale|sort=1|simple=1}}
{{breaking row|Target|sort=1|simple=1}}
{{breaking row|Dried Kelp Block|sort=1|simple=1}}
{{breaking row|Sponge,Wet Sponge|sort=1|simple=1}}
{{breaking row|Leaves|sort=1|simple=1}}
{{breaking row|Sculk|sort=1|simple=1}}
{{breaking row|Sculk Vein|sort=1|simple=1}}
{{breaking row|Moss Block|foot=1}}
Breaking any other block takes 0 durability if the block breaks instantly when broken by hand, or 1 otherwise.
=== Tilling ===
Hoes are used to turn dirt, grass blocks, and dirt paths into [[farmland]]. To till, press {{control|use}} on a grass or dirt block while holding a hoe. This does not work on [[mycelium]] or [[podzol]],<ref>{{bug|MC-8231||Mycelium and podzol cannot be tilled with hoes}}</ref> nor does it work if there are other blocks on top of the targeted blocks, including snow layers or torches. However, mycelium and podzol can be first converted to dirt paths with a shovel, then tilled into farmland with a hoe.
Hoes can be used to convert [[coarse dirt]] into regular dirt by pressing {{control|use}} on the coarse dirt. Similar to tilling dirt, the space above the coarse dirt must be empty for it to be tilled.
Hoes can also be used on [[rooted dirt]], which turns it into normal dirt, and yields a [[hanging roots]] item.
Tilling is effectively instantaneous, regardless of material, and uses 1 durability. Breaking blocks with a hoe uses 0 or 1 durability, depending on the block.
Hoes are unable to work on blocks with a plant on top, even if that plant could normally be placed on top of farmland without reverting it to dirt.<ref>{{bug|MC-167846||Hoe cannot be used on blocks with certain blocks on top even if said blocks can normally exist on farmland|WAI}}</ref>
=== Weapon ===
Hoes may be used as a weapon, although they deal only {{hp|1}} damage {{in|java}}. {{IN|bedrock}}, hoes can do as much as a pickaxe in terms of damage. Hoes use 2 durability when used as a weapon.
{{IN|java}}, hoes have an attack speed modifier depending on the material: wood and gold have a modifier of -3 (refill in 1s), stone has a modifier of -2 (refill in 0.5s), iron has a modifier of -1 (refill in 0.33s), and diamond and netherite have a modifier of 0 (refill in 0.25s).
{| class="wikitable" style="text-align:center" data-description="Attack damage"
! Attack damage
! colspan="4" | Attack speed
! colspan="4" | Damage/Second (DPS)
|-
| {{hp|1}}
| {{ItemSprite|Wooden Hoe}}{{ItemSprite|Golden Hoe}} 1
| {{ItemSprite|Stone Hoe}} 2
| {{ItemSprite|Iron Hoe}} 3
| {{ItemSprite|Diamond Hoe}}{{ItemSprite|Netherite Hoe}} 4
| {{ItemSprite|Wooden Hoe}}{{ItemSprite|Golden Hoe}} 1
| {{ItemSprite|Stone Hoe}} 2
| {{ItemSprite|Iron Hoe}} 3
| {{ItemSprite|Diamond Hoe}}{{ItemSprite|Netherite Hoe}} 4
|}
Hoes always attack instantly {{in|bedrock}}.
=== Enchantments ===
A hoe can receive the following enchantments and curses:
{| class="wikitable col-2-center"
|+
!Name
!Max Level
![[Enchanting|Method]]
|-
|[[Efficiency]]
|V
|{{Inventory slot|Enchanting Table}}{{Inventory slot|Anvil}}
|-
|[[Fortune]] <ref group=note name=note1>Fortune and Silk Touch are mutually exclusive.</ref>
|III
|{{Inventory slot|Enchanting Table}}{{Inventory slot|Anvil}}
|-
|[[Unbreaking]]
|III
|{{Inventory slot|Enchanting Table}}{{Inventory slot|Anvil}}
|-
|[[Silk Touch]] <ref group=note name=note1>Fortune and Silk Touch are mutually exclusive.</ref>
|I
|{{Inventory slot|Enchanting Table}}{{Inventory slot|Anvil}}
|-
|[[Mending]]
|I
|{{Inventory slot|Anvil}}
|-
|[[Curse of Vanishing]]
|I
|{{Inventory slot|Anvil}}
|}
{{Notelist}}
=== Fuel ===
Wooden hoes can be used as a [[fuel]] in [[furnace]]s, smelting 1 item per hoe.
=== Smelting ingredient ===
{{Smelting|showname=1|Iron Hoe;Golden Hoe|Iron Nugget;Gold Nugget|0,1}}
===Piglins===
{{EntityLink|Piglin|Piglins}} are attracted to golden hoes and run toward any golden hoes on the ground, and inspect them for 6 to 8 seconds before putting them in their inventory.
== Sounds ==
{{edition|java}}:
{{Sound table
|sound=Hoe till1.ogg
|sound2=Hoe till2.ogg
|sound3=Hoe till3.ogg
|sound4=Hoe till4.ogg
|subtitle=Hoe tills
|source=block
|description=When a block is tilled into farmland
|id=item.hoe.till
|translationkey=subtitles.item.hoe.till
|volume=1.0
|pitch=1.0
|distance=16}}
{{Sound table
|sound=Random break.ogg
|subtitle=Item breaks
|source=player
|description=When a hoe's durability is exhausted
|id=entity.item.break
|translationkey=subtitles.entity.item.break
|volume=0.8
|pitch=0.8-1.2
|distance=16
|foot=1}}
{{edition|bedrock}}:
{{Sound table
|type=bedrock
|sound=Gravel hit1.ogg
|sound2=Gravel hit2.ogg
|sound3=Gravel hit3.ogg
|sound4=Gravel hit4.ogg
|source=block
|description=When a block is tilled into farmland
|id=use.gravel
|volume=1.0
|pitch=0.8}}
{{Sound table
|sound=Random break.ogg
|source=player
|description=When a hoe's durability is exhausted
|id=random.break
|volume=1.0
|pitch=0.9
|foot=1}}
== Data values ==
=== ID ===
{{edition|java}}:
{{ID table
|edition=java
|showforms=y
|generatetranslationkeys=y
|displayname=Wooden Hoe
|spritetype=item
|nameid=wooden_hoe
|form=item}}
{{ID table
|displayname=Stone Hoe
|spritetype=item
|nameid=stone_hoe
|form=item}}
{{ID table
|displayname=Iron Hoe
|spritetype=item
|nameid=iron_hoe
|form=item}}
{{ID table
|displayname=Diamond Hoe
|spritetype=item
|nameid=diamond_hoe
|form=item}}
{{ID table
|displayname=Golden Hoe
|spritetype=item
|nameid=golden_hoe
|form=item}}
{{ID table
|displayname=Netherite Hoe
|spritetype=item
|nameid=netherite_hoe
|form=item
|foot=1}}
{{edition|bedrock}}:
{{ID table
|edition=bedrock
|shownumericids=y
|showforms=y
|notshowbeitemforms=y
|generatetranslationkeys=y
|displayname=Wooden hoe
|spritetype=item
|nameid=wooden_hoe
|id=329
|form=item}}
{{ID table
|displayname=Stone hoe
|spritetype=item
|nameid=stone_hoe
|id=330
|form=item}}
{{ID table
|displayname=Iron hoe
|spritetype=item
|nameid=iron_hoe
|id=331
|form=item}}
{{ID table
|displayname=Diamond hoe
|spritetype=item
|nameid=diamond_hoe
|id=332
|form=item}}
{{ID table
|displayname=Golden hoe
|spritetype=item
|nameid=golden_hoe
|id=333
|form=item}}
{{ID table
|displayname=Netherite hoe
|spritetype=item
|nameid=netherite_hoe
|id=608
|form=item
|foot=1}}
== Achievements ==
{{load achievements|Time to Farm!; MOAR Tools;Oooh, shiny!}}
== Advancements ==
{{load advancements|Oh Shiny;Serious Dedication;A Seedy Place}}
== Video ==
<div style="text-align:center">{{yt|Wkqfv6QLEs0}}</div>
== History ==
{{History|java indev}}
{{History||20100206|[[File:Wooden Hoe JE1 BE1.png|32px]] [[File:Stone Hoe JE1 BE1.png|32px]] [[File:Iron Hoe JE1 BE1.png|32px]] [[File:Golden Hoe JE1 BE1.png|32px]] [[File:Diamond Hoe JE1 BE1.png|32px]] Added hoes.
|Compared to other golden tools, golden hoes had much higher durability, which was 513 instead of 33.}}
{{History|java alpha}}
{{History||v1.0.17|Golden hoes' durability has been decreased from 513 to 65, matching the stone tools.}}
{{History|java beta}}
{{History||1.2|Golden hoes now have the same durability as the other gold tools.}}
{{History||1.6|snap=Test Build 3|Before, using a hoe on [[grass block]]s was the only way to collect [[Wheat Seeds|seeds]] for planting. As [[tall grass]] has been introduced, this feature has been removed.}}
{{History|java}}
{{History||1.2.1|snap=12w07a|Player is now unable to till [[dirt]] or [[grass block]] when there is block on top of them.}}
{{History||1.2.4|snap=release|[[Spruce planks]], [[birch planks]], and [[jungle planks]] can now be used to craft wooden hoes.}}
{{History||1.3.1|snap=12w18a|Wooden hoes can now be used as [[Smelting#Fuel|fuel]] in a [[furnace]].}}
{{History|||snap=12w21a|Blacksmith [[villager]]s now [[trading|sell]] 1 diamond hoe for 7 [[emerald]]s, and 1 iron hoe for 4–5 emeralds.}}
{{History||1.4.2|snap=12w38a|Hoes now have a [[sound]] when tilling [[dirt]].}}
{{History||1.7.2|snap=1.7.1|[[Acacia planks]] and [[dark oak planks]] can now be used to craft wooden hoes.}}
{{History||1.8|snap=14w02a|Villagers no longer trade iron or diamond hoes, making diamond hoes [[non-renewable resource|non-renewable]].}}
{{History|||snap=14w32a|Hoes can now be used to convert [[coarse dirt]] into regular [[dirt]].}}
{{History||1.9|snap=15w34c|Stone, iron and diamond hoes now do slightly more [[damage]] than an unarmed attack.}}
{{History|||snap=15w34d|All hoes now lose 1 [[durability]] when used as a [[weapon]].}}
{{History|||snap=15w35a|Hoes now all do the same damage, but better materials have higher speeds.}}
{{History|||snap=15w50a|Added a [[sound]] for hoes: <code>item.hoe.till</code>.}}
{{History||1.11|snap=16w39a|Diamond hoes are now found in the new [[woodland mansion]] [[chest]]s.}}
{{History||1.11.1|snap=16w50a|Golden and iron hoes can now be [[smelting|smelted]] down into one of their respective [[nugget]]s.}}
{{History||1.13|snap=17w47a|Prior to ''[[1.13/Flattening|The Flattening]]'', these items' numeral IDs were 290 (wooden), 291 (stone), 292 (iron), 293 (diamond) and 294 (golden).}}
{{History||1.14|snap=18w43a|[[File:Wooden Hoe JE2 BE2.png|32px]] [[File:Stone Hoe JE2 BE2.png|32px]] [[File:Iron Hoe JE2 BE2.png|32px]] [[File:Golden Hoe JE2 BE2.png|32px]] [[File:Diamond Hoe JE2 BE2.png|32px]] The textures of all hoes have been changed.}}
{{History|||snap=19w11a|Toolsmith villagers now sell stone hoes and diamond hoes, making diamond hoes [[renewable resource|renewable]] again.}}
{{History|||snap=19w13a|Toolsmith villagers now give stone hoes to players under the [[Hero of the Village]] effect.}}
{{History||1.16|snap=20w06a|[[File:Netherite Hoe JE1.png|32px]] Added netherite hoes.
|Netherite hoes are obtained by combining one diamond hoe and one netherite ingot in a crafting table.
|[[Crimson planks]] and [[warped planks]] can now be used to craft wooden hoes.}}
{{History|||snap=20w09a|Hoes can now break [[Nether Wart Block|nether wart and warped wart block]]s quickly.
|Netherite hoes can now be obtained through [[bartering]] with [[piglin]]s.
|[[File:Wooden Hoe JE3 BE3.png|32px]] [[File:Golden Hoe JE3 BE3.png|32px]] [[File:Diamond Hoe JE3 BE3.png|32px]] The textures of wooden, golden, and diamond hoes have been changed.}}
{{History|||snap=20w10a|Each tier of hoes now has different a speed while [[breaking|mining]] blocks they are effective against.
|Hoes can now be enchanted with [[Efficiency]], [[Fortune]] and [[Silk Touch]].
|Hoes now mine [[hay bale]]s faster than other tools.
|Netherite hoes are now less common when bartering with piglins.
|Hoes now lose 2 durability when used as a weapon.
|[[File:Netherite Hoe JE2.png|32px]] The texture of netherite hoes has been changed.
|Netherite hoes can no longer be [[crafted]].
|Netherite hoes are now obtained by combining one diamond hoe and one [[netherite ingot]] in a [[smithing table]].}}
{{History|||snap=20w11a|Hoes can now mine [[dried kelp block]]s, [[target]]s, and [[shroomlight]]s faster than other [[tool]]s.}}
{{History|||snap=20w12a|Hoes can now mine [[sponge]]s faster than other tools.}}
{{History|||snap=20w15a|Hoes can now mine [[leaves]] faster.
|Stone hoes can now be crafted using [[blackstone]].}}
{{History|||snap=20w16a|Golden hoes now generate randomly enchanted in [[bastion remnant]]s and [[ruined portal]] chests.}}
{{History|||snap=20w20a|Netherite hoes can no longer be obtained through bartering with piglins, making them no longer renewable.}}
{{History||1.17|snap=20w49a|Hoes can now mine [[sculk sensor]]s faster than other tools.}}
{{History|||snap=21w11a|Hoes are now the appropriate tool for breaking [[moss block]]s.}}
{{History|||snap=21w08a|Stone hoes can now be crafted using [[cobbled deepslate]].}}
{{History|||snap=21w20a|Hoes can now be used on [[rooted dirt]], turning it into normal dirt, yielding a [[hanging roots]] item.}}
{{History||1.19|snap=22w11a|[[Mangrove planks]] can now be used to craft wooden hoes.}}
{{History|||snap=22w12a|Hoes can now mine mangrove [[leaves]] faster.<ref>{{Cite bug|MC|249270|Mangrove leaves do not have a hoe as their preferred tool|date=March 19, 2022}}</ref>}}
{{History|||snap=22w13a|Diamond hoes may now be found in [[ancient city]] [[chest]]s.}}
{{History||1.20<br>(Experimental)|link=1.19.4|snap=23w04a|Upgrading diamond hoes to netherite hoes now requires the netherite upgrade [[smithing template]].}}
{{History||1.20|snap=23w12a|Wooden hoes may now be found when brushing [[suspicious sand]] and [[suspicious gravel]] in cold and warm [[ocean ruins]] and [[trail ruins]].}}
{{History|||snap=23w16a|Wooden hoe no longer generates in [[suspicious sand]] in [[trail ruins]].|Due to the split of the archaeological loot tables for the suspicious gravel within the [[trail ruins]]; wooden hoe now is in the common loot.}}
{{History|upcoming java}}
{{History||Combat Tests|snap=1.14.3 - Combat Test|The attack speed of wooden hoes has been changed to 2, stone to 2.5, and diamond and gold to 3.5.
|The [[damage]] dealt for wooden, stone, and gold hoes have been changed to {{hp|2}} and iron and diamond hoes to {{hp|3}}.
|The attack reach of hoes has been increased to 4 [[block]]s.}}
{{History|pocket alpha}}
{{History||v0.4.0|[[File:Wooden Hoe JE1 BE1.png|32px]] [[File:Stone Hoe JE1 BE1.png|32px]] [[File:Iron Hoe JE1 BE1.png|32px]] [[File:Golden Hoe JE1 BE1.png|32px]] [[File:Diamond Hoe JE1 BE1.png|32px]] Added hoes.
|Only iron hoes are available in the Creative inventory.
|[[Wheat seed]]s are now obtained by using a hoe on [[grass]] blocks.}}
{{History||v0.8.0|snap=build 3|[[Beetroot seeds]], [[carrot]]s, and [[potato]]es are now obtained by using a hoe on [[grass]] blocks.}}
{{History|||snap=build 4|[[Carrot]]s and [[potato]]es no longer spawn from tilling [[grass]] blocks with a hoe.}}
{{History||v0.11.0|snap=build 11|Wooden, stone, golden, and diamond hoes are now available in the [[creative]] [[inventory]].}}
{{History|||snap=build 12|Wooden, stone, golden, and diamond hoes have been removed from creative.}}
{{History|||snap=build 13|All hoes are now available in [[creative]] mode again.}}
{{History||v0.16.2|Wooden hoes can now be found inside the [[chest]] in the large house of [[ice plains]] [[village]]s.}}
{{History|pocket}}
{{History||1.1.0|snap=alpha 1.1.0.0|Iron and golden hoes are now [[smelting|smeltable]].
|Diamond hoes can now be found inside [[woodland mansion]] [[chest]]s.}}
{{History|bedrock}}
{{History||1.2.0|snap=beta 1.2.0.2|Hoes can now be used to transform [[coarse dirt]] into normal [[dirt]].}}
{{History||1.10.0|snap=beta 1.10.0.3|Due to [[village]]s being overhauled, wooden hoes can no longer be found in [[village]]s.
|[[File:Wooden Hoe JE2 BE2.png|32px]] [[File:Stone Hoe JE2 BE2.png|32px]] [[File:Iron Hoe JE2 BE2.png|32px]] [[File:Golden Hoe JE2 BE2.png|32px]] [[File:Diamond Hoe JE2 BE2.png|32px]] The textures of all hoes have been changed.}}
{{History||1.11.0|snap=beta 1.11.0.4|Stone and diamond hoes can now be [[trading|bought]] from toolsmith [[villager]]s.}}
{{History||1.12.0|snap=beta 1.12.0.4|The price of diamond hoes [[trading|sold]] by toolsmith villagers has been lowered to 4 [[emerald]]s.}}
{{History||1.16.0|snap=beta 1.16.0.51|[[File:Netherite Hoe BE1.png|32px]] Added netherite hoes.|Netherite hoes are obtained by combining one diamond hoe and one netherite ingot in a crafting table.
|[[File:Wooden Hoe JE3 BE3.png|32px]] [[File:Golden Hoe JE3 BE3.png|32px]] [[File:Diamond Hoe JE3 BE3.png|32px]] The textures of wooden, golden, and diamond hoes have been changed.}}
{{History|||snap=beta 1.16.0.57|Each tier of hoes now has different a speed while [[breaking|mining]] blocks they are effective against.
|Hoes can now break [[hay bale]]s, [[dried kelp block]]s, [[target block]]s, [[Sponge|dry and wet sponges]], [[shroomlight]]s, [[leaves]], [[Nether Wart Block|nether wart and warped wart block]]s quickly.
|Hoes can now be enchanted with [[Efficiency]], [[Fortune]] and [[Silk Touch]].
|Netherite hoes can now be obtained through [[bartering]] with [[piglin]]s.
|Netherite hoes can no longer be [[crafting|crafted]].
|Netherite hoes are now obtained by combining one diamond hoe and one [[netherite ingot]] in a [[smithing table]].
|Stone Hoes can now be created using Blackstone.
|Golden and netherite hoes now generate randomly enchanted in [[bastion remnants]] chests.
|Golden hoes now generate randomly enchanted in ruined portal chests.
|Hoes now deal the same damage as pickaxes of each tier.}}
{{History||1.16.100|snap=beta 1.16.100.54|Netherite hoes can no longer be obtained through [[bartering]] with [[piglin]]s, making them no longer renewable.}}
{{History||1.17.10|snap=beta 1.17.10.20|[[File:Netherite Hoe JE2.png|32px]] The texture of netherite hoes has been changed to match ''Java Edition''.}}
{{History|console}}
{{History||xbox=TU1|xbone=CU1|ps=1.0|wiiu=Patch 1|switch=1.0.1|[[File:Wooden Hoe JE1 BE1.png|32px]] [[File:Stone Hoe JE1 BE1.png|32px]] [[File:Iron Hoe JE1 BE1.png|32px]] [[File:Golden Hoe JE1 BE1.png|32px]] [[File:Diamond Hoe JE1 BE1.png|32px]] Added hoes (all five types).}}
{{History||xbox=TU53|xbone=CU43|ps=1.49|wiiu=Patch 23|switch=1.0.3|Iron and golden hoes are now [[smelting|smeltable]].}}
{{History|ps4}}
{{History||1.90|[[File:Wooden Hoe JE2 BE2.png|32px]] [[File:Stone Hoe JE2 BE2.png|32px]] [[File:Iron Hoe.png|32px]] [[File:Golden Hoe JE2 BE2.png|32px]] [[File:Diamond Hoe JE2 BE2.png|32px]] The textures of all hoes have been changed.}}
{{History|New 3DS}}
{{History||0.1.0|[[File:Wooden Hoe JE1 BE1.png|32px]] [[File:Stone Hoe JE1 BE1.png|32px]] [[File:Iron Hoe JE1 BE1.png|32px]] [[File:Golden Hoe JE1 BE1.png|32px]] [[File:Diamond Hoe JE1 BE1.png|32px]] Added hoes.}}
{{History|foot}}
== Issues ==
{{issue list}}
== Trivia ==
*Tilling a [[dirt]] block that has a dirt block on top of it changes it to [[farmland]] even though it cannot be used. If a hoe is used on a [[block]] horizontally adjacent to such a block, the first block reverts to dirt and the selected block is not tilled.
*When a hoe breaks, it does not display the tool breaking animation like on other tools, because tilling is not predicted client-side.
*The textures for the post 1.14 iron and stone hoes have an error, where the color for the edge of the handle is partly the same color as the edge of the top part. This isn't present in any other tool.
== Gallery ==
<gallery>
Stone Hoe SDGP.png|Stone hoe in the [[Super Duper Graphics Pack]].
Kingbdogz Hoe.jpg|[[Kingbdgoz]] holding a hoe.
</gallery>
=== Enchanted hoes ===
<gallery>
Enchanted Wooden Hoe.gif
Enchanted Stone Hoe.gif
Enchanted Iron Hoe.gif
Enchanted Golden Hoe.gif
Enchanted Diamond Hoe.gif
Enchanted Netherite Hoe.gif
</gallery>
== References ==
{{reflist}}
== External Links ==
*[https://www.minecraft.net/en-us/article/taking-inventory--hoe Taking Inventory: Hoe] – Minecraft.net on June 25, 2019
{{Items}}
[[Category:Combat]]
[[cs:Motyka]]
[[de:Hacke]]
[[es:Azada]]
[[fr:Houe]]
[[hu:Kapa]]
[[it:Zappa]]
[[ja:クワ]]
[[ko:괭이]]
[[nl:Schoffel]]
[[pl:Motyka]]
[[pt:Enxada]]
[[ru:Мотыга]]
[[tr:Çapa]]
[[uk:Мотика]]
[[zh:锄]]</li></ul></nowiki> | 12w34b | "Boss Health" now says "Ender Dragon". | |||||||||||||||||||||||||||||||||
| 1.4 | Before this update, Ender dragons used the same damage sound as the player. Ender dragons now have their own sound. | ||||||||||||||||||||||||||||||||||
1.5{{Extension DPL}}<ul><li>[[Explorer Map|Explorer Map]]<br/>{{about|the map used to find rare structures|the craftable map|Map|others|Map (disambiguation)}}{{Needs updating|Add info on the new jungle, swamp, and village maps in Java 1.20.2 Pre-Release 1}}{{Item
| image = <gallery>
Ocean Explorer Map.png | Ocean
Woodland Explorer Map.png | Woodland
Buried Treasure Map.png | Buried Treasure
</gallery>
|image2 = <gallery>
Ocean Explorer Map BE.png | Ocean (BE)
Woodland Explorer Map BE.png | Woodland (BE)
Buried Treasure Map BE.png | Buried in Treasure (BE)
</gallery>
| renewable =
* '''Buried Treasure''': No
* '''Woodland and Ocean''': Yes
| stackable = Yes (64)
}}
An '''explorer map''' is a special [[map]] used to aid in finding rare [[generated structures]], including [[woodland mansion]]s, [[ocean monument]]s, and [[buried treasure]]s.
== Obtaining ==
=== Trading ===
Apprentice-level [[cartographer]] villagers sell ocean explorer maps for 13 emeralds and a compass. Journeyman-level cartographer villagers sell woodland explorer maps for 14 emeralds and a compass.
{{IN|java}}, if the cartographer is in [[the Nether]] or [[the End]], either spawned or transported, the trades for the map do not unlock. However, {{in|bedrock}}, the cartographer trades for the map are unlocked, but the purchased map shows the same layout as in the corresponding dimension and shows no destination structure, but if cartographer trades are unlocked in an old world type (prior-1.11.0), the game stops ticking.
In ''Java Edition'', each cartographer sells its own unique explorer map that points to a different location than other cartographers. Purchasing another explorer map from the same cartographer results in the same explorer map. In Bedrock Edition, a cartographer sells an explorer map that points to the nearest location, regardless of whether it is explored or previously mapped by another cartographer.<!-- start to glitched out-->
=== Chest loot ===
Treasure maps, in contrast to explorer maps, generate in underwater ruins or in shipwrecks.
{{LootChestItem|buried-treasure-map}}
== Usage ==
[[File:Explorer Map Comparison.gif|thumb|217px|Unexplored and partially explored maps.]]
{{See also|Map#Mapping|Map#Map content}}
=== Locating structures ===
There are three types of explorer maps: woodland, [[ocean]], and buried treasure. The maps differ from a normal map, in that it shows the area's land-water outline, with an orange striated (striped) texture for water<ref>Specifically, biomes in the "water_on_map_outlines" [[Tag#Biomes|biome tag]].</ref>, and the blank map texture for land. The maps show a section of land that contains a [[woodland mansion]], [[monument]] or [[buried treasure]] respectively. This may not be the nearest such [[structure]] to the [[player]]. The structures are displayed as a small icon. If the player icon is smaller than it would be on a normal map, that means the player is a great distance away. When the player is less than 1027 blocks away from the map border, the icon returns to the proper size. When the player reaches the map's area of land (512×512), the [[map]] fills in like a normal map.
The basic functions of a buried treasure explorer map are similar to that of the other two. However, instead of showing the structure icon on the map, it shows a red X instead. The [[buried treasure]] structure is located on the same X and Z coordinates as the middle of the X (the player marker may need to be aligned with the bottom of the middle 2×2 pixel square of the X). To locate the [[chest]] spot, hold the treasure map with both hands, not in the offhand slot.
=== Cloning ===
{{Crafting
|showdescription=1
|shapeless=1
|name=[[Explorer Map]]<br>(cloned)
|;;;Empty Map;Empty Map;Empty Map;Empty Map;Empty Map
|;;;;Empty Map;Empty Map;Empty Map;Empty Map
|;;;;;Empty Map;Empty Map;Empty Map
|Ocean Explorer Map; Woodland Explorer Map; Buried Treasure Map; Ocean Explorer Map; Woodland Explorer Map; Buried Treasure Map; Ocean Explorer Map; Woodland Explorer Map
|Empty Map
|;;;;;;Empty Map;Empty Map
|;Empty Map;Empty Map;Empty Map;Empty Map;Empty Map;Empty Map;Empty Map
|;;Empty Map;Empty Map;Empty Map;Empty Map;Empty Map;Empty Map
|;;;;;;;Empty Map
|Output= Ocean Explorer Map,2; Woodland Explorer Map,3; Buried Treasure Map,4; Ocean Explorer Map,5; Woodland Explorer Map,6; Buried Treasure Map,7; Ocean Explorer Map,8; Woodland Explorer Map,9
|type= Miscellaneous
|description=The output has the same map center as the input map, and the same [[monument]], [[woodland mansion]] or [[buried treasure]] marker. Cloned maps are stackable.
}}
The parts of the world that have already been explored and mapped are copied, and newly explored areas appear on both instances. In Creative mode, cloned explorer maps can be obtained by pick blocking on the explorer map displayed on [[item frames]] (the map needs to be out of the [[player]]'s inventory when using pick block, or else that map moves into the active hotbar slot).
== Sounds ==
{{edition|java}}:
{{Sound table
|sound=Drawmap1.ogg
|sound2=Drawmap2.ogg
|sound3=Drawmap3.ogg
|subtitle=Map drawn
|source=block
|description=When an explorer map is edited using a cartography table
|id=ui.cartography_table.take_result
|translationkey=subtitles.ui.cartography_table.take_result
|volume=1.0
|pitch=1.0
|distance=16
|foot=1}}
{{edition|bedrock}}: ''None''
== Data values ==
=== ID ===
{{edition|java}}:
{{ID table
|edition=java
|showforms=y
|generatetranslationkeys=y
|displayname=Map
|spritetype=item
|nameid=filled_map
|form=item
|translationkey=filled_map.mansion,filled_map.ocean,filled_map.buried_treasure
|foot=1}}
{{edition|bedrock}}:
{{ID table
|edition=bedrock
|showaliasids=y
|shownumericids=y
|showforms=y
|notshowbeitemforms=y
|generatetranslationkeys=y
|displayname=Map
|spritetype=item
|nameid=filled_map
|aliasid=map
|id=358
|form=item
|translationkey=item.map.exploration.monument.name,item.map.exploration.mansion.name,item.map.exploration.treasure.name
|foot=1}}
=== Metadata ===
{{see also|Bedrock Edition data values}}
{{IN|bedrock}}, the item [[Data value]] distinguishes explorer maps from one another:
{{:Map/DV}}
=== Item data ===
An explorer map differs from a map in that its <code>display</code> tag is set, which includes a <code>Mapcolor</code> and a <code>LocName</code>; also its <code>Decorations</code> list includes an entry for its target monument, mansion or buried treasure. Its [[Map item format#map_<#>.dat format|map item entry]] is identical to that of a normal map, except that by the time the player sees it, its <code>colors</code> byte array is pre-filled with explorer maps' characteristic land-water boundary lines and water shading.
<div class="treeview">
It should be noted that this additional data is stored in the Cartographer's NBT data and in the inventory item's NBT data, and not in the map file (e.g. <samp>map_0.dat</samp>). If the [[player]] were to use the {{cmd|give}} command to give themselves a map with the same map ID as an existing explorer map, it would still have the Ocean Monument or the Woodland Mansion icon on the map, but it would simply be named "Map" instead of, for example, "Ocean Explorer Map".
* {{nbt|compound}} Item data
** {{nbt|compound|tag}}:
*** {{nbt|compound|display}}: How the map looks in an item slot. See also [[Player.dat_format#Display Properties]].
**** {{nbt|string|Name}}: The name the map is given. In this case, they are localized strings: either <code>{"translate":"filled_map.monument"}</code>,<code>{"translate":"filled_map.mansion"}</code> or <code>{"translate":"filled_map.buried_treasure"}</code>.
**** {{nbt|int|MapColor}}: Color codes are calculated from the Red, Green and Blue components using this formula:<br>'''<span style="color:red">Red</span>[[wikipedia:Logical shift|<<]]16 + <span style="color:green">Green</span><<8 + <span style="color:blue">Blue</span>'''.<ref group=note>For positive values larger than 0x00FFFFFF, the top byte is ignored. All negative values produce white.</ref> Monument maps use 3830373, which is {{color swatch|58|114|101}}. Mansion maps use 5393476, which is {{color swatch|82|76|68}}. Buried treasure explorer maps do not use a color code.
*** {{nbt|list|Decorations}}:
**** {{nbt|compound}}: One of these for each icon on the map. Explorer maps always have at least one representing their target.
***** {{nbt|string|id}}: An arbitrary unique string identifying the decoration. For explorer map target structures, this is "+".
***** {{nbt|double|rot}}: The rotation of the icon. For explorer map target structures, this is always 180.
***** {{nbt|byte|type}}: The ID of the [[Map#Map icons|map icon]]: 8 for a mansion map, 9 for a monument map, 26 for a treasure map.
***** {{nbt|double|x}}: The world x-coordinate of the target structure icon.
***** {{nbt|double|z}}: The world z-coordinate of the target structure icon.
</div>
; Notes
{{notelist}}
== Achievements ==
{{load achievements|Treasure Hunter}}
== History ==
{{History|java}}
{{History||1.11|snap=16w39a|[[File:Woodland Explorer Map JE1 BE1.png|32px]] [[File:Ocean Explorer Map JE1 BE1.png|32px]] Added woodland and ocean explorer maps.}}
{{History|||snap=16w41a|Explorer maps can now no longer be zoomed out.}}
{{History||1.13|snap=18w10a|[[File:Map (item) JE1 BE1.png|32px]] Added buried treasure explorer maps.}}
{{History|||snap=18w11a|Buried treasure explorer maps now generate in the [[chest]]s of [[shipwreck]]s.}}
{{History||1.14|snap=18w43a|[[File:Woodland Explorer Map JE2 BE2.png|32px]] [[File:Ocean Explorer Map JE2 BE2.png|32px]] [[File:Map (item) JE2 BE2.png|32px]] The textures for explorer maps have now been changed.}}
{{History||1.20.2|snap=1.20.2 Pre-release 1|Updated structure icons on explorer maps sold by cartographers.}}
{{History||Villager Trade Rebalance<br>(Experimental)|link=Java Edition 1.20.2|snap=1.20.2 Pre-release 1|Added seven new maps which cartographers can sell.}}
{{History|pocket}}
{{History||1.1.0|snap=alpha 1.1.0.0|[[File:Woodland Explorer Map JE1 BE1.png|32px]] [[File:Ocean Explorer Map JE1 BE1.png|32px]] Added explorer maps.<ref>{{Mcnet|discovery-update-pocket-and-win-10-soon|The Discovery Update: on Pocket and Win 10 soon|March 29, 2017}}</ref>
|Explorer maps are not yet obtainable in [[survival]] mode.}}
{{History|||snap=alpha 1.1.0.3|Explorer maps are now obtainable as [[trading|trades]] from [[cartographer]] [[villager]]s.}}
{{History|bedrock}}
{{History||1.4.0|snap=beta 1.2.14.2|[[File:Map (item) JE1 BE1.png|32px]] Added buried treasure explorer maps.}}
{{History|||snap=beta 1.2.20.1|Treasure maps now generate in [[underwater ruins]] [[chest]]s.}}
{{History||1.10.0|snap=beta 1.10.0.3|[[File:Woodland Explorer Map JE2 BE2.png|32px]] [[File:Ocean Explorer Map JE2 BE2.png|32px]] [[File:Map (item) JE2 BE2.png|32px]] The textures for explorer maps have now been changed.}}
{{History||1.11.0|snap=beta 1.11.0.4|[[Trading]] has now been changed, woodland and ocean explorer maps now cost a [[compass]] and 12 [[emerald]]s.
|Journeyman-level [[cartographer]] [[villager]]s no longer [[trading|sell]] 2 type of explorer map as they now have {{frac|1|3}} chance to sell woodland explorer maps, {{frac|1|3}} chance to sell ocean explorer maps, or {{frac|1|3}} chance to sell other [[item]]s<!-- empty locator map--> as part of their [[trading|trades]].
|Woodland explorer maps can now be [[trading|bought]] from fletcher [[villager]]s.}}
{{History||1.12.0|snap=beta 1.12.0.3|Journeyman-level fletcher villagers no longer [[trading|sell]] woodland explorer maps.}}
{{History||1.13.0|snap=beta 1.13.0.1|[[File:Woodland Explorer Map BE3.png|32px]] [[File:Ocean Explorer Map BE3.png|32px]] [[File:Buried Treasure Map BE3.png|32px]] The textures of explorer maps have now been changed.}}
{{History||1.16.100|snap=beta 1.16.100.56|The ID of maps has been changed from <code>map</code> to <code>filled_map</code>.}}
{{History|console}}
{{History||xbox=TU54|xbone=CU44|ps=1.52|wiiu=Patch 24|switch=1.0.4|[[File:Woodland Explorer Map JE1 BE1.png|32px]] [[File:Ocean Explorer Map JE1 BE1.png|32px]] Added explorer maps.}}
{{History|PS4}}
{{History||1.90|[[File:Woodland Explorer Map JE2 BE2.png|32px]] [[File:Ocean Explorer Map JE2 BE2.png|32px]] The textures for explorer maps have now been changed.}}
{{History|new3ds}}
{{History||1.9.19|[[File:Woodland Explorer Map JE1 BE1.png|32px]] [[File:Ocean Explorer Map JE1 BE1.png|32px]] Added explorer maps.}}
{{History|foot}}
== Issues ==
{{Issue list}}
== Trivia ==
* When a [[cartographer]] generates the trade offers for the explorer maps, it chooses the location of one of the nearest structures of the respective type ([[monument]] or [[woodland mansion]]).
* For the reason above, explorer maps obtained from one cartographer are always the same. Also, if two cartographers unlock the explorer map trades approximately at the same place and at the same time, the map locations are usually identical. This sometimes also happens when finding multiple treasure maps from [[ocean ruins]].
* Explorer maps fill as the [[chunk]]s are generated, rather than when the [[player]] holds them while in the area; leaving an explorer map while exploring the area still fills the map.
* Buried treasure explorer maps are named ''Buried Treasure Map'' {{in|java}} while {{in|bedrock}}, they are named ''Treasure Map''.
* It is possible for a cartographer to give a monument or woodland mansion explorer map for areas where the [[generated structures|structures]] would have spawned in the world, but were unable to as a result of terrain generation. As a result, explorer maps, unfortunately, don't always guarantee that a structure exists at the purported location. This is most common with woodland mansion explorer maps, due to its generation algorithm.
* On [[Bedrock Edition]], inventory editors and add-ons can be used to create Explorer Maps that lead to any structure.
== Gallery ==
<gallery>
File:Explorer Maps.png|An ocean explorer map in the [[off-hand]], a woodland explorer map in the main hand, and a [[cartographer]] [[villager]] in between them.
File:Partial Explorer Map.png|A partially-explored explorer map.
File:ExplorerToNormal Map Comparison.png|Two fully-explored maps of the same place, one of which is a woodland explorer map.
File:Buried Treasure Explorer Map.png|An [[item frame]] holding a buried treasure explorer map. The player can see the red X on the left side of the map.
File:Purchase.png|Purchasing explorer maps from a cartographer.
</gallery>
== See also ==
* [[Map]]
* [[Woodland Mansion]]
* [[Ocean Monument]]
* [[Shipwreck]]
* [[Buried treasure]]
== References ==
{{reflist}}
== External Links ==
*[https://www.minecraft.net/en-us/article/taking-inventory--explorer-map Taking Inventory: Explorer Map] – Minecraft.net on November 13, 2019
{{Items}}
[[de:Schatzkarte]]
[[es:Mapa (localización de estructura)]]
[[fr:Carte d'exploration]]
[[ja:探検家の地図]]
[[ko:탐험 지도]]
[[pl:Mapa eksploracyjna]]
[[pt:Mapa de exploração]]
[[ru:Карта сокровищ]]
[[zh:探险家地图]]</li><li>[[Lead|Lead]]<br/>{{About|the item used for leashing and leading mobs|the element|Element#Lead}}
{{Item
| image = Lead.png
| stackable = Yes (64)
| renewable = Yes
}}
'''Leads''' are [[tool]]s used to leash and lead passive and neutral [[animal]]s, [[golem]]s and some [[monster]]s.
== Obtaining ==
=== Chest loot ===
{{LootChestItem|lead}}
=== Crafting ===
{{Crafting
|A1= String
|B1= String
|A2= String
|B2= Slimeball
|C3= String
|Output= Lead,2
|type= Tool
}}
=== Mob loot ===
[[Wandering Trader|Wandering trader]]s always spawn with 2 [[llama|trader llama]]s, each held with a lead. When a trader llama is detached, either by killing it or the wandering trader, dragging them far apart, or putting the llama in a [[boat]] or a [[minecart]], the lead drops at the llama's position.
== Usage ==
=== Crafting ingredient ===
{{crafting usage}}
=== Leashing mobs ===
[[File:SuspendedPigs.png|190px|thumb|One block tall mobs, such as pigs, suspend at 7 blocks above the ground.]]
[[File:SuspendedCows.png|190px|thumb|Two block tall mobs, such as cows, also suspend at 7 blocks above the ground.]]
{{control|Using}} a lead on a [[mob]] ties the lead to the mob, allowing it to be moved by the player. Multiple mobs can be held by leads at once, but each mob held requires its own lead.
It is possible to leash the following mobs and other entities:
{{columns-list|colwidth=20em|
* {{EntityLink|Allay}}
* {{EntityLink|Axolotl}}
* {{EntityLink|Bee}}
* {{EntityLink|Boat}}{{only|bedrock}}
* {{EntityLink|Camel}}
* {{EntityLink|Cat}}
* {{EntityLink|Chicken}}
* {{EntityLink|Chicken Jockey}} (only the mount)
* {{EntityLink|Cow}}
* {{EntityLink|Dolphin}}
* {{EntityLink|Donkey}}
* {{EntityLink|Fox}}
* {{EntityLink|Frog}}
* {{EntityLink|Glow Squid}}
* {{EntityLink|Goat}}
* {{EntityLink|Hoglin}}
* {{EntityLink|Horse}}
* {{EntityLink|Iron Golem}}
* {{EntityLink|Llama}}
* {{EntityLink|Mooshroom}}
* {{EntityLink|Mule}}
* {{EntityLink|Ocelot}}
* {{EntityLink|Parrot}}
* {{EntityLink|Pig}}
* {{EntityLink|Polar Bear}}
* {{EntityLink|Rabbit}}
* {{EntityLink|Sheep}}
* {{EntityLink|Skeleton Horse}}
* {{EntityLink|Skeleton Horseman}} (only the mount)
* {{EntityLink|Sniffer}}
* {{EntityLink|Snow Golem}}
* {{EntityLink|Squid}}
* {{EntityLink|Strider}}
* {{EntityLink|Trader Llama}}
* {{EntityLink|Wolf}}
* {{EntityLink|Zoglin}}
* {{EntityLink|Zombie Horse}}}}
Additionally, [[villager]]s, [[wandering trader]]s, and [[monster]]s other than the ones listed above, can be leashed using a map editor or [[NBT]] editor.
With a mob on a lead held by the player, {{control|using}} the lead on any type of [[fence]] (or [[wall]]{{only|bedrock|short=1}}) attaches the lead to it with a visible knot, tying the mob to it. To attach it to a wall on Bedrock Edition, the player must hold a lead in the main hand.<ref>{{bug|MCPE-108078}}</ref> Multiple leads may be attached to one fence post. A mob tied to a fence tends to stay within 5 blocks of the fence post.
A lead is broken by pressing the {{control|use item}} control on the mob again, hitting the knot, or removing the attached fence post. Leads also break when hit by projectiles. Whenever a lead is removed or broken, it drops as an [[item (entity)|item]] at the location of the mob. However, it does not drop when unleashed in Creative mode.{{only|java}}<ref>{{bug|MCPE-79639}}</ref> A lead does not break if the attached animal dies.
A lead can stretch a maximum of 10 blocks. If the mob is able to move towards the player or fence post, it does so. If not, or if the mob is moving very quickly away from the player, the lead breaks.
When the player or the knot is more than 7 blocks above the ground, the mob being leashed becomes suspended.
Most mobs that can be leashed can still be leashed even if attacking the player leashing them, and any attached leads do not break.
[[Wolf|Wolves]] cannot be leashed after becoming angry. Despite this, if they become angry while already leashed, the lead does not break, but it cannot be reattached when broken through other methods while the wolf is still angry.
A lead attached to a hoglin breaks if it becomes a [[zoglin]].
A lead does not prevent mobs from despawning if they normally would despawn.
When moving downwards and accelerating towards the ground, leashed mobs accumulate fall damage and take it if they hit the ground while still accelerating. When moving up or decelerating (such as when the lead is stretched to its limit), the fall distance is set to one block and the mob therefore does not take any fall damage if it touches the ground.
If the player walks into and back out of a [[nether portal]] while holding a lead connected to a mob, the lead remains attached to the mob. However, if a mob attached to a lead walks into a nether portal, the lead breaks and drops as an item in the other dimension.
A lead can be used to remove a mob from a boat without needing to break the boat, if the mob can normally be leashed.
If a chunk unloads while containing a leashed mob (either by the player walking too far away, or traveling to another dimension via a portal), the lead breaks and drops as an item, leaving the mob free to wander around.
== Sounds ==
{{Edition|Java}}:
{{Sound table
|sound=Lead Knot break1.ogg
|sound2=Lead Knot break2.ogg
|sound3=Lead Knot break3.ogg
|subtitle=Leash Knot breaks
|source=neutral
|description=When a leash knot is destroyed
|id=entity.leash_knot.break
|translationkey=subtitles.entity.leashknot.break
|volume=1.0
|pitch=1.0
|distance=16}}
{{Sound table
|sound=Lead Knot place1.ogg
|sound2=Lead Knot place2.ogg
|sound3=Lead Knot place3.ogg
|subtitle=Leash Knot tied
|source=neutral
|description=When a leash knot is placed on a fence
|id=entity.leash_knot.place
|translationkey=subtitles.entity.leashknot.place
|volume=1.0
|pitch=1.0
|distance=16
|foot=1}}
{{Edition|Bedrock}}:
{{Sound table
|type=bedrock
|sound=Lead Knot break1.ogg
|sound2=Lead Knot break2.ogg
|sound3=Lead Knot break3.ogg
|source=neutral
|description=When a leash knot is broken by {{ctrl|interacting}} with it
|id=leashknot.break
|volume=1.0
|pitch=1.0}}
{{Sound table
|sound=Lead Knot place1.ogg
|sound2=Lead Knot place2.ogg
|sound3=Lead Knot place3.ogg
|source=neutral
|description=When a leash knot is placed on a fence or wall
|id=leashknot.place
|volume=1.0
|pitch=1.0
|foot=1}}
== Leash Knot ==
'''Leash knot''' is an entity created when the [[player]] right-clicks the fence while having a mob leashed.
{{Entity| title = Leash Knot| image = Knot.png|imagesize= 100px|networkid='''[[JE]]''': 77}}
=== Data values ===
==== ID ====
{{edition|java}}:
{{ID table
|edition=java
|generatetranslationkeys=y
|displayname=Leash Knot
|spritetype=entity
|nameid=leash_knot
|foot=1}}
{{edition|bedrock}}:
{{ID table
|edition=bedrock
|shownumericids=y
|notshowbeitemforms=y
|generatetranslationkeys=y
|displayname=Leash Knot
|spritetype=entity
|nameid=leash_knot
|id=88
|foot=1}}
==== Entity data ====
Leash knots have entity data that define various properties of the entity.
{{el|java}}:
{{main|Entity format}}
{{/ED}}
{{el|bedrock}}:
: See [[Bedrock Edition level format/Entity format]].
== Data values ==
=== ID ===
{{edition|java}}:
{{ID table
|edition=java
|showforms=y
|generatetranslationkeys=y
|displayname=Lead
|spritetype=item
|nameid=lead
|form=item
|foot=1}}
{{edition|bedrock}}:
{{ID table
|edition=bedrock
|shownumericids=y
|showforms=y
|notshowbeitemforms=y
|generatetranslationkeys=y
|displayname=Lead
|spritetype=item
|nameid=lead
|id=547
|form=item
|foot=1}}
== Achievements ==
{{load achievements|So I Got That Going for Me}}
== Advancements ==
{{load advancements|When the Squad Hops into Town}}
== History ==
{{missing information|The history of a lot of mobs be leashed}}
{{History|java}}
{{History||1.6.1|snap=13w16a|[[File:Lead JE1 BE1.png|32px]] Added leads.
|Leads do not currently have a tooltip and are called “leashes” in [http://www.mojang.com/2013/04/minecraft-snapshot-13w16a-and-new-launcher/ the change notes].}}
{{History|||snap=13w16b|Leads have been given a tooltip.}}
{{History|||snap=13w18a|Leads have been given a [[crafting]] recipe.}}
{{History||1.9|snap=15w50a|Added a [[sound]] for leads: <code>entity.leashknot.place</code>.}}
{{History||1.11|snap=16w32a|The [[entity]] ID of the knot has been changed from <code>LeashKnot</code> to <code>leash_knot</code>.}}
{{History|||snap=16w39a|Leads can now be found in [[woodland mansion]] chests.}}
{{History||1.13|snap=17w47a|Prior to [[1.13/Flattening|''The Flattening'']], this [[item]]'s numeral ID was 420.}}
{{History||1.14|snap=18w43a|[[File:Lead JE2 BE2.png|32px]] The texture of leads has been changed.}}
{{History|||snap=19w05a|Added [[wandering trader]]s, which are naturally equipped with leads.}}
{{History||1.15|snap=?|[[Bee]]s can now be leashed.}}
{{History||1.16|snap=20w09a|[[Skeleton horse]]s and [[zombie horse]]s can now be leashed.<ref>{{bug|MC-166246}}</ref>}}
{{History|||snap=?|[[Hoglin]]s can now be leashed.}}
{{History||1.16.2|snap=20w27a|[[Zoglin]]s can now be leashed.}}
{{History||1.17|snap=21w19a|[[Squid]]s and [[glow squid]]s can now be leashed.<ref>{{bug|MC-136647}}</ref>}}
{{History|||snap=?|[[Axolotl]]s can now be leashed.}}
{{History||1.19|snap=22w13a|Lead may now be found in [[ancient city]] [[chest]]s.}}
{{History|||snap=?|[[Frog]]s can now be leashed.}}
{{History||1.19.3|snap=22w42a|[[Camel]]s can now be leashed.|Mobs no longer accumulate fall damage when dangling on leads.<ref>{{bug|MC-14167||Mobs build up fall damage when dangling on a lead|Fixed}}</ref>}}
{{History||1.20 (Experimental)|link=1.19.4|snap=?|[[Sniffer]]s can now be leashed.}}
{{History||1.20|snap=23w12a|Lead can now be found in [[suspicious gravel]] and [[suspicious sand]] in [[trail ruins]].}}
{{History|||snap=23w16a|Lead no longer generates in [[suspicious sand]] in [[trail ruins]].|Due to the split of the archaeological loot tables for the suspicious gravel within the [[trail ruins]]; lead now is in the common loot.}}
{{History|pocket alpha}}
{{History||v0.15.0|snap=build 1|[[File:Lead JE1 BE1.png|32px]] Added leads.}}
{{History|pocket}}
{{History||1.1.0|snap=alpha 1.1.0.0|Leads now have better "physics".
|The [[entity]] ID of the knot has been changed from <code>leashknot</code> to <code>leash_knot</code>.
|Leads can now be found inside [[woodland mansion]] [[chest]]s.}}
{{History|bedrock}}
{{History||1.4.0|snap=beta 1.2.14.2|Leads can now be found inside [[buried treasure]] [[chest]]s.
|Leads can now be used on [[boat]]s.}}
{{History||1.4.0|snap=beta 1.2.20.1|Leads can now be used to craft [[balloon]]s.}}
{{History||1.10.0|snap=beta 1.10.0.3|[[File:Lead JE2 BE2.png|32px]] The texture of leads has been changed.
|[[Wandering trader]]s now [[drops|drop]] leads after they are detached from trader [[llama]]s.}}
{{History||1.14.0|snap=beta 1.14.0.1|Leads can now be used on [[polar bear]]s, [[ocelot]]s, [[parrot]]s, [[dolphin]]s and old [[villager]]s.}}
{{History||1.19.0|snap=beta 1.19.0.20|Allays can now be leashed.}}
{{History|console}}
{{History||xbox=TU19|xbone=CU7|ps=1.12|wiiu=Patch 1|switch=1.0.1|[[File:Lead JE1 BE1.png|32px]] Added leads.}}
{{History||xbox=TU43|xbone=CU33|ps=1.36|wiiu=Patch 13|[[Sound]]s have been added for leads.}}
{{History|Ps4}}
{{History||1.90|[[File:Lead JE2 BE2.png|32px]] The texture of leads has been changed.}}
{{History|3ds}}
{{History||0.1.0|[[File:Lead JE1 BE1.png|32px]] Added leads.}}
{{History|foot}}
== Issues ==
{{issue list|Lead|Leash}}
== Trivia ==
[[File:Steve wearing Lead.png|100px]] [[File:Alex wearing Lead.png|100px]]
* The lead is named as "leash" in the texture file.
* If a [[player]] goes to sleep while holding a mob on a lead, the lead remains attached.
* {{IN|Java}}, when using the {{cmd|item}} command to put a lead in a player's head slot, the item gets rotated and positioned in such a way that it looks like the player is wearing a monocle.
== Gallery ==
<gallery>
Multiple_Leash.png|Many animals can be tied to one fence post.
HorseLeashedOnAFence.png|A [[horse]] wearing [[golden horse armor]] that is leashed to a fence post.
ThreeTiedSheep.png|Three sheep tied to the same fence.
More accurate lead mobs.png|A shot of all the mobs that could be tied with leads as of 1.6.1, except donkeys and mules.
Yo Yo.png|With the use of the leash, it is possible to suspend animals in the air by tying the leash on high-up fence posts.
YoYo.png|A [[donkey]] with the Grumm/Dinnerbone [[name tag]] [[easter egg]] tied to a fence with a lead to make a yo-yo.
Flying_Sheep.png|Several [[sheep]] hanging in the air in [[Creative]] mode.
Pocket Edition Lead.jpg|First image of a lead in ''Bedrock Edition''.
</gallery>
== References ==
{{Reflist}}
== External Links ==
*[https://www.minecraft.net/en-us/article/taking-inventory-lead Taking Inventory: Lead] – Minecraft.net on April 8, 2022
{{items}}
{{entities}}
[[Category:Tools]]
[[de:Leine]]
[[es:Rienda]]
[[fr:Laisse]]
[[hu:Lasszó]]
[[it:Guinzaglio]]
[[ja:リード]]
[[ko:끈]]
[[nl:Leidtouw]]
[[pl:Smycz]]
[[pt:Laço]]
[[ru:Поводок]]
[[th:เชือกจูง]]
[[zh:拴绳]]
[[Category:Renewable resources]]</li></ul> | 13w09c | A bug where swords take no damage when used on the Ender dragon has been fixed. | |||||||||||||||||||||||||||||||||
1.5.1{{Extension DPL}}<ul><li>[[Chain|Chain]]<br/>{{about|the block|the enchantment in Minecraft Dungeons|MCD:Chains|the armor tier named chainmail|Armor|the armor material called chainmail|Armor materials}}
{{Block
|image=<gallery>
Chain Axis Y.png | Y-axis
Chain Axis X.png | X-axis
Chain Axis Z.png | Z-axis
</gallery>
| transparent = Yes
| light = No
| tool = Wooden pickaxe
| renewable = Yes
| stackable = Yes (64)
| flammable = No
| lavasusceptible = No
}}
'''Chains''' are metallic decoration [[block]]s.
== Obtaining ==
=== Breaking ===
Chains can be mined using any [[pickaxe]]. If mined without a pickaxe, it drops nothing.
{{breaking row|Chain|Pickaxe|Wood|horizontal=1}}
=== Natural generation ===
Chains generate in [[bastion remnant]]s and sometimes in [[ruined portal]]s that generate in the Nether. They always generate above [[magma cube]] spawners, also found in [[bastion]]s.
Chains can also generate in [[mineshafts]]. They generate on the sides of a wooden bridge (a mid-air corridor) when the distance between the bridge and the highest solid block below it is higher than the distance to the lowest solid block above it. Chains here generate vertically in a pillar between the bridge and the ceiling. The lowest block of the pillar, connecting the chain to the bridge, is always an [[oak fence]].
=== Chest loot ===
{{LootChestItem|chain}}
=== Crafting ===
{{Crafting
|B1=Iron Nugget
|B2=Iron Ingot
|B3=Iron Nugget
|Output=Chain
|type=Building block
}}
== Usage ==
Chains can be used to suspend [[bell]]s, [[hanging sign]]s, or both types of [[lantern]]s (normal lanterns and soul lanterns), as the chain texture connects to the chain of the lantern seamlessly as if it were part of it, and it connects the hanging sign chains together. Chains do not require a supporting block to be placed whether it is on the top, next to it or at the bottom. It can exist completely free-standing in mid air<ref>{{bug|MC-178791}}</ref> and it can be rotated. Chains connect horizontally or vertically, but not across different orientations (so a chain with N orientation does not connect to a chain with E orientation in the adjacent block).
Horizontal chains one block above a surface may be walked over. Horizontal chains two blocks above a surface prevent players from traveling past them. Vertical chains block travel if targeted directly, but may be skirted.
Precision is required, but chains can be walked on, allowing for inconspicuous, although somewhat costly, bridges.
Chains can be pushed by [[piston]]s without being broken.
=== Crafting ingredient ===
{{crafting usage}}
== Sounds ==
{{Sound table/Block/Chain}}
== Data values ==
=== ID ===
{{edition|java}}:
{{ID table
|edition=java
|showforms=y
|generatetranslationkeys=y
|displayname=Chain
|spritetype=block
|nameid=chain
|foot=1}}
{{edition|bedrock}}:
{{ID table
|edition=bedrock
|firstcolumnname=Chain
|shownumericids=y
|showforms=y
|generatetranslationkeys=y
|displayname=Block
|spritename=chain
|spritetype=block
|nameid=chain
|id=541
|form=block
|itemform=item.chain}}
{{ID table
|displayname=Item
|spritename=chain
|spritetype=item
|nameid=chain
|id=619
|form=item
|translationkey=tile.chain.name
|foot=1}}
=== Block states ===
{{see also|Block states}}
{{/BS}}
== History ==
{{History|java}}
{{History||1.16|snap=20w16a|[[File:Chain (item) JE1 BE1.png|32px]] [[File:Chain Axis Y JE1 BE1.png|32px]] Added chains.
|Chains generate in the newly added [[bastion remnant]]s, and can be found in their [[chest]]s.
|Chains currently use the generic metal [[block]] [[sound]]s.}}
{{History|||snap=20w17a|Unique [[sound]]s have been added for chains.}}
{{History|||snap=20w18a|Chains can now be [[waterlogged]].}}
{{History||1.16.2|snap=20w30a|The chance of finding chains in bastion remnant chests is decreased from 31.5% to 24.4%.}}
{{History|||snap=Pre-release 1|[[File:Chain Axis X JE1 BE1.png|32px]] [[File:Chain Axis Z JE1 BE1.png|32px]] Chains can now be placed in all orientations.}}
{{History||1.17|snap=21w07a|Chains can now generate in [[mineshaft]]s.}}
{{History|||snap=21w13a|[[File:Chain (UD) JE2.png|32px]] [[File:Chain (NS) JE2.png|32px]] [[File:Chain (EW) JE2.png|32px]] The model of chains has been changed so that the backside texture is mirrored.}}
{{History||1.20<br>(Experimental)|link=1.19.3|snap=22w42a|Chains are now used to craft [[hanging sign]]s.}}
{{History|bedrock}}
{{History||1.16.0|snap=beta 1.16.0.57|[[File:Chain_(item)_JE1_BE1.png|32px]] [[File:Chain Axis Y JE1 BE1.png|32px]] Added chains.}}
{{History|||snap=beta 1.16.0.63|Unique [[sound]]s have been added for chains.}}
{{History||1.16.100|snap=beta 1.16.100.54|[[File:Chain Axis X JE1 BE1.png|32px]] [[File:Chain Axis Z JE1 BE1.png|32px]] Chains can now be placed in all orientations.}}
{{History||1.20.0<br>(Experimental)|link=Bedrock Edition 1.19.50|snap=beta 1.19.50.21|Chains are now used to craft [[hanging sign]]s.}}
{{History|foot}}
== Issues ==
{{issue list}}
== Trivia ==
* A vertical chain, being a solid, but not a full [[block]], allows for many sizes of [[mob]]s and [[player]]s to pass alongside each piece horizontally.
* Despite its name, it cannot be [[crafted]] into [[chainmail armor]].<ref>{{bug|MC-178979}} - Invalid</ref>
* Chains do not stick together when moved by pistons, regardless of orientation.
== Gallery ==
<gallery>
Chained Stone Bricks.jpg|Chains and stone bricks.
Barbell.jpg|Chains and chiseled blackstone.
Barbell Evoker.jpg|An evoker lifting weights.
Chain with Lantern.png|A [[lantern]] hanging from a chain.
Chain with Spawner.png|A [[spawner]] hanging with a chain found in the bastion remnants.
</gallery>
== References ==
{{reflist}}
{{blocks|Building}}
{{Items}}
[[Category:Manufactured blocks]]
[[Category:Generated structure blocks]]
[[Category:Nether blocks]]
[[de:Kette]]
[[es:Cadena]]
[[fr:Chaîne]]
[[ja:鎖]]
[[ko:사슬]]
[[pl:Łańcuch]]
[[pt:Corrente]]
[[ru:Цепь]]
[[zh:锁链]]</li><li>[[Raw Porkchop|Raw Porkchop]]<br/>{{Item
| title = Raw Porkchop
| image = Raw Porkchop.png
| renewable = Yes
| heals = {{hunger|3}}
| stackable = Yes (64)
}}
A '''raw porkchop''' is a [[food]] item that can be eaten by the [[player]] or cooked to make a [[cooked porkchop]].
== Obtaining ==
=== Mob loot ===
==== Pigs ====
Adult [[pig]]s drop 1–3 raw porkchop when killed. The maximum amount is increased by 1 per level of [[Looting]], for a maximum of 1-6 with Looting III. If killed while on fire, they drop [[cooked porkchop]] instead.
==== Hoglins ====
Adult [[hoglin]]s drop 2–4 raw porkchop when killed. The maximum amount is increased by 1 per level of [[Looting]], for a maximum of 7 with Looting III. If killed while on fire, they drop [[cooked porkchop]] instead.
=== Chest loot ===
{{LootChestItem|raw-porkchop}}
== Usage ==
=== Food ===
To eat raw porkchop, press and hold {{control|use}} while it is selected in the hotbar. Eating one restores {{hunger|3}} [[hunger]] and 0.6 [[Hunger#Mechanics|saturation]].
=== Smelting ingredient ===
{{Smelting
|showname=1
|Raw Porkchop
|Cooked Porkchop
|0.35
}}
=== Trading ===
{{IN|bedrock}}, novice-level butcher [[villager]]s have a {{frac|1|3}} chance to [[trading|buy]] 7 raw porkchop for an [[emerald]] as part of their [[trading|trades]].
{{IN|java}}, novice-level butcher villagers have a 40% chance to buy 7 raw porkchop for an emerald.
=== Wolves ===
Raw porkchops can be used to [[breed]] and heal tamed [[wolves]], lead them around, and make baby tamed wolves grow up faster by 10% of the remaining time.
=== Piglins ===
[[Piglin|Piglins]] instantly pick up raw or [[Cooked Porkchop|cooked porkchops]] that are within 1 block of them, unless they have already picked up one within the last 10 seconds. Porkchops picked up are not dropped upon the piglin's death.
==Sounds==
{{Sound table/Entity/Food}}
== Data values ==
=== ID ===
{{edition|java}}:
{{ID table
|edition=java
|showitemtags=y
|showforms=y
|generatetranslationkeys=y
|displayname=Raw Porkchop
|spritetype=item
|nameid=porkchop
|itemtags=piglin_food
|form=item
|foot=1}}
{{edition|bedrock}}:
{{ID table
|edition=bedrock
|shownumericids=y
|showforms=y
|notshowbeitemforms=y
|generatetranslationkeys=y
|displayname=Raw Porkchop
|spritetype=item
|nameid=porkchop
|id=262
|form=item
|foot=1}}
== Achievements ==
{{load achievements|Pork Chop}}
== Advancements ==
{{load advancements|Husbandry;A Balanced Diet}}
== History ==
{{History|java indev}}
{{History||20100219|[[File:Raw Porkchop JE1 BE1.png|32px]] Added raw porkchops.
|Raw porkchops restore {{hp|3}} and do not stack in the [[inventory]].
|Raw porkchops are [[drops|dropped]] by [[pig]]s.}}
{{History|java beta}}
{{History||1.4|Raw porkchops can now be given to [[wolf|wolves]].}}
{{History||1.8|snap=Pre-release|Raw porkchops can now be stacked to 64.<ref>{{Tweet|jeb|103408168356421632|Some Minecraft food changes...}}</ref>
|Raw porkchops now restore {{hunger|3}} to the [[Hunger|food bar]].}}
{{History|java}}
{{History||1.2.1|snap=12w03a|Raw porkchops can now be used to breed wolves.}}
{{History||1.3.1|snap=12w21a|Raw porkchops can now be [[trading|sold]] to butcher [[villager]]s, at 14–17 pork chops for 1 [[emerald]].}}
{{History|||snap=12w25a|[[Pig]]s now [[drops|drop]] 1–3 porkchops instead of 0–2.}}
{{History||1.4.2|snap=12w37a|[[File:Raw Porkchop JE2 BE2.png|32px]] The texture of raw porkchops has been changed, so that it no longer has a dark outline.}}
{{History||1.8|snap=14w02a|[[Trading]] has been changed; butcher villagers now [[trading|buy]] 14–18 porkchops for 1 emerald.}}
{{History||1.13|snap=17w47a|Prior to [[1.13/Flattening|''The Flattening'']], this [[item]]'s numeral ID was 319.}}
{{History||1.14|snap=18w43a|[[File:Raw Porkchop.png|32px]] The texture of raw porkchops has been changed.}}
{{History|||snap=18w49a|Raw porkchops can now be found in [[chest]]s in [[village]] butcher shops.}}
{{History||1.16|snap=20w07a|Raw porkchops are dropped by the new [[hoglin]]s.
|Raw porkchops have a {{frac|5|109}} (~4.59%) chance of being given by the new [[piglin]]s when [[bartering]], in a stack size of 2–5.}}
{{History|||snap=20w09a|Raw porkchops can no longer be obtained by bartering with piglins.}}
{{History|||snap=20w16a|Raw porkchops now generate in [[bastion remnants]] chests.}}
{{History|pocket alpha}}
{{History||v0.4.0|[[File:Raw Porkchop JE1 BE1.png|32px]] Added raw porkchops.}}
{{History||v0.5.0|Raw porkchops now restore {{hp|3}} instead of {{hp|1}}.}}
{{History||v0.8.0|snap=build 1|[[File:Raw Porkchop JE2 BE2.png|32px]] The texture of raw porkchops has been changed, so that it no longer has that dark outline.}}
{{History||v0.12.1|snap=build 1|Raw porkchops now restore [[hunger]] instead of [[health]].}}
{{History||v0.16.2|[[Pig]]s now [[drops|drop]] 1–3 raw porkchops rather than 0–2.}}
{{History|pocket}}
{{History||1.0.4|snap=alpha 1.0.4.0|14–18 raw porkchops can now be [[trading|sold]] to butcher [[villager]]s for an [[emerald]].}}
{{History|bedrock}}
{{History||1.10.0|snap=beta 1.10.0.3|[[File:Raw Porkchop.png|32px]] The texture of raw porkchops has been changed.}}
{{History||1.11.0|snap=beta 1.11.0.3|Raw porkchops can now be found in [[village]] butcher [[chest]]s.}}
{{History|||snap=beta 1.11.0.4|Butcher [[villager]]s now have {{frac|1|3}} chance to [[trading|buy]] 7 raw porkchops.}}
{{History|console}}
{{History||xbox=TU1|xbone=CU1|ps=1.0|wiiu=Patch 1|switch=1.0.1|[[File:Raw Porkchop JE1 BE1.png|32px]] Added raw porkchops.}}
{{History||xbox=TU5|Raw porkchops are now stackable to 64 and fills [[hunger]] instead of [[health]].}}
{{History||xbox=TU12|[[File:Raw Porkchop JE2 BE2.png|32px]] The texture of raw porkchops has been changed, so that it no longer has a dark outline.}}
{{History||xbox=none|xbone=none|ps=1.90|wiiu=none|switch=none|[[File:Raw Porkchop.png|32px]] The texture of raw porkchops has been changed.}}
{{History|new3DS}}
{{History||0.1.0|[[File:Raw Porkchop JE2 BE2.png|32px]] Added raw porkchops.}}
{{History|foot}}
== Issues ==
{{issue list}}
== Gallery ==
<gallery>
I Porkchop Minecraft JINX.jpg|Official T-shirt artwork "I Porkchop Minecraft" sold by [https://www.jinx.com JINX].
I Brake for Porkchop Bumper Sticker JINX.jpg|An official bumper sticker featuring a raw porkchop sold by JINX.
</gallery>
== References ==
{{reflist}}
== External Links ==
*[https://www.minecraft.net/en-us/article/taking-inventory--porkchop Taking Inventory: Porkchop] – Minecraft.net on February 13, 2020
{{Items}}
[[Category:Food]]
[[cs:Syrová kotleta]]
[[de:Rohes Schweinefleisch]]
[[es:Chuleta de cerdo cruda]]
[[fr:Côtelette de porc crue]]
[[hu:Nyers disznóhús]]
[[ja:生の豚肉]]
[[nl:Rauw varkensvlees]]
[[pl:Surowy schab]]
[[pt:Costeleta de porco crua]]
[[ru:Сырая свинина]]
[[uk:Сира свинина]]
[[zh:生猪排]]
[[Category:Renewable resources]]</li></ul> | 13w11a | Before this snapshot, the gamerule mobGriefing didn't prevent the Ender dragons from destroying blocks when they fly through them. Now, mobGriefing from the /gamerule command prevents the Ender dragon from destroying blocks at their sight. | |||||||||||||||||||||||||||||||||
2013 Music Update
Template loop detected: Template:History Template loop detected: Template:History Template loop detected: Template:History Template loop detected: Template:History Template loop detected: Template:History Template loop detected: Template:History Template loop detected: Template:History Template loop detected: Template:History Template loop detected: Template:History Template loop detected: Template:History Template loop detected: Template:History Template loop detected: Template:History Template loop detected: Template:History Template loop detected: Template:History Template loop detected: Template:History Template loop detected: Template:History Template loop detected: Template:History Template loop detected: Template:History Template loop detected: Template:History Template loop detected: Template:History Template loop detected: Template:History Template loop detected: Template:History Template loop detected: Template:History Template loop detected: Template:History Template loop detected: Template:History Template loop detected: Template:History Template loop detected: Template:History Template loop detected: Template:History Template loop detected: Template:History Template loop detected: Template:History Template loop detected: Template:History Template loop detected: Template:History Template loop detected: Template:History Template loop detected: Template:History Template loop detected: Template:History Template loop detected: Template:History Template loop detected: Template:History Template loop detected: Template:History Template loop detected: Template:History Template loop detected: Template:History Template loop detected: Template:History Template loop detected: Template:History
| A music track now accompanies the Ender dragon boss fight. | ||||||||||||||||||||||||||||||||||
1.8{{Extension DPL}}<ul><li>[[Copper Ingot|Copper Ingot]]<br/>{{About|the ingot|the ore|Copper Ore|the mineral block|Block of Copper}}
{{Item
| image = Copper Ingot.png
| renewable = Yes
| stackable = Yes (64)
}}
'''Copper ingots''' are [[metal]] ingots obtained from smelting [[raw copper]] or killing [[drowned]].
== Obtaining ==
=== Crafting ===
{{Crafting
|Block of Copper;Waxed Block of Copper|Output=Copper Ingot,9
|type=Miscellaneous
}}
=== Smelting ===
Copper ingots can be obtained by smelting [[raw copper]] in a [[furnace]] or [[blast furnace]], as well as the ore itself if mined using [[Silk Touch]].
{{Smelting
|head=1
|Raw Copper
|Copper Ingot
|0.7
}}
{{Smelting
|foot=1
|Copper Ore; Deepslate Copper Ore
|Copper Ingot
|0.7
}}
=== Mob loot ===
==== Drowned ====
When killed by a [[player]] or a tamed [[wolf]], a [[drowned]] has a 11% ({{frac|11|100}}) chance of dropping a copper ingot. With the [[Looting]] enchantment, the chance can be increased to 13% ({{frac|13|100}}) with Looting I, 15% ({{frac|3|20}}) with Looting II, and 17% ({{frac|17|100}}) with Looting III.
== Usage ==
=== Crafting ingredient ===
{{crafting usage}}
=== Smithing ingredient ===
{{Smithing
|head=1
|ingredients=Any Armor Trim +<br/>Any Armor Piece + <br/>Copper Ingot
|Any Armor Trim Smithing Template
|Netherite Chestplate
|Copper Ingot
|Copper Trim Netherite Chestplate
|showdescription=1
|description = All armor types can be used in this recipe,<br/>a netherite chestplate is shown as an example.<br/>
|tail=1
}}
;Trim color palette
The following color palette is shown on the designs on trimmed armor:
*{{TrimPalette|copper ingot}}
== Data values ==
=== ID ===
{{edition|java}}:
{{ID table
|edition=java
|showforms=y
|generatetranslationkeys=y
|displayname=Copper Ingot
|spritetype=item
|nameid=copper_ingot
|form=item
|foot=1}}
{{edition|bedrock}}:
{{ID table
|edition=bedrock
|shownumericids=y
|showforms=y
|notshowbeitemforms=y
|generatetranslationkeys=y
|displayname=Copper Ingot
|spritetype=item
|nameid=copper_ingot
|form=item
|id=504
|foot=1}}
== History ==
{{History|java}}
{{History||1.17|snap=20w45a|[[File:Copper Ingot JE1.png|32px]] Added copper ingots.}}
{{History|||snap=20w46a|[[File:Copper Ingot JE2 BE1.png|32px]] The texture of copper ingots has been changed.|Crafting copper ingots from and into copper blocks now outputs/requires only 4 ingots.}}
{{History|||snap=21w05a|[[Drowned]] can now drop copper ingots when killed instead of [[gold ingots]], making copper ingots renewable.}}
{{History|||snap=21w10a|Copper ingots can now be smelted from [[deepslate copper ore]].}}
{{History|||snap=21w14a|Copper ingots can now be smelted from [[raw copper]].}}
{{History|||snap=21w17a|The amount of copper ingots required to make a [[block of copper]] has been changed back to 9.}}
{{History||1.17.1|snap=Pre-release 1|Increased the chance of [[drowned]] dropping a copper ingot from 5% to 11% and the increase of this chance for each level of [[Looting]] enchantment from 1% to 2% to match {{el|be}}.}}
{{History||1.20<br>(Experimental)|link=1.19.4|snap=23w04a|Copper ingots can now be used as an armor trim material.}}
{{History|||snap=1.19.4 Pre-release 1|Copper ingots can now be used to craft [[brush]]es.}}
{{History|bedrock}}
{{History||Caves & Cliffs (experimental)|link=Bedrock Edition 1.17.0|snap=beta 1.16.210.57|[[File:Copper Ingot JE2 BE1.png|32px]] Added copper ingots.}}
{{History||1.17.0|snap=beta 1.17.0.50|Copper ingots can now be used to craft [[spyglass|spyglasses]].}}
{{History|||snap=beta 1.17.0.52|Copper ingots are now available without enabling [[experimental gameplay]].}}
{{History|||snap=beta 1.17.0.54|The amount of copper ingots required to make a [[block of copper]] has been changed to 9.}}
{{History||Vanilla Experiments (experimental)|link=1.18.30|snap=beta 1.18.30.26|Copper ingots can now be used to craft copper horns.}}
{{History||1.19.0|snap=beta 1.19.0.24|Copper ingots can no longer be used to craft copper horns, as copper horns have been removed.}}
{{History||1.20.0<br>(Experimental)|link=Bedrock Edition 1.19.80|snap=beta 1.19.80.20|Copper ingots can now be used to craft [[brush]]es.}}
{{History|||snap=beta 1.19.80.21|Copper ingots can now be used as an armor trim material.}}
{{History|foot}}
== Issues ==
{{Issue list}}
== External Links ==
*[https://www.minecraft.net/en-us/article/taking-inventory--copper-ingot Taking Inventory:Copper Ingot] – Minecraft.net on December 22, 2022
{{Items}}
[[Category:Renewable resources]]
[[de:Kupferbarren]]
[[es:Lingote de cobre]]
[[fr:Lingot de cuivre]]
[[it:Lingotto di rame]]
[[ja:Copper Ingot]]
[[ko:구리괴]]
[[pl:Sztabka miedzi]]
[[pt:Barra de cobre]]
[[ru:Медный слиток]]
[[uk:Мідний злиток]]
[[zh:铜锭]]</li><li>[[Compound|Compound]]<br/>{{About|a feature in the Education Edition|the NBT tag|NBT}}
{{education feature}}
{{exclusive|bedrock|education}}
{{Item
| image = Water (compound).png
| image2 = Garbage.png
| renewable = No
| stackable = Yes (64)
}}
'''Compounds''' are a type of [[item]] from [[Education Edition]] used in chemistry, which are created from combinations of various [[element]]s.
== Obtaining ==
Compounds cannot be obtained in the [[Creative inventory]]. They are only obtained from creating them in the [[compound creator]]. This is done by inserting a certain number of [[element]]s corresponding to the compound's chemical formula.
== List of compounds ==
{| class="wikitable" data-description="Compounds"
!Icon
!Compound Name
!Compound Recipe
!Description
!Uses
|-
|{{slot|Aluminum Oxide|link=none}}
|{{text anchor|Aluminium Oxide}}
|{{slot|Aluminum,2}}{{slot|Oxygen,3}}
|Is only brown when dug up from the Earth and contaminated; actually white when pure. Can be electrolyzed to make aluminum metal. Also the main chemical in rubies and sapphires.
|Used to craft [[hardened glass]].
|-
|{{slot|Ammonia|link=none}}
|{{text anchor|Ammonia}}
|{{slot|Nitrogen}}{{slot|Hydrogen,3}}
|
|Used to create [[super fertilizer]].
|-
|{{slot|Barium Sulfate|link=none}}
|{{text anchor|Barium Sulfate}}
|{{slot|Barium}}{{slot|Sulfur}}{{slot|Oxygen,4}}
|
|
|-
|{{slot|Benzene|link=none}}
|{{text anchor|Benzene}}
|{{slot|Carbon,6}}{{slot|Hydrogen,6}}
|
|
|-
|{{slot|Boron Trioxide|link=none}}
|{{text anchor|Boron Trioxide}}
|{{slot|Boron,2}}{{slot|Oxygen,3}}
|
|Used to craft [[hardened glass]].
|-
|{{slot|Calcium Bromide|link=none}}
|{{text anchor|Calcium Bromide}}
|{{slot|Calcium}}{{slot|Bromine,2}}
|
|
|-
|{{slot|Crude Oil|link=none}}
|{{text anchor|Crude Oil}}
|{{slot|Carbon,9}}{{slot|Hydrogen,20}}
|C<sub>9</sub>H<sub>20</sub> is the chemical formula for nonane.
|
|-
|{{slot|Glue|link=none}}
|{{text anchor|Glue}} (Cyanoacrylate)
|{{slot|Carbon,5}}{{slot|Hydrogen,5}}{{slot|Nitrogen}}{{slot|Oxygen,2}}
|C<sub>5</sub>H<sub>5</sub>NO<sub>2</sub> is the chemical formula for methyl cyanoacrylate, one of the cyanoacrylate glues ("superglue"); its condensed formula is CH<sub>2</sub>=C(CN)COOCH<sub>3</sub>.
|
|-
|{{slot|Hydrogen Peroxide|link=none}}
|{{text anchor|Hydrogen Peroxide}}
|{{slot|Hydrogen,2}}{{slot|Oxygen,2}}
|
|Used to craft [[glow stick]].
|-
|{{slot|Iron Sulfide|link=none}}
|{{text anchor|Iron Sulfide}}
|{{slot|Iron}}{{slot|Sulfur}}
|
|
|-
|{{slot|Latex|link=none}}
|{{text anchor|Latex}}
|{{slot|Carbon,5}}{{slot|Hydrogen,8}}
|C<sub>5</sub>H<sub>8</sub> is the chemical formula for isoprene, which polymers are the main components of natural rubber; its condensed formula is CH<sub>2</sub>=C(CH<sub>3</sub>)−CH=CH<sub>2</sub>.
|Used to craft [[balloon]]s.
|-
|{{slot|Lithium Hydride|link=none}}
|{{text anchor|Lithium Hydride}}
|{{slot|Lithium}}{{slot|Hydrogen}}
|
|
|-
|{{slot|Luminol|link=none}}
|{{text anchor|Luminol}}
| class="nowrap" |{{slot|Carbon,8}}{{slot|Hydrogen,7}}{{slot|Nitrogen,3}}{{slot|Oxygen,2}}
|Luminol is a chemical that glows blue when oxidized. It can detect blood.
|Used to craft [[glow stick]].
|-
|{{slot|Lye|link=none}}
|{{text anchor|Lye}}
|{{slot|Sodium}}{{slot|Oxygen}}{{slot|Hydrogen}}
|
|
|-
|{{slot|Magnesium Nitrate|link=none}}
|{{text anchor|Magnesium Nitrate}}
|{{slot|Magnesium}}{{slot|Nitrogen,2}}{{slot|Oxygen,6}}
|Condensed formula: Mg(NO<sub>3</sub>)<sub>2</sub>
|
|-
|{{slot|Magnesium Oxide|link=none}}
|{{text anchor|Magnesium Oxide}}
|{{slot|Magnesium}}{{slot|Oxygen}}
|
|
|-
|{{slot|Polyethylene|link=none}}
|{{text anchor|Polyethylene}}
|{{slot|Carbon,10}}{{slot|Hydrogen,20}}
|Polyethlene (PE), (CH<sub>2</sub>)<sub>''n''</sub>, is ''the'' most commonly produced plastic.
|Used to craft [[glow stick]].
|-
|{{slot|Potassium Iodide|link=none}}
|{{text anchor|Potassium Iodide}}
|{{slot|Potassium}}{{slot|Iodine}}
|Used for making iodized salt and other things.
|
|-
|{{slot|Soap|link=none}}
|{{text anchor|Soap}}
|{{slot|Carbon,18}}{{slot|Hydrogen,35}}{{slot|Sodium}}{{slot|Oxygen,2}}
|C<sub>18</sub>H<sub>35</sub>NaO<sub>2</sub> is the chemical formula of sodium stearate, the most common soap.
|
|-
|{{slot|Sodium Acetate|link=none}}
|{{text anchor|Sodium Acetate}}
|{{slot|Carbon,2}}{{slot|Hydrogen,3}}{{slot|Sodium}}{{slot|Oxygen,2}}
|Used to make hand warmers because it heats up when it "freezes".
|Used to create [[Ice Bomb]].
|-
|{{slot|Sodium Fluoride|link=none}}
|{{text anchor|Sodium Fluoride}}
|{{slot|Sodium}}{{slot|Fluorine}}
|Commonly used in toothpaste to prevent cavity, among other uses.
|
|-
|{{slot|Sodium Hydride|link=none}}
|{{text anchor|Sodium Hydride}}
|{{slot|Sodium}}{{slot|Hydrogen}}
|
|
|-
|{{slot|Sodium Hypochlorite|link=none}}
|{{text anchor|Sodium Hypochlorite}}
|{{slot|Sodium}}{{slot|Chlorine}}{{slot|Oxygen}}
|Main ingredient of real-life bleach.
|Used to create [[Bleach]].
|-
|{{slot|Sodium Oxide|link=none}}
|{{text anchor|Sodium Oxide}}
|{{slot|Sodium,2}}{{slot|Oxygen}}
|
|
|-
|{{slot|Sulfate|link=none}}
|{{text anchor|Sulfate}}
|{{slot|Sulfur}}{{slot|Oxygen,4}}
|Cannot actually exist on its own, as it should have a <sup>2-</sup> charge.
|
|}
=== Chlorides ===
{| class="wikitable" data-description="Chlorides"
!Icon
!Compound
!Recipe
!Uses
|-
|{{slot|Salt|link=none}}
|{{text anchor|Salt}}
|{{slot|Sodium}}{{slot|Chlorine}}
|Used to create [[heat block]].
|-
|{{slot|Calcium Chloride|link=none}}
|{{text anchor|Calcium Chloride}}
|{{slot|Calcium}}{{slot|Chlorine,2}}
|Used to craft [[sparkler|orange sparkler]].
|-
|{{slot|Cerium Chloride|link=none}}
|{{text anchor|Cerium Chloride}}
|{{slot|Cerium}}{{slot|Chlorine,3}}
|Used to craft [[colored torch|blue torch]] and [[sparkler|blue sparkler]].
|-
|{{slot|Mercuric Chloride|link=none}}
|{{text anchor|Mercuric Chloride}}
|{{slot|Mercury}}{{slot|Chlorine,2}}
|Used to craft [[colored torch|red torch]] and [[sparkler|red sparkler]].
|-
|{{slot|Potassium Chloride|link=none}}
|{{text anchor|Potassium Chloride}}
|{{slot|Potassium}}{{slot|Chlorine}}
|Used to craft [[colored torch|purple torch]] and [[sparkler|purple sparkler]].
|-
|{{slot|Tungsten Chloride|link=none}}
|{{text anchor|Tungsten Chloride}}
|{{slot|Tungsten}}{{slot|Chlorine,6}}
|Used to craft [[colored torch|green torch]] and [[sparkler|green sparkler]].
|}
=== Natural compounds ===
Natural compounds are compounds which can be obtained naturally in ''Minecraft''.
{| class="wikitable" data-description="Chlorides"
!Icon
!Compound
! class="nowrap" |Chemical formula
!Natural source
!Method
!Notes
|-
|{{slot|Charcoal}}
|[[Charcoal]]
|{{slot|Carbon,7}}{{slot|Hydrogen,4}}{{slot|Oxygen}}
|[[Log]] or [[Wood]]
|[[Smelting]]
|The chemical formula C<sub>7</sub>H<sub>4</sub>O is sometimes used to describe the approximate composition of charcoal.
|-
|{{slot|Glow Ink Sac}} {{slot|Ink Sac}}
|[[Glow Ink Sac]], [[Ink Sac]]
|{{slot|Iron}}{{slot|Sulfur}}{{slot|Oxygen,4}}
|[[Glow Squid]], [[Squid]]
|Killing Glow Squid, Squid
|FeSO<sub>4</sub> is the chemical formula of iron(II) sulfate or ferrous sulfate, normally found complexed with water as a salt with the formula FeSO<sub>4</sub>·''x''H<sub>2</sub>O, and has been used in the manufacture of iron gall ink and other inks for centuries. In contrast, squid ink (and other cephalopod inks) is composed mainly of melanin and mucus, with an assortment of other compounds in a variety of concentrations dependent on the species.
|-
|{{slot|Sugar}}
|[[Sugar]]
|{{slot|Carbon,6}}{{slot|Hydrogen,12}}{{slot|Oxygen,6}}
|[[Sugar Cane]]s or [[Honey Bottle]]s
|Harvesting and [[crafting]]
|C<sub>6</sub>H<sub>12</sub>O<sub>6</sub> is the chemical formula of glucose and fructose, as well as a number of other simple sugars (common table sugar is instead sucrose, a complex sugar made of glucose and fructose with the chemical formula C<sub>12</sub>H<sub>22</sub>O<sub>11</sub>).
|-
|{{slot|Water (compound)|link=water}}
|{{text anchor|Water}}
|{{slot|Hydrogen,2}}{{slot|Oxygen}}
|[[Water]]
|Picking up in a [[bucket]] or [[glass bottle]] from a [[Cauldron]] or a water source block
|One of the easiest to obtain.
|}
=== Garbage ===
Garbage is considered a "compound", but the only way to produce it is to activate the [[Lab Table]] when its inputs are an invalid recipe. It has no uses.
== Usage ==
Certain compounds are used as ingredients in [[crafting]] or [[lab table]] experiments. Natural compounds have uses outside of chemistry, detailed in their respective articles.
=== Crafting ingredient ===
{{Crafting usage|description=0|Latex, Polyethylene, Hydrogen Peroxide, Luminol, Boron Trioxide, Aluminum Oxide}}
==== Chloride coloring ====
{{Crafting usage|Chloride,Cerium Chloride|match=end}}
=== Lab table ingredient ===
{| class="wikitable"
!Result
!Materials needed
|-
! rowspan="2" |{{slot|Bleach}}<br>[[Bleach]]
|{{slot|Water (compound)|link=Compound}}{{slot|Water (compound)|link=Compound}}{{slot|Water (compound)|link=Compound}}{{slot|Sodium Hypochlorite|link=Compound}}{{slot|Sodium Hypochlorite|link=Compound}}{{slot|Sodium Hypochlorite|link=Compound}}
|-
|<center>Water ×3, Sodium Hypochlorite ×3</center>
|-
! rowspan="2" |{{slot|Heat Block.gif}}<br>[[Heat Block]]
|{{slot}}{{slot|Iron|link=Element#Iron}}{{slot|Water (compound)|link=Compound}}{{slot|Charcoal}}{{slot|Salt|link=Compound}}{{slot}}
|-
|<center>[[Iron (element)|Iron]], Water, [[Charcoal]], Salt</center>
|-
! rowspan="2" |{{slot|Ice Bomb}}<br>[[Ice Bomb]]
|{{slot}}{{slot|Sodium Acetate|link=Compound}}{{slot|Sodium Acetate|link=Compound}}{{slot|Sodium Acetate|link=Compound}}{{slot|Sodium Acetate|link=Compound}}{{slot}}
|-
|<center>Sodium Acetate ×4</center>
|-
! rowspan="2" |{{slot|Super Fertilizer}}<br>[[Super Fertilizer]]
|{{slot}}{{slot}}{{slot|Ammonia|link=Compound}}{{slot|Phosphorus|link=Element#Phosphorus}}{{slot}}{{slot}}
|-
|<center>Ammonia, [[Phosphorus]]</center>
|}
== Sounds ==
Sounds are produced when a [[lab table]] creates garbage.
{{Sound table
|type=bedrock
|sound=Fizz.ogg
|source=block
|description=When a lab table creates garbage{{verify}}
|id=random.fizz
|volume=1.0
|pitch=0.5/0.7}}
{{Sound table
|sound=Ghast fireball4.ogg
|source=hostile
|description=When a lab table creates garbage{{verify}}
|id=mob.blaze.shoot
|volume=1.0
|pitch=0.8/1.0}}
{{Sound table
|sound=Explosion1.ogg
|sound2=Explosion2.ogg
|sound3=Explosion3.ogg
|sound4=Explosion4.ogg
|source=block
|description=When a lab table creates garbage
|id=random.explode
|volume=1.0
|pitch=0.4/0.6}}
{{Sound table
|sound=Fire.ogg
|source=sound
|description=When a lab table creates garbage
|id=lt.reaction.fire
|volume=2.0
|pitch=0.4/0.6}}
{{Sound table
|sound=Explosion1.ogg
|sound2=Explosion2.ogg
|sound3=Explosion3.ogg
|sound4=Explosion4.ogg
|source=weather
|description=When a lab table creates garbage
|id=ambient.weather.lightning.impact
|volume=1.0
|pitch=0.6/0.8
|foot=1}}
== Data values ==
=== ID ===
{{ID table
|edition=bedrock
|shownumericids=y
|showforms=y
|notshowbeitemforms=y
|generatetranslationkeys=y
|displayname=Compound
|spritetype=item
|nameid=compound
|id=594
|form=item
|translationkey=item.compound.salt.name,item.compound.sodiumoxide.name,item.compound.sodiumhydroxide.name,item.compound.magnesiumnitrate.name,item.compound.ironsulfide.name,item.compound.lithiumhydride.name,item.compound.sodiumhydride.name,item.compound.calciumbromide.name,item.compound.magnesiumoxide.name,item.compound.sodiumacetate.name,item.compound.luminol.name,item.compound.charcoal.name,item.compound.sugar.name,item.compound.aluminumoxide.name,item.compound.borontrioxide.name,item.compound.soap.name,item.compound.polyethylene.name,item.compound.garbage.name,item.compound.magnesiumsalts.name,item.compound.sulfate.name,item.compound.bariumsulfate.name,item.compound.potassiumchloride.name,item.compound.mercuricchloride.name,item.compound.ceriumchloride.name,item.compound.tungstenchloride.name,item.compound.calciumchloride.name,item.compound.water.name,item.compound.glue.name,item.compound.hypochlorite.name,item.compound.crudeoil.name,item.compound.latex.name,item.compound.potassiumiodide.name,item.compound.sodiumfluoride.name,item.compound.benzene.name,item.compound.ink.name,item.compound.hydrogenperoxide.name,item.compound.ammonia.name,item.compound.sodiumhypochlorite.name
|foot=1}}
===Item data===
{{see also|Data values}}Compounds uses the following data values:{{/DV}}
== History ==
{{History|bedrock}}
{{History||1.4.0|snap=beta 1.2.20.1|[[File:Aluminum Oxide BE1.png|32px]] [[File:Ammonia BE1.png|32px]] [[File:Barium Sulfate BE1.png|32px]] [[File:Benzene BE1.png|32px]] [[File:Boron Trioxide BE1.png|32px]] [[File:Calcium Bromide BE1.png|32px]] [[File:Crude Oil BE1.png|32px]] [[File:Glue BE1.png|32px]] [[File:Hydrogen Peroxide BE1.png|32px]] [[File:Iron Sulfide BE1.png|32px]] [[File:Latex BE1.png|32px]] [[File:Lithium Hydride BE1.png|32px]] [[File:Luminol BE1.png|32px]] [[File:Lye BE1.png|32px]] [[File:Magnesium Nitrate BE1.png|32px]] [[File:Magnesium Oxide BE1.png|32px]] [[File:Polyethylene BE1.png|32px]] [[File:Potassium Iodide BE1.png|32px]] [[File:Salt BE1.png|32px]] [[File:Soap BE1.png|32px]] [[File:Sodium Acetate BE1.png|32px]] [[File:Sodium Fluoride.png|32px]] [[File:Sodium Hydride BE1.png|32px]] [[File:Sodium Hypochlorite BE1.png|32px]] [[File:Sodium Oxide BE1.png|32px]] [[File:Sulfate BE1.png|32px]] [[File:Calcium Chloride BE1.png|32px]] [[File:Cerium Chloride BE1.png|32px]] [[File:Mercuric Chloride BE1.png|32px]] [[File:Potassium Chloride BE1.png|32px]] [[File:Tungsten Chloride BE1.png|32px]] [[File:Charcoal JE3 BE3.png|32px]] [[File:Ink Sac JE1 BE1.png|32px]] [[File:Sugar JE1 BE1.png|32px]] [[File:Water (compound) BE1.png|32px]] [[File:Garbage BE1.png|32px]] Added compounds.}}
{{History||1.10.0|snap=beta 1.10.0.3|[[File:Charcoal JE4 BE4.png|32px]][[File:Ink Sac JE2 BE2.png|32px]][[File:Sugar JE2 BE2.png|32px]] The textures of Charcoal, Ink Sacs and Sugar have been changed.}}
{{History||1.16|All compounds have been made unobtainable. It is unknown whether it is a glitch or intended. {{bug|MCPE-113776}}}}
{{History| |1.17.0|All compounds are obtainable once again.}}{{History|education}}
{{History||1.0.27|[[File:Aluminum Oxide BE1.png|32px]] [[File:Ammonia BE1.png|32px]] [[File:Barium Sulfate BE1.png|32px]] [[File:Benzene BE1.png|32px]] [[File:Boron Trioxide BE1.png|32px]] [[File:Calcium Bromide BE1.png|32px]] [[File:Crude Oil BE1.png|32px]] [[File:Glue BE1.png|32px]] [[File:Hydrogen Peroxide BE1.png|32px]] [[File:Iron Sulfide BE1.png|32px]] [[File:Latex BE1.png|32px]] [[File:Lithium Hydride BE1.png|32px]] [[File:Luminol BE1.png|32px]] [[File:Lye BE1.png|32px]] [[File:Magnesium Nitrate BE1.png|32px]] [[File:Magnesium Oxide BE1.png|32px]] [[File:Polyethylene BE1.png|32px]] [[File:Potassium Iodide BE1.png|32px]] [[File:Salt BE1.png|32px]] [[File:Soap BE1.png|32px]] [[File:Sodium Acetate BE1.png|32px]] [[File:Sodium Fluoride BE1.png|32px]] [[File:Sodium Hydride BE1.png|32px]] [[File:Sodium Hypochlorite BE1.png|32px]] [[File:Sodium Oxide BE1.png|32px]] [[File:Sulfate BE1.png|32px]] [[File:Calcium Chloride BE1.png|32px]] [[File:Cerium Chloride BE1.png|32px]] [[File:Mercuric Chloride BE1.png|32px]] [[File:Potassium Chloride BE1.png|32px]] [[File:Tungsten Chloride BE1.png|32px]] [[File:Charcoal JE3 BE3.png|32px]] [[File:Ink Sac JE1 BE1.png|32px]] [[File:Sugar JE1 BE1.png|32px]] [[File:Water (compound) BE1.png|32px]] [[File:Garbage BE1.png|32px]] Added compounds.}}
{{History||1.12.0|[[File:Charcoal JE4 BE4.png|32px]][[File:Ink Sac JE2 BE2.png|32px]][[File:Sugar JE2 BE2.png|32px]] The textures of Charcoal, Ink Sacs and Sugar have been changed.}}
{{History|foot}}
== Unused compound textures ==
In the chemistry resource pack folder, there are numerous [[History of textures/Unused textures#Unused compounds|compound textures which are not used]] in the game. Note: a <code>compound</code> item with a data value of <code>38</code> will have the <code>Blue Flask</code> texture and will be called <code>item.compound..name</code>. If you use an NBT Editor to get a compound item with no assigned data value (by deleting the data tag) and then transfer that item to another world / realm using structure blocks (by exporting to a <code>.mcstructure</code> file, then importing it on another world or realm) then it will be renamed to <code>Ivory Tusk</code>.
<gallery widths="48" heights="48" perrow="30" class="center">
Flask EE1.png|Flask
Black Flask EE1.png|Black Flask
Blue Flask EE1.png|Blue Flask
Brown Beaker EE1.png|Brown Beaker
Brown Flask EE1.png|Brown Flask
Dark Gray Beaker EE1.png|Dark Gray Beaker
Dark Gray Flask EE1.png|Dark Gray Flask
Dark Gray Jar EE1.png|Dark Gray Jar
Green Beaker EE1.png|Green Beaker
Green Flask EE1.png|Green Flask
Green Jar EE1.png|Green Jar
Indigo Beaker EE1.png|Indigo Beaker
Indigo Flask EE1.png|Indigo Flask
Indigo Jar EE1.png|Indigo Jar
Light Gray Beaker EE1.png|Light Gray Beaker
Light Gray Flask EE1.png|Light Gray Flask
Orange Beaker EE1.png|Orange Beaker
Orange Flask EE1.png|Orange Flask
Orange Jar EE1.png|Orange Jar
Purple Beaker EE1.png|Purple Beaker
Purple Flask EE1.png|Purple Flask
Purple Jar EE1.png|Purple Jar
Red Beaker EE1.png|Red Beaker
Red Flask EE1.png|Red Flask
Red Jar EE1.png|Red Jar
White Flask EE1.png|White Flask
Yellow Flask EE1.png|Yellow Flask
Bleach (compound).png|Bleach
</gallery>
== Gallery ==
<gallery>
Screen Shot 2021-08-19 at 12.22.50 PM.png|A compound creator in using 5 carbon and 8 hydrogen to create latex.
</gallery>
== See also ==
*[[Compound Creator]]
*[[Crafting]]
*[[Element Constructor]]
*[[Lab Table]]
*[[Brewing Stand]]
*[[Brewing]]
*[[Crafting Table]]
== References ==
{{reflist}}
{{Items}}
{{Education Edition}}
[[Category:Non-renewable resources]]
[[Category:Education Edition items]]
[[de:Verbindung]]
[[it:Composto]]
[[ja:化合物]]
[[pl:Związki chemiczne]]
[[pt:Composto]]
[[ru:Соединение]]
[[th:สารประกอบ]]
[[uk:Сполуки]]
[[zh:化合物]]</li></ul> | 14w20a | The Ender dragon no longer breaks barriers. | |||||||||||||||||||||||||||||||||
1.9{{Extension DPL}}<ul><li>[[Bucket|Bucket]]<br/>{{about|the empty bucket|buckets filled with objects}}
{{Item
| image = Bucket.png
| renewable = Yes
| stackable = Yes (16), except in furnace fuel slot
}}
A '''bucket''' is an item used to carry [[water]], [[lava]], [[milk]], [[powder snow]], and [[Bucket of aquatic mob|various aquatic mobs]].
== Obtaining ==
=== Crafting ===
{{Crafting
|A2= Iron Ingot
|C2= Iron Ingot
|B3= Iron Ingot
|Output= Bucket
|type= Miscellaneous
}}
=== Natural generation ===
{{LootChestItem|bucket}}
== Usage ==
Empty buckets can be used to "pick up" a [[water]] or [[lava]] source block by pressing {{control|use}} item on a block of the relevant type. If the empty bucket is part of a stack and the player's inventory is full, the filled bucket drops in front of the player as an item.
A bucket filled with a source block can then be used to place its source block contents in the empty block next to the side of the block the player is currently looking at, or replacing the block looked at for some replaceable blocks.
One can press {{control|use}} when looking at a [[cow]], [[mooshroom]], or [[goat]] to fill a bucket with [[milk]]. A bucket full of milk can be emptied only by drinking it or by using it in crafting a recipe (like [[cake]]).
A bucket full of water can be used on a live aquatic mob ([[cod]], [[salmon]], [[tropical fish]], [[pufferfish]], [[axolotl]], or [[tadpole]]) to collect the mob in the bucket for transportation to another location. The mob in item form becomes a [[bucket of aquatic mob]].
An empty bucket can be used to empty a [[cauldron]] with water or lava, filling the bucket with the fluid. This does not work with dispensers.<ref>{{bug|MC-165196}}</ref>
A lava bucket placed in the fuel slot of a [[furnace]] becomes an empty bucket after the lava is consumed during [[smelting]].
An empty bucket fills with [[water]] when placed in the fuel slot of a [[furnace]] while smelting a [[Sponge|wet sponge]].
An empty bucket can be used to collect [[powder snow]], filling the bucket with powder snow. Emptying the powder snow bucket places the powder snow block in the empty block next to the side of the block the player is currently looking at.
== Sounds ==
{{el|je}}:
{{Sound table
|sound=Fill water bucket1.ogg
|sound2=Fill water bucket2.ogg
|sound3=Fill water bucket3.ogg
|subtitle=Bucket fills
|source=player
|description=When a bucket is filled with water
|id=item.bucket.fill
|translationkey=subtitles.item.bucket.fill
|volume=1.0
|pitch=1.0
|distance=16}}
{{Sound table
|sound=Empty water bucket1.ogg
|sound2=Empty water bucket1.ogg
|sound3=Empty water bucket2.ogg
|sound4=Empty water bucket3.ogg
|subtitle=Bucket empties
|source=block
|description=When a water bucket is emptied <ref group=sound><code>empty1</code> plays at twice the frequency as the other sounds</ref>
|id=item.bucket.empty
|translationkey=subtitles.item.bucket.empty
|volume=1.0
|pitch=1.0 <ref group=sound>Except for the second copy of <code>empty1</code>, which is 0.9</ref>
|distance=16}}
{{Sound table
|sound=Fill lava bucket1.ogg
|sound2=Fill lava bucket2.ogg
|sound3=Fill lava bucket3.ogg
|subtitle=Bucket fills
|source=player
|description=When a bucket is filled with lava
|id=item.bucket.fill_lava
|translationkey=subtitles.item.bucket.fill
|volume=1.0
|pitch=1.0
|distance=16}}
{{Sound table
|sound=Empty lava bucket1.ogg
|sound2=Empty lava bucket2.ogg
|sound3=Empty lava bucket3.ogg
|subtitle=Bucket empties
|source=block
|description=When a lava bucket is emptied
|id=item.bucket.empty_lava
|translationkey=subtitles.item.bucket.empty
|volume=1.0
|pitch=1.0
|distance=16}}
{{Sound table
|sound=Fill powder snow bucket1.ogg
|sound2=Fill powder snow bucket2.ogg
|subtitle=Bucket fills
|source=player
|description=When a bucket is filled with powder snow
|id=item.bucket.fill_powder_snow
|translationkey=subtitles.item.bucket.fill
|volume=1.0
|pitch=1.0/0.9/1.1
|distance=16}}
{{Sound table
|sound=Empty powder snow bucket1.ogg
|sound2=Empty powder snow bucket2.ogg
|subtitle=Bucket empties
|source=block
|description=When a powder snow bucket is emptied
|id=item.bucket.empty_powder_snow
|translationkey=subtitles.item.bucket.empty
|volume=1.0
|pitch=1.0
|distance=16}}
{{Sound table
|rowspan=2
|sound=Fill fish bucket1.ogg
|sound2=Fill fish bucket2.ogg
|sound3=Fill fish bucket3.ogg
|subtitle=Fish captured
|source=neutral
|description=When a fish is collected into a water bucket
|translationkey=subtitles.item.bucket.fill_fish
|id=item.bucket.fill_fish
|volume=1.0
|pitch=1.0
|distance=16}}
{{Sound table
|subtitle=Tadpole captured
|source=neutral
|description=When a tadpole is collected into a bucket
|id=item.bucket.fill_tadpole
|translationkey=subtitles.item.bucket.fill_tadpole
|volume=0.5
|pitch=1.5
|distance=16}}
{{Sound table
|sound=Fill axolotl1.ogg
|sound2=Fill axolotl2.ogg
|sound3=Fill axolotl3.ogg
|subtitle=Axolotl scooped
|source=neutral
|description=When an axolotl is collected into a bucket
|id=item.bucket.fill_axolotl
|translationkey=subtitles.item.bucket.fill_axolotl
|volume=1.0
|pitch=1.0
|distance=16}}
{{Sound table
|rowspan=3
|sound=Empty fish bucket1.ogg
|sound2=Empty fish bucket2.ogg
|sound3=Empty fish bucket3.ogg
|subtitle=Bucket empties
|source=neutral
|description=When a fish is placed from a bucket
|id=item.bucket.empty_fish
|translationkey=subtitles.item.bucket.empty
|volume=1.0
|pitch=1.0
|distance=16}}
{{Sound table
|subtitle=Bucket empties
|source=neutral
|description=When a tadpole is placed from a bucket
|id=item.bucket.empty_tadpole
|translationkey=subtitles.item.bucket.empty
|volume=0.5
|pitch=1.5
|distance=16}}
{{Sound table
|subtitle=Bucket empties
|source=neutral
|description=When an axolotl is placed from a bucket
|id=item.bucket.empty_axolotl
|translationkey=subtitles.item.bucket.empty
|volume=1.0
|pitch=1.0
|distance=16}}
{{Sound table
|sound=Cow milk1.ogg
|sound2=Cow milk2.ogg
|sound3=Cow milk3.ogg
|source=player
|subtitle=Cow gets milked
|description=When a cow is milked
|id=entity.cow.milk
|translationkey=subtitles.entity.cow.milk
|volume=1.0
|pitch=1.0
|distance=16}}
{{Sound table
|sound=Mooshroom milk1.ogg
|sound2=Mooshroom milk2.ogg
|sound3=Mooshroom milk3.ogg
|subtitle=Goat gets milked
|description=When a regular goat is milked
|source=neutral
|id=entity.goat.milk
|translationkey=subtitles.entity.goat.milk
|volume=1.0
|pitch=1.0
|distance=16}}
{{Sound table
|sound=Goat screaming milk1.ogg
|sound2=Goat screaming milk2.ogg
|sound3=Goat screaming milk3.ogg
|sound4=Goat screaming milk4.ogg
|sound5=Goat screaming milk5.ogg
|subtitle=Goat gets milked
|source=neutral
|description=When a screaming goat is milked
|id=entity.goat.screaming.milk
|translationkey=subtitles.entity.goat.milk
|volume=1.0
|pitch=1.0
|distance=16
|foot=1}}
{{el|be}}:
{{Sound table
|type=bedrock
|sound=Fill water bucket1.ogg
|sound2=Fill water bucket2.ogg
|sound3=Fill water bucket3.ogg
|source=block
|description=When a bucket is filled with water
|id=bucket.fill_water
|volume=1.0
|pitch=1.0}}
{{Sound table
|sound=Empty water bucket1.ogg
|sound2=Empty water bucket2.ogg
|sound3=Empty water bucket3.ogg
|source=block
|description=When a water bucket is emptied
|id=bucket.empty_water
|volume=1.0
|pitch=1.0}}
{{Sound table
|rowspan=2
|sound=Water Splash Old.ogg
|source=block
|description=When a water bucket is placed in a cauldron<wbr><ref group=sound name=bucketsplash>{{Bug|MCPE-135919}}</ref>
|id=cauldron.fillwater
|volume=0.1
|pitch=1.0}}
{{Sound table
|source=block
|description=When a water bucket is removed from a cauldron<wbr><ref group=sound name=bucketsplash/>
|id=cauldron.takewater
|volume=0.1
|pitch=1.0}}
{{Sound table
|sound=Fill lava bucket1.ogg
|sound2=Fill lava bucket2.ogg
|sound3=Fill lava bucket3.ogg
|source=block
|description=When a bucket is filled with lava
|id=bucket.fill_lava
|volume=1.0
|pitch=1.0}}
{{Sound table
|sound=Empty lava bucket1.ogg
|sound2=Empty lava bucket2.ogg
|sound3=Empty lava bucket3.ogg
|source=block
|description=When a lava bucket is emptied
|id=bucket.empty_lava
|volume=1.0
|pitch=1.0}}
{{Sound table
|sound=Fill powder snow bucket1.ogg
|sound2=Fill powder snow bucket2.ogg
|source=player
|description=When a bucket is filled with powder snow
|id=bucket.fill_powder_snow
|volume=1.0
|pitch=1.0}}
{{Sound table
|sound=Empty powder snow bucket1.ogg
|sound2=Empty powder snow bucket2.ogg
|source=block
|description=When a powder snow bucket is emptied
|id=bucket.empty_powder_snow
|volume=1.0
|pitch=1.0}}
{{Sound table
|sound=Fill fish bucket1.ogg
|sound2=Fill fish bucket2.ogg
|sound3=Fill fish bucket3.ogg
|source=block
|description=When a creature is collected into a water bucket
|id=bucket.fill_fish
|volume=1.0
|pitch=1.0}}
{{Sound table
|sound=Empty fish bucket1.ogg
|sound2=Empty fish bucket2.ogg
|sound3=Empty fish bucket3.ogg
|source=block
|description=When a creature is placed from a bucket
|id=bucket.empty_fish
|volume=1.0
|pitch=1.0}}
{{Sound table
|sound=Cow milk1.ogg
|sound2=Cow milk2.ogg
|sound3=Cow milk3.ogg
|source=neutral
|description=When a cow is milked
|id=mob.cow.milk
|volume=1.0
|pitch=1.0}}
{{Sound table
|sound=Mooshroom milk1.ogg
|sound2=Mooshroom milk2.ogg
|sound3=Mooshroom milk3.ogg
|description=When a regular goat is milked
|source=neutral
|id=mob.mooshroom.suspicious_milk
|volume=1.0
|pitch=1.0, 0.9, 1.1}}
{{Sound table
|sound=Goat screaming milk1.ogg
|sound2=Goat screaming milk2.ogg
|sound3=Goat screaming milk3.ogg
|sound4=Goat screaming milk4.ogg
|sound5=Goat screaming milk5.ogg
|description=When a screaming goat is milked
|source=neutral
|id=mob.goat.milk.screamer
|volume=1.0
|pitch=1.0
|foot=1}}
== Data values ==
=== ID ===
{{edition|java}}:
{{ID table
|edition=java
|showforms=y
|generatetranslationkeys=y
|displayname=Bucket
|spritetype=item
|nameid=bucket
|form=item
|foot=1}}
{{edition|bedrock}}:
{{ID table
|edition=bedrock
|shownumericids=y
|showforms=y
|notshowbeitemforms=y
|showaliasids=y
|generatetranslationkeys=y
|displayname=Bucket
|spritetype=item
|nameid=bucket
|id=360
|aliasid=bucket / 0
|form=item
|foot=1}}
== Video ==
<div style="text-align:center">{{yt|0tVu5HYLQMw}}</div>
== Achievements ==
{{Load achievements|I am a Marine Biologist}}
== Advancements ==
{{Load advancements|Hot Stuff}}
== History ==
{{History|java infdev}}
{{History||20100615|[[File:Bucket JE1 BE1.png|32px]] Added buckets.
|Buckets can currently pick up only [[water]] and [[lava]].}}
{{History||20100625-2|Buckets can now be found in the new [[dungeon]] [[chest]]s.}}
{{History|java alpha}}
{{History||v1.0.11|[[Cow]]s are now [[milk]]able by using buckets.}}
{{History|java}}
{{History||1.0.0|snap=Beta 1.9 Prerelease|Added [[mooshroom]]s, which can be milked like normal [[cow]]s.}}
{{History|||snap=Beta 1.9 Prerelease 5|In [[Creative]] mode, buckets now remain empty when {{control|used}} to pick up [[water]] and [[lava]].}}
{{History||1.2.1|snap=12w06a|Buckets are now [[renewable resource|renewable]], due to zombies having a chance to drop iron ingots.}}
{{History||1.3.1|snap=12w21a|Buckets are now stackable up to 16.
|[[Dispenser]]s can now use buckets to collect and dispense water and lava.}}
{{History|||snap=12w22a|[[Smelting]] in a [[furnace]] with a [[lava bucket]] now leaves an empty bucket for the [[player]] to retrieve.}}
{{History||1.8|snap=14w25b|An empty bucket in the [[fuel]] slot now fills and become a [[water bucket]] after a [[sponge|wet sponge]] is dried. This happens for empty buckets placed by the [[player]] while the furnace is still smelting, and for empty buckets left by lava buckets.
|Stacked buckets in the fuel slot now become a single water bucket.}}
{{History|||snap=14w26a|The [[player]] can now place only one bucket in the [[fuel]] slot, which fixes the bug above.}}
{{History||1.9|snap=15w44a|A full [[cauldron]] can now be emptied with a bucket, filling the bucket with [[water]].
|The average yield of buckets from [[dungeon]] [[chest]]s has been substantially decreased.}}
{{History|||snap=15w46a|Buckets now replace single [[snow|snow layers]] when {{control|used}} on the top, instead of placing the [[water]] or [[lava]] in the [[air]] above the snow layer.}}
{{History|||snap=15w50a|Added [[sound]]s for buckets: <code>item.bucket.fill</code>, <code>item.bucket.fill_lava</code>, <code>item.bucket.empty</code>, and <code>item.bucket.empty_lava</code>.}}
{{History||1.11|snap=16w39a|Buckets are now found in the new [[woodland mansion]] [[chest]]s.}}
{{History||1.13|snap=17w47a|Prior to [[1.13/Flattening|''The Flattening'']], this [[item]]'s numeral ID was 325.}}
{{History|||snap=November 18, 2017|slink=https://youtu.be/A_Z3AokMwWI?t=1h52m07s|Buckets were said to be able to pick up fish mobs.}}
{{History|||snap=18w08b|Added [[fish bucket]]s, which turn into regular buckets when {{control|used}}.}}
{{History||1.14|snap=18w43a|[[File:Bucket JE2 BE2.png|32px]] The texture of buckets has been changed.}}
{{History|||snap=18w49a|Buckets can now be found in chests in [[savanna]] [[village]] houses.}}
{{History||1.16|snap=Pre-release 1|Using a bucket on water or lava in Creative mode now provides the player with one water or lava bucket in the inventory.<ref>{{bug|MC-9856}}</ref> This is created in a new inventory slot rather than replacing the used bucket. A limit of one bucket per fluid can be obtained this way - attempting to fill a bucket where a filled one already exists in the inventory removes the fluid as expected but does not provide any new buckets.
|Cows and mooshrooms can also now be milked in Creative mode,<ref>{{bug|MC-36322}}</ref> providing the player with limitless milk buckets.}}
{{History|||snap=Pre-release 4|Milking cows now provides Creative players with only one bucket.<ref>{{bug|MC-188352}}</ref>}}
{{History||1.17|snap=October 3, 2020|slink=https://youtu.be/DWZIfsaIgtE?t=2h04m58s|Buckets were revealed to be able to be used to collect [[axolotl]]s.}}
{{History|||snap=21w13a|[[Goat]]s are now milkable by using buckets.}}
{{History|||snap=20w46a|Added [[powder snow]], which can be collected with buckets.}}
{{History|pocket alpha}}
{{History||v0.7.0|[[File:Bucket JE1 BE1.png|32px]] Added buckets.}}
{{History||v0.7.4|Filled buckets no longer stack.<ref>{{bug|MCPE-3960}}</ref>
|Empty buckets no longer allow [[liquid]] sources to be targeted and broken like [[block]]s.<ref>{{bug|MCPE-3857}}</ref>}}
{{History||unknown|The stack limit for empty buckets has been changed from 64 to 16.}}
{{History||v0.14.0|snap=build 1|A full [[cauldron]] can now be emptied with a bucket, filling the bucket with [[water]].}}
{{History||v0.16.0|snap=build 1|Added [[sound]]s when using buckets.
|An empty bucket in the [[fuel]] slot now fills and becomes a [[water bucket]] after a [[sponge|wet sponge]] is dried. This happens for empty buckets placed by the [[player]] while the [[furnace]] is still [[smelting]], and for empty buckets left by [[lava bucket]]s.}}
{{History||?|Buckets no longer highlight fluid blocks when aiming at them.}}
{{History|pocket}}
{{History||1.1.0|snap=alpha 1.1.0.0|Buckets now generate in [[woodland mansion]] [[chest]]s.}}
{{History|bedrock}}
{{History||1.4.0|snap=beta 1.2.14.2|Added [[fish bucket]]s, which turn into regular buckets when used.
|Empty buckets can now be used to catch [[fish]].
|Moved all bucket items from the Equipment tab to the Items tab in the [[Creative inventory]].{{verify|type=update}}{{info needed}}<!---please check snapshots, only 1 major release version was checked each--->}}
{{History||1.9.0|snap=beta 1.9.0.2|[[Cauldron]]s filled with [[lava]] can now be emptied by using a bucket, filling it with lava.}}
{{History||1.10.0|snap=beta 1.10.0.3|[[File:Bucket JE2 BE2.png|32px]] The texture of buckets has been changed.}}
{{History||1.11.0|snap=beta 1.11.0.1|Buckets can now be found in [[savanna]] [[village]] house [[chest]]s.}}
{{History||1.16.200|snap=beta 1.16.200.52|[[Goat]]s are now milkable by using buckets.}}
{{History||1.16.210|snap=beta 1.16.210.53|Added [[powder snow]], which can be used to turn bucket to powder snow bucket.}}
{{History||1.17.0|snap=beta 1.16.230.52|Added [[axolotl]]s, which can be used to turn bucket to axolotl bucket.}}
{{History||1.19.0|snap=?|Added [[tadpole]]s, which can be used to turn bucket to tadpole bucket.}}
{{History|console}}
{{History||xbox=TU1|xbone=CU1|ps=1.0|wiiu=Patch 1|[[File:Bucket JE1 BE1.png|32px]] Added buckets.}}
{{History||xbox=TU9|Buckets are now stackable up to 16.}}
{{History|PS4}}
{{History||1.90|[[File:Bucket JE2 BE2.png|32px]] The texture of buckets has been changed.}}
{{History|new 3DS}}
{{History||0.1.0|[[File:Bucket JE1 BE1.png|32px]] Added buckets.}}
{{History|foot}}
== Issues ==
{{issue list}}
== Gallery ==
<gallery>
Bucket SDGP.png|Bucket in the [[Super Duper Graphics Pack]].
</gallery>
== See also ==
*[[Cauldron]]
*[[Bowl]]
*[[Glass Bottle]]
*[[Water]]
== References ==
{{reflist}}
== External Links ==
*[https://www.minecraft.net/en-us/article/taking-inventory-bucket Taking Inventory: Bucket] – Minecraft.net on December 14, 2018
{{Items}}
[[Category:Tools]]
[[Category:Renewable resources]]
[[cs:Kbelík]]
[[de:Eimer]]
[[es:Cubo]]
[[fr:Seau]]
[[hu:Vödör]]
[[it:Secchio]]
[[ja:バケツ]]
[[ko:양동이]]
[[nl:Emmer]]
[[pl:Wiadro]]
[[pt:Balde]]
[[ru:Ведро]]
[[th:ถัง]]
[[uk:Відро]]
[[zh:桶]]</li><li>[[Dye|Dye]]<br/>{{Item
| title = Dyes
| image = White Dye.png
| extratext = View [[#Gallery|all renders]]
| renewable = Yes
| stackable = Yes (64)
}}
'''Dyes''' are a set of sixteen items used to change the color of [[wool]], [[carpet]]s, [[terracotta]], [[concrete powder]], [[glass]], [[shulker box]]es, [[bed]]s, [[candle]]s, the patterns on [[banner]]s, [[firework star]]s, certain mobs, and text on [[sign]]s and [[hanging sign]]s. {{IN|bedrock}} they can also be used to dye water in a [[cauldron]] (which is thereafter used to dye leather [[armor]]); {{in|java}} leather armor can be dyed directly. {{IN|education}} dyes can also be used to dye [[balloon]]s and [[glow stick]]s.
{{IN|bedrock|education}}, [[bone meal]], [[ink sac]]s, [[lapis lazuli]], and [[cocoa bean]]s can generally substitute for [[white dye]], [[black dye]], [[blue dye]], and [[brown dye]], respectively, in crafting recipes and for use in dyeing items or mobs. However, they have other important uses that aren't related to color, and are therefore not considered true dyes. They are mentioned in this article only in regard to their use as dyeing agents; see their individual articles for complete information about them.
[[File:Dye Recipes.png|400px|thumb|A guide for creating all the dyes]]
== Obtaining ==
<!--[[File:Dye Chart.png|350px|thumb|A guide to crafting all the dyes.{{until|java 1.14}}]]-->
Dyes can be produced by crafting them from plants (mainly flowers), by crafting dyes of different colors together, by smelting plants, or by trading with a [[wandering trader]].
{{loadPage|Crafting/Dye|Crafting|h3}}
=== Smelting ===
{{smelting|head=1|Sea Pickle|Lime Dye|0,2}}
{{smelting|foot=1|Cactus|Green Dye|1||b=Lapis Lazuli|c=Any fuel|d=1}}
=== Trading ===
[[Wandering trader]]s can sell 3 dyes for an [[emerald]]. {{IN|bedrock}}, they can also sell 3 lapis lazuli, bone meal, cocoa beans, or ink sacs for one emerald.
Apprentice-level cleric [[villager]]s sell one lapis lazuli per emerald.
=== Chest loot ===
{{#invoke:LootChest|base3|blue-dye,green-dye,orange-dye,light-blue-dye,yellow-dye,white-dye}}
=== Other ===
Ink sacs can also be created using 1 iron, 1 sulfur, and 4 oxygen in the [[compound creator]]. {{only|bedrock|education}}
== Usage ==
Similar to their use in crafting, [[bone meal]], [[ink sac]]s, [[lapis lazuli]], and [[cocoa beans]] can be substituted for the corresponding dye in any of the following usages unless otherwise specified.{{only|bedrock}} <!--- sections are ordered by craftable dyeable blocks, dyeable items, version exclusive sections, and non-crafting miscellaneous uses--->
=== Dyeing wool and mobs ===
Players can dye wool by placing [[wool]] and any dye in a crafting grid.
{{Crafting
|nocat=1
|Any Wool
|Matching Dye
|Output=Any Wool
}}
Dyes can be {{control|use|text=used}} on sheep to change the color of the wool. Shearing a colored sheep drops the corresponding color of the wool, and the sheep retains the color when the wool regenerates. [[Breeding]] colored sheep produces a lamb colored as one of the parent sheep, or a color resulting from the combination of both parents' color. The color combining follows the same rules that dyes use – red and yellow sheep produce an orange lamb, but a blue and yellow sheep cannot create a green lamb. The unlimited reproduction of colored sheep makes dyeing and shearing sheep infinitely more efficient than just dyeing wool directly.
Dye can also be used on a tamed [[wolf]] or [[cat]] to change the color of its collar from the default red to the color of the dye.
=== Dyeing carpets ===
Carpets can be dyed.
{{Crafting
|Any Carpet
|Matching Dye
|Output= Matching Carpet
|type= Building block
}}
=== Dyeing terracotta ===
[[Terracotta]] can be dyed by placing 8 blocks around a dye on a crafting table.
{{Crafting
|nocat=1
|A1=Terracotta |B1=Terracotta |C1=Terracotta
|A2=Terracotta |B2=Matching Dye |C2=Terracotta
|A3=Terracotta |B3=Terracotta |C3=Terracotta
|Output=Matching Dyed Terracotta,8
}}
=== Creating concrete powder ===
Dyes can also be used to craft [[concrete powder]], which can then be set into their respective [[concrete]] blocks (they cannot be dyed directly).
{{Crafting
|nocat=1
|Sand |Gravel |Sand
|Gravel |Matching Dye |Gravel
|Sand |Gravel |Sand
|Output=Matching Concrete Powder,8
}}
=== Staining glass ===
[[Stained glass]] can be stained by placing 8 blocks of glass around a dye on a [[crafting table]]. Just like regular glass, stained glass can be crafted into stained glass panes. The recipe for this is the same as with regular glass.
{{Crafting
|nocat=1
|A1=Glass |B1=Glass |C1=Glass
|A2=Glass |B2=Matching Dye |C2=Glass
|A3=Glass |B3=Glass |C3=Glass
|Output=Matching Stained Glass,8
|head=1
}}
{{Crafting
|nocat=1
|A1= Glass Pane
|B1= Glass Pane
|C1= Glass Pane
|A2= Glass Pane
|B2= Matching Dye
|C2= Glass Pane
|A3= Glass Pane
|B3= Glass Pane
|C3= Glass Pane
|Output= Matching Stained Glass Pane,8
|type= Decoration block
|foot=1
}}
=== Dyeing shulker boxes ===
[[Shulker box]]es are generated in a light shade of purple (like the [[purpur block]]), but can be dyed any color. They can also be re-dyed as often as desired.
{{Crafting
|ignoreusage=1
|showname=1
|Any Shulker Box
|Matching Dye
|Output=Matching Shulker Box
}}
=== Dyeing beds ===
Players can dye beds by placing a [[bed]] and any color dye in a crafting grid.
{{Crafting
|nocat=1
|Any Bed
|Matching Dye
|Output=Matching Bed
}}
=== Dyeing candles ===
Players can dye [[candles]] by placing an undyed candle and any color dye in a crafting grid.
{{Crafting
|ignoreusage=1
|Candle
|Matching Dye
|Output=Matching Dyed Candle
}}
=== Banner patterns ===
{{main|Banner#Patterns}}
Dyes are used in most banner patterns to determine the pattern and color displayed.
=== Dyeing armor ===
[[File:DyeGraph2.png|200px|thumb|A graph showing all combinations of two dyes on a [[tunic]].]]
Leather [[armor]] can be dyed by:
* Crafting dyes with a piece of leather armor or leather [[horse armor]].{{Only|java}}
* Dousing the leather armor or leather [[horse armor]] in a [[cauldron]] to which dyes have been added.{{Only|bedrock}}
There are 5,713,438<ref>https://anrar4.github.io/DyeLeatherArmor/</ref> (34.1% of sRGB) colors leather armor can be, as it is possible to put more than one dye on the crafting bench alongside the leather armor. Armor can be dyed multiple times with previous colors affecting the final outcome. Colored armor can be reverted to their original color using a [[cauldron]] with undyed water.
The game has a specific formula for calculating the color of dyed armor: each color, in the RGB color model, has a red value, green value, and blue value. For each dye in the crafting grid, and the armor itself (if it is already dyed), the red, green, and blue values are added to running totals. In addition, a running total of the highest value (be it red, green, or blue) is also kept. After this, each total is divided by the number of colors used. This effectively produces the average red, green, blue, and maximum values. The maximum value of the average RGB values is also calculated. Finally, each average RGB value is multiplied by the average maximum value and divided by the maximum of the average RGB values. The modified average RGB values are then used as the final color. This procedure can be summed up with the following equations:
for each color (all "total" variables start at 0 before counting):
totalRed = totalRed + redValue
totalGreen = totalGreen + greenValue
totalBlue = totalBlue + blueValue
totalMaximum = totalMaximum + max(redValue, greenValue, blueValue)
numberOfColors = numberOfColors + 1
averageRed = totalRed / numberOfColors
averageGreen = totalGreen / numberOfColors
averageBlue = totalBlue / numberOfColors
averageMaximum = totalMaximum / numberOfColors
maximumOfAverage = max(averageRed, averageGreen, averageBlue)
gainFactor = averageMaximum / maximumOfAverage
resultRed = averageRed * gainFactor
resultGreen = averageGreen * gainFactor
resultBlue = averageBlue * gainFactor
Due to the way this formula works, the resulting color can never be darker than the average of the input colors and is often lighter and more saturated. Of course, the resulting color can never be lighter or more saturated than the lightest or most saturated input color. In addition, this formula never creates an RGB value higher than 255 (which would be invalid in the 8-bit RGB color model).
If leather armor is renamed on an [[anvil]], it retains its name when dyed or undyed.
;Mixing Samples
: {{ItemSprite|Yellow Dye}} + {{ItemSprite|Yellow Dye}} = {{Tint|leather-chestplate| #{{CalcDye| yellow=2 }} | code=1}}
: {{ItemSprite|Red Dye}} + {{ItemSprite|Blue Dye}} + {{ItemSprite|White Dye}} = {{Tint|leather-chestplate| #{{CalcDye| red=1 | blue=1 | white=1}} | code=1}}
: {{ItemSprite|Green Dye}} + {{ItemSprite|Red Dye}} + {{ItemSprite|Pink Dye}} = {{Tint|leather-chestplate| #{{CalcDye| green=1 | red=1 | pink=1}} | code=1}}
=== Dyeing firework stars ===
A [[firework star]] can have a single color or a combination of up to eight colors when crafted with dyes. Adding one or more dyes to a crafted firework star adds a "fade to color" effect to it, overwriting any existing fade colors.
{{Crafting
|head=1
|ignoreusage=1
|ingredients=[[Gunpowder]] +<br>Any Dye (1–8) +<br>Extra ingredient (optional)
|Gunpowder
|Matching Dye
|Diamond;Glowstone Dust;Head;Gold Nugget;Feather;Fire Charge;
|Output=Matching Firework Star
}}
{{Crafting
|ignoreusage=1
|Matching Firework Star
|Any Dye
|Output=Matching Firework Star
|foot=1
}}
=== Creating balloons ===
Dye can be used to craft balloons.{{only|education}}
{{Crafting
|nocat=1
|A1= Latex
|B1= Matching Dye
|C1= Latex
|A2= Latex
|B2= Helium
|C2= Latex
|A3= Latex
|B3= Lead
|C3= Latex
|Output= Matching Balloon
}}
=== Creating glow sticks ===
Dye can also be used to craft glow sticks.{{only|education}}
{{Crafting
|nocat=1
|A1= Polyethylene
|B1= Hydrogen Peroxide
|C1= Polyethylene
|A2= Polyethylene
|B2= Matching Dye
|C2= Polyethylene
|A3= Polyethylene
|B3= Luminol
|C3= Polyethylene
|Output= Matching Glow Stick
}}
=== Dyeing water inside cauldrons ===
Water can be dyed in a cauldron by holding any dye in the hand and pressing {{Ctrl|use}} on a cauldron filled with water.{{only|bedrock}}
=== Signs ===
Dye can be {{control|used}} on a [[sign]] or a [[hanging sign]] to change the text color. {{IN|bedrock}}, [[ink sac]]s cannot be used for this purpose; black dye must be used to change the text to black.
=== Trading ===
Apprentice, journeyman and expert-level shepherd [[villager]]s buy any of the 12 dyes for an [[emerald]].
== Color values ==
The "color codes" are used to determine the color imparted on sheep, wolf and cat collars, firework stars, [[beacon]] beams, and dyed leather armor. The hex value is shown in the extended tooltips of dyed leather armor; however, to set the color using an NBT data tag in a [[command]], the decimal value must be used instead. The color values for firework stars are slightly different from the ones listed below, and use [[Item colors#Firework stars|these values]] instead.
{| class="wikitable" style="margin:2px; border: 1px solid silver; text-align: left;" data-description="Data values"
! rowspan=2 | Description
! colspan=2 style="text-align:center" | Color Code
|-
! Dec
! <abbr title="Hexadecimal color code">Hex</abbr>
|-
| style="text-align:center" | White || 16383998 || {{color|#F9FFFE}}
|-
| style="text-align:center" | Light gray || 10329495 || {{color|#9D9D97}}
|-
| style="text-align:center" | Gray || 4673362 || {{color|#474F52}}
|-
| style="text-align:center" | Black || 1908001|| {{color|#1D1D21}}
|-
| style="text-align:center" | Brown || 8606770 || {{color|#835432}}
|-
| style="text-align:center" | Red || 11546150 || {{color|#B02E26}}
|-
| style="text-align:center" | Orange || 16351261 || {{color|#F9801D}}
|-
| style="text-align:center" | Yellow || 16701501 || {{color|#FED83D}}
|-
| style="text-align:center" | Lime || 8439583 || {{color|#80C71F}}
|-
| style="text-align:center" | Green || 6192150 || {{color|#5E7C16}}
|-
| style="text-align:center" | Cyan || 1481884|| {{color|#169C9C}}
|-
| style="text-align:center" | Light blue || 3847130 || {{color|#3AB3DA}}
|-
| style="text-align:center" | Blue || 3949738 || {{color|#3C44AA}}
|-
| style="text-align:center" | Purple || 8991416 || {{color|#8932B8}}
|-
| style="text-align:center" | Magenta || 13061821 || {{color|#C74EBD}}
|-
| style="text-align:center" | Pink || 15961002 || {{color|#F38BAA}}
|}
== Sounds ==
{{edition|java}}:
{{Sound table
|rowspan=2
|sound=Dye.ogg
|subtitle=Dye stains
|source=block
|description=When dye is used on a [[sign]]
|id=item.dye.use
|translationkey=subtitles.item.dye.use
|volume=1.0
|pitch=1.0/0.9/0.95/1.1
|distance=16}}
{{Sound table
|subtitle=Dye stains
|source=player
|description=When dye is used on a [[sheep]]
|id=item.dye.use
|translationkey=subtitles.item.dye.use
|volume=1.0
|pitch=1.0/0.9/0.95/1.1
|distance=16
|foot=1}}
{{edition|bedrock}}:
{{Sound table
|type=bedrock
|sound=Dye.ogg
|source=sound
|description=When dye is used on a sign
|id=sign.dye.use
|volume=1.0
|pitch=1.0}}
{{Sound table
|rowspan=3
|sound=Water Splash Old.ogg
|source=block
|description=When dye is added to a cauldron
|id=cauldron.adddye
|volume=0.1
|pitch=1.0}}
{{Sound table
|source=block
|description=When armor is dyed using a cauldron
|id=cauldron.dyearmor
|volume=0.1
|pitch=1.0}}
{{Sound table
|source=block
|description=When dye is removed from armor using a cauldron
|id=cauldron.cleanarmor
|volume=0.1
|pitch=1.0
|foot=1}}
== Achievements ==
{{load achievements|Rainbow Collection;Tie dye outfit}}
== Video ==
{{Video note|These videos are outdated, as it does not include details of the [[Java Edition 1.7.2|1.7.2]] update's changes to the dyeing system/production chain.}}
<div style="text-align:center">
<span style="display:inline-block">{{yt|8YD7oauNZHE}}</span>
<span style="display:inline-block">{{yt|7tETaRt7STM}}</span>
</div>
== History ==
{{History|java beta}}
{{History||January 3, 2011|link=https://web.archive.org/web/0/http://notch.tumblr.com/post/2582321901/2011-here-we-go|Notch mentions adding a "paint" feature if he can figure out how.}}
{{History||January 10, 2011<ref group="n">Supposed time when fragment was filmed. Based on modified date of client.jar/gui/trap.png in [[Beta 1.2]].</ref>|link=https://www.youtube.com/watch?v=cBF2ugTzXqQ&t=181s|[[File:Red Dye (pre-release).png|32px]] Shown rose red in development as part of [[Minecraft: The Story of Mojang]].}}
{{History||1.2|[[File:Ink Sac JE1 BE1.png|32px]] [[File:Red Dye JE1 BE1.png|32px]] [[File:Green Dye JE1 BE1.png|32px]] [[File:Cocoa Beans JE1 BE1.png|32px]] [[File:Lapis Lazuli JE1 BE1.png|32px]] [[File:Purple Dye JE1 BE1.png|32px]] [[File:Cyan Dye JE1 BE1.png|32px]] [[File:Light Gray Dye JE1 BE1.png|32px]] [[File:Gray Dye JE1 BE1.png|32px]] [[File:Pink Dye JE1 BE1.png|32px]] [[File:Lime Dye JE1 BE1.png|32px]] [[File:Yellow Dye JE1 BE1.png|32px]] [[File:Light Blue Dye JE1 BE1.png|32px]] [[File:Magenta Dye JE1 BE1.png|32px]] [[File:Orange Dye JE1 BE1.png|32px]] [[File:Bone Meal JE1 BE1.png|32px]] Added dyes.
|[[File:Black Dye (Recreated).png|32px]] [[File:Red Dye (pre-release).png|32px]] [[File:Green Dye (Recreated).png|32px]] [[File:Brown Dye (Recreated).png|32px]] [[File:Blue Dye (Recreated).png|32px]] [[File:Purple Dye (Recreated).png|32px]] [[File:Cyan Dye (Recreated).png|32px]] [[File:Light Gray Dye (Recreated).png|32px]] [[File:Gray Dye (Recreated).png|32px]] [[File:Pink Dye (Recreated).png|32px]] [[File:Lime Dye (Recreated).png|32px]] [[File:Yellow Dye (Recreated).png|32px]] [[File:Light Blue Dye (Recreated).png|32px]] [[File:Magenta Dye (Recreated).png|32px]] [[File:Orange Dye (Recreated).png|32px]] [[File:White Dye (Recreated).png|32px]] Leftovers of old textures can be seen in [[items.png]] with 100% opacity. The white dye texture was reused for [[Sugar]].
| The colors were as follows:{{verify|Did the color codes remain the same between Beta 1.2 and Java 1.11.2?}}
{{:Color/Java Edition dye colors before 17w06a}}
}}
{{History|java}}
{{History||1.1|snap=11w49a|[[Sheep]] can now regrow their [[wool]] by eating [[grass block|grass]]. Dyed sheep regrow wool in their new color.}}
{{History||1.3.1|snap=12w19a|[[File:Cocoa Beans JE2.png|32px]] The texture of [[cocoa beans]] has been changed.}}
{{History|||snap=1.3|[[File:bone meal changes.gif|32px]] The textures of [[bone meal]], [[cactus green]], cocoa beans and [[rose red]] have been changed. The textures have been lowered one pixel.}}
{{History||1.4.2|snap=12w34a|Added the ability to dye leather [[armor]] and [[wolf]] collars.}}
{{History||1.4.4|snap=1.4.3|Color codes have been changed. The colors of red, brown, blue, purple, cyan, pink, light blue, magenta and orange were adjusted a little vividly.}}
{{History||1.6.1|snap=13w19a|[[Stained clay]] can now be crafted using dyes.}}
{{history||1.7.2|snap=13w36a|With the addition of new [[flower]]s, many secondary and tertiary dyes are now primary dyes.}}
{{History|||snap=13w41a|[[Stained glass]] can now be crafted using dyes.}}
{{History||1.8|snap=14w02a|As cleric [[villager]]s now sell lapis lazuli, all dyes have become fully renewable.}}
{{History|||snap=14w30a|Added [[banner]]s, which can be dyed.}}
{{History||1.9|snap=15w34a|Added [[shield]]s, which can be dyed indirectly by applying a matching [[banner]].}}
{{History||1.11|snap=16w39b|Dyes are now used to change the color of [[shulker box]]es.}}
{{History||1.12|snap=17w06a|Dyes are now used to craft [[concrete powder]].
|Color codes have been changed. All colors are adjusted more vividly. The changes were as follows:
{{:Color/Java Edition dye color changes in 17w06a}}
|Light blue dye, stained glass, and stained glass panes, did not change colors in this update. This means that they still use old colors.<ref name="unchanged dyes">{{Bug|MC-214643}}<br>{{Bug|MC-214641}}</ref>
}}
{{History|||snap=17w15a|Dyes can now apply color to white [[bed]]s.}}
{{History||1.13|snap=17w47a|The different data values for the <code>dye</code> ID have been split up into their own IDs.}}
{{History||1.14|snap=18w43a|[[Bone meal]], [[ink sac]]s, [[cocoa beans]] and [[lapis lazuli]] are no longer considered dyes.
|[[File:White Dye JE1 BE1.png|32px]] [[File:Black Dye JE1 BE1.png|32px]] [[File:Brown Dye JE1 BE1.png|32px]] [[File:Blue Dye JE1 BE1.png|32px]] Added [[white dye|white]], [[black dye|black]], [[brown dye|brown]] and [[blue dye]]s.
|"Rose Red", "Dandelion Yellow" and "Cactus Green" have been renamed to "Red Dye", "Yellow Dye" and "Green Dye", respectively.
|[[Glass pane]]s and [[carpet]]s can now be dyed.
|[[File:Light Gray Dye JE2 BE2.png|32px]] [[File:Gray Dye JE2 BE2.png|32px]] [[File:Red Dye JE2 BE2.png|32px]] [[File:Orange Dye JE2 BE2.png|32px]] [[File:Yellow Dye JE2 BE2.png|32px]] [[File:Lime Dye JE2 BE2.png|32px]] [[File:Green Dye JE2 BE2.png|32px]] [[File:Cyan Dye.png|32px]] [[File:Light Blue Dye JE2 BE2.png|32px]] [[File:Purple Dye JE2 BE2.png|32px]] [[File:Magenta Dye JE2 BE2.png|32px]] [[File:Pink Dye JE2 BE2.png|32px]] The textures of light gray, gray, red, orange, yellow, lime, green, cyan, light blue, purple, magenta, and pink dyes, have been changed. The color texture for light blue dye was not changed to reflect the updated colors from 1.12.<ref name="unchanged dyes"></ref>}}
{{History|||snap=18w44a|The color of the text on [[sign]]s can now be changed with dye.}}
{{History|||snap=18w49a|Yellow dyes can now be found in [[chest]]s in [[village]] mason houses.}}
{{History|||snap=18w50a|Green dyes can now be found in [[chest]]s in [[desert]] [[village]] houses.}}
{{History|||snap=19w05a|Added the [[wandering trader]], which can sell any type of dye.}}
{{History|||snap=19w11a|All 16 types of dyes can now be [[trading|bought]] by shepherd villagers.}}
{{History||1.16.2|snap=Pre-release 2|Reversed the order of dyes to match other colored items in the [[Creative inventory]].<ref name="reverse dye">{{Bug|MC-136553}}</ref>
|Regrouped dyes in the Creative inventory such that white, blue, brown, and black dyes are within and not [[cocoa beans]], [[ink sacs]], [[lapis lazuli]], and [[bone meal]].<ref name="regroup dye">{{Bug|MC-177684}}</ref>}}
{{History||1.17|snap=20w45a|Added [[candle]]s, which can be dyed.}}
{{History|||snap=21w03a|Added a sound for applying dyes.}}
{{History|||snap=21w19a|Candles can no longer be dyed.}}
{{History|||snap=Pre-release 1|Candles can now once again be dyed.}}
{{History||1.20<br>(Experimental)|link=1.19.3|snap=22w42a|The color of the text on [[hanging sign]]s can now be changed with dye.}}
{{History||1.20<br>(Experimental)|link=1.19.4|snap=23w07a|[[Torchflower]]s can now be crafted into orange dye.|[[Pink petals]] can now be crafted into pink dye.}}
{{History||1.20|snap=23w12a|[[Pitcher plant]]s can now be crafted into cyan dye.|Blue, light blue, orange, white, and yellow dye can now be found in [[suspicious gravel]] and [[suspicious sand]] in [[trail ruins]].}}
{{History|||snap=23w14a|Pitcher plants can now craft two [[cyan dye]] instead of one.}}
{{History|||snap=23w16a|Blue, light blue, orange, white, and yellow dye no longer generates in [[suspicious sand]] in [[trail ruins]].|Due to the split of the archaeological loot tables for the suspicious gravel within the [[trail ruins]]; blue, light blue, orange, white, and yellow dye now are in the common loot.}}
{{History|pocket alpha}}
{{History||v0.3.0|[[File:Bone Meal JE1 BE1.png|32px]] [[File:Light Gray Dye JE1 BE1.png|32px]] [[File:Gray Dye JE1 BE1.png|32px]] [[File:Ink Sac JE1 BE1.png|32px]] [[File:Cocoa Beans JE1 BE1.png|32px]] [[File:Red Dye JE1 BE1.png|32px]] [[File:Orange Dye JE1 BE1.png|32px]] [[File:Yellow Dye JE1 BE1.png|32px]] [[File:Lime Dye JE1 BE1.png|32px]] [[File:Green Dye JE1 BE1.png|32px]] [[File:Cyan Dye JE1 BE1.png|32px]] [[File:Light Blue Dye JE1 BE1.png|32px]] [[File:Lapis Lazuli JE1 BE1.png|32px]] [[File:Purple Dye JE1 BE1.png|32px]] [[File:Magenta Dye JE1 BE1.png|32px]] [[File:Pink Dye JE1 BE1.png|32px]] Added dyes. Only [[dandelion yellow]] and [[lapis lazuli]] are currently obtainable and have functionality.}}
{{History||v0.3.2|[[Cactus green]] is now obtainable by smelting [[cacti]].}}
{{History||v0.3.3|[[Bone meal]] is now obtainable via [[crafting]].}}
{{History||v0.4.0|[[Cyan dye]], [[light blue dye]], [[lime dye]], [[magenta dye]], [[orange dye]], [[pink dye]], and [[purple dye]] are now obtainable via crafting.
|[[Rose red]] is now obtainable by smelting red [[mushroom]]s.
|All available dyes, excluding bone meal, can now be used to craft their respective [[wool]] color.}}
{{History||v0.8.0|snap=build 1|[[File:Cocoa Beans JE3 BE2.png|32px]] The texture of cocoa beans has been changed.}}
{{History|||snap=build 3|[[Ink sac]]s, [[cocoa bean]]s, [[gray dye]], and [[light gray dye]] are now available in the [[creative]] [[inventory]].
|Rose red can now be obtained from [[beetroot]]s.}}
{{History||v0.9.0|snap=build 1|Cocoa beans can now be obtained from [[cocoa pod]]s.
|The [[rose]] has been removed and replaced with a new poppy [[flower]] that can be crafted into rose red.}}
{{History|||snap=build 3|All new [[flower]]s can now be [[crafting|crafted]] into dyes. Because of this, many secondary and tertiary dyes are now primary dyes.
|[[Gray dye]] and [[light gray dye]] can now be obtained in [[survival]].}}
{{History|||snap=build 11|[[Terracotta|Stained clay]] can now be crafted using dyes.}}
{{History||v0.11.0|snap=build 1|[[Ink sac]]s can now be obtained from [[squid]].
|Added the ability to dye [[wolf]] collars.}}
{{History||v0.12.1|snap=build 1|Red [[mushroom]]s can no longer be smelted to obtain [[rose red]].}}
{{History||v0.14.0|snap=build 1|[[Cauldron]]s now used for leather dyeing, by applying a dye to a [[water]]-filled cauldron.}}
{{History||v0.16.0|snap=build 1|[[Cocoa bean]]s can no longer be crafted.}}
{{History|pocket}}
{{History||1.0.0|snap=alpha 0.17.0.1|Added a ''Dye'' button for [[sheep]].
|Added [[shulker]]s, which can be dyed.
|Added [[stained glass]]. Stain glass cannot be [[crafting|crafted]], but purple glass generates in [[end city|end cities]].}}
{{History||1.1.0|snap=alpha 1.1.0.0|Dyes can now apply color to a white [[bed]]s.
|Dyes are now used to craft [[concrete powder]].
|The color palette has been changed.}}
{{History|bedrock}}
{{History||1.2.0|snap=beta 1.2.0.2|Dyes can now be used for [[banner]] crafting.
|Dyes can now be used to craft [[firework star]]s.
|[[Stained glass]] is now [[crafting|craftable]], using dyes.}}
{{History||1.4.0|snap=beta 1.2.20.1|[[Lime dye]] can now be obtained from smelting [[sea pickle]]s.
|Dyes can now used to craft [[glow stick]]s and [[balloon]]s.}}
{{History||1.8.0|snap=beta 1.8.0.8|Dyes can now be used to dye [[cat]] collars.}}
{{History|||snap=beta 1.8.0.10|[[File:White Dye JE1 BE1.png|32px]] [[File:Black Dye JE1 BE1.png|32px]] [[File:Brown Dye JE1 BE1.png|32px]] [[File:Blue Dye JE1 BE1.png|32px]] Added [[white dye|white]], [[brown dye|brown]], [[black dye|black]] and [[blue dye]]s, which can be crafted from [[lapis lazuli]], [[bone meal]], [[cocoa beans]] and [[ink sac]]s. This, however, the later four still use as dyes.<ref>{{Bug|MCPE-42473}}</ref>
|"Rose Red", "Dandelion Yellow" and "Cactus Green" have been renamed to "Red Dye", "Yellow Dye" and "Green Dye", respectively.}}
{{History||1.9.0|snap=beta 1.9.0.0|Blue and white dye can now be obtained from [[cornflower]]s and [[lily of the valley]]s.}}
{{History||1.10.0|snap=beta 1.10.0.3|[[Glass pane]]s and [[carpet]]s can now be dyed.
|Only a single dye is now required to apply a banner pattern in a [[loom]].
|Various dyes except black dye, white dye, brown dye and blue dye are now [[trading|sold]] by [[wandering trader]]s.
|[[File:Bone Meal JE2 BE2.png|32px]] [[File:Light Gray Dye JE2 BE2.png|32px]] [[File:Gray Dye JE2 BE2.png|32px]] [[File:Ink Sac JE2 BE2.png|32px]] [[File:Cocoa Beans JE4 BE3.png|32px]] [[File:Red Dye JE3 BE3.png|32px]] [[File:Orange Dye JE2 BE2.png|32px]] [[File:Yellow Dye JE2 BE2.png|32px]] [[File:Lime Dye JE2 BE2.png|32px]] [[File:Green Dye JE2 BE2.png|32px]] [[File:Cyan Dye.png|32px]] [[File:Light Blue Dye JE2 BE2.png|32px]] [[File:Lapis Lazuli JE2 BE2.png|32px]] [[File:Purple Dye JE2 BE2.png|32px]] [[File:Magenta Dye JE2 BE2.png|32px]] [[File:Pink Dye JE2 BE2.png|32px]] The textures of bone meal, light gray, gray, ink sac, cocoa beans, red, orange, yellow, lime, green, cyan, light blue, lapis lazuli, purple, magenta, and pink dyes have been changed.}}
{{History||1.11.0|snap=beta 1.11.0.4|Dye can now be [[trading|sold]] to shepherd [[villager]]s.}}
{{History||1.16.210|snap=beta 1.16.210.59|The color of the text on [[sign]]s can now be changed with dye.}}
{{History|||snap=beta 1.16.210.60|The ability to dye the color of the text on [[sign]]s was temporarily removed.}}
{{History||1.16.220|snap=beta 1.16.220.50|The color of the text on [[sign]]s can now be changed with dye again.}}
{{History||1.17.10|snap=beta 1.17.10.22|Added [[candles]], which can be dyed.}}
{{History|console}}
{{History||xbox=TU1|xbone=CU1|ps=1.0|wiiu=Patch 1|switch=1.0.1|[[File:Bone Meal JE1 BE1.png|32px]] [[File:Light Gray Dye JE1 BE1.png|32px]] [[File:Gray Dye JE1 BE1.png|32px]] [[File:Ink Sac JE1 BE1.png|32px]] [[File:Cocoa Beans JE1 BE1.png|32px]] [[File:Red Dye JE1 BE1.png|32px]] [[File:Orange Dye JE1 BE1.png|32px]] [[File:Yellow Dye JE1 BE1.png|32px]] [[File:Lime Dye JE1 BE1.png|32px]] [[File:Green Dye JE1 BE1.png|32px]] [[File:Cyan Dye JE1 BE1.png|32px]] [[File:Light Blue Dye JE1 BE1.png|32px]] [[File:Lapis Lazuli JE1 BE1.png|32px]] [[File:Purple Dye JE1 BE1.png|32px]] [[File:Magenta Dye JE1 BE1.png|32px]] [[File:Pink Dye JE1 BE1.png|32px]] Added dyes.}}
{{History||xbox=TU9|[[File:Cocoa Beans JE3 BE2.png|32px]] The texture of cocoa beans has been changed.}}
{{History||xbox=none|xbone=none|ps=1.83|wiiu=none|switch=none|[[File:White Dye JE1 BE1.png|32px]] [[File:Black Dye JE1 BE1.png|32px]] [[File:Brown Dye JE1 BE1.png|32px]] [[File:Blue Dye JE1 BE1.png|32px]] Added [[white dye|white]], [[black dye|black]], [[brown dye|brown]], and [[blue dye|blue]] dyes, which can crafted from [[bone meal]], [[ink sac]], [[cocoa beans]], and [[lapis lazuli]].
|"Rose Red", "Dandelion Yellow" and "Cactus Green" have been renamed to "Red Dye", "Yellow Dye" and "Green Dye", respectively.}}
{{History||ps=1.90|[[File:Bone Meal JE2 BE2.png|32px]] [[File:Light Gray Dye JE2 BE2.png|32px]] [[File:Gray Dye JE2 BE2.png|32px]] [[File:Ink Sac JE2 BE2.png|32px]] [[File:Cocoa Beans JE4 BE3.png|32px]] [[File:Red Dye JE2 BE2.png|32px]] [[File:Orange Dye JE2 BE2.png|32px]] [[File:Yellow Dye JE2 BE2.png|32px]] [[File:Lime Dye JE2 BE2.png|32px]] [[File:Green Dye JE2 BE2.png|32px]] [[File:Cyan Dye.png|32px]] [[File:Light Blue Dye JE2 BE2.png|32px]] [[File:Lapis Lazuli JE2 BE2.png|32px]] [[File:Purple Dye JE2 BE2.png|32px]] [[File:Magenta Dye JE2 BE2.png|32px]] [[File:Pink Dye JE2 BE2.png|32px]] The textures of bone meal, light gray, gray, ink sac, cocoa beans, red, orange, yellow, lime, green, cyan, light blue, lapis lazuli, purple, magenta, and pink dyes have been changed.}}
{{History|3ds}}
{{History||0.1.0|[[File:Bone Meal JE1 BE1.png|32px]] [[File:Light Gray Dye JE1 BE1.png|32px]] [[File:Gray Dye JE1 BE1.png|32px]] [[File:Ink Sac JE1 BE1.png|32px]] [[File:Cocoa Beans JE3 BE2.png|32px]] [[File:Red Dye JE1 BE1.png|32px]] [[File:Orange Dye JE1 BE1.png|32px]] [[File:Yellow Dye JE1 BE1.png|32px]] [[File:Lime Dye JE1 BE1.png|32px]] [[File:Green Dye JE1 BE1.png|32px]] [[File:Cyan Dye JE1 BE1.png|32px]] [[File:Light Blue Dye JE1 BE1.png|32px]] [[File:Lapis Lazuli JE1 BE1.png|32px]] [[File:Purple Dye JE1 BE1.png|32px]] [[File:Magenta Dye JE1 BE1.png|32px]] [[File:Pink Dye JE1 BE1.png|32px]] Added dyes from [[Pocket Edition v0.15.4 alpha]].}}
{{History|foot}}
<gallery>
Pre-release dyes.png|Pre-release dye textures hidden within [[Items.png]].
</gallery>
;Notes
{{reflist|group=n}}
== Gallery ==
<gallery>
White Dye.png|White Dye
Light Gray Dye.png|Light Gray Dye
Gray Dye.png|Gray Dye
Black Dye.png|Black Dye
Brown Dye.png|Brown Dye
Red Dye.png|Red Dye
Orange Dye.png|Orange Dye
Yellow Dye.png|Yellow Dye
Lime Dye.png|Lime Dye
Green Dye.png|Green Dye
Cyan Dye.png|Cyan Dye
Light Blue Dye.png|Light Blue Dye
Blue Dye.png|Blue Dye
Purple Dye.png|Purple Dye
Magenta Dye.png|Magenta Dye
Pink Dye.png|Pink Dye
</gallery>
==Issues==
{{issue list}}
== Trivia ==
* Players can obtain each one of every color with 1 cocoa bean, 2 yellow dye, 2 ink sac, 3 green dye, 4 lapis lazuli, 4 red dye, and 6 bone meal (2 bones).
* The dyed sheep breeding behavior mirrors [[wikipedia:Lamarckism|Lamarck's theory]], in which the organisms evolve inheriting the external changes and adaptations of the previous generation, transmitting them to their offspring.
* In ''Bedrock Edition'', tertiary colors, along with their regular crafting recipes, can be crafted with primary colors. E.g.: Magenta can be crafted with one rose red and two bone meals.
* The colors of the dyes match the chat colors in [[color codes]] except for brown (dye only), light aqua, and gold (color codes only).
* The texture for light blue dye still uses the color from prior to the 1.12 World of Color update.<ref name="unchanged dyes"></ref>
== References ==
{{reflist}}
== External Links ==
* Tools for calculating leather dye combination: [https://minecraft.tools/en/armor.php minecraft.tools] (webapp); [https://github.com/pudquick/pyMCdyes/ pyMCDyes] (open-source Python script, outdated); [https://anrar4.github.io/DyeLeatherArmor/ DyeLeatherArmor]: a tool for calculating an exact crafting recipe for any sRGB color
{{Items}}
[[Category:Dyes]]
[[Category:Renewable resources]]
[[cs:Barvivo]]
[[de:Farbstoff]]
[[es:Tinte]]
[[fr:Teinture]]
[[hu:Színezés]]
[[it:Colorante]]
[[ja:染料]]
[[ko:염료]]
[[nl:Kleurstof]]
[[pl:Barwniki]]
[[pt:Corante]]
[[ru:Красители]]
[[th:สีย้อม]]
[[uk:Барвники]]
[[zh:染料]]</li></ul> | 15w31a | The Ender dragon boss fight has been revamped to be similar to the Legacy Console Edition. | |||||||||||||||||||||||||||||||||
| The Ender dragon no longer destroys iron bars. | |||||||||||||||||||||||||||||||||||
| 15w32a | The Ender dragon's fireballs now give off Ender Acid particles upon exploding and no longer light ground on fire. | ||||||||||||||||||||||||||||||||||
| The Ender dragon's charge/knockback attack has now returned. | |||||||||||||||||||||||||||||||||||
| The Ender dragon's wings now damage the player, prevent side and back melee attacks when the dragon lands on the portal. | |||||||||||||||||||||||||||||||||||
| Dragon breath from the Ender dragon now shoots out farther. | |||||||||||||||||||||||||||||||||||
| The Ender dragon now immediately charges at the player after finishing the ender acid attack. | |||||||||||||||||||||||||||||||||||
| The Ender dragon's ender acid attack now goes around the whole portal. | |||||||||||||||||||||||||||||||||||
| The Ender dragon no longer stops attacking from single hits. | |||||||||||||||||||||||||||||||||||
| The Ender dragon now flies back to portal before finishing the death animation. | |||||||||||||||||||||||||||||||||||
| The Ender dragon no longer takes damage from snowballs, eggs, or other attacks that normally do no damage. | |||||||||||||||||||||||||||||||||||
| 15w32b | When fatally damaged, the Ender dragon now flies to the portal and dies rather than resetting to 1 | ||||||||||||||||||||||||||||||||||
| 15w33a | The Ender dragon's wings no longer deal damage while the Ender dragon is landed. | ||||||||||||||||||||||||||||||||||
| The Ender dragon is now immune to arrows while landed. | |||||||||||||||||||||||||||||||||||
| The Ender dragon no longer destroys End portal blocks, end portal frame blocks, or End gateway blocks. | |||||||||||||||||||||||||||||||||||
| The Ender dragon's breath attack now lasts longer. | |||||||||||||||||||||||||||||||||||
| The Ender dragon's fireball attack is now more or less equivalent to a lingering potion of Harming II. | |||||||||||||||||||||||||||||||||||
| 15w33c | Respawned Ender dragons now drop 500 experience. | ||||||||||||||||||||||||||||||||||
| Respawning the dragon also respawns the pillars and end crystals. | |||||||||||||||||||||||||||||||||||
| 15w44b | Respawning Ender dragons now require placing 4 end crystals near the exit portal. | ||||||||||||||||||||||||||||||||||
| 15w49a | The Ender dragon no longer travels through portals. | ||||||||||||||||||||||||||||||||||
| The Ender dragon no longer rides rideable entities such as minecarts or boats. | |||||||||||||||||||||||||||||||||||
| The Ender dragon no longer affected by status effects. | |||||||||||||||||||||||||||||||||||
1.11{{Extension DPL}}<ul><li>[[:Category:Minecraft Dungeons items|Category:Minecraft Dungeons items]]<br/>All items that are in ''[[Minecraft Dungeons]]''.
{{Minecraft Dungeons items}}
[[Category:Minecraft Dungeons]]
[[Category:Items]]
[[ja:カテゴリ:アイテム (Minecraft Dungeons)]]
[[pl:Kategoria:Przedmioty w Minecraft Dungeons]]
[[pt:Categoria:Itens do Minecraft Dungeons]]</li><li>[[Map|Map]]<br/>{{about|the craftable map|maps showing the locations of certain structures|Explorer Map|other uses|Map (disambiguation)}}
{{distinguish|World}}
{{Item
| image = Map Zoom 4.png
| renewable = Yes
| stackable = Yes (64)
}}
A '''map''' is an [[item]] used to view explored [[Chunk|terrain]] and mark landmarks.
==Obtaining==
===Crafting===
{{crafting
|head=1
|showname=0
|showdescription=1
|A1= Paper
|B1= Paper
|C1= Paper
|A2= Paper
|B2= Compass
|C2= Paper
|A3= Paper
|B3= Paper
|C3= Paper
|Output= Empty Map
|type= Miscellaneous
|description=This variation is called an "empty locator map" {{in|bedrock}}, or an "empty map" {{in|java}}.
When the player first creates a map, it is blank. It needs to be activated by holding it and pressing ''{{Control|use item}}''. after which it records terrain and location markers as the player travels within (or close to) the area it maps.
}}
{{crafting
|A1= Paper
|B1= Paper
|C1= Paper
|A2= Paper
|B2= Paper
|C2= Paper
|A3= Paper
|B3= Paper
|C3= Paper
|Output= Empty Map
|type= Miscellaneous
|description={{only|bedrock}}
This variation is called an "empty map". It does not show location markers. It is intended for cloning and zooming locator maps without having to consume an additional [[compass]] (thereby saving [[iron ingot]]s and [[redstone dust]]), but it can also be {{Control|use|text=activated}} and later converted to a locator map by combining it with a compass on an [[anvil]], [[crafting table]], or [[cartography table]].
|foot=1
}}
=== Natural generation ===
==== Chest loot ====
{{LootChestItem|empty-map,map
}}
=== Cartography table ===
A map can also be created using a single paper on a [[cartography table]] to create an empty map, or a paper with a compass for an empty locator map.{{only|bedrock}}
=== Starting map ===
{{exclusive|bedrock|section=1}}
When creating a new world {{in|bedrock}}, the player can enable the "Starting Map" option to spawn with an empty locator map in the hotbar. The map's zoom scale is 1:8. The map is updated only while the player holds it.
=== Trading ===
Novice-level cartographer [[Villager|villagers]] sell a single empty map for 7 [[Emerald|emeralds]] as their trades.
{{IN|java}}, cartographer villagers may give players with the [[Hero of the Village]] effect an empty map.
== Usage ==
{{See also|Tutorials/Mapping}}
=== Mapping ===
Crafting a map creates an empty map. The map is drawn for the first time when it is held and used (with ''{{control|use item}}''). This map can then be adjusted to different zoom levels. After conversion to a drawn map item, it starts to draw a top-down view of the player's surroundings, with North pointing to the top of the map. A pointed oval pointer indicates the player's position on the map, and moves in real-time as the player moves across the terrain shown on the map. The map does ''not'' center on the player when created, rather, the world is broken up into large invisible grid squares, and the map displays the area of whichever grid square it is in when it is first used. For example, if a player uses a new map in a certain grid square, and then moves a distance away and uses another fresh map but is still within the same grid square, both maps appear identical. To make a map that is not identical to the first one, the player would have to move outside of the edges of the first map (because then they would be in a new grid square). This way, no two maps of the same size can ever partially overlap and every map can display only a fixed area.
To record the world on a map, that specific map must be held in the player's hands while the player moves around the world. The world is recorded as-is during exploration, meaning that if the world is modified, a player must revisit the area while holding the map to update the map's view. Maps can also be [[Map#Cloning|cloned]]. If a player holds a map whose one or more clones are on display in item frames, updates are made on all clone-connected maps.
Other players are displayed on the map only if they have a map in their inventory cloned from the one being looked at. When placing a map into an [[item frame]], the map displays with a green pointer shown at the location of the item frame. This is to help the player see where they are in relation to the area that the map is showing. If the player leaves a map in an item frame and views a clone of it, the green pointer remains in the spot of the framed copy. This can be used to set up waypoints. Unexplored areas are transparent, making the item frame visible.
When the player leaves the area shown on a specific map, the player pointer transforms into a white dot that moves on that map. The marker shrinks to a smaller white dot if the player is far from the map's center: the area is 320 by 320 blocks per scale factor. The dot moves along the edge of the map to show the relative location of the player. However {{in|bedrock}}, the pointer remains as an arrow but shrinks until the player is near the area shown on the map.
While maps in [[the Nether]] work, they show only the red-and-gray pattern, regardless of the blocks placed. The only useful function is finding where the player is in relation to placed framed maps, which show as green pointers. Additionally, the player pointer rapidly spins and is not a good indicator of direction. Placing a [[banner]] in [[the Nether]] still shows it on the map as usual. Having a smaller map image while riding a [[strider]] in the Nether can help one to see one's footing while traveling over [[lava]].
{{IN|java}}, when using a map from another dimension, the map shows the player's position and direction when they were last in the dimension of the map. {{IN|bedrock}}, however, the player can use maps from one dimension while in another dimension. For locator maps, the place marker changes color depending on the dimension that the player is currently in (white for the Overworld, red for [[the Nether]], and magenta for [[the End]]). An Overworld map in the Nether shows the player's corresponding location and direction in the Overworld.<ref name=multiverse>{{ytl|EpP1diZdEdI}}</ref> Similarly, a Nether Map in the Overworld shows the player's corresponding location in the Overworld, but the place marker spins, just like a Nether map in the Nether. An Overworld map in the End shows the world spawn.<ref name=multiverse/> A Nether map cannot be used in the End — the map appears, but the place marker is not shown anywhere — and similarly, an End map cannot be used in the Overworld or the Nether.
A player can make a large piece of pixel art (128×128) facing upward, center a map on it, and place that map in an [[item frame]] to create a custom picture. Locking is recommended. See [[Map item format#Map Pixel Art]] for details on the techniques.
Maps display as a mini-map when held in the off-hand, or if the off-hand slot is occupied; the map is full-sized only when held in the dominant hand with both hands free.
A map always positions itself facing towards North when placed horizontally within an item frame regardless of how the map is placed.
=== Map content ===
{{Main|Map item format}}
Maps consist of square pixels arranged like pixels in a 128×128 square pattern, with each pixel representing a square portion of land. {{IN|java}}, the [[Map item format#Color table|color of a map pixel]] generally matches the color of the most common [[opaque]] block in the corresponding area, as seen from the sky. 'Minority blocks' in the target area have no effect on the color of the pixel, thus small features tend to be undetectable on zoomed-out maps.
{{IN|bedrock}}, the [[Map item format#Color table|color of a map pixel]] instead matches the single top-most opaque block in a grid sized by the map magnification pixel size (see the table in the "Player marker and pointer" section below). For example, a 3/4 magnification map has a pixel size of 8x8 blocks; this means the map will read only the top-most opaque blocks at the 0,0 coordinate, the 8,0 coordinate, the 0,8 coordinate, etcetera, ignoring all other blocks in the area. This means that {{in|bedrock}}, map pixel art requires only one block per pixel regardless of map magnification.
{{IN|bedrock}}, grass, foliage and water colors that are biome-dependent are represented accurately on a map.
{| class="wikitable"
|-
! style="width: 300px;" | {{el|je}}
! style="width: 300px;" | {{el|be}}
|-
| style="text-align: center;" | [[File:Map Zoom 4.png|alt=All banners marked on a map, alongside a named banner.|216px]]
| style="text-align: center;" | [[File:Map item BE.png|216px]]
|-
| Biome colors on ''Java Edition''.
| Biome colors on ''Bedrock Edition''.
|-
|}
Maps also show ground up to about 15 blocks below the surface of the water in oceans as slightly lighter blue, to show where the ground rises. This is not true with land above water. Higher elevations in the world mean lighter colors on the map. The map records the surface even as the player moves below the surface.
A standard map represents 128x128 blocks (1 block per pixel, 8x8 [[chunks]]) but maps can be zoomed-out to represent up to 2048x2048 blocks (16 square blocks per pixel, 128x128 [[chunks]]).
Some relevant distances: 64 blocks (4 chunks) is the update radius from a player in the Overworld and the End. However, it is half this (32 blocks) in the Nether. Also, 1024 blocks is the minimum Overworld distance from a [[nether portal]], at which players can build another portal and expect to reach a new location in the Nether. This is the distance across a 1:8 map, and also from a 1:16 map's center to its edge.
=== Player marker and pointer ===
{{IN|java}}, every map contains a marker that marks the position of the player, and points in the same direction as the player. When a player moves out of a map, a big white dot appears and moves relative to the player's position. The pointer either disappears when the player moves away a certain distance from the border of the map or, in case of [[explorer map]]s, the big white dot changes to a smaller white dot. The distance required for the small white dot to appear(explorer maps) or for the big dot to vanish (normal maps) changes with the scaling of the map.
* '''Level 0/4 :''' 128×128 blocks (each map pixel represents 1 block)
* '''Level 1/4 :''' 256×256 blocks (2×2 blocks per map pixel)
* '''Level 2/4 :''' 512×512 blocks (4×4 blocks per map pixel)
* '''Level 3/4 :''' 1024×1024 blocks (8×8 blocks per map pixel)
* '''Level 4/4 :''' 2048×2048 blocks (16×16 blocks per map pixel)
{{IN|bedrock}}, a map can be crafted with or without this marker, and a map without a position marker can add one later by adding a compass to the map. When a map is crafted without a compass, it's simply called an "empty map", but when crafted with a compass, it's called an "empty locator map". The marker also turns red if the player enters the Nether with an Overworld map and shows the player's Overworld location relative to the Nether location. A map created in the End has a purple marker showing the player's location. If an Overworld map is used in the End, a magenta dot appears on the player's spawn point.{{/BE|position}}
{{crafting
|name=Map<br>(with marker)
|ingredients=[[Map]] or Empty Map +<br>[[Compass]]
|showdescription=1
|Map (no markers);Empty Map
|Compass
|Output= Locator Map;Empty Locator Map
|type= Miscellaneous
|description={{el|be}} only.
Maps crafted from only paper do not show the location marker; to add it, a compass must be added to the map.
|foot=1
}}
{{IN|bedrock}}, a cartography table can also be used to add a pointer to create a locator map or empty locator map. This can be done by adding a compass to paper, or to an empty map or map.
=== Zooming out ===
[[File:Cartography table UI zoom.png|thumb|300px|{{IN|java}}, cartography table's UI, showing the map is being zoomed out.]]
A [[cartography table]] can also be used to zoom out, taking only one piece of paper per zoom level.
A blank map can not be zoomed out. A map has to have something already marked on it for the zooming to be possible.
{{Crafting
|A1= Paper |B1= Paper |C1= Paper
|A2= Paper |B2= Map;Locator Map |C2= Paper
|A3= Paper |B3= Paper |C3= Paper
|Output= Map;Locator Map
|showdescription=1
|description=Locator Map {{el|be}} only.
}}
{{/BE|zoom}}
==== Zoom details ====
The zooming function starts from when the map is created (zoom level 0) up to its fourth zoom step (zoom level 4).
{| class="wikitable" style="text-align: center" data-description="Zoom levels"
! colspan="2" |
! Zoom step 0
! Zoom step 1
! Zoom step 2
! Zoom step 3
! Zoom step 4
|-
! colspan="2" |
| [[File:Map Zoom 0.png|116px|Zoom step 0, 1:1]]
| [[File:Map Zoom 1.png|116px|Zoom step 1, 1:2]]
| [[File:Map Zoom 2.png|116px|Zoom step 2, 1:4]]
| [[File:Map Zoom 3.png|116px|Zoom step 3, 1:8]]
| [[File:Map Zoom 4.png|116px|Zoom step 4, 1:16]]
|-
! colspan="2" | Zoom level
| 0/4
| 1/4
| 2/4
| 3/4
| 4/4
|-
! colspan="2" | 1 map pixel represents
| 1 block
| 2×2 blocks
| 4×4 blocks
| 8×8 blocks
| 16×16 blocks<br>(1×1 chunk)
|-
! colspan="2" | Scaling ratio
| 1:1
| 1:2
| 1:4
| 1:8
| 1:16
|-
! rowspan="2" colspan="2" | Map covers an area of
| 128×128 blocks
| 256×256 blocks
| 512×512 blocks
| 1024×1024 blocks
| 2048×2048 blocks
|-
| 8×8 chunks
| 16×16 chunks
| 32×32 chunks
| 64×64 chunks
| 128×128 chunks
|-
! colspan="2" | Smallest discernible features
| Blocks
| Trees, Paths
| Lakes, Buildings
| Mountains, Rivers
| Biomes, Mountain Ranges
|-
! colspan="2" | Use cases
| Pixel art, Base plans
| Base surroundings
| Structure mapping
| Landscape mapping
| Biome mapping
|-
! rowspan="2" | Total paper needed to zoom out from Level 0
! in anvil{{only|bedrock|short=1}} or crafting table
| -
| {{ItemSprite|Paper}} 8
| {{ItemSprite|Paper}} 16
| {{ItemSprite|Paper}} 24
| {{ItemSprite|Paper}} 32
|-
! in cartography table
| -
| {{ItemSprite|Paper}} 1
| {{ItemSprite|Paper}} 2
| {{ItemSprite|Paper}} 3
| {{ItemSprite|Paper}} 4
|}
Maps are always aligned to a grid at all zoom levels. That means zooming out any different map in a specific area covered by that map always has the same center. As such, maps are aligned by map width (1024 blocks for a level 3 maps) minus 64. A level 3 map generated at spawn covers X and Z coordinates from -64 to 959. All maps generated in this area zoom out to the same coordinates, guaranteeing that they are always 'aligned' on a map wall. For a zoomed-out map to cover a new area, it must start with a base (level 0) map that is in that area.
At zoom level 0, a map created on the point (0,0) has (0,0) at the center of the map. At higher zoom levels of the same map, the coordinate (0,0) is in the top left square of the map.
{{IN|java}}, zoom level can be seen on a map by turning on Advanced Tooltips (a [[Debug screen#More debug keys|debug screen]] option that can be toggled by using the key combination {{key|F3+H}}). The tooltip of the map then shows the zoom level, scaling factors, and map ID.
=== Cloning ===
[[File:Cartography table UI clone.png|thumb|300px|{{IN|Java}}, cartography table's UI, showing the map is being cloned.]]
A mix of empty maps and empty locator maps may be used. Whether the cloned maps show position markers is dependent only on the input map.
A [[cartography table]] can also be used to clone a map.
The parts of the world that have already been explored and mapped are copied, and newly explored areas appear on both instances. If one of the maps is later zoomed out, then the maps lose their connection to each other and function as completely separate maps that have to be individually filled by exploring.
In Creative mode, a map in an item frame may be cloned by using {{control|pick block}} on it, as long as that map is not also in the player's inventory.
It doesn't matter if the map to be cloned is at a higher zoom level (made of more paper) than the blank map. Upon copying the map, both resulting maps have the same magnification as the starting map.
{{/BE|clone}}
=== Crafting ingredient ===
{{crafting usage|Map, Empty Map}}
=== Marking points ===
{{IN|java}} the player has the ability to mark spots on a map. To do this, {{control|use}} a map on a placed-down [[banner]], and the spot of the banner gets marked on the map. The mark takes the color of whatever the base color is for the banner, and if the banner has a name, the mark shows that name. Banner marks on a map are always oriented with their top facing north, regardless of the banner's actual orientation. If the banner is destroyed, the mark of the banner remains at first, but if the player gets closer to where the banner previously was, it disappears as the area is updated on the map.
If a map is mounted on an item frame and is within the area it depicts, the mounted map displays its current location with a green indicator rotated to match its orientation.
[[File:Map Marker Bedrock on Item frame.png|thumb|181x181px|{{IN|bedrock}} this is what a map lying on an item frame looks like, while showing markers.]]
{{IN|bedrock}} the player can place copies of locator maps in [[item frame]]s in order to create a land mark. The marker is a green dot that resembles the shape of the player's marker, but in green color. The position the marker points at depends on the direction the item frame is facing. It is worth noting that the markers work only on copies of the same map. Other maps of the same area do not show the existing markers that the player(s) had placed.
If a player has a cloned map in their inventory, their pointer appears white when viewed on the same map held by another player. Hence, if all players have the same cloned map in their inventory, all markers would appear white when the clone map is viewed.
{| class="wikitable"
|-
! style="width: 300px;" | {{el|je}}
! style="width: 300px;" | {{el|be}}
|-
| style="text-align: center;" | [[File:Banner marked map.png|alt=All banners marked on a map, alongside a named banner.|216px]]
| style="text-align: center;" | [[File:Tracking map with markers bedrock.png|216px]]
|-
| How every banner appears {{IN|java}} on a map, including named banners.
| {{IN|bedrock}} this is how a locator map shows map markers while held by a player.
|-
|}
===Locking===
[[File:Cartography table UI lock.png|thumb|300px|{{IN|Java}}, cartography table's UI, showing the map is being locked.]]
Maps can be locked when using a [[glass pane]] in a [[cartography table]]. This creates a new map containing the same data and locks it. All copies of this new map are also locked. A locked map never changes, even when the depicted terrain changes. {{IN|Be}}, locked maps have a unique texture.
{| class="wikitable" style="text-align: center;"
|-
! Condition
! style="width: 200px;" | Newly created map
! style="width: 200px;" | Map after terrain alteration
|-
! Unlocked map
| [[File:Map Zoom 0.png|174px]] || [[File:Unlocked Map.png|174px]]
|-
! Locked map
| [[File:Map Zoom 0.png|174px]] || [[File:Map Zoom 0.png|174px]]
|-
|}
{{-}}
== Sounds ==
{{Edition|Java}}:
{{Sound table
|rowspan=2
|sound=Drawmap1.ogg
|sound2=Drawmap2.ogg
|sound3=Drawmap3.ogg
|subtitle=Map drawn
|source=player
|description=When a map is drawn
|id=ui.cartography_table.take_result
|translationkey=subtitles.ui.cartography_table.take_result
|volume=1.0
|pitch=1.0
|distance=16}}
{{Sound table
|subtitle=Map drawn
|source=block
|description=When a map is edited using a cartography table
|id=ui.cartography_table.take_result
|translationkey=subtitles.ui.cartography_table.take_result
|volume=1.0
|pitch=1.0
|distance=16
|foot=1}}
{{Edition|Bedrock}}:
{{Sound table
|type=bedrock
|rowspan=2
|sound=Drawmap1.ogg
|sound2=Drawmap2.ogg
|sound3=Drawmap3.ogg
|source=block
|description=When a map is drawn<wbr>{{Upcoming|BE 1.20.20.20}}
|id=ui.cartography_table.take_result|idnote={{Verify|Could be block.cartography_table.use}}
|volume=0.8
|pitch=1.0}}
{{Sound table
|type=bedrock
|source=block
|description=When a map is edited using a cartography table
|id=ui.cartography_table.take_result
|volume=0.8
|pitch=1.0
|foot=1}}
== Data values ==
=== ID ===
{{edition|java}}:
{{ID table
|edition=java
|showforms=y
|generatetranslationkeys=y
|displayname=Empty Map
|spritetype=item
|nameid=map
|form=item}}
{{ID table
|displayname=Map
|spritetype=item
|nameid=filled_map
|form=item
|translationkey=item.minecraft.filled_map, filled_map.buried_treasure, filled_map.explorer_jungle{{upcoming|java 1.20.2}}, filled_map.explorer_swamp{{upcoming|java 1.20.2}}, filled_map.mansion, filled_map.monument, filled_map.unknown, filled_map.village_desert{{upcoming|java 1.20.2}}, filled_map.village_plains{{upcoming|java 1.20.2}}, filled_map.village_savanna{{upcoming|java 1.20.2}}, filled_map.village_snowy{{upcoming|java 1.20.2}}, filled_map.village_taiga{{upcoming|java 1.20.2}}
|foot=1}}
{{edition|bedrock}}:
{{ID table
|edition=bedrock
|showaliasids=y
|shownumericids=y
|showforms=y
|notshowbeitemforms=y
|generatetranslationkeys=y
|displayname=Empty Map
|spritetype=item
|nameid=empty_map
|aliasid=emptymap
|id=515
|form=item
|translationkey=item.emptyMap.name, item.emptyLocatorMap.name}}
{{ID table
|displayname=Map
|spritetype=item
|spritename=map-be
|nameid=filled_map
|aliasid=map
|id=420
|form=item
|translationkey=item.map.name, item.map.exploration.mansion.name, item.map.exploration.monument.name, item.map.exploration.treasure.name
|foot=1}}
=== Metadata ===
{{see also|Bedrock Edition data values}}
{{IN|bedrock}}, maps use the following data values:
{{/DV}}
=== Item data ===
{{el|java}}:
{{main|Player.dat format}}
<div class="treeview">
* {{nbt|compound|tag}}: The item's '''tag''' tag.
{{:Player.dat_format/Maps}}
</div>
{{el|bedrock}}:
: See [[Bedrock Edition level format/Item format]].
=== Map icons ===
{{see also|Player.dat format|Map item format|map_icons.png}}
Map icons are 8×8 in ''Java Edition'', but 16×16 in Bedrock Edition. As such, there are minor misalignment issues in ''Java Edition''.<ref>{{bug|MC-214649|||WF}}</ref>
[[File:Map icons.png|thumb|128px|Map icons texture {{in|Java}}]]
[[File:Map icons BE.png|thumb|128px|Map icons texture {{in|Bedrock}}]]
{| class="wikitable"
|-
! Java ID !! Bedrock ID !! Text ID !! Appearance !! Purpose !! Shown in item frames?
|-
| 0 || ||<code>player</code> || [[File:Player (texture) JE1 BE1.png|16px]] [[File:Player (texture) BE2.png|16px]] White marker || Players (on map) || No
|-
| 1 || 1 ||<code>frame</code> || [[File:Green Marker (texture) JE1 BE1.png|16px]] [[File:Green Marker (texture) BE2.png|16px]] Green marker || The current map in an item frame || Yes
|-
| 2 || ||<code>red_marker</code> || [[File:Red Marker (texture) JE1 BE1.png|16px]] [[File:Red Marker (texture) BE2.png|16px]] Red marker || Position converted to Overworld when opening Overworld map in the Nether{{Only|bedrock}} || No
|-
| 3 || ||<code>blue_marker</code> || [[File:Blue Marker (texture) JE1 BE1.png|16px]] [[File:Blue Marker (texture) BE2.png|16px]] Blue marker || Other players || No
|-
| 4 || ||<code>target_x</code> || [[File:Target X (texture) JE1 BE1.png|16px]] White X || Unused || Yes
|-
| 5 ||5
|<code>target_point</code> || [[File:Target Point (texture) JE1 BE1.png|16px]] [[File:Target Point (texture) BE2.png|16px]] Red triangle || Unused || Yes
|-
| 6 || 6 ||<code>player_off_map</code> || [[File:Player Off Map (texture) JE1 BE1.png|16px]] Large white dot || Players off map, nearby{{only|java}} || No
|-
| 7 || 13 ||<code>player_off_limits</code> || [[File:Player Off Limits (texture) JE1.png|16px]] [[File:Player Off Limits (texture) BE.png|16px]] Small white dot || Players off map, far away{{only|java}} || No
|-
| 8 ||14
|<code>mansion</code> || [[File:Mansion (texture) JE1.png|16px]] [[File:Mansion (Texture) BE2.png|frameless|16x16px]] Woodland mansion || Woodland mansion || Yes
|-
| 9 || 15 ||<code>monument</code> || [[File:Monument (texture) JE1.png|16px]] [[File:Monument Texture BE2.png|frameless|16x16px]] Ocean monument || Ocean monument || Yes
|-
| 10 - 25 || ||<code>{{tooltip|banner_*|banner_white, banner_orange, banner_magenta, banner_light_blue, banner_yellow, banner_lime, banner_pink, banner_gray, banner_light_gray, banner_cyan, banner_purple, banner_blue, banner_brown, banner_green, banner_red, banner_black}}</code> || [[File:Banner White (texture) JE1.png|16px]] [[File:Banner Light Gray (texture) JE1.png|16px]] [[File:Banner Gray (texture) JE1.png|16px]] [[File:Banner Black (texture) JE1.png|16px]] [[File:Banner Brown (texture) JE1.png|16px]] [[File:Banner Red (texture) JE1.png|16px]] [[File:Banner Orange (texture) JE1.png|16px]] [[File:Banner Yellow (texture) JE1.png|16px]] [[File:Banner Lime (texture) JE1.png|16px]] [[File:Banner Green (texture) JE1.png|16px]] [[File:Banner Cyan (texture) JE1.png|16px]] [[File:Banner Light Blue (texture) JE1.png|16px]] [[File:Banner Blue (texture) JE1.png|16px]] [[File:Banner Magenta (texture) JE1.png|16px]] [[File:Banner Purple (texture) JE1.png|16px]] [[File:Banner Pink (texture) JE1.png|16px]]<br>Banners in all 16 wool colors{{only|java}}|| Banner markers || Yes
|-
| 26 ||4
|<code>red_x</code> || [[File:Red X (texture) JE1.png|16px]] [[File:Target X (texture) BE2.png|16px]] Red X || Buried treasure || Yes
|-
| || 8 || || [[File:Magenta Marker (texture) BE1.png|16px]] Magenta marker
| Position converted to Overworld when opening Overworld map in the End{{Only|bedrock}} || No
|-
| || 9 || || [[File:Orange Marker (texture) BE1.png|16px]] Orange marker{{more info}}
|Other players
|Yes
|-
| || 10 || || [[File:Yellow Marker (texture) BE1.png|16px]] Yellow marker
| Other players || No
|-
| || 11 || || [[File:Cyan Marker (texture) BE1.png|16px]] Cyan marker
| Other players || No
|-
| -
|12
| || [[File:Green Point (texture) BE1.png|16px]] Green Triangle
| Other structure such as stronghold, fortress, end city, etc. when used as explorer map destination{{Only|bedrock}} || Yes
|}
It should be noted that even if the player used a NBT editor to add an additional icon on the map, ''Minecraft'' shows only the first one listed when the player loads up their world.
== Achievements ==
{{load achievements|Map Room}}
== History ==
{{see also|section=24|map_icons.png|Java Edition history of textures#Map icons}}
{{more images|section=24|{{bug|MC-72962}}}}
{{History||April 27, 2011|link=https://web.archive.org/web/0/http://notch.tumblr.com/post/4988431144/the-maps|[[Notch]] unveiled screenshots of the map.}}
{{History||April 28, 2011|link={{tweet|notch|63500114005721088}}|[[Notch]] said that he would try to make maps place-able on [[wall]]s.}}
{{History|java beta}}
{{History||1.6|snap=Test Build 3|[[File:Map (item) JE1 BE1.png|32px]] Added maps.}}
{{History||1.6.6|The ability to auto-craft maps using shift-click has been disabled.}}
{{History||1.8|snap=Pre-release|Maps can now be found in library chests in the brand-new [[stronghold]]s.
|Auto crafting maps has been restored. Map cloning, therefore, is unavailable for a period of time.}}
{{History||1.8.1|Maps now work both while walking and flying.}}
{{History|java}}
{{History||1.0.0|snap=Beta 1.9 Prerelease 5|Prior to this update, the [[sun]] in ''[[Minecraft]]'' rose in the North, which threw off many [[player]]s and led to a common misconception that ''Minecraft'' maps/[[world]]s were oriented with East at the top. The sun now rises in the east and sets in the west, making navigation much more intuitive.
|Before the change in sun position, it was commonly said that ''Minecraft'' maps/worlds are oriented with East at the top; sunrise, by definition, occurs at the East, which means it is certainly true that the maps were oriented "East" since the Sun rose from the top (North). However, [[Jeb]] asserted (and [[Notch]] agreed) that the sun rose in the north.<ref>{{Tweet|jeb|87815841160237056}}</ref><ref>{{Tweet|notch|88155424880201728}}</ref> Most mods and map-making tools, however, used the terms East and North consistent with their actual definitions (e.g. a [[Programs and editors/Cartograph|Cartograph]]-generated map with North at the top is rotated 90 degrees from the in-game map).}}
{{History||1.4.2|snap=12w34a|[[File:Empty Map JE1 BE1.png|32px]] [[Crafting]] a map now creates an empty map. The map is drawn for the first time when it is held and right clicked, and is centered near the location of the [[player]] when clicked (not as before where it was centered on the location it was crafted.)
|Previously, in order to map a new area, the map had to be ''crafted'' in that area (rather than carrying a previously-crafted map to the new area). The point where a map is crafted becomes its permanent center, and could never be changed.
|The pointer no longer disappears when leaving the map, but transforms into a white dot, indicating on what side of the map the player is located.
|Maps now align to a grid, making it easier to create adjacent maps.
|Maps can now be zoomed out (but not zoomed in).
|Maps can now be cloned and scaled.}}
{{History||1.4.2|snap=12w34b|Maps now have a ''zoom level'', which was fixed at 1:8 prior to snapshot [[Java Edition 12w34a|12w34a]],<ref name="mapinfo">https://web.archive.org/web/0/http://notch.tumblr.com/post/4988431144/the-maps</ref> but now starts at 1:1 and can be increased up to 1:16 by re-crafting an existing map.
|Maps are no longer numbered on the top-left corner and is labeled through the tooltip.}}
{{History|||snap=12w36a|New maps are now crafted at a scale factor of 1:1. A zoomed in map can be zoomed out by re-crafting it with another 8 sheets of [[paper]] on a [[crafting table]]. Each time this is done, the scale increases - 1:1, 1:2, 1:4, 1:8, 1:16 with a map scale of 1:16 being the current maximum.}}
{{History||1.7.2|snap=13w38a|The map size has been increased when placed on a [[wall]] using the [[item frame]].
|More colors have been added to maps for different [[block]]s.<ref name="infodump2">https://web.archive.org/web/0/https://www.mojang.com/2013/10/minecraft-1-7-the-update-that-changed-the-world</ref>}}
{{History||1.8|snap=14w31a|Zoomed maps now conform to an expanded grid based on their zoom level. Previously, careful considerations would need to be taken to creating a wall of adjoining maps.}}
{{History||1.8.1|snap=pre1|Some colors have been changed on maps to more accurately represent their respective [[block]].}}
{{History||1.9|snap=15w31a|Maps now display as a mini-map when held in the off-hand, or if the off-hand slot is occupied; the (old) large version is visible only when held in the dominant hand with the secondary hand free.}}
{{History|||snap=15w34a|New maps can now be [[crafting|crafted]] at a scale factor of 1:4.
|A crafting recipe has been added for zooming in maps.}}
{{History|||snap=15w43a|The average yield of empty maps from [[stronghold]] library [[chest]]s has been doubled.}}
{{History|||snap=15w45a|New maps are once again [[crafting|crafted]] at a scale factor of 1:1, as they had been before snapshot [[15w34a]].
|The [[crafting]] recipe, that was introduced in 15w34a, for zooming in maps has been removed.}}
{{History|||snap=15w49a|Map making now uses armor equipping sounds.}}
{{History||1.11|snap=16w39a|Maps now work in [[the End]].
|Empty maps are now [[trading|sold]] by cartographer [[villager]]s as their tier 3 [[trading|trade]].
|Added [[explorer map]]s, sold by cartographers as their tier 4 trades.}}
{{History||1.12|snap=17w17a|Maps now have separate colors for colored [[terracotta]] blocks from other colored blocks.}}
{{History||1.13|snap=17w47a|Prior to [[1.13/Flattening|''The Flattening'']], these [[item]]s' numeral IDs were 358 and 395.
|Maps now use additional NBT to specify which map they contain. Prior to this version, they used the [[damage]] value instead.
|Map IDs are no longer limited to 32,768.}}
{{History|||snap=17w50a|Maps can now be placed on floor and ceiling [[item frame]]s.}}
{{History|||snap=18w10a|Spots on maps can now be marked using [[banner]]s.}}
{{History|||snap=18w11a|Empty maps can now generate in [[shipwreck]] [[chest]]s.}}
{{History|||snap=pre7|Maps have been changed slightly, in regard to which [[block]]s are shown and which blocks are not.}}
{{History||1.14|snap=18w43a|[[File:Empty Map JE2 BE2.png|32px]] [[File:Map (item) JE2 BE2.png|32px]] The textures of maps have been changed.}}
{{History|||snap=18w48a|Empty maps can now be found in chests in [[village]] cartographer houses.}}
{{History|||snap=19w02a|Maps can now be cloned and zoomed out (extended) by using a [[cartography table]].
|Maps can now be locked by using a [[glass pane]] with a cartography table.
|The recipes for cloning and zooming out maps have been removed.}}
{{History|||snap=19w06a|Map making is now silent again.}}
{{History|||snap=19w13a|Cartographer villagers now give empty maps to players under the [[Hero of the Village]] effect.}}
{{History||1.16|snap=20w21a|Map making sounds are now the same as when using a cartography table.}}
{{History|pocket alpha}}
{{History||v0.14.0|snap=build 1|[[File:Empty Map JE1 BE1.png|32px]] [[File:Map (item) JE1 BE1.png|32px]] Added maps.
|Maps are crafted using nine [[paper]], one for every slot of the [[crafting]] grid.
|Maps must be combined with a [[compass]] using an [[anvil]] in order to show the [[player]]'s position.
|Maps can be zoomed using an anvil.}}
{{History|||snap=build 3|New maps are now [[crafting|crafted]] at full zoom.
|Empty maps now have a "Create Map" button to initialize them.}}
{{History|||snap=build 7|New maps are now crafted at a scale factor of 1:1.}}
{{History||v0.15.0|snap=unknown|Maps can now be crafted either with 8 pieces of [[paper]] and a [[compass]] ''or'' 9 pieces of paper, to get a map with or without a position marker.}}
{{History||v0.16.0|snap=build 1|Different colors have been added to maps for different [[biome]]s.}}
{{History|pocket}}
{{History||1.0.0|snap=?|[[Windows 10 Edition]] can now use the [[anvil]] as well as the [[crafting table]] to clone, zoom and apply markers, just as [[Pocket Edition]] in general could.
|Maps can now be found inside [[stronghold]] library [[chest]]s.}}
{{History||1.1.0|snap=alpha 1.1.0.0|Empty maps with direction markers built-in are now called "locator maps".}}
{{History|||snap=alpha 1.1.0.3|"Locator maps" are now called "empty locator maps".
|Empty maps are now [[trading|sold]] by cartographer [[villager]]s for 7-11 [[emerald]]s as their tier 3 [[trading|trade]].}}
{{History|bedrock}}
{{History||1.4.0|snap=beta 1.2.14.2|Maps can now be found inside map room [[chest]]s in [[shipwreck]]s.}}
{{History||?|The texture of the filled map overlay has been changed.}}
{{History||?|Maps now function in dimensions other than the dimension in which they were created.}}
{{History||1.10.0|snap=beta 1.10.0.3|Maps can now be found in cartographer house [[chest]]s in [[village]]s.
|[[File:Empty Map JE2 BE2.png|32px]] The texture of empty maps has been changed.}}
{{History||1.11.0|snap=beta 1.11.0.1|Empty maps can now be created from 1 [[paper]] in [[cartography table]]s.
|Maps can now be zoomed, cloned, renamed, and have pointers added in cartography tables.}}
{{History|||snap=beta 1.11.0.4|Cartographer [[villager]]s now [[trading|sell]] empty map for an [[emerald]] as their first tier [[trading|trades]].
|Empty locator maps can now be [[trading|bought]] from cartographer villagers.}}
{{History||1.13.0|snap=beta 1.13.0.1|[[File:Map (item) BE3.png|32px]] [[File:Locked Map (item) BE2.png|32px]] Filled maps and locked maps now have unique inventory icons.}}
{{History||1.16.0|snap=beta 1.16.0.57|Trading has been changed, novice-level cartographer now sell an empty map for 7 emeralds. Cartographer villager no longer sell empty locator map.}}
{{History||1.16.100|snap=beta 1.16.100.56|The ID of maps have been changed from <code>emptymap</code> to <code>empty_map</code> and <code>map</code> to <code>filled_map</code>.}}
{{History|console}}
{{History||xbox=TU1|xbone=CU1|ps=1.00|wiiu=Patch 1|switch=1.0.1|[[File:Map (item) JE1 BE1.png|32px]] Added maps.
|The [[player]] spawns with a free map.
|Maps are available only as zoom step 3 maps centered at coordinates 0,0. Biome colors do not appear on maps.}}
{{History||xbox=none|xbone=CU1|ps=1.0|wiiu=none|Larger sized worlds on Xbox One, Playstation 4, and Nintendo Switch have zoom step 3 maps aligned to a grid with maps centered at 0, 1024, or 2048 on the X or Z coordinates.}}
{{History||xbox=TU21|xbone=CU9|ps=1.14|wiiu=Patch 1|[[File:Empty Map JE1 BE1.png|32px]] [[Crafting]] a map now produces an empty map.}}
{{History||xbox=TU46|xbone=CU36|ps=1.38|wiiu=Patch 15|The outer end islands appear on different maps; even on Xbox 360, Playstation 3, Vita, and Wii U editions.}}
{{History||xbox=none|xbone=none|ps=1.90|wiiu=none|switch=none|[[File:Empty Map JE2 BE2.png|32px]] [[File:Map (item) JE2 BE2.png|32px]] The textures of maps have been changed.}}
{{History||ps=1.91|Maps can now be created and used in [[cartography table]]s.}}
{{History|foot}}
== Issues ==
{{issue list}}
== Trivia ==
* Use of the {{key|F1}} key can allow the player to hold a map without blocking their view at all.
* In ''Java Edition'', a map created using {{cmd|give}} can be any map by using the Map parameter to specify the map number desired. E.g. {{cmd|give [player] minecraft:filled_map{map:5<nowiki>}}} gives the specified player map_5. If no data value is supplied it defaults to map_0. If map_0 has not ever been crafted, it is centered on x=0, z=0.
* The maps are stored separately as their own data (<code>.dat</code>) file as <code>map_x.dat</code> with (x) being the map number, see [[map item format]] for more info. By manipulating this number, players can organize their maps to suit them, or if they accidentally create a map in the same location, they can delete their extra map so as to save the number they make.
* Certain programs can be used to make customized maps with images or text on them instead of actual maps, many people use these in adventure maps to show pictures or to tell a story.
* Since all copies of a map are links to the same file, copying an unfinished map keeps it synchronized with the copy as the player fills it in. Thus, a copy stored in a chest can act as a remote backup.
* A map that is in an item frame does not update itself until a player picks it up, lets it reload, and places it back again. However, if a player holds a clone of the map, both maps update.
* Filled maps are the only items that make 90 degree rotations in item frames, and also the only items that can expand the item frame into full block wide.
* On [[Legacy Console Edition]], the player always spawns with a map in their inventory after creating a world. This was later added to Bedrock Edition as an optional feature in the world creation menu.
* Maps on Legacy Console Edition always show the player's current coordinates, as a substitute for the optional [[Coordinates|coordinate display]] in other editions.
* A map cannot be created on [[New Nintendo 3DS Edition]]. Instead, the map is always displayed on the bottom screen along with the coordinates. Biome colors do not appear on maps.
== Gallery ==
<gallery>
MapItem1.png|A fully zoomed map.
MapRotation.png|Having a map in hand does not stop the ability to see ahead.
MapItem3.png|A world being recorded onto a map.
Mcmap4.png|Nearly fully explored map.
Zoomed Map.png|A map edited to the scale of 1.
Sky Map.png|A map mapping the [[Sky Dimension]].
MapOfVillage.png|A village and how it is represented on a map.
Pumpkin map.png|A map containing a custom image made by placing a large number of blocks.
Complete Map.png|A completely explored map.
MapZooms.png|A diagram showing how maps zoomed out before [[Java Edition 1.8]]. Notice how the larger maps have borders made of half and quarter small maps.
Map18zooms.png|From 1.8, zoomed maps are aligned to this grid exactly.
Large Biome Map.png|A map of a [[Large Biomes]] world.
Map0140-0160.png|A comparison of maps between versions in Pocket Edition Alpha [[Pocket Edition Alpha 0.14.0|0.14.0]] and [[Pocket Edition Alpha 0.16.0|0.16.0]].
Mycelium Map.png|A map view of a mushroom biome, showing that mycelium appears purple on a map.
MiniMap.png|Maps held in the off-hand or in either hand while [[dual wielding]] appear as mini-maps.
Partly filled treasure map.png|Partly filled treasure map with an odd area at the bottom left. Normally a partly filled map would look striped (as in the top left), but this map seems to be bugged and is possibly showing caves, or something, in the bottom left.
Partly filled ocean explorer map.png|Partly filled ocean explorer map. Updating the game from an older version (in this case the area was first generated before 1.18) and buying a map after updating (in this case in 1.19.4) can result in the map displaying rivers and terrain where there is really a frozen sea.
Map Stained Glass 1.png|Stained glasses' appearances on maps before and after 1.13.
Map Stained Glass 2.png|Stained glasses' appearances on maps before and after 1.13.
Map Various Blocks 1.png|Various blocks' appearances on maps before and after 1.13.
Map Various Blocks 2.png|Various blocks' appearances on maps before and after 1.13.
Better Together Map.jpg|Holding a map in the offhand in ''Bedrock Edition''.
Better Together Map Icon.jpg|Holding a map in both hands in ''Bedrock Edition''.
File:MapFailedtoFill.png|A map that has not yet filled. A rare bug in Java.
</gallery>
=== The Nether ===
<gallery>
Nethermap.png|A map in [[the Nether]].
Maponnether.png|A map in the Nether; the arrow turns around itself, like in [[compass]].
</gallery>
=== The End ===
<gallery>
Jeb End Map.png|The first image of a map in [[the End]].
Endmap.png|A map in the End.
</gallery>
=== Maps in item frames ===
<gallery>
FramedMap.png|A map displayed on an item frame, as it looked before [[Java Edition 1.7.2]].
Structure Map Collection.png|Multiple maps in item frames. Notice a [[village]], two [[desert temple]]s and a lava lake.
Minecraft maps 3by3.png|A collection of 9 connected full maps.
Full Map.png|A combination of 25 maps pasted together as one map.
Map wall BE.png|A map wall on ''Bedrock Edition'', showing large areas of biome colors for each biome.
Map's in item frames.png|Maps can be placed into [[item frame]]s so they can be viewed together.
Comparing Maps.png|The comparison between 3 zooms of maps.
SuperflatMap.png|A map in a [[Superflat]] world, with some [[village]]s.
MapWallWithMarkers.png|A 3x3 map wall with banner markers.
HEYYEYAAEYAAAEYAEYAA.png|He-Man map art.
Map Player Icons 1.png|First image of player icons on maps.
Map Player Icons 2.png|Second image of player icons on maps.
</gallery>
== See also ==
* [[Explorer Map]]
* [[Clock]]
* [[Tutorials/Navigation|Navigation]]
== References ==
{{Reflist}}
{{Items}}
[[cs:Mapa]]
[[de:Karte]]
[[es:Mapa]]
[[fr:Carte (objet)]]
[[hu:Térkép (tárgy)]]
[[ja:地図]]
[[ko:지도]]
[[nl:Kaart]]
[[pl:Mapa]]
[[pt:Mapa]]
[[ru:Карта]]
[[tr:Harita]]
[[th:แผนที่]]
[[uk:Мапа]]
[[zh:地图]]
[[Category:Renewable resources]]</li></ul></nowiki> | 16w32a | The entity ID of the Ender dragon has been changed from EnderDragon to ender_dragon.
| |||||||||||||||||||||||||||||||||
The fireball's entity ID has been changed from DragonFireball to dragon_fireball. | |||||||||||||||||||||||||||||||||||
| 16w35a | Hitboxes of the damageable portions of the Ender dragon are now visible using F3 + B. | ||||||||||||||||||||||||||||||||||
| 16w40a | The tags xTile, yTile, zTile, inTile and inGround have been removed from the dragon fireball entity data.
| ||||||||||||||||||||||||||||||||||
The life tag of Ender dragons is no longer used for anything, but still saved/read. | |||||||||||||||||||||||||||||||||||
| 16w43a | The Ender dragon is now able to draw from her own loot table. | ||||||||||||||||||||||||||||||||||
1.14{{Extension DPL}}<ul><li>[[Powder Snow Bucket|Powder Snow Bucket]]<br/>{{Item
| title = Powder Snow Bucket
| image = Powder Snow Bucket.png
| renewable = Yes
| stackable = No
}}
A '''powder snow bucket''' is a [[bucket]] with [[powder snow]] inside.
== Obtaining ==
A powder snow bucket can be obtained by {{ctrl|using}} an [[empty bucket]] on a [[powder snow block]] or [[powder snow cauldron]].
== Usage ==
Pressing {{control|use}} while holding a powder snow bucket places a [[powder snow]] block. {{IN|Java}}, powder snow may also be placed inside empty [[cauldron]]s, creating powder snow cauldrons.
[[Dispenser]]s can also create and place powder snow buckets. However, they cannot do so with [[cauldron]]s. You can also use it to cushion falls in the [[nether]] by placing it below you when falling.
== Sounds ==
{{el|je}}:
{{Sound table
|sound=Empty powder snow bucket1.ogg
|sound2=Empty powder snow bucket2.ogg
|subtitle=Bucket empties
|source=block
|description=When a powder snow bucket is placed
|id=item.bucket.empty_powder_snow
|translationkey=subtitles.item.bucket.empty
|volume=1.0
|pitch=''varies'' <ref group=sound>Each sound event can be 1.0, 0.95, or 1.1</ref>
|distance=16}}
{{Sound table
|sound=Fill powder snow bucket1.ogg
|sound2=Fill powder snow bucket2.ogg
|subtitle=Bucket fills
|source=player
|description=When a bucket is filled with powder snow
|id=item.bucket.fill_powder_snow
|translationkey=subtitles.item.bucket.fill
|volume=1.0
|pitch=''varies'' <ref group=sound>Each sound event can be 1.0, 0.9, or 1.1</ref>
|distance=16}}
{{Sound table
|sound=Powder Snow break1.ogg
|sound2=Powder Snow break2.ogg
|sound3=Powder Snow break3.ogg
|sound4=Powder Snow break4.ogg
|sound5=Powder Snow break5.ogg
|sound6=Powder Snow break6.ogg
|sound7=Powder Snow break7.ogg
|subtitle=Block broken
|source=block
|description=When a bucket is filled with powder snow
|id=block.powder_snow.break
|translationkey=subtitles.block.generic.break
|volume=1.0
|pitch=0.8
|distance=16
|foot=1}}
{{el|be}}:
{{Sound table
|type=bedrock
|sound=Fill powder snow bucket1.ogg
|sound2=Fill powder snow bucket2.ogg
|source=player
|description=When a bucket is filled with powder snow
|id=bucket.fill_powder_snow
|volume=1.0
|pitch=1.0}}
{{Sound table
|sound=Empty powder snow bucket1.ogg
|sound2=Empty powder snow bucket2.ogg
|source=block
|description=When a powder snow bucket is placed
|id=bucket.empty_powder_snow
|volume=1.0
|pitch=1.0
|foot=1}}
== Data values ==
=== ID ===
{{edition|java}}:
{{ID table
|edition=java
|showforms=y
|generatetranslationkeys=y
|displayname=Powder Snow Bucket
|spritetype=item
|nameid=powder_snow_bucket
|form=item
|foot=1}}
{{edition|bedrock}}:
{{ID table
|edition=bedrock
|shownumericids=y
|showforms=y
|showaliasids=y
|notshowbeitemforms=y
|generatetranslationkeys=y
|displayname=Powder Snow Bucket
|spritetype=item
|nameid=powder_snow_bucket
|aliasid=bucket / 11
|form=item
|id=368
|foot=1}}
== History ==
{{History|java}}
{{History||1.17|snap=20w46a|[[File:Powder Snow Bucket JE1 BE1.png|32px]] Added powder snow buckets.}}
{{History|bedrock}}
{{History||Caves & Cliffs<br>(experimental)|link=Bedrock Edition 1.17.0|snap=beta 1.16.210.53|[[File:Powder Snow Bucket JE1 BE1.png|32px]] Added powder snow buckets.
|The powder snow bucket replaced the powder snow block in the creative inventory.}}
{{History||1.17.0|snap=beta 1.17.0.50|Powder snow bucket are now available without enabling [[Experimental Gameplay]].}}
{{h|foot}}
== Issues ==
{{Issue list}}
==Gallery==
<gallery>
Cozy Cabin Powder Snow Bucket 1.jpg|Teaser image with a barely visible powder snow bucket.
Cozy Cabin Powder Snow Bucket 2.jpg|Teaser image with a barely visible powder snow bucket.
Cozy Cabin Powder Snow Bucket 3.jpg|Teaser image with a barely visible powder snow bucket.
</gallery>
{{Items}}
[[Category:Renewable resources]]
[[Category:Tools]]
[[de:Pulverschneeeimer]]
[[es:Cubo con nieve polvo]]
[[fr:Seau de neige poudreuse]]
[[it:Secchio di neve polverosa]]
[[ja:粉雪入りバケツ]]
[[pl:Wiadro sypkiego śniegu]]
[[pt:Balde de neve fofa]]
[[ru:Ведро с рыхлым снегом]]
[[zh:细雪桶]]</li><li>[[Lava|Lava]]<br/>{{About|the fluid|the [[bucket]]|Lava Bucket}}
{{Fluid
| image = Lava.gif
| image2 = Lava BE.gif
| invimage = Lava Bucket
| invimage2 = Lava
| renewable = Yes
| transparent = Yes
| light = Yes (15)
| tool = Bucket
| infinite = No
| flowrate = 30 [[tick]]s/block (Overworld, End)<br> 10 [[tick]]s/block (Nether)
| flowdistance = 4 blocks (Overworld, End)<br>8 blocks (Nether)
}}
'''Lava''' is a light-emitting [[fluid]] that causes fire [[damage]], mostly found in the [[altitude|lower reaches]] of the [[Overworld]] and [[the Nether]].
== Obtaining ==
Lava blocks do not exist as items (at least {{in|java}}), but can be retrieved with a [[Lava Bucket|bucket]]. {{IN|bedrock}}, they may be obtained as an item via glitches (in old versions), add-ons or inventory editing.
Lava may be obtained [[renewable resource|renewably]] from [[cauldron]]s, as [[pointed dripstone]] with a lava source above it can slowly fill a cauldron with lava.
=== Natural generation ===
During world generation, lava replaces [[air]] blocks generated in [[cave]]s and [[canyon]]s between Y=-55 and Y=-63. [[Aquifer]]s are sometimes filled with lava below Y=0. Lava does not replace air blocks inside [[mineshaft]]s, [[monster room]]s, [[amethyst geode]]s, or [[stronghold]]s.
Lava can also occur as lava flows from a single [[spring]] block, pouring down walls into pools. The spring block can be on the side of a cave, ravine, mineshaft, or stone cliff above ground.
Lava also generates as small [[lava lake]]s, which can be found above Y=0 within any [[biome]].
Two blocks of lava can also be found in plains, snowy plains, and desert [[village]] weaponsmith buildings, or one source in savanna village weaponsmith buildings.
Fifteen blocks of lava can be found in the [[end portal]] room of a [[stronghold]]: 3 along each side wall, and 9 below the portal frame.
Lava also generates in [[woodland mansion]]s: two blocks of lava generate in the "blacksmith room", and 25 blocks of lava generate in a secret "lava room".
In [[the Nether]], lava is more common than [[water]] in the [[Overworld]]. [[Terrain features#Lava sea|Seas of lava]] occur, with sea level at y-level 32, about a quarter of the total height of the Nether (as the usable space in the Nether is 128 blocks tall). They can extend down to about y-level 19-22. Lava also randomly appears [[Spring#Hidden lava|in single blocks]] inside [[netherrack]] formations. Lava is also generated as a single source in well rooms in [[nether fortress]]es. There are also large pockets of lava generated under y-19 and can reach all the way down to bedrock level. These pockets are generally over 12 blocks in height and often connect to a large lava lake on y-32; the size of these pockets in 1.18 can range from the size of a singular pre-1.18 ravine to multiple ravines combined.
Lava generates as [[delta]] shapes, which can be found commonly in the [[basalt deltas]] biome. Lava also generates in [[ruined portal]]s and [[bastion remnant]]s.
=== Post-generation ===
Unlike [[Water#Source blocks|water source blocks]], new lava source blocks cannot be created in a space by two or more adjacent source blocks. However {{in|Java}}, if the [[game rule]] {{cd|lavaSourceConversion}} is set to {{cd|true}}, new lava source blocks can form in a similar way to water source blocks.
== Usage ==
=== Fuel ===
When used in a [[furnace]], a bucket of lava lasts 1000 seconds (100 items).
=== Burning ===
[[File:Inside Lava.png|thumb|What it looks like inside lava.]]
[[File:Under lava fire resistance.png|thumb|What it looks like inside lava using Fire Resistance {{in|java}}.]]
Most [[entity|entities]] take {{hp|4}} damage every half-second while in contact with lava, and are set on [[fire]]. An entity/player in lava will also have its {{code|remainingFireTicks}} set to 300, setting it on fire for 15 seconds. This timer is reset to 300 every tick that the victim spends in lava, so it will only start counting down once the victim leaves the lava. Once the victim does exit the lava source, it will burn for just under 15 seconds, taking fire damage 14 times. This is due to the fact that for the first tick outside of lava, its {{code|remainingFireTicks}} decrease to 299, and entities take fire damage when {{code|remainingFireTicks}} is a multiple of 20 and greater than 0. If the victim touches water or [[rain]] falls on it, the fire is extinguished, but the lava continues to damage them directly.
In addition, a dense [[fog]] effect will be applied for players under lava to obscure vision. This can be slightly mitigated via the [[Fire Resistance]] effect.
An entity/player moving in lava has their horizontal movement speed reduced by 50% and their vertical movement speed reduced by 20%.
{{IN|bedrock}}, a player with the Fire Resistance effect or a total [[Fire Protection]] of 7 or higher does not catch fire.
[[Vex]]es, [[zoglin]]s, Nether [[mob]]s (excluding [[piglin]]s and [[hoglin]]s), [[Wither|withers]], [[Warden|wardens]], and players or mobs affected by the [[Fire Resistance]] effect are not damaged when touching lava.
The embers or fireballs that fly out of lava are purely decorative and do not cause fires or damage to entities. When rain falls on lava, the black ember particles appear more frequently.
A player in lava lasts a few seconds before dying:
==== ''Java Edition'' ====
* 2.5 seconds with no armor
* 3.5 seconds with full leather armor, no enchantments
* 4 seconds with full gold armor, no enchantments
* 4.5 seconds with full chain armor, no enchantments
* 5.5 seconds with full iron armor, no enchantments
* 10.5 seconds with full diamond armor, no enchantments
* 11 seconds with full netherite armor, no enchantments
==== Bedrock Edition====
* 2.5 seconds with no armor
* 3.5 seconds with full leather armor, no enchantments
* 4.5 seconds with full gold armor, no enchantments
* 5 seconds with full chain armor, no enchantments
* 6.5 seconds with full iron armor, no enchantments
* 12.5 seconds with full diamond armor, no enchantments
* 12.5 seconds with full netherite armor, no enchantments
If the player is wearing armor enchanted with [[Fire Protection]], they can last even longer. With the maximum bonus, the damage is small enough that the natural healing from a full hunger bar can outpace it {{only|JE|short=1}}, so a player could survive indefinitely as long as they have food and their armor holds up (non-netherite armor is damaged by lava). This maximum bonus can be obtained by wearing 2 pieces of armor with [[Fire Protection|Fire Protection IV]] and 1 with [[Protection|Protection IV]], or 1 piece of armor with [[Fire Protection|Fire Protection IV]] and 3 with [[Protection|Protection IV]].
==== Fire spread ====
Lava can cause fires by turning air blocks to fire blocks.
In order for air above lava to turn to fire, a block adjacent to the air has to be [[Fire#Burning blocks|flammable]], or one of the wood-constructed [[Fire#Non-flammable blocks|non-flammable]] blocks. Since catching fire depends on air blocks, even torches or lava itself can prevent a flammable block from catching fire. Additionally, not all flammable or wood-constructed blocks can be ignited by lava.
The lava of any depth can start fires this way, whether or not it appears to have a current.
Additional conditions must be met, depending on the edition of Minecraft.
===== Java Edition =====
{{FakeImage|align=right|{{BlockGrid|scale=2|L=lava|w=Oak Planks|p=Orange Stained Glass|s=Light Gray Stained Glass|wwwwwwwww|wwsssssww|wspppppsw|wwspppsww|wwwsLswww|wwwwwwwww}}|Example for JE. The orange area represents areas<br>where air could catch flame if the<br>gray and orange areas contain<br>flammable blocks. The wood<br>is all at a safe distance.
}}
Air block must be in a 3×1×3 area right above the lava or in a 5×1×5 2 blocks above the lava.
Note that an air block in the 5x1x5 area will not catch on fire if the 3x1x3 area is completely filled, even if the latter is filled with flammable blocks.
===== Bedrock Edition =====
The block to be set on fire must be in a 3×3×3 cube centered on a lava block, above which there must be either air or an ignitable block.
=== Flow ===
{{See also|Fluid}}
Lava flows from "source blocks". Most streams or "lava-falls" come from a single source block, but lava lakes (including the "flood lava" in the bottom 10 layers) are composed entirely of source blocks. A source block can be captured only with a [[lava bucket|bucket]].
In the [[Overworld]] and [[the End]], lava travels 3 blocks in any horizontal direction from a source block. Lava flows far more slowly than water (1 block every 30 game ticks, or 1.5 seconds), and sourceless lava flows linger for a short time more. In [[the Nether]], lava travels 7 blocks horizontally and spreads 1 block every 10 game ticks, or 2 blocks per second, which is half the speed as water in the Overworld. In all dimensions, lava spreading uses the same mechanic as water: for every adjacent block it can flow into it tries to find a way down that is reachable in four or fewer blocks from the block it wants to flow to. When found, the flow weight for that direction is set to the shortest path distance to the way down. (This can result in lava flows turning toward dropoffs that they cannot reach in the Overworld and the End.)
Flowing lava destroys the following in its path: [[sapling]]s, [[cobweb]], [[tall grass]], [[dead bush]], [[wheat]], [[flower]]s, [[mushroom]]s, [[snow]] on ground (but snow blocks are immune), [[lily pad]]s, [[vines]], [[lever]]s, [[button]]s, all three types of [[torch]]es, [[redstone]], [[redstone repeater|repeaters]], [[end rod]]s, and [[rail]]s. [[Sugar cane]]s hold back lava, but disappear if the sugar cane's water source is destroyed by the lava. Lava also slows down entities, including those that are normally immune to lava damage.
Using redstone wire, a one-block lava flow can be redirected by supplying power to the source block, which causes it to reset the flow toward the now-nearest terrain depression. It cannot, however, be reversed. This re-calculation is made because of the redstone wire when toggled changes the block from redstone (on) to redstone (off). Whenever a block updates on any side of the lava, the lava re-calculates where to flow, but does not cut off its current direction of flow. In Bedrock Edition using the /setblock command can be used to create stationary lava without the use of barriers.
Flowing lava can push entities.
==== Flow arrangement tables ====
===== Overworld and the End =====
{| class="wikitable"
|+
|
|
|
!4
|
|
|
|-
|
|
!4
!3
!4
|
|
|-
|
!4
!3
!2
!3
!4
|
|-
!4
!3
!2
!1
!2
!3
!4
|-
|
!4
!3
!2
!3
!4
|
|-
|
|
!4
!3
!4
|
|
|-
|
|
|
!4
|
|
|
|}
{| class="wikitable"
|+
! colspan="2" |Range
!Height in blocks
|-
!1
|block
|1
|-
!2
|blocks
|0.75-1
|-
!3
|blocks
|0.5-0.75
|-
!4
|blocks
|0.25-0.5
|}
===== The Nether =====
{| class="wikitable"
|+
|
|
|
|
|
|
!7
|
|
|
|
|
|
|-
|
|
|
|
|
!7
!6
!7
|
|
|
|
|
|-
|
|
|
|
!7
!6
!5
!6
!7
|
|
|
|
|-
|
|
|
!7
!6
!5
!4
!5
!6
!7
|
|
|
|-
|
|
!7
!6
!5
!4
!3
!4
!5
!6
!7
|
|
|-
|
!7
!6
!5
!4
!3
!2
!3
!4
!5
!6
!7
|
|-
!7
!6
!5
!4
!3
!2
!1
!2
!3
!4
!5
!6
!7
|-
|
!7
!6
!5
!4
!3
!2
!3
!4
!5
!6
!7
|
|-
|
|
!7
!6
!5
!4
!3
!4
!5
!6
!7
|
|
|-
|
|
|
!7
!6
!5
!4
!5
!6
!7
|
|
|
|-
|
|
|
|
!7
!6
!5
!6
!7
|
|
|
|
|-
|
|
|
|
|
!7
!6
!7
|
|
|
|
|
|-
|
|
|
|
|
|
!7
|
|
|
|
|
|
|}
{| class="wikitable"
! colspan="2" |Range
!Height in blocks
|-
!1
|block
|1
|-
!2
|blocks
|0.75-1
|-
!3
|blocks
|0.625-0.75
|-
!4
|blocks
|0.5-0.625
|-
!5
|blocks
|0.375-0.5
|-
!6
|blocks
|0.25-0.375
|-
!7
|blocks
|0.125-0.25
|}
=== Lava and water ===
{{Main|Fluid#Mixing}}
Water and lava can produce [[stone]], [[cobblestone]], or [[obsidian]] based on how they interact. Lava can also generate basalt when above soul soil and touching blue ice.
=== Light source ===
Lava blocks emit a [[light]] level of 15.
=== Other ===
[[File:LavaDropletsExample.png|thumb|If there is lava flowing above a [[block]], the lava seeps through.]]
Lava above a non-transparent block (does ''not'' include stairs, fences, and slabs) produces dripping particles on the underside of that block. These droplets do not do anything other than warn the player that a deluge of lava lies above that block. The particles function identically to their water counterparts, except that they drip slower.
Flowing lava can set off tripwires because it breaks placed string. Lava triggers a tripwire only once.
Any [[item (entity)|item]] dropped into lava is immediately destroyed, except for [[netherite]]-related items. [[Lodestone|Lodestones]], however, can be destroyed by lava despite containing netherite.<ref>{{bug|MC-176618|||WAI}}</ref>
Lava can be placed in an empty [[cauldron]].
If lava is above a non-transparent block supporting [[pointed dripstone]], dripping particles are created on the end. These can fill cauldrons with lava.
== Farming ==
{{main|Tutorials/Lava farming}}
Lava farms can be created by placing a lava source block on top of a solid block and a [[pointed dripstone]] and a [[cauldron]] underneath.
== Sounds ==
{{edition|java}}:
{{Sound table
|sound=Lava.ogg
|subtitle=Lava pops
|source=block
|description=Randomly
|id=block.lava.ambient
|translationkey=subtitles.block.lava.ambient
|volume=0.2-0.4
|pitch=0.9-1.05
|distance=16}}
{{Sound table
|sound=Fizz.ogg
|subtitle=Lava hisses
|source=block
|description=When lava mixes with water, making a block
|id=block.lava.extinguish
|translationkey=subtitles.block.lava.extinguish
|volume=0.5
|pitch=1.8-3.4
|distance=16}}
{{Sound table
|sound=Lava pop.ogg
|subtitle=Lava pops
|source=block
|description=When a lava bubble particle spawns
|id=block.lava.pop
|translationkey=subtitles.block.lava.ambient
|volume=0.2-0.4
|pitch=0.9-1.05
|distance=16}}
{{Sound table
|sound=Empty lava bucket1.ogg
|sound2=Empty lava bucket2.ogg
|sound3=Empty lava bucket3.ogg
|subtitle=Bucket empties
|source=block
|description=When lava is placed with a bucket
|id=item.bucket.empty_lava
|translationkey=subtitles.item.bucket.empty
|volume=1.0
|pitch=1.0
|distance=16}}
{{Sound table
|sound=Fill lava bucket1.ogg
|sound2=Fill lava bucket2.ogg
|sound3=Fill lava bucket3.ogg
|subtitle=Bucket fills
|source=player
|description=When lava is collected with a bucket
|id=item.bucket.fill_lava
|translationkey=subtitles.item.bucket.fill
|volume=1.0
|pitch=1.0
|distance=16}}
{{Sound table
|sound=Fizz.ogg
|subtitle=Fire extinguishes
|description=When something [[freezing]] is dunked into lava
|source=block
|id=entity.generic.extinguish_fire
|translationkey=subtitles.entity.generic.extinguish_fire
|volume=0.7
|pitch=1.2-2.0
|distance=16
|foot=1}}
{{edition|bedrock}}:
{{Sound table
|type=bedrock
|sound=Lava.ogg
|source=block
|description=Randomly
|id=liquid.lava
|volume=0.4-0.6
|pitch=0.9-1.05}}
{{Sound table
|sound=Fizz.ogg
|source=block
|description=When lava mixes with water, making a block
|id=random.fizz
|volume=0.5
|pitch=1.8-2.4}}
{{Sound table
|sound=Lava pop.ogg
|source=block
|description=When a lava bubble particle spawns
|id=liquid.lavapop
|volume=0.4-0.6
|pitch=0.9-1.05}}
{{Sound table
|sound=Empty lava bucket1.ogg
|sound2=Empty lava bucket2.ogg
|sound3=Empty lava bucket3.ogg
|source=block
|description=When lava is placed with a bucket
|id=bucket.empty_lava
|volume=1.0
|pitch=1.0}}
{{Sound table
|sound=Fill lava bucket1.ogg
|sound2=Fill lava bucket2.ogg
|sound3=Fill lava bucket3.ogg
|source=block
|description=When lava is collected with a bucket
|id=bucket.fill_lava
|volume=1.0
|pitch=1.0}}
{{Sound table
|sound=Fizz.ogg
|source=block
|description=When something freezing is dunked into lava
|id=random.fizz
|foot=1}}
== Data values ==
=== ID ===
{{edition|java}}:
{{ID table
|edition=java
|firstcolumnname=Lava
|showblocktags=y
|showforms=y
|generatetranslationkeys=y
|displayname=Block
|spritename=lava
|spritetype=block
|nameid=lava
|blocktags=strider_warm_blocks
|form=block
|foot=1}}
{{ID table
|firstcolumnname=Lava
|showfluidtags=y
|displayname=Fluid
|spritename=lava
|spritetype=block
|nameid=lava
|fluidtags=lava}}
{{ID table
|displayname=Flowing Fluid
|spritetype=block
|spritename=lava
|nameid=flowing_lava
|fluidtags=lava
|foot=1}}
{{edition|bedrock}}:
{{ID table
|edition=bedrock
|firstcolumnname=Lava
|shownumericids=y
|showforms=y
|generatetranslationkeys=y
|displayname=Flowing
|spritename=lava
|spritetype=block
|nameid=flowing_lava
|id=10
|form=block}}
{{ID table
|displayname=Stationary
|spritename=lava
|spritetype=block
|nameid=lava
|id=11
|form=block
|foot=1}}
Lava spends most of its time as stationary, rather than 'flowing' – regardless of its level, or whether it contains a current downward or to the side. When specifically triggered by a block update, lava changes to 'flowing', update its level, then change back to stationary. Lava springs are generated as flowing, and lava lakes are generated as stationary.
=== Block states ===
{{see also|Block states}}
{{/BS}}
=== Fluid states ===
{{see also|Block states}}
{{/FS}}
== Achievements ==
{{load achievements|Stayin' Frosty;Super Fuel;Feels Like Home}}
== Advancements ==
{{Load advancements|Hot Stuff;Feels Like Home}}
== History ==
{{main|/History}}
{{History|java classic}}
{{History||0.0.12a|snap=May 19, 2009|slink=Java Edition Classic 0.0.12a/Development#Lava test (May 19, 2009)|Lava is shown.}}
{{History|||snap=release|slink=Java Edition Classic 0.0.12a|[[File:Lava JE1.png|32px]] Added lava.
|The texture is transparent.
|Lava spreads by duplicating itself to open horizontal and downward squares.
|Lava is slower than [[water]] and can be easily outrun.
|Model has z-fighting with blocks below lava.}}
{{History||0.0.13a|[[File:Lava JE2.png|32px]] The texture has changed to be opaque.}}
{{History||0.0.13a_03|Lava lakes no longer generate.}}
{{History||0.0.15a|link=Java Edition Classic 0.0.15a (Multiplayer Test 1)|[[File:Lava JE3.png|32px]] The model is no longer shaded.}}
{{History||0.0.19a|[[File:Lava JE4.png|32px]] Added a [[Procedural animated texture generation|procedural animated texture]] to lava. Old texture is still retained for use as a [[animation placeholder texture|placeholder]].|Upscaled model 2% to fix z-fighting with blocks below lava. It's created lava or water models overlapping and z-fighting with each other.|Added lava layer to the bottom of the map.<!--as it traps the [[player]] and prevents the player from leaving unless [[water]] is let in and collides with it or if the player places a [[sand]] or [[gravel]] block, letting it [[drops|drop]] into the lava. If water is let into the area where the lava is, the lava becomes [[stone]], allowing the stone block to be removed to expose bedrock underneath.-->}}
{{History||0.0.20a_02|[[File:Lava JE5.png|32px]] Changed model scale back to normal with 1% offset on all coordinates.}}
{{History||0.0.22a|[[File:Lava JE6.png|32px]] Lava's generated texture has changed - it now appears brighter overall.}}
{{History||August 25, 2009|link=https://notch.tumblr.com/post/170887079/survival-mode-status-update-video-with-plenty-of|Lava has been shown to deal [[damage]].}}
{{History||0.24_SURVIVAL_TEST|Lava now deals damage.}}
{{History||0.26 SURVIVAL TEST|[[File:Lava JE7.png|32px]] UV mapping on side faces now has 11% v offset up.}}
{{History||0.28|[[File:Lava JE6.png|32px]] Fixed UV mapping.}}
{{History|java indev}}
{{History||0.31|snap=20091223-2|Lava is now luminous.}}
{{History|||snap=20100110|Lava now sets [[fire]] to flammable materials.}}
{{History|||snap=20100122|Added [[lava spawner]]s that spawn lava on sides and bottom.|It appears in the player's inventory in a stack of 5.
|Lava now flows, but more slowly than water.<ref>[[wordofnotch:347976621]]</ref>
|Dropped [[item]]s now burn in lava.
|Shot [[arrow]]s catch [[fire]] and not burn in lava.}}
{{History|||snap=20100124|Lava spawner can no longer be found in the player's inventory. Instead, a full stack (99) can be found inside the [[Indev house]] chests.}}
{{History|||snap=20100125-1|Lava now has [[particles|particle]] effects.}}
{{History|||snap=20100130|Re-added the infinite lava sea to the bottom of the map.}}
{{History||20100219|[[File:Lava JE8.png|32px]] The model is shaded again.}}
{{History|java infdev}}
{{History||20100227-1|Lava no longer flows due to changes in chunk handling for infinite worlds.}}
{{History||20100607|[[File:Lava JE9.png|32px]] UV mapping now has 1% uv offset on top and bottom faces and 1% u, 11% v offset on side faces.}}
{{History||20100608|[[File:Lava JE8.png|32px]] Fixed UV mapping, once again.}}
{{History||20100615|[[File:Lava JE10.png|32px]] The model has been changed.
|Added flowing lava.
|Lava now creates flowing lava for a total distance of 7 blocks "away" from the source block.
|Flowing lava flows in a single line toward the nearest terrain depression within four blocks.}}
{{History||20100616-1|[[File:Lava JE11.png|32px]] Added flowing lava texture for sides and vertex offset.
|Lava and flowing lava now have visual connection to blocks.|A large lava flow is now visible in the dark from a long distance.}}
{{History||20100617-2|[[File:Lava JE12.png|32px]] Removed vertex offset.
|Lava now flows 3 blocks horizontally instead of 7.
|Lava and flowing lava touching water, flowing water, water spawner, or lava spawner now replaces with [[obsidian]].
|Removed the infinite lava sea at the bottom of the map.}}
{{History|java alpha}}
{{History||v1.0.2_02|Flowing of lava has been tweaked.}}
{{History||v1.0.4|Added [[ice]] and [[snow]], which lava can melt.}}
{{History||v1.0.15|Lava now sets nearby [[block]]s on [[fire]].}}
{{History||v1.2.0|snap=preview|Added [[the Nether]], which contains lava.}}
{{History||v1.2.2|Lava now flows further in the Nether.}}
{{History||v1.2.6|Added [[lava lake]]s, which can generate at any [[altitude]].}}
{{History|java beta}}
{{History||1.8|snap=Pre-release|[[File:Lava JE13.png|32px]] Changed [[lighting]].
|When lava is touched by [[rain]], it emits smoke [[particles]].
|Lava now generates in the blacksmiths of the newly added [[village]]s.}}
{{History|java}}
{{History||1.0.0|snap=Beta 1.9 Prerelease|Added lava dripping.
|Lava blocks now form [[stone]] when falling directly onto [[water]] source blocks.}}
{{History|||snap=Beta 1.9 Prerelease 3|Lava now generates in the newly added [[end portal]] rooms of [[stronghold]]s.}}
{{History|||snap=Beta 1.9 Prerelease 5|Only in this version, it is possible to create an infinite lava source using a plus-sign shaped arrangement of [[block]]s with four lava source blocks flowing into a central empty block.}}
{{History|||snap=RC1|[[File:Lava JE14.png|32px]] Faces on model now 0.1% moved to center to fix z-fighting on inner faces.}}
{{History||1.2.1|snap=12w05a|Lava (as well as the embers that pop out of it) now makes [[sound]]s. These sounds were in the game files for a long time, but they had not played in-game.}}
{{History||1.3.1|snap=12w21a|Lava can now be collected and dispensed by [[dispenser]]s containing buckets.}}
{{History||1.4.2|snap=12w38a|Flowing lava now has a constant [[sound]].}}
{{History||1.5|snap=13w02a|[[File:Lava JE15.png|32px]] The model of lava now uses animated texture files.
|There is now "hidden lava" in [[the Nether]].
|Lava now flows much more quickly in the Nether.}}
{{History||1.6.1|snap=13w18a|Lava no longer lingers after the source is removed.}}
{{History||1.7.2|snap=13w37a|Flowing lava, which previously could be destroyed by a few [[block]]s of [[TNT]], can no longer be destroyed by [[explosion]]s.}}
{{History||1.10|snap=16w21a|[[File:Lava JE16.png|32px]] [[File:Lava (bottom view) 16w21a.png|32px]] Lava is now [[color]]ed red ({{color|#ff0000}}) except for the bottom face.<ref>{{bug|MC-102511}}</ref>}}
{{History|||snap=16w21b|[[File:Lava JE15.png|32px]] Lava is no longer colored.
|Added 2 [[splash]]es referencing colored lava: "Rule #1: it's never my fault", "Replaced molten cheese with blood?".}}
{{History||1.11|snap=16w39a|Lava can now generate in [[woodland mansion]]s.}}
{{History||1.13|snap=18w15a|[[File:Lava JE17.png|32px]] [[File:Swamp Lava 18w15a.png|32px]] [[File:Swamp Hills Lava 18w15a.png|32px]] [[File:Warm Ocean Lava 18w15a.png|32px]] [[File:Lukewarm Ocean Lava 18w15a.png|32px]] [[File:Cold Ocean Lava 18w15a.png|32px]] [[File:Frozen Ocean Lava 18w15a.png|32px]] Lava is now biome colored except for the bottom face. This is linked to new biome coloring for water.<ref>{{bug|MC-128233}}</ref>}}
{{History|||snap=18w16a|[[File:Lava JE15.png|32px]] Lava is no longer biome colored.}}
{{History||1.16|snap=20w09a|Lava now pushes [[Entity|entities]].}}
{{History|||snap=20w13a|Added [[strider]]s, which can be [[saddle]]d and ridden across lava.
|When lava flows over [[soul soil]] next to [[blue ice]], it now turns into [[basalt]].}}
{{History|||snap=20w16a|Lava now generates as part of [[bastion remnants]] and [[ruined portal]]s.}}
{{History|||snap=Pre-release 3|Visibility under lava is now slightly better when under the effect of [[Fire Resistance]].}}
{{History||1.17|snap=20w45a|[[Cauldron]]s can now be filled with lava.}}
{{History|||snap=20w48a|Added a [[renewable]] way of obtaining lava through cauldrons and [[pointed dripstone]].}}
{{History|||snap=21w06a|Lava no longer replaces air below Y{{=}}11.}}
{{History|||snap=21w08a|Lava now replaces air below Y{{=}}-53.
|Lava [[spring]]s are able to generate below Y{{=}}0.}}
{{History|||snap=21w11a|[[Spectator]] mode players can now see through lava.<ref>{{bug|MC-71530|||Fixed}}</ref>}}
{{History|||snap=21w13a|Lava is now fully renewable, as pointed dripstone can be obtained in Survival without custom generation.}}
{{History|||snap=21w15a|The changes to lava generation in 21w06a and 21w08a have been reverted.}}
{{History||1.18|snap=Experimental Snapshot 1|The changes to lava generation in the 1.17 snapshots have been reintroduced.
|[[Aquifer]]s below Y{{=}}0 sometimes generate with lava instead of water.}}
{{History||1.19.3|snap=22w44a|Added [[game rule]] {{cd|lavaSourceConversion}}, which allows the formation of new lava source blocks when set to {{cd|true}}.}}
{{History|pocket alpha}}
{{History||v0.1.0|[[File:Lava BE1.png|32px]] Added lava.}}
{{History||v0.3.3|Lava no longer creates [[fire]], due to a game breaking spreading bug.}}
{{History||v0.7.0|Lava now lights flammable [[block]]s around it on fire.
|[[File:Lava BE2.png|32px]] [[File:Lava BE2.gif|32px]] Lava now has a flowing animation.}}
{{History||v0.8.0|snap=build 5|Lava flowing directly into [[water]] now actually spreads out over it.}}
{{History||v0.9.0|snap=build 1|Underground ponds of lava can now be found, making lava much more easy to obtain.
|Lava dripping [[particles]] have been added.
|Lava now generates in [[village]] blacksmiths and [[stronghold]] end portal rooms.}}
{{History||v0.12.1|snap=build 1|[[Player]]s are now able to [[swimming|swim]] in lava.
|Lava now generates in [[the Nether]].}}
{{History|||snap=build 6|[[File:Lava BE3.png|32px]] [[File:Lava BE3.gif|32px]] Lava is now brighter shaded.}}
{{History|||snap=build 8|Lava now cancels all fall [[damage]].}}
{{History|pocket}}
{{History||1.1.0|snap=alpha 1.1.0.0|Lava now generates in [[woodland mansion]]s.}}
{{History|bedrock}}
{{History||1.11.0|snap=beta 1.11.0.5|[[File:Lava BE4.png|32px]] The texture for lava has been changed to match ''Java Edition''.}}
{{History||1.16.0|snap=beta 1.16.0.51|Lava can now push entities.}}
{{History|||snap=beta 1.16.0.57|Lava now generates as a [[delta]] that can be found in [[basalt deltas]].
|Lava now generates as part of [[bastion remnants]] and [[ruined portal]]s.
|When lava flows over [[soul soil]] next to [[blue ice]], it now turns into [[basalt]].}}
{{History|||snap=beta 1.16.0.59|Lava can no longer push entities.}}
{{History||1.17.30|snap=beta 1.17.20.22|Lava can now push entities, once again.<ref>{{bug|MCPE-75124}}</ref>}}
{{History|console}}
{{History||xbox=TU1|xbone=CU1|ps=1.00|wiiu=Patch 1|switch=1.0.1|[[File:Lava JE12.png|32px]] Added lava.}}
{{History||xbox=TU12|[[File:Lava JE15.png|32px]] The texture for lava has been changed.
|Lava (as well as the embers that pop out of it) now makes [[sound]]s.}}
{{History||xbox=TU25|xbone=CU14|ps=1.17|Lava can be used in custom superflats. It appears as a 3D block in the block selection screen of the custom superflat interface.}}
{{History|new 3ds}}
{{History||0.1.0|[[File:Lava BE3.png|32px]] Added lava.}}
{{History|foot}}
=== Data history ===
{{History|java}}
{{History||1.13|snap=17w47a|Prior to [[1.13/Flattening|''The Flattening'']], these blocks' numeral IDs were 10 and 11.}}
{{History|foot}}
== Issues ==
{{Issue list}}
== Trivia ==
* A player with [[Fire Resistance]] can swim in lava without taking damage, although the swimming speed does not become faster.
* A player cannot sprint-swim in lava.
* An arrow catches fire when shot into flowing lava, but not still lava.
* [[Water]] flows into lava-occupied blocks as though it were empty space, and vice versa.
* Although lava is a fluid, it is not possible to drown in lava. This applies to all mobs. However, it is still possible to suffocate in lava. This applies to almost every mob.{{only|bedrock}}<ref>{{bug|MCPE-17073}}</ref>
* A player sleeping in a bed cannot be damaged by lava.
* If the lava is changed to be transparent via a [[resource pack]], it does not become transparent.
* {{IN|bedrock}}, lava does not deactivate [[elytra]] like [[water]] does.
* Despite flowing identically to water while in [[the Nether]], it was not possible to create an infinite spring of lava before [[Java Edition 1.19.3|1.19.3]].
** Before Lava source conversion was implemented, the ''Minecraft: Combat Handbook'' (2014) stated the possibility to create infinite sources of lava by simply creating a cross shape with 4 nether bricks and placing lava in the middle. As expected, this turned out to be false, as confirmed by [[Nathan Adams|Dinnerbone]].<ref>[[bugtracker:MC-71088|MC-71088]]</ref>
* Geologically, lava in the Overworld is consistent with [[wikipedia:Felsic lava|felsic lava]], and lava in the Nether is consistent with [[wikipedia:mafic lava|mafic lava]]. Felsic lava is slow, sticky, and does not run as far as mafic lava, which is relatively thin and runny.
* When lava source conversion was implemented, any text where lava was supposed to be said "lave" instead.
** A splash text now says "Made with 'lave'".
== Gallery ==
<gallery>
Lavameltpattern1.png|Lava's melting pattern for snow and ice.
Water and lava springs.png|A natural lava spring near a waterfall.
Cave Lava.png|The lava "ocean" layer of [[cave]]s.
Lavastreamwithores.png|A naturally-occurring stream of lava next to diamond and iron ore.
Spawn Point Lava Warning.png|The warning in [[Legacy Console Edition]] when trying to place lava near the spawn point.
Lave found close under the dessert.png|A running lava source (origin not seen) uncovered six blocks below the surface of desert terrain.
Lava with Night vision potion.png|The inside view of lava with the night vision effect.
Ladders Blocking Lava.png|Ladders can stop lava from flowing.
Lava flowing off cliff.png|A lava [[spring]].
Minecraft Surface LavaFall.png|Lava spreading into dirt.
Exposed Cavern Lava.png|Lava in a ravine.
Lava in Ravine.png|Lava found in a snowy [[ravine]].
BedrockLava.png|Lava generates on bedrock.
BedrockPostLavaRemoval.png| Lava being extinguished near bedrock.
LavaRiver.png| Lava pool and water pool meeting each other naturally.
Lavafall.png| Two lava springs meeting water in a savannah plateau.
Lava spring.png| Lava spreading in the Overworld.
Minecraft lavalake.png| A lava spring spreading into a lava lake.
Lava cane.png|Sugar cane growing with lava flowing around it.
TallLavafall.png|Tall lavafall flowing into ravine.
RavineandStornghold.png|Ravine with multiple ores, water and lava falls, and stronghold bridge over it.
Underground Lava Lake.png|Another example of underground lava lake.
Lwava.png|Lava pouring from a cliff.
Extreme Hills Falls.png|Lava and water pouring from a cliff.
Lavalake.png|Lava and ores in a cave underground.
Cavern2.png|Lava texture in Classic [[0.0.21a_01]].
Lavaspring.png|Lava setting fire to [[grass]].
File:Mobbo Destroyed Village.jpeg|A [[village]] ravaged by lava.
File:Lava Moodlight.jpg|An officially licensed lava block moodlight.
</gallery>
== References ==
{{Reflist}}
== External links ==
*[https://www.minecraft.net/en-us/article/block-week-lava Block of the Week: Lava] – Minecraft.net on September 29, 2017
*[[wikipedia:Lava|Real-life lava on Wikipedia]]
*[[wikipedia:Magma|Real-life magma on Wikipedia]]
{{Blocks|natural}}
{{Items}}
[[Category:Fluids]]
[[Category:Natural blocks]]
[[Category:Non-solid blocks]]
[[Category:Generated structure blocks]]
[[Category:Light sources]]
[[cs:Láva]]
[[de:Lava]]
[[es:Lava]]
[[fr:Lave]]
[[hu:Láva]]
[[it:Lava]]
[[ja:溶岩]]
[[ko:용암]]
[[nl:Lava]]
[[pl:Lawa]]
[[pt:Lava]]
[[ru:Лава]]
[[th:ลาวา]]
[[tr:Lav]]
[[uk:Лава]]
[[zh:熔岩]]</li></ul> | 19w08b | The Ender dragon no longer dives straight down to the fountain, instead she slowly descends. | |||||||||||||||||||||||||||||||||
| The Ender dragon's AI in general has been heavily altered.[4] | |||||||||||||||||||||||||||||||||||
1.15{{Extension DPL}}<ul><li>[[Trial Key|Trial Key]]<br/>{{Item|
|image=Trial Key .webp
|renewable=Yes
|stackable=Yes (64)
}}
{{Stub}}
{{in dev|java|bedrock|1.21|1.21.0}}
A '''Trial Key''' is an item found in [[Trial Chambers]].
Its functionality remained a mystery for a pretty good time, but on the Minecraft Monthly of January 2024, it has been revealed to open vaults, which once opened will drop an item. It's still unknown what will the loot be, but was seen dispensing the following:
Enchanted iron helmet, enchanted iron leggings, enchanted crossbow, enchanted diamond chestplate, iron, gold and diamond horse armour, enchanted golden apple, saddle, enchanted diamond axe, enchanted iron pickaxe and enchanted iron Shovel.
The trial key can currently be obtained from trial spawners (50%), or from pots and chests (8%).
[[Category:Items]]
[[ja:Trial Key]]
[[lzh:煉管]]</li><li>[[Snowball|Snowball]]<br/>{{about|the throwable item|the enchantment in ''Minecraft Dungeons''|MCD:Snowball}}
{{ItemEntity
|image=Snowball.png
|renewable=Yes
|stackable=Yes (16)<br>
Yes (64){{upcoming|java Combat Tests}}
|size=Height: 0.25 Blocks<br>Width: 0.25 Blocks
}}
'''Snowballs''' are throwable combat items that hit but do not damage most [[Mob|mobs]] on impact.
== Obtaining ==
{{see also|Tutorials/Snow farming}}
=== Mining ===
A [[shovel]] without the [[Silk Touch]] enchantment can get 4 snowballs by breaking a [[snow block]], and 1–8 snowballs by breaking or blasting [[snow layer]]s – one per layer. The [[Fortune]] enchantment does not affect these amounts.
{{IN|bedrock}}, snowballs are dropped from snow layers even when mined with a Silk Touch shovel.<ref>{{bug|MCPE-59729||Snow layers don't drop themselves when mined with a silk touch enchanted shovel}}</ref>
==== Explosions ====
Creeper and TNT [[explosion]]s leave snowballs in the resulting debris field if near snow.
==== Ravagers ====
{{IN|BE}}, Ravagers destroy snow layers, dropping snowballs.
==== Pistons ====
{{IN|BE}}, a block or piston head pushed into the position of snow layers destroys the snow layers, dropping snowballs. 1-3 layers drops 1 snowball, 4-5 layers drops 2 snowballs, 6-7 layers drops 3 snowballs and 8 layers drops 4 snowballs.
=== Mob loot ===
[[Snow golem]]s drop 0–15 snowballs upon death, unaffected by [[Looting]].
=== Chest loot ===
{{LootChestItem|snowball}}
== Usage ==
=== Crafting ingredient ===
{{crafting usage}}
=== Combat ===
[[File:Throwing a snowball on a pig.gif|300px|thumbnail|right|Throwing a snowball on a pig animation.]]
Snowballs can be thrown by {{control|using}} them. There is no charging time or cooldown for firing them,{{Until|java Combat Tests}} meaning they can be thrown as fast as the player can click.
Like other projectiles, snowballs are affected by gravity: their range is the same as those of [[egg]]s and [[ender pearl]]s, less than that of [[arrow]]s fired from [[bow]]s, and more than that of [[splash potion]]s. In [[Bedrock Edition]], players will receive damage and will be knockbacked.
Snowballs deal {{hp|3}} each to [[blaze]]s but they deal no damage to other mobs. Mobs still receive knockback and act the same as if they were being damaged (for example, [[zombified piglin]]s who are hit by snowballs become aggressive). Players {{in|BE}} receive knockback, while players {{in|JE}} are unaffected.<ref>{{bug|MC-3179|||WAI}}</ref>{{Until|java Combat Tests}}
When fighting the [[ender dragon]], [[end crystal]]s are able to be destroyed by snowballs being thrown at them.
Snowball, like other projectiles, can be used to distract the [[warden]]. A warden walks towards the location where the snowball lands to inspect it, giving the player time to escape. However, if snowballs are fired too frequently (at least twice in 5 seconds), the warden walks straight to the player instead.
In the new versions they can hit players but just only in bedrock
=== Dispenser ===
Snowballs can be fired from [[dispenser]]s.
== Sounds ==
{{Edition|Java}}:<br>
Thrown snowballs use the Friendly Creatures sound category for entity-dependent sound events.
{{Sound table
|rowspan=3
|sound=Bow shoot.ogg
|subtitle=Snowball flies
|source=neutral
|description=When a player throws a snowball
|id=entity.snowball.throw
|translationkey=subtitles.entity.snowball.throw
|volume=0.5
|pitch={{frac|1|3}}-0.5
|distance=16}}
{{Sound table
|subtitle=Snowball flies
|source=neutral
|description=When a snow golem shoots a snowball
|id=entity.snow_golem.shoot
|translationkey=subtitles.entity.snowball.throw
|volume=1.0
|pitch={{frac|1|3}}-0.5
|distance=16}}
{{Sound table
|subtitle=Dispensed item
|source=block
|description=When a dispenser shoots a snowball
|id=block.dispenser.launch
|translationkey=subtitles.block.dispenser.dispense
|volume=1.0
|pitch=1.2
|distance=16
|foot=1}}
{{Edition|Bedrock}}:
{{Sound table
|type=bedrock
|rowspan=3
|sound=Bow shoot.ogg
|source=player
|description=When a player throws a snowball
|id=random.bow
|volume=0.5
|pitch=0.33-0.5}}
{{Sound table
|source=neutral
|description=When a snow golem shoots a snowball
|id=mob.snowgolem.shoot
|volume=1.0
|pitch=0.8-1.2}}
{{Sound table
|source=player
|description=When a dispenser shoots a snowball
|id=random.bow
|volume=1.0
|pitch=0.83-1.25
|foot=1}}
== Data values ==
=== ID ===
{{edition|java}}:
{{ID table
|edition=java
|firstcolumnname=Item
|showforms=y
|generatetranslationkeys=y
|displayname=Snowball
|spritetype=item
|nameid=snowball
|form=item
|foot=1}}
{{ID table
|edition=java
|firstcolumnname=Entity
|showentitytags=y
|generatetranslationkeys=y
|displayname=Snowball
|spritetype=entity
|nameid=snowball
|entitytags=impact_projectiles
|foot=1}}
{{edition|bedrock}}:
{{ID table
|edition=bedrock
|firstcolumnname=Item
|shownumericids=y
|showforms=y
|notshowbeitemforms=y
|generatetranslationkeys=y
|displayname=Snowball
|spritetype=item
|nameid=snowball
|id=374
|form=item
|foot=1}}
{{ID table
|edition=bedrock
|firstcolumnname=Entity
|shownumericids=y
|generatetranslationkeys=y
|displayname=Snowball
|spritetype=entity
|nameid=snowball
|id=81
|foot=1}}
=== Entity Data ===
Snowballs have entity data that define various properties of the entity.
{{el|java}}:
{{main|Entity format}}
{{/ED}}
{{el|bedrock}}:
: See [[Bedrock Edition level format/Entity format]].
== Advancements ==
{{Load advancements|Bullseye}}
== Video ==
<div style="text-align:center">{{yt|2E-c9P8kyfg}}</div>
==History==
{{History|java alpha}}
{{History||v1.0.5|[[File:Snowball JE1 BE1.png|32px]] Added snowballs.
|Snowballs are used to craft [[snow block]]s.
|Snowballs could stack up to 64.}}
{{History||v1.0.5_01|Snowballs now stack to 8.
|Added a new snowball [[sound]] effect.
|Harvesting snowballs now requires a [[shovel]].}}
{{History||v1.0.6|Snowballs now stack up to 16.
|Thrown snowballs no longer disappear.}}
{{History||v1.1.1|It is no longer possible to obtain more than four snowballs from a solid [[snow block]] (the [[player]] was previously able to obtain 4-6 snowballs per snow block allowing an infinite number of snowballs to be made).}}
{{History||v1.2.0|snap=preview|[[Fireball]]s use the same texture as the snowball.}}
{{History|java beta}}
{{History||1.2|Snowballs can now be fired by [[dispenser]]s.}}
{{History|java}}
{{History||1.0.0|snap=Beta 1.9 Prerelease|[[Fireball]]s no longer use the snowball texture.}}
{{History|||snap=RC1|Snowball throwing sound was changed.}}
{{History||1.9|snap=15w32a|Snowballs no longer damage the [[ender dragon]].}}
{{History|||snap=15w36b|Snowballs now produce particles when thrown at an entity.}}
{{History|||snap=15w49a|Snowballs, as well as all projectiles, now take the thrower's motion into account when fired.}}
{{History||1.11|snap=16w32a|The entity ID has been changed from <code>Snowball</code> to <code>snowball</code>.}}
{{History||1.13|snap=17w47a|Prior to [[1.13/Flattening|''The Flattening'']], this [[item]]'s numeral ID was 332.}}
{{History||1.14|snap=18w43a|[[File:Snowball JE2 BE2.png|32px]] The texture of snowballs has been changed.}}
{{History|||snap=18w49a|Snowballs can now be found in [[chest]]s in [[snowy tundra]] [[village]] houses.}}
{{History|||snap=19w08a|[[File:Snowball JE3 BE3.png|32px]] The texture of snowballs has been changed, once again.}}
{{History||1.16.2|snap=Pre-Release 1|Snowballs are now affected by [[bubble column]]s.}}
{{History||1.19|snap=Deep Dark Experimental Snapshot 1|Snowballs now generate in [[ancient city]] chests.}}
{{History|upcoming java}}
{{History||Combat Tests|snap=Combat Test 4|Snowballs now stack to 64, once again.
|Snowballs now have 4-tick cooldown and are not rendered for the first 2 ticks to prevent screen flickering.}}
{{History|pocket alpha}}
{{History||v0.2.0|[[File:Snowball JE1 BE1.png|32px]] Added snowballs. They are currently unobtainable and serve no purpose.}}
{{History||v0.3.0|Snowballs now drop as an item when mining [[snow block]]s and [[snow layer]]s.
|Snowballs can be used to craft [[snow block]]s.}}
{{History||v0.4.0|Snowballs can now be thrown.}}
{{History||v0.11.0|snap=build 14|Snowballs are now available in the [[creative]] inventory.}}
{{History||v0.12.0|Snowballs now deal [[damage]] to [[blaze]]s.}}
{{History||v0.12.1|snap=build 1|Added [[snow golem]]s, which [[drops|drop]] snowballs.}}
{{History|bedrock}}
{{History||1.2.0|Snowballs now deal knockback to [[player]]s.}}
{{History||1.10.0|snap=beta 1.10.0.3|[[File:Snowball JE2 BE2.png|32px]] The texture of snowballs has been changed.}}
{{History||1.11.0|snap=beta 1.11.0.1|Snowballs can now be found in some [[snowy tundra]] [[village]] house [[chest]]s.}}
{{History|||snap=beta 1.11.0.5|[[File:Snowball JE3 BE3.png|32px]] The texture of snowballs has been changed, once again.}}
{{History|console}}
{{History||xbox=TU1|xbone=CU1|ps=1.0|switch=1.0.1|wiiu=Patch 1|[[File:Snowball JE1 BE1.png|32px]] Added snowballs.}}
{{History||xbox=none|xbone=none|ps=1.90|switch=none|wiiu=none|[[File:Snowball JE3 BE3.png|32px]] The texture of snowballs has been changed.}}
{{History|3DS}}
{{History||0.1.0|[[File:Snowball JE1 BE1.png|32px]] Added snowballs.}}
{{History|foot}}
== Issues ==
{{issue list}}
== Trivia ==
* A thrown snowball faces the player in the first-person view, while it appears horizontally rotated in third-person view. This is the case for all throwable items ([[ender pearl]]s, [[egg]]s, snowballs, and all throwable [[potion]]s).
== References ==
{{reflist}}
== External Links ==
*[https://www.minecraft.net/en-us/article/taking-inventory--snowball Taking Inventory: Snowball] – Minecraft.net on August 3, 2019
{{Items}}
{{entities}}
[[Category:Combat]]
[[cs:Sněhová koule]]
[[de:Schneeball]]
[[es:Bola de nieve]]
[[fr:Boule de neige]]
[[hu:Hógolyó]]
[[ja:雪玉]]
[[ko:눈덩이]]
[[nl:Sneeuwbal]]
[[pl:Śnieżka]]
[[pt:Bola de neve]]
[[ru:Снежок]]
[[th:บอลหิมะ]]
[[uk:Сніжок]]
[[zh:雪球]]</li></ul> | 19w39a | The Ender dragon no longer has a separate texture for the bottom of her wing anymore. | |||||||||||||||||||||||||||||||||
| 19w41a | A black dot on transparent parts of wing texture has been removed from Ender dragons. | ||||||||||||||||||||||||||||||||||
| A texture for part of wing bottom in the exploding Ender dragon has been removed. | |||||||||||||||||||||||||||||||||||
| 19w46a | |||||||||||||||||||||||||||||||||||
| Pocket Edition | |||||||||||||||||||||||||||||||||||
1.0.0{{Extension DPL}}<ul><li>[[Prismarine Crystals|Prismarine Crystals]]<br/>{{Item
|type=
| renewable = Yes
| stackable = Yes (64)
}}
'''Prismarine crystals''' are items obtained by defeating [[guardian]]s or [[elder guardian]]s. They are used along with [[prismarine shard]]s to craft [[sea lantern]]s.
== Obtaining ==
=== Mob loot ===
[[Guardian]]s and [[elder guardian]]s have a 40% chance and {{frac|1|3}} chance, respectively, of dropping prismarine crystals upon death. The maximum drop count is increased by one per level of [[Looting]].
=== Mining ===
Prismarine crystals are dropped by [[sea lantern]]s when not using a [[Silk Touch]] tool. They drop 2–3 crystals each time, which can be increased to a maximum of 5 using the [[Fortune]] enchantment.
=== Natural generation ===
{{LootChestItem|prismarine-crystals}}
== Usage ==
=== Crafting ingredient ===
{{crafting usage}}
== Data values ==
=== ID ===
{{edition|java}}:
{{ID table
|edition=java
|showforms=y
|generatetranslationkeys=y
|displayname=Prismarine Crystals
|spritetype=item
|nameid=prismarine_crystals
|form=item
|foot=1}}
{{edition|bedrock}}:
{{ID table
|edition=bedrock
|shownumericids=y
|showforms=y
|notshowbeitemforms=y
|generatetranslationkeys=y
|displayname=Prismarine Crystals
|spritetype=item
|nameid=prismarine_crystals
|id=549
|form=item
|foot=1}}
== History ==
{{History|java}}
{{History||1.8|snap=14w25a|[[File:Prismarine Crystals JE1 BE1.png|32px]] Added prismarine crystals.}}
{{History||1.9|snap=15w43a|The chance of [[guardian]]s and [[elder guardian]]s dropping prismarine crystals upon [[death]] has been increased, from 33% to 40%.}}
{{History|||snap=15w43b|The chance of elder guardians [[drops|dropping]] crystals upon [[death]] has now been reverted back to 33%. However, the chance for guardians to drop them is still 40%.}}
{{History||1.13|snap=17w47a|Prior to [[1.13/Flattening|''The Flattening'']], this [[item]]'s numeral ID was 410.}}
{{History|||snap=18w10a|Prismarine crystals now generate in [[buried treasure]] [[chest]]s.}}
{{History||1.14|snap=18w43a|[[File:Prismarine Crystals JE2 BE2.png|32px]] The texture of prismarine crystals has been changed.}}
{{History|pocket alpha}}
{{History||v0.16.0|snap=build 1|[[File:Prismarine Crystals JE1 BE1.png|32px]] Added prismarine crystals.}}
{{History|bedrock}}
{{History||1.4.0|snap=beta 1.2.14.2|Prismarine crystals can now be found inside [[buried treasure]] [[chest]]s.}}
{{History||1.10.0|snap=beta 1.10.0.3|[[File:Prismarine Crystals JE2 BE2.png|32px]] The texture of prismarine crystals has been changed.}}
{{History|console}}
{{History||xbox=TU31|xbone=CU19|ps=1.22|wiiu=Patch 3|[[File:Prismarine Crystals JE1 BE1.png|32px]] Added prismarine crystals.}}
{{History||xbox=none|xbone=none|ps=1.90|wiiu=none|switch=none|[[File:Prismarine Crystals JE2 BE2.png|32px]] The texture of prismarine crystals has been changed.}}
{{History|New 3DS}}
{{History||1.3.12|[[File:Prismarine Crystals JE1 BE1.png|32px]] Added prismarine crystals.}}
{{History|foot}}
== Issues ==
{{issue list}}
{{Items}}
[[Category:Renewable resources]]
[[de:Prismarinkristalle]]
[[es:Cristales de prismarina]]
[[fr:Cristaux de prismarine]]
[[hu:Prizmarin kristály]]
[[ja:プリズマリンクリスタル]]
[[ko:프리즈머린 수정]]
[[lzh:海磷晶]]
[[nl:Prismarienkristallen]]
[[pl:Kryształy pryzmarynu]]
[[pt:Cristais de prismarinho]]
[[ru:Призмариновый кристалл]]
[[uk:Призмаринові кристали]]
[[zh:海晶砂粒]]</li><li>[[Painting|Painting]]<br/>{{ItemEntity
|title=Painting
|image=Painting JE2 BE2.png
|extratext=View [[#Renders|all renders]]
|renewable=Yes
|stackable=Yes (64)
|drops=1 {{ItemLink|Painting}}
}}
'''Paintings''' are decorative [[entity|entities]] that hang on walls.
== Obtaining ==
=== Crafting ===
{{Crafting
|A1= Stick |B1= Stick |C1= Stick
|A2= Stick |B2= Any Wool |C2= Stick
|A3= Stick |B3= Stick |C3= Stick
|Output= Painting
|type= Decoration block
}}
Paintings can be crafted with any color of [[wool]]. The color of the wool used does not influence the picture chosen when the painting is placed.
Once placed, it displays a random painting.
=== Breaking ===
To remove a painting from a wall, the player can {{control|attack}} it, break one of its supporting blocks, cover one square of it with a block, hit it with an arrow, egg, ender pearl, snowball, or fire charge, or subject it to an explosion. The painting then drops as an item. Arrows that hit paintings disappear.
=== Trading ===
Master-level shepherd [[villager]]s sell 3 paintings for 2 [[emerald]]s.
== Usage ==
=== Placement ===
Paintings can be placed on the sides of [[solid block]]s, [[sign]]s, [[banner]]s, or [[sculk vein]]s. A small gap is visible between the painting and attachment surface. There are several different sizes of paintings (see below). When placed, a painting checks for the largest amount of space it has. It then chooses a random painting of that size. The player can add blocks around the painting to ensure it is the size wanted. When the supporting blocks are removed, the painting breaks after 20 game [[tick]]s (1 second) if no supporting blocks are replaced during that interval.
=== Properties ===
Being an entity, paintings can simultaneously exist in the same space as blocks such as water or torches. Specifically, they can share the space with any block whose collision box does not intersect its hitbox.
Players and mobs are able to walk through paintings, as long as the blocks supporting the painting allow it. Secret doorways can be created this way. [[Light]] propagates through paintings as well.
If a player is concealed behind a painting, the player's name is also concealed from other players.{{verify|Is this true in Bedrock?}}
Paintings are non-flammable.
== Canvases ==
{{Stub|Needing the new painting renders}}
There are 31 paintings in the game. These are mostly based on paintings by [[Kristoffer Zetterstrand]], who also created the ''Minecraft'' versions.
{| class="wikitable stikitable" style="text-align: center" data-description="Paintings"
! style="min-width:150px" |Canvas
! style="min-width:3em;max-width:4em" |Size
! style="min-width:3em" |Original
! style="min-width:3em" |Name
! style="min-width:3em;max-width:4.5em" |[[Resource location]]
! style="min-width:10em" |Description
! Java Edition version added
|-
! [[File:Alban (texture).png|64px]]
| rowspan="7" | 1×1 blocks<br>16×16 pixels || [https://zetterstrand.com/work/pictures/archive/alban.jpeg "Albanian"] || Albanian || <code>alban</code> || A man wearing a fez next to a house and a bush. As the name of the painting suggests, it may be a landscape in [[Wikipedia:Albania|Albania]]. || rowspan="9" | [[Indev 20100223]]
|-
! [[File:Aztec (texture).png|64px]]
|[https://zetterstrand.com/eventz/wp-content/uploads/2aztbig.jpg "de_aztec"]|| de_aztec || <code>aztec</code> || [[Wikipedia:Noclip mode|Free-look]] perspective of the map [[w:c:counterstrike:Aztec|de_aztec]] from the video game ''[[Wikipedia:Counter-Strike (video game)|Counter-Strike]]''.
|-
! [[File:Aztec2 (texture).png|64px]]
|[https://zetterstrand.com/eventz/wp-content/uploads/11aztec_for_print.jpg "de_aztec"]|| de_aztec || <code>aztec2</code> || [[Wikipedia:Noclip mode|Free-look]] perspective of the map [[w:c:counterstrike:Aztec|de_aztec]] from the video game ''[[Wikipedia:Counter-Strike (video game)|Counter-Strike]]''.
|-
! [[File:Bomb (texture).png|64px]]
|[https://zetterstrand.com/eventz/wp-content/uploads/12bomb.jpg "Target successfully bombed"]|| Target Successfully Bombed || <code>bomb</code> || The map [[w:c:counterstrike:Dust II|de_dust2]] from the video game ''[[Wikipedia:Counter-Strike (video game)|Counter-Strike]]'', named “target successfully bombed" in reference to the game.
|-
! [[File:Kebab (texture).png|64px]]
|[https://zetterstrand.com/work/pictures/archive/kebab2.jpg "Kebab med tre pepperoni"] || Kebab med tre pepperoni || <code>kebab</code> || A kebab with three green chili peppers.
|-
! [[File:Plant (texture).png|64px]]
|[https://zetterstrand.com/work/pictures/archive/paradistrad.jpeg "Paradisträd"] || Paradisträd || <code>plant</code> || Still life of two plants in pots. "Paradisträd" is Swedish for "[[Wikipedia:Crassula ovata|money tree]]", which is a common name for the depicted species in Scandinavia.
|-
! [[File:Wasteland (texture).png|64px]]
|[https://zetterstrand.com/eventz/wp-content/uploads/Wasteland_1920.jpg "Wasteland"]|| Wasteland || <code>wasteland</code> || A view of some wastelands; a small animal (presumably a rabbit) is sitting on the window ledge.
|-
! [[File:Courbet (texture).png|128px]]
| rowspan="5" | 2×1 blocks<br>32×16 pixels ||[https://zetterstrand.com/eventz/wp-content/uploads/bonjourmonsieurcourbet_BIG.jpg "Bonjour monsieur Courbet"]|| Bonjour Monsieur Courbet || <code>courbet</code> || Two hikers with pointy beards seemingly greeting each other. Based on Gustave Courbet's painting ''[[Wikipedia:La rencontre|The Meeting or "Bonjour, Monsieur Courbet"]]''.
|-
! [[File:Pool (texture).png|128px]]
|[https://zetterstrand.com/eventz/wp-content/uploads/thepool_1920.jpg "The pool"]|| The Pool || <code>pool</code> || Some men and women skinny-dipping in a pool over a cube of sorts. Also there is an old man resting in the lower-right edge.
|-
! [[File:Sea (texture).png|128px]]
| rowspan=2 |[https://zetterstrand.com/eventz/wp-content/uploads/SeaSide_1920.jpg "Seaside"]
| Seaside
| <code>sea</code>
| Mountains and a lake, with a small photo of a mountain and a bright-colored plant on the window ledge. || [[Indev 20100223]] / [[Alpha v1.1.1]]
|-
! [[File:Creebet (texture).png|128px]]
| Creebet || <code>creebet</code> || Mountains and a lake, with a small photo of a mountain and a creeper looking at the viewer through a window. || [[Alpha v1.1.1]]
|-
! [[File:Sunset (texture).png|128px]]
|[https://zetterstrand.com/eventz/wp-content/uploads/sunset_dense.jpg "sunset_dense"]|| sunset_dense || <code>sunset</code> || A view of mountains at sunset. || [[Indev 20100223]]
|-
! [[File:Graham (texture).png|64px]]
| rowspan="2" | 1×2 blocks<br>16×32 pixels ||[https://zetterstrand.com/eventz/wp-content/uploads/graham.jpg "Graham"]|| Graham || <code>graham</code> || King Graham, the player character in the video game series ''[[Wikipedia:King's Quest|King's Quest]]''. The original is based on ''[[Wikipedia:File:Sánchez_Cotán_(Bodegón_con_membrillo,_repollo,_melón_y_pepino).jpg|Still Life with Quince, Cabbage, Melon, and Cucumber]]'' by Juan Sánchez Cotán.|| [[Alpha v1.1.1]]
|-
! [[File:Wanderer (texture).png|64px]]
|[https://zetterstrand.com/eventz/wp-content/uploads/wanderer_1920.jpg "Wanderer"]|| Wanderer || <code>wanderer</code> || A version of Caspar David Friedrich's famous painting ''[[Wikipedia:Wanderer above the Sea of Fog|Wanderer above the Sea of Fog]]''. || rowspan="4" | [[Indev 20100223]]
|-
! [[File:Bust (texture).png|128px]]
| rowspan="6" | 2×2 blocks<br>32×32 pixels ||[https://zetterstrand.com/eventz/wp-content/uploads/bust_1915.jpg "Bust"]|| Bust || <code>bust</code> || A bust of [[Wikipedia:Marcus Aurelius|Marcus Aurelius]] surrounded by fire.
|-
! [[File:Match (texture).png|128px]]
|[https://zetterstrand.com/eventz/wp-content/uploads/Match_rgb_1918.jpg "Match"]|| Match || <code>match</code> || A hand holding a match, causing fire on a white cubic gas fireplace.
|-
! [[File:Skull and Roses (texture).png|128px]]
|[https://zetterstrand.com/eventz/wp-content/uploads/moonlight-installation_1920.jpg "Moonlight Installation"]|| Skull and Roses || <code>skull_and_roses</code> || A skeleton at night with red flowers in the foreground. The original painting was different, depicting a woman sitting in a couch, while the skull is in the middle of a body of glacial water of sorts.
|-
! [[File:Stage (texture).png|128px]]
|[https://zetterstrand.com/eventz/wp-content/uploads/The-stage-is-set-1.jpg "The stage is set"]
| The Stage Is Set
| <code>stage</code>
| Scenery from ''[[Wikipedia:Space Quest I|Space Quest I]]'', with the character Graham from the video game series ''[[Wikipedia:King's Quest|King's Quest]]'' appearing twice. || [[Indev 20100223]] / [[Alpha v1.1.1]]
|-
! [[File:Void (texture).png|128px]]
|[https://zetterstrand.com/eventz/wp-content/uploads/the-void_1920.jpg "The Void"]|| The void || <code>void</code> || An angel praying into a void with fire below. || [[Indev 20100223]]
|-
! [[File:Wither (painting texture).png|128px]]
| – || Wither || <code>wither</code> || The creation of a [[wither]].
This is the only painting not based on a real painting. Made by Jens Bergensten.<ref>{{Citation|url=https://www.youtube.com/watch?v=kK5Y4k-vVXc|title=Who Made Minecraft’s LAST Painting?!|author=AntVenom|website=YouTube|date=29 October 2022}}</ref><ref>https://www.reddit.com/r/Minecraft/comments/1tzav2/comment/cedagcy/</ref>
|| [[Java Edition 1.4.2]] ([[12w36a]])
|-
! [[File:Fighters (texture).png|128px]]
| 4×2 blocks<br>64×32 pixels ||[https://zetterstrand.com/eventz/wp-content/uploads/fighters.jpg "Fighters"]|| Fighters || <code>fighters</code> || Two men poised to fight. Paper versions of fighters from the game ''[[Wikipedia:International Karate +|International Karate +]]''. || [[Indev 20100223]]
|-
! [[File:Donkey Kong (texture).png|128px]]
| rowspan="2" | 4×3 blocks<br>64×48 pixels ||[https://zetterstrand.com/eventz/wp-content/uploads/kong.jpg "Kong"]|| Kong || <code>donkey_kong</code> || A paper-looking screenshot of the level [https://www.mariowiki.com/100m 100m] from the arcade game ''[[Wikipedia:Donkey Kong (arcade game)|Donkey Kong]]''. || rowspan="2" | [[Alpha v1.1.1]]
|-
! [[File:Skeleton (painting texture).png|128px]]
|[https://zetterstrand.com/eventz/wp-content/uploads/mortal_coil.jpg "Mortal Coil"]|| Mortal Coil || <code>skeleton</code> || [[w:c:grim-fandango:Bruno Martinez|Bruno Martinez]] from the adventure game ''[[Wikipedia:Grim Fandango|Grim Fandango]]''.
|-
! [[File:Burning Skull (texture).png|128px]]
| rowspan="3" | 4×4 blocks<br>64×64 pixels ||[https://zetterstrand.com/eventz/wp-content/uploads/skull_on_fire_framed_c_1910.jpg "Skull on Fire"]|| Skull On Fire || <code>burning_skull</code> || A Skull on fire; in the background there is a moon in a clear night sky.<br>This painting is based on a Minecraft screenshot,<ref>{{Citation|url=https://web.archive.org/web/20220928041338/https://imgur.com/HVhrbnH|website=Imgur|date=22 August 2020|title=https://web.archive.org/web/20220928041338/https://imgur.com/HVhrbnH}}</ref> with the grass block and a 3D skull added on top.<ref>{{Citation|url=https://web.archive.org/web/20200906184721/https://imgur.com/AwqQFS6|title=https://web.archive.org/web/20200906184721/https://imgur.com/AwqQFS6|website=Imgur|date=23 August 2020}}</ref>
(See the [[:en:Painting#Trivia|trivia]] section for more info.)
| [[Java Edition Beta 1.2 01|Beta 1.2_01]] / [[Java Edition Beta 1.3|Beta 1.3]]
|-
! [[File:Pigscene (texture).png|128px]]
|[https://zetterstrand.com/eventz/wp-content/uploads/rgb_1914.jpg "RGB"]|| Pigscene || <code>pigscene</code> <!-- yes, without an underscore --> || A girl pointing to a pig on a canvas. In the original version, the canvas showed red, green and blue blocks, representing the three colors of the [[Wikipedia:RGB color model|RGB color model]] that is typically used by computer displays. It is based on the painting ''[[Wikipedia:File:Jacob van Oost (I) - The Artist's Studio - WGA16654.jpg|The Artist's Studio]]'' by Jacob van Oost.|| [[Alpha v1.1.1]]
|-
! [[File:Pointer (texture).png|128px]]
|[https://zetterstrand.com/eventz/wp-content/uploads/pointer_1920.jpg "Pointer"]|| Pointer || <code>pointer</code> || The main character of the game ''[[Wikipedia:International Karate +|International Karate +]]'' in a fighting stance touching a large hand. It could also be interpreted as a play on Michelangelo's famous painting ''[[Wikipedia:The Creation of Adam|The Creation of Adam]]''. || [[Indev 20100223]]
|-
! TBA ||
Pack || <code>pack</code> || Reference to the pack.png fi || [[Java Edition 1.21]]le
|}
=== Unused paintings ===
In [[Pocket Edition v0.5.0 alpha|v0.5.0 alpha]], with the addition of paintings to Pocket Edition, four unused 32×32 paintings were present in <samp>[[kz.png]]</samp> which remained unused. See {{slink|Bedrock Edition unused features|Paintings}} for more information. They were also added to Java Edition in snapshot [[Java Edition 22w16a|22w16a]]. They cannot be placed by default, but can be summoned by [[commands]] (such as {{cmd|/summon painting ~ ~ ~ {variant:"water"} }}) or through a [[datapack]].
According to [[Helen Zbihlyj]],<ref>https://old.reddit.com/r/Minecraft/comments/u8hpnx/thoughts_on_the_new_paintings/i5olue6/?context=3 ([https://web.archive.org/web/20220422115723/https://old.reddit.com/r/Minecraft/comments/u8hpnx/thoughts_on_the_new_paintings/i5olue6/?context=3 archived])</ref> these paintings were originally added "as part of a Pocket Edition promo map" (no footage found) which was planned to be a part of [[Pocket Edition]] promotion at [[MINECON 2012]] [[MINECON 2013|or 2013]] and have never been used in game. The artist of these paintings remains unknown.
{| class="wikitable stikitable" style="text-align: center" data-description="Paintings"
! style="min-width:100px" |Canvas
! style="min-width:3em;max-width:4em" |Size
! style="min-width:6em" |Name
! style="min-width:10em" |[[Resource location]]
! style="min-width:10em" |Description
! style="min-width:5em;max-width:10em" |Bedrock Edition version added
! style="min-width:5em;max-width:8em" |Java Edition version added
|-
! [[File:Earth (texture) BE2.png|128px]]
| rowspan="4" | 2×2 blocks<br>32×32 pixels || Earth || <code>earth</code> || One of the four {{Wikipedia|Classical element|classical elements}}: Earth. || rowspan="4" | [[Pocket Edition v0.5.0 alpha|v0.5.0 alpha]] || rowspan="4" | [[Java Edition 22w16a|22w16a]]
|-
! [[File:Fire (texture) BE2.png|128px]]
| Fire || <code>fire</code> || One of the four classical elements: Fire.
|-
! [[File:Water (texture) BE2.png|128px]]
| Water || <code>water</code> || One of the four classical elements: Water.
|-
! [[File:Wind (texture) BE2.png|128px]]
| Wind || <code>wind</code> || One of the four classical elements: Air.
|}
==Sounds==
{{Edition|Java}}:
{{Sound table
|sound=Painting break1.ogg
|sound2=Painting break2.ogg
|sound3=Painting break3.ogg
|subtitle=Painting breaks<ref>{{Cite bug|MC|194948|Painting, item frame and lead breaking subtitles inconsistent with block breaking subtitle|date=July 14, 2020}}</ref>
|source=neutral
|description=When a painting is broken or pops off
|id=entity.painting.break
|translationkey=subtitles.entity.painting.break
|volume=1.0
|pitch=1.0
|distance=16}}
{{Sound table
|sound=Painting place1.ogg
|sound2=Painting place2.ogg
|sound3=Painting place3.ogg
|sound4=Painting place4.ogg
|subtitle=Painting placed
|source=neutral
|description=When a painting is placed
|id=entity.painting.place
|translationkey=subtitles.entity.painting.place
|volume=1.0
|pitch=1.0
|distance=16
|foot=1}}
{{Edition|Bedrock}}:
{{Sound table
|type=bedrock
|sound=Item Frame break1.ogg
|sound2=Item Frame break2.ogg
|sound3=Item Frame break3.ogg
|source=block
|description=When a painting is broken or pops off
|id=block.itemframe.break
|volume=1.0
|pitch=1.0}}
{{Sound table
|sound=Item Frame add item1.ogg
|sound2=Item Frame add item2.ogg
|soumd3=Item Frame add item3.ogg
|sound4=Item Frame add item4.ogg
|source=block
|description=When a painting is placed
|id=block.itemframe.add_item
|volume=1.0
|pitch=1.0
|foot=1}}
== Data values ==
=== ID ===
{{edition|java}}:
{{ID table
|edition=java
|firstcolumnname=Item
|showforms=y
|generatetranslationkeys=y
|displayname=Painting
|spritetype=item
|nameid=painting
|form=item
|foot=1}}
{{ID table
|edition=java
|firstcolumnname=Entity
|generatetranslationkeys=y
|displayname=Painting
|spritetype=entity
|nameid=painting
|foot=1}}
{{edition|bedrock}}:
{{ID table
|edition=bedrock
|firstcolumnname=Item
|shownumericids=y
|showforms=y
|notshowbeitemforms=y
|generatetranslationkeys=y
|displayname=Painting
|spritetype=item
|nameid=painting
|id=357
|form=item
|foot=1}}
{{ID table
|edition=bedrock
|firstcolumnname=Entity
|shownumericids=y
|generatetranslationkeys=y
|displayname=Painting
|spritetype=entity
|nameid=painting
|id=83
|foot=1}}
=== Entity data ===
Paintings have entity data that defines various properties of the entity.
{{el|java}}:
{{main|Entity format}}
{{/ED}}
{{el|bedrock}}:
: See [[Bedrock Edition level format/Entity format]].
== Video ==
<div style="text-align:center">{{yt|M3vWDirTMek}}</div>
== History ==
{{History|java indev}}
{{History||20100223|[[File:Painting JE1 BE1.png|32px]] Added paintings.
|There are currently 19 canvases, which can be viewed at [[Java Edition history of textures/Paintings]].
|The [[crafting]] recipe of paintings uses eight [[planks]].
{{{!}} class{{=}}"collapsible collapsed"
! Recipe
{{!}}-
{{!}}
{{Crafting Table
|A1=Oak Planks
|B1=Oak Planks
|C1=Oak Planks
|A2=Oak Planks
|B2=Light Gray Wool
|C2=Oak Planks
|A3=Oak Planks
|B3=Oak Planks
|C3=Oak Planks
|Output=Painting
}}
{{!}}}
|Painting textures are currently stored on a [[texture atlas]] called <samp>[[kz.png]]</samp>.}}
{{History|java infdev}}
{{History||20100227-1|The [[crafting]] recipe has of paintings has been changed, so that it now uses [[stick]]s, rather than [[planks]].
{{{!}} class{{=}}"collapsible collapsed"
! Recipe
{{!}}-
{{!}}
{{Crafting Table
|A1=Stick
|B1=Stick
|C1=Stick
|A2=Stick
|B2=Light Gray Wool
|C2=Stick
|A3=Stick
|B3=Stick
|C3=Stick
|Output=Painting
}}
{{!}}}
}}
{{History|java alpha}}
{{History||v1.1.1|Added five more painting canvases, for a total of 24.
|The textures of two paintings have been changed.}}
{{History|java beta}}
{{History||1.2_01|Added a new painting, although it uses an untextured part of <samp>kz.png</samp> due to the painting texture not yet being implemented.}}
{{History||1.3|The texture of the new painting, has been added to the part of <samp>kz.png</samp> displayed by the new painting.}}
{{History||April 27, 2011|link=https://web.archive.org/web/20201111211000/https://notch.tumblr.com/post/4988431144/the-maps|Custom paintings are mentioned by [[Notch]].}}
{{History||1.7.3|Paintings pushed by [[piston]]s now pop off.}}
{{History|java}}
{{History||1.4.2|snap=12w36a|Added new painting canvas 'Wither'.
|Paintings can now be placed overlapping one another.}}
{{History||1.8|snap=14w10a|Paintings can no longer be placed directly inside of each other.}}
{{History||1.9|snap=15w49a|Paintings can no longer be destroyed by [[lightning]].}}
{{History|||snap=15w50a|Added [[sound]]s for placing and breaking paintings: <code>entity.painting.place</code> and <code>entity.painting.break</code>.}}
{{History||1.11|snap=16w32a|The [[entity]] ID for paintings has been changed from <code>Painting</code> to <code>painting</code>.}}
{{History||1.12|snap=17w06a|Paintings now have a more intuitive placement system. When placed, a painting always uses the maximum possible amount of available space.}}
{{History||1.13|snap=17w47a|Prior to [[1.13/Flattening|''The Flattening'']], this [[item]]'s numeral ID was 321.}}
{{History|||snap=18w02a|Paintings now use a [[resource location]] for their motive.}}
{{History||1.14|snap=18w43a|[[File:Painting JE2 BE2.png|32px]] The [[item]] texture of paintings has been changed.}}
{{History|||snap=19w07a|Paintings are now stored as individual image files instead of parts of a single large image file, and now support animations.}}
{{History|||snap=19w11a|Shepherd [[villager]]s now [[trading|sell]] paintings.}}
{{History||1.17|snap=21w11a|The painting back texture has been updated to be in line with the texture update.}}
{{History||1.19|snap=22w16a|Added the four unused paintings from Bedrock Edition: "Earth", "Wind", "Fire", and "Water".|These paintings can only be added through a [[data pack]], or with the {{cmd|summon}} command.}}
{{History||1.19.4|snap=23w06a|Added [[painting]] variants to "Functional Blocks" tab.|Paintings with pre-defined variant will now display author, title and size in description when hovered over.|The "Operator Utilities" tab now contains the four paintings that are not available in Survival mode.}}
{{History||1.21|snap=TBA|Added 5 new paintings, one 1x1, one 2x1, one 2x2, one 3x2 and one 4x4}}
}
{{History|pocket alpha}}
{{History||v0.5.0|[[File:Painting JE1 BE1.png|32px]] Added paintings.
|There are currently 25 canvases, which can be viewed at [[Bedrock Edition history of textures/Paintings]].}}
{{History||v0.8.0|snap=build 3|A new painting rendering has been added.{{info needed|What exactly changed?}}}}
{{History||v0.12.1|snap=build 1|Paintings are no longer available from the [[nether reactor]].}}
{{History||v0.15.0|snap=build 1|Paintings now have [[sound]]s when placed and broken.}}
{{History|pocket}}
{{History||1.0.7|Added new painting canvas 'Wither'.}}
{{History|bedrock}}
{{History||1.10.0|snap=beta 1.10.0.3|[[File:Painting JE2 BE2.png|32px]] The [[item]] texture of paintings has been changed.}}
{{History||1.11.0|snap=beta 1.11.0.4|Paintings can now be [[trading|bought]] from shepherd [[villager]]s.}}
{{History||1.17.0|snap=beta 1.17.0.50|The painting back texture has been updated to be in line with the texture update.}}
{{History|console}}
{{History||xbox=TU1|xbone=CU1|ps=1.0|wiiu=Patch 1|switch=1.0.1|[[File:Painting JE1 BE1.png|32px]] Added paintings.
|There are currently 25 canvases, which can be viewed at [[Legacy Console Edition history of textures/Paintings]].}}
{{History||xbox=TU11|The limit for paintings in a world has been increased.
|A message is now displayed when the maximum paintings are reached.}}
{{History||xbox=TU14|ps=1.04|Added new painting canvas 'Wither'.}}
{{History||xbox=TU43|xbone=CU33|ps=1.36|wiiu=Patch 13|Added [[sound]]s for paintings.}}
{{History||xbox=none|xbone=none|ps=1.90|wiiu=none|switch=none|[[File:Painting JE2 BE2.png|32px]] The [[item]] texture of paintings has been changed.}}
{{History|3ds}}
{{History||0.1.0|[[File:Painting JE1 BE1.png|32px]] Added paintings.
|There are currently 25 canvases, which can be viewed at [[New Nintendo 3DS Edition history of textures/Paintings]].}}
{{History|foot}}
== Issues ==
{{issue list}}
== Trivia ==
* On April 26, 2011, Notch stated that the automapping code can be used to share custom paintings and books in the future.<ref>{{tweet|notch|62970142207913984|The auto mapping code can be used to share custom paintings and books in the future. There's a hard cap on 65536 of each/world, though|April 26, 2011}}</ref>
* The texture on the back of a painting is the same as the wooden planks texture, but with a yellowish color similar to that of [[chests]] (but slightly darker).
* The "Skull on Fire" painting contains a Minecraft world in the background, which is based on a screenshot taken by the artist in [[Java Edition Alpha v1.1.2 01|Alpha 1.1.2_01]] (or earlier) on October 12, 2010, at 13:22:49 (UTC+2).<ref>{{cite|url=https://web.archive.org/web/20220928041338/https://imgur.com/HVhrbnH|title=The original (never publicly shared before) screenshot that Kristoffer Zetterstrand took and based his painting on.|website=Imgur}}</ref>
**The seeds for this world are -1044887956651363087 and -6984854390176336655 (both are the same), standing at X=-249.65, Y=91, Z=-29.04.<ref>https://pastebin.com/fzAY9ES4</ref><ref>https://www.reddit.com/r/Minecraft/comments/iqg3ey/the_original_screenshot_seed_of_the_minecraft/</ref>
* The "Skull on Fire" painting's texture was added in [[Java Edition Beta 1.3|Beta 1.3]]. However, the code for paintings to randomly display the part of the [[Kz.png]] texture that was to be occupied by the Burning Skull painting was added earlier, in [[Java Edition Beta 1.2_01|Beta 1.2_01]]. As there was nothing on this part of the texture except for a purple background grid, this is what would be displayed if the painting was randomly chosen, until the Burning Skull painting texture was actually added.
* The original "Skull on Fire" painting was given to the winner of an official texture pack competition by Mojang.<ref>https://web.archive.org/web/20110110003612/http://www.webhallen.com:80/minecraft/</ref>
== Gallery ==
<gallery>
File:Notch Painting Screenshot.png|The first image of paintings released by [[Notch]].
File:Skull on Fire world.jpg|The original screenshot behind the "Skull on Fire" painting.
File:Burning Skull Render.jpg|A render of the "Skull on Fire" painting that [[Kristoffer Zetterstrand]] used as a reference image.
File:Skull on Fire IRL.jpg|The original "Skull on Fire" painting being painted.
File:Burning Skull JE1.png|The "Skull on Fire" painting as it appeared between versions [[Java Edition Beta 1.2_01|Beta 1.2_01]] and [[Java Edition Beta 1.2_02|Beta 1.2_02]], prior to its texture being added in [[Java Edition Beta 1.3|Beta 1.3]].
</gallery>
=== Renders ===
<gallery>
Alban.png | Albanian
Aztec.png | de_aztec
Aztec2.png | de_aztec
Bomb.png | Target Successfully Bombed
Kebab.png | Kebab med tre pepperoni
Plant.png | Paradisträd
Wasteland.png | Wasteland
Courbet.png | Bonjour Monsieur Courbet
Creebet.png | Creebet
Pool.png | The Pool
Sea.png | Seaside
Sunset.png | sunset_dense
Graham.png | Graham
Wanderer.png | Wanderer
Bust.png | Bust
Match.png | Match
Skull and Roses.png | Skull and Roses
Stage.png | The Stage Is Set
Void.png | The void
Wither (painting).png | Wither
Fighters.png | Fighters
Donkey Kong.png | Kong
Skeleton (painting).png | Mortal Coil
Burning Skull.png | Skull On Fire
Pigscene.png | Pigscene
Pointer.png | Pointer
Earth BE2.png | Earth
Fire BE2.png | Fire
Water BE2.png | Water
Wind BE2.png | Wind
</gallery>
== See also ==
* [[Item Frame]]
* [[Bedrock Edition unused features#Paintings|Unused paintings]]
* [[Kz.png]]
* [[Kristoffer Zetterstrand]]
== References ==
{{reflist}}
== External links ==
*[https://www.minecraft.net/en-us/article/taking-inventory-painting Taking Inventory: Painting] – Minecraft.net on January 18, 2019
{{items}}
{{entities}}
[[cs:Obraz]]
[[de:Gemälde]]
[[es:Cuadro]]
[[fr:Tableau]]
[[hu:Festmény]]
[[it:Quadro]]
[[ja:絵画]]
[[ko:그림]]
[[nl:Schilderij]]
[[pl:Obraz]]
[[pt:Quadro]]
[[ru:Картина]]
[[th:ภาพวาด]]
[[uk:Картина]]
[[zh:画]]</li></ul> | alpha 0.17.0.1 | ||||||||||||||||||||||||||||||||||
| alpha 1.0.0.2 | The Ender dragon now goes to the nearest end crystal. | ||||||||||||||||||||||||||||||||||
| ? | Dragon fireballs no longer make a glass sound on impact. | ||||||||||||||||||||||||||||||||||
1.1.0{{Extension DPL}}<ul><li>[[Brown Dye|Brown Dye]]<br/>{{Item
| image = Brown Dye.png
| renewable = Yes
| stackable = Yes (64)
}}
'''Brown dye''' is a [[Dye#Primary|primary color dye]] derived from [[cocoa beans]].
== Obtaining ==
=== Crafting ===
{{Crafting
|Cocoa Beans
|Output=Brown Dye
|type=Material
|head=
}}
== Usage ==
{{dye usage}}
=== Crafting ingredient ===
{{crafting usage|ignore=Banner|continue=1}}
{{banner crafting usage}}
=== Loom ingredient ===
{{Banner loom usage|Brown Dye}}
=== Trading ===
Apprentice-level Shepherd villagers have a 20% chance to buy 12 brown dye for an emerald.{{only|bedrock}}
Expert-level Shepherd villagers have a {{frac|2|7}} chance to buy 12 brown dye for an emerald.{{only|java}}
== Data values ==
=== ID ===
{{edition|java}}:
{{ID table
|edition=java
|showforms=y
|generatetranslationkeys=y
|displayname=Brown Dye
|spritetype=item
|nameid=brown_dye
|form=item
|foot=1}}
{{edition|bedrock}}:
{{ID table
|edition=bedrock
|showaliasids=y
|shownumericids=y
|showforms=y
|notshowbeitemforms=y
|generatetranslationkeys=y
|displayname=Brown Dye
|spritetype=item
|nameid=brown_dye
|aliasid=dye / 17
|id=398
|form=item
|translationkey=item.dye.brown_new.name
|foot=1}}
== History ==
{{expand section|Item textures and more from a development video on twitter by bartek.}}
{{History|java}}
{{History||1.14|snap=18w43a|[[File:Brown Dye JE1 BE1.png|32px]] Added brown dye.}}
{{History|||snap=18w44a|Brown dye now can change the text color on [[sign]]s to brown.}}
{{History|||snap=19w05a|Added the [[wandering trader]], which sell brown dyes.}}
{{History|||snap=19w11a|Brown dye can now be [[trading|bought]] by shepherd villagers.}}
{{History||1.17|snap=20w45a|Brown dye can now used to craft newly added [[brown candle]]s.}}
{{History|||snap=21w19a|Brown dye can no longer used to craft brown candles.}}
{{History|||snap=Pre-release 1|Brown dye can once again used to craft brown candles.}}
{{History||1.20<br>(Experimental)|link=1.19.3|snap=22w42a|Brown dye now can change the text color on [[hanging sign]]s to brown.}}
{{History|bedrock}}
{{History||1.8.0|snap=beta 1.8.0.10|[[File:Brown Dye JE1 BE1.png|32px]] Added brown dye.}}
{{History||1.11.0|snap=beta 1.11.0.4|Brown dye can now be [[trading|sold]] to shepherd [[villager]]s.}}
{{History||1.16.100|snap=beta 1.16.100.56|The ID of brown dye has been changed from <code>dye/17</code> to <code>brown_dye</code>.}}
{{History|ps4}}
{{History||1.83|[[File:Brown Dye JE1 BE1.png|32px]] Added brown dye.}}
{{History|foot}}
== Issues ==
{{issue list}}
{{Items}}
[[Category:Dyes]]
[[Category:Renewable resources]]
[[de:Brauner Farbstoff]]
[[es:Tinte marrón]]
[[fr:Teinture marron]]
[[ja:茶色の染料]]
[[ko:갈색 염료]]
[[pl:Brązowy barwnik]]
[[pt:Corante marrom]]
[[th:สีย้อมสีน้ำตาล]]
[[zh:棕色染料]]</li><li>[[:Category:Combat|Category:Combat]]<br/>[[Category:Items]]
[[fr:Catégorie:Combat]]
[[zh:Category:武器]]</li></ul> | alpha 1.1.0.0 | The entity ID of the Ender dragon has been changed from dragon to ender_dragon. | |||||||||||||||||||||||||||||||||
| Bedrock Edition | |||||||||||||||||||||||||||||||||||
1.10.0{{Extension DPL}}<ul><li>[[Baked Potato|Baked Potato]]<br/>{{Item
| title = Baked Potato
| renewable = Yes
| heals = {{hunger|5}}
| stackable = Yes (64)}}
A '''baked potato''' is a [[food]] [[item]] that can be eaten by the [[player]].
== Obtaining ==
Baked potatoes can be obtained by cooking [[potato]]es in a [[furnace]], [[smoker]], or [[campfire]].
{{Smelting
|Potato
|Baked Potato
|0,35
}}
{{IN|JE}}, baked potatoes can also be obtained by killing a zombie or one of its variants while it is on fire. The drop chance is still affected by [[Looting]].
=== Chest loot ===
{{LootChestItem|baked-potato}}
== Usage ==
To eat a baked potato, press and hold {{control|use}} while it is selected in the [[hotbar]]. Eating one restores {{hunger|5}} hunger and 6.0 hunger [[Hunger#Mechanics|saturation]].
=== Crafting ingredient ===
{{crafting usage}}
=== Composting ===
Placing a baked potato into a [[composter]] has an 85% chance of raising the compost level by 1. This is more efficient than composting with raw potatoes.
== Sounds ==
{{Sound table/Entity/Food}}
== Data values ==
=== ID ===
{{edition|java}}:
{{ID table
|edition=java
|showforms=y
|generatetranslationkeys=y
|displayname=Baked Potato
|spritetype=item
|nameid=baked_potato
|form=item
|foot=1}}
{{edition|bedrock}}:
{{ID table
|edition=bedrock
|shownumericids=y
|showforms=y
|notshowbeitemforms=y
|generatetranslationkeys=y
|displayname=Baked Potato
|spritetype=item
|nameid=baked_potato
|id=281
|form=item
|foot=1}}
== Advancements ==
{{load advancements|Husbandry;A Balanced Diet}}
== History ==
{{History|java}}
{{History||1.4.2|snap=12w34a|[[File:Baked Potato JE1.png|32px]] Added baked potatoes.}}
{{History|||snap=12w37a|[[File:Baked Potato JE2 BE1.png|32px]] The texture of baked potatoes has been slightly changed.}}
{{History||1.8|snap=14w02a|Baked potatoes now restore {{Hunger|5}} hunger points instead of 6.}}
{{History|||snap=14w27a|Baked potatoes are now used to craft [[rabbit stew]].}}
{{History||1.13|snap=17w47a|Prior to [[1.13/Flattening|''The Flattening'']], this [[item]]'s numeral ID was 393.}}
{{History||1.14|snap=18w43a|[[File:Baked Potato JE3.png|32px]] The texture of baked potatoes has been changed.}}
{{History|||snap=18w50a|[[File:Baked Potato JE4 BE2.png|32px]] The texture of baked potatoes has been changed, once again.}}
{{History|||snap=19w03a|Placing a baked potato into the new [[composter]] has an 80% chance of raising the compost level by 1.}}
{{History|||snap=19w05a|Baked potatoes now have an 85% chance of increasing the compost level in a composter by 1.}}
{{History||1.17|snap=21w13a|Baked potatoes can now be dropped by flaming [[zombie]]s.<ref>{{bug|MC-199065}}</ref>}}
{{History||1.19|snap=22w13a|Baked potatoes can now be found in [[ancient city]] ice box [[chest]]s.}}
{{History|upcoming java}}
{{History||Villager Trade Rebalance<br>(Experimental)|link=Java Edition 1.20.2|snap=23w31a|[[Wandering trader]]s now have a chance to [[trading|buy]] baked potatoes from the player.}}
{{History|pocket alpha}}
{{History||v0.8.0|snap=build 1|[[File:Baked Potato JE2 BE1.png|32px]] Added baked potatoes.}}
{{History||v0.12.1|snap=build 1|Baked potatoes now restore [[hunger]] instead of [[health]].}}
{{History||v0.13.0|snap=build 1|Baked potatoes are now used to craft [[rabbit stew]].}}
{{History|bedrock}}
{{History||1.10.0|snap=beta 1.10.0.3|[[File:Baked Potato JE4 BE2.png|32px]] The texture of baked potatoes has been changed.}}
{{History||1.11.0|snap=beta 1.11.0.1|Baked potatoes can now be used to fill up [[composter]]s.}}
{{History|console}}
{{History||xbox=TU14|xbone=CU1|ps=1.04|wiiu=Patch 1|switch=1.0.1|[[File:Baked Potato JE2 BE1.png|32px]] Added baked potatoes.}}
{{History||ps=1.00|[[File:Baked Potato JE2 BE1.png|32px]] Added baked potatoes to the [[PlayStation 4 Edition|PS4]] and [[PlayStation Vita Edition|PSVita]].}}
{{History||xbox=none|xbone=none|ps=1.90|wiiu=none|switch=none|[[File:Baked Potato JE4 BE2.png|32px]] The texture of baked potatoes has been changed.}}
{{History|new3DS}}
{{History||0.1.0|[[File:Baked Potato JE2 BE1.png|32px]] Added baked potatoes.}}
{{History|foot}}
== Issues ==
{{issue list}}
== See also ==
* {{ItemLink|Poisonous Potato}}
{{Items}}
[[Category:Food]]
[[Category:Renewable resources]]
[[cs:Pečená brambora]]
[[de:Ofenkartoffel]]
[[es:Patata cocida]]
[[fr:Pomme de terre cuite]]
[[hu:Sült burgonya]]
[[it:Patata al forno]]
[[ja:ベイクドポテト]]
[[ko:구운 감자]]
[[nl:Gebakken aardappel]]
[[pl:Pieczony ziemniak]]
[[pt:Batata assada]]
[[ru:Печёный картофель]]
[[th:มันฝรั่งอบ]]
[[zh:烤马铃薯]]</li><li>[[Lapis Lazuli|Lapis Lazuli]]<br/>{{Item
| image = Lapis Lazuli.png
|type=
| renewable = Yes
| stackable = Yes (64)
}}
{{About|the item|the ore|Lapis Lazuli Ore|the mineral block|Lapis Lazuli Block}}
'''Lapis lazuli''' is a mineral required to [[Enchanting|enchant]] items in an [[Enchanting Table|enchanting table]].
== Obtaining ==
=== Mining ===
When mined with a stone [[pickaxe]] or better, [[lapis lazuli ore]] drops 4–9 lapis lazuli. With the [[Fortune]] III enchantment, a single block has a chance of dropping up to 36 items.
=== Crafting ===
{{Crafting
|Block of Lapis Lazuli
|Output=Lapis Lazuli,9
|type=Material
}}
=== Smelting ===
{{Smelting
|showname=1
|Lapis Lazuli Ore; Deepslate Lapis Lazuli Ore
|Lapis Lazuli
|0.2
}}
=== Villager gifts ===
{{IN|java}}, cleric [[villager]]s give [[player]]s lapis lazuli if they have the [[Hero of the Village]] effect.
=== Trading ===
Apprentice-level cleric villagers sell one lapis lazuli for an [[emerald]] as part of their trades.
{{IN|bedrock}}, [[wandering trader]]s may sell 3 lapis lazuli for an emerald.
=== Chest loot ===
{{see also|Lapis Lazuli Ore#Natural generation}}
{{LootChestItem|lapis-lazuli}}
== Usage ==
=== Enchanting ===
1–3 pieces of lapis lazuli are required to use an [[Enchanting Table|enchanting table]] to enchant an [[items|item]]. More specifically, the enchanting table UI shows 3 options (see [[Enchanting mechanics]] for details): the first, second, and third options cost 1, 2, and 3 lapis lazuli, respectively.
=== Crafting ingredient ===
Lapis lazuli can be used to make [[blocks of lapis lazuli]] and [[blue dye]]. {{IN|bedrock}}, it can also be used directly as a substitute for blue dye.
{{crafting usage}}
{{IN|bedrock}}, lapis lazuli can be also used in banner patterns:
{{banner crafting usage}}
=== Loom ingredient ===
{{Banner loom usage|Lapis Lazuli}}
=== Dye ===
{{Dye usage}}
=== Smithing ingredient ===
{{Smithing
|head=1
|ingredients=Any Armor Trim +<br/>Any Armor Piece + <br/>Lapis Lazuli
|Any Armor Trim Smithing Template
|Netherite Chestplate
|Lapis Lazuli
|Lapis Trim Netherite Chestplate
|showdescription=1
|description = All armor types can be used in this recipe,<br/>a netherite chestplate is shown as an example.<br/>
|tail=1
}}
;Trim color palette
The following color palette is shown on the designs on trimmed armor:
*{{TrimPalette|lapis lazuli}}
== Data values ==
=== ID ===
{{edition|java}}:
{{ID table
|edition=java
|showforms=y
|generatetranslationkeys=y
|displayname=Lapis Lazuli
|spritetype=item
|nameid=lapis_lazuli
|form=item
|foot=1}}
{{edition|bedrock}}:
{{ID table
|edition=bedrock
|showaliasids=y
|shownumericids=y
|showforms=y
|notshowbeitemforms=y
|generatetranslationkeys=y
|displayname=Lapis Lazuli
|spritetype=item
|nameid=lapis_lazuli
|aliasid=dye / 4
|id=414
|form=item
|translationkey=item.dye.blue.name
|foot=1}}
== Advancements ==
{{load advancements|Enchanter}}
== History ==
{{History|java beta}}
{{History||1.2|[[File:Lapis Lazuli JE1 BE1.png|32px]] Added lapis lazuli.}}
{{History||1.2_02|[[Lapis lazuli ore]] can now be found at [[bedrock]] level and now drops 4–8 lapis lazuli per block mined (increased from 1) on [[singleplayer]] only. However, servers have not been affected yet.}}
{{History||1.8|snap=Pre-release|Lapis lazuli can now be found in [[mineshaft]] [[chest]]s.}}
{{History|java}}
{{History||1.4.2|snap=12w34a|Lapis lazuli can now be used to [[Armor#Dyeing|dye]] leather [[armor]] and [[wolf]] collars.}}
{{History||1.4.6|snap=12w49a|Lapis lazuli can now be [[crafting|crafted]] with [[gunpowder]] to create a [[firework star]].}}
{{History||1.6.1|snap=13w19a|Lapis lazuli can now be used to craft blue [[stained clay]].}}
{{History||1.7.2|snap=13w41a|Lapis lazuli can now be used to craft blue [[stained glass]].}}
{{History||1.8|snap=14w02a|[[Enchanting]] now requires lapis lazuli. Different enchantments require different amounts of levels and different amounts of levels now require different amounts of lapis lazuli (between 1-3).
|Cleric [[villager]]s now [[trading|sell]] 1–2 lapis lazuli for 1 [[emerald]], making it a [[renewable resource]].}}
{{History|||snap=14w30a|Lapis lazuli can now be used to dye [[banner]]s.}}
{{History||1.9|snap=15w44a|The average yield of lapis lazuli in [[mineshaft]] [[chest]]s has been decreased.}}{{History||1.11|snap=16w39a|Added the ability to dye [[shulker box]]es.}}
{{History||1.12|snap=17w06a|Can now be used to craft blue [[concrete powder]].}}
{{History|||snap=17w15a|Added the ability to dye [[bed]]s.}}
{{History||1.13|snap=17w47a|The different data values for the <code>dye</code> ID have been split up into their own IDs.
|Prior to [[1.13/Flattening|''The Flattening'']], this [[item]]'s numeral ID was 351.}}
{{History|||snap=18w11a|Lapis lazuli now generates in [[shipwreck]] [[chest]]s.}}
{{History||1.14|snap=18w43a|Lapis lazuli can now be used to craft [[blue dye]].
|Lapis lazuli can no longer be used as a [[dye]].
|All of the dye-related functions and crafting recipes of lapis lazuli (except lapis lazuli blocks) have been transferred to blue dye.
|[[File:Lapis Lazuli JE2 BE2.png|32px]] The texture of lapis lazuli has been changed.}}
{{History|||snap=18w50a|Lapis lazuli can now be found in chests in [[village]] temples.}}
{{History|||snap=19w13a|Cleric villagers now give lapis lazuli to players under the [[Hero of the Village]] effect.}}
{{History||1.17|snap=21w08a|Lapis lazuli can now drop and be smelted from [[deepslate lapis lazuli ore]].}}
{{History||1.20<br>(Experimental)|link=1.19.4|snap=23w04a|Lapis lazuli can now be used as an armor trim material.}}
{{History|pocket alpha}}
{{History||v0.3.0|[[File:Lapis Lazuli JE1 BE1.png|32px]] Added lapis lazuli.}}
{{History||v0.3.2|Lapis lazuli can now be crafted into lapis lazuli blocks, and vice versa.}}
{{History||v0.12.1|snap=build 1|Lapis lazuli is now required for [[enchanting]].}}
{{History||v0.14.0|snap=build 1|Lapis lazuli can now be found inside [[minecart with chest]]s in [[mineshaft]]s.
|Lapis lazuli can now be used to dye [[water]] in [[cauldron]]s.}}
{{History|pocket}}
{{History||1.0.4|snap=alpha 1.0.4.0|Cleric [[villager]]s now [[trading|sell]] 1–2 lapis lazuli for 1 [[emerald]].
|Lapis lazuli can now be used to [[dyeing|dye]] [[shulker shell]]s.}}
{{History||1.1.0|snap=alpha 1.1.0.0|Lapis lazuli can now be used to dye [[shulker box]]es and [[bed]]s.
|Lapis lazuli can now be used to [[crafting|craft]] blue [[concrete powder]].}}
{{History|bedrock}}
{{History||1.2.0|snap=beta 1.2.0.2|Lapis lazuli can now be used to dye [[banner]]s, [[firework star]]s and [[glass]].}}
{{History||1.4.0|snap=beta 1.2.14.2|Lapis lazuli can now be found in [[shipwreck]] treasure chests.}}
{{History|||snap=beta 1.2.20.1|Lapis lazuli can now be used to craft [[balloon]]s and [[glow stick]]s.}}
{{History||1.8.0|snap=beta 1.8.0.10|Lapis lazuli can now be used to craft [[blue dye]]s.}}
{{History||1.10.0|snap=beta 1.10.0.3|Lapis lazuli are now [[trading|sold]] by [[wandering trader]]s.
|[[File:Lapis Lazuli JE2 BE2.png|32px]] The texture of lapis lazuli has been changed.}}
{{History||1.11.0|snap=beta 1.11.0.1|Lapis lazuli can now be found in [[desert]] [[village]] temple [[chest]]s.}}
{{History|||snap=beta 1.11.0.4|Cleric [[villager]]s now [[trading|sell]] one lapis lazuli for one [[emerald]].}}
{{History||1.16.100|snap=beta 1.16.100.56|The ID of lapis lazuli has been changed from <code>dye/4</code> to <code>lapis_lazuli</code>.}}
{{History||1.17.0|snap=beta 1.16.230.52|Lapis lazuli can now drop and be smelted from [[deepslate lapis lazuli ore]].}}
{{History||1.19.80|snap=beta 1.19.80.21|Lapis lazuli can now be used as an armor trim material.}}
{{History|console}}
{{History||xbox=TU1|xbone=CU1|ps=1.0|wiiu=Patch 1|switch=1.0.1|[[File:Lapis Lazuli JE1 BE1.png|32px]] Added lapis lazuli.}}
{{History||xbox=TU31|xbone=CU19|ps=1.22|wiiu=Patch 3|switch=1.0.1|Lapis lazuli can now be used in [[enchanting]].}}
{{History|Ps4}}
{{History||1.90|[[File:Lapis Lazuli JE2 BE2.png|32px]] The texture of lapis lazuli has been changed.}}
{{History|foot}}
== Issues ==
{{issue list}}
== Trivia ==
* In real life, lapis lazuli is a blue gem that can be ground and processed into ultramarine pigment. Lapis lazuli pigment has been famously used in the production of illuminated manuscripts, stained glass, and cave paintings. [[Wikipedia:Lapis lazuli|See the Wikipedia article for more information]].
* Lapis lazuli is the only [[ore]] that can be used as a [[dye]]{{only|BE|short=1}} or making a dye.
* It is the only item that can be put in the second slot of an [[enchantment table]].
== References ==
{{reflist}}
{{Items}}
[[Category:Dyes]]
[[cs:Lazurit]]
[[de:Lapislazuli]]
[[es:Lapislázuli]]
[[fr:Lapis-lazuli]]
[[hu:Lazurit]]
[[ja:ラピスラズリ]]
[[ko:청금석]]
[[nl:Lapis lazuli]]
[[pl:Lazuryt]]
[[pt:Lápis-lazúli]]
[[ru:Лазурит]]
[[th:แร่แลพิสแลซูลี]]
[[uk:Лазурит]]
[[zh:青金石]]
[[Category:Renewable resources]]</li></ul> | beta 1.10.0.3 | ||||||||||||||||||||||||||||||||||
| Legacy Console Edition | |||||||||||||||||||||||||||||||||||
| TU9 | CU1 | 1.0 | Patch 1 | 1.0.1 | |||||||||||||||||||||||||||||||
| New Nintendo 3DS Edition | |||||||||||||||||||||||||||||||||||
1.7.10{{Extension DPL}}<ul><li>[[Saddle|Saddle]]<br/>{{about|normal saddles|the removed horse saddle|Horse Saddle}}
{{item
| image = <gallery>
Saddle (Pig).png | Pig
Saddle (Horse).png | Horse
Saddle (Strider).png | Strider
</gallery>
| invimage = Saddle
| renewable = Yes
| stackable = No
}}
A '''saddle''' is an [[item]] required to ride [[Pig|pigs]] and [[Strider|striders]] or control ridden [[camel]]s, [[Horse|horses]], [[Donkey|donkeys]] and [[Mule|mules]].
== Obtaining ==
=== Chest loot ===
{{LootChestItem|saddle}}
=== Fishing ===
Saddles can be obtained as a "treasure" item from [[fishing]] with a base chance (without fishing rod enchantments) of 0.8%.
=== Trading ===
Master-level [[Trading#Leatherworker|leatherworker]] [[villager]]s have a 50% chance to sell a saddle for 6 [[Emerald|emeralds]] as their trade.{{only|bedrock}} This trade is always offered in ''Java Edition''.
=== Mob loot ===
Any mob that the player equips with a saddle drops the saddle upon death.
A [[strider]] may spawn being ridden by a [[zombified piglin]], which causes it to spawn wearing a saddle. This saddle always drops when the strider is killed.
A [[ravager]] always spawns with a saddle and always drops the saddle upon death. Looting does not affect the drop.
== Usage ==
[[File:SaddledHorse.png|thumb|right|A [[horse]] equipped with a saddle.]]
While [[camel]]s, [[horse]]s, [[donkey]]s, [[mule]]s and [[Skeleton Horse|skeleton horse]]s{{Only|Java}} can always be ridden, a saddle is required to control them. These mobs (only after being tamed, in the case of equine mobs) can be equipped with a saddle by placing it in their inventory, which can be opened by pressing {{control|use}} while holding a saddle or {{control|sneaking}}. The saddle can be unequipped by removing it from {{SlotSprite|Saddle}} the specific inventory slot.
Saddles are required to ride [[Pig|pigs]] and [[Strider|striders]], but even with a saddle their movement cannot be controlled like other mobs. A [[Carrot on a Stick|carrot on a stick]] (for pigs) or a [[Warped Fungus on a Stick|warped fungus on a stick]] (for striders) is required to direct these mobs. {{control|Using}} a saddle on one of these mobs equips them with the saddle, and, since they have no inventory, there is no way to retrieve the saddle without killing the mob.
Animals can also be equipped with saddles by a [[dispenser]].
Although [[ravager]]s are equipped with saddles and sometimes ridden by other mobs, the [[player]] is unable to ride ravagers.
== Sounds ==
{{edition|java}}:
{{Sound table
|rowspan=4
|sound=Saddle equip.ogg
|source=neutral
|subtitle=Saddle equips
|description=When a saddle is equipped to a camel
|id=entity.camel.saddle
|translationkey=subtitles.entity.horse.saddle
|volume=0.5
|pitch=0.8
|distance=16}}
{{Sound table
|subtitle=MC-184399
|source=neutral
|description=When a saddle is equipped to a strider
|id=entity.strider.saddle
|translationkey=-
|volume=0.5
|pitch=1.0
|distance=16}}
{{Sound table
|subtitle=Saddle equips
|source=neutral
|description=When a saddle is equipped to a horse, donkey, mule, skeleton horse, or zombie horse
|id=entity.horse.saddle
|translationkey=subtitles.entity.horse.saddle
|volume=0.5
|pitch=1.0
|distance=16}}
{{Sound table
|subtitle=Saddle equips
|source=neutral
|description=When a saddle is equipped to a pig
|id=entity.pig.saddle
|translationkey=subtitles.entity.pig.saddle
|volume=0.5
|pitch=1.0
|distance=16
|foot=1}}
{{edition|bedrock}}:
{{Sound table
|type=bedrock
|rowspan=3
|sound=Saddle equip.ogg
|source=neutral
|description=When a saddle is equipped to a camel
|id=mob.horse.leather
|volume=1.0
|pitch=1.0}}
{{Sound table
|source=neutral
|description=When a saddle is equipped to a horse, mule, skeleton horse, or zombie horse
|id=mob.horse.leather
|volume=0.6
|pitch=1.0}}
{{Sound table
|source=neutral
|description=When a saddle is equipped to a donkey
|id=mob.horse.leather
|volume=0.5
|pitch=1.0
|foot=1}}
== Data values ==
=== ID ===
{{edition|java}}:
{{ID table
|edition=java
|showforms=y
|generatetranslationkeys=y
|displayname=Saddle
|spritetype=item
|nameid=saddle
|form=item
|foot=1}}
{{edition|bedrock}}:
{{ID table
|edition=bedrock
|shownumericids=y
|showforms=y
|notshowbeitemforms=y
|generatetranslationkeys=y
|displayname=Saddle
|spritetype=item
|nameid=saddle
|id=371
|form=item
|foot=1}}
== Achievements ==
{{load achievements|When Pigs Fly}}
== Advancements ==
{{load advancements|This Boat Has Legs}}
== History ==
{{needs render|type=old|isolated saddles in 1.13 dev|section=11}}
{{History|java infdev}}
{{History||20100625-2|[[File:Saddle (Pig) JE1 BE1.png|32px]] [[File:Saddle JE1 BE1.png|32px]] Added saddles.
|Saddles do not [[drops|drop]] from saddled [[pig]]s.
|Saddles can be found in the new [[dungeon]] [[chest]]s.}}
{{History|java}}
{{History||1.2.4|snap=release|When baby animals were introduced, baby [[pig]]s could be ridden just like adult pigs. After this version, baby pigs can no longer be saddled.}}
{{History||1.3.1|snap=12w21a|Saddles can now be [[trading|bought]] from butcher [[villager]]s for 6–7 [[emerald]]s each, and thus have become [[renewable resource|renewable]].}}
{{History||1.4.2|snap=12w36a|Saddles now [[drops|drop]] from killing saddled [[pig]]s.
|Added [[Carrot on a Stick|carrot on a stick]] to direct saddled pigs, effectively controlling them.}}
{{History|||snap=12w37a|Pigs can now jump when being ridden.}}
{{History||1.6.1|snap=13w18a|Regular saddles can now be used to ride [[horse]]s, while previously they required [[Horse Saddle|horse saddle]]s.
|Added saddles to the loot tables of [[mineshaft]] minecarts, [[stronghold]] altar chests, [[village]] blacksmith chests, as well as [[Desert pyramid|desert]] and [[jungle pyramid]]s.
|Added chests to [[Nether Fortress|nether fortresses]], where saddles can be found.}}
{{History||1.7.2|snap=13w36a|Saddles can now be [[fishing|fished]] with [[Fishing Rod|fishing rod]]s and are described as treasure.}}
{{History||1.8|snap=14w02a|[[Trading]] has been changed: leatherworker [[villager]]s now [[trading|sell]] saddles for 8–10 [[emerald]]s each, and butchers no longer [[trading|trade]] saddles.}}
{{History||1.9|snap=15w31a|Saddles can now be found in [[End City|end city]] [[chest]]s.}}
{{History|||snap=15w43a|The average yield of saddles in [[Nether Fortress|nether fortress]] chests has been slightly decreased.}}
{{History|||snap=15w44a|Saddles have been removed from [[mineshaft]] chests.
|The average yield of saddles in [[dungeon]] chests has been decreased.
|The average yield of saddles in [[desert pyramid|desert temple]] chests has been increased.}}
{{History||1.13|snap=17w45a|[[File:White Horse (Saddle) 17w45a.png|50px]] The models of the horse's saddle has been changed.}}
{{History|||snap=17w46a|[[File:White Horse (Saddle) 17w46a.png|50px]] The models of the horse's saddle has been changed once again.}}
{{History|||snap=17w47a|Prior to [[Java Edition 1.13/Flattening|''The Flattening'']], this [[item]]'s numeral ID was 329.}}
{{History|||snap=18w03a|[[File:White Horse (Saddle) 18w03a.png|50px]] The models of the horse's saddle has been changed once again.}}
{{History|||snap=pre2|[[File:White Horse (Saddle) 1.13pre2.png|50px]] The models of the horse's saddle has been changed once again. The reins bit has now been rendered. Also, the lines of the reins are no longer rendered except when riding.}}
{{History||1.14|snap=18w43a|Added [[ravager|illager beast]]s, which [[drops|drop]] saddles.
|[[File:Saddle (Pig) JE2 BE2.png|32px]] [[File:Saddle (Horse) JE2 BE2.png|32px]] <br>[[File:Saddle JE2 BE2.png|32px]] The textures of saddles have been changed.}}
{{History|||snap=18w48a|Saddles can now be found in [[chest]]s in [[village]] tanneries.}}
{{History|||snap=18w49a|Saddles can now be found in chests in [[savanna]] village houses.}}
{{History||1.16|snap=20w13a|[[File:Saddle (Strider) JE1 BE1.png|32px]] Added [[strider]]s, which can be ridden with saddles.}}
{{History|||snap=20w15a|Saddles placed in a [[dispenser]] can now saddle pigs, striders, and tamed horses, donkeys and mules.}}
{{History|||snap=20w16a|Saddles now generate in [[Bastion Remnant|bastion remnant]] chests.}}
{{History|||snap=20w17a|[[File:Saddle (Strider) JE2.png|32px]] The texture of the strider saddles has been changed. The front and back orientation of the saddle has been corrected.<ref>{{bug|MC-176116}}</ref>}}
{{History||1.19|snap=22w13a|Saddles may now be found in [[ancient city]] [[chest]]s.}}
{{History||1.20<br>(Experimental)|link=1.19.3|snap=22w42a|Saddles can be used to ride [[camel]]s with the use of a built-in experimental data pack.}}
{{History|pocket alpha}}
{{History||v0.7.0|[[File:Saddle JE1 BE1.png|32px]] Added saddles. They are currently unobtainable and have no practical usage since they cannot be equipped on any mobs.}}
{{History||v0.9.0|snap=build 1|Saddles can now be obtained from [[village]] blacksmith [[chest]]s.}}
{{History||v0.11.0|snap=build 1|Saddles can now be [[fishing|fished]] with [[fishing rod]]s and are described as treasure.}}
{{History||v0.12.1|snap=build 1|Saddles can now be found in [[nether fortress]]es.}}
{{History||v0.13.0|snap=build 1|Saddles can now be found in [[desert temple]]s.}}
{{History||v0.15.0|snap=build 1|[[File:Saddle (Pig) JE1 BE1.png|32px]] [[File:Saddle (Horse) JE1 BE1.png|32px]] Saddles can now be used for riding [[horse]]s and [[pig]]s.|Saddles can now be found inside [[jungle temple]]s.}}
{{History||snap=?||Added saddles to the [[Creative inventory]].{{info needed}}}}
{{History|pocket}}
{{History||1.0.0|snap=alpha 0.17.0.1|Saddles can now be found in [[end cities]].}}
{{History||1.0.4|snap=alpha 1.0.4.0|Saddles are now [[trading|sold]] by leatherworker [[villager]]s for 8-10 [[emerald]]s as their only third tiers [[trading|trades]].}}
{{History|bedrock}}
{{History||1.10.0|snap=beta 1.10.0.3|Saddles can now be found in [[plains]] [[village]] tannery and weaponsmith [[chest]]s.
|Added [[ravager]]s, which [[drops|drop]] a saddle upon death.
|[[File:Saddle (Pig) JE2 BE2.png|32px]] [[File:Saddle (Horse) JE2 BE2.png|32px]] <br>[[File:Saddle JE2 BE2.png|32px]] The textures of saddles have been changed.}}
{{History||1.11.0|snap=beta 1.11.0.1|Saddles can now be found in [[savanna]], [[snowy taiga]], [[taiga]] and [[snowy tundra]] village tannery [[chest]]s.
|Saddles can now be found in savanna, taiga, snowy taiga, and [[desert]] village weaponsmith chests.
|Saddles can now be found in savanna [[village]] house chests.}}
{{History|||snap=beta 1.11.0.4|[[Trading]] has been changed. Leatherworker [[villager]]s now have 50% chance to [[trading|sell]] saddles for 10 [[emerald]]s as part of their last tier [[trading|trade]].}}
{{History||1.12.0|snap=beta 1.12.0.3|The trading price of saddles has been lowered to 6 emeralds.}}
{{History||1.16.0|snap=beta 1.16.0.57|[[File:Saddle (Strider) JE1 BE1.png|32px]] Added [[strider]]s, which can be ridden with saddles.|Saddles now generate in [[Bastion Remnant|bastion remnant]] chests.}}
{{History||1.20.0<br>(Experimental)|link=Bedrock Edition 1.19.50|snap=beta 1.19.50.21|Saddles can now be used to ride [[camel]]s with the use of the "[[Bedrock Edition 1.20|Next Major Update]]" [[experimental]] toggle.}}
{{History|console}}
{{History||xbox=TU1|xbone=CU1|ps=1.0|wiiu=Patch 1|switch=1.0.1|[[File:Saddle (Pig) JE1 BE1.png|32px]] <br>[[File:Saddle JE1 BE1.png|32px]] Added saddles.}}
{{History||xbox=none|xbone=none|ps=1.90|wiiu=none|switch=none|[[File:Saddle (Pig) JE2 BE2.png|32px]] [[File:Saddle (Horse) JE2 BE2.png|32px]] <br>[[File:Saddle JE2 BE2.png|32px]] The textures of saddles have been changed.}}
{{History|3ds}}
{{History||0.1.0|[[File:Saddle (Pig) JE1 BE1.png|32px]] <br>[[File:Saddle JE1 BE1.png|32px]] Added saddles.}}
{{History|foot}}
== Issues ==
{{issue list}}
== Trivia ==
* A saddle is considered "armor" by the game, but the value of protection to the animal is zero.
* A saddle on a pig can still be seen if the pig is afflicted with [[Invisibility]].
* When riding a saddled mob, the hunger bar is replaced by hearts (representing the mounted mob's health) resembling the look of the saddle.
== Gallery ==
<gallery>
File:Pig saddle.png|A [[player]] riding a [[pig]] (before [[Java Edition Beta 1.8|Beta 1.8]]).
File:Horse saddle.png|A player riding a [[horse]].
File:13w21a-new-HorseUI-inventory.png|The horse interface implemented in [[Java Edition 13w21a|13w21a]] that allows for the removal of saddles, but only on horses, [[donkey]]s or [[mule]]s.
File:Saddled Mule (picture).png|Mule equipped with both a saddle and a [[chest]].
File:GodSpawner.png|A saddle found in a monster room chest, which coincidentally contains an [[enchanted golden apple]].
</gallery>
== See also ==
* [[Transportation]]
== References ==
{{reflist}}
{{items}}
[[cs:Sedlo]]
[[de:Sattel]]
[[es:Montura]]
[[fr:Selle]]
[[hu:Nyereg]]
[[it:Sella]]
[[ja:鞍]]
[[ko:안장]]
[[nl:Zadel]]
[[pl:Siodło]]
[[pt:Sela]]
[[ru:Седло]]
[[zh:鞍]]
[[Category:Renewable resources]]
[[uk:Сідло]]</li><li>[[Spyglass|Spyglass]]<br/>{{Item
| title = Spyglass
| image = Spyglass.png
| durability =
| rarity = Common
| renewable = Yes
| stackable = No
}}
A '''spyglass''' is a [[tool]] used to zoom in on distant objects.
== Obtaining ==
=== Crafting ===
{{Crafting
|B1=Amethyst Shard
|B2=Copper Ingot
|B3=Copper Ingot
|Output=Spyglass
|type=Tool
}}
== Usage ==
[[File:Steve scoping Spyglass.png|right|100px]] [[File:Alex scoping Spyglass.png|right|100px]]
To use a spyglass, the player selects it from the hotbar and clicks {{control|use}} while looking in the desired direction.
Spyglasses are used to zoom in on a specific location in the player's field of view (FOV). The spyglass changes the FOV to {{frac|1|10}} of the FOV set in [[options]]. By default, the FOV is set to 70° in ''Java Edition'' and 60° in Bedrock Edition, resulting in an FOV of 7° in ''Java Edition'' and 6° in Bedrock Edition through the spyglass. The player's FOV can be set from 30° to 110°, so the spyglass FOV can range from 3° to 11°. Regardless of the situation, or status effects the player has, using the Spyglass always shows a FOV {{frac|1|10}} of the FOV set in [[options]].
A square vignette is applied when in use, similar to the effect when wearing a [[carved pumpkin]]. Pressing {{key|F1}} removes the vignette,{{only|java}}<ref>{{bug|MC-203575||The spyglass overlay goes away when pressing F1|WAI}}</ref><ref>{{bug|MCPE-125869||Spyglass's overlay don't go away even if the player toggles Hide GUI on/ Pressing F1|}}</ref> similar to a carved pumpkin.
Hazy distant objects remain hazy when viewed in the spyglass. Mobs too distant to render also do not render in the spyglass. The spyglass shows a magnified view of what the player already sees.
The player is slowed down while watching through the spyglass. When the player uses the spyglass continuously for {{convert|1|minute|game tick}}, the interface is automatically closed.
If the player has a certain effect on their screen like [[fire]], the spyglass does not remove that effect on the player's screen.
[[File:Spyglass Zooming.gif|thumb|center|A spyglass being used to zoom in on a [[block of gold]] starting from normal FOV (70°).]]
== Sounds ==
{{edition|java}}:
{{Sound table
|sound=Spyglass use.ogg
|subtitle=Spyglass expands
|source=player
|description=When a player uses a spyglass
|id=item.spyglass.use
|translationkey=subtitles.item.spyglass.use
|volume=0.5
|pitch=''varies'' <ref group=sound>Can be 1.15, 1.33, 1.4, or 1.55</ref>
|distance=16}}
{{Sound table
|sound=Spyglass stop.ogg
|subtitle=Spyglass retracts
|source=player
|description=When a player stops using a spyglass
|id=item.spyglass.stop_using
|translationkey=subtitles.item.spyglass.stop_using
|volume=0.5
|pitch=''varies'' <ref group=sound>Can be 1.0, 0.8, or 0.9</ref>
|distance=16
|foot=1}}
{{edition|bedrock}}:
{{Sound table
|type=bedrock
|sound=Spyglass use.ogg
|source=player
|description=When a player uses a spyglass
|id=item.spyglass.use
|volume=0.5
|pitch=1.15-1.55}}
{{Sound table
|sound=Spyglass stop.ogg
|source=player
|description=When a player stops using a spyglass
|id=item.spyglass.stop_using
|volume=0.5
|pitch=0.8-1.0
|foot=1}}
== Data values ==
=== ID ===
{{edition|java}}:
{{ID table
|edition=java
|showforms=y
|generatetranslationkeys=y
|displayname=Spyglass
|spritetype=item
|nameid=spyglass
|form=item
|foot=1}}
{{edition|bedrock}}:
{{ID table
|edition=bedrock
|shownumericids=y
|showforms=y
|notshowbeitemforms=y
|generatetranslationkeys=y
|displayname=Spyglass
|spritetype=item
|nameid=spyglass
|form=item
|foot=1|id=626}}
== Advancements ==
{{load advancements|Is it a Bird?;Is it a Balloon?;Is it a Plane?}}
== History ==
{{History||October 3, 2020|link={{ytl|DBvZ2Iqmm3M|t=25m21s}}|[[File:Spyglass JE1.png|32px]]<!-- [[File:Spyglass scope (pre-release).png|32px]]--> Spyglasses are revealed at [[Minecraft Live 2020]]. They were originally named "telescopes" and had an oval vignette.}}
{{History|java}}
{{History||1.17|snap=20w45a|[[File:Spyglass JE1.png|32px]] Added spyglasses.
|[[File:Spyglass scope JE1.png|32px]] The scope texture is currently a circle with glare spots.}}
{{History|||snap=20w46a|[[File:Spyglass scope JE2.png|32px]] The scope texture is now a [[glass]] square with a [[copper]] border.}}
{{History|||snap=20w48a|[[File:Spyglass JE2 BE1.png|32px]] The spyglass is now a 3D model instead of a flat sprite.
|[[File:Spyglass (texture) JE2.png|32px]] The texture of the spyglass has changed.
|A spyglass in use is anchored better to the player's "eye" when viewed in 3rd person.}}
{{History|||snap=21w05a|Copper ingots are now renewable via [[drowned]], making spyglasses renewable.}}
{{History|||snap=21w10a|[[File:Spyglass (item) JE3 BE1.png|32px]] Spyglasses have a new texture in the inventory. The 3D model is still used in the hand, similar to [[tridents]].}}
{{History||1.17.1|snap=Pre-release 1|[[File:Spyglass (texture) JE3.png|32px]] The texture of the spyglass model has changed.}}
{{History|bedrock}}
{{History||1.17.0|snap=beta 1.17.0.50|[[File:Spyglass JE2 BE1.png|32px]] [[File:Spyglass (item) JE3 BE1.png|32px]] Added spyglasses.}}
{{History|||snap=beta 1.17.0.52|Spyglasses are now available without enabling [[experimental gameplay]].}}
{{History|foot}}
== Issues ==
{{Issue list}}
== Trivia ==
*If {{command|item replace}} is used to place a spyglass on a player's head, the item appears stuck to the center of the player's face.
== Gallery ==
<gallery>
Villager Spyglass.png|Spying on [[villager]]s through a spyglass.
After using the spyglass at FOV 30 F1.png|Hiding the HUD removes the spyglass overlay.
Panda eating a spyglass.png|When eaten by a [[panda]], spyglasses cause [[missing texture]] particles to be produced.<ref>{{bug|MC-206684}}</ref>
JE 1.17 Development Telescope.jpg|The spyglass was originally called the telescope.
JE 1.17 Development Telescope 2.jpg|The telescope's overlay was originally round instead of square.
File:Ari Spyglass.jpg|How the spyglass looks in the third person.
Steve scoping Spyglass JE1.png|Steve using a spyglass before its 3D model was added.
Alex scoping Spyglass JE1.png|Alex using a spyglass before its 3D model was added.
File:Mangrove Portal.jpg|An [[allay]] peeking into view of [[Noor]]’s spyglass.
</gallery>
== References ==
{{Reflist}}
== External Links ==
*[https://www.minecraft.net/en-us/article/taking-inventory--spyglass Taking Inventory: Spyglass] – Minecraft.net on February 17, 2022
{{Items}}
[[Category:Renewable resources]]
[[de:Fernrohr]]
[[es:Catalejo]]
[[fr:Longue-vue]]
[[it:Cannocchiale]]
[[ja:望遠鏡]]
[[pl:Luneta]]
[[pt:Luneta]]
[[ru:Подзорная труба]]
[[zh:望远镜]]</li></ul> | |||||||||||||||||||||||||||||||||||
Issues
Issues relating to "Ender Dragon" are maintained on the bug tracker. Report issues there.
Trivia
- Health depletion effect of The Void does not affect Ender dragons.
- If low enough on health, the Ender dragon emits beams of light without dying, as if she cracked.
- Name tags cannot be used on an Ender dragon.
- The Ender dragon's hitbox is larger than the Ender dragon herself, causing players to be pushed away from her.
- If the player kills a summoned dragon in the Overworld or Nether, she does not create a portal, nor an egg.
- In Spectator mode, the player cannot view the perspective of the Ender dragon, unlike any other mob.
- However, it is possible through the use of commands (like /spectate). When this happens, the player's camera appears about 1 block over the dragon's body.
- Using F3+B to show hitboxes reveals that the Ender dragon's head rotation faces in the opposite direction to where her real head faces. This is also why the Ender dragon faces the wrong way when set in a monster spawner.
- When an Ender dragon is spawned in the Overworld, she flies to coordinates x=0 and z=0 and dives at the ground or does the same behavior as if in the End. If End crystals are placed in the Overworld, they heal the dragon as normal, but she does not perch anywhere, and continues to fly around forever.
- In Bedrock Edition, there is an unused texture file for a dragon fireball item.
- In Super Smash Bros. Ultimate, one of the spirits that comes with the Steve/Alex DLC is the Ender dragon. She appears as a Legend-class "spirit" that makes the user breathe fire for a long time at the start of each battle.
- If commands or creative mode are used to get end portal frames and eyes of ender, a player can basically skip to the end poem.
- If a player destroys ender crystals or even hurts the dragon and then uses a player-made portal, upon returning, the player retains their progress.[BE only]
- On Reddit, Notch referred to the Ender dragon as a she and suggested her name to be "Jean?" in the same manner he called the Player "Steve?".[5]
- Dinnerbone later stated that he thinks the name is officially "Jean?"[6]
- The Xbox avatar item 'Ender Dragon Pet' has the description 'A cuter, friendlier version of his bigger, less playful Minecraft sister.'- confirming that the Ender dragon is female.
- Before she was textured, Notch reported that he was afraid to texture the Ender dragon as she was a complicated model.[7] In the end, the dragon model was so complex Notch stated that he gave up making the texture manually and wrote a texture packer tool to aid him in adding the texture to the model. Notch also uploaded the code for the tool so others could use the pack.[8][9]
- Notch joked about how Minecraft was "going next-gen" when deadmau5 mentioned this.[10]
- Notch has uploaded a video showing why Ender dragons do not spawn in the main world, as they would destroy any block they touch.[11]
- On Reddit, Notch explained that Ender dragons destroy Overworld matter because "trying to make an AI to properly navigate arbitrary terrain before the code freeze next tuesday isn't feasible"[12]
Gallery
Development screenshots

The first screenshot of the Ender dragon.
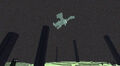
The same screenshot, only brighter.
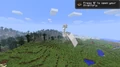
The Ender dragon before being textured.
The Ender dragon before being textured.
The Ender dragon before being textured.
The Ender dragon before being textured.
The Ender dragon before being textured.
The first Ender dragon texture.
The Ender dragon with its first texture.
The Ender dragon's texture taking shape.
The Ender dragon with its first semi-complete texture.
The Ender dragon's texture at this stage.
The Ender dragon with wings more closely resembling their modern form.
The Ender dragon's texture at this stage.
The Ender dragon's head and neck were lowered to make it look more "evil".
The Ender dragon flying over the Overworld.
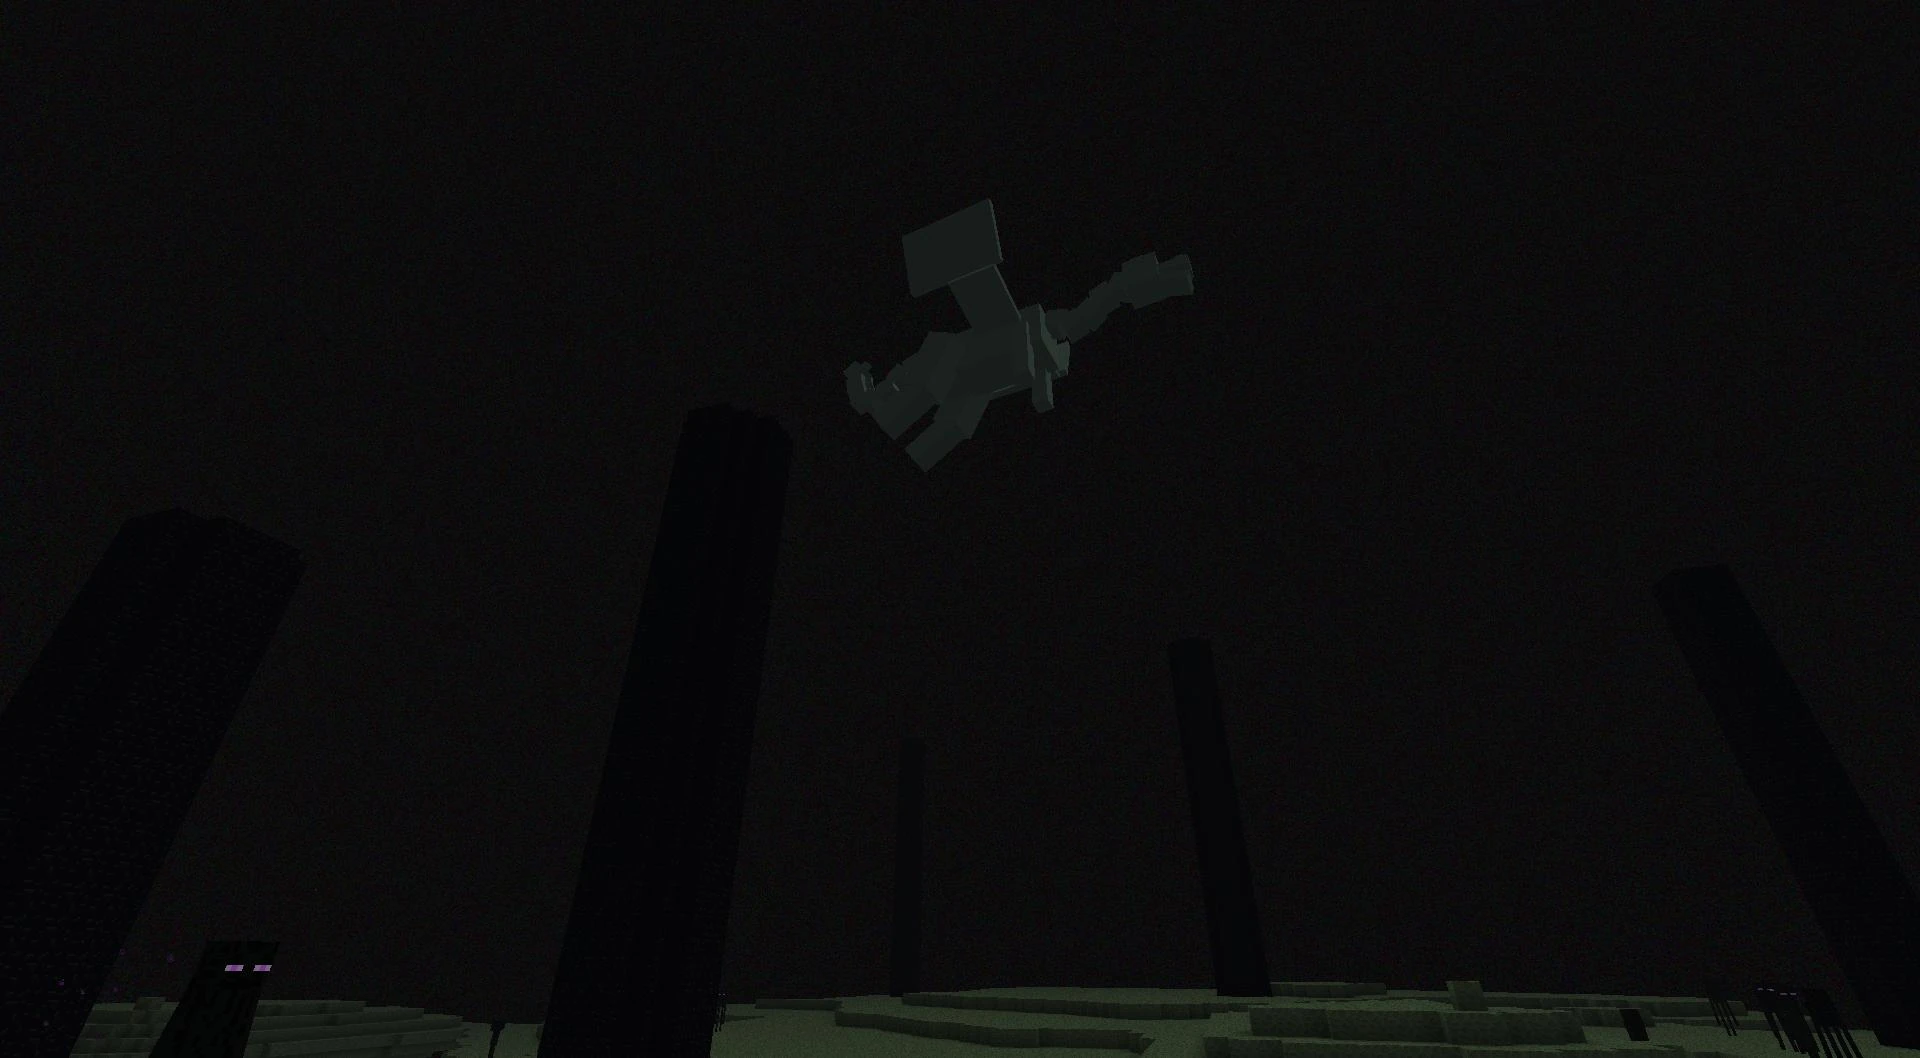
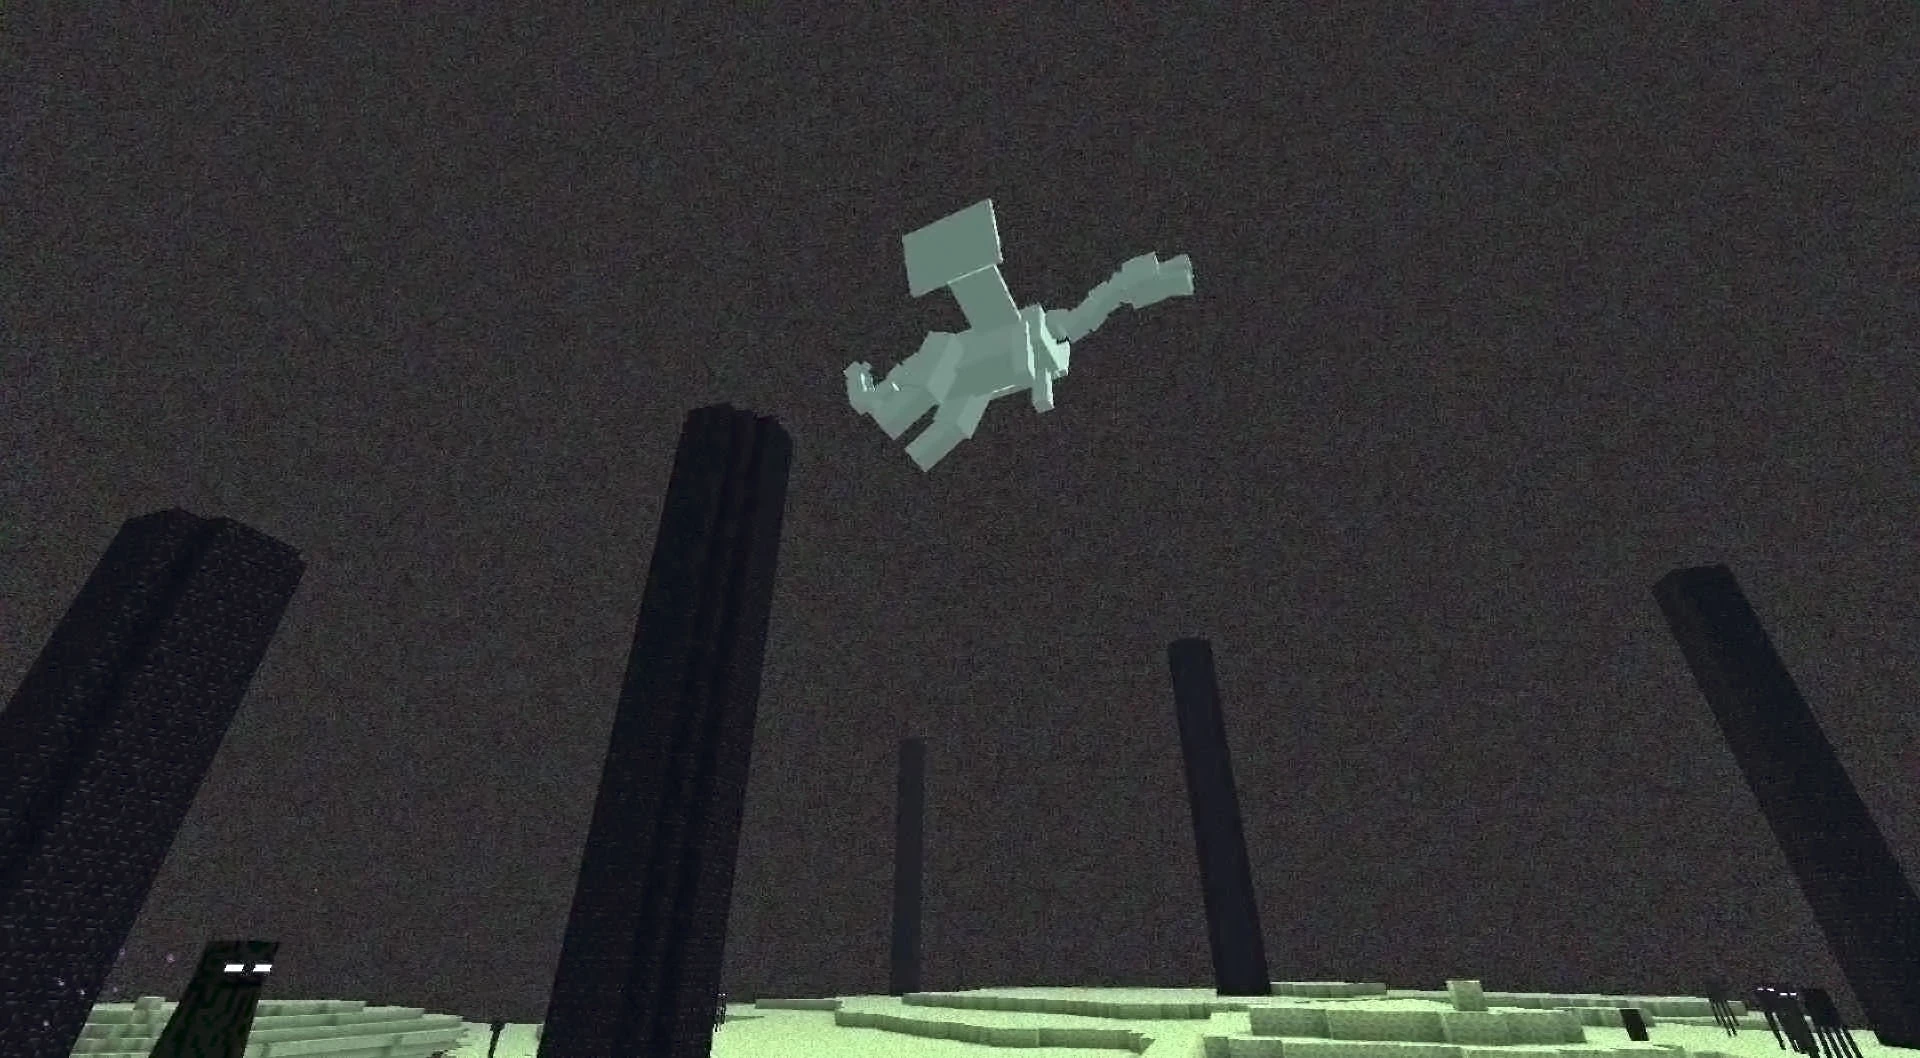

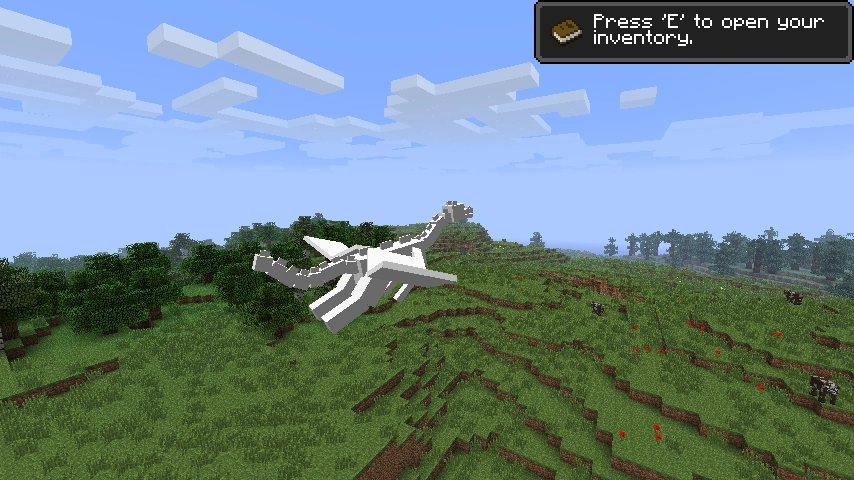
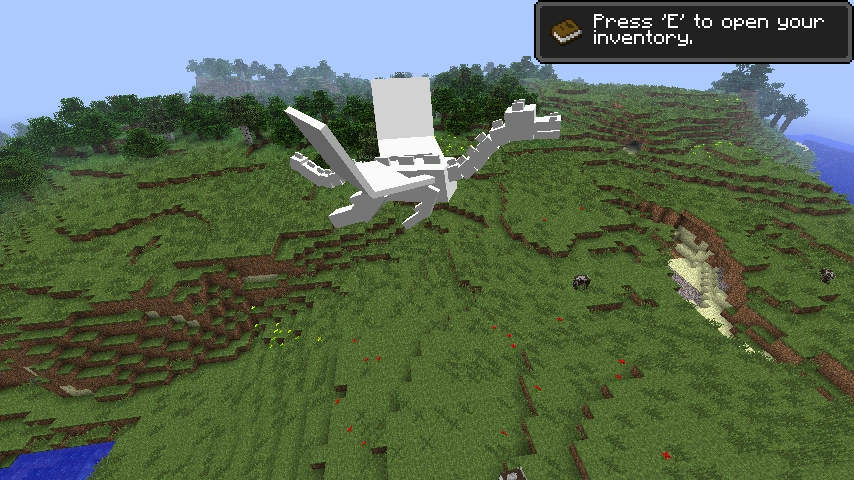
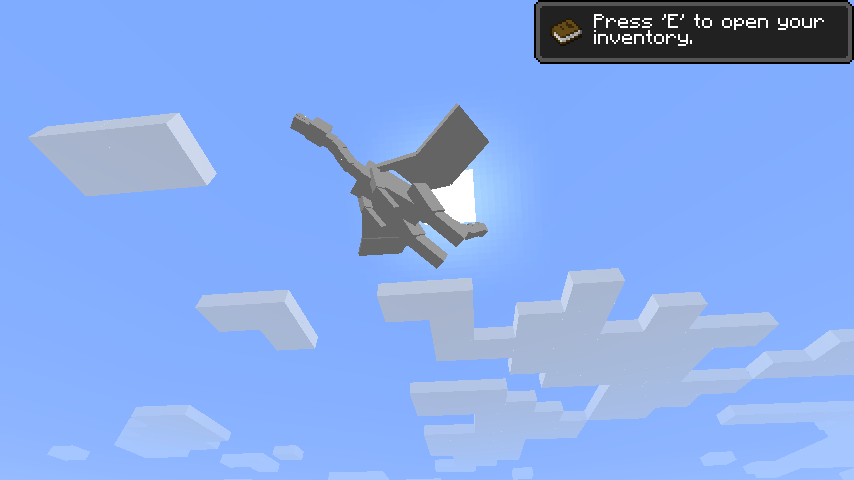
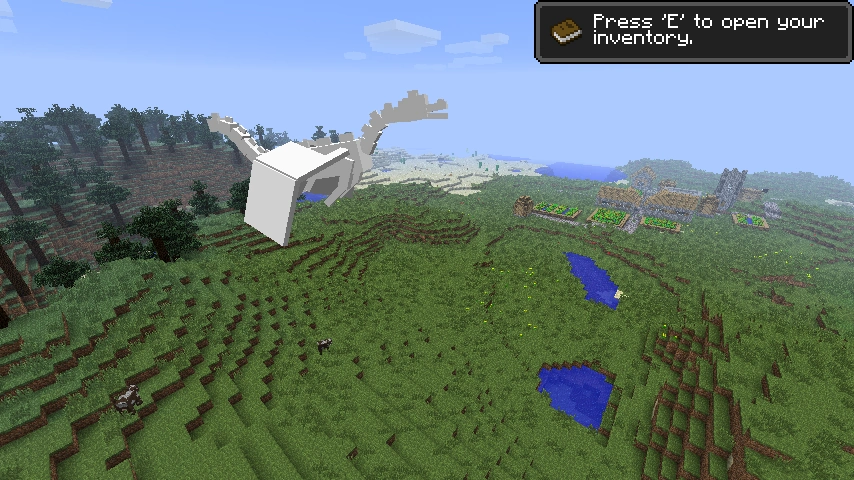
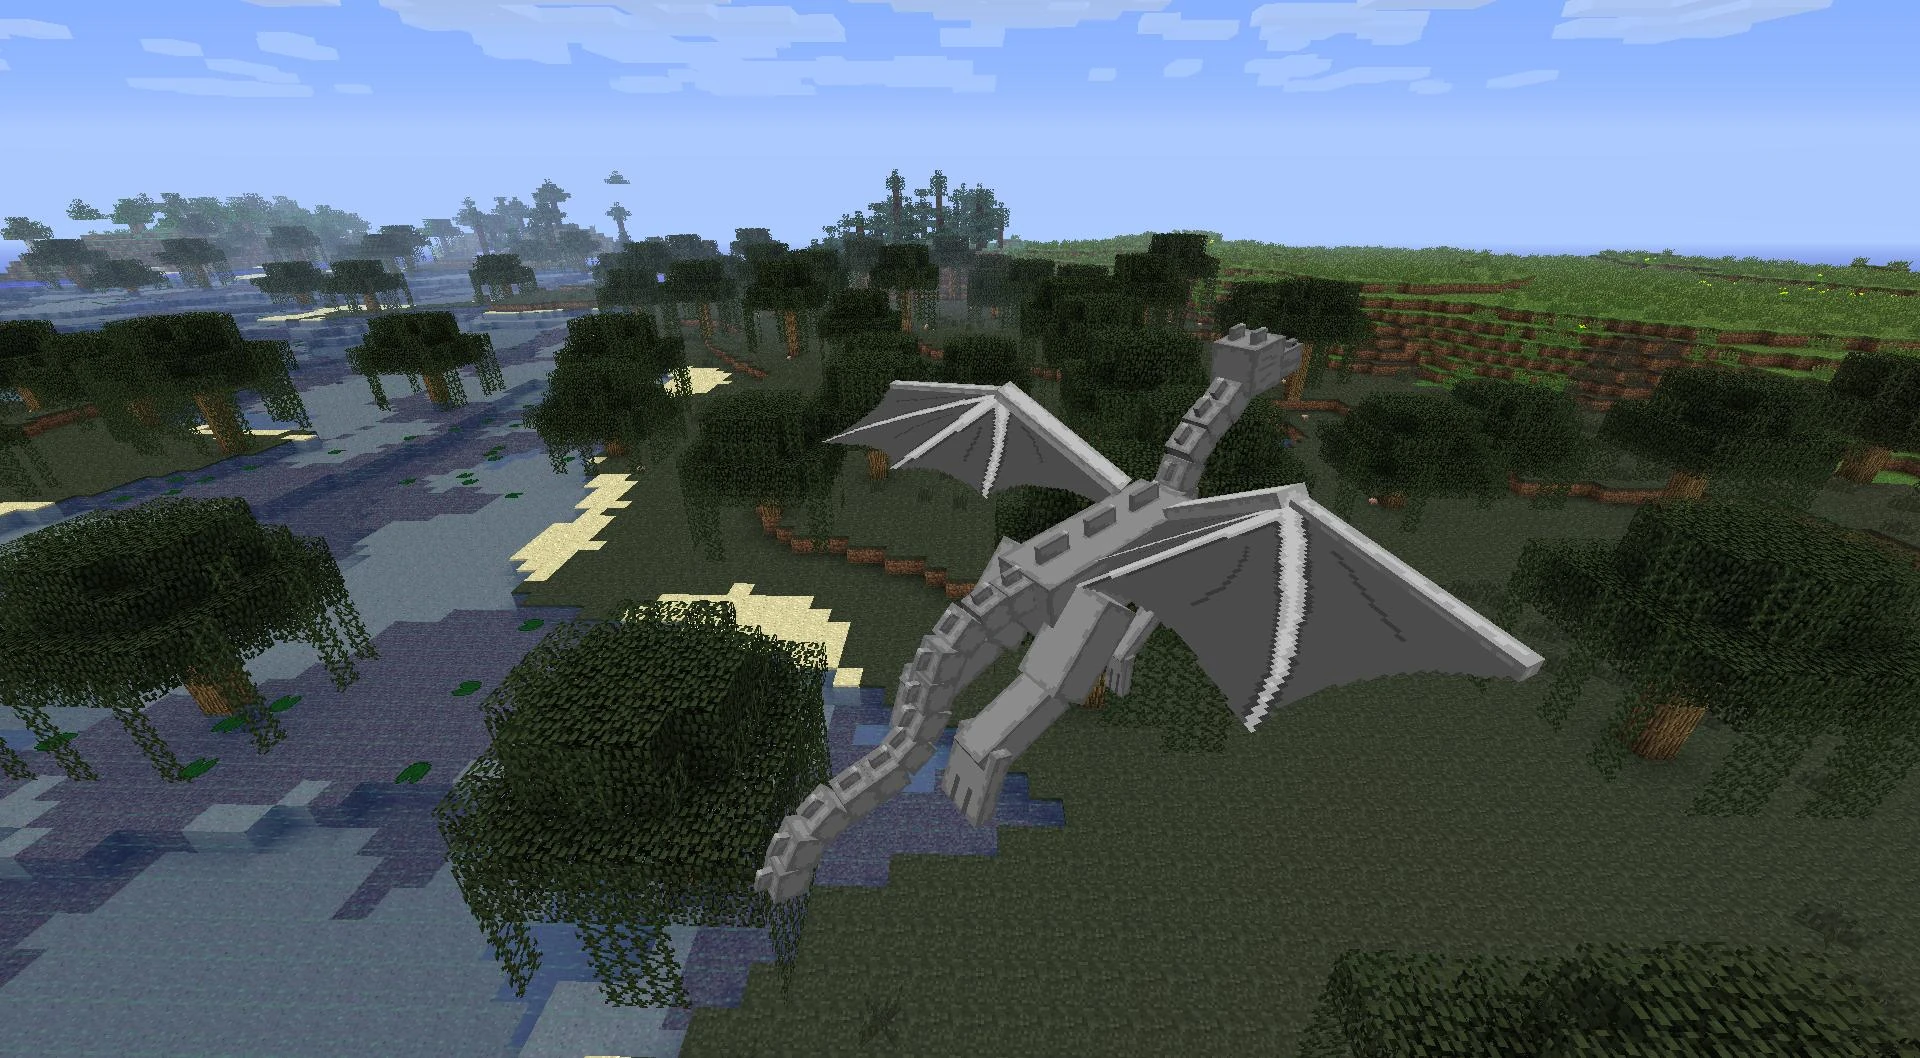
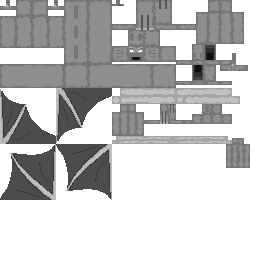
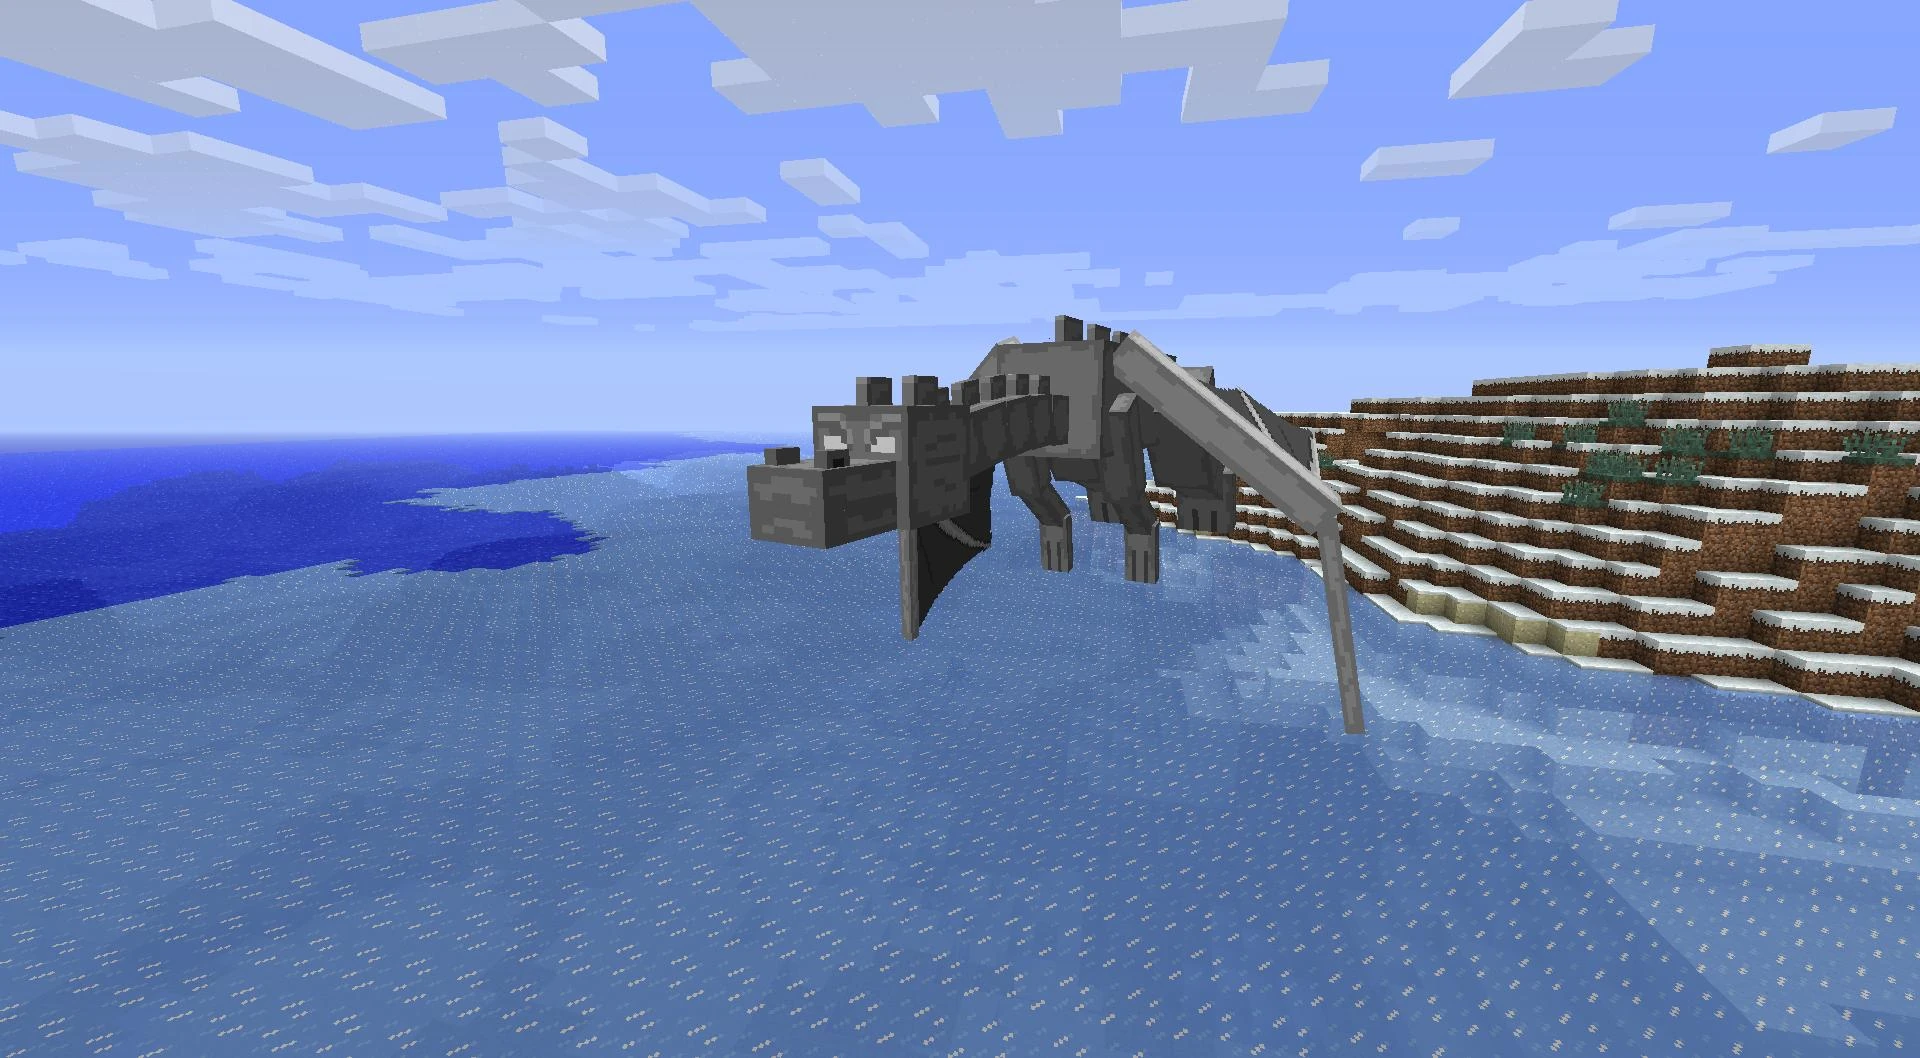
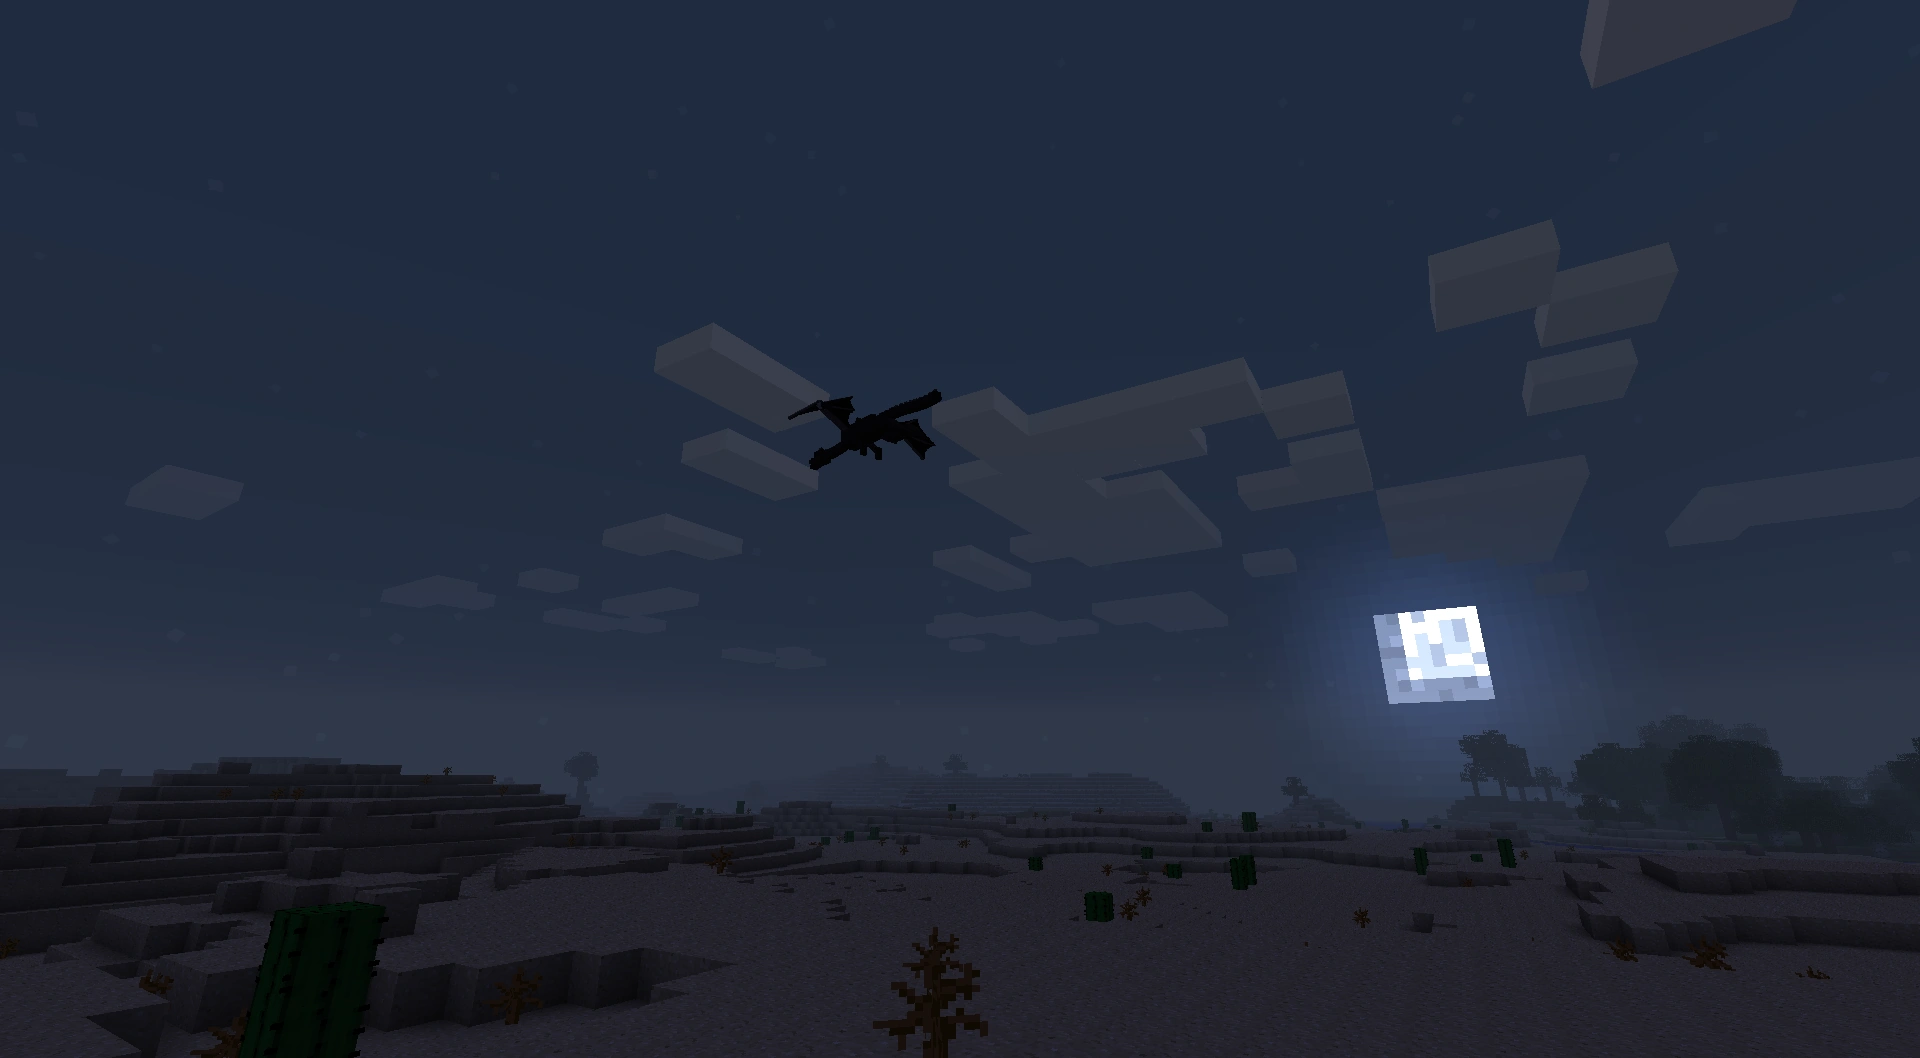
Screenshots
The first screenshot of Ender dragon with toxic breath attack.
The Ender dragon after defeat.
A dragon egg and the End portal after the Ender dragon is defeated.
An Ender dragon being healed by an End crystal.
The Ender dragon flying over the End.
The Ender dragon attacks a player while being healed.
The Ender dragon defeated.
Dozens of player-spawned Ender dragons and withers fighting each other.
More Ender dragons fighting withers.
The Ender dragon's death inside netherrack.
The Ender dragon dying from the explosion of the End crystal she was using.
The dragon perching on the end portal frame.
The dragon firing an Ender Acid ball at the player.
The dying dragon quickly charging toward the End portal frame to roost. A pool of acid lies in the foreground.
The green hitboxes, visible when F3 + B is toggled.
The Ender dragon dying as seen when the player has night vision in Bedrock Edition.
Four ender crystals placed at the bottom to respawn the Ender dragon.
Comparison between the ender dragon and the wither.
Screenshot of a possible glitch resulting in the spawning of two Ender Dragons.
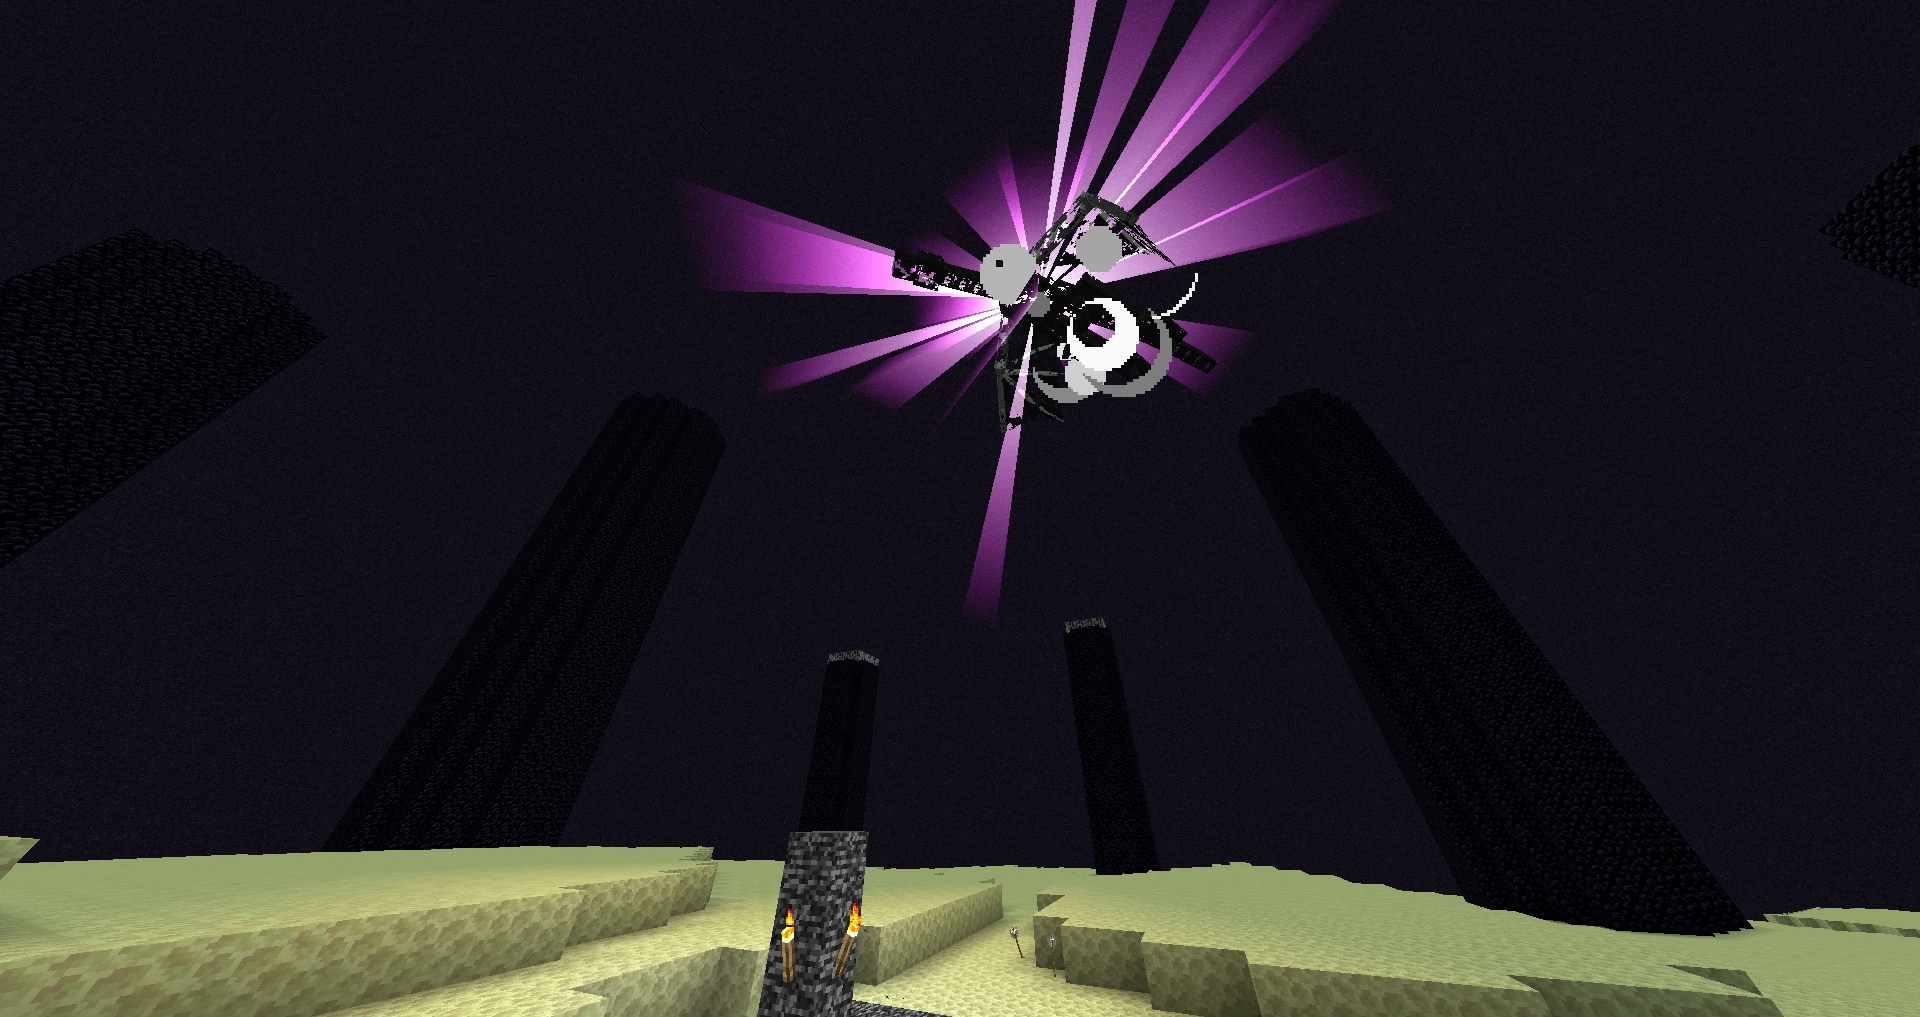
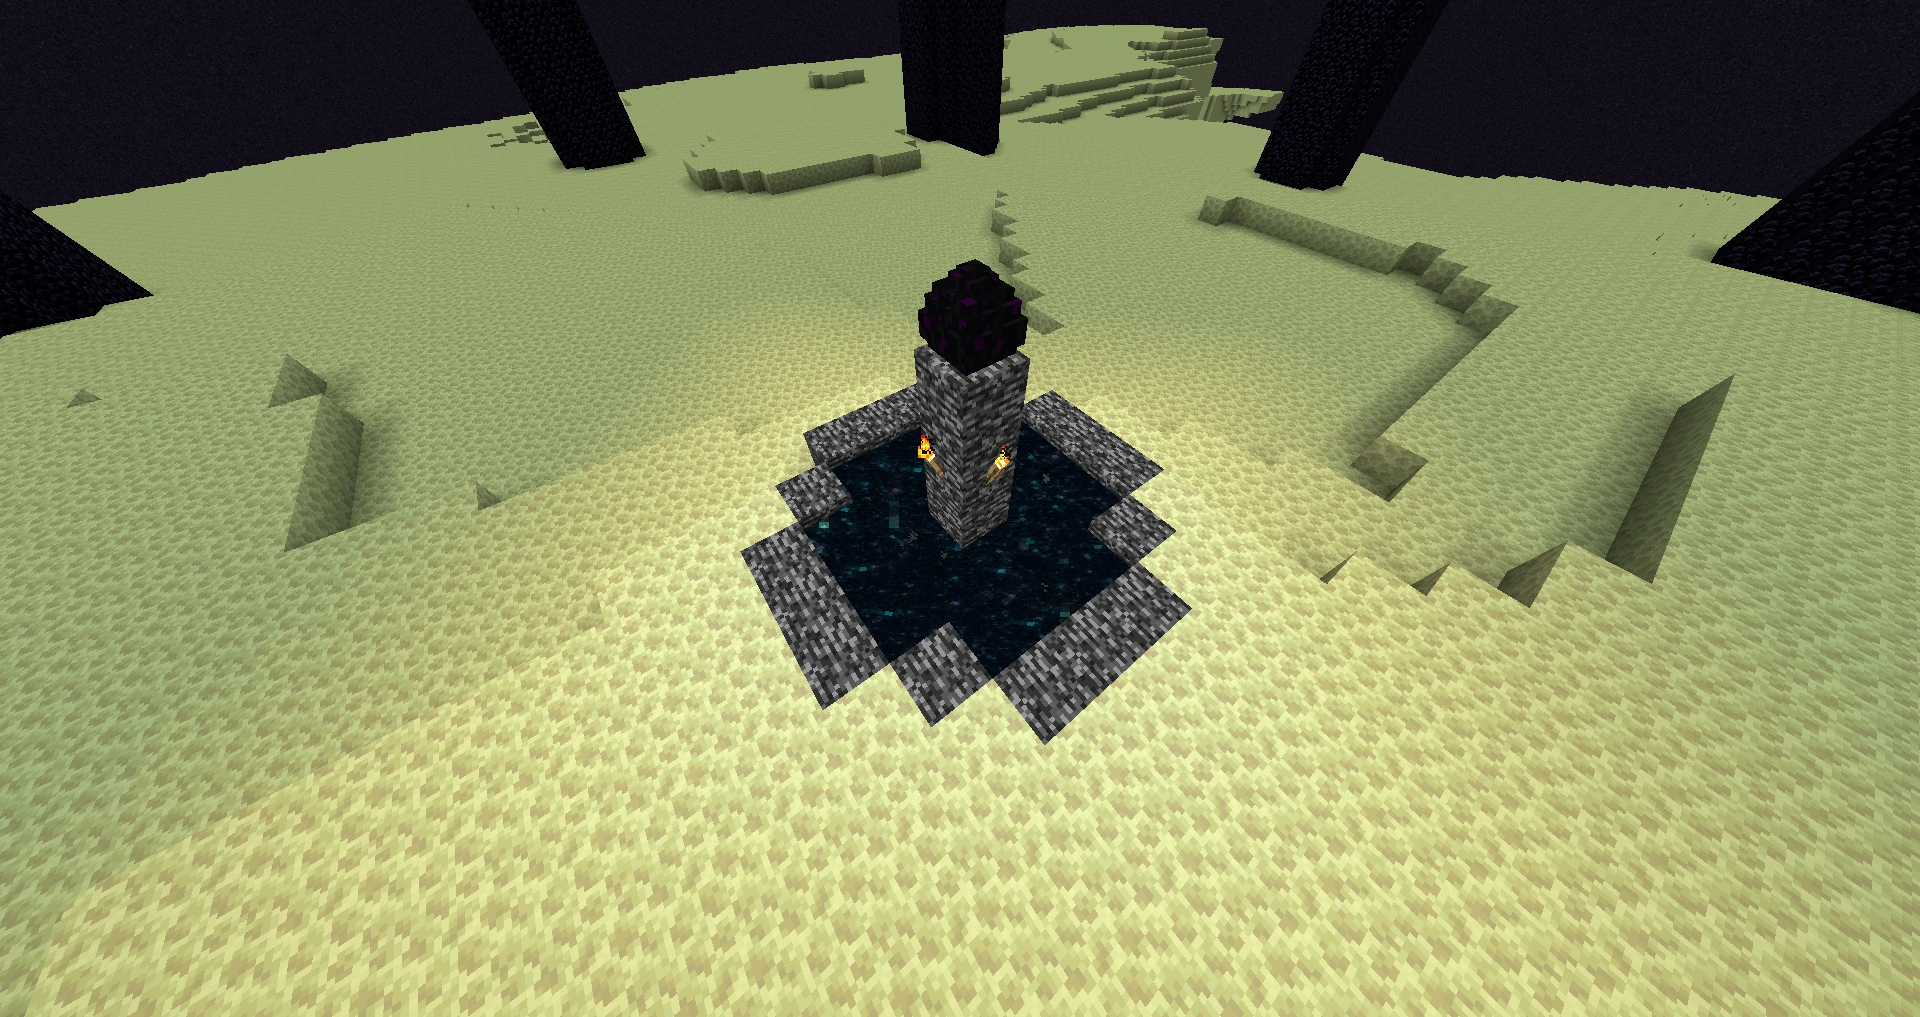
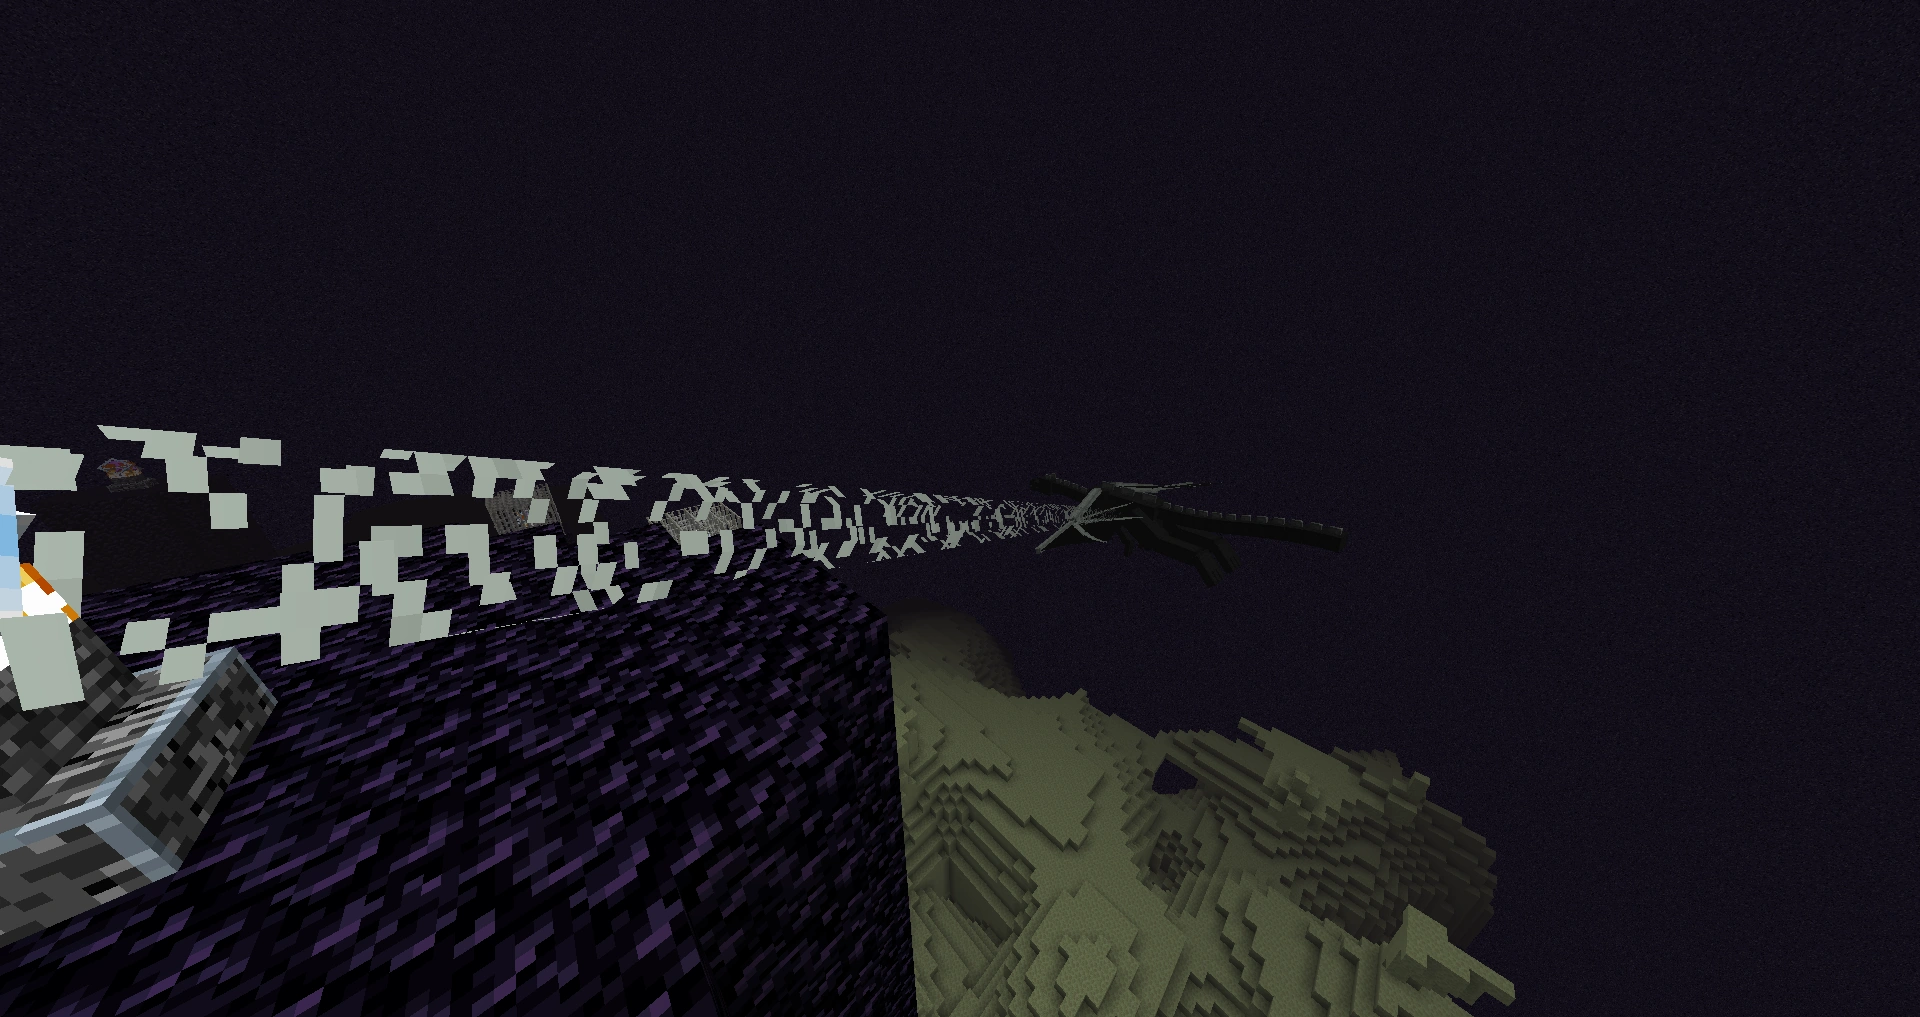
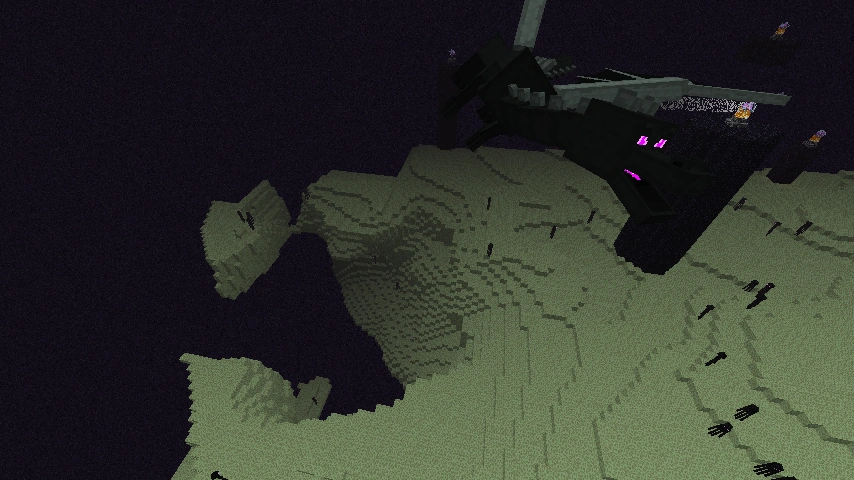
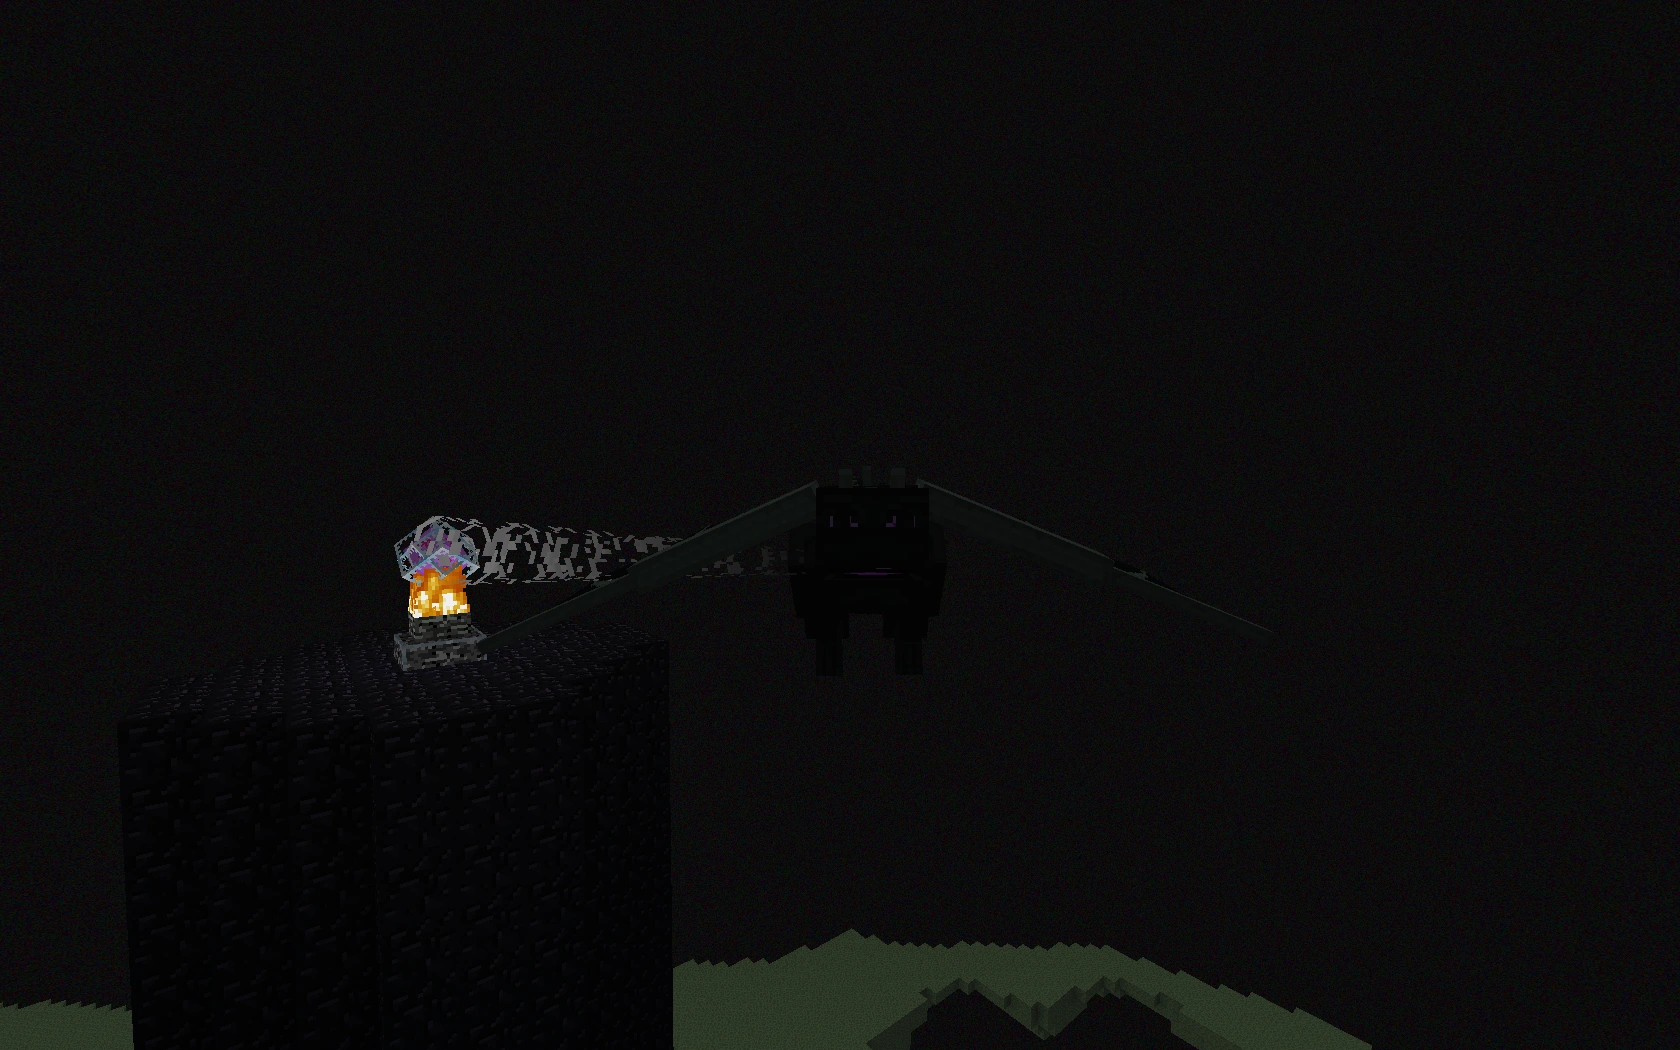
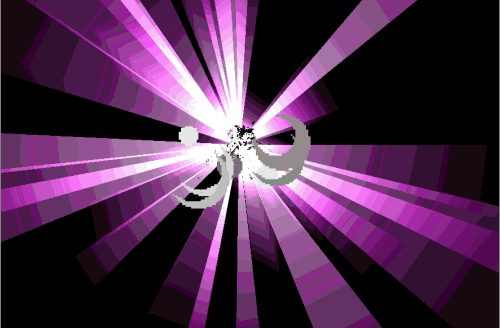
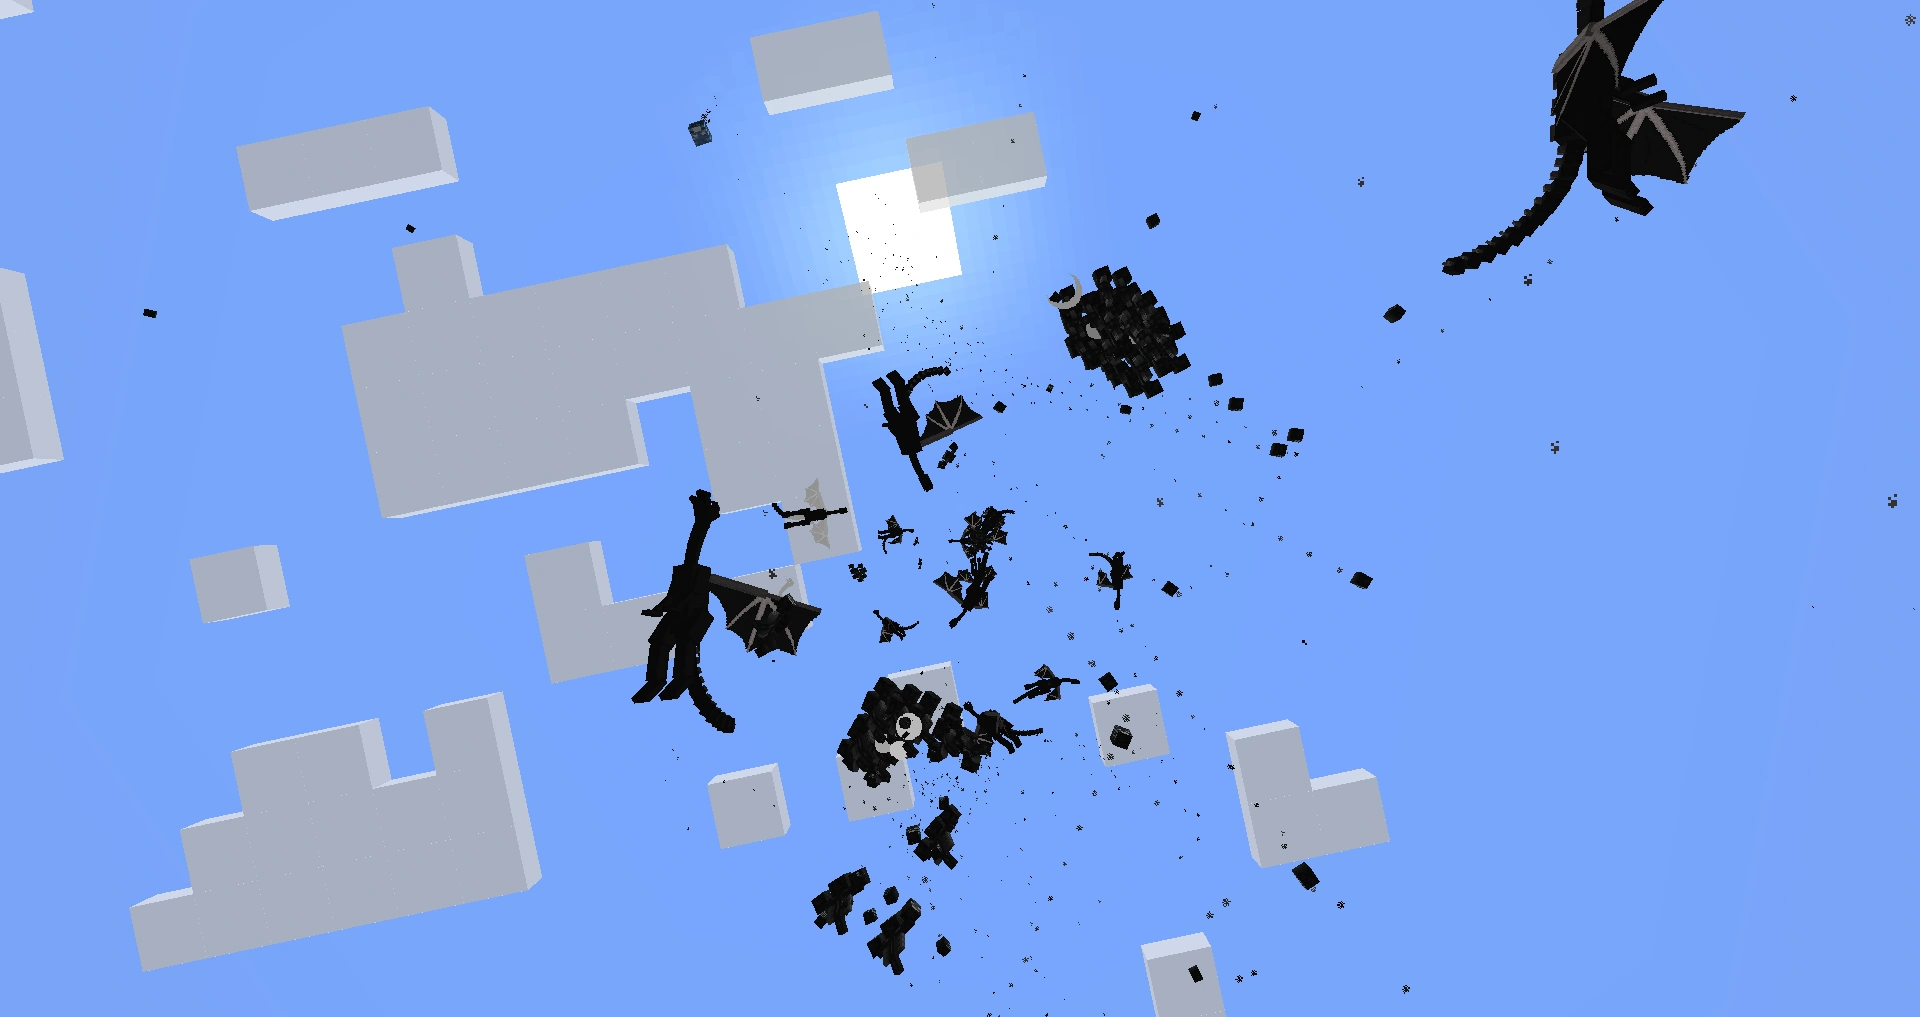
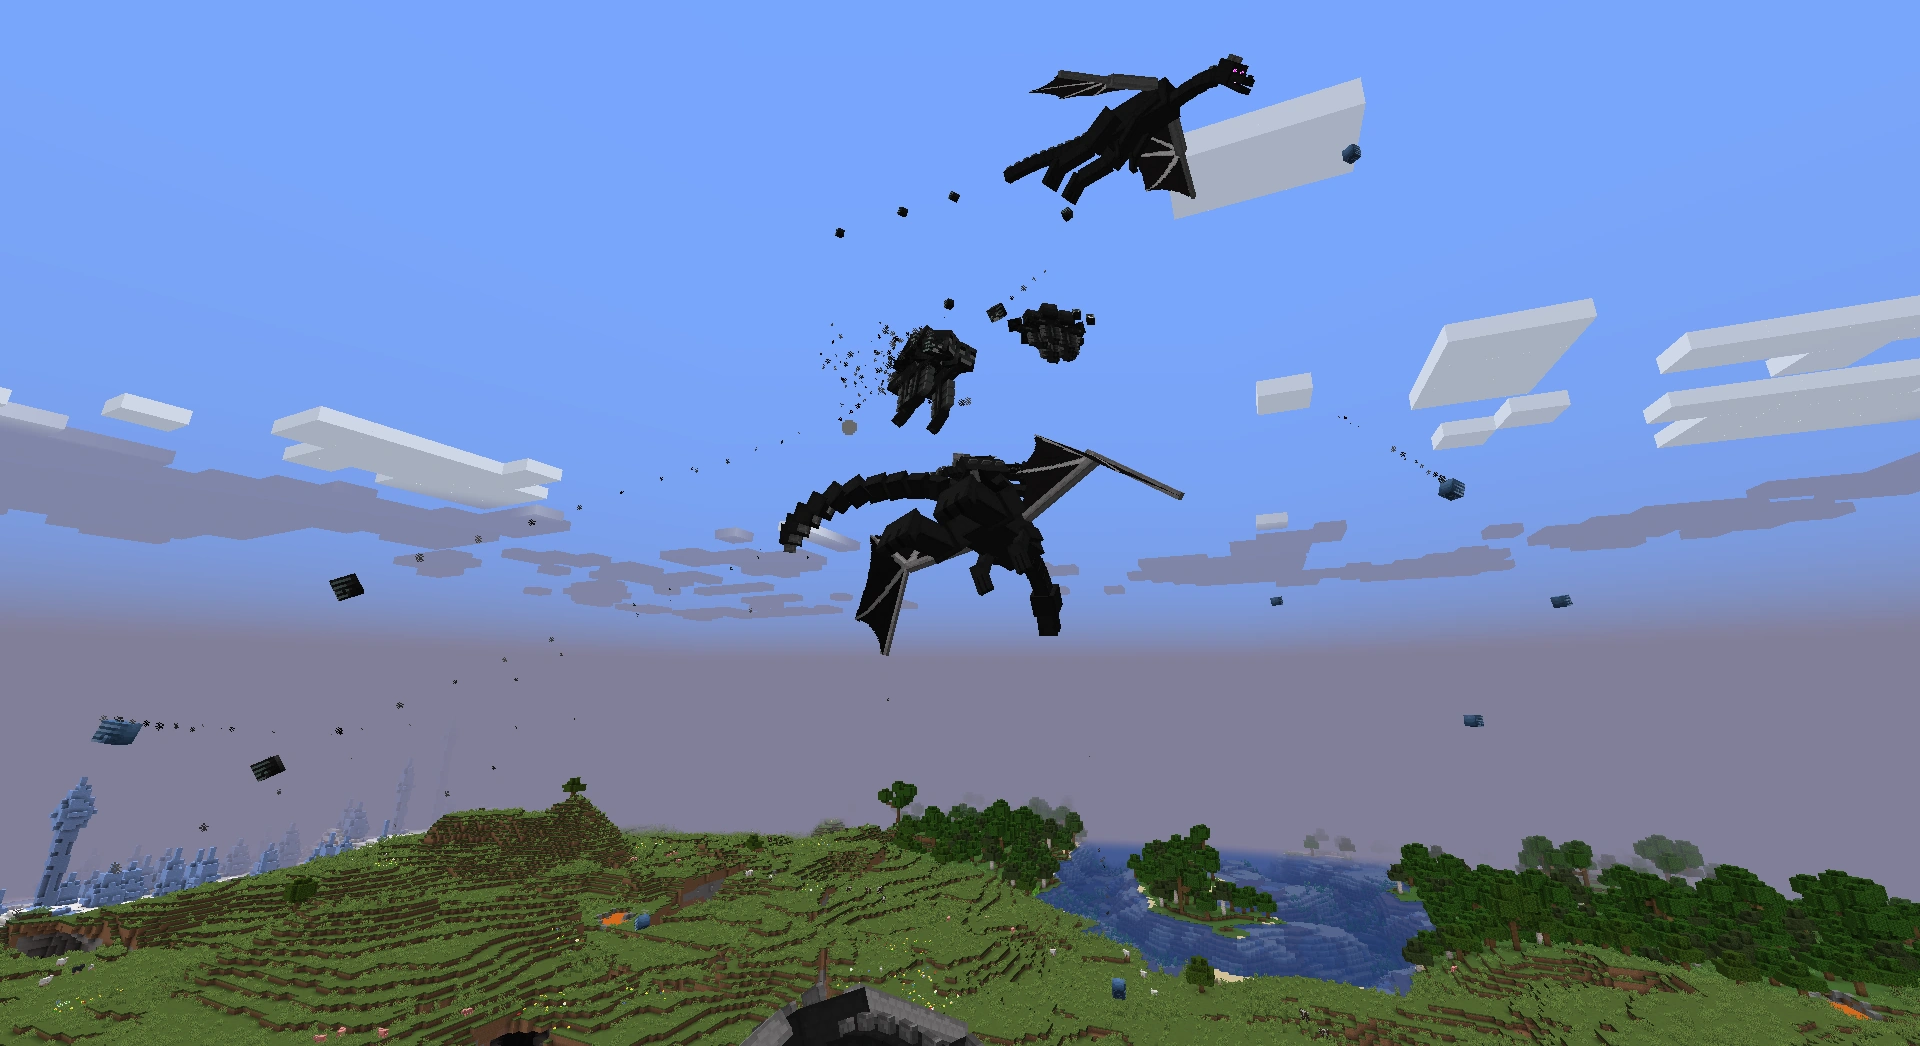

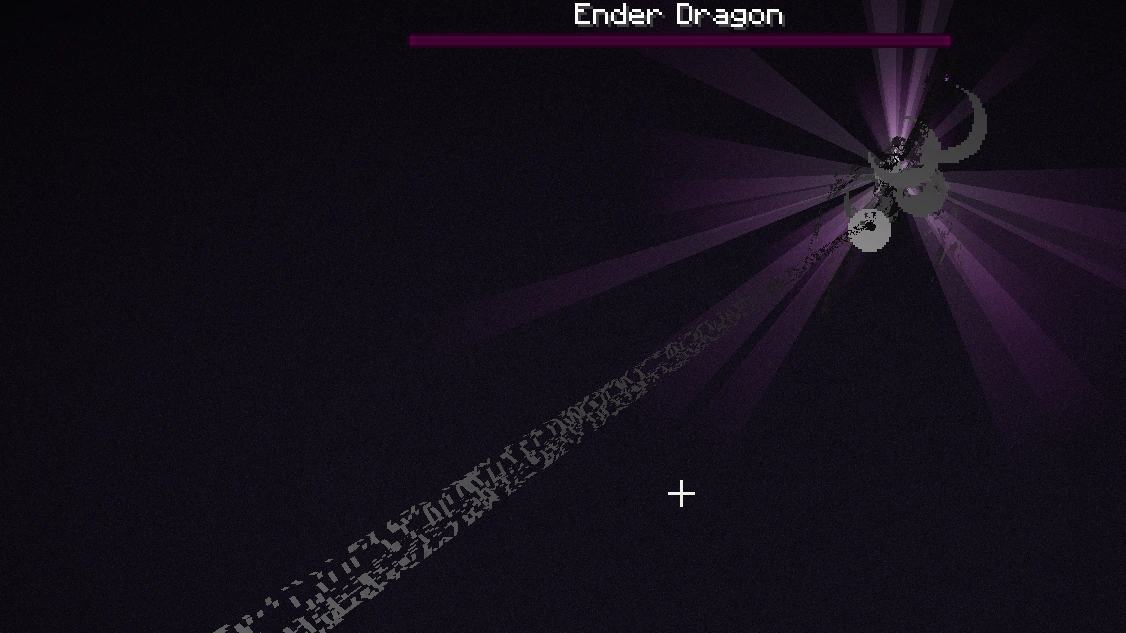
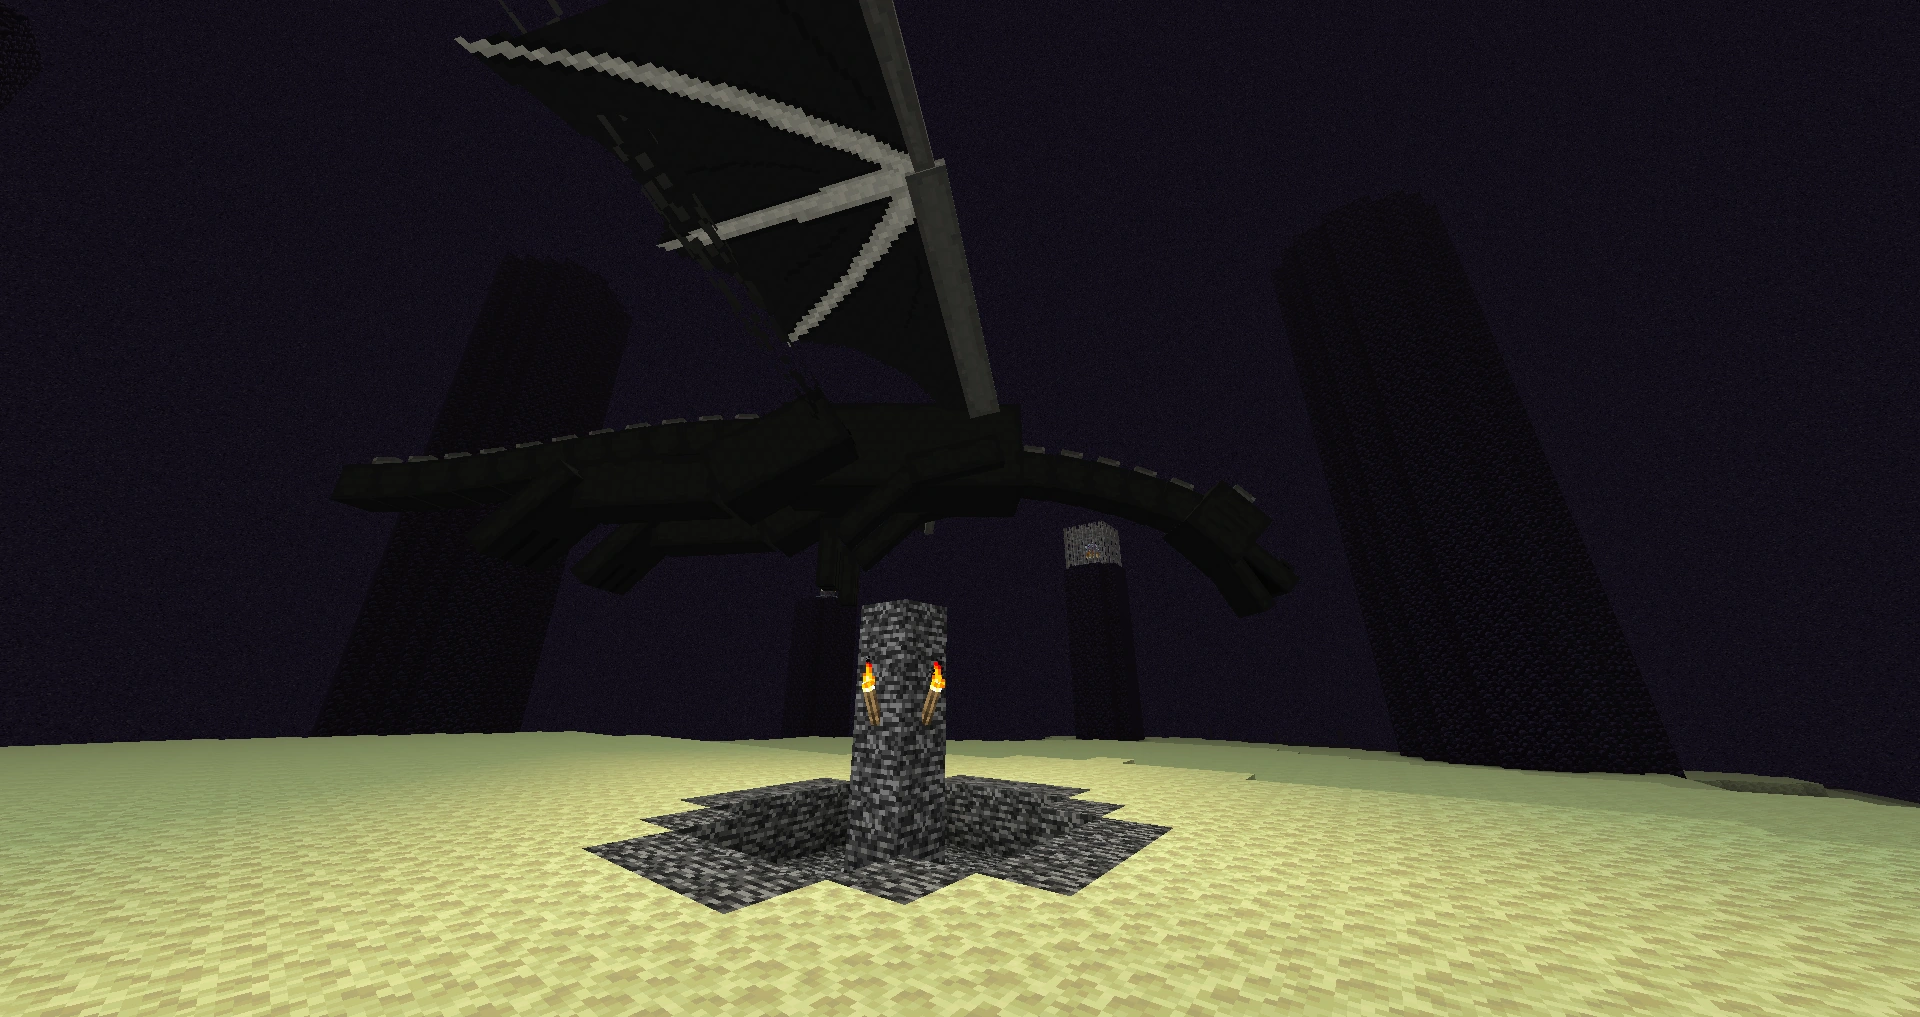
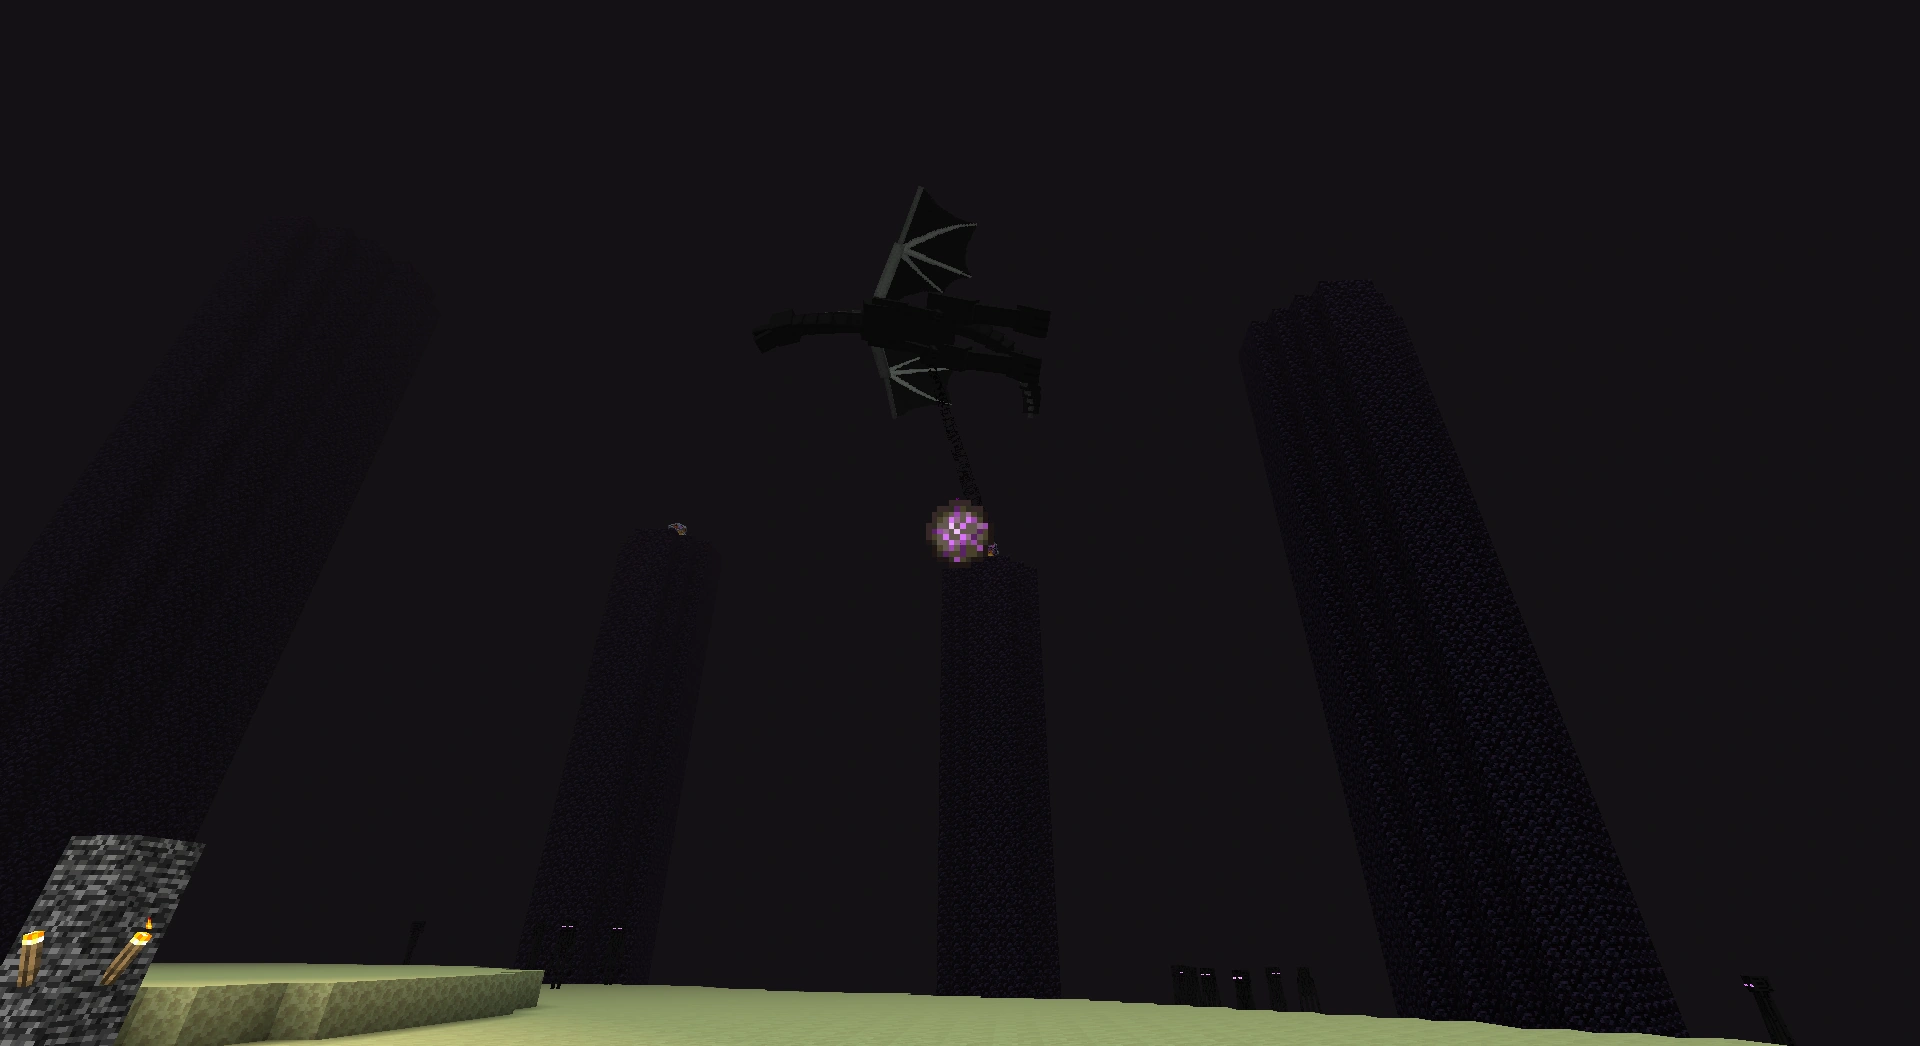
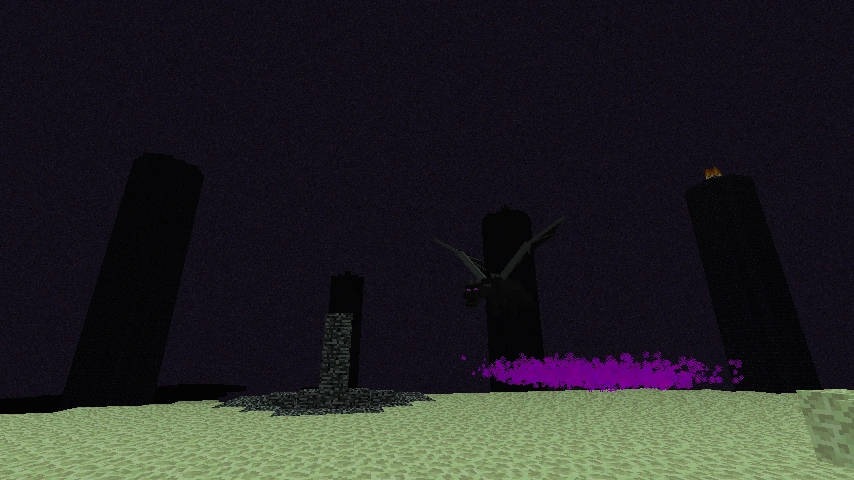
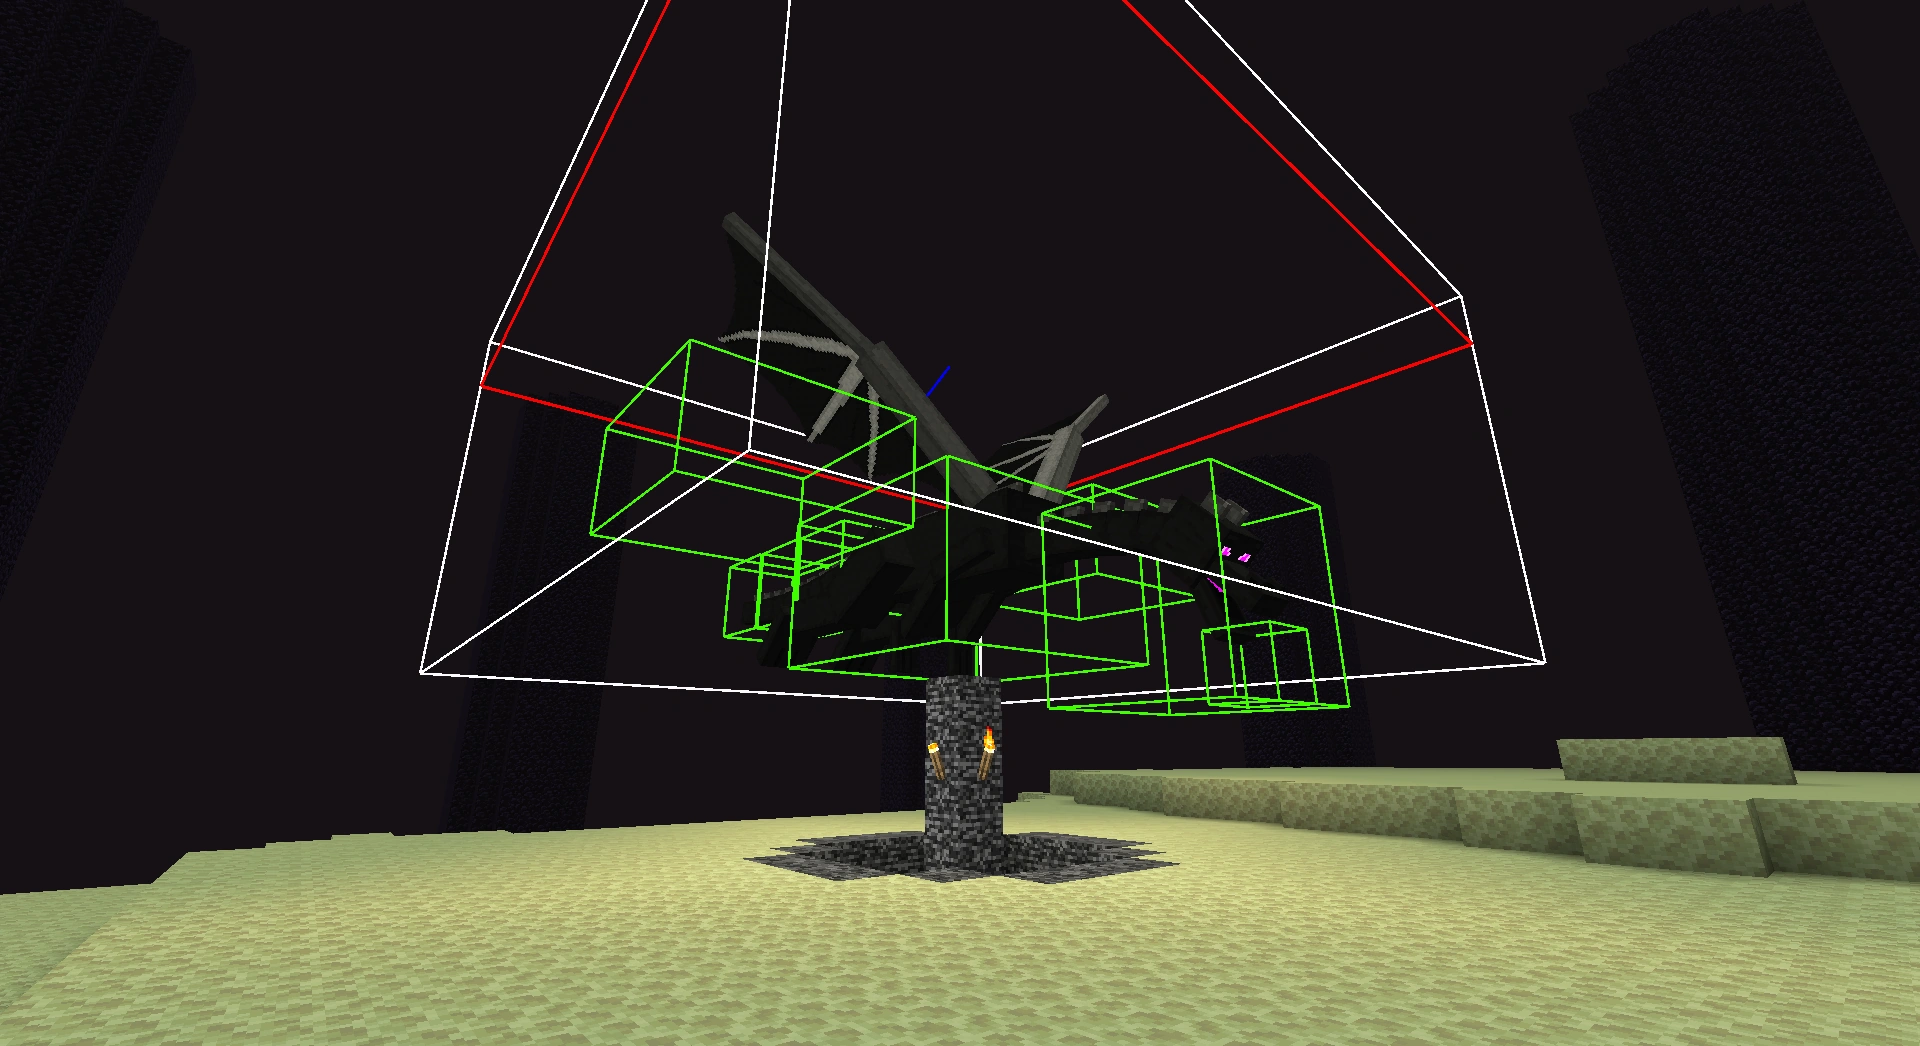
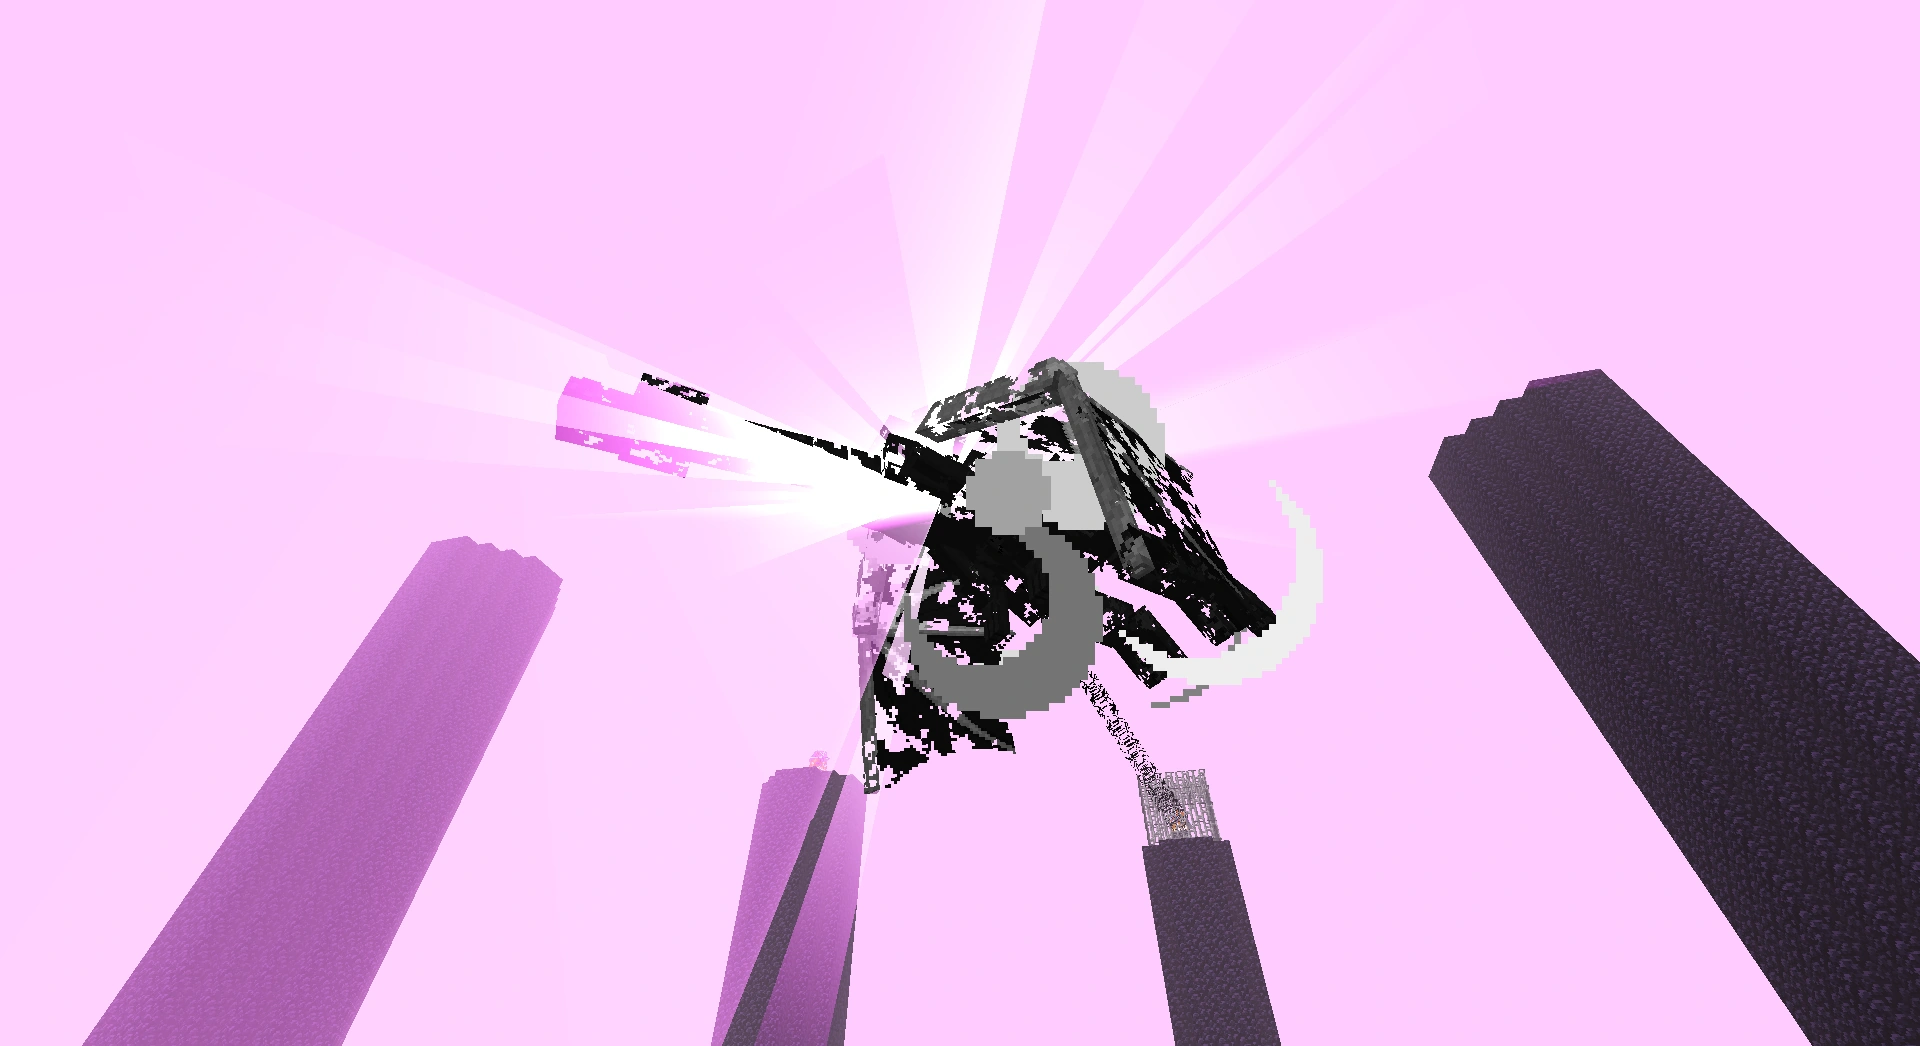
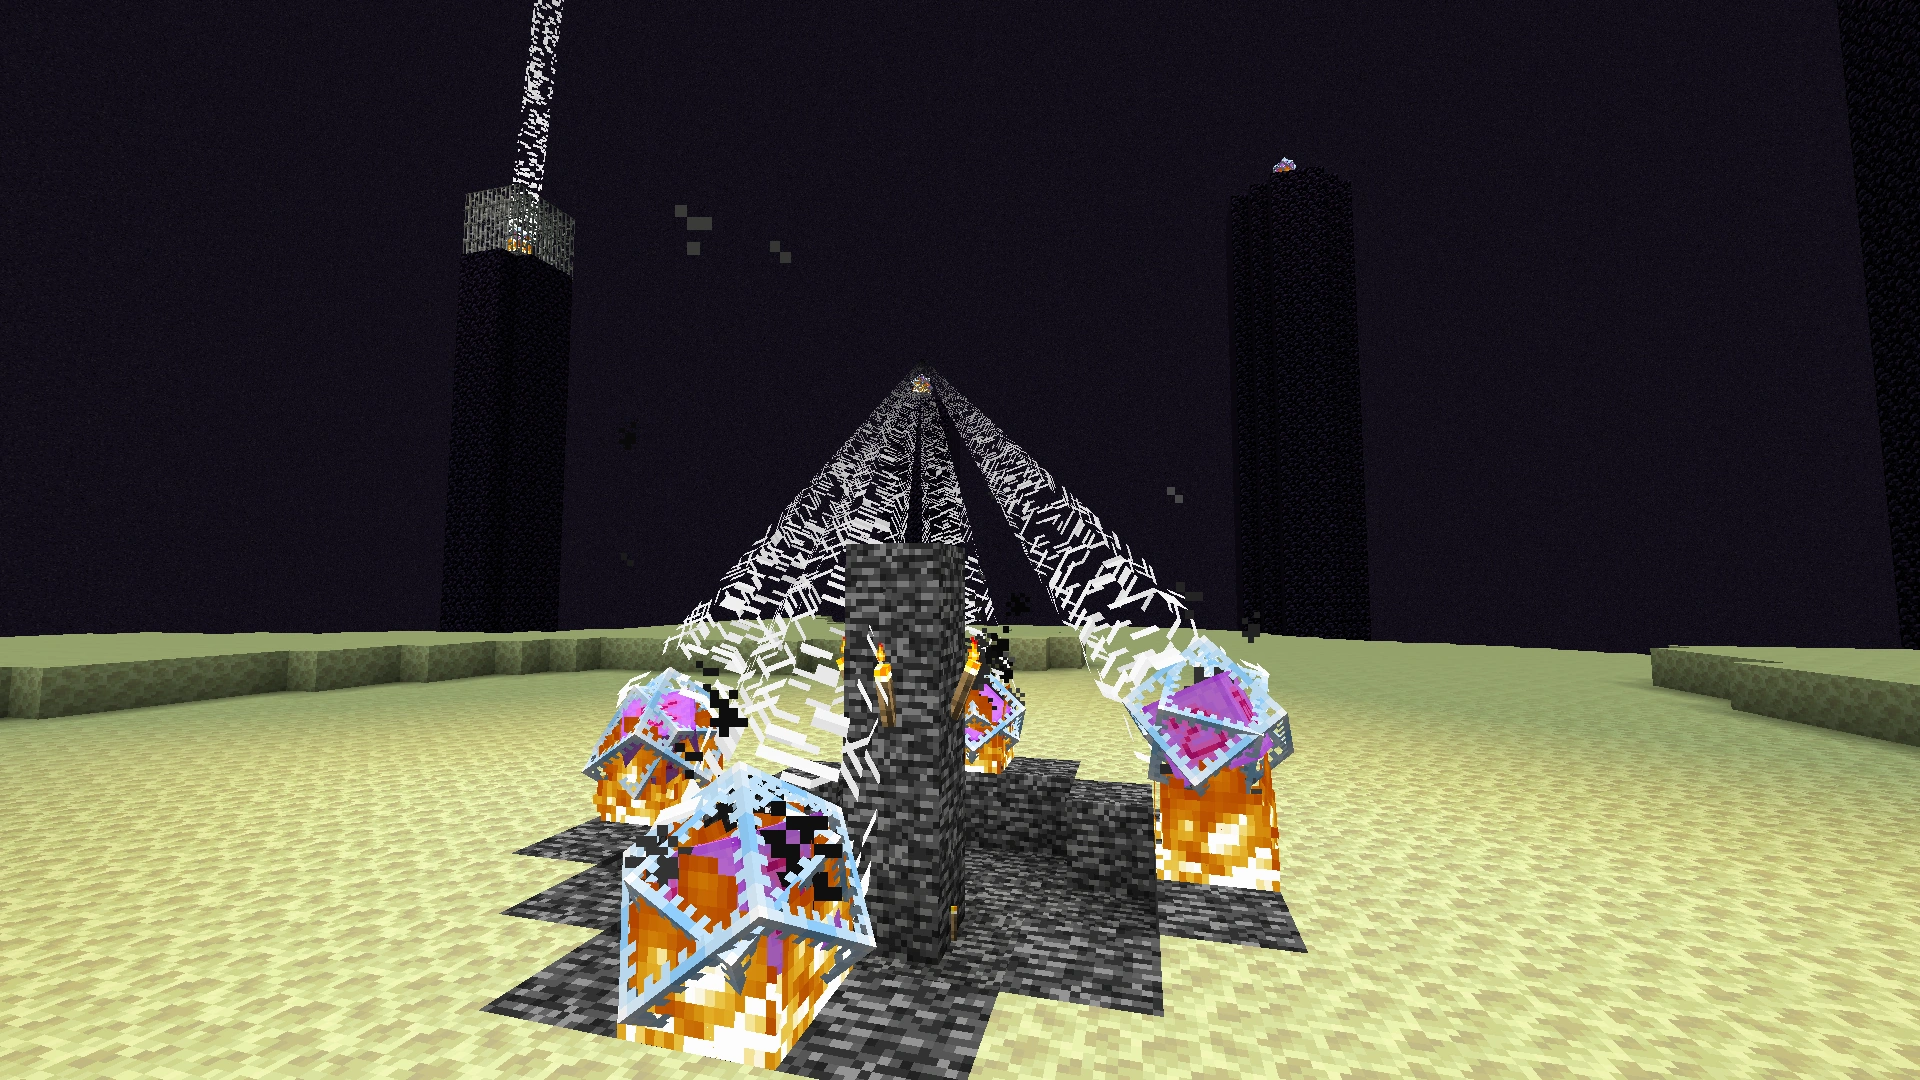
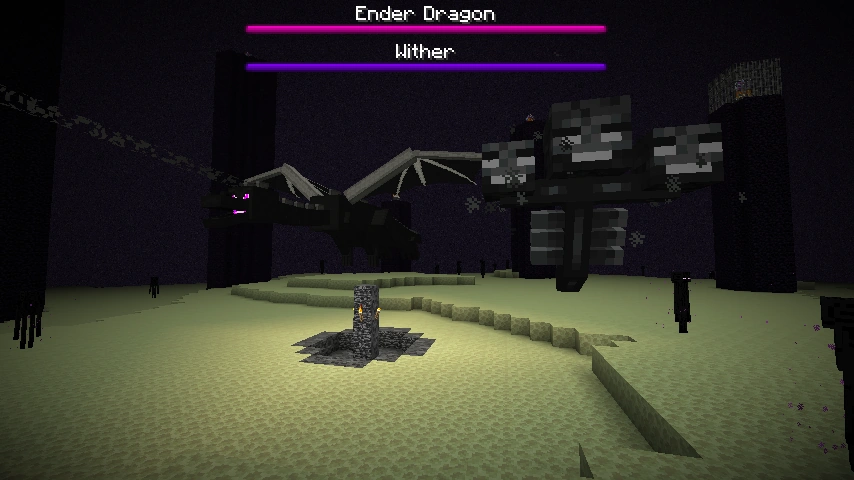
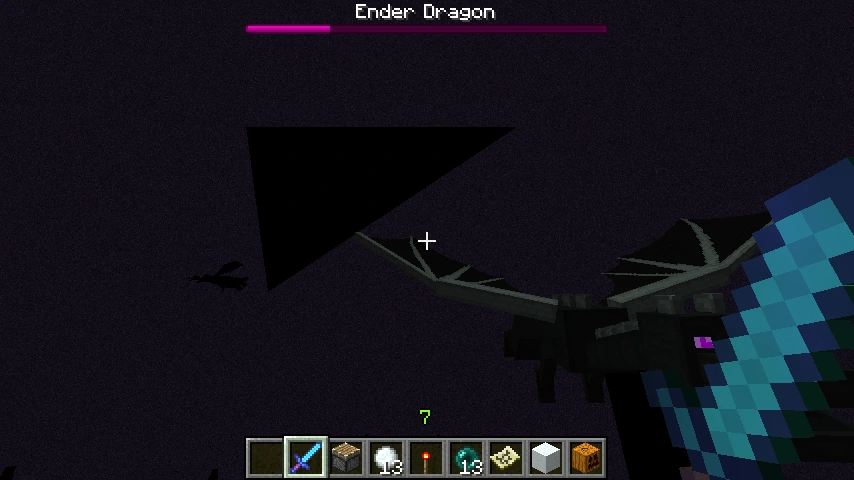
In other media
Ender Dragon in promotional artwork for the Ender Update.
- Ender Dragon Mobestiary.jpeg
Ender Dragon pictured in the Mobestiary.
Ender Dragon micromob from Lego Minecraft.
Lego Minecraft Ender Dragon minifigure.
The Ender Dragon spirit in Super Smash Bros. Ultimate.
The Super Smash Bros. Ultimate Ender dragon spirit.
Ender Dragon Plush in Minecraft.
The Ender Dragon "artwork" in the official Minecraft site.
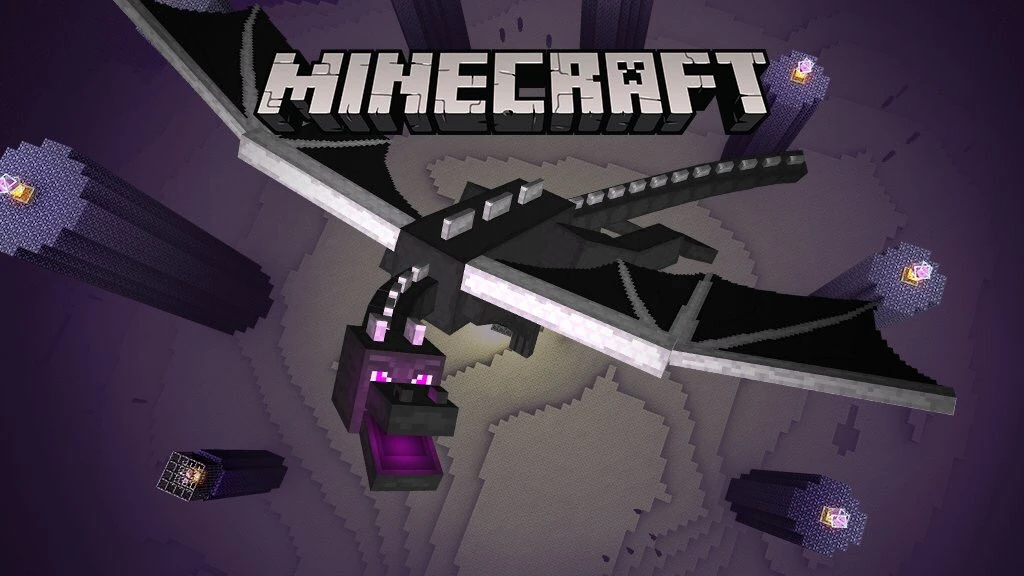
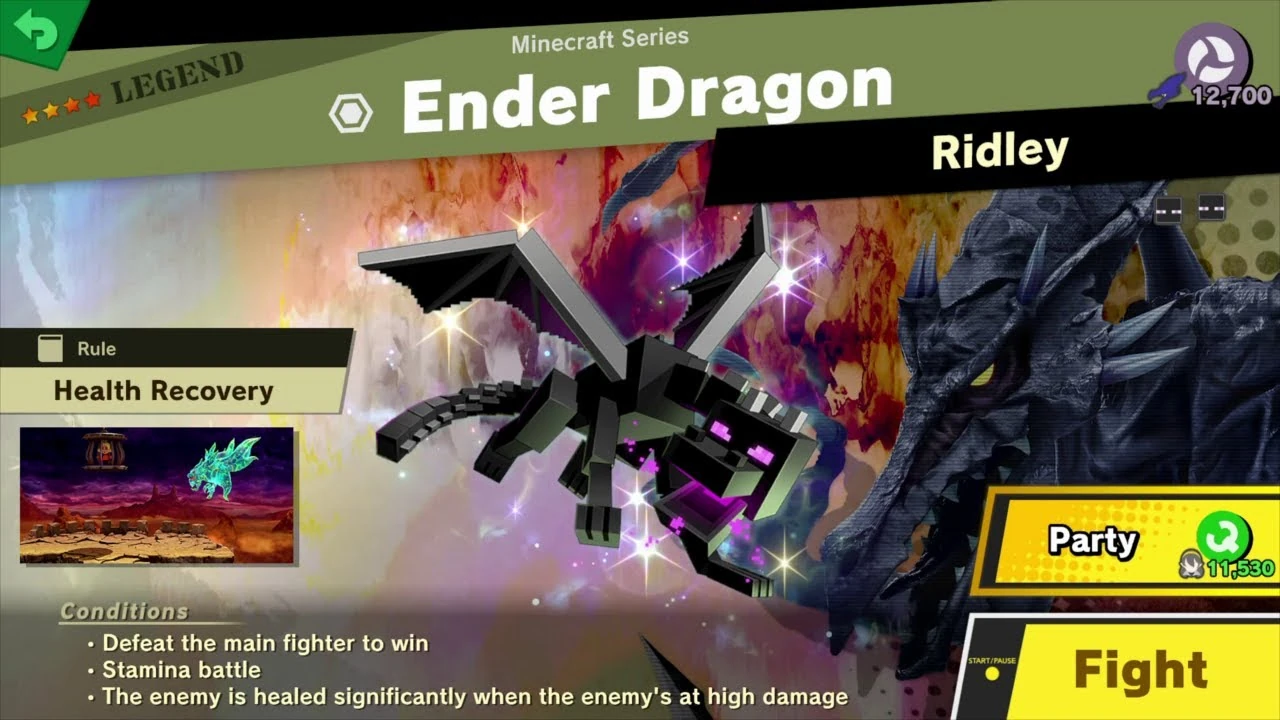
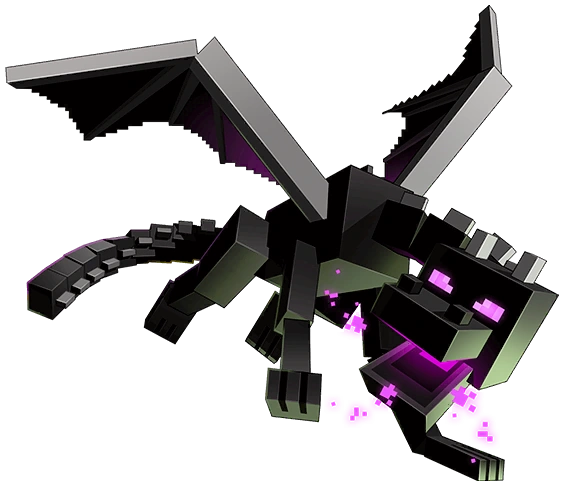

References
- ↑ MC-199994 — Advancement "Free the End" is only granted to one player
- ↑ http://www.reddit.com/r/Minecraft/comments/l9m8m/why_ender_dragons_wont_spawn_in_main_world/c2qxhwh
- ↑ https://twitter.com/notch/status/124246459775328257
- ↑ https://bugs.mojang.com/browse/MC-201937
- ↑ https://www.reddit.com/r/Minecraft/comments/l9m8m/why_ender_dragons_wont_spawn_in_main_world/c2qxl5z?context=1
- ↑ https://twitter.com/Dinnerbone/status/558263033173389313
- ↑ https://twitter.com/notch/status/122600570170249216
- ↑ https://twitter.com/notch/status/122978062143979522 Twitter; texture packer
- ↑ http://pastebin.com/0AcY6YV2 link to the texture packer
- ↑ https://twitter.com/notch/status/122980577832992768
- ↑ https://youtu.be/XTpFDRZExAg
- ↑ https://www.reddit.com/r/Minecraft/comments/l9m8m/why_ender_dragons_wont_spawn_in_main_world/c2qx6qk?context=1