Note:
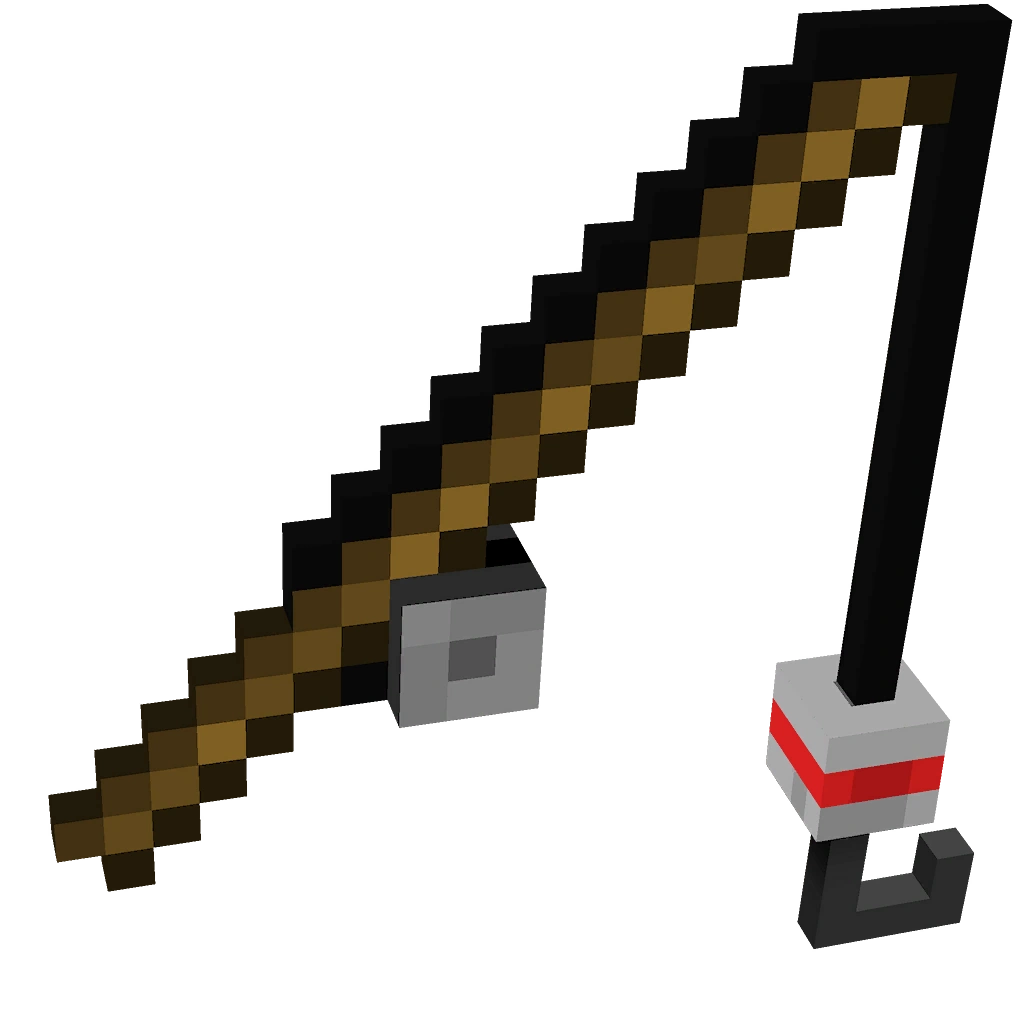
- Replace the cooldown video with that of the fishing rod - it is too long
- Seperate out artifact stats and cooldown
| “ |
|
„ |
| — Guide to Minecraft Dungeons: A Handbook for Heroes |
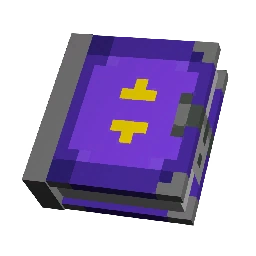
The term artifact refers to a category of items that can equipped by the hero to temporarily summon pets, enhance or heal themselves or other heroes, or attack and weaken mobs. The hero can have up to three artifacts equipped at any one time.
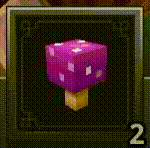
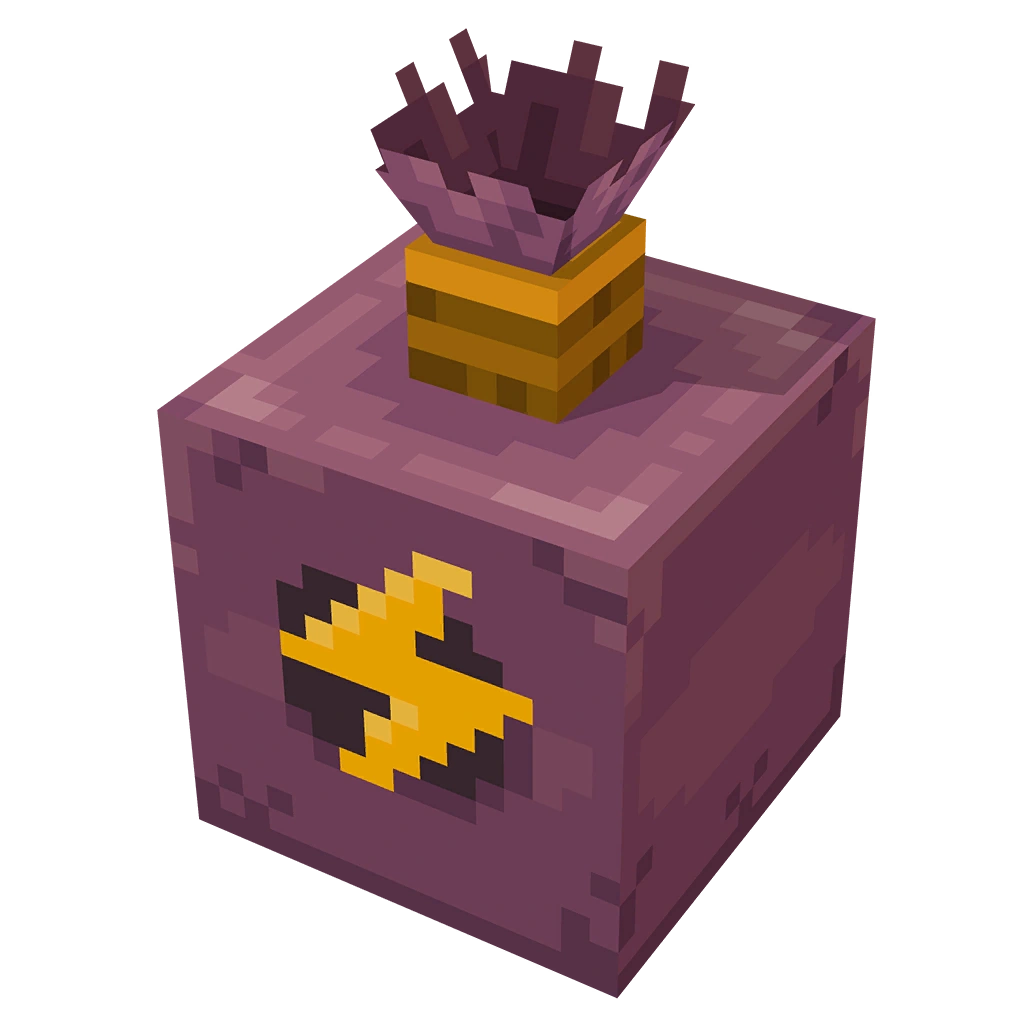
There are currently 46 known artifacts. This includes a single unique, the Corrupted Pumpkin, which is a unique Corrupted Beacon which is only obtainable during the Spooky Fall event. All are obtainable except for the Totem of Soul Protection, which was an unused artifact seen in the game's trailer.
There are two types of artifacts: ones that require (and grant) souls, and ones that do not. Soul-based artifacts generally have shorter cooldown times, and always come with +1 soul gathering.
Obtaining[]
Ways artifacts can be obtained:
- Village Merchant
- Luxury Merchant
- Mystery Merchant
- During missions
- Obsidian chests
- Piggy Banks
- When a mission is completed.
Cooldown[]
Cooldown Sequence
Artifacts have a cooldown period between uses, during which they cannot be used, unequipped, or switched with a different Artifact from the inventory. Artifact cooldowns are independent from one another. For example, equipping two Corrupted Beacons and using one of them will only cause a cooldown on the one that was used.
Cooldowns can be reduced by equipping armor with cooldown reduction properties, such as the Evocation Robe, Battle Robe and its unique variants, or enchanting armor with Cool Down or Cooldown Shot, which can be used to trim down cooldown time on artifacts that are already on cooldown.
Damaging artifacts[]
Artifacts that output damage to mobs with no other notable affects.
| Icon | NameInternal ID
|
DLC exclusive | Soul requiring | Properties | Obtainable location[1] | Ancient Hunt Runes | |
|---|---|---|---|---|---|---|---|

|
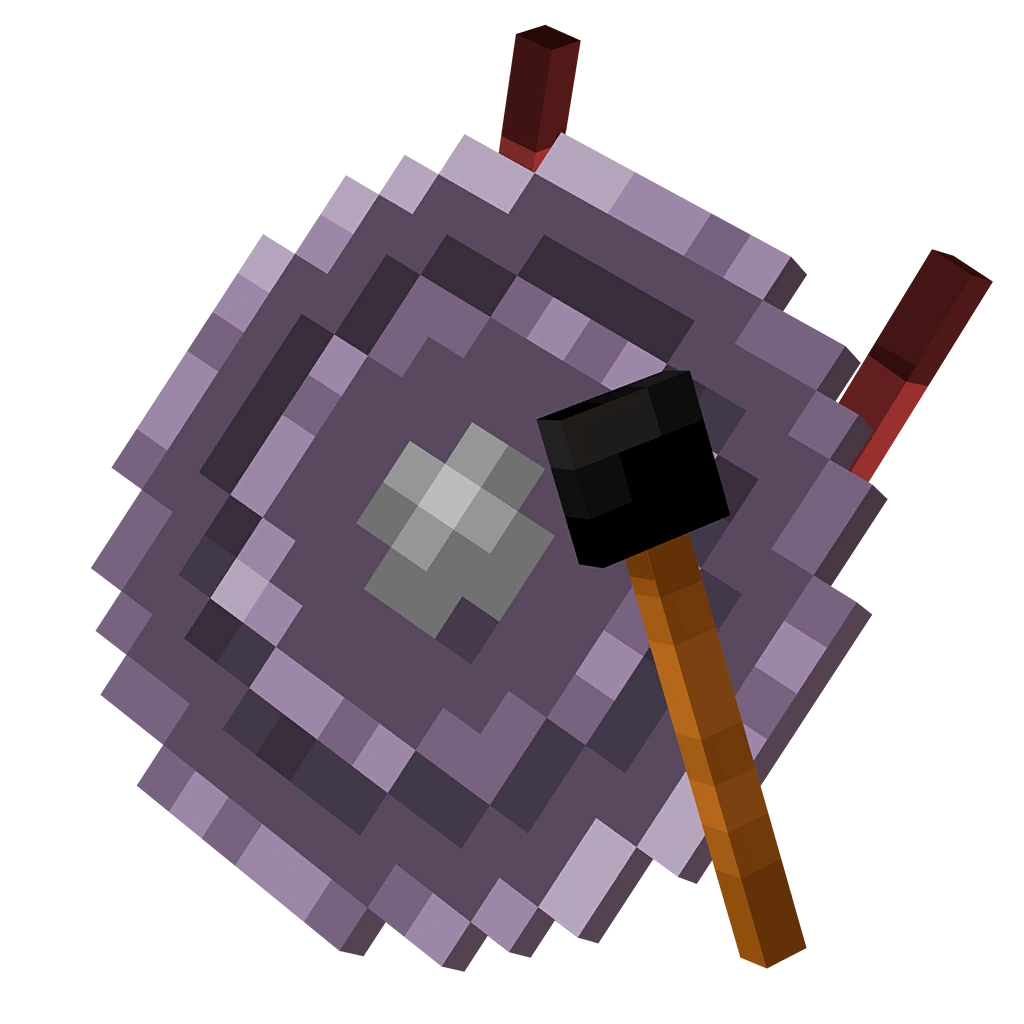
✖ | ✔ | +1 soul gathering
Summons a beam that does incredibly heavy damage to enemies. Cooldown 2.5 seconds. |
||||

|
✖ | ✖ | Sends six mobs into the air, and then releases them, dealing fall damage. | ||||

|
✖ | ✔ | Creates a giant explosion near the player, consuming souls and dealing medium damage.
|
|
|||

|
✖ | ✔ | Summons a lightning bolt to attack the enemy at the cost of souls. Heavy damage.
|
||||

|
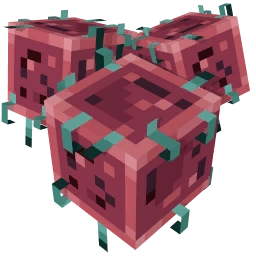
✖ | ✖ | Summons three mines, which denotate upon contact. Similar to Redstone Golem's Mines. Allies no longer take damage from this artifact. | ||||
|
Flames of the Nether | ✖ | Shoots three blast fungus, which automatically detonate. |
|
|||

|
Flames of the Nether | ✖ | Ricochets off mobs, damaging them and eventually returning to the player. |
|
|||
|
Hidden Depths | ✖ | Fires a continuous laser beam at mobs, similar to the Corrupted Beacon and Corrupted Pumpkin, but doesn't use souls and remains active for a limited time. |
|
|||
| Spooky Fall | |||||||

|
✖ | ✔ |
|
||||
Status-inflicting artifacts[]
Artifacts that apply an Status Effect or similar on mobs such as Stunned or Poisoned.
| Icon | NameInternal ID
|
DLC exclusive | Soul requiring | Properties | Obtainable location[1] | Ancient Hunt Runes |
|---|---|---|---|---|---|---|

|
✖ | ✖ |
|
|
||
|
✖ | ✖ |
|
|||
|
✖ | ✖ | This gong reduces the amount of damage and health of the mobs around it. | |||

|
Creeping Winter | ✖ |
|
|
||

|
✖ | ✖ | Turns up to three mobs near you into allies for ten seconds, then kills them. Mobs that have been charmed by this artifact also gain a damage boost when turning on other mobs. The damage of the mobs increased is directly proportional to the item's power level. | |||
|
Howling Peaks | ✖ |
|
|||
|
✖ | ✖ |
|
Quivers and arrow artifacts[]
Artifacts providing a set number of special ammo that can be consumed by using Ranged Weapons. Infinity-enchanted ranged weapons function on artifact provided ammo. Like normal arrows, they are affected by ranged weapon enchantments and can be boosted by armor that boosts ammo damage or artifact damage.
| Icon | NameInternal ID
|
DLC exclusive | Soul requiring | Properties | Obtainable location[1] | Ancient Hunt Runes |
|---|---|---|---|---|---|---|
| ✖ | ✖ | Gives 1 fireworks arrow
Explodes on impact. 30 second cooldown |
|
|||

|
✖ | ✖ |
|
|||

|
✖ | ✔ |
6 second cooldown |
|||

|
✖ | ✖ |
|
|
||
|
Hidden Depths | ✖ |
|
|
||
| Echoing Void | ✖ |
|
Summoning artifacts[]
Pet spawning artifacts that can damage and distract mobs. More summons can be spawned from the same artifact during a Daily Trial with an increased pet count.
| Icon | NameInternal ID
|
DLC exclusive | Soul requiring | Properties | Obtainable location[1] | Ancient Hunt Runes |
|---|---|---|---|---|---|---|

|
✖ | ✖ |
|
|
||
|
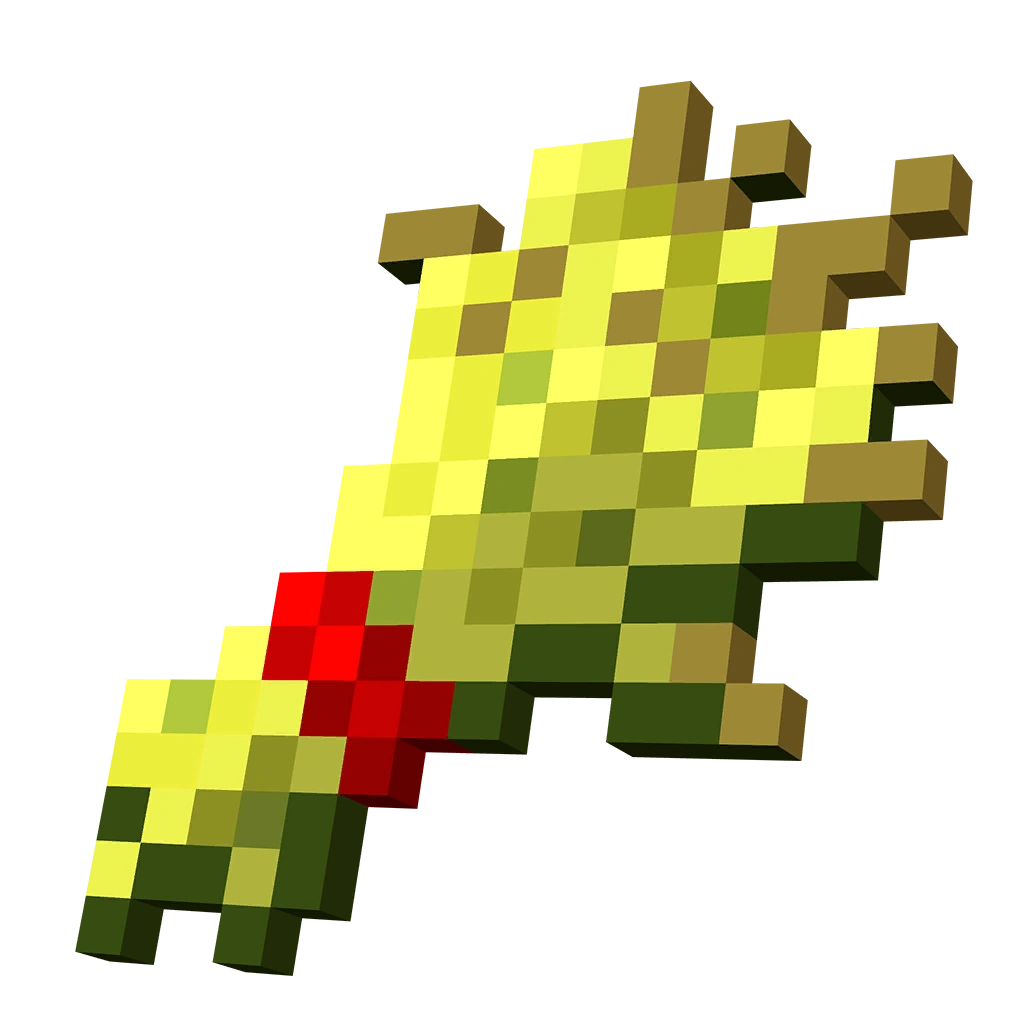
Enchanted Grass | ✖ | ✖ |
|
|
|

|
✖ | ✖ |
|
|||

|
✖ | ✔ |
|
|||

|
✖ | ✖ |
|
|||

|
Echoing Void | ✖ |
|
|||
|
✖ | ✖ |
|
Agility artifacts[]
These increase movement speed, attack speed or cause the player to roll when used.
| Icon | NameInternal ID
|
DLC exclusive | Soul requiring | Properties | Obtainable location[1] | Ancient Hunt Runes |
|---|---|---|---|---|---|---|

|
✖ | ✖ | Applies Swiftness
5 Second Cooldown |
|||

|
Death Cap Mushroom | ✖ | ✖ | Greatly increase attack and movement speed.
30 second cooldown |
|
|

|
✖ | ✖ | Gives player Ghost Form, increasing speed and defense for a short time.
6 second cooldown |
|||

|
✖ | ✖ |
|
Defensive, healing, and cooperative artifacts[]
These heal or apply beneficial affects upon the user or surrounding players and pets.
| Icon | NameInternal ID
|
DLC exclusive | Soul requiring | Properties | Obtainable location[1] | Ancient Hunt Runes |
|---|---|---|---|---|---|---|

|
Howling Peaks | ✖ | Applies Double Damage, Fast Attack, or Quick to nearby allies. | |||
|
✖ | ✖ | Applies Defense
25 second cooldown |
|||
|
Echoing Void | ✔ | Grants the user Shadow Form
|
|||

|
✖ | ✔ | Heals the most
injured nearby, including the user, at the cost of souls.
|
|
||
|
Echoing Void | ✔ | Creates a copy of the last consumable used by the player.
30 second cooldown |
|||

|
✖ | ✔ | Creates a boosting aura using souls to speed up other players' artifact cooldowns.
10 second cooldown |
|||

|
✖ | ✖ | Creates a healing aura, which gradually heals players inside.
30 second cooldown |
|
||

|
✖ | ✖ | Protects player and allies in range from projectiles. |
|
||
|
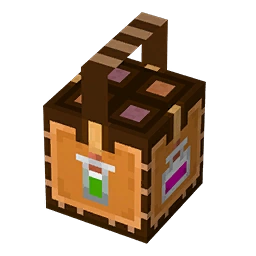
Hidden Depths | ✖ | Crafts two random potions that can benefit the player.
30 second cooldown |
|
||
|
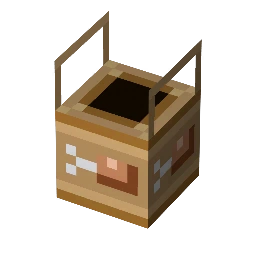
Hidden Depths | ✖ | Crafts a random food item that can benefit the player.
20 second cooldown |
|
||
|
✖ | ✖ | Pushes enemies away and slows them briefly. |
|
||

|
Flames of the Nether | ✖ | Applies an effect similar to Exploding.
8 second cooldown |
|
Unobtainable artifacts[]
| Icon | NameInternal ID
|
DLC exclusive | Soul requiring | Properties | Obtainable location |
|---|---|---|---|---|---|

|
Totem of Soul Protection | ✖ | ✔ |
Creates a square area around the player, reviving and stopping players from suffering a fatal blow. 1 second cooldown |
Unobtainable
|
History[]
| Minecraft Dungeons | |||||
|---|---|---|---|---|---|
Dungeons Beta{{Extension DPL}}<ul><li>[[Baked Potato|Baked Potato]]<br/>{{Item
| title = Baked Potato
| renewable = Yes
| heals = {{hunger|5}}
| stackable = Yes (64)}}
A '''baked potato''' is a [[food]] [[item]] that can be eaten by the [[player]].
== Obtaining ==
Baked potatoes can be obtained by cooking [[potato]]es in a [[furnace]], [[smoker]], or [[campfire]].
{{Smelting
|Potato
|Baked Potato
|0,35
}}
{{IN|JE}}, baked potatoes can also be obtained by killing a zombie or one of its variants while it is on fire. The drop chance is still affected by [[Looting]].
=== Chest loot ===
{{LootChestItem|baked-potato}}
== Usage ==
To eat a baked potato, press and hold {{control|use}} while it is selected in the [[hotbar]]. Eating one restores {{hunger|5}} hunger and 6.0 hunger [[Hunger#Mechanics|saturation]].
=== Crafting ingredient ===
{{crafting usage}}
=== Composting ===
Placing a baked potato into a [[composter]] has an 85% chance of raising the compost level by 1. This is more efficient than composting with raw potatoes.
== Sounds ==
{{Sound table/Entity/Food}}
== Data values ==
=== ID ===
{{edition|java}}:
{{ID table
|edition=java
|showforms=y
|generatetranslationkeys=y
|displayname=Baked Potato
|spritetype=item
|nameid=baked_potato
|form=item
|foot=1}}
{{edition|bedrock}}:
{{ID table
|edition=bedrock
|shownumericids=y
|showforms=y
|notshowbeitemforms=y
|generatetranslationkeys=y
|displayname=Baked Potato
|spritetype=item
|nameid=baked_potato
|id=281
|form=item
|foot=1}}
== Advancements ==
{{load advancements|Husbandry;A Balanced Diet}}
== History ==
{{History|java}}
{{History||1.4.2|snap=12w34a|[[File:Baked Potato JE1.png|32px]] Added baked potatoes.}}
{{History|||snap=12w37a|[[File:Baked Potato JE2 BE1.png|32px]] The texture of baked potatoes has been slightly changed.}}
{{History||1.8|snap=14w02a|Baked potatoes now restore {{Hunger|5}} hunger points instead of 6.}}
{{History|||snap=14w27a|Baked potatoes are now used to craft [[rabbit stew]].}}
{{History||1.13|snap=17w47a|Prior to [[1.13/Flattening|''The Flattening'']], this [[item]]'s numeral ID was 393.}}
{{History||1.14|snap=18w43a|[[File:Baked Potato JE3.png|32px]] The texture of baked potatoes has been changed.}}
{{History|||snap=18w50a|[[File:Baked Potato JE4 BE2.png|32px]] The texture of baked potatoes has been changed, once again.}}
{{History|||snap=19w03a|Placing a baked potato into the new [[composter]] has an 80% chance of raising the compost level by 1.}}
{{History|||snap=19w05a|Baked potatoes now have an 85% chance of increasing the compost level in a composter by 1.}}
{{History||1.17|snap=21w13a|Baked potatoes can now be dropped by flaming [[zombie]]s.<ref>{{bug|MC-199065}}</ref>}}
{{History||1.19|snap=22w13a|Baked potatoes can now be found in [[ancient city]] ice box [[chest]]s.}}
{{History|upcoming java}}
{{History||Villager Trade Rebalance<br>(Experimental)|link=Java Edition 1.20.2|snap=23w31a|[[Wandering trader]]s now have a chance to [[trading|buy]] baked potatoes from the player.}}
{{History|pocket alpha}}
{{History||v0.8.0|snap=build 1|[[File:Baked Potato JE2 BE1.png|32px]] Added baked potatoes.}}
{{History||v0.12.1|snap=build 1|Baked potatoes now restore [[hunger]] instead of [[health]].}}
{{History||v0.13.0|snap=build 1|Baked potatoes are now used to craft [[rabbit stew]].}}
{{History|bedrock}}
{{History||1.10.0|snap=beta 1.10.0.3|[[File:Baked Potato JE4 BE2.png|32px]] The texture of baked potatoes has been changed.}}
{{History||1.11.0|snap=beta 1.11.0.1|Baked potatoes can now be used to fill up [[composter]]s.}}
{{History|console}}
{{History||xbox=TU14|xbone=CU1|ps=1.04|wiiu=Patch 1|switch=1.0.1|[[File:Baked Potato JE2 BE1.png|32px]] Added baked potatoes.}}
{{History||ps=1.00|[[File:Baked Potato JE2 BE1.png|32px]] Added baked potatoes to the [[PlayStation 4 Edition|PS4]] and [[PlayStation Vita Edition|PSVita]].}}
{{History||xbox=none|xbone=none|ps=1.90|wiiu=none|switch=none|[[File:Baked Potato JE4 BE2.png|32px]] The texture of baked potatoes has been changed.}}
{{History|new3DS}}
{{History||0.1.0|[[File:Baked Potato JE2 BE1.png|32px]] Added baked potatoes.}}
{{History|foot}}
== Issues ==
{{issue list}}
== See also ==
* {{ItemLink|Poisonous Potato}}
{{Items}}
[[Category:Food]]
[[Category:Renewable resources]]
[[cs:Pečená brambora]]
[[de:Ofenkartoffel]]
[[es:Patata cocida]]
[[fr:Pomme de terre cuite]]
[[hu:Sült burgonya]]
[[it:Patata al forno]]
[[ja:ベイクドポテト]]
[[ko:구운 감자]]
[[nl:Gebakken aardappel]]
[[pl:Pieczony ziemniak]]
[[pt:Batata assada]]
[[ru:Печёный картофель]]
[[th:มันฝรั่งอบ]]
[[zh:烤马铃薯]]</li><li>[[Sweet Berries|Sweet Berries]]<br/>{{Block
| title = Sweet Berries
| image = <gallery>
Sweet Berry Bush Age 0.png| Age 0
Sweet Berry Bush Age 1.png| Age 1
Sweet Berry Bush Age 2.png| Age 2
Sweet Berry Bush Age 3.png| Age 3
</gallery>
| image2 = Sweet Berries JE1 BE1.png
| transparent = Yes
| light = No
| tool = Any
| renewable = Yes
| stackable = Yes (64)
| heals = {{hunger|2}}
| flammable = Yes (60 java, 30 bedrock)
| lavasusceptible = No
}}
'''Sweet berries''' are a [[food]] [[item]] obtained from sweet berry bushes and are used to plant them.
'''Sweet berry bushes''' are quick-growing, [[Bone Meal|bonemealable]] [[Plant|plants]] that grow sweet berries, and damage and slow [[Player|players]] and most [[Mob|mobs]] moving through them. They can be found naturally in [[taiga]] and [[Snowy Taiga|snowy taiga]] biomes.
== Obtaining ==
=== Breaking ===
{{See also|Fortune#Discrete random}}
Sweet berry bushes can be mined instantly with any tool or by hand. A mature sweet berry bush yields 2–3 sweet berries. On its third growth stage, it yields 1–2 sweet berries. Each level of [[Fortune]] can increase the amount of drops by 1.
{{IN|ps4}}, the sweet berries drop into the player's inventory. In other editions, they drop on the ground.
=== Natural generation ===
Berry bushes commonly generate in [[taiga]] and [[snowy taiga]] biomes. Each [[chunk]] has {{frac|1|12}} chance to generate sweet berry bushes in [[random patch]]es. They also generate in both [[old growth pine taiga]] and [[old growth spruce taiga]].
=== Chest loot ===
{{LootChestItem|sweet-berries}}
=== Post-generation ===
Sweet berries can be collected from a sweet berry bush by {{control|using}} or {{control|breaking}} it, which yield 1–2 sweet berries in its third growth stage, and 2–3 sweet berries in its final growth stage.
== Usage ==
=== Placement ===
Placing [[sweet berries]] on a [[grass block]], [[dirt]], [[podzol]], [[coarse dirt]], [[farmland]]{{Only|Java}}, or [[moss block]] creates a small sweet berry bush that eventually becomes a fully grown sweet berry bush.
=== Growth ===
A sweet berry bush grows through four stages after it is planted. Its first growth stage is a small bush without any berries. It becomes a grown plant in its second stage, and produces berries in its third and fourth growth stage. The bush needs to be in light level 9 or greater to grow. {{control|Using}} [[bone meal]] on it increases its growth stage by one, and at full maturity, ejects the sweet berry item. The bush can be placed on a 1 block high space, but it cannot grow with a full, non-transparent block immediately above it.
=== Food ===
To eat sweet berries, press and hold {{control|use}} while it is selected in the hotbar. Eating one restores {{hunger|2}} [[hunger]] and 0.4{{only|je|short=1}} / 1.2{{only|be|short=1}} hunger [[saturation]].
=== Composting ===
Placing sweet berries into a [[composter]] has a 30% chance of raising the compost level by 1.
=== Breeding ===
Sweet berries can be fed to [[fox]]es to [[breeding|breed]] them. Foxes are similar to cats when being fed as a wild animal; a sudden movement by the [[player]] may cause the fox to flee even if the player holds sweet berries. A baby fox bred by a [[player]] trusts the player and does not flee.
=== Trading ===
Master-level butcher [[villager]]s offer to [[trading|buy]] 10 sweet berries for an [[emerald]].
=== Entity movement ===
A sweet berry bush (at any stage) slows down all [[entity|entities]] (except [[Item (entity)|items]]) passing through it. At stage 1 and higher, it causes damage. [[Fox]]es are immune to both characteristics, however. Sweet berry bushes deal {{hp|1}} [[damage]] every 0.5 seconds, only if the entity is moving in the hitbox of the bush. Entities that move through sweet berry bushes slow down to about 34.05% of their normal speed, similar to how a [[cobweb]] slows down mobs to 15% of normal speed. This makes it impossible to jump a full [[block]] while inside the bush.
Mobs at standard block height in a [[minecart]] are not damaged when the minecart is pushed through sweet berries. Players in a sweet berry bush take no damage except from horizontal movement, but are unable to jump out of the bush, similar to a cobweb.
=== Bees ===
[[Bee]]s pollinate sweet berry bushes, and then increase the honey level in [[beehive]]s and bee nests by 1.{{only|java}}
== Sounds ==
=== Generic ===
==== Block ====
{{Sound table/Block/Sweet berry bush}}
==== Item ====
{{Sound table/Entity/Food}}
=== Unique ===
{{edition|java}}:
{{Sound table
|rowspan=2
|sound=Berries pick1.ogg
|sound2=Berries pick2.ogg
|subtitle=Berries pop
|source=block
|description=When sweet berries are picked by a player
|id=block.sweet_berry_bush.pick_berries
|translationkey=subtitles.item.berries.pick
|volume=1.0
|pitch=0.8-1.2
|distance=16}}
{{Sound table
|subtitle=Berries pop
|source=block
|description=When sweet berries are picked by a fox
|id=block.sweet_berry_bush.pick_berries
|translationkey=subtitles.item.berries.pick
|volume=1.0
|pitch=1.0
|distance=16}}
{{Sound table
|sound=Player hurt sweet berry bush1.ogg
|sound2=Player hurt sweet berry bush2.ogg
|subtitle=Player hurts
|source=player
|description=When a player is damaged by touching a sweet berry bush
|id=entity.player.hurt_sweet_berry_bush
|translationkey=subtitles.entity.player.hurt
|volume=1.0
|pitch=0.8-1.2
|distance=16
|foot=1}}
{{edition|bedrock}}:
{{Sound table
|type=bedrock
|sound=Berries pick1.ogg
|sound2=Berries pick2.ogg
|source=block
|description=When sweet berries are picked
|id=block.sweet_berry_bush.pick
|volume=1.0
|pitch=1.0}}
{{Sound table
|sound=Player hurt sweet berry bush1.ogg
|sound2=Player hurt sweet berry bush2.ogg
|source=block
|description=When a player is damaged by touching a sweet berry bush
|id=block.sweet_berry_bush.hurt
|volume=1.0
|pitch=1.0
|foot=1}}
== Data values ==
=== ID ===
{{edition|java}}:
{{ID table
|edition=java
|showblocktags=y
|showitemtags=y
|showforms=y
|generatetranslationkeys=y
|displayname=Sweet Berry Bush
|spritetype=block
|nameid=sweet_berry_bush
|blocktags=azalea_log_replaceable, bee_growables
|form=block}}
{{ID table
|displayname=Sweet Berries
|spritetype=item
|nameid=sweet_berries
|itemtags=fox_food
|form=item
|foot=1}}
{{edition|bedrock}}:
{{ID table
|edition=bedrock
|shownumericids=y
|showforms=y
|generatetranslationkeys=y
|displayname=Sweet Berry Bush
|spritetype=block
|nameid=sweet_berry_bush
|id=462
|form=block}}
{{ID table
|displayname=Sweet Berries
|spritetype=item
|nameid=sweet_berries
|id=287
|form=item
|foot=1}}
=== Block states ===
{{see also|Block states}}
{{/BS}}
==Advancements==
{{Load advancements|Husbandry;A Balanced Diet;The Parrots and the Bats;Two by Two}}
== History ==
{{History||September 26, 2018|link={{tweet|minecraft|1044587405779451906}}|Berries are announced to be part of the [[biome]] vote at [[MINECON Earth 2018]].}}
{{History||September 29, 2018|link={{tweet|minecraft|1046097775199498245}}|[[Taiga]] wins the [[biome]] vote, meaning berries are to be added to the game first.}}
{{History|java}}
{{History||December 3, 2018|link={{tweet|cojomax99|1069586461173919745}}|[[Cojomax99]] tweets an image of some berries.}}
{{History||1.14|snap=18w49a|[[File:Sweet Berry Bush Age 0 JE1 BE1.png|32px]] [[File:Sweet Berry Bush Age 1 JE1 BE1.png|32px]] [[File:Sweet Berry Bush Age 2 JE1 BE1.png|32px]] [[File:Sweet Berry Bush Age 3 JE1 BE1.png|32px]] Added sweet berry bushes.|
[[File:Sweet Berries JE1 BE1.png|32px]] Added sweet berries.}}
{{History|||snap=18w50a|Sweet berries can now be found within [[taiga]] [[village]] loot [[chest]]s.}}
{{History|||snap=19w03a|Placing a sweet berry into the new [[composter]] has a 10% chance of raising the compost level by 1.
|Added [[sound]]s for sweet berry bushes.}}
{{History|||snap=19w05a|Sweet berries now have a 30% chance of increasing the compost level in a composter by 1.
|The [[sound]] for planting sweet berries has been changed.}}
{{History|||snap=19w07a|Sweet berries can now be fed to [[fox]]es to [[breeding|breed]] them.}}
{{History|||snap=19w11a|Butcher [[villager]]s now [[trading|buy]] sweet berries.}}
{{History||1.15|snap=19w34a|[[Bee]]s can now pollinate sweet berry bushes.}}
{{History|||snap=Pre-Release 2|Sweet berries now generate in [[giant tree taiga]] biomes.}}
{{History||1.16|snap=Pre-release 1|Sweet berry bushes no longer prevent mob spawning inside them.}}
{{History||1.17|snap=21w20a|The sound event for picking berries has been changed as to align better with that of glow berries.<ref>{{bug|MC-220063}}</ref>}}
{{History||1.18|snap=1.18-pre5|Sweet berry bushes in taigas are about 4 times more common than in previous snapshots.}}
{{History|bedrock}}
{{History||1.10.0|snap=beta 1.10.0.3|[[File:Sweet Berries JE1 BE1.png|32px]] Added sweet berries, which are available only through Experimental Gameplay.|[[File:Sweet Berry Bush Age 0 JE1 BE1.png|32px]] [[File:Sweet Berry Bush Age 1 JE1 BE1.png|32px]] [[File:Sweet Berry Bush Age 2 JE1 BE1.png|32px]] [[File:Sweet Berry Bush Age 3 JE1 BE1.png|32px]] Added sweet berry bushes, available only through Experimental Gameplay.}}
{{History||1.11.0|snap=beta 1.11.0.1|Sweet berries can now be used to fill [[composter]]s.}}
{{History|||snap=beta 1.11.0.3|Sweet berries and sweet berry bushes have been fully implemented and are now separate from Experimental Gameplay.}}
{{History|||snap=beta 1.11.0.4|Sweet berries can now be [[trading|sold]] to butcher [[villager]]s.}}
{{History||1.13.0|snap=beta 1.13.0.1|Sweet berries can now be fed to [[fox]]es to [[breeding|breed]] them.}}
{{History||1.14.0|snap=beta 1.14.0.1|[[Bee]]s can now pollinate sweet berry bushes.}}
{{History||1.16.100|snap=beta 1.16.100.54|Sweet berry bushes now properly damage entities.<ref>{{Bug|MCPE-56142}}</ref>}}
{{History||1.17.0|snap=beta 1.17.0.56|Bees no longer gather nectar from sweet berry bushes.}}
{{History|PS4}}
{{History||1.91|[[File:Sweet Berries JE1 BE1.png|32px]] Added sweet berries.|[[File:Sweet Berry Bush Age 0 JE1 BE1.png|32px]] [[File:Sweet Berry Bush Age 1 JE1 BE1.png|32px]] [[File:Sweet Berry Bush Age 2 JE1 BE1.png|32px]] [[File:Sweet Berry Bush Age 3 JE1 BE1.png|32px]] Added sweet berry bushes.}}
{{History|foot}}
=== Sweet berry bush "item" ===
{{:Technical blocks/Sweet Berry Bush}}
== Issues ==
{{issue list|berry|berries|sweet berry|sweet berries|berry bush|sweet berry bush}}
==Trivia==
* {{IN|java}}, sweet berry bushes absorb [[fall damage]] like [[water]].<ref>{{bug|MC-149990|||WAI}}</ref>
* Foxes harvest mature sweet berry bushes that have grown into their third or fourth stage. Unlike how carrots eaten by rabbits are destroyed and not dropped as items, sweet berry bushes harvested by foxes drop as items, although the fox may pick up one of the dropped berries. The bush remains intact, allowing for automatic sweet berry farms.
== Gallery ==
<gallery>
Berry Bush.png|A close-up look of a sweet berry bush.
Naturally generated berry bushes.png|A naturally generated sweet berry bush.
Multiplebushes.png|Multiple bushes of sweet berries in Taiga biome.
BerryBushCloseToRavine.png|A berry bush that is close to a ravine.
Cozy Cabin Berries.jpg|Berry bushes near a cozy cabin.
</gallery>
==References==
{{Reflist}}
{{Blocks|vegetation}}
{{Items}}
[[Category:Food]]
[[Category:Plants]]
[[Category:Non-solid blocks]]
[[Category:Natural blocks]]
[[Category:Flammable blocks]]
[[cs:Sladké bobule]]
[[es:Bayas dulces]]
[[de:Süßbeeren]]
[[fr:Baies sucrées]]
[[ja:スイートベリー]]
[[ko:달콤한 열매]]
[[pl:Słodkie jagody]]
[[pt:Bagas doces]]
[[ru:Сладкие ягоды]]
[[th:เบอร์รีหวาน]]
[[zh:甜浆果]]</li></ul> | Added corrupted beacon, harvester, lightning rod, fishing rod, gong of weakening, love medallion, shock powder, fireworks arrow, flaming quiver, torment quiver, golem kit, tasty bone, wonderful wheat, boots of swiftness, death cap mushroom, ghost cloak, light feather, iron hide amulet, soul healer, totem of regeneration, totem of shielding, wind horn, totem of soul protection. | ||||
1.1.1.0{{Extension DPL}}<ul><li>[[Melon Seeds|Melon Seeds]]<br/>{{Block
|image = <gallery>
Melon Stem Age 0.png | Age 0
Melon Stem Age 1.png | Age 1
Melon Stem Age 2.png | Age 2
Melon Stem Age 3.png | Age 3
Melon Stem Age 4.png | Age 4
Melon Stem Age 5.png | Age 5
Melon Stem Age 6.png | Age 6
Melon Stem Age 7.png | Age 7
</gallery>
| image2 = <gallery>
Attached Melon Stem (N).png | North
Attached Melon Stem (E).png | East
Attached Melon Stem (S).png | South
Attached Melon Stem (W).png | West
</gallery>
| transparent = Yes
| light = No
| tool = none
| renewable = Yes
| stackable = Yes (64)
| flammable = No
| lavasusceptible = No
}}'''Melon seeds''' are items obtained from [[Melon Slice|melon slices]] that can be used to grow melon stems.
'''Melon stems''' are plants grown on [[farmland]] that, over time, grow [[melon]]s on dirt, mud and moss blocks adjacent to them.
== Obtaining ==
=== Breaking ===
When broken, a melon stem drops 0–3 melon seeds. The chance for melon seeds to drop increases with the stem's age.
{| class="wikitable"
! rowspan="3" |[[Resource location]]
! rowspan="3" | Source
! colspan="4" | Default
|-
| colspan="1" rowspan="2" style="text-align:center" | Nothing || colspan="3" style="text-align:center" |{{ItemLink|Melon Seeds|Melon seeds}}
|-
| style="text-align:center" | 1 || style="text-align:center" | 2 || style="text-align:center" | 3
|-
| rowspan="8" |<code>blocks/melon_stem</code>
|{{BlockLink|Melon Stem|Melon stem}} <code>age = 0</code>
| style="text-align:center" |81.3%|| style="text-align:center" |17.42%|| style="text-align:center" |1.24%|| style="text-align:center" |0.03%
|-
|{{BlockLink|Melon Stem|Melon stem}} <code>age = 1</code>
| style="text-align:center" |65.1%|| style="text-align:center" |30.04%|| style="text-align:center" |4.62%|| style="text-align:center" |0.24%
|-
|{{BlockLink|Melon Stem|Melon stem}} <code>age = 2</code>
| style="text-align:center" |51.2%|| style="text-align:center" |38.4%|| style="text-align:center" |9.6%|| style="text-align:center" |0.8%
|-
|{{BlockLink|Melon Stem|Melon stem}} <code>age = 3</code>
| style="text-align:center" |39.44%|| style="text-align:center" |43.02%|| style="text-align:center" |15.64%|| style="text-align:center" |1.9%
|-
|{{BlockLink|Melon Stem|Melon stem}} <code>age = 4</code>
| style="text-align:center" |29.13%|| style="text-align:center" |44.44%|| style="text-align:center" |22.22%|| style="text-align:center" |3.7%
|-
|{{BlockLink|Melon Stem|Melon stem}} <code>age = 5</code>
| style="text-align:center" |21.6%|| style="text-align:center" |43.2%|| style="text-align:center" |28.8%|| style="text-align:center" |6.4%
|-
|{{BlockLink|Melon Stem|Melon stem}} <code>age = 6</code>
| style="text-align:center" |15.17%|| style="text-align:center" |39.82%|| style="text-align:center" |34.84%|| style="text-align:center" |10.16%
|-
|{{BlockLink|Melon Stem|Melon stem}} <code>age = 7</code>
| style="text-align:center" |10.16%|| style="text-align:center" |34.84%|| style="text-align:center" |39.82%|| style="text-align:center" |15.17%
|-
| rowspan="1" |<code>blocks/attached_melon_stem</code>
|{{BlockLink|Attached Melon Stem|Attached Melon stem}}
| style="text-align:center" |10.16%|| style="text-align:center" |34.84%|| style="text-align:center" |39.82%|| style="text-align:center" |15.17%
|}
=== Natural generation ===
Melon stems generate naturally in stem farm inside [[woodland mansion]]s.
Melon stems generate in 20% of the farm plots in [[savanna]] [[village]]s, and 10% of the farm plots in [[desert]] villages.
=== Chest loot ===
{{LootChestItem|melon-seeds}}
=== Crafting ===
{{Crafting
|Melon Slice
|Output= Melon Seeds
|type= Material
}}
=== Trading ===
[[Wandering trader]]s sell melon seeds for 1 [[emerald]].
== Usage ==
=== Farming ===
{{see also|Tutorials/Pumpkin and melon farming}}
Melon seeds can be planted only on [[farmland]], as stems. Over time, a stem grows through several stages<sup>[''[[Talk:Pumpkin Seeds|needs testing]]'']</sup> and, at its final growth stage, will produce [[melon]]s on any adjacent [[dirt]], [[Coarse Dirt|coarse dirt]], [[Rooted Dirt|rooted dirt]], [[Grass Block|grass block]], [[farmland]], [[podzol]], [[mycelium]], [[Moss Block|moss block]], [[mud]] or [[Muddy Mangrove Roots|muddy mangrove roots]]. If a melon is already occupying a spot adjacent to a stem it does not grow more melons until the melons is removed. A single stem can grow an unlimited number of melons. Melon stems need a minimum light level of 10 in the block above the stem to grow and give melons. Melon seeds are affected by [[bone meal]] only with respect to stem growth; bone meal does not help produce the actual melons.
=== Breeding ===
Like other seeds, melon seeds can be used to [[breed]] [[chicken]]s, lead chickens around, and make baby chickens grow up faster by 10% of the remaining time.
=== Taming ===
Like other seeds, melon seeds can be used to tame [[parrot]]s.
=== Composting ===
Placing melon seeds into a [[composter]] has a 30% chance of raising the compost level by 1.
== Melon Stem ==
A '''melon stem''' is the block that is planted on [[farmland]] when melon seeds are used on it. It starts underground, and rises up as the plant grows. The stem is colored green when young, and then yellow once fully grown.
The stem curves once a melon has grown from it. A fully-grown single stem connects to any [[melon]] in an adjacent square, thus there are 5 possible appearances to a stem. If there are multiple melons it can connect to, it favors the east, then west, north, and south. When the melon is removed, the stem returns to its straight shape.
== Sounds ==
{{Sound table/Block/Hard crop}}
== Data values ==
=== ID ===
{{edition|java}}:
{{ID table
|edition=java
|showblocktags=y
|showforms=y
|generatetranslationkeys=y
|displayname=Melon Stem
|spritetype=block
|nameid=melon_stem
|blocktags=bee_growables, crops
|form=block}}
{{ID table
|displayname=Attached Melon Stem
|spritetype=block
|nameid=attached_melon_stem
|form=block}}
{{ID table
|displayname=Melon Seeds
|spritetype=item
|nameid=melon_seeds
|form=item
|foot=1}}
{{edition|bedrock}}:
{{ID table
|edition=bedrock
|shownumericids=y
|showforms=y
|generatetranslationkeys=y
|displayname=Melon Stem
|spritetype=block
|nameid=melon_stem
|id=105
|form=block
|translationkey=-}}
{{ID table
|displayname=Melon Seeds
|spritetype=item
|nameid=melon_seeds
|id=293
|form=item
|foot=1}}
=== Block states ===
{{see also|Block states}}
{{/BS}}
== Advancements ==
{{load advancements|A Seedy Place}}
== History ==
{{info needed section|check if stems floated above farmland upon initial implementation}}
{{History|java beta}}
{{History||1.8|snap=Pre-release|[[File:Melon Seeds JE1 BE1.png|32px]] Added melon seeds.
|[[File:Melon Stem Age 0 JE1.png|32px]] [[File:Stem Age 1 JE1.png|32px]] [[File:Melon Stem Age 2 JE1.png|32px]] [[File:Melon Stem Age 3 JE1.png|32px]] [[File:Melon Stem Age 4 JE1.png|32px]] [[File:Melon Stem Age 5 JE1.png|32px]] [[File:Melon Stem Age 6 JE1.png|32px]] [[File:Melon Stem Age 7 JE1.png|32px]] Added the melon stem, with seven stages of growth.
|Melon seeds can found in the new [[mineshaft]] [[chest]]s.
|[[File:Attached Melon Stem (N) JE1.png|32px]] [[File:Attached Melon Stem (E) JE1.png|32px]] [[File:Attached Melon Stem (S) JE1.png|32px]] [[File:Attached Melon Stem (W) JE1.png|32px]] Melon stems have four slightly visually distinct appearances for each facing direction - the bent part of the stem rotates, but the other two planes do not.
|[[File:Melon Stem Age 8 JE1.png|32px]] [[File:Melon Stem Age 9 JE1.png|32px]] [[File:Melon Stem Age 10 JE1.png|32px]] [[File:Melon Stem Age 11 JE1.png|32px]] [[File:Melon Stem Age 12 JE1.png|32px]] [[File:Melon Stem Age 13 JE1.png|32px]] [[File:Melon Stem Age 14 JE1.png|32px]] [[File:Melon Stem Age 15 JE1.png|32px]] Melon stem data values 8–15 now show a glitched formation, with a floating stem with an attached stem cross eventually emerging below.
|[[File:Attached Stem Age 8 JE1.png|32px]] [[File:Attached Stem Age 9 JE1.png|32px]] [[File:Attached Stem Age 10 JE1.png|32px]] [[File:Attached Stem Age 11 JE1.png|32px]] [[File:Attached Stem Age 12 JE1.png|32px]] [[File:Attached Stem Age 13 JE1.png|32px]] [[File:Attached Stem Age 14 JE1.png|32px]] [[File:Attached Stem Age 15 JE1.png|32px]] Melon stem blocks with data values higher than 7 can now attach to adjacent fruits, which results in buggy stem textures with [[vines]] in the mix due to vines being below attached stems in [[terrain.png]].}}
{{History|||snap=Pre-release 2 ;)|Melon stems can now be grown faster using [[bone meal]].}}
{{History|java}}
{{History||1.3.1|snap=1.3|The texture of melon stems has been moved one pixel to the left in [[terrain.png]].
|[[File:Melon Stem Age 0 JE2.png|32px]] [[File:Melon Stem Age 1 JE2.png|32px]] [[File:Melon Stem Age 2 JE2.png|32px]] [[File:Melon Stem Age 3 JE2.png|32px]] [[File:Melon Stem Age 4 JE2.png|32px]] [[File:Melon Stem Age 5 JE2.png|32px]] [[File:Melon Stem Age 6 JE2.png|32px]] [[File:Melon Stem Age 7 JE2.png|32px]] Stems now appear slightly different.
|[[File:Melon Stem Age 8 JE2.png|32px]] [[File:Melon Stem Age 9 JE2.png|32px]] [[File:Melon Stem Age 10 JE2.png|32px]] [[File:Melon Stem Age 11 JE2.png|32px]] [[File:Melon Stem Age 12 JE2.png|32px]] [[File:Melon Stem Age 13 JE2.png|32px]] [[File:Melon Stem Age 14 JE2.png|32px]] [[File:Melon Stem Age 15 JE2.png|32px]] Overgrown stems now appear slightly different.
|[[File:Attached Melon Stem (N) JE2.png|32px]] [[File:Attached Melon Stem (E) JE2.png|32px]] [[File:Attached Melon Stem (S) JE2.png|32px]] [[File:Attached Melon Stem (W) JE2.png|32px]] Attached melon stems now appear slightly different.
|[[File:Attached Stem Age 8 JE2.png|32px]] [[File:Attached Stem Age 9 JE2.png|32px]] [[File:Attached Stem Age 10 JE2.png|32px]] [[File:Attached Stem Age 11 JE2.png|32px]] [[File:Attached Stem Age 12 JE2.png|32px]] [[File:Attached Stem Age 13 JE2.png|32px]] [[File:Attached Stem Age 14 JE2.png|32px]] [[File:Attached Stem Age 15 JE2.png|32px]] Overgrown attached melon stems now appear slightly different.}}
{{History||1.4.2|snap=12w36a|[[Chicken]]s now use [[wheat seeds]], melon seeds, and [[pumpkin seeds]], instead of [[wheat]] to breed.}}
{{History||1.5|snap=13w02a|[[File:Melon Stem Age 0 JE3.png|32px]] [[File:Melon Stem Age 1 JE3.png|32px]] [[File:Melon Stem Age 2 JE3.png|32px]] [[File:Melon Stem Age 3 JE3.png|32px]] [[File:Melon Stem Age 4 JE3.png|32px]] [[File:Melon Stem Age 5 JE3.png|32px]] [[File:Melon Stem Age 6 JE3.png|32px]] Melon stems now use a squished version of their texture for immature stems, depending on age.
|[[File:Melon Stem Age 8 JE3.png|32px]] [[File:Melon Stem Age 9 JE3.png|32px]] [[File:Melon Stem Age 10 JE3.png|32px]] [[File:Melon Stem Age 11 JE3.png|32px]] [[File:Melon Stem Age 12 JE3.png|32px]] [[File:Melon Stem Age 13 JE3.png|32px]] [[File:Melon Stem Age 14 JE3.png|32px]] [[File:Melon Stem Age 15 JE3.png|32px]] This also affects melon stems of ages 8–15, which are likewise stretched to accommodate its predicted size.
|[[File:Attached Stem Age 8 JE3.png|32px]] [[File:Attached Stem Age 9 JE3.png|32px]] [[File:Attached Stem Age 10 JE3.png|32px]] [[File:Attached Stem Age 11 JE3.png|32px]] [[File:Attached Stem Age 12 JE3.png|32px]] [[File:Attached Stem Age 13 JE3.png|32px]] [[File:Attached Stem Age 14 JE3.png|32px]] [[File:Attached Stem Age 15 JE3.png|32px]] Melon stems of extreme ages, which are attached to adjacent fruits, now show a stretched and tinted stem appearance.}}
{{History|||snap=13w03a|[[File:Melon Stem Age 0 JE4.png|32px]] [[File:Melon Stem Age 1 JE4.png|32px]] [[File:Melon Stem Age 2 JE4.png|32px]] [[File:Melon Stem Age 3 JE4.png|32px]] [[File:Melon Stem Age 4 JE4.png|32px]] [[File:Melon Stem Age 5 JE4.png|32px]] [[File:Melon Stem Age 6 JE4.png|32px]] [[File:Melon Stem Age 7 JE4.png|32px]] Melon stems are no longer squished or stretched to account for age.<ref>{{bug|MC-7111}}</ref>
|[[File:Melon Stem Age 8 JE4.png|32px]] [[File:Melon Stem Age 9 JE4.png|32px]] [[File:Melon Stem Age 10 JE4.png|32px]] [[File:Melon Stem Age 11 JE4.png|32px]] [[File:Melon Stem Age 12 JE4.png|32px]] [[File:Melon Stem Age 13 JE4.png|32px]] [[File:Melon Stem Age 14 JE4.png|32px]] [[File:Melon Stem Age 15 JE4.png|32px]] Melon stems with age values 8 through 15 now show a tinted [[trapdoor]] texture.
|From this version up until 14w08a, overgrown melon stems start to draw from the texture below them on the [[texture atlas]], in much the same way they previously did with terrain.png. However, as texture atlases are unstable and textures tend to change positions as new blocks and textures are added, overgrown stems change the texture they draw from every time new textures are added, which includes when textures added by [[mods]].}}
{{History|||snap=13w09a|[[File:Melon Stem Age 8 JE5.png|32px]] [[File:Melon Stem Age 9 JE5.png|32px]] [[File:Melon Stem Age 10 JE5.png|32px]] [[File:Melon Stem Age 11 JE5.png|32px]] [[File:Melon Stem Age 12 JE5.png|32px]] [[File:Melon Stem Age 13 JE5.png|32px]] [[File:Melon Stem Age 14 JE5.png|32px]] [[File:Melon Stem Age 15 JE5.png|32px]] Melon stems with age values 8–15 now show a tinted [[birch wood]] texture.}}
{{History||1.6.1|snap=13w24a|Melon and pumpkin stems have now been assigned separate textures.
|[[File:Melon Stem Age 8 JE6.png|32px]] [[File:Melon Stem Age 9 JE6.png|32px]] [[File:Melon Stem Age 10 JE6.png|32px]] [[File:Melon Stem Age 11 JE6.png|32px]] [[File:Melon Stem Age 12 JE6.png|32px]] [[File:Melon Stem Age 13 JE6.png|32px]] [[File:Melon Stem Age 14 JE6.png|32px]] [[File:Melon Stem Age 15 JE6.png|32px]] Melon stems with age values 8–15 now show a tinted [[note block]] texture.}}
{{History||1.7.2|snap=13w37a|Added the {{cmd|setblock}} [[commands|command]], allowing for invalid stem ages to be placed in the world without using external editors. This also allows them to be obtained in earlier versions via backdating.}}
{{History|||snap=13w41a|[[File:Melon Stem Age 8 JE7.png|32px]] [[File:Melon Stem Age 9 JE7.png|32px]] [[File:Melon Stem Age 10 JE7.png|32px]] [[File:Melon Stem Age 11 JE7.png|32px]] [[File:Melon Stem Age 12 JE7.png|32px]] [[File:Melon Stem Age 13 JE7.png|32px]] [[File:Melon Stem Age 14 JE7.png|32px]] [[File:Melon Stem Age 15 JE7.png|32px]] Melon stems with age values 8–15 now show a tinted [[netherrack]] texture.}}
{{History||1.8|snap=14w10a|[[File:Melon Stem Age 8 JE8.png|32px]] [[File:Melon Stem Age 9 JE8.png|32px]] [[File:Melon Stem Age 10 JE8.png|32px]] [[File:Melon Stem Age 11 JE8.png|32px]] Melon stems with data values 8–11 now display a tinted attached stem, with 8 facing west, 9 facing east, 10 facing north and 11 facing south.
|Invalid melon stems with data values 12-15 now crash the game.}}
{{History|||snap=14w25a|[[File:Melon Stem Age 0 JE5.png|32px]] [[File:Melon Stem Age 1 JE5.png|32px]] [[File:Melon Stem Age 2 JE5.png|32px]] [[File:Melon Stem Age 3 JE5.png|32px]] [[File:Melon Stem Age 4 JE5.png|32px]] [[File:Melon Stem Age 5 JE5.png|32px]] [[File:Melon Stem Age 6 JE5.png|32px]] [[File:Melon Stem Age 7 JE5.png|32px]] Melon stems now render as a single diagonal plane, or, in the case of attached stems, a diagonal and orthogonal plane.
|[[File:Attached Melon Stem (N) JE3.png|32px]] [[File:Attached Melon Stem (E) JE3.png|32px]] [[File:Attached Melon Stem (S) JE3.png|32px]] [[File:Attached Melon Stem (W) JE3.png|32px]] The attached melon stem [[model]] now fully rotates to the direction the stem points. Prior to this update, the base of the melon stem would stay the same while the long attaching section would differ, resulting in four possible attached stem appearances.
|Invalid overgrown melon stems have effectively been removed from the game, as attempting to place an out of range stem via {{cmd|setblock}} creates a stem of age 0 and loading a world with such stems existing causes a game crash.}}
{{History|||snap=14w26a|[[File:Melon Stem Age 0 JE6.png|32px]] [[File:Melon Stem Age 1 JE6.png|32px]] [[File:Melon Stem Age 2 JE6.png|32px]] [[File:Melon Stem Age 3 JE6.png|32px]] [[File:Melon Stem Age 4 JE6.png|32px]] [[File:Melon Stem Age 5 JE6.png|32px]] [[File:Melon Stem Age 6 JE6.png|32px]] [[File:Melon Stem Age 7 JE6.png|32px]] [[File:Attached Melon Stem (N) JE4.png|32px]] [[File:Attached Melon Stem (E) JE4.png|32px]] [[File:Attached Melon Stem (S) JE4.png|32px]] [[File:Attached Melon Stem (W) JE4.png|32px]] Melon stems now correctly render as crosses again.<ref>{{bug|MC-58136}}</ref>}}
{{History|||snap=14w27a|[[File:Attached Stem Age 0 14w27a.png|32px]] [[File:Attached Stem Age 1 14w27a.png|32px]] [[File:Attached Stem Age 2 14w27a.png|32px]] [[File:Attached Stem Age 3 14w27a.png|32px]] [[File:Attached Stem Age 4 14w27a.png|32px]] [[File:Attached Stem Age 5 14w27a.png|32px]] [[File:Attached Stem Age 6 14w27a.png|32px]] Due to a bug, all melon stems appear attached regardless of age or any actual attachment.<ref>{{bug|MC-60208}}</ref>}}
{{History|||snap=14w28a|All melon stems appearing attached regardless of age or any actual attachment has been fixed. However, melon stems still appear attached to adjacent fruits regardless of age due to a similar bug.<ref>{{bug|MC-61716}}</ref>}}
{{History|||snap=14w34d|Melon seeds can no longer be used for [[breeding]] [[chicken]]s.}}
{{History||1.9|snap=15w31a|Chickens can now use melon seeds to breed again.}}
{{History|||snap=15w44a|Melon seeds have been added to [[dungeon]] [[chest]]s.
|The average yield of melon seeds from [[mineshaft]] chests has been decreased.}}
{{History|||snap=15w45a|Melon stems must now be fully grown again to attach.}}
{{History||1.11|snap=16w39a|Melon seeds can now be found inside chests in the new [[woodland mansion]]s.
|Melon crops now generate inside woodland mansions.}}
{{History||1.12|snap=17w18b|Placing a melon seeds in farmland now gives the player the "A Seedy Place" [[advancement]].{{verify}}}}
{{History||1.13|snap=17w47a|The different block states for the <code>melon_stem</code> ID have been split up into their own IDs.
|Prior to [[1.13/Flattening|''The Flattening'']], this [[block]]'s numeral ID was 105, and the [[item]]'s 362.}}
{{History|||snap=17w48a|Attached melon stems no longer [[drops|drop]] seeds.}}
{{History||1.14|snap=18w43a|[[File:Attached Melon Stem (N) JE5.png|32px]] [[File:Attached Melon Stem (E) JE5.png|32px]] [[File:Attached Melon Stem (S) JE5.png|32px]] [[File:Attached Melon Stem (W) JE5.png|32px]] The texture of attached melon stems has been changed.}}
{{History|||snap=18w49a|Melon stems now generate in the updated [[savanna]] [[village]]s.}}
{{History|||snap=18w50a|Melon stems now generate in the updated [[desert]] [[village]]s.}}
{{History|||snap=19w03a|Placing melon seeds into the new [[composter]] has a 10% chance of raising the compost level by 1.}}
{{History|||snap=19w05a|Melon seeds now have a 30% chance of increasing the compost level in a composter by 1.
|Added [[Wandering Trader|wandering trader]]s, which sell melon seeds.}}
{{History||1.15|snap=19w34a|[[Bee]]s can now pollinate melon stems.}}
{{History|||snap=19w39a|Attached melon stems now [[drops|drop]] seeds again.<ref>{{bug|MC-136360}}</ref>}}
{{History||1.18|snap=Pre-release 5|[[File:Melon Seeds JE2.png|32px]] The texture of melon seeds has been changed.}}
{{History|pocket alpha}}
{{History||v0.5.0|Added melon seeds.
|[[File:Melon Stem Age 0 JE1.png|32px]] [[File:Stem Age 1 JE1.png|32px]] [[File:Melon Stem Age 2 JE1.png|32px]] [[File:Melon Stem Age 3 JE1.png|32px]] [[File:Melon Stem Age 4 JE1.png|32px]] [[File:Melon Stem Age 5 JE1.png|32px]] [[File:Melon Stem Age 6 JE1.png|32px]] [[File:Melon Stem Age 7 JE1.png|32px]] [[File:Attached Melon Stem (N) JE1.png|32px]] [[File:Attached Melon Stem (E) JE1.png|32px]] [[File:Attached Melon Stem (S) JE1.png|32px]] [[File:Attached Melon Stem (W) JE1.png|32px]]{{verify|Are these models correct?}} Added melon stems.}}
{{History||v0.6.0|[[File:Melon Seeds JE1 BE1.png|32px]] Melon seeds no longer use the pumpkin seeds texture.}}
{{History||v0.9.0|snap=?|Melon seeds can now be found in [[mineshaft]] chests.}}
{{History||v0.12.1|snap=build 1|Melon seeds are no longer available from the [[Nether reactor]].}}
{{History||v0.14.0|snap=build 1|Melon seeds can now be found in [[minecart with chest|minecarts with chests]] in [[mineshaft]]s.}}
{{History|pocket}}
{{History||1.0.0|snap=alpha 0.17.0.1|Melon seeds now generate inside [[dungeon]] [[chest]]s.}}
{{History||1.1.0|snap=alpha 1.1.0.0|Melon crops now generate inside [[woodland mansion]]s.
|Melon seeds can now be found in woodland mansion chests.}}
{{History|bedrock}}
{{History||1.2.0|snap=beta 1.2.0.2|Melon seeds can now be found inside [[bonus chest]]s.
|Melon seeds are now used to tame [[parrot]]s.}}
{{History||1.10.0|snap=beta 1.10.0.3|[[File:Attached Melon Stem (W) JE5.png|32px]]{{info needed|More accurate image}} The texture of attached melon stems has been changed.
|Melon stems now generate in [[savanna]] and [[desert]] [[village]] farms.
|Added [[wandering trader]]s, who [[trading|sell]] melon seeds.}}
{{History||1.11.0|snap=beta 1.11.0.1|Melon seeds can now be used to fill up [[composter]]s.}}
{{History||1.14.0|snap=beta 1.14.0.1|[[Bee]]s can now pollinate melon stems.}}
{{History|console}}
{{History||xbox=TU5|xbone=CU1|ps=1.0|wiiu=Patch 1|[[File:Melon Seeds JE1 BE1.png|32px]] Added melon seeds.
|[[File:Melon Stem Age 0 JE1.png|32px]] [[File:Stem Age 1 JE1.png|32px]] [[File:Melon Stem Age 2 JE1.png|32px]] [[File:Melon Stem Age 3 JE1.png|32px]] [[File:Melon Stem Age 4 JE1.png|32px]] [[File:Melon Stem Age 5 JE1.png|32px]] [[File:Melon Stem Age 6 JE1.png|32px]] [[File:Melon Stem Age 7 JE1.png|32px]] [[File:Attached Melon Stem (N) JE1.png|32px]] [[File:Attached Melon Stem (E) JE1.png|32px]] [[File:Attached Melon Stem (S) JE1.png|32px]] [[File:Attached Melon Stem (W) JE1.png|32px]]{{verify|Are these models correct?}} Added melon stems.}}
{{History||xbox=none|xbone=none|ps=1.90|wiiu=none|switch=none|[[File:Attached Melon Stem (W) JE5.png|32px]]{{info needed|More accurate image}} The texture of attached melon stems has been changed.}}
{{History|New 3DS}}
{{History||0.1.0|[[File:Melon Stem Age 0 JE1.png|32px]] [[File:Stem Age 1 JE1.png|32px]] [[File:Melon Stem Age 2 JE1.png|32px]] [[File:Melon Stem Age 3 JE1.png|32px]] [[File:Melon Stem Age 4 JE1.png|32px]] [[File:Melon Stem Age 5 JE1.png|32px]] [[File:Melon Stem Age 6 JE1.png|32px]] [[File:Melon Stem Age 7 JE1.png|32px]] [[File:Attached Melon Stem (N) JE1.png|32px]] [[File:Attached Melon Stem (E) JE1.png|32px]] [[File:Attached Melon Stem (S) JE1.png|32px]] [[File:Attached Melon Stem (W) JE1.png|32px]]{{verify|Are these models correct?}} Added melon stems.}}
{{History|foot}}
<gallery>
Melon Stem with data value 15.png|The final version of the melon stem with age 15, as seen in-game.
Melonstems.png|Melon stems of ages 1–15 on a modded version of 1.7.2, hence the melon stems using the melon top texture.
Stems of 13w02a.png|All 16 stem sizes in 13w02a, with accompanying data values.
</gallery>
=== Melon stem "item" ===
{{:Technical blocks/Melon Stem}}
== Issues ==
{{issue list}}
== Gallery ==
<gallery>
Stem All Ages.png|All stages of growth.
AllSeeds.png|All the [[seeds]] that exist in the game.
</gallery>
== See also ==
* [[Melon]]
* [[Pumpkin Seeds]]
==References==
{{Reflist}}
{{Blocks|vegetation}}
{{Items}}
[[Category:Plants]]
[[Category:Food]]
[[Category:Non-solid blocks]]
[[Category:Generated structure blocks]]
[[cs:Semínka melounu]]
[[de:Melone]]
[[es:Semillas de sandía]]
[[fr:Graines de pastèque]]
[[hu:Dinnyemagok]]
[[it:Anguria]]
[[ja:スイカの種]]
[[ko:수박씨]]
[[nl:Meloenzaden]]
[[pl:Nasiona arbuza]]
[[pt:Sementes de melancia]]
[[ru:Семена арбуза]]
[[th:เมล็ดแตงโม]]
[[zh:西瓜种子]]</li><li>[[Raw Porkchop|Raw Porkchop]]<br/>{{Item
| title = Raw Porkchop
| image = Raw Porkchop.png
| renewable = Yes
| heals = {{hunger|3}}
| stackable = Yes (64)
}}
A '''raw porkchop''' is a [[food]] item that can be eaten by the [[player]] or cooked to make a [[cooked porkchop]].
== Obtaining ==
=== Mob loot ===
==== Pigs ====
Adult [[pig]]s drop 1–3 raw porkchop when killed. The maximum amount is increased by 1 per level of [[Looting]], for a maximum of 1-6 with Looting III. If killed while on fire, they drop [[cooked porkchop]] instead.
==== Hoglins ====
Adult [[hoglin]]s drop 2–4 raw porkchop when killed. The maximum amount is increased by 1 per level of [[Looting]], for a maximum of 7 with Looting III. If killed while on fire, they drop [[cooked porkchop]] instead.
=== Chest loot ===
{{LootChestItem|raw-porkchop}}
== Usage ==
=== Food ===
To eat raw porkchop, press and hold {{control|use}} while it is selected in the hotbar. Eating one restores {{hunger|3}} [[hunger]] and 0.6 [[Hunger#Mechanics|saturation]].
=== Smelting ingredient ===
{{Smelting
|showname=1
|Raw Porkchop
|Cooked Porkchop
|0.35
}}
=== Trading ===
{{IN|bedrock}}, novice-level butcher [[villager]]s have a {{frac|1|3}} chance to [[trading|buy]] 7 raw porkchop for an [[emerald]] as part of their [[trading|trades]].
{{IN|java}}, novice-level butcher villagers have a 40% chance to buy 7 raw porkchop for an emerald.
=== Wolves ===
Raw porkchops can be used to [[breed]] and heal tamed [[wolves]], lead them around, and make baby tamed wolves grow up faster by 10% of the remaining time.
=== Piglins ===
[[Piglin|Piglins]] instantly pick up raw or [[Cooked Porkchop|cooked porkchops]] that are within 1 block of them, unless they have already picked up one within the last 10 seconds. Porkchops picked up are not dropped upon the piglin's death.
==Sounds==
{{Sound table/Entity/Food}}
== Data values ==
=== ID ===
{{edition|java}}:
{{ID table
|edition=java
|showitemtags=y
|showforms=y
|generatetranslationkeys=y
|displayname=Raw Porkchop
|spritetype=item
|nameid=porkchop
|itemtags=piglin_food
|form=item
|foot=1}}
{{edition|bedrock}}:
{{ID table
|edition=bedrock
|shownumericids=y
|showforms=y
|notshowbeitemforms=y
|generatetranslationkeys=y
|displayname=Raw Porkchop
|spritetype=item
|nameid=porkchop
|id=262
|form=item
|foot=1}}
== Achievements ==
{{load achievements|Pork Chop}}
== Advancements ==
{{load advancements|Husbandry;A Balanced Diet}}
== History ==
{{History|java indev}}
{{History||20100219|[[File:Raw Porkchop JE1 BE1.png|32px]] Added raw porkchops.
|Raw porkchops restore {{hp|3}} and do not stack in the [[inventory]].
|Raw porkchops are [[drops|dropped]] by [[pig]]s.}}
{{History|java beta}}
{{History||1.4|Raw porkchops can now be given to [[wolf|wolves]].}}
{{History||1.8|snap=Pre-release|Raw porkchops can now be stacked to 64.<ref>{{Tweet|jeb|103408168356421632|Some Minecraft food changes...}}</ref>
|Raw porkchops now restore {{hunger|3}} to the [[Hunger|food bar]].}}
{{History|java}}
{{History||1.2.1|snap=12w03a|Raw porkchops can now be used to breed wolves.}}
{{History||1.3.1|snap=12w21a|Raw porkchops can now be [[trading|sold]] to butcher [[villager]]s, at 14–17 pork chops for 1 [[emerald]].}}
{{History|||snap=12w25a|[[Pig]]s now [[drops|drop]] 1–3 porkchops instead of 0–2.}}
{{History||1.4.2|snap=12w37a|[[File:Raw Porkchop JE2 BE2.png|32px]] The texture of raw porkchops has been changed, so that it no longer has a dark outline.}}
{{History||1.8|snap=14w02a|[[Trading]] has been changed; butcher villagers now [[trading|buy]] 14–18 porkchops for 1 emerald.}}
{{History||1.13|snap=17w47a|Prior to [[1.13/Flattening|''The Flattening'']], this [[item]]'s numeral ID was 319.}}
{{History||1.14|snap=18w43a|[[File:Raw Porkchop.png|32px]] The texture of raw porkchops has been changed.}}
{{History|||snap=18w49a|Raw porkchops can now be found in [[chest]]s in [[village]] butcher shops.}}
{{History||1.16|snap=20w07a|Raw porkchops are dropped by the new [[hoglin]]s.
|Raw porkchops have a {{frac|5|109}} (~4.59%) chance of being given by the new [[piglin]]s when [[bartering]], in a stack size of 2–5.}}
{{History|||snap=20w09a|Raw porkchops can no longer be obtained by bartering with piglins.}}
{{History|||snap=20w16a|Raw porkchops now generate in [[bastion remnants]] chests.}}
{{History|pocket alpha}}
{{History||v0.4.0|[[File:Raw Porkchop JE1 BE1.png|32px]] Added raw porkchops.}}
{{History||v0.5.0|Raw porkchops now restore {{hp|3}} instead of {{hp|1}}.}}
{{History||v0.8.0|snap=build 1|[[File:Raw Porkchop JE2 BE2.png|32px]] The texture of raw porkchops has been changed, so that it no longer has that dark outline.}}
{{History||v0.12.1|snap=build 1|Raw porkchops now restore [[hunger]] instead of [[health]].}}
{{History||v0.16.2|[[Pig]]s now [[drops|drop]] 1–3 raw porkchops rather than 0–2.}}
{{History|pocket}}
{{History||1.0.4|snap=alpha 1.0.4.0|14–18 raw porkchops can now be [[trading|sold]] to butcher [[villager]]s for an [[emerald]].}}
{{History|bedrock}}
{{History||1.10.0|snap=beta 1.10.0.3|[[File:Raw Porkchop.png|32px]] The texture of raw porkchops has been changed.}}
{{History||1.11.0|snap=beta 1.11.0.3|Raw porkchops can now be found in [[village]] butcher [[chest]]s.}}
{{History|||snap=beta 1.11.0.4|Butcher [[villager]]s now have {{frac|1|3}} chance to [[trading|buy]] 7 raw porkchops.}}
{{History|console}}
{{History||xbox=TU1|xbone=CU1|ps=1.0|wiiu=Patch 1|switch=1.0.1|[[File:Raw Porkchop JE1 BE1.png|32px]] Added raw porkchops.}}
{{History||xbox=TU5|Raw porkchops are now stackable to 64 and fills [[hunger]] instead of [[health]].}}
{{History||xbox=TU12|[[File:Raw Porkchop JE2 BE2.png|32px]] The texture of raw porkchops has been changed, so that it no longer has a dark outline.}}
{{History||xbox=none|xbone=none|ps=1.90|wiiu=none|switch=none|[[File:Raw Porkchop.png|32px]] The texture of raw porkchops has been changed.}}
{{History|new3DS}}
{{History||0.1.0|[[File:Raw Porkchop JE2 BE2.png|32px]] Added raw porkchops.}}
{{History|foot}}
== Issues ==
{{issue list}}
== Gallery ==
<gallery>
I Porkchop Minecraft JINX.jpg|Official T-shirt artwork "I Porkchop Minecraft" sold by [https://www.jinx.com JINX].
I Brake for Porkchop Bumper Sticker JINX.jpg|An official bumper sticker featuring a raw porkchop sold by JINX.
</gallery>
== References ==
{{reflist}}
== External Links ==
*[https://www.minecraft.net/en-us/article/taking-inventory--porkchop Taking Inventory: Porkchop] – Minecraft.net on February 13, 2020
{{Items}}
[[Category:Food]]
[[cs:Syrová kotleta]]
[[de:Rohes Schweinefleisch]]
[[es:Chuleta de cerdo cruda]]
[[fr:Côtelette de porc crue]]
[[hu:Nyers disznóhús]]
[[ja:生の豚肉]]
[[nl:Rauw varkensvlees]]
[[pl:Surowy schab]]
[[pt:Costeleta de porco crua]]
[[ru:Сырая свинина]]
[[uk:Сира свинина]]
[[zh:生猪排]]
[[Category:Renewable resources]]</li></ul> | Removed totem of soul protection. | ||||
1.2.0.0{{Extension DPL}}<ul><li>[[Cooked Porkchop|Cooked Porkchop]]<br/>{{Item
| title = Cooked Porkchop
| image = Cooked Porkchop.png
| renewable = Yes
| heals = {{hunger|8}}
| stackable = Yes (64)
}}
'''Cooked porkchop''' is a [[food]] [[item]] that can be eaten by the [[player]].
== Obtaining ==
{{see also|Tutorials/Animal farming|title1=Animal farming}}
Cooked porkchops can be obtained by cooking [[raw porkchop]]s or by [[trading]] with butchers, and is a [[drops|drop]] from [[pig]]s and [[hoglin]]s that die while on [[fire]].
=== Mob loot ===
==== Pigs ====
Adult [[pig]]s drop 1–3 cooked porkchop if killed while on fire. The maximum amount is increased by 1 per level of [[Looting]], for a maximum of 1-6 with Looting III.
==== Hoglins ====
Adult [[hoglin]]s drop 2–4 cooked porkchop if killed while on fire. The maximum amount is increased by 1 per level of Looting, for a maximum of 7 with Looting III.
=== Cooking ===
[[Raw porkchop]] can be cooked in a [[furnace]], [[smoker]], or [[campfire]]. Each piece of cooked porkchop removed from a furnace output slot gives 0.35 [[experience]] (22.4 experience per stack).
{{Smelting
|Raw Porkchop
|Cooked Porkchop
|0,35
}}
=== Trading ===
{{IN|java}}, apprentice-level butcher [[villager]]s have a {{frac|2|3}} chance of selling 5 cooked porkchop for 1 [[emerald]].
Butcher villagers may give players with the [[Hero of the Village]] effect a cooked porkchop.{{only|java}}
{{IN|bedrock}}, apprentice-level butcher villagers have a 25% chance to sell 5 cooked porkchop for 1 emerald.
=== Chest loot ===
{{LootChestItem|cooked-porkchop}}
== Usage ==
=== Food ===
{{see also|Tutorials/Hunger management|title1=Hunger management}}
To eat cooked porkchop, press and hold {{control|use}} while it is selected in the hotbar. Eating one restores {{hunger|8}} [[hunger]] and 12.8 [[Hunger#Mechanics|saturation]].
=== Wolves ===
Cooked porkchops can be used to [[breeding|breed]] and heal tamed [[wolf|wolves]], lead them around, and make baby tamed wolves grow up faster by 10% of the remaining time.
=== Piglins ===
[[Piglin]]s pick up any cooked porkchops in their [[item (entity)|item]] form. However, they do not eat it.
==Sounds==
{{Sound table/Entity/Food}}
== Data values ==
=== ID ===
{{edition|java}}:
{{ID table
|edition=java
|showitemtags=y
|showforms=y
|generatetranslationkeys=y
|displayname=Cooked Porkchop
|spritetype=item
|nameid=cooked_porkchop
|itemtags=piglin_food
|form=item
|foot=1}}
{{edition|bedrock}}:
{{ID table
|edition=bedrock
|shownumericids=y
|showforms=y
|notshowbeitemforms=y
|generatetranslationkeys=y
|displayname=Cooked Porkchop
|spritetype=item
|nameid=cooked_porkchop
|id=263
|form=item
|foot=1}}
== Achievements ==
{{load achievements|Pork Chop}}
== Advancements ==
{{load advancements|Husbandry;A Balanced Diet}}
== History ==
{{History|java indev}}
{{History||20100219|[[File:Cooked Porkchop JE1.png|32px]] Added cooked porkchops.
|Cooked porkchops restore {{hp|8}} and do not stack in the [[inventory]].
|Created by cooking [[raw porkchops]] in the inventory.}}
{{History|java alpha}}
{{History||v1.2.0|snap=preview|[[Zombie pigmen]] now [[drops|drop]] 0-2 cooked porkchops upon [[death]].}}
{{History|java beta}}
{{History||1.5|[[Pig]]s now [[drops|drop]] cooked porkchops when killed with [[fire]].}}
{{History||1.8|snap=Pre-release|[[File:Cooked Porkchop JE2 BE1.png|32px]] The texture of cooked porkchops has been changed to avoid confusion with [[steak]].
|Cooked porkchops are now stackable to 64 and restore [[hunger]] instead of [[health]].
|Cooked porkchops now restore {{hunger|8}} to the food bar.
|Cooked porkchops are no longer dropped by [[zombie pigmen]] upon their [[death]].}}
{{History|java}}
{{History||1.2.1|snap=12w03a|Cooked porkchop can now be used to breed wolves.}}
{{History||1.3.1|snap=12w21a|Butcher [[villager]]s now [[trading|sell]] 6–7 cooked porkchops for 1 [[emerald]].}}
{{History||1.4.2|snap=12w37a|[[File:Cooked Porkchop JE3 BE2.png|32px]] The texture of cooked porkchops has been changed, so that it no longer has a dark outline.}}
{{History||1.8|snap=14w02a|Butcher [[villager]]s now [[trading|sell]] 5–7 cooked porkchops for 1 [[emerald]].}}
{{History||1.13|snap=17w47a|Prior to [[1.13/Flattening|''The Flattening'']], this [[item]]'s numeral ID was 320.}}
{{History||1.14|snap=18w43a|[[File:Cooked Porkchop JE4 BE3.png|32px]] The texture of cooked porkchops has been changed.}}
{{History|||snap=19w13a|Butcher villagers now give cooked porkchops to players under the [[Hero of the Village]] effect.}}
{{History||1.16|snap=20w07a|[[Hoglin]]s now drop cooked porkchops if killed while on fire.}}
{{History|||snap=20w16a|Cooked porkchops can now be found in hoglin stable chests in [[bastion remnant]]s.}}
{{History||1.16.2|snap=20w30a|Cooked porkchops can now be found in generic bastion remnant chests as well.}}
{{History|pocket alpha}}
{{History||v0.4.0|[[File:Cooked Porkchop JE2 BE1.png|32px]] Added cooked porkchops.}}
{{History||v0.5.0|Cooked porkchops now restore {{hp|8}} instead of {{hp|4}}.}}
{{History||v0.8.0|snap=build 1|[[File:Cooked Porkchop JE3 BE2.png|32px]] The texture of cooked porkchops has been changed, so that it no longer has a dark outline.}}
{{History||v0.12.1|snap=build 1|Cooked porkchops now restore [[hunger]] instead of [[health]].}}
{{History|pocket}}
{{History||1.0.4|snap=alpha 1.0.4.0|Butcher [[villager]]s now [[trading|sell]] 5–7 cooked porkchops for 1 [[emerald]].}}
{{History|bedrock}}
{{History||1.10.0|snap=beta 1.10.0.3|[[File:Cooked Porkchop JE4 BE3.png|32px]] The texture of cooked porkchops has been changed.}}
{{History||1.11.0|snap=beta 1.11.0.4|[[Trading]] has been changed, butcher [[villager]]s now have a 25% chance to [[trading|sell]] 4 cooked porkchops as part of their second-tier [[trading|trade]].}}
{{History||1.16.0|snap=beta 1.16.0.57|Trading has been changed, apprentice butcher [[villager]]s now have a 25% chance to [[trading|sell]] 5 cooked porkchops instead of 3.}}
{{History|console}}
{{History||xbox=TU1|xbone=CU1|ps=1.0|wiiu=Patch 1|[[File:Cooked Porkchop JE1.png|32px]] Added cooked porkchops.}}
{{History||xbox=TU3|[[File:Cooked Porkchop JE2 BE1.png|32px]] The texture of cooked porkchops has been changed to be consistent with [[Java Edition]].}}
{{History||xbox=TU5|Cooked porkchops are now stackable to 64.
|Cooked porkchops now fill [[hunger]] instead of [[health]].}}
{{History||xbox=TU12|[[File:Cooked Porkchop JE3 BE2.png|32px]] The texture of cooked porkchops has been changed, so that it no longer has a dark outline.}}
{{History|PS4}}
{{History||1.90|[[File:Cooked Porkchop JE4 BE3.png|32px]] The texture of cooked porkchops has been changed.}}
{{History|new3DS}}
{{History||0.1.0|[[File:Cooked Porkchop JE3 BE2.png|32px]] Added cooked porkchops.}}
{{History|foot}}
== Issues ==
{{issue list}}
== External Links ==
*[https://www.minecraft.net/en-us/article/taking-inventory--porkchop Taking Inventory: Porkchop] – Minecraft.net on February 13, 2020
{{Items}}
[[Category:Food]]
[[Category:Renewable resources]]
[[cs:Pečená kotleta]]
[[de:Gebratenes Schweinefleisch]]
[[es:Chuleta de cerdo cocinada]]
[[fr:Côtelette de porc cuite]]
[[hu:Sült sertésszelet]]
[[ja:焼き豚]]
[[nl:Gebraden varkensvlees]]
[[pl:Pieczony schab]]
[[pt:Costeleta de porco assada]]
[[ru:Жареная свинина]]
[[uk:Смажена свинина]]
[[zh:熟猪排]]</li><li>[[Stick|Stick]]<br/>{{for|other uses|Stick (disambiguation)}}
{{Item
| image = Stick.png
| renewable = Yes
| stackable = Yes (64)
}}
A '''stick''' is an item used for [[crafting]] many [[tools]] and [[item]]s.
== Obtaining ==
=== Crafting ===
{{Crafting
|B2= Any Planks
|B3= Any Planks
|Output= Stick,4
|type= Material
|head=1
}}
{{Crafting
|B2= Bamboo
|B3= Bamboo
|Output= Stick
|type= Material
|foot=1
}}
=== Fishing ===
Sticks can be obtained as a "junk" item while [[fishing]].
=== Block loot ===
[[Dead bush]]es drop between 0–2 sticks when destroyed.
All [[Leaves|leaf]] types have a 2% chance to drop between 1-2 sticks when broken. Using a tool with [[Fortune]] increase these chances to 2.2%, 2.5%, and 3.3% for Fortune I, II, and III respectively.
=== Entity loot ===
[[Witch]]es have a chance of dropping 0–6 sticks upon death. This is increased by 3 per level of [[Looting]], for a chance of 0-15 sticks.
[[Boat]]s and [[Boat with Chest|boats with chest]]s drop 2 sticks when falling from exactly 12, 13, 49, 51, 111, 114, 198, 202, 310, or 315 blocks.<ref>{{bug|MC-119369}}</ref>.
=== Chest loot ===
{{LootChestItem|stick}}
== Usage ==
=== Crafting ingredient ===
{{crafting usage}}
=== Fuel ===
When used as a [[furnace]] fuel, a stick smelts 0.5 [[item]]s.
=== Trading ===
Novice-level [[Trading#Fletcher|fletcher]] [[villager]]s have a {{frac|2|3}} chance to buy 32 sticks for an [[emerald]] in ''Java Edition'', and they always offer the trade in Bedrock Edition.
== Video ==
<div style="text-align:center">{{yt|SYoHAJBuoss}}</div>
== Data values ==
=== ID ===
{{edition|java}}:
{{ID table
|edition=java
|showforms=y
|generatetranslationkeys=y
|displayname=Stick
|spritetype=item
|nameid=stick
|form=item
|foot=1}}
{{edition|bedrock}}:
{{ID table
|edition=bedrock
|shownumericids=y
|showforms=y
|notshowbeitemforms=y
|generatetranslationkeys=y
|displayname=Stick
|spritetype=item
|nameid=stick
|id=320
|form=item
|foot=1}}
== History ==
{{History|java indev}}
{{History||0.31|snap=20100129|[[File:Stick JE1 BE1.png|32px]] Added sticks.
|Sticks are used to craft [[sign]]s, [[torch]]es, [[sword]]s, [[pickaxe]]s, [[axe]]s and [[shovel]]s.}}
{{History|||snap=20100130|Sticks are now used to craft [[bow]]s and [[arrow]]s.}}
{{History||20100206|Sticks are now used to craft [[hoe]]s.}}
{{History||20100219|Sticks can be used as fuel for the newly added [[furnace]].}}
{{History||20100223|Sticks are now used to craft [[painting]]s.}}
{{History|java infdev}}
{{History||20100607|Sticks are now used to craft [[ladder]]s.}}
{{History||20100618|Sticks are now used to craft [[rail]]s.}}
{{History|java alpha}}
{{History||v1.0.1|Sticks are now used to craft [[redstone torch]]es and [[lever]]s.}}
{{History||v1.0.6|2 sticks now drops from breaking [[boat]]s.}}
{{History||v1.0.17|Sticks are now used to craft [[fence]]s.}}
{{History||v1.1.1|Sticks are now used to craft [[fishing rod]]s.}}
{{History|java beta}}
{{History||1.5|Sticks are now used to craft [[powered rail]]s.}}
{{History||1.8|snap=Pre-release|Sticks are now used to craft [[fence gate]]s.}}
{{History|java}}
{{History||1.2.4|snap=release|[[Spruce planks]], [[birch planks]], and [[jungle planks]] can now be used to craft sticks.}}
{{History||1.3.1|snap=12w16a|Sticks are found in the new [[bonus chest]]s.}}
{{History|||snap=12w22a|Sticks are now used to craft [[tripwire hook]]s.}}
{{History|||snap=12w27a|Sticks no longer drops from breaking [[boat]]s.|Instead, it needs to fall certain heights to drop 2 sticks.}}
{{History||1.4.2|snap=12w34a|Sticks are now used to craft [[item frame]]s.}}
{{History|||snap=12w38b|[[Witch]]es now have a chance to drop sticks.}}
{{History||1.5|snap=13w02a|Sticks are now used to craft [[activator rail]]s.}}
{{History||1.7.2|snap=13w36a|Sticks can be obtained as one of the "junk" [[item]]s by [[fishing]].}}
{{History|||snap=1.7.1|[[Acacia planks]] and [[dark oak planks]] can now be used to craft sticks.}}
{{History||1.8|snap=14w30a|Sticks are now used to craft [[banner]]s.}}
{{History|||snap=14w32a|Sticks are now used to craft [[armor stand]]s.}}
{{History||1.9|snap=15w31a|Sticks are now dropped by [[dead bush]]es.}}
{{History|||snap=15w44a|Sticks are now found in [[bonus chest]]s for more than double the average yield.}}
{{History||1.13|snap=17w47a|Sticks can now be found in 70.5% of bonus chests in stacks of 1–12.
|Prior to [[1.13/Flattening|''The Flattening'']], this [[item]]'s numeral ID was 280.}}
{{History||1.14|snap=18w43a|Sticks can now be crafted from [[bamboo]].
|Sticks can now be used to craft [[crossbow]]s.
|Sticks are now [[drops|dropped]] by [[leaves]].}}
{{History|||snap=18w48a|Sticks can now be used to craft [[grindstone]]s.
|Sticks can now be found in [[chest]]s in [[village]] cartographer houses.}}
{{History|||snap=18w50a|Sticks can now be found in village fletcher houses and toolsmith houses.}}
{{History|||snap=19w02a|Sticks can now be used to craft [[campfire]]s.}}
{{History|||snap=19w11a|Fletcher [[villager]]s now [[trading|buy]] sticks.}}
{{History||1.16|snap=20w06a|[[Crimson planks]] and [[warped planks]] can now be used to craft sticks.
|Sticks can now be used to craft [[soul torch]]es.}}
{{History||1.17|snap=21w05a|Sticks are now dropped by [[azalea leaves]] and [[flowering azalea leaves]].}}
{{History||1.19|snap=22w11a|[[Mangrove planks]] can now be used to craft sticks.}}
{{History|||snap=22w13a|Sticks are now dropped by [[mangrove leaves]].}}
{{History||1.19.4|snap=23w07a|The [[crossbow]] and [[soul campfire]] recipes are no longer unlocked by sticks.}}
{{History||1.20<br>(Experimental)|link=1.19.4|snap=23w07a|Sticks are now dropped by [[cherry leaves]].
|Sticks can now be used to craft [[brush]]es.
|Sticks now drop when brushing [[suspicious sand]] in [[desert well]]s.}}
{{History||1.20|snap=23w12a|The probability for the stick to generate in the [[suspicious sand]] in [[desert well]] has been changed from 1/7 to 1/8.}}
{{History|pocket alpha}}
{{History||v0.2.0|[[File:Stick JE1 BE1.png|32px]] Added sticks. They are currently unobtainable and serve no purpose.}}
{{History||v0.3.0|Sticks are now [[craft]]able.
|Sticks can be used to [[craft]] wooden and stone [[pickaxe]]s, [[axe]]s, [[sword]]s and [[shovel]]s, [[ladder]]s, [[torch]]es, [[fence]]s and [[fence gate]]s.}}
{{History||v0.3.2|Sticks are now used to craft iron, gold and diamond [[pickaxe]]s, [[axe]]s, [[sword]]s and [[shovel]]s.}}
{{History||v0.3.3|Sticks are now used to craft [[bow]]s.}}
{{History||v0.4.0|Sticks are now used to craft [[hoe]]s.}}
{{History||v0.5.0|Sticks are now used to craft [[painting]]s.}}
{{History||v0.6.0|Sticks are now used to craft [[sign]]s.}}
{{History||v0.8.0|snap=build 2|Sticks are now used to craft [[rail]]s and [[powered rail]]s.}}
{{History||v0.11.0|snap=build 1|Sticks are now used to craft [[fishing rod]]s.
|Sticks can now be found as a junk [[item]] from [[fishing]].}}
{{History||v0.12.1|snap=build 1|Sticks are now [[drops|dropped]] when [[dead bush]]es are [[breaking|destroyed]].}}
{{History||v0.13.0|snap=build 1|Sticks are now used to craft [[redstone torch]]es, [[lever]]s and [[tripwire hook]]s.}}
{{History||v0.14.0|snap=build 1|Added [[witch]]es, which have a chance of [[drops|dropping]] sticks.
|Sticks can now be used to craft [[item frame]]s.}}
{{History|bedrock}}
{{History||1.2.0|snap=beta 1.2.0.2|Sticks can now be used to craft [[armor stand]]s and [[banner]]s.
|Sticks can now generate inside [[bonus chest]]s.}}
{{History||1.4.0|snap=beta 1.2.20.1|Sticks can now be used to craft [[sparkler]]s.}}
{{History||1.8.0|snap=beta 1.8.0.8|Sticks can now be crafted from [[bamboo]].}}
{{History|||snap=beta 1.8.0.10|Sticks can now be used to craft [[crossbow]]s.}}
{{History||1.10.0|snap=beta 1.10.0.3|Sticks can now be used to craft [[barrel]]s, [[grindstone]]s, and [[campfire]]s.
|[[Leaves]] now have a chance of [[drops|dropping]] 0-2 sticks when [[breaking|destroyed]].}}
{{History||1.11.0|snap=beta 1.11.0.1|Sticks can now be found in [[village]] toolsmith and fletcher [[chest]]s.}}
{{History|||snap=beta 1.11.0.4|Sticks can now be [[trading|sold]] to fletcher [[villager]]s.}}
{{History||1.16.0|snap=beta 1.16.0.51|Sticks can now be used to craft [[soul torch]]es.}}
{{History||1.20.0<br>(Experimental)|link=Bedrock Edition 1.19.70|snap=beta 1.19.70.23|Sticks can now be used to craft [[brush]]es.
|Sticks now drop when brushing [[suspicious sand]] in [[desert well]]s.}}
{{History||1.20.10|snap=beta 1.20.10.20|Sticks are no longer used to craft barrels.}}
{{History|console}}
{{History||xbox=TU1|xbone=CU1|ps=1.0|wiiu=Patch 1|[[File:Stick JE1 BE1.png|32px]] Added sticks.}}
{{History|PS4}}
{{History||1.90|Sticks can now be [[drops|dropped]] by [[leaves]].}}
{{History|new3DS}}
{{History||0.1.0|[[File:Stick JE1 BE1.png|32px]] Added sticks.}}
{{History|foot}}
== Issues ==
{{issue list}}
== Trivia ==
* The stick is used in 49 recipes in ''Java Edition'', and 50 recipes in ''Bedrock Edition'', more than any other item in the game. [[Iron ingot]] takes second place with 35 recipes, and [[planks]] take third place with 34 recipes.
* To craft each recipe once, a player would need 111 sticks, including 1 for the [[redstone torch]] in an [[activator rail]], while using the extra tripwire hook for the [[crossbow]]. This would require 56 [[planks]], or 14 [[logs]], for the sticks, and an extra 29 planks for the [[tool|wooden tools]], [[tripwire hook]], [[signs]], [[fences]], [[fence gate]], [[grindstone]], and slabs for the [[barrel]]. This means that the player needs a total of 85 planks, or 22 logs, plus 6 more for the [[campfire]] and [[soul campfire]].
== External Links ==
*[https://www.minecraft.net/en-us/article/taking-inventory--stick Taking Inventory: Stick] – Minecraft.net on April 2, 2020
{{Items}}
[[cs:Tyčka]]
[[de:Stock]]
[[es:Palo]]
[[fr:Bâton]]
[[hu:Bot]]
[[it:Bastone]]
[[ja:棒]]
[[ko:막대기]]
[[nl:Stok]]
[[pl:Patyk]]
[[pt:Graveto]]
[[ru:Палка]]
[[th:แท่งไม้]]
[[tr:Çubuk]]
[[uk:Палиця]]
[[zh:木棍]]
[[Category:Renewable resources]]</li></ul> | Fixed crash that could occur when using a Fishing Rod, getting stuck in the air when Ghost Cloak ran out. | ||||
1.3.2.0{{Extension DPL}}<ul><li>[[Map|Map]]<br/>{{about|the craftable map|maps showing the locations of certain structures|Explorer Map|other uses|Map (disambiguation)}}
{{distinguish|World}}
{{Item
| image = Map Zoom 4.png
| renewable = Yes
| stackable = Yes (64)
}}
A '''map''' is an [[item]] used to view explored [[Chunk|terrain]] and mark landmarks.
==Obtaining==
===Crafting===
{{crafting
|head=1
|showname=0
|showdescription=1
|A1= Paper
|B1= Paper
|C1= Paper
|A2= Paper
|B2= Compass
|C2= Paper
|A3= Paper
|B3= Paper
|C3= Paper
|Output= Empty Map
|type= Miscellaneous
|description=This variation is called an "empty locator map" {{in|bedrock}}, or an "empty map" {{in|java}}.
When the player first creates a map, it is blank. It needs to be activated by holding it and pressing ''{{Control|use item}}''. after which it records terrain and location markers as the player travels within (or close to) the area it maps.
}}
{{crafting
|A1= Paper
|B1= Paper
|C1= Paper
|A2= Paper
|B2= Paper
|C2= Paper
|A3= Paper
|B3= Paper
|C3= Paper
|Output= Empty Map
|type= Miscellaneous
|description={{only|bedrock}}
This variation is called an "empty map". It does not show location markers. It is intended for cloning and zooming locator maps without having to consume an additional [[compass]] (thereby saving [[iron ingot]]s and [[redstone dust]]), but it can also be {{Control|use|text=activated}} and later converted to a locator map by combining it with a compass on an [[anvil]], [[crafting table]], or [[cartography table]].
|foot=1
}}
=== Natural generation ===
==== Chest loot ====
{{LootChestItem|empty-map,map
}}
=== Cartography table ===
A map can also be created using a single paper on a [[cartography table]] to create an empty map, or a paper with a compass for an empty locator map.{{only|bedrock}}
=== Starting map ===
{{exclusive|bedrock|section=1}}
When creating a new world {{in|bedrock}}, the player can enable the "Starting Map" option to spawn with an empty locator map in the hotbar. The map's zoom scale is 1:8. The map is updated only while the player holds it.
=== Trading ===
Novice-level cartographer [[Villager|villagers]] sell a single empty map for 7 [[Emerald|emeralds]] as their trades.
{{IN|java}}, cartographer villagers may give players with the [[Hero of the Village]] effect an empty map.
== Usage ==
{{See also|Tutorials/Mapping}}
=== Mapping ===
Crafting a map creates an empty map. The map is drawn for the first time when it is held and used (with ''{{control|use item}}''). This map can then be adjusted to different zoom levels. After conversion to a drawn map item, it starts to draw a top-down view of the player's surroundings, with North pointing to the top of the map. A pointed oval pointer indicates the player's position on the map, and moves in real-time as the player moves across the terrain shown on the map. The map does ''not'' center on the player when created, rather, the world is broken up into large invisible grid squares, and the map displays the area of whichever grid square it is in when it is first used. For example, if a player uses a new map in a certain grid square, and then moves a distance away and uses another fresh map but is still within the same grid square, both maps appear identical. To make a map that is not identical to the first one, the player would have to move outside of the edges of the first map (because then they would be in a new grid square). This way, no two maps of the same size can ever partially overlap and every map can display only a fixed area.
To record the world on a map, that specific map must be held in the player's hands while the player moves around the world. The world is recorded as-is during exploration, meaning that if the world is modified, a player must revisit the area while holding the map to update the map's view. Maps can also be [[Map#Cloning|cloned]]. If a player holds a map whose one or more clones are on display in item frames, updates are made on all clone-connected maps.
Other players are displayed on the map only if they have a map in their inventory cloned from the one being looked at. When placing a map into an [[item frame]], the map displays with a green pointer shown at the location of the item frame. This is to help the player see where they are in relation to the area that the map is showing. If the player leaves a map in an item frame and views a clone of it, the green pointer remains in the spot of the framed copy. This can be used to set up waypoints. Unexplored areas are transparent, making the item frame visible.
When the player leaves the area shown on a specific map, the player pointer transforms into a white dot that moves on that map. The marker shrinks to a smaller white dot if the player is far from the map's center: the area is 320 by 320 blocks per scale factor. The dot moves along the edge of the map to show the relative location of the player. However {{in|bedrock}}, the pointer remains as an arrow but shrinks until the player is near the area shown on the map.
While maps in [[the Nether]] work, they show only the red-and-gray pattern, regardless of the blocks placed. The only useful function is finding where the player is in relation to placed framed maps, which show as green pointers. Additionally, the player pointer rapidly spins and is not a good indicator of direction. Placing a [[banner]] in [[the Nether]] still shows it on the map as usual. Having a smaller map image while riding a [[strider]] in the Nether can help one to see one's footing while traveling over [[lava]].
{{IN|java}}, when using a map from another dimension, the map shows the player's position and direction when they were last in the dimension of the map. {{IN|bedrock}}, however, the player can use maps from one dimension while in another dimension. For locator maps, the place marker changes color depending on the dimension that the player is currently in (white for the Overworld, red for [[the Nether]], and magenta for [[the End]]). An Overworld map in the Nether shows the player's corresponding location and direction in the Overworld.<ref name=multiverse>{{ytl|EpP1diZdEdI}}</ref> Similarly, a Nether Map in the Overworld shows the player's corresponding location in the Overworld, but the place marker spins, just like a Nether map in the Nether. An Overworld map in the End shows the world spawn.<ref name=multiverse/> A Nether map cannot be used in the End — the map appears, but the place marker is not shown anywhere — and similarly, an End map cannot be used in the Overworld or the Nether.
A player can make a large piece of pixel art (128×128) facing upward, center a map on it, and place that map in an [[item frame]] to create a custom picture. Locking is recommended. See [[Map item format#Map Pixel Art]] for details on the techniques.
Maps display as a mini-map when held in the off-hand, or if the off-hand slot is occupied; the map is full-sized only when held in the dominant hand with both hands free.
A map always positions itself facing towards North when placed horizontally within an item frame regardless of how the map is placed.
=== Map content ===
{{Main|Map item format}}
Maps consist of square pixels arranged like pixels in a 128×128 square pattern, with each pixel representing a square portion of land. {{IN|java}}, the [[Map item format#Color table|color of a map pixel]] generally matches the color of the most common [[opaque]] block in the corresponding area, as seen from the sky. 'Minority blocks' in the target area have no effect on the color of the pixel, thus small features tend to be undetectable on zoomed-out maps.
{{IN|bedrock}}, the [[Map item format#Color table|color of a map pixel]] instead matches the single top-most opaque block in a grid sized by the map magnification pixel size (see the table in the "Player marker and pointer" section below). For example, a 3/4 magnification map has a pixel size of 8x8 blocks; this means the map will read only the top-most opaque blocks at the 0,0 coordinate, the 8,0 coordinate, the 0,8 coordinate, etcetera, ignoring all other blocks in the area. This means that {{in|bedrock}}, map pixel art requires only one block per pixel regardless of map magnification.
{{IN|bedrock}}, grass, foliage and water colors that are biome-dependent are represented accurately on a map.
{| class="wikitable"
|-
! style="width: 300px;" | {{el|je}}
! style="width: 300px;" | {{el|be}}
|-
| style="text-align: center;" | [[File:Map Zoom 4.png|alt=All banners marked on a map, alongside a named banner.|216px]]
| style="text-align: center;" | [[File:Map item BE.png|216px]]
|-
| Biome colors on ''Java Edition''.
| Biome colors on ''Bedrock Edition''.
|-
|}
Maps also show ground up to about 15 blocks below the surface of the water in oceans as slightly lighter blue, to show where the ground rises. This is not true with land above water. Higher elevations in the world mean lighter colors on the map. The map records the surface even as the player moves below the surface.
A standard map represents 128x128 blocks (1 block per pixel, 8x8 [[chunks]]) but maps can be zoomed-out to represent up to 2048x2048 blocks (16 square blocks per pixel, 128x128 [[chunks]]).
Some relevant distances: 64 blocks (4 chunks) is the update radius from a player in the Overworld and the End. However, it is half this (32 blocks) in the Nether. Also, 1024 blocks is the minimum Overworld distance from a [[nether portal]], at which players can build another portal and expect to reach a new location in the Nether. This is the distance across a 1:8 map, and also from a 1:16 map's center to its edge.
=== Player marker and pointer ===
{{IN|java}}, every map contains a marker that marks the position of the player, and points in the same direction as the player. When a player moves out of a map, a big white dot appears and moves relative to the player's position. The pointer either disappears when the player moves away a certain distance from the border of the map or, in case of [[explorer map]]s, the big white dot changes to a smaller white dot. The distance required for the small white dot to appear(explorer maps) or for the big dot to vanish (normal maps) changes with the scaling of the map.
* '''Level 0/4 :''' 128×128 blocks (each map pixel represents 1 block)
* '''Level 1/4 :''' 256×256 blocks (2×2 blocks per map pixel)
* '''Level 2/4 :''' 512×512 blocks (4×4 blocks per map pixel)
* '''Level 3/4 :''' 1024×1024 blocks (8×8 blocks per map pixel)
* '''Level 4/4 :''' 2048×2048 blocks (16×16 blocks per map pixel)
{{IN|bedrock}}, a map can be crafted with or without this marker, and a map without a position marker can add one later by adding a compass to the map. When a map is crafted without a compass, it's simply called an "empty map", but when crafted with a compass, it's called an "empty locator map". The marker also turns red if the player enters the Nether with an Overworld map and shows the player's Overworld location relative to the Nether location. A map created in the End has a purple marker showing the player's location. If an Overworld map is used in the End, a magenta dot appears on the player's spawn point.{{/BE|position}}
{{crafting
|name=Map<br>(with marker)
|ingredients=[[Map]] or Empty Map +<br>[[Compass]]
|showdescription=1
|Map (no markers);Empty Map
|Compass
|Output= Locator Map;Empty Locator Map
|type= Miscellaneous
|description={{el|be}} only.
Maps crafted from only paper do not show the location marker; to add it, a compass must be added to the map.
|foot=1
}}
{{IN|bedrock}}, a cartography table can also be used to add a pointer to create a locator map or empty locator map. This can be done by adding a compass to paper, or to an empty map or map.
=== Zooming out ===
[[File:Cartography table UI zoom.png|thumb|300px|{{IN|java}}, cartography table's UI, showing the map is being zoomed out.]]
A [[cartography table]] can also be used to zoom out, taking only one piece of paper per zoom level.
A blank map can not be zoomed out. A map has to have something already marked on it for the zooming to be possible.
{{Crafting
|A1= Paper |B1= Paper |C1= Paper
|A2= Paper |B2= Map;Locator Map |C2= Paper
|A3= Paper |B3= Paper |C3= Paper
|Output= Map;Locator Map
|showdescription=1
|description=Locator Map {{el|be}} only.
}}
{{/BE|zoom}}
==== Zoom details ====
The zooming function starts from when the map is created (zoom level 0) up to its fourth zoom step (zoom level 4).
{| class="wikitable" style="text-align: center" data-description="Zoom levels"
! colspan="2" |
! Zoom step 0
! Zoom step 1
! Zoom step 2
! Zoom step 3
! Zoom step 4
|-
! colspan="2" |
| [[File:Map Zoom 0.png|116px|Zoom step 0, 1:1]]
| [[File:Map Zoom 1.png|116px|Zoom step 1, 1:2]]
| [[File:Map Zoom 2.png|116px|Zoom step 2, 1:4]]
| [[File:Map Zoom 3.png|116px|Zoom step 3, 1:8]]
| [[File:Map Zoom 4.png|116px|Zoom step 4, 1:16]]
|-
! colspan="2" | Zoom level
| 0/4
| 1/4
| 2/4
| 3/4
| 4/4
|-
! colspan="2" | 1 map pixel represents
| 1 block
| 2×2 blocks
| 4×4 blocks
| 8×8 blocks
| 16×16 blocks<br>(1×1 chunk)
|-
! colspan="2" | Scaling ratio
| 1:1
| 1:2
| 1:4
| 1:8
| 1:16
|-
! rowspan="2" colspan="2" | Map covers an area of
| 128×128 blocks
| 256×256 blocks
| 512×512 blocks
| 1024×1024 blocks
| 2048×2048 blocks
|-
| 8×8 chunks
| 16×16 chunks
| 32×32 chunks
| 64×64 chunks
| 128×128 chunks
|-
! colspan="2" | Smallest discernible features
| Blocks
| Trees, Paths
| Lakes, Buildings
| Mountains, Rivers
| Biomes, Mountain Ranges
|-
! colspan="2" | Use cases
| Pixel art, Base plans
| Base surroundings
| Structure mapping
| Landscape mapping
| Biome mapping
|-
! rowspan="2" | Total paper needed to zoom out from Level 0
! in anvil{{only|bedrock|short=1}} or crafting table
| -
| {{ItemSprite|Paper}} 8
| {{ItemSprite|Paper}} 16
| {{ItemSprite|Paper}} 24
| {{ItemSprite|Paper}} 32
|-
! in cartography table
| -
| {{ItemSprite|Paper}} 1
| {{ItemSprite|Paper}} 2
| {{ItemSprite|Paper}} 3
| {{ItemSprite|Paper}} 4
|}
Maps are always aligned to a grid at all zoom levels. That means zooming out any different map in a specific area covered by that map always has the same center. As such, maps are aligned by map width (1024 blocks for a level 3 maps) minus 64. A level 3 map generated at spawn covers X and Z coordinates from -64 to 959. All maps generated in this area zoom out to the same coordinates, guaranteeing that they are always 'aligned' on a map wall. For a zoomed-out map to cover a new area, it must start with a base (level 0) map that is in that area.
At zoom level 0, a map created on the point (0,0) has (0,0) at the center of the map. At higher zoom levels of the same map, the coordinate (0,0) is in the top left square of the map.
{{IN|java}}, zoom level can be seen on a map by turning on Advanced Tooltips (a [[Debug screen#More debug keys|debug screen]] option that can be toggled by using the key combination {{key|F3+H}}). The tooltip of the map then shows the zoom level, scaling factors, and map ID.
=== Cloning ===
[[File:Cartography table UI clone.png|thumb|300px|{{IN|Java}}, cartography table's UI, showing the map is being cloned.]]
A mix of empty maps and empty locator maps may be used. Whether the cloned maps show position markers is dependent only on the input map.
A [[cartography table]] can also be used to clone a map.
The parts of the world that have already been explored and mapped are copied, and newly explored areas appear on both instances. If one of the maps is later zoomed out, then the maps lose their connection to each other and function as completely separate maps that have to be individually filled by exploring.
In Creative mode, a map in an item frame may be cloned by using {{control|pick block}} on it, as long as that map is not also in the player's inventory.
It doesn't matter if the map to be cloned is at a higher zoom level (made of more paper) than the blank map. Upon copying the map, both resulting maps have the same magnification as the starting map.
{{/BE|clone}}
=== Crafting ingredient ===
{{crafting usage|Map, Empty Map}}
=== Marking points ===
{{IN|java}} the player has the ability to mark spots on a map. To do this, {{control|use}} a map on a placed-down [[banner]], and the spot of the banner gets marked on the map. The mark takes the color of whatever the base color is for the banner, and if the banner has a name, the mark shows that name. Banner marks on a map are always oriented with their top facing north, regardless of the banner's actual orientation. If the banner is destroyed, the mark of the banner remains at first, but if the player gets closer to where the banner previously was, it disappears as the area is updated on the map.
If a map is mounted on an item frame and is within the area it depicts, the mounted map displays its current location with a green indicator rotated to match its orientation.
[[File:Map Marker Bedrock on Item frame.png|thumb|181x181px|{{IN|bedrock}} this is what a map lying on an item frame looks like, while showing markers.]]
{{IN|bedrock}} the player can place copies of locator maps in [[item frame]]s in order to create a land mark. The marker is a green dot that resembles the shape of the player's marker, but in green color. The position the marker points at depends on the direction the item frame is facing. It is worth noting that the markers work only on copies of the same map. Other maps of the same area do not show the existing markers that the player(s) had placed.
If a player has a cloned map in their inventory, their pointer appears white when viewed on the same map held by another player. Hence, if all players have the same cloned map in their inventory, all markers would appear white when the clone map is viewed.
{| class="wikitable"
|-
! style="width: 300px;" | {{el|je}}
! style="width: 300px;" | {{el|be}}
|-
| style="text-align: center;" | [[File:Banner marked map.png|alt=All banners marked on a map, alongside a named banner.|216px]]
| style="text-align: center;" | [[File:Tracking map with markers bedrock.png|216px]]
|-
| How every banner appears {{IN|java}} on a map, including named banners.
| {{IN|bedrock}} this is how a locator map shows map markers while held by a player.
|-
|}
===Locking===
[[File:Cartography table UI lock.png|thumb|300px|{{IN|Java}}, cartography table's UI, showing the map is being locked.]]
Maps can be locked when using a [[glass pane]] in a [[cartography table]]. This creates a new map containing the same data and locks it. All copies of this new map are also locked. A locked map never changes, even when the depicted terrain changes. {{IN|Be}}, locked maps have a unique texture.
{| class="wikitable" style="text-align: center;"
|-
! Condition
! style="width: 200px;" | Newly created map
! style="width: 200px;" | Map after terrain alteration
|-
! Unlocked map
| [[File:Map Zoom 0.png|174px]] || [[File:Unlocked Map.png|174px]]
|-
! Locked map
| [[File:Map Zoom 0.png|174px]] || [[File:Map Zoom 0.png|174px]]
|-
|}
{{-}}
== Sounds ==
{{Edition|Java}}:
{{Sound table
|rowspan=2
|sound=Drawmap1.ogg
|sound2=Drawmap2.ogg
|sound3=Drawmap3.ogg
|subtitle=Map drawn
|source=player
|description=When a map is drawn
|id=ui.cartography_table.take_result
|translationkey=subtitles.ui.cartography_table.take_result
|volume=1.0
|pitch=1.0
|distance=16}}
{{Sound table
|subtitle=Map drawn
|source=block
|description=When a map is edited using a cartography table
|id=ui.cartography_table.take_result
|translationkey=subtitles.ui.cartography_table.take_result
|volume=1.0
|pitch=1.0
|distance=16
|foot=1}}
{{Edition|Bedrock}}:
{{Sound table
|type=bedrock
|rowspan=2
|sound=Drawmap1.ogg
|sound2=Drawmap2.ogg
|sound3=Drawmap3.ogg
|source=block
|description=When a map is drawn<wbr>{{Upcoming|BE 1.20.20.20}}
|id=ui.cartography_table.take_result|idnote={{Verify|Could be block.cartography_table.use}}
|volume=0.8
|pitch=1.0}}
{{Sound table
|type=bedrock
|source=block
|description=When a map is edited using a cartography table
|id=ui.cartography_table.take_result
|volume=0.8
|pitch=1.0
|foot=1}}
== Data values ==
=== ID ===
{{edition|java}}:
{{ID table
|edition=java
|showforms=y
|generatetranslationkeys=y
|displayname=Empty Map
|spritetype=item
|nameid=map
|form=item}}
{{ID table
|displayname=Map
|spritetype=item
|nameid=filled_map
|form=item
|translationkey=item.minecraft.filled_map, filled_map.buried_treasure, filled_map.explorer_jungle{{upcoming|java 1.20.2}}, filled_map.explorer_swamp{{upcoming|java 1.20.2}}, filled_map.mansion, filled_map.monument, filled_map.unknown, filled_map.village_desert{{upcoming|java 1.20.2}}, filled_map.village_plains{{upcoming|java 1.20.2}}, filled_map.village_savanna{{upcoming|java 1.20.2}}, filled_map.village_snowy{{upcoming|java 1.20.2}}, filled_map.village_taiga{{upcoming|java 1.20.2}}
|foot=1}}
{{edition|bedrock}}:
{{ID table
|edition=bedrock
|showaliasids=y
|shownumericids=y
|showforms=y
|notshowbeitemforms=y
|generatetranslationkeys=y
|displayname=Empty Map
|spritetype=item
|nameid=empty_map
|aliasid=emptymap
|id=515
|form=item
|translationkey=item.emptyMap.name, item.emptyLocatorMap.name}}
{{ID table
|displayname=Map
|spritetype=item
|spritename=map-be
|nameid=filled_map
|aliasid=map
|id=420
|form=item
|translationkey=item.map.name, item.map.exploration.mansion.name, item.map.exploration.monument.name, item.map.exploration.treasure.name
|foot=1}}
=== Metadata ===
{{see also|Bedrock Edition data values}}
{{IN|bedrock}}, maps use the following data values:
{{/DV}}
=== Item data ===
{{el|java}}:
{{main|Player.dat format}}
<div class="treeview">
* {{nbt|compound|tag}}: The item's '''tag''' tag.
{{:Player.dat_format/Maps}}
</div>
{{el|bedrock}}:
: See [[Bedrock Edition level format/Item format]].
=== Map icons ===
{{see also|Player.dat format|Map item format|map_icons.png}}
Map icons are 8×8 in ''Java Edition'', but 16×16 in Bedrock Edition. As such, there are minor misalignment issues in ''Java Edition''.<ref>{{bug|MC-214649|||WF}}</ref>
[[File:Map icons.png|thumb|128px|Map icons texture {{in|Java}}]]
[[File:Map icons BE.png|thumb|128px|Map icons texture {{in|Bedrock}}]]
{| class="wikitable"
|-
! Java ID !! Bedrock ID !! Text ID !! Appearance !! Purpose !! Shown in item frames?
|-
| 0 || ||<code>player</code> || [[File:Player (texture) JE1 BE1.png|16px]] [[File:Player (texture) BE2.png|16px]] White marker || Players (on map) || No
|-
| 1 || 1 ||<code>frame</code> || [[File:Green Marker (texture) JE1 BE1.png|16px]] [[File:Green Marker (texture) BE2.png|16px]] Green marker || The current map in an item frame || Yes
|-
| 2 || ||<code>red_marker</code> || [[File:Red Marker (texture) JE1 BE1.png|16px]] [[File:Red Marker (texture) BE2.png|16px]] Red marker || Position converted to Overworld when opening Overworld map in the Nether{{Only|bedrock}} || No
|-
| 3 || ||<code>blue_marker</code> || [[File:Blue Marker (texture) JE1 BE1.png|16px]] [[File:Blue Marker (texture) BE2.png|16px]] Blue marker || Other players || No
|-
| 4 || ||<code>target_x</code> || [[File:Target X (texture) JE1 BE1.png|16px]] White X || Unused || Yes
|-
| 5 ||5
|<code>target_point</code> || [[File:Target Point (texture) JE1 BE1.png|16px]] [[File:Target Point (texture) BE2.png|16px]] Red triangle || Unused || Yes
|-
| 6 || 6 ||<code>player_off_map</code> || [[File:Player Off Map (texture) JE1 BE1.png|16px]] Large white dot || Players off map, nearby{{only|java}} || No
|-
| 7 || 13 ||<code>player_off_limits</code> || [[File:Player Off Limits (texture) JE1.png|16px]] [[File:Player Off Limits (texture) BE.png|16px]] Small white dot || Players off map, far away{{only|java}} || No
|-
| 8 ||14
|<code>mansion</code> || [[File:Mansion (texture) JE1.png|16px]] [[File:Mansion (Texture) BE2.png|frameless|16x16px]] Woodland mansion || Woodland mansion || Yes
|-
| 9 || 15 ||<code>monument</code> || [[File:Monument (texture) JE1.png|16px]] [[File:Monument Texture BE2.png|frameless|16x16px]] Ocean monument || Ocean monument || Yes
|-
| 10 - 25 || ||<code>{{tooltip|banner_*|banner_white, banner_orange, banner_magenta, banner_light_blue, banner_yellow, banner_lime, banner_pink, banner_gray, banner_light_gray, banner_cyan, banner_purple, banner_blue, banner_brown, banner_green, banner_red, banner_black}}</code> || [[File:Banner White (texture) JE1.png|16px]] [[File:Banner Light Gray (texture) JE1.png|16px]] [[File:Banner Gray (texture) JE1.png|16px]] [[File:Banner Black (texture) JE1.png|16px]] [[File:Banner Brown (texture) JE1.png|16px]] [[File:Banner Red (texture) JE1.png|16px]] [[File:Banner Orange (texture) JE1.png|16px]] [[File:Banner Yellow (texture) JE1.png|16px]] [[File:Banner Lime (texture) JE1.png|16px]] [[File:Banner Green (texture) JE1.png|16px]] [[File:Banner Cyan (texture) JE1.png|16px]] [[File:Banner Light Blue (texture) JE1.png|16px]] [[File:Banner Blue (texture) JE1.png|16px]] [[File:Banner Magenta (texture) JE1.png|16px]] [[File:Banner Purple (texture) JE1.png|16px]] [[File:Banner Pink (texture) JE1.png|16px]]<br>Banners in all 16 wool colors{{only|java}}|| Banner markers || Yes
|-
| 26 ||4
|<code>red_x</code> || [[File:Red X (texture) JE1.png|16px]] [[File:Target X (texture) BE2.png|16px]] Red X || Buried treasure || Yes
|-
| || 8 || || [[File:Magenta Marker (texture) BE1.png|16px]] Magenta marker
| Position converted to Overworld when opening Overworld map in the End{{Only|bedrock}} || No
|-
| || 9 || || [[File:Orange Marker (texture) BE1.png|16px]] Orange marker{{more info}}
|Other players
|Yes
|-
| || 10 || || [[File:Yellow Marker (texture) BE1.png|16px]] Yellow marker
| Other players || No
|-
| || 11 || || [[File:Cyan Marker (texture) BE1.png|16px]] Cyan marker
| Other players || No
|-
| -
|12
| || [[File:Green Point (texture) BE1.png|16px]] Green Triangle
| Other structure such as stronghold, fortress, end city, etc. when used as explorer map destination{{Only|bedrock}} || Yes
|}
It should be noted that even if the player used a NBT editor to add an additional icon on the map, ''Minecraft'' shows only the first one listed when the player loads up their world.
== Achievements ==
{{load achievements|Map Room}}
== History ==
{{see also|section=24|map_icons.png|Java Edition history of textures#Map icons}}
{{more images|section=24|{{bug|MC-72962}}}}
{{History||April 27, 2011|link=https://web.archive.org/web/0/http://notch.tumblr.com/post/4988431144/the-maps|[[Notch]] unveiled screenshots of the map.}}
{{History||April 28, 2011|link={{tweet|notch|63500114005721088}}|[[Notch]] said that he would try to make maps place-able on [[wall]]s.}}
{{History|java beta}}
{{History||1.6|snap=Test Build 3|[[File:Map (item) JE1 BE1.png|32px]] Added maps.}}
{{History||1.6.6|The ability to auto-craft maps using shift-click has been disabled.}}
{{History||1.8|snap=Pre-release|Maps can now be found in library chests in the brand-new [[stronghold]]s.
|Auto crafting maps has been restored. Map cloning, therefore, is unavailable for a period of time.}}
{{History||1.8.1|Maps now work both while walking and flying.}}
{{History|java}}
{{History||1.0.0|snap=Beta 1.9 Prerelease 5|Prior to this update, the [[sun]] in ''[[Minecraft]]'' rose in the North, which threw off many [[player]]s and led to a common misconception that ''Minecraft'' maps/[[world]]s were oriented with East at the top. The sun now rises in the east and sets in the west, making navigation much more intuitive.
|Before the change in sun position, it was commonly said that ''Minecraft'' maps/worlds are oriented with East at the top; sunrise, by definition, occurs at the East, which means it is certainly true that the maps were oriented "East" since the Sun rose from the top (North). However, [[Jeb]] asserted (and [[Notch]] agreed) that the sun rose in the north.<ref>{{Tweet|jeb|87815841160237056}}</ref><ref>{{Tweet|notch|88155424880201728}}</ref> Most mods and map-making tools, however, used the terms East and North consistent with their actual definitions (e.g. a [[Programs and editors/Cartograph|Cartograph]]-generated map with North at the top is rotated 90 degrees from the in-game map).}}
{{History||1.4.2|snap=12w34a|[[File:Empty Map JE1 BE1.png|32px]] [[Crafting]] a map now creates an empty map. The map is drawn for the first time when it is held and right clicked, and is centered near the location of the [[player]] when clicked (not as before where it was centered on the location it was crafted.)
|Previously, in order to map a new area, the map had to be ''crafted'' in that area (rather than carrying a previously-crafted map to the new area). The point where a map is crafted becomes its permanent center, and could never be changed.
|The pointer no longer disappears when leaving the map, but transforms into a white dot, indicating on what side of the map the player is located.
|Maps now align to a grid, making it easier to create adjacent maps.
|Maps can now be zoomed out (but not zoomed in).
|Maps can now be cloned and scaled.}}
{{History||1.4.2|snap=12w34b|Maps now have a ''zoom level'', which was fixed at 1:8 prior to snapshot [[Java Edition 12w34a|12w34a]],<ref name="mapinfo">https://web.archive.org/web/0/http://notch.tumblr.com/post/4988431144/the-maps</ref> but now starts at 1:1 and can be increased up to 1:16 by re-crafting an existing map.
|Maps are no longer numbered on the top-left corner and is labeled through the tooltip.}}
{{History|||snap=12w36a|New maps are now crafted at a scale factor of 1:1. A zoomed in map can be zoomed out by re-crafting it with another 8 sheets of [[paper]] on a [[crafting table]]. Each time this is done, the scale increases - 1:1, 1:2, 1:4, 1:8, 1:16 with a map scale of 1:16 being the current maximum.}}
{{History||1.7.2|snap=13w38a|The map size has been increased when placed on a [[wall]] using the [[item frame]].
|More colors have been added to maps for different [[block]]s.<ref name="infodump2">https://web.archive.org/web/0/https://www.mojang.com/2013/10/minecraft-1-7-the-update-that-changed-the-world</ref>}}
{{History||1.8|snap=14w31a|Zoomed maps now conform to an expanded grid based on their zoom level. Previously, careful considerations would need to be taken to creating a wall of adjoining maps.}}
{{History||1.8.1|snap=pre1|Some colors have been changed on maps to more accurately represent their respective [[block]].}}
{{History||1.9|snap=15w31a|Maps now display as a mini-map when held in the off-hand, or if the off-hand slot is occupied; the (old) large version is visible only when held in the dominant hand with the secondary hand free.}}
{{History|||snap=15w34a|New maps can now be [[crafting|crafted]] at a scale factor of 1:4.
|A crafting recipe has been added for zooming in maps.}}
{{History|||snap=15w43a|The average yield of empty maps from [[stronghold]] library [[chest]]s has been doubled.}}
{{History|||snap=15w45a|New maps are once again [[crafting|crafted]] at a scale factor of 1:1, as they had been before snapshot [[15w34a]].
|The [[crafting]] recipe, that was introduced in 15w34a, for zooming in maps has been removed.}}
{{History|||snap=15w49a|Map making now uses armor equipping sounds.}}
{{History||1.11|snap=16w39a|Maps now work in [[the End]].
|Empty maps are now [[trading|sold]] by cartographer [[villager]]s as their tier 3 [[trading|trade]].
|Added [[explorer map]]s, sold by cartographers as their tier 4 trades.}}
{{History||1.12|snap=17w17a|Maps now have separate colors for colored [[terracotta]] blocks from other colored blocks.}}
{{History||1.13|snap=17w47a|Prior to [[1.13/Flattening|''The Flattening'']], these [[item]]s' numeral IDs were 358 and 395.
|Maps now use additional NBT to specify which map they contain. Prior to this version, they used the [[damage]] value instead.
|Map IDs are no longer limited to 32,768.}}
{{History|||snap=17w50a|Maps can now be placed on floor and ceiling [[item frame]]s.}}
{{History|||snap=18w10a|Spots on maps can now be marked using [[banner]]s.}}
{{History|||snap=18w11a|Empty maps can now generate in [[shipwreck]] [[chest]]s.}}
{{History|||snap=pre7|Maps have been changed slightly, in regard to which [[block]]s are shown and which blocks are not.}}
{{History||1.14|snap=18w43a|[[File:Empty Map JE2 BE2.png|32px]] [[File:Map (item) JE2 BE2.png|32px]] The textures of maps have been changed.}}
{{History|||snap=18w48a|Empty maps can now be found in chests in [[village]] cartographer houses.}}
{{History|||snap=19w02a|Maps can now be cloned and zoomed out (extended) by using a [[cartography table]].
|Maps can now be locked by using a [[glass pane]] with a cartography table.
|The recipes for cloning and zooming out maps have been removed.}}
{{History|||snap=19w06a|Map making is now silent again.}}
{{History|||snap=19w13a|Cartographer villagers now give empty maps to players under the [[Hero of the Village]] effect.}}
{{History||1.16|snap=20w21a|Map making sounds are now the same as when using a cartography table.}}
{{History|pocket alpha}}
{{History||v0.14.0|snap=build 1|[[File:Empty Map JE1 BE1.png|32px]] [[File:Map (item) JE1 BE1.png|32px]] Added maps.
|Maps are crafted using nine [[paper]], one for every slot of the [[crafting]] grid.
|Maps must be combined with a [[compass]] using an [[anvil]] in order to show the [[player]]'s position.
|Maps can be zoomed using an anvil.}}
{{History|||snap=build 3|New maps are now [[crafting|crafted]] at full zoom.
|Empty maps now have a "Create Map" button to initialize them.}}
{{History|||snap=build 7|New maps are now crafted at a scale factor of 1:1.}}
{{History||v0.15.0|snap=unknown|Maps can now be crafted either with 8 pieces of [[paper]] and a [[compass]] ''or'' 9 pieces of paper, to get a map with or without a position marker.}}
{{History||v0.16.0|snap=build 1|Different colors have been added to maps for different [[biome]]s.}}
{{History|pocket}}
{{History||1.0.0|snap=?|[[Windows 10 Edition]] can now use the [[anvil]] as well as the [[crafting table]] to clone, zoom and apply markers, just as [[Pocket Edition]] in general could.
|Maps can now be found inside [[stronghold]] library [[chest]]s.}}
{{History||1.1.0|snap=alpha 1.1.0.0|Empty maps with direction markers built-in are now called "locator maps".}}
{{History|||snap=alpha 1.1.0.3|"Locator maps" are now called "empty locator maps".
|Empty maps are now [[trading|sold]] by cartographer [[villager]]s for 7-11 [[emerald]]s as their tier 3 [[trading|trade]].}}
{{History|bedrock}}
{{History||1.4.0|snap=beta 1.2.14.2|Maps can now be found inside map room [[chest]]s in [[shipwreck]]s.}}
{{History||?|The texture of the filled map overlay has been changed.}}
{{History||?|Maps now function in dimensions other than the dimension in which they were created.}}
{{History||1.10.0|snap=beta 1.10.0.3|Maps can now be found in cartographer house [[chest]]s in [[village]]s.
|[[File:Empty Map JE2 BE2.png|32px]] The texture of empty maps has been changed.}}
{{History||1.11.0|snap=beta 1.11.0.1|Empty maps can now be created from 1 [[paper]] in [[cartography table]]s.
|Maps can now be zoomed, cloned, renamed, and have pointers added in cartography tables.}}
{{History|||snap=beta 1.11.0.4|Cartographer [[villager]]s now [[trading|sell]] empty map for an [[emerald]] as their first tier [[trading|trades]].
|Empty locator maps can now be [[trading|bought]] from cartographer villagers.}}
{{History||1.13.0|snap=beta 1.13.0.1|[[File:Map (item) BE3.png|32px]] [[File:Locked Map (item) BE2.png|32px]] Filled maps and locked maps now have unique inventory icons.}}
{{History||1.16.0|snap=beta 1.16.0.57|Trading has been changed, novice-level cartographer now sell an empty map for 7 emeralds. Cartographer villager no longer sell empty locator map.}}
{{History||1.16.100|snap=beta 1.16.100.56|The ID of maps have been changed from <code>emptymap</code> to <code>empty_map</code> and <code>map</code> to <code>filled_map</code>.}}
{{History|console}}
{{History||xbox=TU1|xbone=CU1|ps=1.00|wiiu=Patch 1|switch=1.0.1|[[File:Map (item) JE1 BE1.png|32px]] Added maps.
|The [[player]] spawns with a free map.
|Maps are available only as zoom step 3 maps centered at coordinates 0,0. Biome colors do not appear on maps.}}
{{History||xbox=none|xbone=CU1|ps=1.0|wiiu=none|Larger sized worlds on Xbox One, Playstation 4, and Nintendo Switch have zoom step 3 maps aligned to a grid with maps centered at 0, 1024, or 2048 on the X or Z coordinates.}}
{{History||xbox=TU21|xbone=CU9|ps=1.14|wiiu=Patch 1|[[File:Empty Map JE1 BE1.png|32px]] [[Crafting]] a map now produces an empty map.}}
{{History||xbox=TU46|xbone=CU36|ps=1.38|wiiu=Patch 15|The outer end islands appear on different maps; even on Xbox 360, Playstation 3, Vita, and Wii U editions.}}
{{History||xbox=none|xbone=none|ps=1.90|wiiu=none|switch=none|[[File:Empty Map JE2 BE2.png|32px]] [[File:Map (item) JE2 BE2.png|32px]] The textures of maps have been changed.}}
{{History||ps=1.91|Maps can now be created and used in [[cartography table]]s.}}
{{History|foot}}
== Issues ==
{{issue list}}
== Trivia ==
* Use of the {{key|F1}} key can allow the player to hold a map without blocking their view at all.
* In ''Java Edition'', a map created using {{cmd|give}} can be any map by using the Map parameter to specify the map number desired. E.g. {{cmd|give [player] minecraft:filled_map{map:5<nowiki>}}} gives the specified player map_5. If no data value is supplied it defaults to map_0. If map_0 has not ever been crafted, it is centered on x=0, z=0.
* The maps are stored separately as their own data (<code>.dat</code>) file as <code>map_x.dat</code> with (x) being the map number, see [[map item format]] for more info. By manipulating this number, players can organize their maps to suit them, or if they accidentally create a map in the same location, they can delete their extra map so as to save the number they make.
* Certain programs can be used to make customized maps with images or text on them instead of actual maps, many people use these in adventure maps to show pictures or to tell a story.
* Since all copies of a map are links to the same file, copying an unfinished map keeps it synchronized with the copy as the player fills it in. Thus, a copy stored in a chest can act as a remote backup.
* A map that is in an item frame does not update itself until a player picks it up, lets it reload, and places it back again. However, if a player holds a clone of the map, both maps update.
* Filled maps are the only items that make 90 degree rotations in item frames, and also the only items that can expand the item frame into full block wide.
* On [[Legacy Console Edition]], the player always spawns with a map in their inventory after creating a world. This was later added to Bedrock Edition as an optional feature in the world creation menu.
* Maps on Legacy Console Edition always show the player's current coordinates, as a substitute for the optional [[Coordinates|coordinate display]] in other editions.
* A map cannot be created on [[New Nintendo 3DS Edition]]. Instead, the map is always displayed on the bottom screen along with the coordinates. Biome colors do not appear on maps.
== Gallery ==
<gallery>
MapItem1.png|A fully zoomed map.
MapRotation.png|Having a map in hand does not stop the ability to see ahead.
MapItem3.png|A world being recorded onto a map.
Mcmap4.png|Nearly fully explored map.
Zoomed Map.png|A map edited to the scale of 1.
Sky Map.png|A map mapping the [[Sky Dimension]].
MapOfVillage.png|A village and how it is represented on a map.
Pumpkin map.png|A map containing a custom image made by placing a large number of blocks.
Complete Map.png|A completely explored map.
MapZooms.png|A diagram showing how maps zoomed out before [[Java Edition 1.8]]. Notice how the larger maps have borders made of half and quarter small maps.
Map18zooms.png|From 1.8, zoomed maps are aligned to this grid exactly.
Large Biome Map.png|A map of a [[Large Biomes]] world.
Map0140-0160.png|A comparison of maps between versions in Pocket Edition Alpha [[Pocket Edition Alpha 0.14.0|0.14.0]] and [[Pocket Edition Alpha 0.16.0|0.16.0]].
Mycelium Map.png|A map view of a mushroom biome, showing that mycelium appears purple on a map.
MiniMap.png|Maps held in the off-hand or in either hand while [[dual wielding]] appear as mini-maps.
Partly filled treasure map.png|Partly filled treasure map with an odd area at the bottom left. Normally a partly filled map would look striped (as in the top left), but this map seems to be bugged and is possibly showing caves, or something, in the bottom left.
Partly filled ocean explorer map.png|Partly filled ocean explorer map. Updating the game from an older version (in this case the area was first generated before 1.18) and buying a map after updating (in this case in 1.19.4) can result in the map displaying rivers and terrain where there is really a frozen sea.
Map Stained Glass 1.png|Stained glasses' appearances on maps before and after 1.13.
Map Stained Glass 2.png|Stained glasses' appearances on maps before and after 1.13.
Map Various Blocks 1.png|Various blocks' appearances on maps before and after 1.13.
Map Various Blocks 2.png|Various blocks' appearances on maps before and after 1.13.
Better Together Map.jpg|Holding a map in the offhand in ''Bedrock Edition''.
Better Together Map Icon.jpg|Holding a map in both hands in ''Bedrock Edition''.
File:MapFailedtoFill.png|A map that has not yet filled. A rare bug in Java.
</gallery>
=== The Nether ===
<gallery>
Nethermap.png|A map in [[the Nether]].
Maponnether.png|A map in the Nether; the arrow turns around itself, like in [[compass]].
</gallery>
=== The End ===
<gallery>
Jeb End Map.png|The first image of a map in [[the End]].
Endmap.png|A map in the End.
</gallery>
=== Maps in item frames ===
<gallery>
FramedMap.png|A map displayed on an item frame, as it looked before [[Java Edition 1.7.2]].
Structure Map Collection.png|Multiple maps in item frames. Notice a [[village]], two [[desert temple]]s and a lava lake.
Minecraft maps 3by3.png|A collection of 9 connected full maps.
Full Map.png|A combination of 25 maps pasted together as one map.
Map wall BE.png|A map wall on ''Bedrock Edition'', showing large areas of biome colors for each biome.
Map's in item frames.png|Maps can be placed into [[item frame]]s so they can be viewed together.
Comparing Maps.png|The comparison between 3 zooms of maps.
SuperflatMap.png|A map in a [[Superflat]] world, with some [[village]]s.
MapWallWithMarkers.png|A 3x3 map wall with banner markers.
HEYYEYAAEYAAAEYAEYAA.png|He-Man map art.
Map Player Icons 1.png|First image of player icons on maps.
Map Player Icons 2.png|Second image of player icons on maps.
</gallery>
== See also ==
* [[Explorer Map]]
* [[Clock]]
* [[Tutorials/Navigation|Navigation]]
== References ==
{{Reflist}}
{{Items}}
[[cs:Mapa]]
[[de:Karte]]
[[es:Mapa]]
[[fr:Carte (objet)]]
[[hu:Térkép (tárgy)]]
[[ja:地図]]
[[ko:지도]]
[[nl:Kaart]]
[[pl:Mapa]]
[[pt:Mapa]]
[[ru:Карта]]
[[tr:Harita]]
[[th:แผนที่]]
[[uk:Мапа]]
[[zh:地图]]
[[Category:Renewable resources]]</li><li>[[Redstone Repeater|Redstone Repeater]]<br/>{{Block
| image = <gallery>
Redstone Repeater.png|Redstone Repeater
Redstone Repeater BE.png|Redstone Repeater (BE)
</gallery>
| extratext = View [[#Renders|all renders]]
| transparent = Yes
| light = No
| tool = any
| stackable = Yes (64)
| flammable = No
| lavasusceptible = No
| renewable = Yes
}}
{{about|the block|repeater circuits|Transmission circuit#Repeater|other topics related to redstone|Redstone (disambiguation)}}
A '''redstone repeater''' is a [[block]] that produces a full-strength [[Redstone Dust|output signal]] from its front when its back is powered, with four configurable delay settings. It can also be locked into a power state by its side being directly powered by a repeater or a [[Redstone Comparator|comparator]].
== Obtaining ==
=== Breaking ===
A redstone repeater can be broken instantly using any [[tool]], or without a tool, and drops itself as an item. To remove a redstone repeater, {{control|mine}} it.
A redstone repeater is removed and drops as an item if:
* its attachment block is moved, removed, or destroyed;
* [[water]] or [[lava]] flows into its space;{{only|java}}
* a [[piston]] tries to push it or moves a block into its space.
=== Natural generation ===
[[File:Redstone Repeater naturally generated.png|thumb|A redstone repeater generated in the jungle temple's hidden room.]]
A single redstone repeater is generated naturally in each [[jungle temple]].
They also generate in [[Ancient City|ancient cities]].
=== Crafting ===
{{Crafting
|A2= Redstone Torch
|B2= Redstone Dust
|C2= Redstone Torch
|B3= Stone
|C3= Stone
|A3= Stone
|Output= Redstone Repeater
|type= Redstone
}}
== Usage ==
{{see also|Redstone circuit}}
A redstone repeater can be used in four different ways: to "repeat" redstone signals back to full strength, delay signals, prevent signals moving backwards, or to "lock" signals in one state.
A repeater can be placed only on top of [[opaque]] blocks (dirt, stone, etc.), on top of upside-down [[slab]]s, upside-down [[stairs]], furnaces, and glass. {{IN|be}}, a repeater can also be placed on fences and stone walls. They can also be placed on some transparent blocks. See [[Opacity/Placement]] for more information. To place a repeater, use the {{control|Place Block}} [[control]].
A redstone repeater has a front and back – the arrow on the top points to the repeater's front. A repeater also has two small redstone torches on its top – the color of the torches indicates whether its output is on (dark red when off, bright red when on) and the distance between them indicates the delay the repeater adds to the signal transmission.
A repeater is 0.125 ({{frac|1|8}}) blocks high.
=== Signal transmission ===
A repeater transmits signals only from its back to its front, but its behavior can be modified from the side (see [[#Signal locking|signal locking]], below).
[[File:Redstone Torch Power.png|Different ways to power a repeater|thumb]]
A redstone repeater can be powered by any of the following components at its back:
* an active [[power component]] (redstone torch, lever, block of redstone, etc.)
* powered [[redstone dust]]
* a powered [[redstone comparator]] or another powered redstone repeater facing the repeater
* a powered opaque block (including any opaque [[mechanism component]]s, such as [[dispenser]]s, [[redstone lamp]]s, etc.)
A redstone repeater can power any of the following components at its front:
* redstone dust
* a redstone comparator or another redstone repeater facing away from the repeater
* any opaque block (including any opaque [[mechanism component]]s)
A redstone repeater can activate any [[mechanism component]] it is facing.
An opaque block powered by a redstone repeater is called "strongly-powered" (as opposed to an opaque block "weakly-powered" by redstone dust). A strongly-powered opaque block can power adjacent redstone dust, as well as other redstone components.
=== Signal repeating ===
{{see also|Transmission circuit#Repeater}}
A redstone repeater can "repeat" a [[Redstone Dust|redstone]] signal, boosting it back up to power level 15.
Redstone signals have a maximum power level of 15 and that level drops by 1 for every block of [[redstone dust]] the signal travels through. If a signal must travel through more than 15 [[block]]s of redstone dust, a redstone repeater can be used to boost the signal back up to full strength. An extra two blocks of distance can be achieved by placing solid opaque blocks before and after the repeater.
While redstone repeaters can allow signals to travel great distances, each always adds some delay to the transmission since the minimum amount of delay is 1 redstone tick (0.1 seconds, barring lag).
=== Signal delay ===
When initially placed, a redstone repeater has a delay of one [[redstone tick]] (equivalent to two game ticks, or 0.1 seconds barring lag).
A repeater's delay can be modified by using the {{control|Use Item}} control. Each use increases the repeater's delay by one redstone tick, to a maximum of four redstone ticks, then back to one redstone tick. Longer delays can be made with multiple repeaters – for example, a repeater set to 'four' and another to 'one' provides a half-second delay (0.4s + 0.1s = 0.5s).
A repeater set to a delay of two to four redstone ticks increases the length of any shorter [[Pulse circuit#Pulses|on-pulse]] to match the length of the repeater's delay, and suppress any shorter off-pulse. For example, a repeater set to a 4-tick delay changes a 1-tick, 2-tick, or 3-tick on-pulse into a 4-tick on-pulse, and does not allow through any off-pulse shorter than 4 ticks.
Although a repeater cannot be set to have a delay of zero, [[Transmission circuit#Instant repeater|instant repeater circuits]] are possible (circuits that repeat a signal with no delay).
In Bedrock Edition, the first repeater have a delay of zero but the repeater is still showing 1-tick{{info needed}}
=== {{anchor|diode}} Signal direction ===
{{see also| Mechanics/Redstone/Transmission circuit#Diode}}
A redstone repeater acts as a diode – it allows redstone signals through in one direction (unlike [[redstone dust]] or opaque blocks that can transmit redstone signals in any direction).
A diode can be used to protect a [[redstone circuit]] from redstone signals feeding back into the circuit from its output, or can be used to isolate one part of a circuit from another.
=== {{anchor|lock}} Signal locking ===
{{see also| Mechanics/Redstone/Memory circuit}}
[[File:Latch.png|thumb|The left repeater has been locked in an unpowered output state by the right repeater.]]
A redstone repeater can be "locked" by another powered redstone repeater facing its side. When locked, the repeater does not change its output (whether powered or unpowered), no matter what the input does. When the side repeater turns back off, the repeater returns to its normal behavior.
A repeater can also be locked by a powered [[redstone comparator]] facing its side. This offers additional possibilities for locking signals because a comparator's output can be affected from 3 sides as well as by containers.
If a repeater is locked again too quickly after unlocking (e.g. the lock is controlled by a fast clock circuit), or the lock and the input are changed only on the same tick (e.g. because they're fed by the same clock and both repeaters have the same delay), the repeater does not switch states.
== Sounds ==
{{Edition|java}}:
{{Sound table/Block/Stone/JE}}
{{Edition|bedrock}}:
{{Sound table/Block/Wood/BE}}
== Data values ==
=== ID ===
{{edition|java}}:
{{ID table
|edition=java
|showforms=y
|generatetranslationkeys=y
|displayname=Redstone Repeater
|spritetype=block
|nameid=repeater
|foot=1}}
{{edition|bedrock}}:
{{ID table
|edition=bedrock
|firstcolumnname=Redstone Repeater
|shownumericids=y
|showforms=y
|generatetranslationkeys=y
|displayname=Unpowered block
|spritename=unpowered-repeater
|spritetype=block
|nameid=unpowered_repeater
|id=93
|form=block
|translationkey=-}}
{{ID table
|displayname=Powered block
|spritename=powered-repeater
|spritetype=block
|nameid=powered_repeater
|id=94
|form=block
|translationkey=-}}
{{ID table
|displayname=Item
|spritename=redstone-repeater
|spritetype=item
|nameid=repeater
|id=419
|form=item
|foot=1}}
=== Block states ===
{{see also|Block states}}
{{/BS}}
== Video ==
<div style="text-align:center">{{yt|0Ij_qMLiRzE}}</div>
== History ==
''For a more in-depth breakdown of changes to repeater textures and models, including a set of renders for each state combination, see [[/Asset history]]''
{{History|java beta}}
{{History||1.3|[[File:Redstone Repeater (S) JE1.png|32px]] [[File:Redstone Repeater (item) JE1.png|32px]] Added redstone repeaters.
|Originally, the four possible settings were "1, 2, 5 and 7",<ref>http://twitter.com/jeb_/status/33888465502339073</ref> but [[Jeb]] decided to change the settings to "1, 2, 3, and 4".<ref>http://www.reddit.com/r/Minecraft/comments/fmdtp/teammojang_redstone_repeater_video/c1gzrn6</ref>
|The particles when [[breaking]] redstone repeaters erroneously use the [[pumpkin]] top texture.}}
{{History||unknown|The breaking particles of redstone repeaters now use the smooth stone [[slab]] top texture, even though none of the elements on the [[model]] use it.}}
{{History||1.7|[[File:Redstone Repeater (S) JE2.png|32px]] The side texture of redstone repeaters has been changed to the previous bottom part of the texture.
|[[Redstone dust]] now automatically connects to the input of a redstone repeater. Previously, it needed to be specifically pointed towards the repeater like with other blocks.}}
{{History||unknown|Redstone dust now visually connects to the output of redstone repeaters, though this does not change its behavior.}}
{{History|java}}
{{History||unknown|The breaking particles of redstone repeaters have been changed to an unlit [[redstone torch]] when unpowered and a lit redstone torch when powered.}}
{{History||1.3.1|snap=12w22a|Redstone repeaters now naturally generate inside [[jungle temple]]s.}}
{{History|||snap=1.3|[[File:Redstone Repeater (item) JE2 BE1.png|32px]] The texture of redstone repeater [[item]]s have been changed.}}
{{History||1.4.2|snap=12w42a|[[File:Redstone Repeater (S) JE3.png|32px]] The top texture of redstone repeaters has now been changed.
|[[File:Locked Redstone Repeater (S) JE1.png|32px]] Added repeater locking to redstone repeaters. Interestingly, the smallest face of the bedrock cuboid's texture changes depending on the delay, but the other two faces remain the same. When/if this changed is unknown.}}
{{History||1.5|snap=13w02a|[[File:Redstone Repeater (S) JE4.png|32px]] The side textures of redstone repeaters have been changed to use the top texture of stone [[slab]]s.}}
{{History||unknown|The breaking [[particles|particle]] of redstone repeaters has been changed once again and now matches the top texture of redstone repeaters.}}
{{History||1.8|snap=14w06a|Repeaters no longer produce block [[light]] when powered.}}
{{History|||snap=14w10a|[[File:Powered Redstone Repeater (S) JE5.png|32px]] Torches on repeaters now no longer have protruding features.
|The torches underneath redstone repeaters have now been shortened, which has changed the underside textures from [[File:Redstone Repeater JE2 BE1 (facing NWU).png|32px]] [[File: Redstone Repeater Delay 2 JE2 BE1 (facing NWU).png|32px]] [[File: Redstone Repeater Delay 3 JE2 BE1 (facing NWU).png|32px]] [[File: Redstone Repeater Delay 4 JE2 BE1 (facing NWU).png|32px]] [[File: Active Redstone Repeater JE2 BE1 (facing NWU).png|32px]] [[File: Active Redstone Repeater Delay 2 JE2 BE1 (facing NWU).png|32px]] [[File: Active Redstone Repeater Delay 3 JE2 BE1 (facing NWU).png|32px]] [[File: Active Redstone Repeater Delay 4 JE2 BE1 (facing NWU).png|32px]] [[File: Locked Redstone Repeater JE2 BE1 (facing NWU).png|32px]] [[File: Locked Redstone Repeater Delay 2 JE2 BE1 (facing NWU).png|32px]] [[File: Locked Redstone Repeater Delay 3 JE2 BE1 (facing NWU).png|32px]] [[File: Locked Redstone Repeater Delay 4 JE2 BE1 (facing NWU).png|32px]] [[File: Active Locked Redstone Repeater JE2 BE1 (facing NWU).png|32px]] [[File: Active Locked Redstone Repeater Delay 2 JE2 BE1 (facing NWU).png|32px]] [[File: Active Locked Redstone Repeater Delay 3 JE2 BE1 (facing NWU).png|32px]] [[File: Active Locked Redstone Repeater Delay 4 JE2 BE1 (facing NWU).png|32px]] to [[File:Redstone Repeater JE3 (facing NWU).png|32px]] [[File: Redstone Repeater Delay 2 JE3 (facing NWU).png|32px]] [[File: Redstone Repeater Delay 3 JE3 (facing NWU).png|32px]] [[File: Redstone Repeater Delay 4 JE3 (facing NWU).png|32px]] [[File: Active Redstone Repeater JE3 (facing NWU).png|32px]] [[File: Active Redstone Repeater Delay 2 JE3 (facing NWU).png|32px]] [[File: Active Redstone Repeater Delay 3 JE3 (facing NWU).png|32px]] [[File: Active Redstone Repeater Delay 4 JE3 (facing NWU).png|32px]] [[File: Locked Redstone Repeater JE3 (facing NWU).png|32px]] [[File: Locked Redstone Repeater Delay 2 JE3 (facing NWU).png|32px]] [[File: Locked Redstone Repeater Delay 3 JE3 (facing NWU).png|32px]] [[File: Locked Redstone Repeater Delay 4 JE3 (facing NWU).png|32px]] [[File: Locked Active Redstone Repeater JE3 (facing NWU).png|32px]] [[File: Locked Active Redstone Repeater Delay 2 JE3 (facing NWU).png|32px]] [[File: Locked Active Redstone Repeater Delay 3 JE3 (facing NWU).png|32px]] [[File: Locked Active Redstone Repeater Delay 4 JE3 (facing NWU).png|32px]].}}
{{History|||snap=14w10b|[[File:Powered Redstone Repeater (S) JE4.png|32px]] Repeater torches now have protruding features again.<ref>{{bug|MC-50242}}</ref>}}
{{History|||snap=?|[[File:Powered Redstone Repeater (S) JE7.png|32px]] The torches on redstone repeaters are now affected by directional shading.}}
{{History||1.13|snap=17w47a|All 3 IDs for the redstone repeater have now been merged into 1 ID: <code>repeater</code>.
|Added powered block state to redstone repeaters.
|Redstone repeaters now render their underside, which has changed their undersides from [[File:Redstone Repeater JE3 (facing NWU).png|32px]] [[File: Redstone Repeater Delay 2 JE3 (facing NWU).png|32px]] [[File: Redstone Repeater Delay 3 JE3 (facing NWU).png|32px]] [[File: Redstone Repeater Delay 4 JE3 (facing NWU).png|32px]] [[File: Active Redstone Repeater JE3 (facing NWU).png|32px]] [[File: Active Redstone Repeater Delay 2 JE3 (facing NWU).png|32px]] [[File: Active Redstone Repeater Delay 3 JE3 (facing NWU).png|32px]] [[File: Active Redstone Repeater Delay 4 JE3 (facing NWU).png|32px]] [[File: Locked Redstone Repeater JE3 (facing NWU).png|32px]] [[File: Locked Redstone Repeater Delay 2 JE3 (facing NWU).png|32px]] [[File: Locked Redstone Repeater Delay 3 JE3 (facing NWU).png|32px]] [[File: Locked Redstone Repeater Delay 4 JE3 (facing NWU).png|32px]] [[File: Locked Active Redstone Repeater JE3 (facing NWU).png|32px]] [[File: Locked Active Redstone Repeater Delay 2 JE3 (facing NWU).png|32px]] [[File: Locked Active Redstone Repeater Delay 3 JE3 (facing NWU).png|32px]] [[File: Locked Active Redstone Repeater Delay 4 JE3 (facing NWU).png|32px]] to [[File:Redstone Repeater JE4 BE2 (facing NWU).png|32px]] [[File: Redstone Repeater Delay 2 JE4 BE2 (facing NWU).png|32px]] [[File: Redstone Repeater Delay 3 JE4 BE2 (facing NWU).png|32px]] [[File: Redstone Repeater Delay 4 JE4 BE2 (facing NWU).png|32px]] [[File: Active Redstone Repeater JE4 BE2 (facing NWU).png|32px]] [[File: Active Redstone Repeater Delay 2 JE4 BE2 (facing NWU).png|32px]] [[File: Active Redstone Repeater Delay 3 JE4 BE2 (facing NWU).png|32px]] [[File: Active Redstone Repeater Delay 4 JE4 BE2 (facing NWU).png|32px]] [[File: Locked Redstone Repeater JE4 BE2 (facing NWU).png|32px]] [[File: Locked Redstone Repeater Delay 2 JE4 BE2 (facing NWU).png|32px]] [[File: Locked Redstone Repeater Delay 3 JE4 BE2 (facing NWU).png|32px]] [[File: Locked Redstone Repeater Delay 4 JE4 BE2 (facing NWU).png|32px]] [[File: Locked Active Redstone Repeater JE4 BE2 (facing NWU).png|32px]] [[File: Locked Active Redstone Repeater Delay 2 JE4 BE2 (facing NWU).png|32px]] [[File: Locked Active Redstone Repeater Delay 3 JE4 BE2 (facing NWU).png|32px]] [[File: Locked Active Redstone Repeater Delay 4 JE4 BE2 (facing NWU).png|32px]].
|Prior to [[1.13/Flattening|''The Flattening'']], these [[block]]s' numeral IDs were 93 and 94, and the [[item]]'s 356.}}
{{History||1.14|snap=18w43a|[[File:Redstone Repeater (S) JE5.png|32px]] [[File:Powered Redstone Repeater (S) JE9.png|32px]] [[File:Locked Redstone Repeater (S) JE5.png|32px]] [[File:Powered Locked Redstone Repeater (S) JE6.png|32px]] [[File:Redstone Repeater (item) JE3 BE2.png|32px]] The textures of redstone repeaters have now been changed.}}
{{History|||snap=18w50a|[[File:Locked Redstone Repeater (S) JE6.png|32px]] [[File:Powered Locked Redstone Repeater (S) JE7.png|32px]] As the texture of [[bedrock]] has been changed, the textures of locked redstone repeaters have also now been changed.}}
{{History|||snap=19w12b|Redstone repeaters can now be placed on [[glass]], [[ice]], [[glowstone]] and [[sea lantern]]s.}}
{{History||1.19|snap=22w13a|Redstone repeaters now generate in [[Ancient City|ancient cities]].}}
{{History||1.20.2|snap=23w33a|Redstone repeaters now use stone sounds instead of wood sounds.<ref>{{bug|MC-182820|||Fixed}}</ref>}}
{{History|pocket alpha}}
{{History||v0.14.0|snap=build 1|[[File:Redstone Repeater (S) JE3.png|32px]] [[File:Redstone Repeater (item) JE2 BE1.png|32px]] Added redstone repeaters.}}
{{History|bedrock}}
{{History||1.2.0|snap=beta 1.2.0.2|Redstone repeaters now render their underside, which has changed their undersides from [[File:Redstone Repeater JE2 BE1 (facing NWU).png|32px]] [[File: Redstone Repeater Delay 2 JE2 BE1 (facing NWU).png|32px]] [[File: Redstone Repeater Delay 3 JE2 BE1 (facing NWU).png|32px]] [[File: Redstone Repeater Delay 4 JE2 BE1 (facing NWU).png|32px]] [[File: Active Redstone Repeater JE2 BE1 (facing NWU).png|32px]] [[File: Active Redstone Repeater Delay 2 JE2 BE1 (facing NWU).png|32px]] [[File: Active Redstone Repeater Delay 3 JE2 BE1 (facing NWU).png|32px]] [[File: Active Redstone Repeater Delay 4 JE2 BE1 (facing NWU).png|32px]] [[File: Locked Redstone Repeater JE2 BE1 (facing NWU).png|32px]] [[File: Locked Redstone Repeater Delay 2 JE2 BE1 (facing NWU).png|32px]] [[File: Locked Redstone Repeater Delay 3 JE2 BE1 (facing NWU).png|32px]] [[File: Locked Redstone Repeater Delay 4 JE2 BE1 (facing NWU).png|32px]] [[File: Active Locked Redstone Repeater JE2 BE1 (facing NWU).png|32px]] [[File: Active Locked Redstone Repeater Delay 2 JE2 BE1 (facing NWU).png|32px]] [[File: Active Locked Redstone Repeater Delay 3 JE2 BE1 (facing NWU).png|32px]] [[File: Active Locked Redstone Repeater Delay 4 JE2 BE1 (facing NWU).png|32px]] to [[File:Redstone Repeater JE4 BE2 (facing NWU).png|32px]] [[File: Redstone Repeater Delay 2 JE4 BE2 (facing NWU).png|32px]] [[File: Redstone Repeater Delay 3 JE4 BE2 (facing NWU).png|32px]] [[File: Redstone Repeater Delay 4 JE4 BE2 (facing NWU).png|32px]] [[File: Active Redstone Repeater JE4 BE2 (facing NWU).png|32px]] [[File: Active Redstone Repeater Delay 2 JE4 BE2 (facing NWU).png|32px]] [[File: Active Redstone Repeater Delay 3 JE4 BE2 (facing NWU).png|32px]] [[File: Active Redstone Repeater Delay 4 JE4 BE2 (facing NWU).png|32px]] [[File: Locked Redstone Repeater JE4 BE2 (facing NWU).png|32px]] [[File: Locked Redstone Repeater Delay 2 JE4 BE2 (facing NWU).png|32px]] [[File: Locked Redstone Repeater Delay 3 JE4 BE2 (facing NWU).png|32px]] [[File: Locked Redstone Repeater Delay 4 JE4 BE2 (facing NWU).png|32px]] [[File: Locked Active Redstone Repeater JE4 BE2 (facing NWU).png|32px]] [[File: Locked Active Redstone Repeater Delay 2 JE4 BE2 (facing NWU).png|32px]] [[File: Locked Active Redstone Repeater Delay 3 JE4 BE2 (facing NWU).png|32px]] [[File: Locked Active Redstone Repeater Delay 4 JE4 BE2 (facing NWU).png|32px]].}}
{{History||1.10.0|snap=beta 1.10.0.3|[[File:Redstone Repeater (S) BE2.png|32px]] [[File:Powered Redstone Repeater (S) BE2.png|32px]] [[File:Redstone Repeater (item) JE3 BE2.png|32px]] The textures of redstone repeaters have now been changed.}}
{{History||1.20.30|snap=beta 1.20.30.20|Redstone Repeaters now use the <code>minecraft:cardinal_direction</code> [[block state]] instead of <code>direction</code>.}}
{{History|console}}
{{History||xbox=TU1|xbone=CU1|ps=1.0|wiiu=Patch 1|switch=1.0.1|[[File:Redstone Repeater (S) JE3.png|32px]]{{verify|Was this model actually used here?}} [[File:Redstone Repeater (item) JE2 BE1.png|32px]] Added redstone repeaters.}}
{{History||xbox=TU19|xbone=CU7|ps=1.12|wiiu=Patch 1|switch=1.0.1|[[File:Locked Redstone Repeater (S) JE1.png|32px]]{{verify|Was this model actually used here?}} Added repeater locking to redstone repeaters.}}
{{History||xbox=none|xbone=none|ps=1.90|wiiu=none|switch=none|[[File:Redstone Repeater (S) JE4.png|32px]]{{verify|Was this model actually used here?}} [[File:Redstone Repeater (item) JE3 BE2.png|32px]] The textures of redstone repeaters have now been changed.}}
{{History|new 3ds}}
{{History||0.1.0|[[File:Redstone Repeater (S) JE3.png|32px]]{{verify|Was this model actually used here?}} [[File:Redstone Repeater (item) JE2 BE1.png|32px]] Added redstone repeaters and repeater locking.}}
{{History|foot}}
=== Redstone repeater "items" ===
{{:Technical blocks/Redstone Repeater}}
== Issues ==
{{Issue list}}
== Trivia ==
* The recipe and appearance of redstone repeaters are a likely reference to the old method of repeating signals, which would also use two torches at a time, inverting each other
== Gallery ==
<gallery>
Repeater clock.gif|A redstone clock formed from a redstone torch and a repeater.
Repeater feedback.gif|A redstone clock formed from two repeaters.
Two way repeater.gif|MCRedstoneSim diagram of a two-way repeater.
Repeater bridge.png|Crossing redstone wires using repeaters.
Jeb Repeaters 1.png|
Jeb Repeaters 2.png|
Jeb Repeaters 3.png|
</gallery>
=== Renders ===
<gallery>
Redstone Repeater.png
Redstone Repeater Delay 2.png
Redstone Repeater Delay 3.png
Redstone Repeater Delay 4.png
Powered Redstone Repeater.png
Powered Redstone Repeater Delay 2.png
Powered Redstone Repeater Delay 3.png
Powered Redstone Repeater Delay 4.png
Locked Redstone Repeater.png
Locked Redstone Repeater Delay 2.png
Locked Redstone Repeater Delay 3.png
Locked Redstone Repeater Delay 4.png
Powered Locked Redstone Repeater.png
Powered Locked Redstone Repeater Delay 2.png
Powered Locked Redstone Repeater Delay 3.png
Powered Locked Redstone Repeater Delay 4.png
Redstone Repeater BE.png
Redstone Repeater Delay 2 BE.png
Redstone Repeater Delay 3 BE.png
Redstone Repeater Delay 4 BE.png
Powered Redstone Repeater BE.png
Powered Redstone Repeater Delay 2 BE.png
Powered Redstone Repeater Delay 3 BE.png
Powered Redstone Repeater Delay 4 BE.png
Locked Redstone Repeater BE.png
Locked Redstone Repeater Delay 2 BE.png
Locked Redstone Repeater Delay 3 BE.png
Locked Redstone Repeater Delay 4 BE.png
Powered Locked Redstone Repeater BE.png
Powered Locked Redstone Repeater Delay 2 BE.png
Powered Locked Redstone Repeater Delay 3 BE.png
Powered Locked Redstone Repeater Delay 4 BE.png
</gallery>
== References ==
{{Reflist}}
{{Redstone}}
{{Blocks|Utility}}
{{Items}}
[[Category:Mechanics]]
[[Category:Redstone mechanics]]
[[Category:Redstone]]
[[Category:Mechanisms]]
[[Category:Manufactured blocks]]
[[Category:Generated structure blocks]]
[[Category:Non-solid blocks]]
[[de:Redstone-Verstärker]]
[[es:Repetidor de redstone]]
[[fr:Répéteur de redstone]]
[[hu:Redstone-jelismétlő]]
[[it:Ripetitore di redstone]]
[[ja:レッドストーンリピーター]]
[[ko:레드스톤 중계기]]
[[nl:Redstoneversterker]]
[[pl:Przekaźnik]]
[[pt:Repetidor de redstone]]
[[ru:Красный повторитель]]
[[tr:Kızıltaş tekrarlayıcı]]
[[zh:红石中继器]]</li></ul></nowiki> | Added corrupted seeds. | ||||
| Changed: summoned pets health -50%, damage reduction = 50%, attack damage +10%, llama attack speed +15%, iron golem health +25%, wolf movement speed + 15%, harvester soul cost 25 -> 40, cooldown 1s -> 4s, max damage +60% , lightning rod soul cost 10 -> 15, cooldown 0s -> 2s, radius 300 -> 350, damage per soul 30 -> 60, max damage +50%, Soul Healer soul cost 20 -> 50, cooldown 1s -> 5s, healing allies spark start speed +100% and acceleration +150%, Healing per soul 10 -> 4, Torment Quiver cooldown 1s -> 6s, soul cost 10 -> 30. | |||||
| Removed variable soul cost. | |||||
| Fixed sound effects for some artifacts not playing when encountering large groups of mobs, artifacts hovering over weapon and armor slots on the inventory screen, Flaming Quiver, Torment Quiver, and fireworks arrow overlaps with arrows on the heads-up display, corrupted fireworks arrow animation | |||||
1.4.3.0{{Extension DPL}}<ul><li>[[Lava Bucket|Lava Bucket]]<br/>{{Item
| title = Lava Bucket
| image = Lava Bucket.png
| renewable = Yes
| stackable = No
}}
A '''lava bucket''' is a [[bucket]] filled with [[lava]].
== Obtaining ==
=== Interacting ===
To fill an empty [[bucket]] with lava, {{control|use}} it on a [[lava]] source block or lava in a [[cauldron]]. The block is consumed in the process. Flowing lava does not fill a bucket.
If there is a lava source above the [[pointed dripstone]] stalactite, there is a {{frac|15|256}} (~5.9%) chance for it to completely fill an empty cauldron within 10 blocks under the tip with lava after a [[random tick]]. This lava can then be scooped with a bucket, making it a renewable resource.
==Usage==
A lava bucket can be used to place down lava sources with the {{key|Use Item}} button. Doing so gives the player the bucket back. Lava buckets can be used to replace some transparent, non-full blocks such as [[tall grass]] and [[water]], both flowing and sources.
{{IN|java}}, lava buckets can be used to break [[Nether Portal (block)|Nether portal blocks]] by placing the lava on the side of a block next to the portal block.
=== Smelting ===
A lava bucket can be used as an efficient [[fuel]]. It has the longest burning value of 1000 seconds, compared to 800 seconds for a [[coal block]] (a lava bucket smelts 100 items, and a coal block smelts 80). After smelting starts, the lava bucket turns into an empty bucket.
=== Trading ===
{{IN|bedrock}}, journeyman-level armorer villagers buy a lava bucket for one [[emerald]] as part of their trades.
{{IN|java}}, journeyman-level armorer villagers have a 40% chance of offering to buy a lava bucket for one emerald.
=== Cauldrons ===
A lava bucket can be used to fill a [[cauldron]] with lava. The lava damages any entity standing inside the cauldron, unless the entity is immune to fire damage.<!-- ex: nether mobs--> Flowing water or waterlogging does not affect the lava in the cauldron.
== Sounds ==
{{el|je}}:
{{Sound table
|sound=Fill lava bucket1.ogg
|sound2=Fill lava bucket2.ogg
|sound3=Fill lava bucket3.ogg
|subtitle=Bucket fills
|source=player
|description=When a bucket is filled with lava
|id=item.bucket.fill_lava
|translationkey=subtitles.item.bucket.fill
|volume=1.0
|pitch=1.0
|distance=16}}
{{Sound table
|sound=Empty lava bucket1.ogg
|sound2=Empty lava bucket2.ogg
|sound3=Empty lava bucket3.ogg
|subtitle=Bucket empties
|source=block
|description=When a lava bucket is emptied
|id=item.bucket.empty_lava
|translationkey=subtitles.item.bucket.empty
|volume=1.0
|pitch=1.0
|distance=16
|foot=1}}
{{el|be}}:
{{Sound table
|type=bedrock
|sound=Fill lava bucket1.ogg
|sound2=Fill lava bucket2.ogg
|sound3=Fill lava bucket3.ogg
|source=block
|description=When a bucket is filled with lava
|id=bucket.fill_lava
|volume=1.0
|pitch=1.0}}
{{Sound table
|sound=Empty lava bucket1.ogg
|sound2=Empty lava bucket2.ogg
|sound3=Empty lava bucket3.ogg
|source=block
|description=When a lava bucket is emptied
|id=bucket.empty_lava
|volume=1.0
|pitch=1.0
|foot=1}}
==Data values==
=== ID ===
{{edition|java}}:
{{ID table
|edition=java
|showforms=y
|generatetranslationkeys=y
|displayname=Lava Bucket
|spritetype=item
|nameid=lava_bucket
|form=item
|foot=1}}
{{edition|bedrock}}:
{{ID table
|edition=bedrock
|showaliasids=y
|shownumericids=y
|showforms=y
|notshowbeitemforms=y
|generatetranslationkeys=y
|displayname=Lava Bucket
|spritetype=item
|nameid=lava_bucket
|aliasid=bucket / 10
|id=363
|form=item
|translationkey=item.bucketLava.name
|foot=1}}
== Achievements ==
{{load achievements|Super Fuel}}
== Advancements ==
{{Load advancements|Hot Stuff}}
==History==
{{History|java infdev}}
{{History||20100615|[[File:Lava Bucket JE1 BE1.png|32px]] Added lava buckets.}}
{{History|java alpha}}
{{History||v1.1.0|Buckets of lava can now be used to fuel a [[furnace]] for 100 [[smelting|smelts]], consuming the [[lava]] and the [[bucket]]. This is the highest number of smelts of any single [[item]] in the game.}}
{{History||v1.2.6|{{control|use|text=Using}} a lava bucket on [[block]]s with GUIs ([[chest]]s, furnaces, etc.) no longer places the lava.}}
{{History|java}}
{{History||1.2.1|snap=1.2|Changed name from "Lava bucket" to "Lava Bucket".}}
{{History||1.3|snap=12w22a|[[Smelting]] in a [[furnace]] with a lava bucket now leaves an empty [[bucket]] for the [[player]] to retrieve.}}
{{History||1.8|snap=14w25a|A lava bucket is now shown as the icon when [[lava]] is used as a layer in [[Superflat]].}}
{{History||1.9|snap=15w50a|Added sounds for filling and pouring lava buckets.}}
{{History||1.13|snap=17w47a|Prior to the ''[[Flattening]]'' this item's numerical ID was 327.}}
{{History||1.14|snap=18w43a|[[File:Lava Bucket JE2 BE2.png|32px]] The texture of lava buckets has been changed.}}
{{History|||snap=19w11a|Armorer villagers can now [[trading|buy]] lava buckets.}}
{{History||1.17|snap=20w45a|Lava buckets can now be used to fill a [[cauldron]] with lava.}}
{{History|||snap=21w13a|The lava bucket is now fully renewable, as [[pointed dripstone]] can now be obtained in Survival mode without custom generation.}}
{{History|pocket alpha}}
{{History||v0.7.0|[[File:Lava Bucket JE1 BE1.png|32px]] Added lava buckets.}}
{{History||v0.7.4|Lava buckets can now be used as [[fuel]] in a [[furnace]].
|Lava buckets no longer stack to 64.}}
{{History|bedrock}}
{{History||1.4.0|snap=beta 1.2.14.2|Moved all bucket items, including lava buckets, from the Equipment tab to the Items tab in the [[Creative inventory]].{{verify|type=update}}{{info needed}}<!---please check snapshots, only 1 major release version was checked each--->}}
{{History||1.9.0|snap=beta 1.9.0.2|Lava bucket can now be used to fill a [[cauldron]].}}
{{History||1.10.0|snap=beta 1.10.0.3|[[File:Lava Bucket JE2 BE2.png|32px]] The texture of lava buckets has been changed.}}
{{History||1.11.0|snap=beta 1.11.0.4|Lava buckets can now be [[trading|sold]] to armorer [[villager]]s.}}
{{History||1.16.100|snap=beta 1.16.100.56|The ID of lava buckets has been changed from <code>bucket/10</code> to <code>lava_bucket</code>.}}
{{History||1.17.0|snap=beta 1.16.230.54|The lava bucket is now fully renewable, as [[pointed dripstone]] can now be obtained in Survival mode without custom generation.}}
{{History|console}}
{{History||xbox=TU1|xbone=CU1|ps=1.0|wiiu=Patch 1|switch=1.0.1|[[File:Lava Bucket JE1 BE1.png|32px]] Added lava buckets.}}
{{History||xbox=TU9|[[Dispenser]]s have now been given the ability to shoot out the [[liquids]] inside lava buckets. They can also suck up the liquids if activated again, but do not fill up the [[bucket]]s with the liquid dropped due to a bug.}}
{{History||xbox=none|xbone=none|ps=1.90|wiiu=none|switch=none|[[File:Lava Bucket JE2 BE2.png|32px]] The texture of lava buckets has been changed.}}
{{History|New Nintendo 3DS Edition}}
{{History||0.1.0|[[File:Lava Bucket JE1 BE1.png|32px]] Added lava buckets.}}
{{History|foot}}
== Issues ==
{{Issue list}}
==Trivia==
* One lava bucket has the highest number of [[smelting|smelts]] in the game at 100 items per bucket.
** This makes it 12.5 times more efficient than [[coal]] and [[charcoal]].
* A lava bucket is used as Steve's Down-Smash attack in the crossover fighting game Super Smash Bros. Ultimate.
{{Items}}
[[Category:Renewable resources]]
[[Category:Tools]]
[[de:Lavaeimer]]
[[ja:溶岩入りバケツ]]
[[pt:Balde de lava]]
[[th:ถังลาวา]]
[[uk:Відро лави]]
[[zh:熔岩桶]]</li><li>[[Trident|Trident]]<br/>{{For|the Hidden Depths DLC weapon in ''Minecraft Dungeons''|MCD:Trident}}
{{ItemEntity
|durability= 250
|renewable= Yes
|stackable= No
|size=Height: 0.25 Blocks<br>Width: 0.25 Blocks
|title=Trident|image= <gallery>
Trident (item).png | Item
Trident.png | Entity
</gallery>}}
A '''trident''' is a [[weapon]] used in both melee and ranged combat and is a rare drop from [[drowned]].
==Obtaining==
Tridents are not craftable. A trident can be obtained only when dropped by a [[drowned]], Converted drowned are never equipped with tridents.
===Mob loot===
==== '''''Java Edition''''' ====
6.25% (or 1 in 16) of [[Drowned]] in Java Edition spawn with a trident of random durability as their natural weapon. They have an 8.5% chance to drop their trident when killed by a player. The chance is increased by 1% for each level of [[Looting]] up to a max of 11.5% with Looting III. This means the overall chance of obtaining a trident from any given drowned is 0.53125% (about 1 in 188) or 0.71875% (about 1 in 140) with looting III.
{{IN|Java}}, a trident held by a drowned has a chance to be enchanted, but the trident's enchantments have no effects for drowned.<ref>{{bug|MC-127321}}</ref>
==== '''''Bedrock Edition''''' ====
Only 15% (or 3 in 20) of [[Drowned]] in Bedrock Edition spawn with tridents. Of these, they have a 25% chance to drop their trident when killed by a player. This chance is increased by 4% for each level of looting up to a max of 37% with looting III. This means the overall chance of obtaining a trident from any given drowned is 3.75% (or 3 in 80) or 5.55% with looting III.
===Thrown tridents===
Tridents thrown onto the ground by a player can be picked up; however, tridents thrown by [[drowned]] cannot be picked up, similar to arrows shot by [[skeleton]]s, [[stray]]s, and [[pillager]]s. Only the owner of a trident thrown in Creative mode or enchanted with Loyalty can pick it up; other players in Creative and players in Survival mode including its own owner can't pick up the trident thrown in Creative.
===Trading===
Drowned who are holding tridents will sometimes drop their trident at full durability if given a nautilus shell when they aren't attacking anything.{{only|BE}}
==Usage==
===Drowned===
{{main|Drowned}}
15% of drowned {{in|bedrock}}, and 6.25% {{in|java}}, spawn with a trident as its natural weapon. It throws the trident at its opponent every 1.5 seconds, dealing {{hp|9}} [[damage]] in normal difficulty. A drowned can throw unlimited tridents, and these tridents cannot be picked up by the [[player]].
A [[villager]] can be turned into a [[zombie villager]] if it is killed by a trident thrown by a drowned: the chance of conversion is 0% on Easy [[difficulty]], 50% on Normal, and 100% on Hard and [[Hardcore]].
{{IN|bedrock}}, a drowned can use the trident's melee attack if its target is within three blocks. The melee attack deals {{hp|9}} damage.
===Melee attack===
Pressing {{control|attack}} while holding a trident deals damage to both [[mob]]s and players. Tridents deal {{hp|9}} melee damage. A successful hit consumes durability of the trident.
===Ranged attack===
[[File:Steve aiming with Trident.png|150px]] [[File:Alex aiming with Trident.png|150px]]
Pressing and holding {{control|use}} while holding a trident charges it. When released at half charge or more, the trident is thrown and deals damage to any [[entity]] it hits. Note that it doesn't have to be full charge for the complete damage and length. It flies on a ballistic trajectory similar to that of an [[arrow]], but at 80% strength. If the trident hits a block, it sticks to the block. If it hits an entity, it bounces off the entity and lands nearby. It is also blocked by [[shield]]s and can be retrieved once it lands in the ground. Thrown tridents can trigger wooden [[button]]s, wooden [[pressure plate]]s, and [[target]] blocks. A trident can be thrown at a [[chorus flower]] or [[pointed dripstone]] to break it, which causes the block to be dropped as its respective item.
{{IN|bedrock}} and [[Java Edition Combat Test 4]], tridents can be shot by [[dispenser]]s regardless of enchantment.
Tridents [[Enchanting#Summary_of_enchantments_by_item|enchanted]] with [[Loyalty]] return to the thrower after hitting an entity{{only|java}}/hitting and bouncing off an entity then hitting a block{{only|bedrock}}<ref>{{bug|MCPE-51726}}</ref> or just a block. A Loyalty-enchanted trident fired from a [[dispenser]] just sticks to the block it strikes. Higher levels of enchantment result in shorter recovery times. {{IN|java}}, throwing a trident enchanted with Loyalty into the [[void]] destroys it,<ref>{{bug|MC-125755|||WAI}}</ref> while {{in|bedrock}} it automatically returns to the player. Tridents (if enchanted with Loyalty), can take [[fire]] damage but still return to the player if thrown in [[lava]]. This is especially helpful in [[the Nether]] should the [[player]] be using a trident instead of a [[bow]]. If a trident enchanted with Loyalty attempts to return to a player with no available inventory space, the trident floats near the player until inventory space becomes available.
Thrown tridents take 1 durability damage, regardless of whether it hit an entity or not. Tridents with 1 durability remaining cannot be thrown.
Tridents enchanted with [[Riptide]] launch the player a certain distance when thrown, with the distance increasing for higher enchantment levels. They can be thrown only if the player is standing in [[water]], or if it is raining on the block they are standing on. If the player charges it but walks into a nearby dry area, the charge is canceled. If the player throws a Riptide trident and collides with a mob, the mob takes melee damage (including critical damage if the player is falling). {{IN|java}} tridents enchanted with Riptide take one durability damage upon throwing, and lose an additional 1 durability if it collides with an entity on both editions. Each level of Riptide increases the distance traveled by six blocks. The enchantment at level one launches the player nine blocks, fifteen blocks at level two, and twenty-one blocks at level three.
Tridents enchanted with [[Channeling]] summon a lightning bolt if there is a thunderstorm, although only upon hitting a mob or player standing in the rain as well as a [[Lightning Rod|lightning rod]] placed in the rain.
Unlike other projectiles, the trident does not slow down when thrown through water or lava.
{{IN|java}}, the [[Impaling]] enchantment affects ''all water mobs''. {{IN|bedrock}}, it deals extra damage to [[player]]s and mobs in water or rain.
Unlike arrows, thrown tridents do not despawn.{{only|bedrock}} Tridents despawn after 60 seconds if they are not picked up.{{only|java}}<ref>{{bug|MC-125817}}</ref>
;Magical damage
Using [[Riptide]], nearby players or mobs are dealt [[Harming|splash damage]] within an 8.25×8.25×4.25 cubical area. It stacks with the [[Impaling]] enchantment and [[Strength]] effect. Critical hits do not increase splash damage, but affect the target.
{{IN|bedrock}}, thrown tridents can damage the [[ender dragon]] while resting on the bedrock fountain. {{IN|java}}, they act just like arrows — deflected, but burn as if they had [[Flame]].
=== Damage===
Thrown tridents and splashes deal {{hp|8}} damage. The damage remains the same regardless of the trident's speed. It has a faster charging speed than a [[bow]] or [[crossbow]] (barring the [[Quick Charge]] enchantment.)
====Java Edition====
{{IN|java}}, tridents have an attack speed of 1.1 and take ~0.91 seconds to [[Damage#Attack cooldown|recover]].
{| class="wikitable" style="text-align:center" data-description="Sword attack damage by type"
!Attack
!{{ItemSprite|Trident|text=Melee}}
!{{ItemSprite|Trident|text=Melee (critical)}}
!{{ItemSprite|Trident|text=Range}}
|-
!Attack damage
|{{hp|9}}
|{{hp|13.5}}
|{{hp|8}}
|-
!Damage/Second (DPS)<ref group="note">This does not take travel time into account</ref>
|9.9
|14.3
| ?
|-
!Lifetime damage inflicted<ref group="note">The formula to find the total lifetime damage is ''Durability × Damage per hit = Lifetime damage minimum'' (e.g., 250 × 9 = 2250). It ignores enchantments and critical hits, and assumes the trident is at maximum charge</ref>
|{{hp|2250}}
|{{hp|3375}}
|{{hp|2000}}
|-
!Durability
| colspan="3" |250
|}
{{notelist}}
====Bedrock Edition====
{{IN|bedrock}}, tridents have no attack cooldown and do the following damage:
{| class="wikitable" style="text-align:center" data-description="Sword attack damage by type"
!Attack
!{{ItemSprite|Trident|text=Melee}}
!{{ItemSprite|Trident|text=Range}}
|-
!Attack damage
|{{hp|9}}
|{{hp|8}}
|-
! ''Lifetime damage inflicted''<ref group="note">The formula to find the total lifetime damage is ''Durability × Damage per hit = Lifetime damage minimum''. It excludes enchantments and critical hits.</ref>
|{{hp|2259}}
|{{hp|2008}}
|-
!Durability
| colspan="2" |251
|}
{{notelist}}
===Elytra===
A trident with the [[Riptide]] enchantment can be used to propel a player with a pair of [[elytra]], but only in [[rain]]y weather, during snowy weather in certain biomes<ref>{{bug|MC-128169}}</ref> or while the [[player]] is in a body of water. A Riptide trident can boost the player to speeds as high as 125 blocks per second,<ref>{{bug|MC-147173||Using riptide tridents while elytra flying can boost the player to excessive speeds}}</ref> much faster than the 33.5 blocks-per-second speed achievable using [[firework rocket]]s.
===Impaling damage ===
{{IN|java}}, the [[Impaling]] enchantment deals extra damage to all water mobs. {{IN|bedrock}} and in [[Java Edition Combat Test 3]], it deals extra damage to all players and mobs in water or rain.
{| class="wikitable" style="text-align:center" data-description="Trident Damage by Impaling Level" |
|+ Trident Damage by Impaling level
|-
!Level
!Increase
!Melee
!Ranged
|-
|I
| adds {{hp|2.5}}
|{{hp|11.5}}
|{{hp|10.5}}
|-
|II
|adds {{hp|5}}
|{{hp|14}}
|{{hp|13}}
|-
|III
| adds {{hp|7.5}}
|{{hp|16.5}}
|{{hp|15.5}}
|-
|IV
|adds {{hp|10}}
|{{hp|19}}
|{{hp|18}}
|-
|V
|adds {{hp|12.5}}
|{{hp|21.5}}
|{{hp|20.5}}
|}
{{-}}
===Enchantments===
Tridents have a base enchantability of 1 and can receive the following [[enchantment]]s:
{| class="wikitable col-2-center col-3-right"
|+
!Name
!Max Level
![[Enchanting|Method]]
|-
|[[Loyalty]]<ref group="note" name="note1">Loyalty and Channeling are mutually exclusive from Riptide, but not from each other.</ref>
|III
|{{Inventory slot|Enchanting Table}}{{Inventory slot|Anvil}}
|-
|[[Channeling]]<ref group="note" name="note1" />
|I
|{{Inventory slot|Enchanting Table}}{{Inventory slot|Anvil}}
|-
|[[Riptide]]<ref group="note" name="note1" />
|III
|{{Inventory slot|Enchanting Table}}{{Inventory slot|Anvil}}
|-
|[[Impaling]]
|V
|{{Inventory slot|Enchanting Table}}{{Inventory slot|Anvil}}
|-
|[[Unbreaking]]
|III
|{{Inventory slot|Enchanting Table}}{{Inventory slot|Anvil}}
|-
|[[Mending]]
|I
|{{Inventory slot|Anvil}}
|-
|[[Curse of Vanishing]]
|I
|{{Inventory slot|Anvil}}
|}
; Notes
<references group="note" />
===Repairing ===
Tridents have the same [[durability]] as an [[sword|iron sword]]. Whenever a trident deals damage, its durability decreases by 1.
Tridents can be repaired by:
*combining two damaged tridents in a [[grindstone]], or on a [[crafting table]] or the 2×2 inventory grid, which removes any enchantments except for [[Curse of Vanishing]] and [[Curse of Binding]]
*combining a damaged trident with another trident on an [[anvil]], which preserves enchantments.
*applying the [[Mending]] enchantment.
==Sounds==
{{Edition|Java}}:<br>
Thrown tridents use the Friendly Creatures sound category for entity-dependent sound events.
{{Sound table
|sound=Trident pierce1.ogg
|sound2=Trident pierce2.ogg
|sound3=Trident pierce3.ogg
|subtitle=Trident stabs
|source=neutral
|description=When a trident hits a mob
|id=item.trident.hit
|translationkey=subtitles.item.trident.hit
|volume=1.0
|pitch=1.0
|distance=16}}
{{Sound table
|sound=Trident ground impact1.ogg
|sound2=Trident ground impact2.ogg
|sound3=Trident ground impact3.ogg
|sound4=Trident ground impact4.ogg
|subtitle=Trident vibrates
|source=neutral
|description=When a trident hits the ground
|id=item.trident.hit_ground
|translationkey=subtitles.item.trident.hit_ground
|volume=0.9
|pitch={{frac|12|11}}-{{frac|4|3}}
|distance=16}}
{{Sound table
|sound=Trident throw1.ogg
|sound2=Trident throw2.ogg
|subtitle=Trident clangs
|source=player
|description=When a player throws a trident
|id=item.trident.throw
|translationkey=subtitles.item.trident.throw
|volume=1.0
|pitch=1.0
|distance=16}}
{{Sound table
|rowspan=2
|sound=Trident thunder1.ogg
|sound2=Trident thunder2.ogg
|subtitle=Trident thunder cracks
|source=neutral
|description=When a Channeling trident hits a mob
|id=item.trident.thunder
|translationkey=subtitles.item.trident.thunder
|volume=5.0
|pitch=1.0
|distance=16}}
{{Sound table
|subtitle=Trident thunder cracks
|source=weather
|description=When a trident with Channeling strikes a lightning rod
|id=item.trident.thunder
|translationkey=subtitles.item.trident.thunder
|volume=5.0
|pitch=1.0
|distance=16}}
{{Sound table
|sound=Riptide I.ogg
|subtitle=Trident zooms
|source=player
|description=When a Riptide I trident is used
|id=item.trident.riptide_1
|translationkey=subtitles.item.trident.riptide
|volume=1.0
|pitch=1.0
|distance=16}}
{{Sound table
|sound=Riptide II.ogg
|subtitle=Trident zooms
|source=player
|description=When a Riptide II trident is used
|id=item.trident.riptide_2
|translationkey=subtitles.item.trident.riptide
|volume=1.0
|pitch=1.0
|distance=16}}
{{Sound table
|sound=Riptide III.ogg
|subtitle=Trident zooms
|source=player
|description=When a Riptide III or higher trident is used
|id=item.trident.riptide_3
|translationkey=subtitles.item.trident.riptide
|volume=1.0
|pitch=1.0
|distance=16}}
{{Sound table
|sound=Trident return1.ogg
|sound2=Trident return2.ogg
|sound3=Trident return3.ogg
|subtitle=Trident returns
|source=neutral
|description=When a trident starts returning <ref group=sound>The first sound is only played {{frac|1|9}} of the time, while the others are played {{frac|4|9}} of the time</ref>
|id=item.trident.return
|translationkey=subtitles.item.trident.return
|volume=8.0
|pitch=''varies'' <ref group=sound>1.0 for <code>return1</code>, 1.0/0.8/1.2/1.2 for <code>return2</code>, and 1.0/0.8/0.8/1.2 for <code>return3</code></ref>
|distance=16}}
{{Sound table
|sound=Trident throw1.ogg
|sound2=Trident throw2.ogg
|subtitle=Drowned throws Trident
|source=hostile
|description=When a drowned shoots a trident
|id=entity.drowned.shoot
|translationkey=subtitles.entity.drowned.shoot
|volume=1.0
|pitch={{frac|5|6}}-1.25
|distance=16}}
{{Sound table
|sound=Random break.ogg
|subtitle=Item breaks
|source=player
|description=When a trident's durability is exhausted
|id=entity.item.break
|translationkey=subtitles.entity.item.break
|volume=0.8
|pitch=0.8-1.2
|distance=16
|foot=1}}
{{Edition|Bedrock}}:
{{Sound table
|type=bedrock
|sound=Trident pierce1.ogg
|sound2=Trident pierce2.ogg
|sound3=Trident pierce3.ogg
|source=player
|description=When a trident hits a mob
|id=item.trident.hit
|volume=1.0
|pitch=1.0}}
{{Sound table
|sound=Trident ground impact1.ogg
|sound2=Trident ground impact2.ogg
|sound3=Trident ground impact3.ogg
|sound4=Trident ground impact4.ogg
|source=player
|description=When a trident hits the ground
|id=item.trident.hit_ground
|volume=0.9
|pitch=1.0}}
{{Sound table
|sound=Trident throw1.ogg
|sound2=Trident throw2.ogg
|source=player
|description=When a player throws a trident
|id=item.trident.throw
|volume=1.0
|pitch=1.0}}
{{Sound table
|sound=Trident thunder1.ogg
|sound2=Trident thunder2.ogg
|source=player
|description=When a trident with Channeling strikes a mob<ref group="sound">{{Bug|MCPE-43402}}</ref><wbr><ref group=sound>{{bug|MCPE-173931||Tridents don't make channeling sounds when striking a lightning rod}}</ref><wbr>{{Upcoming|BE 1.20.30}}
|id=item.trident.thunder
|volume=1.0<wbr>{{Until|BE 1.20.30}}<br>1000.0<wbr>{{Upcoming|BE 1.20.30}}
|pitch=1.0}}
{{Sound table
|sound=Riptide I.ogg
|source=player
|description=When a Riptide I trident is used
|id=item.trident.riptide_1
|volume=1.0
|pitch=1.0}}
{{Sound table
|sound=Riptide II.ogg
|source=player
|description=When a Riptide II trident is used
|id=item.trident.riptide_2
|volume=1.0
|pitch=1.0}}
{{Sound table
|sound=Riptide III.ogg
|source=player
|description=When a Riptide III trident is used
|id=item.trident.riptide_3
|volume=1.0
|pitch=1.0}}
{{Sound table
|sound=Trident return1.ogg
|sound2=Trident return2.ogg
|sound3=Trident return3.ogg
|source=player
|description=When a trident starts returning <ref group=sound>The first sound is only played {{frac|1|9}} of the time, while the others are played {{frac|4|9}} of the time</ref>
|id=item.trident.return
|volume=8.0
|pitch=''varies'' <ref group=sound>1.0 for <code>return1</code>, 1.0/0.8/1.2/1.2 for <code>return2</code>, and 1.0/0.8/0.8/1.2 for <code>return3</code></ref>}}
{{Sound table
|sound=Trident throw1.ogg
|sound2=Trident throw2.ogg
|source=hostile
|description=When a drowned shoots a trident<ref group="sound">{{Bug|MCPE-53297}}</ref><wbr>{{Upcoming|BE 1.20.30}}
|id=mob.drowned.shoot
|volume=1.0
|pitch=0.8-1.2
|foot=1}}
==Data values==
===ID===
{{edition|java}}:
{{ID table
|edition=java
|showforms=y
|generatetranslationkeys=y
|displayname=Trident
|spritetype=item
|nameid=trident
|form=item
|foot=1}}
{{ID table
|edition=java
|showentitytags=y
|generatetranslationkeys=y
|displayname=Trident
|spritetype=entity
|nameid=trident
|entitytags=impact_projectiles
|foot=1}}
{{edition|bedrock}}:
{{ID table
|edition=bedrock
|shownumericids=y
|showforms=y
|notshowbeitemforms=y
|generatetranslationkeys=y
|displayname=Trident
|spritetype=item
|nameid=trident
|id=546
|form=item
|foot=1}}
{{ID table
|edition=bedrock
|shownumericids=y
|generatetranslationkeys=y
|displayname=Trident
|spritetype=entity
|nameid=thrown_trident
|id=73
|foot=1}}
===Entity data ===
Tridents have entity data associated with them that contain various properties of the entity.
{{el|java}}:
{{main|Entity format}}
{{/ED}}
{{el|bedrock}}:
:See [[Bedrock Edition level format/Entity format]].
==Achievements==
{{load achievements|Do a Barrel Roll!;Bullseye}}
==Advancements==
{{load advancements|A Throwaway Joke;Very Very Frightening;Not Today;Sniper Duel;Bullseye}}
==History==
{{History|java}}
{{History||November 18, 2017|link={{YouTubeLink|mAapz_nIC_Y}}|A trident was shown killing a [[zombie]] in a clip presented at [[MineCon Earth]].}}
{{History||1.13|snap=18w07a|[[File:Trident.png|60px]] {{InvSprite|Trident Revision 1}} Added tridents, which are currently unobtainable in [[Survival]].}}
{{History|||snap=18w10a|[[File:Trident (item).png|32px]] Tridents now have a new texture in the [[inventory]].}}
{{History|||snap=18w11a|Added [[drowned]] mobs, which can spawn with a trident, allowing tridents to now become obtainable in [[Survival]].}}
{{History|||snap=18w14a|If the [[player]] is not in [[water]] and it is not [[rain]]ing, the player can no longer throw tridents [[enchantment|enchanted]] with [[Riptide]], but they can still deal melee [[damage]].}}
{{History|||snap=18w20a|Like with swords, tridents no longer can break blocks when held in [[Creative]] mode.<ref>{{bug|MC-126300}}</ref>}}
{{History||1.14|snap=18w43a|Thrown tridents can now break [[chorus flower]]s.}}
{{History||1.15|snap=19w39a|[[File:Enchanted Trident.png|60px]] [[File:Enchanted Trident (item).gif|32px]] Tridents that are [[enchanting|enchanted]] now have a glint.
|Trident items use a 3D model again. When dropped, it rotates off center<ref>{{bug|MC-161886}}</ref> (like with beds at the time and shields currently).}}
{{History|||snap=19w42a|Trident items now use the 2D sprite again.<ref>{{bug|MC-161872}}</ref>}}
{{History||1.17|snap=20w48a|Thrown tridents can now break [[pointed dripstone]].}}
{{History|upcoming java}}
{{History||Villager Trade Rebalance<br>(Experimental)|link=Java Edition 1.20.2|snap=23w31a|Trident-exclusive enchantments are no longer obtainable from villager [[trading]].}}
{{History||Combat Tests|snap=1.14.3 - Combat Test|The attack speed of tridents has been increased to 2.
|The base [[damage]] of tridents has been decreased from {{hp|9}} to {{hp|7}}.
|The attack reach of tridents has been increased to 4 [[block]]s.}}
{{History|||snap=Combat Test 2|The damage of tridents has been increased to {{hp|8}}.}}
{{History|||snap=Combat Test 4|Tridents can now be shot from [[dispenser]]s.
|Tridents with [[Loyalty]] that fall into the [[void]] now return to their owner upon breaking in the void.
|Tridents with [[Impaling]] now deal [[enchanting|enchantment]] damage to all [[mob]]s that are in [[water]] or [[rain]].}}
{{History|||snap=Combat Test 5|The damage of tridents has been decreased to {{hp|7}} again.}}
{{History|bedrock}}
{{History||1.4.0|snap=beta 1.2.13.8|[[File:Trident.png|60px]] [[File:Trident (item).png|32px]] Added tridents.
|Tridents are currently a part of [[Experimental Gameplay]].}}
{{History|||snap=beta 1.2.14.2|Tridents have been fully implemented.}}
{{History|||snap=beta 1.2.20.1|A new animation has been added for tridents with [[Riptide]] when they are thrown.}}
{{History||1.5.0|snap=beta 1.5.0.0|Tridents can now be [[enchantment|enchanted]] with [[Mending]] and [[Unbreaking]].}}
{{History|||snap=beta 1.5.0.7|Tridents no longer break [[block]]s in [[Creative]] mode.}}
{{History||1.10.0|snap=beta 1.10.0.3|Thrown tridents can now break [[chorus flower]]s.}}
{{History||1.16.0|snap=beta 1.15.0.51|Drowned can no longer have a trident when converted.|Drowned that are not holding a trident are no longer able to drop one.}}
{{History||1.16.220|snap=beta 1.16.220.50|Tridents are now able to break pointed dripstone.}}
{{History|||snap=beta 1.16.220.51|Drowned now hold their tridents correctly when targeting a player.}}
{{History|console}}
{{History||xbox=TU69|ps=1.76|wiiu=Patch 38|[[File:Trident.png|60px]] [[File:Trident (item).png|32px]] Added tridents.}}
{{History|education}}
{{History||1.4.0|[[File:Trident.png|60px]] [[File:Trident (item).png|32px]] Added tridents.}}
{{History|foot}}
==Issues==
{{issue list}}
==Trivia==
* If a player throws a Loyalty-enchanted trident and the player's inventory subsequently fills, the trident hovers around or through the player's skin until an inventory slot opens, which it fills immediately. Multiple tridents can be 'queued' to re-enter the player's inventory in this manner.
*{{IN|java}} in Creative mode, sword enchantments can be applied to tridents. This includes Sharpness, Fire Aspect, and Looting. Sharpness, Smite, and Bane of Arthropods increases their damage against their specific mobs, as well.{{more info needed|Does the damage also increase when the trident is thrown?}}
*Thrown tridents pass through [[Nether Portal (block)|nether portal block]]s without being transported to [[the Nether]] or the [[Overworld]].
*Using a trident enchanted with Riptide while riding an entity cancels the charge and does nothing.
==Gallery==
<gallery>
TridentMineconEarth.jpg|Tridents are shown in a clip of Minecon Earth 2017.
Returning trident.jpg|A trident [[enchantment|enchanted]] with [[Loyalty]] returning to the [[player]].
Riptide Trident.png|A player "flying" high in the [[air]] after throwing a trident enchanted with [[Riptide]] III vertically upward.
Trident in ground.png|A trident stuck in [[sand]].
Two-hand drowned.png|A drowned holding a trident and a [[nautilus shell]].
Enchanted Trident (item).gif|An enchanted trident.
Alex with Trident.png|An official T-Shirt design of [[Alex]] with a trident.
Acid Drowned.png|"Acid Drowned," an officially licensed T-Shirt featuring a [[drowned]] with a trident.
ArgoMajor Trident.jpg|First image of a trident in ''Bedrock Edition''.
</gallery>
==References==
{{reflist}}
==External Links==
*[https://www.minecraft.net/en-us/article/taking-inventory--trident Taking Inventory: Trident] – Minecraft.net on January 30, 2020
{{Items}}
{{Entities}}
[[Category:Combat]]
[[de:Dreizack]]
[[es:Tridente]]
[[fr:Trident]]
[[ja:トライデント]]
[[ko:삼지창]]
[[pl:Trójząb]]
[[pt:Tridente]]
[[ru:Трезубец]]
[[th:ตรีศูล]]
[[zh:三叉戟]]</li></ul> | Added ice wand, soul lantern, enchanted grass, buzzy nest. | ||||
| Changed: Light Feather triggers all rolling enchantments. | |||||
| Fixed freezing after activating flaming quiver, torment quiver, and fireworks arrow at the same time on Nintendo Switch, soul related items while wearing soul related gear propelling players into the air. | |||||
1.5.0.0{{Extension DPL}}<ul><li>[[Pumpkin Pie|Pumpkin Pie]]<br/>{{redirect|Pie|the other craftable dessert|Cake|the terrain features|Pile}}
{{Item
| title = Pumpkin Pie
| image = Pumpkin Pie.png
| renewable = Yes
| heals = {{hunger|8}}
| stackable = Yes (64)
}}
'''Pumpkin pie''' is a [[food]] item that can be eaten by the [[player]].
== Obtaining ==
{{see also
| Tutorials/Pumpkin and melon farming |title1= Pumpkin and melon farming
| Tutorials/Sugar Cane farming |title2= Sugar cane farming
| Tutorials/Egg farming |title3= Egg farming
}}
=== Crafting ===
{{Crafting
|Pumpkin
|Sugar
|Egg
|Output= Pumpkin Pie
|type=Foodstuff
}}
=== Trading ===
Apprentice-level farmer [[villager]]s have a 50%{{only|bedrock}} or {{frac|2|3}}{{only|java}} chance to sell 4 pumpkin pies for an emerald as part of their trades.
{{in|java}}, farmer villagers throw pumpkin pies at players under the [[Hero of the Village]] effect.
=== Natural generation ===
{{LootChestItem|pumpkin-pie}}
== Usage ==
=== Food ===
{{see also|Tutorials/Hunger management|title1=Hunger management}}
To eat pumpkin pie, press and hold {{control|use}} while it is selected in the hotbar. Eating one restores {{hunger|8}} [[hunger]] and 4.8 [[:en:Hunger#Mechanics|saturation]].
=== Composting ===
Placing pumpkin pie into a [[composter]] raises the compost level by 1.
==Sounds==
{{Sound table/Entity/Food}}
== Advancements ==
{{load advancements|Husbandry;A Balanced Diet}}
== Data values ==
=== ID ===
{{edition|java}}:
{{ID table
|edition=java
|showforms=y
|generatetranslationkeys=y
|displayname=Pumpkin Pie
|spritetype=item
|nameid=pumpkin_pie
|form=item
|foot=1}}
{{edition|bedrock}}:
{{ID table
|edition=bedrock
|shownumericids=y
|showforms=y
|notshowbeitemforms=y
|generatetranslationkeys=y
|displayname=Pumpkin Pie
|spritetype=item
|nameid=pumpkin_pie
|id=284
|form=item
|foot=1}}
== Video ==
<div style="text-align:center">{{yt|IjeeTE117HM}}</div>
== History ==
{{History|java}}
{{History||September 11, 2012|link=http://twitter.com/jeb_/status/245503714167750656|The first screenshot of pumpkin pie was posted on [[Jens Bergensten|Jeb's]] Twitter.<ref>{{Tweet|jeb|245503714167750656}}</ref><ref>{{Tweet|jeb|245506498099298305}}</ref>}}
{{History||1.4.2|snap=12w37a|[[File:Pumpkin Pie JE1 BE1.png|32px]] Added pumpkin pies.}}
{{History||1.8|snap=14w02a|Pumpkin pie can now be [[trading|bought]] from farmer [[villager]]s, at 2–3 pumpkin pies for 1 [[emerald]].}}
{{History||1.13|snap=17w47a|Prior to [[1.13/Flattening|''The Flattening'']], this [[item]]'s numeral ID was 400.}}
{{History||1.14|snap=18w43a|[[File:Pumpkin Pie JE2 BE2.png|32px]] The texture of pumpkin pie has been changed.}}
{{History|||snap=18w50a|Pumpkin pies now generate in chests in taiga [[village]] houses.}}
{{History|||snap=19w03a|Placing pumpkin pie into the new [[composter]] raises the compost level by 1.}}
{{History|||snap=19w13a|Farmer villagers now give pumpkin pies to players under the [[Hero of the Village]] effect.}}
{{History|pocket alpha}}
{{History||v0.8.0|snap=build 1|[[File:Pumpkin Pie JE1 BE1.png|32px]] Added pumpkin pie.}}
{{History||v0.12.1|snap=build 1|Pumpkin pie now restores [[hunger]] instead of [[health]].}}
{{History|bedrock}}
{{History||1.10.0|snap=beta 1.10.0.3|[[File:Pumpkin Pie JE2 BE2.png|32px]] The texture of pumpkin pie has been changed.}}
{{History||1.11.0|snap=beta 1.11.0.1|Pumpkin pie can now be found in [[taiga]] and [[snowy taiga]] [[village]] house [[chest]]s.
|Pumpkin pie can now be used to fill up [[composter]]s.}}
{{History|||snap=beta 1.11.0.4|Farmer [[villager]]s now have a 50% chance to [[trading|sell]] 4 pumpkin pies for an [[emerald]].}}
{{History|console}}
{{History||xbox=TU14|xbone=CU1|ps=1.04|wiiu=Patch 1|switch=1.0.1|[[File:Pumpkin Pie JE1 BE1.png|32px]] Added pumpkin pie.}}
{{History||xbox=none|xbone=none|ps=1.90|wiiu=none|switch=none|[[File:Pumpkin Pie JE2 BE2.png|32px]] The texture of pumpkin pie has been changed.}}
{{History|New 3DS}}
{{History||0.1.0|[[File:Pumpkin Pie JE1 BE1.png|32px]] Added pumpkin pie.}}
{{History|foot}}
== Issues ==
{{issue list}}
== Gallery ==
<gallery>
File:Twitter Pumpkin Pie.png|The first screenshot of pumpkin pies, posted on Jeb's twitter.
</gallery>
== References ==
{{reflist}}
{{Items}}
[[cs:Dýňový koláč]]
[[de:Kürbiskuchen]]
[[es:Tarta de calabaza]]
[[fr:Tarte à la citrouille]]
[[it:Torta di zucca]]
[[ja:パンプキンパイ]]
[[ko:호박 파이]]
[[lzh:南瓜餅]]
[[nl:Pompoentaart]]
[[pl:Placek dyniowy]]
[[pt:Torta de abóbora]]
[[ru:Тыквенный пирог]]
[[zh:南瓜派]]
[[Category:Food]]
[[Category:Renewable resources]]</li><li>[[Cooked Chicken|Cooked Chicken]]<br/>{{about|a food item|other uses of the word "chicken"|Chicken (disambiguation)}}
{{Item
| title = Cooked Chicken
| image = Cooked Chicken.png
| renewable = Yes
| heals = {{hunger|6}}
| stackable = Yes (64)
}}
'''Cooked chicken''' is a [[food]] item that can be eaten by the [[player]].
== Obtaining ==
=== Mob loot ===
When a chicken dies while on fire, it drops one cooked chicken. The maximum is increased by 1 per level of [[Looting]], for a maximum of 1–4 cooked chicken with Looting III.
=== Cooking ===
[[Raw chicken]] can be cooked in a [[furnace]], [[smoker]], or [[campfire]]. Each piece of cooked chicken removed from a furnace output slot gives 0.35 [[experience]] (22.4 experience per stack).
{{Smelting
|Raw Chicken
|Cooked Chicken
|0,35
}}
=== Trading ===
{{IN|java}}, apprentice-level butcher [[villager]]s have a {{frac|2|3}} chance to sell 8 cooked chicken for an [[emerald]].
Butcher villagers may give cooked chicken to players with the [[Hero of the Village]] effect.{{only|java}}
{{IN|bedrock}}, apprentice-level butcher villagers have a 25% chance to sell 8 cooked chicken for an emerald as part of their trades.
== Usage ==
=== Food ===
To eat cooked chicken, press and hold {{control|use}} while it is selected in the hotbar. Eating one restores {{hunger|6}} [[hunger]] and 7.2 hunger [[Hunger#Mechanics|saturation]].
=== Wolves ===
Cooked chicken can be used to [[breed]] and heal tamed [[wolves]], lead them around, and make baby tamed wolves grow up faster by 10% of the remaining time.
== Sounds ==
{{Sound table/Entity/Food}}
== Data values ==
=== ID ===
{{edition|java}}:
{{ID table
|edition=java
|showforms=y
|generatetranslationkeys=y
|displayname=Cooked Chicken
|spritetype=item
|nameid=cooked_chicken
|form=item
|foot=1}}
{{edition|bedrock}}:
{{ID table
|edition=bedrock
|shownumericids=y
|showforms=y
|notshowbeitemforms=y
|generatetranslationkeys=y
|displayname=Cooked Chicken
|spritetype=item
|nameid=cooked_chicken
|id=276
|form=item
|foot=1}}
== Advancements ==
{{load advancements|Husbandry;A Balanced Diet}}
== Video ==
<div style="text-align:center">{{yt|ux362Ae8Llc}}</div>
== History ==
{{History|java beta}}
{{History||July 19, 2011|link=https://twitter.com/jeb_/status/93330811608240128|[[File:Cooked Chicken (pre-release).png|32px]] A teaser image for cooked chicken is revealed by [[Jeb]].}}
{{History||July 19, 2011|link=https://twitter.com/jeb_/status/93946593748852736|[[File:Cooked Chicken (pre-release 2).png|32px]] Jens changes the texture based on feedback, saying "the chicken may be too smooth compared to other MC [[item]]s."<ref>https://twitter.com/jeb_/status/93335976298033152</ref>}}
{{History||1.8|snap=Pre-release|[[File:Cooked Chicken JE1 BE1.png|32px]] Added cooked chicken.}}
{{History|java}}
{{History||1.2.1|snap=12w03a|Cooked chicken can now be used to breed wolves.}}
{{History||1.3.1|snap=12w21a|Farmer [[villager]]s now [[trading|sell]] 7–8 cooked chicken for 1 [[emerald]].}}
{{History||1.4.2|snap=12w37a|[[File:Cooked Chicken JE2 BE2.png|32px]] The texture of cooked chicken has been changed so that it no longer has a dark outline.}}{{History||1.8|snap=14w02a|Butcher villagers now [[trading|sell]] 6–8 cooked chicken for 1 [[emerald]]. Farmer [[villager]]s no longer sell cooked chicken.}}
{{History||1.9|snap=15w43a|[[Chicken]]s can now [[drops|drop]] several cooked chickens if killed with a [[Looting]]-enchanted [[weapons|weapon]].}}
{{History||1.13|snap=17w47a|Prior to [[1.13/Flattening|''The Flattening'']], this [[item]]'s numeral ID was 366.}}
{{History||1.14|snap=18w43a|[[File:Cooked Chicken JE3 BE3.png|32px]] The texture of cooked chicken has been changed.}}
{{History|||snap=19w13a|Butcher villagers now give cooked chicken to players under the [[Hero of the Village]] effect.}}
{{History|pocket alpha}}
{{History||v0.4.0|[[File:Cooked Chicken JE1 BE1.png|32px]] Added cooked chicken.}}
{{History||v0.5.0|Cooked chicken now restores {{hp|6}} instead of {{hp|3}}.}}
{{History||v0.8.0|snap=build 1|[[File:Cooked Chicken JE2 BE2.png|32px]] The texture of cooked chicken has been changed so that it no longer has a dark outline.}}
{{History||v0.12.1|snap=build 1|Cooked chicken now restores [[hunger]] instead of [[health]].}}
{{History|pocket}}
{{History||1.0.4|snap=alpha 1.0.4.0|Butcher villagers now [[trading|sell]] 6–8 cooked chicken for 1 [[emerald]].}}
{{History||?|[[Chicken]]s can now [[drops|drop]] several cooked chickens if killed with a [[Looting]]-enchanted [[weapons|weapon]].}}
{{History|bedrock}}
{{History||1.10.0|snap=beta 1.10.0.3|[[File:Cooked Chicken JE3 BE3.png|32px]] The texture of cooked chicken has been changed.}}
{{History||1.11.0|snap=beta 1.11.0.4|[[Trading]] has been changed, butcher [[villager]]s now have a 25% chance to [[trading|sell]] 4 cooked chicken as part of their second-tier [[trading|trade]].}}
{{History||1.16.0|snap=beta 1.16.0.57|[[Trading]] has been changed, apprentice butcher [[villager]]s now have a 25% chance to [[trading|sell]] 8 cooked chicken instead of 4.}}
{{History|console}}
{{History||xbox=TU5|xbone=CU1|ps=1.0|wiiu=Patch 1|[[File:Cooked Chicken JE1 BE1.png|32px]] Added cooked chicken.}}
{{History||xbox=TU12|[[File:Cooked Chicken JE2 BE2.png|32px]] The texture of cooked chicken has been changed so that it no longer has a dark outline.}}
{{History|PS4}}
{{History||1.90|[[File:Cooked Chicken JE3 BE3.png|32px]] The texture of cooked chicken has been changed.}}
{{History|new3DS}}
{{History||0.1.0|[[File:Cooked Chicken JE2 BE2.png|32px]] Added cooked chicken.}}
{{History|foot}}
== Issues ==
{{issue list}}
== Gallery ==
<gallery>
Beta 1.8 Dev Chicken.png|First image of cooked chicken.
Beta 1.8 Dev Chicken 2.png|Second image of cooked chicken.
</gallery>
== References ==
{{reflist}}
{{Items}}
[[Category:Food]]
[[Category:Renewable resources]]
[[cs:Pečené kuře]]
[[de:Gebratenes Hühnchen]]
[[es:Pollo asado]]
[[fr:Poulet rôti]]
[[hu:Sültcsirke]]
[[it:Pollo cotto]]
[[ja:焼き鳥]]
[[ko:익힌 닭고기]]
[[nl:Gebraden kip]]
[[pl:Pieczony kurczak]]
[[pt:Frango assado]]
[[ru:Жареная курятина]]
[[zh:熟鸡肉]]</li></ul> | Added corrupted pumpkin | ||||
1.7.2.0{{Extension DPL}}<ul><li>[[Ankle Monitor|Ankle Monitor]]<br/>{{Joke feature}}
{{Item
| title = Ankle Monitor
| image = Ankle Monitor.png
| renewable = No
| stackable = Yes (64)
}}
The '''Ankle monitor''' was a joke foot item.
== Usage ==
Ankle monitors were equipped in the boots slot. In survival mode, when equipped, it could not be taken off. However, players in Creative mode are unaffected.
When equipped, the player would be afflicted with {{EffectLink|Slowness}} I.
During the night, being a certain number of blocks from the world spawn, above a certain minimum,{{checkthecode|how much?}} would prompt the following message in chat: "CURFEW WARNING! You are violating your house arrest! Get back by [distance] meters!"
If in [[the Nether]] or [[the End]], a different set of messages would be cycled through which can be seen in the section below.
=== Nether and End messages ===
* CURFEW WARNING! You are violating your house arrest! Uuuh... where are you anyway?
* CURFEW WARNING! Hello, are you there?
* CURFEW WARNING! I'm sure you have important things to do, but you need to go back!
* CURFEW WARNING! We're lonely back home!
* CURFEW WARNING! By "we" I mean I. I'm lonely.
* CURFEW WARNING! Ok enough games... GET BACK RIGHT NOW!
* CURFEW WARNING! LAST WARNING!
* CURFEW WARNING! LASTEST WARNING (really now)
* CURFEW WARNING! ...
* CURFEW WARNING! So... Where are you?
* CURFEW WARNING! Having a good day?
* CURFEW WARNING! Did you see that monster over there?
* CURFEW WARNING! Give it a whack, if you would be so kind.
* CURFEW WARNING! Teheee...
* CURFEW WARNING! Ok, enough of this!
* CURFEW WARNING! Last straw!
* CURFEW WARNING! Now you die.
* CURFEW WARNING! Boom!
* CURFEW WARNING! Hehe, fun right?
* CURFEW WARNING! Ok, you will not hear anything more from me now!
* CURFEW WARNING! You'll be as lonely as I am.
* CURFEW WARNING! How does that feel?
* CURFEW WARNING! Stop. Please. Stupid.
* CURFEW WARNING! I know, I'll wipe my memory. That way, I can start over!
* CURFEW WARNING! *bzzzzttt*
== Sounds ==
{{Sound table
|sound=Robot1arm1.ogg
|sound2=Robot1arm2.ogg
|sound3=Robot1arm3.ogg
|sound4=Robot1arm4.ogg
|source=dependent
|subtitle=''None''
|description=When a notification is displayed
|id=item.ankle_monitor.warning
|translationkey=''None''
|volume=1.0
|pitch=1.0
|distance=16
|foot=1}}
== Data values ==
=== ID ===
{{ID table
|shownumericids=y
|showforms=y
|generatetranslationkeys=java
|displayname=Ankle Monitor
|spritetype=item
|nameid=ankle_monitor
|id=501
|form=item
|translationkey=item.ankleMonitor.name
|foot=1}}
== History ==
{{History|java}}
{{History||1.RV-Pre1|[[File:Ankle_Monitor_(item).png|32px]] [[File:Ankle Monitor.png|32px]] Added ankle monitors.}}
{{History||1.11|snap=16w39a|The inability to remove ankle monitors was somewhat implemented into the canonical game through the addition of [[Curse of Binding]].<ref>{{ytl|Vm6oplvyyh0|t=3m31s}}</ref>}}
{{History|foot}}
== Issues ==
Ankle monitors are an unsupported [[item]] due to being an [[Wikipedia:April Fools' Day|April Fools']] joke, and therefore such issues relating to them will not be fixed.
== Gallery ==
<gallery>
TechGear.png|A [[player]] wearing the gear featured in this [[wikipedia:April Fools' Day|April Fools']] joke version.
</gallery>
==References==
{{Reflist}}
{{Items}}
{{Jokes}}
[[Category:Non-renewable resources]]
[[Category:Joke items]]
[[es:Ankle monitor]]</li><li>[[Lead|Lead]]<br/>{{About|the item used for leashing and leading mobs|the element|Element#Lead}}
{{Item
| image = Lead.png
| stackable = Yes (64)
| renewable = Yes
}}
'''Leads''' are [[tool]]s used to leash and lead passive and neutral [[animal]]s, [[golem]]s and some [[monster]]s.
== Obtaining ==
=== Chest loot ===
{{LootChestItem|lead}}
=== Crafting ===
{{Crafting
|A1= String
|B1= String
|A2= String
|B2= Slimeball
|C3= String
|Output= Lead,2
|type= Tool
}}
=== Mob loot ===
[[Wandering Trader|Wandering trader]]s always spawn with 2 [[llama|trader llama]]s, each held with a lead. When a trader llama is detached, either by killing it or the wandering trader, dragging them far apart, or putting the llama in a [[boat]] or a [[minecart]], the lead drops at the llama's position.
== Usage ==
=== Crafting ingredient ===
{{crafting usage}}
=== Leashing mobs ===
[[File:SuspendedPigs.png|190px|thumb|One block tall mobs, such as pigs, suspend at 7 blocks above the ground.]]
[[File:SuspendedCows.png|190px|thumb|Two block tall mobs, such as cows, also suspend at 7 blocks above the ground.]]
{{control|Using}} a lead on a [[mob]] ties the lead to the mob, allowing it to be moved by the player. Multiple mobs can be held by leads at once, but each mob held requires its own lead.
It is possible to leash the following mobs and other entities:
{{columns-list|colwidth=20em|
* {{EntityLink|Allay}}
* {{EntityLink|Axolotl}}
* {{EntityLink|Bee}}
* {{EntityLink|Boat}}{{only|bedrock}}
* {{EntityLink|Camel}}
* {{EntityLink|Cat}}
* {{EntityLink|Chicken}}
* {{EntityLink|Chicken Jockey}} (only the mount)
* {{EntityLink|Cow}}
* {{EntityLink|Dolphin}}
* {{EntityLink|Donkey}}
* {{EntityLink|Fox}}
* {{EntityLink|Frog}}
* {{EntityLink|Glow Squid}}
* {{EntityLink|Goat}}
* {{EntityLink|Hoglin}}
* {{EntityLink|Horse}}
* {{EntityLink|Iron Golem}}
* {{EntityLink|Llama}}
* {{EntityLink|Mooshroom}}
* {{EntityLink|Mule}}
* {{EntityLink|Ocelot}}
* {{EntityLink|Parrot}}
* {{EntityLink|Pig}}
* {{EntityLink|Polar Bear}}
* {{EntityLink|Rabbit}}
* {{EntityLink|Sheep}}
* {{EntityLink|Skeleton Horse}}
* {{EntityLink|Skeleton Horseman}} (only the mount)
* {{EntityLink|Sniffer}}
* {{EntityLink|Snow Golem}}
* {{EntityLink|Squid}}
* {{EntityLink|Strider}}
* {{EntityLink|Trader Llama}}
* {{EntityLink|Wolf}}
* {{EntityLink|Zoglin}}
* {{EntityLink|Zombie Horse}}}}
Additionally, [[villager]]s, [[wandering trader]]s, and [[monster]]s other than the ones listed above, can be leashed using a map editor or [[NBT]] editor.
With a mob on a lead held by the player, {{control|using}} the lead on any type of [[fence]] (or [[wall]]{{only|bedrock|short=1}}) attaches the lead to it with a visible knot, tying the mob to it. To attach it to a wall on Bedrock Edition, the player must hold a lead in the main hand.<ref>{{bug|MCPE-108078}}</ref> Multiple leads may be attached to one fence post. A mob tied to a fence tends to stay within 5 blocks of the fence post.
A lead is broken by pressing the {{control|use item}} control on the mob again, hitting the knot, or removing the attached fence post. Leads also break when hit by projectiles. Whenever a lead is removed or broken, it drops as an [[item (entity)|item]] at the location of the mob. However, it does not drop when unleashed in Creative mode.{{only|java}}<ref>{{bug|MCPE-79639}}</ref> A lead does not break if the attached animal dies.
A lead can stretch a maximum of 10 blocks. If the mob is able to move towards the player or fence post, it does so. If not, or if the mob is moving very quickly away from the player, the lead breaks.
When the player or the knot is more than 7 blocks above the ground, the mob being leashed becomes suspended.
Most mobs that can be leashed can still be leashed even if attacking the player leashing them, and any attached leads do not break.
[[Wolf|Wolves]] cannot be leashed after becoming angry. Despite this, if they become angry while already leashed, the lead does not break, but it cannot be reattached when broken through other methods while the wolf is still angry.
A lead attached to a hoglin breaks if it becomes a [[zoglin]].
A lead does not prevent mobs from despawning if they normally would despawn.
When moving downwards and accelerating towards the ground, leashed mobs accumulate fall damage and take it if they hit the ground while still accelerating. When moving up or decelerating (such as when the lead is stretched to its limit), the fall distance is set to one block and the mob therefore does not take any fall damage if it touches the ground.
If the player walks into and back out of a [[nether portal]] while holding a lead connected to a mob, the lead remains attached to the mob. However, if a mob attached to a lead walks into a nether portal, the lead breaks and drops as an item in the other dimension.
A lead can be used to remove a mob from a boat without needing to break the boat, if the mob can normally be leashed.
If a chunk unloads while containing a leashed mob (either by the player walking too far away, or traveling to another dimension via a portal), the lead breaks and drops as an item, leaving the mob free to wander around.
== Sounds ==
{{Edition|Java}}:
{{Sound table
|sound=Lead Knot break1.ogg
|sound2=Lead Knot break2.ogg
|sound3=Lead Knot break3.ogg
|subtitle=Leash Knot breaks
|source=neutral
|description=When a leash knot is destroyed
|id=entity.leash_knot.break
|translationkey=subtitles.entity.leashknot.break
|volume=1.0
|pitch=1.0
|distance=16}}
{{Sound table
|sound=Lead Knot place1.ogg
|sound2=Lead Knot place2.ogg
|sound3=Lead Knot place3.ogg
|subtitle=Leash Knot tied
|source=neutral
|description=When a leash knot is placed on a fence
|id=entity.leash_knot.place
|translationkey=subtitles.entity.leashknot.place
|volume=1.0
|pitch=1.0
|distance=16
|foot=1}}
{{Edition|Bedrock}}:
{{Sound table
|type=bedrock
|sound=Lead Knot break1.ogg
|sound2=Lead Knot break2.ogg
|sound3=Lead Knot break3.ogg
|source=neutral
|description=When a leash knot is broken by {{ctrl|interacting}} with it
|id=leashknot.break
|volume=1.0
|pitch=1.0}}
{{Sound table
|sound=Lead Knot place1.ogg
|sound2=Lead Knot place2.ogg
|sound3=Lead Knot place3.ogg
|source=neutral
|description=When a leash knot is placed on a fence or wall
|id=leashknot.place
|volume=1.0
|pitch=1.0
|foot=1}}
== Leash Knot ==
'''Leash knot''' is an entity created when the [[player]] right-clicks the fence while having a mob leashed.
{{Entity| title = Leash Knot| image = Knot.png|imagesize= 100px|networkid='''[[JE]]''': 77}}
=== Data values ===
==== ID ====
{{edition|java}}:
{{ID table
|edition=java
|generatetranslationkeys=y
|displayname=Leash Knot
|spritetype=entity
|nameid=leash_knot
|foot=1}}
{{edition|bedrock}}:
{{ID table
|edition=bedrock
|shownumericids=y
|notshowbeitemforms=y
|generatetranslationkeys=y
|displayname=Leash Knot
|spritetype=entity
|nameid=leash_knot
|id=88
|foot=1}}
==== Entity data ====
Leash knots have entity data that define various properties of the entity.
{{el|java}}:
{{main|Entity format}}
{{/ED}}
{{el|bedrock}}:
: See [[Bedrock Edition level format/Entity format]].
== Data values ==
=== ID ===
{{edition|java}}:
{{ID table
|edition=java
|showforms=y
|generatetranslationkeys=y
|displayname=Lead
|spritetype=item
|nameid=lead
|form=item
|foot=1}}
{{edition|bedrock}}:
{{ID table
|edition=bedrock
|shownumericids=y
|showforms=y
|notshowbeitemforms=y
|generatetranslationkeys=y
|displayname=Lead
|spritetype=item
|nameid=lead
|id=547
|form=item
|foot=1}}
== Achievements ==
{{load achievements|So I Got That Going for Me}}
== Advancements ==
{{load advancements|When the Squad Hops into Town}}
== History ==
{{missing information|The history of a lot of mobs be leashed}}
{{History|java}}
{{History||1.6.1|snap=13w16a|[[File:Lead JE1 BE1.png|32px]] Added leads.
|Leads do not currently have a tooltip and are called “leashes” in [http://www.mojang.com/2013/04/minecraft-snapshot-13w16a-and-new-launcher/ the change notes].}}
{{History|||snap=13w16b|Leads have been given a tooltip.}}
{{History|||snap=13w18a|Leads have been given a [[crafting]] recipe.}}
{{History||1.9|snap=15w50a|Added a [[sound]] for leads: <code>entity.leashknot.place</code>.}}
{{History||1.11|snap=16w32a|The [[entity]] ID of the knot has been changed from <code>LeashKnot</code> to <code>leash_knot</code>.}}
{{History|||snap=16w39a|Leads can now be found in [[woodland mansion]] chests.}}
{{History||1.13|snap=17w47a|Prior to [[1.13/Flattening|''The Flattening'']], this [[item]]'s numeral ID was 420.}}
{{History||1.14|snap=18w43a|[[File:Lead JE2 BE2.png|32px]] The texture of leads has been changed.}}
{{History|||snap=19w05a|Added [[wandering trader]]s, which are naturally equipped with leads.}}
{{History||1.15|snap=?|[[Bee]]s can now be leashed.}}
{{History||1.16|snap=20w09a|[[Skeleton horse]]s and [[zombie horse]]s can now be leashed.<ref>{{bug|MC-166246}}</ref>}}
{{History|||snap=?|[[Hoglin]]s can now be leashed.}}
{{History||1.16.2|snap=20w27a|[[Zoglin]]s can now be leashed.}}
{{History||1.17|snap=21w19a|[[Squid]]s and [[glow squid]]s can now be leashed.<ref>{{bug|MC-136647}}</ref>}}
{{History|||snap=?|[[Axolotl]]s can now be leashed.}}
{{History||1.19|snap=22w13a|Lead may now be found in [[ancient city]] [[chest]]s.}}
{{History|||snap=?|[[Frog]]s can now be leashed.}}
{{History||1.19.3|snap=22w42a|[[Camel]]s can now be leashed.|Mobs no longer accumulate fall damage when dangling on leads.<ref>{{bug|MC-14167||Mobs build up fall damage when dangling on a lead|Fixed}}</ref>}}
{{History||1.20 (Experimental)|link=1.19.4|snap=?|[[Sniffer]]s can now be leashed.}}
{{History||1.20|snap=23w12a|Lead can now be found in [[suspicious gravel]] and [[suspicious sand]] in [[trail ruins]].}}
{{History|||snap=23w16a|Lead no longer generates in [[suspicious sand]] in [[trail ruins]].|Due to the split of the archaeological loot tables for the suspicious gravel within the [[trail ruins]]; lead now is in the common loot.}}
{{History|pocket alpha}}
{{History||v0.15.0|snap=build 1|[[File:Lead JE1 BE1.png|32px]] Added leads.}}
{{History|pocket}}
{{History||1.1.0|snap=alpha 1.1.0.0|Leads now have better "physics".
|The [[entity]] ID of the knot has been changed from <code>leashknot</code> to <code>leash_knot</code>.
|Leads can now be found inside [[woodland mansion]] [[chest]]s.}}
{{History|bedrock}}
{{History||1.4.0|snap=beta 1.2.14.2|Leads can now be found inside [[buried treasure]] [[chest]]s.
|Leads can now be used on [[boat]]s.}}
{{History||1.4.0|snap=beta 1.2.20.1|Leads can now be used to craft [[balloon]]s.}}
{{History||1.10.0|snap=beta 1.10.0.3|[[File:Lead JE2 BE2.png|32px]] The texture of leads has been changed.
|[[Wandering trader]]s now [[drops|drop]] leads after they are detached from trader [[llama]]s.}}
{{History||1.14.0|snap=beta 1.14.0.1|Leads can now be used on [[polar bear]]s, [[ocelot]]s, [[parrot]]s, [[dolphin]]s and old [[villager]]s.}}
{{History||1.19.0|snap=beta 1.19.0.20|Allays can now be leashed.}}
{{History|console}}
{{History||xbox=TU19|xbone=CU7|ps=1.12|wiiu=Patch 1|switch=1.0.1|[[File:Lead JE1 BE1.png|32px]] Added leads.}}
{{History||xbox=TU43|xbone=CU33|ps=1.36|wiiu=Patch 13|[[Sound]]s have been added for leads.}}
{{History|Ps4}}
{{History||1.90|[[File:Lead JE2 BE2.png|32px]] The texture of leads has been changed.}}
{{History|3ds}}
{{History||0.1.0|[[File:Lead JE1 BE1.png|32px]] Added leads.}}
{{History|foot}}
== Issues ==
{{issue list|Lead|Leash}}
== Trivia ==
[[File:Steve wearing Lead.png|100px]] [[File:Alex wearing Lead.png|100px]]
* The lead is named as "leash" in the texture file.
* If a [[player]] goes to sleep while holding a mob on a lead, the lead remains attached.
* {{IN|Java}}, when using the {{cmd|item}} command to put a lead in a player's head slot, the item gets rotated and positioned in such a way that it looks like the player is wearing a monocle.
== Gallery ==
<gallery>
Multiple_Leash.png|Many animals can be tied to one fence post.
HorseLeashedOnAFence.png|A [[horse]] wearing [[golden horse armor]] that is leashed to a fence post.
ThreeTiedSheep.png|Three sheep tied to the same fence.
More accurate lead mobs.png|A shot of all the mobs that could be tied with leads as of 1.6.1, except donkeys and mules.
Yo Yo.png|With the use of the leash, it is possible to suspend animals in the air by tying the leash on high-up fence posts.
YoYo.png|A [[donkey]] with the Grumm/Dinnerbone [[name tag]] [[easter egg]] tied to a fence with a lead to make a yo-yo.
Flying_Sheep.png|Several [[sheep]] hanging in the air in [[Creative]] mode.
Pocket Edition Lead.jpg|First image of a lead in ''Bedrock Edition''.
</gallery>
== References ==
{{Reflist}}
== External Links ==
*[https://www.minecraft.net/en-us/article/taking-inventory-lead Taking Inventory: Lead] – Minecraft.net on April 8, 2022
{{items}}
{{entities}}
[[Category:Tools]]
[[de:Leine]]
[[es:Rienda]]
[[fr:Laisse]]
[[hu:Lasszó]]
[[it:Guinzaglio]]
[[ja:リード]]
[[ko:끈]]
[[nl:Leidtouw]]
[[pl:Smycz]]
[[pt:Laço]]
[[ru:Поводок]]
[[th:เชือกจูง]]
[[zh:拴绳]]
[[Category:Renewable resources]]</li></ul> | Added enchanter's tome, satchel of elements, scatter mines, updraft tome. | ||||
| Changed: Totem of regeneration healing per second 20 to 40, soul lantern (soul wizard) damage +50%, attack speed +40%, soul cost +20%. | |||||
| Fixed flaming quiver not dealing additional damage on top of ranged weapon damage[2], recalling the soul wizard interrupting player movement. | |||||
1.7.3.0{{Extension DPL}}<ul><li>[[Cooked Porkchop|Cooked Porkchop]]<br/>{{Item
| title = Cooked Porkchop
| image = Cooked Porkchop.png
| renewable = Yes
| heals = {{hunger|8}}
| stackable = Yes (64)
}}
'''Cooked porkchop''' is a [[food]] [[item]] that can be eaten by the [[player]].
== Obtaining ==
{{see also|Tutorials/Animal farming|title1=Animal farming}}
Cooked porkchops can be obtained by cooking [[raw porkchop]]s or by [[trading]] with butchers, and is a [[drops|drop]] from [[pig]]s and [[hoglin]]s that die while on [[fire]].
=== Mob loot ===
==== Pigs ====
Adult [[pig]]s drop 1–3 cooked porkchop if killed while on fire. The maximum amount is increased by 1 per level of [[Looting]], for a maximum of 1-6 with Looting III.
==== Hoglins ====
Adult [[hoglin]]s drop 2–4 cooked porkchop if killed while on fire. The maximum amount is increased by 1 per level of Looting, for a maximum of 7 with Looting III.
=== Cooking ===
[[Raw porkchop]] can be cooked in a [[furnace]], [[smoker]], or [[campfire]]. Each piece of cooked porkchop removed from a furnace output slot gives 0.35 [[experience]] (22.4 experience per stack).
{{Smelting
|Raw Porkchop
|Cooked Porkchop
|0,35
}}
=== Trading ===
{{IN|java}}, apprentice-level butcher [[villager]]s have a {{frac|2|3}} chance of selling 5 cooked porkchop for 1 [[emerald]].
Butcher villagers may give players with the [[Hero of the Village]] effect a cooked porkchop.{{only|java}}
{{IN|bedrock}}, apprentice-level butcher villagers have a 25% chance to sell 5 cooked porkchop for 1 emerald.
=== Chest loot ===
{{LootChestItem|cooked-porkchop}}
== Usage ==
=== Food ===
{{see also|Tutorials/Hunger management|title1=Hunger management}}
To eat cooked porkchop, press and hold {{control|use}} while it is selected in the hotbar. Eating one restores {{hunger|8}} [[hunger]] and 12.8 [[Hunger#Mechanics|saturation]].
=== Wolves ===
Cooked porkchops can be used to [[breeding|breed]] and heal tamed [[wolf|wolves]], lead them around, and make baby tamed wolves grow up faster by 10% of the remaining time.
=== Piglins ===
[[Piglin]]s pick up any cooked porkchops in their [[item (entity)|item]] form. However, they do not eat it.
==Sounds==
{{Sound table/Entity/Food}}
== Data values ==
=== ID ===
{{edition|java}}:
{{ID table
|edition=java
|showitemtags=y
|showforms=y
|generatetranslationkeys=y
|displayname=Cooked Porkchop
|spritetype=item
|nameid=cooked_porkchop
|itemtags=piglin_food
|form=item
|foot=1}}
{{edition|bedrock}}:
{{ID table
|edition=bedrock
|shownumericids=y
|showforms=y
|notshowbeitemforms=y
|generatetranslationkeys=y
|displayname=Cooked Porkchop
|spritetype=item
|nameid=cooked_porkchop
|id=263
|form=item
|foot=1}}
== Achievements ==
{{load achievements|Pork Chop}}
== Advancements ==
{{load advancements|Husbandry;A Balanced Diet}}
== History ==
{{History|java indev}}
{{History||20100219|[[File:Cooked Porkchop JE1.png|32px]] Added cooked porkchops.
|Cooked porkchops restore {{hp|8}} and do not stack in the [[inventory]].
|Created by cooking [[raw porkchops]] in the inventory.}}
{{History|java alpha}}
{{History||v1.2.0|snap=preview|[[Zombie pigmen]] now [[drops|drop]] 0-2 cooked porkchops upon [[death]].}}
{{History|java beta}}
{{History||1.5|[[Pig]]s now [[drops|drop]] cooked porkchops when killed with [[fire]].}}
{{History||1.8|snap=Pre-release|[[File:Cooked Porkchop JE2 BE1.png|32px]] The texture of cooked porkchops has been changed to avoid confusion with [[steak]].
|Cooked porkchops are now stackable to 64 and restore [[hunger]] instead of [[health]].
|Cooked porkchops now restore {{hunger|8}} to the food bar.
|Cooked porkchops are no longer dropped by [[zombie pigmen]] upon their [[death]].}}
{{History|java}}
{{History||1.2.1|snap=12w03a|Cooked porkchop can now be used to breed wolves.}}
{{History||1.3.1|snap=12w21a|Butcher [[villager]]s now [[trading|sell]] 6–7 cooked porkchops for 1 [[emerald]].}}
{{History||1.4.2|snap=12w37a|[[File:Cooked Porkchop JE3 BE2.png|32px]] The texture of cooked porkchops has been changed, so that it no longer has a dark outline.}}
{{History||1.8|snap=14w02a|Butcher [[villager]]s now [[trading|sell]] 5–7 cooked porkchops for 1 [[emerald]].}}
{{History||1.13|snap=17w47a|Prior to [[1.13/Flattening|''The Flattening'']], this [[item]]'s numeral ID was 320.}}
{{History||1.14|snap=18w43a|[[File:Cooked Porkchop JE4 BE3.png|32px]] The texture of cooked porkchops has been changed.}}
{{History|||snap=19w13a|Butcher villagers now give cooked porkchops to players under the [[Hero of the Village]] effect.}}
{{History||1.16|snap=20w07a|[[Hoglin]]s now drop cooked porkchops if killed while on fire.}}
{{History|||snap=20w16a|Cooked porkchops can now be found in hoglin stable chests in [[bastion remnant]]s.}}
{{History||1.16.2|snap=20w30a|Cooked porkchops can now be found in generic bastion remnant chests as well.}}
{{History|pocket alpha}}
{{History||v0.4.0|[[File:Cooked Porkchop JE2 BE1.png|32px]] Added cooked porkchops.}}
{{History||v0.5.0|Cooked porkchops now restore {{hp|8}} instead of {{hp|4}}.}}
{{History||v0.8.0|snap=build 1|[[File:Cooked Porkchop JE3 BE2.png|32px]] The texture of cooked porkchops has been changed, so that it no longer has a dark outline.}}
{{History||v0.12.1|snap=build 1|Cooked porkchops now restore [[hunger]] instead of [[health]].}}
{{History|pocket}}
{{History||1.0.4|snap=alpha 1.0.4.0|Butcher [[villager]]s now [[trading|sell]] 5–7 cooked porkchops for 1 [[emerald]].}}
{{History|bedrock}}
{{History||1.10.0|snap=beta 1.10.0.3|[[File:Cooked Porkchop JE4 BE3.png|32px]] The texture of cooked porkchops has been changed.}}
{{History||1.11.0|snap=beta 1.11.0.4|[[Trading]] has been changed, butcher [[villager]]s now have a 25% chance to [[trading|sell]] 4 cooked porkchops as part of their second-tier [[trading|trade]].}}
{{History||1.16.0|snap=beta 1.16.0.57|Trading has been changed, apprentice butcher [[villager]]s now have a 25% chance to [[trading|sell]] 5 cooked porkchops instead of 3.}}
{{History|console}}
{{History||xbox=TU1|xbone=CU1|ps=1.0|wiiu=Patch 1|[[File:Cooked Porkchop JE1.png|32px]] Added cooked porkchops.}}
{{History||xbox=TU3|[[File:Cooked Porkchop JE2 BE1.png|32px]] The texture of cooked porkchops has been changed to be consistent with [[Java Edition]].}}
{{History||xbox=TU5|Cooked porkchops are now stackable to 64.
|Cooked porkchops now fill [[hunger]] instead of [[health]].}}
{{History||xbox=TU12|[[File:Cooked Porkchop JE3 BE2.png|32px]] The texture of cooked porkchops has been changed, so that it no longer has a dark outline.}}
{{History|PS4}}
{{History||1.90|[[File:Cooked Porkchop JE4 BE3.png|32px]] The texture of cooked porkchops has been changed.}}
{{History|new3DS}}
{{History||0.1.0|[[File:Cooked Porkchop JE3 BE2.png|32px]] Added cooked porkchops.}}
{{History|foot}}
== Issues ==
{{issue list}}
== External Links ==
*[https://www.minecraft.net/en-us/article/taking-inventory--porkchop Taking Inventory: Porkchop] – Minecraft.net on February 13, 2020
{{Items}}
[[Category:Food]]
[[Category:Renewable resources]]
[[cs:Pečená kotleta]]
[[de:Gebratenes Schweinefleisch]]
[[es:Chuleta de cerdo cocinada]]
[[fr:Côtelette de porc cuite]]
[[hu:Sült sertésszelet]]
[[ja:焼き豚]]
[[nl:Gebraden varkensvlees]]
[[pl:Pieczony schab]]
[[pt:Costeleta de porco assada]]
[[ru:Жареная свинина]]
[[uk:Смажена свинина]]
[[zh:熟猪排]]</li><li>[[Stick|Stick]]<br/>{{for|other uses|Stick (disambiguation)}}
{{Item
| image = Stick.png
| renewable = Yes
| stackable = Yes (64)
}}
A '''stick''' is an item used for [[crafting]] many [[tools]] and [[item]]s.
== Obtaining ==
=== Crafting ===
{{Crafting
|B2= Any Planks
|B3= Any Planks
|Output= Stick,4
|type= Material
|head=1
}}
{{Crafting
|B2= Bamboo
|B3= Bamboo
|Output= Stick
|type= Material
|foot=1
}}
=== Fishing ===
Sticks can be obtained as a "junk" item while [[fishing]].
=== Block loot ===
[[Dead bush]]es drop between 0–2 sticks when destroyed.
All [[Leaves|leaf]] types have a 2% chance to drop between 1-2 sticks when broken. Using a tool with [[Fortune]] increase these chances to 2.2%, 2.5%, and 3.3% for Fortune I, II, and III respectively.
=== Entity loot ===
[[Witch]]es have a chance of dropping 0–6 sticks upon death. This is increased by 3 per level of [[Looting]], for a chance of 0-15 sticks.
[[Boat]]s and [[Boat with Chest|boats with chest]]s drop 2 sticks when falling from exactly 12, 13, 49, 51, 111, 114, 198, 202, 310, or 315 blocks.<ref>{{bug|MC-119369}}</ref>.
=== Chest loot ===
{{LootChestItem|stick}}
== Usage ==
=== Crafting ingredient ===
{{crafting usage}}
=== Fuel ===
When used as a [[furnace]] fuel, a stick smelts 0.5 [[item]]s.
=== Trading ===
Novice-level [[Trading#Fletcher|fletcher]] [[villager]]s have a {{frac|2|3}} chance to buy 32 sticks for an [[emerald]] in ''Java Edition'', and they always offer the trade in Bedrock Edition.
== Video ==
<div style="text-align:center">{{yt|SYoHAJBuoss}}</div>
== Data values ==
=== ID ===
{{edition|java}}:
{{ID table
|edition=java
|showforms=y
|generatetranslationkeys=y
|displayname=Stick
|spritetype=item
|nameid=stick
|form=item
|foot=1}}
{{edition|bedrock}}:
{{ID table
|edition=bedrock
|shownumericids=y
|showforms=y
|notshowbeitemforms=y
|generatetranslationkeys=y
|displayname=Stick
|spritetype=item
|nameid=stick
|id=320
|form=item
|foot=1}}
== History ==
{{History|java indev}}
{{History||0.31|snap=20100129|[[File:Stick JE1 BE1.png|32px]] Added sticks.
|Sticks are used to craft [[sign]]s, [[torch]]es, [[sword]]s, [[pickaxe]]s, [[axe]]s and [[shovel]]s.}}
{{History|||snap=20100130|Sticks are now used to craft [[bow]]s and [[arrow]]s.}}
{{History||20100206|Sticks are now used to craft [[hoe]]s.}}
{{History||20100219|Sticks can be used as fuel for the newly added [[furnace]].}}
{{History||20100223|Sticks are now used to craft [[painting]]s.}}
{{History|java infdev}}
{{History||20100607|Sticks are now used to craft [[ladder]]s.}}
{{History||20100618|Sticks are now used to craft [[rail]]s.}}
{{History|java alpha}}
{{History||v1.0.1|Sticks are now used to craft [[redstone torch]]es and [[lever]]s.}}
{{History||v1.0.6|2 sticks now drops from breaking [[boat]]s.}}
{{History||v1.0.17|Sticks are now used to craft [[fence]]s.}}
{{History||v1.1.1|Sticks are now used to craft [[fishing rod]]s.}}
{{History|java beta}}
{{History||1.5|Sticks are now used to craft [[powered rail]]s.}}
{{History||1.8|snap=Pre-release|Sticks are now used to craft [[fence gate]]s.}}
{{History|java}}
{{History||1.2.4|snap=release|[[Spruce planks]], [[birch planks]], and [[jungle planks]] can now be used to craft sticks.}}
{{History||1.3.1|snap=12w16a|Sticks are found in the new [[bonus chest]]s.}}
{{History|||snap=12w22a|Sticks are now used to craft [[tripwire hook]]s.}}
{{History|||snap=12w27a|Sticks no longer drops from breaking [[boat]]s.|Instead, it needs to fall certain heights to drop 2 sticks.}}
{{History||1.4.2|snap=12w34a|Sticks are now used to craft [[item frame]]s.}}
{{History|||snap=12w38b|[[Witch]]es now have a chance to drop sticks.}}
{{History||1.5|snap=13w02a|Sticks are now used to craft [[activator rail]]s.}}
{{History||1.7.2|snap=13w36a|Sticks can be obtained as one of the "junk" [[item]]s by [[fishing]].}}
{{History|||snap=1.7.1|[[Acacia planks]] and [[dark oak planks]] can now be used to craft sticks.}}
{{History||1.8|snap=14w30a|Sticks are now used to craft [[banner]]s.}}
{{History|||snap=14w32a|Sticks are now used to craft [[armor stand]]s.}}
{{History||1.9|snap=15w31a|Sticks are now dropped by [[dead bush]]es.}}
{{History|||snap=15w44a|Sticks are now found in [[bonus chest]]s for more than double the average yield.}}
{{History||1.13|snap=17w47a|Sticks can now be found in 70.5% of bonus chests in stacks of 1–12.
|Prior to [[1.13/Flattening|''The Flattening'']], this [[item]]'s numeral ID was 280.}}
{{History||1.14|snap=18w43a|Sticks can now be crafted from [[bamboo]].
|Sticks can now be used to craft [[crossbow]]s.
|Sticks are now [[drops|dropped]] by [[leaves]].}}
{{History|||snap=18w48a|Sticks can now be used to craft [[grindstone]]s.
|Sticks can now be found in [[chest]]s in [[village]] cartographer houses.}}
{{History|||snap=18w50a|Sticks can now be found in village fletcher houses and toolsmith houses.}}
{{History|||snap=19w02a|Sticks can now be used to craft [[campfire]]s.}}
{{History|||snap=19w11a|Fletcher [[villager]]s now [[trading|buy]] sticks.}}
{{History||1.16|snap=20w06a|[[Crimson planks]] and [[warped planks]] can now be used to craft sticks.
|Sticks can now be used to craft [[soul torch]]es.}}
{{History||1.17|snap=21w05a|Sticks are now dropped by [[azalea leaves]] and [[flowering azalea leaves]].}}
{{History||1.19|snap=22w11a|[[Mangrove planks]] can now be used to craft sticks.}}
{{History|||snap=22w13a|Sticks are now dropped by [[mangrove leaves]].}}
{{History||1.19.4|snap=23w07a|The [[crossbow]] and [[soul campfire]] recipes are no longer unlocked by sticks.}}
{{History||1.20<br>(Experimental)|link=1.19.4|snap=23w07a|Sticks are now dropped by [[cherry leaves]].
|Sticks can now be used to craft [[brush]]es.
|Sticks now drop when brushing [[suspicious sand]] in [[desert well]]s.}}
{{History||1.20|snap=23w12a|The probability for the stick to generate in the [[suspicious sand]] in [[desert well]] has been changed from 1/7 to 1/8.}}
{{History|pocket alpha}}
{{History||v0.2.0|[[File:Stick JE1 BE1.png|32px]] Added sticks. They are currently unobtainable and serve no purpose.}}
{{History||v0.3.0|Sticks are now [[craft]]able.
|Sticks can be used to [[craft]] wooden and stone [[pickaxe]]s, [[axe]]s, [[sword]]s and [[shovel]]s, [[ladder]]s, [[torch]]es, [[fence]]s and [[fence gate]]s.}}
{{History||v0.3.2|Sticks are now used to craft iron, gold and diamond [[pickaxe]]s, [[axe]]s, [[sword]]s and [[shovel]]s.}}
{{History||v0.3.3|Sticks are now used to craft [[bow]]s.}}
{{History||v0.4.0|Sticks are now used to craft [[hoe]]s.}}
{{History||v0.5.0|Sticks are now used to craft [[painting]]s.}}
{{History||v0.6.0|Sticks are now used to craft [[sign]]s.}}
{{History||v0.8.0|snap=build 2|Sticks are now used to craft [[rail]]s and [[powered rail]]s.}}
{{History||v0.11.0|snap=build 1|Sticks are now used to craft [[fishing rod]]s.
|Sticks can now be found as a junk [[item]] from [[fishing]].}}
{{History||v0.12.1|snap=build 1|Sticks are now [[drops|dropped]] when [[dead bush]]es are [[breaking|destroyed]].}}
{{History||v0.13.0|snap=build 1|Sticks are now used to craft [[redstone torch]]es, [[lever]]s and [[tripwire hook]]s.}}
{{History||v0.14.0|snap=build 1|Added [[witch]]es, which have a chance of [[drops|dropping]] sticks.
|Sticks can now be used to craft [[item frame]]s.}}
{{History|bedrock}}
{{History||1.2.0|snap=beta 1.2.0.2|Sticks can now be used to craft [[armor stand]]s and [[banner]]s.
|Sticks can now generate inside [[bonus chest]]s.}}
{{History||1.4.0|snap=beta 1.2.20.1|Sticks can now be used to craft [[sparkler]]s.}}
{{History||1.8.0|snap=beta 1.8.0.8|Sticks can now be crafted from [[bamboo]].}}
{{History|||snap=beta 1.8.0.10|Sticks can now be used to craft [[crossbow]]s.}}
{{History||1.10.0|snap=beta 1.10.0.3|Sticks can now be used to craft [[barrel]]s, [[grindstone]]s, and [[campfire]]s.
|[[Leaves]] now have a chance of [[drops|dropping]] 0-2 sticks when [[breaking|destroyed]].}}
{{History||1.11.0|snap=beta 1.11.0.1|Sticks can now be found in [[village]] toolsmith and fletcher [[chest]]s.}}
{{History|||snap=beta 1.11.0.4|Sticks can now be [[trading|sold]] to fletcher [[villager]]s.}}
{{History||1.16.0|snap=beta 1.16.0.51|Sticks can now be used to craft [[soul torch]]es.}}
{{History||1.20.0<br>(Experimental)|link=Bedrock Edition 1.19.70|snap=beta 1.19.70.23|Sticks can now be used to craft [[brush]]es.
|Sticks now drop when brushing [[suspicious sand]] in [[desert well]]s.}}
{{History||1.20.10|snap=beta 1.20.10.20|Sticks are no longer used to craft barrels.}}
{{History|console}}
{{History||xbox=TU1|xbone=CU1|ps=1.0|wiiu=Patch 1|[[File:Stick JE1 BE1.png|32px]] Added sticks.}}
{{History|PS4}}
{{History||1.90|Sticks can now be [[drops|dropped]] by [[leaves]].}}
{{History|new3DS}}
{{History||0.1.0|[[File:Stick JE1 BE1.png|32px]] Added sticks.}}
{{History|foot}}
== Issues ==
{{issue list}}
== Trivia ==
* The stick is used in 49 recipes in ''Java Edition'', and 50 recipes in ''Bedrock Edition'', more than any other item in the game. [[Iron ingot]] takes second place with 35 recipes, and [[planks]] take third place with 34 recipes.
* To craft each recipe once, a player would need 111 sticks, including 1 for the [[redstone torch]] in an [[activator rail]], while using the extra tripwire hook for the [[crossbow]]. This would require 56 [[planks]], or 14 [[logs]], for the sticks, and an extra 29 planks for the [[tool|wooden tools]], [[tripwire hook]], [[signs]], [[fences]], [[fence gate]], [[grindstone]], and slabs for the [[barrel]]. This means that the player needs a total of 85 planks, or 22 logs, plus 6 more for the [[campfire]] and [[soul campfire]].
== External Links ==
*[https://www.minecraft.net/en-us/article/taking-inventory--stick Taking Inventory: Stick] – Minecraft.net on April 2, 2020
{{Items}}
[[cs:Tyčka]]
[[de:Stock]]
[[es:Palo]]
[[fr:Bâton]]
[[hu:Bot]]
[[it:Bastone]]
[[ja:棒]]
[[ko:막대기]]
[[nl:Stok]]
[[pl:Patyk]]
[[pt:Graveto]]
[[ru:Палка]]
[[th:แท่งไม้]]
[[tr:Çubuk]]
[[uk:Палиця]]
[[zh:木棍]]
[[Category:Renewable resources]]</li></ul> | Fixed cooldown not affecting satchel of elements.[3] | ||||
1.8.0.0{{Extension DPL}}<ul><li>[[Popped Chorus Fruit|Popped Chorus Fruit]]<br/>{{Item
| image = Popped Chorus Fruit.png
| renewable = Yes
| stackable = Yes (64)
}}
'''Popped chorus fruit''' is an [[item]] obtained by [[smelting]] [[chorus fruit]], and used to craft [[End Rod|end rods]] and [[purpur blocks]]. Unlike raw chorus fruit, the popped fruit is inedible.
== Obtaining ==
=== Smelting ===
{{Smelting
|Chorus Fruit
|Popped Chorus Fruit
|0,1
}}
== Usage ==
=== Crafting ingredient ===
{{crafting usage}}
== Data values ==
=== ID ===
{{edition|java}}:
{{ID table
|edition=java
|showforms=y
|generatetranslationkeys=y
|displayname=Popped Chorus Fruit
|spritetype=item
|nameid=popped_chorus_fruit
|form=item
|foot=1}}
{{edition|bedrock}}:
{{ID table
|edition=bedrock
|showaliasids=y
|shownumericids=y
|showforms=y
|notshowbeitemforms=y
|generatetranslationkeys=y
|displayname=Popped Chorus Fruit
|spritetype=item
|nameid=popped_chorus_fruit
|aliasid=chorus_fruit_popped
|id=559
|form=item
|translationkey=item.chorus_fruit_popped.name
|foot=1}}
== History ==
{{History|java}}
{{History||1.9|snap=15w31a|[[File:Popped Chorus Fruit JE1 BE1.png|32px]] Added popped chorus fruit.
|Popped chorus fruit are used to craft [[purpur block]]s.}}
{{History|||snap=15w44b|Popped chorus fruit are now used to craft [[end rod]]s.}}
{{History||1.13|snap=17w47a|Prior to [[1.13/Flattening|''The Flattening'']], this [[item]]'s numeral ID was 433.}}
{{History|||snap=pre5|The ID of popped chorus fruit has now been changed to <code>popped_chorus_fruit</code>.}}
{{History||1.14|snap=18w43a|[[File:Popped Chorus Fruit JE2 BE2.png|32px]] The texture of popped chorus fruit has now been changed.}}
{{History|pocket}}
{{History||1.0.0|snap=alpha 0.17.0.1|[[File:Popped Chorus Fruit JE1 BE1.png|32px]] Added popped chorus fruit.}}
{{History|bedrock}}
{{History||1.10.0|snap=beta 1.10.0.3|[[File:Popped Chorus Fruit JE2 BE2.png|32px]] The texture of popped chorus fruit has now been changed.}}
{{History||1.16.100|snap=beta 1.16.100.56|The ID of popped chorus fruit has been changed from <code>chorus_fruit_popped</code> to <code>popped_chorus_fruit</code>.}}
{{History|console}}
{{History||xbox=TU46|xbone=CU36|ps=1.38|wiiu=Patch 15|[[File:Popped Chorus Fruit JE1 BE1.png|32px]] Added popped chorus fruit.}}
{{History||xbox=none|xbone=none|ps=1.90|wiiu=none|switch=none|[[File:Popped Chorus Fruit JE2 BE2.png|32px]] The texture of popped chorus fruit has now been changed.}}
{{History|new 3ds}}
{{History||1.7.10|[[File:Popped Chorus Fruit JE1 BE1.png|32px]] Added popped chorus fruit.}}
{{History|foot}}
== Issues ==
{{issue list}}
{{Items}}
[[cs:Vypukaný květ chorusu]]
[[de:Geplatzte Chorusfrucht]]
[[fr:Chorus éclaté]]
[[it:Frutto di chorus scoppiato]]
[[ja:焼いたコーラスフルーツ]]
[[ko:튀긴 후렴과]]
[[nl:Gepoft Chorusfruit]]
[[pl:Prażony owoc refrenusu]]
[[pt:Fruta do coro cozida]]
[[ru:Приготовленный плод коруса]]
[[zh:爆裂紫颂果]]
[[Category:Renewable resources]]</li><li>[[Glow Stick|Glow Stick]]<br/>{{stub}}
{{education feature}}
{{Exclusive|Bedrock|Education}}
{{Item
| image = White Glow Stick.png
| extratext = View [[#Gallery|all renders]]
| renewable = No
| durability = 95
| stackable = No
}}
'''Glow sticks''' are [[Chemistry Update|chemistry]]-related [[item]]s, which can be lit up in the player's hand for a limited time.
== Obtaining ==
{{iN|be}}, glow sticks cannot be obtained by the {{cmd|give}} command. They also cannot be obtained in [[Survival]]. Cheats must be enabled to obtain glow sticks in Survival mode, or in [[Minecraft Education]].
=== Crafting ===
{{Crafting
|showdescription=1
|ingredients=[[Polyethylene]] +<br>[[Hydrogen Peroxide]] +<br>Matching [[Dye]] +<br>[[Luminol]]
|A1= Polyethylene
|B1= Hydrogen Peroxide
|C1= Polyethylene
|A2= Polyethylene
|B2= White Dye; Orange Dye; Magenta Dye; Light Blue Dye; Yellow Dye; Lime Dye; Pink Dye; Gray Dye; Cyan Dye; Purple Dye; Blue Dye; Brown Dye; Green Dye; Red Dye
|C2= Polyethylene
|A3= Polyethylene
|B3= Luminol
|C3= Polyethylene
|Output= Matching Glow Stick
|description={{only|bedrock|education}}
|type= Miscellaneous
}}
<div style="display:none">
<!--
This is so the pre-Village & Pillage dyes can have dye-related crafting recipes show on their respective pages.
They don't need to be displayed on this page because they already intuitively list "Any Matching Dye".
-->
{{Crafting
|showdescription=1
|ingredients=[[Polyethylene]] +<br>[[Hydrogen Peroxide]] +<br>Matching [[Dye]] +<br>[[Luminol]]
|A1= Polyethylene
|B1= Hydrogen Peroxide
|C1= Polyethylene
|A2= Polyethylene
|B2= Bone Meal; Lapis Lazuli; Cocoa Beans
|C2= Polyethylene
|A3= Polyethylene
|B3= Luminol
|C3= Polyethylene
|Output= White Glow Stick; Blue Glow Stick; Brown Glow Stick
|description={{only|bedrock|Education}}
|type= Miscellaneous
}}
</div>
== Usage ==
While equipped, [[player]]s can {{control|use}} glow sticks to shake them, causing them to appear bright regardless of the [[light]] level. This is only an aesthetic change, as no light is emitted to the surrounding area. A [[particle]] effect is visible until the [[durability]] runs out. The glow stick's durability depletes while lit{{Info needed}}, in both Survival and Creative modes.
== Sounds ==
{{Sound table
|type=bedrock
|sound=Flint and steel click.ogg
|source=block
|description=While a glowstick is being activated
|id=fire.ignite
|volume=1.0
|pitch=0.5/0.7
|foot=1}}
== Data values ==
=== ID ===
{{ID table
|edition=bedrock
|shownumericids=y
|showforms=y
|notshowbeitemforms=y
|generatetranslationkeys=y
|displayname=Glow Stick
|spritename=glow-sticks
|spritetype=item
|nameid=glow_stick
|id=601
|form=item
|translationkey=item.glow_stick.black.name,item.glow_stick.red.name,item.glow_stick.green.name,item.glow_stick.brown.name,item.glow_stick.blue.name,item.glow_stick.purple.name,item.glow_stick.cyan.name,item.glow_stick.silver.name,item.glow_stick.gray.name,item.glow_stick.pink.name,item.glow_stick.lime.name,item.glow_stick.yellow.name,item.glow_stick.lightBlue.name,item.glow_stick.magenta.name,item.glow_stick.orange.name,item.glow_stick.white.name
|foot=1}}
===Metadata===
{{/DV}}
===Item data===
See [[Bedrock Edition level format/Item format]].
== History ==
{{History|bedrock}}
{{History||1.4.0|snap=beta 1.2.20.1|[[File:White Glow Stick.png|32px]] [[File:Orange Glow Stick.png|32px]] [[File:Magenta Glow Stick.png|32px]] [[File:Light Blue Glow Stick.png|32px]] [[File:Yellow Glow Stick.png|32px]] [[File:Lime Glow Stick.png|32px]] [[File:Pink Glow Stick.png|32px]] [[File:Gray Glow Stick.png|32px]] [[File:Cyan Glow Stick.png|32px]] [[File:Purple Glow Stick.png|32px]] [[File:Blue Glow Stick.png|32px]] [[File:Brown Glow Stick.png|32px]] [[File:Green Glow Stick.png|32px]] [[File:Red Glow Stick.png|32px]] Added glow sticks.}}
{{History||1.14.60|snap=?|Making a glow stick results in an edible item called {{code|item.glow_stick.black.name}}.}}
{{History||?|Making a glow stick results in correct items again.
|Making a glow stick with dye has been made an upgrade{{info needed|what is this supposed to mean?}}
|Putting 2 glow sticks in a Crafting Table now outputs a correct glow stick.}}
{{History||1.17.0|snap=?|[[File:Missing Glow Stick.png|32px]] Two black glow sticks, using the [[missing texture]] if Education Edition is disabled, now generate in fake end portal rooms in [[mansion]]s instead of [[ender pearl]]s.}}
{{h||1.18.0|snap=beta 1.18.0.21|Glow sticks no longer generate in [[woodland mansion]]s.}}
{{History|education}}
{{History||1.0.27|[[File:White Glow Stick.png|32px]] [[File:Orange Glow Stick.png|32px]] [[File:Magenta Glow Stick.png|32px]] [[File:Light Blue Glow Stick.png|32px]] [[File:Yellow Glow Stick.png|32px]] [[File:Lime Glow Stick.png|32px]] [[File:Pink Glow Stick.png|32px]] [[File:Gray Glow Stick.png|32px]] [[File:Cyan Glow Stick.png|32px]] [[File:Purple Glow Stick.png|32px]] [[File:Blue Glow Stick.png|32px]] [[File:Brown Glow Stick.png|32px]] [[File:Green Glow Stick.png|32px]] [[File:Red Glow Stick.png|32px]] Added glow sticks.}}
{{History|foot}}
== Gallery ==
<gallery>
White Glow Stick.png|
Orange Glow Stick.png|
Magenta Glow Stick.png|
Light Blue Glow Stick.png|
Yellow Glow Stick.png|
Lime Glow Stick.png|
Pink Glow Stick.png|
Gray Glow Stick.png|
Cyan Glow Stick.png|
Purple Glow Stick.png|
Blue Glow Stick.png|
Brown Glow Stick.png|
Green Glow Stick.png|
Red Glow Stick.png|
</gallery>
== Trivia ==
* The glowing reaction of [[Wikipedia:Luminol|Luminol]] during oxidation exists in real life. It is used for detecting blood in crime scenes.
* Players cannot enchant glow sticks with Unbreaking or Mending, despite the items having [[durability]].
* The black and light gray glow sticks use the same texture as the red glow stick.{{verify|It seems they use the missing texture instead. Was this the case beforehand, and they only started using the missing texture later?}}
== Issues ==
{{issue list}}
{{items}}
{{Education Edition}}
[[Category:Non-renewable resources]]
[[Category:Education Edition items]]
[[de:Knicklicht]]
[[ja:ケミカルライト]]
[[ko:발광봉]]
[[pt:Graveto Brilhante]]
[[ru:Химический источник света]]
[[zh:荧光棒]]</li></ul> | Added blast fungus, powershaker, spinblade, thundering quiver. | ||||
1.9.1.0{{Extension DPL}}<ul><li>[[Pottery Sherd|Pottery Sherd]]<br/>{{Item
| image=Angler Pottery Sherd.png
| extratext = View [[#Items|all items]]
| renewable = No
| stackable = Yes (64)
}}
<!-- IT IS SHERD, NOT SHARD! DO NOT CHANGE TO SHARD, AS IT IS NAMED SHERD IN-GAME! -->
'''Pottery sherds'''<ref group="note">The word "[[wiktionary:sherd#English|sherd]]" or "[[wiktionary:potsherd#English|potsherd]]" is used by archaeologists to refer to fragments of pottery or other ceramics in order to differentiate them from "shards" of glass, metal, minerals and other materials.
</ref> are a set of twenty [[item]]s used to craft [[decorated pot]]s with ornamental designs. They can be obtained only by [[brush]]ing [[suspicious block]]s, with the variants of sherd obtainable being dependent on the structure.
== Obtaining ==
=== Breaking ===
When a [[decorated pot]] is broken with a [[pickaxe]], [[axe]], [[shovel]], [[hoe]] or [[sword]] that is ''not'' enchanted with [[Silk Touch]], it drops all of the pottery sherds and [[brick]]s used to craft it.
=== Suspicious block loot ===
Pottery sherds can be found as [[suspicious block]] loot in [[trail ruins]], [[ocean ruins]], [[desert pyramids]] and [[desert well]]s, and can be extracted from these blocks using a [[brush]].
{{#invoke:LootChest|base3|angler-pottery-sherd,archer-pottery-sherd,arms-up-pottery-sherd,blade-pottery-sherd,brewer-pottery-sherd,burn-pottery-sherd,danger-pottery-sherd,explorer-pottery-sherd,friend-pottery-sherd,heart-pottery-sherd,heartbreak-pottery-sherd,howl-pottery-sherd,miner-pottery-sherd,mourner-pottery-sherd,plenty-pottery-sherd,prize-pottery-sherd,sheaf-pottery-sherd,shelter-pottery-sherd,skull-pottery-sherd,snort-pottery-sherd}}
== Usage ==
=== Crafting ingredient ===
{{Crafting
|ingredients=Any Pottery Sherd or [[Brick]]
|B1= Any Pottery Sherd
|A2= Any Pottery Sherd |C2= Any Pottery Sherd
|B3= Any Pottery Sherd
|Output= Decorated Pot
|type= Decoration block
}}
== Data values ==
=== ID ===
{{edition|java}}:
{{ID table
|edition=java
|showforms=y
|generatetranslationkeys=y
|displayname=Angler Pottery Sherd
|spritetype=item
|nameid=angler_pottery_sherd
|form=item}}
{{ID table
|displayname=Archer Pottery Sherd
|spritetype=item
|nameid=archer_pottery_sherd
|form=item}}
{{ID table
|displayname=Arms Up Pottery Sherd
|spritetype=item
|nameid=arms_up_pottery_sherd
|form=item}}
{{ID table
|displayname=Blade Pottery Sherd
|spritetype=item
|nameid=blade_pottery_sherd
|form=item}}
{{ID table
|displayname=Brewer Pottery Sherd
|spritetype=item
|nameid=brewer_pottery_sherd
|form=item}}
{{ID table
|displayname=Burn Pottery Sherd
|spritetype=item
|nameid=burn_pottery_sherd
|form=item}}
{{ID table
|displayname=Danger Pottery Sherd
|spritetype=item
|nameid=danger_pottery_sherd
|form=item}}
{{ID table
|displayname=Explorer Pottery Sherd
|spritetype=item
|nameid=explorer_pottery_sherd
|form=item}}
{{ID table
|displayname=Friend Pottery Sherd
|spritetype=item
|nameid=friend_pottery_sherd
|form=item}}
{{ID table
|displayname=Heart Pottery Sherd
|spritetype=item
|nameid=heart_pottery_sherd
|form=item}}
{{ID table
|displayname=Heartbreak Pottery Sherd
|spritetype=item
|nameid=heartbreak_pottery_sherd
|form=item}}
{{ID table
|displayname=Howl Pottery Sherd
|spritetype=item
|nameid=howl_pottery_sherd
|form=item}}
{{ID table
|displayname=Miner Pottery Sherd
|spritetype=item
|nameid=miner_pottery_sherd
|form=item}}
{{ID table
|displayname=Mourner Pottery Sherd
|spritetype=item
|nameid=mourner_pottery_sherd
|form=item}}
{{ID table
|displayname=Plenty Pottery Sherd
|spritetype=item
|nameid=plenty_pottery_sherd
|form=item}}
{{ID table
|displayname=Prize Pottery Sherd
|spritetype=item
|nameid=prize_pottery_sherd
|form=item}}
{{ID table
|displayname=Sheaf Pottery Sherd
|spritetype=item
|nameid=sheaf_pottery_sherd
|form=item}}
{{ID table
|displayname=Shelter Pottery Sherd
|spritetype=item
|nameid=shelter_pottery_sherd
|form=item}}
{{ID table
|displayname=Skull Pottery Sherd
|spritetype=item
|nameid=skull_pottery_sherd
|form=item}}
{{ID table
|displayname=Snort Pottery Sherd
|spritetype=item
|nameid=snort_pottery_sherd
|form=item
|foot=1}}
{{edition|bedrock}}:
{{ID table
|edition=bedrock
|shownumericids=y
|showforms=y
|notshowbeitemforms=y
|generatetranslationkeys=y
|displayname=Angler Pottery Sherd
|spritetype=item
|nameid=angler_pottery_sherd
|id=664
|form=item}}
{{ID table
|displayname=Archer Pottery Sherd
|spritetype=item
|nameid=archer_pottery_sherd
|id=665
|form=item}}
{{ID table
|displayname=Arms Up Pottery Sherd
|spritetype=item
|nameid=arms_up_pottery_sherd
|id=666
|form=item}}
{{ID table
|displayname=Blade Pottery Sherd
|spritetype=item
|nameid=blade_pottery_sherd
|id=667
|form=item}}
{{ID table
|displayname=Brewer Pottery Sherd
|spritetype=item
|nameid=brewer_pottery_sherd
|id=668
|form=item}}
{{ID table
|displayname=Burn Pottery Sherd
|spritetype=item
|nameid=burn_pottery_sherd
|id=669
|form=item}}
{{ID table
|displayname=Danger Pottery Sherd
|spritetype=item
|nameid=danger_pottery_sherd
|id=670
|form=item}}
{{ID table
|displayname=Explorer Pottery Sherd
|spritetype=item
|nameid=explorer_pottery_sherd
|id=671
|form=item}}
{{ID table
|displayname=Friend Pottery Sherd
|spritetype=item
|nameid=friend_pottery_sherd
|id=672
|form=item}}
{{ID table
|displayname=Heart Pottery Sherd
|spritetype=item
|nameid=heart_pottery_sherd
|id=673
|form=item}}
{{ID table
|displayname=Heartbreak Pottery Sherd
|spritetype=item
|nameid=heartbreak_pottery_sherd
|id=674
|form=item}}
{{ID table
|displayname=Howl Pottery Sherd
|spritetype=item
|nameid=howl_pottery_sherd
|id=675
|form=item}}
{{ID table
|displayname=Miner Pottery Sherd
|spritetype=item
|nameid=miner_pottery_sherd
|id=676
|form=item}}
{{ID table
|displayname=Mourner Pottery Sherd
|spritetype=item
|nameid=mourner_pottery_sherd
|id=677
|form=item}}
{{ID table
|displayname=Plenty Pottery Sherd
|spritetype=item
|nameid=plenty_pottery_sherd
|id=678
|form=item}}
{{ID table
|displayname=Prize Pottery Sherd
|spritetype=item
|nameid=prize_pottery_sherd
|id=679
|form=item}}
{{ID table
|displayname=Sheaf Pottery Sherd
|spritetype=item
|nameid=sheaf_pottery_sherd
|id=680
|form=item}}
{{ID table
|displayname=Shelter Pottery Sherd
|spritetype=item
|nameid=shelter_pottery_sherd
|id=681
|form=item}}
{{ID table
|displayname=Skull Pottery Sherd
|spritetype=item
|nameid=skull_pottery_sherd
|id=682
|form=item}}
{{ID table
|displayname=Snort Pottery Sherd
|spritetype=item
|nameid=snort_pottery_sherd
|id=683
|form=item
|foot=1}}
== Achievements ==
{{Load achievements|Careful restoration}}
== Advancements ==
{{Load advancements|Respecting the Remnants;Careful Restoration}}
== History ==
{{History||October 3, 2020|[[File:Blue Ceramic Shard.png|32px]][[File:Orange Ceramic Shard.png|32px]][[File:Ceramic Shard 1.png|32px]][[File:Ceramic Shard 2.png|32px]][[File:Ceramic Shard 3.png|32px]][[File:Ceramic Shard 4.png|32px]] Ceramic shards were announced at [[Minecraft Live 2020]].|link=https://youtu.be/DBvZ2Iqmm3M?t=2216}}
{{History||February 10, 2023|[[Sofia Dankis]] posted an article about upcoming archaeology features, including pottery shards.|link=https://www.minecraft.net/en-us/article/archeology-coming-minecraft-120}}
{{History|java}}
{{History||1.20<br>(Experimental)|link=1.19.4|snap=23w07a|[[File:Archer Pottery Sherd JE1.png|32px]] [[File:Arms Up Pottery Sherd JE1 BE2.png|32px]] [[File:Prize Pottery Sherd JE1 BE2.png|32px]] [[File:Skull Pottery Sherd JE1 BE2.png|32px]] Added pottery shards behind the [[Java Edition 1.20|Update 1.20 experimental datapack]].}}
{{History|||snap=1.19.4 Pre-release 3|[[File:Archer Pottery Sherd JE2 BE2.png|32px]] Changed the texture of archer pottery shard.}}
{{History||1.20|snap=23w12a|Pottery shards are now out of the 1.20 experimental data pack.|[[File:Angler Pottery Sherd JE1 BE1.png|32px]] [[File:Blade Pottery Sherd JE1 BE1.png|32px]] [[File:Brewer Pottery Sherd JE1 BE1.png|32px]] [[File:Burn Pottery Sherd JE1 BE1.png|32px]] [[File:Danger Pottery Sherd JE1 BE1.png|32px]] [[File:Explorer Pottery Sherd JE1 BE1.png|32px]] [[File:Friend Pottery Sherd JE1 BE1.png|32px]] [[File:Heart Pottery Sherd JE1 BE1.png|32px]] [[File:Heartbreak Pottery Sherd JE1 BE1.png|32px]] [[File:Howl Pottery Sherd JE1 BE1.png|32px]] [[File:Miner Pottery Sherd JE1 BE1.png|32px]] [[File:Mourner Pottery Sherd JE1 BE1.png|32px]] [[File:Plenty Pottery Sherd JE1 BE1.png|32px]] [[File:Sheaf Pottery Sherd JE1 BE1.png|32px]] [[File:Shelter Pottery Sherd JE1 BE1.png|32px]] [[File:Snort Pottery Sherd JE1 BE1.png|32px]] Added another sixteen pottery shards.
|The probability for the archer, prize, and skull pottery shards to generate in the [[suspicious sand]] in [[desert temple]] and in [[desert well]] has been changed from 1/7 to 1/8, for the arms up pottery sherd to generate in the suspicious sand in [[desert well]] has been changed from 3/7 to 1/4.}}
{{History|||snap=23w16a|Renamed "Pottery Shard" to "Pottery Sherd".|Burn, danger, friend, heart, heartbreak, howl and sheaf pottery sherds no longer generates in [[suspicious sand]] in [[trail ruins]].|Due to the split of the archaeological loot tables for the suspicious gravel within the [[trail ruins]]; burn, danger, friend, heart, heartbreak, howl and sheaf pottery sherds now are in the rare loot.}}
{{History|||snap=23w17a|The probability of the burn, danger, friend, heart, heartbreak, howl, and sheaf pottery sherds to generate in [[suspicious gravel]] in [[trail ruins]] has been changed from 1/11 to 1/12.{{verify}}|The player now gets the [[advancement]] "Respecting the remnants" when they brush a [[suspicious sand]] or a [[suspicious gravel]] to obtain a pottery sherd, "Careful restoration" when they craft a decorated pot using 4 pottery sherds.}}
{{History|bedrock}}
{{History||Next Major Update<br>(Experimental)|link=Bedrock Edition 1.19.70|snap=beta 1.19.70.23|[[File:Archer Pottery Sherd BE1.png|32px]] [[File:Arms Up Pottery Sherd BE1.png|32px]] [[File:Prize Pottery Sherd BE1.png|32px]] [[File:Skull Pottery Sherd BE1.png|32px]] Added pottery shards behind the "[[Bedrock Edition 1.20.0|Next Major Update]]" [[experimental]] toggle.}}
{{History|||snap=beta 1.19.80.20|[[File:Archer Pottery Sherd JE2 BE2.png|32px]] Changed the texture of archer pottery shard.}}
{{h|||snap=beta 1.19.80.22|[[File:Angler Pottery Sherd JE1 BE1.png|32px]] [[File:Blade Pottery Sherd JE1 BE1.png|32px]] [[File:Brewer Pottery Sherd JE1 BE1.png|32px]] [[File:Burn Pottery Sherd JE1 BE1.png|32px]] [[File:Danger Pottery Sherd JE1 BE1.png|32px]] [[File:Explorer Pottery Sherd JE1 BE1.png|32px]] [[File:Friend Pottery Sherd JE1 BE1.png|32px]] [[File:Heart Pottery Sherd JE1 BE1.png|32px]] [[File:Heartbreak Pottery Sherd JE1 BE1.png|32px]] [[File:Howl Pottery Sherd JE1 BE1.png|32px]] [[File:Miner Pottery Sherd JE1 BE1.png|32px]] [[File:Mourner Pottery Sherd JE1 BE1.png|32px]] [[File:Plenty Pottery Sherd JE1 BE1.png|32px]] [[File:Sheaf Pottery Sherd JE1 BE1.png|32px]] [[File:Shelter Pottery Sherd JE1 BE1.png|32px]] [[File:Snort Pottery Sherd JE1 BE1.png|32px]] Added another sixteen pottery shards.
|[[File:Arms Up Pottery Sherd JE1 BE2.png|32px]] [[File:Prize Pottery Sherd JE1 BE2.png|32px]] [[File:Skull Pottery Sherd JE1 BE2.png|32px]] Changed the texture of arms up, prize and skull pottery shards.<ref>{{bug|MCPE-167202}}</ref>}}
{{History||Next Major Update<br>(Experimental)|link=Bedrock Edition 1.20.0|snap=beta 1.20.0.20|Miner pottery shard can generate in desert pyramids.}}
{{History||1.20.0|snap=beta 1.20.0.21|Pottery shards are now available without using the "Next Major Update" experimental toggle.}}
{{History|||snap=beta 1.20.0.22|Renamed "Pottery Shard" to "Pottery Sherd".}}
{{History|foot}}
== Issues ==
{{issue list}}
== Trivia ==
* Many pottery sherds are based on another in-game mob or item:
** The angler pottery sherd depicts a [[fishing rod]].
** The archer pottery sherd depicts a [[bow]] and [[arrow]].
** The blade pottery sherd depicts a [[sword]].
** The brewer pottery sherd depicts a [[potion]].
** The burn pottery sherd depicts [[fire]].
** The danger pottery sherd depicts a [[creeper]].
** The explorer pottery sherd depicts a [[map]].
** The friend pottery sherd depicts the unibrow and nose of a [[villager]] or [[iron golem]].
** The howl pottery sherd depicts a [[wolf]].
** The miner pottery sherd depicts a [[pickaxe]].
** The mourner pottery sherd depicts an early design for the [[warden]].
** The plenty pottery sherd depicts a [[chest]].
** The sheaf pottery sherd depicts [[wheat]].
** The skull pottery sherd depicts a [[skeleton]].
** The snort pottery sherd depicts a [[sniffer]].
**The prize pottery sherd depicts a diamond cut [[diamond]]
***It could depict a [[MCE:Ruby|ruby]] from ''Minecraft Earth'', as well.
**The arms up pottery sherd depicts a [[character]] with their arms up.
**The heart and heartbreak pottery sherds depict a [[Health|heart]] and broken heart respectively.
**The shelter pottery sherd depicts a [[tree]].
==Gallery==
=== Items ===
<gallery>
Angler Pottery Sherd.png|Angler Pottery Sherd
Archer Pottery Sherd.png|Archer Pottery Sherd
Arms Up Pottery Sherd.png|Arms Up Pottery Sherd
Blade Pottery Sherd.png|Blade Pottery Sherd
Brewer Pottery Sherd.png|Brewer Pottery Sherd
Burn Pottery Sherd.png|Burn Pottery Sherd
Danger Pottery Sherd.png|Danger Pottery Sherd
Explorer Pottery Sherd.png|Explorer Pottery Sherd
Friend Pottery Sherd.png|Friend Pottery Sherd
Heart Pottery Sherd.png|Heart Pottery Sherd
Heartbreak Pottery Sherd.png|Heartbreak Pottery Sherd
Howl Pottery Sherd.png|Howl Pottery Sherd
Miner Pottery Sherd.png|Miner Pottery Sherd
Mourner Pottery Sherd.png|Mourner Pottery Sherd
Plenty Pottery Sherd.png|Plenty Pottery Sherd
Prize Pottery Sherd.png|Prize Pottery Sherd
Sheaf Pottery Sherd.png|Sheaf Pottery Sherd
Shelter Pottery Sherd.png|Shelter Pottery Sherd
Skull Pottery Sherd.png|Skull Pottery Sherd
Snort Pottery Sherd.png|Snort Pottery Sherd
</gallery>
=== Development images ===
<gallery>
JE 1.17 Development Archeology.jpg|Blue ceramic shard.
JE 1.17 Development Archeology 2.jpg|Ceramic shards.
</gallery>
=== Official artwork ===
<gallery>
Pottery Sherd Pixel Art.png|Pixel artwork of [[Ari]] holding a skull pottery sherd.
File:T&T Thumbnail.jpg|Ari holding up a different sherd.
</gallery>
== References ==
<references />
== Notes ==
<references group="note"/>
{{Items}}
[[Category:Non-renewable resources]]
[[de:Töpferscherbe]]
[[es:Fragmento de cerámica]]
[[fr:Tesson de poterie]]
[[ja:壺の欠片]]
[[pt:Óstraco]]
[[zh:陶片]]</li><li>[[Cauldron|Cauldron]]<br/>{{For|the boss in ''Minecraft Dungeons''|MCD:Corrupted Cauldron}}
{{Block
| extratext = View [[#Renders|all renders]]
| transparent = Yes
| light = Depends on contained liquid
| tool = wooden pickaxe
| renewable = Yes
| stackable = Yes (64)
| flammable = No
| lavasusceptible = No
}}
A '''cauldron''' is a [[block]] that can contain [[water]], [[lava]] or [[powder snow]] and, in certain situations, collect it from the environment. {{IN|bedrock}}, it can also hold [[potion]]s or dyed water. It also serves as a [[leatherworker]]'s [[job site block]].
== Obtaining ==
=== Breaking ===
A cauldron can be obtained using any [[pickaxe]]. If mined without a pickaxe, it drops nothing. Regardless of the tool, when a cauldron is destroyed, its contents are lost.
{{breaking row|horizontal=1|Cauldron|Pickaxe|Wood}}
=== Natural generation ===
[[File:Natural Cauldron Table.png|A naturally occurring cauldron inside of a [[witch hut]].|thumb]]
A single empty cauldron is generated in each [[swamp hut]]. {{IN|be}}, the cauldrons generated there are {{frac|1|3}} to {{frac|2|3}} full of a random [[potion]].
A cauldron {{frac|2|3}} full of water is generated in each [[igloo]] basement.
[[File:MansionJailInner.png|thumb|Cauldron in [[woodland mansion]] jail.]]
Cauldrons can be found in a few rooms inside of [[woodland mansion]]s.
Two filled cauldrons can be found inside savanna, taiga, snowy taiga, and snowy tundra [[village]] tannery houses.
A single filled cauldron can be found in plains village and desert village tannery houses.
{{IN|java}}, three filled cauldrons can be found in plains village tannery houses.
Cauldrons can also spawn in [[trail ruins]].
=== Crafting ===
A cauldron can be crafted from [[iron ingot]]s.
{{Crafting
|A1= Iron Ingot
|C1= Iron Ingot
|A2= Iron Ingot
|C2= Iron Ingot
|A3= Iron Ingot
|B3= Iron Ingot
|C3= Iron Ingot
|Output= Cauldron
|type= Brewing
}}
== Usage ==
=== Storage for substances ===
Cauldrons can hold a variety of substances. Fluids they cannot hold include [[milk]], [[Honey Bottle|honey]] and any food items that exist in [[bowl]]s; namely [[mushroom stew]], [[beetroot soup]], [[rabbit stew]] and [[suspicious stew]]. {{IN|java}}, cauldrons containing fluids are considered by the game to be separate blocks from each other and from empty cauldrons, which does not affect gameplay but does affect the commands needed to place them.
==== Holding water ====
A cauldron can be filled with [[water]] by {{control|using}} a [[water bucket]] on the cauldron. Once completely filled, a cauldron can be used to fill a water bucket by {{control|using}} an empty [[bucket]] on the cauldron; this empties the cauldron. Despite containing water, using a [[fish bucket]] on a cauldron does not fill it with water, but places water against it, meaning it does nothing to the cauldron.<ref>{{bug|MC-129109|||WAI}}</ref>
A cauldron can also be filled by dumping a water bucket on the block above the cauldron. Once the water block is removed, the cauldron is filled to the full level with water.{{only|be}}
It can contain three levels of water. One level of water can be added to a cauldron by {{control|using}} a [[water bottle]] on it. One level of water can be removed from a cauldron, filling a water bottle, by {{control|using}} a [[glass bottle]] on it.
A cauldron slowly fills with [[water]] when [[rain]]ed upon, if starting empty or with some water. This happens randomly, at 5% of the rate in which snow accumulates on the ground during [[snowfall]].
Water can be stored in a cauldron even in [[the Nether]]. Water in a cauldron does not freeze in cold biomes.
Water in a cauldron does ''not'' absorb [[explosion]] damage; make [[sound]]s and [[particle]]s; absorb fall damage;<ref>{{bug|MC-176867|||WF}}</ref><ref>{{bug|MCPE-104572|||WF}}</ref> allow [[Riptide]] [[trident]]s to activate;<ref>{{bug|MC-145311|||WF}}</ref><ref>{{bug|MCPE-93111}}</ref> or damage [[endermen]], [[strider]]s, or [[blaze]]s.<ref>{{bug|MC-106813|||WF}}</ref> Cauldrons do ''not'' deal drowning damage to mobs inside of them<ref>{{bug|MC-152680}}</ref> and [[fish]] act as if there is no water inside it.<ref>{{bug|MC-126819|||WF}}</ref> The player ''cannot'' float or [[swim]] in it, as the water is about level with the player's waist. Jumping in a cauldron does ''not'' produce any bubble or water particles.
A cauldron placed below a down-facing [[pointed dripstone]] that has water placed a block above it slowly fills with water. The same works with [[lava]], allowing for infinite lava generation.
Attempting to add lava or potion to water empties the cauldron.{{only|be}}
The water in a cauldron cannot be sucked up by a [[sponge]], whether the sponge is touching the cauldron or not.
===== Applying dye to cauldron water =====
{{exclusive|bedrock|section=yes}}
{{IN|bedrock}}, leather armor is dyed through a cauldron, so a cauldron can hold dyed [[water]]. {{control|Using}} a dye on a cauldron filled with water colors the water, consuming the dye. Different dyes may be added to produce mixed colors. {{control|Using}} [[leather armor]] or [[leather horse armor]] on the cauldron dyes that item the color of the water, reducing the water in the cauldron by one level for each item dyed.
Attempting to add water, lava or potion to dyed water empties the cauldron.
==== Holding lava ====
[[File:Lava Cauldron.png|150px|thumb|Cauldron filled with lava]]
Cauldrons can be used to hold lava. {{IN|be|ee}}, when a cauldron is already filled with water, it empties the cauldron and makes an extinguishing sound. A cauldron filled with lava emits a light level of 15, similar to lava, and burns any [[entity]] inside of it; {{in|be|ee|short=1}}, this includes mobs that do not take damage from lava like [[zombified piglin]]s.
Lava inside a cauldron does not interact with water outside of the cauldron. The lava disappears upon putting water in the cauldron.
A [[redstone comparator]] with a lava cauldron behind it outputs redstone signal strength of 3.<ref name=JavaLava>{{bug|MC-204393}}</ref><ref>{{bug|MCPE-104824}}</ref>
A cauldron placed below a down-facing [[pointed dripstone]] that has lava placed a block above it slowly fills with lava.
If a cauldron is filled by lava, using glass bottles on the cauldron does nothing.
==== Holding powder snow ====
[[Powder snow]] is currently the only solid material that can be stored in a cauldron. A cauldron slowly fills with powder snow during [[snowfall]], if starting empty or with any layer of powder snow already inside. Up to three layers can be filled. When the cauldron is full, {{ctrl|interacting}} using a [[bucket]], creates a [[powder snow bucket]] and empties the cauldron. Entities standing in the cauldron do not take freeze damage, and entities wearing [[leather boots]] still fall through the powder snow.
A [[redstone comparator]] with a powder snow cauldron behind it outputs a redstone signal strength proportional to the fill level, up to 3.
Contrary to a cauldron filled with water, a powder snow cauldron that is not full cannot be filled up with a powder snow bucket, as {{control|using}} the bucket on the cauldron instead places powder snow against it.
==== Filling cauldrons with potions ====
{{exclusive|bedrock|education|section=yes}}
{{IN|bedrock}}, a cauldron can hold normal [[potion]]s, [[splash potion]]s and [[lingering potion]]s. {{control|Using}} a potion on a cauldron empties the potion and increases the level of the potion in the cauldron by one level. A glass bottle can then be {{control|used}} on a cauldron with a potion in it, filling the bottle with that potion. This reduces the potion in the cauldron by one level.
{{control|Using}} an [[arrow]] on a cauldron that contains a potion transforms the arrow into a [[tipped arrow]] with that potion [[effect]], and reduce the potion in the cauldron by one level. Tipping multiple arrows at once can be more efficient, and it may use more than one level at once. 1 level of potion tips up to 16 arrows, 2 levels up to 32, and a full cauldron can tip a full stack of arrows, resulting in 21.33 tipped arrows per potion.
Attempting to put [[water]], [[lava]] or a different potion into a cauldron with a potion causes an explosion sound, and the cauldron is emptied.
An entity that stands in a cauldron filled to any level with any potion does not receive the effect of the potion.
Using an empty bucket on a cauldron filled with any potion does nothing, as the bucket remains empty and the potion in the cauldron does not empty.
=== Removing dye from items ===
A cauldron with [[water]] can wash the dye off of leather [[armor]] and [[shulker box]]es, and can remove the top-most pattern layer of a [[banner]], by pressing {{control|use}} on the cauldron with the leather armor, shulker box, or banner in hand. Each wash reduces the water in the cauldron by one level. The water does not become dyed while removing dye from objects.
=== Changing profession ===
If a [[village]] has a cauldron that has not been claimed by a [[villager]], any villager that does not already have a profession or [[job site]] block may change their profession to [[leatherworker]].
=== Extinguishing fire ===
A cauldron with [[water]] or [[powder snow]] extinguishes [[entities]] on [[fire]] that fall into it and the entity emits black particles. This includes [[mob]]s, [[player]]s, [[item]]s (if they land in the cauldron before burning up), and flaming [[arrow]]s{{only|je|short=1}}. Flaming arrows stuck into the side are also extinguished. Entities must reach the water or powder snow in it. Each entity extinguished causes the substance in the cauldron to decrease by one level. If the cauldron is filled with powder snow, it then becomes a water cauldron.
=== Redstone component ===
[[File:Cauldron transmission over piston.png|An example of a cauldron used in a [[redstone]] circuit.|thumb]]
{{see also|Redstone circuit}}
A cauldron can act as a power source for a [[redstone comparator]]. With a cauldron behind it (either directly, or separated by an unpowered solid block), a comparator outputs a signal strength proportional to how full the cauldron is: 0 for empty, 1 for one-third full, 2 for two-thirds full, and 3 for completely full or filled with lava. However, if there is a block between the cauldron and the comparator, the comparator does not immediately update.
== Sounds ==
=== Generic ===
{{Sound table/Block/Normal}}
=== Unique ===
{{edition|java}}:
{{Sound table
|sound=Pointed Dripstone drip water cauldron1.ogg
|sound2=Pointed Dripstone drip water cauldron2.ogg
|sound3=Pointed Dripstone drip water cauldron3.ogg
|sound4=Pointed Dripstone drip water cauldron4.ogg
|sound5=Pointed Dripstone drip water cauldron5.ogg
|sound6=Pointed Dripstone drip water cauldron6.ogg
|sound7=Pointed Dripstone drip water cauldron7.ogg
|sound8=Pointed Dripstone drip water cauldron8.ogg
|subtitle=Water drips
|source=block
|description=When dripping water from a pointed dripstone falls into a cauldron
|id=block.pointed_dripstone.drip_water_into_cauldron
|translationkey=subtitles.block.pointed_dripstone.drip_water_into_cauldron
|volume=2.0
|pitch=0.9-1.0
|distance=16}}
{{Sound table
|sound=Pointed Dripstone drip lava cauldron1.ogg
|sound2=Pointed Dripstone drip lava cauldron2.ogg
|sound3=Pointed Dripstone drip lava cauldron3.ogg
|sound4=Pointed Dripstone drip lava cauldron4.ogg
|subtitle=Lava drips
|source=block
|description=When dripping lava from a pointed dripstone falls into a cauldron
|id=block.pointed_dripstone.drip_lava_into_cauldron
|translationkey=subtitles.block.pointed_dripstone.drip_lava_into_cauldron
|volume=2.0
|pitch=0.9-1.0
|distance=16}}
{{Sound table
|sound=Empty water bucket1.ogg
|sound2=Empty water bucket1.ogg
|sound3=Empty water bucket2.ogg
|sound4=Empty water bucket3.ogg
|subtitle=Bucket empties
|source=block
|description=When water from a bucket is placed in a cauldron <ref group=sound><code>empty1</code> plays twice as often as the other sounds</ref>
|id=item.bucket.empty
|translationkey=subtitles.item.bucket.empty
|volume=1.0
|pitch=1.0 <ref group=sound>Except for the second copy of <code>empty1</code>, which is 0.9</ref>
|distance=16}}
{{Sound table
|sound=Fill water bucket1.ogg
|sound2=Fill water bucket2.ogg
|sound3=Fill water bucket3.ogg
|subtitle=Bucket fills
|source=block
|description=When water from a bucket is removed from a cauldron
|id=item.bucket.fill
|translationkey=subtitles.item.bucket.fill
|volume=1.0
|pitch=1.0
|distance=16}}
{{Sound table
|sound=Empty lava bucket1.ogg
|sound2=Empty lava bucket2.ogg
|sound3=Empty lava bucket3.ogg
|subtitle=Bucket empties
|source=block
|description=When lava is placed in a cauldron
|id=item.bucket.empty_lava
|translationkey=subtitles.item.bucket.empty
|volume=1.0
|pitch=1.0
|distance=16}}
{{Sound table
|sound=Fill lava bucket1.ogg
|sound2=Fill lava bucket2.ogg
|sound3=Fill lava bucket3.ogg
|subtitle=Bucket fills
|source=block
|description=When lava is removed from a cauldron
|id=item.bucket.fill_lava
|translationkey=subtitles.item.bucket.fill
|volume=1.0
|pitch=1.0
|distance=16}}
{{Sound table
|sound=Empty powder snow bucket1.ogg
|sound2=Empty powder snow bucket2.ogg
|subtitle=Bucket empties
|source=block
|description=When powder snow is placed in a cauldron
|id=item.bucket.empty_powder_snow
|translationkey=subtitles.item.bucket.empty
|volume=1.0
|pitch=''varies'' <ref group=sound>Can be 1.0, 0.95, or 1.1 for each sound</ref>
|distance=16}}
{{Sound table
|sound=Fill powder snow bucket1.ogg
|sound2=Fill powder snow bucket2.ogg
|subtitle=Bucket fills
|source=block
|description=When powder snow is removed from a cauldron
|id=item.bucket.fill_powder_snow
|translationkey=subtitles.item.bucket.fill
|volume=1.0
|pitch=''varies'' <ref group=sound>Can be 1.0, 0.9, or 1.1 for each sound</ref>
|distance=16}}
{{Sound table
|sound=Bottle empty1.ogg
|sound2=Bottle empty2.ogg
|subtitle=Bottle empties
|source=block
|description=When water from a bottle is placed in a cauldron
|id=item.bottle.empty
|translationkey=subtitles.item.bottle.empty
|volume=1.0
|pitch=1.0
|distance=16}}
{{Sound table
|sound=Bottle fill_water1.ogg
|sound2=Bottle fill_water2.ogg
|sound3=Bottle fill_water3.ogg
|sound4=Bottle fill_water4.ogg
|subtitle=Bottle fills
|source=block
|description=When water from a bottle is removed from a cauldron
|id=item.bottle.fill
|translationkey=subtitles.item.bottle.fill
|volume=1.0
|pitch=1.0
|distance=16}}
{{Sound table
|sound=Empty water bucket1.ogg
|sound2=Empty water bucket2.ogg
|sound3=Empty water bucket3.ogg
|subtitle=Leatherworker works
|source=neutral
|description=Randomly while a leatherworker is working
|id=entity.villager.work_leatherworker
|translationkey=subtitles.entity.villager.work_leatherworker
|volume=0.9
|pitch=0.8-1.2
|distance=16
|foot=1}}
{{edition|bedrock}}:
{{Sound table
|type=bedrock
|sound=Pointed Dripstone drip water cauldron1.ogg
|sound2=Pointed Dripstone drip water cauldron2.ogg
|sound3=Pointed Dripstone drip water cauldron3.ogg
|sound4=Pointed Dripstone drip water cauldron4.ogg
|sound5=Pointed Dripstone drip water cauldron5.ogg
|sound6=Pointed Dripstone drip water cauldron6.ogg
|sound7=Pointed Dripstone drip water cauldron7.ogg
|sound8=Pointed Dripstone drip water cauldron8.ogg
|source=block
|description=When dripping water from a pointed dripstone falls into a cauldron
|id=cauldron_drip.water<br>.pointed_dripstone
|volume=2.0
|pitch=0.9-1.0}}
{{Sound table
|sound=Pointed Dripstone drip lava cauldron1.ogg
|sound2=Pointed Dripstone drip lava cauldron2.ogg
|sound3=Pointed Dripstone drip lava cauldron3.ogg
|sound4=Pointed Dripstone drip lava cauldron4.ogg
|source=block
|description=When dripping lava from a pointed dripstone falls into a cauldron
|id=cauldron_drip.lava<br>.pointed_dripstone
|volume=2.0
|pitch=0.9-1.0}}
{{Sound table
|sound=Fizz.ogg
|source=block
|description=When a different liquid is put in a cauldron with a potion
|id=random.fizz
|volume=1.0
|pitch=0.6-0.8<wbr>{{Checkthecode}}[[Category:Pages with inaccurate sound pitch value]]}}
{{Sound table
|rowspan=8
|sound=Water Splash Old.ogg
|source=block
|description=When dye is added to a cauldron
|id=cauldron.adddye
|volume=0.1
|pitch=1.0}}
{{Sound table
|source=block
|description=When armor is dyed using a cauldron
|id=cauldron.dyearmor
|volume=0.1
|pitch=1.0}}
{{Sound table
|source=block
|description=When dye is removed from armor using a cauldron
|id=cauldron.cleanarmor
|volume=0.1
|pitch=1.0}}
{{Sound table
|source=block
|description=When all patterns are removed from a banner using a cauldron
|id=cauldron.cleanbanner
|volume=0.1
|pitch=1.0}}
{{Sound table
|source=block
|description=When a potion is placed in a cauldron<wbr><ref group=sound name=potionsplash>{{Bug|MCPE-174867}}</ref>
|id=cauldron.fillpotion
|volume=0.1
|pitch=1.0}}
{{Sound table
|source=block
|description=When a potion is taken from a cauldron<wbr><ref group=sound name=potionsplash/>
|id=cauldron.takepotion
|volume=0.1
|pitch=1.0}}
{{Sound table
|source=block
|description=When water from a bucket or bottle is placed in a cauldron<wbr><ref group=sound name=bucketsplash>{{Bug|MCPE-135919}}</ref>
|id=cauldron.fillwater
|volume=0.1
|pitch=1.0}}
{{Sound table
|source=block
|description=When water from a bucket or bottle is removed from a cauldron <ref group=sound name=bucketsplash/>
|id=cauldron.takewater
|volume=0.1
|pitch=1.0}}
{{Sound table
|sound=Empty lava bucket1.ogg
|sound2=Empty lava bucket2.ogg
|sound3=Empty lava bucket3.ogg
|source=block
|description=When lava is placed in a cauldron
|id=bucket.empty_lava
|volume=1.0
|pitch=1.0}}
{{Sound table
|sound=Fill lava bucket1.ogg
|sound2=Fill lava bucket2.ogg
|sound3=Fill lava bucket3.ogg
|source=block
|description=When lava is removed from a cauldron
|id=bucket.fill_lava
|volume=1.0
|pitch=1.0}}
{{Sound table
|sound=Empty powder snow bucket1.ogg
|sound2=Empty powder snow bucket2.ogg
|source=block
|description=When powder snow is placed in a cauldron
|id=bucket.empty_powder_snow
|volume=1.0
|pitch=1.0}}
{{Sound table
|sound=Fill powder snow bucket1.ogg
|sound2=Fill powder snow bucket2.ogg
|source=player
|description=When powder snow is removed from a cauldron
|id=bucket.fill_powder_snow
|volume=1.0
|pitch=1.0}}
{{Sound table
|sound=Empty water bucket1.ogg
|sound2=Empty water bucket2.ogg
|sound3=Empty water bucket3.ogg
|source=block
|description=Randomly while a leatherworker is working
|id=bucket.fill_water
|volume=1.0
|pitch=1.0
|foot=1}}
== Data values ==
=== ID ===
{{edition|java}}:
{{ID table
|edition=java
|showblocktags=y
|showforms=y
|generatetranslationkeys=y
|displayname=Cauldron
|spritetype=block
|nameid=cauldron
|blocktags=cauldrons
|translationkey=block.minecraft.cauldron,item.minecraft.cauldron}}
{{ID table
|displayname=Lava Cauldron
|spritename=cauldron
|spritetype=block
|nameid=lava_cauldron
|blocktags=cauldrons
|form=block}}
{{ID table
|displayname=Powder Snow Cauldron
|spritename=cauldron
|spritetype=block
|nameid=powder_snow_cauldron
|blocktags=cauldrons
|form=block}}
{{ID table
|displayname=Water Cauldron
|spritename=cauldron
|spritetype=block
|nameid=water_cauldron
|blocktags=cauldrons
|form=block
|foot=1}}
{{edition|bedrock}}:
{{ID table
|edition=bedrock
|firstcolumnname=Type
|shownumericids=y
|showforms=y
|generatetranslationkeys=y
|displayname=Normal block
|spritename=cauldron
|spritetype=block
|nameid=cauldron
|id=118
|form=block
|itemform=item.cauldron}}
{{ID table
|displayname=Brighting block
|spritename=cauldron
|spritetype=block
|nameid=lava_cauldron
|id=465
|form=block
|translationkey=-}}
{{ID table
|displayname=Item
|spritename=cauldron
|spritetype=item
|nameid=cauldron
|id=432
|form=item
|foot=1}}
{{ID table
|notnamespaced=y
|displayname=Block entity
|spritename=cauldron
|spritetype=block
|nameid=Cauldron
|foot=1}}
=== Block states ===
{{see also|Block states}}
{{/BS}}
=== Block data ===
{{IN|be}}, a cauldron has a block entity associated with it that holds additional data about the block.
See [[Bedrock Edition level format/Block entity format]].
== Achievements ==
{{load achievements|Tie Dye Outfit}}
== History ==
{{History|java}}
{{History||1.0.0|snap=Beta 1.9 Prerelease 2|[[File:Cauldron JE1.png|32px]] Cauldrons are present in the code, but are not assigned to a [[block]] ID (and thus are unobtainable without [http://www.minecraftforum.net/topic/673742-19-pre2-cauldron-block/ mods] (archived link: [https://web.archive.org/web/20141222205821/https://dl.dropboxusercontent.com/u/19728555/cauldron.zip])).}}
{{History|||snap=Beta 1.9 Prerelease 3|[[File:Cauldron (item) JE1 BE1.png|32px]] Cauldrons have been given a [[block]] ID, an [[item]] ID, and a [[crafting]] recipe.}}
{{History||1.2.1|snap=12w06a|Cauldrons have now become [[renewable]], due to [[zombie]]s sometimes dropping iron ingots.}}
{{History||1.4.2|snap=12w40a|Empty cauldrons can now be found in [[witch hut]]s.}}
{{History||1.5|snap=13w02a|[[File:Cauldron JE2.png|32px]] The walls inside of the cauldron now use the bottom texture, and the cauldron now has no bottom.<ref name="whatdoyouputinacauldrontomakeitlighter">{{bug|MC-6772}}</ref>}}
{{History|||snap=13w02b|[[File:Cauldron JE1.png|32px]] Fixed the model error from 13w02a.}}
{{History||1.8|snap=14w03a|[[File:Cauldron JE4.png|32px]] Cauldrons now appear completely opaque.<ref>{{bug|MC-44990}}</ref>}}
{{History|||snap=14w03b|[[File:Cauldron JE1.png|32px]] Cauldrons now render as normal again.}}
{{History|||snap=14w06a|Cauldrons now have extra planes inside the feet. These planes are now rendered solid, so the [[player]] cannot see through the [[water]].{{info needed|what exactly does this mean?}}}}
{{History|||snap=14w10a|[[File:Cauldron JE6.png|32px]] The cauldron's feet now have planes on all sides.}}
{{History||1.11|snap=16w39a|Cauldrons now generate naturally in jail cells in [[woodland mansion]]s.}}
{{History||July 19, 2017|link=https://twitter.com/jeb_/status/887599625045250048|[[Jeb]] tweets image of a new jungle [[planks]], cauldron and [[dandelion]] textures.}}
{{History||1.13|snap=17w47a|Prior to [[1.13/Flattening|''The Flattening'']], this [[block]]'s numeral ID was 118, and the [[item]]'s was 380.}}
{{History||1.14|snap=18w43a|[[File:Cauldron JE7.png|32px]]<br/>[[File:Cauldron (item) JE2 BE2.png|32px]] The textures of cauldrons have been changed.}}
{{History|||snap=18w48a|Cauldrons now generate in the updated [[plains]] [[village]]s.}}
{{History|||snap=18w49a|Cauldrons now generate in the updated [[savanna]] villages and the new [[snowy tundra]] villages.}}
{{History|||snap=18w50a|Cauldrons now generate in the updated [[desert]] and [[taiga]] villages.}}
{{History|||snap=19w03a|The numerous missing cullface arguments for the cauldron have been fixed.}}
{{History|||snap=19w11a|Cauldrons now serve as leatherworker [[villager]]s' job site block.}}
{{History|||snap=19w13a|The cauldron's hitbox has been fixed.<ref>{{bug|MC-129205}}</ref>}}
{{History||1.17|snap=20w45a|Normal and water cauldrons have been split into different blocks, making filled cauldrons no longer work as a workstation for villagers.<ref name="technicalunemployment">{{bug|MC-204430}}</ref>
|This also means that any [[structure]]s before this snapshot that have cauldron(s) fill with water now no longer generate(s) cauldron. Instead, water cauldron(s) will generate.}}
{{History|||snap=20w48a|Cauldrons can now collect water and lava dripped by [[pointed dripstone]].}}
{{History|||snap=21w11a|[[Lava bucket]]s and [[powder snow bucket]]s can now be emptied into any filled cauldron.}}
{{History|||snap=21w13a|Filled cauldrons work again as a workstation for villagers.}}
{{History||1.20|snap=23w12a|Cauldrons now generate in [[trail ruins]].}}
{{History|pocket alpha}}
{{History||v0.14.0|snap=build 1|[[File:Cauldron BE1.png|32px]]<br/>[[File:Cauldron (item) JE1 BE1.png|32px]] Added cauldrons.
|Cauldrons are generated naturally in [[witch hut]]s.}}
{{History||v0.15.0|snap=build 1|Cauldrons can now be moved by [[piston]]s.}}
{{History|pocket}}
{{History||1.1.0|snap=alpha 1.1.0.0|Cauldrons now generate naturally in [[woodland mansion]]s, their fullness status is unknown.}}
{{History|bedrock}}
{{History||1.10.0|snap=beta 1.10.0.3|[[File:Cauldron BE2.png|32px]] The textures of cauldrons have been changed.
|Cauldrons now generate in tannery houses in [[village]]s.}}
{{History||?|[[File:Cauldron JE7.png|32px]] The textures of cauldrons have been changed.}}
{{History|console}}
{{History||xbox=TU7|xbone=CU1|ps=1.0|wiiu=Patch 1|switch=1.0.1|[[File:Cauldron JE1.png|32px]]{{verify|Was this the actually used model?}}[[File:Cauldron (item) JE1 BE1.png|32px]] Added cauldrons.}}
{{History||xbox=TU60|xbone=CU51|ps=1.64|wiiu=Patch 30|switch=1.0.11|[[Water]] in a cauldron can now be [[dye]]d.
|[[Armor]] can be dyed in a cauldron filled with dyed water.
|Cauldrons can no longer be pushed by [[piston]]s.}}
{{History||xbox=none|xbone=none|ps=1.90|wiiu=none|switch=none|[[File:Cauldron JE7.png|32px]]{{verify|Was this the actually used model?}}<br/>[[File:Cauldron (item) JE2 BE2.png|32px]] The textures of cauldrons have been changed.}}
{{History|new 3ds}}
{{History||0.1.0|[[File:Cauldron BE1.png|32px]]<br/>[[File:Cauldron (item) JE1 BE1.png|32px]] Added cauldrons.}}
{{History|foot}}
=== Water cauldron ===
{{History|java}}
{{History||1.0.0|snap=Beta 1.9 Prerelease 2|[[File:Water Cauldron (level 1) JE1.png|32px]] [[File:Water Cauldron (level 2) JE1.png|32px]] [[File:Water Cauldron JE1.png|32px]] If made to work with a mod, cauldrons can be filled with a [[water bucket]].
|Cauldron water transparency appears inconsistent depending on hardware.}}
{{History||1.3.1|snap=12w22a|Cauldrons can now be filled with [[water]], if placed outside during [[rain]] or a [[thunderstorm]].}}
{{History||1.4.2|snap=12w34a|Holding a piece of [[Dyeing|dyed]] leather [[armor]] and right-clicking a [[water]]-filled cauldron now washes away all [[dye]]s applied to the leather armor.}}
{{History||1.5|snap=13w02a|[[File:Water Cauldron (level 1) JE2.png|32px]] [[File:Water Cauldron (level 2) JE2.png|32px]] [[File:Water Cauldron JE2.png|32px]] The walls inside of the cauldron now use the bottom texture, and the cauldron now has no bottom.<ref name="whatdoyouputinacauldrontomakeitlighter"/>}}
{{History|||snap=13w02b|[[File:Water Cauldron (level 1) JE1.png|32px]] [[File:Water Cauldron (level 2) JE1.png|32px]] [[File:Water Cauldron JE1.png|32px]] Fixed the model error from 13w02a.}}
{{History||1.6.1|snap=13w18a|When used with a [[redstone comparator]], cauldrons now output a signal varying in strength according to the amount of water inside.}}
{{History||1.7.2|snap=13w43a|Cauldrons now extinguish burning [[entity|entities]].}}
{{History||1.8|snap=14w10a|[[File:Water Cauldron (level 1) JE4.png|32px]] [[File:Water Cauldron (level 2) JE4.png|32px]] [[File:Water Cauldron JE4.png|32px]] The cauldron's feet now have planes on all sides.}}
{{History|||snap=14w30a|Right-clicking a non-empty cauldron with a [[banner]] now removes the top-most pattern layer.}}
{{History||1.9|snap=15w43a|A cauldron now generates within [[igloo]] basements, {{frac|2|3}} full.}}
{{History|||snap=15w44a|A full cauldron can now be emptied with a [[bucket]], filling the bucket with [[water]].}}
{{History||1.11|snap=16w32a|When a cauldron washes a dyed item (leather [[armor]] or [[banner]]), it reduces its water level by 1.}}
{{History|||snap=16w33a|A [[water bottle]] is now able to add 1 [[water]] level to a cauldron.}}
{{History||1.13|snap=18w10d|[[Shulker box]]es can now be undyed in a cauldron.}}
{{History|||snap=18w15a|[[File:Water Cauldron (level 1) JE5.png|32px]] [[File:Water Cauldron (level 2) JE5.png|32px]] [[File:Water Cauldron JE5.png|32px]] [[Water]] in cauldrons is now white colored.<ref>{{bug|MC-128253}}</ref>}}
{{History|||snap=18w20b|[[File:Water Cauldron (level 1) JE6.png|32px]] [[File:Water Cauldron (level 2) JE6.png|32px]] [[File:Water Cauldron JE6.png|32px]] Cauldron water is now colored again, depending on the biome.
|[[File:Swamp Water Cauldron JE1.png|32px]] [[File:Warm Ocean Water Cauldron JE1.png|32px]] [[File:Lukewarm Ocean Water Cauldron JE1.png|32px]] [[File:Cold Ocean Water Cauldron JE1.png|32px]] [[File:Frozen Ocean Water Cauldron JE1.png|32px]] This currently affects ocean temperature variants and swamps.
|[[File:Swamp Hills Water Cauldron JE1.png|32px]] Swampland M water has a yellowish color while in a cauldron.<ref>{{bug|MC-128558}}</ref>}}
{{History|||snap=pre3|[[File:Swamp Water Cauldron JE1.png|32px]] Swampland M water now has the same [[water]] color in cauldrons as regular [[swamp]]s.}}
{{History||1.14|snap=18w43a|[[File:Water Cauldron (level 1) JE7.png|32px]] [[File:Water Cauldron (level 2) JE7.png|32px]] [[File:Water Cauldron JE7.png|32px]]<br>[[File:Swamp Water Cauldron JE2.png|32px]] [[File:Warm Ocean Water Cauldron JE2.png|32px]] [[File:Lukewarm Ocean Water Cauldron JE2.png|32px]] [[File:Cold Ocean Water Cauldron JE2.png|32px]] [[File:Frozen Ocean Water Cauldron JE2.png|32px]] The textures of cauldrons have been changed.}}
{{History|||snap=19w03a|The numerous missing cullface arguments for the water cauldron have been fixed.}}
{{History||1.17|snap=20w45a|Normal and water cauldrons have been split into different blocks, making filled cauldrons no longer work as a workstation for villagers.<ref name="technicalunemployment"/>
|This also means that any [[structure]]s before this snapshot that have cauldron(s) fill with water now no longer generate(s) cauldron. Instead, water cauldron(s) will generate.}}
{{History|||snap=21w13a|Filled cauldrons work again as a workstation for villagers.}}
{{History|pocket alpha}}
{{History||v0.14.0|snap=build 1|[[File:Water Cauldron (level 1) BE1.png|32px]] [[File:Water Cauldron (level 2) BE1.png|32px]] [[File:Water Cauldron BE1.png|32px]] Added water cauldrons.
|[[Water]] color in cauldrons can be changed by adding [[dye]]s. [[Item]]s dipped in the water are dyed that color.}}
{{History||v0.15.0|snap=build 1|Cauldrons are now used to dye leather [[horse armor]].
|Water cauldrons can now be moved by [[piston]]s.}}
{{History|pocket}}
{{History||1.0.0|snap=alpha 0.17.0.1|Cauldrons now generate naturally in [[igloo]] basements.
|Cauldrons now extinguish burning [[entity|entities]].}}
{{History|bedrock}}
{{History||1.10.0|snap=beta 1.10.0.3|[[File:Water Cauldron (level 1) BE2.png|32px]] [[File:Water Cauldron (level 2) BE2.png|32px]] [[File:Water Cauldron BE2.png|32px]] The textures of cauldrons have been changed.}}
{{History||1.20.0|snap=beta 1.20.0.20|[[File:Water Cauldron (level 1) MCPE-170427.png|32px]] [[File:Water Cauldron (level 2) MCPE-170427.png|32px]] [[File:Water Cauldron MCPE-170427.png|32px]] [[Water]] in cauldrons now looks like lava.<ref>{{bug|MCPE-170427}}</ref>}}
{{History||1.20.10|snap=beta 1.20.10.20|[[File:Water Cauldron (level 1) BE2.png|32px]] [[File:Water Cauldron (level 2) BE2.png|32px]] [[File:Water Cauldron BE2.png|32px]] Cauldron water now uses the correct texture.}}
{{History|console}}
{{History||xbox=TU7|xbone=CU1|ps=1.0|wiiu=Patch 1|switch=1.0.1|[[File:Water Cauldron (level 1) JE1.png|32px]] [[File:Water Cauldron (level 2) JE1.png|32px]] [[File:Water Cauldron JE1.png|32px]]{{verify|Were these the models used?}} Added water cauldrons.}}
{{History||xbox=TU12|[[Water]] is no longer removed from a [[water bucket]] when filling a cauldron in [[creative]] mode.}}
{{History||xbox=TU14|ps=1.04|Cauldrons fill with water if placed outside during [[rain]] or a [[thunderstorm]].}}
{{History||xbox=TU31|xbone=CU19|ps=1.22|wiiu=Patch 3|Cauldrons with [[water]] in them extinguish burning [[entity|entities]], taking away one water level each time.}}
{{History|new 3ds}}
{{History||0.1.0|[[File:Water Cauldron (level 1) BE1.png|32px]] [[File:Water Cauldron (level 2) BE1.png|32px]] [[File:Water Cauldron BE1.png|32px]]{{verify|Were these the models used?}} Added cauldrons.
|Water color in cauldrons can be changed by adding [[dye]]s.
|Cauldrons can be used to [[dye]] leather [[armor]].}}
{{History|foot}}
=== Lava cauldron ===
{{History|Java}}
{{History||1.17|snap=20w45a|[[File:Lava Cauldron JE1.png|32px]] Cauldrons can now be filled with [[lava]].}}
{{History|||snap=21w20a|Lava cauldrons now emits redstone signal strength of 3.<ref name=JavaLava/>}}
{{History|bedrock}}
{{History||1.9.0|snap=beta 1.9.0.2|[[File:Lava Cauldron BE1.png|32px]] Cauldrons can now be filled with lava.}}
{{History||1.10.0|snap=beta 1.10.0.3|[[File:Lava Cauldron BE2.png|32px]] The texture of cauldrons filled with lava has been changed.}}
{{History|console}}
{{History||xbox=none|xbone=none|ps=1.88|wiiu=none|switch=none|[[File:Lava Cauldron LCE1.png|32px]] Cauldrons can now be filled with lava.}}
{{History||xbox=none|xbone=none|ps=1.90|wiiu=none|switch=none|[[File:Lava Cauldron LCE2.png|32px]] The texture of cauldrons filled with lava has been changed.}}
{{History|foot}}
=== Powder Snow Cauldron ===
{{History|java}}
{{History||1.17|snap=20w46a|[[File:Powder Snow Cauldron (level 1) JE1.png|32px]] [[File:Powder Snow Cauldron (level 2) JE1.png|32px]] [[File:Powder Snow Cauldron JE1.png|32px]] Cauldrons can now be filled with powder snow.}}
{{History||1.17.1|snap=Pre-release 1|Powder snow now fills twice as fast in a cauldron.}}
{{History|bedrock}}
{{History||1.17.0|snap=beta 1.17.0.52|[[File:Powder Snow Cauldron (level 1) JE1.png|32px]] [[File:Powder Snow Cauldron (level 2) JE1.png|32px]] [[File:Powder Snow Cauldron JE1.png|32px]] Cauldrons can now be filled with powder snow.}}
{{History|foot}}
=== Potion cauldron ===
{{cleanup|Many potion cauldrons here are listed as being added in versions where said potion did not exist yet - please rearrange and add new history entries accordingly}}
{{History|java}}
{{History||1.0.0|snap=Beta 1.9 Prerelease 2|[[File:Arrran Cauldron 1.png|32px]] [[File:Arrran Cauldron 2.png|32px]] [[File:Arrran Cauldron 3.png|32px]] [[File:Arrran Cauldron 4.png|32px]] <br/>[[File:Cauldron (item) JE1 BE1.png|32px]] Cauldrons are intended to be used for the creation of [[potion]]s.
|Cauldrons can be made to work with a mod, through which the following has been revealed:
* Applying a [[potion]] ingredient to a water cauldron cause it to change to a differently-colored [[lava]] texture, and adding any further potion ingredients to the filled cauldron cause the [[liquid]] to change color.
* Scooping out a potion with ingredients applied cause the potion to have an effect related to the ingredient, e.g. a potion brewed with a [[magma cream]] have [[Fire Resistance]] as an effect.}}
{{History|||snap=Beta 1.9 Prerelease 3|The system was deemed too complex and not user-friendly,<ref>{{Tweet|jeb|119466949708222465|Potions are delayed because *add to cauldron, pick up, look at tooltip, pour back into cauldron, repeat* was extremely tedious|September 29, 2011}}</ref> so the cauldron's ability to brew potions has been replaced with the [[brewing stand]].<ref>{{Tweet|jeb|119710836469149697|A quick discussion with @notch led me in on a new way of doing the potion brewing. Cauldron is out...|September 30, 2011}}</ref><ref>{{Tweet|jeb|119762786619359232|Look back at me! Your Cauldron is now a Brewing Stand. Anything's possible when working with interaction design.|September 30, 2011}}</ref> That brewing system is finalized and doesn't change in the rest of the pre-releases.}}
{{History|pocket alpha}}
{{History||v0.14.0|snap=build 1|[[File:Invisibility Potion Cauldron BE1.png|32px]] [[File:Jump Boost Potion Cauldron BE1.png|32px]] [[File:Fire Resistance Potion Cauldron BE1.png|32px]] [[File:Speed Potion Cauldron BE1.png|32px]] [[File:Slowness Potion Cauldron BE1.png|32px]] [[File:Water Breathing Potion Cauldron BE1.png|32px]] [[File:Instant Health Potion Cauldron BE1.png|32px]] [[File:Instant Damage Potion Cauldron BE1.png|32px]] [[File:Poison Potion Cauldron BE1.png|32px]] [[File:Regeneration Potion Cauldron BE1.png|32px]] [[File:Strength Potion Cauldron BE1.png|32px]] [[File:Weakness Potion Cauldron BE1.png|32px]] [[File:Wither Potion Cauldron BE1.png|32px]] [[File:Turtle Master Potion Cauldron BE1.png|32px]] [[File:Slow Falling Potion Cauldron BE1.png|32px]] Cauldrons can store [[potion]]s, and [[explosion|explode]] if potions are mixed.}}
{{History||v0.15.0|snap=build 1|Cauldrons are now used to make [[tipped arrow]]s.}}
{{History|bedrock}}
{{History||1.10.0|snap=beta 1.10.0.3|[[File:Invisibility Potion Cauldron BE2.png|32px]] [[File:Jump Boost Potion Cauldron BE2.png|32px]] [[File:Fire Resistance Potion Cauldron BE2.png|32px]] [[File:Speed Potion Cauldron BE2.png|32px]] [[File:Slowness Potion Cauldron BE2.png|32px]] [[File:Water Breathing Potion Cauldron BE2.png|32px]] [[File:Instant Health Potion Cauldron BE2.png|32px]] [[File:Instant Damage Potion Cauldron BE2.png|32px]] [[File:Poison Potion Cauldron BE2.png|32px]] [[File:Regeneration Potion Cauldron BE2.png|32px]] [[File:Strength Potion Cauldron BE2.png|32px]] [[File:Weakness Potion Cauldron BE2.png|32px]] [[File:Wither Potion Cauldron BE2.png|32px]] [[File:Turtle Master Potion Cauldron BE2.png|32px]] [[File:Slow Falling Potion Cauldron BE2.png|32px]] The textures of cauldrons filled with [[potion]]s have been changed.}}
{{History|console}}
{{History||xbox=TU60|xbone=CU51|ps=1.64|wiiu=Patch 30|switch=1.0.11|[[File:Invisibility Potion Cauldron BE1.png|32px]] [[File:Jump Boost Potion Cauldron BE1.png|32px]] [[File:Fire Resistance Potion Cauldron BE1.png|32px]] [[File:Speed Potion Cauldron BE1.png|32px]] [[File:Slowness Potion Cauldron BE1.png|32px]] [[File:Water Breathing Potion Cauldron BE1.png|32px]] [[File:Instant Health Potion Cauldron BE1.png|32px]] [[File:Instant Damage Potion Cauldron BE1.png|32px]] [[File:Poison Potion Cauldron BE1.png|32px]] [[File:Regeneration Potion Cauldron BE1.png|32px]] [[File:Strength Potion Cauldron BE1.png|32px]] [[File:Weakness Potion Cauldron BE1.png|32px]] [[File:Wither Potion Cauldron BE1.png|32px]] [[File:Turtle Master Potion Cauldron BE1.png|32px]] [[File:Slow Falling Potion Cauldron BE1.png|32px]]{{verify|Were these the models used?}} Cauldrons can now be filled with [[potion]]s and make an explosion [[sound]] if they are mixed.
|[[Effect]]s can now be applied to [[arrow]]s by using them on a potion-filled cauldron.}}
{{History||xbox=none|xbone=none|ps=1.90|wiiu=none|switch=none|[[File:Invisibility Potion Cauldron BE2.png|32px]] [[File:Jump Boost Potion Cauldron BE2.png|32px]] [[File:Fire Resistance Potion Cauldron BE2.png|32px]] [[File:Speed Potion Cauldron BE2.png|32px]] [[File:Slowness Potion Cauldron BE2.png|32px]] [[File:Water Breathing Potion Cauldron BE2.png|32px]] [[File:Instant Health Potion Cauldron BE2.png|32px]] [[File:Instant Damage Potion Cauldron BE2.png|32px]] [[File:Poison Potion Cauldron BE2.png|32px]] [[File:Regeneration Potion Cauldron BE2.png|32px]] [[File:Strength Potion Cauldron BE2.png|32px]] [[File:Weakness Potion Cauldron BE2.png|32px]] [[File:Wither Potion Cauldron BE2.png|32px]] [[File:Turtle Master Potion Cauldron BE2.png|32px]] [[File:Slow Falling Potion Cauldron BE2.png|32px]]{{verify|Were these the models used?}} The textures of cauldrons filled with [[potion]]s have been changed.}}
{{History|new 3ds}}
{{History||0.1.0|[[File:Invisibility Potion Cauldron BE1.png|32px]] [[File:Jump Boost Potion Cauldron BE1.png|32px]] [[File:Fire Resistance Potion Cauldron BE1.png|32px]] [[File:Speed Potion Cauldron BE1.png|32px]] [[File:Slowness Potion Cauldron BE1.png|32px]] [[File:Water Breathing Potion Cauldron BE1.png|32px]] [[File:Instant Health Potion Cauldron BE1.png|32px]] [[File:Instant Damage Potion Cauldron BE1.png|32px]] [[File:Poison Potion Cauldron BE1.png|32px]] [[File:Regeneration Potion Cauldron BE1.png|32px]] [[File:Strength Potion Cauldron BE1.png|32px]] [[File:Weakness Potion Cauldron BE1.png|32px]] [[File:Wither Potion Cauldron BE1.png|32px]] [[File:Turtle Master Potion Cauldron BE1.png|32px]] [[File:Slow Falling Potion Cauldron BE1.png|32px]]{{verify|Were these the models used?}} Cauldrons can store [[potion]]s.
|Cauldrons make an explosion [[sound]] if potions are mixed, and the potions disappear.
|Potions inside cauldrons have a bubbling effect.}}
{{History|foot}}
===Cauldron "item"===
{{:Technical blocks/Cauldron}}
==Issues==
{{issue list}}
==Trivia==
*[[Arrow]]s "stick" to the [[water]] in a cauldron.
*The inside of a cauldron is 0.25 ({{frac|1|4}}) blocks tall.
*A cauldron holding water is the only way to have water in [[the Nether]] without the use of [[commands]].
==Renders==
; Normal water
<gallery>
Water Cauldron (level 1).png | Level 1
Water Cauldron (level 2).png | Level 2
Water Cauldron.png | Level 3 - full
Water Cauldron (level 1) BE.png | Level 1 (Bedrock Edition)
Water Cauldron (level 2) BE.png | Level 2 (Bedrock Edition)
Water Cauldron BE.png | Level 3 - full (Bedrock Edition)
</gallery>
;Dyed water {{Only|BE}}
<gallery>
Cauldron (filled with white water).png|White Water Cauldron
Cauldron (filled with light gray water).png|Light Gray Water Cauldron
Cauldron (filled with gray water).png|Gray Water Cauldron
Cauldron (filled with black water).png|Black Water Cauldron
Cauldron (filled with brown water).png|Brown Water Cauldron
Cauldron (filled with red water).png|Red Water Cauldron
Cauldron (filled with orange water).png|Orange Water Cauldron
Cauldron (filled with yellow water).png|Yellow Water Cauldron
Cauldron (filled with lime water).png|Lime Water Cauldron
Cauldron (filled with green water).png|Green Water Cauldron
Cauldron (filled with cyan water).png|Cyan Water Cauldron
Cauldron (filled with light blue water).png|Light Blue Water Cauldron
Cauldron (filled with blue water).png|Blue Water Cauldron
Cauldron (filled with purple water).png|Purple Water Cauldron
Cauldron (filled with magenta water).png|Magenta Water Cauldron
Cauldron (filled with pink water).png|Pink Water Cauldron
</gallery>
;Cauldrons filled with potions {{Only|BE}}
<gallery>
Night Vision Potion Cauldron.png|Night Vision Potion Cauldron
Invisibility Potion Cauldron.png|Invisibility Potion Cauldron
Jump Boost Potion Cauldron.png|Leaping Potion Cauldron
Fire Resistance Potion Cauldron.png|Fire Resistance Potion Cauldron
Speed Potion Cauldron.png|Swiftness Potion Cauldron
Slowness Potion Cauldron.png|Slowness Potion Cauldro
Turtle Master Potion Cauldron.png|Turtle Master Potion Cauldron
Water Breathing Potion Cauldron.png|Water Breathing Potion Cauldron
Instant Health Potion Cauldron.png|Healing Potion Cauldron
Instant Damage Potion Cauldron.png|Harming Potion Cauldron
Poison Potion Cauldron.png|Poison Potion Cauldron
Regeneration Potion Cauldron.png|Regeneration Potion Cauldron
Strength Potion Cauldron.png|Strength Potion Cauldron
Weakness Potion Cauldron.png|Weakness Potion Cauldron
Slow Falling Potion Cauldron.png|Slow Falling Potion Cauldron
Wither Potion Cauldron.png|Decay Potion Cauldron
</gallery>
;Powder Snow
<gallery>
Powder Snow Cauldron (level 1).png | Level 1
Powder Snow Cauldron (level 2).png | Level 2
Powder Snow Cauldron.png | Level 3 - full
</gallery>
== Gallery==
<gallery>
The three stages of water height in cauldrons.png| All cauldron states in [[Java Edition]].
Cauldrons potion.png|All [[potion]]s in cauldrons.{{only|be|short=1}}
Cauldrons DyeWater.png|All cauldron [[water]] colors possible with one dye.{{only|be|short=1}}
Brewing Potions.png|How potions were brewed in [[Java Edition Beta 1.9 Prerelease 2|Beta 1.9 Pre-Release 2]] if enabled through a mod.
Dyed Water Cauldrons.jpg|Cauldrons filled with dyed water.
Potion Cauldron.jpg|A cauldron filled with potions.
Arrow Tipping 1.jpg|Using a cauldron to make [[tipped arrow]]s.
Arrow Tipping 2.jpg|Using a cauldron to make [[tipped arrow]]s.
Arrow Tipping 3.jpg|Using a cauldron to make [[tipped arrow]]s.
Snow Cauldron.jpg|A cauldron full of snow.
</gallery>
==References==
{{reflist|2}}
{{Blocks|Utility}}
{{items}}
[[Category:Natural blocks]]
[[Category:Job blocks]]
[[Category:Utility blocks]]
[[Category:Storage]]
[[Category:Manufactured blocks]]
[[Category:Generated structure blocks]]
[[Category:Light sources]]
[[cs:Kotel]]
[[de:Kessel]]
[[es:Caldero]]
[[fr:Chaudron]]
[[hu:Üst]]
[[it:Calderone]]
[[ja:大釜]]
[[ko:가마솥]]
[[nl:Ketel]]
[[pl:Kocioł]]
[[pt:Caldeirão]]
[[ru:Котёл]]
[[th:หม้อปรุงยา]]
[[uk:Казан]]
[[zh:炼药锅]]</li></ul> | Added eye of the guardian, harpoon quiver, satchel of snacks, satchel of elixirs. | ||||
| Fixed: Artifact-summoned pets can no longer destroy scatter mines, iron golem sounds can no longer be heard after the golem has died, arrows from flaming quiver and thundering quiver dealing instant kill damage when deflected by a mob with the Deflecting enchantment, powershaker's explosion no longer blocks other players' arrows, increased the spacing of artifact icons on the Upload/Download Hero screens when playing on Xbox Cloud Gaming, artifact charge no longer triggers after picking up a consumable item. | |||||
1.10.2.0{{Extension DPL}}<ul><li>[[Honeycomb|Honeycomb]]<br/>{{distinguish|Honeycomb Block}}
{{Item
| image = Honeycomb.png
| renewable = Yes
| stackable = Yes (64)
}}
'''Honeycombs''' are [[item]]s obtained from [[bee nest]]s and beehives.
== Obtaining ==
{{See also|Tutorials/Honey farming}}
When a bee nest or beehive at {{cd|honey_level}} 5 is [[shear]]ed, it drops 3 honeycombs and angers any [[bee]]s inside, causing them to attack. Having a lit [[campfire]] or lighting a [[fire]] underneath the nest or hive prevents the bees from becoming hostile.
A [[dispenser]] with [[shears]] inside can be used to shear the nest or hive without angering the bees. A honeycomb item drops out after using the shears.
== Usage ==
=== Signs ===
{{Control|Using}} a honeycomb on a [[sign]] or a hanging sign prevents the sign from being edited.
=== Waxing ===
{{Control|Using}} a honeycomb on a [[block of copper]] changes the block into its waxed variant, preventing oxidation of the copper.
=== Crafting ingredient ===
{{crafting usage}}
== Sounds ==
{{edition|java}}:
{{Sound table
|sound=Beehive shear.ogg
|subtitle=Shears scrape
|source=neutral
|description=When honeycombs are collected from a beehive
|id=block.beehive.shear
|translationkey=subtitles.block.beehive.shear
|volume=0.8
|pitch=1.0/0.9/0.8
|distance=16}}
{{Sound table
|sound=Wax on1.ogg
|sound2=Wax on2.ogg
|sound3=Wax on3.ogg
|subtitle=Wax on
|source=block
|description=When a honeycomb waxes something
|id=item.honeycomb.wax_on
|translationkey=subtitles.item.honeycomb.wax_on
|volume=1.0
|pitch=1.0/0.9/1.1
|distance=16
|foot=1}}
{{edition|bedrock}}:
{{Sound table
|type=bedrock
|sound=Beehive shear.ogg
|source=block
|description=When honeycombs are collected from a beehive
|id=block.beehive.shear
|volume=0.8
|pitch=0.8-1.0}}
{{Sound table
|sound=Wax on1.ogg
|sound2=Wax on2.ogg
|sound3=Wax on3.ogg
|source=neutral
|description=When a honeycomb waxes something
|id=copper.wax.on
|volume=1.0
|pitch=0.8-1.2
|foot=1}}
== Data values ==
=== ID ===
{{edition|java}}:
{{ID table
|edition=java
|showforms=y
|generatetranslationkeys=y
|displayname=Honeycomb
|spritetype=item
|nameid=honeycomb
|form=item
|foot=1}}
{{edition|bedrock}}:
{{ID table
|edition=bedrock
|shownumericids=y
|showforms=y
|notshowbeitemforms=y
|generatetranslationkeys=y
|displayname=Honeycomb
|spritetype=item
|nameid=honeycomb
|id=591
|form=item
|foot=1}}
== Advancements ==
{{load advancements|Wax on;Wax off}}
== History ==
{{History|java}}
{{History||1.15|snap=19w34a|[[File:Honeycomb JE1.png|32px]] Added honeycombs.
|Honeycombs can be used to craft [[beehive]]s.}}
{{History|||snap=19w41a|Honeycombs can now be used to craft [[honeycomb block]]s.}}
{{History|||snap=Pre-release 3|[[File:Honeycomb texture change 1.15pre2 to 1.15pre3.gif|32px]] The texture file of honeycombs has been slightly changed. The color channel of transparent pixels are now filled to black. The in-game texture has not been changed.}}
{{History||1.17|snap=20w45a|Honeycomb can now be used to craft [[candle]]s and [[waxed copper]].}}
{{History|||snap=21w11a|Honeycomb can now be used to wax copper blocks by right clicking or dispensing honeycomb onto the block.}}
{{History|||snap=21w14a|Honeycomb can now be used to wax oxidized copper blocks.}}
{{History|||snap=21w19a|Honeycomb can no longer used to craft candles.}}
{{History|||snap=Pre-release 1|Honeycomb can once again used to craft candles.}}
{{History||1.20|snap=23w12a|[[Sign]]s and hanging signs can now be waxed with honeycomb to prevent them from being edited.}}
{{History|bedrock}}
{{History||1.14.0|snap=beta 1.14.0.1|[[File:Honeycomb BE1.png|32px]] Added honeycombs.}}
{{History|||snap=beta 1.14.0.4|[[File:Honeycomb BE2.png|32px]] The texture of honeycombs has been changed to match {{el|je}}'s.}}
{{History||Caves & Cliffs (experimental)|link=Bedrock Edition 1.17.0|snap=beta 1.16.210.57|Honeycomb can now be used to craft [[waxed copper]].
|Honeycomb can now be used to wax copper blocks by right clicking or dispensing honeycomb onto the block.}}
{{History||1.17.0|snap=beta 1.16.230.52|Honeycomb can now be used to wax oxidized copper blocks.}}
{{History||1.17.10|snap=beta 1.17.10.22|Honeycomb can now be used to craft [[candle]]s.}}
{{History||Next Major Update<br>(Experimental)|link=Bedrock Edition 1.19.80|snap=beta 1.19.80.22|[[Sign]]s and hanging signs can now be waxed with honeycomb to prevent them from being edited.}}
{{History|foot}}
== Issues ==
{{issue list}}
{{items}}
[[cs:Plástev medu]]
[[de:Honigwabe]]
[[es:Panal]]
[[fr:Rayon de miel]]
[[ja:ハニカム]]
[[ko:벌집 조각]]
[[pl:Plaster miodu]]
[[pt:Favo de mel]]
[[ru:Пчелиные соты]]
[[zh:蜜脾]]
[[Category:Renewable resources]]</li><li>[[Heart of the Sea|Heart of the Sea]]<br/>{{Item
| image = Heart of the Sea.png
| stackable = Yes (64)
| rarity = Uncommon
| renewable = No
}}
A '''heart of the sea''' is a rare [[item]] that can be crafted into a [[conduit]].
== Obtaining ==
The heart of the sea must be found. It cannot be crafted or obtained by trading, making it a [[non-renewable resource]].
A heart of the sea is obtained from a [[buried treasure]]. The location is marked with a noticeable red X on a [[Explorer Map|buried treasure map]], which is found in [[Ocean_Ruins|ocean ruins]] and [[Shipwreck|shipwrecks]]. Feeding [[raw cod]] or [[raw salmon]] to a [[dolphin]] causes the dolphin to swim toward the nearest [[buried treasure]], [[shipwreck]], or [[ocean ruins]].
=== Chest loot ===
{{LootChestItem|heart-of-the-sea}}
== Usage ==
=== Crafting===
{{crafting usage}}
== Data values ==
=== ID ===
{{edition|java}}:
{{ID table
|edition=java
|showforms=y
|generatetranslationkeys=y
|displayname=Heart of the Sea
|spritetype=item
|nameid=heart_of_the_sea
|form=item
|foot=1}}
{{edition|bedrock}}:
{{ID table
|edition=bedrock
|shownumericids=y
|showforms=y
|notshowbeitemforms=y
|generatetranslationkeys=y
|displayname=Heart of the Sea
|spritetype=item
|nameid=heart_of_the_sea
|id=571
|form=item
|foot=1}}
== History ==
{{History|java}}
{{History||1.13|snap=18w15a|[[File:Heart of the Sea JE1 BE2.png|32px]] Added heart of the sea.}}
{{History|||snap=18w19a|Heart of the sea now generates in all [[buried treasure]] [[chest]]s in a stack of 1.}}
{{History|bedrock}}
{{History||1.4.0|snap=beta 1.2.14.2|An entry in the [[buried treasure]] loot table has been added named <code>nautilus_core</code>. It is unobtainable though since the <code>nautilus_core</code> has not been added into the game yet.}}
{{History|||snap=beta 1.2.20.1|[[File:Heart of the Sea BE1.png|32px]] Added heart of the sea as an [[item]] obtainable in buried treasure [[chest]]s. It cannot be used to craft [[conduit]]s yet.}}
{{History|||snap=beta 1.2.20.2|[[File:Heart of the Sea JE1 BE2.png|32px]] The texture of heart of the sea has been changed.}}
{{History||1.5.0|snap=beta 1.5.0.1|Heart of the sea can now be used to craft [[conduit]]s.}}
{{History|console}}
{{History||xbox=TU69|ps=1.76|wiiu=Patch 38|[[File:Heart of the Sea JE1 BE2.png|32px]] Added heart of the sea.}}
{{History|education}}
{{History||1.4.0|[[File:Heart of the Sea JE1 BE2.png|32px]] Added heart of the sea. It generates in all [[buried treasure]] [[chest]]s in a stack of 1.}}
{{History|foot}}
== Issues ==
{{issue list}}
== Trivia ==
* Before the heart of the sea was added to {{el|be}}, there was an entry found in the buried treasure chest loot table named <code>nautilus_core</code>, which was later revealed to be the heart of the sea. Despite the name change, the heart of the sea continues to be referred to as the <code>nautilus_core</code> in most game files.
== External Links ==
*[https://www.minecraft.net/en-us/article/heart-sea Taking Inventory: Heart of the Sea] – Minecraft.net on August 31, 2023
{{items}}
[[Category:Non-renewable resources]]
[[de:Herz des Meeres]]
[[fr:Cœur de la mer]]
[[es:Corazón del mar]]
[[it:Cuore del mare]]
[[ja:海洋の心]]
[[ko:바다의 심장]]
[[nl:Hart van de zee]]
[[pl:Serce oceanu]]
[[pt:Coração do mar]]
[[ru:Сердце моря]]
[[uk:Серце моря]]
[[zh:海洋之心]]</li></ul> | Added shadow shifter, tome of duplication, vexing chant, void quiver. | ||||
1.16.2.0{{Extension DPL}}<ul><li>[[Bottle o' Enchanting|Bottle o' Enchanting]]<br/>{{ItemEntity
|image=Bottle o' Enchanting.gif
|imagesize=160px
|invimage=Bottle o' Enchanting
|stackable=Yes (64)
|renewable=Yes
|size=Height: 0.25 Blocks<br>Width: 0.25 Blocks
|rarity=Uncommon
|networkid='''[[JE]]''': 75
}}
A '''bottle o' enchanting''' is a throwable item that releases [[experience]] orbs on impact.
== Obtaining ==
=== Trading ===
Master-level cleric [[villager]]s sell bottles o' enchanting for 3 emeralds as part of their trade.
=== Natural generation ===
{{LootChestItem|bottle-o'-enchanting}}
== Usage ==
A bottle o' enchanting can be thrown by pressing {{control|use}}. On impact, it drops [[experience]] orbs worth {{xp|3|11}} (average 7.0) and sends out blue particles.
== Sounds ==
{{Edition|Java}}:<br>
Bottles o' enchanting use the Friendly Creatures sound category for entity-dependent sound events.
{{Sound table
|sound=Glass dig1.ogg
|sound2=Glass dig2.ogg
|sound3=Glass dig3.ogg
|subtitle=Bottle smashes
|source=neutral
|description=When a bottle o' enchanting impacts something
|id=entity.splash_potion.break
|translationkey=subtitles.entity.potion.splash
|volume=1.0
|pitch=0.9-1.0
|distance=16}}
{{Sound table
|rowspan=2
|sound=Bow shoot.ogg
|subtitle=Bottle thrown
|source=neutral
|description=When a bottle o' enchanting is thrown by a player
|id=entity.experience_bottle.throw
|translationkey=subtitles.entity.potion.throw
|volume=0.5
|pitch={{frac|1|3}}-0.5
|distance=16}}
{{Sound table
|subtitle=Dispensed item
|source=block
|description=When a bottle o' enchanting is dispensed from a [[dispenser]]
|id=block.dispenser.launch
|translationkey=subtitles.block.dispenser.dispense
|volume=1.0
|pitch=1.2
|distance=16
|foot=1}}
{{Edition|Bedrock}}:
{{Sound table
|type=bedrock
|sound=Glass dig1.ogg
|sound2=Glass dig2.ogg
|sound3=Glass dig3.ogg
|source=block
|description=When a splash potion impacts something
|id=random.glass
|volume=1.0
|pitch=1.0}}
{{Sound table
|rowspan=2
|sound=Bow shoot.ogg
|source=player
|description=When a splash potion is thrown by a player
|id=random.bow
|volume=0.5
|pitch=0.33-0.5}}
{{Sound table
|source=player
|description=When a splash potion is dispensed from a dispenser
|id=random.bow
|volume=1.0
|pitch=0.83-1.25
|foot=1}}
== Data values ==
=== ID ===
{{edition|java}}:
{{ID table
|edition=java
|firstcolumnname=Item
|showforms=y
|generatetranslationkeys=y
|displayname=Bottle o' Enchanting
|spritetype=item
|nameid=experience_bottle
|form=item
|foot=1}}
{{ID table
|edition=java
|firstcolumnname=Entity
|generatetranslationkeys=y
|displayname=Thrown Bottle o' Enchanting
|spritetype=entity
|spritename=Bottle o' Enchanting
|nameid=experience_bottle
|foot=1}}
{{edition|bedrock}}:
{{ID table
|edition=bedrock
|firstcolumnname=Item
|shownumericids=y
|showforms=y
|notshowbeitemforms=y
|generatetranslationkeys=y
|displayname=Bottle o' Enchanting
|spritetype=item
|nameid=experience_bottle
|id=508
|form=item
|foot=1}}
{{ID table
|edition=bedrock
|firstcolumnname=Entity
|shownumericids=y
|generatetranslationkeys=y
|displayname=Bottle o' Enchanting
|spritetype=entity
|nameid=xp_bottle
|id=68
|foot=1}}
=== Entity data ===
{{see also|Chunk format}}
Thrown bottles o' enchanting have entity data that define various properties of the entity.
{{/ED}}
== History ==
<!--When were dispensers made able to fire these? Or was this always a thing?-->
{{History|java}}
{{History||1.2.1|snap=12w04a|[[File:Bottle o' Enchanting JE1 BE1.png|32px]] Added bottles o' enchanting.
|Bottles o' enchanting can currently be obtained only in [[creative]] mode.}}
{{History||1.3.1|snap=12w21a|With the implementation of the [[trading]] system, the [[player]] can now trade with priest [[villager]]s to obtain 2–4 bottles o' enchanting for 1 [[emerald]].}}
{{History||1.8|snap=14w02a|With the trading revamp, villagers no longer [[trading|sell]] bottles o' enchanting, making them again unobtainable in regular [[survival]].}}
{{History|||snap=14w31a|Cleric [[villager]]s now sell bottles o' enchanting for 3–11 [[emerald]]s each, making them [[renewable resource|renewable]] again.}}
{{History||1.9|snap=15w49a|Bottles o' enchanting, like all projectiles, now take thrower's motion into account.}}
{{History||1.11|snap=16w32a|The entity ID has now been changed from <code>ThrownExpBottle</code> to <code>xp_bottle</code>.}}
{{History||1.13|snap=17w47a|Prior to [[1.13/Flattening|''The Flattening'']], this [[item]]'s numeral ID was 384.}}
{{History|||snap=18w11a|Bottles o' enchanting can now generate in [[shipwreck]] chests.}}
{{History|||snap=pre5|The entity ID has now been changed to <code>experience_bottle</code>.}}
{{History||1.14|snap=18w43a|[[File:Bottle o' Enchanting JE2 BE2.png|32px]] The texture of bottles o' enchanting has now been changed.}}
{{History|||snap=18w47a|Bottles o' enchanting can now generate in [[pillager outpost]] chests.}}
{{History||1.19|snap=22w13a|Bottles o' enchanting may now be found in [[ancient city]] [[chest]]s.}}
{{History|pocket alpha}}
{{History||v0.12.1|snap=build 1|[[File:Bottle o' Enchanting JE1 BE1.png|32px]] Added bottles o' enchanting.
|Due to the lack of [[trading]], bottles o' enchanting are currently available only in [[creative]] mode, similar to [[Java Edition 12w04a|12w04a]] when it was first released.}}
{{History|pocket}}
{{History||1.0.4|snap=alpha 1.0.4.0|With [[villager]] [[trading]] added, it is now possible to obtain bottles o' enchanting legitimately.}}
{{History||1.1.0|snap=alpha 1.1.0.0|The entity ID has now been changed from <code>potion.experience</code> to <code>xp_bottle</code>.}}
{{History|bedrock}}
{{History||1.4.0|snap=beta 1.2.14.2|Bottles o' enchanting can now be found inside [[shipwreck]] and [[buried treasure]] [[chest]]s.}}
{{History||1.10.0|snap=beta 1.10.0.3|Bottles o' enchanting can now be found in [[pillager outpost]] chests.
|[[File:Bottle o' Enchanting JE2 BE2.png|32px]] The texture of bottles o' enchanting has now been changed.}}
{{History||1.11.0|snap=beta 1.11.0.4|[[Trading]] has now been changed and bottles o' enchanting are now [[trading|sold]] by cleric [[villager]]s for 3 [[emerald]]s.}}
{{History|console}}
{{History||xbox=TU7|xbone=CU1|ps=1.0|wiiu=Patch 1|[[File:Bottle o' Enchanting JE1 BE1.png|32px]] Added bottles o' enchanting.
|Bottle o' enchanting can be found in the Miscellaneous tab in the [[Creative inventory]].}}
{{History||xbox=TU12|Moved bottle o' enchanting to the Brewing tab in the Creative inventory.}}
{{History|PS4}}
{{History||1.90|[[File:Bottle o' Enchanting JE2 BE2.png|32px]] The texture of bottles o' enchanting has now been changed.}}
{{History|3ds}}
{{History||0.1.0|[[File:Bottle o' Enchanting JE1 BE1.png|32px]] Added bottles o' enchanting.
|Bottles o' enchanting are not available within the [[Creative inventory]].}}
{{History||?|Added bottles o' enchanting to the Creative inventory.{{info needed|Which update did this occur?}}}}
{{History|foot}}
== Issues ==
{{issue list|Bottle o' Enchanting|Experience Bottle}}
== Gallery ==
<gallery>
Bottle O' Enchanting Splash.gif|Bottle o' enchanting splash animation on impact.
Bottle O' Enchanting villager.png|Players may trade with villagers to obtain bottles o' enchanting in survival mode.
</gallery>
{{Items}}
{{Entities}}
[[cs:Lektvar očarování]]
[[de:Erfahrungsfläschchen]]
[[es:Frasco con experiencia]]
[[fr:Fiole d'expérience]]
[[ja:エンチャントの瓶]]
[[ko:경험치 병]]
[[pl:Zaklęta butelka]]
[[pt:Frasco de experiência]]
[[ru:Зелье опыта]]
[[th:ขวดแห่งเวทมนตร์]]
[[zh:附魔之瓶]]</li><li>[[Smithing Template|Smithing Template]]<br/>{{for|the block|Smithing Table}}
{{Item
| title = Smithing Template
| image = <gallery>
Netherite Upgrade Smithing Template.png | Netherite Upgrade
Sentry Armor Trim Smithing Template.png | Armor Trim
</gallery>
| rarity = Rare
| renewable = No<!--Smithing templates are not renewable because diamonds, their only other method of creation, are not renewable.-->
| stackable = Yes (64)
}}
'''Smithing templates''' are items used in [[Smithing Table|smithing tables]] to alter [[Tool|tools]] and [[armor]]. They are consumed when used, but can be [[Crafting|duplicated]] using an existing template, its material and [[Diamond|diamonds]].
The sixteen '''armor trim smithing templates''' are found in a variety of [[Generated structures|structures]], and are used to apply various decorative trims (dependent on the variant) to armor using certain minerals for different colors.
'''Netherite upgrade smithing templates''' are required to upgrade diamond equipment with a [[Netherite Ingot|netherite ingot]]. They are only found in [[Bastion Remnant|bastion remnants]], but are guaranteed only in [[:en:Bastion_Remnant#Treasure_room|treasure rooms]].
== Obtaining ==
Smithing templates can be found in various [[Generated structures|structures]] and can be duplicated by using seven diamonds and a block based on what the template is.
=== Crafting ===
{{Crafting
|A1=Diamond |B1=Matching Smithing Template |C1=Diamond
|A2=Diamond |B2=Netherrack;Cobblestone;Sandstone;End Stone;Terracotta;Terracotta;Netherrack;Cobblestone;Terracotta;Cobbled Deepslate;Blackstone;Purpur Block;Prismarine;Cobblestone;Cobbled Deepslate;Terracotta;Mossy Cobblestone |C2=Diamond
|A3=Diamond |B3=Diamond |C3=Diamond
|Output=Matching Smithing Template,2
}}
{| class="article-table"
|+ Duplication
! Item !! Material
|-
| {{ItemSprite|netherite-upgrade|text=Netherite Upgrade}} || {{BlockSprite|Netherrack|text=Netherrack}}
|-
| {{ItemSprite|sentry-armor-trim|text=Sentry Armor Trim}} || {{BlockSprite|Cobblestone|text=Cobblestone}}
|-
| {{ItemSprite|vex-armor-trim|text=Vex Armor Trim}} || {{BlockSprite|Cobblestone|text=Cobblestone}}
|-
| {{ItemSprite|wild-armor-trim|text=Wild Armor Trim}} || {{BlockSprite|Mossy Cobblestone|text=Mossy Cobblestone}}
|-
| {{ItemSprite|coast-armor-trim|text=Coast Armor Trim}} || {{BlockSprite|Cobblestone|text=Cobblestone}}
|-
| {{ItemSprite|dune-armor-trim|text=Dune Armor Trim}} || {{BlockSprite|Sandstone|text=Sandstone}}
|-
| {{ItemSprite|wayfinder-armor-trim|text=Wayfinder Armor Trim}} || {{BlockSprite|Terracotta|text=Terracotta}}
|-
| {{ItemSprite|raiser-armor-trim|text=Raiser Armor Trim}} || {{BlockSprite|Terracotta|text=Terracotta}}
|-
| {{ItemSprite|shaper-armor-trim|text=Shaper Armor Trim}} || {{BlockSprite|Terracotta|text=Terracotta}}
|-
| {{ItemSprite|host-armor-trim|text=Host Armor Trim}} || {{BlockSprite|Terracotta|text=Terracotta}}
|-
| {{ItemSprite|ward-armor-trim|text=Ward Armor Trim}} || {{BlockSprite|Cobbled Deepslate|text=Cobbled Deepslate}}
|-
| {{ItemSprite|silence-armor-trim|text=Silence Armor Trim}} || {{BlockSprite|Cobbled Deepslate|text=Cobbled Deepslate}}
|-
| {{ItemSprite|tide-armor-trim|text=Tide Armor Trim}} || {{BlockSprite|Prismarine|text=Prismarine}}
|-
| {{ItemSprite|snout-armor-trim|text=Snout Armor Trim}} || {{BlockSprite|Blackstone|text=Blackstone}}
|-
| {{ItemSprite|rib-armor-trim|text=Rib Armor Trim}} || {{BlockSprite|Netherrack|text=Netherrack}}
|-
| {{ItemSprite|eye-armor-trim|text=Eye Armor Trim}} || {{BlockSprite|End Stone|text=End Stone}}
|-
| {{ItemSprite|spire-armor-trim|text=Spire Armor Trim}} || {{BlockSprite|Purpur Block|text=Purpur Block}}
|}
{{IN|bedrock}}, spire, tide, and dune armor trims can be duplicated with more blocks than {{in|java}}. In addition to the normal blocks, Tide armor trims can be duplicated using Prismarine Bricks or Dark Prismarine, dune armor trims can be duplicated with smooth sandstone, cut sandstone, or chiseled sandstone, and spire armor trims can be duplicated with purpur pillars.<ref>{{bug|MCPE-172711||Tide, Spire, and Dune Armor Trims can be crafted from more blocks than in Java Edition}}</ref>
=== Mob loot ===
[[Elder guardian]]s have a 20% chance to drop 1 tide armor trim upon death. [[Looting]] doesn't affect this percentage, and the elder guardian doesn't need to be killed by a player in order for the trim to drop and can be duplicated with [[prismarine]].
=== Chest loot ===
{{#invoke:LootChest|base3|netherite-upgrade-smithing-template,sentry-armor-trim-smithing-template,vex-armor-trim-smithing-template,wild-armor-trim-smithing-template,coast-armor-trim-smithing-template,dune-armor-trim-smithing-template,ward-armor-trim-smithing-template,silence-armor-trim-smithing-template,snout-armor-trim-smithing-template,rib-armor-trim-smithing-template,eye-armor-trim-smithing-template,spire-armor-trim-smithing-template}}
Note: In Woodland Mansions, only chests with random loot have the chance to contain the Vex Smithing Template, chests in the "Allium room", "Sapling farm", "Tree-chopping room" and "Fake End portal room" always generate with the same, room specific, loot.
=== Suspicious block loot ===
Items can only be extracted from [[Suspicious Block|suspicious blocks]] using a [[brush]].{{#invoke:LootChest|base3|wayfinder-armor-trim-smithing-template,raiser-armor-trim-smithing-template,shaper-armor-trim-smithing-template,host-armor-trim-smithing-template}}
== Usage ==
=== Crafting ingredient ===
{{Crafting
|A1=Diamond |B1=Matching Smithing Template |C1=Diamond
|A2=Diamond |B2=Netherrack;Cobblestone;Sandstone;End Stone;Terracotta;Terracotta;Netherrack;Cobblestone;Terracotta;Cobbled Deepslate;Blackstone;Purpur Block;Prismarine;Cobblestone;Cobbled Deepslate;Terracotta;Mossy Cobblestone |C2=Diamond
|A3=Diamond |B3=Diamond |C3=Diamond
|Output=Matching Smithing Template,2
}}
=== Smithing ingredient ===
Smithing templates are used at a [[smithing table]]. Netherite upgrade smithing templates are used to upgrade diamond gear into netherite gear by using a netherite upgrade, a piece of diamond gear, and a [[netherite ingot]].
{{Smithing
|head=1
|ingredients=Netherite Upgrade +<br>Any Diamond Gear +<br>[[Netherite Ingot]]
|Netherite Upgrade
|Diamond Helmet; Diamond Chestplate; Diamond Leggings; Diamond Boots; Diamond Sword; Diamond Pickaxe; Diamond Axe; Diamond Shovel
|Netherite Ingot
|Netherite Helmet; Netherite Chestplate; Netherite Leggings; Netherite Boots; Netherite Sword; Netherite Pickaxe; Netherite Axe; Netherite Shovel
|tail=1
}}
{{FakeImage|{{Animate|Iron_Armor_with_Iron_Shaper_Trim.png; Golden_Armor_with_Golden_Shaper_Trim.png; Diamond_Armor_with_Diamond_Shaper_Trim.png; Netherite_Armor_with_Netherite_Shaper_Trim.png|180px}}|If the armor material and the trimming material are the same, the color palette used for the armor trim is darker.}}
Armor trim smithing templates are used to customize an armor piece's appearance by using a smithing template, an armor piece, and an ingot or crystal ([[emerald]], [[redstone dust]], [[lapis lazuli]], [[amethyst shard]], [[nether quartz]], [[netherite ingot]], [[diamond]], [[gold ingot]], [[iron ingot]], or [[copper ingot]]). Including all dyed leather armor colors and regular armor, there are ≈3.679x10<sup>9</sup> different possible armor pieces<!--5713438 leather colors, plus the 4 other armor materials = 5713442. 5713442 * 161 (the 160 trim combos (16 trims, 10 materials) + untrimmed) = 919864162. 919864162 * 4 (helmet, chestplate, leggings, boots) = 3679456648 ≈ 3.679x10^9-->, and 7.16x10<sup>35</sup> <!--919864162 + 1 (no armor in that slot) = 919864163. 919864163^4 = 715969952015045562662444917041515536 ≈ 7.16x10^35 total possible armor combinations-->total possible armor combinations excluding enchantments and the player not wearing armor.
Already trimmed armor can be trimmed again by applying another template on it; the old trim pattern is overwritten in the process.<ref>{{bug|MC-262538||When combining armor trims the new trim deletes the old one|WAI}}</ref> Therefore, one piece of armor cannot possess multiple trims at the same time.
Most armor trims cover a small portion of the armor piece's surface with the trim material, except for the silence armor trim, which allows the trim material to cover a majority of the armor piece's surface.
All of the trims are purely decorative, and don't impact gameplay or strength(without the use of mods or plugins) of the armor they are applied to in any way. [[Piglin]]s do not pick up any gold-trimmed armor pieces, and they are not pacified by players wearing even a full set of gold-trimmed armor (unless, of course, the armor pieces in question are themselves golden), and netherite-trimmed armor pieces can still be burned by [[fire]].
{{Smithing
|head=1
|ingredients=Any Armor Trim +<br>Any Armor Piece +<br>Any Ingot/Crystal
|Any Armor Trim Smithing Template
|Iron Helmet; Netherite Chestplate;Golden Leggings;Diamond Boots
|Amethyst Shard; Copper Ingot; Diamond; Emerald; Gold Ingot; Iron Ingot; Lapis Lazuli; Nether Quartz; Netherite Ingot; Redstone Dust; Diamond; Emerald
|Amethyst Trim Iron Helmet; Copper Trim Netherite Chestplate; Diamond Trim Golden Leggings; Emerald Trim Diamond Boots; Gold Trim Iron Helmet; Iron Trim Netherite Chestplate; Lapis Trim Golden Leggings; Quartz Trim Diamond Boots; Netherite Trim Iron Helmet; Redstone Trim Netherite Chestplate; Diamond Trim Golden Leggings; Emerald Trim Diamond Boots
|tail=1
}}
;List of color palettes for all materials
*{{ItemSprite|emerald }} - {{TrimPalette| emerald }}
*{{ItemSprite|redstone dust }} - {{TrimPalette| redstone dust }}
*{{ItemSprite|lapis lazuli }} - {{TrimPalette| lapis lazuli }}
*{{ItemSprite|amethyst shard }} - {{TrimPalette| amethyst shard }}
*{{ItemSprite|nether quartz }} - {{TrimPalette| nether quartz }}
*{{ItemSprite|netherite ingot }} - {{TrimPalette| netherite ingot }} (Darker: {{TrimPalette| netherite ingot |darker=1}})
*{{ItemSprite|diamond }} - {{TrimPalette| diamond }} (Darker: {{TrimPalette| diamond |darker=1}})
*{{ItemSprite|gold ingot }} - {{TrimPalette| gold ingot }} (Darker: {{TrimPalette| gold ingot |darker=1}})
*{{ItemSprite|iron ingot }} - {{TrimPalette| iron ingot }} (Darker: {{TrimPalette| iron ingot |darker=1}})
*{{ItemSprite|copper ingot }} - {{TrimPalette| copper ingot }}
== Data values ==
=== ID ===
{{edition|java}}:
{{ID table
|edition=java
|firstcolumnname=Smithing Template
|showforms=y
|generatetranslationkeys=y
|displayname=Netherite Upgrade
|spritename=netherite-upgrade-smithing-template
|spritetype=item
|nameid=netherite_upgrade_smithing_template
|form=item}}
{{ID table
|displayname=Sentry Armor Trim
|spritename=sentry-armor-trim-smithing-template
|spritetype=item
|nameid=sentry_armor_trim_smithing_template
|form=item}}
{{ID table
|displayname=Vex Armor Trim
|spritename=vex-armor-trim-smithing-template
|spritetype=item
|nameid=vex_armor_trim_smithing_template
|form=item}}
{{ID table
|displayname=Wild Armor Trim
|spritename=wild-armor-trim-smithing-template
|spritetype=item
|nameid=wild_armor_trim_smithing_template
|form=item}}
{{ID table
|displayname=Coast Armor Trim
|spritename=coast-armor-trim-smithing-template
|spritetype=item
|nameid=coast_armor_trim_smithing_template
|form=item}}
{{ID table
|displayname=Dune Armor Trim
|spritename=dune-armor-trim-smithing-template
|spritetype=item
|nameid=dune_armor_trim_smithing_template
|form=item}}
{{ID table
|displayname=Wayfinder Armor Trim
|spritename=wayfinder-armor-trim-smithing-template
|spritetype=item
|nameid=wayfinder_armor_trim_smithing_template
|form=item}}
{{ID table
|displayname=Raiser Armor Trim
|spritename=raiser-armor-trim-smithing-template
|spritetype=item
|nameid=raiser_armor_trim_smithing_template
|form=item}}
{{ID table
|displayname=Shaper Armor Trim
|spritename=shaper-armor-trim-smithing-template
|spritetype=item
|nameid=shaper_armor_trim_smithing_template
|form=item}}
{{ID table
|displayname=Host Armor Trim
|spritename=host-armor-trim-smithing-template
|spritetype=item
|nameid=host_armor_trim_smithing_template
|form=item}}
{{ID table
|displayname=Ward Armor Trim
|spritename=ward-armor-trim-smithing-template
|spritetype=item
|nameid=ward_armor_trim_smithing_template
|form=item}}
{{ID table
|displayname=Silence Armor Trim
|spritename=silence-armor-trim-smithing-template
|spritetype=item
|nameid=silence_armor_trim_smithing_template
|form=item}}
{{ID table
|displayname=Tide Armor Trim
|spritename=tide-armor-trim-smithing-template
|spritetype=item
|nameid=tide_armor_trim_smithing_template
|form=item}}
{{ID table
|displayname=Snout Armor Trim
|spritename=snout-armor-trim-smithing-template
|spritetype=item
|nameid=snout_armor_trim_smithing_template
|form=item}}
{{ID table
|displayname=Rib Armor Trim
|spritename=rib-armor-trim-smithing-template
|spritetype=item
|nameid=rib_armor_trim_smithing_template
|form=item}}
{{ID table
|displayname=Eye Armor Trim
|spritename=eye-armor-trim-smithing-template
|spritetype=item
|nameid=eye_armor_trim_smithing_template
|form=item}}
{{ID table
|displayname=Spire Armor Trim
|spritename=spire-armor-trim-smithing-template
|spritetype=item
|nameid=spire_armor_trim_smithing_template
|form=item
|foot=1}}
{{edition|bedrock}}:
{{ID table
|edition=bedrock
|firstcolumnname=Smithing Template
|shownumericids=y
|showforms=y
|notshowbeitemforms=y
|generatetranslationkeys=y
|displayname=Netherite Upgrade
|spritename=netherite-upgrade-smithing-template
|spritetype=item
|nameid=netherite_upgrade_smithing_template
|id=685
|form=item
|translationkey=item.smithing_template.name, upgrade.netherite_upgrade.name}}
{{ID table
|displayname=Sentry Armor Trim
|spritename=sentry-armor-trim-smithing-template
|spritetype=item
|nameid=sentry_armor_trim_smithing_template
|id=686
|form=item
|translationkey=item.smithing_template.name, trim_pattern.sentry.name}}
{{ID table
|displayname=Vex Armor Trim
|spritename=vex-armor-trim-smithing-template
|spritetype=item
|nameid=vex_armor_trim_smithing_template
|id=692
|form=item
|translationkey=item.smithing_template.name, trim_pattern.vex.name}}
{{ID table
|displayname=Wild Armor Trim
|spritename=wild-armor-trim-smithing-template
|spritetype=item
|nameid=wild_armor_trim_smithing_template
|id=689
|form=item
|translationkey=item.smithing_template.name, trim_pattern.wild.name}}
{{ID table
|displayname=Coast Armor Trim
|spritename=coast-armor-trim-smithing-template
|spritetype=item
|nameid=coast_armor_trim_smithing_template
|id=688
|form=item
|translationkey=item.smithing_template.name, trim_pattern.coast.name}}
{{ID table
|displayname=Dune Armor Trim
|spritename=dune-armor-trim-smithing-template
|spritetype=item
|nameid=dune_armor_trim_smithing_template
|id=687
|form=item
|translationkey=item.smithing_template.name, trim_pattern.dune.name}}
{{ID table
|displayname=Wayfinder Armor Trim
|spritename=wayfinder-armor-trim-smithing-template
|spritetype=item
|nameid=wayfinder_armor_trim_smithing_template
|id=698
|form=item
|translationkey=item.smithing_template.name, trim_pattern.wayfinder.name}}
{{ID table
|displayname=Raiser Armor Trim
|spritename=raiser-armor-trim-smithing-template
|spritetype=item
|nameid=raiser_armor_trim_smithing_template
|id=699
|form=item
|translationkey=item.smithing_template.name, trim_pattern.raiser.name}}
{{ID table
|displayname=Shaper Armor Trim
|spritename=shaper-armor-trim-smithing-template
|spritetype=item
|nameid=shaper_armor_trim_smithing_template
|id=700
|form=item
|translationkey=item.smithing_template.name, trim_pattern.shaper.name}}
{{ID table
|displayname=Host Armor Trim
|spritename=host-armor-trim-smithing-template
|spritetype=item
|nameid=host_armor_trim_smithing_template
|id=701
|form=item
|translationkey=item.smithing_template.name, trim_pattern.host.name}}
{{ID table
|displayname=Ward Armor Trim
|spritename=ward-armor-trim-smithing-template
|spritetype=item
|nameid=ward_armor_trim_smithing_template
|id=690
|form=item
|translationkey=item.smithing_template.name, trim_pattern.ward.name}}
{{ID table
|displayname=Silence Armor Trim
|spritename=silence-armor-trim-smithing-template
|spritetype=item
|nameid=silence_armor_trim_smithing_template
|id=697
|form=item
|translationkey=item.smithing_template.name, trim_pattern.silence.name}}
{{ID table
|displayname=Tide Armor Trim
|spritename=tide-armor-trim-smithing-template
|spritetype=item
|nameid=tide_armor_trim_smithing_template
|id=693
|form=item
|translationkey=item.smithing_template.name, trim_pattern.tide.name}}
{{ID table
|displayname=Snout Armor Trim
|spritename=snout-armor-trim-smithing-template
|spritetype=item
|nameid=snout_armor_trim_smithing_template
|id=694
|form=item
|translationkey=item.smithing_template.name, trim_pattern.snout.name}}
{{ID table
|displayname=Rib Armor Trim
|spritename=rib-armor-trim-smithing-template
|spritetype=item
|nameid=rib_armor_trim_smithing_template
|id=695
|form=item
|translationkey=item.smithing_template.name, trim_pattern.rib.name}}
{{ID table
|displayname=Eye Armor Trim
|spritename=eye-armor-trim-smithing-template
|spritetype=item
|nameid=eye_armor_trim_smithing_template
|id=691
|form=item
|translationkey=item.smithing_template.name, trim_pattern.eye.name}}
{{ID table
|displayname=Spire Armor Trim
|spritename=spire-armor-trim-smithing-template
|spritetype=item
|nameid=spire_armor_trim_smithing_template
|id=696
|form=item
|translationkey=item.smithing_template.name, trim_pattern.spire.name
|foot=1}}
== Achievements ==
{{load achievements|Smithing with style}}
== Advancements ==
{{load advancements|Crafting a New Look;Smithing with Style}}
== Video ==
{{yt|klP9SrJFDU8}}
== History ==
{{History|java}}
{{History||1.20<br>(Experimental)|link=1.19.4|snap=23w04a|[[File:Netherite Upgrade Smithing Template JE1 BE1.png|32px]] [[File:Sentry Armor Trim Smithing Template JE1 BE1.png|32px]] [[File:Vex Armor Trim Smithing Template JE1 BE1.png|32px]] [[File:Wild Armor Trim Smithing Template JE1 BE1.png|32px]] [[File:Coast Armor Trim Smithing Template JE1 BE1.png|32px]] [[File:Dune Armor Trim Smithing Template JE1 BE1.png|32px]] [[File:Ward Armor Trim Smithing Template JE1 BE1.png|32px]] [[File:Tide Armor Trim Smithing Template JE1 BE1.png|32px]] [[File:Snout Armor Trim Smithing Template JE1 BE1.png|32px]] [[File:Rib Armor Trim Smithing Template JE1 BE1.png|32px]] [[File:Eye Armor Trim Smithing Template JE1 BE1.png|32px]] [[File:Spire Armor Trim Smithing Template JE1 BE1.png|32px]] Added smithing templates behind the "Update 1.20" experimental datapack.}}
{{History|||snap=23w05a|Smithing templates can be used to trim leather armor.
|Gold, iron, diamond, and netherite armor can be trimmed with their respective material.
|The dune, coast, wild, and sentry armor trims now always generate two templates in a chest when found.
|Increased the chances for all smithing templates that generate in chest loot to spawn:
*Netherite upgrade chance to find increased from 3.2% to 10%.
*Coast chance to find increased from 11.1% to 16.7%.
*Dune chance to find increased from 11.1% to 14.3%.
*Eye chance to find increased from 4.7% to 10% in alter chests, and to 100% in library chests.
*Rib chance to find increased from 4.7% to 6.7%.
*Sentry chance to find increased from 20% to 25%.
*Snout chance to find increased from 4.7% to 8.3%.
*Spire chance to find increased from 4.7% to 6.7%.
*Vex chance to find increased from 4.7% to 50%.
*Ward chance to find increased from 4.7% to 5%.
*Wild chance to find increased from 20% to 33%.}}
{{History||1.20|snap=23w12a|Smithing templates are now available without using the "Update 1.20" experimental datapack.|[[File:Wayfinder Armor Trim Smithing Template JE1 BE1.png|32px]] [[File:Raiser Armor Trim Smithing Template JE1 BE1.png|32px]] [[File:Shaper Armor Trim Smithing Template JE1 BE1.png|32px]] [[File:Host Armor Trim Smithing Template JE1 BE1.png|32px]] [[File:Silence Armor Trim Smithing Template JE1 BE1.png|32px]] Added wayfinder, raiser, shaper, host, and silence armor trim smithing templates.
|[[File:Sentry Armor Trim Smithing Template JE2 BE2.png|32px]] [[File:Dune Armor Trim Smithing Template JE2 BE2.png|32px]] Changed the textures of the sentry and dune armor trim smithing templates.
|The pattern textures of dune and sentry armor trims are changed from [[File:Armor Trim Dune (sample model) JE1 BE1.png|24px]] [[File:Armor Trim Sentry (sample model) JE1 BE1.png|24px]] to [[File:Armor Trim Dune (sample model) JE2 BE2.png|24px]] [[File:Armor Trim Sentry (sample model) JE2 BE2.png|24px]].<br>
Those previous patterns were left with different names: dune was renamed sentry and sentry was renamed shaper.}}
{{History|||snap=23w16a|Wayfinder, raiser, shaper, and host armor trim no longer generates in [[suspicious sand]] in [[trail ruins]].|Due to the split of the archaeological loot tables for the suspicious gravel within the [[trail ruins]]; wayfinder, raiser, shaper, and host armor trim now are in the rare loot.}}
{{History|||snap=23w17a|The probability of the wayfinder, raiser, shaper, and host armor trim to generate in [[suspicious gravel]] in [[trail ruins]] has been changed from 1/11 to 1/12.|The player now get the [[advancement]] "Crafting a new look" when they craft a trimmed armor at a [[smithing table]] using a smithing template, "Smithing with style" when they apply these smithing templates at least once on their armor: Spire, Snout, Rib, Ward, Silence, Vex, Tide, and Wayfinder.}}
{{History|bedrock}}
{{History||Next Major Update<br>(Experimental)|link=Bedrock Edition 1.19.80|snap=beta 1.19.80.21|[[File:Netherite Upgrade Smithing Template JE1 BE1.png|32px]] [[File:Sentry Armor Trim Smithing Template JE1 BE1.png|32px]] [[File:Vex Armor Trim Smithing Template JE1 BE1.png|32px]] [[File:Wild Armor Trim Smithing Template JE1 BE1.png|32px]] [[File:Coast Armor Trim Smithing Template JE1 BE1.png|32px]] [[File:Dune Armor Trim Smithing Template JE1 BE1.png|32px]] [[File:Ward Armor Trim Smithing Template JE1 BE1.png|32px]] [[File:Tide Armor Trim Smithing Template JE1 BE1.png|32px]] [[File:Snout Armor Trim Smithing Template JE1 BE1.png|32px]] [[File:Rib Armor Trim Smithing Template JE1 BE1.png|32px]] [[File:Eye Armor Trim Smithing Template JE1 BE1.png|32px]] [[File:Spire Armor Trim Smithing Template JE1 BE1.png|32px]] Added smithing templates behind the "[[Bedrock Edition 1.20.0|Next Major Update]]" [[experimental]] toggle.}}
{{History|||snap=beta 1.19.80.22|[[File:Wayfinder Armor Trim Smithing Template JE1 BE1.png|32px]] [[File:Raiser Armor Trim Smithing Template JE1 BE1.png|32px]] [[File:Shaper Armor Trim Smithing Template JE1 BE1.png|32px]] [[File:Host Armor Trim Smithing Template JE1 BE1.png|32px]] [[File:Silence Armor Trim Smithing Template JE1 BE1.png|32px]] Added wayfinder, raiser, shaper, host, and silence armor trim smithing templates.
|[[File:Sentry Armor Trim Smithing Template JE2 BE2.png|32px]] [[File:Dune Armor Trim Smithing Template JE2 BE2.png|32px]] Changed the textures of the sentry and dune armor trim smithing templates.
|The pattern textures of dune and sentry armor trims are changed from [[File:Armor Trim Dune (sample model) JE1 BE1.png|24px]] [[File:Armor Trim Sentry (sample model) JE1 BE1.png|24px]] to [[File:Armor Trim Dune (sample model) JE2 BE2.png|24px]] [[File:Armor Trim Sentry (sample model) JE2 BE2.png|24px]].<br>
Those previous patterns were left with different names: dune was renamed sentry and sentry was renamed shaper.}}
{{History||1.20.0|snap=beta 1.20.0.21|Smithing templates are now available without using the "Next Major Update" experimental toggle.}}
{{History|foot}}
== Issues ==
{{Issue list}}
== Trivia ==
* Smithing templates were named "Smithing Blueprints" in the prototype but was changed because the word "blueprint" sounded modern and technical.<ref>{{ytl|klP9SrJFDU8|Minecraft 1.20: Armor Trims - What Do They Mean?|Minecraft|May 4, 2023|t=98}}</ref>
* When Mojang developer Gnembon was working on armor trims, he accidentally messed up their rendering, making them jet through the player's body in a weird fashion, similar to what appears in {{w|Salvador Dalí}}'s paintings where a hand might poke through a forehead.<ref>{{ytl|ghQODkq4ITI|Mojang Dev Comes To Hermitcraft! (Mojang Developer Gnembom Interview)|GoodVodsWithScar|June 23, 2023|t=1980}}</ref>
* Some of the armor trims feature patterns based on a [[mob]] or [[block]] that is found in the same [[Generated structures|structure]] as the corresponding smithing template.<ref name=":0">"Some of the armor trims reflect the place where you found the template, for example bastions contain a piglin-inspired trim."-[[Sofia Dankis]]-{{Mcnet|armor-trims-coming-minecraft-1-20|Armor Trims Coming to Minecraft 1.20|January 24, 2023}}</ref>
** The spire armor trim resembles a [[shulker]].
** The vex armor trim resembles an [[evoker]]. As an item in the [[inventory]], it resembles the wing or the vein texture of a [[vex]].
** The wild armor trim has moss growing on 3 of its corners.
** The coast armor trim appears to have barnacles attached to it.
** The ward armor trim, as an item in the inventory, resembles the faces inside a [[warden]]'s chest.
** The silence armor trim appears to have sculk creeping onto / infecting it.
** The tide armor trim resembles [[Prismarine|prismarine bricks]].
** The snout armor trim resembles a [[piglin]]<ref name=":0" />.
** The rib armor trim resembles a [[wither skeleton]].
** The eye armor trim resembles an [[eye of ender]]. There are also two eyes on the head part of the armor trim that resemble those of an [[enderman]].
* ''Netherite upgrade smithing template'' (35 characters with "_" and 32 characters without "_") and ''sentry armor trim smithing template'' (35 characters with "_" and 31 characters without "_") are the current longest name for item ID, while ''[[polished blackstone pressure plate]]'' and ''[[cracked polished blackstone bricks]]'' have 34 characters with "_" and 31 characters without "_".
* The silence armor trim is the rarest trim, due to being found in ancient cities in the deep dark, and having only a 1.2% chance to be per chest.
* When [[lapis lazuli]] is used as trim material, it is called "Lapis" instead of its full name "Lapis Lazuli"; this is the only instance of the abbreviation "Lapis" being used in-game.<ref>{{bug|MC-262486|||WAI}}</ref>
== Gallery ==
=== Sprites ===
<gallery>
Netherite Upgrade Smithing Template.png|Netherite Upgrade
Sentry Armor Trim Smithing Template.png|Sentry Armor Trim
Vex Armor Trim Smithing Template.png|Vex Armor Trim
Wild Armor Trim Smithing Template.png|Wild Armor Trim
Coast Armor Trim Smithing Template.png|Coast Armor Trim
Dune Armor Trim Smithing Template.png|Dune Armor Trim
Wayfinder Armor Trim Smithing Template.png|Wayfinder Armor Trim
Raiser Armor Trim Smithing Template.png|Raiser Armor Trim
Shaper Armor Trim Smithing Template.png|Shaper Armor Trim
Host Armor Trim Smithing Template.png|Host Armor Trim
Ward Armor Trim Smithing Template.png|Ward Armor Trim
Silence Armor Trim Smithing Template.png|Silence Armor Trim
Tide Armor Trim Smithing Template.png|Tide Armor Trim
Snout Armor Trim Smithing Template.png|Snout Armor Trim
Rib Armor Trim Smithing Template.png|Rib Armor Trim
Eye Armor Trim Smithing Template.png|Eye Armor Trim
Spire Armor Trim Smithing Template.png|Spire Armor Trim
</gallery>
=== Armor trim patterns ===
<gallery>
Armor Trim Sentry (sample model).png|Sentry Armor Trim
Armor Trim Vex (sample model).png|Vex Armor Trim
Armor Trim Wild (sample model).png|Wild Armor Trim
Armor Trim Coast (sample model).png|Coast Armor Trim
Armor Trim Dune (sample model).png|Dune Armor Trim
Armor Trim Wayfinder (sample model).png|Wayfinder Armor Trim
Armor Trim Raiser (sample model).png|Raiser Armor Trim
Armor Trim Shaper (sample model).png|Shaper Armor Trim
Armor Trim Host (sample model).png|Host Armor Trim
Armor Trim Ward (sample model).png|Ward Armor Trim
Armor Trim Silence (sample model).png|Silence Armor Trim
Armor Trim Tide (sample model).png|Tide Armor Trim
Armor Trim Snout (sample model).png|Snout Armor Trim
Armor Trim Rib (sample model).png|Rib Armor Trim
Armor Trim Eye (sample model).png|Eye Armor Trim
Armor Trim Spire (sample model).png|Spire Armor Trim
</gallery>
=== Official Artwork ===
<gallery>
T&T Thumbnail.jpg|[[Sunny]] wearing amethyst armor trims.
Warden Chasing Alex with Silence Trim Pixel Art.png|A [[warden]] chasing Alex holding the silence armor trim.
Alex Trimming Armor in Smithing Table Pixel Art.png|Alex adding the silence armor trim and amethyst on iron armor.
Alex Wearing Iron Armor with Amethyst Pixel Art.jpg|Alex wearing the trimmed iron armor.
File:Live2023-01.jpeg|Noor working on trimmed iron armor.
</gallery>
=== Screenshots ===
<gallery>
Kingbdogz Armor Trim 1.jpg|Redstone trims on diamond armor.
Kingbdogz Armor Trim 2.jpg|Gold trims on netherite armor.
Too Many Trims.jpg|A large amount of armor trims.
Kingbdogz Armor Trim 3.jpg|Gold on netherite.
Kingbdogz Armor Trim 4.jpg|Diamond on diamond.
New Armor Trims in 23W12A.jpg|<ref>{{Tweet|kingbdogz|1638580472962850831|new trims got the drip The new "Silence" armor trim to the left is now the hardest trim to get, with only a 1% chance per chest to spawn in Ancient Cities. Definitely gonna be a challenge to get!|March 22, 2023}}</ref>
Emerald Armor.png|Emerald on gold.
Xilefian Armor Trims 1.png|[[Xilefian]] showing how armor trims work.
Xilefian Armor Trims 2.png|[[Xilefian]] showing how armor trims work.
Xilefian Armor Trims 3.png|[[Xilefian]] showing how armor trims work.
Armor Trims On Netherite Armors.png|A display of all eleven (before [[Java Edition 23w12a]]) armor trims and ten colors on netherite armors.
Armor Trim Showcase.png|A display of all eleven (before [[Java Edition 23w12a]]) armor trims, on netherite armor using emerald as the trim material.
Armor Trim Colors.png|A display of all ten armor trim colors, using the ward trim on a netherite helmet.
Silence Armor Trim on All Armors.png|A display of all ten colors of the silence armor trim on all armors.
Image 2023-06-07 154100087.png|A screenshot of every armor trim in every color(besides quartz) on leather armor.
Armor Trim Friends.jpg|Official screenshot of [[Alex]] and [[Zuri]] wearing armor trims.
LadyAgnes Armor Trims.jpg|Copper trims on netherite armor.
Trim Lineup.jpg
Fancy Delta.jpg|[[Kai]] wearing trimmed armor in a [[Basalt Delta]].
Trims & Pots.jpg
Noor Gold Armor Trim .jpeg
Noor Diamond Armor Trim.jpeg
Noor Netherite Armor Trim.jpeg
Noor Iron Armor Trim.jpeg
</gallery>
== References ==
{{Reflist}}
{{Items}}
[[Category:Bedrock Edition]]
[[Category:Non-renewable resources]]
[[de:Schmiedevorlage]]
[[es:Molde de herrería]]
[[fr:Modèle de forge]]
[[ja:鍛冶型]]
[[pl:Szablon kowalski]]
[[pt:Molde de ferraria]]
[[ru:Кузнечный шаблон]]
[[uk:Ковальський шаблон]]
[[zh:锻造模板]]</li></ul> | Added totem of casting. | ||||
| Fixed the corrupted beacon flickering when used in the Tower. | |||||
.gif)